Cook it once
  • Home
  • Privacy Policy
  • Recipes
    • KETO
    • LC
    • WW
  • Tips
  • Contact
Cook it once
  • Home
  • Privacy Policy
  • Recipes
    • KETO
    • LC
    • WW
  • Tips
  • Contact
Category:

Main Dish Recipes

Main Dish Recipes

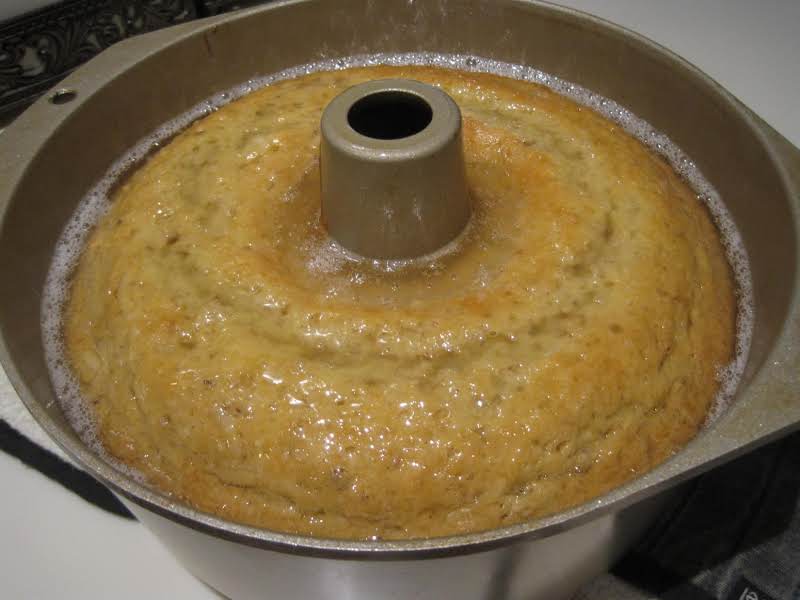
Coconut Brunch Bread

by Rebecca August 7, 2020
written by Rebecca

Serves: 6 or more | Prep: 30 minutes | Cook: 1 hour 15 minutes

This bread is very soft, moist, and delicious. It has the perfect amount of coconut flavor with crunchy bits from the walnuts and buttery coconut flavor glaze. It makes a perfect breakfast or brunch with a cup of freshly brewed coffee. This is such a simple recipe with readily available ingredients that is undeniably delicious and no-mixer required! It is quick and easy to prepare, you can even make it with your eyes close! And the aroma of sweet coconut will make your mouth water every time. No one can say no this perfectly sweet and delicious breakfast or brunch or afternoon snack bread that you can whip up in a heartbeat.

Ingredients

4 extra-large eggs

2 cups of sugar

1 cup of vegetable oil

2 teaspoons coconut flavoring

3 cups flour

1/2 teaspoon baking soda

1/2 teaspoon baking powder

1/2 teaspoon salt

1 cup buttermilk

1 cup flaked coconut

1 cup chopped walnuts

FOR THE TOPPING:

1 cup of sugar

1/2 cup water

2 tablespoons butter

1 teaspoon coconut flavoring

How to Make Coconut Brunch Bread

Step 1: In a large mixing bowl, beat the eggs. Stir in the sugar, oil, and coconut flavoring. Mix well.

Step 2: In a separate bowl, sift the flour, baking soda, baking powder, and salt. Combine with the egg mixture alternately with the buttermilk.

Step 3: Then, fold in the walnuts and flaked coconut.

Step 4: Transfer the mixture into a 10-inch greased and floured bundt pan.

Step 5: Place inside the oven and bake at 325 degrees for about an hour and a half. Insert a toothpick in the middle, when it comes out clean the bread is done.

Step 6: Meanwhile, combine the sugar, water, and butter in a saucepan and bring to boil. Let it simmer for about 5 minutes. Then, remove the saucepan from the heat and stir in a teaspoon of coconut flavoring.

Step 7: Once the bread is done, remove from the oven and pour the topping over. Allow the bread to set for at least 4 hours before removing it from the pan.
Coconut Brunch Bread

Rebecca Serves: 6 or more | Prep: 30 minutes | Cook: 1 hour 15 minutes This bread is very soft, moist, and delicious. It has the perfect amount of coconut flavor… Main Dish Recipes Coconut Brunch Bread European Print This
Serves: 6 Prep Time: 30 mins Cooking Time: 1 hr 15 mins 1 hr 15 mins
Nutrition facts: 200 calories 20 grams fat
Rating: 5.0/5
( 1 voted )

Ingredients

  • 4 extra-large eggs
  • 2 cups of sugar
  • 1 cup of vegetable oil
  • 2 teaspoons coconut flavoring
  • 3 cups flour
  • 1/2 teaspoon baking soda
  • 1/2 teaspoon baking powder
  • 1/2 teaspoon salt
  • 1 cup buttermilk
  • 1 cup flaked coconut
  • 1 cup chopped walnuts
  • FOR THE TOPPING:
  • 1 cup of sugar
  • 1/2 cup water
  • 2 tablespoons butter
  • 1 teaspoon coconut flavoring

Instructions

Step 1: In a large mixing bowl, beat the eggs. Stir in the sugar, oil, and coconut flavoring. Mix well.

Step 2: In a separate bowl, sift the flour, baking soda, baking powder, and salt. Combine with the egg mixture alternately with the buttermilk.

Step 3: Then, fold in the walnuts and flaked coconut.

Step 4: Transfer the mixture into a 10-inch greased and floured bundt pan.

Step 5: Place inside the oven and bake at 325 degrees for about an hour and a half. Insert a toothpick in the middle, when it comes out clean the bread is done.

Step 6: Meanwhile, combine the sugar, water, and butter in a saucepan and bring to boil. Let it simmer for about 5 minutes. Then, remove the saucepan from the heat and stir in a teaspoon of coconut flavoring.

Step 7: Once the bread is done, remove from the oven and pour the topping over. Allow the bread to set for at least 4 hours before removing it from the pan.
August 7, 2020 0 comment
0 FacebookTwitterPinterestEmail
Main Dish Recipes

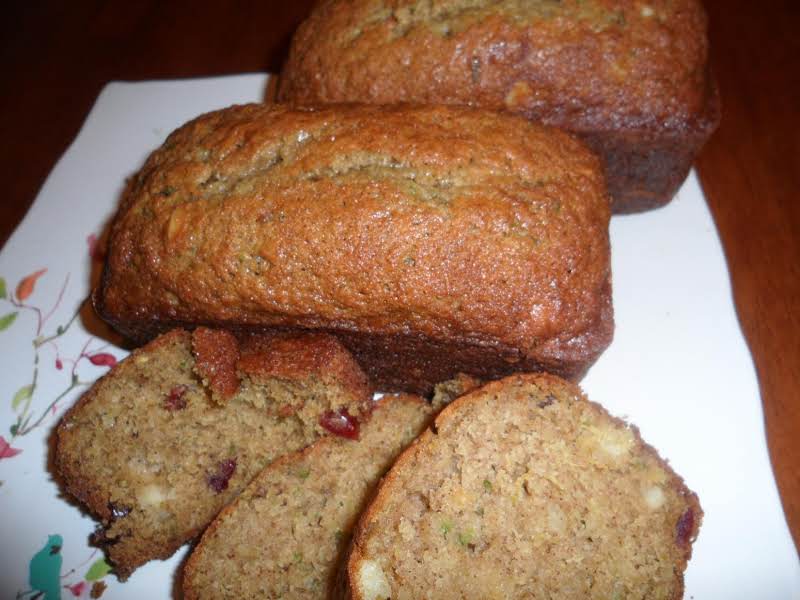
Pineapple Cranberry Zucchini Bread

by Rebecca August 7, 2020
written by Rebecca

Cook: 50 Min

I am obsessed with this bread! The pop of dried cranberries and slash of coconut give this bread an amazing flair. It is moist, loaded with chopped nuts, crushed pineapple that goes well with zucchini. I love how I can sneak some veggies or fruit into this. As a mom, I always prefer healthy aside from quick and easy. This Pineapple Cranberry Zucchini Bread is perfect! I can trick my picky eaters to eat healthily and it is super delicious they have nothing to complain about. And it is an easy bread recipe everyone can make it!

Ingredients

3 eggs

2 cups shredded zucchini

1 cup vegetable oil (I like to use 1/2 coconut oil, melted, 1/2 veg. oil)

1 can crushed pineapple, drained, 8 oz

2 teaspoons vanilla extract

3 cups all-purpose flour

1 3/4 cups sugar

2 teaspoons baking soda

1 1/2 teaspoons cinnamon

1 teaspoon salt

1/2 teaspoon baking powder

1 cup chopped nuts (use macadamia or pecan)

1/2 cup dried cranberries

1/2 cup coconut (optional)

How to Make Pineapple Cranberry Zucchini Bread

Step 1: Prepare the oven. Preheat it to 350 degrees.

Step 2: Combine the eggs, zucchini, oil, pineapple, and vanilla extract in a large bowl. Set aside.

Step 3: In another bowl, mix the flour, sugar, baking soda, cinnamon, salt, and baking powder.

Step 4: Stir in the dry ingredients into the wet ingredients.

Step 5: Then, fold in the chopped nuts, cranberries, and coconut if using.

Step 6: Transfer the mixture into 2 greased 8 x 4-inch loaf pans or 3 small loaf pans.

Step 7: Place inside the oven to bake for about 50 to 55 minutes for larger pans or 35 to 40 minutes for smaller pans. Check the doneness by inserting a toothpick in the middle. When it comes out clean the bread is done.

Step 8: Remove from the oven and allow the bread to cool for at least 10 minutes before removing and transferring the bread on wire racks to cool completely.

Pineapple Cranberry Zucchini Bread

Rebecca Cook: 50 Min I am obsessed with this bread! The pop of dried cranberries and slash of coconut give this bread an amazing flair. It is moist, loaded with chopped… Main Dish Recipes Pineapple Cranberry Zucchini Bread European Print This
Cooking Time: 50 mins 50 mins
Nutrition facts: 200 calories 20 grams fat
Rating: 5.0/5
( 1 voted )

Ingredients

  • 3 eggs
  • 2 cups shredded zucchini
  • 1 cup vegetable oil (I like to use 1/2 coconut oil, melted, 1/2 veg. oil)
  • 1 can crushed pineapple, drained, 8 oz
  • 2 teaspoons vanilla extract
  • 3 cups all-purpose flour
  • 1 3/4 cups sugar
  • 2 teaspoons baking soda
  • 1 1/2 teaspoons cinnamon
  • 1 teaspoon salt
  • 1/2 teaspoon baking powder
  • 1 cup chopped nuts (use macadamia or pecan)
  • 1/2 cup dried cranberries
  • 1/2 cup coconut (optional)

Instructions

Step 1: Prepare the oven. Preheat it to 350 degrees.

Step 2: Combine the eggs, zucchini, oil, pineapple, and vanilla extract in a large bowl. Set aside.

Step 3: In another bowl, mix the flour, sugar, baking soda, cinnamon, salt, and baking powder.

Step 4: Stir in the dry ingredients into the wet ingredients.

Step 5: Then, fold in the chopped nuts, cranberries, and coconut if using.

Step 6: Transfer the mixture into 2 greased 8 x 4-inch loaf pans or 3 small loaf pans.

Step 7: Place inside the oven to bake for about 50 to 55 minutes for larger pans or 35 to 40 minutes for smaller pans. Check the doneness by inserting a toothpick in the middle. When it comes out clean the bread is done.

Step 8: Remove from the oven and allow the bread to cool for at least 10 minutes before removing and transferring the bread on wire racks to cool completely.

August 7, 2020 0 comment
0 FacebookTwitterPinterestEmail
Main Dish Recipes

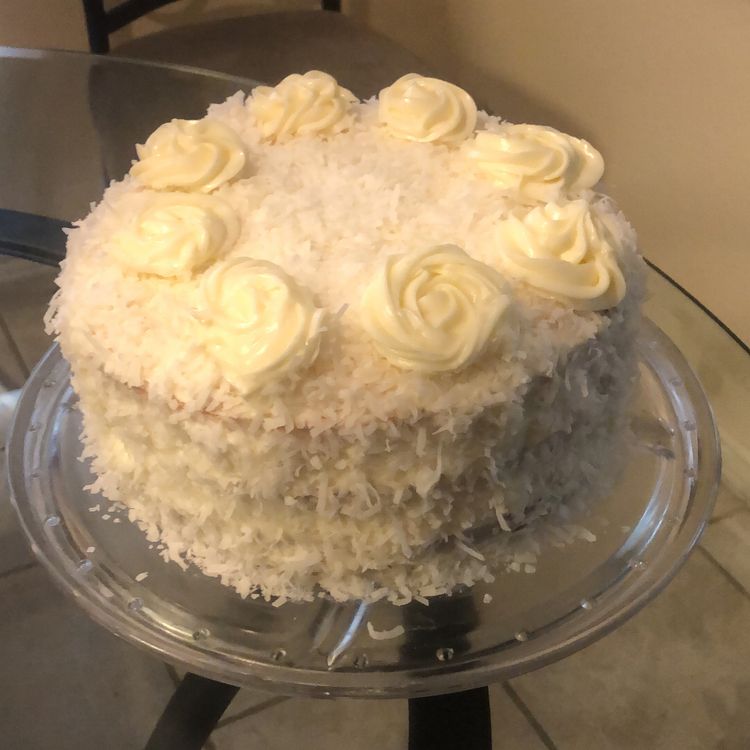
Granny’s Famous Coconut Cake

by Rebecca August 7, 2020
written by Rebecca

Serves: 8 -12 Depends on how you slice it | Prep: 5 Min | Cook: 25 Min

A classic coconut cake that has been around for ages! This cake is one of my grandmother’s favorites. I watched her make this all time. She’s well known to make the most amazing pastries. And I admire her the most. She made cakes with grace and pour her heart into them.

This cake has been the most requested on every occasion. We grew on this and our love for everything my grandmother baked stayed with us. I make this cake on special moments and it never fails to amaze my guests. It is such a simple cake with the most amazing coconut flavor everyone can ask for. Whenever I make this cake, I can’t help but think of her. My grandmother is an amazing person! She’s one of kind just like her coconut cake that everyone adores. A super moist, unquestionably scrumptious, and a crowd favorite.

Ingredients

1 cup butter

5 eggs

2 3/4 cake flour

1 cup buttermilk

1/2 teaspoon coconut flavoring

2 cups of sugar

dash salt

1 teaspoon baking powder

1 teaspoon vanilla flavoring

How to Make Granny’s Famous Coconut Cake

Step 1: In a mixing bowl, place the butter and sugar. Cream until smooth.

Step 2: Add in the eggs. Beat the eggs every after each addition and set aside.

Step 3: In a separate bowl, sift the flour, salt, and baking powder. Stir in the cream mixture alternately with the buttermilk.

Step 4: Then, mix in the coconut and vanilla flavoring.

Step 5: Pour the mixture in 3 or 4 9-inch greased and floured cake pans.

Step 6: Place inside the oven to bake at 350 degrees for approximately 25 minutes. Insert a toothpick in the middle of the cake to check the doneness. When the toothpick comes out clean the cake is done.

Step 7: Remove from the oven and let the cakes cool. Ice the cakes with Granny’s Never fail Frosting. Enjoy!

Granny's Famous Coconut Cake

Rebecca Serves: 8 -12 Depends on how you slice it | Prep: 5 Min | Cook: 25 Min A classic coconut cake that has been around for ages! This cake is… Main Dish Recipes Granny’s Famous Coconut Cake European Print This
Serves: 8-12 Prep Time: 5 mins Cooking Time: 25 mins 25 mins
Nutrition facts: 200 calories 20 grams fat
Rating: 4.5/5
( 2 voted )

Ingredients

  • 1 cup butter
  • 5 eggs
  • 2 3/4 cake flour
  • 1 cup buttermilk
  • 1/2 teaspoon coconut flavoring
  • 2 cups of sugar
  • dash salt
  • 1 teaspoon baking powder
  • 1 teaspoon vanilla flavoring

Instructions

Step 1: In a mixing bowl, place the butter and sugar. Cream until smooth.

Step 2: Add in the eggs. Beat the eggs every after each addition and set aside.

Step 3: In a separate bowl, sift the flour, salt, and baking powder. Stir in the cream mixture alternately with the buttermilk.

Step 4: Then, mix in the coconut and vanilla flavoring.

Step 5: Pour the mixture in 3 or 4 9-inch greased and floured cake pans.

Step 6: Place inside the oven to bake at 350 degrees for approximately 25 minutes. Insert a toothpick in the middle of the cake to check the doneness. When the toothpick comes out clean the cake is done.

Step 7: Remove from the oven and let the cakes cool. Ice the cakes with Granny's Never fail Frosting. Enjoy!

August 7, 2020 0 comment
0 FacebookTwitterPinterestEmail
Main Dish Recipes

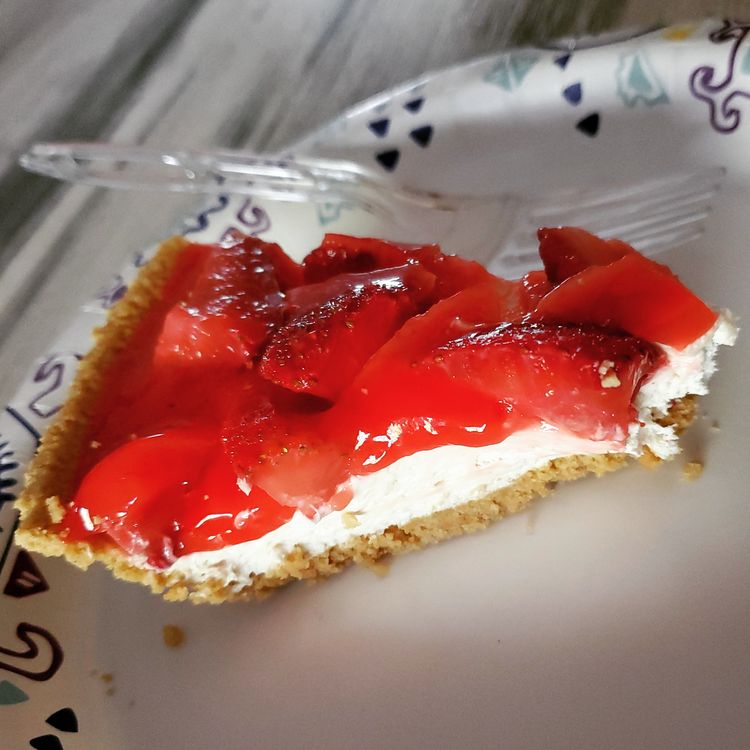
Strawberry Cream Cheese Pie

by Rebecca August 6, 2020
written by Rebecca

Serves: 6 | Prep: 25 Min | Cook: 15 Min

No one will say no to this triple menace! A gorgeous cake that has a delightful blend of cheesecake, cream pie, and fruit pie all in one. This is a real treat for all the strawberry lovers! Feast to this sweet, fruity, and delightful dessert. You are welcome to use either strawberries, blueberries, raspberries, or a mixture of fruit for the topmost layer. And drizzle with chocolate before serving. Fancy!

Ingredients

FOR THE GRAHAM CRACKER CRUST

1 1/2 cups graham cracker crumbs

1/4 cup sugar

6 tablespoons butter melted

FOR THE PIE FILLING

1 box (8 ounces) cream cheese

3/4 teaspoon vanilla extract

1/2 cup powdered sugar

1 cup whipping cream

FOR THE STRAWBERRY TOPPING

2 tablespoons cornstarch

1/4 cup sugar

2 tablespoons strawberry gelatin

1/2 cup water

1 tablespoon lemon juice

3 cups strawberries hulled

How to Make Strawberry Cream Cheese Pie

Step 1: In a bowl, combine the graham cracker crumbs, 1/4 cup of sugar, and melted butter. Mix well.

Step 2: Then, press the crumb mixture firmly into the bottom and up sides of a 9-inch pie dish.

Step 3: Place the dish inside the oven and bake at 350 degrees for about 8 to 9 minutes. Once done, remove from the oven and let it cool for at least 30 minutes.

Step 4: Beat the cream cheese with a mixer until smooth. Then, add in the vanilla extract and powdered sugar while beating continuously until smooth.

Step 5: Whip the cream in another bowl until soft peaks form. Then, fold in the cream cheese mixture and delicately spread onto the baked crust. Place in the fridge to chill for at least an hour or two.

Step 6: Whisk the cornstarch, 1/4 cup of sugar, strawberry gelatin, water, and lemon juice in a small saucepan. Cook the mixture on low heat while constantly whisking until thickened. Then, remove the saucepan from the heat and cool for about 10 to 15 minutes.

step 7: Once the strawberry topping cooled, add in the strawberries and stir to coat. Layer the pie with the glazed strawberries and chill until ready to serve.

Strawberry Cream Cheese Pie

Rebecca Serves: 6 | Prep: 25 Min | Cook: 15 Min No one will say no to this triple menace! A gorgeous cake that has a delightful blend of cheesecake, cream… Main Dish Recipes Strawberry Cream Cheese Pie European Print This
Serves: 6 Prep Time: 25 mins Cooking Time: 15 mins 15 mins
Nutrition facts: 200 calories 20 grams fat
Rating: 5.0/5
( 1 voted )

Ingredients

  • FOR THE GRAHAM CRACKER CRUST
  • 1 1/2 cups graham cracker crumbs
  • 1/4 cup sugar
  • 6 tablespoons butter melted
  • FOR THE PIE FILLING
  • 1 box (8 ounces) cream cheese
  • 3/4 teaspoon vanilla extract
  • 1/2 cup powdered sugar
  • 1 cup whipping cream
  • FOR THE STRAWBERRY TOPPING
  • 2 tablespoons cornstarch
  • 1/4 cup sugar
  • 2 tablespoons strawberry gelatin
  • 1/2 cup water
  • 1 tablespoon lemon juice
  • 3 cups strawberries hulled

Instructions

Step 1: In a bowl, combine the graham cracker crumbs, 1/4 cup of sugar, and melted butter. Mix well.

Step 2: Then, press the crumb mixture firmly into the bottom and up sides of a 9-inch pie dish.

Step 3: Place the dish inside the oven and bake at 350 degrees for about 8 to 9 minutes. Once done, remove from the oven and let it cool for at least 30 minutes.

Step 4: Beat the cream cheese with a mixer until smooth. Then, add in the vanilla extract and powdered sugar while beating continuously until smooth.

Step 5: Whip the cream in another bowl until soft peaks form. Then, fold in the cream cheese mixture and delicately spread onto the baked crust. Place in the fridge to chill for at least an hour or two.

Step 6: Whisk the cornstarch, 1/4 cup of sugar, strawberry gelatin, water, and lemon juice in a small saucepan. Cook the mixture on low heat while constantly whisking until thickened. Then, remove the saucepan from the heat and cool for about 10 to 15 minutes.

step 7: Once the strawberry topping cooled, add in the strawberries and stir to coat. Layer the pie with the glazed strawberries and chill until ready to serve.

August 6, 2020 0 comment
0 FacebookTwitterPinterestEmail
Main Dish Recipes

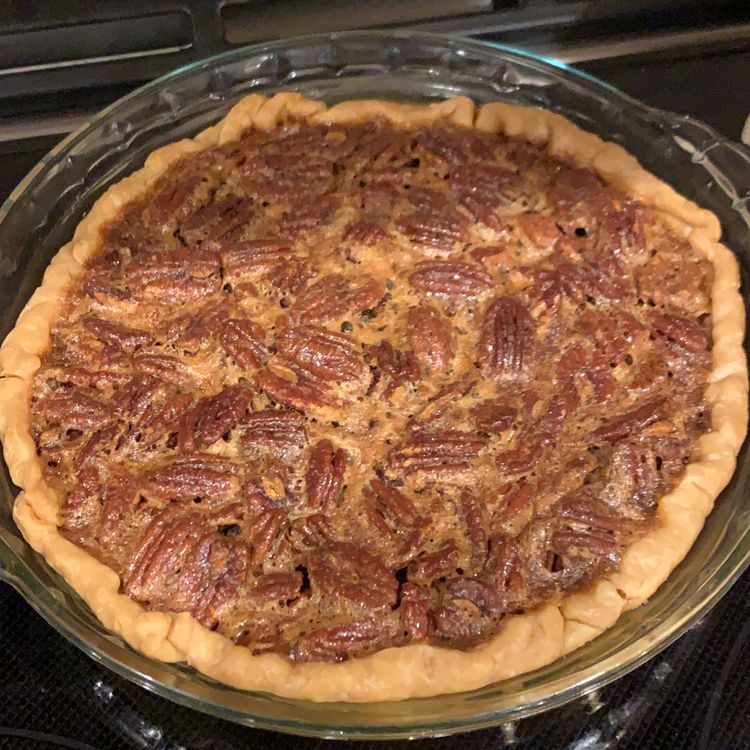
Easy Pecan Pie

by Rebecca August 6, 2020
written by Rebecca

Prep: 10 Min | Cook: 1 Hr

Make your afternoon extra special with this Easy Pecan Pie. My sister introduced this recipe to me and I am so glad that she gave me the recipe to this because I never would have tasted the best Pie ever! I kid you not. I have tried a lot of Pies but this makes it to the top spot of my favorites! A 1-hour recipe that will surely be worth it. Oh, the smell of your house after opening the oven. The smell will make you want to eat more! Give this one a try today. Have your friends come over and surprise them with the amazing taste of this Pie. By the way, make sure to cover it with aluminum foil if it starts to brown. It will prevent the Pie from burning. You don’t want to eat a burnt Pie, right? I hope you all love this. Enjoy!

Ingredients

1 cup Karo light corn syrup

1 cup of sugar

3 eggs, well beaten

2 tablespoons butter, melted

1 teaspoon pure vanilla extract

1 1/2 cups pecan halves

1 9 inches, deep-dish frozen pie crust

How to Make Easy Pecan Pie

Step 1: Ready the oven and preheat to 350 degrees.

Step 2: Place the cookie sheet inside the preheating oven.

Step 3: In a medium bowl, add in eggs, corn syrup, butter, sugar, and vanilla. Mix using a spoon until well blended.

Step 4: Add in the pecans and stir.

Step 5: Transfer the filling into the frozen pie crust.

Step 6: Put the pie on the baking sheet. Place it into the middle of the oven.

Step 7: Bake for 60 to 70 minutes or until the center of the pie springs back after tapping. Cover the edges with aluminum foil if it starts to brown.

Step 8: Remove from the oven and let it sit on a wire rack to cool for at least 2 hours.

Step 9: Serve and enjoy!

Easy Pecan Pie

Rebecca Prep: 10 Min | Cook: 1 Hr Make your afternoon extra special with this Easy Pecan Pie. My sister introduced this recipe to me and I am so glad that… Main Dish Recipes Easy Pecan Pie European Print This
Prep Time: 10 mins Cooking Time: 1 hr 1 hr
Nutrition facts: 200 calories 20 grams fat
Rating: 5.0/5
( 1 voted )

Ingredients

  • 1 cup Karo light corn syrup
  • 1 cup of sugar
  • 3 eggs, well beaten
  • 2 tablespoons butter, melted
  • 1 teaspoon pure vanilla extract
  • 1 1/2 cups pecan halves
  • 1 9 inches, deep-dish frozen pie crust

Instructions

Step 1: Ready the oven and preheat to 350 degrees.

Step 2: Place the cookie sheet inside the preheating oven.

Step 3: In a medium bowl, add in eggs, corn syrup, butter, sugar, and vanilla. Mix using a spoon until well blended.

Step 4: Add in the pecans and stir.

Step 5: Transfer the filling into the frozen pie crust.

Step 6: Put the pie on the baking sheet. Place it into the middle of the oven.

Step 7: Bake for 60 to 70 minutes or until the center of the pie springs back after tapping. Cover the edges with aluminum foil if it starts to brown.

Step 8: Remove from the oven and let it sit on a wire rack to cool for at least 2 hours.

Step 9: Serve and enjoy!

August 6, 2020 0 comment
0 FacebookTwitterPinterestEmail
Main Dish Recipes

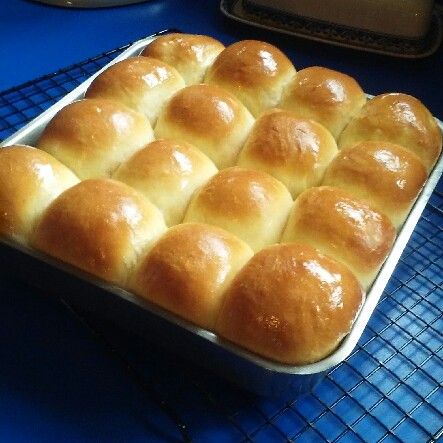
Homemade King Hawaiian Rolls or Loaf

by Rebecca August 6, 2020
written by Rebecca

Serves: 24 buns or 2 loaves | Prep: 2 Hr | Cook: 30 Min

These gorgeous golden brown rolls are perfectly sweet, soft, and fluffy. My family loves this and they ask for it every time! A pretty easy recipe that you can make in two forms; rolls or loaves with the same goodness no matter what shape.

Ingredients

6 cups all-purpose flour, divided in half; plus an additional 1/2 cup flour

3 large eggs

2 cups pineapple juice, room temperature

3/4 cup sugar or Splenda

1 teaspoon vanilla extract

2 pkg yeast (.25 oz each)

1/2 cup butter, melted (8 tablespoons)

How to Make Homemade King Hawaiian Rolls or Loaf

Step 1: Beat the eggs in a small bowl. Mix in the pineapple juice, sugar, vanilla extract, and melted butter. Combine well.

Step 2: In a large bowl, place the 3 cups of flour. Pour in the egg mixture and stir until incorporated. Then, sprinkle, one at a time the yeast packets. Mix well.

Step 3: Stir in the rest of the flour and thoroughly mix. Use a wooden spoon to mix and if the mixture becomes too difficult to stir, you can use your hands instead. Making sure that the flour is well incorporated.

Step 4: If the dough is tacky but not too sticky it is ready. And if the dough appears too wet you can sprinkle a little flour, a tablespoon or so at a time.

Step 5: Place the dough in a bowl and cover with a clean kitchen towel. Place it in a warm place for an hour to rise.

Step 6: Once the dough is set, remove it from the bowl. Knead the dough in an extra half cup of flour. Knead for about 10 to 15 minutes to make sure that the flour is completely combined.

Step 7: Then, shape the dough into rolls or loaf and transfer in buttered pans.

Step 8: Sit the rolls or loaf in a warm place, covered, to rise until double in size. For the rolls, let them rise for an hour and 90 minutes if making loaves.

Step 9: Place inside the oven and bake at 350 degrees for about 25 to 30 minutes or until golden brown.

Step 10: Once done, remove from the oven and brush the tops with melted butter before serving. Enjoy!

Homemade King Hawaiian Rolls or Loaf

Rebecca Serves: 24 buns or 2 loaves | Prep: 2 Hr | Cook: 30 Min These gorgeous golden brown rolls are perfectly sweet, soft, and fluffy. My family loves this and… Main Dish Recipes Homemade King Hawaiian Rolls or Loaf European Print This
Serves: 24 Prep Time: 2 hrs Cooking Time: 30 mins 30 mins
Nutrition facts: 200 calories 20 grams fat
Rating: 5.0/5
( 1 voted )

Ingredients

  • 6 cups all-purpose flour, divided in half; plus an additional 1/2 cup flour
  • 3 large eggs
  • 2 cups pineapple juice, room temperature
  • 3/4 cup sugar or Splenda
  • 1 teaspoon vanilla extract
  • 2 pkg yeast (.25 oz each)
  • 1/2 cup butter, melted (8 tablespoons)

Instructions

Step 1: Beat the eggs in a small bowl. Mix in the pineapple juice, sugar, vanilla extract, and melted butter. Combine well.

Step 2: In a large bowl, place the 3 cups of flour. Pour in the egg mixture and stir until incorporated. Then, sprinkle, one at a time the yeast packets. Mix well.

Step 3: Stir in the rest of the flour and thoroughly mix. Use a wooden spoon to mix and if the mixture becomes too difficult to stir, you can use your hands instead. Making sure that the flour is well incorporated.

Step 4: If the dough is tacky but not too sticky it is ready. And if the dough appears too wet you can sprinkle a little flour, a tablespoon or so at a time.

Step 5: Place the dough in a bowl and cover with a clean kitchen towel. Place it in a warm place for an hour to rise.

Step 6: Once the dough is set, remove it from the bowl. Knead the dough in an extra half cup of flour. Knead for about 10 to 15 minutes to make sure that the flour is completely combined.

Step 7: Then, shape the dough into rolls or loaf and transfer in buttered pans.

Step 8: Sit the rolls or loaf in a warm place, covered, to rise until double in size. For the rolls, let them rise for an hour and 90 minutes if making loaves.

Step 9: Place inside the oven and bake at 350 degrees for about 25 to 30 minutes or until golden brown.

Step 10: Once done, remove from the oven and brush the tops with melted butter before serving. Enjoy!

August 6, 2020 0 comment
0 FacebookTwitterPinterestEmail
Main Dish Recipes

CHILE RELLENOS CASSEROLE

by Rebecca August 6, 2020
written by Rebecca

Serves: 8 | Prep: 20 Min | Cook: 45 Min

What an awesome dish! This is by far the best recipe I have ever tried. The flavors are just too good. The best part of this dish for me is the cheesy taste. So, my advice, be very generous with the cheese because it will make your dish extra special. Enjoy!

Ingredients

1 lb ground sirloin

1/2 cup chopped onion

3/4 cup red bell pepper

1 teaspoon olive oil

1/2 teaspoon salt

1/4 teaspoon black pepper

1/2 teaspoon garlic powder

1 teaspoon cumin

1/4 teaspoon allspice

2 cans chopped green chile, 4 oz each

1 1/2 cups shredded sharp cheddar cheese, and a little more for the top of the casserole

1 dash(es) milk

1/2 cup sour cream

1/4 cup all-purpose flour

4 eggs, beaten

dash(es) Tabasco

toppings of sour cream, black sliced olives, and chopped green onions

HOW TO MAKE BONNIE’S CHILE RELLENOS CASSEROLE

Step 1: Place a medium skillet on the stove and add olive oil.

Step 2: Add the chopped onion and bell pepper then saute’. Season with a pinch of salt. Cook until the onion becomes translucent.

Step 3: Add in the ground beef. Sprinkle pepper, salt, cumin, garlic powder, and allspice. Cook until the beef becomes color brown.

Step 4: Drain the excess oil. Use a paper towel to soak the rest of the oil.

Step 5: Spread evenly one can of the chiles in a 9 x 13-inch baking dish.

Step 6: Sprinkle sharp cheese over the chiles.

Step 7: Transfer the cooked beef mixture. Spread on top of the cheese.

Step 8: Add in another can of chiles on top of the ground beef.

Step 9: Prepare a small mixing bowl. Add in the sour cream, milk, beaten eggs, dash of Tabasco, salt, and pepper. Whisk until well mixed and smooth.

Step 10: Transfer the mixture into the dish and spread.

Step 11: Place inside the oven and bake for 45 to 50 minutes at 350 degrees or until cooked through.

Step 12: Remove from the oven and sprinkle cheese on top 10 minutes before the cooking time.

Step 13: Cut into small squares.

Step 14: Garnish with black olives, sour cream, and chopped spring onions.

Step 15: Serve and enjoy!

CHILE RELLENOS CASSEROLE

Rebecca Serves: 8 | Prep: 20 Min | Cook: 45 Min What an awesome dish! This is by far the best recipe I have ever tried. The flavors are just too… Main Dish Recipes CHILE RELLENOS CASSEROLE European Print This
Serves: 8 Prep Time: 20 mins Cooking Time: 45 mins 45 mins
Nutrition facts: 200 calories 20 grams fat
Rating: 4.0/5
( 2 voted )

Ingredients

  • 1 lb ground sirloin
  • 1/2 cup chopped onion
  • 3/4 cup red bell pepper
  • 1 teaspoon olive oil
  • 1/2 teaspoon salt
  • 1/4 teaspoon black pepper
  • 1/2 teaspoon garlic powder
  • 1 teaspoon cumin
  • 1/4 teaspoon allspice
  • 2 cans chopped green chile, 4 oz each
  • 1 1/2 cups shredded sharp cheddar cheese, and a little more for the top of the casserole
  • 1 dash(es) milk
  • 1/2 cup sour cream
  • 1/4 cup all-purpose flour
  • 4 eggs, beaten
  • dash(es) Tabasco
  • toppings of sour cream, black sliced olives, and chopped green onions

Instructions

Step 1: Place a medium skillet on the stove and add olive oil.

Step 2: Add the chopped onion and bell pepper then saute'. Season with a pinch of salt. Cook until the onion becomes translucent.

Step 3: Add in the ground beef. Sprinkle pepper, salt, cumin, garlic powder, and allspice. Cook until the beef becomes color brown.

Step 4: Drain the excess oil. Use a paper towel to soak the rest of the oil.

Step 5: Spread evenly one can of the chiles in a 9 x 13-inch baking dish.

Step 6: Sprinkle sharp cheese over the chiles.

Step 7: Transfer the cooked beef mixture. Spread on top of the cheese.

Step 8: Add in another can of chiles on top of the ground beef.

Step 9: Prepare a small mixing bowl. Add in the sour cream, milk, beaten eggs, dash of Tabasco, salt, and pepper. Whisk until well mixed and smooth.

Step 10: Transfer the mixture into the dish and spread.

Step 11: Place inside the oven and bake for 45 to 50 minutes at 350 degrees or until cooked through.

Step 12: Remove from the oven and sprinkle cheese on top 10 minutes before the cooking time.

Step 13: Cut into small squares.

Step 14: Garnish with black olives, sour cream, and chopped spring onions.

Step 15: Serve and enjoy!

August 6, 2020 0 comment
0 FacebookTwitterPinterestEmail
Main Dish Recipes

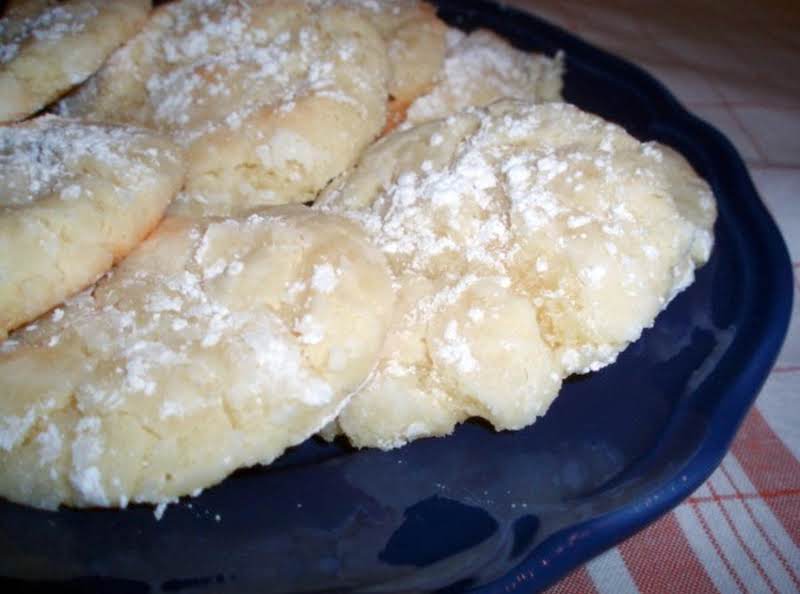
Gooey Butter Cookies

by Rebecca August 6, 2020
written by Rebecca

Serves: approx. 24 cookies | Prep: 2 Hr 15 Min | Cook: 10 Min

So how can I describe these Butter Cookies? Hmm. Gooey? Yes! Thick, moist, and soft? Unquestionably! These cuties are a no-fuss, made from scratch butter cookies that are everyone’s favorite!

These cookies are the handheld version of the famous butter cake. They are easily put together and can be stored in an airtight container for days! You can roll them in powdered sugar or sprinkles. These cookies are like blank canvasses, you can dress them up with whatever you want! They are super fun to make! Let the kids help, I am pretty sure they’ll jump in excitement. These festive cookies are great for holidays, cookie exchange, and gift-giving. Super delicious, extremely irresistible, and fun to make!

I love these gooey butter cookies because they are yummy, kids friendly, and are amazing to put in gift tins for a nice holiday present. Everyone will appreciate a nice homemade gift. It is a breeze to make so make sure to prepare a bunch for everybody!

Ingredients

1 box Duncan Hines butter recipe cake mix (can substitute yellow or French vanilla)

1 stick butter

1/4 teaspoon vanilla extract

1 pkg cream cheese, room temp (8 oz)

1 egg

powdered sugar (for rolling dough into)

How to Make Gooey Butter Cookies

Step 1: In a mixing bowl, combine the cake mix, butter, vanilla extract, and cream cheese using an electric mixer until incorporated.

Step 2: Once mixed, chill the dough for at least 2 hours.

Step 3: Then, roll the chilled dough in balls about walnut sizes and roll them in powdered sugar.

Step 4: Transfer the balls in an ungreased cookie sheet.

Step 5: Place inside the oven and bake at 350 degrees for about 10 to 12 minutes.

Step 6: Once done, remove from the oven and let them cool. When cooled, dust the cookies with powdered sugar. Enjoy!

Gooey Butter Cookies

Rebecca Serves: approx. 24 cookies | Prep: 2 Hr 15 Min | Cook: 10 Min So how can I describe these Butter Cookies? Hmm. Gooey? Yes! Thick, moist, and soft? Unquestionably!… Main Dish Recipes Gooey Butter Cookies European Print This
Serves: 24 Prep Time: 2 hrs 15 mins Cooking Time: 10 mins 10 mins
Nutrition facts: 200 calories 20 grams fat
Rating: 5.0/5
( 1 voted )

Ingredients

  • 1 box Duncan Hines butter recipe cake mix (can substitute yellow or French vanilla)
  • 1 stick butter
  • 1/4 teaspoon vanilla extract
  • 1 pkg cream cheese, room temp (8 oz)
  • 1 egg
  • powdered sugar (for rolling dough into)

Instructions

Step 1: In a mixing bowl, combine the cake mix, butter, vanilla extract, and cream cheese using an electric mixer until incorporated.

Step 2: Once mixed, chill the dough for at least 2 hours.

Step 3: Then, roll the chilled dough in balls about walnut sizes and roll them in powdered sugar.

Step 4: Transfer the balls in an ungreased cookie sheet.

Step 5: Place inside the oven and bake at 350 degrees for about 10 to 12 minutes.

Step 6: Once done, remove from the oven and let them cool. When cooled, dust the cookies with powdered sugar. Enjoy!

August 6, 2020 0 comment
0 FacebookTwitterPinterestEmail
Main Dish Recipes

Coconut Cream Pie Cake

by Rebecca August 6, 2020
written by Rebecca

Serves: 8-10 | Prep: 15 Min | Cook: 30 Min

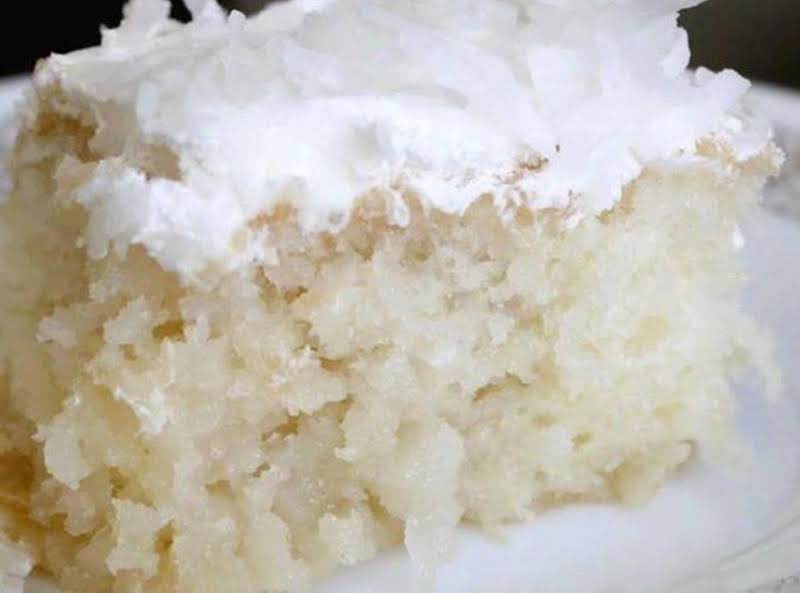
This is a pretty simple cake that’s made with a delicious buttery crust, creamy coconut filling, and fluffy whipped cream topping. Some say that this is a love and hate dessert. But if you enjoy coconut like me, then, this cake is a real treat. It’s a heavenly sweet dessert that you can make in a breeze! A no-fuss, all goodness dessert that you can enjoy all year. Moist, with an amazing texture, and flavor. Enjoy the creamy taste of coconut in every bite!

Ingredients

1 box yellow cake mix

1 can coconut milk or cream

1 can sweeten condensed milk

8 oz cool whip

1 small package sweetened flaked coconut

How to Make Coconut Cream Pie Cake

Step 1: Prepare the cake following the package instruction. Place the batter in a 9 x 13-inch baking pan or dish to bake.

Step 2: Meanwhile, combine a can of coconut cream or milk and a can of sweetened condensed milk. Use any brand that you prefer or one from the Dollar store. If you want a cheaper alternative.

Step 3: Once the cake is done, remove it from the oven. With a skewer or a chopstick to evenly poke holes through the hot cake. If possible, poke holes as well along the sides o the cake. When doing this, make sure to leave the cake in the pan or dish.

Step 4: After poking the cake, pour all of the coconut-condensed milk over the cake. And allow the cake to cool in the pan or dish before putting the cake in the fridge

Step 5: When the cake is set, remove from the fridge and spread the cool whip over the cake. Then, sprinkle the flaked coconut on top.

NOTE: You can make this cake one of two days ahead as it’ll make the consistency like a coconut cream pie. Which I normally do! This cake is guaranteed super delish and creamy. Enjoy!

Coconut Cream Pie Cake

Rebecca Serves: 8-10 | Prep: 15 Min | Cook: 30 Min This is a pretty simple cake that’s made with a delicious buttery crust, creamy coconut filling, and fluffy whipped cream… Main Dish Recipes Coconut Cream Pie Cake European Print This
Serves: 8-10 Prep Time: 15 mins Cooking Time: 30 mins 30 mins
Nutrition facts: 200 calories 20 grams fat
Rating: 4.3/5
( 3 voted )

Ingredients

  • 1 box yellow cake mix
  • 1 can coconut milk or cream
  • 1 can sweeten condensed milk
  • 8 oz cool whip
  • 1 small package sweetened flaked coconut

Instructions

Step 1: Prepare the cake following the package instruction. Place the batter in a 9 x 13-inch baking pan or dish to bake.

Step 2: Meanwhile, combine a can of coconut cream or milk and a can of sweetened condensed milk. Use any brand that you prefer or one from the Dollar store. If you want a cheaper alternative.

Step 3: Once the cake is done, remove it from the oven. With a skewer or a chopstick to evenly poke holes through the hot cake. If possible, poke holes as well along the sides o the cake. When doing this, make sure to leave the cake in the pan or dish.

Step 4: After poking the cake, pour all of the coconut-condensed milk over the cake. And allow the cake to cool in the pan or dish before putting the cake in the fridge

Step 5: When the cake is set, remove from the fridge and spread the cool whip over the cake. Then, sprinkle the flaked coconut on top.

NOTE: You can make this cake one of two days ahead as it'll make the consistency like a coconut cream pie. Which I normally do! This cake is guaranteed super delish and creamy. Enjoy!

August 6, 2020 0 comment
0 FacebookTwitterPinterestEmail
Main Dish Recipes

Creamy Scalloped Potatoes & Kielbasa -My Way

by Rebecca August 6, 2020
written by Rebecca

Serves: 4 – 6 | Prep: 15 Min | Cook: 1 Hr 25 Min

This creamy, super-rich and cheesy casserole is the most comforting evening meal alongside any of your fave veggies or with nice crusty bread.

Ingredients

1 tablespoon oil

1 – 14 oz kielbasa – sliced and cut in half

1 medium sweet onion, sliced and cut in half

6 medium potatoes – peeled, washed and sliced – I used my mandolin to keep thinness consistent – about 1/4 inch

2 cups cheddar or favorite shredded cheese

FOR THE WHITE SAUCE

3 1/2 tablespoons butter

4 1/2 tablespoons flour

1 1/2 cups chicken broth

1 cup heavy cream

1/2 cup milk

1/4 teaspoon dried thyme

1/2 – 3/4 teaspoon kosher salt

1/2 teaspoon pepper

How to Make Creamy Scalloped Potatoes & Kielbasa -My Way

Step 1: Add oil in a medium skillet and heat over medium-high heat. Then, sautee the kielbasa and onions. Occasionally stir until the sausage begins caramelizing and onions soften. Set aside.

Step 2: Prepare the potatoes. Peel, wash, and slice the potatoes. You can do this ahead, just keep the sliced potatoes in cold water.

Step 3: If using harder potatoes like Russets, you can par-cook to cut down baking time. Or boil for 10 minutes to soften.

Step 4: Meanwhile, start preparing the sauce. Melt the butter in a medium saucepan over medium heat. Once melted, stir in the flour and start whisking to make a paste. Cook for at least a minute to eliminate the flour taste. Stir for about 1 1/2 minutes.

Step 5: Gradually add in the broth while whisking to make sure that there are no lumps. Then, add in the cream and milk followed by the seasonings. Stir often until thickened. Adjust the seasoning if needed.

Step 6: Spoon the sauce in the bottom of a 4-quart casserole. Make sure to place enough sauce to cover the bottom of the pan. Then, layer half of the potatoes, followed by the kielbasa, and the onion mixture. Top with half of the cheese.

Step 7: Repeat the same steps for the remaining sauce, potatoes, kielbasa, and lastly the cheese. At this point, you need the push some of the potatoes into the white sauce.

Step 8: Place the casserole inside the oven, covered, and bake at 350 degrees for about 40 minutes. Uncover and continue baking for another 40 minutes or longer until the potatoes are fork-tender.

Step 9: Once done, remove from the oven and serve with your favorite veggies or a slice of crusty bread. Enjoy!

Creamy Scalloped Potatoes & Kielbasa -My Way

Rebecca Serves: 4 – 6 | Prep: 15 Min | Cook: 1 Hr 25 Min This creamy, super-rich and cheesy casserole is the most comforting evening meal alongside any of your… Main Dish Recipes Creamy Scalloped Potatoes & Kielbasa -My Way European Print This
Serves: 4-6 Prep Time: 15 mins Cooking Time: 1 hr 25 mins 1 hr 25 mins
Nutrition facts: 200 calories 20 grams fat
Rating: 5.0/5
( 2 voted )

Ingredients

  • 1 tablespoon oil
  • 1 - 14 oz kielbasa - sliced and cut in half
  • 1 medium sweet onion, sliced and cut in half
  • 6 medium potatoes - peeled, washed and sliced - I used my mandolin to keep thinness consistent - about 1/4 inch
  • 2 cups cheddar or favorite shredded cheese
  • FOR THE WHITE SAUCE
  • 3 1/2 tablespoons butter
  • 4 1/2 tablespoons flour
  • 1 1/2 cups chicken broth
  • 1 cup heavy cream
  • 1/2 cup milk
  • 1/4 teaspoon dried thyme
  • 1/2 - 3/4 teaspoon kosher salt
  • 1/2 teaspoon pepper

Instructions

Step 1: Add oil in a medium skillet and heat over medium-high heat. Then, sautee the kielbasa and onions. Occasionally stir until the sausage begins caramelizing and onions soften. Set aside.

Step 2: Prepare the potatoes. Peel, wash, and slice the potatoes. You can do this ahead, just keep the sliced potatoes in cold water.

Step 3: If using harder potatoes like Russets, you can par-cook to cut down baking time. Or boil for 10 minutes to soften.

Step 4: Meanwhile, start preparing the sauce. Melt the butter in a medium saucepan over medium heat. Once melted, stir in the flour and start whisking to make a paste. Cook for at least a minute to eliminate the flour taste. Stir for about 1 1/2 minutes.

Step 5: Gradually add in the broth while whisking to make sure that there are no lumps. Then, add in the cream and milk followed by the seasonings. Stir often until thickened. Adjust the seasoning if needed.

Step 6: Spoon the sauce in the bottom of a 4-quart casserole. Make sure to place enough sauce to cover the bottom of the pan. Then, layer half of the potatoes, followed by the kielbasa, and the onion mixture. Top with half of the cheese.

Step 7: Repeat the same steps for the remaining sauce, potatoes, kielbasa, and lastly the cheese. At this point, you need the push some of the potatoes into the white sauce.

Step 8: Place the casserole inside the oven, covered, and bake at 350 degrees for about 40 minutes. Uncover and continue baking for another 40 minutes or longer until the potatoes are fork-tender.

Step 9: Once done, remove from the oven and serve with your favorite veggies or a slice of crusty bread. Enjoy!

August 6, 2020 0 comment
0 FacebookTwitterPinterestEmail
Newer Posts
Older Posts

Popular Posts

  • 1

    Crispy Crunchy Parmesan Potatoes

    March 21, 2020
  • 2

    CROCK POT SMOTHERED PORK CHOPS

    March 21, 2020
  • Facebook
  • Twitter

@2019 - All Right Reserved.


Back To Top