Cook it once
  • Home
  • Privacy Policy
  • Recipes
    • KETO
    • LC
    • WW
  • Tips
  • Contact
Cook it once
  • Home
  • Privacy Policy
  • Recipes
    • KETO
    • LC
    • WW
  • Tips
  • Contact
Category:

Main Dish Recipes

Main Dish Recipes

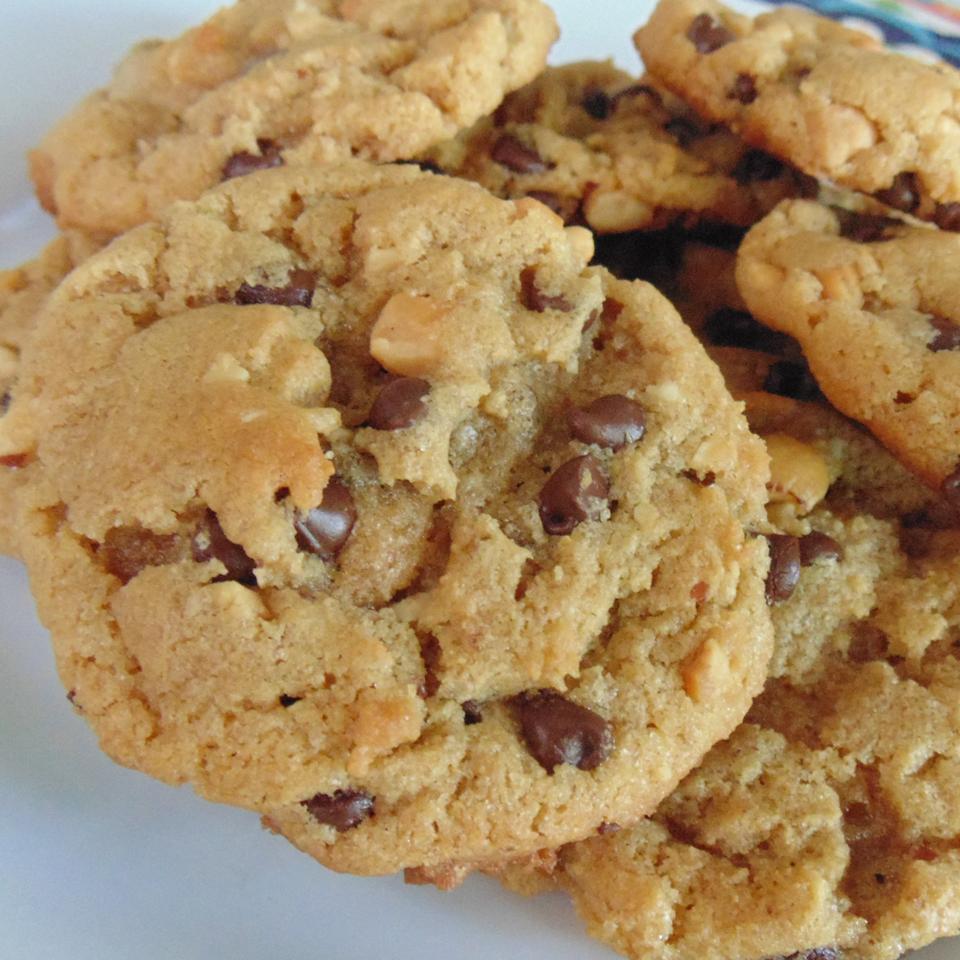
EASY, CHEWY FLOURLESS PEANUT BUTTER COOKIES

by Rebecca September 12, 2020
written by Rebecca

Prep: 10 mins | Cook: 10mins | Total: 20 mins | Servings: 12 | Yield: 12 to 16 cookies

These are excellent. Flourless cookies with all the goodness of peanut butter. I am obsessed with peanut butter and this recipe works perfectly for me. I can make this whenever I won’t because this is way too easy and quick to make. I recommend that you try crunchy or honey roasted peanut butter instead of your usual for a change of flavor and texture. These are always a huge hit. I make sure to bake extra because the kids love these, too. These chewy flourless peanut butter cookies are my go-to anytime.

INGREDIENTS

1 cup peanut butter

½ cup white sugar

⅓ cup packed brown sugar

1 egg

1 tsp vanilla extract

½ tsp baking soda

½ cup semisweet chocolate chips

HOW TO MAKE EASY, CHEWY FLOURLESS PEANUT BUTTER COOKIES

Step 1: Prepare the oven. Preheat it to 350 degrees F or 175 degrees C.

Step 2: In a large bowl, add the peanut butter, white sugar, and brown sugar. Beat using an electric mixer until smooth. Add in the egg, vanilla extract, and baking soda. Stir, then, mix in the chocolate chips.

Step 3: On a baking sheet, place spoonfuls of the mixture about 2 inches apart.

Step 4: Place inside the preheated oven and bake for about 8 minutes or until the cookies are flattened and golden.

NOTES:

You are welcome to use either smooth or crunchy peanut butter. I usually use smooth but crunchy peanut butter works well, too.

As a variety, use a honey roasted peanut butter in place of the usual peanut butter. I promise it is gonna be awesome!

Make sure to cool the cookie dough before baking. baking with the warm dough will result in more thinner and flatter cookies.

Nutrition Facts:

Per Serving: 222.4 calories; fat 13.3g 21% DV; cholesterol 15.5mg 5% DV; sodium 159.5mg 6% DV; protein 6.2g 12% DV; carbohydrates 23g 7% DV

EASY, CHEWY FLOURLESS PEANUT BUTTER COOKIES

Rebecca Prep: 10 mins | Cook: 10mins | Total: 20 mins | Servings: 12 | Yield: 12 to 16 cookies These are excellent. Flourless cookies with all the goodness of peanut butter. I am obsessed with peanut butter and this… Main Dish Recipes EASY, CHEWY FLOURLESS PEANUT BUTTER COOKIES European Print This
Serves: 12 Prep Time: 10 mins Cooking Time: 10 mins 10 mins
Nutrition facts: 224.4 calories 13.3 fat
Rating: 4.1/5
( 8 voted )

Ingredients

  • 1 cup peanut butter
  • ½ cup white sugar
  • ⅓ cup packed brown sugar
  • 1 egg
  • 1 tsp vanilla extract
  • ½ tsp baking soda
  • ½ cup semisweet chocolate chips

Instructions

Step 1: Prepare the oven. Preheat it to 350 degrees F or 175 degrees C.

Step 2: In a large bowl, add the peanut butter, white sugar, and brown sugar. Beat using an electric mixer until smooth. Add in the egg, vanilla extract, and baking soda. Stir, then, mix in the chocolate chips.

Step 3: On a baking sheet, place spoonfuls of the mixture about 2 inches apart.

Step 4: Place inside the preheated oven and bake for about 8 minutes or until the cookies are flattened and golden.

NOTES:

You are welcome to use either smooth or crunchy peanut butter. I usually use smooth but crunchy peanut butter works well, too.

As a variety, use a honey roasted peanut butter in place of the usual peanut butter. I promise it is gonna be awesome!

Make sure to cool the cookie dough before baking. baking with the warm dough will result in more thinner and flatter cookies.
September 12, 2020 0 comment
0 FacebookTwitterPinterestEmail
Main Dish Recipes

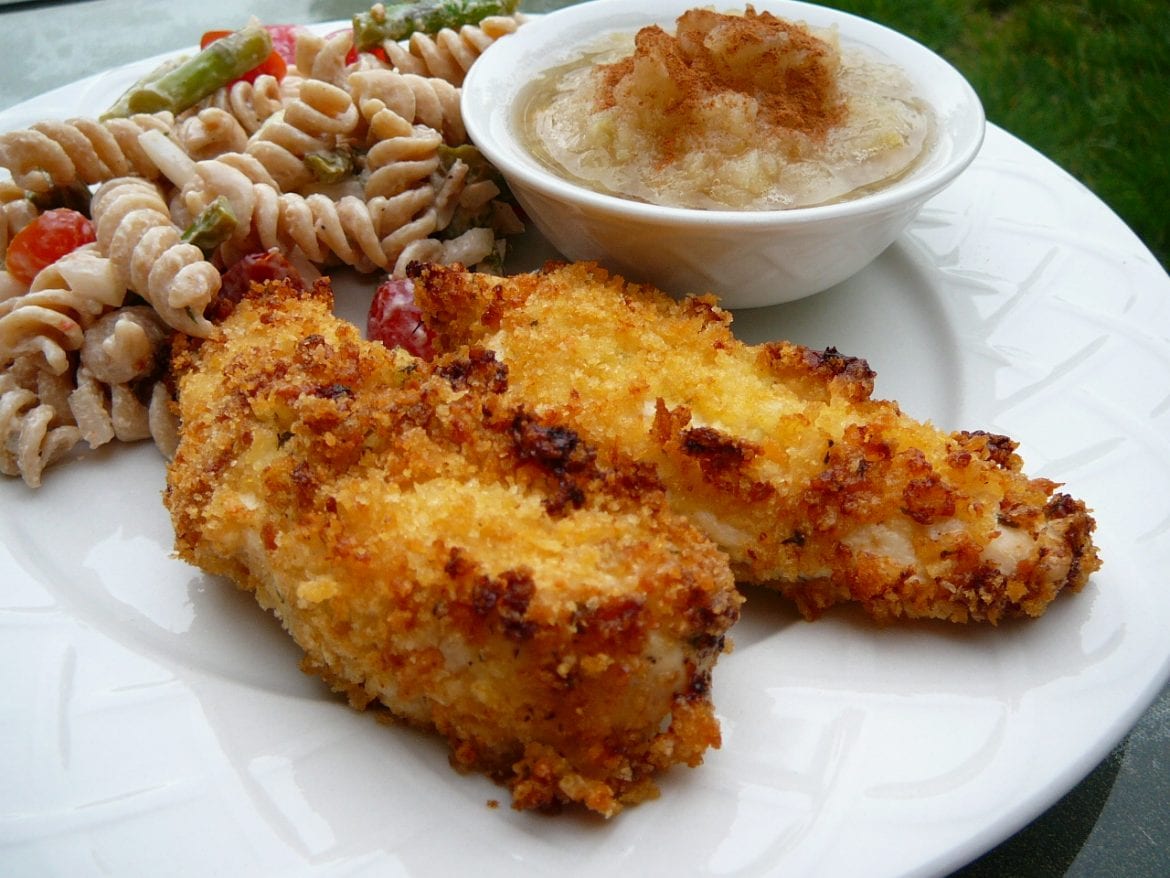
TENDER ITALIAN BAKED CHICKEN

by Rebecca September 12, 2020
written by Rebecca

Prep: 10 mins | Cook: 20mins | Total: 30 mins | Servings: 4 | Yield: 4 servings

When I first made this, there were no leftovers! Even the crumbs were gone. All that was left were empty plates. These moist chicken breasts coated in an easy parmesan and bread crumbs coating are always a huge hit. A winner in the heart of many – kids and adults. This easy and quick recipe calls for only a few simple ingredients and it’s ready in thirty minutes. This will be an amazing addition to your weekly menu. Especially if you have kids who love everything chicken as I do.

INGREDIENTS

¾ cup mayonnaise

½ cup grated Parmesan cheese

¾ tsp garlic powder

¾ cup Italian seasoned bread crumbs

4 (blank)s skinless, boneless chicken breast halves

HOW TO MAKE TENDER ITALIAN BAKED CHICKEN

Step 1: Ready the oven. Preheat it to 425 degrees F or 220 degrees C.

Step 2: Add the mayonnaise, Parmesan cheese, and garlic powder in a bowl. Mix well.

Step 3: In a different bowl, add the bread crumbs.

Step 4: Dip first the chicken into the mayonnaise mix, then, into the bread crumbs. Coat well.

Step 5: Put the coated chicken on a baking sheet.

Step 6: Place inside the preheated oven and bake for about 20 minutes until the juices run clear and the coating of the chicken is golden brown.

NOTES:

If you are weight conscious, boneless skinless chicken is your best friend because it is an excellent source of protein. And they need less time to cook than bone-in-chicken thighs. Although, boneless skinless chicken can be boring and dry sometimes but with this recipe that is not gonna be the case.

If an instant-read thermometer is available, I would recommend using that t check the chicken. make sure to not cook the chicken for too long because a minute extra will make a huge difference.

Nutrition Facts:

Per Serving: 553.9 calories; fat 39.6g 61% DV; cholesterol 91.6mg 31% DV; sodium 768.3mg 31% DV; protein 31.8g 64% DV; carbohydrates 17.1g 6% DV

TENDER ITALIAN BAKED CHICKEN

Rebecca Prep: 10 mins | Cook: 20mins | Total: 30 mins | Servings: 4 | Yield: 4 servings When I first made this, there were no leftovers! Even the crumbs were gone. All that was left were empty plates. These… Main Dish Recipes TENDER ITALIAN BAKED CHICKEN European Print This
Serves: 4 Prep Time: 10 mins Cooking Time: 20 mins 20 mins
Nutrition facts: 553.9 calories 39.6 fat
Rating: 5.0/5
( 1 voted )

Ingredients

  • ¾ cup mayonnaise
  • ½ cup grated Parmesan cheese
  • ¾ tsp garlic powder
  • ¾ cup Italian seasoned bread crumbs
  • 4 (blank)s skinless, boneless chicken breast halves

Instructions

Step 1: Ready the oven. Preheat it to 425 degrees F or 220 degrees C.

Step 2: Add the mayonnaise, Parmesan cheese, and garlic powder in a bowl. Mix well.

Step 3: In a different bowl, add the bread crumbs.

Step 4: Dip first the chicken into the mayonnaise mix, then, into the bread crumbs. Coat well.

Step 5: Put the coated chicken on a baking sheet.

Step 6: Place inside the preheated oven and bake for about 20 minutes until the juices run clear and the coating of the chicken is golden brown.

NOTES:

If you are weight conscious, boneless skinless chicken is your best friend because it is an excellent source of protein. And they need less time to cook than bone-in-chicken thighs. Although, boneless skinless chicken can be boring and dry sometimes but with this recipe that is not gonna be the case.

If an instant-read thermometer is available, I would recommend using that t check the chicken. make sure to not cook the chicken for too long because a minute extra will make a huge difference.

September 12, 2020 0 comment
0 FacebookTwitterPinterestEmail
Main Dish Recipes

CHEESY, CREAMY CORNBREAD CASSEROLE

by Rebecca September 12, 2020
written by Rebecca

Prep: 10mins | Cook: 30mins | Total: 40 mins | Servings: 12 | Yield: 1 – 9×13 inch pan

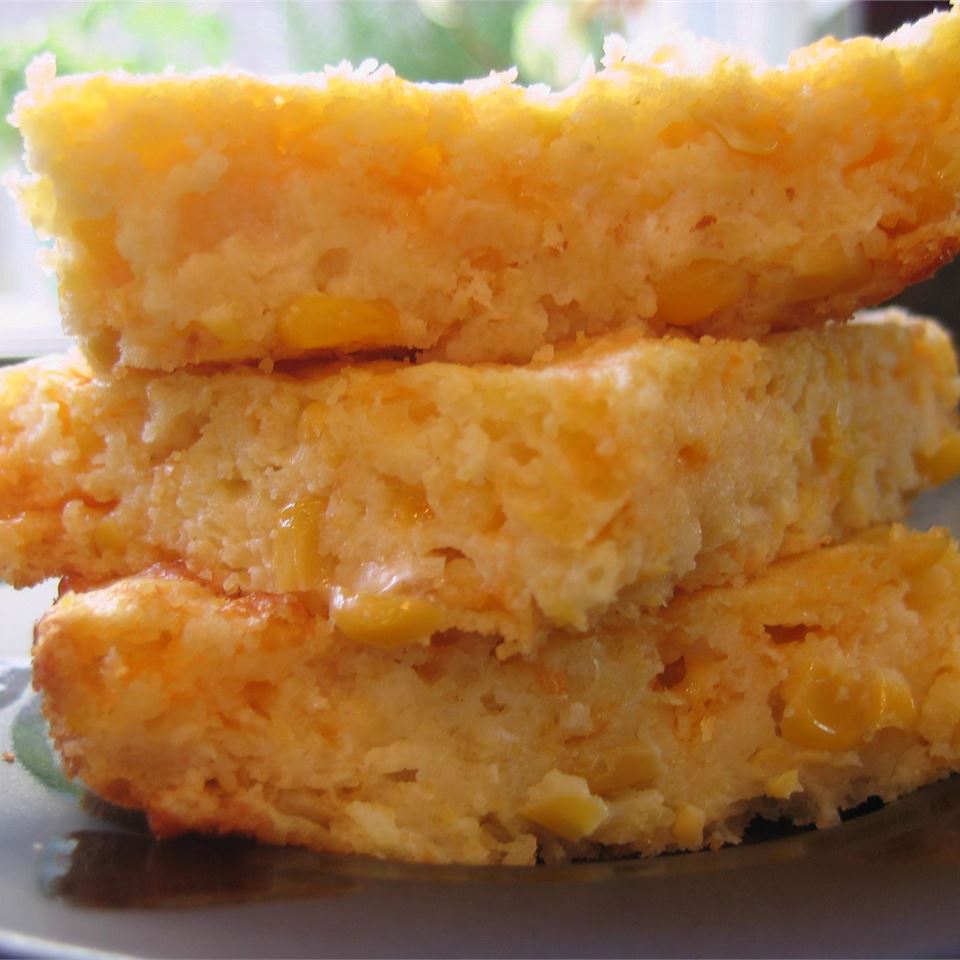
Cheesy and creamy – this cornbread casserole is the best of the best. A delicious casserole that you can eat with your hands! Decadent, comforting, and the perfect side dish. Easy and quick to whip up, you can make this whenever! And this freezes well, too. When in the freezer this delish casserole can last up to six months. This tastes superb –  extra creamy, outrageously cheesy, and a favorite at Thanksgiving. If you love cornbread, then, this is for you. Try this and I’m pretty sure that it will be love at first bite!

INGREDIENTS

1 (15 oz) can whole kernel corn, drained with only 1/2 liquid reserved

1 (14.75 oz) can cream-style corn

2 large eggs

1 (8 oz) package dry cornbread mix

1 cup sour cream

8 ounces Cheddar cheese, shredded

HOW TO MAKE CORNBREAD CASSEROLE

Step 1: Prepare the oven. Preheat it to 400 degrees F or 200 degrees C.

Step 2: Then, lightly grease a 9 x 13-inch baking pan.

Step 3: In a large mixing bowl, add the corn, reserved liquid, eggs, cornbread mix, and sour cream. Stir until well combined.

Step 4: Transfer the batter into the prepared pan and sprinkle the cheese over.

Step 5: Place inside the preheated oven and bake for about 30 minutes until golden brown.

NOTES:

If you would like a bit of color, try adding and sprinkling some freshly chopped parsley on top. Although, this is pretty amazing as is.

The consistency of this is that of a thick pudding so make sure that when serving you have a spoon handing.

Completely cool before serving. This casserole you can keep for up to 6 months, just slide this into an airtight tub freezer.

To serve, thaw first in the fridge before reheating in the microwave.

Nutrition Facts:

Per Serving: 254.5 calories; fat 13.4g 21% DV; cholesterol 59.8mg 20% DV; sodium 642.3mg 26% DV; protein 9.4g 19% DV; carbohydrates 26.4g 9% DV

CHEESY, CREAMY CORNBREAD CASSEROLE

Rebecca Prep: 10mins | Cook: 30mins | Total: 40 mins | Servings: 12 | Yield: 1 – 9×13 inch pan Cheesy and creamy – this cornbread casserole is the best of the best. A delicious casserole that you can eat… Main Dish Recipes CHEESY, CREAMY CORNBREAD CASSEROLE European Print This
Serves: 12 Prep Time: 10 mins Cooking Time: 30 mins 30 mins
Nutrition facts: 254.5 calories 13.4 fat
Rating: 5.0/5
( 1 voted )

Ingredients

  • 1 (15 oz) can whole kernel corn, drained with only 1/2 liquid reserved
  • 1 (14.75 oz) can cream-style corn
  • 2 large eggs
  • 1 (8 oz) package dry cornbread mix
  • 1 cup sour cream
  • 8 ounces Cheddar cheese, shredded

Instructions

Step 1: Prepare the oven. Preheat it to 400 degrees F or 200 degrees C.

Step 2: Then, lightly grease a 9 x 13-inch baking pan.

Step 3: In a large mixing bowl, add the corn, reserved liquid, eggs, cornbread mix, and sour cream. Stir until well combined.

Step 4: Transfer the batter into the prepared pan and sprinkle the cheese over.

Step 5: Place inside the preheated oven and bake for about 30 minutes until golden brown.

NOTES:

If you would like a bit of color, try adding and sprinkling some freshly chopped parsley on top. Although, this is pretty amazing as is.

The consistency of this is that of a thick pudding so make sure that when serving you have a spoon handing.

Completely cool before serving. This casserole you can keep for up to 6 months, just slide this into an airtight tub freezer.

To serve, thaw first in the fridge before reheating in the microwave.

September 12, 2020 0 comment
0 FacebookTwitterPinterestEmail
Main Dish Recipes

SUPER-EASY PEANUT BUTTER COOKIES

by Rebecca September 12, 2020
written by Rebecca

Prep: 5 mins | Cook: 20mins | Additional: 5 mins | Total: 30 mins | Servings: 24 | Yield: 24 cookies

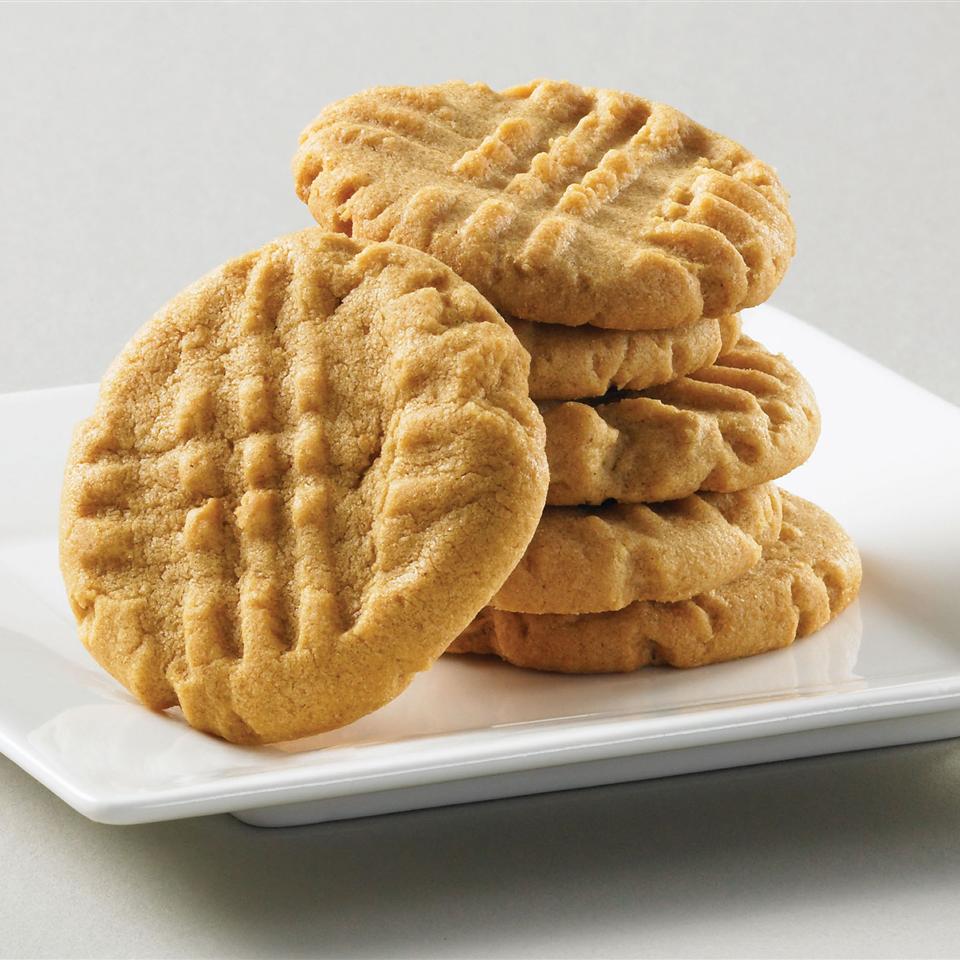
This is my go-to whenever I want something easy and quick. Delish cookies made with my favorite peanut butter brand. My personal favorite and always a huge hit!

INGREDIENTS

1 cup KRAFT Smooth Peanut Butter

½ cup white sugar

1 egg

HOW TO MAKE SUPER-EASY PEANUT BUTTER COOKIES

Step 1: Prepare the oven. Preheat it to 325 degrees F.

Step 2: Using a large spoon, mix the peanut butter, white sugar, and egg until well blended.

Step 3: Roll the mixture into 24 pieces of balls.

Step 4: Place them on the baking sheets, 4 inches apart. Then, with a fork flatten the balls.

Step 5: Place inside the preheated oven and bake for about 20 minutes until lightly browned. Making sure not to overbake.

Step 6: Remove from the oven and allow the cookies to cool for at least 5 minutes on the baking sheets before transferring them onto a wire rack to completely cool.

NOTES:

I would recommend chilling the dough for a few hours. This will aid the cookies to hold their shape and not spread too much once baked.

Store these cookies in an airtight jar for up to a week.

Dip the tines between the cookies in a little amount of sugar. This will help prevent the fork to stick when making a cross-hatch pattern on each cookie.

For the best result, I recommend using smooth and salted peanut butter. But if you are using sweetened peanut butter, adjust the amount of sugar to 2 tablespoons.

If you plan on using a natural peanut butter without a stabilizer, you need to make sure that when you open the jar that you mix the peanut butter well. If not, the cookies will be runny because of the heavy oil on top of the jar.

You are welcome to use any brand of peanut butter you desire.

Nutrition Facts:

Per Serving: 79.1 calories; fat 5.5g 9% DV; cholesterol 7.8mg 3% DV; sodium 42.9mg 2% DV; protein 2.3g 5% DV; carbohydrates 6.8g 2% DV

SUPER-EASY PEANUT BUTTER COOKIES

Rebecca Prep: 5 mins | Cook: 20mins | Additional: 5 mins | Total: 30 mins | Servings: 24 | Yield: 24 cookies This is my go-to whenever I want something easy and quick. Delish cookies made with my favorite peanut butter brand.… Main Dish Recipes SUPER-EASY PEANUT BUTTER COOKIES European Print This
Serves: 24 Prep Time: 5 mins Cooking Time: 25 mins 25 mins
Nutrition facts: 79.1 calories 5.1 fat
Rating: 5.0/5
( 1 voted )

Ingredients

  • 1 cup KRAFT Smooth Peanut Butter
  • ½ cup white sugar
  • 1 egg

Instructions

Step 1: Prepare the oven. Preheat it to 325 degrees F.

Step 2: Using a large spoon, mix the peanut butter, white sugar, and egg until well blended.

Step 3: Roll the mixture into 24 pieces of balls.

Step 4: Place them on the baking sheets, 4 inches apart. Then, with a fork flatten the balls.

Step 5: Place inside the preheated oven and bake for about 20 minutes until lightly browned. Making sure not to overbake.

Step 6: Remove from the oven and allow the cookies to cool for at least 5 minutes on the baking sheets before transferring them onto a wire rack to completely cool.

NOTES:

I would recommend chilling the dough for a few hours. This will aid the cookies to hold their shape and not spread too much once baked.

Store these cookies in an airtight jar for up to a week.

Dip the tines between the cookies in a little amount of sugar. This will help prevent the fork to stick when making a cross-hatch pattern on each cookie.

For the best result, I recommend using smooth and salted peanut butter. But if you are using sweetened peanut butter, adjust the amount of sugar to 2 tablespoons.

If you plan on using a natural peanut butter without a stabilizer, you need to make sure that when you open the jar that you mix the peanut butter well. If not, the cookies will be runny because of the heavy oil on top of the jar.

You are welcome to use any brand of peanut butter you desire.

September 12, 2020 0 comment
0 FacebookTwitterPinterestEmail
Main Dish Recipes

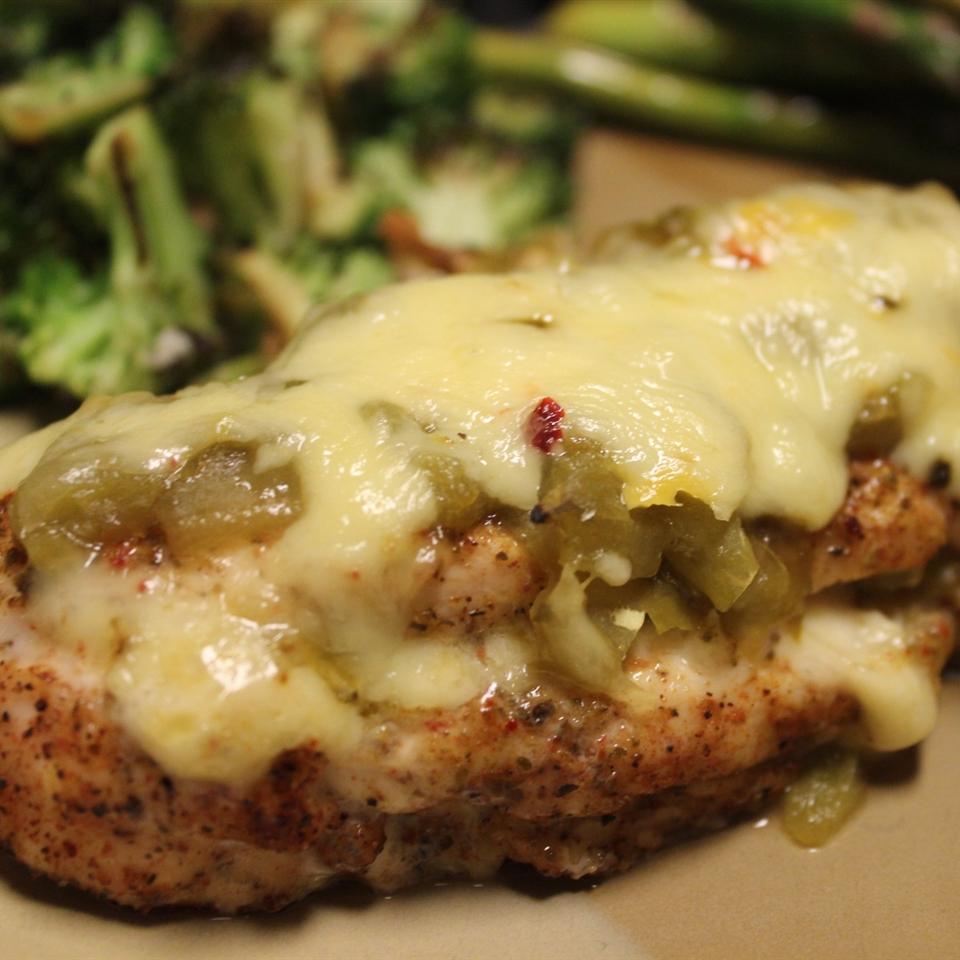
GREEN CHILI AND CHEESE CHICKEN

by Rebecca September 12, 2020
written by Rebecca

Prep: 10 mins | Cook: 30mins | Total: 40 mins | Servings: 4 | Yield: 4 servings

This is another amazing recipe that everyone will enjoy. You can adjust the heat to your liking – make it spicy or mild bu adding more or fewer chilies. A mouthwatering dish that goes alongside anything! Easy and quick with excellent flavors that just burst in your mouth. This recipe for Green Chili and Cheese Chicken is a must-try and to keep. A great addition to your list of menu that your whole family will love. I urge you to try this and see for yourself.

Ingredients

4 breast half, (blank)s boneless, skinless chicken breasts

1 ½ cups shredded pepper jack cheese

1 (4 oz) can dice green chile peppers, drained

1 tbsp dry fajita seasoning

HOW TO MAKE GREEN CHILI AND CHEESE CHICKEN

Step 1: Prepare the oven. Preheat it to 350 degrees F or 175 degrees C.

Step 2: Using a cooking spray, grease a 9-inch square baking dish or a similar size dish.

Step 3: Into the sides of each chicken breast half, make a deep cut to form a pocket or purse. Fill the cut with 1/4 cup of cheese and a tablespoon of chilies per side. Make sure to securely close the cut using a toothpick for the cheese to not escape while cooking.

Step 4: Transfer the stuffed chicken breasts into the prepared baking dish. Then, season with Fajita seasoning and sprinkle over the rest of the cheese and chilies.

Step 5: Place inside the preheated oven and bake for about 30 minutes or until the juices run clear, the cheese has melted, and lightly brown.

NOTE:

Adjust the spiciness as much as you want. Adding mild green chili will add more flavor and is more pleasant. Pretty sure your family will love it.

Nutrition Facts:

Per Serving: 334.4 calories; fat 18.8g 29% DV; cholesterol 120.2mg 40% DV; sodium 792.4mg 32% DV; protein 35.4g 71% DV; carbohydrates 4.3g 1% DV

GREEN CHILI AND CHEESE CHICKEN

Rebecca Prep: 10 mins | Cook: 30mins | Total: 40 mins | Servings: 4 | Yield: 4 servings This is another amazing recipe that everyone will enjoy. You can adjust the heat to your liking – make it spicy or… Main Dish Recipes GREEN CHILI AND CHEESE CHICKEN European Print This
Serves: 4 Prep Time: 10 mins Cooking Time: 30 mins 30 mins
Nutrition facts: 334.4 calories 18.8 fat
Rating: 5.0/5
( 1 voted )

Ingredients

  • 4 breast half, (blank)s boneless, skinless chicken breasts
  • 1 ½ cups shredded pepper jack cheese
  • 1 (4 oz) can dice green chile peppers, drained
  • 1 tbsp dry fajita seasoning

Instructions

Step 1: Prepare the oven. Preheat it to 350 degrees F or 175 degrees C.

Step 2: Using a cooking spray, grease a 9-inch square baking dish or a similar size dish.

Step 3: Into the sides of each chicken breast half, make a deep cut to form a pocket or purse. Fill the cut with 1/4 cup of cheese and a tablespoon of chilies per side. Make sure to securely close the cut using a toothpick for the cheese to not escape while cooking.

Step 4: Transfer the stuffed chicken breasts into the prepared baking dish. Then, season with Fajita seasoning and sprinkle over the rest of the cheese and chilies.

Step 5: Place inside the preheated oven and bake for about 30 minutes or until the juices run clear, the cheese has melted, and lightly brown.

NOTE:

Adjust the spiciness as much as you want. Adding mild green chili will add more flavor and is more pleasant. Pretty sure your family will love it.

September 12, 2020 0 comment
0 FacebookTwitterPinterestEmail
Main Dish Recipes

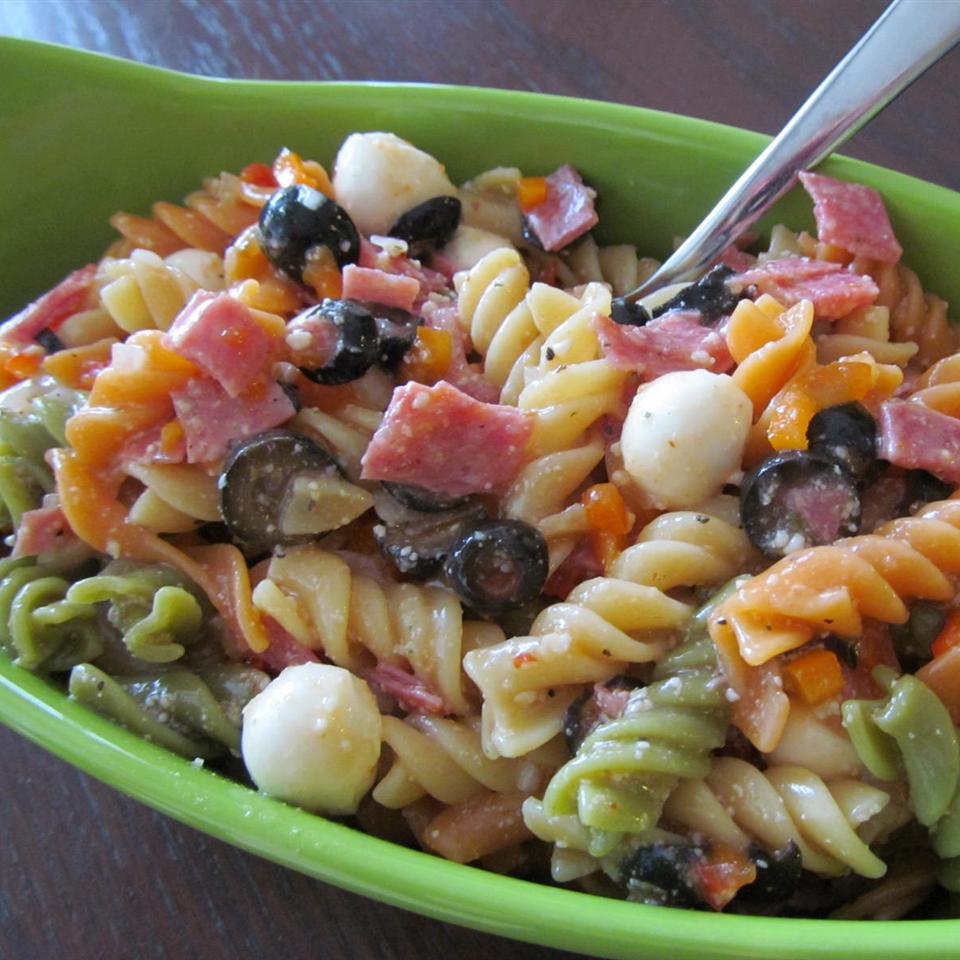
QUICK ITALIAN PASTA SALAD

by Rebecca September 12, 2020
written by Rebecca

Prep: 15 mins | Cook: 10mins | Total: 25 mins | Servings: 12 | Yield: 12 servings

This is the star of the night! An excellent, delish pasta dish that is most loved by my kids. Pretty easy and not fussy, you can make this whenever! A quick dinner idea for your whole family to enjoy. This is the easiest and quickest pasta recipe I have ever tried. And the result is incomparable – burst in your mouth flavors, heavenly superb, and always a crowd-pleaser. All the ingredients are covered in Italian dressing. Yum! I will be bringing this to our next potluck and I am making a lot because I am one hundred percent sure everyone will go crazy over this fabulous pasta dish.

INGREDIENTS

1 (12 oz) package tri-color rotini pasta

¾ pound Italian salami, finely diced

½ green bell pepper, sliced

½ red bell pepper, sliced

½ red onion, chopped

1 cup Italian-style salad dressing

1 (6 oz) can slice black olives

8 ounces small fresh mozzarella balls (ciliegine)

3 (.7 oz) packages dry Italian-style salad dressing mix

½ cup shredded Parmesan cheese

HOW TO MAKE QUICK ITALIAN PASTA SALAD

Step 1: Bring to a boil a large pot of lightly salted water. Add the rotini and cook for about 8 minutes until tender but not firm. Drain and rinse the rotini with cold water. Set aside.

Step 2: In a large bowl, combine the pasta, salami, green bell pepper, red bell pepper, onion, salad dressing, olives, and mozzarella cheese.

Step 3: Add the dry salad dressing into the pasta and mix. Then, sprinkle the parmesan cheese over.

NOTES:

Try using a tri-color rotini. This does a good job as well on keeping the cheese and Italian dressing in the fissures for complete flavor.

Anything available you can use for this recipe like shells or medium noodles.

Nutrition Facts:

Per Serving: 370.9 calories; fat 21g 32% DV; cholesterol 46mg 15% DV; sodium 1893.1mg 76% DV; protein 15.2g 30% DV; carbohydrates 29.2g 9% DV

QUICK ITALIAN PASTA SALAD

Rebecca Prep: 15 mins | Cook: 10mins | Total: 25 mins | Servings: 12 | Yield: 12 servings This is the star of the night! An excellent, delish pasta dish that is most loved by my kids. Pretty easy and… Main Dish Recipes QUICK ITALIAN PASTA SALAD European Print This
Serves: 12 Prep Time: 15 mins Cooking Time: 10 mins 10 mins
Nutrition facts: 370.9 calories 21 fat
Rating: 5.0/5
( 2 voted )

Ingredients

  • 1 (12 oz) package tri-color rotini pasta
  • ¾ pound Italian salami, finely diced
  • ½ green bell pepper, sliced
  • ½ red bell pepper, sliced
  • ½ red onion, chopped
  • 1 cup Italian-style salad dressing
  • 1 (6 oz) can slice black olives
  • 8 ounces small fresh mozzarella balls (ciliegine)
  • 3 (.7 oz) packages dry Italian-style salad dressing mix
  • ½ cup shredded Parmesan cheese

Instructions

Step 1: Bring to a boil a large pot of lightly salted water. Add the rotini and cook for about 8 minutes until tender but not firm. Drain and rinse the rotini with cold water. Set aside.

Step 2: In a large bowl, combine the pasta, salami, green bell pepper, red bell pepper, onion, salad dressing, olives, and mozzarella cheese.

Step 3: Add the dry salad dressing into the pasta and mix. Then, sprinkle the parmesan cheese over.

NOTES:

Try using a tri-color rotini. This does a good job as well on keeping the cheese and Italian dressing in the fissures for complete flavor.

Anything available you can use for this recipe like shells or medium noodles.

September 12, 2020 0 comment
0 FacebookTwitterPinterestEmail
Main Dish Recipes

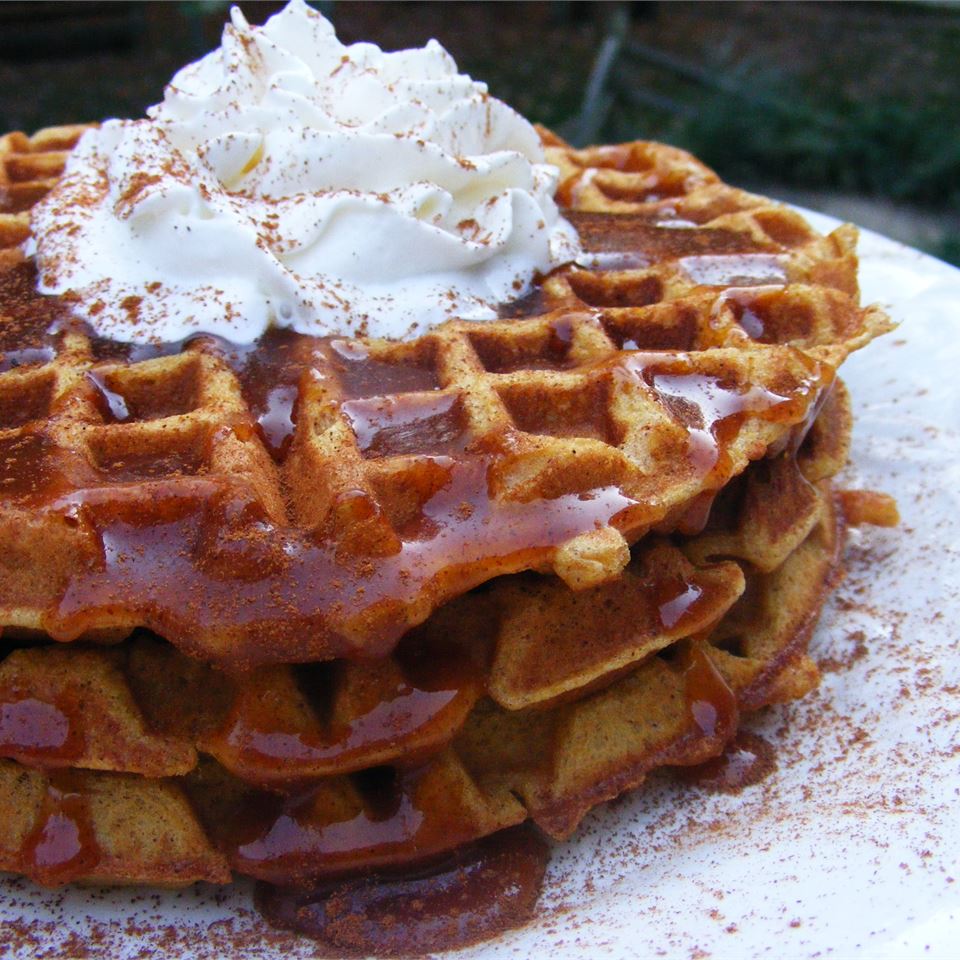
PUMPKIN WAFFLES WITH APPLE CIDER SYRUP

by Rebecca September 12, 2020
written by Rebecca

Prep: 30mins | Cook: 15mins | Total: 45 mins | Servings: 6 | Yield: 6 servings

This is the perfect autumn recipe. The quintessential fall flavors of pumpkin combine perfectly with the apple cider. I am sure your kids will go gaga over this. Even the kids at heart will fall madly in love with this Pumpkin Waffles with Apple Cider Syrup.

Ingredients

2 ½ cups all-purpose flour

4 tsp baking powder

2 tsp ground cinnamon

1 tsp ground allspice

1 tsp ground ginger

½ tsp salt

¼ cup packed brown sugar

1 cup canned pumpkin

2 cups of milk

4 large eggs, separated

¼ cup butter, melted

For Apple Cider Syrup:

½ cup white sugar

1 tbsp cornstarch

1 tsp ground cinnamon

1 cup apple cider

1 tbsp lemon juice

2 tbsp butter

HOW TO MAKE PUMPKIN WAFFLES WITH APPLE CIDER SYRUP

Step 1: Following the instruction written on the manufacturer’s instructions preheat your waffle iron.

Step 2: In a mixing bowl, combine the flour, baking powder, cinnamon, allspice, ginger, salt, and brown sugar.

Step 3: Add the pumpkin, milk, and egg yolks in a different bowl. Mix well.

Step 4: Whip the egg whites in a clean and dry bowl until soft peaks form.

Step 5: Add the flour and 1/4 cup melted butter into the pumpkin mixture. Stir well until just combined.

Step 6: Fold in 1/3 egg white into the butter using a whisk until incorporated. Making sure to stir gently.

Step 7: Then, fold in the rest of the egg whites.

Step 8: Follow the manufacturer’s instructions to cook the waffles.

Step 9: For the syrup, add the sugar, cornstarch, and cinnamon in a saucepan. Stir, then, add in the apple cider and lemon juice. Mix to combine. Over medium heat, cook until the mixture starts to boil. Continue cooking until the syrup has thickened. Then, remove from the heat and immediately stir in 2 tablespoons of butter until melted.

Step 10: Serve warm. Enjoy!

Nutrition Facts:

Per Serving: 529.9 calories; fat 17.1g 26% DV; cholesterol 161mg 54% DV; sodium 702.8mg 28% DV; protein 13g 26% DV; carbohydrates 82.3g 27% DV

PUMPKIN WAFFLES WITH APPLE CIDER SYRUP

Rebecca Prep: 30mins | Cook: 15mins | Total: 45 mins | Servings: 6 | Yield: 6 servings This is the perfect autumn recipe. The quintessential fall flavors of pumpkin combine perfectly with the apple cider. I am sure your kids… Main Dish Recipes PUMPKIN WAFFLES WITH APPLE CIDER SYRUP European Print This
Serves: 6 Prep Time: 30 mins Cooking Time: 15 mins 15 mins
Nutrition facts: 529.9 calories 17.1 fat
Rating: 5.0/5
( 1 voted )

Ingredients

  • 2 ½ cups all-purpose flour
  • 4 tsp baking powder
  • 2 tsp ground cinnamon
  • 1 tsp ground allspice
  • 1 tsp ground ginger
  • ½ tsp salt
  • ¼ cup packed brown sugar
  • 1 cup canned pumpkin
  • 2 cups of milk
  • 4 large eggs, separated
  • ¼ cup butter, melted
  • For Apple Cider Syrup:
  • ½ cup white sugar
  • 1 tbsp cornstarch
  • 1 tsp ground cinnamon
  • 1 cup apple cider
  • 1 tbsp lemon juice
  • 2 tbsp butter

Instructions

Step 1: Following the instruction written on the manufacturer’s instructions preheat your waffle iron.

Step 2: In a mixing bowl, combine the flour, baking powder, cinnamon, allspice, ginger, salt, and brown sugar.

Step 3: Add the pumpkin, milk, and egg yolks in a different bowl. Mix well.

Step 4: Whip the egg whites in a clean and dry bowl until soft peaks form.

Step 5: Add the flour and 1/4 cup melted butter into the pumpkin mixture. Stir well until just combined.

Step 6: Fold in 1/3 egg white into the butter using a whisk until incorporated. Making sure to stir gently.

Step 7: Then, fold in the rest of the egg whites.

Step 8: Follow the manufacturer’s instructions to cook the waffles.

Step 9: For the syrup, add the sugar, cornstarch, and cinnamon in a saucepan. Stir, then, add in the apple cider and lemon juice. Mix to combine. Over medium heat, cook until the mixture starts to boil. Continue cooking until the syrup has thickened. Then, remove from the heat and immediately stir in 2 tablespoons of butter until melted.

Step 10: Serve warm. Enjoy!

September 12, 2020 0 comment
0 FacebookTwitterPinterestEmail
Main Dish Recipes

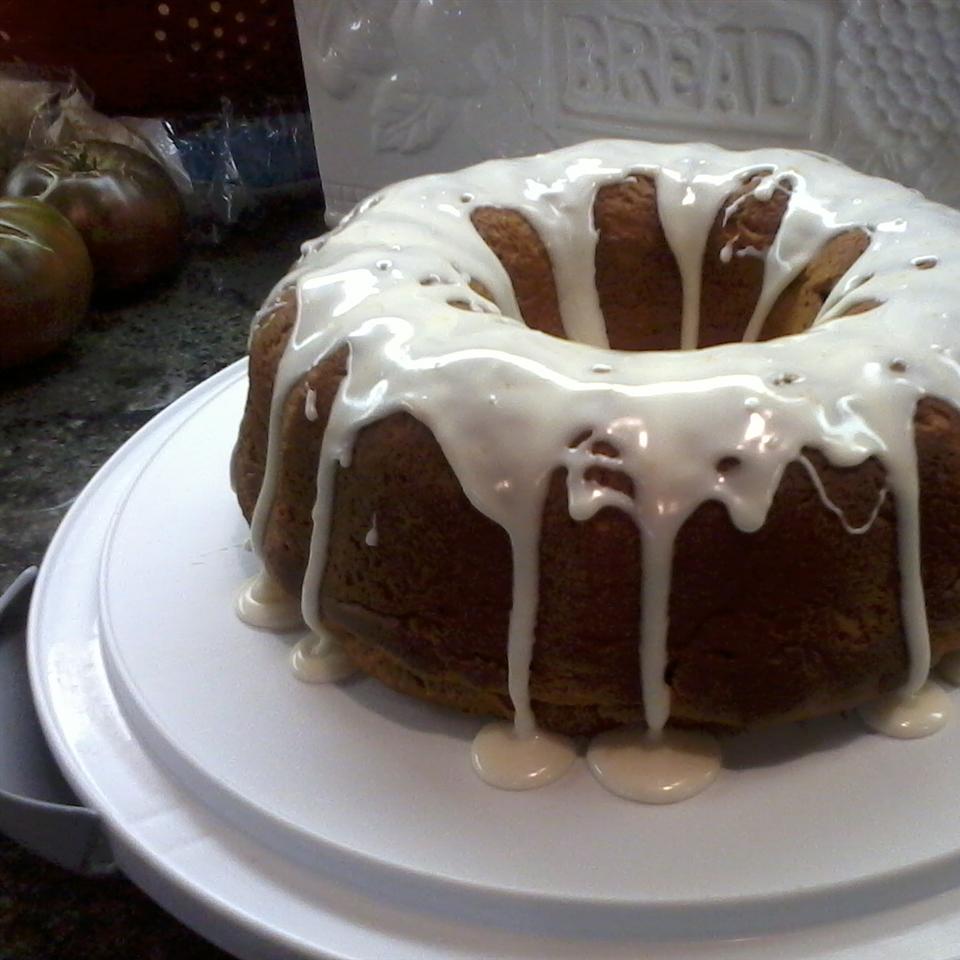
BUTTERSCOTCH PUMPKIN PUDDING CAKE

by Rebecca September 12, 2020
written by Rebecca

Prep: 15mins | Cook: 1hr 10mins | Additional: 15 mins | Total: 1 hr 40 mins | Servings: 12 | Yield: 1 10-inch cake

Who would have thought that this amazing cake is made straight out of a cake mix box? A smooth cake with creamy icing on top – perfectly sweet and a perfect instant fix. The kids love this and it is always a hit. A star on gatherings and potlucks. Pretty easy and not fussy yet the taste is superb! This calls for simple and readily available ingredients – a good deal whenever you need something easy and quick. This delectable cake is excellent on any occasion. I made this for a friend last week and she adored this so much! She said this cake was a huge hit! I urge you to give this a try and I’m sure you’ll love it, too.

Ingredients

1 serving cooking spray

1 (18.25 oz) package white cake mix

1 cup canned pure pumpkin

1 (3.4 oz) package of instant butterscotch pudding mix

4 large eggs, beaten

¼ cup of water

¼ cup canola oil

2 tsp pumpkin pie spice

HOW TO MAKE BUTTERSCOTCH PUMPKIN PUDDING CAKE

Step 1: Prepare the oven. Preheat it to 300 degrees F or 150 degrees C.

Step 2: Using a cooking spray, grease a 10-inch fluted pan like a Bundt.

Step 3: In a bowl, add the white cake mix, pumpkin, butterscotch pudding mix, eggs, water, canola oil, and pumpkin pie spice. Mix until well combined and the batter is smooth.

Step 4: Transfer the batter into the prepared pan.

Step 5: Place inside the preheated oven and bake for about an hour and ten minutes or until a toothpick inserted in the center of the cake comes out clean.

Step 6: Remove from the oven and allow the cake to cool for at least 10 minutes in the pan. Then remove from the pan and transfer the cake onto a serving platter.

Nutrition Facts:

Per Serving: 283.2 calories; fat 11.1g 17% DV; cholesterol 62mg 21% DV; sodium 479.3mg 19% DV; protein 4.3g 9% DV; carbohydrates 42.5g 14% DV

BUTTERSCOTCH PUMPKIN PUDDING CAKE

Rebecca Prep: 15mins | Cook: 1hr 10mins | Additional: 15 mins | Total: 1 hr 40 mins | Servings: 12 | Yield: 1 10-inch cake Who would have thought that this amazing cake is made straight out of a cake mix… Main Dish Recipes BUTTERSCOTCH PUMPKIN PUDDING CAKE European Print This
Serves: 12 Prep Time: 15 mins Cooking Time: 1 hr 25 mins 1 hr 25 mins
Nutrition facts: 283.2 calories 11.1 fat
Rating: 5.0/5
( 1 voted )

Ingredients

  • 1 serving cooking spray
  • 1 (18.25 oz) package white cake mix
  • 1 cup canned pure pumpkin
  • 1 (3.4 oz) package of instant butterscotch pudding mix
  • 4 large eggs, beaten
  • ¼ cup of water
  • ¼ cup canola oil
  • 2 tsp pumpkin pie spice

Instructions

Step 1: Prepare the oven. Preheat it to 300 degrees F or 150 degrees C.

Step 2: Using a cooking spray, grease a 10-inch fluted pan like a Bundt.

Step 3: In a bowl, add the white cake mix, pumpkin, butterscotch pudding mix, eggs, water, canola oil, and pumpkin pie spice. Mix until well combined and the batter is smooth.

Step 4: Transfer the batter into the prepared pan.

Step 5: Place inside the preheated oven and bake for about an hour and ten minutes or until a toothpick inserted in the center of the cake comes out clean.

Step 6: Remove from the oven and allow the cake to cool for at least 10 minutes in the pan. Then remove from the pan and transfer the cake onto a serving platter.

September 12, 2020 0 comment
0 FacebookTwitterPinterestEmail
Main Dish Recipes

MELT-IN-YOUR-MOUTH MELTING POTATOES

by Rebecca September 11, 2020
written by Rebecca

Active: 25 mins | Total: 1hr 10mins | Servings: 6

I am in love with these melt-in-your-mouth potatoes. Ever since I made this, I have never eaten potatoes any other way. These melting potatoes are outrageously delicious! Try this and I am pretty sure that your family will crave this always!

INGREDIENTS

2 lbs of Yukon Gold potatoes, peeled, cut into 1-inch slices

2 tbsp of melted butter

2 tbsp extra-virgin olive oil

2 tsp chopped fresh thyme

1 tsp chopped fresh rosemary

¾ tsp salt

½ tsp ground pepper

1 cup low-sodium vegetable broth or chicken broth

5 cloves garlic, peeled and smashed

HOW TO MAKE MELT-IN-YOUR-MOUTH MELTING POTATOES

Step 1: Before preheating the oven, position the rack in the upper third of the oven. Then, preheat to 500 degrees F.

Step 2: In a large bowl, add the potatoes, butter, oil, thyme, rosemary, salt, and pepper. Toss to fully coat the potatoes.

Step 3: In a 9 x 13-inch metal baking pan, arrange in a single layer the potatoes.

Step 4: Place inside the preheated oven and roast for approximately 30 minutes. Then, flip the potatoes once until they turn brown.

Step 5: Remove from the oven and carefully add in the broth and garlic into the pan.

Step 7: Place the pan back into the oven and roast for another 15 minutes until most of the broth is consumed and the potatoes are very tender.

Step 8: Serve immediately. Enjoy!

NOTE:

Make sure to not use a glass dish because it could break.

For that melt-in-your-mouth bites, let the tots cook undisturbed for some time. Flip the potatoes. Remove the pan from the oven to add the magic ingredient – the chicken broth. Adding liquid will help you get that melting potato to result as the potatoes absorbed the broth right up.

Nutrition Facts:

Per Serving: 206 calories; sodium 315mg 13% DV; potassium 842mg 24% DV; carbohydrates 28.1g 9% DV; fiber 2.4g 10% DV; sugarg; protein 3.3g 7% DV; exchange other carbs 2; vitamin a iu 140IU; vitamin c 1mg; folate 1mcg; calcium 12mg; ironmg; magnesium 1mg; total fat 8.5g 13% DV; saturated fat 3g; cholesterol 10mg 3% DV

MELT-IN-YOUR-MOUTH MELTING POTATOES

Rebecca Active: 25 mins | Total: 1hr 10mins | Servings: 6 I am in love with these melt-in-your-mouth potatoes. Ever since I made this, I have never eaten potatoes any other way. These melting potatoes are… Main Dish Recipes MELT-IN-YOUR-MOUTH MELTING POTATOES European Print This
Serves: 6 Prep Time: 25 mins
Nutrition facts: 206 calories 8.5 fat
Rating: 5.0/5
( 1 voted )

Ingredients

  • 2 lbs of Yukon Gold potatoes, peeled, cut into 1-inch slices
  • 2 tbsp of melted butter
  • 2 tbsp extra-virgin olive oil
  • 2 tsp chopped fresh thyme
  • 1 tsp chopped fresh rosemary
  • ¾ tsp salt
  • ½ tsp ground pepper
  • 1 cup low-sodium vegetable broth or chicken broth
  • 5 cloves garlic, peeled and smashed

Instructions

Step 1: Before preheating the oven, position the rack in the upper third of the oven. Then, preheat to 500 degrees F.

Step 2: In a large bowl, add the potatoes, butter, oil, thyme, rosemary, salt, and pepper. Toss to fully coat the potatoes.

Step 3: In a 9 x 13-inch metal baking pan, arrange in a single layer the potatoes.

Step 4: Place inside the preheated oven and roast for approximately 30 minutes. Then, flip the potatoes once until they turn brown.

Step 5: Remove from the oven and carefully add in the broth and garlic into the pan.

Step 7: Place the pan back into the oven and roast for another 15 minutes until most of the broth is consumed and the potatoes are very tender.

Step 8: Serve immediately. Enjoy!

NOTE:

Make sure to not use a glass dish because it could break.

For that melt-in-your-mouth bites, let the tots cook undisturbed for some time. Flip the potatoes. Remove the pan from the oven to add the magic ingredient - the chicken broth. Adding liquid will help you get that melting potato to result as the potatoes absorbed the broth right up.

September 11, 2020 0 comment
0 FacebookTwitterPinterestEmail
Main Dish Recipes

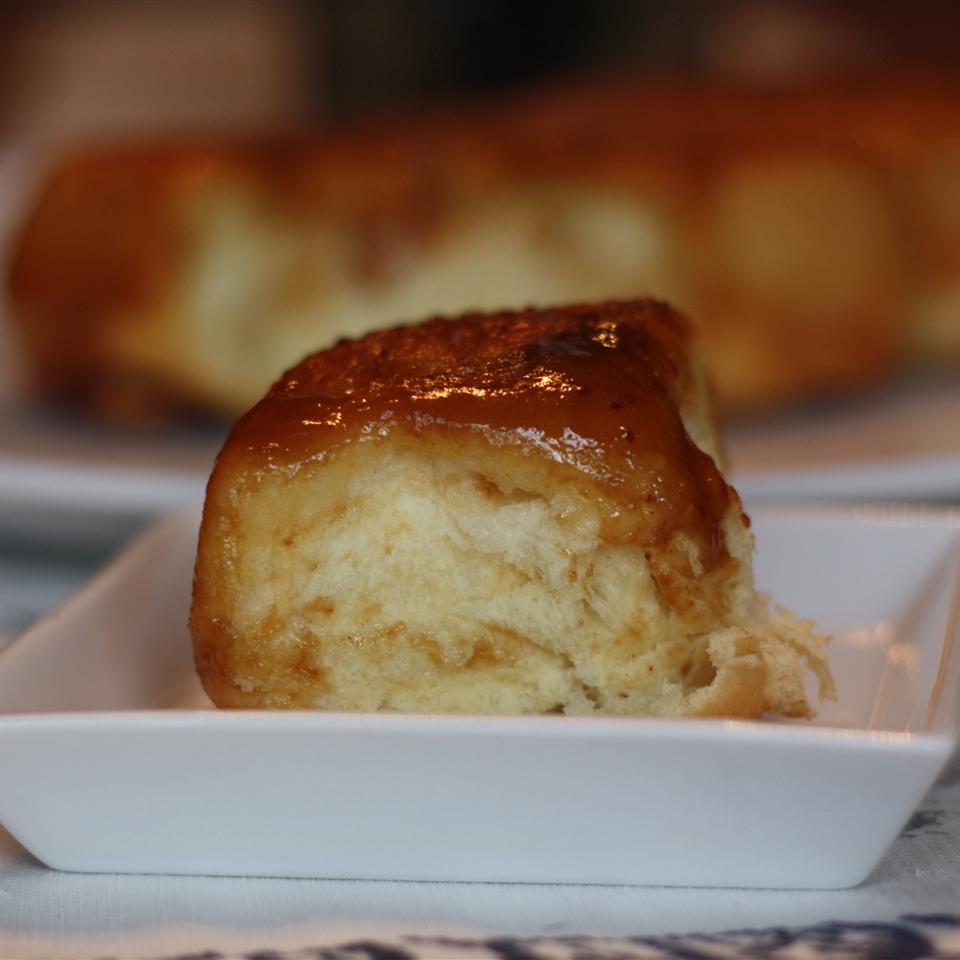
BEST EVER CARAMEL ROLLS

by Rebecca September 11, 2020
written by Rebecca

Prep: 25 mins | Cook: 33 mins | Additional: 8 hrs 10 mins | Total: 9 hrs 8 mins | Servings: 24 | Yield: 24 caramel rolls

Gobble up this airy and light rolls with a wonderful caramel flavor. This is the softest, most tender rolls I’ve ever tasted and it is a breeze to make. Hurray! I hit the jackpot!

INGREDIENTS

1 cup white sugar, or to taste

2 tbsp ground cinnamon, or to taste

2 (1 pound) loaves frozen bread dough, thawed

¼ cup butter, melted and cooled

For the Caramel Sauce:

1 cup brown sugar

¾ cup vanilla ice cream

½ cup butter

HOW TO MAKE CARAMEL ROLLS

Step 1: Add the white sugar and cinnamon in a small bowl. Mix well.

Step 2: Into a large rectangle, roll out a thawed loaf. Brush evenly over the dough half of the melted butter. Then, sprinkle over half of the cinnamon-sugar mixture.

Step 3: To roll the dough (like a log), grab the long edge closest to you. Divide the log into 1-inch pieces using a sharp serrated knife.

Step 4: Place the pieces cut-side up in an ungreased 9 × 13-inch baking pan.

Step 5: For the second thawed loaf, repeat step 2.

Step 6: In a small saucepan, add the brown sugar, vanilla ice cream, and half a cup butter. Combine and heat for about 3 to 5 minutes over medium heat. Stirring well until melted and incorporated. when done, pour this over the rolls in the baking pan. Using an aluminum foil, cover the pan and place inside the fridge to double the size of the rolls for about 8 hours or overnight.

Step 7: When ready to bake, prepare the oven. Preheat it to 350 degrees F or 175 degrees C.

Step 8: Place the rolls in the preheated oven and bake for approximately 30 minutes until golden brown.

Step 9: Remove from the oven and let the rolls cool for at least 10 minutes before serving.

NOTE:

To cut the logs into slices, you can either use a sharp knife or a long thread string.

Nutrition Facts:

Per Serving: 233.6 calories; fat 7.7g 12% DV; cholesterol 17.1mg 6% DV; sodium 258.7mg 10% DV; protein 4g 8% DV; carbohydrates 36.9g 12% DV

BEST EVER CARAMEL ROLLS

Rebecca Prep: 25 mins | Cook: 33 mins | Additional: 8 hrs 10 mins | Total: 9 hrs 8 mins | Servings: 24 | Yield: 24 caramel rolls Gobble up this airy and light rolls with a wonderful caramel flavor. This… Main Dish Recipes BEST EVER CARAMEL ROLLS European Print This
Serves: 24 Prep Time: 25 mins Cooking Time: 8 hrs 43 mins 8 hrs 43 mins
Nutrition facts: 233.6 calories 7.7 fat
Rating: 5.0/5
( 1 voted )

Ingredients

  • 1 cup white sugar, or to taste
  • 2 tbsp ground cinnamon, or to taste
  • 2 (1 pound) loaves frozen bread dough, thawed
  • ¼ cup butter, melted and cooled
  • For the Caramel Sauce:
  • 1 cup brown sugar
  • ¾ cup vanilla ice cream
  • ½ cup butter

Instructions

Step 1: Add the white sugar and cinnamon in a small bowl. Mix well.

Step 2: Into a large rectangle, roll out a thawed loaf. Brush evenly over the dough half of the melted butter. Then, sprinkle over half of the cinnamon-sugar mixture.

Step 3: To roll the dough (like a log), grab the long edge closest to you. Divide the log into 1-inch pieces using a sharp serrated knife.

Step 4: Place the pieces cut-side up in an ungreased 9 × 13-inch baking pan.

Step 5: For the second thawed loaf, repeat step 2.

Step 6: In a small saucepan, add the brown sugar, vanilla ice cream, and half a cup butter. Combine and heat for about 3 to 5 minutes over medium heat. Stirring well until melted and incorporated. when done, pour this over the rolls in the baking pan. Using an aluminum foil, cover the pan and place inside the fridge to double the size of the rolls for about 8 hours or overnight.

Step 7: When ready to bake, prepare the oven. Preheat it to 350 degrees F or 175 degrees C.

Step 8: Place the rolls in the preheated oven and bake for approximately 30 minutes until golden brown.

Step 9: Remove from the oven and let the rolls cool for at least 10 minutes before serving.

NOTE:

To cut the logs into slices, you can either use a sharp knife or a long thread string.

September 11, 2020 0 comment
0 FacebookTwitterPinterestEmail
Newer Posts
Older Posts

Popular Posts

  • 1

    Crispy Crunchy Parmesan Potatoes

    March 21, 2020
  • 2

    CROCK POT SMOTHERED PORK CHOPS

    March 21, 2020
  • Facebook
  • Twitter

@2019 - All Right Reserved.


Back To Top