Cook it once
  • Home
  • Privacy Policy
  • Recipes
    • KETO
    • LC
    • WW
  • Tips
  • Contact
Cook it once
  • Home
  • Privacy Policy
  • Recipes
    • KETO
    • LC
    • WW
  • Tips
  • Contact
Category:

General Recipes

General Recipes

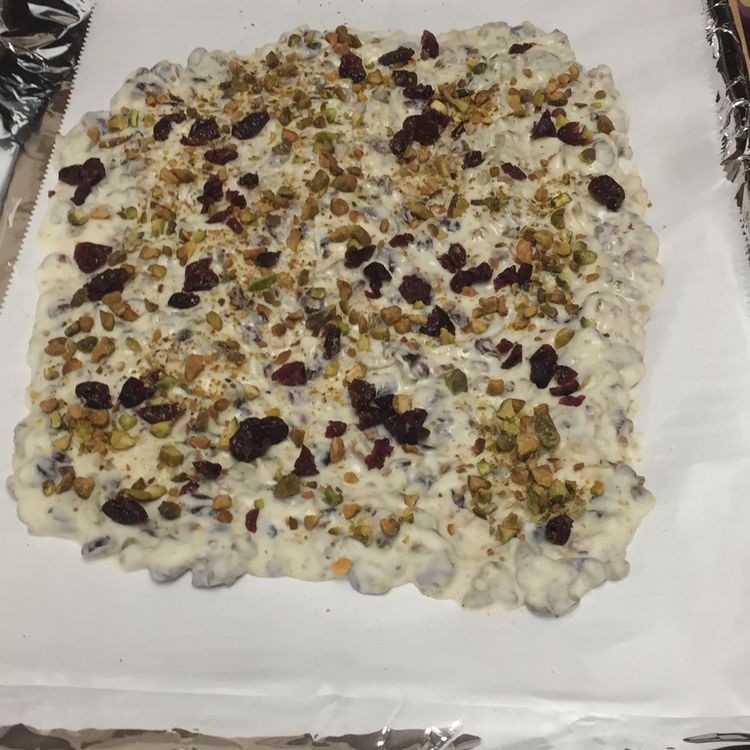
Pistachio Cranberry Bark

by Rebecca October 20, 2022
written by Rebecca

This recipe has always been a part of my family since I was little. My grandma used to make this all the time! I remember waking up to the divine smell of this in the kitchen! It was mostly Christmas mornings! I am so grateful to Grams for this recipe because now I get to share it with you as well! I have listed all the ingredients and directions so all you need to do is to follow them step by step, and you are good to go! You don’t need to worry about leftovers because I know there won’t be any! I can finish this in one sitting. That’s how delicious it is! Don’t forget to share this recipe with your peers as well. Enjoy!

Ingredients:

1/2 c roughly chopped pistachios

12 ounces white chocolate chips

1/2 c roughly chopped dried cranberries

Directions:

Cover the inside of a baking sheet with parchment paper.

Place the chocolate chips into a heat-proof bowl, then place it in the microwave. Heat the chips for about 30 seconds intervals until completely melted.

Remove the melted chocolate from the microwave, then stir until the texture becomes smooth.

Add the dried cranberries aside from 1 tablespoon of it into the bowl with the melted chocolate.

Add pistachios as well, then stir everything until well incorporated.

Transfer the mixture onto the prepared baking sheet and spread it evenly.

Sprinkle the reserved pistachios and cranberries on top.

Place the Pistachio Cranberry Bark in the fridge to chill for a couple of minutes. Slice it into small pieces.

Serve and enjoy!

Notes:

Place any leftovers in an airtight container, then put them in the fridge.

Make sure to melt the chocolate in 30-second intervals. Also, don’t forget to stir it from time to time until the texture becomes smooth.
Pistachio Cranberry Bark

Rebecca This recipe has always been a part of my family since I was little. My grandma used to make this all the time! I remember waking up to the divine… General Recipes Pistachio Cranberry Bark European Print This
Nutrition facts: 200 calories 20 grams fat
Rating: 5.0/5
( 1 voted )

Ingredients

  • 1/2 c roughly chopped pistachios
  • 12 ounces white chocolate chips
  • 1/2 c roughly chopped dried cranberries

Instructions

Cover the inside of a baking sheet with parchment paper.

Place the chocolate chips into a heat-proof bowl, then place it in the microwave. Heat the chips for about 30 seconds intervals until completely melted.

Remove the melted chocolate from the microwave, then stir until the texture becomes smooth.

Add the dried cranberries aside from 1 tablespoon of it into the bowl with the melted chocolate.

Add pistachios as well, then stir everything until well incorporated.

Transfer the mixture onto the prepared baking sheet and spread it evenly.

Sprinkle the reserved pistachios and cranberries on top.

Place the Pistachio Cranberry Bark in the fridge to chill for a couple of minutes. Slice it into small pieces.

Serve and enjoy!

Notes

Place any leftovers in an airtight container, then put them in the fridge. Make sure to melt the chocolate in 30-second intervals. Also, don't forget to stir it from time to time until the texture becomes smooth.
October 20, 2022 0 comment
0 FacebookTwitterPinterestEmail
General Recipes

Lemon Blueberry Cake

by Rebecca October 20, 2022
written by Rebecca

Prep Time: 30 mins | Cook Time: 35 mins | Total Time: 1 hr 5 mins | Yield: 10 Servings

This Lemon Blueberry Cake may be a lot of work, but I promise you that it is worth all your effort! This is a must-try recipe! Everyone is going to love how delicious this cake is. Enjoy!

Ingredients:

For the Cake:

1/2 c whole milk 120ml, room temperature

1/2 c sour cream 120ml, room temperature

1 ½ teaspoons baking powder

¼ teaspoon kosher salt

1 tablespoon vanilla extract 15mL

1 2/3 c granulated sugar 333g

1 ¾ c all-purpose flour 210g, plus 1 tbsp to coat berries

3 Egg whites at room temperature

1 tablespoon lemon zest

3/4 c unsalted butter 170g, room temperature

⅓ c lemon juice 60g, fresh

1 1/3 c blueberries 180g, fresh

For the Reduction:

1 tablespoon lemon juice fresh

1 1/2 c blueberries 203g, fresh

1 tablespoon granulated sugar

1 tablespoon water 15mL

For the Lemon Buttercream:

1/4 teaspoon kosher salt

6 c confectioners’ sugar 720g

3 tablespoons lemon juice 45g

1 1/2 c unsalted butter 339g, room temperature

Directions:

To Make the Cake:

Prepare the oven and preheat it to 175 degrees C or 350 degrees F.

Brush butter on three 6-inch baking pans, then sprinkle flour on them.

In a large mixing bowl, add all the dry ingredients. Whisk until well incorporated.

In another mixing bowl, add all the wet ingredients. Beat until well blended.

In a separate mixing bowl, add blueberries, lemon zest, and 2 tablespoons of flour. Toss until the berries are completely coated.

Transfer the wet ingredients into the bowl with the dry ingredients, then whisk until well combined.

Add the blueberry mixture, then stir again until well incorporated.

Fill each of the prepared cake pans with the batter and spread it evenly.

Place the pans in the preheated oven and bake the batter for half an hour.

For the Reduction:

Add 1/2 cup of the blueberries to the freezer.

Place a saucepan on the stove and turn the heat to medium-low. Add 1 tablespoon of water, 1 tablespoon of lemon juice, 1 tablespoon of granulated sugar, and 1 cup of blueberries to the pan. Stir everything until well blended. Simmer the mixture for a few minutes until it reduces to almost half.

Strain the mixture into a mixing bowl and allow it to cool completely.

To Make the Lemon Buttercream:

Add butter and confectioners’ sugar into a mixing bowl, then beat until well incorporated.

Gradually add the lemon juice, then beat until well combined.

Add 3/4 cup of the mixture into a mixing bowl together with the reduced blueberry. Stir until well combined.

Transfer the mixture and the lemon-vanilla buttercream inside a piping bag.

To Assemble:

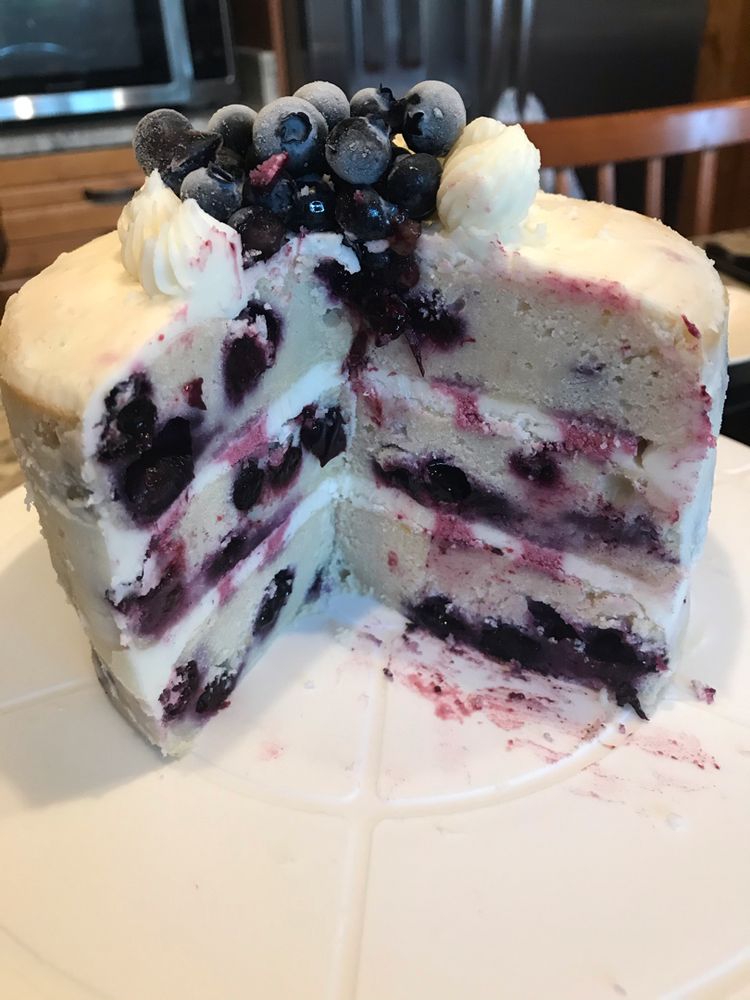
Pipe the blueberry buttercream in the middle of each layer, followed by the lemon buttercream to the sides.

Spread the plain lemon on the sides as well.

Place the frozen blueberries in the middle.

Serve and enjoy!

Nutrition Facts:

Serving: 1Slice | Calories: 430 kcal | Carbohydrates: 29g | Protein: 2.4g | Fat: 7g | Saturated Fat: 5.3g | Monounsaturated Fat: 1.7g | Cholesterol: 38mg | Sodium: 25mg | Potassium: 55mg | Fiber: 1g | Sugar: 19g | Vitamin A: 300IU | Vitamin C: 4.1mg | Calcium: 40mg | Iron: 0.4mg

Lemon Blueberry Cake

Rebecca Prep Time: 30 mins | Cook Time: 35 mins | Total Time: 1 hr 5 mins | Yield: 10 Servings This Lemon Blueberry Cake may be a lot of work,… General Recipes Lemon Blueberry Cake European Print This
Serves: 10 Prep Time: 30 mins Cooking Time: 35 mins 35 mins
Nutrition facts: 430 calories 7 fat
Rating: 5.0/5
( 1 voted )

Ingredients

  • For the Cake:
  • 1/2 c whole milk 120ml, room temperature
  • 1/2 c sour cream 120ml, room temperature
  • 1 ½ teaspoons baking powder
  • ¼ teaspoon kosher salt
  • 1 tablespoon vanilla extract 15mL
  • 1 2/3 c granulated sugar 333g
  • 1 ¾ c all-purpose flour 210g, plus 1 tbsp to coat berries
  • 3 Egg whites at room temperature
  • 1 tablespoon lemon zest
  • 3/4 c unsalted butter 170g, room temperature
  • ⅓ c lemon juice 60g, fresh
  • 1 1/3 c blueberries 180g, fresh
  • For the Reduction:
  • 1 tablespoon lemon juice fresh
  • 1 1/2 c blueberries 203g, fresh
  • 1 tablespoon granulated sugar
  • 1 tablespoon water 15mL
  • For the Lemon Buttercream:
  • 1/4 teaspoon kosher salt
  • 6 c confectioners’ sugar 720g
  • 3 tablespoons lemon juice 45g
  • 1 1/2 c unsalted butter 339g, room temperature

Instructions

To Make the Cake:

Prepare the oven and preheat it to 175 degrees C or 350 degrees F.

Brush butter on three 6-inch baking pans, then sprinkle flour on them.

In a large mixing bowl, add all the dry ingredients. Whisk until well incorporated.

In another mixing bowl, add all the wet ingredients. Beat until well blended.

In a separate mixing bowl, add blueberries, lemon zest, and 2 tablespoons of flour. Toss until the berries are completely coated.

Transfer the wet ingredients into the bowl with the dry ingredients, then whisk until well combined.

Add the blueberry mixture, then stir again until well incorporated.

Fill each of the prepared cake pans with the batter and spread it evenly.

Place the pans in the preheated oven and bake the batter for half an hour.

For the Reduction:

Add 1/2 cup of the blueberries to the freezer.

Place a saucepan on the stove and turn the heat to medium-low. Add 1 tablespoon of water, 1 tablespoon of lemon juice, 1 tablespoon of granulated sugar, and 1 cup of blueberries to the pan. Stir everything until well blended. Simmer the mixture for a few minutes until it reduces to almost half.

Strain the mixture into a mixing bowl and allow it to cool completely.

To Make the Lemon Buttercream:

Add butter and confectioners' sugar into a mixing bowl, then beat until well incorporated.

Gradually add the lemon juice, then beat until well combined.

Add 3/4 cup of the mixture into a mixing bowl together with the reduced blueberry. Stir until well combined.

Transfer the mixture and the lemon-vanilla buttercream inside a piping bag.

To Assemble:

Pipe the blueberry buttercream in the middle of each layer, followed by the lemon buttercream to the sides.

Spread the plain lemon on the sides as well.

Place the frozen blueberries in the middle.

Serve and enjoy!

October 20, 2022 0 comment
0 FacebookTwitterPinterestEmail
General Recipes

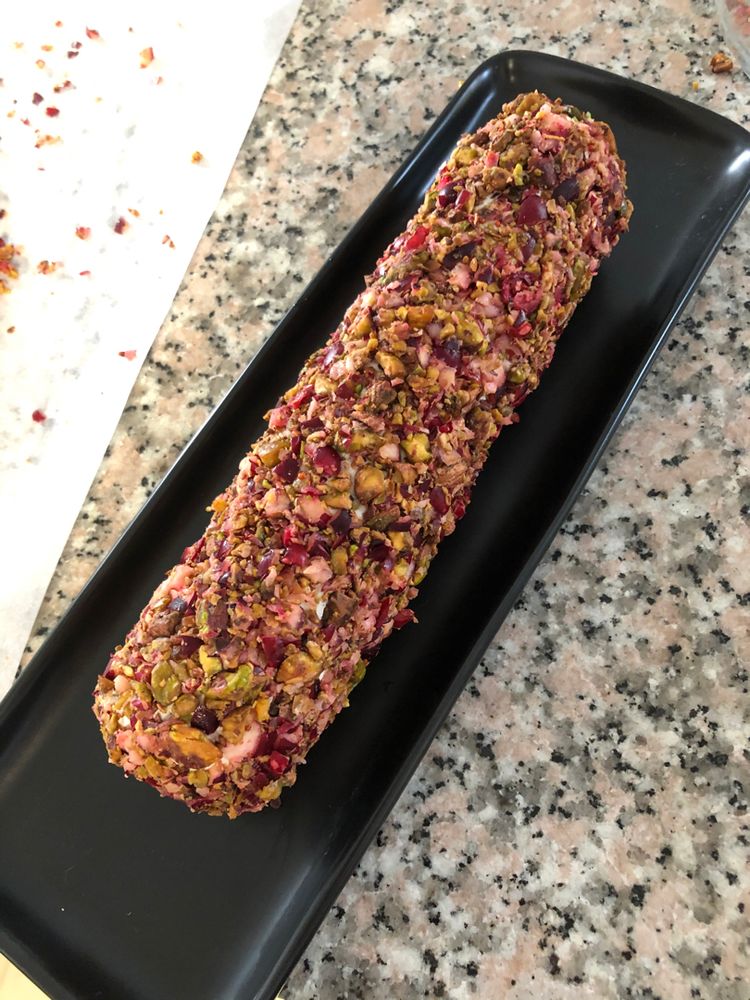
EASY CRANBERRY PISTACHIO CHEESE LOG

by Rebecca October 20, 2022
written by Rebecca

Prep Time: 10 mins | Cook Time: 20 mins | Total Time: 30 mins | Yield: 16 Servings

It will only take you half an hour to make this Cranberry Pistachio Cheese Log! If you are having guests over, then you have got to give this one a try! I promise you, everyone is going to be impressed by it! I highly suggest serving this with crackers! Movie night or just a simple party with your constants is going to be amazing. Enjoy!

Ingredients:

Cranberry Pistachio Coating:

1 c shelled roasted, salted pistachios

1 1/4 c fresh cranberries

Cheese Log:

1/4 teaspoon EACH ground ginger, ground cinnamon, salt, dried thyme, dried rosemary

1/8 tsp pepper

7-8 ounces goat cheese log or tub

1/2 c Cranberry Pistachio Coating mixture

2 tbsp honey

4 ounces of cream cheese, softened

Garnish:

Honey

Directions:

In a food processor, add the pistachios and cranberries. Pulse a few times until chopped.

Add half of the chopped ingredients into a mixing bowl together with the rest of the ingredients for the goat cheese log. Stir everything until well incorporated.

Transfer the cheese mixture onto a large plastic wrap, then shape it into a log.

Place the cheese log in the freezer to chill for half an hour.

Lay parchment paper onto a flat surface, then add all the ingredients for the coating and spread it evenly.

Place the cheese log at the bottom of the parchment paper, then roll it up and seal it while pressing it gently. Place it in the fridge to chill for a few minutes before serving.

Remove from the fridge, then drizzle honey on top of the log.

Serve it with crackers. Enjoy!

Note:

Place any leftovers in an airtight container, then put them in the fridge.

EASY CRANBERRY PISTACHIO CHEESE LOG

Rebecca Prep Time: 10 mins | Cook Time: 20 mins | Total Time: 30 mins | Yield: 16 Servings It will only take you half an hour to make this Cranberry… General Recipes EASY CRANBERRY PISTACHIO CHEESE LOG European Print This
Serves: 16 Prep Time: 10 mins Cooking Time: 20 mins 20 mins
Nutrition facts: 200 calories 20 grams fat
Rating: 5.0/5
( 1 voted )

Ingredients

  • Cranberry Pistachio Coating:
  • 1 c shelled roasted, salted pistachios
  • 1 1/4 c fresh cranberries
  • Cheese Log:
  • 1/4 teaspoon EACH ground ginger, ground cinnamon, salt, dried thyme, dried rosemary
  • 1/8 tsp pepper
  • 7-8 ounces goat cheese log or tub
  • 1/2 c Cranberry Pistachio Coating mixture
  • 2 tbsp honey
  • 4 ounces of cream cheese, softened
  • Garnish:
  • Honey

Instructions

In a food processor, add the pistachios and cranberries. Pulse a few times until chopped.

Add half of the chopped ingredients into a mixing bowl together with the rest of the ingredients for the goat cheese log. Stir everything until well incorporated.

Transfer the cheese mixture onto a large plastic wrap, then shape it into a log.

Place the cheese log in the freezer to chill for half an hour.

Lay parchment paper onto a flat surface, then add all the ingredients for the coating and spread it evenly.

Place the cheese log at the bottom of the parchment paper, then roll it up and seal it while pressing it gently. Place it in the fridge to chill for a few minutes before serving.

Remove from the fridge, then drizzle honey on top of the log.

Serve it with crackers. Enjoy!

Notes

Place any leftovers in an airtight container, then put them in the fridge.

October 20, 2022 0 comment
0 FacebookTwitterPinterestEmail
General Recipes

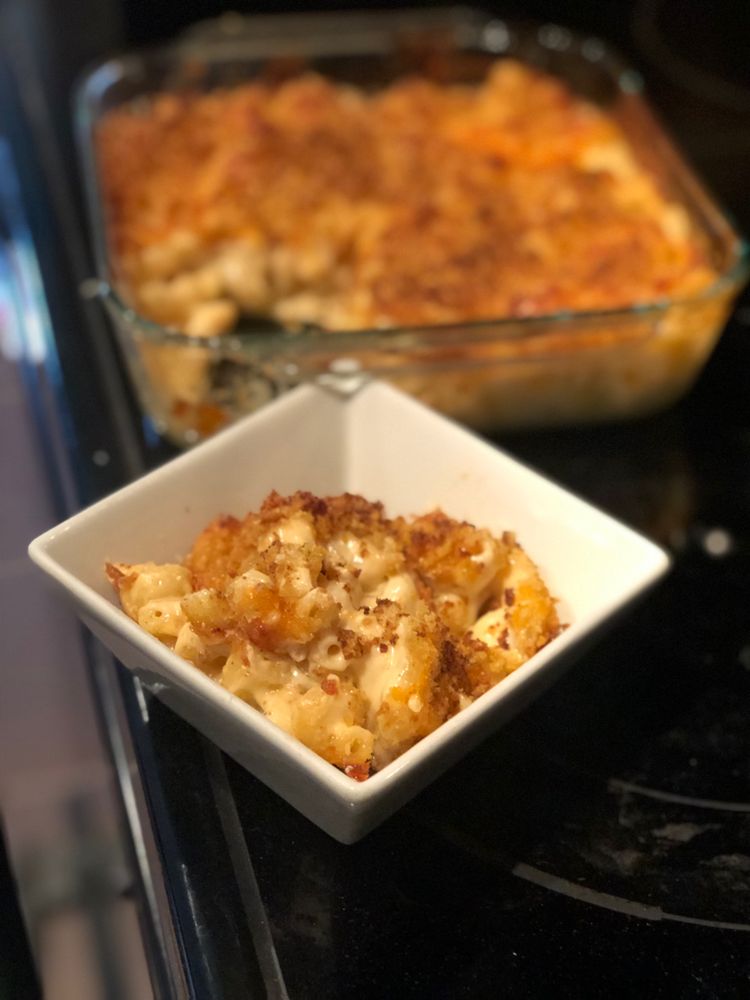
Soul Food Macaroni and Cheese Recipe

by Rebecca October 20, 2022
written by Rebecca

Prep Time: 10 mins | Cook Time: 55 mins | Total Time: 1 hr 5 mins | Yield: 10 Servings

Food for the soul! This incredible Mac and Cheese recipe is my favorite! Layers of delicious flavors in each bite. You can enjoy this in just about an hour!

Ingredients:

8 ounces creamy Havarti cheese, shredded or cubed

8 ounces sharp cheddar cheese, shredded

4 tablespoons unsalted butter, not margarine

4 ounces of mozzarella cheese, shredded

8 ounces of gouda cheese, shredded or cubed

1 c evaporated milk

8 c water

1/2 teaspoon freshly cracked black pepper

1 teaspoon smoked paprika

1 teaspoon seasoning salt OR plain salt

1 pound elbow macaroni pasta, uncooked

1 1/2 c half & half

2 tablespoons all-purpose flour

4 ounces Colby Jack chees,e shredded

1 teaspoon onion powder

4 ounces of cream cheese

1 teaspoon garlic powder

1 teaspoon salt to salt the water for the pasta

Directions:

Place a large pot with water on the stove and the heat to high. Allow the water to boil.

Add the macaroni pasta and a bit of salt, then cook for a few minutes until al dente.

Drain the pasta and rinse with cold water to stop the cooking process. Put it back in the pot.

Place a large pan on the stove and turn the heat to medium. Add 4 tablespoons of butter and allow it to melt.

Add 2 tablespoons of flour, then whisk and cook for a minute or until it turns into a roux.

Add the half & half and evaporated milk, then simmer for about 3 minutes. Don’t forget to stir.

Turn the heat down to low, then add the Havarti, cream cheese, and gouda. Stir everything until well blended. Stir in the pepper, onion powder, garlic powder, salt, and paprika to taste.

Transfer the sauce into the pot with the macaroni, then toss until completely coated.

Transfer 1/2 of the mixture into a 9×13-inch baking dish and spread it evenly. Top with a generous amount of cheese.

Repeat the process with the rest of the ingredients until everything is arranged in layers.

Prepare the oven and preheat it to 350 degrees F.

Place the baking dish in the preheated oven and bake for half an hour.

Remove from the oven and allow it to sit at room temperature for at least 5 minutes.

Serve and enjoy!

Soul Food Macaroni and Cheese Recipe

Rebecca Prep Time: 10 mins | Cook Time: 55 mins | Total Time: 1 hr 5 mins | Yield: 10 Servings Food for the soul! This incredible Mac and Cheese recipe… General Recipes Soul Food Macaroni and Cheese Recipe European Print This
Serves: 10 Prep Time: 10 mins Cooking Time: 55 mins 55 mins
Nutrition facts: 200 calories 20 grams fat
Rating: 5.0/5
( 1 voted )

Ingredients

  • 8 ounces creamy Havarti cheese, shredded or cubed
  • 8 ounces sharp cheddar cheese, shredded
  • 4 tablespoons unsalted butter, not margarine
  • 4 ounces of mozzarella cheese, shredded
  • 8 ounces of gouda cheese, shredded or cubed
  • 1 c evaporated milk
  • 8 c water
  • 1/2 teaspoon freshly cracked black pepper
  • 1 teaspoon smoked paprika
  • 1 teaspoon seasoning salt OR plain salt
  • 1 pound elbow macaroni pasta, uncooked
  • 1 1/2 c half & half
  • 2 tablespoons all-purpose flour
  • 4 ounces Colby Jack chees,e shredded
  • 1 teaspoon onion powder
  • 4 ounces of cream cheese
  • 1 teaspoon garlic powder
  • 1 teaspoon salt to salt the water for the pasta

Instructions

Place a large pot with water on the stove and the heat to high. Allow the water to boil.

Add the macaroni pasta and a bit of salt, then cook for a few minutes until al dente.

Drain the pasta and rinse with cold water to stop the cooking process. Put it back in the pot.

Place a large pan on the stove and turn the heat to medium. Add 4 tablespoons of butter and allow it to melt.

Add 2 tablespoons of flour, then whisk and cook for a minute or until it turns into a roux.

Add the half & half and evaporated milk, then simmer for about 3 minutes. Don't forget to stir.

Turn the heat down to low, then add the Havarti, cream cheese, and gouda. Stir everything until well blended. Stir in the pepper, onion powder, garlic powder, salt, and paprika to taste.

Transfer the sauce into the pot with the macaroni, then toss until completely coated.

Transfer 1/2 of the mixture into a 9×13-inch baking dish and spread it evenly. Top with a generous amount of cheese.

Repeat the process with the rest of the ingredients until everything is arranged in layers.

Prepare the oven and preheat it to 350 degrees F.

Place the baking dish in the preheated oven and bake for half an hour.

Remove from the oven and allow it to sit at room temperature for at least 5 minutes.

Serve and enjoy!

October 20, 2022 0 comment
0 FacebookTwitterPinterestEmail
General Recipes

Shrimp Quesadillas

by Rebecca October 19, 2022
written by Rebecca

Prep Time: 5 mins | Cook Time: 10 mins | Total Time: 15 mins | Yield: 8 Servings

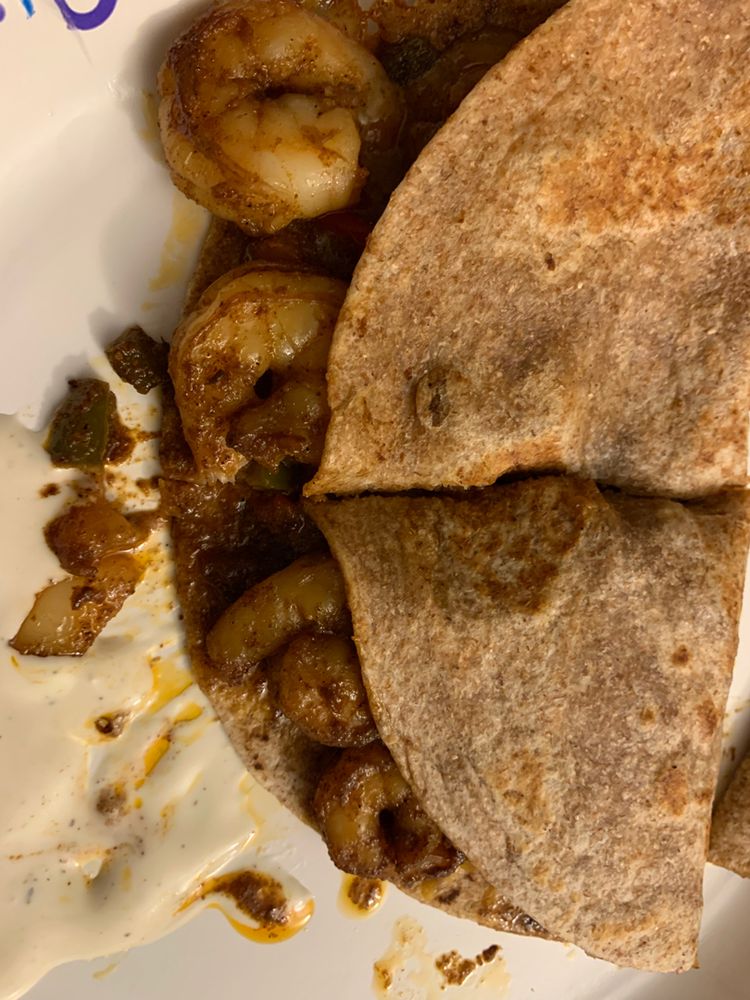
These Shrimp Quesadillas are ready in less than 20 minutes! These heavenly treats are packed with shrimp, veggies, cheese, and a lot more! Invite your friends over and surprise them with these one-of-a-kind quesadillas. Enjoy!

Ingredients:

1/2 c onion, chopped

1 tbsp olive oil

1/2 c bell pepper, chopped

1-2 c melting cheese, mozzarella, cheddar, Mexican blend, or Monterey Jack

2 tbsp taco seasoning or 1 tbsp chili powder and 1/2 tsp EACH garlic powder, onion powder, dried oregano, paprika, ground cumin, salt, black pepper

1 lb. uncooked medium shrimp, peeled and deveined

6-8 Medium flour tortillas

2 cloves garlic, minced

Directions:

Place a large skillet on the stove and turn the heat to medium. Add 1 tbsp of oil and allow it to become hot.

Add bell pepper, garlic, and onion into the hot skillet, then sauté for a few minutes until soft and aromatic.

Add the shrimp and taco seasoning, then cook for about 2 minutes. Make sure to stir the shrimp. Transfer everything into a container.

Use paper towels to wipe clean the skillet. Add a bit of oil and allow it to become hot.

Add the tortilla, then add cheese to one side. Lay about 5 shrimp over the tortilla, then top then with more cheese.

Fold the tortilla, then cook each side for 3 minutes or until golden brown. Transfer it onto a clean plate. Repeat the process with the rest of the ingredients.

Serve right away with salsa, Guacamole, or sour cream as a dipping sauce. Enjoy!

Notes:

Place any leftovers in an airtight container, then put them in the fridge. Reheat for a few minutes before serving again.

You can add more cheese if you want.

Shrimp Quesadillas

Rebecca Prep Time: 5 mins | Cook Time: 10 mins | Total Time: 15 mins | Yield: 8 Servings These Shrimp Quesadillas are ready in less than 20 minutes! These heavenly… General Recipes Shrimp Quesadillas European Print This
Serves: 8 Prep Time: 5 mins Cooking Time: 10 mins 10 mins
Nutrition facts: 200 calories 20 grams fat
Rating: 5.0/5
( 1 voted )

Ingredients

  • 1/2 c onion, chopped
  • 1 tbsp olive oil
  • 1/2 c bell pepper, chopped
  • 1-2 c melting cheese, mozzarella, cheddar, Mexican blend, or Monterey Jack
  • 2 tbsp taco seasoning or 1 tbsp chili powder and 1/2 tsp EACH garlic powder, onion powder, dried oregano, paprika, ground cumin, salt, black pepper
  • 1 lb. uncooked medium shrimp, peeled and deveined
  • 6-8 Medium flour tortillas
  • 2 cloves garlic, minced

Instructions

Place a large skillet on the stove and turn the heat to medium. Add 1 tbsp of oil and allow it to become hot.

Add bell pepper, garlic, and onion into the hot skillet, then sauté for a few minutes until soft and aromatic.

Add the shrimp and taco seasoning, then cook for about 2 minutes. Make sure to stir the shrimp. Transfer everything into a container.

Use paper towels to wipe clean the skillet. Add a bit of oil and allow it to become hot.

Add the tortilla, then add cheese to one side. Lay about 5 shrimp over the tortilla, then top then with more cheese.

Fold the tortilla, then cook each side for 3 minutes or until golden brown. Transfer it onto a clean plate. Repeat the process with the rest of the ingredients.

Serve right away with salsa, Guacamole, or sour cream as a dipping sauce. Enjoy!

Notes

Place any leftovers in an airtight container, then put them in the fridge. Reheat for a few minutes before serving again. You can add more cheese if you want.

October 19, 2022 0 comment
0 FacebookTwitterPinterestEmail
General Recipes

Baked Spinach Mushroom Quesadillas

by Rebecca October 19, 2022
written by Rebecca

Prep Time: 10 mins | Cook Time: 15 mins | Total Time: 25 mins | Yield: 4 Servings

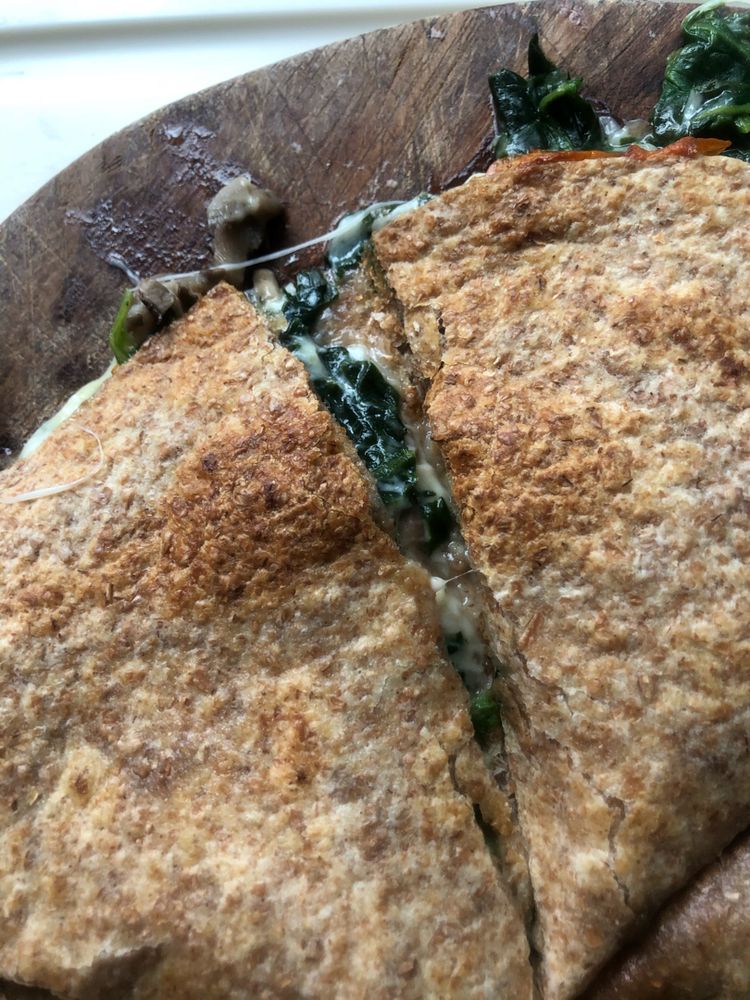
If you are looking for a new quesadilla recipe, then this is one to try! These Baked Spinach, Mushroom Quesadillas were made to light up everyone’s day! Ready in just 25 minutes, you will surely love these delicious treats. Enjoy!

Ingredients:

1 c shredded cheddar

8 oz. sliced mushrooms

olive oil (optional, enough to lightly coat the tortillas)

4 tortillas (8 inches)

3 c roughly chopped spinach

1 c shredded mozzarella

Directions:

Prepare the oven and preheat it to 200 degrees C or 400 degrees F.

In a heat-proof bowl, add the mushrooms. Place the bowl in the microwave and heat the mushrooms for about 2 to 3 minutes or until they are soft.

Remove the mushrooms from the microwave and drain them.

Brush olive oil on one side of each tortilla. Lay them onto a baking sheet.

Top each tortilla with 1/2 of the cheese. Add the spinach and mushrooms on top. Sprinkle the rest of the cheese over the tortillas. Fold it over.

Place the baking sheet in the preheated oven and bake the tortillas for 6 minutes on each side or until the cheese is completely melted.

Remove the tortillas from the oven and allow them to rest for a few minutes at room temperature.

Serve warm and enjoy!

Notes:

You can use your preferred type of tortillas for this recipe.

You can use a different type of vegetable as well.

Feel free to use only one cheese for this recipe.

Brushing tortillas with olive oil is optional.

Place any leftovers in an airtight container, then put them in the fridge. They can last up to 5 days. Reheat for a few minutes before serving again.

Nutrition Facts:

Calories: 305 kcal | Carbohydrates: 19g | Protein: 18g | Fat: 17g | Saturated Fat: 10g | Cholesterol: 51mg | Sodium: 577mg | Potassium: 400mg | Fiber: 1g | Sugar: 2g | Vitamin A: 2580IU | Vitamin C: 7.5mg | Calcium: 399mg | Iron: 2.2mg

Baked Spinach Mushroom Quesadillas

Rebecca Prep Time: 10 mins | Cook Time: 15 mins | Total Time: 25 mins | Yield: 4 Servings If you are looking for a new quesadilla recipe, then this is… General Recipes Baked Spinach Mushroom Quesadillas European Print This
Serves: 4 Prep Time: 10 mins Cooking Time: 15 mins 15 mins
Nutrition facts: 305 calories 17 fat
Rating: 5.0/5
( 1 voted )

Ingredients

  • 1 c shredded cheddar
  • 8 oz. sliced mushrooms
  • olive oil (optional, enough to lightly coat the tortillas)
  • 4 tortillas (8 inches)
  • 3 c roughly chopped spinach
  • 1 c shredded mozzarella

Instructions

Prepare the oven and preheat it to 200 degrees C or 400 degrees F.

In a heat-proof bowl, add the mushrooms. Place the bowl in the microwave and heat the mushrooms for about 2 to 3 minutes or until they are soft.

Remove the mushrooms from the microwave and drain them.

Brush olive oil on one side of each tortilla. Lay them onto a baking sheet.

Top each tortilla with 1/2 of the cheese. Add the spinach and mushrooms on top. Sprinkle the rest of the cheese over the tortillas. Fold it over.

Place the baking sheet in the preheated oven and bake the tortillas for 6 minutes on each side or until the cheese is completely melted.

Remove the tortillas from the oven and allow them to rest for a few minutes at room temperature.

Serve warm and enjoy!

Notes

You can use your preferred type of tortillas for this recipe. You can use a different type of vegetable as well. Feel free to use only one cheese for this recipe. Brushing tortillas with olive oil is optional. Place any leftovers in an airtight container, then put them in the fridge. They can last up to 5 days. Reheat for a few minutes before serving again.

October 19, 2022 0 comment
0 FacebookTwitterPinterestEmail
General Recipes

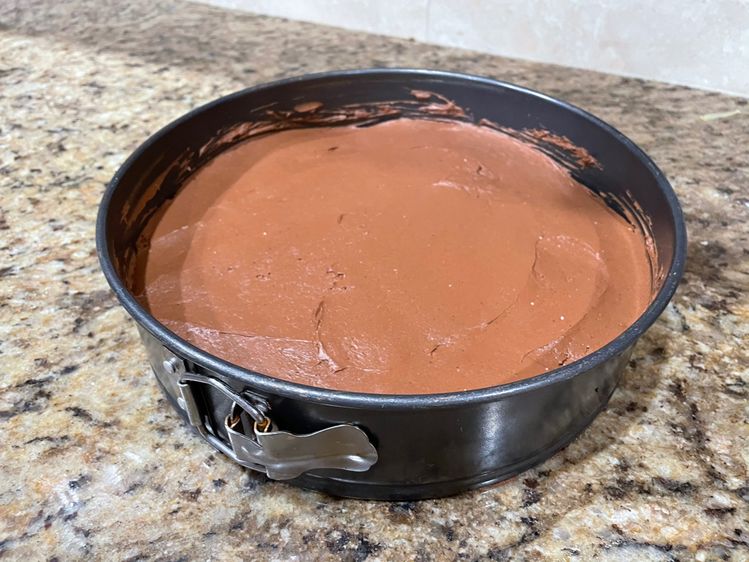
KETO LOW CARB NO BAKE CHOCOLATE CHEESECAKE RECIPE

by Rebecca October 19, 2022
written by Rebecca

Prep Time: 20 mins | Chill Time: 2 hrs | Total Time: 2 hrs 20 mins | Yield: 12 Servings

You don’t need an oven to make this scrumptious chocolate cheesecake! Just put it in the fridge for about 2 hours, and it is ready for serving! You will be amazed by how these simple ingredients could turn into something awesome. Try it now!

Ingredients:

LOW-CARB CHOCOLATE CHEESECAKE CRUST:

1/3 c Unsalted butter (melted)

3 tablespoons Best Monk Fruit Allulose Blend

1 teaspoon Vanilla extract

1 3/4 c Wholesome Yum Blanched Almond Flour

3 tablespoons Cocoa powder

LOW-CARB CHOCOLATE CHEESECAKE FILLING:

1 teaspoon Vanilla extract

1 1/4 c Best Powdered Monk Fruit Allulose Blend

8 ounces of Unsweetened baking chocolate

24 ounces Cream cheese (softened at room temperature)

Directions:

For the Low-Carb Chocolate Cheesecake Crust:

Add erythritol, cocoa powder, and almond flour into a large mixing bowl. Whisk everything until well incorporated.

In a separate mixing bowl, add vanilla and melted butter. Stir until well blended.

Transfer the mixture into the bowl with the flour mixture, then whisk until well incorporated.

Line parchment paper onto a 9-inch springform pan.

Transfer the crust to the prepared pan and press it to the sides and bottom.

Place the crust in the fridge to chill while prepping for the filling.

For the Low-Carb Chocolate Cheesecake Filling:

Add the unsweetened chocolate into a heat-proof bowl, then place it in the microwave. Heat for a few minutes until completely melted. Remove and allow it to cool at room temperature.

Add vanilla extract, cream cheese, and powdered sweetener into the bowl of a stand mixer. Beat until well blended. Stir in the vanilla as well.

Add the cool melted chocolate, then beat until well incorporated.

Add the filling on top of the prepared crust and spread it evenly.

Place it in the fridge to chill for about 2 hours.

Serve and enjoy!

Nutrition Facts:

Calories238 Fat23g Protein6g Total Carbs10g Net Carbs5g Fiber5g Sugar0g

KETO LOW CARB NO BAKE CHOCOLATE CHEESECAKE RECIPE

Rebecca Prep Time: 20 mins | Chill Time: 2 hrs | Total Time: 2 hrs 20 mins | Yield: 12 Servings You don’t need an oven to make this scrumptious chocolate… General Recipes KETO LOW CARB NO BAKE CHOCOLATE CHEESECAKE RECIPE European Print This
Serves: 12 Prep Time: 20 mins
Nutrition facts: 238 calories 23 fat
Rating: 5.0/5
( 1 voted )

Ingredients

  • LOW-CARB CHOCOLATE CHEESECAKE CRUST:
  • 1/3 c Unsalted butter (melted)
  • 3 tablespoons Best Monk Fruit Allulose Blend
  • 1 teaspoon Vanilla extract
  • 1 3/4 c Wholesome Yum Blanched Almond Flour
  • 3 tablespoons Cocoa powder
  • LOW-CARB CHOCOLATE CHEESECAKE FILLING:
  • 1 teaspoon Vanilla extract
  • 1 1/4 c Best Powdered Monk Fruit Allulose Blend
  • 8 ounces of Unsweetened baking chocolate
  • 24 ounces Cream cheese (softened at room temperature)

Instructions

For the Low-Carb Chocolate Cheesecake Crust:

Add erythritol, cocoa powder, and almond flour into a large mixing bowl. Whisk everything until well incorporated.

In a separate mixing bowl, add vanilla and melted butter. Stir until well blended.

Transfer the mixture into the bowl with the flour mixture, then whisk until well incorporated.

Line parchment paper onto a 9-inch springform pan.

Transfer the crust to the prepared pan and press it to the sides and bottom.

Place the crust in the fridge to chill while prepping for the filling.

For the Low-Carb Chocolate Cheesecake Filling:

Add the unsweetened chocolate into a heat-proof bowl, then place it in the microwave. Heat for a few minutes until completely melted. Remove and allow it to cool at room temperature.

Add vanilla extract, cream cheese, and powdered sweetener into the bowl of a stand mixer. Beat until well blended. Stir in the vanilla as well.

Add the cool melted chocolate, then beat until well incorporated.

Add the filling on top of the prepared crust and spread it evenly.

Place it in the fridge to chill for about 2 hours.

Serve and enjoy!

October 19, 2022 0 comment
0 FacebookTwitterPinterestEmail
General Recipes

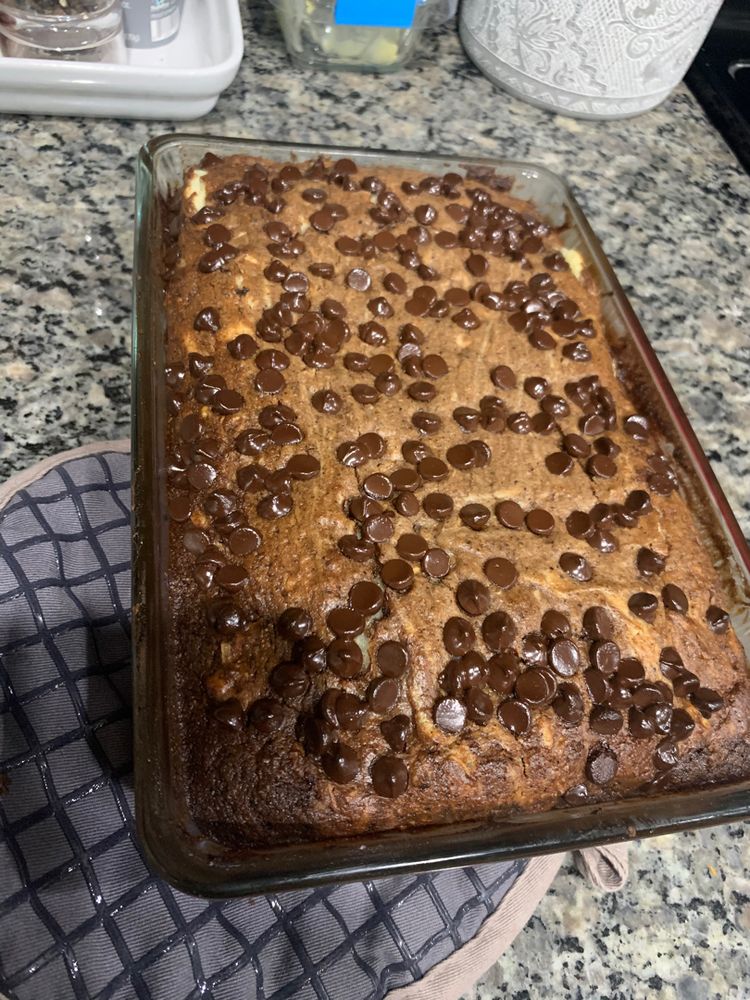
Earthquake Cake

by Rebecca October 19, 2022
written by Rebecca

Prep Time: 20 mins | Cook Time: 45 mins | Total Time: 1 hr 5 mins | Yield: 20 Servings

Layer after layer of sweet flavors, this Earthquake Cake is surely a must-try! The best thing about this cake is that it is low in carbs! What are you waiting for? It is time to go to your kitchen and start prepping now. Enjoy!

Ingredients:

3 large Eggs

14 tbsp butter, melted, divided

1 c unsweetened shredded coconut

½ c Swerve Sweetener

1 c powdered Swerve Sweetener

½ c cold coffee or water, coffee helps boost the chocolate flavor

¼ c unflavored whey protein powder

½ c sugar-free chocolate chips

⅓ c cocoa powder

8 oz. of cream cheese, softened

½ c chopped pecans

½ tsp vanilla extract

2 c almond flour

2 tsp baking powder

½ tsp salt

Directions:

Prepare the oven and preheat it to 325 degrees F.

Apply cooking spray to a 9×13-inch baking pan.

Scatter the pecans and shredded coconut into the bottom of the prepared baking pan.

Add baking powder, salt, cocoa powder, protein powder, almond flour, and sweetener into a large mixing bowl. Whisk everything until well incorporated.

Add vanilla extract, eggs, coffee, and 6 tbsp of melted butter. Stir until well combined. Transfer the mixture to the baking pan over the pecans and spread it evenly.

In a separate mixing bowl, add 8 tbsp of melted butter and cream cheese. Beat a few times until well blended.

Add the powdered sweetener and beat again until well incorporated.

Transfer the mixture on top of the cake mixture and spread it evenly. Run a knife on top of the layer to make swirls,

Scatter the chocolate chips on top. Place it in the preheated oven and bake for 45 minutes or until done.

Remove the cake from the oven and allow it to cool for about 20 minutes at room temperature.

Serve and enjoy!

Nutrition Facts:

Calories 264 Calories from Fat 212 Fat 23.5g36% Carbohydrates 7.4g2% Fiber 4.1g16% Protein 6g12%

Earthquake Cake

Rebecca Prep Time: 20 mins | Cook Time: 45 mins | Total Time: 1 hr 5 mins | Yield: 20 Servings Layer after layer of sweet flavors, this Earthquake Cake is… General Recipes Earthquake Cake European Print This
Serves: 20 Prep Time: 20 mins Cooking Time: 45 mins 45 mins
Nutrition facts: 264 calories 23.5 fat
Rating: 5.0/5
( 1 voted )

Ingredients

  • 3 large Eggs
  • 14 tbsp butter, melted, divided
  • 1 c unsweetened shredded coconut
  • ½ c Swerve Sweetener
  • 1 c powdered Swerve Sweetener
  • ½ c cold coffee or water, coffee helps boost the chocolate flavor
  • ¼ c unflavored whey protein powder
  • ½ c sugar-free chocolate chips
  • ⅓ c cocoa powder
  • 8 oz. of cream cheese, softened
  • ½ c chopped pecans
  • ½ tsp vanilla extract
  • 2 c almond flour
  • 2 tsp baking powder
  • ½ tsp salt

Instructions

Prepare the oven and preheat it to 325 degrees F.

Apply cooking spray to a 9x13-inch baking pan.

Scatter the pecans and shredded coconut into the bottom of the prepared baking pan.

Add baking powder, salt, cocoa powder, protein powder, almond flour, and sweetener into a large mixing bowl. Whisk everything until well incorporated.

Add vanilla extract, eggs, coffee, and 6 tbsp of melted butter. Stir until well combined. Transfer the mixture to the baking pan over the pecans and spread it evenly.

In a separate mixing bowl, add 8 tbsp of melted butter and cream cheese. Beat a few times until well blended.

Add the powdered sweetener and beat again until well incorporated.

Transfer the mixture on top of the cake mixture and spread it evenly. Run a knife on top of the layer to make swirls,

Scatter the chocolate chips on top. Place it in the preheated oven and bake for 45 minutes or until done.

Remove the cake from the oven and allow it to cool for about 20 minutes at room temperature.

Serve and enjoy!

October 19, 2022 0 comment
0 FacebookTwitterPinterestEmail
General Recipes

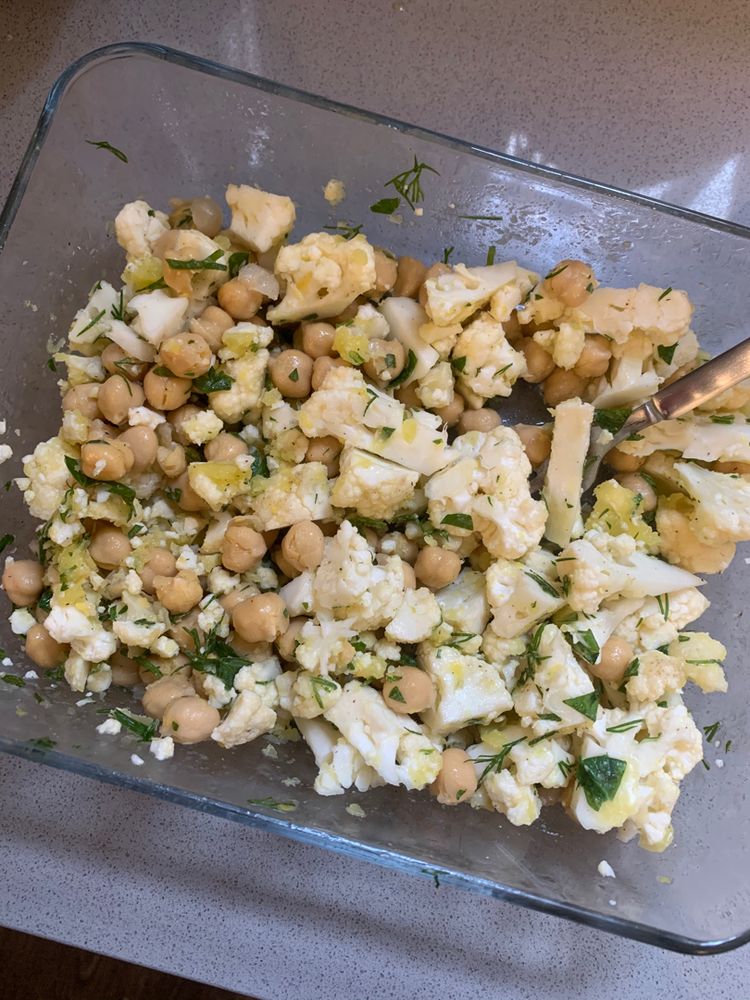
Herby Cauliflower Salad with Chickpeas

by Rebecca October 19, 2022
written by Rebecca

Prep Time: 45 mins | Total Time: 45 mins | Yield: 10 Servings

After eating this salad, you will surely love cauliflower even more! This recipe takes a simple cauliflower to the next level! The incredible taste of the dressing is very addicting! Try this recipe now, and taste perfection yourself. Enjoy!

Ingredients:

1/4 c extra virgin olive oil

1 medium head cauliflower, about 1 3/4 to 2 lbs. (6 to 7 c small florets)

1 (15 oz.) can chickpeas, drained and rinsed (or use 1 1/2 c cooked chickpeas)

1 tsp finely grated lemon zest (from 1 lemon)

1/2 tsp fine sea salt, plus more to taste

1/2 c fine fresh herbs like parsley, dill, or mint, chopped

1/2 c pickled red onions, chopped, optional

1/4 tsp crushed red pepper flakes, optional for some heat

1/4 c freshly squeezed lemon juice, plus more to taste

1/2 tsp fresh ground black pepper

Directions:

Remove the core and leaves from the cauliflower. Slice the cauliflower individually and put them into a large mixing bowl.

Chop the stems of the cauliflower and put them into the bowl as well.

Sprinkle 1/2 tsp black ground pepper and 1/2 tsp fine sea salt over the florets, then toss to coat.

Add olive oil, salt, red pepper flakes, lemon zest, and lemon juice into a mixing bowl. Stir everything until well blended.

Transfer the dressing into the bowl with the cauliflower together with the herbs, pickled onions, and chickpeas. Toss again until completely coated. Add more juice or seasonings if needed.

Allow the salad to rest for half an hour in the fridge to incorporate all the flavors.

Serve and enjoy!

Notes:

Place any leftovers in an airtight container, then put them in the fridge. They can last up to a week.

I highly suggest using pickled onions for this recipe. They give an amazing taste to the salad!

Feel free to add ham instead of chickpeas if you prefer.

Nutrition Facts:

NUTRITION PER SERVING: Serving Size 1 cup / Calories 140 / Total Fat 7.2g / Saturated Fat 1g / Cholesterol 0mg / Sodium 237.7mg / Carbohydrate 15.8g / Dietary Fiber 4.9g / Total Sugars 2.7g / Protein 5.3g

Herby Cauliflower Salad with Chickpeas

Rebecca Prep Time: 45 mins | Total Time: 45 mins | Yield: 10 Servings After eating this salad, you will surely love cauliflower even more! This recipe takes a simple cauliflower… General Recipes Herby Cauliflower Salad with Chickpeas European Print This
Serves: 10 Prep Time: 45 mins
Nutrition facts: 140 calories 7.2 fat
Rating: 5.0/5
( 1 voted )

Ingredients

  • 1/4 c extra virgin olive oil
  • 1 medium head cauliflower, about 1 3/4 to 2 lbs. (6 to 7 c small florets)
  • 1 (15 oz.) can chickpeas, drained and rinsed (or use 1 1/2 c cooked chickpeas)
  • 1 tsp finely grated lemon zest (from 1 lemon)
  • 1/2 tsp fine sea salt, plus more to taste
  • 1/2 c fine fresh herbs like parsley, dill, or mint, chopped
  • 1/2 c pickled red onions, chopped, optional
  • 1/4 tsp crushed red pepper flakes, optional for some heat
  • 1/4 c freshly squeezed lemon juice, plus more to taste
  • 1/2 tsp fresh ground black pepper

Instructions

Remove the core and leaves from the cauliflower. Slice the cauliflower individually and put them into a large mixing bowl.

Chop the stems of the cauliflower and put them into the bowl as well.

Sprinkle 1/2 tsp black ground pepper and 1/2 tsp fine sea salt over the florets, then toss to coat.

Add olive oil, salt, red pepper flakes, lemon zest, and lemon juice into a mixing bowl. Stir everything until well blended.

Transfer the dressing into the bowl with the cauliflower together with the herbs, pickled onions, and chickpeas. Toss again until completely coated. Add more juice or seasonings if needed.

Allow the salad to rest for half an hour in the fridge to incorporate all the flavors.

Serve and enjoy!

Notes

Place any leftovers in an airtight container, then put them in the fridge. They can last up to a week. I highly suggest using pickled onions for this recipe. They give an amazing taste to the salad! Feel free to add ham instead of chickpeas if you prefer.

October 19, 2022 0 comment
0 FacebookTwitterPinterestEmail
General Recipes

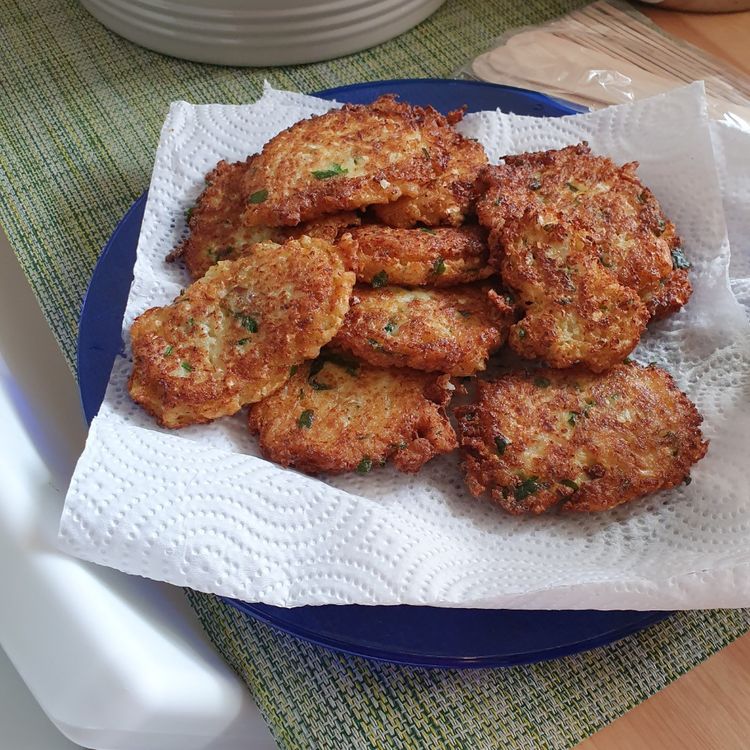
Basic Cauliflower Fritters

by Rebecca October 19, 2022
written by Rebecca

Prep Time: 10 mins | Cook Time: 15 mins | Total Time: 25 mins | Yield: 2 Servings

These Basic Cauliflower Fritters have been the highlight of my week! I am so excited to share this recipe with you today. These delicious treats are ready for serving in less than 30 minutes! It only requires four main ingredients. I’m pretty sure you already have them in your fridge or drawer right now! The best thing about these fritters is that you can eat them any time of the day! I love having them for a snack. Eat them with your favorite dipping sauce, and you have yourself something to satisfy all your cravings! Try this recipe now. Enjoy!

Ingredients:

½ teaspoon baking powder

vegetable oil for frying

2 Eggs

5 c chopped cauliflower florets

salt and pepper to taste

½ c all-purpose flour

Directions:

In the food processor, add the cauliflower. Pulse a few times until minced finely.

Place the processed cauliflower into a large bowl. Add the remaining ingredients aside from the vegetable oil. Stir until well incorporated and turn into a paste. Make sure to add a bit of flour if the texture becomes too moist.

Measure the mixture with an ice cream scoop. Shape each into a 1/3-inch patty.

Place a skillet on the stove and turn the heat to medium. Add a bit of vegetable oil and allow it to become hot.

Add the patties into the hot skillet, then cook each side for 2 minutes or until brown. Transfer them onto a clean serving plate.

Serve the fritters right away with your preferred sauce. Enjoy!

Notes:

Place any leftovers in an airtight container, then put them in the fridge. They can last up to 3 days. Reheat for a few minutes before serving again.

Nutrition Facts:

Calories: 272 kcal | Carbohydrates: 57g | Protein: 11g | Fat: 0.3g | Saturated Fat: 0.1g | Polyunsaturated Fat: 0.2g | Monounsaturated Fat: 0.04g | Sodium: 75mg | Potassium: 758mg | Fiber: 8g | Sugar: 7g | Vitamin C: 159.2mg | Calcium: 50mg | Iron: 2.9mg

Basic Cauliflower Fritters

Rebecca Prep Time: 10 mins | Cook Time: 15 mins | Total Time: 25 mins | Yield: 2 Servings These Basic Cauliflower Fritters have been the highlight of my week! I… General Recipes Basic Cauliflower Fritters European Print This
Serves: 2 Prep Time: 10 mins Cooking Time: 15 mins 15 mins
Nutrition facts: 272 calories 0.3 fat
Rating: 5.0/5
( 1 voted )

Ingredients

  • ½ teaspoon baking powder
  • vegetable oil for frying
  • 2 Eggs
  • 5 c chopped cauliflower florets
  • salt and pepper to taste
  • ½ c all-purpose flour

Instructions

In the food processor, add the cauliflower. Pulse a few times until minced finely.

Place the processed cauliflower into a large bowl. Add the remaining ingredients aside from the vegetable oil. Stir until well incorporated and turn into a paste. Make sure to add a bit of flour if the texture becomes too moist.

Measure the mixture with an ice cream scoop. Shape each into a 1/3-inch patty.

Place a skillet on the stove and turn the heat to medium. Add a bit of vegetable oil and allow it to become hot.

Add the patties into the hot skillet, then cook each side for 2 minutes or until brown. Transfer them onto a clean serving plate.

Serve the fritters right away with your preferred sauce. Enjoy!

Notes

Place any leftovers in an airtight container, then put them in the fridge. They can last up to 3 days. Reheat for a few minutes before serving again.

October 19, 2022 0 comment
0 FacebookTwitterPinterestEmail
Newer Posts
Older Posts

Popular Posts

  • 1

    Crispy Crunchy Parmesan Potatoes

    March 21, 2020
  • 2

    CROCK POT SMOTHERED PORK CHOPS

    March 21, 2020
  • Facebook
  • Twitter

@2019 - All Right Reserved.


Back To Top