Cook it once
  • Home
  • Privacy Policy
  • Recipes
    • KETO
    • LC
    • WW
  • Tips
  • Contact
Cook it once
  • Home
  • Privacy Policy
  • Recipes
    • KETO
    • LC
    • WW
  • Tips
  • Contact
Category:

General Recipes

General Recipes

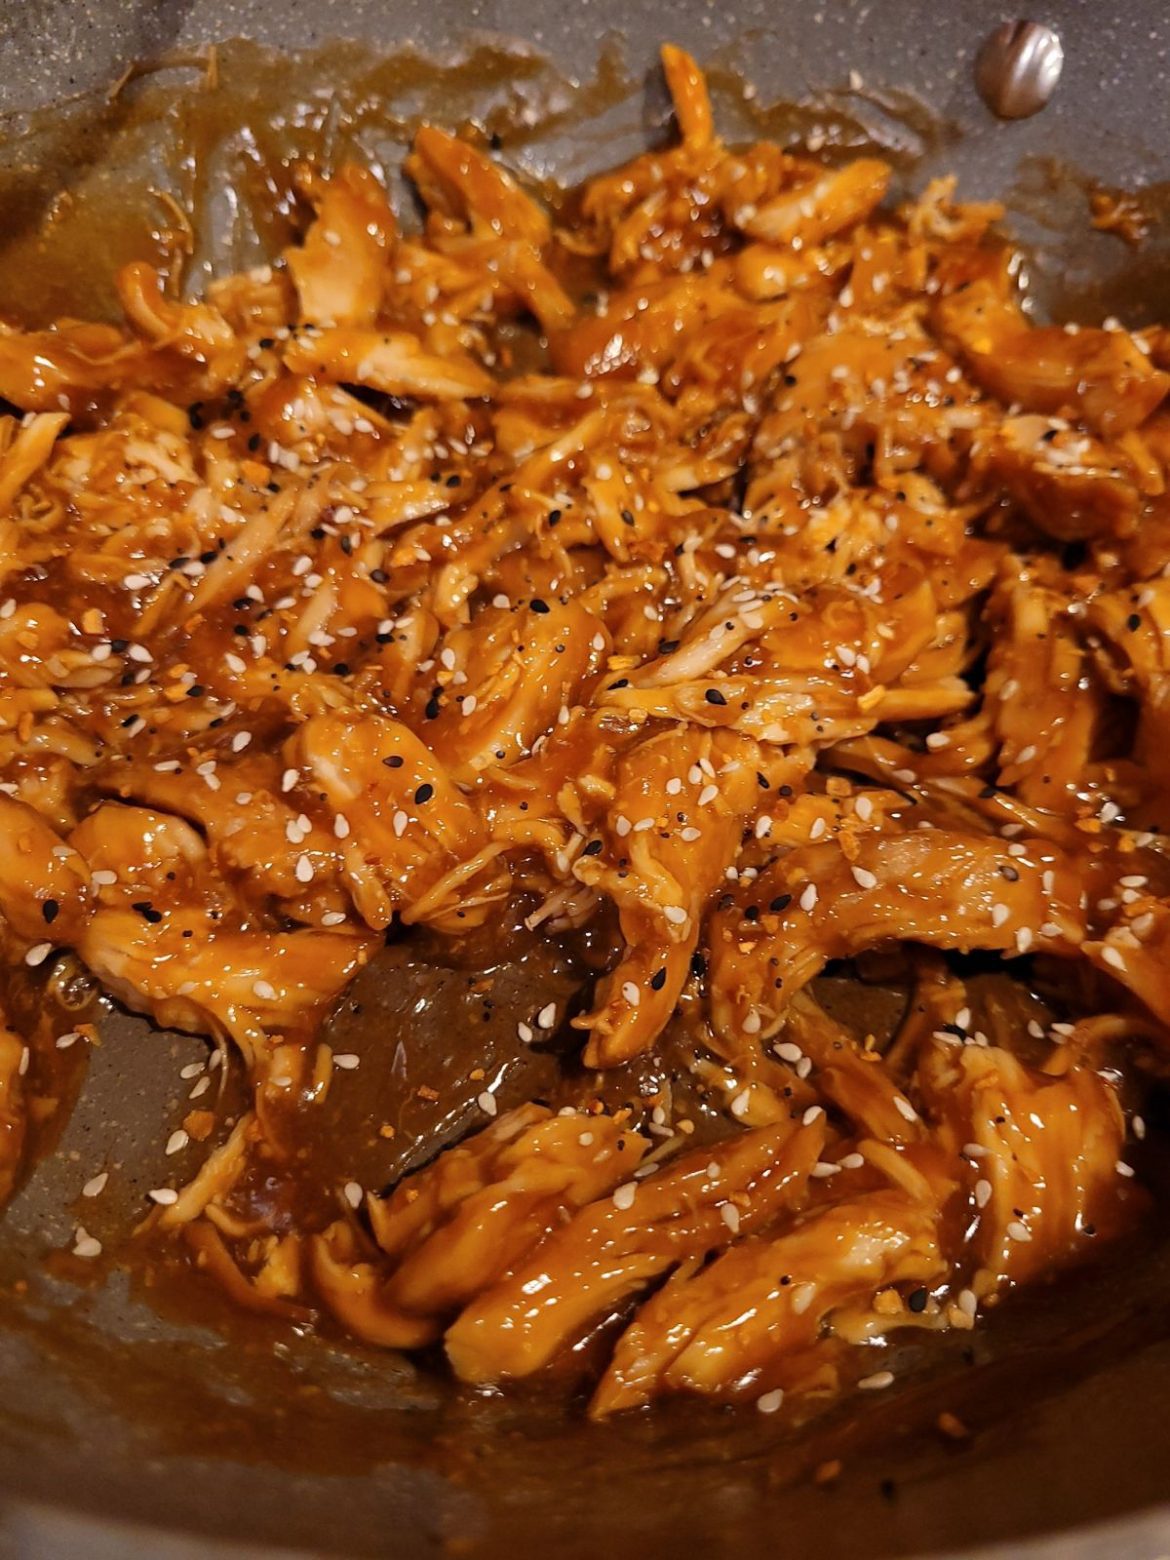
You’ll Be Crazy About This Slow Cooker Teriyaki Chicken Recipe

by Rebecca December 1, 2022
written by Rebecca

Prep Time: 10 mins | Cook Time: 4 hrs | Total Time: 4 hrs 10 mins | Yield: 6 Servings

The teriyaki sauce of this dish is more than enough to satisfy all your cravings! When served over rice, this makes the perfect meal! You got to try this recipe. I’m telling you; it is worth all the time and effort. Enjoy!

Ingredients:

2 tsp toasted sesame oil

2 tbsp rice vinegar

1/4 c cold water

1 tbsp sesame seeds

3 tbsp brown sugar

2 tbsp sliced green onions

2 tsp ginger, minced

2 tsp garlic, minced

1 1/2 lbs. boneless, skinless chicken breasts

1/2 c low-sodium soy sauce

2 tbsp cornstarch

1/4 c honey

Directions:

In the slow cooker, add the chicken breasts.

Add sesame oil, rice vinegar, brown sugar, garlic, honey, soy sauce, and ginger into a mixing bowl. Stir everything until well blended.

Add the mixture into the slow cooker on top of the chicken breasts, then toss to coat.

Cover and seal the slow cooker, then cook the chicken breasts for about 4 to 5 hours on a high setting or 8 hours on a low setting.

Transfer the chicken breasts onto a clean plate, then use two forks to shred them into small pieces.

Strain the teriyaki sauce and put it into a saucepan. Place it on the stove and turn the heat to medium-high and let it simmer for a few minutes.

Dissolve cornstarch in water, then add it to the pan. Allow the sauce to boil for about 2 minutes or until the texture becomes thick.

Add the sauce on top of the shredded chicken, then toss until completely coated.

Garnish with freshly chopped green onions and sesame seeds on top.

Serve right away over rice. Enjoy!

Notes:

Feel free to add your favorite veggies to this dish.

Leftovers should be kept in an airtight container, then in the fridge. Reheat for a few minutes before serving again.

Nutrition Facts:

Calories: 227 kcal | Carbohydrates: 22g | Protein: 25g | Fat: 3g | Cholesterol: 72mg | Sodium: 542mg | Potassium: 479mg | Sugar: 17g | Vitamin A: 35IU | Vitamin C: 1.7mg | Calcium: 29mg | Iron: 1.2mg

You'll Be Crazy About This Slow Cooker Teriyaki Chicken Recipe

Rebecca Prep Time: 10 mins | Cook Time: 4 hrs | Total Time: 4 hrs 10 mins | Yield: 6 Servings The teriyaki sauce of this dish is more than enough… General Recipes You’ll Be Crazy About This Slow Cooker Teriyaki Chicken Recipe European Print This
Serves: 6 Prep Time: 10 mins Cooking Time: 4 hrs 4 hrs
Nutrition facts: 227 calories 3 fat
Rating: 5.0/5
( 1 voted )

Ingredients

  • 2 tsp toasted sesame oil
  • 2 tbsp rice vinegar
  • 1/4 c cold water
  • 1 tbsp sesame seeds
  • 3 tbsp brown sugar
  • 2 tbsp sliced green onions
  • 2 tsp ginger, minced
  • 2 tsp garlic, minced
  • 1 1/2 lbs. boneless, skinless chicken breasts
  • 1/2 c low-sodium soy sauce
  • 2 tbsp cornstarch
  • 1/4 c honey

Instructions

In the slow cooker, add the chicken breasts.

Add sesame oil, rice vinegar, brown sugar, garlic, honey, soy sauce, and ginger into a mixing bowl. Stir everything until well blended.

Add the mixture into the slow cooker on top of the chicken breasts, then toss to coat.

Cover and seal the slow cooker, then cook the chicken breasts for about 4 to 5 hours on a high setting or 8 hours on a low setting.

Transfer the chicken breasts onto a clean plate, then use two forks to shred them into small pieces.

Strain the teriyaki sauce and put it into a saucepan. Place it on the stove and turn the heat to medium-high and let it simmer for a few minutes.

Dissolve cornstarch in water, then add it to the pan. Allow the sauce to boil for about 2 minutes or until the texture becomes thick.

Add the sauce on top of the shredded chicken, then toss until completely coated.

Garnish with freshly chopped green onions and sesame seeds on top.

Serve right away over rice. Enjoy!

Notes

Feel free to add your favorite veggies to this dish. Leftovers should be kept in an airtight container, then in the fridge. Reheat for a few minutes before serving again.
December 1, 2022 0 comment
0 FacebookTwitterPinterestEmail
General Recipes

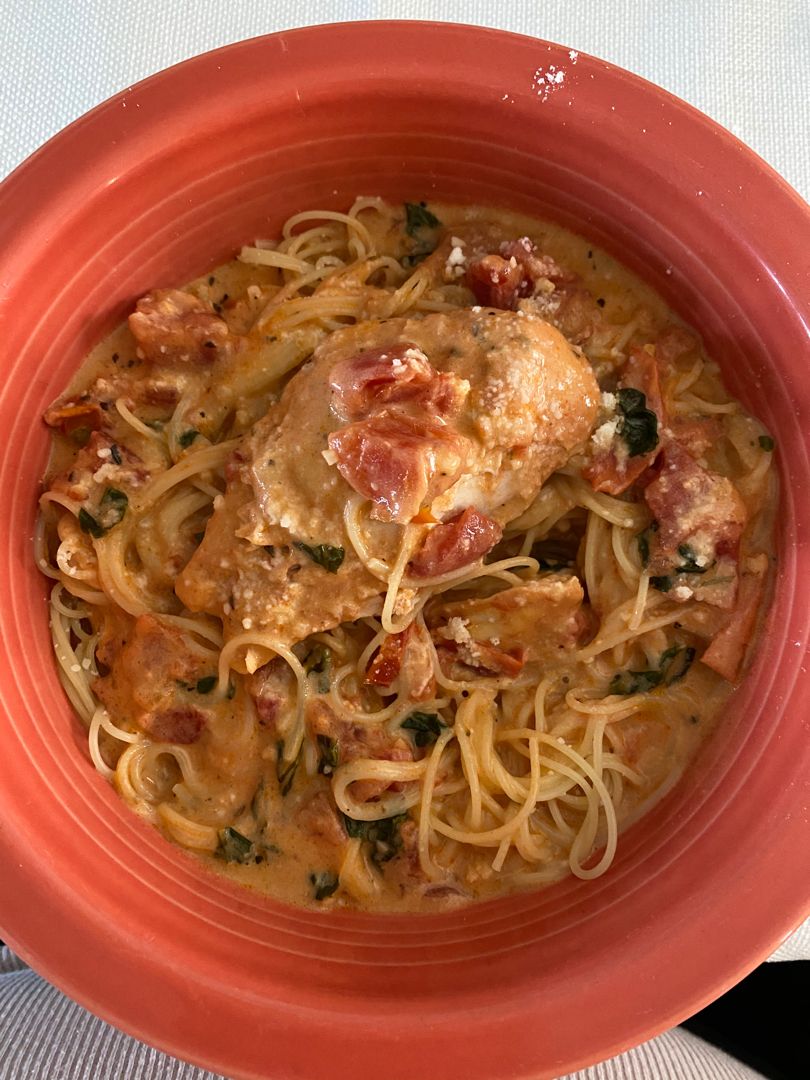
Slow Cooker Creamy Tomato Basil Chicken – You’ll Never Make It Any Other Way Again

by Rebecca December 1, 2022
written by Rebecca

Prep Time: 5 mins | Cook Time: 4 hrs | Total Time: 4 hrs 5 mins | Yield: 4 Servings

This dish is slow-cooked to perfect for about 4 hours! You can just imagine how delicious this would taste! With a very simple set of ingredients, this recipe is the best decision you will ever make today. Serve it over rice, pasta, or salad. Enjoy!

Ingredients:

4 boneless, skinless chicken breasts

2 tbsp finely chopped fresh basil

1 tsp salt

2 tbsp cornstarch

1/4 tsp black pepper

2 tsp minced garlic

1/2 tsp dried basil

3/4 c evaporated milk or heavy cream

14 ounces can of diced tomatoes with Italian herbs

3/4 c tomato pasta sauce

Directions:

In a 3 or 6-quart slow cooker, add the pasta sauce together with the tomatoes.

In a mixing bowl, add cornstarch and cream. Whisk until well blended. Pour the mixture into the slow cooker with the tomatoes.

Add salt, pepper, garlic, and basil. Stir everything until well incorporated.

Lay the chicken breasts over the sauce and gently press them.

Cover and seal the slow cooker, then cook the dish for about 3 to 5 hours on a low setting or until done.

Add the dried basil and stir until well blended.

Serve right away over salad, pasta, or rice. Enjoy!

Notes:

Feel free to use a 6-quart slow cooker for this recipe if you want to double it.

I highly suggest you use an instant-read thermometer to check if the chicken is cooked. It should read about 165 degrees F.

Place any leftovers in an airtight container, then put them in the fridge. Reheat for a few minutes before serving again.

Nutrition Facts:

Calories: 210cal | Carbohydrates: 16g | Protein: 29g | Fat: 3g | Saturated Fat: 1g | Cholesterol: 74mg | Sodium: 1099mg | Potassium: 977mg | Fiber: 2g | Sugar: 10g | Vitamin A: 657IU | Vitamin C: 16mg | Calcium: 191mg | Iron: 2mg

Slow Cooker Creamy Tomato Basil Chicken - You'll Never Make It Any Other Way Again

Rebecca Prep Time: 5 mins | Cook Time: 4 hrs | Total Time: 4 hrs 5 mins | Yield: 4 Servings This dish is slow-cooked to perfect for about 4 hours!… General Recipes Slow Cooker Creamy Tomato Basil Chicken – You’ll Never Make It Any Other Way Again European Print This
Serves: 4 Prep Time: 5 mins Cooking Time: 4 hrs 4 hrs
Nutrition facts: 210 calories 3 fat
Rating: 5.0/5
( 1 voted )

Ingredients

  • 4 boneless, skinless chicken breasts
  • 2 tbsp finely chopped fresh basil
  • 1 tsp salt
  • 2 tbsp cornstarch
  • 1/4 tsp black pepper
  • 2 tsp minced garlic
  • 1/2 tsp dried basil
  • 3/4 c evaporated milk or heavy cream
  • 14 ounces can of diced tomatoes with Italian herbs
  • 3/4 c tomato pasta sauce

Instructions

In a 3 or 6-quart slow cooker, add the pasta sauce together with the tomatoes.

In a mixing bowl, add cornstarch and cream. Whisk until well blended. Pour the mixture into the slow cooker with the tomatoes.

Add salt, pepper, garlic, and basil. Stir everything until well incorporated.

Lay the chicken breasts over the sauce and gently press them.

Cover and seal the slow cooker, then cook the dish for about 3 to 5 hours on a low setting or until done.

Add the dried basil and stir until well blended.

Serve right away over salad, pasta, or rice. Enjoy!

Notes

Feel free to use a 6-quart slow cooker for this recipe if you want to double it. I highly suggest you use an instant-read thermometer to check if the chicken is cooked. It should read about 165 degrees F. Place any leftovers in an airtight container, then put them in the fridge. Reheat for a few minutes before serving again.
December 1, 2022 0 comment
0 FacebookTwitterPinterestEmail
General Recipes

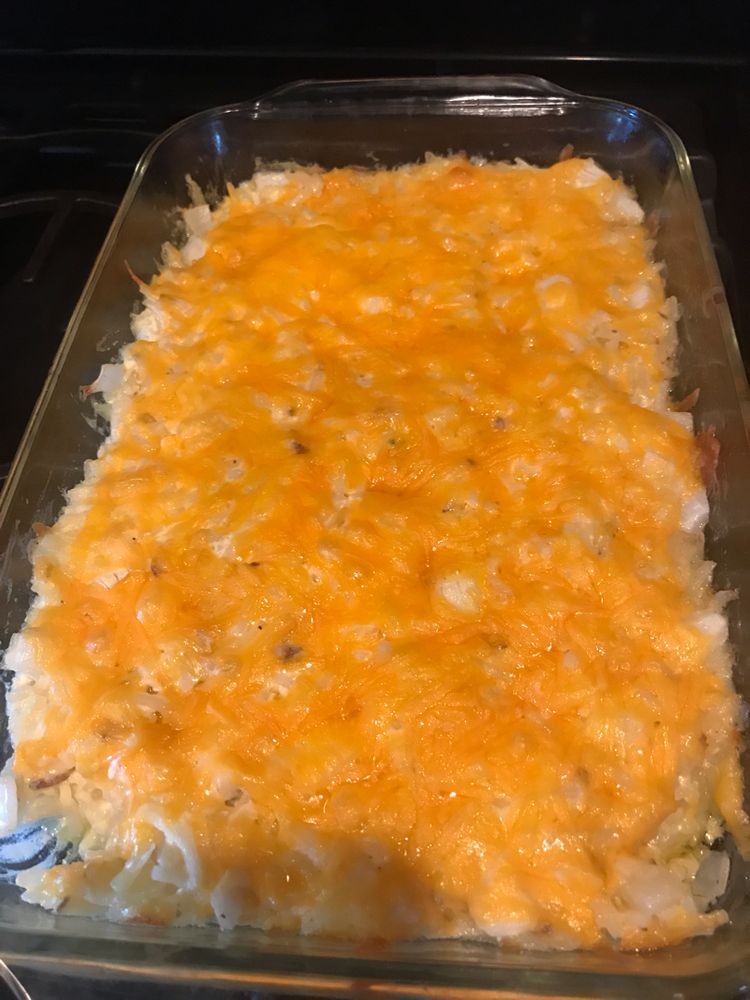
Copycat Cracker Barrel Hashbrown Casserole

by Rebecca November 30, 2022
written by Rebecca

Prep Time: 10 mins | Cook Time: 55 mins | Total Time: 1 hr 5 mins | Yield: 8 Servings

Enjoy this spectacular dish in the comfort of your home! This Copycat Cracker Barrel Hash brown Casserole is ready in just about an hour! You can serve this for breakfast or as a side dish for dinner! The cheesy flavor of this casserole is simply the best! You are so in for a treat, I’m telling you! With these basic ingredients, you can have something amazing! Just a warning though, you will surely eat a lot because it is very addicting! Each bite makes you want to eat the whole thing! Anyway, surprise everyone with this. Enjoy!

Ingredients:

1 teaspoon salt

1 small Onion, chopped

1 can Cream of Chicken Soup

30 ounces Frozen Hash Browns thawed

1 c Sour Cream

1 stick of butter, melted

1/2 teaspoon Black Pepper

8 ounces of Shredded Cheddar Cheese

Directions:

Prepare the oven and preheat it to 175 degrees C or 350 degrees F.

Coat the inside of a 9×11-inch baking dish with cooking spray.

Set aside 1 cup of the cheese for later use, then add the rest into a large bowl together with onion, black pepper, and soup.

Stir everything to combine.

Put the hash browns, sour cream, and melted butter into the bowl with the cheese mixture. Stir everything until well incorporated.

Spoon the mixture into the prepared baking dish and spread it evenly.

Place the baking dish in the preheated oven and bake the casserole for about 45 to 55 minutes or until done. Remove from the oven.

Serve and enjoy!

Notes:

Place any leftovers in an airtight container, then put them in the fridge. Reheat for a few minutes before serving again.
Nutrition Facts:

Calories: 389 kcal | Carbohydrates: 25g | Protein: 11g | Fat: 28g | Saturated Fat: 17g | Trans Fat: 1g | Cholesterol: 77mg | Sodium: 741mg | Potassium: 627mg | Fiber: 2g | Sugar: 4g | Vitamin A: 971IU | Vitamin C: 10mg | Calcium: 254mg | Iron: 1mg

Copycat Cracker Barrel Hashbrown Casserole

Rebecca Prep Time: 10 mins | Cook Time: 55 mins | Total Time: 1 hr 5 mins | Yield: 8 Servings Enjoy this spectacular dish in the comfort of your home!… General Recipes Copycat Cracker Barrel Hashbrown Casserole European Print This
Serves: 8 Prep Time: 10 mins Cooking Time: 55 mins 55 mins
Nutrition facts: 389 calories 28 fat
Rating: 2.5/5
( 2 voted )

Ingredients

  • 1 teaspoon salt
  • 1 small Onion, chopped
  • 1 can Cream of Chicken Soup
  • 30 ounces Frozen Hash Browns thawed
  • 1 c Sour Cream
  • 1 stick of butter, melted
  • 1/2 teaspoon Black Pepper
  • 8 ounces of Shredded Cheddar Cheese

Instructions

Prepare the oven and preheat it to 175 degrees C or 350 degrees F.

Coat the inside of a 9×11-inch baking dish with cooking spray.

Set aside 1 cup of the cheese for later use, then add the rest into a large bowl together with onion, black pepper, and soup.

Stir everything to combine.

Put the hash browns, sour cream, and melted butter into the bowl with the cheese mixture. Stir everything until well incorporated.

Spoon the mixture into the prepared baking dish and spread it evenly.

Place the baking dish in the preheated oven and bake the casserole for about 45 to 55 minutes or until done. Remove from the oven.

Serve and enjoy!

Notes

Place any leftovers in an airtight container, then put them in the fridge. Reheat for a few minutes before serving again.
November 30, 2022 0 comment
0 FacebookTwitterPinterestEmail
General Recipes

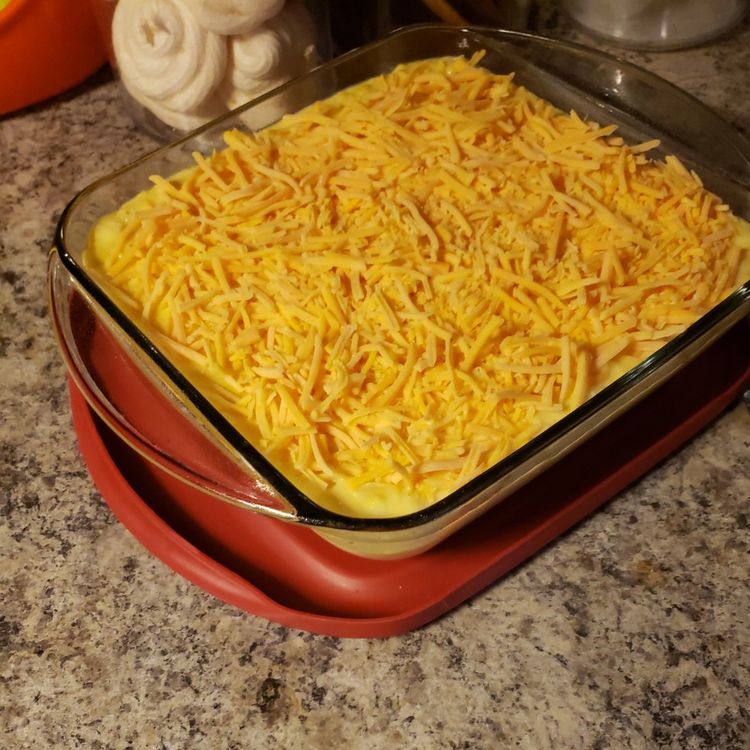
Creamy Cornbread Casserole

by Rebecca November 30, 2022
written by Rebecca

Prep Time: 10 mins | Cook Time: 30 mins | Total Time: 40 mins | Yield: 12 Servings

I am so excited to share this recipe with you today because I know that you are going to love it! This Creamy Cornbread Casserole is one of my comfort foods that my family adores! It is made from simple ingredients. From the cornbread mix to the shredded cheese, everything about this casserole is amazing! It is perfect to serve any time, especially during holidays when everyone is around. Anyway, I have listed all the things you will be needing. Just follow them step by step, and you are good to go! Also, make sure to use a scoop to serve this. Enjoy!

Ingredients:

1 (8 oz.) package of dry cornbread mix

8 oz. of Cheddar cheese, shredded

1 (15 oz.) can whole kernel corn, drained and 1/2 liquid reserved

1 c sour cream

2 Eggs

1 (14.75 oz.) can of cream-style corn

Directions:

Prepare the oven and preheat it to 200 degrees C or 400 degrees F.

Apply cooking spray to the inside of a 9×13-inch baking pan.

Add sour cream, corn, reserved liquid, cornbread, and eggs into a large bowl. Whisk everything until well incorporated.

Transfer the batter to the prepared baking pan and spread it evenly.

Scatter the shredded cheddar cheese over the batter.

Put the baking pan in the preheated oven and bake the casserole for about 30 minutes or until the top turns golden brown or the cheese has melted completely.

Remove the casserole from the oven and let it rest for a few minutes at room temperature before serving.

Serve and enjoy!

Notes:

Place the leftovers in an airtight container, then put them in the fridge. Reheat for a few minutes before serving again.
Nutrition Facts:

Total Fat 13g17% | Saturated Fat 7g36% | Cholesterol 60mg20% | Sodium 642mg28% | Total Carbohydrate 26g10% | Dietary Fiber 1g4% | Total Sugars 4g | Protein 9g | Vitamin C 2mg10% | Calcium 209mg16% | Iron 1mg7% | Potassium 151mg3%

Creamy Cornbread Casserole

Rebecca Prep Time: 10 mins | Cook Time: 30 mins | Total Time: 40 mins | Yield: 12 Servings I am so excited to share this recipe with you today because… General Recipes Creamy Cornbread Casserole European Print This
Serves: 12 Prep Time: 10 mins Cooking Time: 30 mins 30 mins
Nutrition facts: 200 calories 13 fat
Rating: 5.0/5
( 1 voted )

Ingredients

  • 1 (8 oz.) package of dry cornbread mix
  • 8 oz. of Cheddar cheese, shredded
  • 1 (15 oz.) can whole kernel corn, drained and 1/2 liquid reserved
  • 1 c sour cream
  • 2 Eggs
  • 1 (14.75 oz.) can of cream-style corn

Instructions

Prepare the oven and preheat it to 200 degrees C or 400 degrees F.

Apply cooking spray to the inside of a 9x13-inch baking pan.

Add sour cream, corn, reserved liquid, cornbread, and eggs into a large bowl. Whisk everything until well incorporated.

Transfer the batter to the prepared baking pan and spread it evenly.

Scatter the shredded cheddar cheese over the batter.

Put the baking pan in the preheated oven and bake the casserole for about 30 minutes or until the top turns golden brown or the cheese has melted completely.

Remove the casserole from the oven and let it rest for a few minutes at room temperature before serving.

Serve and enjoy!

Notes

Place the leftovers in an airtight container, then put them in the fridge. Reheat for a few minutes before serving again.
November 30, 2022 0 comment
0 FacebookTwitterPinterestEmail
General Recipes

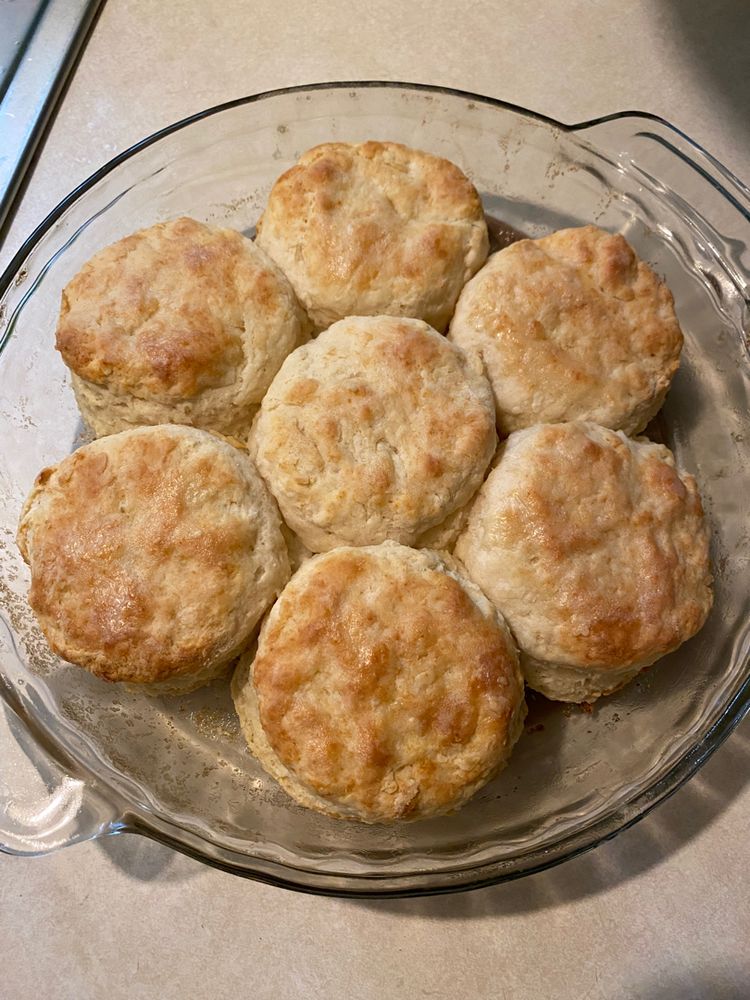
Buttermilk Biscuits

by Rebecca November 30, 2022
written by Rebecca

Prep Time: 20 mins | Cook Time: 15 mins | Total Time: 35 mins | Yield: 8 Servings

You will be amazed by how these Buttermilk Biscuits could make your day extra special! The best thing about this recipe is that you only need 6 ingredients! Yes, you read it right! Try it now. Enjoy!

Ingredients:

1 c + 3 tbsp cold Buttermilk

2 tbsp aluminum-free Baking Powder

1/2 c very cold butter, equal to 1 stick

2 ½ c all-purpose flour

1 tsp salt

2 tsp honey

Topping:

1 tbsp butter

2 tbsp honey

Directions:

Prepare the oven and preheat it to 218 degrees C or 425 degrees F.

In a large mixing bowl, add baking powder, flour, and salt. Whisk everything until well incorporated.

Slice the cold butter into small cuts, then add them into the bowl with the flour mixture. Beat a few times until well blended.

Make a hole in the center of the dry mixture, then add honey and cold buttermilk. Whisk to combine.

Sprinkle flour onto a flat surface and lay the dough on it. Form it into a 9-inch rectangular shape.

Fold the left and right sides of the dough, then turn it horizontally and flatten it out. Repeat the process two more times.

Slice it into 6 round shapes.

Brush a 10-inch cast-iron skillet with butter. Add the biscuits and arrange them in a single layer.

Place the skillet in the preheated oven and bake the biscuits for about 15 minutes or until they turn golden brown.

In a small bowl, add melted butter and honey. Stir to combine.

Remove the biscuits from the oven, then brush each with the butter-honey mixture.

Put them back in the oven and bake for 5 more minutes. Remove from the oven.

Serve and enjoy!

Notes:

Place the leftovers in an airtight container, then put them in the fridge. They can last up to 5 days. Reheat for a few minutes before serving again.
Nutrition Facts:

Calories: 299 kcal, Carbohydrates: 38g, Protein: 5g, Fat: 14g, Saturated Fat: 9g, Polyunsaturated Fat: 1g, Monounsaturated Fat: 4g, Trans Fat: 1g, Cholesterol: 38mg, Sodium: 440mg, Potassium: 393mg, Fiber: 1g, Sugar: 7g, Vitamin A: 448IU, Vitamin C: 1mg, Calcium: 175mg, Iron: 2mg

Buttermilk Biscuits

Rebecca Prep Time: 20 mins | Cook Time: 15 mins | Total Time: 35 mins | Yield: 8 Servings You will be amazed by how these Buttermilk Biscuits could make your… General Recipes Buttermilk Biscuits European Print This
Serves: 8 Prep Time: 20 mins Cooking Time: 15 mins 15 mins
Nutrition facts: 299 calories 14 fat
Rating: 5.0/5
( 1 voted )

Ingredients

  • 1 c + 3 tbsp cold Buttermilk
  • 2 tbsp aluminum-free Baking Powder
  • 1/2 c very cold butter, equal to 1 stick
  • 2 ½ c all-purpose flour
  • 1 tsp salt
  • 2 tsp honey
  • Topping:
  • 1 tbsp butter
  • 2 tbsp honey

Instructions

Prepare the oven and preheat it to 218 degrees C or 425 degrees F.

In a large mixing bowl, add baking powder, flour, and salt. Whisk everything until well incorporated.

Slice the cold butter into small cuts, then add them into the bowl with the flour mixture. Beat a few times until well blended.

Make a hole in the center of the dry mixture, then add honey and cold buttermilk. Whisk to combine.

Sprinkle flour onto a flat surface and lay the dough on it. Form it into a 9-inch rectangular shape.

Fold the left and right sides of the dough, then turn it horizontally and flatten it out. Repeat the process two more times.

Slice it into 6 round shapes.

Brush a 10-inch cast-iron skillet with butter. Add the biscuits and arrange them in a single layer.

Place the skillet in the preheated oven and bake the biscuits for about 15 minutes or until they turn golden brown.

In a small bowl, add melted butter and honey. Stir to combine.

Remove the biscuits from the oven, then brush each with the butter-honey mixture.

Put them back in the oven and bake for 5 more minutes. Remove from the oven.

Serve and enjoy!

Notes

Place the leftovers in an airtight container, then put them in the fridge. They can last up to 5 days. Reheat for a few minutes before serving again.
November 30, 2022 0 comment
0 FacebookTwitterPinterestEmail
General Recipes

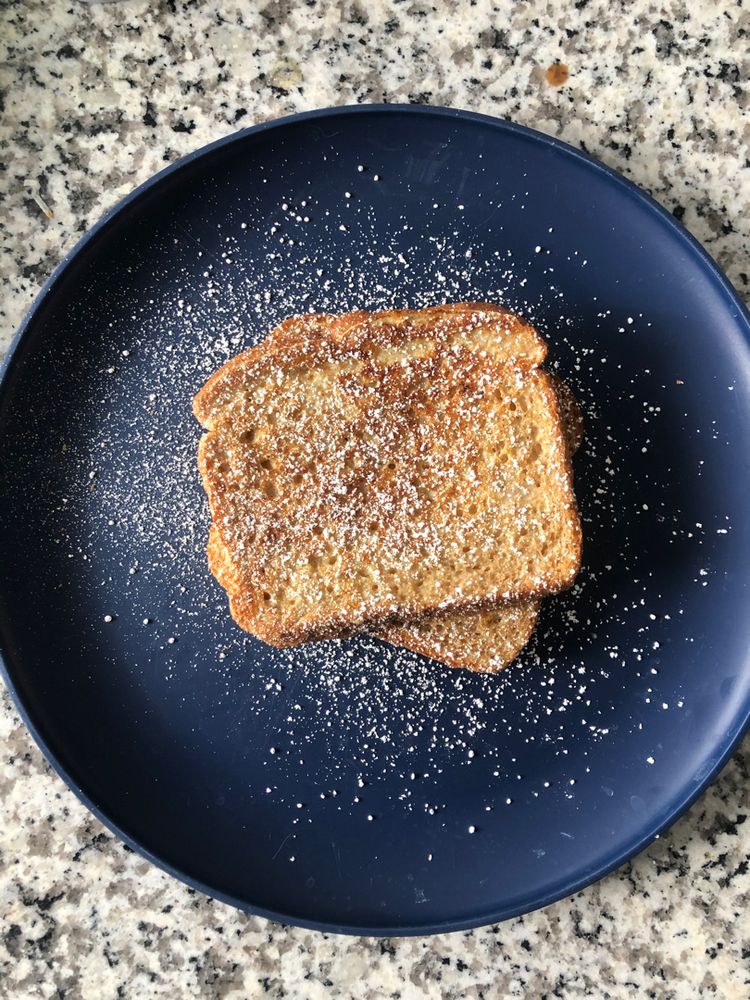
The Best French Toast

by Rebecca November 30, 2022
written by Rebecca

Prep Time: 5 mins | Cook Time: 15 mins | Total Time: 20 mins | Yield: 4 Servings

The best indeed! This French Toast is going to make your breakfast epic! With simple ingredients and easy steps, this French Toast is one to try! I like eating this with hot coffee. I would highly recommend you eat it with some scrambled eggs and bacon. Thank me later! In just 20 minutes of prepping and cooking time, prepare to be amazed. Enjoy!

Ingredients:

1 teaspoon pure vanilla extract

dash of cinnamon, optional

1 tablespoon brown sugar

4 large Eggs

A pinch of salt

8 ounces (8 slices) of Brioche bread

3 tablespoons heavy whipping cream

Directions:

Cut the Brioche bread into slices. Put them onto a plate.

Add sugar, heavy whipping cream, eggs, salt, and vanilla extract into a large bowl. Whisk everything to combine.

Place a large pan on the stove and turn the heat to medium. Add a bit of canola oil and allow it to become hot.

Coat each piece of bread into the bowl with the egg mixture. Make sure to soak it entirely.

Add one prepared bread slice into the hot pan, then toast each side for about 3 to 4 minutes or until golden brown. Move it onto a clean serving plate. Repeat the process with the rest of the bread slices.

Serve hot. Enjoy!

Notes:

For a complete breakfast meal, serve this toasted bread with eggs, bacon, etc.

Add one of these things on top if you want.

Powdered Sugar

Orange zest

Maple Syrup

Feel free to use whole milk for this recipe.

The best thing about this is that you don’t need to worry about leftovers because I am sure that there won’t be any!

Nutrition Facts:

Calories: 359 kcal | Carbohydrates: 29g | Protein: 12g | Fat: 21g | Saturated Fat: 11g | Cholesterol: 276mg | Sodium: 326mg | Potassium: 60mg | Sugar: 3g | Vitamin A: 890IU | Calcium: 64mg | Iron: 1.3mg

The Best French Toast

Rebecca Prep Time: 5 mins | Cook Time: 15 mins | Total Time: 20 mins | Yield: 4 Servings The best indeed! This French Toast is going to make your breakfast… General Recipes The Best French Toast European Print This
Serves: 4 Prep Time: 5 mins Cooking Time: 15 mins 15 mins
Nutrition facts: 359 calories 21 fat
Rating: 5.0/5
( 1 voted )

Ingredients

  • 1 teaspoon pure vanilla extract
  • dash of cinnamon, optional
  • 1 tablespoon brown sugar
  • 4 large Eggs
  • A pinch of salt
  • 8 ounces (8 slices) of Brioche bread
  • 3 tablespoons heavy whipping cream

Instructions

Cut the Brioche bread into slices. Put them onto a plate.

Add sugar, heavy whipping cream, eggs, salt, and vanilla extract into a large bowl. Whisk everything to combine.

Place a large pan on the stove and turn the heat to medium. Add a bit of canola oil and allow it to become hot.

Coat each piece of bread into the bowl with the egg mixture. Make sure to soak it entirely.

Add one prepared bread slice into the hot pan, then toast each side for about 3 to 4 minutes or until golden brown. Move it onto a clean serving plate. Repeat the process with the rest of the bread slices.

Serve hot. Enjoy!

Notes

For a complete breakfast meal, serve this toasted bread with eggs, bacon, etc. Add one of these things on top if you want. Powdered Sugar Orange zest Maple Syrup Feel free to use whole milk for this recipe. The best thing about this is that you don't need to worry about leftovers because I am sure that there won't be any!

November 30, 2022 0 comment
0 FacebookTwitterPinterestEmail
General Recipes

TikTok Tortilla Wrap Hack

by Rebecca November 30, 2022
written by Rebecca

Prep Time: 10 mins | Cook Time: 5 mins | Total Time: 15 mins | Yield: 1 Serving

In this TikTok Tortilla Wrap Hack, you do not need to worry about leftovers because I promise you that there will be none! I came across this recipe online. I was curious and tried it immediately. I am so glad that I did because it is indeed amazing according to the reviews I have read! Now, allow me to share it with you as well! You will not be disappointed with this recipe at all! I have listed all the things you will be needing so just follow them step by step, and you are good to go! This recipe can serve one person. Make sure to double the ingredients if you are serving more than one! Also, don’t forget to share this recipe with everyone. Enjoy!

Ingredients:

Refried beans

Shredded Mexican cheese or use our favorite type

Oil, Olive, or vegetable oil is fine

Guacamole

Salsa

Mexican rice

1 Tortilla

Carnitas or any cooked meat of your choice

Directions:

Create a slice in the center of the tortilla, then add salsa, beans, carnitas, rice, guacamole, and cheese to each quarter of the tortilla.

Fold each quarter of the tortilla to make one wrap. Brush all sides of the tortilla wrap with olive oil.

Prepare and preheat the Panini press.

Add the tortilla wrap to the preheated Panini press, then toast for a few minutes until done. Once the cheese has melted completely, it is ready for serving.

Place tortilla wrap onto a clean serving plate.

Serve right away. Enjoy!

Notes:

Feel free to use a griddle to cook this tortilla wrap. Toast each side for a few minutes over low heat until the cheese is completely melted.

TikTok Tortilla Wrap Hack

Rebecca Prep Time: 10 mins | Cook Time: 5 mins | Total Time: 15 mins | Yield: 1 Serving In this TikTok Tortilla Wrap Hack, you do not need to worry… General Recipes TikTok Tortilla Wrap Hack European Print This
Serves: 1 Prep Time: 10 mins Cooking Time: 5 mins 5 mins
Nutrition facts: 200 calories 20 grams fat
Rating: 5.0/5
( 1 voted )

Ingredients

  • Refried beans
  • Shredded Mexican cheese or use our favorite type
  • Oil, Olive, or vegetable oil is fine
  • Guacamole
  • Salsa
  • Mexican rice
  • 1 Tortilla
  • Carnitas or any cooked meat of your choice

Instructions

Create a slice in the center of the tortilla, then add salsa, beans, carnitas, rice, guacamole, and cheese to each quarter of the tortilla.

Fold each quarter of the tortilla to make one wrap. Brush all sides of the tortilla wrap with olive oil.

Prepare and preheat the Panini press.

Add the tortilla wrap to the preheated Panini press, then toast for a few minutes until done. Once the cheese has melted completely, it is ready for serving.

Place tortilla wrap onto a clean serving plate.

Serve right away. Enjoy!

Notes

Feel free to use a griddle to cook this tortilla wrap. Toast each side for a few minutes over low heat until the cheese is completely melted.

November 30, 2022 0 comment
0 FacebookTwitterPinterestEmail
General Recipes

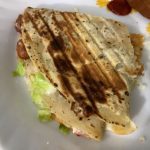
Breakfast Quesadillas

by Rebecca November 30, 2022
written by Rebecca

Prep Time: 10 mins | Cook Time: 5 mins | Total Time: 15 mins | Yield: 4 Servings

Breakfast is going to be amazing with these Quesadillas! It will only take you about 15 minutes to prepare and cook these delicious treats! Enjoy quality food in the comfort of your home!

Ingredients:

8 large flour tortillas

salt and freshly ground black pepper, to taste

8 oz. cheddar cheese, grated or sliced thin

6 slices bacon

6 large Eggs

For serving:

salsa, sour cream, and guacamole

Directions:

Place a large skillet on the stove and turn the heat to medium.

Roughly chop the bacon, then add them to the hot skillet and cook for a few minutes until crispy.

Leave some of the bacon fat in the skillet and discard the rest.

In a mixing bowl, add the cracked eggs and milk. Whisk them to combine. Add it into the skillet together with the bacon, then scramble for a few minutes. Sprinkle a bit of salt and pepper to season. Remove from the heat.

Sprinkle shredded cheese on top of a flour tortilla followed by the bacon and scrambled eggs. Top with more shredded cheese.

Place another flour tortilla on top and seal the sides.

Place a pan on the stove and turn the heat to medium.

Add the quesadilla into the hot pan, then cook each side for a few minutes until golden brown.

Remove the quesadilla from the pan and put it onto a clean serving plate.

Slice the quesadilla into even servings.

Serve right away with sour cream, guacamole, and salsa on the side. Enjoy!

Notes:

Place any leftovers in an airtight container, then put them in the fridge. They can last up to 4 days or 3 months in the freezer. Reheat for a few minutes before serving again.
Feel free to add veggies if you prefer. Sauté them after cooking the bacon.

Nutrition Facts:

Calories: 641 kcal | Carbohydrates: 32g | Protein: 31g | Fat: 42g | Saturated Fat: 19g | Cholesterol: 326mg | Sodium: 1075mg | Potassium: 303mg | Fiber: 1g | Sugar: 3g | Vitamin A: 925IU | Calcium: 509mg | Iron: 3.7mg

Breakfast Quesadillas

Rebecca Prep Time: 10 mins | Cook Time: 5 mins | Total Time: 15 mins | Yield: 4 Servings Breakfast is going to be amazing with these Quesadillas! It will only… General Recipes Breakfast Quesadillas European Print This
Serves: 4 Prep Time: 10 mins Cooking Time: 5 mins 5 mins
Nutrition facts: 641 calories 42 fat
Rating: 5.0/5
( 1 voted )

Ingredients

  • 8 large flour tortillas
  • salt and freshly ground black pepper, to taste
  • 8 oz. cheddar cheese, grated or sliced thin
  • 6 slices bacon
  • 6 large Eggs
  • For serving:
  • salsa, sour cream, and guacamole

Instructions

Place a large skillet on the stove and turn the heat to medium.

Roughly chop the bacon, then add them to the hot skillet and cook for a few minutes until crispy.

Leave some of the bacon fat in the skillet and discard the rest.

In a mixing bowl, add the cracked eggs and milk. Whisk them to combine. Add it into the skillet together with the bacon, then scramble for a few minutes. Sprinkle a bit of salt and pepper to season. Remove from the heat.

Sprinkle shredded cheese on top of a flour tortilla followed by the bacon and scrambled eggs. Top with more shredded cheese.

Place another flour tortilla on top and seal the sides.

Place a pan on the stove and turn the heat to medium.

Add the quesadilla into the hot pan, then cook each side for a few minutes until golden brown.

Remove the quesadilla from the pan and put it onto a clean serving plate.

Slice the quesadilla into even servings.

Serve right away with sour cream, guacamole, and salsa on the side. Enjoy!

Notes

Place any leftovers in an airtight container, then put them in the fridge. They can last up to 4 days or 3 months in the freezer. Reheat for a few minutes before serving again. Feel free to add veggies if you prefer. Sauté them after cooking the bacon.
November 30, 2022 0 comment
0 FacebookTwitterPinterestEmail
General Recipes

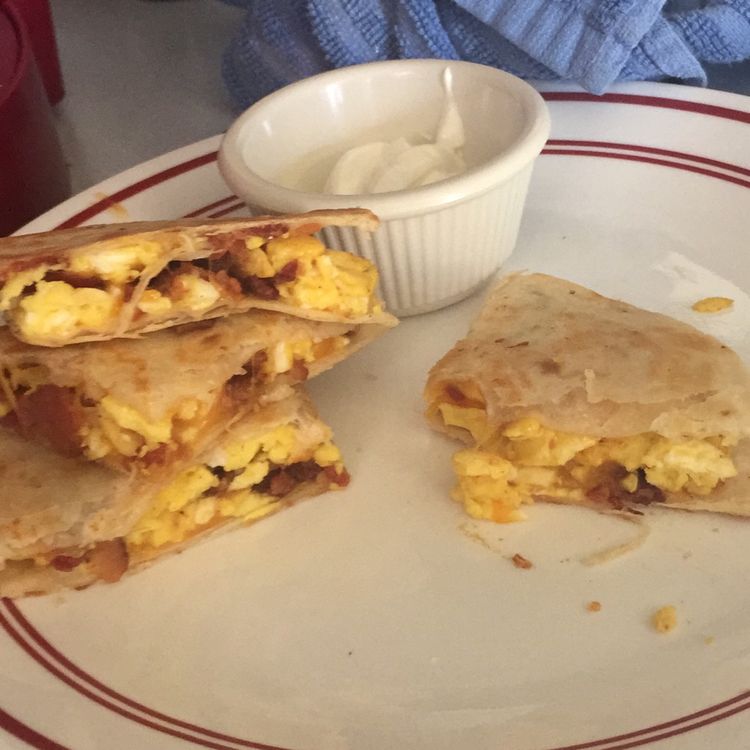
Ham and Cheese Egg Muffins

by Rebecca November 30, 2022
written by Rebecca

Prep Time: 10 mins | Cook Time: 25 mins | Total Time: 35 mins | Yield: 12 Servings

I can’t think of any reason why you shouldn’t give this recipe a try! It is so simple yet very delicious! These Ham and Cheese Egg Muffins will surely make your day extra special! All you need to do is to follow them step by step, and you are good to go! Surprise everyone with these heavenly treats. Enjoy!

Ingredients:

1/4 tsp garlic powder

8 oz. ham steak, cubed

12 large Eggs

1/2 tsp salt

2 green onions, sliced thin

1/2 c milk (I used skim)

1/4 tsp black pepper

3/4 c shredded cheddar cheese divided

Directions:

Prepare the oven and preheat it to 175 degrees C or 350 degrees F.

Apply cooking spray to the inside of a muffin tin.

Add milk, spices, and eggs into a large mixing bowl. Whisk everything until well blended.

Add the green onions, 1/2 cup of shredded cheddar cheese, and ham into the bowl with the egg mixture. Whisk to combine.

Fill each muffin cup with the batter.

Scatter the rest of the shredded cheese over each muffin cup.

Place the muffin pan in the preheated oven and bake the muffins for about 25 to 30 minutes or until a toothpick comes out clean after inserting it in the middle.

Remove the Ham and Cheese Egg Muffins from the oven.

Serve and enjoy!

Notes:

Place any leftovers in an airtight container, then put them in the fridge. They can last up to 4 days or 3 months in the freezer. Reheat for a few minutes before serving again.
Feel free to line the baking pan with paper liners if you prefer.

Nutrition Facts:

Serving: 1egg muffin Calories: 120 kcal (6%) | Carbohydrates: 2.6g (1%) | Protein: 11.3g (23%) | Fat: 7g (11%) | Saturated Fat: 2.7g (17%) | Polyunsaturated Fat: 1g | Monounsaturated Fat: 2.3g | Cholesterol: 198.5mg (66%) | Sodium: 271.6mg (12%) | Potassium: 118.6mg (3%) | Sugar: 1.8g (2%) | Vitamin A: 345IU (7%) | Vitamin C: 0.5mg (1%) | Calcium: 78mg (8%) | Iron: 1mg (6%)

Ham and Cheese Egg Muffins

Rebecca Prep Time: 10 mins | Cook Time: 25 mins | Total Time: 35 mins | Yield: 12 Servings I can’t think of any reason why you shouldn’t give this recipe… General Recipes Ham and Cheese Egg Muffins European Print This
Serves: 12 Prep Time: 10 mins Cooking Time: 25 mins 25 mins
Nutrition facts: 120 calories 7 fat
Rating: 5.0/5
( 1 voted )

Ingredients

  • 1/4 tsp garlic powder
  • 8 oz. ham steak, cubed
  • 12 large Eggs
  • 1/2 tsp salt
  • 2 green onions, sliced thin
  • 1/2 c milk (I used skim)
  • 1/4 tsp black pepper
  • 3/4 c shredded cheddar cheese divided

Instructions

Prepare the oven and preheat it to 175 degrees C or 350 degrees F.

Apply cooking spray to the inside of a muffin tin.

Add milk, spices, and eggs into a large mixing bowl. Whisk everything until well blended.

Add the green onions, 1/2 cup of shredded cheddar cheese, and ham into the bowl with the egg mixture. Whisk to combine.

Fill each muffin cup with the batter.

Scatter the rest of the shredded cheese over each muffin cup.

Place the muffin pan in the preheated oven and bake the muffins for about 25 to 30 minutes or until a toothpick comes out clean after inserting it in the middle.

Remove the Ham and Cheese Egg Muffins from the oven.

Serve and enjoy!

Notes

Place any leftovers in an airtight container, then put them in the fridge. They can last up to 4 days or 3 months in the freezer. Reheat for a few minutes before serving again. Feel free to line the baking pan with paper liners if you prefer.
November 30, 2022 0 comment
0 FacebookTwitterPinterestEmail
General Recipes

SPINACH MUSHROOM AND FETA CRUSTLESS QUICHE

by Rebecca November 30, 2022
written by Rebecca

Prep Time: 15 mins | Cook Time: 50 mins | Total Time: 1 hr 5 mins | Yield: 6 Servings

You will surely eat a lot of this incredible Spinach, Mushroom and Feta Crustless Quiche and since it is low-carb, you will not feel guilty about it! Try this recipe now! You are so in for a treat. Enjoy!

Ingredients:

1/4 c grated Parmesan

1 tablespoon cooking oil, divided

8 ounces mushrooms

2 ounces of feta cheese

1 10-ounce box of frozen chopped spinach

1/4 teaspoon pepper

1/8 teaspoon salt

1 clove of garlic, minced

4 large Eggs

1/2 c shredded mozzarella

1 c milk

Directions:

Prepare the oven and preheat it to 175 degrees C or 350 degrees F.

Squeeze the thawed spinach to remove the water content. Also, mince the garlic clove.

Clean the mushrooms with running water to remove dirt, then slice each into thin cuts.

Place a skillet on the stove and turn the heat to medium. Add 1/2 tbsp of cooking oil and allow it to become hot.

Add the mushroom slices and minced garlic, then sauté for a few minutes until soft and aromatic. Sprinkle salt to season.

Apply cooking spray to the inside of a 9-inch pie plate.

Add the sauteed mushrooms/garlic to the prepared pie plate followed by the squeezed spinach, and crumbled feta. Make sure to arrange them exactly in layers.

Add the milk, Parmesan cheese, pepper, and eggs into a mixing bowl. Whisk to combine. Spread the mixture over the top layer on the pie plate.

Scatter shredded mozzarella cheese over the egg mixture layer.

Place the pie plate in the preheated oven and bake the quiche for about 50 minutes or until the cheese melts completely.

Remove from the oven and slice it into even servings.

Serve and enjoy!

Notes:

Place any leftovers in an airtight container, then put them in the fridge. Reheat for a few minutes before serving again.

Nutrition Facts:

Serving: 1 slice Calories: 187 kcal Carbohydrates: 6 g Protein: 13 g Fat: 13 g Sodium: 378 mg Fiber: 2 g

SPINACH MUSHROOM AND FETA CRUSTLESS QUICHE

Rebecca Prep Time: 15 mins | Cook Time: 50 mins | Total Time: 1 hr 5 mins | Yield: 6 Servings You will surely eat a lot of this incredible Spinach,… General Recipes SPINACH MUSHROOM AND FETA CRUSTLESS QUICHE European Print This
Serves: 6 Prep Time: 15 mins Cooking Time: 50 mins 50 mins
Nutrition facts: 187 calories 13 fat
Rating: 5.0/5
( 1 voted )

Ingredients

  • 1/4 c grated Parmesan
  • 1 tablespoon cooking oil, divided
  • 8 ounces mushrooms
  • 2 ounces of feta cheese
  • 1 10-ounce box of frozen chopped spinach
  • 1/4 teaspoon pepper
  • 1/8 teaspoon salt
  • 1 clove of garlic, minced
  • 4 large Eggs
  • 1/2 c shredded mozzarella
  • 1 c milk

Instructions

Prepare the oven and preheat it to 175 degrees C or 350 degrees F.

Squeeze the thawed spinach to remove the water content. Also, mince the garlic clove.

Clean the mushrooms with running water to remove dirt, then slice each into thin cuts.

Place a skillet on the stove and turn the heat to medium. Add 1/2 tbsp of cooking oil and allow it to become hot.

Add the mushroom slices and minced garlic, then sauté for a few minutes until soft and aromatic. Sprinkle salt to season.

Apply cooking spray to the inside of a 9-inch pie plate.

Add the sauteed mushrooms/garlic to the prepared pie plate followed by the squeezed spinach, and crumbled feta. Make sure to arrange them exactly in layers.

Add the milk, Parmesan cheese, pepper, and eggs into a mixing bowl. Whisk to combine. Spread the mixture over the top layer on the pie plate.

Scatter shredded mozzarella cheese over the egg mixture layer.

Place the pie plate in the preheated oven and bake the quiche for about 50 minutes or until the cheese melts completely.

Remove from the oven and slice it into even servings.

Serve and enjoy!

Notes

Place any leftovers in an airtight container, then put them in the fridge. Reheat for a few minutes before serving again.
November 30, 2022 0 comment
0 FacebookTwitterPinterestEmail
Newer Posts
Older Posts

Popular Posts

  • 1

    Crispy Crunchy Parmesan Potatoes

    March 21, 2020
  • 2

    CROCK POT SMOTHERED PORK CHOPS

    March 21, 2020
  • Facebook
  • Twitter

@2019 - All Right Reserved.


Back To Top