Cook it once
  • Home
  • Privacy Policy
  • Recipes
    • KETO
    • LC
    • WW
  • Tips
  • Contact
Cook it once
  • Home
  • Privacy Policy
  • Recipes
    • KETO
    • LC
    • WW
  • Tips
  • Contact
Category:

General Recipes

General Recipes

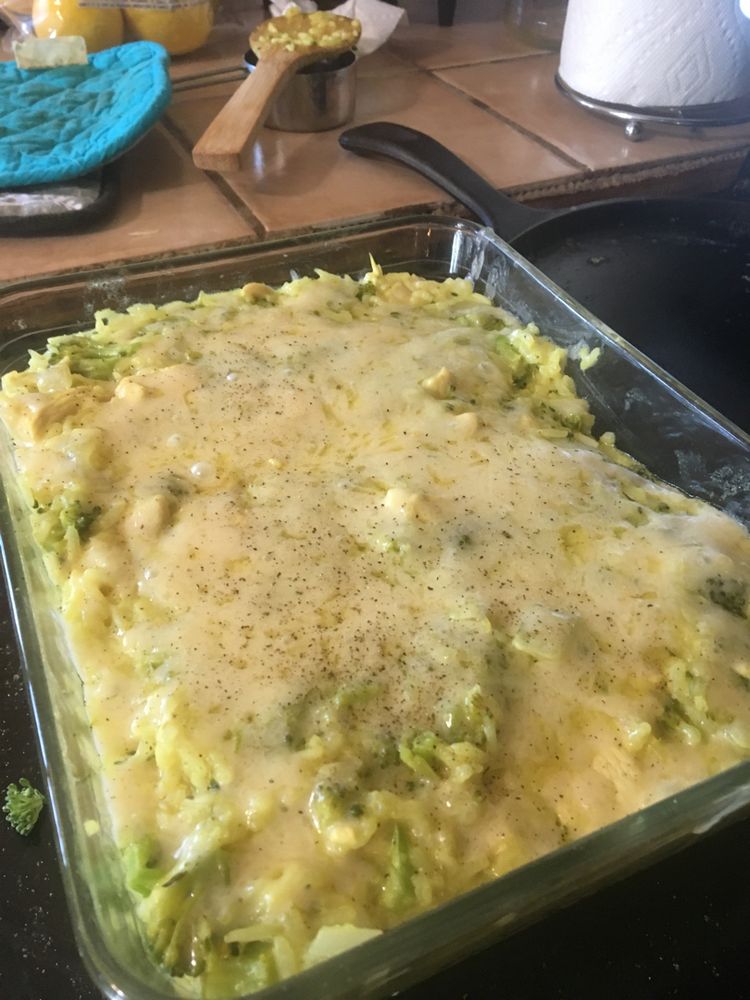
One Pot Broccoli, Chicken and Rice Casserole

by Rebecca August 24, 2022
written by Rebecca

Prep time: 10 mins | Cook time: 20 mins | Total time: 30 mins | Servings: 5

This broccoli, chicken, and rice casserole are a complete meal that you can easily make in one pot! Filling, very comforting, and tastes like our favorite risotto.

Ingredients

1 onion, finely chopped

2 garlic cloves, minced

2 tablespoons (30 grams) of unsalted butter

1 tablespoon olive oil

500 grams (1 pound) chicken thigh, cut into bite-size pieces

2 c. (500 ml) milk (any, I use low fat)

2.5 tablespoons flour (or 1 ½ tablespoon cornflour/cornstarch)

2 c. (500 ml) chicken broth

1 1/4 c. (225 grams) long grain white rice, uncooked

2 c. (200 grams) shredded mozzarella or cheddar (or other cheese of choice)

1 large head of broccoli, broken/cut into small florets (400-500 grams/14 ounces – 1 pound)

Finely chopped parsley, optional garnish

1 teaspoon dried thyme (or your preferred herb)

Salt and pepper

How to make One Pot Broccoli, Chicken and Rice Casserole

Step 1: In a pot, heat the butter and oil over high heat. Once the butter has melted, add the onion and garlic to the pan and cook for about a minute. Then, add the chicken and continue to cook until white. Adjust the heat to medium and stir in the flour for 1 minute.

Step 2: To the pan, pour in half of the milk, stirring constantly until blended. Add the remaining milk and stir well. Next, add the broth along with the rice and thyme. Season with salt and pepper. Stir well and bring everything to a boil. Put the lid on. Adjust the heat to medium-low and continue to cook for additional 12 minutes.

Step 3: Take the lid off, then add the broccoli, pushing them down so they are partly submerged. Replace the lid and cook for another 3 minutes or until the broccoli is just cooked.

Step 4: Prepare the grill/broiler.

Step 5: To the pan, stir in half of the cheese. Then, smooth the surface and sprinkle the rest of the cheese on top. Place in the broiler/grill until the cheese has melted. Alternately, you can simply cover the pan and let the cheese melt with the stove off.

Step 6: Serve the casserole right away. If desired, garnish with parsley. Enjoy!

Notes:

I prefer chicken thighs for this recipe. Ground meat is amazing, too!

The ideal rice for this recipe is long and medium grain rice as they are less sticky. You can also use basmati and jasmine rice. If using brown rice, the cooking time is around 40 minutes over low heat. Right at the end, add the broccoli. You might need to add a little extra water. You can also try quinoa, cauliflower rice, or any non-rice alternatives.

If using frozen broccoli, thaw them first and drain all the excess liquid.

For this recipe, you can use any melting cheese.

Do not cook the chicken all the way through, just get some color on them.

You can make this casserole in advance. Stop after stirring in the cheese. Then, put the lid on and allow the casserole to cool. Once cooled, sprinkle the cheese on top and place it in the fridge. To reheat, pop in the microwave until the cheese has melted.

NUTRITION FACTS:

Serving: 524g, Calories: 576cal (29%) | Carbohydrates: 47g (16%) | Protein: 32g (64%) | Fat: 28g (43%) | Saturated Fat: 11g (69%) | Cholesterol: 120mg (40%) | Sodium: 392mg (17%) | Potassium: 785mg (22%) | Fiber: 3g (13%) | Sugar: 7g (8%) | Vitamin A: 1205IU (24%) | Vitamin C: 92.1mg (112%) | Calcium: 362mg (36%) | Iron: 2.1mg (12%)
One Pot Broccoli, Chicken and Rice Casserole

Rebecca Prep time: 10 mins | Cook time: 20 mins | Total time: 30 mins | Servings: 5 This broccoli, chicken, and rice casserole are a complete meal that you can… General Recipes One Pot Broccoli, Chicken and Rice Casserole European Print This
Serves: 5 Prep Time: 10 mins Cooking Time: 20 mins 20 mins
Nutrition facts: 576 calories 28 fat
Rating: 5.0/5
( 1 voted )

Ingredients

  • 1 onion, finely chopped
  • 2 garlic cloves, minced
  • 2 tablespoons (30 grams) of unsalted butter
  • 1 tablespoon olive oil
  • 500 grams (1 pound) chicken thigh, cut into bite-size pieces
  • 2 c. (500 ml) milk (any, I use low fat)
  • 2.5 tablespoons flour (or 1 ½ tablespoon cornflour/cornstarch)
  • 2 c. (500 ml) chicken broth
  • 1 1/4 c. (225 grams) long grain white rice, uncooked
  • 2 c. (200 grams) shredded mozzarella or cheddar (or other cheese of choice)
  • 1 large head of broccoli, broken/cut into small florets (400-500 grams/14 ounces - 1 pound)
  • Finely chopped parsley, optional garnish
  • 1 teaspoon dried thyme (or your preferred herb)
  • Salt and pepper

Instructions

Step 1: In a pot, heat the butter and oil over high heat. Once the butter has melted, add the onion and garlic to the pan and cook for about a minute. Then, add the chicken and continue to cook until white. Adjust the heat to medium and stir in the flour for 1 minute.

Step 2: To the pan, pour in half of the milk, stirring constantly until blended. Add the remaining milk and stir well. Next, add the broth along with the rice and thyme. Season with salt and pepper. Stir well and bring everything to a boil. Put the lid on. Adjust the heat to medium-low and continue to cook for additional 12 minutes.

Step 3: Take the lid off, then add the broccoli, pushing them down so they are partly submerged. Replace the lid and cook for another 3 minutes or until the broccoli is just cooked.

Step 4: Prepare the grill/broiler.

Step 5: To the pan, stir in half of the cheese. Then, smooth the surface and sprinkle the rest of the cheese on top. Place in the broiler/grill until the cheese has melted. Alternately, you can simply cover the pan and let the cheese melt with the stove off.

Step 6: Serve the casserole right away. If desired, garnish with parsley. Enjoy!

Notes

I prefer chicken thighs for this recipe. Ground meat is amazing, too! The ideal rice for this recipe is long and medium grain rice as they are less sticky. You can also use basmati and jasmine rice. If using brown rice, the cooking time is around 40 minutes over low heat. Right at the end, add the broccoli. You might need to add a little extra water. You can also try quinoa, cauliflower rice, or any non-rice alternatives. If using frozen broccoli, thaw them first and drain all the excess liquid. For this recipe, you can use any melting cheese. Do not cook the chicken all the way through, just get some color on them. You can make this casserole in advance. Stop after stirring in the cheese. Then, put the lid on and allow the casserole to cool. Once cooled, sprinkle the cheese on top and place it in the fridge. To reheat, pop in the microwave until the cheese has melted.
August 24, 2022 0 comment
0 FacebookTwitterPinterestEmail
General Recipes

Slow Cooker Chicken Casserole

by Rebecca August 24, 2022
written by Rebecca

PREP TIME: 20 mins | COOK TIME: 8 hrs | TOTAL TIME: 8 hrs 20 mins | SERVINGS: 6

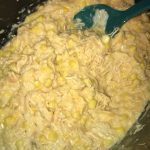
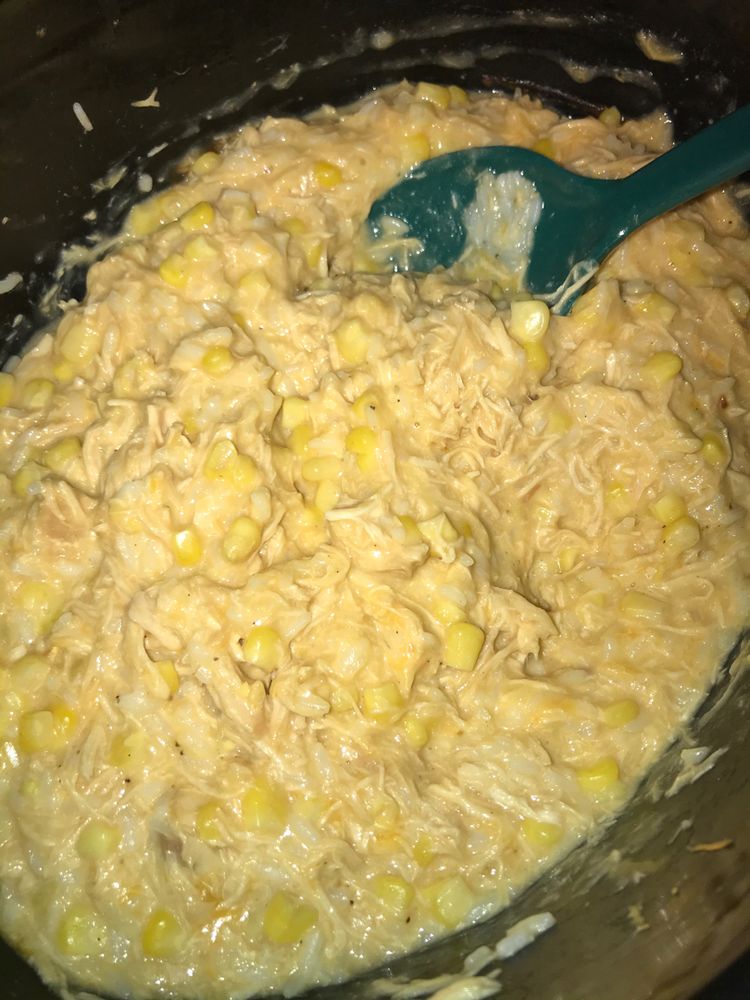
This Slow Cooker Corn Chicken Casserole is an amazing casserole recipe that is cheesy, warm, and incredibly delicious. And this casserole has been one of my family’s favorites for years! To make this casserole you do not need an oven. I know! This recipe is not your usual casserole recipe. It is easily made in the crockpot and comes out great all the time! This recipe is the very first casserole recipe I’ve made in my slow cooker. I love this slow cooker corn chicken casserole as it can be prep ahead for an easy weeknight dinner. I guess everyone will agree that nothing beats coming home with this cheesy, warm, and scrumptious bowl of corn chicken casserole!

I mostly whip up a big batch of this corn chicken casserole, enough to feed the entire town! I know it is crazy, but we love leftovers of this casserole, too. This can be kept in the fridge and this casserole freezes well, too! Because of everyone’s busy schedule, nothing compares to slow cooker meals. All you need is to dump everything in the slow cooker and walk away. For this recipe, you can also use pre-cooked chicken. It will reduce the cooking time down to 6 to 7 hours. Just shred the chicken and cook as directed.

Ingredients

1 medium yellow onion, chopped

4 boneless, skinless chicken breasts

1 can (10.5 oz.) cream of chicken soup

1 c. cooked rice

1 ½ c. chicken stock

2 c. cheddar cheese, shredded

fresh chopped parsley, to garnish

1 can (15 oz.) corn kernels, drained

How to make Slow Cooker Chicken Casserole

Step 1: Add the chicken breasts to the bowl of a slow cooker and sprinkle with the onion.

Step 2: Place the soup and stock in a medium bowl. Mix well until combined and pour this over the chicken. Set to cook for 8 hours on low.

Step 3: Take the chicken out of the slow cooker when done and shred using two forks. Return the shredded chicken into the slow cooker. Add the rice, cheese, and corn. Mix well. Before serving, garnish with parsley. Enjoy!

Slow Cooker Chicken Casserole

Rebecca PREP TIME: 20 mins | COOK TIME: 8 hrs | TOTAL TIME: 8 hrs 20 mins | SERVINGS: 6 This Slow Cooker Corn Chicken Casserole is an amazing casserole recipe… General Recipes Slow Cooker Chicken Casserole European Print This
Serves: 6 Prep Time: 20 mins Cooking Time: 8 hrs 8 hrs
Nutrition facts: 200 calories 20 grams fat
Rating: 5.0/5
( 1 voted )

Ingredients

  • 1 medium yellow onion, chopped
  • 4 boneless, skinless chicken breasts
  • 1 can (10.5 oz.) cream of chicken soup
  • 1 c. cooked rice
  • 1 ½ c. chicken stock
  • 2 c. cheddar cheese, shredded
  • fresh chopped parsley, to garnish
  • 1 can (15 oz.) corn kernels, drained

Instructions

Step 1: Add the chicken breasts to the bowl of a slow cooker and sprinkle with the onion.

Step 2: Place the soup and stock in a medium bowl. Mix well until combined and pour this over the chicken. Set to cook for 8 hours on low.

Step 3: Take the chicken out of the slow cooker when done and shred using two forks. Return the shredded chicken into the slow cooker. Add the rice, cheese, and corn. Mix well. Before serving, garnish with parsley. Enjoy!

August 24, 2022 0 comment
0 FacebookTwitterPinterestEmail
General Recipes

Easy Pineapple Stuffing Recipe

by Rebecca August 23, 2022
written by Rebecca

COOK TIME: 35 mins

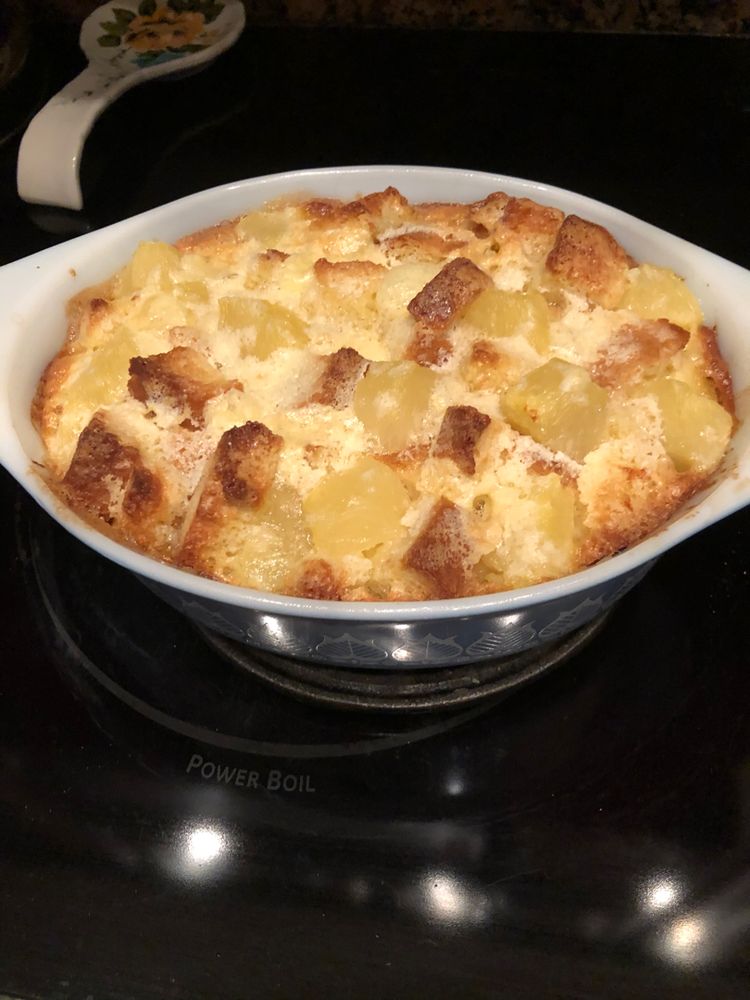
If you are searching for an easy, quick, and convenient recipe to try, then you have to give this easy pineapple stuffing casserole a try. Make this using just five simple ingredients in under thirty minutes and serve this either hot or cold. This casserole is also an amazing addition to any buffet.

Pineapple lovers will fall deep over this pineapple stuffing casserole. This casserole is almost like a dessert. It is incredibly delicious and fabulous. Although, I am not quite sure why it is named pineapple stuffing. Maybe because the main ingredient is bread, but “stuffing” Definitely doesn’t do this casserole justice. But who cares about the name when all it matters is the taste?

This pineapple stuffing casserole is one of the most requested on holidays or special occasions. It is excellent to serve brunch, lunch, or dinner. A superb side dish that everyone will surely ask for over and over again!

I have shared this easy pineapple stuffing casserole recipe with my family and some of my closest friends. They all loved it and can only say amazing things about this casserole.

INGREDIENTS

4 large Eggs

1 large can of Crushed Pineapple drained

1 c. Granulated Sugar

5 Slices of White Bread, cubed

1 stick Butter

How to make Easy Pineapple Stuffing

Step 1: Place the butter and sugar in a large bowl. Cream using a mixer. Then, add the eggs, one at a time, beating well every after each addition.

Step 2: Into half-inch cubes, cut the bread. To the large bowl, add the bread along with the drained pineapple. Mix well until combined.

Step 3: Into a greased baking dish, pour the mixture. Place in the oven and bake for about 40 minutes at 350 degrees until the top is lightly browned.

Step 4: Remove from the oven when done and serve this pineapple stuffing hot or cold. Enjoy!

Easy Pineapple Stuffing Recipe

Rebecca COOK TIME: 35 mins If you are searching for an easy, quick, and convenient recipe to try, then you have to give this easy pineapple stuffing casserole a try. Make… General Recipes Easy Pineapple Stuffing Recipe European Print This
Cooking Time: 35 mins 35 mins
Nutrition facts: 200 calories 20 grams fat
Rating: 5.0/5
( 1 voted )

Ingredients

  • 4 large Eggs
  • 1 large can of Crushed Pineapple drained
  • 1 c. Granulated Sugar
  • 5 Slices of White Bread, cubed
  • 1 stick Butter

Instructions

Step 1: Place the butter and sugar in a large bowl. Cream using a mixer. Then, add the eggs, one at a time, beating well every after each addition.

Step 2: Into half-inch cubes, cut the bread. To the large bowl, add the bread along with the drained pineapple. Mix well until combined.

Step 3: Into a greased baking dish, pour the mixture. Place in the oven and bake for about 40 minutes at 350 degrees until the top is lightly browned.

Step 4: Remove from the oven when done and serve this pineapple stuffing hot or cold. Enjoy!

August 23, 2022 0 comment
0 FacebookTwitterPinterestEmail
General Recipes

SOUTHERN VIDALIA ONION CASSEROLE

by Rebecca August 23, 2022
written by Rebecca

PREP TIME: 20 mins | COOK TIME: 55 mins | TOTAL TIME: 75 mins | YIELD: About 8-10 servings

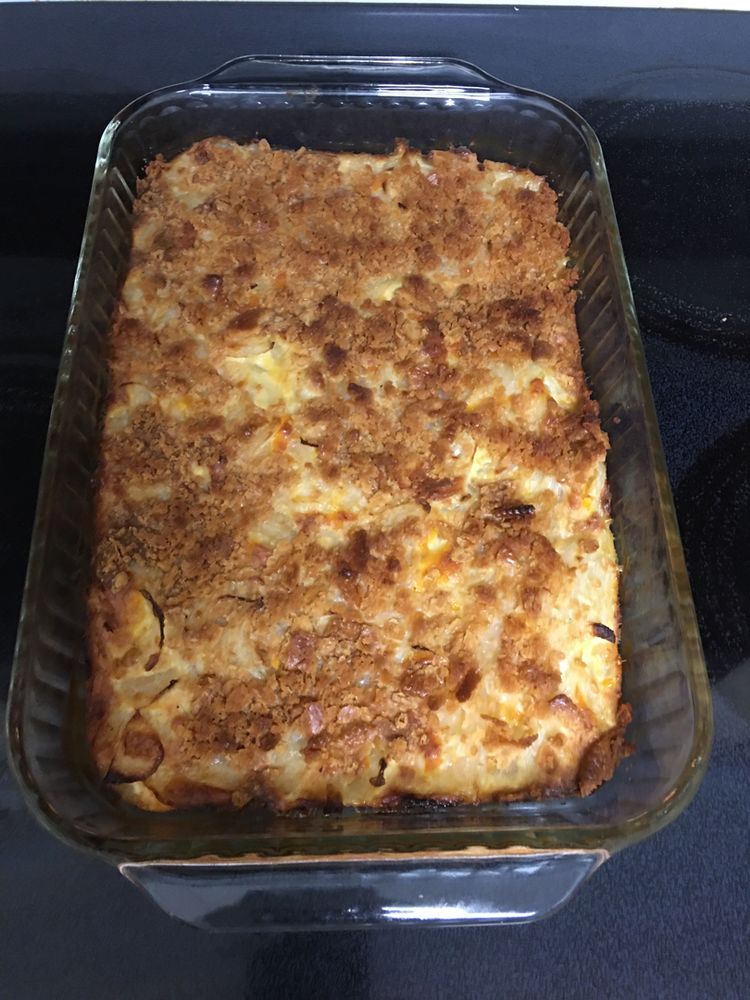
This Southern casserole is the ultimate casserole! It is cheesy, creamy, and packed with sweet onion flavor. This Southern Vidalia Onion Casserole is a perfect pair with pork chops, steak, ham, or burgers.

INGREDIENTS

Casserole Filling:

3 eggs

4 large Vidalia onions

2 tablespoons unsalted butter

1/2 teaspoon salt

1 (5 ounces) can evaporated milk

1 1/2 cup (6 ounces) shredded cheddar cheese

1/8 teaspoon Pepper

1 cup crumbled Ritz crackers

Crumb Topping:

3 tablespoons unsalted butter, melted

1 cup crumbled Ritz crackers

HOW TO MAKE SOUTHERN VIDALIA ONION CASSEROLE

Casserole Filling:

Step 1: After slicing the root off and stem end of the onions, slice the onions in half beginning from the top to bottom. Then, take the outer skins off. On a cutting board, place the onion halves cut-side-down. Into about 1/4 to 1/2-inch slivers, chop the onion halves.

Step 2: In a saucepan, place the onions and pour in enough water to just cover the onions. Bring to a boil, then decrease the heat. Let it simmer for about 8 minutes. Then, drain well.

Step 3: Next, toss the warm onions in 2 tbsp butter.

Step 4: In the meantime, place the eggs and evaporated milk in a large bowl. Beat well. Add the warmed onions along with the cracker crumbs, shredded cheese, salt, and pepper. Mix well.

Step 5: In a greased 9 x 13-inch baking dish, place the onion mixture.

Step 6: Mix the cracker crumbs with melted butter and evenly sprinkle the crumb topping over the casserole.

Step 7: Place in the oven and bake for about 45 minutes at 375 degrees until the center is set and golden brown.

NOTES:

For this recipe, you can swap the Vidalias with Walla Walla or Texas Spring.

If you do not mind a more pungent onion flavor, you can just use regular yellow onions as well. Keep in mind that this casserole won’t be as mild.

SOUTHERN VIDALIA ONION CASSEROLE

Rebecca PREP TIME: 20 mins | COOK TIME: 55 mins | TOTAL TIME: 75 mins | YIELD: About 8-10 servings This Southern casserole is the ultimate casserole! It is cheesy, creamy,… General Recipes SOUTHERN VIDALIA ONION CASSEROLE European Print This
Serves: 8-10 Prep Time: 20 mins Cooking Time: 55 mins 55 mins
Nutrition facts: 200 calories 20 grams fat
Rating: 5.0/5
( 1 voted )

Ingredients

  • Casserole Filling:
  • 3 eggs
  • 4 large Vidalia onions
  • 2 tablespoons unsalted butter
  • 1/2 teaspoon salt
  • 1 (5 ounces) can evaporated milk
  • 1 1/2 cup (6 ounces) shredded cheddar cheese
  • 1/8 teaspoon Pepper
  • 1 cup crumbled Ritz crackers
  • Crumb Topping:
  • 3 tablespoons unsalted butter, melted
  • 1 cup crumbled Ritz crackers

Instructions

Casserole Filling:

Step 1: After slicing the root off and stem end of the onions, slice the onions in half beginning from the top to bottom. Then, take the outer skins off. On a cutting board, place the onion halves cut-side-down. Into about 1/4 to 1/2-inch slivers, chop the onion halves.

Step 2: In a saucepan, place the onions and pour in enough water to just cover the onions. Bring to a boil, then decrease the heat. Let it simmer for about 8 minutes. Then, drain well.

Step 3: Next, toss the warm onions in 2 tbsp butter.

Step 4: In the meantime, place the eggs and evaporated milk in a large bowl. Beat well. Add the warmed onions along with the cracker crumbs, shredded cheese, salt, and pepper. Mix well.

Step 5: In a greased 9 x 13-inch baking dish, place the onion mixture.

Step 6: Mix the cracker crumbs with melted butter and evenly sprinkle the crumb topping over the casserole.

Step 7: Place in the oven and bake for about 45 minutes at 375 degrees until the center is set and golden brown.

August 23, 2022 0 comment
0 FacebookTwitterPinterestEmail
General Recipes

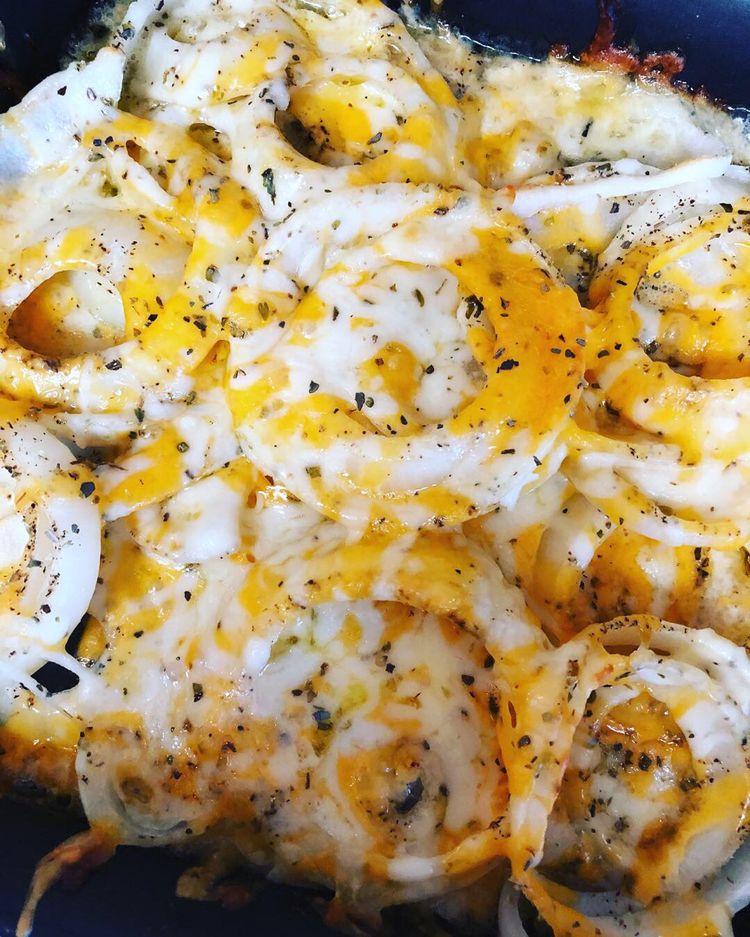
Tennessee Onions

by Rebecca August 23, 2022
written by Rebecca

Prep Time: 5 mins | Cook Time: 30 mins | Total Time: 35 mins | Servings: 8

These Tennessee Onions are the best side dish for cookouts. Serve this baked Vidalia Onions with Cheese, Butter, and Herbs over steaks or hamburgers for the best weeknight dinner any time!

Ingredients

4 tablespoons stick of unsalted butter

½ c. Parmesan cheese

1 c. sharp cheddar cheese the better quality, the better taste

1 c. mozzarella Cheese

2-3 whole Vidalia onions or any sweet onion

Fresh oregano or other herbs for garnish

Garlic salt to taste

Pepper to taste

How to make Tennessee Onions

Step 1: Prepare the oven. Preheat it to 350 degrees. Grease a 9 x 13-inch baking dish using a non-stick cooking spray.

Step 2: In 1/4 to 1/2-inch thickness, slice the Vidalia onions and separate the rings.

Step 3: In the prepared baking dish, lay the rings and sprinkle with about 1 tsp garlic salt and 1/2 tsp pepper.

Step 4: Into pats, cut the butter and put them on top of the onions. Over the onions, spread the cheddar, and mozzarella cheese, followed by the grated Parmesan cheese.

Step 5: Place in the preheated oven and bake for about 30 minutes or until bubbly and the cheese has begun to brown.

Step 6: Take the Tennessee Onions out of the oven and let it cool for a couple of minutes. Before serving, garnish with some fresh herbs such as oregano, chives, and thyme. Enjoy!

Notes:

Pair these Tennessee Onions with hamburgers, steaks, or as a side at your crockpot. Serve this as a burger option for a vegetarian variety.

In even thickness, slice the sweet onions to about half an inch in thickness, then separate the rings.

For this recipe, any sweet onion will do. But I highly recommend Vidalia Onions.

Once baked, these Tennessee Onions will have an amazing cheesy topping.

For best results, use the best quality cheese.

Taste before adding salt as the cheese and garlic already have salt on them.

Nutrition Facts:

Amount Per Serving: Calories 150, Calories from Fat 81, Fat 9g14%, Saturated Fat 5g25%, Cholesterol 30mg10%, Sodium 282mg12%, Potassium 128mg4%, Carbohydrates 6g2%, Sugar 4g4%, Protein 9g18%, Vitamin A 285IU6%, Vitamin C 4mg5%, Calcium 263mg26%, Iron 0.4mg2%

Tennessee Onions

Rebecca Prep Time: 5 mins | Cook Time: 30 mins | Total Time: 35 mins | Servings: 8 These Tennessee Onions are the best side dish for cookouts. Serve this baked… General Recipes Tennessee Onions European Print This
Serves: 8 Prep Time: 5 mins Cooking Time: 30 mins 30 mins
Nutrition facts: 150 calories 9 fat
Rating: 5.0/5
( 1 voted )

Ingredients

  • 4 tablespoons stick of unsalted butter
  • ½ c. Parmesan cheese
  • 1 c. sharp cheddar cheese the better quality, the better taste
  • 1 c. mozzarella Cheese
  • 2-3 whole Vidalia onions or any sweet onion
  • Fresh oregano or other herbs for garnish
  • Garlic salt to taste
  • Pepper to taste

Instructions

Step 1: Prepare the oven. Preheat it to 350 degrees. Grease a 9 x 13-inch baking dish using a non-stick cooking spray.

Step 2: In 1/4 to 1/2-inch thickness, slice the Vidalia onions and separate the rings.

Step 3: In the prepared baking dish, lay the rings and sprinkle with about 1 tsp garlic salt and 1/2 tsp pepper.

Step 4: Into pats, cut the butter and put them on top of the onions. Over the onions, spread the cheddar, and mozzarella cheese, followed by the grated Parmesan cheese.

Step 5: Place in the preheated oven and bake for about 30 minutes or until bubbly and the cheese has begun to brown.

Step 6: Take the Tennessee Onions out of the oven and let it cool for a couple of minutes. Before serving, garnish with some fresh herbs such as oregano, chives, and thyme. Enjoy!

Notes

Pair these Tennessee Onions with hamburgers, steaks, or as a side at your crockpot. Serve this as a burger option for a vegetarian variety. In even thickness, slice the sweet onions to about half an inch in thickness, then separate the rings. For this recipe, any sweet onion will do. But I highly recommend Vidalia Onions. Once baked, these Tennessee Onions will have an amazing cheesy topping. For best results, use the best quality cheese. Taste before adding salt as the cheese and garlic already have salt on them.

August 23, 2022 0 comment
0 FacebookTwitterPinterestEmail
General Recipes

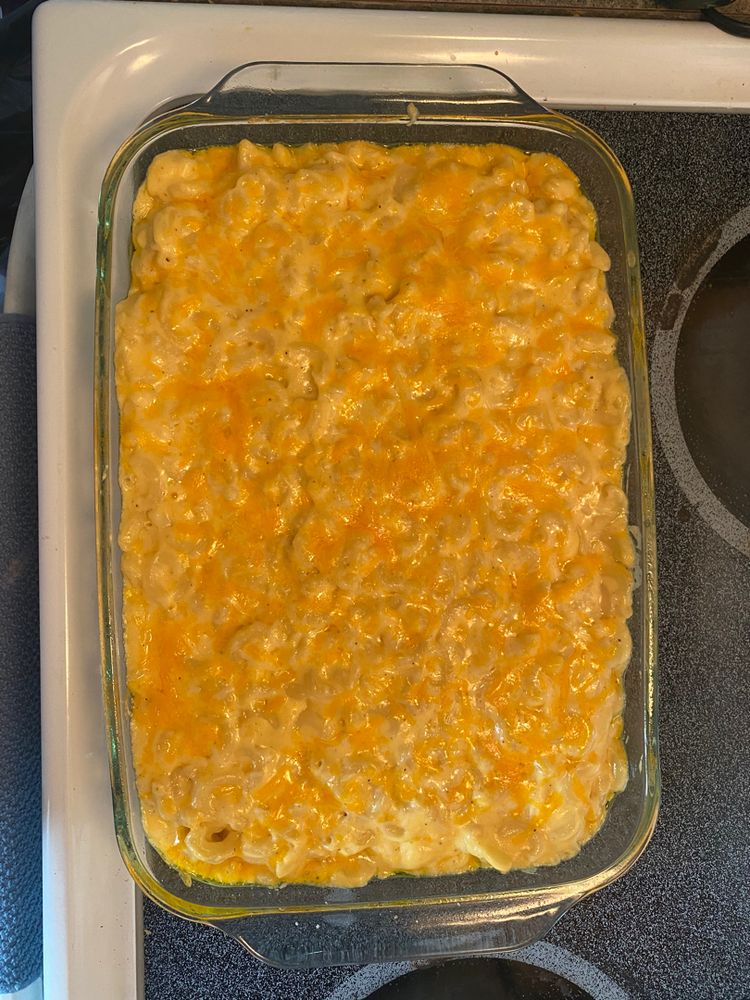
Creamy Homemade Baked Mac and Cheese

by Rebecca August 23, 2022
written by Rebecca

Prep Time: 20 mins | Cook Time: 15 mins | Total Time: 35 mins | Servings: 8

This creamy baked mac and cheese is an amazing dish with layers of goodness. Very comforting, rich, absolutely cream, and the perfect weeknight meal or side dish for the holiday.

Ingredients

1/2 c. unsalted butter

1 pound dried elbow pasta

1/2 c. all-purpose flour

2 1/2 c. half and half

4 c. shredded medium sharp cheddar cheese, divided (measured after shredding)

1 1/2 c. whole milk

2 c. shredded Gruyere cheese, divided (measured after shredding)

1/4 teaspoon Paprika

1/2 tablespoon salt

1/2 teaspoon black pepper

How to make Creamy Homemade Baked Mac and Cheese

Step 1: Prepare the oven. Preheat it to 325 degrees F. Ready a 3-quart or 9 x 13-inch baking dish. Grease and set aside.

Step 2: A minute less than the package directions, cook the dried pasta until al dente. Drain when done and drizzle with a bit of olive oil.

Step 3: In the meantime, mix the shredded cheeses and divide them into three piles; about 3 c. for the sauce, 1 1/2 c. for the inner layer, and 1 1/2 c for the topping.

Step 4: In a large saucepan, melt the butter over medium heat. To the melted butter, whisk in the flour until blended and you have a mixture that resembles very wet sand. Cook for about a minute, stirring occasionally. Then, gradually pour in about 2 cups of milk/half-and-half until smooth, stirring constantly. Next, gradually pour in the rest of the milk/half-and-half until blended and smooth, stirring regularly.

Step 5: Heat further over medium heat until the mixture has a very thick consistency, stirring occasionally.

Step 6: Take the pan off the heat and whisk in the spices and 1 1/2 c of the cheese, stirring until blended. Add in an additional 1 1/2 c of cheese, stirring until smooth and blended.

Step 7: Place the drained pasta and cheese sauce in a large mixing bowl. Toss well. Into the prepared baking dish, pour half of the mixture and top with 1 1/2 c of shredded cheese. On top, add the rest of the pasta mixture and sprinkle with the rest of the 1 1/2 c of cheese.

Step 8: Place in the preheated oven and bake for about 15 minutes or until the cheese is bubbly and lightly golden brown.

Tips:

Shred a 16-ounce block of cheddar to make 4 c of cheddar.

Use close to 8 ounces of Gruyere and shred to make 2 c. Gruyere.

To make ahead:

Prep as instructed, but do not bake. Place in a baking dish and let the mixture cool completely. Using foil, tightly cover the baking dish and keep it in the fridge for 1 to 2 days.

Remove from the fridge and let the dish sit on the counter for 30 minutes before baking.

Place in the oven and bake for about 25 to 35 minutes until hot and bubbly.

FIVE CHEESE VARIATIONS:

You can swap the cheese amounts with the following:

1 c. Colby cheese, shredded

1 c. Muenster cheese, shredded

2 c. cheddar cheese, shredded

1/2 c. mozzarella cheese, shredded

1 1/2 c. Gruyere cheese, shredded

CRUNCHIER TOPPING AND FIRMER CONSISTENCY:

As directed, prep the recipe and bake for 20 to 30 minutes at 350 or 375 degrees F. At the end of baking, broil for about 2 to 3 minutes until crunchy and golden brown.

Creamy Homemade Baked Mac and Cheese

Rebecca Prep Time: 20 mins | Cook Time: 15 mins | Total Time: 35 mins | Servings: 8 This creamy baked mac and cheese is an amazing dish with layers of… General Recipes Creamy Homemade Baked Mac and Cheese European Print This
Serves: 8 Prep Time: 20 mins Cooking Time: 15 mins 15 mins
Nutrition facts: 200 calories 20 grams fat
Rating: 5.0/5
( 1 voted )

Ingredients

  • 1/2 c. unsalted butter
  • 1 pound dried elbow pasta
  • 1/2 c. all-purpose flour
  • 2 1/2 c. half and half
  • 4 c. shredded medium sharp cheddar cheese, divided (measured after shredding)
  • 1 1/2 c. whole milk
  • 2 c. shredded Gruyere cheese, divided (measured after shredding)
  • 1/4 teaspoon Paprika
  • 1/2 tablespoon salt
  • 1/2 teaspoon black pepper

Instructions

Step 1: Prepare the oven. Preheat it to 325 degrees F. Ready a 3-quart or 9 x 13-inch baking dish. Grease and set aside.

Step 2: A minute less than the package directions, cook the dried pasta until al dente. Drain when done and drizzle with a bit of olive oil.

Step 3: In the meantime, mix the shredded cheeses and divide them into three piles; about 3 c. for the sauce, 1 1/2 c. for the inner layer, and 1 1/2 c for the topping.

Step 4: In a large saucepan, melt the butter over medium heat. To the melted butter, whisk in the flour until blended and you have a mixture that resembles very wet sand. Cook for about a minute, stirring occasionally. Then, gradually pour in about 2 cups of milk/half-and-half until smooth, stirring constantly. Next, gradually pour in the rest of the milk/half-and-half until blended and smooth, stirring regularly.

Step 5: Heat further over medium heat until the mixture has a very thick consistency, stirring occasionally.

Step 6: Take the pan off the heat and whisk in the spices and 1 1/2 c of the cheese, stirring until blended. Add in an additional 1 1/2 c of cheese, stirring until smooth and blended.

Step 7: Place the drained pasta and cheese sauce in a large mixing bowl. Toss well. Into the prepared baking dish, pour half of the mixture and top with 1 1/2 c of shredded cheese. On top, add the rest of the pasta mixture and sprinkle with the rest of the 1 1/2 c of cheese.

Step 8: Place in the preheated oven and bake for about 15 minutes or until the cheese is bubbly and lightly golden brown.

Notes

Shred a 16-ounce block of cheddar to make 4 c of cheddar. Use close to 8 ounces of Gruyere and shred to make 2 c. Gruyere. To make ahead: Prep as instructed, but do not bake. Place in a baking dish and let the mixture cool completely. Using foil, tightly cover the baking dish and keep it in the fridge for 1 to 2 days. Remove from the fridge and let the dish sit on the counter for 30 minutes before baking. Place in the oven and bake for about 25 to 35 minutes until hot and bubbly. FIVE CHEESE VARIATIONS: You can swap the cheese amounts with the following: 1 c. Colby cheese, shredded 1 c. Muenster cheese, shredded 2 c. cheddar cheese, shredded 1/2 c. mozzarella cheese, shredded 1 1/2 c. Gruyere cheese, shredded CRUNCHIER TOPPING AND FIRMER CONSISTENCY: As directed, prep the recipe and bake for 20 to 30 minutes at 350 or 375 degrees F. At the end of baking, broil for about 2 to 3 minutes until crunchy and golden brown.

August 23, 2022 0 comment
0 FacebookTwitterPinterestEmail
General Recipes

Pan-Roasted Chicken Thighs

by Rebecca August 23, 2022
written by Rebecca

Prep Time: 30 mins | Cooking Time: 25 mins | Servings: 4

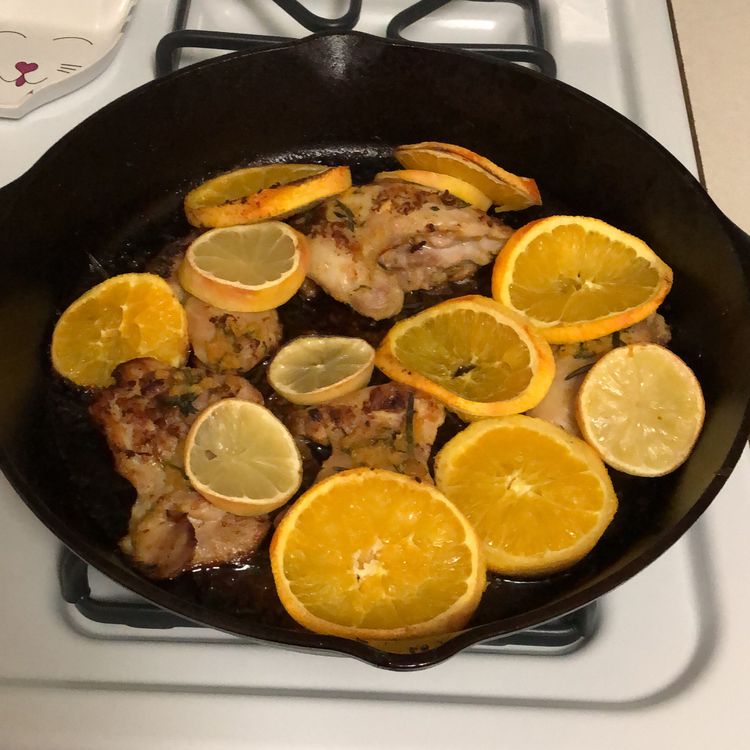
Pan-Roasted Chicken Thighs. This has been one of my family’s favorites for years! Incredibly easy and quick to make and requires only a few simple ingredients. This recipe guarantees juicy chicken thighs that are bursting with flavors! If you are looking for another chicken recipe that you can throw together easily, any time, and is great enough to serve to guests, then you have to give this Pan-Roasted Chicken Thighs recipe a try. This will surely become your new favorite!

Ingredients

3 tbsp of unsalted butter, softened

4 chicken thighs, with bone and skin

Zest of 1 lemon

1 lemon, sliced

Zest of 1 small orange

1 small orange, sliced

3 tbsp of fresh rosemary and thyme, mixed and minced

Canola oil for skillet

Salt and pepper, to taste

How to make Pan-Roasted Chicken Thighs

Step 1: Prepare the oven. Preheat it to 375 degrees F.

Step 2: Place the butter, minced herbs, garlic powder, lemon zest, orange zest, and a little salt and pepper in a small bowl. Mix well until combined.

Step 3: Using paper towels, completely dry the thighs.

Step 4: Lift the thighs, skin. In between the skin and flesh, spread the herb butter mixture. To taste, season all sides with salt and pepper.

Step 5: Heat some of the canola oil in a cast-iron skillet over medium-high heat. Once the oil is hot, place the thighs, skin-side-down on the skillet and cook for about 10 minutes until the skin is golden brown and crispy. Flip the thighs. Around it, arrange the citrus slices.

Step 6: Place the cast-iron skillet in the preheated oven and bake the chicken thighs for about 20 to 25 minutes or until the juices run clear and the meat is completely cooked.

Step 7: Remove from the oven when done and serve these pan-roasted chicken thighs right away with your favorite sides. Enjoy!

Pan-Roasted Chicken Thighs

Rebecca Prep Time: 30 mins | Cooking Time: 25 mins | Servings: 4 Pan-Roasted Chicken Thighs. This has been one of my family’s favorites for years! Incredibly easy and quick to… General Recipes Pan-Roasted Chicken Thighs European Print This
Serves: 4 Prep Time: 30 mins Cooking Time: 25 mins 25 mins
Nutrition facts: 200 calories 20 grams fat
Rating: 5.0/5
( 1 voted )

Ingredients

  • 3 tbsp of unsalted butter, softened
  • 4 chicken thighs, with bone and skin
  • Zest of 1 lemon
  • 1 lemon, sliced
  • Zest of 1 small orange
  • 1 small orange, sliced
  • 3 tbsp of fresh rosemary and thyme, mixed and minced
  • Canola oil for skillet
  • Salt and pepper, to taste

Instructions

Step 1: Prepare the oven. Preheat it to 375 degrees F.

Step 2: Place the butter, minced herbs, garlic powder, lemon zest, orange zest, and a little salt and pepper in a small bowl. Mix well until combined.

Step 3: Using paper towels, completely dry the thighs.

Step 4: Lift the thighs, skin. In between the skin and flesh, spread the herb butter mixture. To taste, season all sides with salt and pepper.

Step 5: Heat some of the canola oil in a cast-iron skillet over medium-high heat. Once the oil is hot, place the thighs, skin-side-down on the skillet and cook for about 10 minutes until the skin is golden brown and crispy. Flip the thighs. Around it, arrange the citrus slices.

Step 6: Place the cast-iron skillet in the preheated oven and bake the chicken thighs for about 20 to 25 minutes or until the juices run clear and the meat is completely cooked.

Step 7: Remove from the oven when done and serve these pan-roasted chicken thighs right away with your favorite sides. Enjoy!

August 23, 2022 0 comment
0 FacebookTwitterPinterestEmail
General Recipes

Roast Duck Recipe

by Rebecca August 23, 2022
written by Rebecca

PREP TIME: 20 mins | COOK TIME: 3 hrs | TOTAL TIME: 3 hrs 20 mins | SERVINGS: 6 people

This step-by-step detailed recipe to make a Roast Duck in the oven guarantees excellent result. Juicy meat and crispy skin that has been glazed with honey-balsamic glaze give the duck a beautiful roasted look. This is the perfect Roast Duck for all occasions!

Ingredients

Roast Duck:

5 garlic cloves, chopped

6-pound whole Pekin duck

1 lemon small or medium, chopped

Salt

Glaze:

1 lemon, freshly squeezed juice

¼ c. honey

½ c. balsamic vinegar

How to make Roast Duck

Step 1: If using frozen duck, defrost in the fridge for a few days. Once completely defrosted, remove the duck from the fridge 30 minutes before cooking.

Step 2: Prepare the oven. Preheat it to 350 degrees F.

To Prepare the duck:

Step 3: From the inside, of the duck, remove the giblets. Then, rinse the inside and outside of the duck with cold water. Pat the ducks dry with paper towels.

Step 4: Place the duck on a working surface. In a diamond pattern, score the duck’s skin on the breast. Make sure to cut only the skin. Using the tip of the knife, poke the other fatty parts of the duck to release the fat. Generously season the inside cavity of the duck and outside with salt. Position the duck breast-side up.

Step 5: Inside the duck cavity, place 5 chopped garlic cloves. Fold the flapping skin, onwards. Using a butcher’s twine, tie the duck legs up.

Roast the duck:

Step 6: On a large roasting pan with a rack, place the bird breast side-up. Roast the duck at 350 degrees F for 1 hour. Flip the duck after an hour and continue roasting the other side for another 40 minutes.

Step 7: Take the duck out of the oven and carefully transfer the duck to a platter. Into a large heat-proof bowl or container, pour all the duck fat juices from the roasting pan.

Step 8: On a rack in a roasting pan, flip the duck breast side-up. Place half c balsamic vinegar and freshly squeezed juice of 1 lemon in a small bowl. Mix well and brush the duck with it. Resume cooking the duck for 40 minutes more at 350 degrees F, brushing the duck with the balsamic mixture every 10 minutes.

Step 9: Whisk 1/4 c honey and 3 tbsp balsamic vinegar, and lemon mixture in another small bowl until blended. Brush the breast side of the duck with it and continue roasting the duck for another 40 minutes, making sure to brush the duck breast with the honey-balsamic mixture every 10 minutes. For the last 10 to 15 minutes, you can broil the duck if desired.

Step 10: Take the duck out of the oven when done and allow it to stand for about 15 minutes. Then, remove the lemon from the cavity and discard. Carve the duck and serve right away. Enjoy!

Note:

The total cooking time of the duck is 3 hours (at 350 degrees F), divided into 4. Breast side up for 1 hour, breast side down for 40 minutes, breast side up (glazed with the balsamic-lemon mixture) for another 40 minutes, and additional 40 minutes, breast side up brushed with the honey-balsamic mixture.

Nutrition Facts:

Amount per Serving: Calories 2862, Fat 267g 411%, Saturated Fat 89g 556%, Cholesterol 517mg 172%, Sodium 438mg 19%, Potassium 1558mg 45%, Carbohydrates 29g 10%, Fiber 1g 4%, Sugar 23g 26%, Protein 79g 158%, Vitamin A 1145IU 23%, Vitamin C 48.8mg 59%, Calcium 104mg 10%, Iron 17mg 94%

Roast Duck Recipe

Rebecca PREP TIME: 20 mins | COOK TIME: 3 hrs | TOTAL TIME: 3 hrs 20 mins | SERVINGS: 6 people This step-by-step detailed recipe to make a Roast Duck in… General Recipes Roast Duck Recipe European Print This
Serves: 6 Prep Time: 20 mins Cooking Time: 3 hrs 3 hrs
Nutrition facts: 2862 calories 267 fat
Rating: 5.0/5
( 1 voted )

Ingredients

  • Roast Duck:
  • 5 garlic cloves, chopped
  • 6-pound whole Pekin duck
  • 1 lemon small or medium, chopped
  • Salt
  • Glaze:
  • 1 lemon, freshly squeezed juice
  • ¼ c. honey
  • ½ c. balsamic vinegar

Instructions

Step 1: If using frozen duck, defrost in the fridge for a few days. Once completely defrosted, remove the duck from the fridge 30 minutes before cooking.

Step 2: Prepare the oven. Preheat it to 350 degrees F.

To Prepare the duck:

Step 3: From the inside, of the duck, remove the giblets. Then, rinse the inside and outside of the duck with cold water. Pat the ducks dry with paper towels.

Step 4: Place the duck on a working surface. In a diamond pattern, score the duck’s skin on the breast. Make sure to cut only the skin. Using the tip of the knife, poke the other fatty parts of the duck to release the fat. Generously season the inside cavity of the duck and outside with salt. Position the duck breast-side up.

Step 5: Inside the duck cavity, place 5 chopped garlic cloves. Fold the flapping skin, onwards. Using a butcher's twine, tie the duck legs up.

Roast the duck:

Step 6: On a large roasting pan with a rack, place the bird breast side-up. Roast the duck at 350 degrees F for 1 hour. Flip the duck after an hour and continue roasting the other side for another 40 minutes.

Step 7: Take the duck out of the oven and carefully transfer the duck to a platter. Into a large heat-proof bowl or container, pour all the duck fat juices from the roasting pan.

Step 8: On a rack in a roasting pan, flip the duck breast side-up. Place half c balsamic vinegar and freshly squeezed juice of 1 lemon in a small bowl. Mix well and brush the duck with it. Resume cooking the duck for 40 minutes more at 350 degrees F, brushing the duck with the balsamic mixture every 10 minutes.

Step 9: Whisk 1/4 c honey and 3 tbsp balsamic vinegar, and lemon mixture in another small bowl until blended. Brush the breast side of the duck with it and continue roasting the duck for another 40 minutes, making sure to brush the duck breast with the honey-balsamic mixture every 10 minutes. For the last 10 to 15 minutes, you can broil the duck if desired.

Step 10: Take the duck out of the oven when done and allow it to stand for about 15 minutes. Then, remove the lemon from the cavity and discard. Carve the duck and serve right away. Enjoy!

Notes

The total cooking time of the duck is 3 hours (at 350 degrees F), divided into 4. Breast side up for 1 hour, breast side down for 40 minutes, breast side up (glazed with the balsamic-lemon mixture) for another 40 minutes, and additional 40 minutes, breast side up brushed with the honey-balsamic mixture.

August 23, 2022 0 comment
0 FacebookTwitterPinterestEmail
General Recipes

EASY BAKED BONELESS PORK CHOPS

by Rebecca August 23, 2022
written by Rebecca

PREP TIME: 10 mins | COOK TIME: 35 mins | TOTAL TIME: 45 mins | YIELD: 4 servings

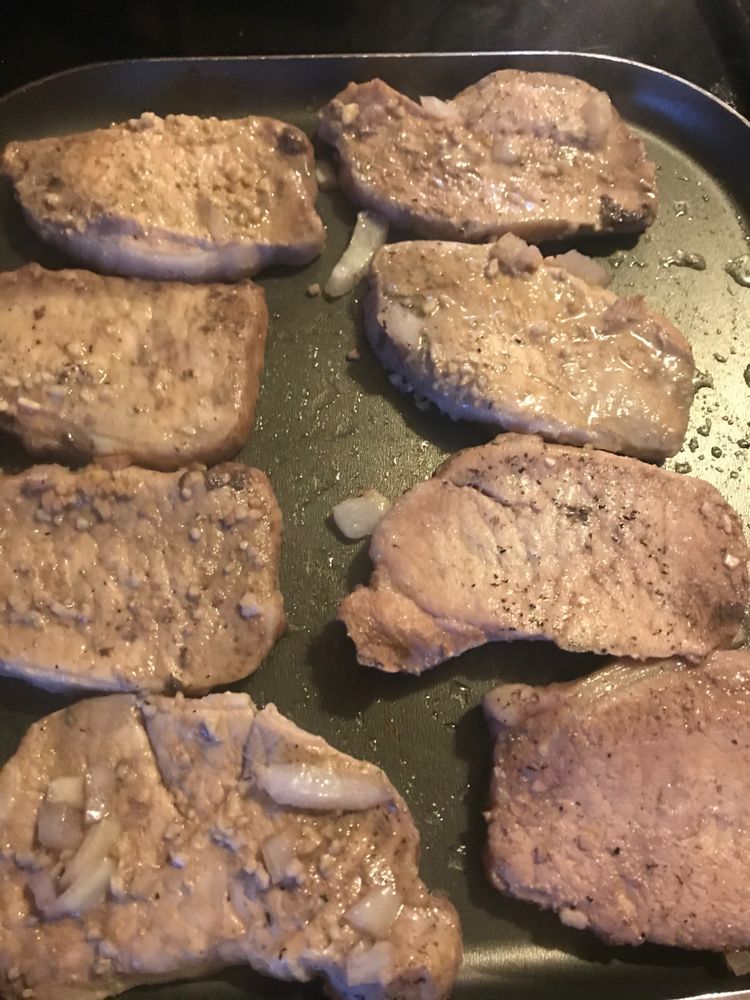
Super easy and incredibly delicious – these baked boneless pork chops are one of my best favorite meals. Made with just a few simple ingredients, you can easily make this dish when you find no inspiration on what to cook for dinner. Pair these luscious baked pork chops with roasted or mashed potatoes for a simple meal. These juicy, tender, and flavor-packed chops are also excellent with steamed veggies or anything, really!

These baked pork chops are a no-fuss and these do not require a lot of preparation. I tossed in some mushrooms, but you can skip them if desired. Not only that, these easy-baked pork chops taste amazing, but they smell divine, too! I would definitely recommend this recipe to anyone!

INGREDIENTS

1 medium onion sliced julienne

8 boneless pork chops (1/2 to 1” thick) (count two per person)

3-4 garlic cloves, sliced

1 tsp dried rosemary

1 tsp salt

1 tsp dried thyme

1 tsp fresh ground pepper

2-3 tbsp extra virgin olive oil

1 c. red wine (your preference)

HOW TO MAKE EASY-BAKED BONELESS PORK CHOPS

Step 1: Prepare the oven. Preheat it to 400 degrees F.

Step 2: On a 9 x 13-inch baking pan, lay the pork chops. You can also use other pans big enough to accommodate the meat in a single layer. Then, sprinkle both sides of the pork chops with salt, pepper, thyme, and rosemary. Toss in the sliced onions along with halved garlic cloves. Drizzle with oil and pour in the red wine.

Step 3: Tightly tent the baking dish with aluminium foil. Place in the preheated oven and bake for about 25 to 30 minutes. Uncover and bake for an additional 5 to 10 minutes or until the internal temperature of the chops reaches 145 degrees.

Step 4: Remove from the oven when done and serve the baked boneless pork chops with salad, roasted potatoes, or roasted veggies. Enjoy!

NUTRITION FACTS:

YIELD: 4 SERVING SIZE: 1
Amount Per Serving: CALORIES: 810 | TOTAL FAT: 48g | SATURATED FAT: 15g | TRANS FAT: 0g | UNSATURATED FAT: 31g | CHOLESTEROL: 206mg | SODIUM: 770mg | CARBOHYDRATES: 6g | FIBER: 1g | SUGAR: 2g | PROTEIN: 74g

EASY BAKED BONELESS PORK CHOPS

Rebecca PREP TIME: 10 mins | COOK TIME: 35 mins | TOTAL TIME: 45 mins | YIELD: 4 servings Super easy and incredibly delicious – these baked boneless pork chops are… General Recipes EASY BAKED BONELESS PORK CHOPS European Print This
Serves: 4 Prep Time: 10 mins Cooking Time: 35 mins 35 mins
Nutrition facts: 810 calories 48 fat
Rating: 5.0/5
( 1 voted )

Ingredients

  • 1 medium onion sliced julienne
  • 8 boneless pork chops (1/2 to 1” thick) (count two per person)
  • 3-4 garlic cloves, sliced
  • 1 tsp dried rosemary
  • 1 tsp salt
  • 1 tsp dried thyme
  • 1 tsp fresh ground pepper
  • 2-3 tbsp extra virgin olive oil
  • 1 c. red wine (your preference)

Instructions

Step 1: Prepare the oven. Preheat it to 400 degrees F.

Step 2: On a 9 x 13-inch baking pan, lay the pork chops. You can also use other pans big enough to accommodate the meat in a single layer. Then, sprinkle both sides of the pork chops with salt, pepper, thyme, and rosemary. Toss in the sliced onions along with halved garlic cloves. Drizzle with oil and pour in the red wine.

Step 3: Tightly tent the baking dish with aluminium foil. Place in the preheated oven and bake for about 25 to 30 minutes. Uncover and bake for an additional 5 to 10 minutes or until the internal temperature of the chops reaches 145 degrees.

Step 4: Remove from the oven when done and serve the baked boneless pork chops with salad, roasted potatoes, or roasted veggies. Enjoy!

August 23, 2022 0 comment
0 FacebookTwitterPinterestEmail
General Recipes

Simple Salisbury Steak

by Rebecca August 23, 2022
written by Rebecca

Prep Time: 8 mins | Cook Time: 10 mins | Servings: 4

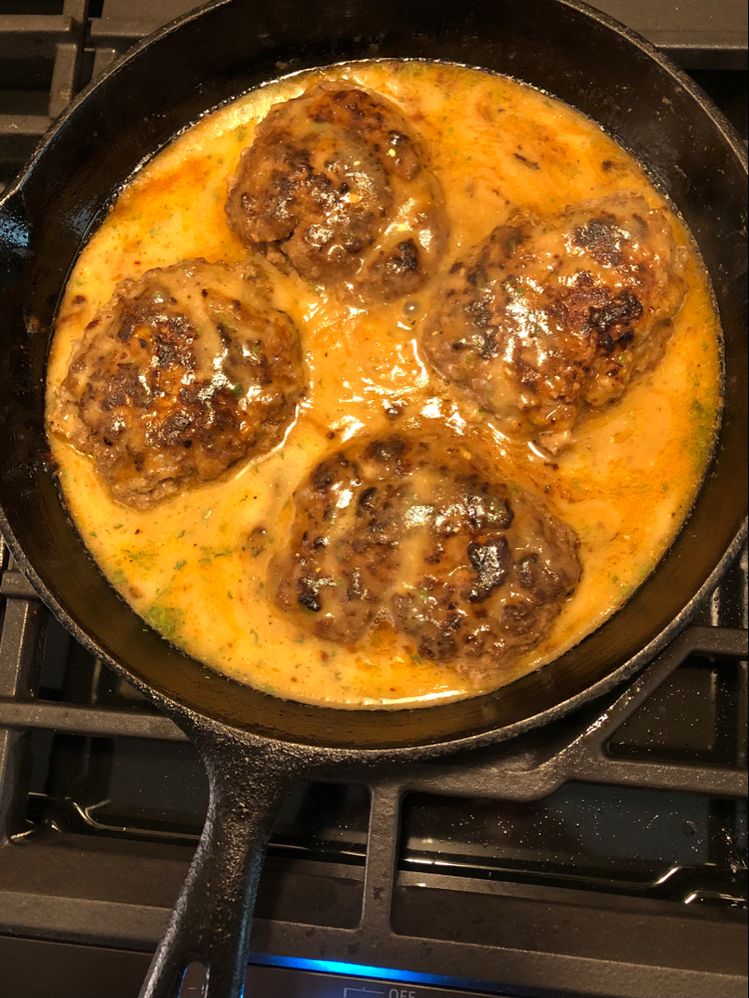
If you are searching for an easy, quick, expensive meal idea to serve your family, then this Simple Salisbury Steak is a must! Serve this over mashed potatoes alongside any of your favorite vegetables for a filling weeknight dinner that everyone will surely love.

This Salisbury Steak has been one of our favorite rotations. It is a solid dinner dish that anyone can throw together easily and quickly. A must-have recipe that will not break your bank. This recipe is an easy stove-top version that requires only a bit of extra time. The perfect dinner option if you have fussy eaters.

We love to enjoy this Salisbury steak with our favorite good-old creamy, rich mashed potatoes. Throw in some vibrant greens to your plate such as green beans to complete the meal. Or if you want something a bit sweet, this pairs perfectly with glazed carrots, too!

Ingredients

Patties:

1/3 c. Bread Crumbs

1 pound Lean Ground Beef

1 teaspoon Mustard

2 teaspoons Ketchup

1 teaspoon Worcestershire

1/2 teaspoon Onion Powder

1/2 teaspoon Garlic Powder

Gravy:

2 c. hot Water

2 packets of Brown Gravy Mix

1/2 teaspoon Worcestershire

1 teaspoon Ketchup

How to make Simple Salisbury Steak

Step 1: In a large bowl, place the Patties ingredients. Using your hands, massage the mixture until well mixed.

Step 2: In a large skillet, heat 1 tbsp olive oil over medium heat. Once the oil is hot, add the patties to the skillet and cook until browned.

Step 3: Adjust the heat to low.

Step 4: Mix the gravy mix and water until well combined. Add the ketchup and Worcestershire. Stir well until blended, then pour this over the patties in the skillet.

Step 5: Simmer everything until the gravy has thickened and warmed through.

Note:

I recommend using lean ground beef for best results. You can also whip up your own homemade beef gravy.

Nutrition Facts:

Calories: 200 kcal | Carbohydrates: 8g | Protein: 26g | Fat: 6g | Saturated Fat: 3g | Cholesterol: 70mg | Sodium: 217mg | Potassium: 422mg | Fiber: 1g | Sugar: 2g | Vitamin A: 13IU | Calcium: 30mg | Iron: 3mg

Simple Salisbury Steak

Rebecca Prep Time: 8 mins | Cook Time: 10 mins | Servings: 4 If you are searching for an easy, quick, expensive meal idea to serve your family, then this Simple… General Recipes Simple Salisbury Steak European Print This
Serves: 4 Prep Time: 8 mins Cooking Time: 10 mins 10 mins
Nutrition facts: 200 calories 6 fat
Rating: 5.0/5
( 1 voted )

Ingredients

  • Patties:
  • 1/3 c. Bread Crumbs
  • 1 pound Lean Ground Beef
  • 1 teaspoon Mustard
  • 2 teaspoons Ketchup
  • 1 teaspoon Worcestershire
  • 1/2 teaspoon Onion Powder
  • 1/2 teaspoon Garlic Powder
  • Gravy:
  • 2 c. hot Water
  • 2 packets of Brown Gravy Mix
  • 1/2 teaspoon Worcestershire
  • 1 teaspoon Ketchup

Instructions

Step 1: In a large bowl, place the Patties ingredients. Using your hands, massage the mixture until well mixed.

Step 2: In a large skillet, heat 1 tbsp olive oil over medium heat. Once the oil is hot, add the patties to the skillet and cook until browned.

Step 3: Adjust the heat to low.

Step 4: Mix the gravy mix and water until well combined. Add the ketchup and Worcestershire. Stir well until blended, then pour this over the patties in the skillet.

Step 5: Simmer everything until the gravy has thickened and warmed through.

Notes

I recommend using lean ground beef for best results. You can also whip up your own homemade beef gravy.

August 23, 2022 0 comment
0 FacebookTwitterPinterestEmail
Newer Posts
Older Posts

Popular Posts

  • 1

    Crispy Crunchy Parmesan Potatoes

    March 21, 2020
  • 2

    CROCK POT SMOTHERED PORK CHOPS

    March 21, 2020
  • Facebook
  • Twitter

@2019 - All Right Reserved.


Back To Top