Cook it once
  • Home
  • Privacy Policy
  • Recipes
    • KETO
    • LC
    • WW
  • Tips
  • Contact
Cook it once
  • Home
  • Privacy Policy
  • Recipes
    • KETO
    • LC
    • WW
  • Tips
  • Contact
Category:

Main Dish Recipes

Main Dish Recipes

CHEF JOHN’S HOT SLOPPY JOE DIP

by Rebecca August 19, 2020
written by Rebecca

Prep time: 15 min | Cooking: 1 hr 15 min | Total: 1 hr 30 min | Servings: 12

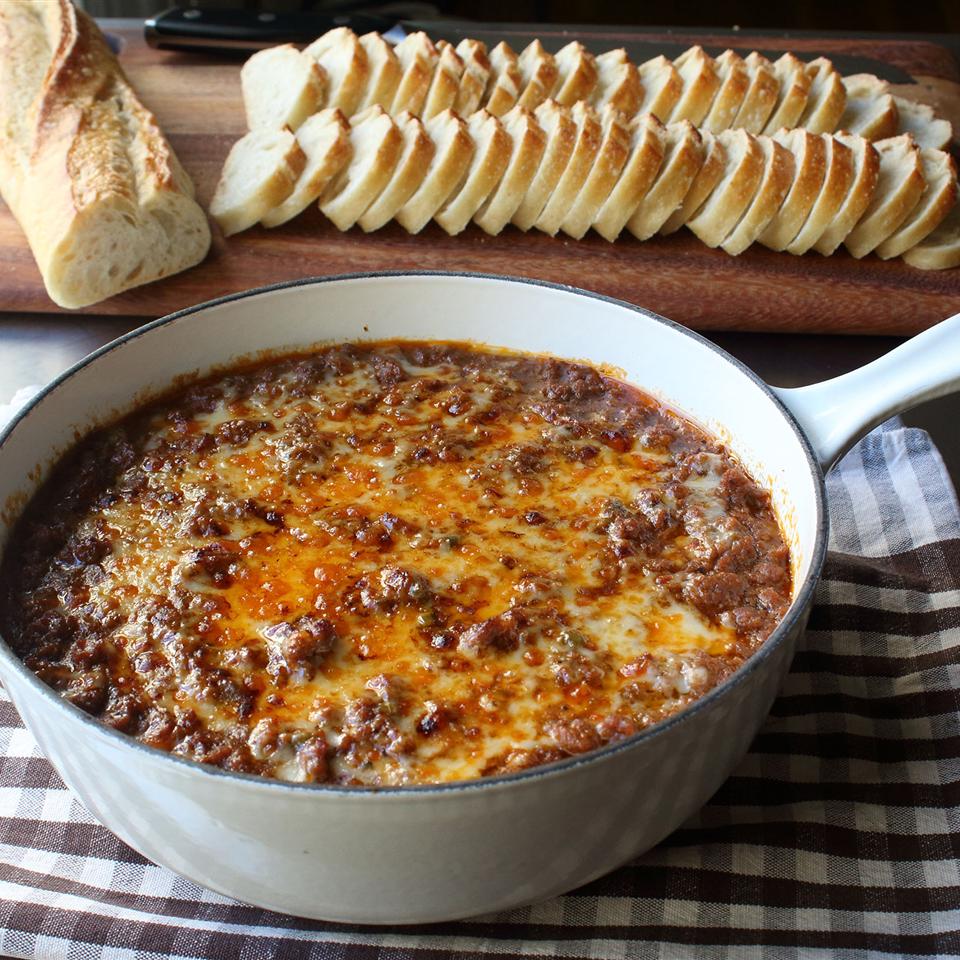
Oh my! This Sloppy Joe Dip just made my day! It’s perfect for a rainy day. The flavors in this bowl are very satisfying. It would touch your very soul. I’m serious! It’s best to eat with some baguette slices. This will surely become your comfort food. Enjoy!

INGREDIENTS

2 pounds extra-lean ground beef

(2) green bell peppers, diced

(1) onion, diced

(4) cloves garlic, minced

3 tbsp of all-purpose flour

2 tbsp brown sugar

2 tsp kosher salt, or to taste

1 tsp ground black pepper

cayenne pepper, to taste

2 cups chicken broth

1 cup ketchup

1 tbsp Dijon mustard

1 tsp Worcestershire sauce

1 cup shredded Cheddar cheese, divided

HOW TO MAKE CHEF JOHN’S HOT SLOPPY JOE DIP

Step 1: Place a heavy pot on the stove and turn the heat to medium-high.

Step 2: Add in the ground beef, garlic, onion, bell pepper, brown sugar, flour, cayenne, salt, and pepper. Stir and break the ingredients. Cook for 15 minutes until cooked through.

Step 3: Add in the chicken broth, mustard, Worcestershire sauce, and mustard. Stir until well mixed and bring to a simmer.

Step 4: Turn down the heat to medium and stir from time to time and cook for 45 minutes until the texture becomes thick.

Step 5: Ready the oven rack and preheat the broiler.

Step 6: Transfer the mixture into the oven-proof saucepan.

Step 7: Add about 1/2 of shredded cheese on top of the mixture then use a fork to push the cheese down.

Step 8: Add in the rest of the cheese on top.

Step 9: Place inside the preheated broiler and broil for 5 minutes or until the cheese turns brown and the mixture is set and hot.

Step 10: Serve and enjoy!

Notes:

Use water instead if you do not have chicken broth.

This serves well with some baguette slices on the side.

Nutrition Facts:

Per Serving: 230 calories; 832 mg sodium. 11.6 g carbohydrates; 19.2 g protein; 11.7 g total fat; 67 mg cholesterol

CHEF JOHN’S HOT SLOPPY JOE DIP

Rebecca Prep time: 15 min | Cooking: 1 hr 15 min | Total: 1 hr 30 min | Servings: 12 Oh my! This Sloppy Joe Dip just made my day! It’s perfect for a rainy day. The… Main Dish Recipes CHEF JOHN’S HOT SLOPPY JOE DIP European Print This
Serves: 12 Prep Time: 15 mins Cooking Time: 1 hr 15 mins 1 hr 15 mins
Nutrition facts: 230 calories 11.7 fat
Rating: 4.8/5
( 4 voted )

Ingredients

  • 2 pounds extra-lean ground beef
  • (2) green bell peppers, diced
  • (1) onion, diced
  • (4) cloves garlic, minced
  • 3 tbsp of all-purpose flour
  • 2 tbsp brown sugar
  • 2 tsp kosher salt, or to taste
  • 1 tsp ground black pepper
  • cayenne pepper, to taste
  • 2 cups chicken broth
  • 1 cup ketchup
  • 1 tbsp Dijon mustard
  • 1 tsp Worcestershire sauce
  • 1 cup shredded Cheddar cheese, divided

Instructions

Step 1: Place a heavy pot on the stove and turn the heat to medium-high.

Step 2: Add in the ground beef, garlic, onion, bell pepper, brown sugar, flour, cayenne, salt, and pepper. Stir and break the ingredients. Cook for 15 minutes until cooked through.

Step 3: Add in the chicken broth, mustard, Worcestershire sauce, and mustard. Stir until well mixed and bring to a simmer.

Step 4: Turn down the heat to medium and stir from time to time and cook for 45 minutes until the texture becomes thick.

Step 5: Ready the oven rack and preheat the broiler.

Step 6: Transfer the mixture into the oven-proof saucepan.

Step 7: Add about 1/2 of shredded cheese on top of the mixture then use a fork to push the cheese down.

Step 8: Add in the rest of the cheese on top.

Step 9: Place inside the preheated broiler and broil for 5 minutes or until the cheese turns brown and the mixture is set and hot.

Step 10: Serve and enjoy!

Notes:

Use water instead if you do not have chicken broth.

This serves well with some baguette slices on the side.
August 19, 2020 0 comment
0 FacebookTwitterPinterestEmail
Main Dish Recipes

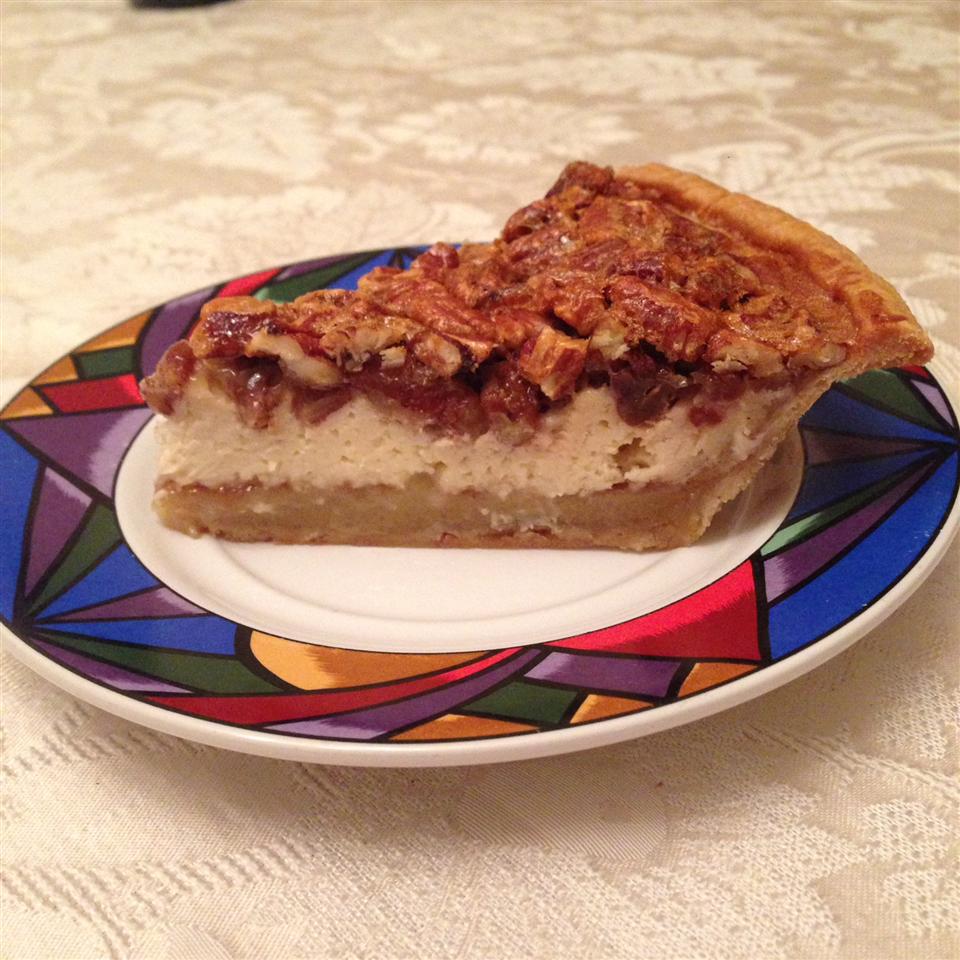
PECAN PIE CHEESECAKE

by Rebecca August 19, 2020
written by Rebecca

Servings: 8 | Yield: 1-9 inch pie

A luscious cheesecake with gooey pecan is everything I need today. This make-ahead cake is a real crowd-pleaser. It has the perfect combination of the gooey pecan pie topping and creamy cheesecake filling. A mouthwatering dessert that deserves a round of applause. This is the ultimate holiday dessert, too good for potlucks, and insanely delicious for a year-round dessert!

INGREDIENTS

1 9 inches pie shell

1 8 oz package cream cheese softened

⅓ cup white sugar

1 egg

1 teaspoon vanilla extract

1 ⅓ cups chopped pecans

3 eggs, beaten

1 cup light corn syrup

¼ cup white sugar

1 teaspoon vanilla extract

¼ teaspoon salt

½ teaspoon ground cinnamon

¼ teaspoon ground cloves

HOW TO MAKE PECAN PIE CHEESECAKE

Step 1: Prepare the oven. Preheat it to 350 degrees F or 175 degrees C.

Step 2: Place the cream cheese in a small mixing bowl. Beat until fluffy. Then, add in 1/3 cup of sugar and beat again until smooth. Beat in one egg and a teaspoon of vanilla extract. Mix thoroughly. Make sure to not overbeat the mixture.

Step 3: Evenly spread the mixture into the pastry shell and sprinkle over the chopped pecans.

Step 4: Combine three beaten eggs, corn syrup, 1/4 cup sugar, a teaspoon of vanilla extract, salt, cinnamon, and cloves in a medium bowl. Mix until combined but not frothy. Then, pour this mixture on top of the pecan.

Step 5: Place inside the preheated oven and bake for about 35 to 45 minutes until the filling is set and the pecans are brown. The pie will be pretty high, don’t worry because it will settle as the pie cools.

Note:

Prepare this ahead so you will have enough time to cool the baked cheesecake before putting it in the fridge to set. You can make the cheesecake up to four days ahead but prepare the pecan pie topping on the day that you will serve. Just pour the topping over the cheesecake and chill again if desired.

Nutrition Facts:

Per Serving: 516.3 calories; 123.8 mg cholesterol; 318.5 mg sodium; 7.6 g protein; 57.6 g carbohydrates.

PECAN PIE CHEESECAKE

Rebecca Servings: 8 | Yield: 1-9 inch pie A luscious cheesecake with gooey pecan is everything I need today. This make-ahead cake is a real crowd-pleaser. It has the perfect combination of… Main Dish Recipes PECAN PIE CHEESECAKE European Print This
Serves: 8
Nutrition facts: 516.3 calories 20 grams fat
Rating: 5.0/5
( 1 voted )

Ingredients

  • 1 9 inches pie shell
  • 1 8 oz package cream cheese softened
  • ⅓ cup white sugar
  • 1 egg
  • 1 teaspoon vanilla extract
  • 1 ⅓ cups chopped pecans
  • 3 eggs, beaten
  • 1 cup light corn syrup
  • ¼ cup white sugar
  • 1 teaspoon vanilla extract
  • ¼ teaspoon salt
  • ½ teaspoon ground cinnamon
  • ¼ teaspoon ground cloves

Instructions

Step 1: Prepare the oven. Preheat it to 350 degrees F or 175 degrees C.

Step 2: Place the cream cheese in a small mixing bowl. Beat until fluffy. Then, add in 1/3 cup of sugar and beat again until smooth. Beat in one egg and a teaspoon of vanilla extract. Mix thoroughly. Make sure to not overbeat the mixture.

Step 3: Evenly spread the mixture into the pastry shell and sprinkle over the chopped pecans.

Step 4: Combine three beaten eggs, corn syrup, 1/4 cup sugar, a teaspoon of vanilla extract, salt, cinnamon, and cloves in a medium bowl. Mix until combined but not frothy. Then, pour this mixture on top of the pecan.

Step 5: Place inside the preheated oven and bake for about 35 to 45 minutes until the filling is set and the pecans are brown. The pie will be pretty high, don't worry because it will settle as the pie cools.

Note:

Prepare this ahead so you will have enough time to cool the baked cheesecake before putting it in the fridge to set. You can make the cheesecake up to four days ahead but prepare the pecan pie topping on the day that you will serve. Just pour the topping over the cheesecake and chill again if desired.

August 19, 2020 0 comment
0 FacebookTwitterPinterestEmail
Main Dish Recipes

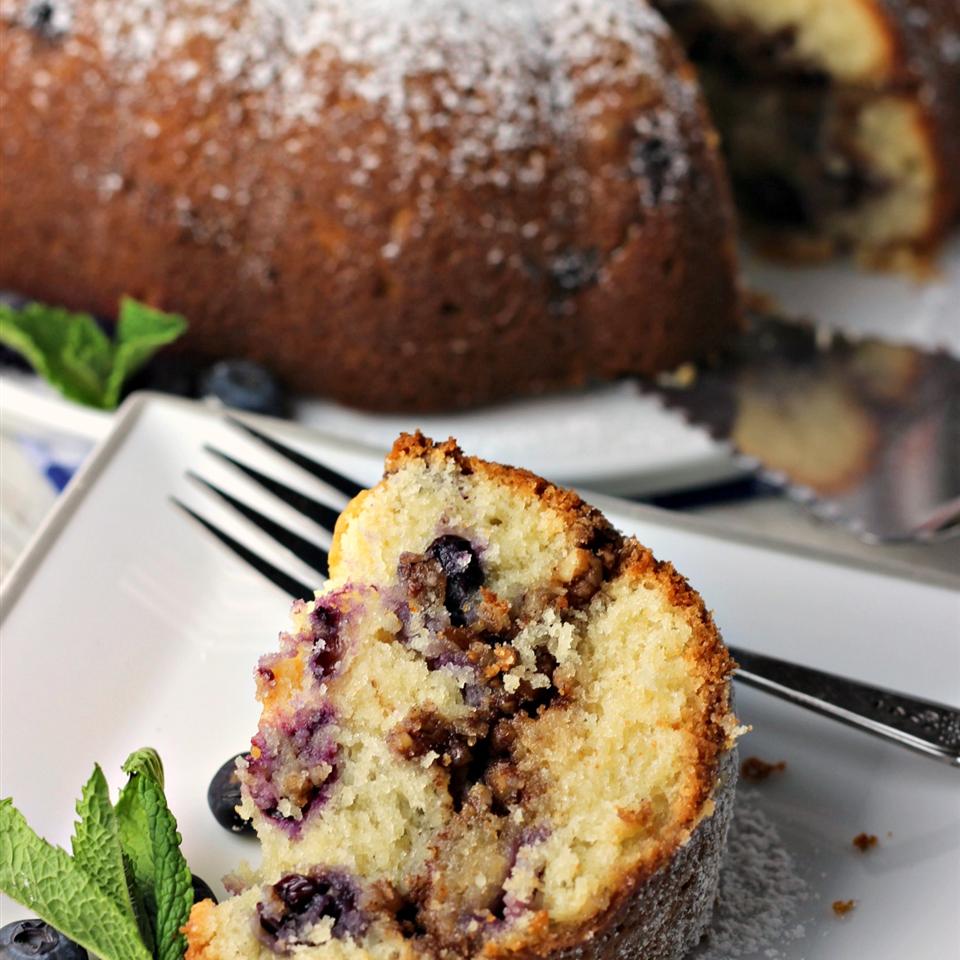
BLUEBERRY SOUR CREAM COFFEE CAKE

by Rebecca August 19, 2020
written by Rebecca

Prep time: 20 min | Cook: 1 hr | Total: 1 hr 20 min | Servings: 12 | Yield: 1 to 9 inch Bundt cake

This is the cake of my dreams! It is insanely delicious, gorgeous, and super moist. Pair it to a freshly brewed coffee or tea for a perfect weekend snack.

INGREDIENTS

1 cup butter, softened

2 cups white sugar

2 eggs

1 cup sour cream

1 teaspoon vanilla extract

1 ⅝ cups all-purpose flour

1 teaspoon baking powder

¼ teaspoon salt

1 cup fresh or frozen blueberries

½ cup brown sugar

1 teaspoon ground cinnamon

½ cup chopped pecans

1 tablespoon confectioners’ sugar for dusting

HOW TO MAKE BLUEBERRY SOUR CREAM COFFEE CAKE

Step 1: Prepare the oven. Preheat it to 350 degrees F or 175 degrees C.

Step 2: Then, grease and flour a 9-inch bundt pan.

Step 3: Place the butter and sugar in a large bowl. Cream until light and fluffy. Then, beat in the eggs a piece at a time, beating every after each addition before stirring in the sour cream and vanilla. Stir in the flour, baking powder, and salt until blended. And finally, fold in the blueberries.

Step 4: Spoon half of the batter into the prepared pan.

Step 5: Stir the brown sugar, cinnamon, and pecans in a small bowl. Then, sprinkle half of this over the batter.

Step 6: Spoon the rest of the batter on top, then, sprinkle the remaining pecan mixture over the batter.

Step 7: Swirl the sugar layer with a knife or thin spatula into the cake.

Step 8: Place inside the preheated oven and bake for about 55 to 60 minutes. Check the doneness by inserting a knife or toothpick in the middle of the cake. Once it comes out clean the cake is perfect!

Step 9: Remove the cake from the oven and allow it to cool on a wire rack in the pan.

Step 10: Once cooled, invert the cake onto a serving plate and firmly tap to remove it from the pan before dusting the cake with the confectioners’ sugar.

Step 11: Slice and serve. Enjoy!

Nutrition Facts:

Per Serving: 459 calories; 223 mg sodium; 59.5 g carbohydrates; 4.1 g protein; 24 g total fat; 80 mg cholesterol

BLUEBERRY SOUR CREAM COFFEE CAKE

Rebecca Prep time: 20 min | Cook: 1 hr | Total: 1 hr 20 min | Servings: 12 | Yield: 1 to 9 inch Bundt cake This is the cake of my dreams! It is insanely delicious, gorgeous, and super… Main Dish Recipes BLUEBERRY SOUR CREAM COFFEE CAKE European Print This
Serves: 12 Prep Time: 20 mins Cooking Time: 1 hr 1 hr
Nutrition facts: 459 calories 24 fat
Rating: 4.7/5
( 3 voted )

Ingredients

  • 1 cup butter, softened
  • 2 cups white sugar
  • 2 eggs
  • 1 cup sour cream
  • 1 teaspoon vanilla extract
  • 1 ⅝ cups all-purpose flour
  • 1 teaspoon baking powder
  • ¼ teaspoon salt
  • 1 cup fresh or frozen blueberries
  • ½ cup brown sugar
  • 1 teaspoon ground cinnamon
  • ½ cup chopped pecans
  • 1 tablespoon confectioners' sugar for dusting

Instructions

Step 1: Prepare the oven. Preheat it to 350 degrees F or 175 degrees C.

Step 2: Then, grease and flour a 9-inch bundt pan.

Step 3: Place the butter and sugar in a large bowl. Cream until light and fluffy. Then, beat in the eggs a piece at a time, beating every after each addition before stirring in the sour cream and vanilla. Stir in the flour, baking powder, and salt until blended. And finally, fold in the blueberries.

Step 4: Spoon half of the batter into the prepared pan.

Step 5: Stir the brown sugar, cinnamon, and pecans in a small bowl. Then, sprinkle half of this over the batter.

Step 6: Spoon the rest of the batter on top, then, sprinkle the remaining pecan mixture over the batter.

Step 7: Swirl the sugar layer with a knife or thin spatula into the cake.

Step 8: Place inside the preheated oven and bake for about 55 to 60 minutes. Check the doneness by inserting a knife or toothpick in the middle of the cake. Once it comes out clean the cake is perfect!

Step 9: Remove the cake from the oven and allow it to cool on a wire rack in the pan.

Step 10: Once cooled, invert the cake onto a serving plate and firmly tap to remove it from the pan before dusting the cake with the confectioners' sugar.

Step 11: Slice and serve. Enjoy!

August 19, 2020 0 comment
0 FacebookTwitterPinterestEmail
Main Dish Recipes

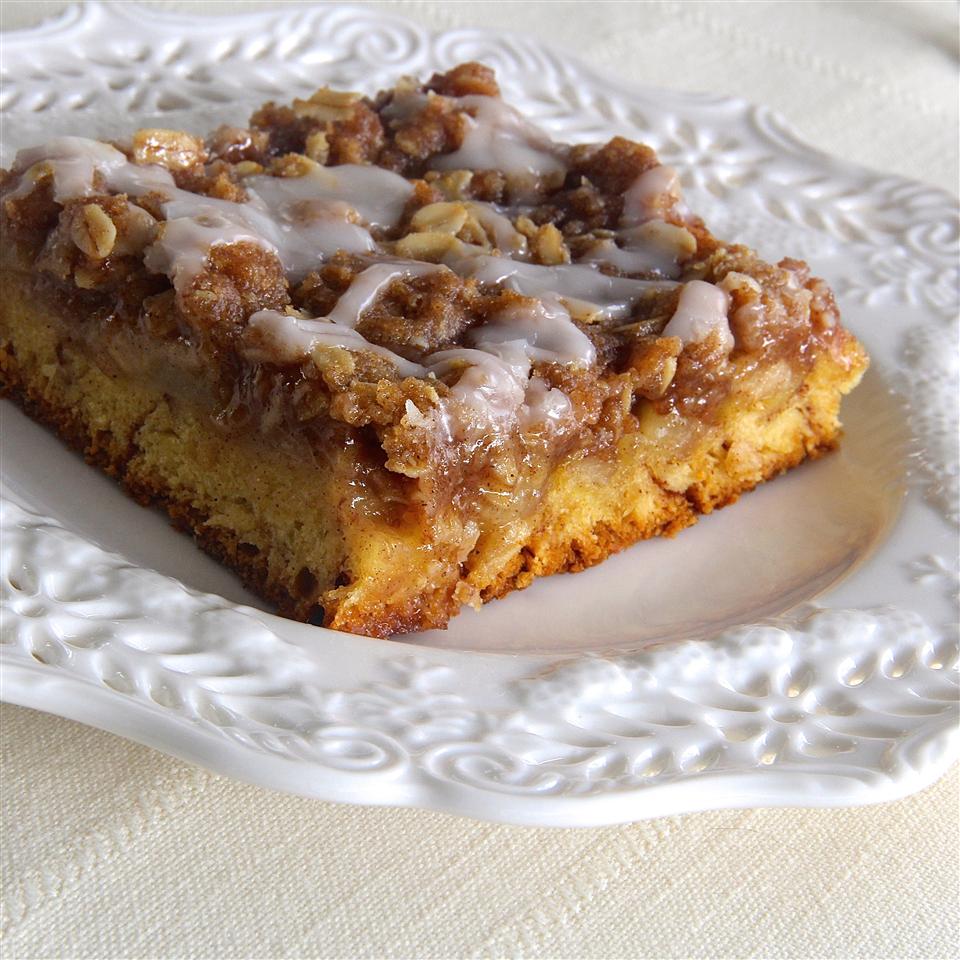
APPLE CRISP WITH CINNAMON ROLL CRUST

by Rebecca August 19, 2020
written by Rebecca

Prep time: 20 min | Cooking: 40 min | Total: 1 hr | Servings: 6 | Yield: 1 9×13-inch baking dish

Cheers to a healthy, perfectly sweet, and decadent treat! This is a real surprise for apple pie and cinnamon lovers out there. No more deciding which you’ll have first, you can enjoy both in one bite! You can make this in a snap. It’s pretty straightforward, not fussy, and no fancy ingredients, everything is simple. Almost too good to be true? Try it and I am sure you are gonna be head over heels!

INGREDIENTS

1 12.4 oz package refrigerated cinnamon roll dough with icing

1 cup rolled oats

1 cup brown sugar

½ cup all-purpose flour

1 tablespoon ground cinnamon

½ teaspoon salt

½ cup margarine softened

8 eaches Granny Smith apples, peeled and sliced

¼ cup white sugar

1 teaspoon ground cinnamon

HOW TO MAKE APPLE CRISP WITH CINNAMON ROLL CRUST

Step 1: Prepare the oven. Preheat it to 350 degrees F or 175 degrees C.

Step 2: On your work surface, roll the cinnamon until you reach your desired thickness. Then, press the cinnamon into the bottom of a 9 x 13-inch baking dish.

Step 3: In a bowl, combine the oats, brown sugar, flour, a tbsp of cinnamon, and salt. And mix in the margarine until crumbly.

Step 4: Scatter the apples on top of the cinnamon roll crust.

Step 5: In a bowl, stir the white sugar and a teaspoon of cinnamon. Sprinkle this over the apples.

Step 6: Put the oat mixture on top.

Step 7: Place inside the preheated oven and bake for approximately 40 to 550 minutes or until the apples are tender.

Step 8: While baking, prepare the icing. Put the icing in a microwave-safe bowl and heat in the microwave for 20 to 30 seconds until warm.

Step 9: Once done baking, remove the cinnamon roll crust from the oven and pour the icing over crisp.

Note:

For a perfect crumble texture, you can use the old-fashioned whole rolled oats for this recipe.

Nutrition Facts:

Per Serving: 674.1 calories; 0 mg cholesterol; 830.5 mg sodium; 6.6 g protein; 115.8 g carbohydrates

APPLE CRISP WITH CINNAMON ROLL CRUST

Rebecca Prep time: 20 min | Cooking: 40 min | Total: 1 hr | Servings: 6 | Yield: 1 9×13-inch baking dish Cheers to a healthy, perfectly sweet, and decadent treat! This is a real surprise for apple pie and… Main Dish Recipes APPLE CRISP WITH CINNAMON ROLL CRUST European Print This
Serves: 6 Prep Time: 20 mins Cooking Time: 40 mins 40 mins
Nutrition facts: 674.1 calories 20 grams fat
Rating: 4.0/5
( 3 voted )

Ingredients

  • 1 12.4 oz package refrigerated cinnamon roll dough with icing
  • 1 cup rolled oats
  • 1 cup brown sugar
  • ½ cup all-purpose flour
  • 1 tablespoon ground cinnamon
  • ½ teaspoon salt
  • ½ cup margarine softened
  • 8 eaches Granny Smith apples, peeled and sliced
  • ¼ cup white sugar
  • 1 teaspoon ground cinnamon

Instructions

Step 1: Prepare the oven. Preheat it to 350 degrees F or 175 degrees C.

Step 2: On your work surface, roll the cinnamon until you reach your desired thickness. Then, press the cinnamon into the bottom of a 9 x 13-inch baking dish.

Step 3: In a bowl, combine the oats, brown sugar, flour, a tbsp of cinnamon, and salt. And mix in the margarine until crumbly.

Step 4: Scatter the apples on top of the cinnamon roll crust.

Step 5: In a bowl, stir the white sugar and a teaspoon of cinnamon. Sprinkle this over the apples.

Step 6: Put the oat mixture on top.

Step 7: Place inside the preheated oven and bake for approximately 40 to 550 minutes or until the apples are tender.

Step 8: While baking, prepare the icing. Put the icing in a microwave-safe bowl and heat in the microwave for 20 to 30 seconds until warm.

Step 9: Once done baking, remove the cinnamon roll crust from the oven and pour the icing over crisp.

Note:

For a perfect crumble texture, you can use the old-fashioned whole rolled oats for this recipe.

August 19, 2020 0 comment
0 FacebookTwitterPinterestEmail
Main Dish Recipes

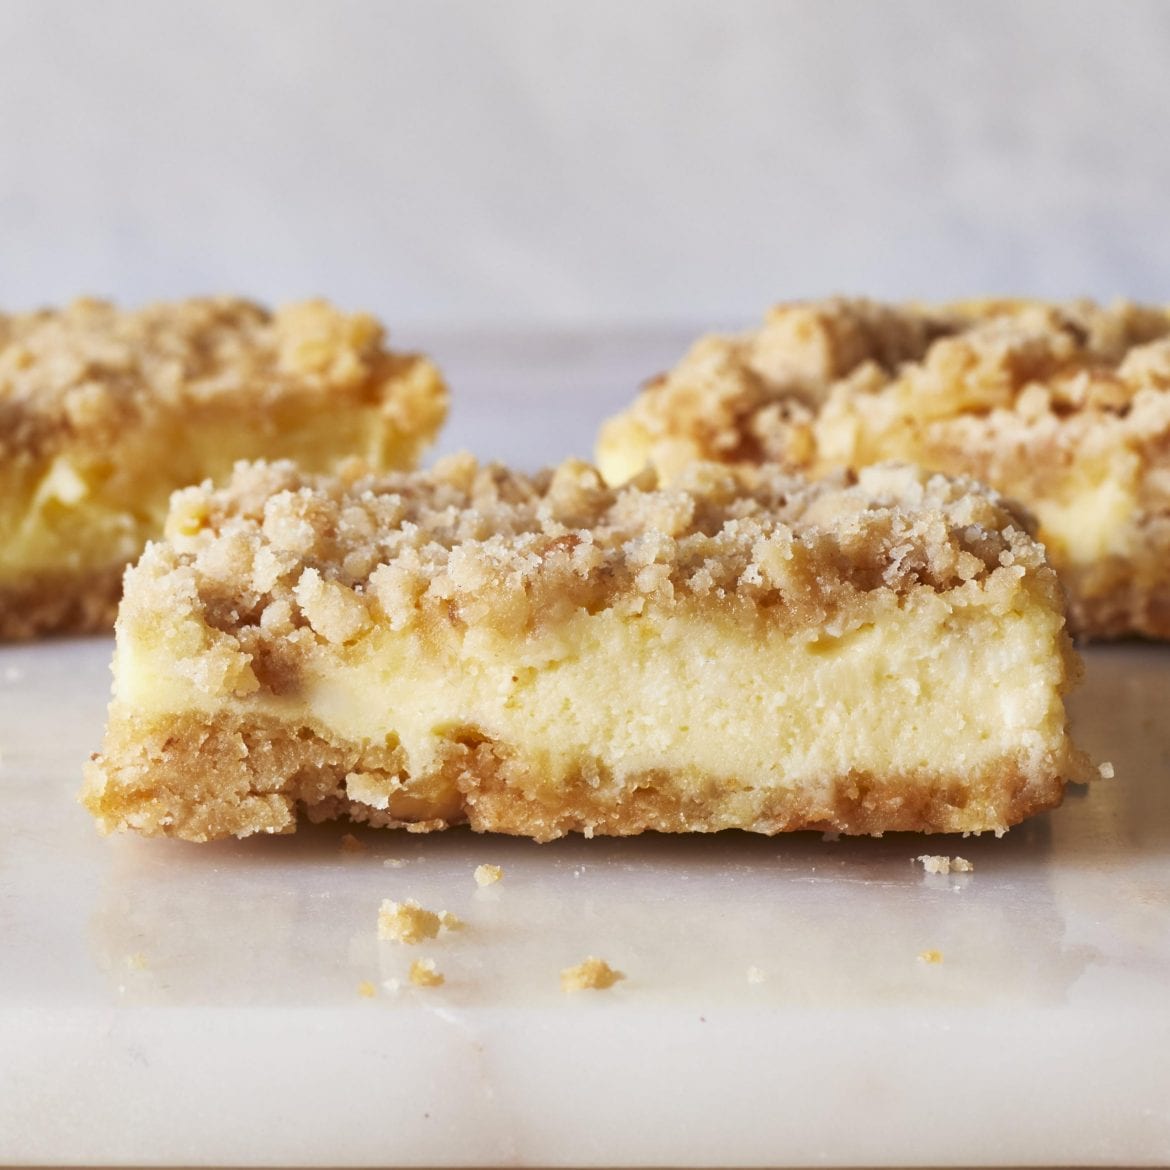
MOM’S CHEESECAKE COOKIE BARS

by Rebecca August 19, 2020
written by Rebecca

Prep time: 15 min | Cooking: 40 min | Total: 55 min | Servings: 16 | Yield: 1 9×13 inch baking pan

These Instagram worthy cookie bars are made of creamy, lemony filling with a buttery crust that’s filled with walnuts. It’s a no fussy dessert that will satisfy your cravings. This simple dessert calls for just a few simple ingredients that are already on hand. It’s super easy to prepare and these bars never stayed long. Everyone wants a taste and fighting for that last piece! It’s perfect in every way and always is gone in a heartbeat.

I have been obsessed with these Cheesecake Cookie Bars. Not only that you can make it in a breeze but it’s so delightfully satisfying. It’s the dessert for all ages and all seasons!

INGREDIENTS

2 cups all-purpose flour

1 cup chopped walnuts

⅔ cup butter

⅔ cup brown sugar

2 8 oz packages cream cheese softened

½ cup white sugar

2 eggs

¼ cup milk

1 teaspoon vanilla extract

2 tablespoons lemon juice

HOW TO MAKE MOM’S CHEESECAKE COOKIE BARS

Step 1: Prepare the oven. Preheat it to 350 degrees F or 175 degrees C.

Step 2: Combine the mix flour, walnuts, butter, and brown sugar in a bowl.

Step 3: Then, with half of the mixture, line a 9 x 13-inch baking pan.

Step 4: Place it inside the preheated oven and bake for about 15 minutes until browned.

Step 5: Once browned, remove from the crust from the oven but leave the oven on.

Step 6: Meanwhile, in another bowl, mix the cream cheese and white sugar with an electric mixer until combined. Whisk in the eggs, milk, and vanilla extract until blended.

Step 7: Transfer the mixture onto the baked crust, then, sprinkle over the rest of the crust mixture.

Step 8: Place the crust back into the oven and bake for another 25 minutes.

Note:

I commonly use walnuts but you can use any nuts that you prefer.

Nutrition facts:

Per Serving: 330.7 calories; 74.7 mg cholesterol; 149.9 mg sodium; 5.9 g protein; 26.3 g carbohydrates

MOM’S CHEESECAKE COOKIE BARS

Rebecca Prep time: 15 min | Cooking: 40 min | Total: 55 min | Servings: 16 | Yield: 1 9×13 inch baking pan These Instagram worthy cookie bars are made of creamy, lemony filling with a buttery crust that’s filled… Main Dish Recipes MOM’S CHEESECAKE COOKIE BARS European Print This
Serves: 16 Prep Time: 15 mins Cooking Time: 40 mins 40 mins
Nutrition facts: 330.7 calories 20 grams fat
Rating: 5.0/5
( 1 voted )

Ingredients

  • 2 cups all-purpose flour
  • 1 cup chopped walnuts
  • ⅔ cup butter
  • ⅔ cup brown sugar
  • 2 8 oz packages cream cheese softened
  • ½ cup white sugar
  • 2 eggs
  • ¼ cup milk
  • 1 teaspoon vanilla extract
  • 2 tablespoons lemon juice

Instructions

Step 1: Prepare the oven. Preheat it to 350 degrees F or 175 degrees C.

Step 2: Combine the mix flour, walnuts, butter, and brown sugar in a bowl.

Step 3: Then, with half of the mixture, line a 9 x 13-inch baking pan.

Step 4: Place it inside the preheated oven and bake for about 15 minutes until browned.

Step 5: Once browned, remove from the crust from the oven but leave the oven on.

Step 6: Meanwhile, in another bowl, mix the cream cheese and white sugar with an electric mixer until combined. Whisk in the eggs, milk, and vanilla extract until blended.

Step 7: Transfer the mixture onto the baked crust, then, sprinkle over the rest of the crust mixture.

Step 8: Place the crust back into the oven and bake for another 25 minutes.

Note:

I commonly use walnuts but you can use any nuts that you prefer.

August 19, 2020 0 comment
0 FacebookTwitterPinterestEmail
Main Dish Recipes

Garlic-Brown Sugar Chicken Thighs

by Rebecca August 18, 2020
written by Rebecca

Prep: 10 mins | Cook: 35 mins | Total: 45 mins | Servings: 8 | Yield: 8 chicken thighs

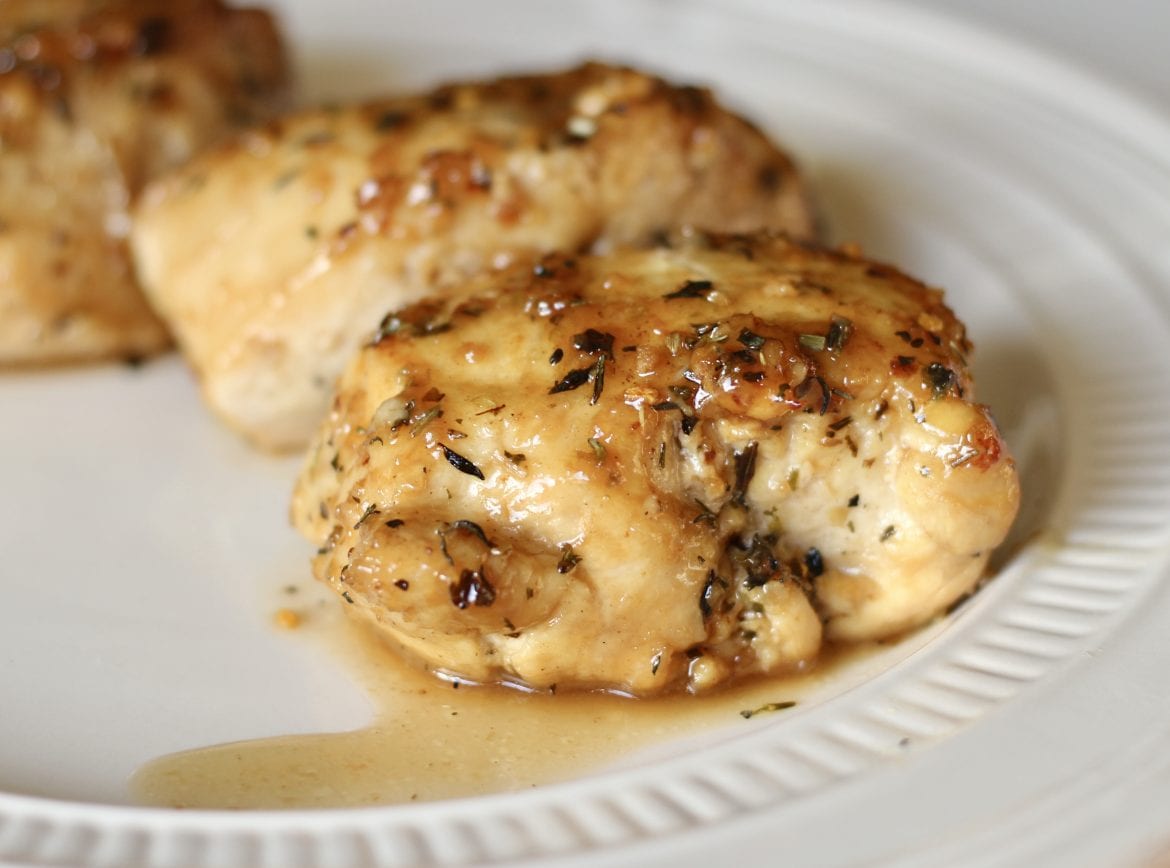
Once you get a bite of this amazing chicken, you will never settle for a plain chicken ever! This recipe of chicken somehow ruined pretty much all the chicken recipes out there! I kid you not. The only way to know if what I am saying is true is to try it yourself! I hope you all love this incredibly amazing meal. I have listed all the steps and ingredients that you will be needing. Just make sure to follow them and you are good to go. Oh, you are so in for a treat. Enjoy!

Ingredients

eaches bone-in, skin-on chicken thighs

1 pinch salt and ground black pepper to taste

3 tablespoons unsalted butter, divided

4 cloves garlic, minced

¼ cup packed brown sugar

1 tablespoon honey

½ teaspoon dried oregano

¼ teaspoon dried thyme

¼ teaspoon dried basil

How to make Garlic-Brown Sugar Chicken Thighs

Step 1: Ready the oven and preheat to 200 degrees C or 400 degrees F.

Step 2: Season the chicken thighs with salt and pepper to taste.

Step 3: Place an oven-proof skillet on the stove and turn the heat to medium-high.

Step 4: Add in the butter and allow it to melt.

Step 5: Once the butter is melted, add in the chicken and sear until it turns brown. Sear each side for 2 to 3 minutes. Place the seared chicken on a clean plate.

Step 6: Add the rest of the butter and melt. Add in the garlic and cook for a minute or two until aromatic.

Step 7: Remove the skillet from the heat and add in honey, brown sugar, oregano, basil, and thyme. Stir until well mixed.

Step 8: Place inside the preheated oven and bake for 25 to 30 minutes or until cooked through.

Step 9: Use a thermometer to check the doneness of the chicken. It should reach 74 degrees C.

Step 10: Remove from the oven and let it sit at room temperature for at least 5 minutes.

Step 11: Serve and enjoy!

Nutrition Facts

Per Serving: 263.7 calories; 19.3 g protein; 9.5 g carbohydrates; 82.5 mg cholesterol; 86.5 mg sodium

Garlic-Brown Sugar Chicken Thighs

Rebecca Prep: 10 mins | Cook: 35 mins | Total: 45 mins | Servings: 8 | Yield: 8 chicken thighs Once you get a bite of this amazing chicken, you will… Main Dish Recipes Garlic-Brown Sugar Chicken Thighs European Print This
Serves: 8 Prep Time: 10 mins Cooking Time: 35 mins 35 mins
Nutrition facts: 263.7 calories 20 grams fat
Rating: 5.0/5
( 1 voted )

Ingredients

  • eaches bone-in, skin-on chicken thighs
  • 1 pinch salt and ground black pepper to taste
  • 3 tablespoons unsalted butter, divided
  • 4 cloves garlic, minced
  • ¼ cup packed brown sugar
  • 1 tablespoon honey
  • ½ teaspoon dried oregano
  • ¼ teaspoon dried thyme
  • ¼ teaspoon dried basil

Instructions

Step 1: Ready the oven and preheat to 200 degrees C or 400 degrees F.

Step 2: Season the chicken thighs with salt and pepper to taste.

Step 3: Place an oven-proof skillet on the stove and turn the heat to medium-high.

Step 4: Add in the butter and allow it to melt.

Step 5: Once the butter is melted, add in the chicken and sear until it turns brown. Sear each side for 2 to 3 minutes. Place the seared chicken on a clean plate.

Step 6: Add the rest of the butter and melt. Add in the garlic and cook for a minute or two until aromatic.

Step 7: Remove the skillet from the heat and add in honey, brown sugar, oregano, basil, and thyme. Stir until well mixed.

Step 8: Place inside the preheated oven and bake for 25 to 30 minutes or until cooked through.

Step 9: Use a thermometer to check the doneness of the chicken. It should reach 74 degrees C.

Step 10: Remove from the oven and let it sit at room temperature for at least 5 minutes.

Step 11: Serve and enjoy!

August 18, 2020 0 comment
0 FacebookTwitterPinterestEmail
Main Dish Recipes

Baked Denver Omelet

by Rebecca August 18, 2020
written by Rebecca

Prep: 10 min | Cook: 35 min | Ready In: 45 min

Breakfast anyone? This Omelet will be the only meal you would want to eat today! It is the definition of perfection. I kid you not. This is so good that it just became my favorite food! I learned about this recipe about a week ago. I am so glad that I tried it because I never would have tasted how awesome breakfast could be! If you feel like adding more ingredients, you can do so. By the way, be very generous with the cheese. It perfectly compliments the eggs! I hope you all love this recipe. Enjoy!

Ingredients

2 tablespoons butter

1/2 onion, chopped

1/2 green bell pepper, chopped

1 cup chopped cooked ham

8 eggs

1/4 cup milk

1/2 cup shredded Cheddar cheese

salt and ground black pepper to taste

How to make Baked Denver Omelet

Step 1: Ready the oven and preheat to 400 degrees F or 200 degrees C.

Step 2: Apply cooking spray in a 10-inch round baking pan.

Step 3: Place a skillet on the stove and turn the heat to medium.

Step 4: Add in the butter and allow it to melt.

Step 5: Saute’ the onion and bell pepper for about 5 minutes or until soft.

Step 6: Add in the ham and stir. Cook for 5 minutes or more.

Step 7: In a large mixing bowl, add egg. Beat until creamy.

Step 8: Add in the ham mixture and Cheddar cheese. Stir until well blended. Season with salt and pepper to taste.

Step 9: Transfer the mixture into the greased baking dish.

Step 10: Place inside the preheated oven and bake for 25 minutes or until the eggs turn color brown and the texture is fluffy.

Step 11: Remove from the oven and let it sit on a wire rack until warm.

Step 12: Serve and enjoy!

Nutrition Facts:

Per Serving: 345 calories; 26.8 g fat; 3.6 g carbohydrates; 22.4 g protein; 381 mg cholesterol; 712 mg sodium

Baked Denver Omelet

Rebecca Prep: 10 min | Cook: 35 min | Ready In: 45 min Breakfast anyone? This Omelet will be the only meal you would want to eat today! It is the… Main Dish Recipes Baked Denver Omelet European Print This
Prep Time: 10 mins Cooking Time: 35 mins 35 mins
Nutrition facts: 345 calories 26.8 fat
Rating: 5.0/5
( 1 voted )

Ingredients

  • 2 tablespoons butter
  • 1/2 onion, chopped
  • 1/2 green bell pepper, chopped
  • 1 cup chopped cooked ham
  • 8 eggs
  • 1/4 cup milk
  • 1/2 cup shredded Cheddar cheese
  • salt and ground black pepper to taste

Instructions

Step 1: Ready the oven and preheat to 400 degrees F or 200 degrees C.

Step 2: Apply cooking spray in a 10-inch round baking pan.

Step 3: Place a skillet on the stove and turn the heat to medium.

Step 4: Add in the butter and allow it to melt.

Step 5: Saute' the onion and bell pepper for about 5 minutes or until soft.

Step 6: Add in the ham and stir. Cook for 5 minutes or more.

Step 7: In a large mixing bowl, add egg. Beat until creamy.

Step 8: Add in the ham mixture and Cheddar cheese. Stir until well blended. Season with salt and pepper to taste.

Step 9: Transfer the mixture into the greased baking dish.

Step 10: Place inside the preheated oven and bake for 25 minutes or until the eggs turn color brown and the texture is fluffy.

Step 11: Remove from the oven and let it sit on a wire rack until warm.

Step 12: Serve and enjoy!

August 18, 2020 0 comment
0 FacebookTwitterPinterestEmail
Main Dish Recipes

Baked Ham and Cheese Party Sandwiches

by Rebecca August 18, 2020
written by Rebecca

Prep: 15 mins | Cook: 20 mins | Total: 35 mins | Servings: 24 | Yield: 24 servings

You should really give this one a try! It is really delicious and super easy to make as well. Anything with ham and cheese in it is definitely gonna be awesome, right? Well, guess what? This recipe is all about cheese and ham! You can add more cheese than usual. More cheese, more delicious! This is best served with some cold lemon juice. Feel free to add more ingredients. For example, I think a little ketchup would be nice as well. Just don’t add a lot because it might ruin the sandwich entirely. Anyway, I hope you all love it. Enjoy!

Ingredients

¾ cup melted butter

1 ½ tablespoons Dijon mustard

1 ½ teaspoons Worcestershire sauce

1 ½ tablespoons poppy seeds

1 tablespoon dried minced onion

24 roll (blank)s mini sandwich rolls

1 pound thinly sliced cooked deli ham

1 pound thinly sliced Swiss cheese

How to make Baked Ham and Cheese Party Sandwiches

Step 1: Ready the oven and preheat to 175 degrees C or 350 degrees F.

Step 2: Apply cooking spray in a 9×13-inch baking dish.

Step 3: In a medium mixing bowl, add Dijon mustard, butter, dried onion, poppy seeds, and Worcestershire sauce.

Step 4: Separate the bottoms and the top of the rolls. Put the bottom pieces into the greased baking dish.

Step 5: Place a layer of the ham onto the rolls.

Step 6: Place the Swiss cheese on top of the ham. Do the same with the remaining ham slices.

Step 7: Place tops of the rolls on the sandwiches then spread mustard mixture on top of the rolls.

Step 8: Place inside the preheated oven and bake for 20 minutes or until the color turns light brown and until the cheese is melted completely.

Step 9: Cut into individual slices through the cheese and ham.

Step 10: Serve and enjoy!

Nutrition Facts

Per Serving:208.3 calories; 9.8 g protein; 10.8 g carbohydrates; 43.4 mg cholesterol; 439.2 mg sodium

Baked Ham and Cheese Party Sandwiches

Rebecca Prep: 15 mins | Cook: 20 mins | Total: 35 mins | Servings: 24 | Yield: 24 servings You should really give this one a try! It is really delicious… Main Dish Recipes Baked Ham and Cheese Party Sandwiches European Print This
Serves: 24 Prep Time: 15 mins Cooking Time: 20 mins 20 mins
Nutrition facts: 208.3 calories 20 grams fat
Rating: 5.0/5
( 1 voted )

Ingredients

  • ¾ cup melted butter
  • 1 ½ tablespoons Dijon mustard
  • 1 ½ teaspoons Worcestershire sauce
  • 1 ½ tablespoons poppy seeds
  • 1 tablespoon dried minced onion
  • 24 roll (blank)s mini sandwich rolls
  • 1 pound thinly sliced cooked deli ham
  • 1 pound thinly sliced Swiss cheese

Instructions

Step 1: Ready the oven and preheat to 175 degrees C or 350 degrees F.

Step 2: Apply cooking spray in a 9x13-inch baking dish.

Step 3: In a medium mixing bowl, add Dijon mustard, butter, dried onion, poppy seeds, and Worcestershire sauce.

Step 4: Separate the bottoms and the top of the rolls. Put the bottom pieces into the greased baking dish.

Step 5: Place a layer of the ham onto the rolls.

Step 6: Place the Swiss cheese on top of the ham. Do the same with the remaining ham slices.

Step 7: Place tops of the rolls on the sandwiches then spread mustard mixture on top of the rolls.

Step 8: Place inside the preheated oven and bake for 20 minutes or until the color turns light brown and until the cheese is melted completely.

Step 9: Cut into individual slices through the cheese and ham.

Step 10: Serve and enjoy!

August 18, 2020 0 comment
0 FacebookTwitterPinterestEmail
Main Dish Recipes

Garlic Cheddar Chicken

by Rebecca August 18, 2020
written by Rebecca

Prep: 15 mins | Cook: 40 mins | Total: 55 mins | Servings: 8 | Yield: 8 servings

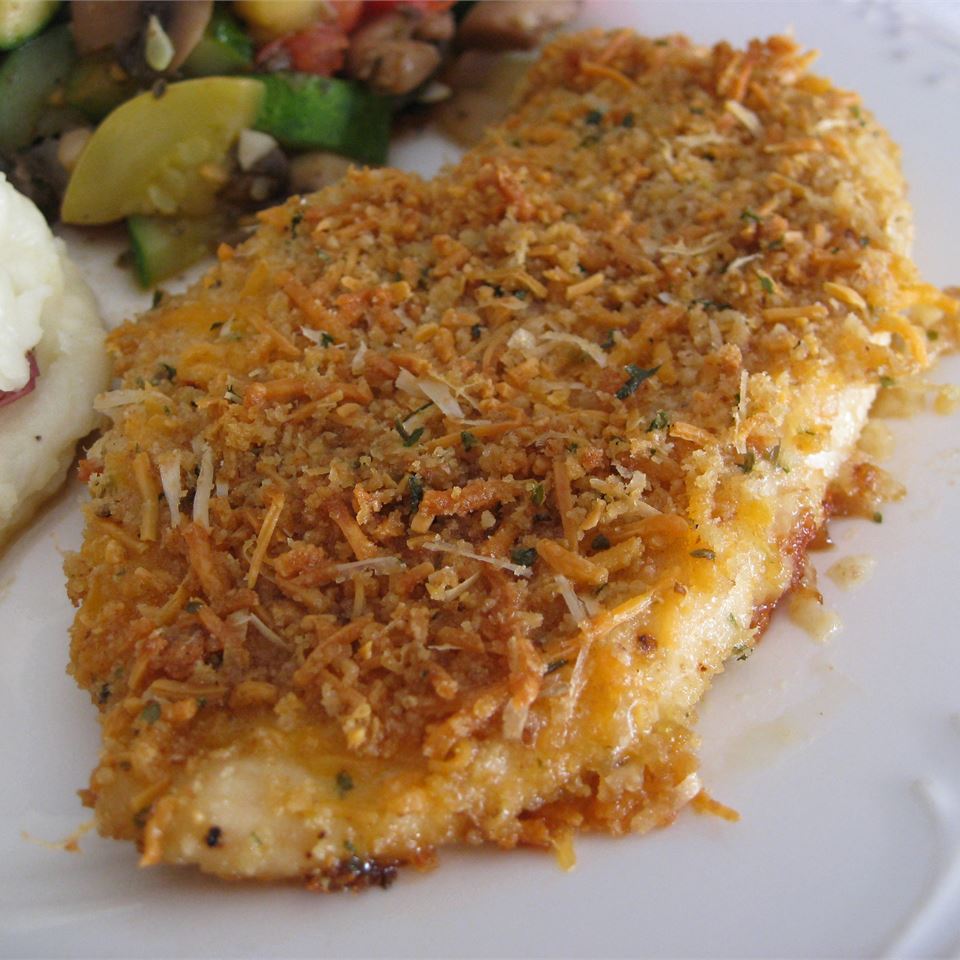
Are you looking for an easy recipe for tonight’s dinner? Then, you have come to the right page! The amazing taste and texture of this chicken will definitely make you want to eat more so make sure to prepare a lot!  Be very generous with the cheese by the way. It makes this really good! The taste of lightly toasted cheese on top is super delicious! I can’t wait for you to try it. Enjoy!

Ingredients

½ cup butter

4 cloves garlic, minced

¾ cup dry bread crumbs

½ cup freshly grated Parmesan cheese

1 ½ cups shredded Cheddar cheese

¼ teaspoon dried parsley

¼ teaspoon dried oregano

¼ teaspoon ground black pepper

⅛ teaspoon salt

8 breast half, bone and skin removed (blank)s skinless, boneless chicken breast halves – pounded thin

How to make Garlic Cheddar Chicken

Step 1: Ready the oven and preheat to 175 degrees C or 350 degrees F.

Step 2: Place a saucepan on the stove and turn the heat to low.

Step 3: Add in the butter and allow it to melt.

Step 4: Once butter is melted, saute’ the chopped garlic for 5 minutes or until the fragrant and tender.

Step 5: In a large mixing bowl, add in the Parmesan cheese, bread crumbs, oregano, parsley, salt, and pepper.

Step 6: Dip the chicken breasts one at a time into the garlic butter. Coat entirely then dip into the bread crumb mixture.

Step 7: Place the coated chicken breasts into a 9×13-inch baking dish.

Step 8: Drizzle the rest of the butter and bread crumbs on top.

Step 9: Place inside the preheated oven and bake for 30 minutes or until the chicken is cooked through and no longer color pink.

Step 10: Remove from the oven and let it sit on a wire rack for at least 2 minutes.

Step 11: Serve and enjoy!

Nutrition Facts

Per Serving: 400.4 calories; 34.5 g protein; 8.4 g carbohydrates; 129.2 mg cholesterol; 488.1 mg sodium

Garlic Cheddar Chicken

Rebecca Prep: 15 mins | Cook: 40 mins | Total: 55 mins | Servings: 8 | Yield: 8 servings Are you looking for an easy recipe for tonight’s dinner? Then, you… Main Dish Recipes Garlic Cheddar Chicken European Print This
Serves: 8 Prep Time: 15 mins Cooking Time: 40 mins 40 mins
Nutrition facts: 400.4 calories 20 grams fat
Rating: 3.3/5
( 3 voted )

Ingredients

  • ½ cup butter
  • 4 cloves garlic, minced
  • ¾ cup dry bread crumbs
  • ½ cup freshly grated Parmesan cheese
  • 1 ½ cups shredded Cheddar cheese
  • ¼ teaspoon dried parsley
  • ¼ teaspoon dried oregano
  • ¼ teaspoon ground black pepper
  • ⅛ teaspoon salt
  • 8 breast half, bone and skin removed (blank)s skinless, boneless chicken breast halves - pounded thin

Instructions

Step 1: Ready the oven and preheat to 175 degrees C or 350 degrees F.

Step 2: Place a saucepan on the stove and turn the heat to low.

Step 3: Add in the butter and allow it to melt.

Step 4: Once butter is melted, saute' the chopped garlic for 5 minutes or until the fragrant and tender.

Step 5: In a large mixing bowl, add in the Parmesan cheese, bread crumbs, oregano, parsley, salt, and pepper.

Step 6: Dip the chicken breasts one at a time into the garlic butter. Coat entirely then dip into the bread crumb mixture.

Step 7: Place the coated chicken breasts into a 9x13-inch baking dish.

Step 8: Drizzle the rest of the butter and bread crumbs on top.

Step 9: Place inside the preheated oven and bake for 30 minutes or until the chicken is cooked through and no longer color pink.

Step 10: Remove from the oven and let it sit on a wire rack for at least 2 minutes.

Step 11: Serve and enjoy!

August 18, 2020 0 comment
0 FacebookTwitterPinterestEmail
Main Dish Recipes

The Best Classic Pastry Cream

by Rebecca August 18, 2020
written by Rebecca

Prep: 15 mins | Cook: 5 mins | Total: 20 mins | Servings: 8 | Yield: 2 1/2 cups

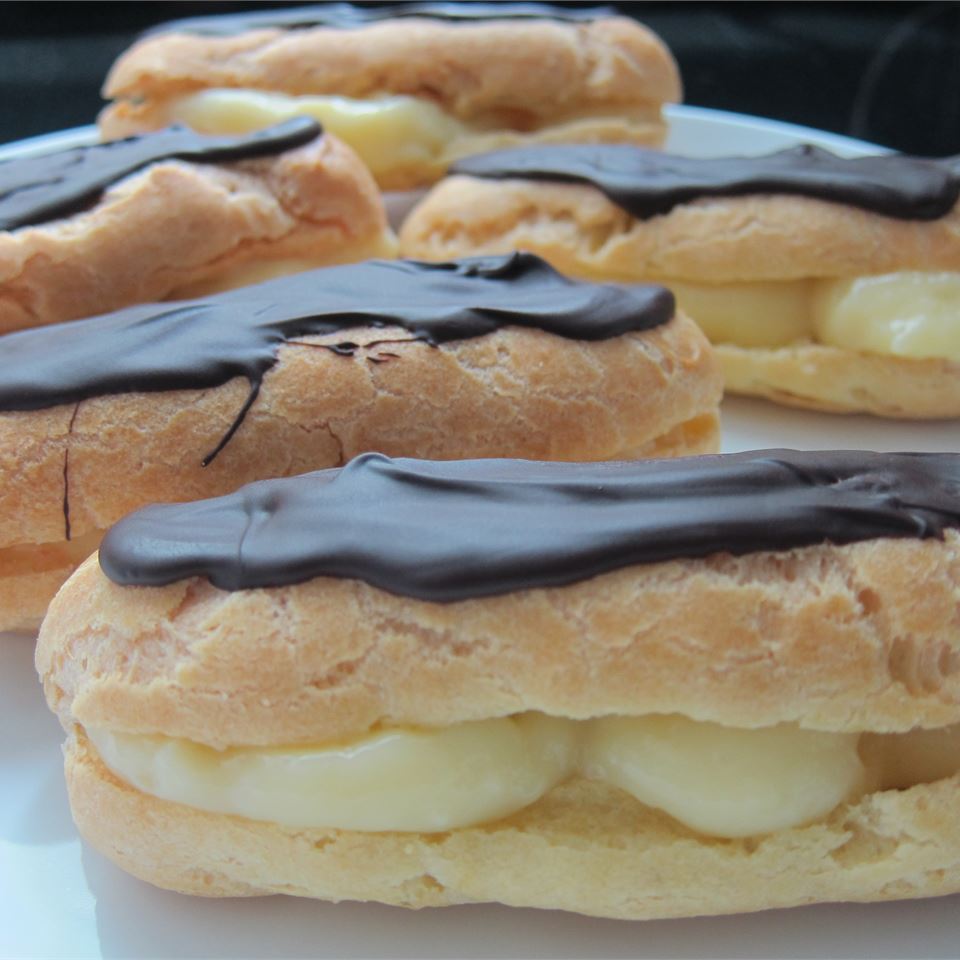
I miss home! This recipe has always been a part of my family since I was a kid. A very easy and simple recipe that you can try at home. Give this one a try and enjoy it with your friends and loved ones! I have listed all the ingredients and steps that you need for this perfect pastry cream.

Ingredients

2 cups milk

¼ cup white sugar

2 large egg yolks egg yolks

1 egg

¼ cup cornstarch

⅓ cup white sugar

2 tablespoons butter

1 teaspoon vanilla extract

How to make Classic Pastry Cream

Step 1: Place a heavy saucepan on the stove and turn the heat to medium.

Step 2: Add in 1/4 cup of sugar and milk. Stir until well mixed. Bring to a boil.

Step 3: In a medium mixing bowl, add in the egg and egg yolks. Whisk until creamy.

Step 4: In a small mixing bowl, add in the rest of the sugar and cornstarch. Stir until well mixed.

Step 5: Transfer the sugar mixture into the egg mixture and stir until well blended.

Step 6: Once the milk is boiling, drizzle into the egg mixture. Use a thin stream to prevent the eggs from cooking.

Step 7: Put the mixture back to the saucepan and bring to a boil at low heat. Stir to prevent the eggs from curdling on the bottom part.

Step 8: Remove from the heat once the mixture boils and becomes thick.

Step 9: Add in the vanilla and butter. Stir until the butter is blended well with the rest of the ingredients.

Step 10: Transfer the mixture into a heat-proof container. Put a plastic wrap on the surface for the skin to form.

Step 11: Place inside the fridge to chill.

Step 12: Serve and enjoy!

Nutrition Facts

Per Serving: 151.3 calories; 3.5 g protein; 21.4 g carbohydrates; 87 mg cholesterol; 56.6 mg sodium

The Best Classic Pastry Cream

Rebecca Prep: 15 mins | Cook: 5 mins | Total: 20 mins | Servings: 8 | Yield: 2 1/2 cups I miss home! This recipe has always been a part of… Main Dish Recipes The Best Classic Pastry Cream European Print This
Serves: 8 Prep Time: 15 mins Cooking Time: 5 mins 5 mins
Nutrition facts: 151.3 calories 20 grams fat
Rating: 5.0/5
( 1 voted )

Ingredients

  • 2 cups milk
  • ¼ cup white sugar
  • 2 large egg yolks egg yolks
  • 1 egg
  • ¼ cup cornstarch
  • ⅓ cup white sugar
  • 2 tablespoons butter
  • 1 teaspoon vanilla extract

Instructions

Step 1: Place a heavy saucepan on the stove and turn the heat to medium.

Step 2: Add in 1/4 cup of sugar and milk. Stir until well mixed. Bring to a boil.

Step 3: In a medium mixing bowl, add in the egg and egg yolks. Whisk until creamy.

Step 4: In a small mixing bowl, add in the rest of the sugar and cornstarch. Stir until well mixed.

Step 5: Transfer the sugar mixture into the egg mixture and stir until well blended.

Step 6: Once the milk is boiling, drizzle into the egg mixture. Use a thin stream to prevent the eggs from cooking.

Step 7: Put the mixture back to the saucepan and bring to a boil at low heat. Stir to prevent the eggs from curdling on the bottom part.

Step 8: Remove from the heat once the mixture boils and becomes thick.

Step 9: Add in the vanilla and butter. Stir until the butter is blended well with the rest of the ingredients.

Step 10: Transfer the mixture into a heat-proof container. Put a plastic wrap on the surface for the skin to form.

Step 11: Place inside the fridge to chill.

Step 12: Serve and enjoy!

August 18, 2020 0 comment
0 FacebookTwitterPinterestEmail
Newer Posts
Older Posts

Popular Posts

  • 1

    Crispy Crunchy Parmesan Potatoes

    March 21, 2020
  • 2

    CROCK POT SMOTHERED PORK CHOPS

    March 21, 2020
  • Facebook
  • Twitter

@2019 - All Right Reserved.


Back To Top