Cook it once
  • Home
  • Privacy Policy
  • Recipes
    • KETO
    • LC
    • WW
  • Tips
  • Contact
Cook it once
  • Home
  • Privacy Policy
  • Recipes
    • KETO
    • LC
    • WW
  • Tips
  • Contact
Category:

Main Dish Recipes

Main Dish Recipes

GERMAN SPAETZLE DUMPLINGS

by Rebecca September 9, 2020
written by Rebecca

Servings: 6 | Yield: 6 servings

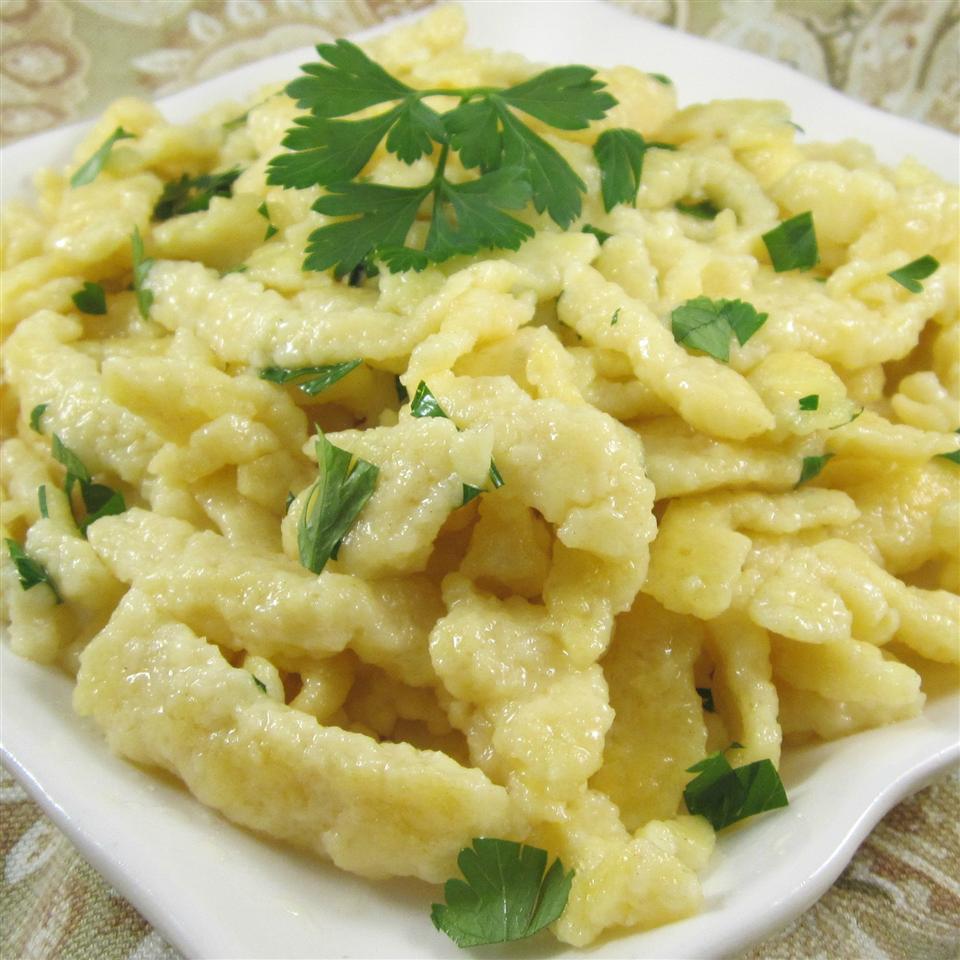
Ever heard of the famous German egg noodle? Spaetzle is a type of pasta made of fresh eggs. It is one of the known delicacies in Germany. If you haven’t had I chance to taste it, then just follow this recipe. Everything you need is listed below.

A friend of mine shared this recipe with me. She’s been in Germany and she said that it is the most talk about dish in Germany. And she knew why. The reason she insisted for me to try this. And heck! She’s right! This German Spaetzle Dumpling tastes amazing! It is the perfect side. Pretty easy to make and very straightforward. It goes along with anything saucy and gravy. And it can be a wonderful main dish, too with melted cheese and crispy fried onions. Or with simple mushroom gravy. Tender homemade spaetzle that your whole family will love! Try this to experience Germany in the comfort of your home.

INGREDIENTS

1 cup all-purpose flour

¼ cup milk

2 large eggs

½ teaspoon ground nutmeg

1 pinch freshly ground white pepper

½ teaspoon salt

1-gallon hot water

2 tablespoons butter

2 tablespoons of chopped fresh parsley

HOW TO MAKE GERMAN SPAETZLE DUMPLINGS

Step 1: In a bowl, add the flour, salt, white pepper, and nutmeg. Mix to combine. Add in the eggs alternately with the milk into the dry ingredients. Beating well until smooth.

Step 2: Using a spaetzle maker, or a large holed sieve, or metal grater, press the dough through.

Step 3: Release the dough a few at a time into the simmering liquid. Cook for about 5 to 8 minutes. When done, drain thoroughly.

Step 4: Then, sautee the cooked spaetzle in butter or margarine.

step 5: Before serving, sprinkle fresh parsley on top of the dumplings. Enjoy!

Nutrition Facts:

Per Serving: 140.9 calories; fat 6g 9% DV; cholesterol 73mg 24% DV; sodium 268.6mg 11% DV; protein 4.7g 9% DV; carbohydrates 16.8g 5% DV

GERMAN SPAETZLE DUMPLINGS

Rebecca Servings: 6 | Yield: 6 servings Ever heard of the famous German egg noodle? Spaetzle is a type of pasta made of fresh eggs. It is one of the known delicacies in Germany.… Main Dish Recipes GERMAN SPAETZLE DUMPLINGS European Print This
Serves: 6
Nutrition facts: 140.9 calories 6 fat
Rating: 5.0/5
( 1 voted )

Ingredients

  • 1 cup all-purpose flour
  • ¼ cup milk
  • 2 large eggs
  • ½ teaspoon ground nutmeg
  • 1 pinch freshly ground white pepper
  • ½ teaspoon salt
  • 1-gallon hot water
  • 2 tablespoons butter
  • 2 tablespoons of chopped fresh parsley

Instructions

Step 1: In a bowl, add the flour, salt, white pepper, and nutmeg. Mix to combine. Add in the eggs alternately with the milk into the dry ingredients. Beating well until smooth.

Step 2: Using a spaetzle maker, or a large holed sieve, or metal grater, press the dough through.

Step 3: Release the dough a few at a time into the simmering liquid. Cook for about 5 to 8 minutes. When done, drain thoroughly.

Step 4: Then, sautee the cooked spaetzle in butter or margarine.

step 5: Before serving, sprinkle fresh parsley on top of the dumplings. Enjoy!
September 9, 2020 0 comment
0 FacebookTwitterPinterestEmail
Main Dish Recipes

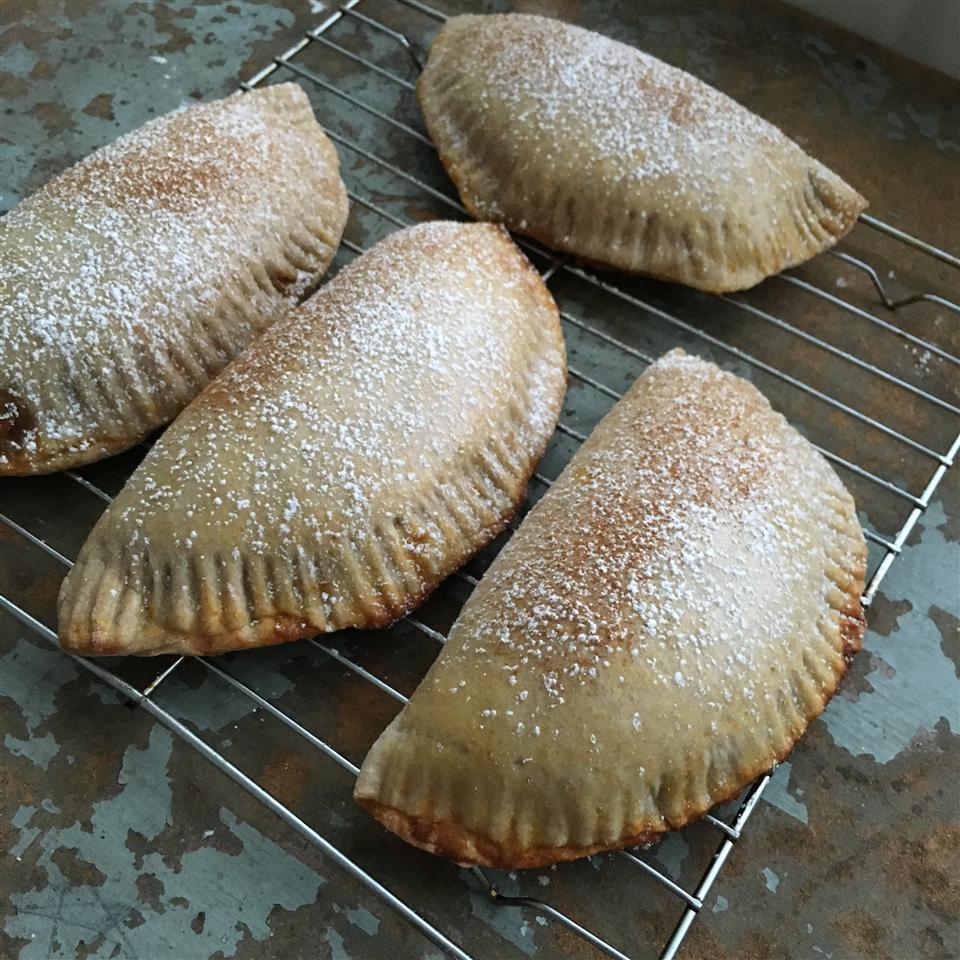
MEXICAN PUMPKIN EMPANADAS

by Rebecca September 9, 2020
written by Rebecca

Prep: 40 mins | Cook: 20 mins | Total: 1 hr | Servings: 12 | Yield: 12 empanada

My mom makes the best empanada. She has her recipe and I have mine. I am about to share with her this amazing Mexican Pumpkin Empanada recipe that I found a few weeks ago. Pretty simple, not fussy, and darn delicious! I am a hundred percent sure that she’ll love these empanadas. So good, it blew my mind!

INGREDIENTS

3 cups all-purpose flour

⅓ cup white sugar

1 ½ teaspoon salt

¼ teaspoon baking powder

1 cup vegetable shortening

1 cup of warm water

4 cups canned pure pumpkin

2 large eggs

1 cup white sugar

1 teaspoon salt

1 ½ teaspoon ground cinnamon

1 teaspoon ground ginger

½ teaspoon ground cloves

1 beaten egg

HOW TO MAKE MEXICAN PUMPKIN EMPANADAS

Step 1: Prepare the oven. Preheat it to 350 degrees F or 175 degrees C.

Step 2: Use a parchment paper to line the baking sheets.

Step 3: Add the flour, 1/3 cup of sugar, 1 1/2 tsp of salt, and baking powder in a large bowl. Whisk well. Add in the shortening until the mixture resembles coarse crumbs. Add in the water, about 2 tablespoons at a time. Stir until you can gather the dough together.

Step 4: Knead the dough several times in a bowl. And scrape the dough out onto a floured surface. Divide the dough in quarters and cut each into thirds to create 12 equal portions. Roll each into balls and cover them with a cloth. Let the balls rest until you are done making the filling.

Step 5: In a bowl, add in the pumpkin, 2 eggs, a cup of sugar, 1 teaspoon of salt, cinnamon, ginger, and cloves. Mix until smooth.

Step 6: On a floured surface, roll the dough out about 6 inches across into a thin circle. Put about 1/3 cup of the filling into the middle of the dough circle.

Step 7: Make half-moon shaped pie by folding the dough over the filling. With a fork, crimp the edges of the crust, leaving small fork lines in the dough.

Step 8: On the prepared baking sheets, gently lay the empanadas. Then, brush the top of the pies with a beaten egg.

Step 9: Place inside the preheated oven and bake for about 20 minutes until the filling is hot and the crusts are shiny and browned.

Nutrition Facts:

Per Serving: 384.2 calories; fat 18.6g 29% DV; cholesterol 46.5mg 16% DV; sodium 709.8mg 28% DV; protein 5.5g 11% DV; carbohydrates 52.3g 17% DV

MEXICAN PUMPKIN EMPANADAS

Rebecca Prep: 40 mins | Cook: 20 mins | Total: 1 hr | Servings: 12 | Yield: 12 empanada My mom makes the best empanada. She has her recipe and I have mine. I am about to… Main Dish Recipes MEXICAN PUMPKIN EMPANADAS European Print This
Serves: 12 Prep Time: 40 mins Cooking Time: 20 mins 20 mins
Nutrition facts: 384.2 calories 18.6 fat
Rating: 5.0/5
( 1 voted )

Ingredients

  • 3 cups all-purpose flour
  • ⅓ cup white sugar
  • 1 ½ teaspoon salt
  • ¼ teaspoon baking powder
  • 1 cup vegetable shortening
  • 1 cup of warm water
  • 4 cups canned pure pumpkin
  • 2 large eggs
  • 1 cup white sugar
  • 1 teaspoon salt
  • 1 ½ teaspoon ground cinnamon
  • 1 teaspoon ground ginger
  • ½ teaspoon ground cloves
  • 1 beaten egg

Instructions

Step 1: Prepare the oven. Preheat it to 350 degrees F or 175 degrees C.

Step 2: Use a parchment paper to line the baking sheets.

Step 3: Add the flour, 1/3 cup of sugar, 1 1/2 tsp of salt, and baking powder in a large bowl. Whisk well. Add in the shortening until the mixture resembles coarse crumbs. Add in the water, about 2 tablespoons at a time. Stir until you can gather the dough together.

Step 4: Knead the dough several times in a bowl. And scrape the dough out onto a floured surface. Divide the dough in quarters and cut each into thirds to create 12 equal portions. Roll each into balls and cover them with a cloth. Let the balls rest until you are done making the filling.

Step 5: In a bowl, add in the pumpkin, 2 eggs, a cup of sugar, 1 teaspoon of salt, cinnamon, ginger, and cloves. Mix until smooth.

Step 6: On a floured surface, roll the dough out about 6 inches across into a thin circle. Put about 1/3 cup of the filling into the middle of the dough circle.

Step 7: Make half-moon shaped pie by folding the dough over the filling. With a fork, crimp the edges of the crust, leaving small fork lines in the dough.

Step 8: On the prepared baking sheets, gently lay the empanadas. Then, brush the top of the pies with a beaten egg.

Step 9: Place inside the preheated oven and bake for about 20 minutes until the filling is hot and the crusts are shiny and browned.

September 9, 2020 0 comment
0 FacebookTwitterPinterestEmail
Main Dish Recipes

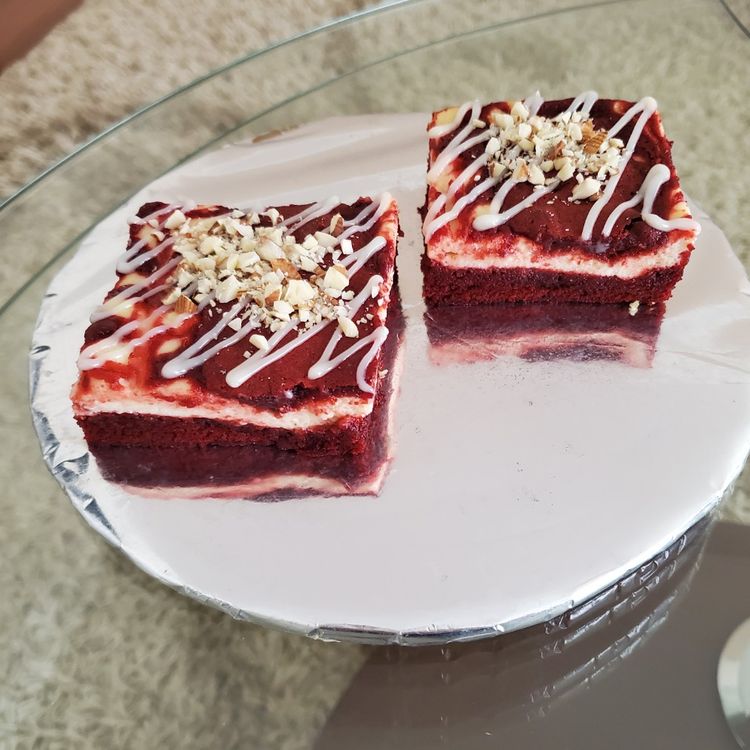
RED VELVET CHEESECAKE BROWNIES

by Rebecca September 9, 2020
written by Rebecca

Active time: 20 mins | Total: 1 hr 50 mins | Yield: 24 brownies

The ultimate surprise is the superb taste of this Red Velvet chocolate brownies with a tangy cheesecake. I ate a lot of red velvets before and nothing taste like this. It is the perfect treat for all the chocolate lovers. One bite and you’ll fall madly in love with this delectable treat.

INGREDIENTS

For the Batter:

Baking spray with flour

3/4 (6 oz.) cup unsalted butter

1 (4-oz.) 70% bittersweet chocolate baking bar, chopped

2 cups granulated sugar

4 large eggs

1 tablespoon red food coloring gel (such as Super Red)

2 teaspoons vanilla extract

1 1/2 (6 3/8 oz.) cups all-purpose flour

1/3 (1 1/8 oz.) cup unsweetened cocoa

1/4 teaspoon kosher salt

For the Cream Cheese Swirl:

2 large egg whites

1 (8-oz.) pkg. cream cheese softened

1/4 cup granulated sugar

2 tablespoons of all-purpose flour

1 teaspoons vanilla extract

HOW TO MAKE RED VELVET CHEESECAKE BROWNIES

Step 1: Prepare the oven. Preheat it to 350 degrees F.

Step 2: To make the batter, grease with cooking spray a 13 x 9-inch baking dish. Use a parchment paper to line the bottom and sides of the dish, making sure to leave 2 to 3-inch overhang on each side. Then, lightly grease the parchment paper with baking spray.

Step 3: In a large microwavable bowl, add the butter and chocolate. Microwave on high for about 1 1/2 to 2 minutes, stirring every 30 seconds, until melted and smooth. Whisk in the sugar and add in the eggs, one at a time, whisking every after each addition until just blended. Add in the food coloring and vanilla and whisk.

Step 4: In a separate bowl, add the flour, cocoa, and salt. Mix well, then, whisk into the butter mixture until just combined. And transfer into the prepared baking dish.

Step 5: To make the Cream Cheese Swirl, add the egg whites, cream cheese, and sugar in a mixing bowl. Mix with an electric mixer fitted with a paddle attachment for about 2 minutes on medium speed until smooth. Add in the flour and vanilla. Continue beating on low speed for about a minute until combined.

Step 6: In large tablespoons, drop the Cream Cheese Swirl into the batter. Using a knife, gently swirl to make a marble effect.

Step 7: Place inside the preheated oven and bake for about 30 to 35 minutes or until a toothpick inserted in the center comes out clean.

Step 8: Remove from the oven and allow the brownie to cool in the baking sheet on a wire rack for at least an hour.

RED VELVET CHEESECAKE BROWNIES

Rebecca Active time: 20 mins | Total: 1 hr 50 mins | Yield: 24 brownies The ultimate surprise is the superb taste of this Red Velvet chocolate brownies with a tangy cheesecake. I ate a lot… Main Dish Recipes RED VELVET CHEESECAKE BROWNIES European Print This
Serves: 24 Prep Time: 20 mins
Nutrition facts: 200 calories 20 grams fat
Rating: 5.0/5
( 1 voted )

Ingredients

  • For the Batter:
  • Baking spray with flour
  • 3/4 (6 oz.) cup unsalted butter
  • 1 (4-oz.) 70% bittersweet chocolate baking bar, chopped
  • 2 cups granulated sugar
  • 4 large eggs
  • 1 tablespoon red food coloring gel (such as Super Red)
  • 2 teaspoons vanilla extract
  • 1 1/2 (6 3/8 oz.) cups all-purpose flour
  • 1/3 (1 1/8 oz.) cup unsweetened cocoa
  • 1/4 teaspoon kosher salt
  • For the Cream Cheese Swirl:
  • 2 large egg whites
  • 1 (8-oz.) pkg. cream cheese softened
  • 1/4 cup granulated sugar
  • 2 tablespoons of all-purpose flour
  • 1 teaspoons vanilla extract

Instructions

Step 1: Prepare the oven. Preheat it to 350 degrees F.

Step 2: To make the batter, grease with cooking spray a 13 x 9-inch baking dish. Use a parchment paper to line the bottom and sides of the dish, making sure to leave 2 to 3-inch overhang on each side. Then, lightly grease the parchment paper with baking spray.

Step 3: In a large microwavable bowl, add the butter and chocolate. Microwave on high for about 1 1/2 to 2 minutes, stirring every 30 seconds, until melted and smooth. Whisk in the sugar and add in the eggs, one at a time, whisking every after each addition until just blended. Add in the food coloring and vanilla and whisk.

Step 4: In a separate bowl, add the flour, cocoa, and salt. Mix well, then, whisk into the butter mixture until just combined. And transfer into the prepared baking dish.

Step 5: To make the Cream Cheese Swirl, add the egg whites, cream cheese, and sugar in a mixing bowl. Mix with an electric mixer fitted with a paddle attachment for about 2 minutes on medium speed until smooth. Add in the flour and vanilla. Continue beating on low speed for about a minute until combined.

Step 6: In large tablespoons, drop the Cream Cheese Swirl into the batter. Using a knife, gently swirl to make a marble effect.

Step 7: Place inside the preheated oven and bake for about 30 to 35 minutes or until a toothpick inserted in the center comes out clean.

Step 8: Remove from the oven and allow the brownie to cool in the baking sheet on a wire rack for at least an hour.

September 9, 2020 0 comment
0 FacebookTwitterPinterestEmail
Main Dish Recipes

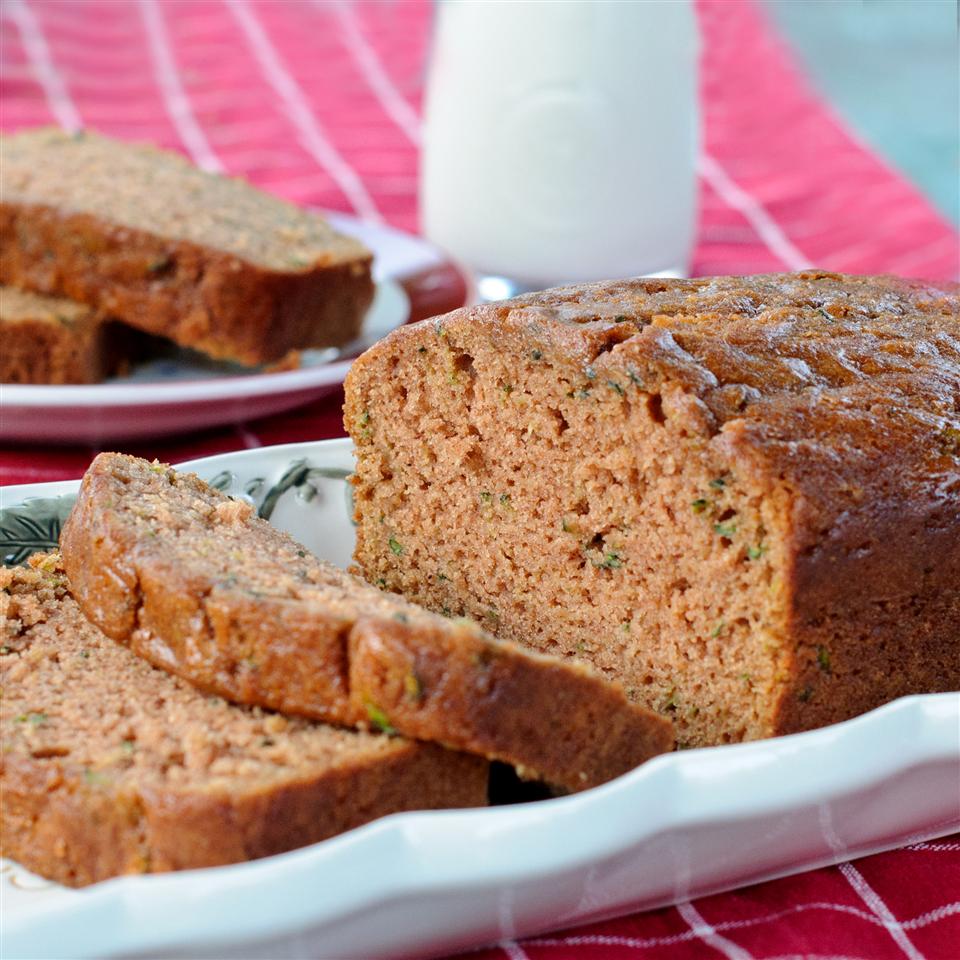
MOM’S ZUCCHINI BREAD

by Rebecca September 9, 2020
written by Rebecca

Prep: 20 mins | Cook: 1hr | Additional: 20 mins | Total: 1 hr 40 mins | Servings: 24 | Yield: 2 loaves

Your search ends here. This is the best recipe for the moistest and delicious Zucchini Bread. It has the perfect blend of everything. Take a big bite of this healthy bread. You outa know by now my love for everything zucchini. Not only that this is a breeze to make and zucchini, as you all know, has lots of amazing health benefits and it is one of the most versatile. Give this a try and I am pretty sure that you and your whole family will love and enjoy this treat.

INGREDIENTS

3 cups all-purpose flour

1 teaspoon salt

1 teaspoon baking soda

1 teaspoon baking powder

1 tablespoon ground cinnamon

3 large eggs

1 cup of vegetable oil

2 ¼ cups white sugar

3 teaspoons vanilla extract

2 cups grated zucchini

1 cup chopped walnuts

HOW TO MAKE MOM’S ZUCCHINI BREAD

Step 1: Prepare the oven. Preheat it to 325 degrees F or 165 degrees C.

Step 2: Then, grease and flour two 8 x 4-inch pans.

Step 3: In a bowl, sift the flour, salt, baking powder, soda, and cinnamon.

Step 4: In a large bowl, beat the eggs, then, add in the oil, vanilla, and sugar. Stir in the sifted ingredients and beat thoroughly. Add in the zucchini and nuts and mix until well combined.

Step 5: Transfer the batter into the prepared pans.

Step 6: Place inside the preheated oven and bake for about 40 to 60 minutes or until a toothpick inserted in the center comes out clean.

Step 7: Remove from the oven and allow the bread to cool for at least 20 minutes in the pan on a wire rack. Then, remove the bread from the pan and transfer onto a wire rack to cool completely.

NOTE:

This recipe yields 2 loaves. You can freeze these loaves until ready to eat.

Nutrition Facts:

Per Serving: 255.2 calories; fat 13.1g 20% DV; cholesterol 23.3mg 8% DV; sodium 179.8mg 7% DV; protein 3.3g 7% DV; carbohydrates 32.1g 10% DV

MOM’S ZUCCHINI BREAD

Rebecca Prep: 20 mins | Cook: 1hr | Additional: 20 mins | Total: 1 hr 40 mins | Servings: 24 | Yield: 2 loaves Your search ends here. This is the best recipe for the moistest and delicious Zucchini Bread. It has… Main Dish Recipes MOM’S ZUCCHINI BREAD European Print This
Serves: 24 Prep Time: 20 mins Cooking Time: 1 hr 20 mins 1 hr 20 mins
Nutrition facts: 255.2 calories 13.1 fat
Rating: 5.0/5
( 1 voted )

Ingredients

  • 3 cups all-purpose flour
  • 1 teaspoon salt
  • 1 teaspoon baking soda
  • 1 teaspoon baking powder
  • 1 tablespoon ground cinnamon
  • 3 large eggs
  • 1 cup of vegetable oil
  • 2 ¼ cups white sugar
  • 3 teaspoons vanilla extract
  • 2 cups grated zucchini
  • 1 cup chopped walnuts

Instructions

Step 1: Prepare the oven. Preheat it to 325 degrees F or 165 degrees C.

Step 2: Then, grease and flour two 8 x 4-inch pans.

Step 3: In a bowl, sift the flour, salt, baking powder, soda, and cinnamon.

Step 4: In a large bowl, beat the eggs, then, add in the oil, vanilla, and sugar. Stir in the sifted ingredients and beat thoroughly. Add in the zucchini and nuts and mix until well combined.

Step 5: Transfer the batter into the prepared pans.

Step 6: Place inside the preheated oven and bake for about 40 to 60 minutes or until a toothpick inserted in the center comes out clean.

Step 7: Remove from the oven and allow the bread to cool for at least 20 minutes in the pan on a wire rack. Then, remove the bread from the pan and transfer onto a wire rack to cool completely.

NOTE:

This recipe yields 2 loaves. You can freeze these loaves until ready to eat.

September 9, 2020 0 comment
0 FacebookTwitterPinterestEmail
Main Dish Recipes

CHARLEY’S SLOW COOKER MEXICAN STYLE MEAT

by Rebecca September 9, 2020
written by Rebecca

Prep: 30mins | Cook: 8hrs | Additional: 20 mins | Total: 8 hrs 50 mins | Servings: 12 | Yield: 12 servings

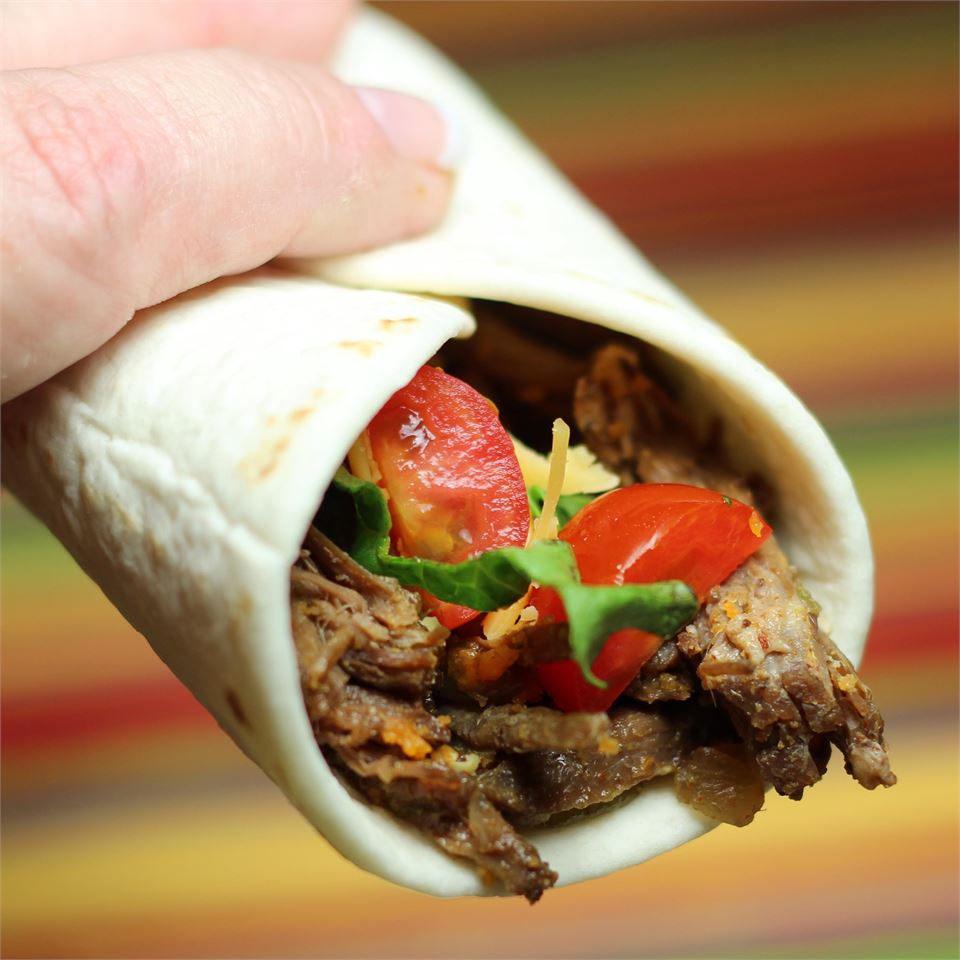
Perfect in every way! This dish is all you need for a quick and easy meal. Amazing to use with just about anything, but I love it personally with nachos, burritos, and salad. Outrageously mouthwatering and darn delicious!

INGREDIENTS

1 (4 lbs) chuck roast

1 teaspoon salt

1 teaspoon ground black pepper

2 tablespoons olive oil

1 large onion, chopped

1 ¼ cups diced green chile pepper

1 teaspoon chili powder

1 teaspoon ground cayenne pepper

1 (5 oz) bottle hot pepper sauce

1 teaspoon garlic powder

HOW TO MAKE CHARLEY’S SLOW COOKER MEXICAN STYLE MEAT

Step 1: Remove any excess fat from the roast, then, season with salt and pepper.

Step 2: In a large skillet, heat the olive oil over medium-high heat. Once hot, add the beef and quickly brown on each side.

Step 3: Then, move the roast into a slow cooker and top it with chopped onion. Season with chile peppers, chili powder, cayenne pepper, hot pepper sauce, and garlic powder. Pour enough water to at least cover 1/3 of the roast.

Step 4: Cook the roast on top for about 6 hours, covered. See if there is a little amount of water remained in the bottom of the cooker before adjusting the heat to low. Continue to cook for another 2 to 4 hours or until the meat is tender ad falling apart.

Step 5: Place the cooked roast into a bowl and use 2 forks to shred the meat. Making sure to reserve 2 cups of cooking liquid if you prefer.

Step 6: Serve the shredded roast in tacos or burritos. Enjoy!

NOTES:

If using the meat for burritos, first shred the meat, then, put it in a frying pan with a cup of liquid. Let it simmer for about 5 minutes until the sauce is thick.

Grab a freeze-proof container, add in the reserved cups of cooking liquid along with the meat. Place inside the fridge to freeze or microwave for up to 6 months. Thaw when ready to cook.

This recipe works perfectly with pork and chicken, too. Just cut the skin before cooking and adjust to high and cook for 4 hours or low to cook for 8 hours. After cooking, cut the bones and shred the meat.

Nutrition Facts:

Per Serving: 260.5 calories; fat 19.1g 29% DV; cholesterol 68.7mg 23% DV; sodium 314.7mg 13% DV; protein 18.4g 37% DV; carbohydrates 3.3g 1% DV

CHARLEY’S SLOW COOKER MEXICAN STYLE MEAT

Rebecca Prep: 30mins | Cook: 8hrs | Additional: 20 mins | Total: 8 hrs 50 mins | Servings: 12 | Yield: 12 servings Perfect in every way! This dish is all you need for a quick and easy meal. Amazing to use… Main Dish Recipes CHARLEY’S SLOW COOKER MEXICAN STYLE MEAT European Print This
Serves: 12 Prep Time: 30 mins Cooking Time: 8 hrs 20 mins 8 hrs 20 mins
Nutrition facts: 260.5 calories 19.1 fat
Rating: 3.4/5
( 28 voted )

Ingredients

  • 1 (4 lbs) chuck roast
  • 1 teaspoon salt
  • 1 teaspoon ground black pepper
  • 2 tablespoons olive oil
  • 1 large onion, chopped
  • 1 ¼ cups diced green chile pepper
  • 1 teaspoon chili powder
  • 1 teaspoon ground cayenne pepper
  • 1 (5 oz) bottle hot pepper sauce
  • 1 teaspoon garlic powder

Instructions

Step 1: Remove any excess fat from the roast, then, season with salt and pepper.

Step 2: In a large skillet, heat the olive oil over medium-high heat. Once hot, add the beef and quickly brown on each side.

Step 3: Then, move the roast into a slow cooker and top it with chopped onion. Season with chile peppers, chili powder, cayenne pepper, hot pepper sauce, and garlic powder. Pour enough water to at least cover 1/3 of the roast.

Step 4: Cook the roast on top for about 6 hours, covered. See if there is a little amount of water remained in the bottom of the cooker before adjusting the heat to low. Continue to cook for another 2 to 4 hours or until the meat is tender ad falling apart.

Step 5: Place the cooked roast into a bowl and use 2 forks to shred the meat. Making sure to reserve 2 cups of cooking liquid if you prefer.

Step 6: Serve the shredded roast in tacos or burritos. Enjoy!

NOTES:

If using the meat for burritos, first shred the meat, then, put it in a frying pan with a cup of liquid. Let it simmer for about 5 minutes until the sauce is thick.

Grab a freeze-proof container, add in the reserved cups of cooking liquid along with the meat. Place inside the fridge to freeze or microwave for up to 6 months. Thaw when ready to cook.

This recipe works perfectly with pork and chicken, too. Just cut the skin before cooking and adjust to high and cook for 4 hours or low to cook for 8 hours. After cooking, cut the bones and shred the meat.

September 9, 2020 0 comment
0 FacebookTwitterPinterestEmail
Main Dish Recipes

ORANGE’S FAMOUS OATMEAL SCOTCHIES!

by Rebecca September 9, 2020
written by Rebecca

Prep: 15 mins | Cook: 10 mins | Additional: 1 hr| Total: 1 hr 25 mins | Servings: 36 | Yield: 3 dozen cookies

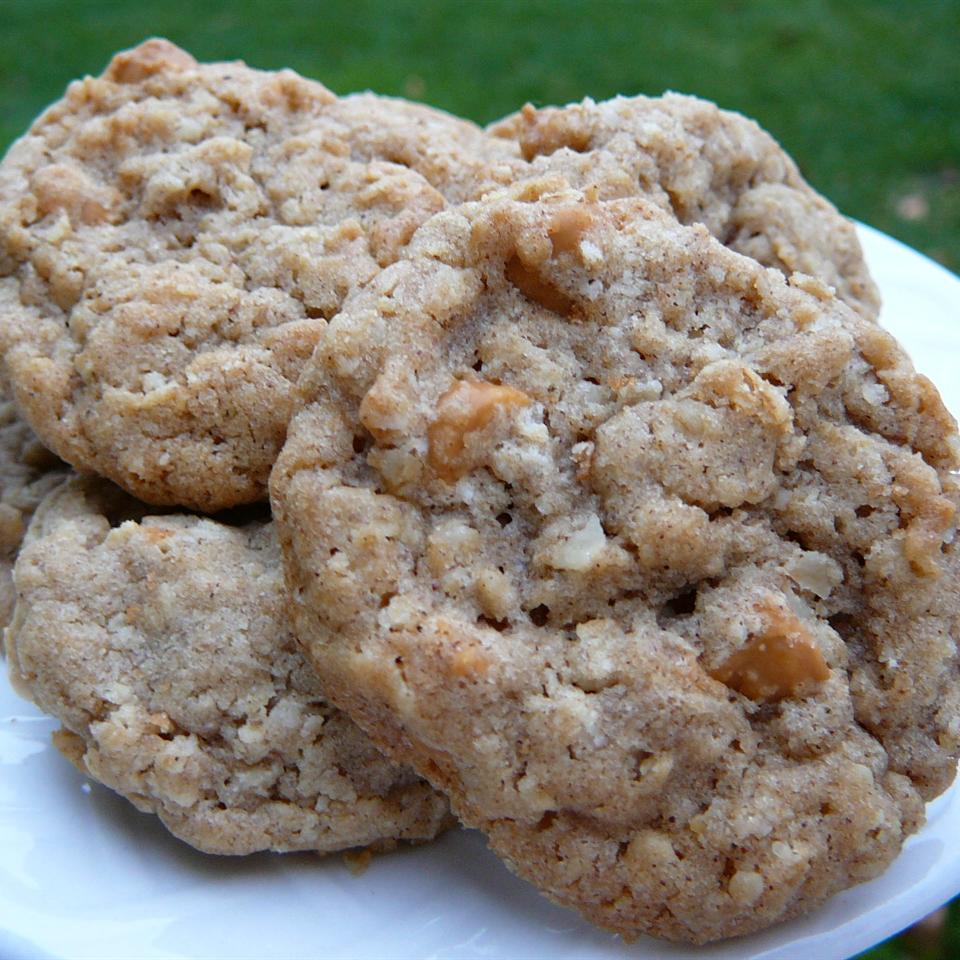
These cookies are perfect! Addictive with a hint of cinnamon and loaded with butterscotch chips. Not too sweet and are darn delicious. These lovely cookies hit all the right spots! Crunchy, chewy, and “oat” so yummy. Don’t forget to share these with family and friends. I am sure they will love these scotches!

INGREDIENTS

1 cup butter, softened

¾ cup firmly packed light brown sugar

¾ cup white sugar

2 large eggs

1 ½ teaspoons vanilla extract

1 ½ cups all-purpose flour

1 teaspoon baking soda

2 teaspoons ground cinnamon

½ teaspoon salt

2 cups rolled oats, or as needed

1 cup butterscotch chips

HOW TO MAKE ORANGE’S FAMOUS OATMEAL SCOTCHIES

Step 1: In a large bowl, add the butter, brown sugar, and white sugar. Beat using an electric mixer until smooth.

Step 2: Beat in the egg until well combined. Followed by the vanilla, then, the last egg. Mixing well every after addition.

Step 3: In another bowl, whisk the flour, baking soda, cinnamon, and salt.

Step 4: Mix in the flour mixture about half a cup at a time into the butter mixture. Fold in the oats and butterscotch chips. If the dough isn’t firm enough, you can add in more rolled oats about 1/4 cup at a time until you reached your desired consistency.

Step 5: Place the dough in the fridge for at least 1 to 2 hours before baking.

Step 6: Meanwhile, prepare the oven. Preheat it to 350 degrees F or 175 degrees C.

Step 7: Roll a heaping tablespoonful of dough into balls. Place the balls on baking sheets about 2 inches apart.

Step 8: Place inside the preheated oven and bake for about 10 to 12 minutes until very light brown and the cookies are done in the middle.

Step 9: Remove from the oven and allow the cookies to cool for at least 5 minutes before removing them from the baking sheets. Cool the cookies completely on wire racks.

ORANGE’S FAMOUS OATMEAL SCOTCHIES!

Rebecca Prep: 15 mins | Cook: 10 mins | Additional: 1 hr| Total: 1 hr 25 mins | Servings: 36 | Yield: 3 dozen cookies These cookies are perfect! Addictive with a hint of cinnamon and loaded with butterscotch chips. Not… Main Dish Recipes ORANGE’S FAMOUS OATMEAL SCOTCHIES! European Print This
Serves: 36 Prep Time: 15 mins Cooking Time: 1 hr 10 mins 1 hr 10 mins
Nutrition facts: 200 calories 20 grams fat
Rating: 5.0/5
( 1 voted )

Ingredients

  • 1 cup butter, softened
  • ¾ cup firmly packed light brown sugar
  • ¾ cup white sugar
  • 2 large eggs
  • 1 ½ teaspoons vanilla extract
  • 1 ½ cups all-purpose flour
  • 1 teaspoon baking soda
  • 2 teaspoons ground cinnamon
  • ½ teaspoon salt
  • 2 cups rolled oats, or as needed
  • 1 cup butterscotch chips

Instructions

Step 1: In a large bowl, add the butter, brown sugar, and white sugar. Beat using an electric mixer until smooth.

Step 2: Beat in the egg until well combined. Followed by the vanilla, then, the last egg. Mixing well every after addition.

Step 3: In another bowl, whisk the flour, baking soda, cinnamon, and salt.

Step 4: Mix in the flour mixture about half a cup at a time into the butter mixture. Fold in the oats and butterscotch chips. If the dough isn't firm enough, you can add in more rolled oats about 1/4 cup at a time until you reached your desired consistency.

Step 5: Place the dough in the fridge for at least 1 to 2 hours before baking.

Step 6: Meanwhile, prepare the oven. Preheat it to 350 degrees F or 175 degrees C.

Step 7: Roll a heaping tablespoonful of dough into balls. Place the balls on baking sheets about 2 inches apart.

Step 8: Place inside the preheated oven and bake for about 10 to 12 minutes until very light brown and the cookies are done in the middle.

Step 9: Remove from the oven and allow the cookies to cool for at least 5 minutes before removing them from the baking sheets. Cool the cookies completely on wire racks.

September 9, 2020 0 comment
0 FacebookTwitterPinterestEmail
Main Dish Recipes

INSTANT POT® GARLIC ROASTED MELTING POTATOES

by Rebecca September 8, 2020
written by Rebecca

Prep: 5 mins | Cook: 20mins | Additional: 5 mins | Total: 30 mins | Servings: 2 | Yield: 2 servings

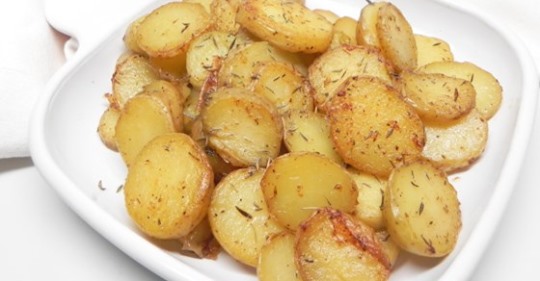
Potatoes are one of the most versatile. You can make them into anything. One of the best I’ve made is this Instant Pot Garlic Roasted Melting Potatoes. Creamy with a perfect crunch, and soft melting potatoes. A pretty simple, not fussy potato recipe that you can make any time. These garlic-infused potatoes are a quick and easy addition to your weeknight menu.

Ingredients

½ cup butter

1 lb of Yukon Gold potatoes, peeled, cut into 1/2-inch slices

¾ cup chicken broth

1 teaspoon ground thyme

1 teaspoon salt

½ teaspoon ground black pepper

2 cloves garlic, peeled and lightly crushed

HOW TO MAKE INSTANT POT® GARLIC ROASTED MELTING POTATOES

Step 1: Ready a pressure cooker and select Saute function in the settings.

Step 2: Place a small skillet on the stove and add in butter. Allow the butter to melt.

Step 3: Add the potato rounds and cook them for 5 minutes or until the color turns golden.

Step 4: Remove the potatoes and put them on a clean plate then set aside.

Step 5: Put the trivet indie the pot and add in the chicken broth. Season it with thyme, salt, and pepper to taste.

Step 6: Add in garlic and cook for 1 minute or until aromatic.

Step 7: Transfer the cooked potatoes into the pot and cover with the lid.

Step 8: Set the timer to 1 minute on high setting.

Step 9: Use quick release to allow the pressure to come out. This will probably last 5 minutes or less.

Step 10: Open the pressure cooker and remove the potatoes.

Step 11: Select Saute function and cook the butter mixture and broth for 2 minutes or until it reduces its amount.

Step 12: Put the potatoes back to the slow cooker and cook for another 3 minutes or until it turns golden.

Step 13: Serve hot and enjoy!

Nutrition Facts:

Per Serving: 600.8 calories; fat 46.6g 72% DV; cholesterol 124.3mg 41% DV; sodium 1940.7mg 78% DV; protein 5.9g 12% DV; carbohydrates 43.1g 14% DV

INSTANT POT® GARLIC ROASTED MELTING POTATOES

Rebecca Prep: 5 mins | Cook: 20mins | Additional: 5 mins | Total: 30 mins | Servings: 2 | Yield: 2 servings Potatoes are one of the most versatile. You can make them into anything. One of the best I’ve made is… Main Dish Recipes INSTANT POT® GARLIC ROASTED MELTING POTATOES European Print This
Serves: 2 Prep Time: 5 mins Cooking Time: 25 mins 25 mins
Nutrition facts: 600.8 calories 46.6 fat
Rating: 5.0/5
( 1 voted )

Ingredients

  • ½ cup butter
  • 1 lb of Yukon Gold potatoes, peeled, cut into 1/2-inch slices
  • ¾ cup chicken broth
  • 1 teaspoon ground thyme
  • 1 teaspoon salt
  • ½ teaspoon ground black pepper
  • 2 cloves garlic, peeled and lightly crushed

Instructions

Step 1: Ready a pressure cooker and select Saute function in the settings.

Step 2: Place a small skillet on the stove and add in butter. Allow the butter to melt.

Step 3: Add the potato rounds and cook them for 5 minutes or until the color turns golden.

Step 4: Remove the potatoes and put them on a clean plate then set aside.

Step 5: Put the trivet indie the pot and add in the chicken broth. Season it with thyme, salt, and pepper to taste.

Step 6: Add in garlic and cook for 1 minute or until aromatic.

Step 7: Transfer the cooked potatoes into the pot and cover with the lid.

Step 8: Set the timer to 1 minute on high setting.

Step 9: Use quick release to allow the pressure to come out. This will probably last 5 minutes or less.

Step 10: Open the pressure cooker and remove the potatoes.

Step 11: Select Saute function and cook the butter mixture and broth for 2 minutes or until it reduces its amount.

Step 12: Put the potatoes back to the slow cooker and cook for another 3 minutes or until it turns golden.

Step 13: Serve hot and enjoy!

September 8, 2020 0 comment
0 FacebookTwitterPinterestEmail
Main Dish Recipes

FRIED DANDELIONS (APPALACHIAN STYLE)

by Rebecca September 8, 2020
written by Rebecca

Prep: 20 mins | Cook: 10mins | Total: 30 mins | Servings: 8 | Yield: 8 servings

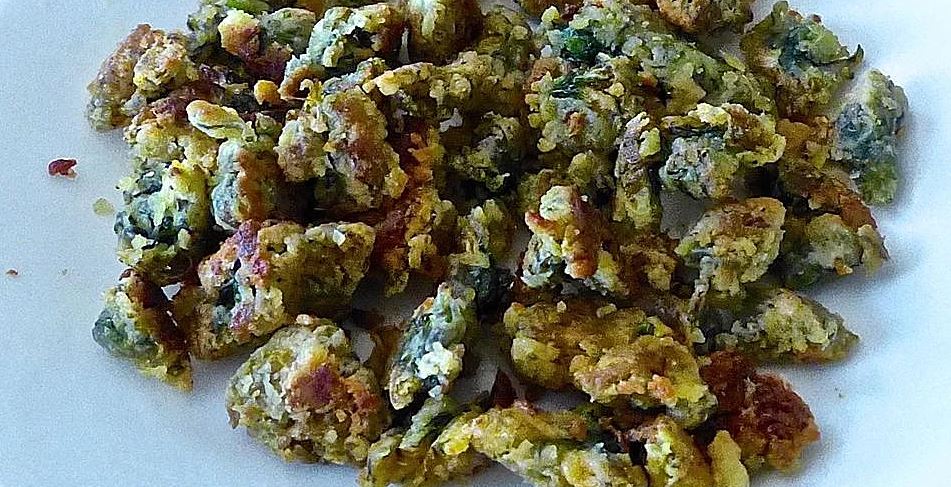
Fried Dandelions? I never heard about it since this. I never thought that frying the biggest dandelions is possible. I mean dandelions? I read about this many times and never thought I would give this a try one day. I am glad I did because I would never have tasted how good these are!

INGREDIENTS

2 cups all-purpose flour

2 tablespoons seasoned salt

1 tablespoon ground black pepper

4 large eggs

80 flowers unopened dandelion blossoms stems removed

½ cup butter

HOW TO MAKE FRIED DANDELIONS (APPALACHIAN STYLE)

Step 1: In a medium mixing bowl, add flour, pepper, and seasoned salt. Whisk until well mixed.

Step 2: In another medium mixing bowl, add in the eggs. Beat until creamy then add in the dandelion blossoms. Coat them well with the beaten eggs.

Step 3: Place a large skillet on the stove and turn the heat to medium.

Step 4: Add in the butter and allow it to melt.

Step 5: Remove half of the coated dandelions from the bowl and remove the excess eggs.

Step 6: Toss in the dandelions into the flour mixture and coat them evenly. Pat the coated dandelions to remove the excess flour.

Step 7: Add in the dandelions into the skillet and cook for 5 minutes or until the color turns golden brown. Stir from time to time to prevent burning.

Step 8: Place the cooked dandelions on a clean plate lined with a paper towel. Repeat this method to the rest of the coated dandelions.

Step 9: Serve and enjoy!

NOTES: 

Always prepare the dandelions before your cooking. Submerge them in a bowl with water and 1 tablespoon of salt then let it sit at room temperature for 10 minutes. This process gets rid of the insects inside the blossom. Rinse with running water and they are ready for cooking.

Only use dandelions with tubular stalk.

I use vegetable oil or canola oil. Either way works perfectly well with dandelions. Season it with spices or just simply garlic powder for more additional flavor.

Nutrition Facts:

Per Serving: 265.8 calories; fat 14.5g 22% DV; cholesterol 123.5mg 41% DV; sodium 821.1mg 33% DV; protein 7.2g 14% DV; carbohydrates 27.2g 9% DV

FRIED DANDELIONS (APPALACHIAN STYLE)

Rebecca Prep: 20 mins | Cook: 10mins | Total: 30 mins | Servings: 8 | Yield: 8 servings Fried Dandelions? I never heard about it since this. I never thought that frying the biggest dandelions is possible. I mean… Main Dish Recipes FRIED DANDELIONS (APPALACHIAN STYLE) European Print This
Serves: 8 Prep Time: 20 mins Cooking Time: 10 mins 10 mins
Nutrition facts: 265.8 calories 14.5 fat
Rating: 3.5/5
( 2 voted )

Ingredients

  • 2 cups all-purpose flour
  • 2 tablespoons seasoned salt
  • 1 tablespoon ground black pepper
  • 4 large eggs
  • 80 flowers unopened dandelion blossoms stems removed
  • ½ cup butter

Instructions

Step 1: In a medium mixing bowl, add flour, pepper, and seasoned salt. Whisk until well mixed.

Step 2: In another medium mixing bowl, add in the eggs. Beat until creamy then add in the dandelion blossoms. Coat them well with the beaten eggs.

Step 3: Place a large skillet on the stove and turn the heat to medium.

Step 4: Add in the butter and allow it to melt.

Step 5: Remove half of the coated dandelions from the bowl and remove the excess eggs.

Step 6: Toss in the dandelions into the flour mixture and coat them evenly. Pat the coated dandelions to remove the excess flour.

Step 7: Add in the dandelions into the skillet and cook for 5 minutes or until the color turns golden brown. Stir from time to time to prevent burning.

Step 8: Place the cooked dandelions on a clean plate lined with a paper towel. Repeat this method to the rest of the coated dandelions.

Step 9: Serve and enjoy!

NOTES: 

Always prepare the dandelions before your cooking. Submerge them in a bowl with water and 1 tablespoon of salt then let it sit at room temperature for 10 minutes. This process gets rid of the insects inside the blossom. Rinse with running water and they are ready for cooking.

Only use dandelions with tubular stalk.

I use vegetable oil or canola oil. Either way works perfectly well with dandelions. Season it with spices or just simply garlic powder for more additional flavor.

September 8, 2020 0 comment
0 FacebookTwitterPinterestEmail
Main Dish Recipes

GRANDMA’S GROUND BEEF CASSEROLE IS JUST AS COMFORTING AS IT SOUNDS

by Rebecca September 8, 2020
written by Rebecca

Prep: 20 mins | Cook: 55mins | Total: 1 hr 15 mins | Servings: 6 | Yield: 6 servings

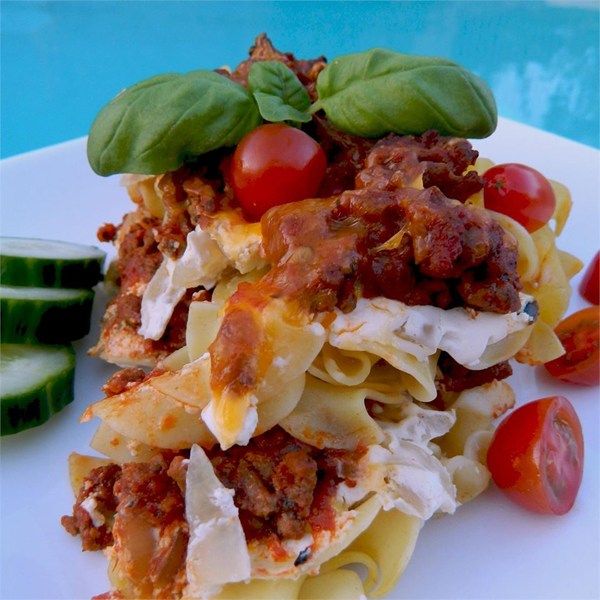
Oh, look at that! Isn’t that appetizing? I want to dig straight in! This casserole is everything my Grandmother made in the past. Meaty, cheesy, and creamy. I love everything about this casserole, not only that it reminds me of my lovely grandmother but it never fails to satisfy my taste buds. A one of a heck casserole!

INGREDIENTS

1 pound ground beef

1 teaspoon white sugar

1 teaspoon salt

1 teaspoon garlic salt

2 15oz cans tomato sauce

1 8oz package egg noodles

1 cup sour cream

1 3oz package cream cheese

1 large white onion, diced

½ cup shredded sharp Cheddar cheese

HOW TO MAKE GRANDMA’S GROUND BEEF CASSEROLE

Step 1: In a large skillet, cook the beef over medium-high heat, Stir for about 5 to 7 minutes until browned and crumbly. Drain any excess grease before adding in the salt, garlic salt, and tomato sauce. Mix and simmer for about 20 minutes until all the flavors are blended. Remove from the heat and allow to cool to room temperature, covered.

Step 2: Boil a large pot with lightly salted water. Add the egg noodles and cook for about 5 minutes while occasionally string until the noodles are cooked through but firm to the bite. Drain the egg noodles and let it cool for a bit.

Step 3: Prepare the oven. Preheat it to 350 degrees F or 175 degrees C.

Step 4: Then, grease a 9 x 13-inch casserole dish.

Step 5: In a bowl, add the sour cream, cream cheese, and onion. Mix well.

Step 6: Put half of the noodles into the prepared casserole dish. Top the noodles with half of the sour cream mixture, then, half of the ground beef mixture over the sour cream. Do the same for the rest of the ingredients. Finish with Cheddar cheese on top.

Step 7: Place inside the preheated oven and bake for about 25 to 30 minutes until the cheese has browned.

Nutrition Facts:

Per Serving: 519.2 calories; fat 29.8g 46% DV; cholesterol 120.1mg 40% DV; sodium 1596.6mg 64% DV; protein 24.5g 49% DV; carbohydrates 39.4g 13% DV

GRANDMA’S GROUND BEEF CASSEROLE IS JUST AS COMFORTING AS IT SOUNDS

Rebecca Prep: 20 mins | Cook: 55mins | Total: 1 hr 15 mins | Servings: 6 | Yield: 6 servings Oh, look at that! Isn’t that appetizing? I want to dig straight in! This casserole is everything my Grandmother made… Main Dish Recipes GRANDMA’S GROUND BEEF CASSEROLE IS JUST AS COMFORTING AS IT SOUNDS European Print This
Serves: 6 Prep Time: 20 mins Cooking Time: 55 mins 55 mins
Nutrition facts: 519.2 calories 29.8 fat
Rating: 5.0/5
( 1 voted )

Ingredients

  • 1 pound ground beef
  • 1 teaspoon white sugar
  • 1 teaspoon salt
  • 1 teaspoon garlic salt
  • 2 15oz cans tomato sauce
  • 1 8oz package egg noodles
  • 1 cup sour cream
  • 1 3oz package cream cheese
  • 1 large white onion, diced
  • ½ cup shredded sharp Cheddar cheese

Instructions

Step 1: In a large skillet, cook the beef over medium-high heat, Stir for about 5 to 7 minutes until browned and crumbly. Drain any excess grease before adding in the salt, garlic salt, and tomato sauce. Mix and simmer for about 20 minutes until all the flavors are blended. Remove from the heat and allow to cool to room temperature, covered.

Step 2: Boil a large pot with lightly salted water. Add the egg noodles and cook for about 5 minutes while occasionally string until the noodles are cooked through but firm to the bite. Drain the egg noodles and let it cool for a bit.

Step 3: Prepare the oven. Preheat it to 350 degrees F or 175 degrees C.

Step 4: Then, grease a 9 x 13-inch casserole dish.

Step 5: In a bowl, add the sour cream, cream cheese, and onion. Mix well.

Step 6: Put half of the noodles into the prepared casserole dish. Top the noodles with half of the sour cream mixture, then, half of the ground beef mixture over the sour cream. Do the same for the rest of the ingredients. Finish with Cheddar cheese on top.

Step 7: Place inside the preheated oven and bake for about 25 to 30 minutes until the cheese has browned.

September 8, 2020 0 comment
0 FacebookTwitterPinterestEmail
Main Dish Recipes

CREAMY NO-CRUST COCONUT PIE

by Rebecca September 8, 2020
written by Rebecca

Servings: 8 | Yield: 1 pie

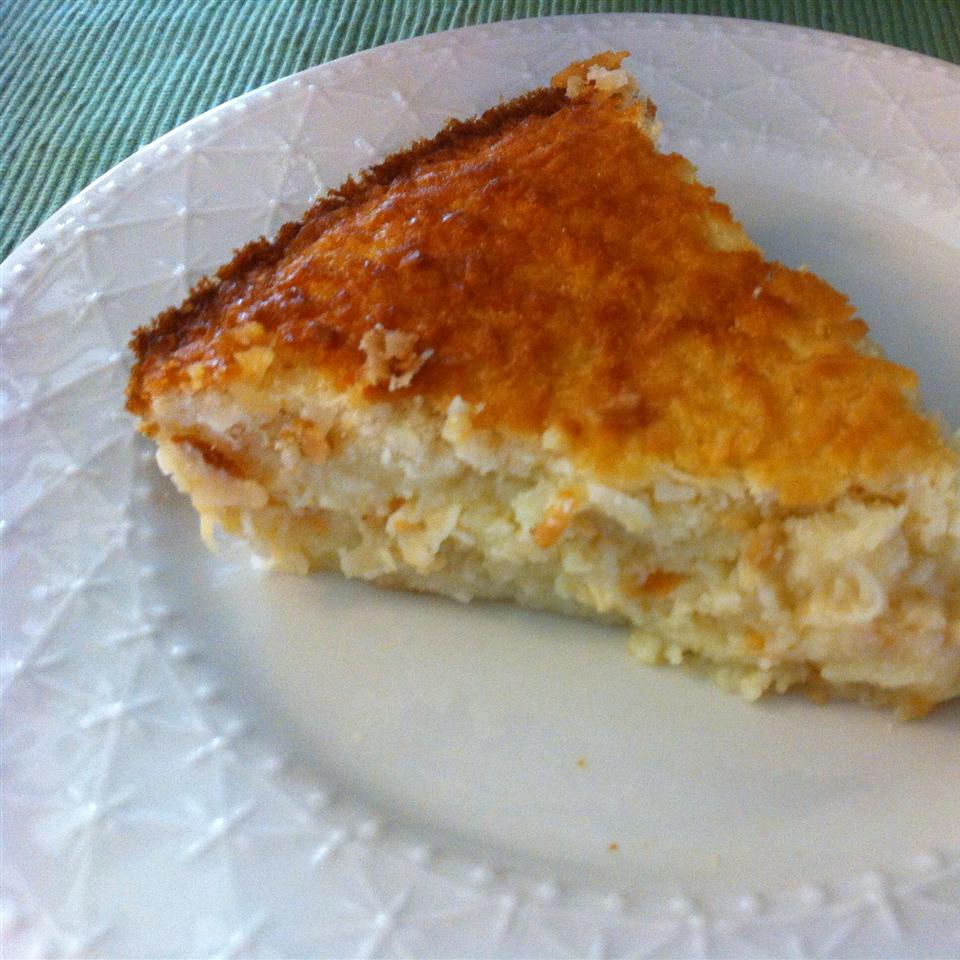
This is a treat for all the coconut lovers around the globe. Easy to make a pie with custard-like filling, soft bottom crust, and crispy coconut topping. A dream dessert that forms its crust when baking. Perfectly sweet, delicious, and a simple dessert that no one can say no to. Add a scoop of vanilla ice cream or a dollop of whipped cream on top and it is gonna be heaven in every bite!

We went on a camping trip last year and a family friend brought this. This did not sit on the table for long. Everybody went crazy over this Creamy No-Crust Coconut Pie. One bite and I am head over heels. I always love coconut and pie ever since I was a kid and this pie hits all the right spots. Pretty simple to make, heavenly delicious, magically forms its crust, and the ingredients needed are readily available. I cannot ask for anything! This pie is here to keep. A must-have and to die for!

INGREDIENTS

4 large eggs, beaten

¼ cup butter

½ cup self-rising flour

1 teaspoon vanilla extract

1 ¾ cups white sugar

2 cups of milk

7 ounces flaked coconut

HOW TO MAKE CREAMY NO-CRUST COCONUT PIE

Step 1: Ready the oven. Preheat it to 325 degrees F or 165 degrees C.

Step 2: Add the butter or margarine, flour, vanilla, sugar, milk, and coconut in a large bowl. Mix well until combined.

Step 3: Transfer the mixture into a 10-inch deep-dish pie plate.

Step 4: Place inside the preheated oven and bake for about 30 to 40 minutes.

Step 5: This pie’s crust will set on the bottom.

NOTES:

You can either use self-rising flour or a homemade flour. For the homemade flour, combine 1 1/2 teaspoon of baking powder, a cup of all-purpose flour, and 1/4 teaspoon of salt. Whisk so the ingredients will be evenly distributed.

Nutrition Facts:

Per Serving: 428.8 calories; fat 16.5g 25% DV; cholesterol 113.1mg 38% DV; sodium 270.8mg 11% DV; protein 6.8g 14% DV; carbohydrates 65.5g 21% DV

CREAMY NO-CRUST COCONUT PIE

Rebecca Servings: 8 | Yield: 1 pie This is a treat for all the coconut lovers around the globe. Easy to make a pie with custard-like filling, soft bottom crust, and crispy coconut topping.… Main Dish Recipes CREAMY NO-CRUST COCONUT PIE European Print This
Serves: 8
Nutrition facts: 428.8 calories 16.5 fat
Rating: 5.0/5
( 1 voted )

Ingredients

  • 4 large eggs, beaten
  • ¼ cup butter
  • ½ cup self-rising flour
  • 1 teaspoon vanilla extract
  • 1 ¾ cups white sugar
  • 2 cups of milk
  • 7 ounces flaked coconut

Instructions

Step 1: Ready the oven. Preheat it to 325 degrees F or 165 degrees C.

Step 2: Add the butter or margarine, flour, vanilla, sugar, milk, and coconut in a large bowl. Mix well until combined.

Step 3: Transfer the mixture into a 10-inch deep-dish pie plate.

Step 4: Place inside the preheated oven and bake for about 30 to 40 minutes.

Step 5: This pie's crust will set on the bottom.

September 8, 2020 0 comment
0 FacebookTwitterPinterestEmail
Newer Posts
Older Posts

Popular Posts

  • 1

    Crispy Crunchy Parmesan Potatoes

    March 21, 2020
  • 2

    CROCK POT SMOTHERED PORK CHOPS

    March 21, 2020
  • Facebook
  • Twitter

@2019 - All Right Reserved.


Back To Top