Cook it once
  • Home
  • Privacy Policy
  • Recipes
    • KETO
    • LC
    • WW
  • Tips
  • Contact
Cook it once
  • Home
  • Privacy Policy
  • Recipes
    • KETO
    • LC
    • WW
  • Tips
  • Contact
Category:

General Recipes

General Recipes

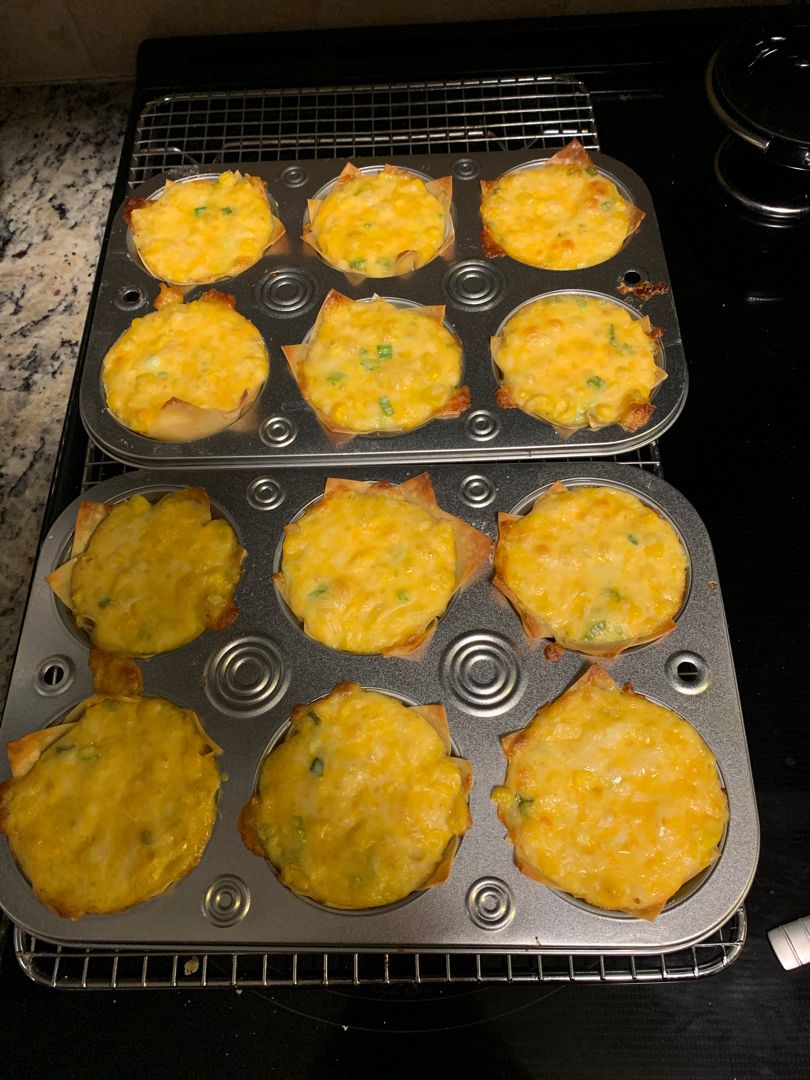
Hot Corn Dip Wonton Appetizers

by Rebecca May 4, 2022
written by Rebecca

PREP TIME: 20 MINS | COOK TIME: 20 MINS | TOTAL TIME: 40 MINS | SERVINGS: 26

These hot corn dip wontons are the best appetizers! These are made with only a few simple ingredients and ready in no time. These wonton appetizers are packed with corn, cheese, onions, celery, and jalapeños. After baking, sprinkle on top some coarsely crushed chili cheese corn chips. Insanely good everyone will be back in seconds!

If you are looking for another appetizer, this handheld appetizer is a great option! These hot corn dip wontons are perfect for entertaining, game day, or any day! I am already looking forward to the next time I’m making these amazing appetizers. Make sure to give this easy appetizer recipe a try soon. It’s a must!

INGREDIENTS

1/4 c. jalapeños, chopped small

2 15-ounces cans of whole kernel corn, drained

1/2 c. green onions, sliced

3/4 c. sour cream

3/4 c. mayonnaise

4 c. Pepper Jack cheese, grated

1/2 c. celery, chopped

9 3/4-ounce bag chili cheese, corn chips, coarsely crushed

14-ounce package of wonton wrappers

How to make Hot Corn Dip Wonton Appetizers

Step 1: Prepare the oven. Preheat it to 350 degrees. Using a nonstick spray, grease two muffin pans and set them aside.

Step 2: In a mixing bowl, place the drained corn, celery, onions, jalapeños, mayo, and sour cream. Mix well until combined before stirring in the grated cheese. Set aside.

Step 3: Lay two wonton wrappers on top of each other (like making a star) and put them into the prepared muffin pan. Repeat with the rest of the wrappers.

Step 4: Into each wonton wrapper, add a tablespoonful of the corn filling.

Step 5: Put in the preheated oven and bake for about 18 to 20 minutes or until the wontons are browned and the filling is hot and bubbly.

Step 6: When done, take the muffin pans out of the oven and top each wonton with some crushed corn chips. Serve and enjoy!
Hot Corn Dip Wonton Appetizers

Rebecca PREP TIME: 20 MINS | COOK TIME: 20 MINS | TOTAL TIME: 40 MINS | SERVINGS: 26 These hot corn dip wontons are the best appetizers! These are made with… General Recipes Hot Corn Dip Wonton Appetizers European Print This
Serves: 26 Prep Time: 20 mins Cooking Time: 20 mins 20 mins
Nutrition facts: 200 calories 20 grams fat
Rating: 5.0/5
( 1 voted )

Ingredients

  • 1/4 c. jalapeños, chopped small
  • 2 15-ounces cans of whole kernel corn, drained
  • 1/2 c. green onions, sliced
  • 3/4 c. sour cream
  • 3/4 c. mayonnaise
  • 4 c. Pepper Jack cheese, grated
  • 1/2 c. celery, chopped
  • 9 3/4-ounce bag chili cheese, corn chips, coarsely crushed
  • 14-ounce package of wonton wrappers

Instructions

Step 1: Prepare the oven. Preheat it to 350 degrees. Using a nonstick spray, grease two muffin pans and set them aside.

Step 2: In a mixing bowl, place the drained corn, celery, onions, jalapeños, mayo, and sour cream. Mix well until combined before stirring in the grated cheese. Set aside.

Step 3: Lay two wonton wrappers on top of each other (like making a star) and put them into the prepared muffin pan. Repeat with the rest of the wrappers.

Step 4: Into each wonton wrapper, add a tablespoonful of the corn filling.

Step 5: Put in the preheated oven and bake for about 18 to 20 minutes or until the wontons are browned and the filling is hot and bubbly.

Step 6: When done, take the muffin pans out of the oven and top each wonton with some crushed corn chips. Serve and enjoy!
May 4, 2022 0 comment
0 FacebookTwitterPinterestEmail
General Recipes

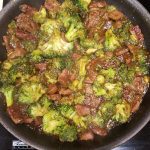
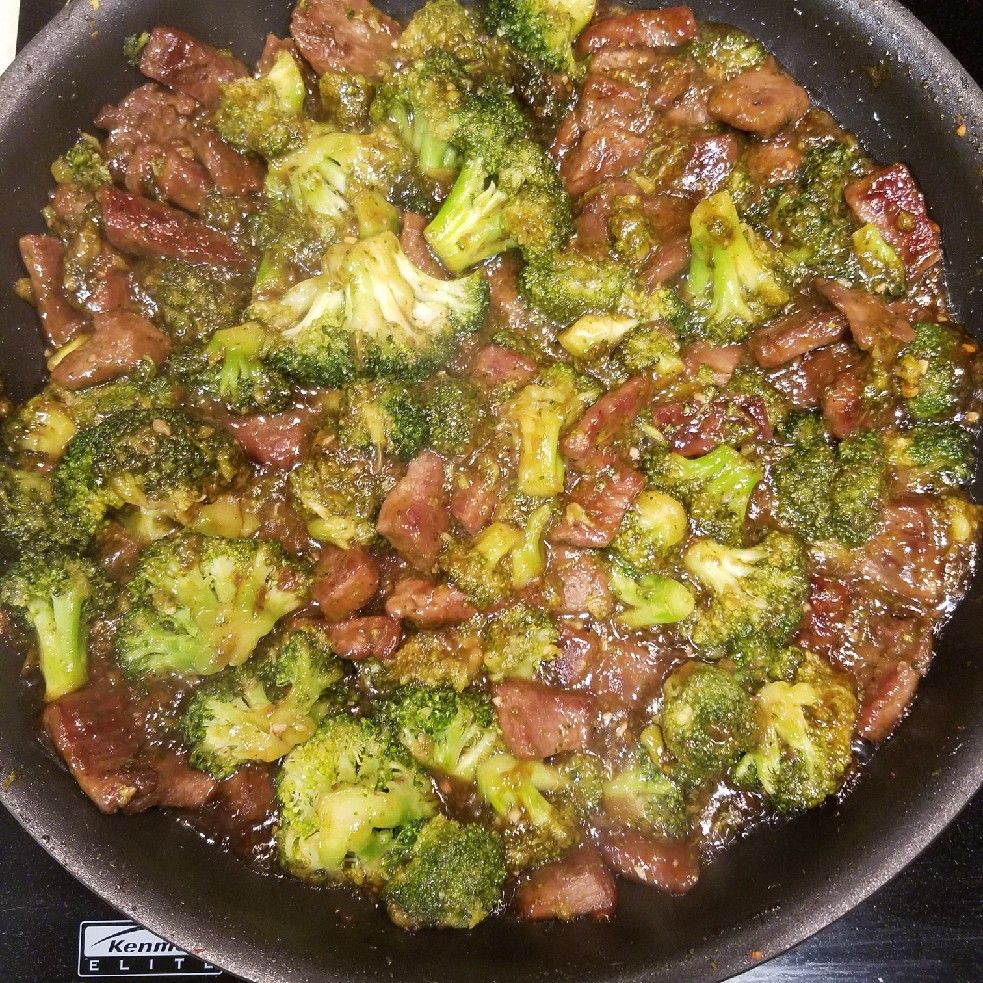
Crazy Good Beef And Broccoli

by Rebecca May 4, 2022
written by Rebecca

Prep time: 15 mins | Cook time: 20 mins | Yield: 2 servings

This easy, one-pan beef and broccoli is crazy good and way better than takeout. Serve this over rice alongside your favorite appetizer for a complete, filling, and delicious weeknight meal perfect for your entire family!

INGREDIENTS

1 tbsp cooking oil

1 lb flank steak, sliced into 1/4” thick strips

5 cloves garlic, minced

3 c. small broccoli florets

2 tbsp corn starch

1/2 c. beef broth

Sauce:

2 tsp cornstarch

1/4 c. brown sugar

1/2 c. low-sodium soy sauce

How to make Crazy Good Beef And Broccoli

Step 1: In a large bowl with corn starch, toss the sliced beef until well coated. Set aside. In a pan, heat the oil over medium heat. Add the sliced beef to the hot oil and cook for a couple of minutes, stirring often, until the beef has browned. To a plate, transfer the browned beef.

Step 2: To the same pan, add the broccoli florets and garlic. Stir well and pour in the beef broth. Simmer for about 10 minutes, stirring often, until the broccoli is cooked.

Step 3: In the meantime, whisk the sauce ingredients in a bowl until well blended.

Step 4: Place the beef back in the pan and pour the sauce over it. Stir well and continue to simmer for another 5 minutes until the sauce has slightly thickened.

NOTES:

For this recipe, I use thinly sliced flank steak (about 1/4-inch thick/thin).

Either you buy a bag of pre-cut raw florets or simply cut florets on a head of broccoli. I use fresh, but if using frozen, you may need to cook the florets longer.

I suggest avoiding regular soy sauce, or the dish will be too salty. Use low sodium. Or swap it with coconut aminos if following a Paleo, whole30, or gluten-free diet.

In an airtight container, store any leftovers and keep them in the fridge for up to 2 days. Before serving, reheat in the microwave.

NUTRITION FACTS:
Amount Per Serving: Calories 630 (25% from fat), Total Fat 18g 27%. Saturated Fat 5g 23%, Cholesterol 175mg 58%, Sodium 2620mg 109%, Net Carb 38g, Total Carb 42g 14%, Dietary Fiber 4g 17%, Sugars 20.5g, Protein 79g, Vitamin A 18%, Vitamin C 206%, Calcium 15%, Iron 49%

Crazy Good Beef And Broccoli

Rebecca Prep time: 15 mins | Cook time: 20 mins | Yield: 2 servings This easy, one-pan beef and broccoli is crazy good and way better than takeout. Serve this over… General Recipes Crazy Good Beef And Broccoli European Print This
Serves: 2 Prep Time: 15 mins Cooking Time: 20 mins 20 mins
Nutrition facts: 630 calories 18 fat
Rating: 5.0/5
( 1 voted )

Ingredients

  • 1 tbsp cooking oil
  • 1 lb flank steak, sliced into 1/4” thick strips
  • 5 cloves garlic, minced
  • 3 c. small broccoli florets
  • 2 tbsp corn starch
  • 1/2 c. beef broth
  • Sauce:
  • 2 tsp cornstarch
  • 1/4 c. brown sugar
  • 1/2 c. low-sodium soy sauce

Instructions

Step 1: In a large bowl with corn starch, toss the sliced beef until well coated. Set aside. In a pan, heat the oil over medium heat. Add the sliced beef to the hot oil and cook for a couple of minutes, stirring often, until the beef has browned. To a plate, transfer the browned beef.

Step 2: To the same pan, add the broccoli florets and garlic. Stir well and pour in the beef broth. Simmer for about 10 minutes, stirring often, until the broccoli is cooked.

Step 3: In the meantime, whisk the sauce ingredients in a bowl until well blended.

Step 4: Place the beef back in the pan and pour the sauce over it. Stir well and continue to simmer for another 5 minutes until the sauce has slightly thickened.

Notes

For this recipe, I use thinly sliced flank steak (about 1/4-inch thick/thin). Either you buy a bag of pre-cut raw florets or simply cut florets on a head of broccoli. I use fresh, but if using frozen, you may need to cook the florets longer. I suggest avoiding regular soy sauce, or the dish will be too salty. Use low sodium. Or swap it with coconut aminos if following a Paleo, whole30, or gluten-free diet. In an airtight container, store any leftovers and keep them in the fridge for up to 2 days. Before serving, reheat in the microwave.

May 4, 2022 0 comment
0 FacebookTwitterPinterestEmail
General Recipes

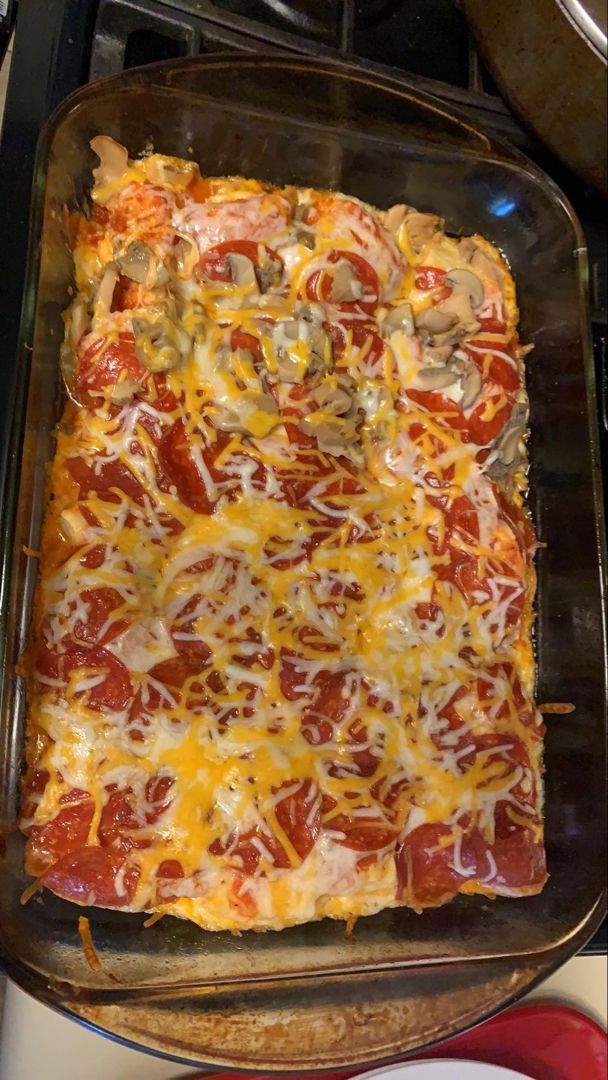
Bubble Up Pizza Recipe

by Rebecca May 4, 2022
written by Rebecca

PREP TIME: 15 MINS | COOK TIME: 25 MINS | TOTAL TIME: 40 MINS | SERVINGS: 6

Fun, super to make, and kid-friendly. This bubble-up pizza is a must-try, especially if your family loves DIY pizza! All you need to throw this together is mozzarella cheese, your favorite store-bought pizza sauce (or homemade), biscuits, and your preferred pizza toppings. The shredded cheddar cheese is optional but highly recommended. Make sure to try this pizza recipe soon and ask your kids to help out. I am pretty sure they’ll have a blast!

To make everything easy and quick, I use canned biscuits for the crust. These biscuits “bubble up” as they bake and create a thick dough just like a deep dish pizza crust. You can make a homemade pizza sauce or use store-bought. Let your children play around with the toppings. We like pepperoni, but you can use your favorites!

INGREDIENTS

2 c. Shredded Mozzarella Cheese

1 jar of pizza sauce Bought or homemade (or 2 small cans of tomato sauce with Italian seasoning)

2 cans of Biscuits

Pizza toppings any that you like (I use pepperoni)

1/2 c. Shredded Cheddar Cheese optional

How to make Bubble Up Pizza

Step 1: Prepare the oven. Preheat it to 350 degrees. Using a nonstick spray, grease a 9 x 13-inch pan.

Step 2: Into fourths, cut each biscuit. To make this process faster, I used a pizza cutter.

Step 3: At the bottom of the prepared pan, place the biscuits. Over the biscuits, pour the pizza sauce and sprinkle with mozzarella cheese. At this point, you can use your favorite pizza toppings.

Step 4: Over the pizza toppings, sprinkle a bit of cheddar cheese.

Step 5: Place the pizza in the preheated oven and bake for about 25 to 35 minutes until the biscuits have bubbled up.

Step 6: Remove from the oven when done and allow the pizza to sit for about 5 minutes before slicing. Enjoy!

NUTRITION FACTS:

Calories 365 kcal, Carbohydrates 35g, Protein 13g, Fat 19g, Saturated Fat 7g, Cholesterol 30mg, Sodium 1105mg, Potassium 333mg, Fiber 2g, Sugar 5g, Vitamin A 457IU, Vitamin C 3mg, Calcium 227mg, Iron 3mg

Bubble Up Pizza Recipe

Rebecca PREP TIME: 15 MINS | COOK TIME: 25 MINS | TOTAL TIME: 40 MINS | SERVINGS: 6 Fun, super to make, and kid-friendly. This bubble-up pizza is a must-try, especially… General Recipes Bubble Up Pizza Recipe European Print This
Serves: 6 Prep Time: 15 mins Cooking Time: 25 mins 25 mins
Nutrition facts: 365 calories 19 fat
Rating: 5.0/5
( 1 voted )

Ingredients

  • 2 c. Shredded Mozzarella Cheese
  • 1 jar of pizza sauce Bought or homemade (or 2 small cans of tomato sauce with Italian seasoning)
  • 2 cans of Biscuits
  • Pizza toppings any that you like (I use pepperoni)
  • 1/2 c. Shredded Cheddar Cheese optional

Instructions

Step 1: Prepare the oven. Preheat it to 350 degrees. Using a nonstick spray, grease a 9 x 13-inch pan.

Step 2: Into fourths, cut each biscuit. To make this process faster, I used a pizza cutter.

Step 3: At the bottom of the prepared pan, place the biscuits. Over the biscuits, pour the pizza sauce and sprinkle with mozzarella cheese. At this point, you can use your favorite pizza toppings.

Step 4: Over the pizza toppings, sprinkle a bit of cheddar cheese.

Step 5: Place the pizza in the preheated oven and bake for about 25 to 35 minutes until the biscuits have bubbled up.

Step 6: Remove from the oven when done and allow the pizza to sit for about 5 minutes before slicing. Enjoy!

May 4, 2022 0 comment
0 FacebookTwitterPinterestEmail
General Recipes

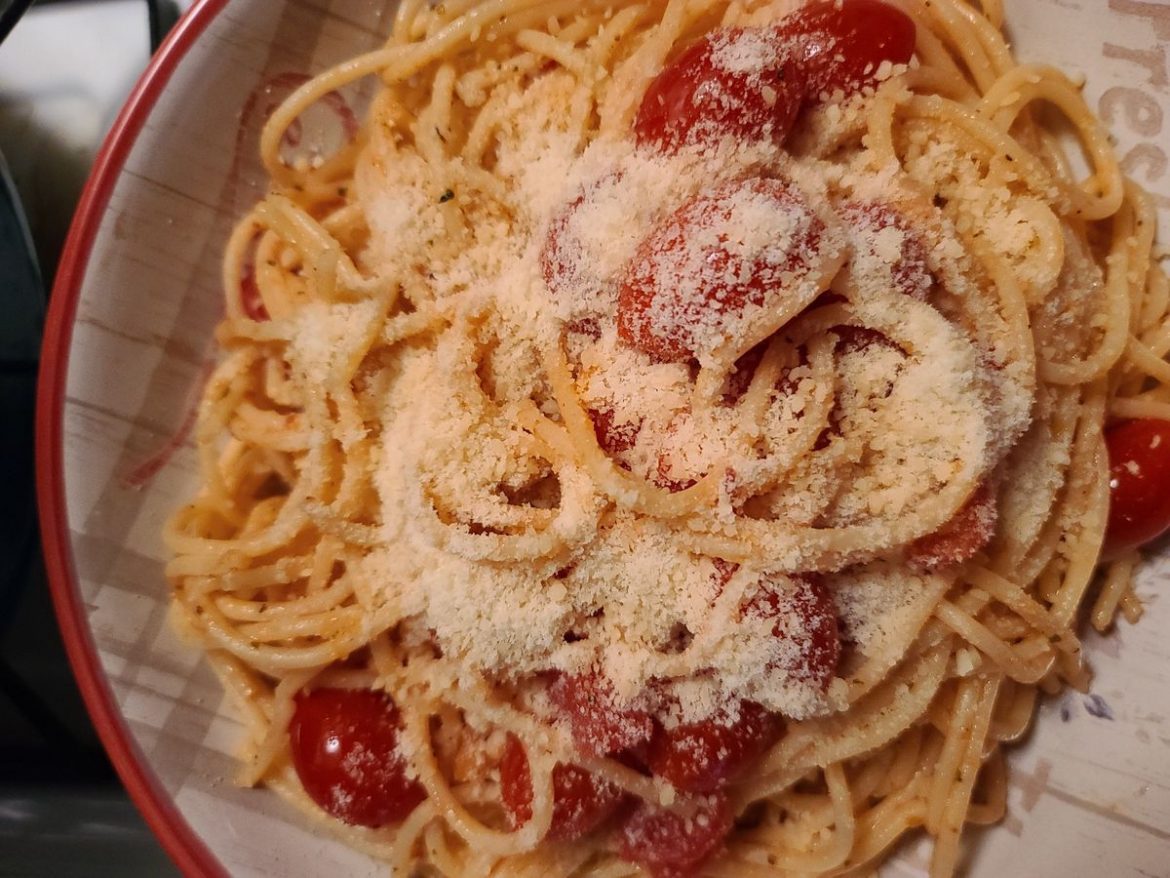
Pasta with Fresh Tomato Sauce

by Rebecca May 4, 2022
written by Rebecca

Total time: 25 mins | Prep time: 25 mins | Servings: 6

Enjoy a plate of this fresh and delicious pasta with fresh tomato sauce. Serve this with a simple side salad or some crusty bread for an easy and quick weeknight dinner. This is also perfect for a simple date night with your favorite bottle of wine.

I have been making this recipe for many years. I already introduced this to family, friends, and colleagues, and they all love this easy recipe. Most people I shared this with have tried adding some cooked sausage, sauteed onions, and fresh mozzarella, and they said it turned out quite amazing, too! This pasta with fresh tomato sauce is another awesome pasta dish that you can make easily and fast! It’s the perfect recipe for busy weeknights.

I’ll be hosting outdoor dining this weekend, and this pasta with fresh tomato sauce surely makes it to the cut. I’ll never allow my special guests to miss this! If you have not tried this, you are already missing out!

Ingredients

1 lb spaghetti or spaghettini

2 1/4 lbs unrefrigerated ripe tomatoes (preferably plum)

1 tbsp flat-leaf parsley

1 tbsp chopped garlic (from 2 garlic cloves), plus more if desired

1/4 c. fresh basil leaves

1/4 c. extra-virgin olive oil, plus more for drizzling

Grated Parmesan cheese, for serving (optional)

Coarse salt and freshly ground pepper

How to make Pasta with Fresh Tomato Sauce

Step 1: In a food processor, place the finely chopped tomatoes, basil, parsley, and garlic with oil. Blend until well combined.

Step 2: Following the package directions, cook the pasta in a large pot of boiling salted water until al dente. Drain the pasta when done. Place the pasta in a serving bowl and toss with the raw sauce.

Step 3: To six shallow bowls, transfer the pasta with fresh tomato sauce and drizzle with oil. Serve right away with cheese. Enjoy!

Pasta with Fresh Tomato Sauce

Rebecca Total time: 25 mins | Prep time: 25 mins | Servings: 6 Enjoy a plate of this fresh and delicious pasta with fresh tomato sauce. Serve this with a simple… General Recipes Pasta with Fresh Tomato Sauce European Print This
Serves: 6 Prep Time: 25 mins
Nutrition facts: 200 calories 20 grams fat
Rating: 5.0/5
( 1 voted )

Ingredients

  • 1 lb spaghetti or spaghettini
  • 2 1/4 lbs unrefrigerated ripe tomatoes (preferably plum)
  • 1 tbsp flat-leaf parsley
  • 1 tbsp chopped garlic (from 2 garlic cloves), plus more if desired
  • 1/4 c. fresh basil leaves
  • 1/4 c. extra-virgin olive oil, plus more for drizzling
  • Grated Parmesan cheese, for serving (optional)
  • Coarse salt and freshly ground pepper

Instructions

Step 1: In a food processor, place the finely chopped tomatoes, basil, parsley, and garlic with oil. Blend until well combined.

Step 2: Following the package directions, cook the pasta in a large pot of boiling salted water until al dente. Drain the pasta when done. Place the pasta in a serving bowl and toss with the raw sauce.

Step 3: To six shallow bowls, transfer the pasta with fresh tomato sauce and drizzle with oil. Serve right away with cheese. Enjoy!

May 4, 2022 0 comment
0 FacebookTwitterPinterestEmail
General Recipes

CAPRESE FLORENTINE QUICHE

by Rebecca May 4, 2022
written by Rebecca

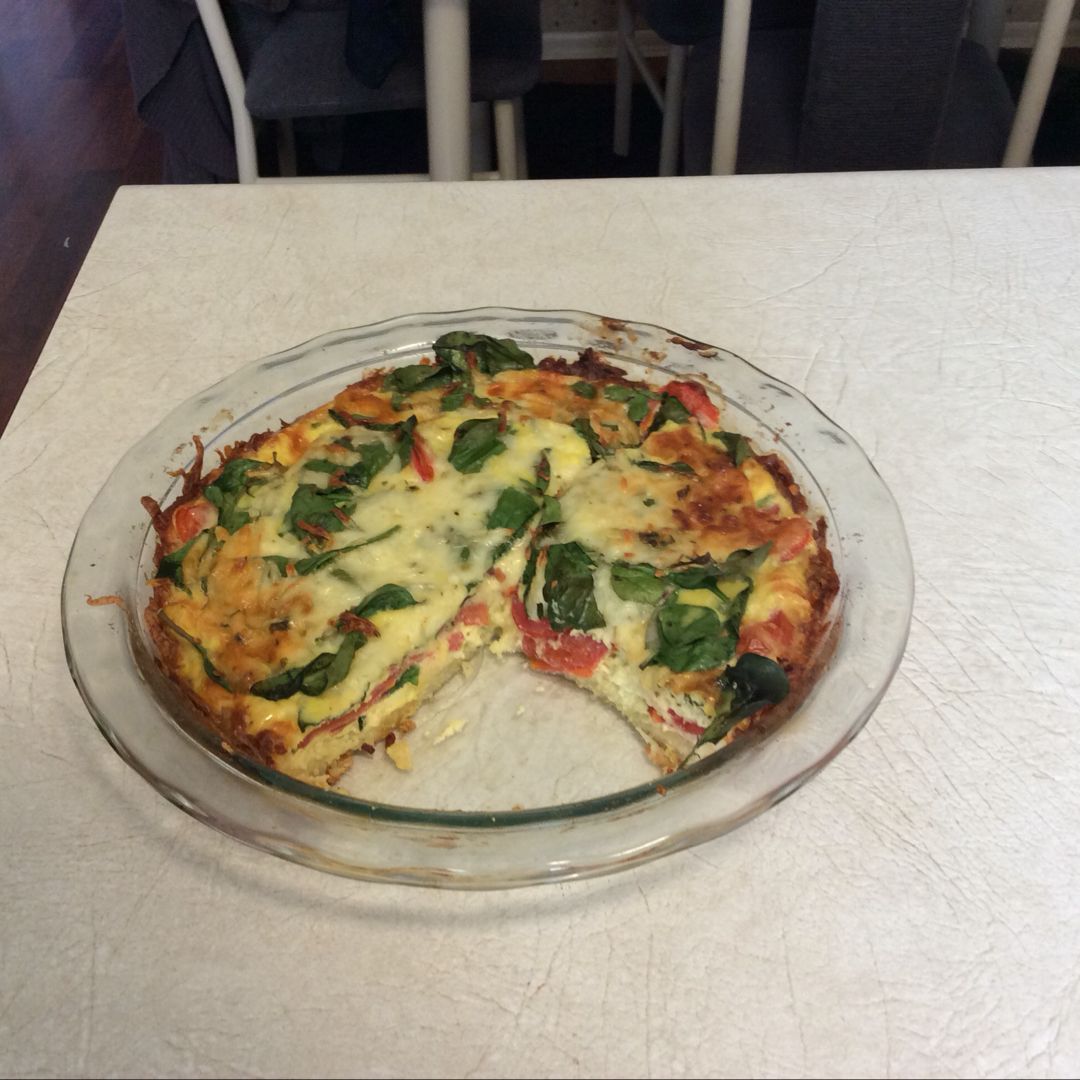
This is a wonderful quiche that never fails to impress everyone around the table. Shredded hash brown crust topped with tomatoes and spinach and baked to perfection. This filling and delicious Caprese Florentine Quiche have always been my family’s favorite brunch for every occasion!

INGREDIENTS

7 large eggs

4 tbsp butter, melted

3 c. Ore-Ida Shredded Hash Brown Potatoes thawed & drained

3 Roma tomatoes, sliced lengthwise

1 c. finely shredded mozzarella cheese

8-10 fresh basil leaves

1/2 c. half & half made need a tablespoon or so more

salt & pepper to season

1/2 c. fresh spinach leaves, roughly chopped

How to make Caprese Florentine Quiche

Step 1: Prepare the oven. Preheat it to 450 degrees. Ready a pie dish. Lightly grease and set aside.

Step 2: In between paper towels, gently press the thawed and drained Shredded Hash Brown Potatoes. Dry the shredded hash brown potatoes and toss them with melted butter.

Step 3: Into the bottom and up the sides of the prepared pie dish, press the mixture to make the crust. Place in the preheated oven and bake for about 20 to 25 minutes or until the edges are beginning to crisp and the pie is golden brown.

Step 4: When done, take the pie dish from the oven and adjust the oven temperature to 350 degrees.

Step 5: In a circle around the outer edge of the crust, layer the slices of tomato and top with chopped spinach. Over the spinach, lay flat out the basil leaves.

Step 6: Place the eggs, half-and-half, and mozzarella cheese in a mixing bowl. Mix well and season with salt and pepper. Over the layered ingredients in the pie dish, gradually pour the mixture.

Step 7: Return the pie dish to the oven and bake for approximately 30 to 40 minutes or until the quiche is beginning to turn golden and the egg mixture is set.

CAPRESE FLORENTINE QUICHE

Rebecca This is a wonderful quiche that never fails to impress everyone around the table. Shredded hash brown crust topped with tomatoes and spinach and baked to perfection. This filling and… General Recipes CAPRESE FLORENTINE QUICHE European Print This
Nutrition facts: 200 calories 20 grams fat
Rating: 5.0/5
( 1 voted )

Ingredients

  • 7 large eggs
  • 4 tbsp butter, melted
  • 3 c. Ore-Ida Shredded Hash Brown Potatoes thawed & drained
  • 3 Roma tomatoes, sliced lengthwise
  • 1 c. finely shredded mozzarella cheese
  • 8-10 fresh basil leaves
  • 1/2 c. half & half made need a tablespoon or so more
  • salt & pepper to season
  • 1/2 c. fresh spinach leaves, roughly chopped

Instructions

Step 1: Prepare the oven. Preheat it to 450 degrees. Ready a pie dish. Lightly grease and set aside.

Step 2: In between paper towels, gently press the thawed and drained Shredded Hash Brown Potatoes. Dry the shredded hash brown potatoes and toss them with melted butter.

Step 3: Into the bottom and up the sides of the prepared pie dish, press the mixture to make the crust. Place in the preheated oven and bake for about 20 to 25 minutes or until the edges are beginning to crisp and the pie is golden brown.

Step 4: When done, take the pie dish from the oven and adjust the oven temperature to 350 degrees.

Step 5: In a circle around the outer edge of the crust, layer the slices of tomato and top with chopped spinach. Over the spinach, lay flat out the basil leaves.

Step 6: Place the eggs, half-and-half, and mozzarella cheese in a mixing bowl. Mix well and season with salt and pepper. Over the layered ingredients in the pie dish, gradually pour the mixture.

Step 7: Return the pie dish to the oven and bake for approximately 30 to 40 minutes or until the quiche is beginning to turn golden and the egg mixture is set.

May 4, 2022 0 comment
0 FacebookTwitterPinterestEmail
General Recipes

MEXICAN CHICKEN ALFREDO CASSEROLE

by Rebecca May 4, 2022
written by Rebecca

Prep Time: 15 mins | Cook Time: 50 mins | Total Time: 1 hr 5 mins | Yield: 8 people

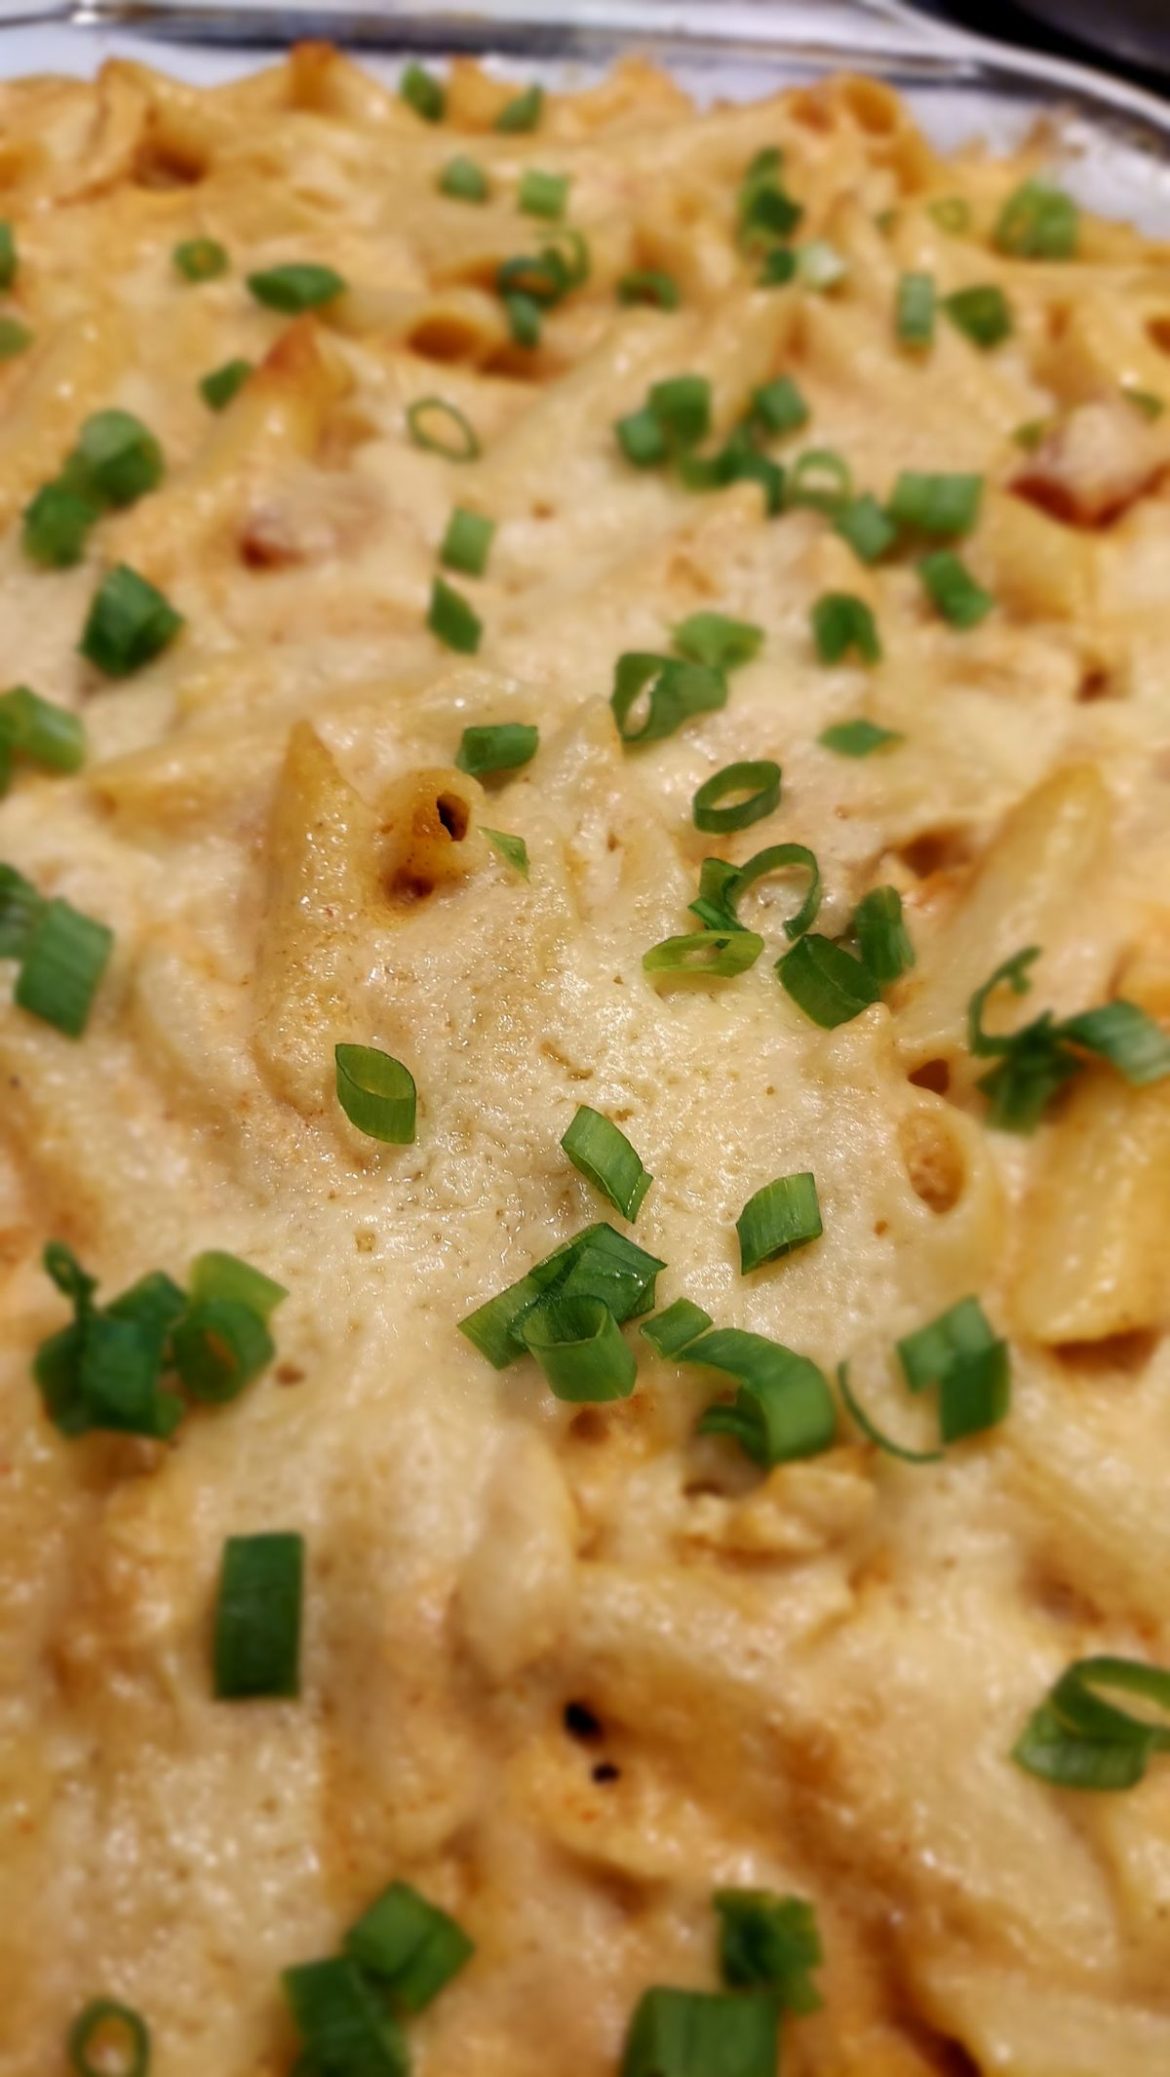
Whenever I am torn between Mexican or Italian dinner, this delicious Mexican chicken Alfredo casserole is my go-to. It is incredibly easy to throw together using only a few simple ingredients. You can even make this ahead and refrigerate or freeze it until ready to serve. Easily make this filling weeknight dinner with chicken, pasta, Alfredo sauce, taco seasoning, salsa, onion, ricotta cheese, and Parmesan cheese, and impress your family with a very tasty dish that they will surely request over and over again!

This casserole is one of my family’s favorite meal rotations. We love pairing this with a simple side salad or some crusty bread. This casserole is also great to bring to potlucks or serve if you are expecting guests. A must-try and no-doubt a keeper!

Ingredients

4 c. cooked chopped chicken

1 (16 ounces) package of penne pasta

2 (15 ounces) jars of Alfredo sauce

1 (1 ounce) package of taco seasoning

1 c. ricotta cheese

2 tablespoons minced onion flakes

1½ c. grated Parmesan cheese

1½ c. salsa

HOW TO MAKE MEXICAN CHICKEN ALFREDO CASSEROLE

Step 1: Prepare the oven. Preheat it to 350 degrees F. Using cooking spray, lightly spray a 9 x 13-inch baking dish.

Step 2: Following the package directions, cook the pasta until al dente. Drain the pasta when done.

Step 3: Mix the cooked chicken with the onion, Alfredo sauce, salsa, ricotta cheese, and taco seasoning until well combined. Then, toss in the cooked pasta. Spread the mixture into the prepared baking dish and top with grated Parmesan cheese.

Step 4: Place in the preheated oven and bake the casserole for about 50 to 60 minutes or until bubbly.

Notes:

Feel free to make this casserole ahead. Just store it in the fridge to freeze.

When ready to serve, thaw the frozen casserole in the fridge completely and bake as instructed.

You can make this casserole in two 8 x 8-inch baking dishes.

MEXICAN CHICKEN ALFREDO CASSEROLE

Rebecca Prep Time: 15 mins | Cook Time: 50 mins | Total Time: 1 hr 5 mins | Yield: 8 people Whenever I am torn between Mexican or Italian dinner, this… General Recipes MEXICAN CHICKEN ALFREDO CASSEROLE European Print This
Serves: 8 Prep Time: 15 mins Cooking Time: 50 mins5 50 mins5
Nutrition facts: 200 calories 20 grams fat
Rating: 5.0/5
( 1 voted )

Ingredients

  • 4 c. cooked chopped chicken
  • 1 (16 ounces) package of penne pasta
  • 2 (15 ounces) jars of Alfredo sauce
  • 1 (1 ounce) package of taco seasoning
  • 1 c. ricotta cheese
  • 2 tablespoons minced onion flakes
  • 1½ c. grated Parmesan cheese
  • 1½ c. salsa

Instructions

Step 1: Prepare the oven. Preheat it to 350 degrees F. Using cooking spray, lightly spray a 9 x 13-inch baking dish.

Step 2: Following the package directions, cook the pasta until al dente. Drain the pasta when done.

Step 3: Mix the cooked chicken with the onion, Alfredo sauce, salsa, ricotta cheese, and taco seasoning until well combined. Then, toss in the cooked pasta. Spread the mixture into the prepared baking dish and top with grated Parmesan cheese.

Step 4: Place in the preheated oven and bake the casserole for about 50 to 60 minutes or until bubbly.

Notes

Feel free to make this casserole ahead. Just store it in the fridge to freeze. When ready to serve, thaw the frozen casserole in the fridge completely and bake as instructed. You can make this casserole in two 8 x 8-inch baking dishes.

May 4, 2022 0 comment
0 FacebookTwitterPinterestEmail
General Recipes

Fried Shrimp Balls

by Rebecca May 4, 2022
written by Rebecca

PREP TIME: 20 MINS | COOK TIME: 5 MINS | TOTAL TIME: 25 MINS | YIELD: 4 people

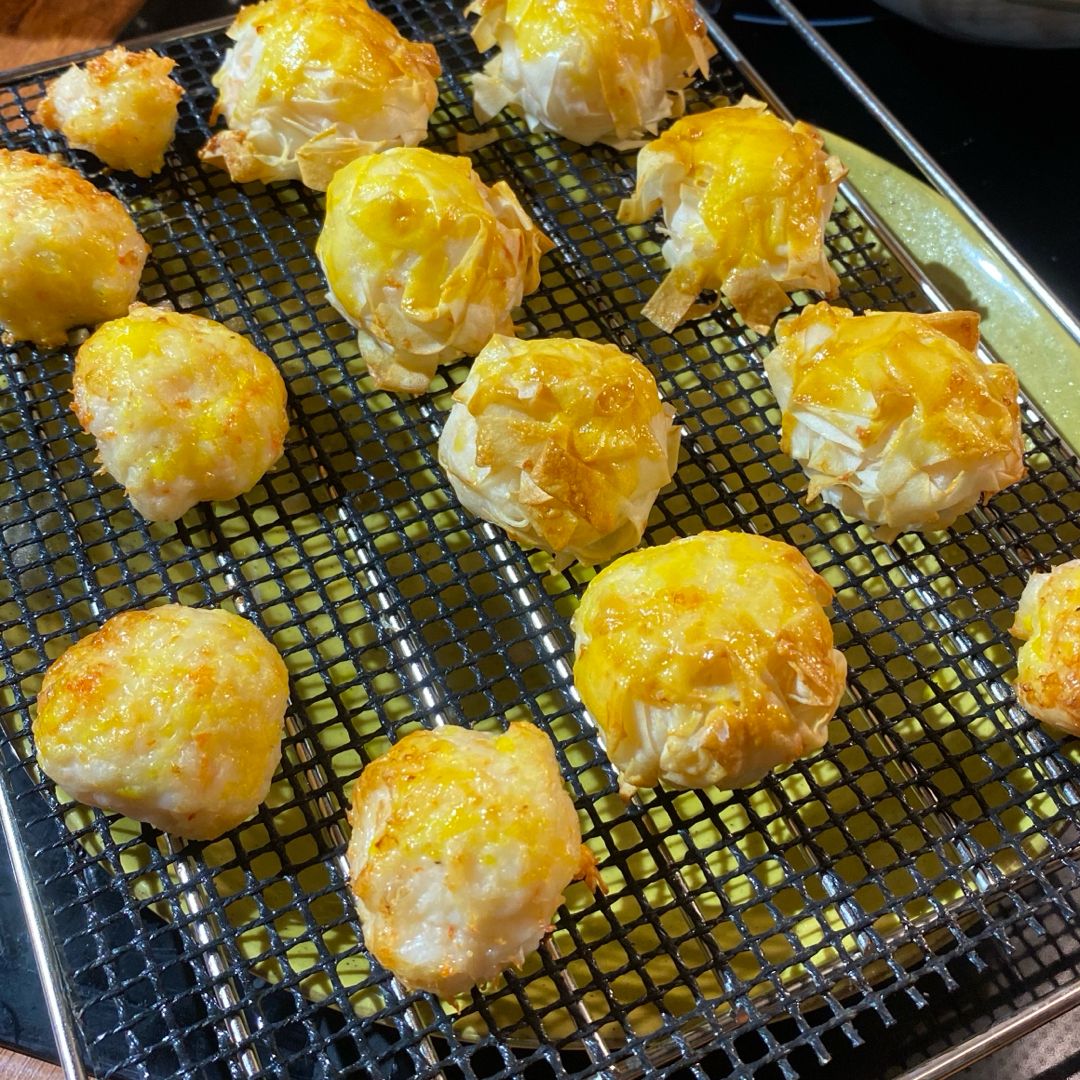
This popular delicious Chinese appetizer is so easy to throw together using only a few simple ingredients. Crispy, crunchy, and golden fried shrimp balls are perfect to serve with Thai sweet chili sauce or any of your favorite chili sauces. I always make sure to whip up a big batch of these adorable shrimp balls because these go out fast!

This easy-fried shrimp balls recipe is a must-try. These taste a million better than the restaurant version. And not to mention incredibly easy to make. Make sure not to miss this simple recipe and learn how to throw together these Cantonese dim sum right in the comfort of your home.

Ingredients

1 egg white, lightly beaten

1 pound (0.4 kg) shelled and deveined shrimp, defrost

3 dashes of white pepper powder

1 tsp sugar

1/2 tsp sesame oil

1 tbsp corn starch

1 tbsp oil or some pork fat

8 piece spring roll wrapper (8” square)

1 tsp salt or fish sauce

How to make Fried Shrimp Balls

Step 1: Add the shrimp into a mini food processor along with egg white, salt/fish sauce, sugar, cornstarch, sesame oil, oil, and white pepper. Pulse until you form a paste.

Step 2: Start folding the spring roll wrappers up and cut them into small strips with scissors. Then, slice the tiny strips into shorter strips and lay them on a flat surface. Shape the shrimp paste into about 1 tbsp balls using your wet hands and roll onto the spring roll strips.

Step 3: Using a pair of scissors, trim the spring roll strips, making sure the strips evenly coat the shrimp ball.

Step 4: In a deep fryer or wok, deep fry the shrimp balls for about 5 minutes or until golden brown. On paper towels, transfer the cooked shrimp balls and serve immediately with any of your favorite dipping sauces, such as Thai sweet chili sauce. Enjoy!

NUTRITION FACTS:

Serving Size: 4 people
Amount Per Serving: Calories 171, Total Fat 6g, Saturated Fat 3g, Cholesterol 286mg, Sodium 1487mg, Carbohydrates 5g, Fiber 1g, Sugars 1g, Protein 24g

Fried Shrimp Balls

Rebecca PREP TIME: 20 MINS | COOK TIME: 5 MINS | TOTAL TIME: 25 MINS | YIELD: 4 people This popular delicious Chinese appetizer is so easy to throw together using… General Recipes Fried Shrimp Balls European Print This
Serves: 4 Prep Time: 20 mins Cooking Time: 5 mins 5 mins
Nutrition facts: 171 calories 6 fat
Rating: 5.0/5
( 1 voted )

Ingredients

  • 1 egg white, lightly beaten
  • 1 pound (0.4 kg) shelled and deveined shrimp, defrost
  • 3 dashes of white pepper powder
  • 1 tsp sugar
  • 1/2 tsp sesame oil
  • 1 tbsp corn starch
  • 1 tbsp oil or some pork fat
  • 8 piece spring roll wrapper (8” square)
  • 1 tsp salt or fish sauce

Instructions

Step 1: Add the shrimp into a mini food processor along with egg white, salt/fish sauce, sugar, cornstarch, sesame oil, oil, and white pepper. Pulse until you form a paste.

Step 2: Start folding the spring roll wrappers up and cut them into small strips with scissors. Then, slice the tiny strips into shorter strips and lay them on a flat surface. Shape the shrimp paste into about 1 tbsp balls using your wet hands and roll onto the spring roll strips.

Step 3: Using a pair of scissors, trim the spring roll strips, making sure the strips evenly coat the shrimp ball.

Step 4: In a deep fryer or wok, deep fry the shrimp balls for about 5 minutes or until golden brown. On paper towels, transfer the cooked shrimp balls and serve immediately with any of your favorite dipping sauces, such as Thai sweet chili sauce. Enjoy!

May 4, 2022 0 comment
0 FacebookTwitterPinterestEmail
General Recipes

OATMEAL CHOCOLATE CHIP PEANUT BUTTER BARS

by Rebecca May 4, 2022
written by Rebecca

Prep Time: 10 mins | Cook Time: 15 mins | Total Time: 25 mins | Servings: 20 bars

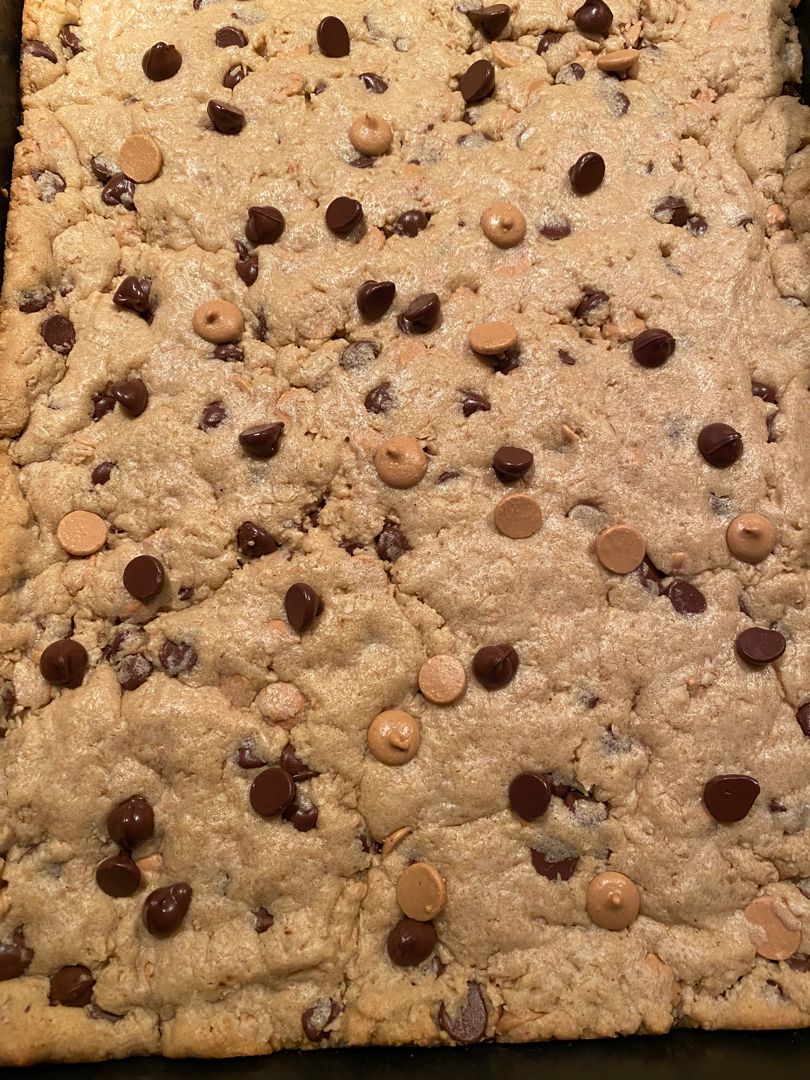
These soft-baked and thick bars are one of my favorite treats! Loaded with peanut butter, oatmeal, chocolate chips, and peanut butter chips – these oatmeal chocolate chip peanut butter bars are hard to resist! Make sure not to overbake these bars so they stay super soft. Whip up a huge batch because these decadent bars are so addictive they don’t stay long!

Ingredients

1 large egg

1 large egg yolk

1 ½ c. all-purpose flour

½ c. (1 stick) butter, softened

¾ tsp baking soda

1 c. whole-grain old fashioned oats (not quick oats)

⅓ c. creamy peanut butter

½ c. packed light brown sugar

½ c. granulated sugar

1 tsp vanilla extract

¼ tsp salt

1 c chocolate chips, semi-sweet, milk chocolate, or miniature

1 c. peanut butter chips

HOW TO MAKE OATMEAL CHOCOLATE CHIP PEANUT BUTTER BARS

Step 1: Prepare the oven. Preheat it to 350 degrees. Lightly oil a 9 x 13-inch baking pan. Set aside.

Step 2: Place the flour, baking soda, salt, and oats in a medium bowl. Mix well until combined.

Step 3: Cream the butter, peanut butter, brown sugar, and sugar in a large bowl or the bowl of a stand mixer fitted with the paddle attachment for about 2 to 3 minutes or until light and fluffy. Then, add the vanilla, egg, and egg yolk. Beat well until blended.

Step 4: In the wet ingredients, add the dry ingredients, and mix until just combined. Fold in the chocolate chips and peanut butter chips.

Step 5: Into the prepared pan, press the batter. Place in the preheated oven and bake for about 15 to 18 minutes or until the edges are lightly browned. Make sure not to overbake the bars.

Step 6: Remove from the oven when done and allow the bars to cool for about 20 to 30 minutes in the pan before cutting into squares.

Step 7: Serve and enjoy!

Nutrition Facts:

Calories: 253 kcal | Carbohydrates: 32g | Protein: 5g | Fat: 12g | Saturated Fat: 7g | Cholesterol: 33mg | Sodium: 159mg | Potassium: 63mg | Fiber: 2g | Sugar: 20g | Vitamin A: 187IU | Vitamin C: 1mg | Calcium: 24mg | Iron: 1mg

OATMEAL CHOCOLATE CHIP PEANUT BUTTER BARS

Rebecca Prep Time: 10 mins | Cook Time: 15 mins | Total Time: 25 mins | Servings: 20 bars These soft-baked and thick bars are one of my favorite treats! Loaded… General Recipes OATMEAL CHOCOLATE CHIP PEANUT BUTTER BARS European Print This
Serves: 20 Prep Time: 10 mins Cooking Time: 15 mins 15 mins
Nutrition facts: 253 calories 12 fat
Rating: 5.0/5
( 1 voted )

Ingredients

  • 1 large egg
  • 1 large egg yolk
  • 1 ½ c. all-purpose flour
  • ½ c. (1 stick) butter, softened
  • ¾ tsp baking soda
  • 1 c. whole-grain old fashioned oats (not quick oats)
  • ⅓ c. creamy peanut butter
  • ½ c. packed light brown sugar
  • ½ c. granulated sugar
  • 1 tsp vanilla extract
  • ¼ tsp salt
  • 1 c chocolate chips, semi-sweet, milk chocolate, or miniature
  • 1 c. peanut butter chips

Instructions

Step 1: Prepare the oven. Preheat it to 350 degrees. Lightly oil a 9 x 13-inch baking pan. Set aside.

Step 2: Place the flour, baking soda, salt, and oats in a medium bowl. Mix well until combined.

Step 3: Cream the butter, peanut butter, brown sugar, and sugar in a large bowl or the bowl of a stand mixer fitted with the paddle attachment for about 2 to 3 minutes or until light and fluffy. Then, add the vanilla, egg, and egg yolk. Beat well until blended.

Step 4: In the wet ingredients, add the dry ingredients, and mix until just combined. Fold in the chocolate chips and peanut butter chips.

Step 5: Into the prepared pan, press the batter. Place in the preheated oven and bake for about 15 to 18 minutes or until the edges are lightly browned. Make sure not to overbake the bars.

Step 6: Remove from the oven when done and allow the bars to cool for about 20 to 30 minutes in the pan before cutting into squares.

Step 7: Serve and enjoy!

May 4, 2022 0 comment
0 FacebookTwitterPinterestEmail
General Recipes

Garden Veggie Frittata

by Rebecca May 4, 2022
written by Rebecca

Prep Time: 10 mins | Cook Time: 24 mins | Total Time: 34 mins | Servings: 4

Enjoy a high-protein breakfast with this delicious Garden Veggie Frittata loaded with fresh vegetables, cheese, and eggs. Super easy to make using only a few simple ingredients and ready in no time. This frittata is a must-have breakfast to jump-start your day!

Ingredients

4 eggs

4 egg whites

1 tsp olive oil

1 red bell pepper, cut into ½ inch pieces

¾ c. broccoli florets, cut into 1” pieces

¼ c. chopped red onion

1/3 c. shredded or diced cheddar cheese or cheese variety of your choice

salt and pepper to taste

cooking spray

fresh herbs for garnish like chopped cilantro, parsley or green onion

How to make Garden Veggie Frittata

Step 1: Prepare the oven. Preheat it to 400 degrees.

Step 2: In an 8-inch pan, heat the oil over medium-high heat. In the hot oil, add the red onion and cook for about 3 to 4 minutes, stirring often, until the onion has softened.

Step 3: To the pan with the onion, add the red pepper and continue to cook for 3 minutes more or until the pepper is tender. Then, add the broccoli and 1 tsp water. Cook further until the broccoli is tender, stirring often. To taste, season with salt and pepper.

Step 4: Once the veggies are done, remove them from the pan and set them aside. Using a paper towel, wipe the pan clean and coat with cooking spray.

Step 5: Beat the eggs and egg whites in a bowl and season with salt and pepper.

Step 6: To the egg mixture, add the vegetables and cheese. Toss well and pour into the pan. Place in the preheated oven and bake for about 15 minutes or until the center of the frittata is set.

Step 7: Remove from the oven when done and garnish with some fresh herbs. Slice the frittata into wedges. Serve and enjoy!

Nutrition Facts:

Calories: 102 kcal | Carbohydrates: 3g | Protein: 9g | Fat: 5g | Saturated Fat: 1g | Cholesterol: 163mg | Sodium: 11

Garden Veggie Frittata

Rebecca Prep Time: 10 mins | Cook Time: 24 mins | Total Time: 34 mins | Servings: 4 Enjoy a high-protein breakfast with this delicious Garden Veggie Frittata loaded with fresh… General Recipes Garden Veggie Frittata European Print This
Serves: 4 Prep Time: 10 mins Cooking Time: 24 mins 24 mins
Nutrition facts: 102 calories 5 fat
Rating: 5.0/5
( 1 voted )

Ingredients

  • 4 eggs
  • 4 egg whites
  • 1 tsp olive oil
  • 1 red bell pepper, cut into ½ inch pieces
  • ¾ c. broccoli florets, cut into 1” pieces
  • ¼ c. chopped red onion
  • 1/3 c. shredded or diced cheddar cheese or cheese variety of your choice
  • salt and pepper to taste
  • cooking spray
  • fresh herbs for garnish like chopped cilantro, parsley or green onion

Instructions

Step 1: Prepare the oven. Preheat it to 400 degrees.

Step 2: In an 8-inch pan, heat the oil over medium-high heat. In the hot oil, add the red onion and cook for about 3 to 4 minutes, stirring often, until the onion has softened.

Step 3: To the pan with the onion, add the red pepper and continue to cook for 3 minutes more or until the pepper is tender. Then, add the broccoli and 1 tsp water. Cook further until the broccoli is tender, stirring often. To taste, season with salt and pepper.

Step 4: Once the veggies are done, remove them from the pan and set them aside. Using a paper towel, wipe the pan clean and coat with cooking spray.

Step 5: Beat the eggs and egg whites in a bowl and season with salt and pepper.

Step 6: To the egg mixture, add the vegetables and cheese. Toss well and pour into the pan. Place in the preheated oven and bake for about 15 minutes or until the center of the frittata is set.

Step 7: Remove from the oven when done and garnish with some fresh herbs. Slice the frittata into wedges. Serve and enjoy!

May 4, 2022 0 comment
0 FacebookTwitterPinterestEmail
General Recipes

Zucchini Garlic Bites

by Rebecca May 4, 2022
written by Rebecca

Prep Time: 12 mins | Cook Time: 18 mins | Total Time: 30 mins | Servings: 16 bites

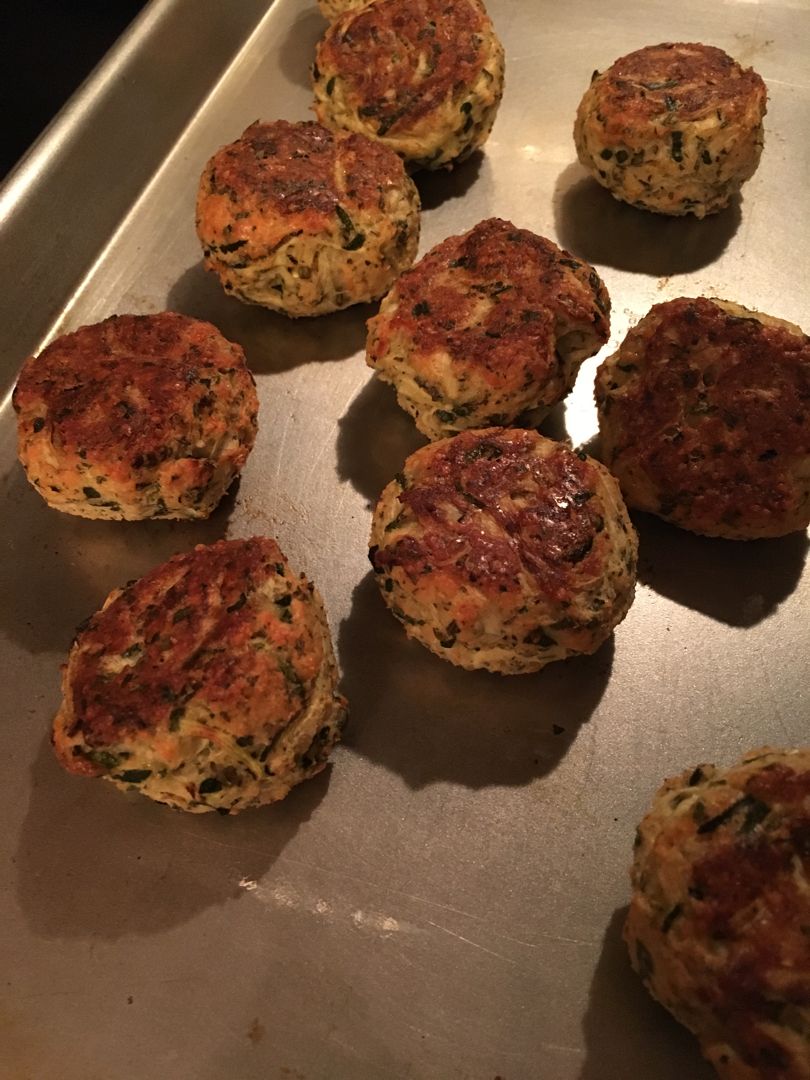
Kid-friendly zucchini, garlic bites with shredded zucchini with garlic, Parmesan cheese, and fresh herbs. These bites are baked to golden and crispy perfection. Serve these right away with a marinara sauce for dipping or freeze for an easy and quick appetizer.

Ingredients

1 large egg

1 c. shredded zucchini drained well

1/3 c. breadcrumbs

1 clove of garlic, grated fine

1/4 c. grated Parmigiano-Reggiano cheese

2 tbsp chopped fresh chives (or 1 tbsp dried chives)

1 tsp chopped fresh basil (or 1/2 tsp dried)

1 tbsp chopped fresh parsley (or 1/2 tbsp dried)

1 tsp chopped fresh oregano (or 1/2 tsp dried)

tomato sauce for dipping

pinch of salt and pepper

How to make Zucchini Garlic Bites

Step 1: Prepare the oven. Preheat it to 400 degrees F. Using olive oil or nonstick spray, lightly grease a baking sheet, and set aside.

Step 2: Into a clean towel, grate the zucchini using a box grater. Roll the towel up and twist to wring the moisture out.

Step 3: Using the small holes on the box grater, grate the garlic.

Step 4: In a medium bowl, combine the shredded zucchini, garlic, egg, breadcrumbs, Parmesan, chives, parsley, basil, oregano, salt, and pepper until well mixed.

Step 5: Into your hands, forms a tablespoon of the mixture and pat it into a small ball. On the prepared baking sheet, place the ball. Repeat until you have to use the whole mixture.

Step 6: Place in the preheated oven and bake for about 15 to 18 minutes or until the zucchini garlic bites are golden. Remove from the oven when done, and serve these bites warm with a marinara sauce for dipping.

To Freeze:

Allow the zucchini bites to cool. Then, place them on a large baking sheet in a single layer and flash freeze for an hour. Take the frozen zucchini out of the freezer and transfer them into a freezer bag. Store in the freezer for up to 4 months.

To reheat, place the frozen bites on a baking sheet and pop them in a preheated oven. Reheat for about 10 to 15 minutes at 400 degrees F until heated and crispy.

Nutrition Facts:

Serving: 1bite | Calories: 26 kcal | Carbohydrates: 2.2g | Protein: 1.9g | Fat: 1.2g | Saturated Fat: 0.6g | Cholesterol: 13mg | Sodium: 54mg | Potassium: 32mg | Fiber: 0.2g | Sugar: 0.3g | Calcium: 400mg

Zucchini Garlic Bites

Rebecca Prep Time: 12 mins | Cook Time: 18 mins | Total Time: 30 mins | Servings: 16 bites Kid-friendly zucchini, garlic bites with shredded zucchini with garlic, Parmesan cheese, and… General Recipes Zucchini Garlic Bites European Print This
Serves: 16 Prep Time: 12 mins Cooking Time: 18 mins 18 mins
Nutrition facts: 26 calories 1.2 fat
Rating: 5.0/5
( 1 voted )

Ingredients

  • 1 large egg
  • 1 c. shredded zucchini drained well
  • 1/3 c. breadcrumbs
  • 1 clove of garlic, grated fine
  • 1/4 c. grated Parmigiano-Reggiano cheese
  • 2 tbsp chopped fresh chives (or 1 tbsp dried chives)
  • 1 tsp chopped fresh basil (or 1/2 tsp dried)
  • 1 tbsp chopped fresh parsley (or 1/2 tbsp dried)
  • 1 tsp chopped fresh oregano (or 1/2 tsp dried)
  • tomato sauce for dipping
  • pinch of salt and pepper

Instructions

Step 1: Prepare the oven. Preheat it to 400 degrees F. Using olive oil or nonstick spray, lightly grease a baking sheet, and set aside.

Step 2: Into a clean towel, grate the zucchini using a box grater. Roll the towel up and twist to wring the moisture out.

Step 3: Using the small holes on the box grater, grate the garlic.

Step 4: In a medium bowl, combine the shredded zucchini, garlic, egg, breadcrumbs, Parmesan, chives, parsley, basil, oregano, salt, and pepper until well mixed.

Step 5: Into your hands, forms a tablespoon of the mixture and pat it into a small ball. On the prepared baking sheet, place the ball. Repeat until you have to use the whole mixture.

Step 6: Place in the preheated oven and bake for about 15 to 18 minutes or until the zucchini garlic bites are golden. Remove from the oven when done, and serve these bites warm with a marinara sauce for dipping.

To Freeze:

Allow the zucchini bites to cool. Then, place them on a large baking sheet in a single layer and flash freeze for an hour. Take the frozen zucchini out of the freezer and transfer them into a freezer bag. Store in the freezer for up to 4 months.

To reheat, place the frozen bites on a baking sheet and pop them in a preheated oven. Reheat for about 10 to 15 minutes at 400 degrees F until heated and crispy.

May 4, 2022 0 comment
0 FacebookTwitterPinterestEmail
Newer Posts
Older Posts

Popular Posts

  • 1

    Crispy Crunchy Parmesan Potatoes

    March 21, 2020
  • 2

    CROCK POT SMOTHERED PORK CHOPS

    March 21, 2020
  • Facebook
  • Twitter

@2019 - All Right Reserved.


Back To Top