Cook it once
  • Home
  • Privacy Policy
  • Recipes
    • KETO
    • LC
    • WW
  • Tips
  • Contact
Cook it once
  • Home
  • Privacy Policy
  • Recipes
    • KETO
    • LC
    • WW
  • Tips
  • Contact
Category:

General Recipes

General Recipes

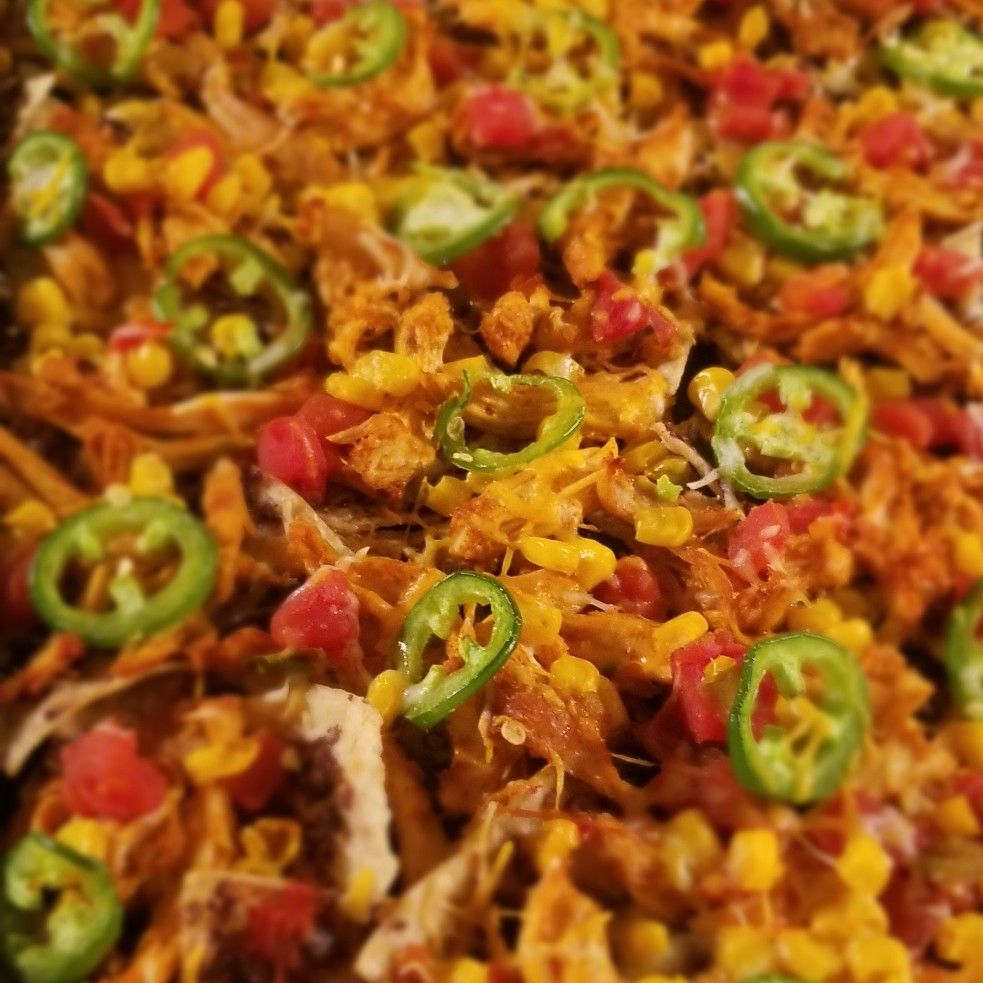
SHEET PAN CHICKEN AND BLACK BEAN NACHOS

by Rebecca May 25, 2022
written by Rebecca

Prep Time: 15 mins | Cook Time: 15 mins | Total Time: 30 mins | Yield: 4-6

These baked chicken and black beans nachos will make you drool! It’s been one of my favorites for years! Easily make these addicting baked nachos any time and very quickly! Make sure to serve these nachos with guacamole, sour cream, salsa, and hot sauce for the complete Mexican experience at home!

INGREDIENTS

1 c. chopped cooked chicken

32–34 home-baked tortilla chips

2 c. shredded Monterey jack & cheddar cheese blend

1 (11 oz) can Mexi-corn, drained

1 (15 oz) can of whole black beans, drained and rinsed

1 c. prepared pico de gallo

1 (15 oz) can of refried black beans

guacamole, sour cream, salsa, and hot sauce, for serving

1–2 fresh jalapenos, thinly sliced or 1 can slice nacho jalapenos

HOW TO MAKE SHEET PAN CHICKEN AND BLACK BEAN NACHOS

Step 1: Prepare the oven. Preheat it to 400 degrees F. Using foil, line a rimmed sheet pan and generously grease with non-stick cooking spray. Or simply grease the pan with non-stick cooking spray.

Step 2: After spreading each tortilla chip with a thin layer of refried black beans, put them on the prepared sheet pan in a single layer. Then, lightly sprinkle each chip with cheese. On top of each chip, place some black beans, corn, pico de gallo, and a piece of chicken. All over the toppings on each chip, sprinkle extra cheese. Lastly, top the chips with a thin slice of jalapeno.

Step 3: Place in the preheated oven and bake for about 15 to 20 minutes until the cheese has melted and begins to turn golden brown in spots. Make sure that halfway through baking, you rotate the pans.

Step 4: Take the nachos out of the oven when done and allow them to rest for a couple of minutes. Serve the nachos with guacamole, sour cream, salsa, and hot sauce. Enjoy!

SHEET PAN CHICKEN AND BLACK BEAN NACHOS

Rebecca Prep Time: 15 mins | Cook Time: 15 mins | Total Time: 30 mins | Yield: 4-6 These baked chicken and black beans nachos will make you drool! It’s been… General Recipes SHEET PAN CHICKEN AND BLACK BEAN NACHOS European Print This
Serves: 4-6 Prep Time: 15 mins Cooking Time: 15 mins 15 mins
Nutrition facts: 200 calories 20 grams fat
Rating: 5.0/5
( 1 voted )

Ingredients

  • 1 c. chopped cooked chicken
  • 32–34 home-baked tortilla chips
  • 2 c. shredded Monterey jack & cheddar cheese blend
  • 1 (11 oz) can Mexi-corn, drained
  • 1 (15 oz) can of whole black beans, drained and rinsed
  • 1 c. prepared pico de gallo
  • 1 (15 oz) can of refried black beans
  • guacamole, sour cream, salsa, and hot sauce, for serving
  • 1–2 fresh jalapenos, thinly sliced or 1 can slice nacho jalapenos

Instructions

Step 1: Prepare the oven. Preheat it to 400 degrees F. Using foil, line a rimmed sheet pan and generously grease with non-stick cooking spray. Or simply grease the pan with non-stick cooking spray.

Step 2: After spreading each tortilla chip with a thin layer of refried black beans, put them on the prepared sheet pan in a single layer. Then, lightly sprinkle each chip with cheese. On top of each chip, place some black beans, corn, pico de gallo, and a piece of chicken. All over the toppings on each chip, sprinkle extra cheese. Lastly, top the chips with a thin slice of jalapeno.

Step 3: Place in the preheated oven and bake for about 15 to 20 minutes until the cheese has melted and begins to turn golden brown in spots. Make sure that halfway through baking, you rotate the pans.

Step 4: Take the nachos out of the oven when done and allow them to rest for a couple of minutes. Serve the nachos with guacamole, sour cream, salsa, and hot sauce. Enjoy!
May 25, 2022 0 comment
0 FacebookTwitterPinterestEmail
General Recipes

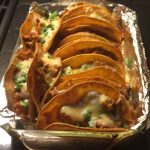
Easy Rotisserie Chicken Tacos

by Rebecca May 25, 2022
written by Rebecca

PREP TIME: 20 MINS | COOK TIME: 20 MINS | TOTAL TIME: 40 MINS | YIELD: 12 tacos

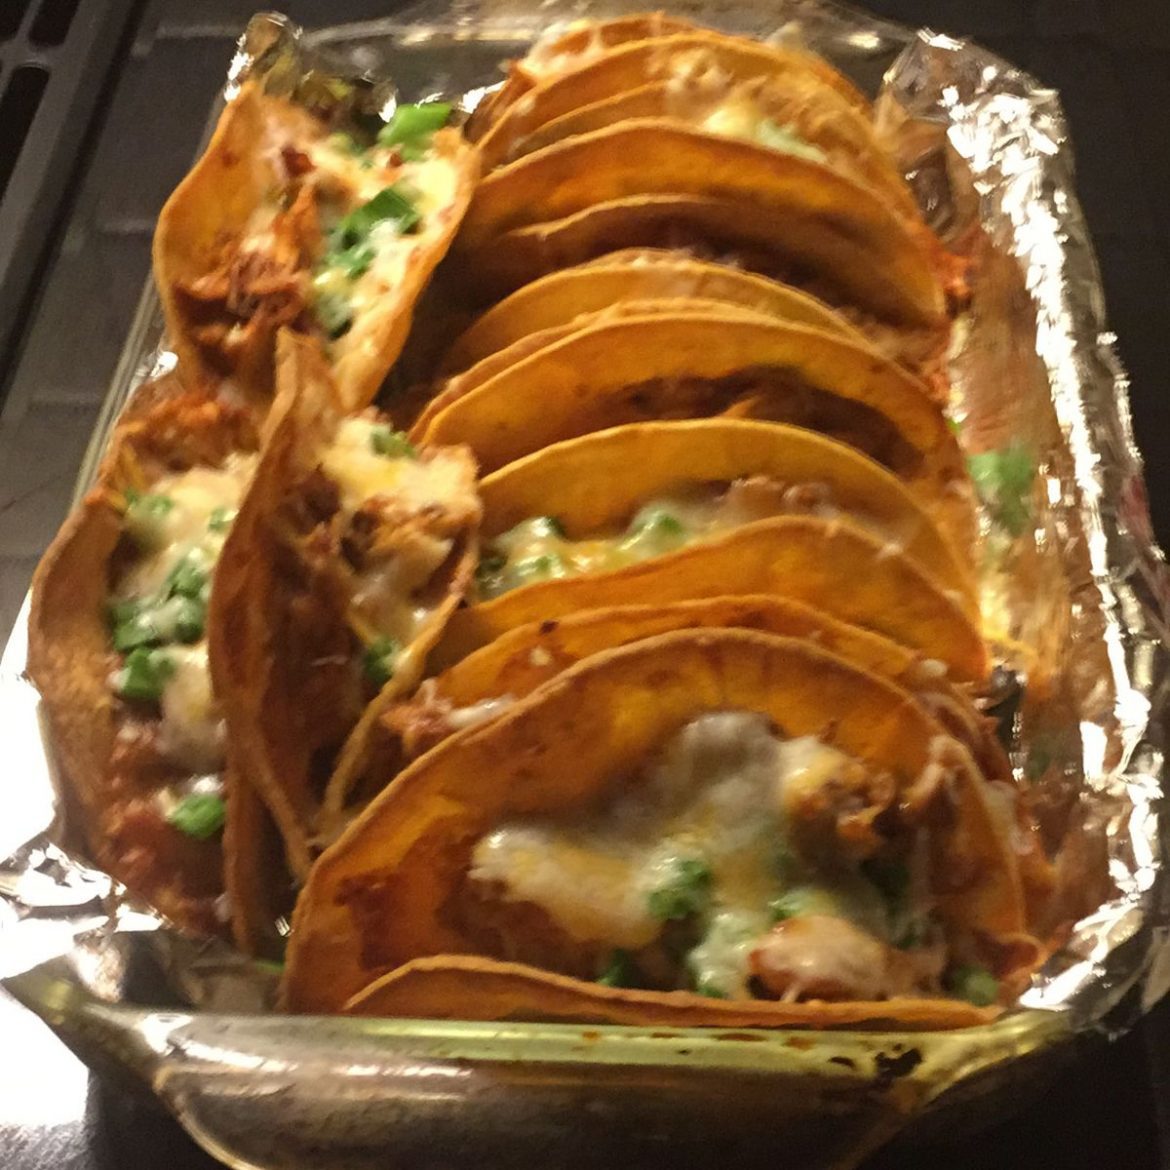
Are you looking for another way to feed the crowd on game nights? Well, these Rotisserie Chicken Tacos are a great choice! It is easy and quick to make and guarantees to make everyone come back in seconds!

INGREDIENTS

1 small rotisserie chicken, meat removed from the bones (you’ll want about 1½ lbs. of picked chicken meat)

2 c. salsa (you can use homemade or any of your favorite jarred salsa)

2 tbsp tomato paste

1 tsp chili powder

½ tsp coriander

1 tsp ground cumin

6 tbsp vegetable oil

12 white or yellow 6-inch corn tortillas

4 c. shredded iceberg lettuce

8 oz. pepper jack cheese, shredded

8 oz. Monterey jack cheese, shredded

1 c. water

Toppings:

Avocado wedges

Sliced black olives

Thinly sliced red onion

Sour cream

Fresh cilantro

Lime juice

Sliced pickled jalapenos

How to make Easy Rotisserie Chicken Tacos

Step 1: Prepare the oven. Preheat it to 450 degrees F.

Step 2: Ready a roasting pan with high sides that can hold 12 completed folded tacos. Or use 2 pans with 6 folded tacos each.

Step 3: Place the salsa, water, and tomato paste in a large skillet. Stir and cook over medium heat. Then, stir in the coriander, chili powder, and cumin.

Step 4: Into the salsa mixture, shred the cooked chicken pieces and continue to cook until heated. When done, keep the chicken mixture warm.

Step 5: With half of the oil, brush two sheet pans. Onto the pans, lay our 6 tortillas each, and brush the tops with the remaining oil.

Step 6: Between the 12 tortillas, divide the pepper jack. Next, divide the warm chicken mixture and place it on top of the pepper jack.

Step 7: Bake in the preheated oven and bake for about 12 to 15 minutes or until the edges begin to get slightly crispy and the mixture is hot and bubbly. Halfway through even browning, rotate the pans.

Step 8: Take the pans out of the oven and immediately top with half of the lettuce. Fold one tortilla in half and transfer to the reserved dish/pan. Repeat until the tortillas are folded. Lean each taco next to the other so they stay folded. Then, turn the oven off.

Step 9: Top 12 folded tacos with Monterey Jack cheese and return in the oven (while it is turned off) for about 4 to 5 minutes to melt the cheese.

Step 10: Serve the tacos, hot with your preferred toppings such as sliced back olives, pickled jalapenos, thinly sliced red onion, avocado wedges, sour cream, lime juice, fresh cilantro, etc. Enjoy!

Nutrition Facts:

Serving Size: 1 taco, Serves: 12
Amount Per Serving: Calories 303, Total Fat 17.8g 23%, Saturated Fat 10.2g, Trans Fat 0g, Polyunsaturated Fat 1.5g, Monounsaturated Fat 4.5g 0%, Cholesterol 45.5mg 15%, Sodium 602.9mg 26%, Total Carbohydrate 20.4g 7%, Dietary Fiber 3.7g 13%, Sugars 3.7g, Protein 17g 34%

Easy Rotisserie Chicken Tacos

Rebecca PREP TIME: 20 MINS | COOK TIME: 20 MINS | TOTAL TIME: 40 MINS | YIELD: 12 tacos Are you looking for another way to feed the crowd on game… General Recipes Easy Rotisserie Chicken Tacos European Print This
Serves: 12 Prep Time: 20 mins Cooking Time: 20 mins 20 mins
Nutrition facts: 303 calories 17.8 fat
Rating: 5.0/5
( 1 voted )

Ingredients

  • 1 small rotisserie chicken, meat removed from the bones (you’ll want about 1½ lbs. of picked chicken meat)
  • 2 c. salsa (you can use homemade or any of your favorite jarred salsa)
  • 2 tbsp tomato paste
  • 1 tsp chili powder
  • ½ tsp coriander
  • 1 tsp ground cumin
  • 6 tbsp vegetable oil
  • 12 white or yellow 6-inch corn tortillas
  • 4 c. shredded iceberg lettuce
  • 8 oz. pepper jack cheese, shredded
  • 8 oz. Monterey jack cheese, shredded
  • 1 c. water
  • Toppings:
  • Avocado wedges
  • Sliced black olives
  • Thinly sliced red onion
  • Sour cream
  • Fresh cilantro
  • Lime juice
  • Sliced pickled jalapenos

Instructions

Step 1: Prepare the oven. Preheat it to 450 degrees F.

Step 2: Ready a roasting pan with high sides that can hold 12 completed folded tacos. Or use 2 pans with 6 folded tacos each.

Step 3: Place the salsa, water, and tomato paste in a large skillet. Stir and cook over medium heat. Then, stir in the coriander, chili powder, and cumin.

Step 4: Into the salsa mixture, shred the cooked chicken pieces and continue to cook until heated. When done, keep the chicken mixture warm.

Step 5: With half of the oil, brush two sheet pans. Onto the pans, lay our 6 tortillas each, and brush the tops with the remaining oil.

Step 6: Between the 12 tortillas, divide the pepper jack. Next, divide the warm chicken mixture and place it on top of the pepper jack.

Step 7: Bake in the preheated oven and bake for about 12 to 15 minutes or until the edges begin to get slightly crispy and the mixture is hot and bubbly. Halfway through even browning, rotate the pans.

Step 8: Take the pans out of the oven and immediately top with half of the lettuce. Fold one tortilla in half and transfer to the reserved dish/pan. Repeat until the tortillas are folded. Lean each taco next to the other so they stay folded. Then, turn the oven off.

Step 9: Top 12 folded tacos with Monterey Jack cheese and return in the oven (while it is turned off) for about 4 to 5 minutes to melt the cheese.

Step 10: Serve the tacos, hot with your preferred toppings such as sliced back olives, pickled jalapenos, thinly sliced red onion, avocado wedges, sour cream, lime juice, fresh cilantro, etc. Enjoy!

May 25, 2022 0 comment
0 FacebookTwitterPinterestEmail
General Recipes

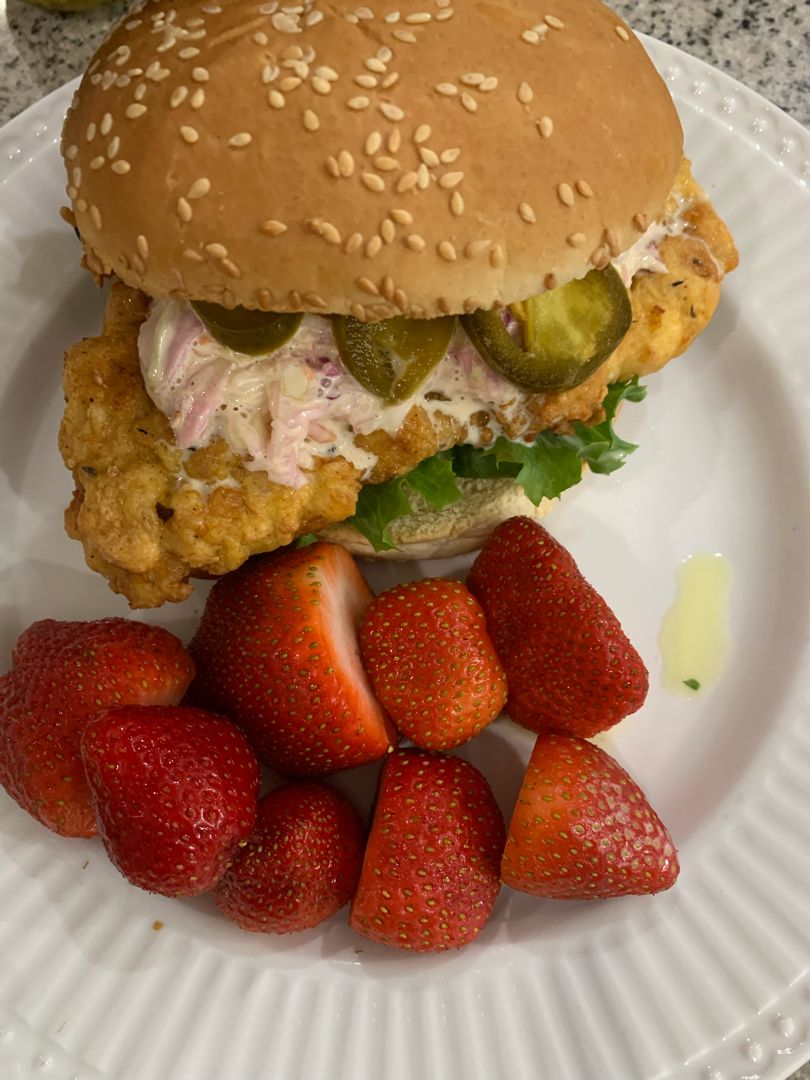
Crispy Chicken Burger with Honey Mustard Coleslaw

by Rebecca May 25, 2022
written by Rebecca

PREP TIME: 20 MINS | COOK TIME: 15 MINS | TOTAL TIME: 35 MINS | SERVINGS: 4 burgers

I am obsessed with this crispy chicken burger! Crispy chicken tenders with honey mustard coleslaw, jalapenos, and crunchy lettuce sandwiched on a toasted brioche bun. I’m never making chicken burgers another way ever again!

INGREDIENTS

Chicken Marinade:

240 ml (1 c.) buttermilk

¼ teaspoon garlic salt

3 large chicken breasts – sliced into long, thick strips

½ teaspoon salt

¼ teaspoon white pepper

Crispy Chicken Coating:

1 teaspoon baking powder

180 grams (1 ½ c.) plain (all-purpose) flour

½ teaspoon garlic salt

1 teaspoon dried thyme

½ teaspoon celery salt

1 teaspoon paprika

1 teaspoon chili flakes

1 teaspoon salt

1 teaspoon ground black pepper

Honey Mustard Coleslaw:

4 tablespoons mayonnaise

2 teaspoons lemon juice

1 tablespoon honey

⅓ white cabbage

1 medium carrot – peeled

pinch black pepper

1 tablespoon Dijon mustard

Additional:

1-2 jalapenos – sliced

vegetable oil – for deep frying

4 brioche buns – toasted

4 slices of Gouda cheese – I used the ready-sliced kind, or you can slice it yourself

½ red onion – peeled and thinly sliced

8 pieces of crunchy lettuce – I used the ‘O’ so sweet’ variety – but Romaine or Little Gem is great too

How to make Crispy Chicken Burger with Honey Mustard Coleslaw

Step 1: In a bowl, place the chicken. Then, add the buttermilk, salt, pepper, and garlic salt. Stir well. Tent the bowl and place it in the fridge for at least an hour up to overnight to marinate the chicken.

Step 2: Prepare the oven and preheat it to low.

Step 3: Heat the vegetable oil in a large pan until hot. Make sure that the pan is more than one-third full. For this, you need around 4 cups (1 liter) of oil.

Step 4: In a small bowl, whisk the crispy coating ingredients. Remove the chicken from the fridge and lift a piece of chicken out, letting the excess drip off. Then, place the chicken in the crispy coating mixture, coating it on all sides. On a tray, lay the chicken. Do the same with the rest of the chicken.

Step 5: Add about 5 to 6 of the chicken tenders to the hot oil and cook for about 3 to 5 minutes until the middle is cooked and the chicken is golden brown. Make sure not to overcrowd the pan. In the oven, pop the chicken to keep them warm while you finish cooking the remaining chicken.

Step 6: Julienne the cabbage and carrot using a mandoline. Alternately, you can just slice them thinly by hand. In a bowl with mayonnaise, mustard, honey, lemon juice, and black pepper, place the thinly sliced cabbage and carrot. Mix well. Tent the bowl and place the coleslaw in the fridge until needed.

Step 7: To assemble: Into four piles, arrange the chicken tenders. On top, place the Gouda. You can grill the chicken tenders or keep them in the warm oven for a few minutes until the cheese just melted.

Step 8: On four plates, place the bottom of the brioche buns and top with lettuce leaves, then with the cheesy chicken pieces. On top of the chicken, spoon the coleslaw and sprinkle with slices of red onion and jalapeno. On top, place the top buns. Enjoy!

NUTRITION FACTS:

Calories: 791 kcal, Carbohydrates: 73g, Protein: 38g, Fat: 38g, Saturated Fat: 20g, Cholesterol: 100mg, Sodium: 2387mg,

Crispy Chicken Burger with Honey Mustard Coleslaw

Rebecca PREP TIME: 20 MINS | COOK TIME: 15 MINS | TOTAL TIME: 35 MINS | SERVINGS: 4 burgers I am obsessed with this crispy chicken burger! Crispy chicken tenders with… General Recipes Crispy Chicken Burger with Honey Mustard Coleslaw European Print This
Serves: 4 Prep Time: 20 mins Cooking Time: 15 mins 15 mins
Nutrition facts: 791 calories 38 fat
Rating: 5.0/5
( 1 voted )

Ingredients

  • Chicken Marinade:
  • 240 ml (1 c.) buttermilk
  • ¼ teaspoon garlic salt
  • 3 large chicken breasts - sliced into long, thick strips
  • ½ teaspoon salt
  • ¼ teaspoon white pepper
  • Crispy Chicken Coating:
  • 1 teaspoon baking powder
  • 180 grams (1 ½ c.) plain (all-purpose) flour
  • ½ teaspoon garlic salt
  • 1 teaspoon dried thyme
  • ½ teaspoon celery salt
  • 1 teaspoon paprika
  • 1 teaspoon chili flakes
  • 1 teaspoon salt
  • 1 teaspoon ground black pepper
  • Honey Mustard Coleslaw:
  • 4 tablespoons mayonnaise
  • 2 teaspoons lemon juice
  • 1 tablespoon honey
  • ⅓ white cabbage
  • 1 medium carrot - peeled
  • pinch black pepper
  • 1 tablespoon Dijon mustard
  • Additional:
  • 1-2 jalapenos - sliced
  • vegetable oil - for deep frying
  • 4 brioche buns - toasted
  • 4 slices of Gouda cheese - I used the ready-sliced kind, or you can slice it yourself
  • ½ red onion - peeled and thinly sliced
  • 8 pieces of crunchy lettuce - I used the 'O' so sweet' variety - but Romaine or Little Gem is great too

Instructions

Step 1: In a bowl, place the chicken. Then, add the buttermilk, salt, pepper, and garlic salt. Stir well. Tent the bowl and place it in the fridge for at least an hour up to overnight to marinate the chicken.

Step 2: Prepare the oven and preheat it to low.

Step 3: Heat the vegetable oil in a large pan until hot. Make sure that the pan is more than one-third full. For this, you need around 4 cups (1 liter) of oil.

Step 4: In a small bowl, whisk the crispy coating ingredients. Remove the chicken from the fridge and lift a piece of chicken out, letting the excess drip off. Then, place the chicken in the crispy coating mixture, coating it on all sides. On a tray, lay the chicken. Do the same with the rest of the chicken.

Step 5: Add about 5 to 6 of the chicken tenders to the hot oil and cook for about 3 to 5 minutes until the middle is cooked and the chicken is golden brown. Make sure not to overcrowd the pan. In the oven, pop the chicken to keep them warm while you finish cooking the remaining chicken.

Step 6: Julienne the cabbage and carrot using a mandoline. Alternately, you can just slice them thinly by hand. In a bowl with mayonnaise, mustard, honey, lemon juice, and black pepper, place the thinly sliced cabbage and carrot. Mix well. Tent the bowl and place the coleslaw in the fridge until needed.

Step 7: To assemble: Into four piles, arrange the chicken tenders. On top, place the Gouda. You can grill the chicken tenders or keep them in the warm oven for a few minutes until the cheese just melted.

Step 8: On four plates, place the bottom of the brioche buns and top with lettuce leaves, then with the cheesy chicken pieces. On top of the chicken, spoon the coleslaw and sprinkle with slices of red onion and jalapeno. On top, place the top buns. Enjoy!

May 25, 2022 0 comment
0 FacebookTwitterPinterestEmail
General Recipes

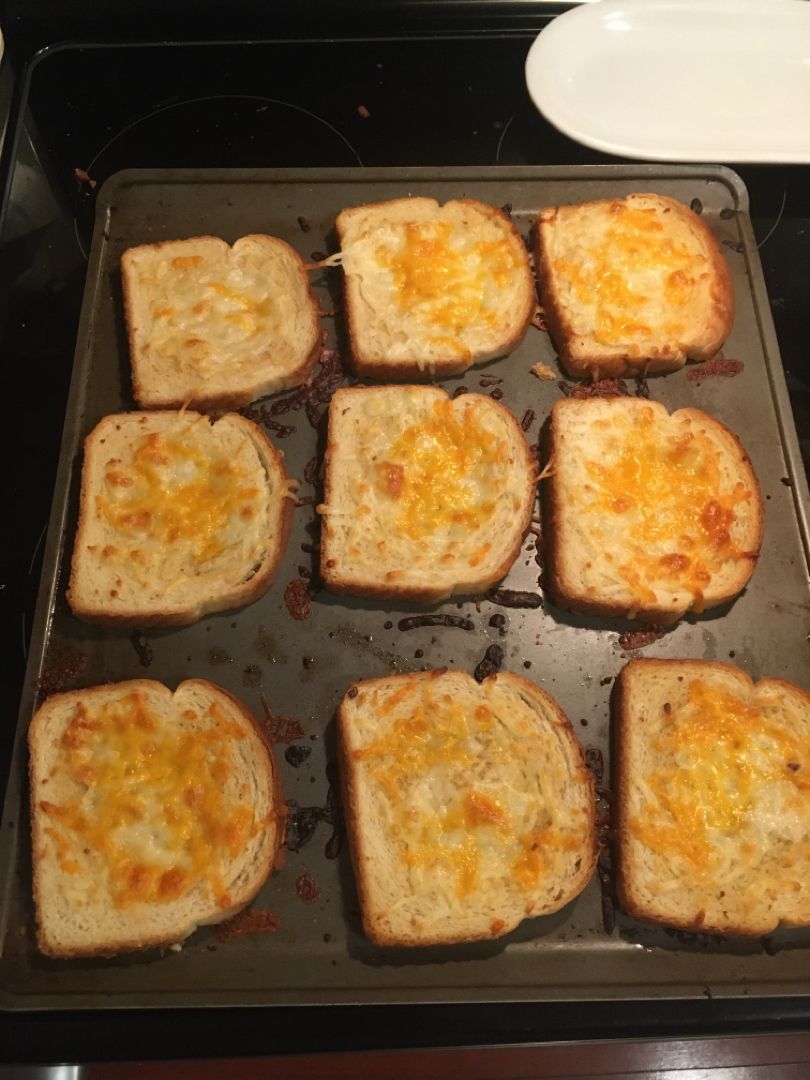
Garlic Cheese Toast

by Rebecca May 25, 2022
written by Rebecca

PREP TIME: 5 MINS | COOK TIME: 8 MINS | TOTAL TIME: 13 MINS | SERVINGS: 10

These amazing garlic cheese toast are a staple at my house. All I need are simple ingredients to make this cheesy and garlicky toast. For the cheese, I use whatever I have on hand, but always make sure to include one variety with bold flavor like Parmesan.

Easily make this garlic cheese toast either in the oven under the broiler or on the grill. You can even use this same recipe to whip up a loaf of cheesy bread. Try dipping the toast in different rich and savory sauces. Also, pair it up with steaks and chicken for a meal to remember!

Ingredients

2 cloves garlic, minced

½ c. + 2 tbsp salted butter, softened, divided

10 slices of thick white bread slightly dry

½ c. cheddar cheese, shredded

¼ c. Parmesan cheese, shredded

¼ c. Monterey jack cheese

salt & pepper to taste

How to make Garlic, Cheese Toast

Step 1: Prepare the oven. Preheat it to 375 degrees F.

Step 2: Spread 2 tbsp butter on one side of the bread pieces. On a baking sheet, place the pieces of bread, and butter-side down.

Step 3: In a food processor, place the rest of the butter, garlic, and cheeses. Pulse until incorporated.

Step 4: On the unbuttered side of the bread pieces, spread the mixture. On the middle rack of the preheated oven, place the baking sheet and bake the bread pieces for about 8 to 10 minutes or until the cheese has melted. If you want to brown the cheese, set the oven to broil for 30 to 60 seconds.

Notes:

You can also use a hand mixer instead of a food processor.

For this recipe, you are welcome to use any combination of cheese you’d like. For best results, make sure to use one cheese with bold flavors such as Parmesan.

To make a loaf of cheesy bread, this can be spread on French bread, too.

NUTRITION FACTS:

Calories: 216, Carbohydrates: 13g, Protein: 5g, Fat: 16g, Saturated Fat: 10g, Cholesterol: 42mg, Sodium: 319mg, Potassium: 38mg, Fiber: 1g, Sugar: 1g, Vitamin A: 467IU, Vitamin C: 1mg, Calcium: 161mg, Iron: 1mg

Garlic Cheese Toast

Rebecca PREP TIME: 5 MINS | COOK TIME: 8 MINS | TOTAL TIME: 13 MINS | SERVINGS: 10 These amazing garlic cheese toast are a staple at my house. All I… General Recipes Garlic Cheese Toast European Print This
Serves: 10 Prep Time: 5 mins Cooking Time: 8 mins 8 mins
Nutrition facts: 216 calories 16 fat
Rating: 5.0/5
( 1 voted )

Ingredients

  • 2 cloves garlic, minced
  • ½ c. + 2 tbsp salted butter, softened, divided
  • 10 slices of thick white bread slightly dry
  • ½ c. cheddar cheese, shredded
  • ¼ c. Parmesan cheese, shredded
  • ¼ c. Monterey jack cheese
  • salt & pepper to taste

Instructions

Step 1: Prepare the oven. Preheat it to 375 degrees F.

Step 2: Spread 2 tbsp butter on one side of the bread pieces. On a baking sheet, place the pieces of bread, and butter-side down.

Step 3: In a food processor, place the rest of the butter, garlic, and cheeses. Pulse until incorporated.

Step 4: On the unbuttered side of the bread pieces, spread the mixture. On the middle rack of the preheated oven, place the baking sheet and bake the bread pieces for about 8 to 10 minutes or until the cheese has melted. If you want to brown the cheese, set the oven to broil for 30 to 60 seconds.

Notes

You can also use a hand mixer instead of a food processor. For this recipe, you are welcome to use any combination of cheese you’d like. For best results, make sure to use one cheese with bold flavors such as Parmesan. To make a loaf of cheesy bread, this can be spread on French bread, too.

May 25, 2022 0 comment
0 FacebookTwitterPinterestEmail
General Recipes

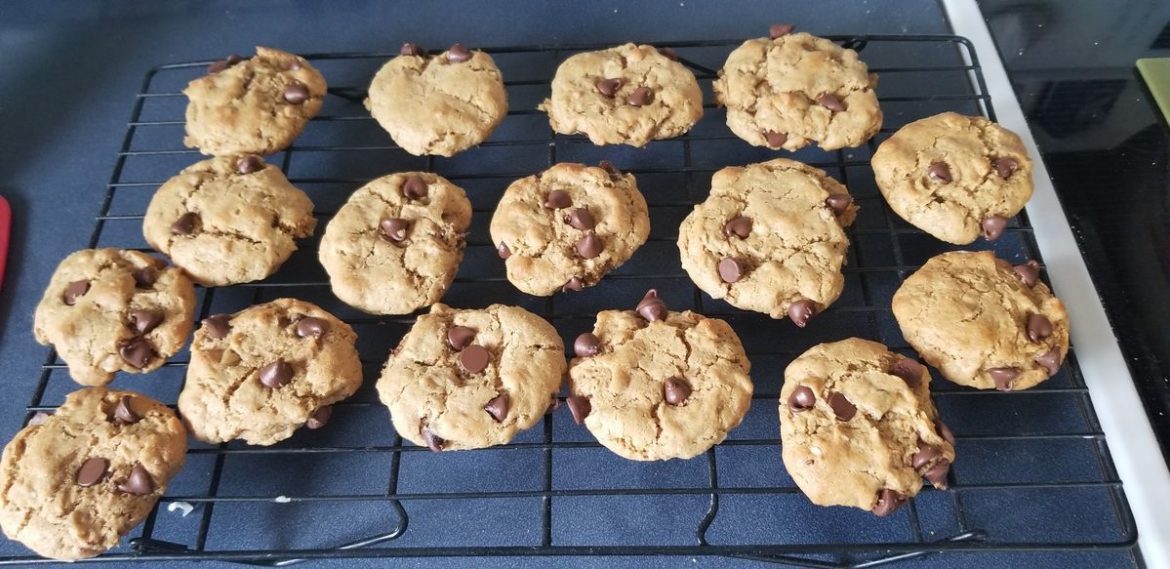
Flourless Peanut Butter Oatmeal Chocolate Chip Cookies

by Rebecca May 25, 2022
written by Rebecca

PREP TIME: 5 MINS | COOK TIME: 10 MINS | TOTAL TIME: 15 MINS | SERVES: 18

These are the best peanut butter oatmeal chocolate chip cookies! Made with only seven ingredients and ready in no time – this foolproof recipe guarantees thick, chewy, and delicious cookies that are perfect for all ages! Enjoy the nostalgic flavor and excellent combination of chocolate and peanut butter with these gluten-free, dairy-free, and healthy cookies with these amazing melt-in-your-mouth cookies!

Ingredients

2 large eggs

1 c. natural creamy peanut butter (just peanuts + salt)

1 tsp vanilla extract

3/4 c. rolled oats (gluten-free if desired)

2/3 c. packed dark brown sugar

1/2 tsp baking soda

Flakey sea salt for sprinkling on top

2/3 c. chocolate chips, dairy-free if desired

How to make Flourless Peanut Butter Oatmeal Chocolate Chip Cookies

Step 1: Prepare the oven. Preheat it to 350 degrees F. Using the parchment paper, line a baking sheet. In the meantime, combine the oats and baking soda in the small bowl and set aside.

Step 2: Place the peanut butter, brown sugar, eggs, and vanilla in a large bowl. Mix well until smooth. Using a wooden spoon, mix in the dry ingredients. Lastly, fold in the chocolate chips gently.

Step 3: Into 2-inch dough balls, roll the cookies, and lay them on the prepared baking sheet about 2-inches apart from each other. Using your hand, gently flatten the top of each cookie. You can also use a cookie scoop to drop the dough onto the prepared baking sheet.

Step 4: Place the baking sheet in the preheated oven and bake the cookie dough for about 9 to 12 minutes until the edges of the cookies are barely starting to turn golden brown.

Step 5: Remove the cookies from the oven and allow them to cool on the cookie sheet for 5 minutes before transferring them to a wire rack to cool fully.

Step 6: With flakey seal salt, sprinkle each cookie.

Notes:

For this recipe, you can reduce the amount of sugar or chocolate chips if desired (half cup each).

Swap peanut butter with almond butter or other nut butter if desired.

Nutrition Facts:

Servings: 18 cookies, Serving size: 1 cookie
Calories: 178 kcal, Fat: 10.2g, Carbohydrates: 17.4g, Fiber: 1.8g, Sugar: 13g, Protein: 4.8g

May 25, 2022 0 comment
0 FacebookTwitterPinterestEmail
General Recipes

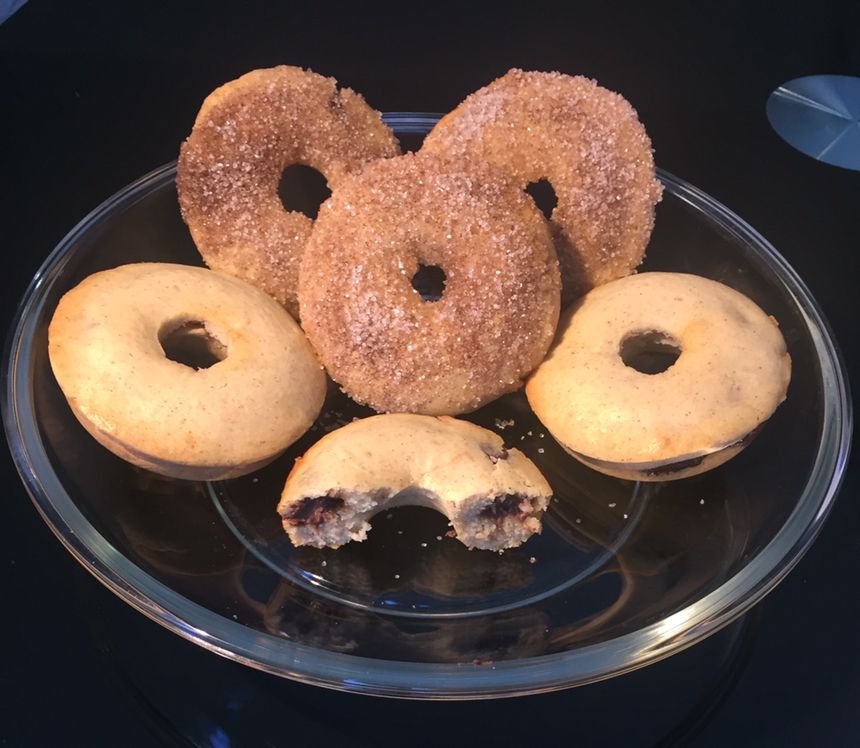
Nutella Filled Baked Donuts

by Rebecca May 25, 2022
written by Rebecca

These are the best doughnuts I’ve ever made! Homemade baked doughnuts stuffed with Nutella filling and brushed with butter, then coated in a crunchy cinnamon-sugar coating. Enjoy two of your favorites in a single bite with these mind-blowing Nutella-filled baked doughnuts any time!

Ingredients

Doughnut batter:

1 egg

¼ tsp cinnamon

1 c. all-purpose flour

1 tsp baking powder

2 ½ tbsp sugar

¾ tsp vanilla

7 tbsp milk

Dash of salt

¼ c. unsalted butter-melted (½ tablespoon to grease the pan and 3.5 tablespoons for the dough)

Filling and Topping:

¼ sugar or light brown sugar

2 tbsp unsalted butter-meted

1 tsp cinnamon (more or less to taste)

¾ c. of Nutella (8 ounces or 220 g.)

How to make Nutella Filled Baked Donuts

Step 1: Using plastic wrap, line a doughnut pan. To a piping bag, transfer the Nutella and pipe it in the middle of each cavity to create a ring. Alternately, you can place the Nutella in a ziplock bag and cut the corner off. Sit in the freezer until fully firm. On a plate, transfer the Nutella rings and return to the freezer until ready to use.

Step 2: Prepare the oven. Preheat it to 350 degrees F. In the meantime, brush the doughnut pan with melted butter and set aside.

Step 3: Place the flour, baking powder, and salt in a small bowl. Mix well until combined.

Step 4: Mix the rest of the 3 1/2 tbsp melted butter with 2 1/2 tbsp sugar in a different bowl. Next, stir in the cinnamon, vanilla, egg, and milk until just blended. Then, stir in the flour mixture.

Step 5: In a piping bag or ziplock bag, transfer the mixture. With half of the batter, fill the doughnut pan. Remove the Nutella rings from the freezer and put them on top of the batter. Then, cover the Nutella rings with the rest of the batter.

Step 6: Place in the preheated oven and bake for about 13 to 15 minutes or until golden brown and firm. Remove from the oven when done and allow the doughnuts to cool in the pan for 5 minutes before inverting onto a wire rack.

Step 7: In the meantime, mix the cinnamon and sugar. And melt 2 tablespoons of butter.

Step 8: With the melted butter, brush each doughnut and dip them one by one in the cinnamon-sugar mixture.

Nutella Filled Baked Donuts

Rebecca These are the best doughnuts I’ve ever made! Homemade baked doughnuts stuffed with Nutella filling and brushed with butter, then coated in a crunchy cinnamon-sugar coating. Enjoy two of your… General Recipes Nutella Filled Baked Donuts European Print This
Nutrition facts: 200 calories 20 grams fat
Rating: 5.0/5
( 1 voted )

Ingredients

  • Doughnut batter:
  • 1 egg
  • ¼ tsp cinnamon
  • 1 c. all-purpose flour
  • 1 tsp baking powder
  • 2 ½ tbsp sugar
  • ¾ tsp vanilla
  • 7 tbsp milk
  • Dash of salt
  • ¼ c. unsalted butter-melted (½ tablespoon to grease the pan and 3.5 tablespoons for the dough)
  • Filling and Topping:
  • ¼ sugar or light brown sugar
  • 2 tbsp unsalted butter-meted
  • 1 tsp cinnamon (more or less to taste)
  • ¾ c. of Nutella (8 ounces or 220 g.)

Instructions

Step 1: Using plastic wrap, line a doughnut pan. To a piping bag, transfer the Nutella and pipe it in the middle of each cavity to create a ring. Alternately, you can place the Nutella in a ziplock bag and cut the corner off. Sit in the freezer until fully firm. On a plate, transfer the Nutella rings and return to the freezer until ready to use.

Step 2: Prepare the oven. Preheat it to 350 degrees F. In the meantime, brush the doughnut pan with melted butter and set aside.

Step 3: Place the flour, baking powder, and salt in a small bowl. Mix well until combined.

Step 4: Mix the rest of the 3 1/2 tbsp melted butter with 2 1/2 tbsp sugar in a different bowl. Next, stir in the cinnamon, vanilla, egg, and milk until just blended. Then, stir in the flour mixture.

Step 5: In a piping bag or ziplock bag, transfer the mixture. With half of the batter, fill the doughnut pan. Remove the Nutella rings from the freezer and put them on top of the batter. Then, cover the Nutella rings with the rest of the batter.

Step 6: Place in the preheated oven and bake for about 13 to 15 minutes or until golden brown and firm. Remove from the oven when done and allow the doughnuts to cool in the pan for 5 minutes before inverting onto a wire rack.

Step 7: In the meantime, mix the cinnamon and sugar. And melt 2 tablespoons of butter.

Step 8: With the melted butter, brush each doughnut and dip them one by one in the cinnamon-sugar mixture.

May 25, 2022 0 comment
0 FacebookTwitterPinterestEmail
General Recipes

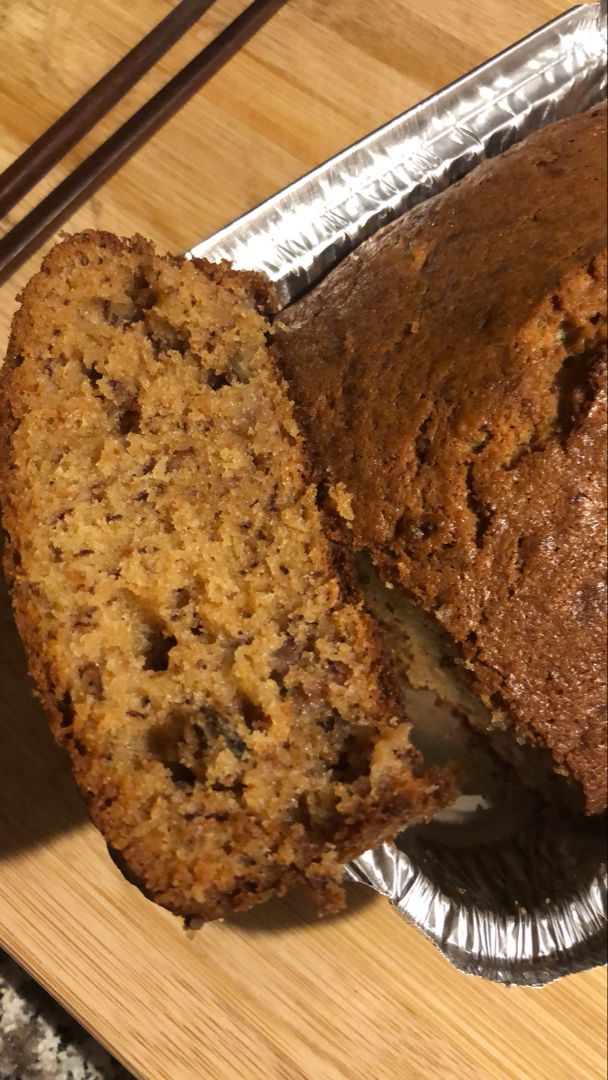
Janet’s Rich Banana Bread

by Rebecca May 25, 2022
written by Rebecca

Prep time: 10 mins | Cook time: 1 hr | Total time: 1 hr 10 mins | Servings: 15 | Yield: 1 9×5-inch loaf

My aunt makes the best banana bread! I do not know her secret, but she always says that it’s not hard math. I have recreated her famous banana bread, but this rich banana bread is the closest I can make. It’s an amazing banana bread that you can easily whip up using only the ingredients you have in your hand. A wonderful recipe that guarantees moist and delicious banana bread! This recipe is also the perfect way to use your overripe bananas. A big point if you hate wasting food. You can also use the same recipe to make banana muffins! It is a tried and tested recipe that I have been doing for so many years!

Ingredients

2 eggs

½ c. butter, melted

1 c. white sugar

½ c. chopped walnuts

1 ½ c. all-purpose flour

1 tsp vanilla extract

1 tsp baking soda

½ c. sour cream

2 medium bananas, sliced

½ tsp salt

How to make Janet’s Rich Banana Bread

Step 1: Prepare the oven. Preheat it to 350 degrees F or 175 degrees C. Meanwhile, ready a 9 x 5-inch loaf pan. Grease and set aside.

Step 2: Place the melted butter and sugar in a large bowl. Mix well, then add the eggs and vanilla. Stir well until blended. Next, whisk the flour, baking soda, and salt until you have a smooth mixture. Lastly, fold in the sour cream along with the walnuts and bananas.

Step 3: Into the prepared pan, pour the mixture and evenly spread it. Place in the preheated oven and bake for about 60 minutes or until a toothpick inserted in the middle of the bread comes out clean. Remove the loaf from the oven when done and allow it to cool for 10 minutes in the pan. Then, invert the bread to a wire rack to cool fully.

Nutrition Facts:

Per Serving: 218 calories; protein 3.2g; carbohydrates 27.4g; fat 11.1g; cholesterol 44.4mg; sodium 218.9mg.

May 25, 2022 0 comment
0 FacebookTwitterPinterestEmail
General Recipes

Meat and Potato Casserole

by Rebecca May 24, 2022
written by Rebecca

This casserole saves my life more than I can count! It’s my go-to for a last-minute dinner and my family’s favorite. It’s made with a few simple ingredients that you might already have sitting in your fridge. Throw this together easily and quickly, and enjoy a filling and scrumptious weeknight meal that your entire family (even your guests) will enjoy! Very comforting and great all year round!

Ingredients

3 c. thinly sliced potatoes (around 5 potatoes)

1 pound lean ground beef or venison

1/4 c. milk or cream

1 onion, chopped

1/2 c. stock (any kind)

1 1/2 c. cream of mushroom soup (I had leftover homemade soup in the fridge), or 1 can of cream of mushroom soup (which might make it not gluten-free)

1 1/2 c. shredded cheese

1 teaspoon each of any of these: garlic powder, paprika, or go more savory with rosemary (optional)

Salt and pepper to taste

How to make Meat and Potato Casserole

Step 1: Prepare the oven. Preheat it to 350 degrees F. Meanwhile, ready an 11 x 7-inch glass baking dish. Lightly grease and set aside.

Step 2: Cook the onions and ground meat in a medium frying pan until done. Then, add any of the seasonings and pepper. Drain the excess grease.

Step 3: Place the soup, stock, milk, salt, and pepper in a medium bowl. Mix well until blended.

Step 4: Into the baking dish, layer half of the potatoes. On top, pour some sauce and sprinkle with half of the meat followed by the cheese. Do the same layers with the remaining potatoes, soup, meat, and then the cheese.

Step 5: Tent the baking dish with lightly greased aluminium foil. Place in the preheated oven and bake the casserole for about 1 to 1 1/2 hours or until the potatoes are tender.

Meat and Potato Casserole

Rebecca This casserole saves my life more than I can count! It’s my go-to for a last-minute dinner and my family’s favorite. It’s made with a few simple ingredients that you… General Recipes Meat and Potato Casserole European Print This
Nutrition facts: 200 calories 20 grams fat
Rating: 5.0/5
( 1 voted )

Ingredients

  • 3 c. thinly sliced potatoes (around 5 potatoes)
  • 1 pound lean ground beef or venison
  • 1/4 c. milk or cream
  • 1 onion, chopped
  • 1/2 c. stock (any kind)
  • 1 1/2 c. cream of mushroom soup (I had leftover homemade soup in the fridge), or 1 can of cream of mushroom soup (which might make it not gluten-free)
  • 1 1/2 c. shredded cheese
  • 1 teaspoon each of any of these: garlic powder, paprika, or go more savory with rosemary (optional)
  • Salt and pepper to taste

Instructions

Step 1: Prepare the oven. Preheat it to 350 degrees F. Meanwhile, ready an 11 x 7-inch glass baking dish. Lightly grease and set aside.

Step 2: Cook the onions and ground meat in a medium frying pan until done. Then, add any of the seasonings and pepper. Drain the excess grease.

Step 3: Place the soup, stock, milk, salt, and pepper in a medium bowl. Mix well until blended.

Step 4: Into the baking dish, layer half of the potatoes. On top, pour some sauce and sprinkle with half of the meat followed by the cheese. Do the same layers with the remaining potatoes, soup, meat, and then the cheese.

Step 5: Tent the baking dish with lightly greased aluminium foil. Place in the preheated oven and bake the casserole for about 1 to 1 1/2 hours or until the potatoes are tender.

May 24, 2022 0 comment
0 FacebookTwitterPinterestEmail
General Recipes

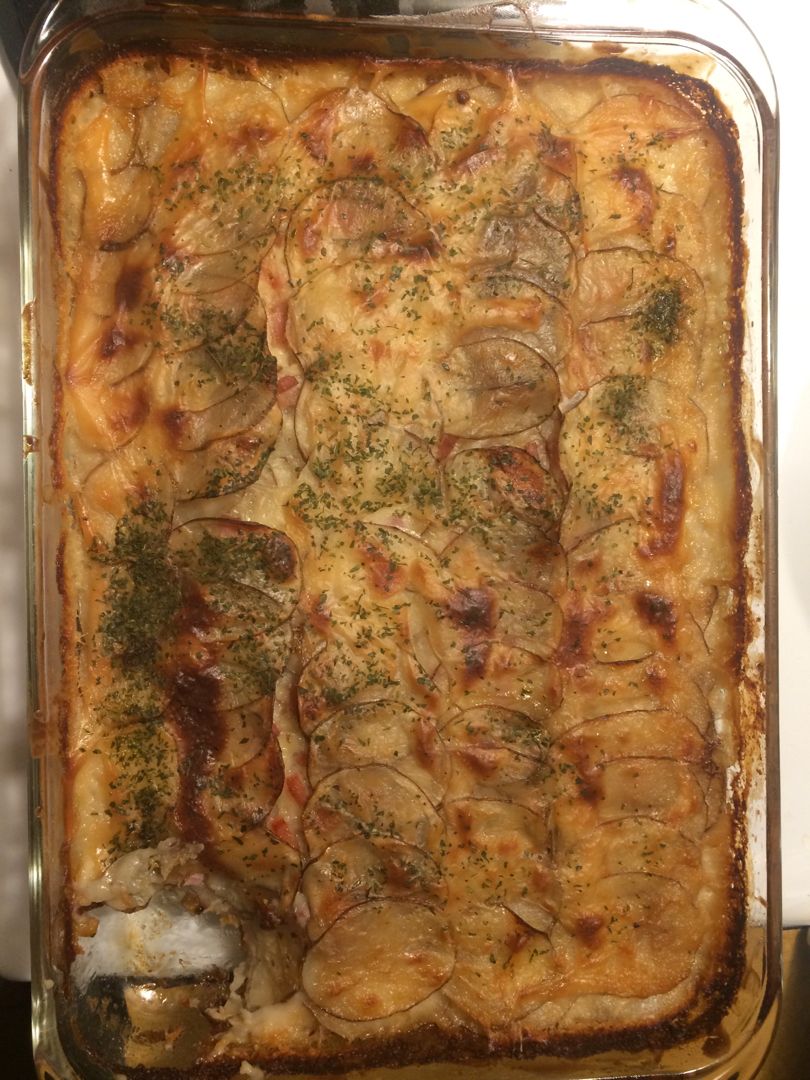
Scalloped Potatoes Recipe

by Rebecca May 24, 2022
written by Rebecca

PREP TIME: 25 MINS | COOK TIME: 1 HR 20 MINS | RESTING TIME: 15 MINS | TOTAL TIME: 1 HR 45 MINS | SERVINGS: 6

Are you in search of the perfect potato casserole? You are in luck! These scalloped potatoes with tender potatoes in a creamy onion sauce are everything. It’s baked until golden perfection for that irresistible potato casserole that will surely impress everyone!

Ingredients

2 cloves garlic, minced

1 large onion, diced

¼ c. flour

¼ c. butter

2 c. milk

½ tsp salt

¼ tsp pepper

1 c. chicken broth

salt and pepper to taste

3 lbs white potatoes, sliced about ⅛-inch thick

How to make Scalloped Potatoes

Step 1: Prepare the oven. Preheat it to 350 degrees F.

To make the Sauce:

Step 2: Melt the butter and add the onion and garlic. Cook for about 3 minutes over medium-low heat until the onion has softened. Next, add the flour and continue to cook for another 1 to 2 minutes.

Step 3: Adjust the heat to low. Whisk the milk and broth until well mixed. To the sauce, add small amounts of the milk/broth mixture at a time, stirring constantly until the sauce has thickened. Keep adding a little liquid at a time, stirring until smooth.

Step 4: Bring the sauce to a boil once all the liquid has been added over medium heat, stirring constantly. Season with salt and pepper and cook for a minute more.

To assemble:

Step 5: In the bottom of the greased 9 x 13-inch baking dish, place 1/3 of the potatoes and sprinkle with salt and pepper. On top, pour 1/3 of the cream sauce. Do the same layers, ending with cream sauce.

Step 6: Place in the preheated oven and bake for about 45 minutes, covered. Remove the cover and continue to bake for another 35 to 45 minutes or until golden brown and the potatoes are tender. To get a golden top, broil for about 3 to 4 minutes.

Step 7: Before serving, let the scalloped potatoes rest for about 15 minutes. Enjoy!

NUTRITION FACTS:

Calories: 286, Carbohydrates: 39g, Protein: 9g, Fat: 11g, Saturated Fat: 7g, Cholesterol: 30mg, Sodium: 484mg, Potassium: 1122mg, Fiber: 6g, Sugar: 5g, Vitamin A: 465IU, Vitamin C: 30.8mg, Calcium: 179mg, Iron: 7.7mg

Scalloped Potatoes Recipe

Rebecca PREP TIME: 25 MINS | COOK TIME: 1 HR 20 MINS | RESTING TIME: 15 MINS | TOTAL TIME: 1 HR 45 MINS | SERVINGS: 6 Are you in search… General Recipes Scalloped Potatoes Recipe European Print This
Serves: 6 Prep Time: 25 mins Cooking Time: 1 hr 20 mins 1 hr 20 mins
Nutrition facts: 286 calories 11 fat
Rating: 5.0/5
( 1 voted )

Ingredients

  • 2 cloves garlic, minced
  • 1 large onion, diced
  • ¼ c. flour
  • ¼ c. butter
  • 2 c. milk
  • ½ tsp salt
  • ¼ tsp pepper
  • 1 c. chicken broth
  • salt and pepper to taste
  • 3 lbs white potatoes, sliced about ⅛-inch thick

Instructions

Step 1: Prepare the oven. Preheat it to 350 degrees F.

To make the Sauce:

Step 2: Melt the butter and add the onion and garlic. Cook for about 3 minutes over medium-low heat until the onion has softened. Next, add the flour and continue to cook for another 1 to 2 minutes.

Step 3: Adjust the heat to low. Whisk the milk and broth until well mixed. To the sauce, add small amounts of the milk/broth mixture at a time, stirring constantly until the sauce has thickened. Keep adding a little liquid at a time, stirring until smooth.

Step 4: Bring the sauce to a boil once all the liquid has been added over medium heat, stirring constantly. Season with salt and pepper and cook for a minute more.

To assemble:

Step 5: In the bottom of the greased 9 x 13-inch baking dish, place 1/3 of the potatoes and sprinkle with salt and pepper. On top, pour 1/3 of the cream sauce. Do the same layers, ending with cream sauce.

Step 6: Place in the preheated oven and bake for about 45 minutes, covered. Remove the cover and continue to bake for another 35 to 45 minutes or until golden brown and the potatoes are tender. To get a golden top, broil for about 3 to 4 minutes.

Step 7: Before serving, let the scalloped potatoes rest for about 15 minutes. Enjoy!

May 24, 2022 0 comment
0 FacebookTwitterPinterestEmail
General Recipes

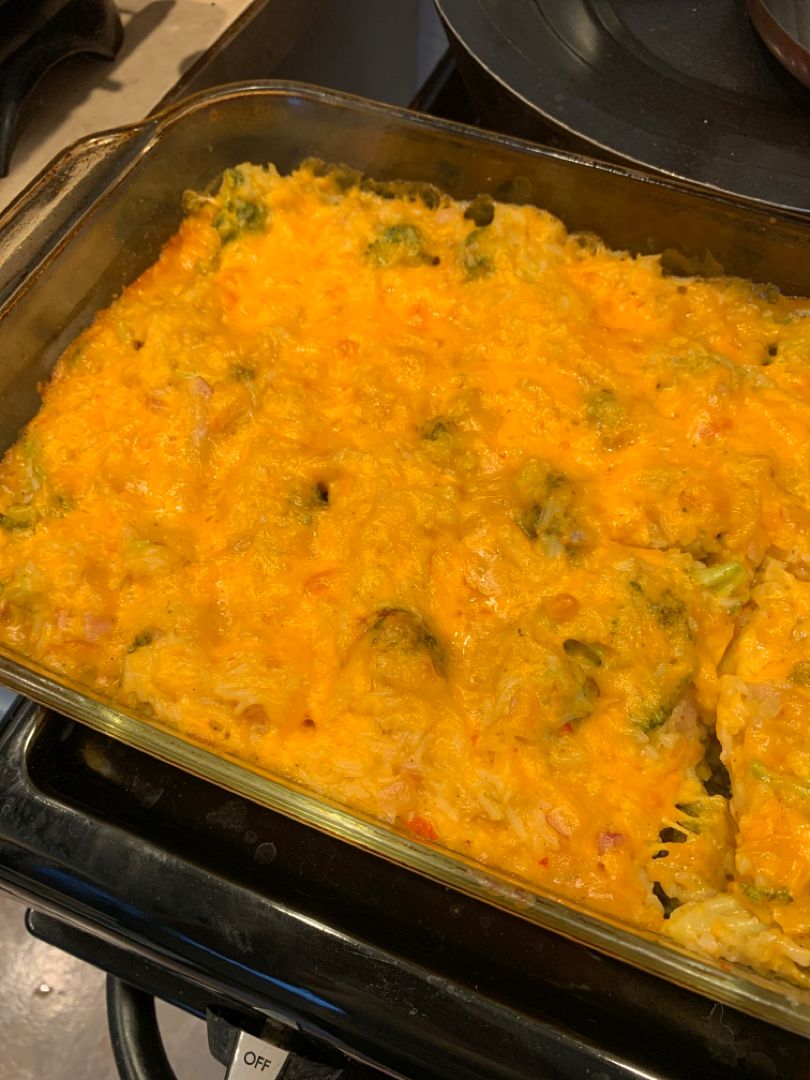
BROCCOLI-RICE CASSEROLE

by Rebecca May 24, 2022
written by Rebecca

PREP TIME: 20 MINS | COOK TIME: 40 MINS | TOTAL TIME: 60 MINS | YIELD: 10 to 12 servings

This impressive broccoli-rice casserole is my favorite and go-to side dish for every occasion. The perfect casserole that you can easily and quickly whip up all year round using just a few simple ingredients. Creamy, cheesy, and incredibly delicious casserole. A flavorful, very comforting dish that would not disappoint. This is no doubt a must and surely for keeping!

INGREDIENTS

3 cups cooked rice (about 1 cup uncooked)

1 (10 3/4 ounces) can cream of mushroom soup

1 small onion, finely chopped

1/2 cup milk

1/4 teaspoon paprika

1/4 teaspoon garlic powder

1 (16 ounces) package of frozen broccoli florets

2 cups shredded mild or medium cheddar cheese, divided

1 teaspoon salt

1/2 teaspoon black pepper

HOW TO MAKE BROCCOLI-RICE CASSEROLE

Step 1: After thawing the broccoli, warm it in the microwave for approximately 5 minutes. Drain well. Into smaller, bite-sized pieces, cut any large florets.

Step 2: Place the warm cooked rice, onion, cream of mushroom soup, milk, salt, pepper, garlic powder, paprika, and 1 c of the shredded cheddar in a bowl. Mix well until blended, then fold in the broccoli.

Step 3: Into the greased 9 x 13-inch baking dish, spoon the broccoli mixture and top with the rest of the 1 c shredded cheddar cheese. Place in the oven and bake for about 35 to 40 minutes at 350 degrees F or until bubbly and the cheese is just starting to get some golden-brown spots.

NOTES:

If desired, you can use frozen chopped broccoli in place of florets.

Prep this casserole in advance. In the casserole dish, place the broccoli mixture, top with cheese, and keep in the fridge until ready to bake. When ready to serve, bake for 60 to 75 minutes at 350 degrees F. Partway through baking, loosely cover the casserole with foil if the cheese starts to brown too much.

BROCCOLI-RICE CASSEROLE

Rebecca PREP TIME: 20 MINS | COOK TIME: 40 MINS | TOTAL TIME: 60 MINS | YIELD: 10 to 12 servings This impressive broccoli-rice casserole is my favorite and go-to side… General Recipes BROCCOLI-RICE CASSEROLE European Print This
Serves: 10-12 Prep Time: 20 mins Cooking Time: 40 mins 40 mins
Nutrition facts: 200 calories 20 grams fat
Rating: 5.0/5
( 1 voted )

Ingredients

  • 3 cups cooked rice (about 1 cup uncooked)
  • 1 (10 3/4 ounces) can cream of mushroom soup
  • 1 small onion, finely chopped
  • 1/2 cup milk
  • 1/4 teaspoon paprika
  • 1/4 teaspoon garlic powder
  • 1 (16 ounces) package of frozen broccoli florets
  • 2 cups shredded mild or medium cheddar cheese, divided
  • 1 teaspoon salt
  • 1/2 teaspoon black pepper

Instructions

Step 1: After thawing the broccoli, warm it in the microwave for approximately 5 minutes. Drain well. Into smaller, bite-sized pieces, cut any large florets.

Step 2: Place the warm cooked rice, onion, cream of mushroom soup, milk, salt, pepper, garlic powder, paprika, and 1 c of the shredded cheddar in a bowl. Mix well until blended, then fold in the broccoli.

Step 3: Into the greased 9 x 13-inch baking dish, spoon the broccoli mixture and top with the rest of the 1 c shredded cheddar cheese. Place in the oven and bake for about 35 to 40 minutes at 350 degrees F or until bubbly and the cheese is just starting to get some golden-brown spots.

Notes

If desired, you can use frozen chopped broccoli in place of florets. Prep this casserole in advance. In the casserole dish, place the broccoli mixture, top with cheese, and keep in the fridge until ready to bake. When ready to serve, bake for 60 to 75 minutes at 350 degrees F. Partway through baking, loosely cover the casserole with foil if the cheese starts to brown too much.

May 24, 2022 0 comment
0 FacebookTwitterPinterestEmail
Newer Posts
Older Posts

Popular Posts

  • 1

    Crispy Crunchy Parmesan Potatoes

    March 21, 2020
  • 2

    CROCK POT SMOTHERED PORK CHOPS

    March 21, 2020
  • Facebook
  • Twitter

@2019 - All Right Reserved.


Back To Top