Cook it once
  • Home
  • Privacy Policy
  • Recipes
    • KETO
    • LC
    • WW
  • Tips
  • Contact
Cook it once
  • Home
  • Privacy Policy
  • Recipes
    • KETO
    • LC
    • WW
  • Tips
  • Contact
Category:

General Recipes

General Recipes

Easy Strawberry Cake with Strawberry Sauce

by Rebecca June 1, 2022
written by Rebecca

Prep Time: 10 mins | Cook Time: 50 mins | Total Time: 1 hr | Servings: 10 slices (9-inch cake)

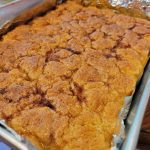
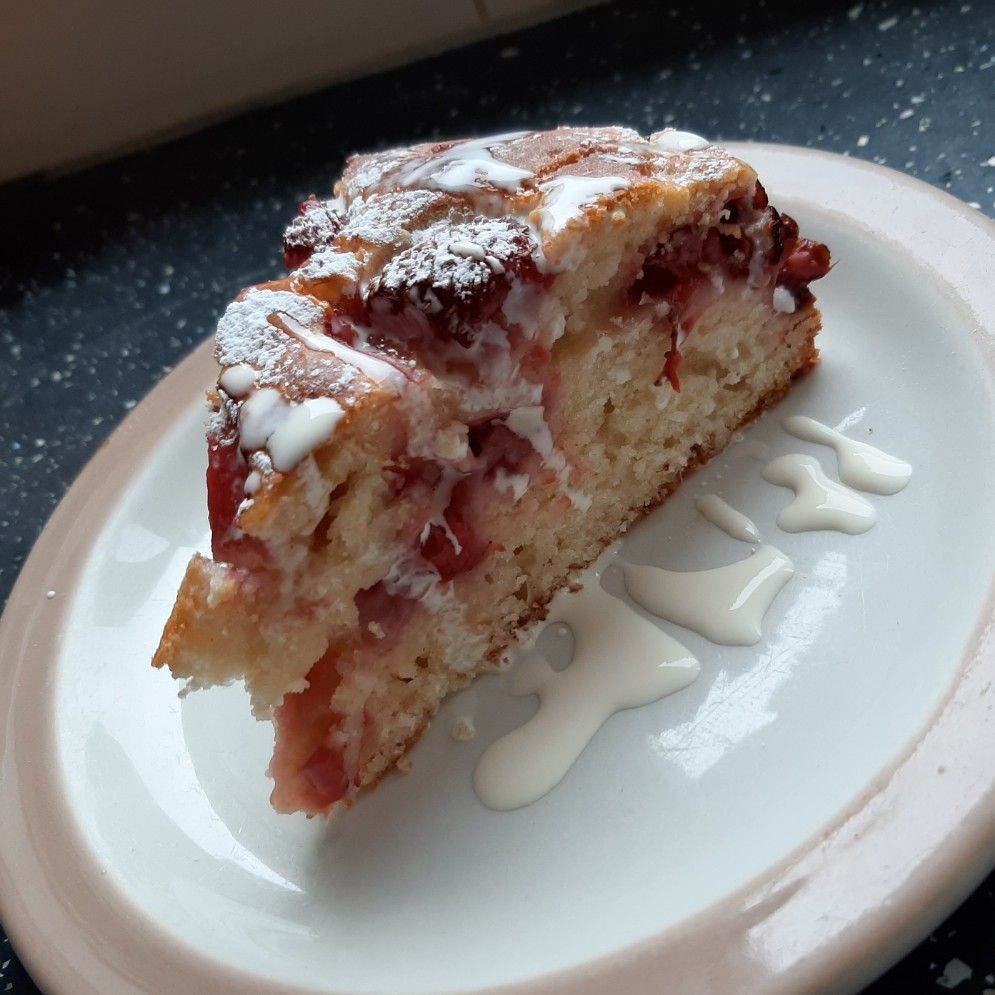
This is a very beautiful cake packed with strawberries. Lightly sweet, tender, very moist, and jammed with heavenly strawberry flavor. To top it all off, the deliciously amazing strawberry syrup!

Ingredients

Strawberry Cake:

1/2 c. light olive oil or vegetable oil

2 large eggs, room temperature

1 c. sour cream

1 teaspoon vanilla extract

1 c. granulated sugar

2 teaspoons baking powder

12 ounces strawberries, hulled

2 c. all-purpose flour, (measured correctly)

1 teaspoon powdered sugar, for dusting, optional

1/4 teaspoon salt

Strawberry Sauce:

1/4 c. granulated sugar, or to taste

16 ounces strawberries, hulled and halved

How to make Easy Strawberry Cake with Strawberry Sauce

Cake Prep:

Step 1: Grease a 9-inch springform pan, then line the bottom using parchment paper.

Step 2: Prepare the oven. Preheat it to 375 degrees F.

Step 3: For the cake, prepare 12 ounces of strawberries. Dice 6 ounces of the strawberries and slice the other half.

Strawberry Cake:

Step 4: Place 2 eggs and 1 c sugar in a large mixing bowl. Beat using an electric hand mixer or stand mixer for about 5 minutes on high speed until thick and light in color. Next, add 1 c. sour cream along with half c oil, and 1 teaspoon vanilla. Continue to beat on low speed until well blended.

Step 5: Place 2 c flour, 2 teaspoons baking powder, and 1/4 teaspoon salt in a small bowl. Mix well until blended. Add the flour 1/3 at a time while mixing on medium/low speed, allowing the flour to incorporate with every addition. Continue mixing until just combined, making sure not to over-mix the batter.

Step 6: Into the prepared pan, pour half of the batter, and top with 6 ounces of the diced strawberries. Top with the rest of the batter and cover the surface with the 6 ounces of halved strawberries, cut-side down. Slightly press the strawberries into the batter. Place in the preheated oven and bake for about 45 to 55 minutes or until a toothpick inserted in the middle of the cake comes out clean.

Step 7: Remove from the oven when done and allow the cake to rest for about 15 to 20 minutes in the pan before taking the ring off.

Step 8: To loosen the cake from the pan, run a thin spatula around the edges of the cake. To a platter, transfer the cake and let it cool until just warm or room temperature. Before serving, dust the cake with powdered sugar if desired. Slice and generously drizzle the individual slices with the strawberry syrup. Enjoy!

Strawberry Sauce:

Step 9: Place 16 ounces of strawberries and 1/4 c sugar in a blender or food processor. Process until pureed.

Nutrition Facts:

Amount Per Serving: Calories 368, Calories from Fat 144, Fat 16g25%, Saturated Fat 4g25%, Cholesterol 44mg15%, Sodium 91mg4%, Potassium 293mg8%, Carbohydrates 51g17%, Fiber 2g8%, Sugar 29g32%, Protein 4g8%, Vitamin A 195IU4%, Vitamin C 46.9 mg57%, Calcium 90mg9%, Iron 1.8 mg10%

Easy Strawberry Cake with Strawberry Sauce

Rebecca Prep Time: 10 mins | Cook Time: 50 mins | Total Time: 1 hr | Servings: 10 slices (9-inch cake) This is a very beautiful cake packed with strawberries. Lightly… General Recipes Easy Strawberry Cake with Strawberry Sauce European Print This
Serves: 10 Prep Time: 10 mins Cooking Time: 50 mins 50 mins
Nutrition facts: 368 calories 16 fat
Rating: 5.0/5
( 1 voted )

Ingredients

  • Strawberry Cake:
  • 1/2 c. light olive oil or vegetable oil
  • 2 large eggs, room temperature
  • 1 c. sour cream
  • 1 teaspoon vanilla extract
  • 1 c. granulated sugar
  • 2 teaspoons baking powder
  • 12 ounces strawberries, hulled
  • 2 c. all-purpose flour, (measured correctly)
  • 1 teaspoon powdered sugar, for dusting, optional
  • 1/4 teaspoon salt
  • Strawberry Sauce:
  • 1/4 c. granulated sugar, or to taste
  • 16 ounces strawberries, hulled and halved

Instructions

Cake Prep:

Step 1: Grease a 9-inch springform pan, then line the bottom using parchment paper.

Step 2: Prepare the oven. Preheat it to 375 degrees F.

Step 3: For the cake, prepare 12 ounces of strawberries. Dice 6 ounces of the strawberries and slice the other half.

Strawberry Cake:

Step 4: Place 2 eggs and 1 c sugar in a large mixing bowl. Beat using an electric hand mixer or stand mixer for about 5 minutes on high speed until thick and light in color. Next, add 1 c. sour cream along with half c oil, and 1 teaspoon vanilla. Continue to beat on low speed until well blended.

Step 5: Place 2 c flour, 2 teaspoons baking powder, and 1/4 teaspoon salt in a small bowl. Mix well until blended. Add the flour 1/3 at a time while mixing on medium/low speed, allowing the flour to incorporate with every addition. Continue mixing until just combined, making sure not to over-mix the batter.

Step 6: Into the prepared pan, pour half of the batter, and top with 6 ounces of the diced strawberries. Top with the rest of the batter and cover the surface with the 6 ounces of halved strawberries, cut-side down. Slightly press the strawberries into the batter. Place in the preheated oven and bake for about 45 to 55 minutes or until a toothpick inserted in the middle of the cake comes out clean.

Step 7: Remove from the oven when done and allow the cake to rest for about 15 to 20 minutes in the pan before taking the ring off.

Step 8: To loosen the cake from the pan, run a thin spatula around the edges of the cake. To a platter, transfer the cake and let it cool until just warm or room temperature. Before serving, dust the cake with powdered sugar if desired. Slice and generously drizzle the individual slices with the strawberry syrup. Enjoy!

Strawberry Sauce:

Step 9: Place 16 ounces of strawberries and 1/4 c sugar in a blender or food processor. Process until pureed.
June 1, 2022 0 comment
0 FacebookTwitterPinterestEmail
General Recipes

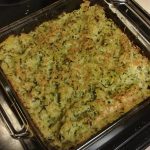
Julia Child’s Zucchini and Rice Gratin (Tian de Courgettes au Riz)

by Rebecca June 1, 2022
written by Rebecca

Prep time: 10 mins | Cook time: 1 hr | Serves: 6

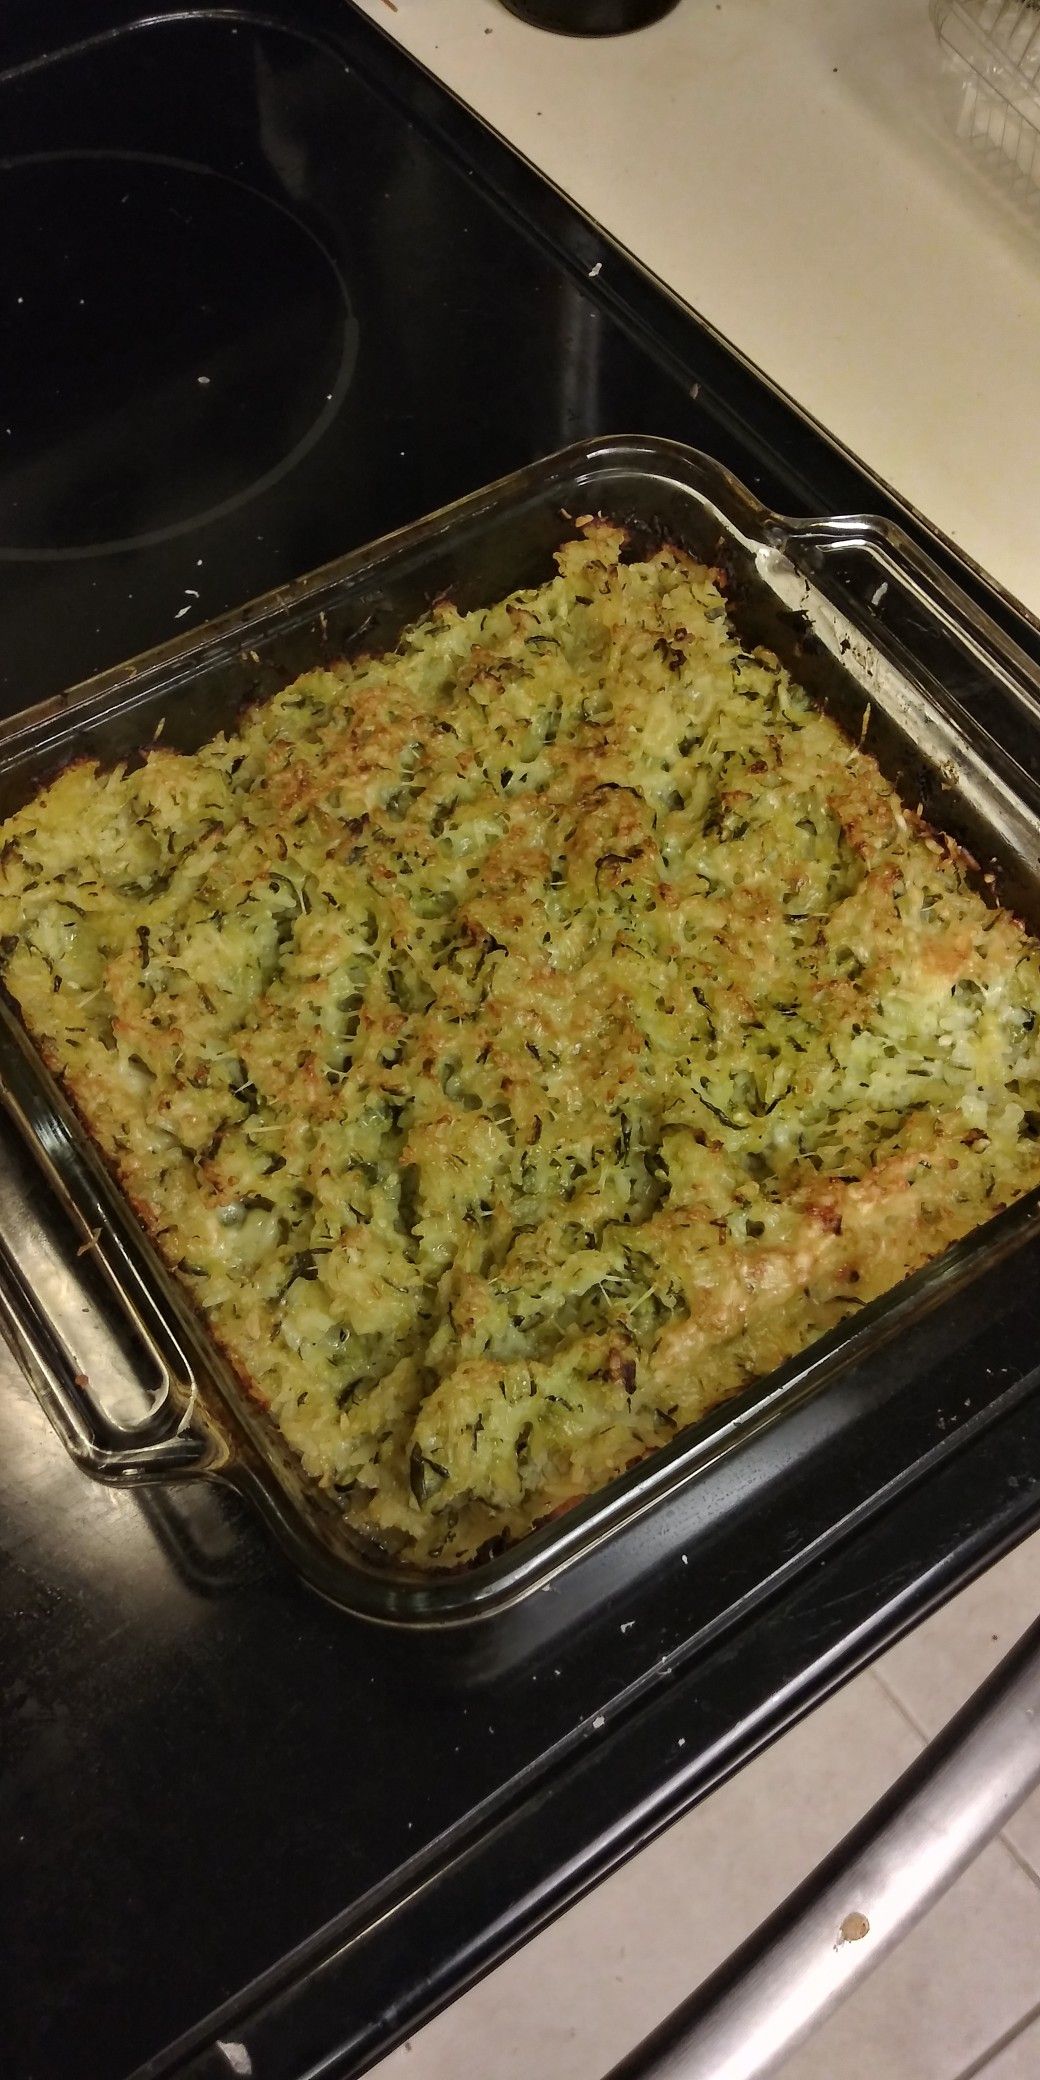
This Zucchini and Rice Gratin is made with only a few simple ingredients. It’s a pretty easy dish to whip up, very comforting with a bounty of amazing flavors. A complete meal in one and simplified version of the popular Tian de Courgettes au Riz.

INGREDIENTS

2 garlic cloves, minced

2 to 2 1/2 pounds of zucchini

1 c. onions, minced

5 tbsp olive oil, divided

2 tbsp all-purpose flour

2/3 c. Parmesan cheese, grated and divided

1/2 c. milk, as needed

Kosher salt and freshly ground black pepper, to taste

1/2 c. uncooked white rice

How to make Julia Child’s Zucchini and Rice Gratin (Tian de Courgettes au Riz)

Step 1: Prepare the oven. Preheat it to 325 degrees F. Using butter or oil, grease a 2-quart baking dish.

Step 2: After washing the zucchini, trim the ends and cut the, in half lengthwise. Next, grate the zucchini and place it in a large bowl.

Step 3: Heat 3 tbsp oil in a large skillet over medium-high heat. Once the oil is hot, add the onions and cook for about 8 to 10 minutes until translucent. Increase the heat and cook further until the onions are lightly browned. Then, add the garlic and continue to cook for another minute. Next, add the rice and cook for 2 minutes more. Generously season with salt and pepper.

Step 4: To the zucchini, add the rice mixture and half c of milk. Reserve 2 tbsp cheese and add the rest to the zucchini mixture. As needed, adjust the seasoning. Mix well.

Step 5: To the prepared baking dish, transfer the mixture and tightly tent with foil. Place in the preheated oven and bake for about 50 minutes or until the rice is cooked but not mushy. Uncover and drizzle the rest of the olive oil on top and sprinkle with the reserved cheese. Return to the oven and resume baking for another 10 to 15 minutes until crispy and golden brown, uncovered. If desired, broil for a minute or two for additional color.

Julia Child's Zucchini and Rice Gratin (Tian de Courgettes au Riz)

Rebecca Prep time: 10 mins | Cook time: 1 hr | Serves: 6 This Zucchini and Rice Gratin is made with only a few simple ingredients. It’s a pretty easy dish… General Recipes Julia Child’s Zucchini and Rice Gratin (Tian de Courgettes au Riz) European Print This
Serves: 6 Prep Time: 10 mins Cooking Time: 1 hr 1 hr
Nutrition facts: 200 calories 20 grams fat
Rating: 5.0/5
( 1 voted )

Ingredients

  • 2 garlic cloves, minced
  • 2 to 2 1/2 pounds of zucchini
  • 1 c. onions, minced
  • 5 tbsp olive oil, divided
  • 2 tbsp all-purpose flour
  • 2/3 c. Parmesan cheese, grated and divided
  • 1/2 c. milk, as needed
  • Kosher salt and freshly ground black pepper, to taste
  • 1/2 c. uncooked white rice

Instructions

Step 1: Prepare the oven. Preheat it to 325 degrees F. Using butter or oil, grease a 2-quart baking dish.

Step 2: After washing the zucchini, trim the ends and cut the, in half lengthwise. Next, grate the zucchini and place it in a large bowl.

Step 3: Heat 3 tbsp oil in a large skillet over medium-high heat. Once the oil is hot, add the onions and cook for about 8 to 10 minutes until translucent. Increase the heat and cook further until the onions are lightly browned. Then, add the garlic and continue to cook for another minute. Next, add the rice and cook for 2 minutes more. Generously season with salt and pepper.

Step 4: To the zucchini, add the rice mixture and half c of milk. Reserve 2 tbsp cheese and add the rest to the zucchini mixture. As needed, adjust the seasoning. Mix well.

Step 5: To the prepared baking dish, transfer the mixture and tightly tent with foil. Place in the preheated oven and bake for about 50 minutes or until the rice is cooked but not mushy. Uncover and drizzle the rest of the olive oil on top and sprinkle with the reserved cheese. Return to the oven and resume baking for another 10 to 15 minutes until crispy and golden brown, uncovered. If desired, broil for a minute or two for additional color.

June 1, 2022 0 comment
0 FacebookTwitterPinterestEmail
General Recipes

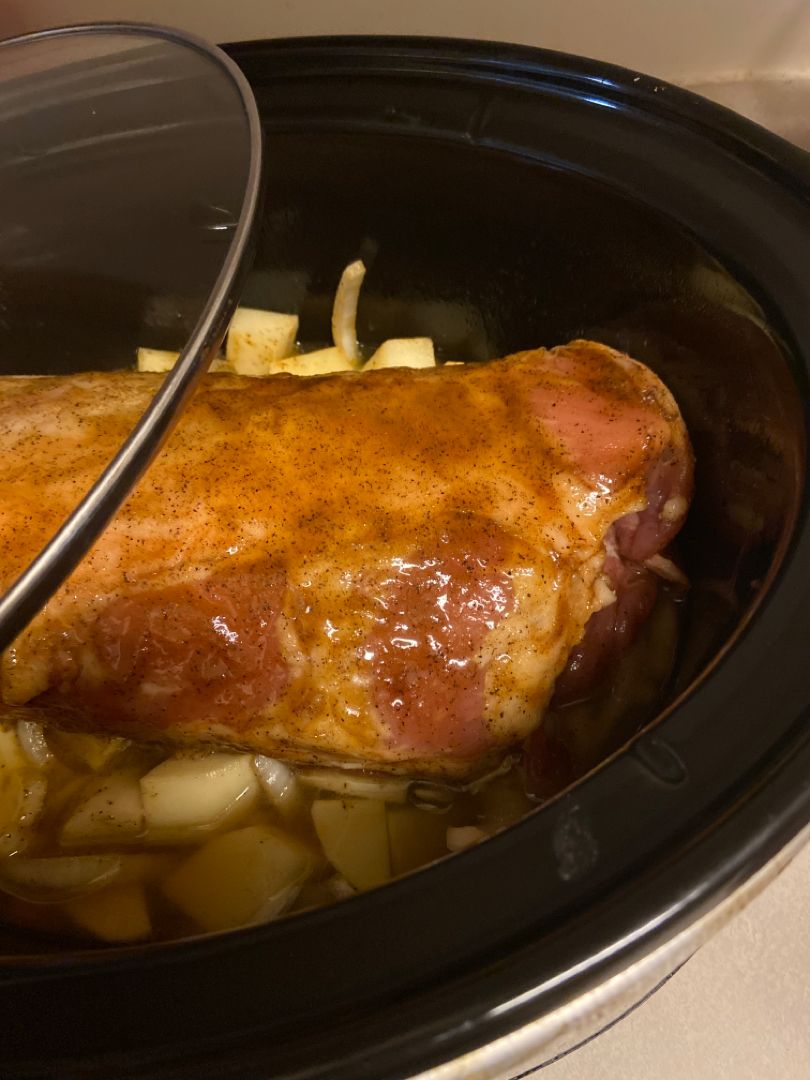
Super Simple Boneless Pork Loin In The Crockpot Recipe

by Rebecca June 1, 2022
written by Rebecca

PREP TIME: 15 MINS | COOK TIME: 6 HRS | TOTAL TIME: 6 HRS 15 MINS | SERVINGS: 8 people

Moist, juicy, and very delicious – this super simple boneless pork loin is a great dish that you can easily make in your crockpot. A no-fuss weeknight meal that even your fussiest eaters will enjoy. Pair this up with your favorite roasted veggies or a simple side salad for an easy dinner any time!

For an even easier meal, you can cook the veggies with the meat. Simply place the veggies such as carrots and potatoes under the meat. This will ensure even cooking and the pork dripping will be a great additional flavor. Also, you are welcome to sear the meat before proceeding with the recipe as it adds lots of flavors. However, it is entirely up to you. As for a busy mom like myself, I generally skip browning the pork.

INGREDIENTS

1 large onion – I prefer sweet onion or Vidalia3-4 lbs Boneless Pork Loin

1 tsp granulated garlic

2 tbsp olive oil

1 tsp onion powder

Cooking Spray

½ tsp paprika

2 c. broth I prefer chicken broth (any broth will work)

1 tsp salt

1 tsp black pepper

How to make Super Simple Boneless Pork Loin In The Crockpot

Step 1: Using cooking spray, grease the bottom and sides of your crockpot.

Step 2: Into circle slices, slice the onion. Place the pieces in the greased crockpot and lay the pork loin on top, fat-side up. Over the pork loin, drizzle the olive oil and sprinkle with garlic, onion powder, black pepper, salt, and paprika over pork loin. To make sure the spices are evenly distributed, give the pork loin a quick rub.

Step 3: To the bottom of the crockpot, pour in two cups of broth.

Step 4: Put the lid on and set to cook the pork loin for 6 hours on low or 4 hours on high. The pork loin is done when the internal temperature of the meat reached 145 degrees.

NUTRITION FACTS:

Serving: 1servings | Sodium: 613mg | Calcium: 19mg | Vitamin C: 2mg | Vitamin A: 137IU | Sugar: 3g | Fiber: 1g | Potassium: 696mg | Cholesterol: 107mg | Calories: 274 kcal | Saturated Fat: 3g | Fat: 10g | Protein: 39g | Carbohydrates: 5g | Iron: 1mg

Super Simple Boneless Pork Loin In The Crockpot Recipe

Rebecca PREP TIME: 15 MINS | COOK TIME: 6 HRS | TOTAL TIME: 6 HRS 15 MINS | SERVINGS: 8 people Moist, juicy, and very delicious – this super simple boneless… General Recipes Super Simple Boneless Pork Loin In The Crockpot Recipe European Print This
Serves: 8 Prep Time: 15 mins Cooking Time: 6 hrs 6 hrs
Nutrition facts: 274 calories 10 fat
Rating: 3.0/5
( 3 voted )

Ingredients

  • 1 large onion - I prefer sweet onion or Vidalia3-4 lbs Boneless Pork Loin
  • 1 tsp granulated garlic
  • 2 tbsp olive oil
  • 1 tsp onion powder
  • Cooking Spray
  • ½ tsp paprika
  • 2 c. broth I prefer chicken broth (any broth will work)
  • 1 tsp salt
  • 1 tsp black pepper

Instructions

Step 1: Using cooking spray, grease the bottom and sides of your crockpot.

Step 2: Into circle slices, slice the onion. Place the pieces in the greased crockpot and lay the pork loin on top, fat-side up. Over the pork loin, drizzle the olive oil and sprinkle with garlic, onion powder, black pepper, salt, and paprika over pork loin. To make sure the spices are evenly distributed, give the pork loin a quick rub.

Step 3: To the bottom of the crockpot, pour in two cups of broth.

Step 4: Put the lid on and set to cook the pork loin for 6 hours on low or 4 hours on high. The pork loin is done when the internal temperature of the meat reached 145 degrees.

June 1, 2022 0 comment
0 FacebookTwitterPinterestEmail
General Recipes

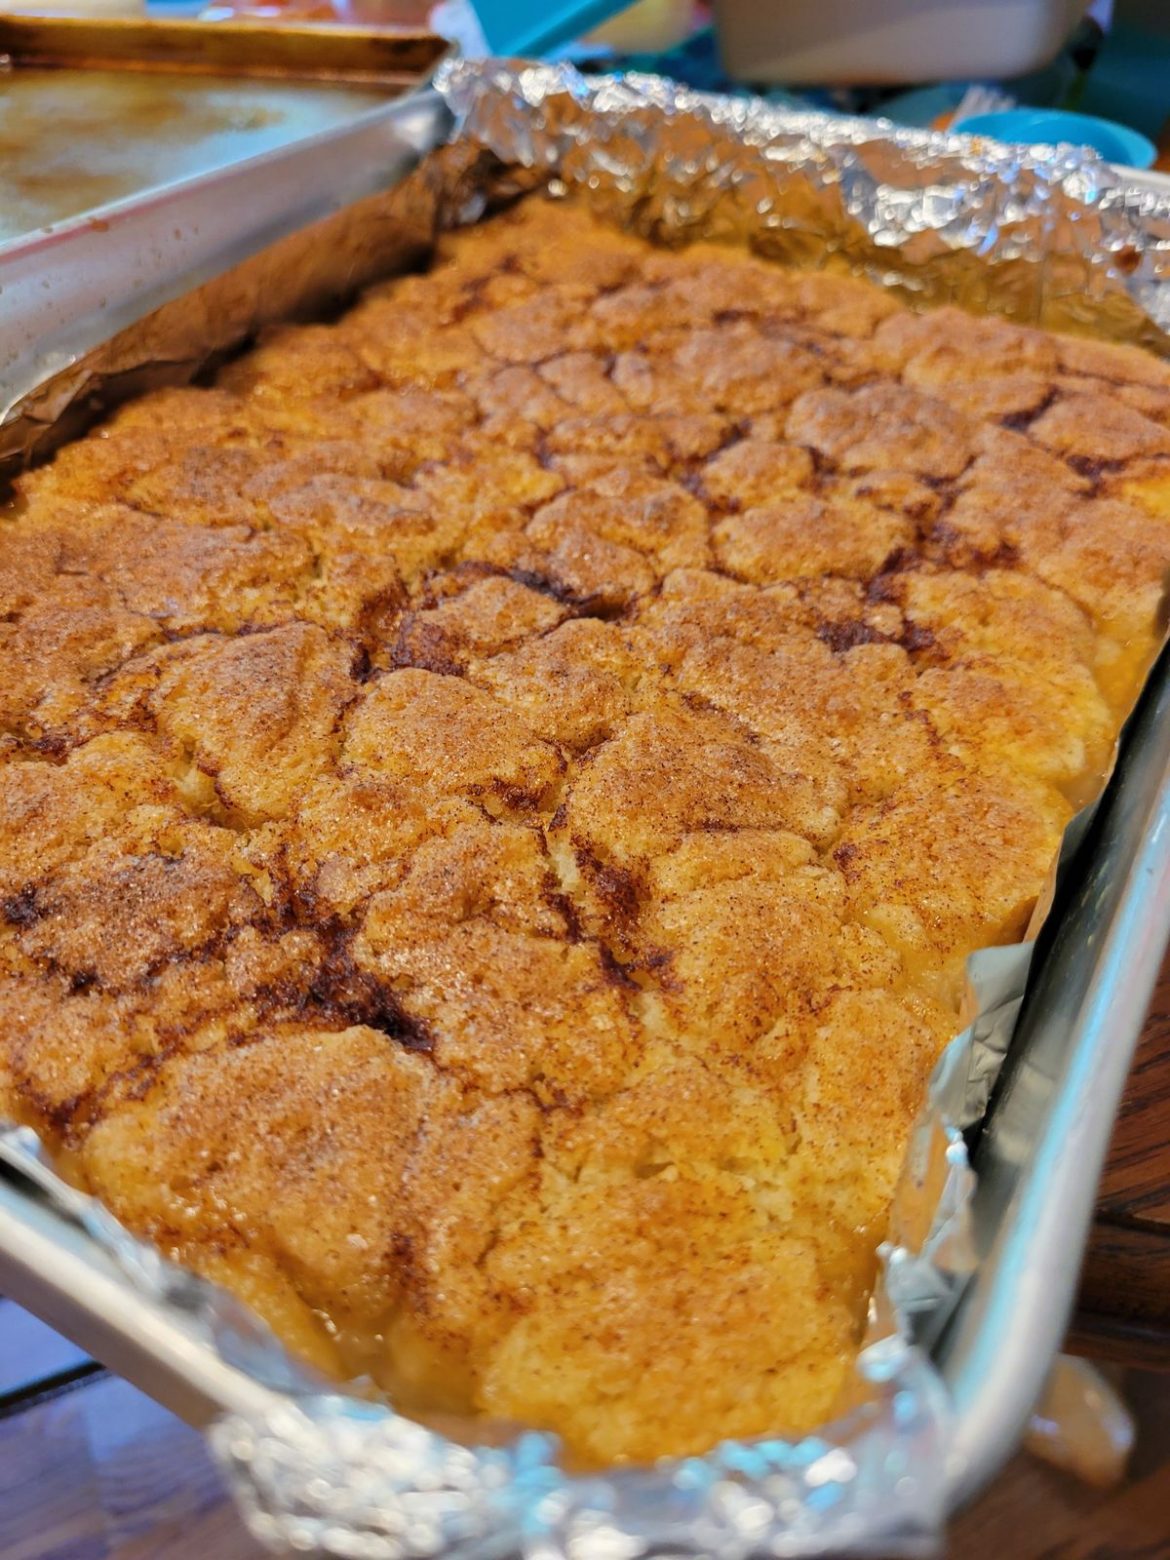
Peach Cobbler

by Rebecca June 1, 2022
written by Rebecca

PREP TIME: 20 MINS | COOK TIME: 40 MINS | TOTAL TIME: 1 HR | SERVINGS: 8

Make this classic Southern dessert any time with this easy recipe. It is loaded with fresh, juicy peaches and an impressive sweet crust. Serve every slice with a big scoop of vanilla ice cream for an indulgent treat that everyone will love!

Ingredients

PEACH FILLING:

2 tsp lemon juice

10 c. peaches, sliced into thin wedges

¼ c. sugar

¼ tsp cinnamon

¼ c. brown sugar

2 tsp cornstarch

⅛ tsp allspice

1 tsp vanilla extract

CRUST TOPPING:

½ c. sugar

2 c. flour

½ c. brown sugar

½ c. hot water

12 tbsp butter, chilled and grated on a cheese grater

2 tsp baking powder

1 tsp salt

CINNAMON SUGAR TOPPING:

2 tsp cinnamon

⅓ c. sugar

How to make Peach Cobbler

Step 1: Prepare the oven. Preheat it to 425 degrees F. Using a cooking spray, grease a 9 x 13-inch deep-sided baking dish. Set aside.

Step 2: Place the peaches, lemon juice, sugar, brown sugar, cinnamon, allspice, vanilla extract, and cornstarch in a large bowl. Mix well until the peaches are all coated.

Step 3: Into the bottom of the prepared baking dish, pour the peach mixture. Bake in the preheated oven for about 10 minutes.

Step 4: In the meantime, whisk the flour, sugar, brown sugar, baking powder, salt, and grated butter in another medium bowl until well blended. Pour in the hot water and mix well until a dough forms.

Step 5: Mix the sugar and cinnamon in a separate small bowl until combined.

Step 6: When done, take the peaches out of the oven. Over the peaches, drop spoonfuls of the crust topping mixture. Spread it out using a spoon or spatula to evenly cover the peaches. On top, evenly sprinkle the cinnamon-sugar topping.

Step 7: Return to the oven and resume baking for another 25 to 30 minutes or until the crust topping has browned and the peach juices are bubbling on the sides.

Step 8: Serve the Peach Cobbler warm with a big scoop of vanilla ice cream. Enjoy!

Notes:

Before adding the canned peaches to the other ingredient, make sure to drain them well.

To ensure the butter is very cold, remove them from the fridge right before prepping.

Nutrition Facts:

Sodium: 301mg | Calcium: 94mg | Vitamin C: 13mg | Vitamin A: 628IU | Sugar: 63g | Fiber: 4g | Potassium: 553mg | Calories: 380 kcal | Saturated Fat: 1g | Fat: 1g | Protein: 5g | Carbohydrates: 91g | Iron: 2mg

Peach Cobbler

Rebecca PREP TIME: 20 MINS | COOK TIME: 40 MINS | TOTAL TIME: 1 HR | SERVINGS: 8 Make this classic Southern dessert any time with this easy recipe. It is loaded… General Recipes Peach Cobbler European Print This
Serves: 8 Prep Time: 20 mins Cooking Time: 40 mins 40 mins
Nutrition facts: 380 calories 1 fat
Rating: 5.0/5
( 1 voted )

Ingredients

  • PEACH FILLING:
  • 2 tsp lemon juice
  • 10 c. peaches, sliced into thin wedges
  • ¼ c. sugar
  • ¼ tsp cinnamon
  • ¼ c. brown sugar
  • 2 tsp cornstarch
  • ⅛ tsp allspice
  • 1 tsp vanilla extract
  • CRUST TOPPING:
  • ½ c. sugar
  • 2 c. flour
  • ½ c. brown sugar
  • ½ c. hot water
  • 12 tbsp butter, chilled and grated on a cheese grater
  • 2 tsp baking powder
  • 1 tsp salt
  • CINNAMON SUGAR TOPPING:
  • 2 tsp cinnamon
  • ⅓ c. sugar

Instructions

Step 1: Prepare the oven. Preheat it to 425 degrees F. Using a cooking spray, grease a 9 x 13-inch deep-sided baking dish. Set aside.

Step 2: Place the peaches, lemon juice, sugar, brown sugar, cinnamon, allspice, vanilla extract, and cornstarch in a large bowl. Mix well until the peaches are all coated.

Step 3: Into the bottom of the prepared baking dish, pour the peach mixture. Bake in the preheated oven for about 10 minutes.

Step 4: In the meantime, whisk the flour, sugar, brown sugar, baking powder, salt, and grated butter in another medium bowl until well blended. Pour in the hot water and mix well until a dough forms.

Step 5: Mix the sugar and cinnamon in a separate small bowl until combined.

Step 6: When done, take the peaches out of the oven. Over the peaches, drop spoonfuls of the crust topping mixture. Spread it out using a spoon or spatula to evenly cover the peaches. On top, evenly sprinkle the cinnamon-sugar topping.

Step 7: Return to the oven and resume baking for another 25 to 30 minutes or until the crust topping has browned and the peach juices are bubbling on the sides.

Step 8: Serve the Peach Cobbler warm with a big scoop of vanilla ice cream. Enjoy!

Notes

Before adding the canned peaches to the other ingredient, make sure to drain them well. To ensure the butter is very cold, remove them from the fridge right before prepping.

June 1, 2022 0 comment
0 FacebookTwitterPinterestEmail
General Recipes

Baked Teriyaki Salmon

by Rebecca June 1, 2022
written by Rebecca

Prep Time: 10 mins | Cook Time: 15 mins | Total Time: 25 mins | Servings: 4

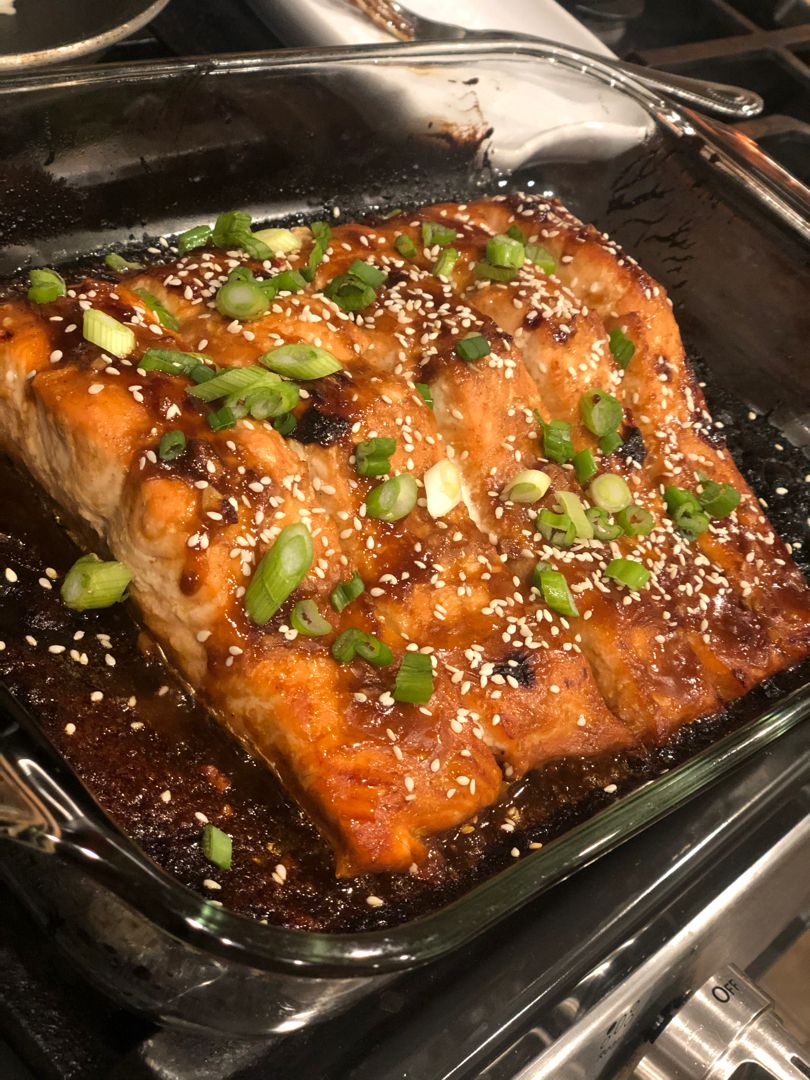
Perfectly tender and flaky salmon in a tasty homemade teriyaki sauce. If you are looking for an easy, quick, and healthy dinner option, then this baked teriyaki salmon is what you are looking for! Easily throw this together anytime using a few simple ingredients and in under twenty-five minutes. Serve this with rice or quinoa, roasted veggies, and even over salads for a filling meal excellent for lunch or dinner.

Prepping for dinner is fun, but if you are a full-time working mom like myself, I am sure you’ll look for the easiest and quickest recipes. You can either cook the teriyaki salmon on the stovetop or bake it. I prefer baking rather than grilling or roasting as it rid the risk of burning or overcooking the fish. I immediately add the sauce before baking the salmon, but you can add the sauce once the salmon is half-baked.

Ingredients

1 Green Onion, sliced

4 Skinless Salmon Fillets about 6 ounces each

1 tablespoon Sesame Seeds

Teriyaki Sauce:

2 Garlic Cloves, minced

⅓ c. Low-sodium soy sauce

2-3 tablespoons of Water

¼ c. Fresh orange juice

2 tablespoons Honey

1 tablespoon minced fresh ginger

½ Lemon, juiced

½ tablespoon Gluten-free flour

1 teaspoon Chili Flakes or to taste

How to make Baked Teriyaki Salmon

Step 1: Prepare the oven. Preheat it to 400 degrees F.

Step 2: Place the teriyaki sauce in a small bowl. Mix well until blended.

Step 3: Using a non-stick cooking spray, grease a baking dish. Lay the salmon in and pour the sauce over it. Place in the preheated oven and bake for about 12 to 15 minutes or until the salmon is completely cooked and flaky.

Step 4: Take the salmon out of the oven when done and spoon the thickened sauce over. Serve the Baked Teriyaki Salmon immediately, garnished with some green onions and sesame seeds. Enjoy!

Nutrition Facts:

Calories: 316 kcal | Carbohydrates: 16g | Protein: 36g | Fat: 12g | Saturated Fat: 2g | Cholesterol: 94mg | Sodium: 794mg | Potassium: 940mg | Fiber: 1g | Sugar: 11g | Vitamin A: 277IU | Vitamin C: 16mg | Calcium: 50mg | Iron: 2mg

Baked Teriyaki Salmon

Rebecca Prep Time: 10 mins | Cook Time: 15 mins | Total Time: 25 mins | Servings: 4 Perfectly tender and flaky salmon in a tasty homemade teriyaki sauce. If you… General Recipes Baked Teriyaki Salmon European Print This
Serves: 4 Prep Time: 10 mins Cooking Time: 15 mins 15 mins
Nutrition facts: 316 calories 12 fat
Rating: 5.0/5
( 1 voted )

Ingredients

  • 1 Green Onion, sliced
  • 4 Skinless Salmon Fillets about 6 ounces each
  • 1 tablespoon Sesame Seeds
  • Teriyaki Sauce:
  • 2 Garlic Cloves, minced
  • ⅓ c. Low-sodium soy sauce
  • 2-3 tablespoons of Water
  • ¼ c. Fresh orange juice
  • 2 tablespoons Honey
  • 1 tablespoon minced fresh ginger
  • ½ Lemon, juiced
  • ½ tablespoon Gluten-free flour
  • 1 teaspoon Chili Flakes or to taste

Instructions

Step 1: Prepare the oven. Preheat it to 400 degrees F.

Step 2: Place the teriyaki sauce in a small bowl. Mix well until blended.

Step 3: Using a non-stick cooking spray, grease a baking dish. Lay the salmon in and pour the sauce over it. Place in the preheated oven and bake for about 12 to 15 minutes or until the salmon is completely cooked and flaky.

Step 4: Take the salmon out of the oven when done and spoon the thickened sauce over. Serve the Baked Teriyaki Salmon immediately, garnished with some green onions and sesame seeds. Enjoy!

June 1, 2022 0 comment
0 FacebookTwitterPinterestEmail
General Recipes

The Best Strawberry Yogurt Muffins

by Rebecca June 1, 2022
written by Rebecca

Yield: 8 muffins (or 12 smaller muffins)

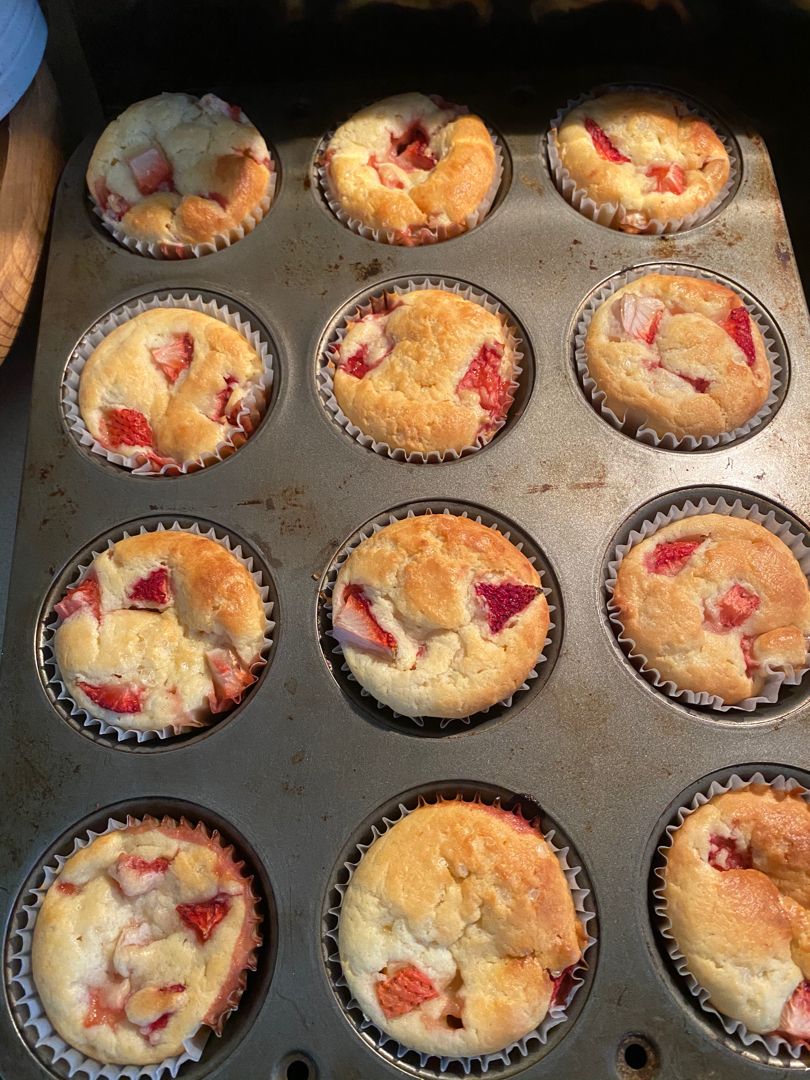
These tasty yoghurt muffins are loaded with fresh strawberries. They are one of the best muffins I’ve made – super moist, fluffy, pillowy, and heavenly! A real treat for all strawberry and muffin lovers out there!

Ingredients

1 large egg

2/3 c. white sugar

1/2 c. vegetable oil

1 tsp vanilla

1 1/4 c. all-purpose flour

1/3 c. milk

1 tsp baking powder

1/2 c yoghurt (I used unsweetened, but any will work!)

1/4 tsp salt

About 1 tbsp white sugar for the top (optional)

1 c. strawberries, chopped about the size of blueberries (feel free to use frozen if desired)

How to make The Best Strawberry Yogurt Muffins

Step 1: Prepare the oven. Preheat it to 375 degrees F. Lightly grease a muffin tin and place eight muffin liners in the pan. Set aside.

Step 2: In a bowl, place the sugar, egg, oil, milk, and vanilla. Mix well until blended.

Step 3: Mix the flour with the baking powder and salt until well incorporated. Add this to the wet ingredients and mix well until just blended and the mixture is no longer lumpy. Next, add the yoghurt and stir well. Then, fold in the chopped strawberries. Set aside around half a cup of the strawberries for later.

Step 4: Into the prepared muffin tin, evenly distribute the batter. Fill the muffin tin to the top if making eight high crowded muffins. Or fill 12 if making shorter muffins. Sprinkle the reserved strawberries on top and lightly press. If desired, sprinkle the tops with 1 tbsp sugar.

Step 5: Place in the preheated oven and bake for about 25 minutes. Or bake 5 minutes, longer if using frozen berries. The muffins are done once a toothpick inserted in the center of a muffin comes out clean. If desired, you can make 3 to 4 giant muffins using a jumbo muffin tin and bake for about 40 minutes at 350 degrees F.

Step 6: Serve right away or place the muffins in a sealed container while still warm. This way the muffins stay moist.

The Best Strawberry Yogurt Muffins

Rebecca Yield: 8 muffins (or 12 smaller muffins) These tasty yoghurt muffins are loaded with fresh strawberries. They are one of the best muffins I’ve made – super moist, fluffy, pillowy,… General Recipes The Best Strawberry Yogurt Muffins European Print This
Serves: 8
Nutrition facts: 200 calories 20 grams fat
Rating: 5.0/5
( 1 voted )

Ingredients

  • 1 large egg
  • 2/3 c. white sugar
  • 1/2 c. vegetable oil
  • 1 tsp vanilla
  • 1 1/4 c. all-purpose flour
  • 1/3 c. milk
  • 1 tsp baking powder
  • 1/2 c yoghurt (I used unsweetened, but any will work!)
  • 1/4 tsp salt
  • About 1 tbsp white sugar for the top (optional)
  • 1 c. strawberries, chopped about the size of blueberries (feel free to use frozen if desired)

Instructions

Step 1: Prepare the oven. Preheat it to 375 degrees F. Lightly grease a muffin tin and place eight muffin liners in the pan. Set aside.

Step 2: In a bowl, place the sugar, egg, oil, milk, and vanilla. Mix well until blended.

Step 3: Mix the flour with the baking powder and salt until well incorporated. Add this to the wet ingredients and mix well until just blended and the mixture is no longer lumpy. Next, add the yoghurt and stir well. Then, fold in the chopped strawberries. Set aside around half a cup of the strawberries for later.

Step 4: Into the prepared muffin tin, evenly distribute the batter. Fill the muffin tin to the top if making eight high crowded muffins. Or fill 12 if making shorter muffins. Sprinkle the reserved strawberries on top and lightly press. If desired, sprinkle the tops with 1 tbsp sugar.

Step 5: Place in the preheated oven and bake for about 25 minutes. Or bake 5 minutes, longer if using frozen berries. The muffins are done once a toothpick inserted in the center of a muffin comes out clean. If desired, you can make 3 to 4 giant muffins using a jumbo muffin tin and bake for about 40 minutes at 350 degrees F.

Step 6: Serve right away or place the muffins in a sealed container while still warm. This way the muffins stay moist.

June 1, 2022 0 comment
0 FacebookTwitterPinterestEmail
General Recipes

Cajun Shrimp Pasta

by Rebecca June 1, 2022
written by Rebecca

PREP TIME: 10 MINS | COOK TIME: 15 MINS | TOTAL TIME: 25 MINS | SERVINGS: 4

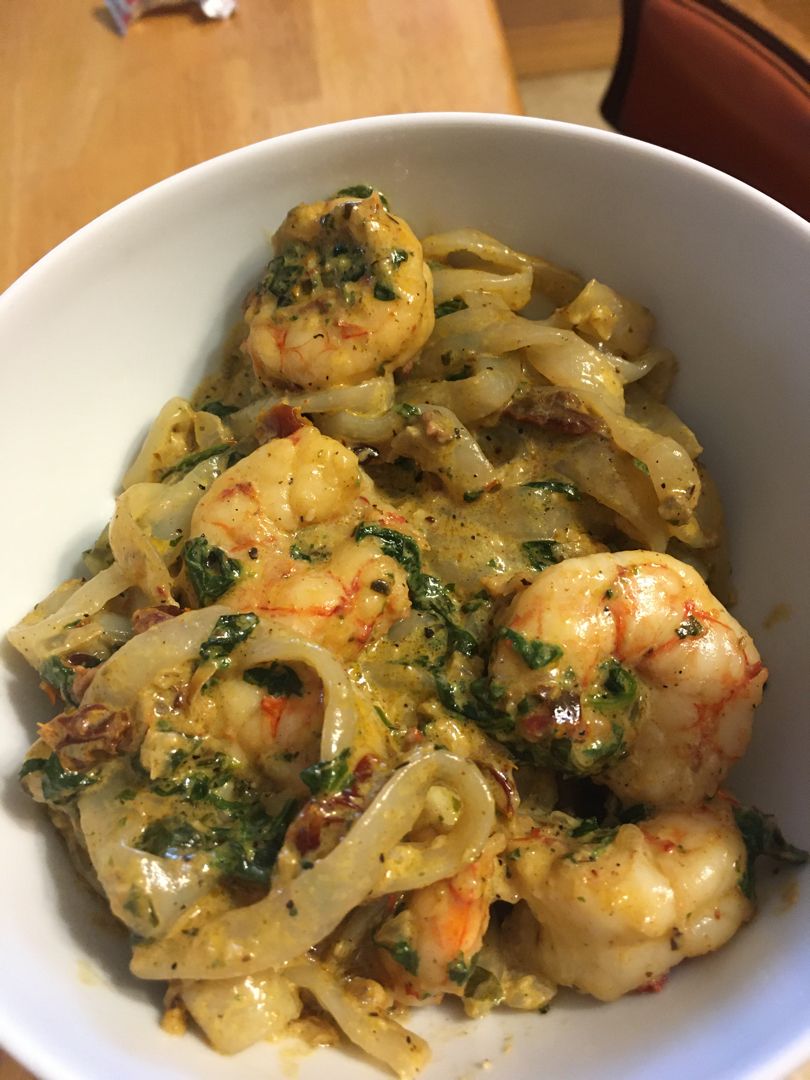
Make this restaurant-quality meal at home using only a few simple ingredients. Throw this together quickly for a midweek treat that you and your family deserve. With bold flavors, this Cajun Shrimp Pasta will surely impress everyone around your dinner table!

INGREDIENTS

1 tbsp butter

1 tbsp olive oil

3/4 lb. medium shrimp, thawed & peeled

8 oz. uncooked pasta

1/4 small onion chopped finely

3 tbsp sun-dried tomatoes, julienned

1 tsp Dijon mustard

3-4 cloves garlic, minced

1 tbsp Cajun seasoning

1 c. heavy/whipping cream

8 large leaves of basil, torn

Freshly grated Parmesan cheese to taste

Salt & pepper to taste

How to make Cajun Shrimp Pasta

Step 1: Following the package directions, cook the pasta in a large pot of salted boiling water until al dente.

Step 2: In a skillet, heat the butter and olive oil over medium heat. Then, add the onions and cook for about 5 minutes, stirring often until lightly browned. Next, stir in the Dijon mustard along with the sun-dried tomatoes, and garlic. Continue to cook for another minute. Then, add the cream and Cajun seasoning. Cook further smooth.

Step 3: To the skillet, add the shrimp and cook for about 5 minutes or until cooked and the sauce has reduced. If desired, season with salt and pepper. Then, add the fresh basil and toss in the drained pasta.

Step 4: Remove from the heat when done and serve the Cajun shrimp pasta immediately, garnished with freshly grated Parmesan cheese. Enjoy!

NOTES:

Keep in mind that the Cajun seasoning can be quite salty. Before adding the extra salt and pepper, make sure to give the dish a taste. Or you can use a lower sodium version.

For this recipe, I used sun-dried tomatoes that are cut into strips (julienned). They are packed in oil so simply drain them before adding them to the pan.

You can remove the shrimp tails if desired or leave them on.

NUTRITION FACTS:

Calories: 563 kcal, Carbohydrates: 49g, Protein: 27g, Fat: 30g, Saturated Fat: 16g, Polyunsaturated Fat: 2g, Monounsaturated Fat: 9g, Trans Fat: 1g, Cholesterol: 212mg, Sodium: 163mg, Potassium: 600mg, Fiber: 3g, Sugar: 5g, Vitamin A: 1900IU, Vitamin C: 3mg, Calcium: 122mg, Iron: 2mg

Cajun Shrimp Pasta

Rebecca PREP TIME: 10 MINS | COOK TIME: 15 MINS | TOTAL TIME: 25 MINS | SERVINGS: 4 Make this restaurant-quality meal at home using only a few simple ingredients. Throw… General Recipes Cajun Shrimp Pasta European Print This
Serves: 4 Prep Time: 10 mins Cooking Time: 15 mins 15 mins
Nutrition facts: 563 calories 30 fat
Rating: 3.5/5
( 2 voted )

Ingredients

  • 1 tbsp butter
  • 1 tbsp olive oil
  • 3/4 lb. medium shrimp, thawed & peeled
  • 8 oz. uncooked pasta
  • 1/4 small onion chopped finely
  • 3 tbsp sun-dried tomatoes, julienned
  • 1 tsp Dijon mustard
  • 3-4 cloves garlic, minced
  • 1 tbsp Cajun seasoning
  • 1 c. heavy/whipping cream
  • 8 large leaves of basil, torn
  • Freshly grated Parmesan cheese to taste
  • Salt & pepper to taste

Instructions

Step 1: Following the package directions, cook the pasta in a large pot of salted boiling water until al dente.

Step 2: In a skillet, heat the butter and olive oil over medium heat. Then, add the onions and cook for about 5 minutes, stirring often until lightly browned. Next, stir in the Dijon mustard along with the sun-dried tomatoes, and garlic. Continue to cook for another minute. Then, add the cream and Cajun seasoning. Cook further smooth.

Step 3: To the skillet, add the shrimp and cook for about 5 minutes or until cooked and the sauce has reduced. If desired, season with salt and pepper. Then, add the fresh basil and toss in the drained pasta.

Step 4: Remove from the heat when done and serve the Cajun shrimp pasta immediately, garnished with freshly grated Parmesan cheese. Enjoy!

Notes

Keep in mind that the Cajun seasoning can be quite salty. Before adding the extra salt and pepper, make sure to give the dish a taste. Or you can use a lower sodium version. For this recipe, I used sun-dried tomatoes that are cut into strips (julienned). They are packed in oil so simply drain them before adding them to the pan. You can remove the shrimp tails if desired or leave them on.

June 1, 2022 0 comment
0 FacebookTwitterPinterestEmail
General Recipes

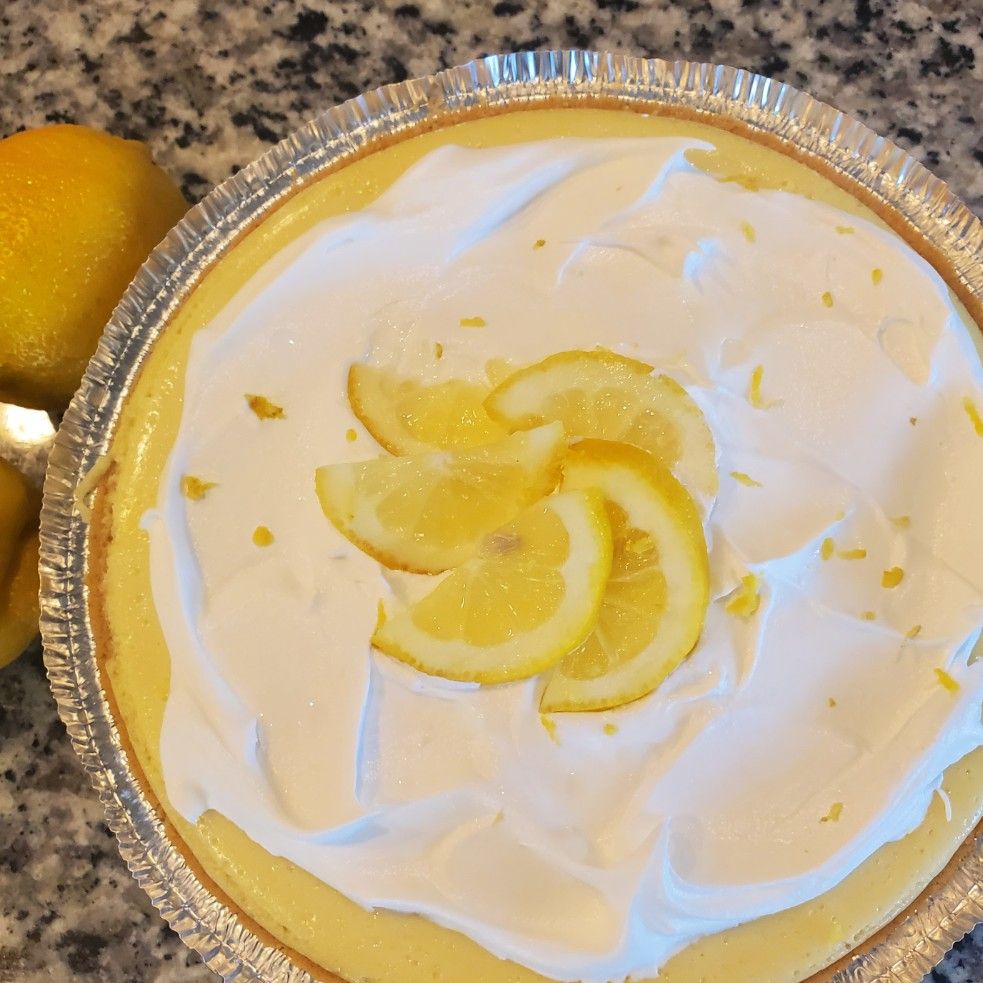
JOANNA GAINES LEMON PIE

by Rebecca June 1, 2022
written by Rebecca

Prep Time: 10 mins | Cook Time: 18 mins | Total Time: 2 hrs (the pie will cool for about 30 mins on the counter and at least 1 hr in the refrigerator) | Yield: 6-8 Servings

This is a beautiful and decadent lemon pie with Graham cracker crust topped with whipped cream topping garnished with sliced wedges of lemon and mint leaves. It is so refreshing, delicious, and perfect for gatherings. To make this lemon pie all you need are a few simple ingredients. The hard part is the waiting as you have to let this pie set before serving. But it is all worth it!

Ingredients

6 tbsp Butter, Melted

3 Egg Yolks

1 1/2 c. Crushed Graham Crackers

1/3 c. Sugar

2/3 c. Lemon Juice

3 c. Sweetened Condensed Milk

1 c. Whipping Cream

1 tsp Vanilla Extract

2 tbsp Sugar

Lemon Wedges, Garnish

Dash Salt

Mint Leaves, Garnish

Lemon Zest, Garnish

Non-Stick Spray

HOW TO MAKE JOANNA GAINES LEMON PIE

Step 1: Using a nonstick spray, lightly grease a 9-inch pie pan. Prepare the oven. Preheat it to 350 degrees.

Step 2: Place the crushed Graham crackers and 1/3 c sugar in a bowl. Mix well before stirring in the melted butter. Onto the bottom of the prepared pie pan, spread the mixture, pushing it up the sides. Place in the preheated oven and bake for about 8 minutes.

Step 3: In the meantime, place the milk, lemon juice, egg yolks, and salt in a bowl. Beat for about 4 minutes on medium speed. Into the baked crust, pour the batter. Return to the oven and resume baking for another 10 minutes.

Step 4: When done, remove the pie from the oven and allow it to cool for about 30 minutes on the counter before putting it in the fridge to set for at least an hour.

Step 5: Beat the whipping cream with 2 tbsp sugar and vanilla extract in a bowl until light and fluffy. Spread this over the lemon pie. Slice and serve garnished with lemon wedges, lemon zest, and/or mint leaves. Enjoy!

JOANNA GAINES LEMON PIE

Rebecca Prep Time: 10 mins | Cook Time: 18 mins | Total Time: 2 hrs (the pie will cool for about 30 mins on the counter and at least 1 hr… General Recipes JOANNA GAINES LEMON PIE European Print This
Serves: 6-8 Prep Time: 10 mins Cooking Time: 18 mins 18 mins
Nutrition facts: 200 calories 20 grams fat
Rating: 5.0/5
( 1 voted )

Ingredients

  • 6 tbsp Butter, Melted
  • 3 Egg Yolks
  • 1 1/2 c. Crushed Graham Crackers
  • 1/3 c. Sugar
  • 2/3 c. Lemon Juice
  • 3 c. Sweetened Condensed Milk
  • 1 c. Whipping Cream
  • 1 tsp Vanilla Extract
  • 2 tbsp Sugar
  • Lemon Wedges, Garnish
  • Dash Salt
  • Mint Leaves, Garnish
  • Lemon Zest, Garnish
  • Non-Stick Spray

Instructions

Step 1: Using a nonstick spray, lightly grease a 9-inch pie pan. Prepare the oven. Preheat it to 350 degrees.

Step 2: Place the crushed Graham crackers and 1/3 c sugar in a bowl. Mix well before stirring in the melted butter. Onto the bottom of the prepared pie pan, spread the mixture, pushing it up the sides. Place in the preheated oven and bake for about 8 minutes.

Step 3: In the meantime, place the milk, lemon juice, egg yolks, and salt in a bowl. Beat for about 4 minutes on medium speed. Into the baked crust, pour the batter. Return to the oven and resume baking for another 10 minutes.

Step 4: When done, remove the pie from the oven and allow it to cool for about 30 minutes on the counter before putting it in the fridge to set for at least an hour.

Step 5: Beat the whipping cream with 2 tbsp sugar and vanilla extract in a bowl until light and fluffy. Spread this over the lemon pie. Slice and serve garnished with lemon wedges, lemon zest, and/or mint leaves. Enjoy!

June 1, 2022 0 comment
0 FacebookTwitterPinterestEmail
General Recipes

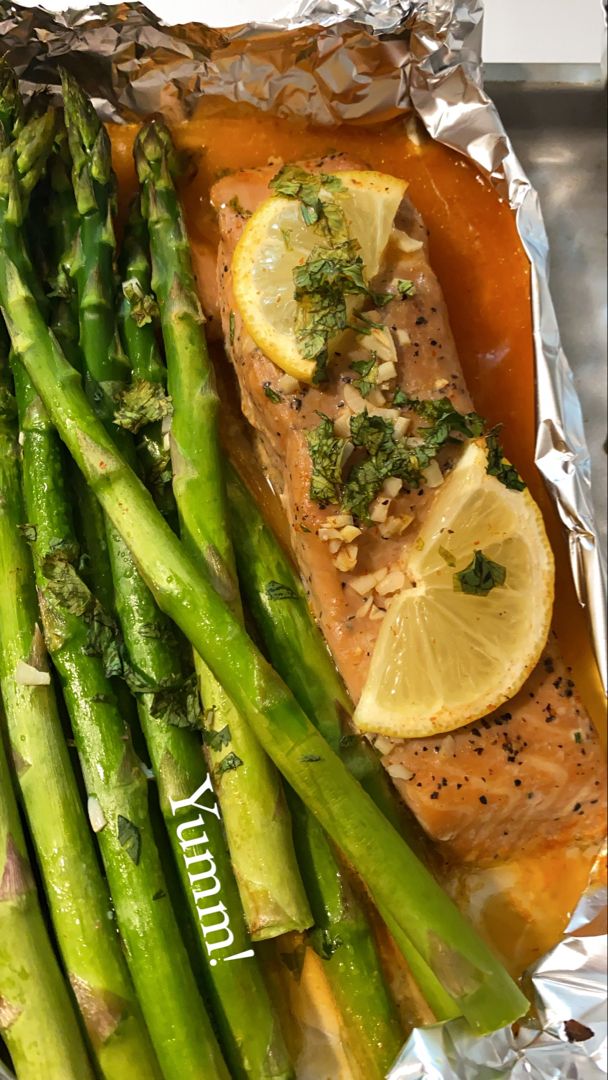
BAKED SALMON IN FOIL WITH ASPARAGUS AND LEMON GARLIC BUTTER SAUCE

by Rebecca June 1, 2022
written by Rebecca

PREP TIME: 12 MINS | COOK TIME: 10 MINS | YIELD: 2 servings

This salmon in foil is one of the best salmon recipes. The flaky salmon with asparagus in a “dreamy” lemon garlic butter sauce makes an amazing meal for the entire family. Serve this with cauliflower rice or some roasted veggies on the side for an easy and quick dinner. This also pairs well with some country bread to soak up all the mouthwatering cooking juices.

INGREDIENTS

4 tsp minced garlic (4 cloves)

2 salmon fillets

2 tbsp vegetable broth or chicken broth

1 tbsp of your favorite hot sauce (we used Sriracha)

2 tbsp fresh chopped parsley or cilantro

3-4 tbsp butter, diced into small cubes (or ghee)

1 pound (450 grams) medium-thick asparagus, woody ends trimmed

1 1/2 tbsp fresh lemon juice, or to taste

Salt and fresh ground black pepper, to taste

HOW TO MAKE BAKED SALMON IN FOIL WITH ASPARAGUS AND LEMON GARLIC BUTTER SAUCE

Step 1: Prepare the oven. Preheat it to 425 degrees F or 220 degrees C. Cut 2 sheets of heavy-duty aluminum foil to 14 x 12-inch (35x30cm). On the countertop, lay them separately.

Step 2: Place the sauce ingredients (broth, lemon juice, and hot sauce) in a small bowl. Whisk well until blended.

Step 3: Season with salt and pepper on both sides of the salmon fillets and divide them between the aluminium foil near the middle. To one side of the salmon, place the trimmed asparagus, tailing the long direction of the foil.

Step 4: Adjust the salt and pepper as desired and sprinkle the garlic on top of the salmon. Then, generously drizzle the salmon fillets and asparagus with the garlic butter sauce.

Step 5: Evenly among the foil packets, divide the pieces of butter, making sure to layer them over the salmon and asparagus. Next, start wrapping the salmon foil packets in and crimp the edges. Wrap the ends, but do not wrap too tight. You want some extra space inside so the heat can circulate.

Step 6: To a baking sheet, transfer the salmon foil packs. Place in the preheated oven (sealed side upward) and bake for about 9 to 12 minutes or until the salmon is completely cooked.

Step 7: Remove from the oven when done. Unwrap the baked salmon carefully and drizzle with more lemon juice. Serve right away garnished with some fresh parsley or cilantro and a slice of lemon. Enjoy!

Nutrition Facts:

Energy 853.05 cal, Fat 49.99 g, Protein 85.08 g, Carbs 15.39 g, Saturated Fat 19.16 g, Polyunsat Fat 11.12 g, Monounsat Fat 15.4 g, Sugar 5.98 g, Cholesterol 282.3 mg, Sodium 473.48 mg, Potassium 2564.49 mg, Fiber 5.64 g

BAKED SALMON IN FOIL WITH ASPARAGUS AND LEMON GARLIC BUTTER SAUCE

Rebecca PREP TIME: 12 MINS | COOK TIME: 10 MINS | YIELD: 2 servings This salmon in foil is one of the best salmon recipes. The flaky salmon with asparagus in… General Recipes BAKED SALMON IN FOIL WITH ASPARAGUS AND LEMON GARLIC BUTTER SAUCE European Print This
Serves: 2 Prep Time: 12 mins Cooking Time: 10 mins 10 mins
Nutrition facts: 853.05 calories 49.99 fat
Rating: 5.0/5
( 1 voted )

Ingredients

  • 4 tsp minced garlic (4 cloves)
  • 2 salmon fillets
  • 2 tbsp vegetable broth or chicken broth
  • 1 tbsp of your favorite hot sauce (we used Sriracha)
  • 2 tbsp fresh chopped parsley or cilantro
  • 3-4 tbsp butter, diced into small cubes (or ghee)
  • 1 pound (450 grams) medium-thick asparagus, woody ends trimmed
  • 1 1/2 tbsp fresh lemon juice, or to taste
  • Salt and fresh ground black pepper, to taste

Instructions

Step 1: Prepare the oven. Preheat it to 425 degrees F or 220 degrees C. Cut 2 sheets of heavy-duty aluminum foil to 14 x 12-inch (35x30cm). On the countertop, lay them separately.

Step 2: Place the sauce ingredients (broth, lemon juice, and hot sauce) in a small bowl. Whisk well until blended.

Step 3: Season with salt and pepper on both sides of the salmon fillets and divide them between the aluminium foil near the middle. To one side of the salmon, place the trimmed asparagus, tailing the long direction of the foil.

Step 4: Adjust the salt and pepper as desired and sprinkle the garlic on top of the salmon. Then, generously drizzle the salmon fillets and asparagus with the garlic butter sauce.

Step 5: Evenly among the foil packets, divide the pieces of butter, making sure to layer them over the salmon and asparagus. Next, start wrapping the salmon foil packets in and crimp the edges. Wrap the ends, but do not wrap too tight. You want some extra space inside so the heat can circulate.

Step 6: To a baking sheet, transfer the salmon foil packs. Place in the preheated oven (sealed side upward) and bake for about 9 to 12 minutes or until the salmon is completely cooked.

Step 7: Remove from the oven when done. Unwrap the baked salmon carefully and drizzle with more lemon juice. Serve right away garnished with some fresh parsley or cilantro and a slice of lemon. Enjoy!

June 1, 2022 0 comment
0 FacebookTwitterPinterestEmail
General Recipes

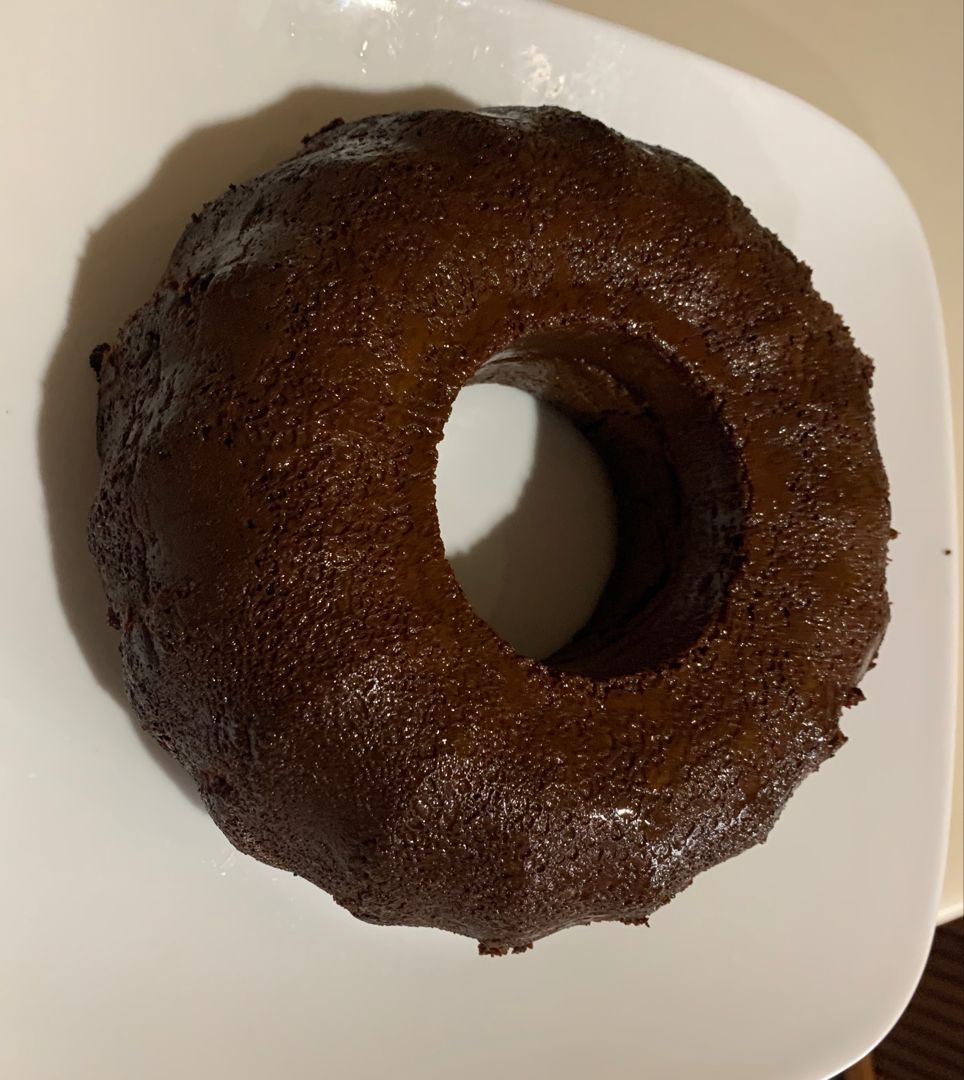
Brigadeirao (Brazilian Chocolate Fudge Flan)

by Rebecca May 31, 2022
written by Rebecca

Prep Time: 10 mins | Cook Time: 40 mins | Total Time: 50 mins | Servings: 12

This Brazillian Chocolate Fudge Flan or Brigadeirao is a great all-year-round dessert. It is decadent, fudgy, rich, addictive, and gluten-free! An excellent dessert to serve on every occasion. Simply decorate it as needed.

Ingredients

4 large eggs, at room temperature

28 ounces sweetened condensed milk (or two 14-ounces cans)

1 c. unsweetened cocoa powder

1 c. whole milk

½ c. sugar

1 tsp pure vanilla extract

¼ c. chocolate sprinkles good quality

½ tbsp cornstarch

How to make Brigadeirao (Brazilian Chocolate Fudge Flan)

Step 1: Prepare the oven. Preheat it to 350 degrees F or 180 degrees C. Using butter or non-stick cooking spray, grease an 8-inch (20 cm) ring pan. All over the pan, sprinkle the sugar. Set aside.

Step 2: In a blender, pulse all the ingredients except for the sprinkles until smooth. Into the prepared pan, pour the mixture. Place in the preheated oven and bake the bain-Marie for approximately 40 minutes. When done, take it out of the oven. Then, carefully run a knife on the edges and shift it on the rack to cool.

Step 3: Tent the dish and place it in the fridge to chill and set for at least 4 hours. After 4 hours, run a knife around and invert it onto a plate. Sprinkle with chocolate sprinkles on top and serve. You can even drizzle it with fudge on the edges if desired. Enjoy!

Notes:

BAIN-MARIE: In a large baking pan, pour in the hot water and put the ring pan inside, ensuring that the water comes halfway up the side of the pan.

You can store the brigadeirao in the fridge for up to 5 days, covered. I do not recommend freezing it. But you can try. First, adjust your freezer to 0 degrees F and slice the brigadeirao into quarters. In plastic bags, wrap the portions and freeze for up to 1 month. Before serving, thaw in the fridge.

Nutrition Facts:

Calories: 310 kcal | Carbohydrates: 53g | Protein: 9g | Fat: 8g | Saturated Fat: 5g | Cholesterol: 79mg | Sodium: 115mg | Potassium: 401mg | Fiber: 2g | Sugar: 48g | Vitamin A: 290IU | Vitamin C: 1.7mg | Calcium: 228mg | Iron: 1.4mg

Brigadeirao (Brazilian Chocolate Fudge Flan)

Rebecca Prep Time: 10 mins | Cook Time: 40 mins | Total Time: 50 mins | Servings: 12 This Brazillian Chocolate Fudge Flan or Brigadeirao is a great all-year-round dessert. It… General Recipes Brigadeirao (Brazilian Chocolate Fudge Flan) European Print This
Serves: 12 Prep Time: 10 mins Cooking Time: 40 mins 40 mins
Nutrition facts: 310 calories 8 fat
Rating: 5.0/5
( 1 voted )

Ingredients

  • 4 large eggs, at room temperature
  • 28 ounces sweetened condensed milk (or two 14-ounces cans)
  • 1 c. unsweetened cocoa powder
  • 1 c. whole milk
  • ½ c. sugar
  • 1 tsp pure vanilla extract
  • ¼ c. chocolate sprinkles good quality
  • ½ tbsp cornstarch

Instructions

Step 1: Prepare the oven. Preheat it to 350 degrees F or 180 degrees C. Using butter or non-stick cooking spray, grease an 8-inch (20 cm) ring pan. All over the pan, sprinkle the sugar. Set aside.

Step 2: In a blender, pulse all the ingredients except for the sprinkles until smooth. Into the prepared pan, pour the mixture. Place in the preheated oven and bake the bain-Marie for approximately 40 minutes. When done, take it out of the oven. Then, carefully run a knife on the edges and shift it on the rack to cool.

Step 3: Tent the dish and place it in the fridge to chill and set for at least 4 hours. After 4 hours, run a knife around and invert it onto a plate. Sprinkle with chocolate sprinkles on top and serve. You can even drizzle it with fudge on the edges if desired. Enjoy!

Notes

BAIN-MARIE: In a large baking pan, pour in the hot water and put the ring pan inside, ensuring that the water comes halfway up the side of the pan. You can store the brigadeirao in the fridge for up to 5 days, covered. I do not recommend freezing it. But you can try. First, adjust your freezer to 0 degrees F and slice the brigadeirao into quarters. In plastic bags, wrap the portions and freeze for up to 1 month. Before serving, thaw in the fridge.

May 31, 2022 0 comment
0 FacebookTwitterPinterestEmail
Newer Posts
Older Posts

Popular Posts

  • 1

    Crispy Crunchy Parmesan Potatoes

    March 21, 2020
  • 2

    CROCK POT SMOTHERED PORK CHOPS

    March 21, 2020
  • Facebook
  • Twitter

@2019 - All Right Reserved.


Back To Top