Cook it once
  • Home
  • Privacy Policy
  • Recipes
    • KETO
    • LC
    • WW
  • Tips
  • Contact
Cook it once
  • Home
  • Privacy Policy
  • Recipes
    • KETO
    • LC
    • WW
  • Tips
  • Contact
Category:

General Recipes

General Recipes

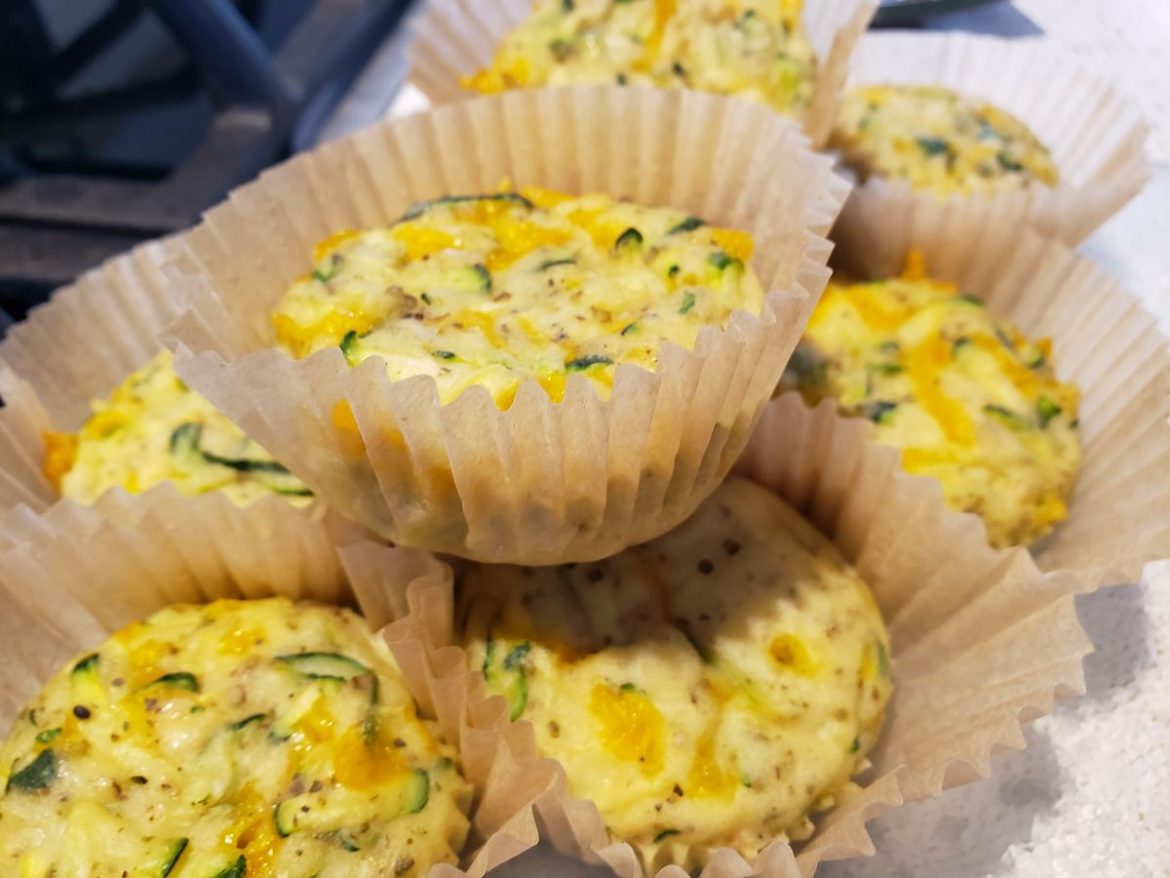
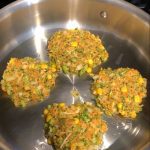
VEGGIE CAKES

by Rebecca June 8, 2022
written by Rebecca

PREP TIME: 1 HR | COOK TIME: 20 MINS | TOTAL TIME: 1 HR 20 MINS | YIELD: 30 cakes

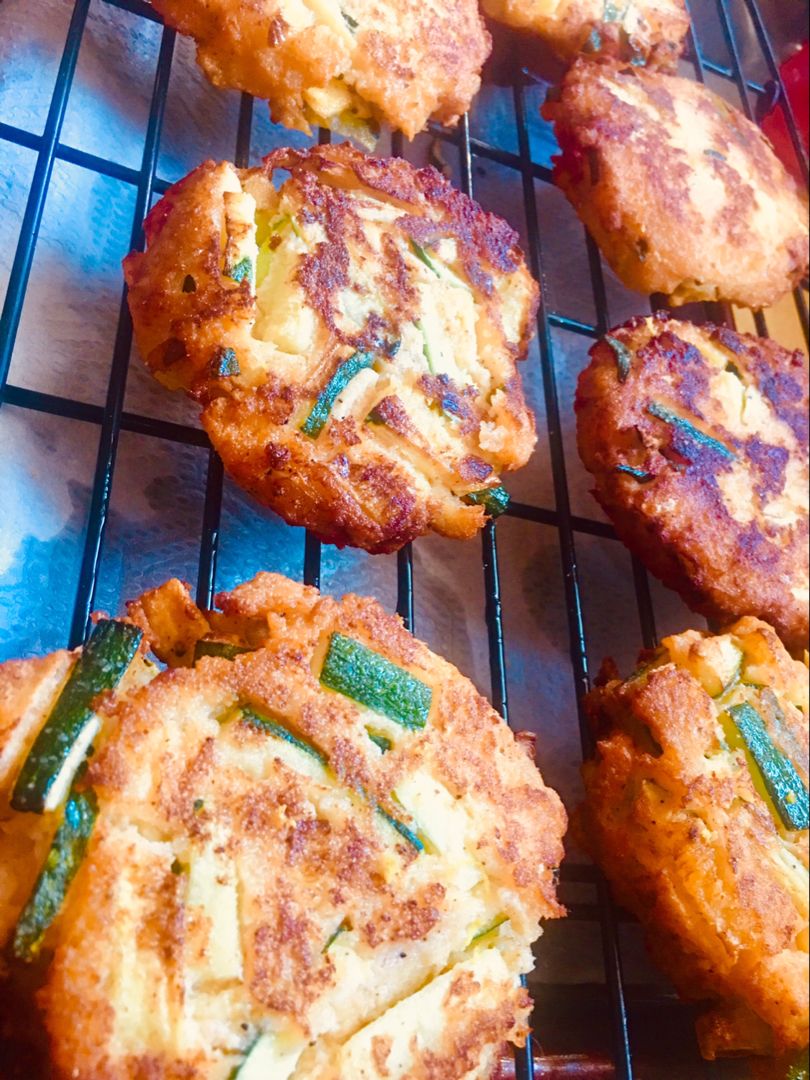
These delicious, crispy on the outside and fluffy on the inside veggie cakes are incredibly amazing! These healthy veggie cakes are perfect for your picky eaters to eat their veggies. Serve these veggie cakes as a side dish, and these are also wonderful for lunches.

INGREDIENTS

4 large eggs

3 large zucchini, grated and drained

2 c. broccoli, grated

6 large carrots, grated

1 cup corn kernels

1 teaspoon granulated garlic

1/2 c. breadcrumbs, I used panko

1/2 c. Parmesan cheese, grated

1/2 c. flour

1/2 teaspoon baking powder

1 teaspoon Cajun seasoning, optional, if you like a little kick

oil for pan

1 onion, diced and sautéed (optional)

2 teaspoon salt

1/2 teaspoon pepper

HOW TO MAKE VEGGIE CAKES

Step 1: Sprinkle the grated zucchini with 1 tsp salt and set it in a fine-mesh strainer. On top of the zucchini, place a bowl or plate to weigh it down. Allow it to sit for at least 30 minutes to an hour. Then, drain and wrap the grated zucchini in a clean towel or a piece of cheesecloth. Squeeze the water out, then set the drained zucchini aside.

TO MAKE THE CAKES:

Step 2: Place the flour, baking powder, pepper, granulated garlic, or Cajun seasoning, if using, breadcrumb and cheese in a large bowl. Mix well until combined. Then, add the vegetables and toss well, ensuring to break up the zucchini and everything is coated with the flour mixture.

Step 3: In a small bowl, crack the eggs and lightly whisk. Pour this over the veggies and mix well.

Step 4: Drizzle a teaspoon or two of oil in a saute pan or skillet over medium-high heat. Swirl the pan to coat the bottom. Into the hot pan, drop a spoonful (or use a scoop) of the mixture. Using your fingers, flatten it out to make a patty. Cook for about 4 to 5 minutes per side, decreasing the heat if the patties start to brown too quickly.

Step 5: To a cooling rack set inside of a sheet pan, transfer the cakes. You can also use a paper towel-lined baking sheet instead.

NUTRITION FACTS:

YIELD: 15 SERVING SIZE: 2
Amount Per Serving: CALORIES: 109 | TOTAL FAT: 4g | SATURATED FAT: 1g | TRANS FAT: 0g | UNSATURATED FAT: 2g | CHOLESTEROL: 52mg | SODIUM: 537mg | CARBOHYDRATES: 14g | FIBER: 2g | SUGAR: 3g | PROTEIN: 5g
VEGGIE CAKES

Rebecca PREP TIME: 1 HR | COOK TIME: 20 MINS | TOTAL TIME: 1 HR 20 MINS | YIELD: 30 cakes These delicious, crispy on the outside and fluffy on the… General Recipes VEGGIE CAKES European Print This
Serves: 30 Prep Time: 1 hr Cooking Time: 20 mins 20 mins
Nutrition facts: 109 calories 4 fat
Rating: 5.0/5
( 1 voted )

Ingredients

  • 4 large eggs
  • 3 large zucchini, grated and drained
  • 2 c. broccoli, grated
  • 6 large carrots, grated
  • 1 cup corn kernels
  • 1 teaspoon granulated garlic
  • 1/2 c. breadcrumbs, I used panko
  • 1/2 c. Parmesan cheese, grated
  • 1/2 c. flour
  • 1/2 teaspoon baking powder
  • 1 teaspoon Cajun seasoning, optional, if you like a little kick
  • oil for pan
  • 1 onion, diced and sautéed (optional)
  • 2 teaspoon salt
  • 1/2 teaspoon pepper

Instructions

Step 1: Sprinkle the grated zucchini with 1 tsp salt and set it in a fine-mesh strainer. On top of the zucchini, place a bowl or plate to weigh it down. Allow it to sit for at least 30 minutes to an hour. Then, drain and wrap the grated zucchini in a clean towel or a piece of cheesecloth. Squeeze the water out, then set the drained zucchini aside.

TO MAKE THE CAKES:

Step 2: Place the flour, baking powder, pepper, granulated garlic, or Cajun seasoning, if using, breadcrumb and cheese in a large bowl. Mix well until combined. Then, add the vegetables and toss well, ensuring to break up the zucchini and everything is coated with the flour mixture.

Step 3: In a small bowl, crack the eggs and lightly whisk. Pour this over the veggies and mix well.

Step 4: Drizzle a teaspoon or two of oil in a saute pan or skillet over medium-high heat. Swirl the pan to coat the bottom. Into the hot pan, drop a spoonful (or use a scoop) of the mixture. Using your fingers, flatten it out to make a patty. Cook for about 4 to 5 minutes per side, decreasing the heat if the patties start to brown too quickly.

Step 5: To a cooling rack set inside of a sheet pan, transfer the cakes. You can also use a paper towel-lined baking sheet instead.

June 8, 2022 0 comment
0 FacebookTwitterPinterestEmail
General Recipes

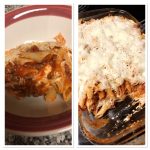
Baked Penne Rigate Recipe

by Rebecca June 8, 2022
written by Rebecca

Prep time: 10 mins | Cook time: 30 mins | Total time: 40 mins

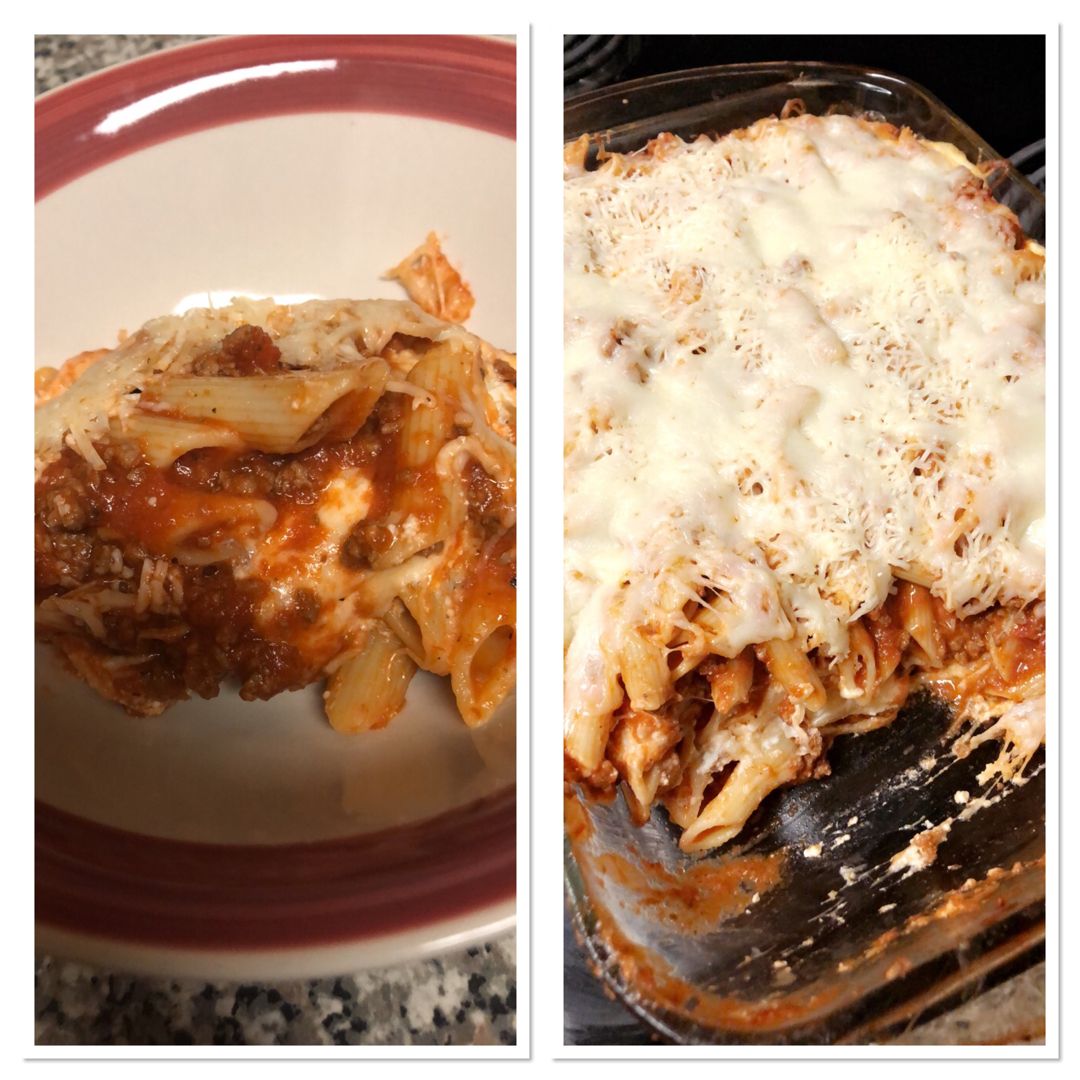
If you are searching for another great weeknight pasta dish, then you have to give this baked Penne Rigate a try. It’s incredibly delicious and packed with tons of cheese and marinara sauce. And this paste dish is super easy to throw together and ready in less than an hour.

To make this amazing pasta dish, all you need are a few readily available ingredients. You can either use homemade marinara sauce or your favorite tomato sauce. Bake this penne rigate in an oven-safe baking dish until done. This baked pasta dish is an incredible pasta casserole excellent for an easy and quick meal anytime! Serve this with protein of your choice, such as chicken or ground beef for a filling meal perfect even on the busiest days.

INGREDIENTS

2 Eggs

1/2 pound Penne Rigate Pasta

1 c. Mozzarella Cheese

2 c. Ricotta Cheese

3/4 c. Parmesan Cheese

1 jar of Marinara Sauce

salt and pepper to taste

Topping:

1/4 cup Parmesan Cheese

How to make Baked Penne Rigate

Step 1: Start by bringing a pot of salted water to a boil.

Step 2: Prepare the oven. Preheat it to 350 degrees.

Step 3: To the boiling water, add the penne rigate and cook following the package directions until al dente.

Step 4: Place the cheeses, eggs, salt, and pepper in a bowl. Mix well until combined.

Step 5: Drain the pasta when done and place it in the base of a heat-safe pan. On top, pour half of the marinara sauce and stir well.

Step 6: Over the pasta, scoop the cheese mixture, and evenly spread. Place in the preheated oven and bake for about 18 to 20 minutes.

Step 7: Remove from the oven when done and drizzle the rest of the marinara sauce on top, then sprinkle with 1/4 c. Parmesan cheese. Return to the oven and resume baking for an additional 5 to 10 minutes.

Baked Penne Rigate Recipe

Rebecca Prep time: 10 mins | Cook time: 30 mins | Total time: 40 mins If you are searching for another great weeknight pasta dish, then you have to give this… General Recipes Baked Penne Rigate Recipe European Print This
Prep Time: 10 mins Cooking Time: 30 mins 30 mins
Nutrition facts: 200 calories 20 grams fat
Rating: 5.0/5
( 1 voted )

Ingredients

  • 2 Eggs
  • 1/2 pound Penne Rigate Pasta
  • 1 c. Mozzarella Cheese
  • 2 c. Ricotta Cheese
  • 3/4 c. Parmesan Cheese
  • 1 jar of Marinara Sauce
  • salt and pepper to taste
  • Topping:
  • 1/4 cup Parmesan Cheese

Instructions

Step 1: Start by bringing a pot of salted water to a boil.

Step 2: Prepare the oven. Preheat it to 350 degrees.

Step 3: To the boiling water, add the penne rigate and cook following the package directions until al dente.

Step 4: Place the cheeses, eggs, salt, and pepper in a bowl. Mix well until combined.

Step 5: Drain the pasta when done and place it in the base of a heat-safe pan. On top, pour half of the marinara sauce and stir well.

Step 6: Over the pasta, scoop the cheese mixture, and evenly spread. Place in the preheated oven and bake for about 18 to 20 minutes.

Step 7: Remove from the oven when done and drizzle the rest of the marinara sauce on top, then sprinkle with 1/4 c. Parmesan cheese. Return to the oven and resume baking for an additional 5 to 10 minutes.

June 8, 2022 0 comment
0 FacebookTwitterPinterestEmail
General Recipes

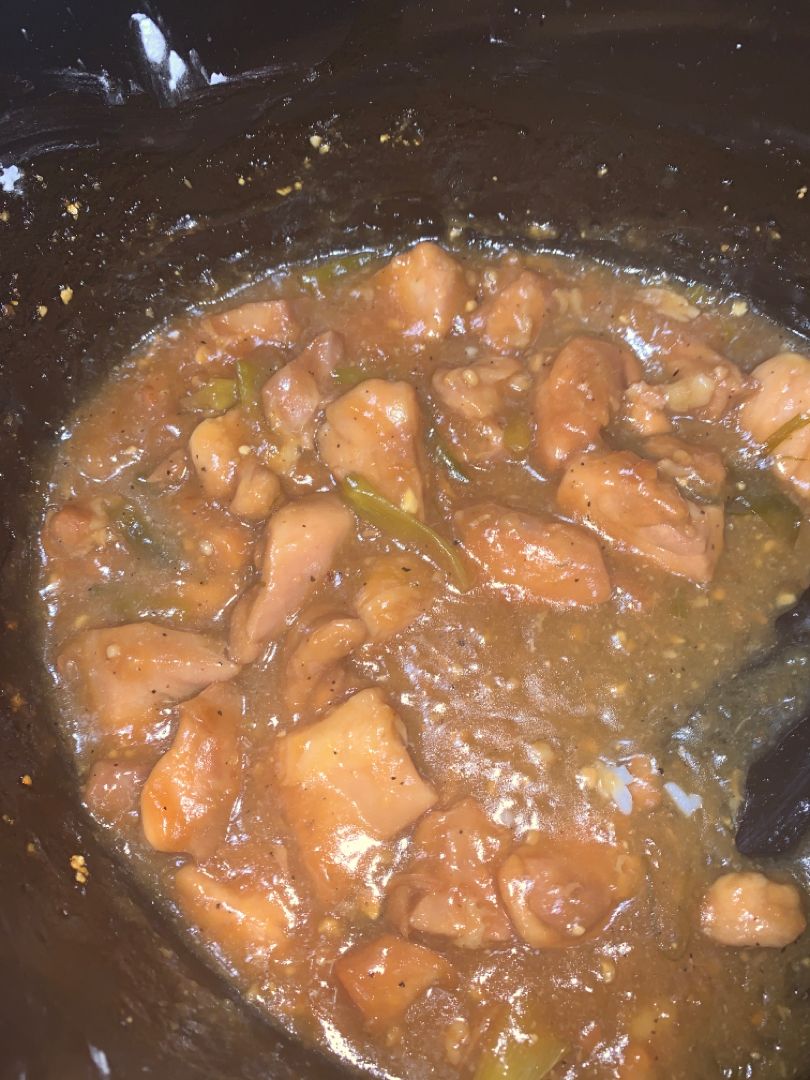
Slow Cooker Honey Teriyaki Chicken

by Rebecca June 8, 2022
written by Rebecca

YIELD: Serves 4 to 6

I love teriyaki chicken and this slow cooker version guarantees the best teriyaki chicken! Pair this up with steamed broccoli and serve over rice for a filling weeknight dinner. And do not forget the mouthwatering sauce that is to die for!

INGREDIENTS

1/2 medium yellow onion, diced (about 1 c.)

2 cloves garlic, minced

2 lbs boneless, skinless chicken thighs (about 6), cut into 1 1/2” pieces

1/2 c. honey

1/2 c. tamari or soy sauce

1/4 c. rice vinegar

1 tbsp grated peeled fresh ginger

1/4 tsp freshly ground black pepper

1/4 c. water

For serving: cooked rice, red pepper flakes, sesame seeds, sliced scallions

2 tbsp cornstarch

How to make Slow Cooker Honey Teriyaki Chicken

Step 1: In the bottom of a 6-quart or large slow cooker, arrange the chicken in a single layer. On top, scatter the onion and garlic. In a small bowl, mix the soy sauce, honey, rice vinegar, pepper, and ginger until well blended. Then, pour this on top of the chicken.

Step 2: Put the lid on and set to cook for 2 to 3 hours on LOW or 1 to 2 hours on HIGH. Once the thickest part of the chicken reaches 165 degrees F, then the chicken is done.

Step 3: To a bowl, transfer the chicken using a slotted spoon. Into a small saucepan, pour the leftover sauce from the slow cooker, and bring to a boil over medium-high heat. Cook for about 15 to 20 minutes or until reduced by half. In the meantime, stir the water and cornstarch in a small bowl until well blended. Into the sauce once reduced, stir in the cornstarch slurry, and cook for another minute or two until thickened.

Step 4: Place the chicken back into the slow cooker and pour in enough sauce to coat the chicken. Set the rest of the sauce aside. Serve the honey teriyaki chicken over cooked rice garnished with some red pepper flakes, sesame seeds, and scallions. Enjoy!

NOTES:

In an airtight container, keep any leftover chicken and store it in the fridge for up to 3 days.

You can make the chicken and sauce a day ahead. Simply keep it in an airtight container and store it in the fridge. Before serving, reheat in the microwave or over medium-low heat until warm.

Nutrition Facts:

Calories 304, Fat 6.4 g (9.8%), Saturated 1.7 g (8.4%), Carbs 29.6 g (9.9%), Fiber 0.7 g (2.9%), Sugars 24.3 g, Protein 31.9 g (63.8%), Sodium 1314.1 mg (54.8%)

Slow Cooker Honey Teriyaki Chicken

Rebecca YIELD: Serves 4 to 6 I love teriyaki chicken and this slow cooker version guarantees the best teriyaki chicken! Pair this up with steamed broccoli and serve over rice for… General Recipes Slow Cooker Honey Teriyaki Chicken European Print This
Serves: 4-6
Nutrition facts: 304 calories 6.4 fat
Rating: 5.0/5
( 1 voted )

Ingredients

  • 1/2 medium yellow onion, diced (about 1 c.)
  • 2 cloves garlic, minced
  • 2 lbs boneless, skinless chicken thighs (about 6), cut into 1 1/2” pieces
  • 1/2 c. honey
  • 1/2 c. tamari or soy sauce
  • 1/4 c. rice vinegar
  • 1 tbsp grated peeled fresh ginger
  • 1/4 tsp freshly ground black pepper
  • 1/4 c. water
  • For serving: cooked rice, red pepper flakes, sesame seeds, sliced scallions
  • 2 tbsp cornstarch

Instructions

Step 1: In the bottom of a 6-quart or large slow cooker, arrange the chicken in a single layer. On top, scatter the onion and garlic. In a small bowl, mix the soy sauce, honey, rice vinegar, pepper, and ginger until well blended. Then, pour this on top of the chicken.

Step 2: Put the lid on and set to cook for 2 to 3 hours on LOW or 1 to 2 hours on HIGH. Once the thickest part of the chicken reaches 165 degrees F, then the chicken is done.

Step 3: To a bowl, transfer the chicken using a slotted spoon. Into a small saucepan, pour the leftover sauce from the slow cooker, and bring to a boil over medium-high heat. Cook for about 15 to 20 minutes or until reduced by half. In the meantime, stir the water and cornstarch in a small bowl until well blended. Into the sauce once reduced, stir in the cornstarch slurry, and cook for another minute or two until thickened.

Step 4: Place the chicken back into the slow cooker and pour in enough sauce to coat the chicken. Set the rest of the sauce aside. Serve the honey teriyaki chicken over cooked rice garnished with some red pepper flakes, sesame seeds, and scallions. Enjoy!

Notes

In an airtight container, keep any leftover chicken and store it in the fridge for up to 3 days. You can make the chicken and sauce a day ahead. Simply keep it in an airtight container and store it in the fridge. Before serving, reheat in the microwave or over medium-low heat until warm.

June 8, 2022 0 comment
0 FacebookTwitterPinterestEmail
General Recipes

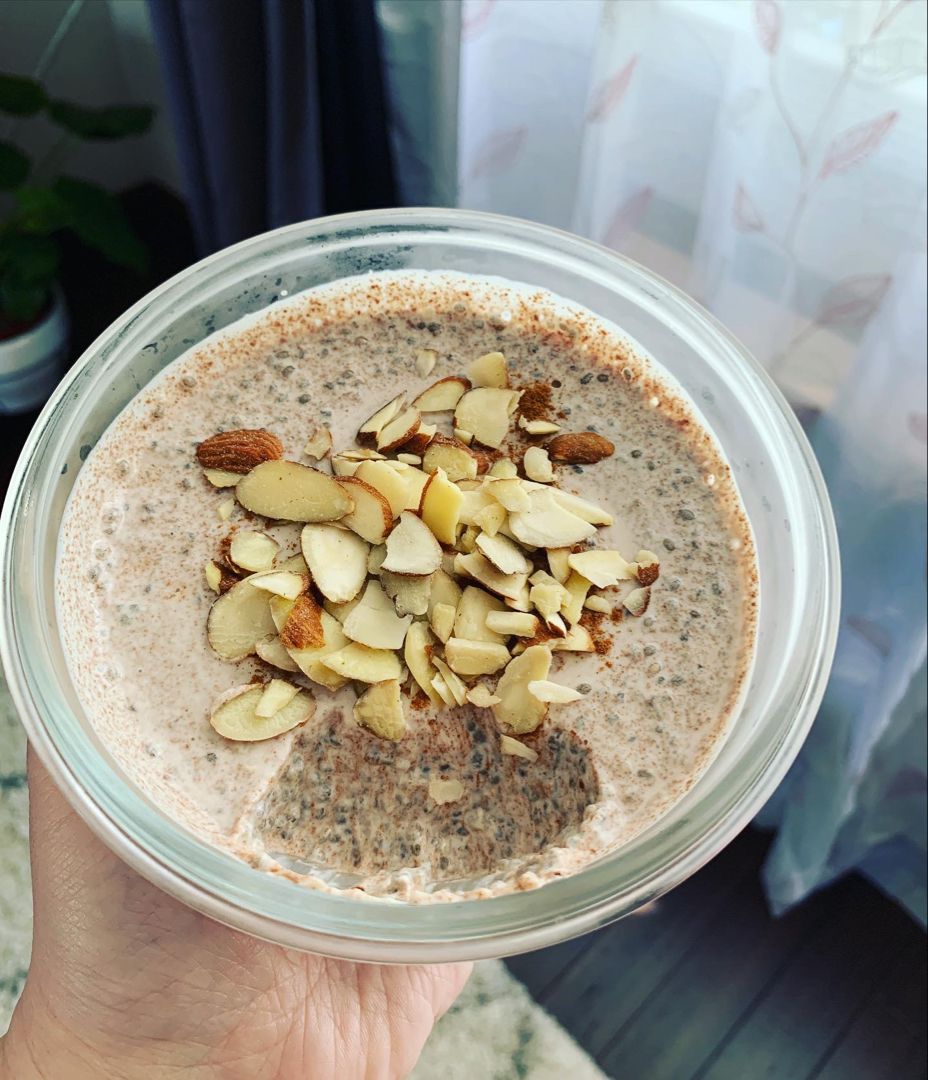
Low Carb Chocolate Almond Chia Seed Pudding

by Rebecca June 8, 2022
written by Rebecca

PREP TIME: 5 MINS | COOK TIME: 4 HRS | TOTAL TIME: 4 HRS 5 MINS | SERVINGS: 1

I love this low-carb chocolate almond Chia seed pudding. It’s the perfect sweet treat for breakfast or even dessert. It is made with almond milk and Greek yoghurt. This is also excellent for meal prep. Whip this up a day ahead and keep it in the fridge. Before serving, simply top the pudding with the almonds and enjoy.

It is very amusing and incredible to find a sweet treat that’s not only delicious but healthy. My mom loves sweet treats, but with her current condition, she cannot enjoy the good things. Luckily, there are tons of treats perfect for her condition just like this low-carb pudding.

If you are looking for a quick chocolate fix any time of the day, this chocolate almond Chia seed pudding is a great choice. It’s super easy to whip up and the ingredients required are readily available. Feel free to adjust the sweetness according to your preference. I recommend adding a small amount, and then going from there. If you do not mind the carb, you can swap stevia with maple syrup.

It is also great to know that this pudding holds up perfectly in the freezer. Simply store it in an airtight container. Before serving, just defrost in the fridge the night before.

Ingredients

1/2 teaspoon vanilla extract

1/2 c. unsweetened almond milk

2 tablespoons Chia seeds

1 tablespoon unsweetened cocoa powder (Dutch-processed)

1/2 c. plain nonfat Greek yoghurt (full fat for lower carb)

1 tablespoon almonds, chopped

1 packet Stevia (more to taste)

How to make Low Carb Chocolate Almond Chia Seed Pudding

Step 1: To a mason jar, bowl, or other container, add all the ingredients except for the almonds. Mix well and keep in the fridge for at least 4 hours up to overnight.

Step 2: Before serving, top the chocolate almond Chia seed pudding with almonds. Enjoy!

Nutritional Facts:

Serving Size: about 1 c.
Amount Per Serving: Calories 234, Calories from Fat 93, Total Fat 10g15%, Saturated Fat 1g6%, Monounsaturated Fat 0g, Polyunsaturated Fat 0g, Cholesterol 0mg0%, Sodium 123mg5%, Total Carbohydrate 20g5%, Dietary Fiber 9g36%, Sugars 8g, Protein 17g

Low Carb Chocolate Almond Chia Seed Pudding

Rebecca PREP TIME: 5 MINS | COOK TIME: 4 HRS | TOTAL TIME: 4 HRS 5 MINS | SERVINGS: 1 I love this low-carb chocolate almond Chia seed pudding. It’s the… General Recipes Low Carb Chocolate Almond Chia Seed Pudding European Print This
Serves: 1 Prep Time: 5 mins Cooking Time: 4 hrs 4 hrs
Nutrition facts: 234 calories 10 fat
Rating: 5.0/5
( 1 voted )

Ingredients

  • 1/2 teaspoon vanilla extract
  • 1/2 c. unsweetened almond milk
  • 2 tablespoons Chia seeds
  • 1 tablespoon unsweetened cocoa powder (Dutch-processed)
  • 1/2 c. plain nonfat Greek yoghurt (full fat for lower carb)
  • 1 tablespoon almonds, chopped
  • 1 packet Stevia (more to taste)

Instructions

Step 1: To a mason jar, bowl, or other container, add all the ingredients except for the almonds. Mix well and keep in the fridge for at least 4 hours up to overnight.

Step 2: Before serving, top the chocolate almond Chia seed pudding with almonds. Enjoy!

June 8, 2022 0 comment
0 FacebookTwitterPinterestEmail
General Recipes

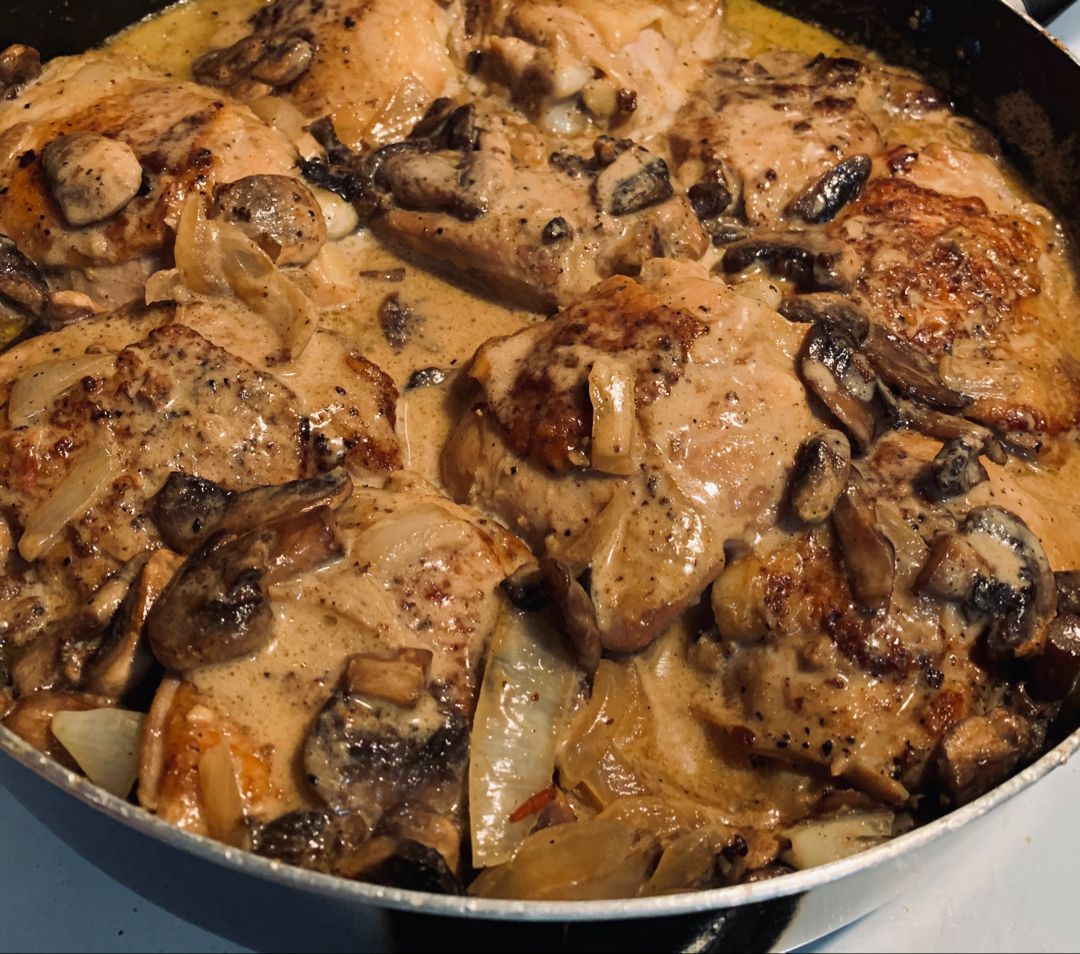
Keto chicken thighs recipe with mushroom sauce

by Rebecca June 8, 2022
written by Rebecca

Prep Time: 5 mins | Cook Time: 30 mins | Total Time: 35 mins | Servings: 11 thighs

Juicy chicken thighs smothered in a delightful mushroom sauce. A keto-friendly, low-carb, and gluten-free dinner that you can easily whip up using a few simple ingredients in less than thirty-five minutes. This chicken dish is excellent for meal prep and perfects to serve to guests over your preferred side dishes such as cauliflower mash or sauteed broccoli and sweet potatoes. Enjoy this flavorful and creamy keto chicken thighs with mushroom sauce any time with this easy recipe.

Ingredients

4 cloves garlic, chopped

2.2 pounds (1kg) of chicken thighs, boneless

1 c (125 grams) heavy cream

½ small onion, diced

Unsalted butter for frying

8 ounces (250 grams) of baby Bella mushrooms, sliced

Green onions for garnishing, chopped

Ground black pepper

Salt

How to make Keto chicken thighs recipe with mushroom sauce

Step 1: Season both sides of the chicken thighs with salt and black pepper.

Step 2: Add the butter to a hot large skillet over medium-high heat. Add the onions and garlic to the skillet once the butter has melted and cook until they begin browning. Next, add the chicken thighs and sear for about 8 minutes per side until golden brown. Transfer the chicken to a clean plate once both sides have a crispy crust and are no longer pink in the center. Set aside.

Step 3: Cook the mushrooms in the now-empty skillet for about 5 minutes or until they begin browning and reducing in size. Pour in the heavy cream and season with salt and pepper. Continue to cook for 5 to 10 minutes more.

Step 4: Return the chicken to the skillet once the mushroom sauce has slightly thickened and cook for additional 2 minutes without flipping.

Step 5: Remove from the heat when done and serve the chicken thighs with mushroom sauce right away garnished with some chopped green onions. Enjoy your favorite side dish.

Notes:

NET CARB: 1,5g

Nutrition Facts:

Amount Per Serving (1 chicken thigh)

Calories 162, Calories from Fat 72, Fat 8g12%, Potassium 24mg1%, Carbohydrates 2g1%, Fiber 0.5g2%, Sugar 0.7g1%, Protein 20g40%, Vitamin A 233IU5%, Vitamin C 1mg1%, Calcium 12mg1%, Iron 1mg6%

Keto chicken thighs recipe with mushroom sauce

Rebecca Prep Time: 5 mins | Cook Time: 30 mins | Total Time: 35 mins | Servings: 11 thighs Juicy chicken thighs smothered in a delightful mushroom sauce. A keto-friendly, low-carb,… General Recipes Keto chicken thighs recipe with mushroom sauce European Print This
Serves: 11 Prep Time: 5 mins Cooking Time: 30 mins 30 mins
Nutrition facts: 162 calories 8 fat
Rating: 5.0/5
( 1 voted )

Ingredients

  • 4 cloves garlic, chopped
  • 2.2 pounds (1kg) of chicken thighs, boneless
  • 1 c (125 grams) heavy cream
  • ½ small onion, diced
  • Unsalted butter for frying
  • 8 ounces (250 grams) of baby Bella mushrooms, sliced
  • Green onions for garnishing, chopped
  • Ground black pepper
  • Salt

Instructions

Step 1: Season both sides of the chicken thighs with salt and black pepper.

Step 2: Add the butter to a hot large skillet over medium-high heat. Add the onions and garlic to the skillet once the butter has melted and cook until they begin browning. Next, add the chicken thighs and sear for about 8 minutes per side until golden brown. Transfer the chicken to a clean plate once both sides have a crispy crust and are no longer pink in the center. Set aside.

Step 3: Cook the mushrooms in the now-empty skillet for about 5 minutes or until they begin browning and reducing in size. Pour in the heavy cream and season with salt and pepper. Continue to cook for 5 to 10 minutes more.

Step 4: Return the chicken to the skillet once the mushroom sauce has slightly thickened and cook for additional 2 minutes without flipping.

Step 5: Remove from the heat when done and serve the chicken thighs with mushroom sauce right away garnished with some chopped green onions. Enjoy your favorite side dish.

June 8, 2022 0 comment
0 FacebookTwitterPinterestEmail
General Recipes

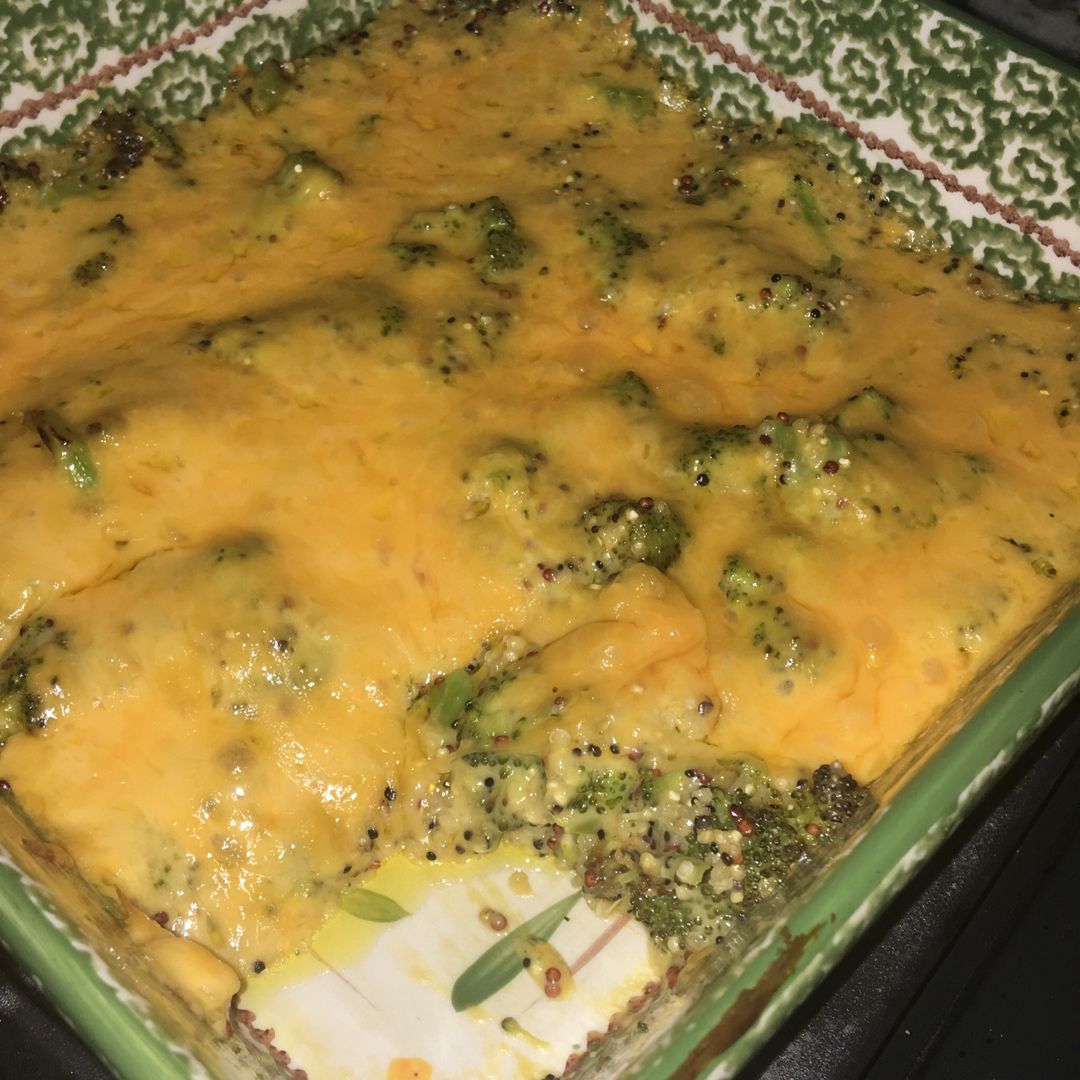
Cheesy Broccoli Quinoa Casserole

by Rebecca June 8, 2022
written by Rebecca

Prep Time: 40 mins | Cook Time: 15 mins | Total Time: 55 mins | Servings: 10

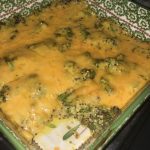
This healthy casserole with protein-packed quinoa and fresh broccoli florets with homemade sauce topped with melted cheese is an amazing weeknight dinner perfect for everyone! It’s an easy and quick recipe for keeps.

Ingredients

2 tbsp butter

2 c. water or low sodium broth, for cooking quinoa

1 c. uncooked quinoa, I love Ancient Harvest

4 c. fresh broccoli florets

1 1/2 c. chopped yellow onion

6 cloves garlic, minced

1 c. milk, I used unsweetened almond milk

2 tbsp oat flour, all-purpose will work too

8-ounce block of good quality cheddar cheese, divided

1/2 tsp garlic powder

1 tsp sea salt

1 tsp ground pepper

How to make Cheesy Broccoli Quinoa Casserole

Step 1: Using a nonstick spray, lightly grease a casserole dish. For this recipe, I use an 8 x 8-inch square dish.

Step 2: Following the package directions, ready the quinoa using water or broth to make around 3 cups of cooked, fluffy quinoa. Then, transfer to a large mixing bowl.

Step 3: In the meantime, steam the broccoli for about 5 to 6 minutes or until crisp-tender and bright green.

Step 4: Using a food processor with the shredding attachment, shred the cheese. Or use a handheld grater.

Step 5: Prepare the oven. Preheat it to 350 degrees F.

Step 6: In a medium saucepan, melt the butter over medium heat. Then, add the onion and garlic. Cook for about 7 minutes or until tender and aromatic. Whisk the milk, flour, garlic powder, salt, and pepper in a small bowl or measuring cup. Into the saucepan with the onions and garlic, pour the milk mixture. Let the sauce simmer for about 5 minutes, stirring constantly until the sauce has thickened. Take the pan off the heat and quickly stir in 2 c shredded cheddar cheese until melted.

Step 7: Over the quinoa and broccoli, pour the cheese sauce. Toss well. Into the prepared baking dish, transfer the mixture, and top with the rest of the shredded cheese. Place in the preheated oven and bake for about 15 minutes or until the casserole is heated through and the cheese has melted.

Step 8: Remove from the oven when done and serve the casserole warm. Enjoy!

Nutrition Facts:

Calories: 207 kcal | Carbohydrates: 18g  | Protein: 10g  | Fat: 11g | Saturated Fat: 6g | Cholesterol: 30mg | Sodium: 523mg | Fiber: 3g | Sugar: 1g

Cheesy Broccoli Quinoa Casserole

Rebecca Prep Time: 40 mins | Cook Time: 15 mins | Total Time: 55 mins | Servings: 10 This healthy casserole with protein-packed quinoa and fresh broccoli florets with homemade sauce… General Recipes Cheesy Broccoli Quinoa Casserole European Print This
Serves: 10 Prep Time: 40 mins Cooking Time: 15 mins 15 mins
Nutrition facts: 207 calories 11 fat
Rating: 5.0/5
( 1 voted )

Ingredients

  • 2 tbsp butter
  • 2 c. water or low sodium broth, for cooking quinoa
  • 1 c. uncooked quinoa, I love Ancient Harvest
  • 4 c. fresh broccoli florets
  • 1 1/2 c. chopped yellow onion
  • 6 cloves garlic, minced
  • 1 c. milk, I used unsweetened almond milk
  • 2 tbsp oat flour, all-purpose will work too
  • 8-ounce block of good quality cheddar cheese, divided
  • 1/2 tsp garlic powder
  • 1 tsp sea salt
  • 1 tsp ground pepper

Instructions

Step 1: Using a nonstick spray, lightly grease a casserole dish. For this recipe, I use an 8 x 8-inch square dish.

Step 2: Following the package directions, ready the quinoa using water or broth to make around 3 cups of cooked, fluffy quinoa. Then, transfer to a large mixing bowl.

Step 3: In the meantime, steam the broccoli for about 5 to 6 minutes or until crisp-tender and bright green.

Step 4: Using a food processor with the shredding attachment, shred the cheese. Or use a handheld grater.

Step 5: Prepare the oven. Preheat it to 350 degrees F.

Step 6: In a medium saucepan, melt the butter over medium heat. Then, add the onion and garlic. Cook for about 7 minutes or until tender and aromatic. Whisk the milk, flour, garlic powder, salt, and pepper in a small bowl or measuring cup. Into the saucepan with the onions and garlic, pour the milk mixture. Let the sauce simmer for about 5 minutes, stirring constantly until the sauce has thickened. Take the pan off the heat and quickly stir in 2 c shredded cheddar cheese until melted.

Step 7: Over the quinoa and broccoli, pour the cheese sauce. Toss well. Into the prepared baking dish, transfer the mixture, and top with the rest of the shredded cheese. Place in the preheated oven and bake for about 15 minutes or until the casserole is heated through and the cheese has melted.

Step 8: Remove from the oven when done and serve the casserole warm. Enjoy!

June 8, 2022 0 comment
0 FacebookTwitterPinterestEmail
General Recipes

CROCK POT COCONUT RICE PUDDING

by Rebecca June 8, 2022
written by Rebecca

Prep Time: 5 mins | Cook Time: 3 hrs | Total Time: 3 hrs 5 mins | Servings: 8

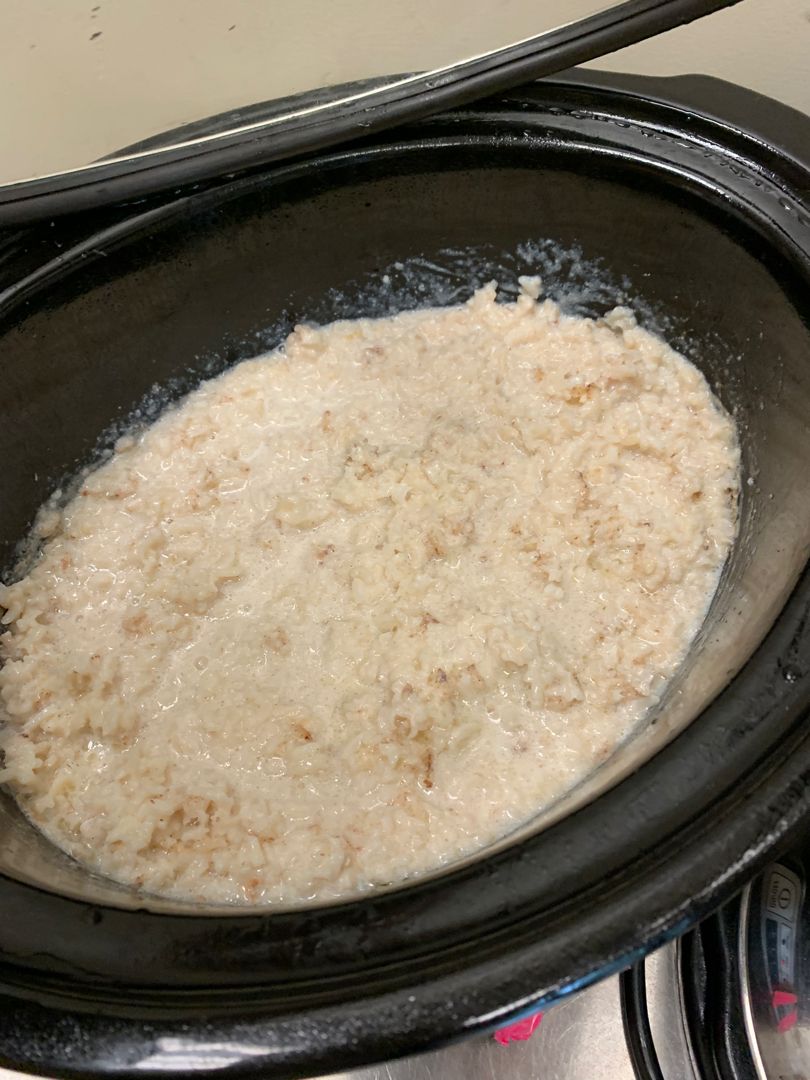
Rich and creamy – this incredible coconut pie pudding is a dream dessert easily made with milk, rice, cinnamon, cream of coconut, and vanilla. This is another of my favorite crock pot recipe that deserves all the attention! For best results, make sure to use only a Cream of Coconut. Cream of coconut is different from the runny and sweetened coconut water. You can usually find the cream of coconut in grocery stores in the alcohol aisle, but this is non-alcohol. It is the same thing used to add flavor and sweeten Pina Coladas. As for the rice, I used instant rice, but you are welcome to experiment and try long grain rice.

Ingredients

15 oz. can cream of coconut NOT COCONUT WATER

3 tbsp salted butter (or margarine) divided use

2 c. instant rice, uncooked (Minute Rice)

½ tsp vanilla extract

½ tsp ground cinnamon

6 c. milk 2% or higher

toasted coconut for topping (optional)

¼ tsp salt

HOW TO MAKE CROCK POT COCONUT RICE PUDDING

Step 1: Grease with butter or margarine a 5-quart slow cooker, making sure to coat the whole interior of the slow cooker.

Step 2: Into the bottom of the greased slow cooker, pour the milk and cream of coconut. Add the rice, salt, ground cinnamon, and vanilla extract. Mix well. On top, add the rest of the butter.

Step 3: Put the lid on and set it to cook on LOW for 3 to 4 hours, making sure to stir often to assist the rice to soak up the delicious flavor as it cooks.

Step 4: Before serving, top the rice pudding with extra cinnamon. If desired, top the individual servings with some toasted coconut flakes. On a nonstick baking sheet, place the sweetened flaked coconut and bake in a preheated 350 degrees F oven for about 10 minutes, rotating the pan every few minutes, until lightly golden brown.

Nutrition Facts:

Calories: 464 kcal | Carbohydrates: 63g | Protein: 7g | Fat: 19g | Saturated Fat: 14g | Cholesterol: 30mg | Sodium: 206mg | Potassium: 247mg | Fiber: 2g | Sugar: 44g | Vitamin A: 435IU | Calcium: 216mg | Iron: 1.4mg

CROCK POT COCONUT RICE PUDDING

Rebecca Prep Time: 5 mins | Cook Time: 3 hrs | Total Time: 3 hrs 5 mins | Servings: 8 Rich and creamy – this incredible coconut pie pudding is a… General Recipes CROCK POT COCONUT RICE PUDDING European Print This
Serves: 8 Prep Time: 5 mins Cooking Time: 3 hrs 3 hrs
Nutrition facts: 464 calories 19 fat
Rating: 5.0/5
( 1 voted )

Ingredients

  • 15 oz. can cream of coconut NOT COCONUT WATER
  • 3 tbsp salted butter (or margarine) divided use
  • 2 c. instant rice, uncooked (Minute Rice)
  • ½ tsp vanilla extract
  • ½ tsp ground cinnamon
  • 6 c. milk 2% or higher
  • toasted coconut for topping (optional)
  • ¼ tsp salt

Instructions

Step 1: Grease with butter or margarine a 5-quart slow cooker, making sure to coat the whole interior of the slow cooker.

Step 2: Into the bottom of the greased slow cooker, pour the milk and cream of coconut. Add the rice, salt, ground cinnamon, and vanilla extract. Mix well. On top, add the rest of the butter.

Step 3: Put the lid on and set it to cook on LOW for 3 to 4 hours, making sure to stir often to assist the rice to soak up the delicious flavor as it cooks.

Step 4: Before serving, top the rice pudding with extra cinnamon. If desired, top the individual servings with some toasted coconut flakes. On a nonstick baking sheet, place the sweetened flaked coconut and bake in a preheated 350 degrees F oven for about 10 minutes, rotating the pan every few minutes, until lightly golden brown.

June 8, 2022 0 comment
0 FacebookTwitterPinterestEmail
General Recipes

Easy Zucchini Ricotta Fritters

by Rebecca June 8, 2022
written by Rebecca

Servings: 7-8 fritters

I was hesitant if can pull this recipe off. Although this is a very easy recipe, I am not sure if the patty will be able to hold itself together. I am surprised that it did! The secret is mixing just the right amount of ricotta, eggs, and breadcrumbs. These easy zucchini, and ricotta fritters turned out the be the best!

Enjoy these firm, golden, and delicious zucchini, and ricotta fritters with some lemon wedges for a healthy and quick lunch any time with this easy recipe. If you love ricotta like me, then these tasty, easy zucchini, and ricotta fritters are a must! Give this recipe a try very soon. I am one hundred percent sure that you’ll love every bit of these fritters!

Ingredients

4 tbsp olive oil

1 egg

1/3 c. ricotta drained

2 medium zucchini washed and thinly cut into sticks

1/2 to 1 c panko breadcrumb depending on the consistency of your ricotta

lemon zest from a lemon

salt and pepper to taste

How to make Easy Zucchini Ricotta Fritters

Step 1: Place the zucchini (that you cut into sticks) along with ricotta, egg, lemon zest, and 1 tsp each of salt and pepper in a large bowl. Mix well before adding the breadcrumbs. Mix again until the breadcrumbs are just blended. Place the batter in the fridge for about 20 minutes to rest.

Step 2: Heat 1/4-inch olive oil in a large skillet. In the meantime, form spoonfuls of zucchini batter into 3-inch diameter patties using your hands. Once the oil is shimmering, add the patties into the skillet (in batches). While the patties are in the pan, flatten them using a spoon. Fry for about 3 minutes on each side over moderately high heat until browned and crispy, turning once. If needed, add extra oil.

Step 3: On paper towels, drain the fritters. Serve the fritters immediately with some lemon wedges. Enjoy!

Easy Zucchini Ricotta Fritters

Rebecca Servings: 7-8 fritters I was hesitant if can pull this recipe off. Although this is a very easy recipe, I am not sure if the patty will be able to… General Recipes Easy Zucchini Ricotta Fritters European Print This
Serves: 7-8
Nutrition facts: 200 calories 20 grams fat
Rating: 5.0/5
( 1 voted )

Ingredients

  • 4 tbsp olive oil
  • 1 egg
  • 1/3 c. ricotta drained
  • 2 medium zucchini washed and thinly cut into sticks
  • 1/2 to 1 c panko breadcrumb depending on the consistency of your ricotta
  • lemon zest from a lemon
  • salt and pepper to taste

Instructions

Step 1: Place the zucchini (that you cut into sticks) along with ricotta, egg, lemon zest, and 1 tsp each of salt and pepper in a large bowl. Mix well before adding the breadcrumbs. Mix again until the breadcrumbs are just blended. Place the batter in the fridge for about 20 minutes to rest.

Step 2: Heat 1/4-inch olive oil in a large skillet. In the meantime, form spoonfuls of zucchini batter into 3-inch diameter patties using your hands. Once the oil is shimmering, add the patties into the skillet (in batches). While the patties are in the pan, flatten them using a spoon. Fry for about 3 minutes on each side over moderately high heat until browned and crispy, turning once. If needed, add extra oil.

Step 3: On paper towels, drain the fritters. Serve the fritters immediately with some lemon wedges. Enjoy!

June 8, 2022 0 comment
0 FacebookTwitterPinterestEmail
General Recipes

Slow Cooker Mongolian Beef

by Rebecca June 8, 2022
written by Rebecca

Prep Time: 10 mins | Cook Time: 3 hrs | Total Time: 3 hrs 10 mins | Servings: 5

Slow cooker recipes are for keeps! They make life easier for working moms like myself. I have tried lots of slow cooker recipes and I already have my favorites. One of them is this slow cooker Mongolian Beef. It’s made with only a few simple ingredients and guarantees the best weeknight meal perfect any time! The flank steak is cooked with garlic, ginger, brown sugar, and soy sauce in your trust crock pot. It’s so simple to throw together and never fails to impress everyone around the dinner table. Prep this in minutes and go home to an amazing meal.

This slow-cooker version of the ever-popular Chinese takeout is a must-try! Enjoy a restaurant-quality meal at home with this savory Mongolian Beef. Serve this over rice alongside your favorite steamed veggies such as broccoli or asparagus for a filling meal excellent even on your busiest days.

Make sure to give this slow cooker Mongolian Beef a try very soon. It’s crazy good, easy to whip up, a no-fuss, and for keeps!

INGREDIENTS

1 tsp minced garlic

1 1/2 lbs flank steak thinly sliced against the grain

1 tbsp toasted sesame oil

1/2 c. low sodium soy sauce

1/2 c. water

1 tsp minced ginger

1/3 c. brown sugar

1/2 c. green onions, cut into 1/2” pieces

1/4 c. cornstarch

How to make Slow Cooker Mongolian Beef

Step 1: In a bowl, place the flank steak. Add the cornstarch and toss to evenly coat the meat. To your slow cooker, add the flank steak, then add the sesame oil, garlic, ginger, soy sauce, brown sugar, and water. Stir well and make sure to coat the meat in the sauce.

Step 2: Put the lid on and set to cook for 2 to 3 hours on HIGH or 4 to 5 hours on LOW.

Step 3: Before serving, stir in the green onions. Enjoy!

NUTRITION FACTS:

Calories: 308 kcal | Carbohydrates: 23g | Protein: 30g | Fat: 9g | Saturated Fat: 3g | Cholesterol: 81mg | Sodium: 629mg | Potassium: 557mg | Sugar: 14g | Vitamin A: 100IU | Vitamin C: 1.9mg | Calcium: 52mg | Iron: 2.9mg

Slow Cooker Mongolian Beef

Rebecca Prep Time: 10 mins | Cook Time: 3 hrs | Total Time: 3 hrs 10 mins | Servings: 5 Slow cooker recipes are for keeps! They make life easier for… General Recipes Slow Cooker Mongolian Beef European Print This
Serves: 5 Prep Time: 10 mins Cooking Time: 3 hrs 3 hrs
Nutrition facts: 308 calories 9 fat
Rating: 5.0/5
( 1 voted )

Ingredients

  • 1 tsp minced garlic
  • 1 1/2 lbs flank steak thinly sliced against the grain
  • 1 tbsp toasted sesame oil
  • 1/2 c. low sodium soy sauce
  • 1/2 c. water
  • 1 tsp minced ginger
  • 1/3 c. brown sugar
  • 1/2 c. green onions, cut into 1/2” pieces
  • 1/4 c. cornstarch

Instructions

Step 1: In a bowl, place the flank steak. Add the cornstarch and toss to evenly coat the meat. To your slow cooker, add the flank steak, then add the sesame oil, garlic, ginger, soy sauce, brown sugar, and water. Stir well and make sure to coat the meat in the sauce.

Step 2: Put the lid on and set to cook for 2 to 3 hours on HIGH or 4 to 5 hours on LOW.

Step 3: Before serving, stir in the green onions. Enjoy!

June 8, 2022 0 comment
0 FacebookTwitterPinterestEmail
General Recipes

Easy Zucchini Puffs

by Rebecca June 7, 2022
written by Rebecca

Prep Time: 15 mins | Cook Time: 20 mins | Total Time: 35 mins | Yield: 24 mini zucchini puffs

I never run out of zucchini because of my min garden at the back of my tiny house. I always have a bountiful zucchini so I always look for recipes to use them. One of the best recipes I was lucky to find is this easy zucchini puff. These delectable puffs are filled with cheese, grated zucchini, and a tasty combination of spices. They are light and airy and best serve as an appetizer for your next family gathering or any occasion! These delicious zucchini puffs are also great to serve as a side dish to grilled steak and more.

Easily throw these zucchini puffs together any time using only a few simple pantry-friendly ingredients in less than thirty-five minutes. And impress everyone with the best zucchini dish they’ll ever taste!

Ingredients

1 Egg

¾ c. flour

2 teaspoons Italian Seasoning

¾ c. milk

¾ teaspoon baking powder

½ c. shredded cheddar cheese

salt and pepper to taste

1 c. grated zucchini

How to make Easy Zucchini Puffs

Zucchini:

Step 1: Grate the zucchini. Wrap the grated zucchini in a clean towel and start squeezing the excess water.

To Prepare the Puffs:

Step 2: Place the flour, baking powder, and Italian Seasoning in a large bowl. Mix well until combined.

Step 3: Whisk the egg with the milk in a different bowl. Add the dry ingredients and mix well until blended.

Step 4: To the batter, add the shredded zucchini and cheese. Mix again until well incorporated.

Step 5: Into mini muffin pans that have been greased with non-stick cooking spray, spoon the batter. Place in a preheated 375 degrees oven and bake for about 20 minutes or until the middle is done.

Notes:

For this recipe, you can add your preferred seasonings such as garlic powder.

To the mixture, you can also add some salt and pepper before spooning it into the muffin pan.

Nutrition Facts:

Yield: 24 Serving Size: 1
Amount Per Serving: Calories: 32 | Total Fat: 1g | Saturated Fat: 1g | Trans Fat: 0g | Unsaturated Fat: 0g | Cholesterol: 11mg | Sodium: 38mg | Carbohydrates: 4g | Fiber: 0g | Sugar: 0g | Protein: 2g

Easy Zucchini Puffs

Rebecca Prep Time: 15 mins | Cook Time: 20 mins | Total Time: 35 mins | Yield: 24 mini zucchini puffs I never run out of zucchini because of my min… General Recipes Easy Zucchini Puffs European Print This
Serves: 24 Prep Time: 15 mins Cooking Time: 20 mins 20 mins
Nutrition facts: 32 calories 1 fat
Rating: 5.0/5
( 1 voted )

Ingredients

  • 1 Egg
  • ¾ c. flour
  • 2 teaspoons Italian Seasoning
  • ¾ c. milk
  • ¾ teaspoon baking powder
  • ½ c. shredded cheddar cheese
  • salt and pepper to taste
  • 1 c. grated zucchini

Instructions

Zucchini:

Step 1: Grate the zucchini. Wrap the grated zucchini in a clean towel and start squeezing the excess water.

To Prepare the Puffs:

Step 2: Place the flour, baking powder, and Italian Seasoning in a large bowl. Mix well until combined.

Step 3: Whisk the egg with the milk in a different bowl. Add the dry ingredients and mix well until blended.

Step 4: To the batter, add the shredded zucchini and cheese. Mix again until well incorporated.

Step 5: Into mini muffin pans that have been greased with non-stick cooking spray, spoon the batter. Place in a preheated 375 degrees oven and bake for about 20 minutes or until the middle is done.

Notes

For this recipe, you can add your preferred seasonings such as garlic powder. To the mixture, you can also add some salt and pepper before spooning it into the muffin pan.

June 7, 2022 0 comment
0 FacebookTwitterPinterestEmail
Newer Posts
Older Posts

Popular Posts

  • 1

    Crispy Crunchy Parmesan Potatoes

    March 21, 2020
  • 2

    CROCK POT SMOTHERED PORK CHOPS

    March 21, 2020
  • Facebook
  • Twitter

@2019 - All Right Reserved.


Back To Top