Cook it once
  • Home
  • Privacy Policy
  • Recipes
    • KETO
    • LC
    • WW
  • Tips
  • Contact
Cook it once
  • Home
  • Privacy Policy
  • Recipes
    • KETO
    • LC
    • WW
  • Tips
  • Contact
Category:

General Recipes

General Recipes

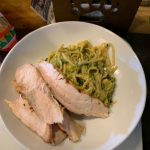
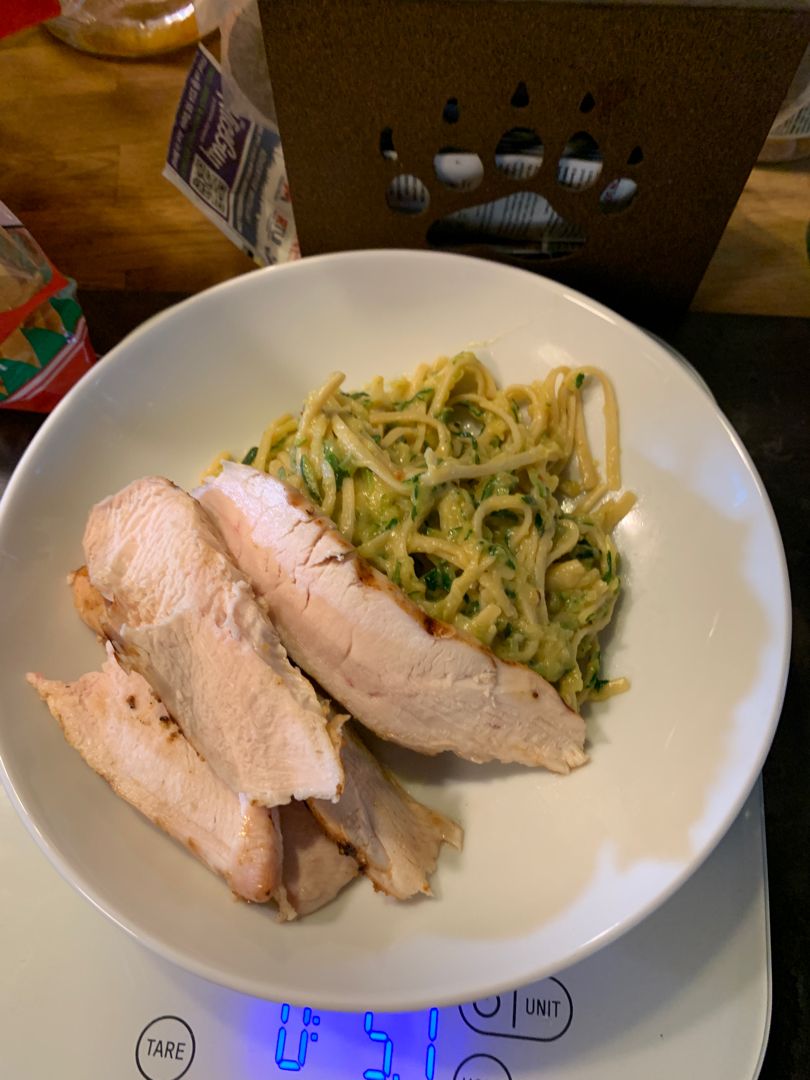
Smitten Kitchen’s Zucchini Butter Spaghetti

by Rebecca August 20, 2022
written by Rebecca

Prep time: 10 mins | Cook time: 20 mins | Serves: 2

Rich, buttery, and luscious! I can only describe this Smitten Kitchen’s Zucchini Butter Spaghetti as magical. No cream is involved, yet because of the zucchini that turns into a sauce, this dish is rather creamy. To make this dish you just need a few simple ingredients. Easily throw everything together and you’ll have this delicious, slurpable with a velvety texture and unexpectedly cheesy dish ready in about thirty minutes.

INGREDIENTS

1 1/4 pounds zucchini, trimmed and coarsely grated

8 ounces spaghetti

1 c. pasta water, reserved

4 garlic cloves, minced

6 tbsp unsalted butter

1/4 tsp red pepper flakes

1/4 c. fresh basil, cut into ribbons

1 1/2 tsp kosher salt

1/2 c. Parmesan cheese, freshly grated

How to make Smitten Kitchen’s Zucchini Butter Spaghetti

Step 1: A minute less than the package directions, cook the spaghetti in a large pot of salted boiling water. Set aside 1 c. of pasta water and drain the rest. Set aside.

Step 2: Melt the butter in a skillet over medium-high heat. Once the butter has melted, add the garlic to the skillet and cook for a minute. Then, stir in the zucchini, salt, and red pepper. Continue to cook for an additional 13 to 15 minutes, stirring often, until the zucchini liquid has been cooked off.

Step 3: Using the edges of a spatula, stir for another 2 minutes, breaking/chopping the mixture down into an almost spreadable consistency.

Step 4: To the skillet, add half a cup of the reserved pasta water along with the drained pasta. Toss and cook for 2 minutes more.

Step 5: Pull the zucchini sauce using tongs throughout the pasta strands. To loosen the mixture, add more water as needed.

Step 6: Stir in half of the Parmesan and basil. To a serving dish, transfer everything and sprinkle the rest of the Parmesan and basil on top. Serve right away. Enjoy!
Smitten Kitchen's Zucchini Butter Spaghetti

Rebecca Prep time: 10 mins | Cook time: 20 mins | Serves: 2 Rich, buttery, and luscious! I can only describe this Smitten Kitchen’s Zucchini Butter Spaghetti as magical. No cream… General Recipes Smitten Kitchen’s Zucchini Butter Spaghetti European Print This
Serves: 2 Prep Time: 10 mins Cooking Time: 20 mins 20 mins
Nutrition facts: 200 calories 20 grams fat
Rating: 5.0/5
( 1 voted )

Ingredients

  • 1 1/4 pounds zucchini, trimmed and coarsely grated
  • 8 ounces spaghetti
  • 1 c. pasta water, reserved
  • 4 garlic cloves, minced
  • 6 tbsp unsalted butter
  • 1/4 tsp red pepper flakes
  • 1/4 c. fresh basil, cut into ribbons
  • 1 1/2 tsp kosher salt
  • 1/2 c. Parmesan cheese, freshly grated

Instructions

Step 1: A minute less than the package directions, cook the spaghetti in a large pot of salted boiling water. Set aside 1 c. of pasta water and drain the rest. Set aside.

Step 2: Melt the butter in a skillet over medium-high heat. Once the butter has melted, add the garlic to the skillet and cook for a minute. Then, stir in the zucchini, salt, and red pepper. Continue to cook for an additional 13 to 15 minutes, stirring often, until the zucchini liquid has been cooked off.

Step 3: Using the edges of a spatula, stir for another 2 minutes, breaking/chopping the mixture down into an almost spreadable consistency.

Step 4: To the skillet, add half a cup of the reserved pasta water along with the drained pasta. Toss and cook for 2 minutes more.

Step 5: Pull the zucchini sauce using tongs throughout the pasta strands. To loosen the mixture, add more water as needed.

Step 6: Stir in half of the Parmesan and basil. To a serving dish, transfer everything and sprinkle the rest of the Parmesan and basil on top. Serve right away. Enjoy!

August 20, 2022 0 comment
0 FacebookTwitterPinterestEmail
General Recipes

Homemade Chicken and Dumplings – It’s Easy. Really.

by Rebecca August 20, 2022
written by Rebecca

One of my favorite comforting meals is a bowl of homemade chicken and dumplings. Incredibly easy to make and ready in a breeze. You can easily make this chicken and dumpling from scratch using just six ingredients. I love making these dumplings using floured tortillas. Cut them using a pizza cutter and make sure to drop them one piece at a time. You can even make them a day ahead and just keep them in the fridge. To serve, slowly heat with extra broth.

My family loves this dish. This has been one of the most requested at home. A staple for many years. If you have not tried this easy homemade chicken and dumplings recipe, you are already missing out! So make sure to give this a go soon.

Ingredients

2 tablespoons butter

about 3 c. cooked chicken

2 c. flour

6-8 c. chicken broth

1/2 teaspoon baking powder

about a c. of milk or maybe a bit less

salt to taste

How to make Homemade Chicken and Dumplings

Step 1: Place the flour, baking powder, and salt in a bowl. Mix well until combined. Using a fork or pastry blender, cut the butter. Then, add the milk, whisking using a fork until the dough forms a ball.

Step 2: On a heavily floured work surface, roll the dough using a rolling spin. In flour, dip the cutter and cut the dumplings to about 2 x 2-inch squares.

Step 3: On a heavily floured plate, place the dumplings using. If not cooking right away, layer the dumplings on a cookie sheet with wax paper in between and with loads of flour. Freeze, then transfer to a Ziploc bag.

Step 4: If cooking right away, first bring the broth to a boil. One piece at a time, drop the dumplings. Make sure to stir while adding them to the broth. Cook the dumplings for about 15 to 20 minutes. Then, add the cooked chicken.

Step 5: Serve immediately. Enjoy!

Homemade Chicken and Dumplings – It’s Easy. Really.

Rebecca One of my favorite comforting meals is a bowl of homemade chicken and dumplings. Incredibly easy to make and ready in a breeze. You can easily make this chicken and… General Recipes Homemade Chicken and Dumplings – It’s Easy. Really. European Print This
Nutrition facts: 200 calories 20 grams fat
Rating: 5.0/5
( 1 voted )

Ingredients

  • 2 tablespoons butter
  • about 3 c. cooked chicken
  • 2 c. flour
  • 6-8 c. chicken broth
  • 1/2 teaspoon baking powder
  • about a c. of milk or maybe a bit less
  • salt to taste

Instructions

Step 1: Place the flour, baking powder, and salt in a bowl. Mix well until combined. Using a fork or pastry blender, cut the butter. Then, add the milk, whisking using a fork until the dough forms a ball.

Step 2: On a heavily floured work surface, roll the dough using a rolling spin. In flour, dip the cutter and cut the dumplings to about 2 x 2-inch squares.

Step 3: On a heavily floured plate, place the dumplings using. If not cooking right away, layer the dumplings on a cookie sheet with wax paper in between and with loads of flour. Freeze, then transfer to a Ziploc bag.

Step 4: If cooking right away, first bring the broth to a boil. One piece at a time, drop the dumplings. Make sure to stir while adding them to the broth. Cook the dumplings for about 15 to 20 minutes. Then, add the cooked chicken.

Step 5: Serve immediately. Enjoy!

August 20, 2022 0 comment
0 FacebookTwitterPinterestEmail
General Recipes

Steak Diane

by Rebecca August 19, 2022
written by Rebecca

Yield: 4 servings

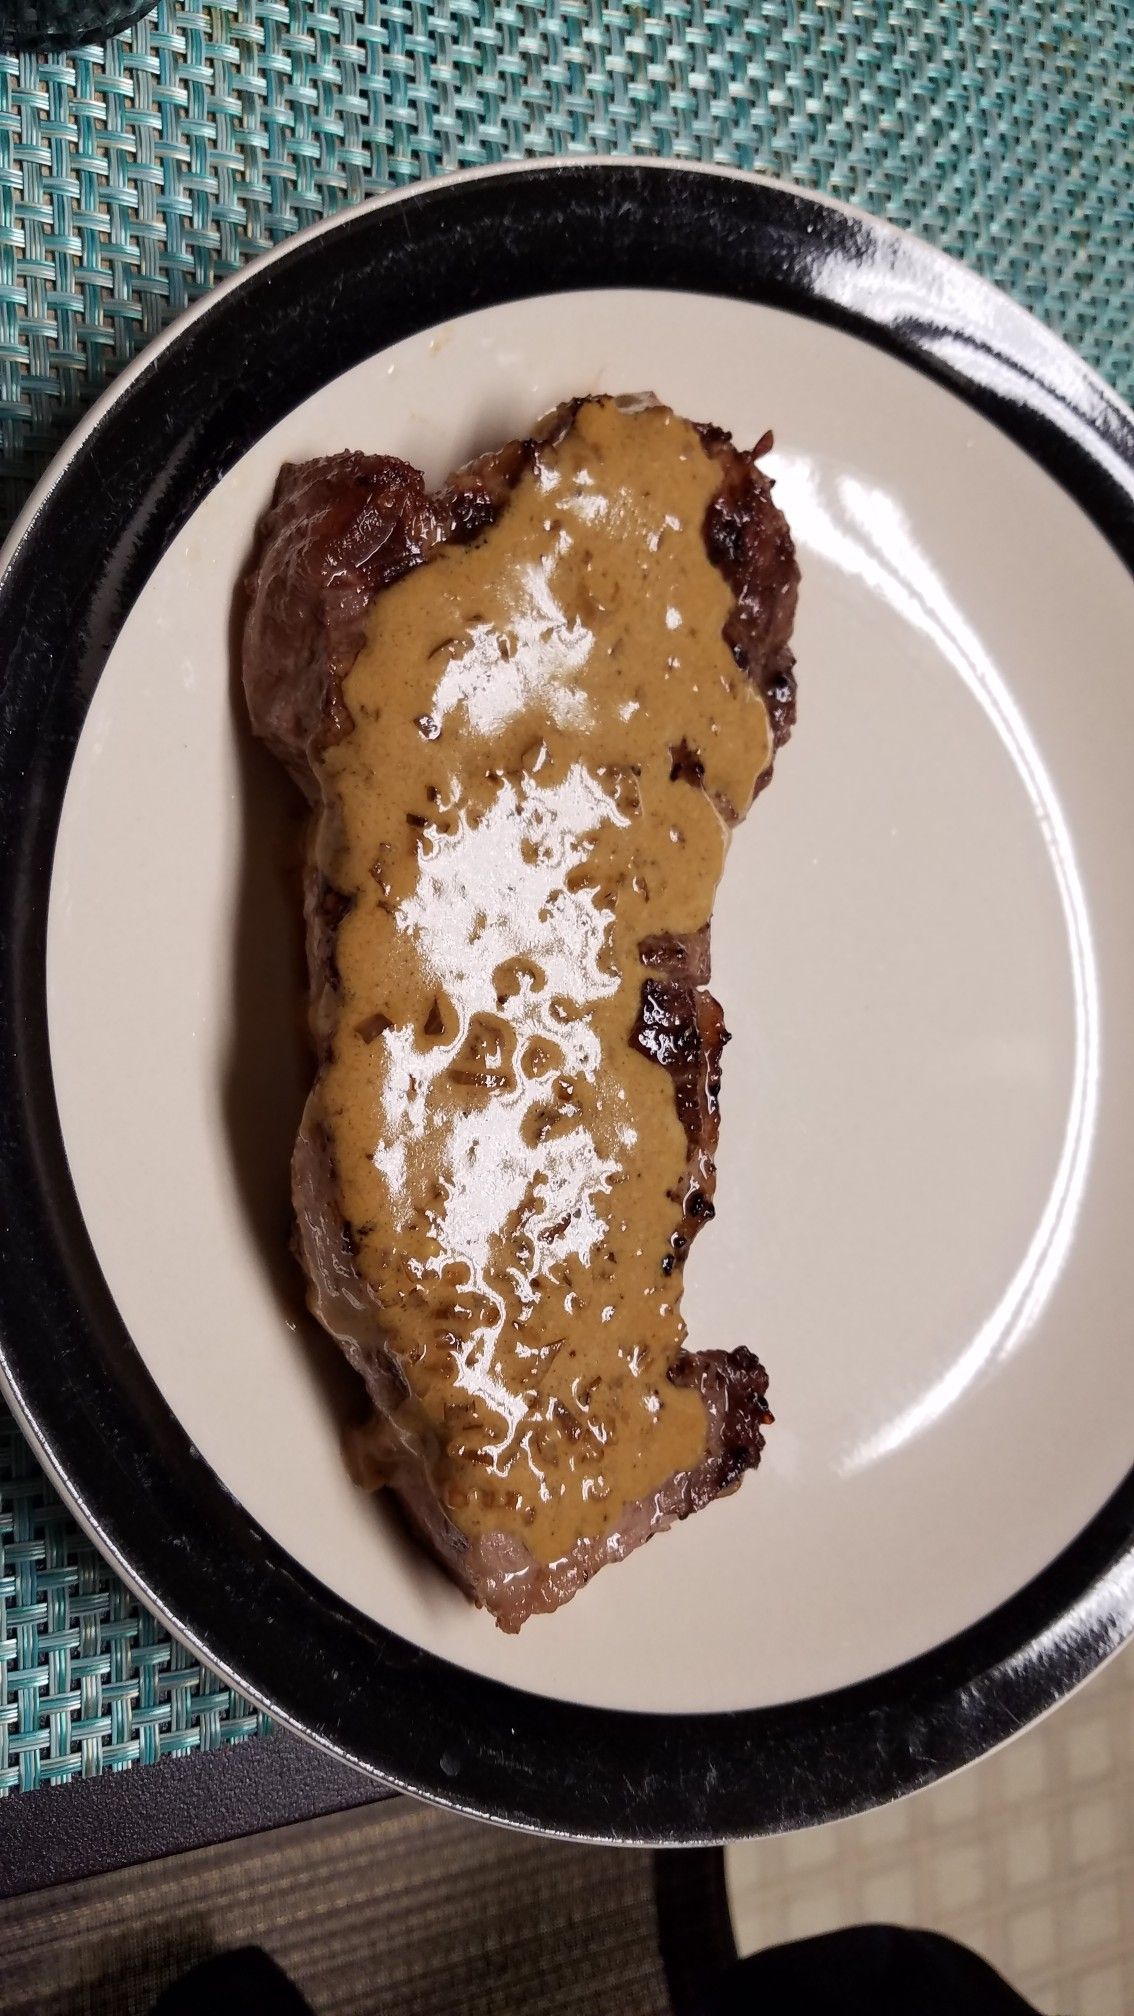
Fantastic pan-fried steak with an impressive sauce made from pan juices and flambeed. A restaurant-quality dish that you can easily make at home. This version is a modern take on this popular 20th-century dish. Absolutely amazing and would definitely blow you away!

Ingredients

4 center-cut beef tenderloin steaks (about 6 ounces each)

2 cloves garlic, minced

4 tsp Worcestershire sauce

1/2 c. beef broth

3 tsp Dijon mustard

3 tbsp unsalted butter

1/2 c. finely minced shallots

4 tbsp brandy

1/3 c. heavy cream

4 ounces oyster mushrooms, sliced

1 tbsp minced parsley

1 tbsp minced chives

salt

Freshly ground black pepper

How to make Steak Diane

Step 1: Combine the broth, Worcestershire sauce, and mustard until well blended and set aside. After pounding the steaks thin, sprinkle both sides with salt and pepper. Set the steaks aside for about 15 to 30 minutes at room temperature.

Step 2: To a skillet, melt 2 tbsp butter over medium-high heat. Using paper towels, pat the steaks dry. Adjust the heat to high and place the steaks in the skillet. Sear for about 1 to 2 minutes, flip and continue to cook the other side. To a cutting board, transfer the steak, cover with foil, and allow them to rest.

Step 3: In the same skillet, saute the shallots over medium-high heat. Then, add the mushrooms along with the garlic and the rest of the butter. Stir well and cook for additional 2 minutes until the mushroom releases its liquid and evaporated. Take the pan off the heat. Pour the brandy into the pan and very carefully light with a match to flame. Cook further, lightly shaking the pan until the flame dies down.

Step 4: Whisk in the broth mixture. Bring it to a boil while stirring often and cook for about 2 to 3 minutes until the mixture has thickened. Add the cream and the steaks with any accumulated juices. Stir well and continue to cook, turning the steaks until the sauce has thickened and the steaks are warmed through.

Step 5: To serve plates, transfer the steaks. Into the sauce, stir in the parsley and chives. Over the steak, pour the sauce. Serve right away. Enjoy!
Steak Diane

Rebecca Yield: 4 servings Fantastic pan-fried steak with an impressive sauce made from pan juices and flambeed. A restaurant-quality dish that you can easily make at home. This version is a… General Recipes Steak Diane European Print This
Serves: 4
Nutrition facts: 200 calories 20 grams fat
Rating: 5.0/5
( 1 voted )

Ingredients

  • 4 center-cut beef tenderloin steaks (about 6 ounces each)
  • 2 cloves garlic, minced
  • 4 tsp Worcestershire sauce
  • 1/2 c. beef broth
  • 3 tsp Dijon mustard
  • 3 tbsp unsalted butter
  • 1/2 c. finely minced shallots
  • 4 tbsp brandy
  • 1/3 c. heavy cream
  • 4 ounces oyster mushrooms, sliced
  • 1 tbsp minced parsley
  • 1 tbsp minced chives
  • salt
  • Freshly ground black pepper

Instructions

Step 1: Combine the broth, Worcestershire sauce, and mustard until well blended and set aside. After pounding the steaks thin, sprinkle both sides with salt and pepper. Set the steaks aside for about 15 to 30 minutes at room temperature.

Step 2: To a skillet, melt 2 tbsp butter over medium-high heat. Using paper towels, pat the steaks dry. Adjust the heat to high and place the steaks in the skillet. Sear for about 1 to 2 minutes, flip and continue to cook the other side. To a cutting board, transfer the steak, cover with foil, and allow them to rest.

Step 3: In the same skillet, saute the shallots over medium-high heat. Then, add the mushrooms along with the garlic and the rest of the butter. Stir well and cook for additional 2 minutes until the mushroom releases its liquid and evaporated. Take the pan off the heat. Pour the brandy into the pan and very carefully light with a match to flame. Cook further, lightly shaking the pan until the flame dies down.

Step 4: Whisk in the broth mixture. Bring it to a boil while stirring often and cook for about 2 to 3 minutes until the mixture has thickened. Add the cream and the steaks with any accumulated juices. Stir well and continue to cook, turning the steaks until the sauce has thickened and the steaks are warmed through.

Step 5: To serve plates, transfer the steaks. Into the sauce, stir in the parsley and chives. Over the steak, pour the sauce. Serve right away. Enjoy!
August 19, 2022 0 comment
0 FacebookTwitterPinterestEmail
General Recipes

Fiesta Chicken Casserole

by Rebecca August 19, 2022
written by Rebecca

Total time: 30 mins | Serves: 6

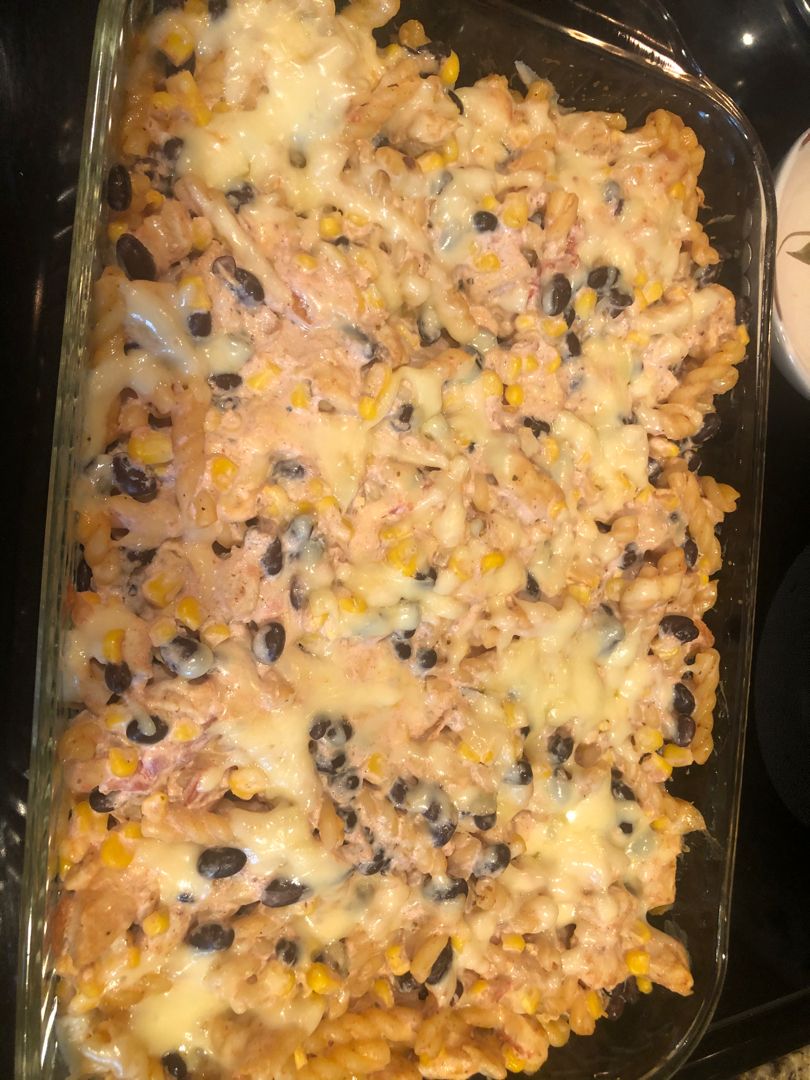
I love a hot and bubbly casserole like this Fiesta Chicken Casserole. It is incredibly easy to make and ready in no more than thirty minutes. The best part is there is no pre-cooking required! This casserole is my kind of comfort food. It is a complete meal in one, delicious, and super filling.

You can easily make this casserole any time. I love this kind because it does not have a lot of prep involved. A dump-and-bake-kind-of-casserole. All you need is to stir everything and make sure to generously season. Tent the dish with foil and pop it in the hot oven. Before you know it, dinner is served! Enjoy a zesty, creamy, and scrumptiously filling weeknight dinner like you are throwing a fiesta at home.

INGREDIENTS

1 c. instant rice

3 c. cooked chicken, shredded

2 tbsp taco seasoning

2 c. Monterey Jack cheese, grated and divided

2 tbsp milk

1 c. sour cream

1/2 c. corn kernels

1 (10 ounces) can Ro-tel, do not drain

Fresh cilantro, chopped, for garnish

1/2 c. black beans, drained

How to make Fiesta Chicken Casserole

Step 1: Prepare the oven. Preheat it to 350 degrees F. Using a nonstick spray, grease a 9 x 9-inch baking dish and set aside.

Step 2: Place the chicken, Ro-Tel, rice, 1 1/2 cups of cheese, sour cream, taco seasoning, milk, corn, and black beans in a large bowl. Mix well until combined. Pour this into the baking dish and sprinkle the rest of the cheese on top.

Step 3: Tightly cover the dish with foil and place it in the preheated oven. Bake for about 20 minutes. Remove the cover and resume baking for another 5 to 10 minutes or until the cheese has melted and bubbly.

Step 4: Remove from the oven when done and allow the casserole to sit for about 5 minutes before serving.

Fiesta Chicken Casserole

Rebecca Total time: 30 mins | Serves: 6 I love a hot and bubbly casserole like this Fiesta Chicken Casserole. It is incredibly easy to make and ready in no more… General Recipes Fiesta Chicken Casserole European Print This
Serves: 6
Nutrition facts: 200 calories 20 grams fat
Rating: 5.0/5
( 1 voted )

Ingredients

  • 1 c. instant rice
  • 3 c. cooked chicken, shredded
  • 2 tbsp taco seasoning
  • 2 c. Monterey Jack cheese, grated and divided
  • 2 tbsp milk
  • 1 c. sour cream
  • 1/2 c. corn kernels
  • 1 (10 ounces) can Ro-tel, do not drain
  • Fresh cilantro, chopped, for garnish
  • 1/2 c. black beans, drained

Instructions

Step 1: Prepare the oven. Preheat it to 350 degrees F. Using a nonstick spray, grease a 9 x 9-inch baking dish and set aside.

Step 2: Place the chicken, Ro-Tel, rice, 1 1/2 cups of cheese, sour cream, taco seasoning, milk, corn, and black beans in a large bowl. Mix well until combined. Pour this into the baking dish and sprinkle the rest of the cheese on top.

Step 3: Tightly cover the dish with foil and place it in the preheated oven. Bake for about 20 minutes. Remove the cover and resume baking for another 5 to 10 minutes or until the cheese has melted and bubbly.

Step 4: Remove from the oven when done and allow the casserole to sit for about 5 minutes before serving.

August 19, 2022 0 comment
0 FacebookTwitterPinterestEmail
General Recipes

Chicken Kiev

by Rebecca August 19, 2022
written by Rebecca

Total time: 45 mins | Serves: 6

No more bland and dried-out chicken with this easy recipe. This fantastic Chicken Kiev is lush, cheesy, crispy, and absolutely bursting with rich and flavorful garlic butter! A show stealer! For a simple weeknight dinner, pair this delicious Chicken Kiev with mashed potatoes and your favorite veggies.

INGREDIENTS

1/2 c (1 stick) unsalted butter, softened

6 boneless, skinless chicken breasts

3/4 c panko or seasoned bread crumbs

1 c all-purpose flour

1/4 c. Parmesan cheese, grated

3 eggs, beaten

2 cloves garlic, minced

1/4 c. fresh parsley, minced

1 lemon, juiced

kosher salt and freshly ground pepper, to taste

vegetable oil, as needed, for frying

How to make Chicken Kiev

Step 1: Prepare the oven. Preheat it to 350 degrees F.

Step 2: Place the butter, parsley, garlic, and lemon juice in a medium bowl or mixer. Generously season with salt and pepper. Mix well until combined.

Step 3: Into a log, roll the butter. Tightly wrap in plastic wrap and place in the fridge to chill.

Step 4: Between two sheets of plastic wrap or parchment paper, place the chicken breasts and pound them into 1/4-inch thickness.

Step 5: In the middle of each flattened chicken breast, place a cube of butter. Fold in the sides and seal with a toothpick.

Step 6: In a large pot or Dutch oven, heat 2 to 3 inches of vegetable oil over medium-high heat.

Step 7: In the meantime, set up and assemble your workstation. In a bowl, place the flour. In another bowl, beat the eggs. And in a third bowl, mix the panko and Parmesan.

Step 8: In flour, dredge each chicken pocket. Shake the excess off, then dip in the egg wash. Transfer the chicken pocket to the panko cheese mixture, pressing the chicken firmly.

Step 9: Place the chicken into the hot oil and cook until all sides are golden brown. To a paper paper-lined plate, transfer the chicken pocket. Do the same with the rest of the chicken breasts.

Step 10: Bake the chicken pockets in the preheated oven for about 15 to 18 minutes or until completely cooked.

Step 11: Serve the Chicken Kiev immediately with mashed potatoes and veggies. Enjoy!

Chicken Kiev

Rebecca Total time: 45 mins | Serves: 6 No more bland and dried-out chicken with this easy recipe. This fantastic Chicken Kiev is lush, cheesy, crispy, and absolutely bursting with rich… General Recipes Chicken Kiev European Print This
Serves: 6
Nutrition facts: 200 calories 20 grams fat
Rating: 5.0/5
( 1 voted )

Ingredients

  • 1/2 c (1 stick) unsalted butter, softened
  • 6 boneless, skinless chicken breasts
  • 3/4 c panko or seasoned bread crumbs
  • 1 c all-purpose flour
  • 1/4 c. Parmesan cheese, grated
  • 3 eggs, beaten
  • 2 cloves garlic, minced
  • 1/4 c. fresh parsley, minced
  • 1 lemon, juiced
  • kosher salt and freshly ground pepper, to taste
  • vegetable oil, as needed, for frying

Instructions

Step 1: Prepare the oven. Preheat it to 350 degrees F.

Step 2: Place the butter, parsley, garlic, and lemon juice in a medium bowl or mixer. Generously season with salt and pepper. Mix well until combined.

Step 3: Into a log, roll the butter. Tightly wrap in plastic wrap and place in the fridge to chill.

Step 4: Between two sheets of plastic wrap or parchment paper, place the chicken breasts and pound them into 1/4-inch thickness.

Step 5: In the middle of each flattened chicken breast, place a cube of butter. Fold in the sides and seal with a toothpick.

Step 6: In a large pot or Dutch oven, heat 2 to 3 inches of vegetable oil over medium-high heat.

Step 7: In the meantime, set up and assemble your workstation. In a bowl, place the flour. In another bowl, beat the eggs. And in a third bowl, mix the panko and Parmesan.

Step 8: In flour, dredge each chicken pocket. Shake the excess off, then dip in the egg wash. Transfer the chicken pocket to the panko cheese mixture, pressing the chicken firmly.

Step 9: Place the chicken into the hot oil and cook until all sides are golden brown. To a paper paper-lined plate, transfer the chicken pocket. Do the same with the rest of the chicken breasts.

Step 10: Bake the chicken pockets in the preheated oven for about 15 to 18 minutes or until completely cooked.

Step 11: Serve the Chicken Kiev immediately with mashed potatoes and veggies. Enjoy!

August 19, 2022 0 comment
0 FacebookTwitterPinterestEmail
General Recipes

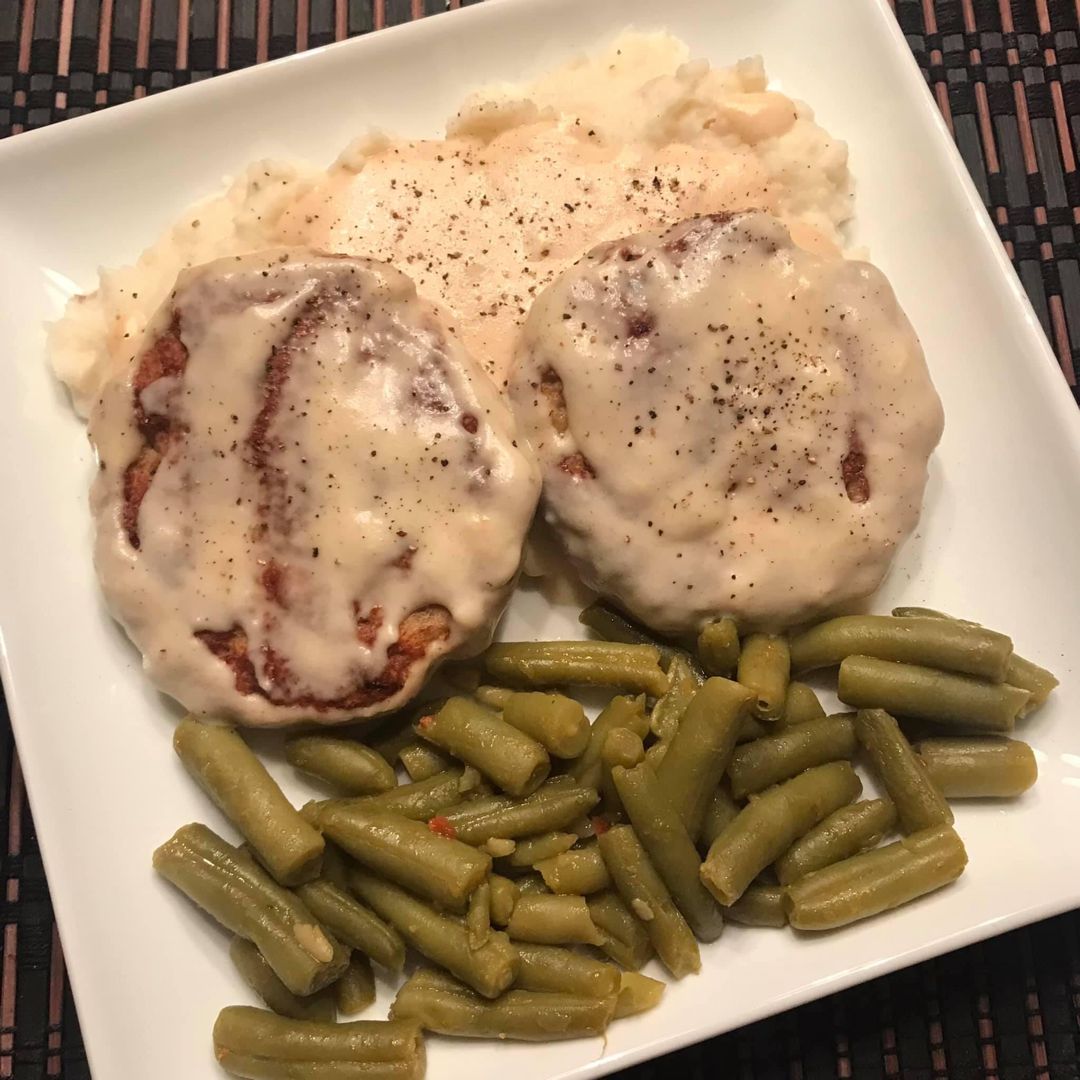
Amish Country Poor Man’s Hamburger Steaks

by Rebecca August 19, 2022
written by Rebecca

Total time: 45 mins | Serves: 6-8

This Amish Country Poor Man’s Hamburger Steaks recipe is another classic. It’s an excellent family dinner idea with flavor-packed pan-fried hamburger steaks, covered in a simple gravy, then baked to perfection. For an easy, filling meal, pair these hamburger steaks with mashed potatoes, your favorite veggies, or salad.

INGREDIENTS

1 1/2 c. saltine crackers, crushed (1 sleeve of crackers, roughly)

2 lbs ground beef

1 c. whole milk

1/4 tsp cayenne

1/2 tsp garlic powder

1/2 tsp Italian seasoning

1/2 tsp onion powder

kosher salt and freshly ground pepper, to taste

all-purpose flour, for dredging

Gravy:

1 1/2 c. whole milk

1 1/2 tbsp fresh parsley, finely chopped

2 (10.75 ounces) cans of condensed cream of mushroom soup

How to make Amish Country Poor Man’s Hamburger Steaks

Step 1: Prepare the oven. Preheat it to 350 degrees F. Using a non-stick spray, grease a 9 x 13-inch baking dish.

Step 2: Place the condensed cream of mushroom soup and whole milk in a medium bowl. Mix well until combined, then whisk in the freshly chopped parsley. Set aside.

Step 3: Place the ground beef, crushed saltines, milk, Italian seasoning, garlic and onion powders, and cayenne in another large bowl. Generously season with salt and pepper. Combine everything using two forks or your hands until just mixed. Then, gently shape the mixture into even-sized patties.

Step 4: In a shallow dish, place 1 c. all-purpose flour. Coat all the patties in the flour.

Step 5: On medium-high, heat a large skillet. Place the patties in the skillet once the oil is very hot and sear until both sides are golden brown. I suggest working in batches to avoid overcrowding the skillet.

Step 6: To the prepared baking dish, transfer the browned patties and top with the gravy. Tent the dish with aluminium foil and place it in the preheated oven. Bake the patties for about 30 to 40 minutes or until completely cooked.

Amish Country Poor Man’s Hamburger Steaks

Rebecca Total time: 45 mins | Serves: 6-8 This Amish Country Poor Man’s Hamburger Steaks recipe is another classic. It’s an excellent family dinner idea with flavor-packed pan-fried hamburger steaks, covered… General Recipes Amish Country Poor Man’s Hamburger Steaks European Print This
Serves: 6-8
Nutrition facts: 200 calories 20 grams fat
Rating: 5.0/5
( 1 voted )

Ingredients

  • 1 1/2 c. saltine crackers, crushed (1 sleeve of crackers, roughly)
  • 2 lbs ground beef
  • 1 c. whole milk
  • 1/4 tsp cayenne
  • 1/2 tsp garlic powder
  • 1/2 tsp Italian seasoning
  • 1/2 tsp onion powder
  • kosher salt and freshly ground pepper, to taste
  • all-purpose flour, for dredging
  • Gravy:
  • 1 1/2 c. whole milk
  • 1 1/2 tbsp fresh parsley, finely chopped
  • 2 (10.75 ounces) cans of condensed cream of mushroom soup

Instructions

Step 1: Prepare the oven. Preheat it to 350 degrees F. Using a non-stick spray, grease a 9 x 13-inch baking dish.

Step 2: Place the condensed cream of mushroom soup and whole milk in a medium bowl. Mix well until combined, then whisk in the freshly chopped parsley. Set aside.

Step 3: Place the ground beef, crushed saltines, milk, Italian seasoning, garlic and onion powders, and cayenne in another large bowl. Generously season with salt and pepper. Combine everything using two forks or your hands until just mixed. Then, gently shape the mixture into even-sized patties.

Step 4: In a shallow dish, place 1 c. all-purpose flour. Coat all the patties in the flour.

Step 5: On medium-high, heat a large skillet. Place the patties in the skillet once the oil is very hot and sear until both sides are golden brown. I suggest working in batches to avoid overcrowding the skillet.

Step 6: To the prepared baking dish, transfer the browned patties and top with the gravy. Tent the dish with aluminium foil and place it in the preheated oven. Bake the patties for about 30 to 40 minutes or until completely cooked.

August 19, 2022 0 comment
0 FacebookTwitterPinterestEmail
General Recipes

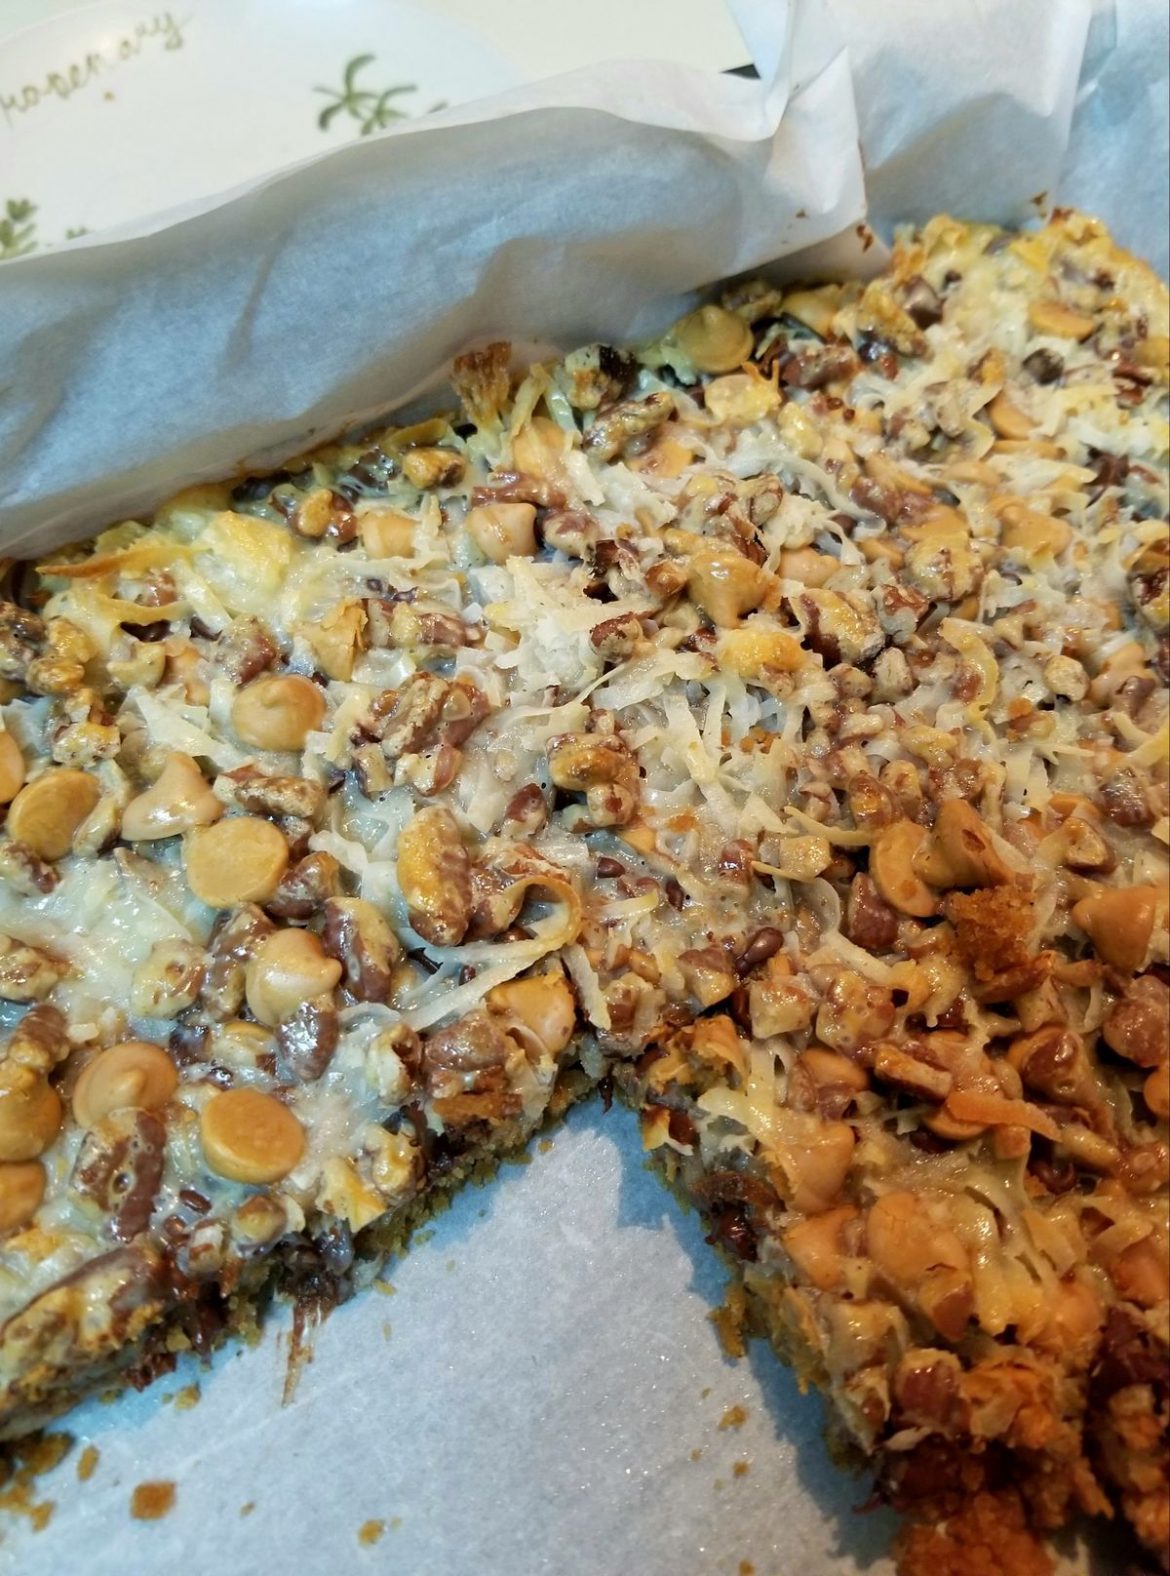
Seven Layer Cookie Bars Recipe

by Rebecca August 19, 2022
written by Rebecca

Prep Time: 5 mins | Cook Time: 30 mins | Total Time: 35 mins | Yield: 24 bars

This Seven Layer Cookie Bars recipe is a pretty easy, no-fuss recipe that you can make any time of the year. These bars are made with graham cracker crust topped with coconut, pecans, chocolate, and butterscotch. It is the ultimate dessert. What I like most about this recipe is you can easily swap the ingredients. If you do not like butterscotch, you can use caramel morsels, white chocolate chips, or M&M’s candy instead. You can also bake a big batch and simply cut them into squares. Keep the cookie bars in an airtight container at room temperature. I like these bars chilled so I store them in the fridge. These cookie bars will stay fresh for up to 7 days when refrigerated. You can even freeze these cookie bars. Place them in a freezer-safe Ziplock bag or container and store them in the freezer for up to 3 months. Before serving, thaw them in the fridge or at room temperature overnight.

Ingredients

½ c. unsalted butter, melted

1 ½ c graham cracker crumbs (12 full-size crackers)

1 c. semi-sweet chocolate chips

1 c. shredded, sweetened coconut

1 c. butterscotch morsels

1 can sweeten condensed milk

½ c. pecan chips (or chopped pecans)

How to make Seven Layer Cookie Bars

Step 1: Prepare the oven. Preheat it to 350 degrees. Using the parchment paper, line a 13 x 9-inch baking dish and set it aside.

Step 2: In a food processor, process the graham crackers until fine crumbs. Add the melted butter and mix well using a fork until you have a crumbly mixture.

Step 3: Into the bottom of the prepared baking pan, press the crumbs. On top, add the chocolate chips, butterscotch morsels, coconut, and pecans. Then, pour the sweetened condensed milk on top.

Step 4: Place in the preheated oven and bake for about 25 to 30 minutes or until golden brown. When done, take the cookie bars out and allow them to cool completely. You can keep these in the fridge or store them in an airtight container at room temperature.

Nutrition Facts:

Yield: 24, Serving Size: 1
Amount Per Serving: Calories: 171 | Total Fat: 10g | Saturated Fat: 5g | Trans Fat: 0g | Unsaturated Fat: 4g | Cholesterol: 12mg | Sodium: 81mg | Carbohydrates: 21g | Fiber: 1g | Sugar: 15g | Protein: 1g

Seven Layer Cookie Bars Recipe

Rebecca Prep Time: 5 mins | Cook Time: 30 mins | Total Time: 35 mins | Yield: 24 bars This Seven Layer Cookie Bars recipe is a pretty easy, no-fuss recipe… General Recipes Seven Layer Cookie Bars Recipe European Print This
Serves: 24 Prep Time: 5 mins Cooking Time: 30 mins 30 mins
Nutrition facts: 171 calories 10 fat
Rating: 5.0/5
( 1 voted )

Ingredients

  • ½ c. unsalted butter, melted
  • 1 ½ c graham cracker crumbs (12 full-size crackers)
  • 1 c. semi-sweet chocolate chips
  • 1 c. shredded, sweetened coconut
  • 1 c. butterscotch morsels
  • 1 can sweeten condensed milk
  • ½ c. pecan chips (or chopped pecans)

Instructions

Step 1: Prepare the oven. Preheat it to 350 degrees. Using the parchment paper, line a 13 x 9-inch baking dish and set it aside.

Step 2: In a food processor, process the graham crackers until fine crumbs. Add the melted butter and mix well using a fork until you have a crumbly mixture.

Step 3: Into the bottom of the prepared baking pan, press the crumbs. On top, add the chocolate chips, butterscotch morsels, coconut, and pecans. Then, pour the sweetened condensed milk on top.

Step 4: Place in the preheated oven and bake for about 25 to 30 minutes or until golden brown. When done, take the cookie bars out and allow them to cool completely. You can keep these in the fridge or store them in an airtight container at room temperature.

August 19, 2022 0 comment
0 FacebookTwitterPinterestEmail
General Recipes

CHICKEN ENCHILADAS WITH SOUR CREAM WHITE SAUCE

by Rebecca August 19, 2022
written by Rebecca

Prep time: 20 mins | Cook time: 30 mins | Total time: 50 mins | Servings: 10 enchiladas

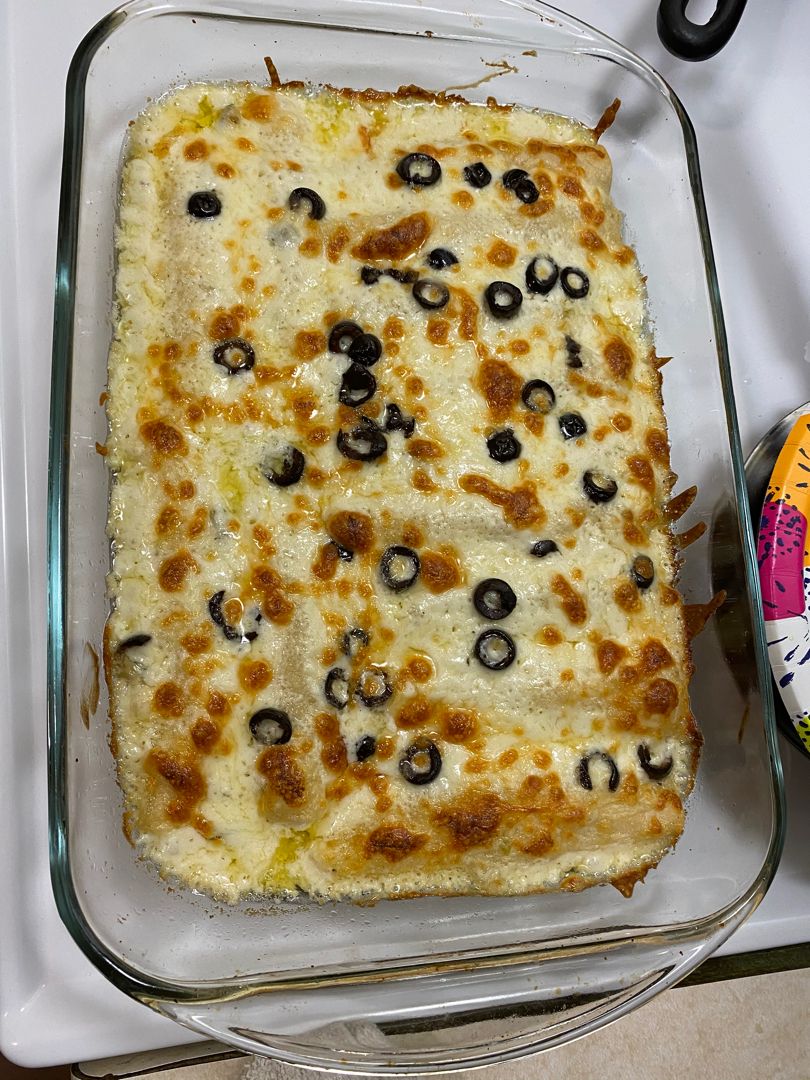
I love enchiladas and this chicken enchiladas with sour cream white sauce are nothing short. This has loads of melted cheese on top. These enchiladas are the creamiest and one of the best enchiladas I have ever made! The best part is, that you can easily make this anytime. And this is also excellent for meal prep as you can whip this up a few days ahead.

Ingredients

16 oz. sour cream

10 flour tortillas

4 oz. canned diced green chiles

5 c. cooked chicken, shredded

10.5 oz. canned cream of chicken soup

1 c. shredded cheddar cheese

2 c. shredded Monterey Jack cheese

HOW TO MAKE CHICKEN ENCHILADAS WITH SOUR CREAM WHITE SAUCE

Step 1: Prepare the oven. Preheat it to 350 degrees F. In the warm oven, soften the tortillas. Whisk the soup, sour cream, and chiles until well blended.

Step 2: With half c chicken, fill each tortilla. Drizzle 2 tbsp each of the sauce and sprinkle with Monterey Jack cheese. Roll the tortilla up one at a time and place them in the baking dish. Do this for the rest of the tortillas.

Step 3: Cover the tortillas with the rest of the sauce and sprinkle the rest of the Monterey Jack cheese on top followed by the cheddar cheese.

Step 4: Tent the dish with foil and place it in the preheated oven. Bake for about 30 minutes.

Step 5: Remove from the oven when done and serve the Chicken Enchiladas with Sour Cream White Sauce immediately. Enjoy!

Tips:

You can prep this a few days in advance and simply keep the stuffed and rolled enchiladas in a covered baking dish. Make sure to store the sauce separately.

The sauce may thicken when chilled and reheated. To fix this, add 1 tbsp of whole milk or chicken stock at a time until you have reached a creamy sauce consistency, making sure to constantly whisk it as you go.

Nutritional Facts:

Calories: 454 kcal, Carbohydrates: 20g, Protein: 30g, Fat: 28g, Cholesterol: 110mg, Sodium: 740mg, Potassium: 327g

CHICKEN ENCHILADAS WITH SOUR CREAM WHITE SAUCE

Rebecca Prep time: 20 mins | Cook time: 30 mins | Total time: 50 mins | Servings: 10 enchiladas I love enchiladas and this chicken enchiladas with sour cream white sauce… General Recipes CHICKEN ENCHILADAS WITH SOUR CREAM WHITE SAUCE European Print This
Serves: 10 Prep Time: 20 mins Cooking Time: 30 mins 30 mins
Nutrition facts: 454 calories 28 fat
Rating: 5.0/5
( 1 voted )

Ingredients

  • 16 oz. sour cream
  • 10 flour tortillas
  • 4 oz. canned diced green chiles
  • 5 c. cooked chicken, shredded
  • 10.5 oz. canned cream of chicken soup
  • 1 c. shredded cheddar cheese
  • 2 c. shredded Monterey Jack cheese

Instructions

Step 1: Prepare the oven. Preheat it to 350 degrees F. In the warm oven, soften the tortillas. Whisk the soup, sour cream, and chiles until well blended.

Step 2: With half c chicken, fill each tortilla. Drizzle 2 tbsp each of the sauce and sprinkle with Monterey Jack cheese. Roll the tortilla up one at a time and place them in the baking dish. Do this for the rest of the tortillas.

Step 3: Cover the tortillas with the rest of the sauce and sprinkle the rest of the Monterey Jack cheese on top followed by the cheddar cheese.

Step 4: Tent the dish with foil and place it in the preheated oven. Bake for about 30 minutes.

Step 5: Remove from the oven when done and serve the Chicken Enchiladas with Sour Cream White Sauce immediately. Enjoy!

Notes

You can prep this a few days in advance and simply keep the stuffed and rolled enchiladas in a covered baking dish. Make sure to store the sauce separately. The sauce may thicken when chilled and reheated. To fix this, add 1 tbsp of whole milk or chicken stock at a time until you have reached a creamy sauce consistency, making sure to constantly whisk it as you go.

August 19, 2022 0 comment
0 FacebookTwitterPinterestEmail
General Recipes

FUNNEL CAKE BITES

by Rebecca August 19, 2022
written by Rebecca

Total prep time: 25 mins | Yield: 30 bites | Servings: 6

These Funnel Cake Bites is a delicious, crunchy fried dough that you can make easily and any time at home. They are an amazing appetizer or side dish. Before serving, cover them with powdered sugar and enjoy with a dipping sauce.

Funnel Cake Bites are a favorite at home. These are particularly popular during summer. These funnel cake bites remind me of the funnel cake truck at our summer carnival. But, instead of standing in a long line of people waiting to be served, I chose to make these delightful Funnel Cake Bites at home. My kids love these and the best part is we can enjoy these delicious Funnel Cake Bites any time of the year!

Ingredients

2 tbsp sugar

2 large eggs

1 ¼ c. whole milk

2 c. all-purpose flour

1 tsp baking powder

4 c. vegetable oil

1 tsp vanilla extract

Powdered sugar, for garnish

¼ tsp kosher salt

HOW TO MAKE FUNNEL CAKE BITES

Step 1: Beat the eggs and sugar in a large bowl until foamy and pale yellow. Add the milk and vanilla extract. Mix well until blended.

Step 2: In another bowl, sift the flour, baking powder, and salt. Into the wet mixture, slowly add the sifted ingredients, mixing until just blended and smooth. Make sure not to over-mix.

Step 3: Add oil to the pot, filling it to about 2 to 3 inches. Let the oil heat to about 375 degrees F over medium-high heat. To the hot oil, add 1/3 scoop of batter. Cook it for about 2 to 3 minutes or until golden brown. Flip and continue to cook until the other side is golden brown.

Step 4: On a paper towel-lined plate, transfer the funnel cake bites. Sprinkle them with powdered sugar and serve right away. Enjoy!

Tips:

Before frying, ensure the oil is at 375 degrees F. I suggest using a deep-fry thermometer so you can monitor the oil temperature.

Nutritional Facts per serving:

402 calories; 16 grams of fat

FUNNEL CAKE BITES

Rebecca Total prep time: 25 mins | Yield: 30 bites | Servings: 6 These Funnel Cake Bites is a delicious, crunchy fried dough that you can make easily and any time… General Recipes FUNNEL CAKE BITES European Print This
Serves: 6 Prep Time: 25 mins
Nutrition facts: 402 calories 16 fat
Rating: 5.0/5
( 1 voted )

Ingredients

  • 2 tbsp sugar
  • 2 large eggs
  • 1 ¼ c. whole milk
  • 2 c. all-purpose flour
  • 1 tsp baking powder
  • 4 c. vegetable oil
  • 1 tsp vanilla extract
  • Powdered sugar, for garnish
  • ¼ tsp kosher salt

Instructions

Step 1: Beat the eggs and sugar in a large bowl until foamy and pale yellow. Add the milk and vanilla extract. Mix well until blended.

Step 2: In another bowl, sift the flour, baking powder, and salt. Into the wet mixture, slowly add the sifted ingredients, mixing until just blended and smooth. Make sure not to over-mix.

Step 3: Add oil to the pot, filling it to about 2 to 3 inches. Let the oil heat to about 375 degrees F over medium-high heat. To the hot oil, add 1/3 scoop of batter. Cook it for about 2 to 3 minutes or until golden brown. Flip and continue to cook until the other side is golden brown.

Step 4: On a paper towel-lined plate, transfer the funnel cake bites. Sprinkle them with powdered sugar and serve right away. Enjoy!
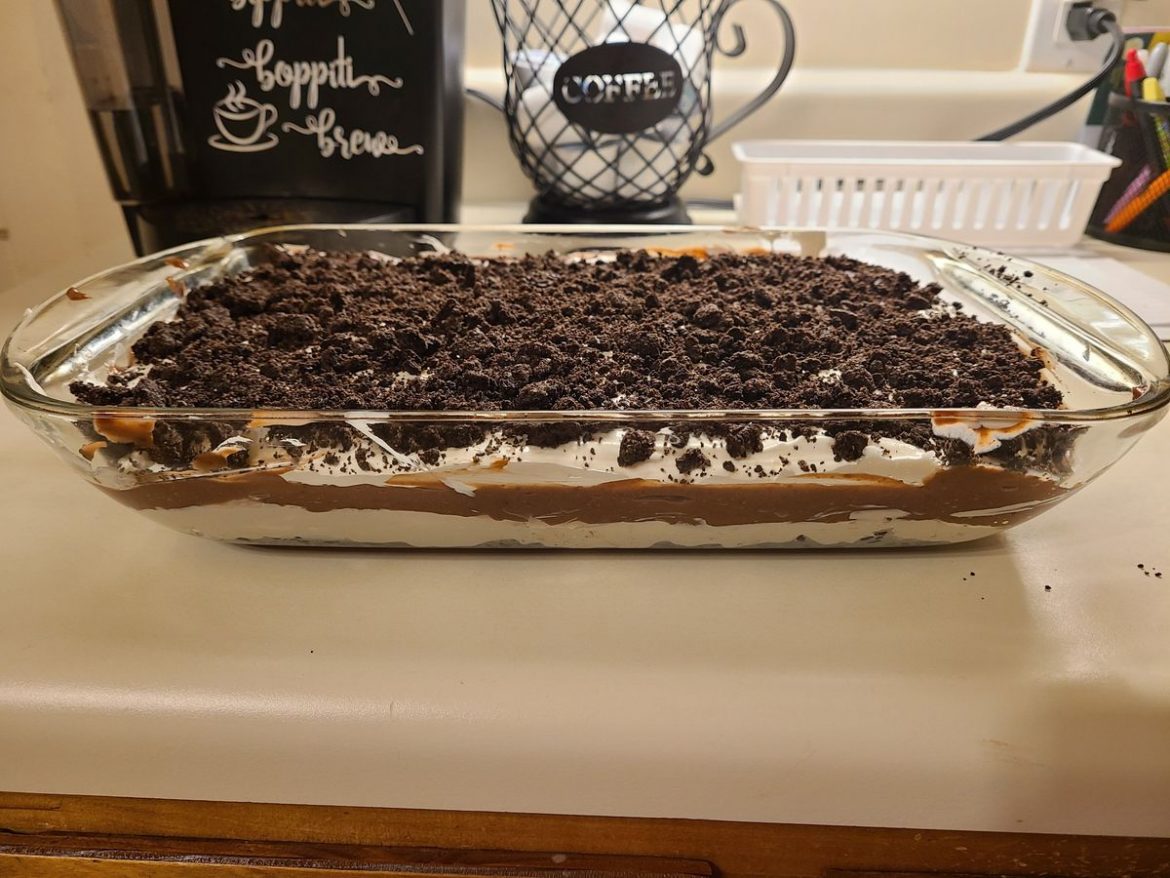
Notes

Before frying, ensure the oil is at 375 degrees F. I suggest using a deep-fry thermometer so you can monitor the oil temperature.

August 19, 2022 0 comment
0 FacebookTwitterPinterestEmail
General Recipes

OREO DELIGHT

by Rebecca August 19, 2022
written by Rebecca

Prep time: 30 mins

My daughter is obsessed with this Oreo Delight. It is an amazing dessert made with Oreo cookies, cream cheese, and frozen whipped topping. A decadent no-bake dessert that you can easily whip up at home without any fuss. Before serving, make sure to let this Oreo Delight set in the fridge. I usually make this a day ahead because my family hates waiting!

This luscious Oreo Delight is my go-to alternative to a cake. It is much more simple to make using simple ingredients. And great enough to impress everyone. It is a pretty special treat, especially for people who love no-bake recipes and Oreo!

Ingredients

6 tbsp butter, melted

1 (14.3 oz.) package of regular Oreo cookies

2 (8 oz.) containers of frozen Cool Whip, thawed

1 c. powdered sugar

1 (8 oz.) block cream cheese, softened

2¾ c. milk

1 (5.9 oz.) package of instant chocolate pudding

HOW TO MAKE OREO DELIGHT

Step 1: Using a food processor, crush the whole bag of Oreo cookies.

Step 2: Reserve 1 c of the Oreo crumbs and mix the remaining with the melted butter. Into the bottom of a pan, press the mixture to form a crust.

Step 3: Using a mixer, mix the cream cheese until smooth. Add the powdered sugar and mix again. Then, fold in a container of Cool Whip until well blended. Over the crust, evenly spread the mixture.

Step 4: Mix the chocolate pudding and milk with a whisk until thickened. Spread this on top of the Cool Whip mixture.

Step 5: Sprinkle the reserved Oreo crumbs over the chocolate pudding mixture. Place in the fridge for at least 4 hours until set, then serve. Enjoy!

Tips:

Make sure the crust is frozen and use fully softened cream cheese.

Fold the Cool Whip layer very carefully so the air is not beaten out.

OREO DELIGHT

Rebecca Prep time: 30 mins My daughter is obsessed with this Oreo Delight. It is an amazing dessert made with Oreo cookies, cream cheese, and frozen whipped topping. A decadent no-bake… General Recipes OREO DELIGHT European Print This
Prep Time: 30 mins
Nutrition facts: 200 calories 20 grams fat
Rating: 5.0/5
( 1 voted )

Ingredients

  • 6 tbsp butter, melted
  • 1 (14.3 oz.) package of regular Oreo cookies
  • 2 (8 oz.) containers of frozen Cool Whip, thawed
  • 1 c. powdered sugar
  • 1 (8 oz.) block cream cheese, softened
  • 2¾ c. milk
  • 1 (5.9 oz.) package of instant chocolate pudding

Instructions

Step 1: Using a food processor, crush the whole bag of Oreo cookies.

Step 2: Reserve 1 c of the Oreo crumbs and mix the remaining with the melted butter. Into the bottom of a pan, press the mixture to form a crust.

Step 3: Using a mixer, mix the cream cheese until smooth. Add the powdered sugar and mix again. Then, fold in a container of Cool Whip until well blended. Over the crust, evenly spread the mixture.

Step 4: Mix the chocolate pudding and milk with a whisk until thickened. Spread this on top of the Cool Whip mixture.

Step 5: Sprinkle the reserved Oreo crumbs over the chocolate pudding mixture. Place in the fridge for at least 4 hours until set, then serve. Enjoy!

Notes

Make sure the crust is frozen and use fully softened cream cheese. Fold the Cool Whip layer very carefully so the air is not beaten out.

August 19, 2022 0 comment
0 FacebookTwitterPinterestEmail
Newer Posts
Older Posts

Popular Posts

  • 1

    Crispy Crunchy Parmesan Potatoes

    March 21, 2020
  • 2

    CROCK POT SMOTHERED PORK CHOPS

    March 21, 2020
  • Facebook
  • Twitter

@2019 - All Right Reserved.


Back To Top