Cook it once
  • Home
  • Privacy Policy
  • Recipes
    • KETO
    • LC
    • WW
  • Tips
  • Contact
Cook it once
  • Home
  • Privacy Policy
  • Recipes
    • KETO
    • LC
    • WW
  • Tips
  • Contact
Category:

General Recipes

General Recipes

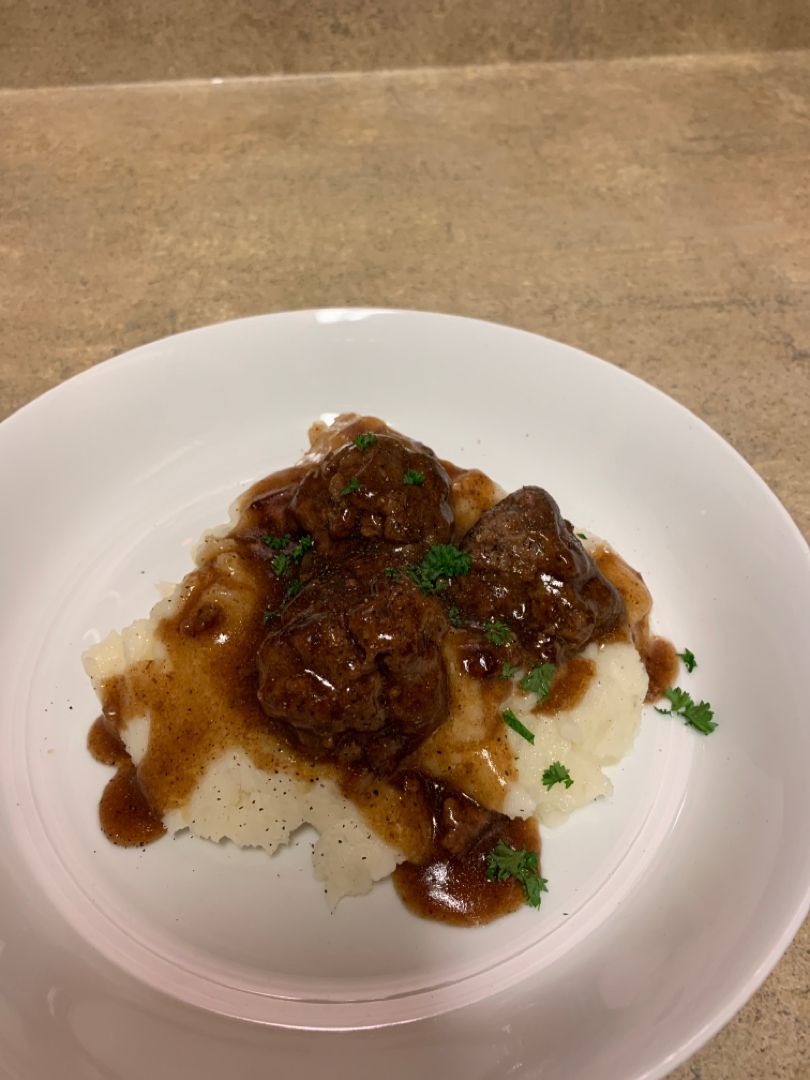
Salisbury Steak Meatballs

by Rebecca August 30, 2022
written by Rebecca

Cook time: 1 hr 20 mins | Prep time: 35 mins | Serves: 4

Very comforting, incredibly delicious, and a classic! These Salisbury Steak Meatballs are a great easy dinner option that you can make at home. These delightful meatballs are my number one favorite among all the meatballs I have tried. These easily steal the number one spot on my list!

To make these Salisbury Steak Meatballs, all you need are just a few simple ingredients that you might already have on hand. These meatballs resemble a steak and are amazing to serve over mashed potatoes or noodles. For an even easier meal, freeze the meatballs for up to 3 months or store them in the fridge for up to 3 to 4 days. The best part is you can do the same with the gravy!

Ingredients

2 tablespoons vegetable oil

2 pounds of ground beef

1 pkg dry onion soup mix

1/4 cup milk

1/4 cup all-purpose flour

1/2 cup Italian bread crumbs

2 can cream of chicken soup

3/4 cup water

1 pkg dry au jus mix

How to make Salisbury Steak Meatballs

Step 1: Place the ground beef, onion soup mix, bread crumbs, and milk in a large bowl. Mix well using your hands until just combined. Then, form the mixture into meatballs.

Step 2: In the flour, lightly coat the mixture and shake the excess off.

Step 3: Heat oil in a skillet over medium-high heat. Once the oil is hot, add the meatballs in batches to the skillet and cook until all sides are browned.

Step 4: To the slow cooker, transfer the meatballs.

Step 5: Place the cream of chicken soup, au jus mix, and water in a large bowl. Mix well until blended and smooth. Then, pour this over the meatballs.

Step 6: Set the meatballs to cook for 3 to 4 hours on high or 4 to 5 hours on low.

Step 7: Serve the meatballs immediately over egg noodles or rice. Enjoy!

Salisbury Steak Meatballs

Rebecca Cook time: 1 hr 20 mins | Prep time: 35 mins | Serves: 4 Very comforting, incredibly delicious, and a classic! These Salisbury Steak Meatballs are a great easy dinner… General Recipes Salisbury Steak Meatballs European Print This
Serves: 4 Prep Time: 1 hr 20 mins
Nutrition facts: 200 calories 20 grams fat
Rating: 5.0/5
( 1 voted )

Ingredients

  • 2 tablespoons vegetable oil
  • 2 pounds of ground beef
  • 1 pkg dry onion soup mix
  • 1/4 cup milk
  • 1/4 cup all-purpose flour
  • 1/2 cup Italian bread crumbs
  • 2 can cream of chicken soup
  • 3/4 cup water
  • 1 pkg dry au jus mix

Instructions

Step 1: Place the ground beef, onion soup mix, bread crumbs, and milk in a large bowl. Mix well using your hands until just combined. Then, form the mixture into meatballs.

Step 2: In the flour, lightly coat the mixture and shake the excess off.

Step 3: Heat oil in a skillet over medium-high heat. Once the oil is hot, add the meatballs in batches to the skillet and cook until all sides are browned.

Step 4: To the slow cooker, transfer the meatballs.

Step 5: Place the cream of chicken soup, au jus mix, and water in a large bowl. Mix well until blended and smooth. Then, pour this over the meatballs.

Step 6: Set the meatballs to cook for 3 to 4 hours on high or 4 to 5 hours on low.

Step 7: Serve the meatballs immediately over egg noodles or rice. Enjoy!
August 30, 2022 0 comment
0 FacebookTwitterPinterestEmail
General Recipes

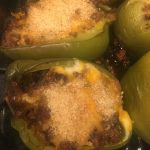
PHILLY CHEESESTEAK STUFFED PEPPERS

by Rebecca August 30, 2022
written by Rebecca

Prep Time: 10 mins | Cook Time: 1 hr 15 mins | Total Time: 1 hr 25 mins | Yield: 6 Servings

My husband is obsessed with these Philly Cheesesteak Stuffed Peppers! It is an awesome way to skip the bread and cut the carbs. A great option for my health-buff husband. Mouthwatering classic Philly cheesesteak mixture stuffed in colorful bell peppers and top with melting cheese. Super good, even my fussiest eaters loved these! So, if you are searching for a delicious alternative to the real thing, then you have to give this Philly Cheesesteak Stuffed Peppers a try. I am pretty sure everyone will be impressed and will ask for this over and over again!

Ingredients

2 tablespoons butter

1 small yellow onion, diced

1 pound lean ground beef

8 ounces brown mushrooms, minced

1 tablespoon Worcestershire sauce

2 tablespoons ketchup

8 ounces shredded cheddar cheese, divided

1 cup beef broth

1/2 teaspoon Kosher salt

1/2 teaspoon fresh ground black pepper

3 bell peppers, split in half and de-seeded through the stem

HOW TO MAKE PHILLY CHEESESTEAK STUFFED PEPPERS

Step 1: Prepare the oven. Preheat it to 175 degrees C or 350 degrees F.

Step 2: Into a hot large skillet over medium heat, cook the ground beef until browned, breaking the meat into small chunks as it cooks. Onto a clean plate, transfer the ground beef when done.

Step 3: Melt the butter in the same skillet. Once the butter has melted, add the mushroom and onion to the skillet and cook until tender.

Step 4: Return the ground beef to the skillet. Add the Worcestershire sauce, ketchup, beef broth, salt, and pepper. Mix well.

Step 5: Stuff each bell pepper with the ground beef mixture and sprinkle with cheese on top. Bake in the preheated oven for about 45 minutes or until the cheese has melted.

Step 6: When done, take the dish out of the oven and let it cool at room temperature for a couple of minutes before serving. Enjoy!

Nutrition Facts:

Amount per serving: Calories: 334g | Carbohydrates: 9g | Protein: 28g | Fat: 20g | Saturated Fat: 12g | Cholesterol: 97mg | Sodium: 739mg | Potassium: 680mg | Fiber: 2g | Sugar: 5g | Vitamin A: 2385g | Vitamin C: 77.9g | Calcium: 300g | Iron: 2.7g

PHILLY CHEESESTEAK STUFFED PEPPERS

Rebecca Prep Time: 10 mins | Cook Time: 1 hr 15 mins | Total Time: 1 hr 25 mins | Yield: 6 Servings My husband is obsessed with these Philly Cheesesteak… General Recipes PHILLY CHEESESTEAK STUFFED PEPPERS European Print This
Serves: 6 Prep Time: 10 mins Cooking Time: 1 hr 15 mins 1 hr 15 mins
Nutrition facts: 334 calories 20 fat
Rating: 5.0/5
( 1 voted )

Ingredients

  • 2 tablespoons butter
  • 1 small yellow onion, diced
  • 1 pound lean ground beef
  • 8 ounces brown mushrooms, minced
  • 1 tablespoon Worcestershire sauce
  • 2 tablespoons ketchup
  • 8 ounces shredded cheddar cheese, divided
  • 1 cup beef broth
  • 1/2 teaspoon Kosher salt
  • 1/2 teaspoon fresh ground black pepper
  • 3 bell peppers, split in half and de-seeded through the stem

Instructions

Step 1: Prepare the oven. Preheat it to 175 degrees C or 350 degrees F.

Step 2: Into a hot large skillet over medium heat, cook the ground beef until browned, breaking the meat into small chunks as it cooks. Onto a clean plate, transfer the ground beef when done.

Step 3: Melt the butter in the same skillet. Once the butter has melted, add the mushroom and onion to the skillet and cook until tender.

Step 4: Return the ground beef to the skillet. Add the Worcestershire sauce, ketchup, beef broth, salt, and pepper. Mix well.

Step 5: Stuff each bell pepper with the ground beef mixture and sprinkle with cheese on top. Bake in the preheated oven for about 45 minutes or until the cheese has melted.

Step 6: When done, take the dish out of the oven and let it cool at room temperature for a couple of minutes before serving. Enjoy!

August 30, 2022 0 comment
0 FacebookTwitterPinterestEmail
General Recipes

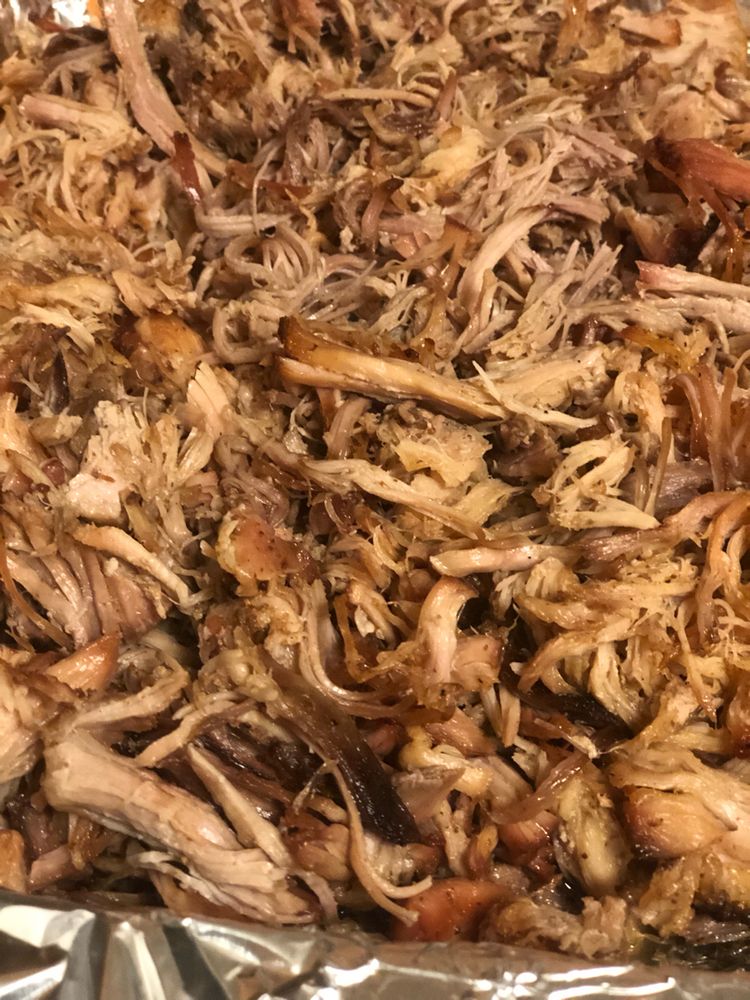
Crockpot Pork Carnitas

by Rebecca August 29, 2022
written by Rebecca

Prep Time: 10 mins | Cook Time: 6 hrs | Servings: 8

Incredibly easy, nontraditional way to make our favorite Carnitas. Melt-in-your-mouth pork carnitas that is bursting with amazing flavors! Tastes great and smells so good. Everyone will surely ask for this pork carnitas again and again!

Ingredients

6 cloves garlic, minced

3-4 lb pork loin

1 lime

1 orange

1 onion

2 bay leaves

1 tablespoon each chili powder, paprika, and cumin

1/2 can beer

kosher salt, pepper, crushed red pepper flakes

How to make Crockpot Pork Carnitas

Step 1: Into 6 to 8 large pieces, cut the pork loin and place them in the crock pot. Into 6 wedges, cut the orange and lime. Then, squeeze these over the pork. Over the pork, place the wedges. After peeling the onion, slice it into large pieces and place the slices over the pork. Next, add the garlic along with the bay leaves, chili powder, paprika, cumin, kosher salt, pepper, and crushed red pepper flakes.

Step 2: Into the crock pot, pour half of the can of beef. Set to cook for 6 to 8 hours on low.

Step 3: Using parchment paper or foil, line a baking sheet. Carefully transfer the pieces of pork to the baking sheet using tongs or two forks. Then, shred the pork and evenly spread this on the baking sheet.

Step 4: Into the crock pot, spoon about half of the liquid on top of the pork. Make sure to spoon only the liquid and not the onions, orange, or lime wedges. Place in the middle rack of the oven and broil for about 5 to 7 minutes on high.

Step 5: Take the baking sheet out of the oven and toss the pork around. On top, spoon the remaining cooking liquid. Return to the oven and bake for another 5 to 7 minutes. If needed, season with extra chili powder, paprika, cumin, kosher salt, pepper, and/or crushed red pepper flakes.

Step 6: Serve the Carnitas right away by themselves or use them as a filling for burritos, tacos, or nachos. Enjoy!

Crockpot Pork Carnitas

Rebecca Prep Time: 10 mins | Cook Time: 6 hrs | Servings: 8 Incredibly easy, nontraditional way to make our favorite Carnitas. Melt-in-your-mouth pork carnitas that is bursting with amazing flavors!… General Recipes Crockpot Pork Carnitas European Print This
Serves: 8 Prep Time: 10 mins Cooking Time: 6 hrs 6 hrs
Nutrition facts: 200 calories 20 grams fat
Rating: 5.0/5
( 1 voted )

Ingredients

  • 6 cloves garlic, minced
  • 3-4 lb pork loin
  • 1 lime
  • 1 orange
  • 1 onion
  • 2 bay leaves
  • 1 tablespoon each chili powder, paprika, and cumin
  • 1/2 can beer
  • kosher salt, pepper, crushed red pepper flakes

Instructions

Step 1: Into 6 to 8 large pieces, cut the pork loin and place them in the crock pot. Into 6 wedges, cut the orange and lime. Then, squeeze these over the pork. Over the pork, place the wedges. After peeling the onion, slice it into large pieces and place the slices over the pork. Next, add the garlic along with the bay leaves, chili powder, paprika, cumin, kosher salt, pepper, and crushed red pepper flakes.

Step 2: Into the crock pot, pour half of the can of beef. Set to cook for 6 to 8 hours on low.

Step 3: Using parchment paper or foil, line a baking sheet. Carefully transfer the pieces of pork to the baking sheet using tongs or two forks. Then, shred the pork and evenly spread this on the baking sheet.

Step 4: Into the crock pot, spoon about half of the liquid on top of the pork. Make sure to spoon only the liquid and not the onions, orange, or lime wedges. Place in the middle rack of the oven and broil for about 5 to 7 minutes on high.

Step 5: Take the baking sheet out of the oven and toss the pork around. On top, spoon the remaining cooking liquid. Return to the oven and bake for another 5 to 7 minutes. If needed, season with extra chili powder, paprika, cumin, kosher salt, pepper, and/or crushed red pepper flakes.

Step 6: Serve the Carnitas right away by themselves or use them as a filling for burritos, tacos, or nachos. Enjoy!

August 29, 2022 0 comment
0 FacebookTwitterPinterestEmail
General Recipes

Pizza Rolls

by Rebecca August 29, 2022
written by Rebecca

PREP TIME: 10 mins | COOK TIME: 10 mins | TOTAL TIME: 20 mins | YIELD: 24

Are you searching for a great party food appetizer? These homemade pizza rolls are a must-try! Enjoy all your favorite pizza flavors with this easy to eat, bite-sized pieces of pizza rolls. These tasty pizza rolls are always a big hit. These have all the flavors of traditional pizza. The only difference is we use pasta as its base instead of dough. You can easily make these homemade pizza rolls any time. They are an excellent meal option for your entire family and even your fussiest eaters will love these!

These homemade pizza rolls are excellent tailgate foods. If you are thinking of making pizza into an appetizer, these homemade pizza rolls are the best options! My family is obsessed so we decided to make these pizza rolls weekly! Serve these delightful pizza rolls with a marinara sauce for dipping. I’m pretty sure everyone will be blown away!

Ingredients

1 c. sliced and chopped pepperoni

2 tubes of refrigerated pizza crust

Italian seasoning, to taste

Garlic salt

1/2 c. Parmesan cheese

Marinara sauce

1 c. shredded Mozzarella cheese, to taste

How to make Pizza Rolls

Step 1: Prepare the oven. Preheat it to 425 degrees F or 218 degrees C.

Step 2: With flour, dust a large surface, then roll out each pizza crust. Directly on each crust, sprinkle the garlic salt and Italian seasoning.

Step 3: On each crust, add the mozzarella and Parmesan cheese, followed by the diced pepperoni. Spread them within 1/2 inch of the edges of the crust.

Step 4: Carefully roll the crust beginning with the short end into a tight log. Slice each roll into 1-inch sections using a serrated knife or sharp pizza cutter.

Step 5: On a lightly greased pan, place the pizza rolls. Place in the preheated oven and bake for about 10 to 12 minutes or until golden brown.

Step 6: Remove from the oven when done and serve the pizza rolls right away with a marinara sauce for dipping. Enjoy!

Nutrition Facts:

YIELD: 24 SERVING SIZE: 1 gram
Amount Per Serving: CALORIES: 111 | TOTAL FAT: 5g | SATURATED FAT: 2g | TRANS FAT: 0g | UNSATURATED FAT: 3g | CHOLESTEROL: 10mg | SODIUM: 293mg | CARBOHYDRATES: 11g | FIBER: 1g | SUGAR: 1g | PROTEIN: 4g

Pizza Rolls

Rebecca PREP TIME: 10 mins | COOK TIME: 10 mins | TOTAL TIME: 20 mins | YIELD: 24 Are you searching for a great party food appetizer? These homemade pizza rolls… General Recipes Pizza Rolls European Print This
Serves: 24 Prep Time: 10 mins Cooking Time: 10 mins 10 mins
Nutrition facts: 111 calories 5 fat
Rating: 5.0/5
( 1 voted )

Ingredients

  • 1 c. sliced and chopped pepperoni
  • 2 tubes of refrigerated pizza crust
  • Italian seasoning, to taste
  • Garlic salt
  • 1/2 c. Parmesan cheese
  • Marinara sauce
  • 1 c. shredded Mozzarella cheese, to taste

Instructions

Step 1: Prepare the oven. Preheat it to 425 degrees F or 218 degrees C.

Step 2: With flour, dust a large surface, then roll out each pizza crust. Directly on each crust, sprinkle the garlic salt and Italian seasoning.

Step 3: On each crust, add the mozzarella and Parmesan cheese, followed by the diced pepperoni. Spread them within 1/2 inch of the edges of the crust.

Step 4: Carefully roll the crust beginning with the short end into a tight log. Slice each roll into 1-inch sections using a serrated knife or sharp pizza cutter.

Step 5: On a lightly greased pan, place the pizza rolls. Place in the preheated oven and bake for about 10 to 12 minutes or until golden brown.

Step 6: Remove from the oven when done and serve the pizza rolls right away with a marinara sauce for dipping. Enjoy!

August 29, 2022 0 comment
0 FacebookTwitterPinterestEmail
General Recipes

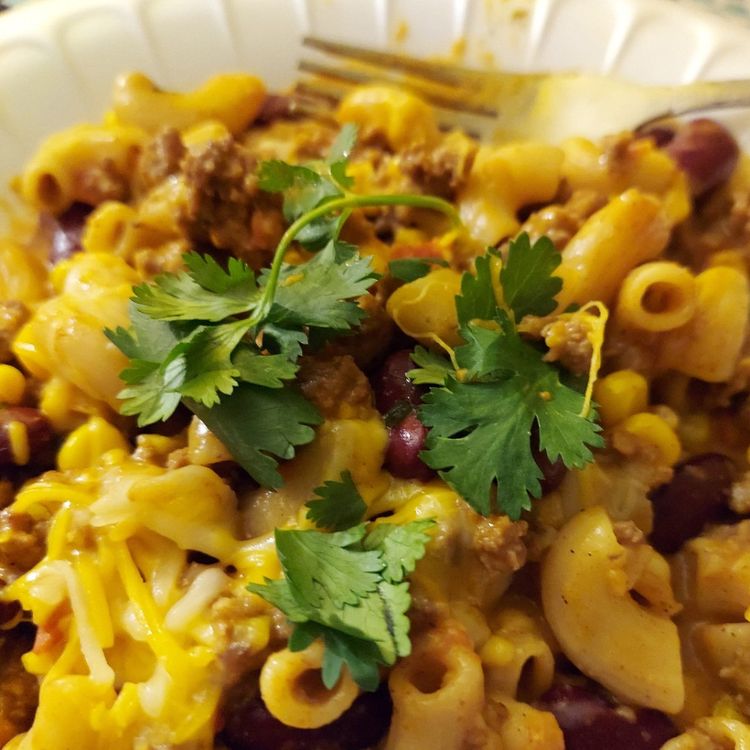
Slow Cooker Chili Mac and Cheese

by Rebecca August 29, 2022
written by Rebecca

Yield: 6 servings

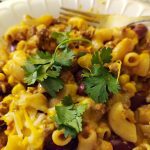
This is the best chili mac and cheese I’ve ever made! Delicious and a no-fuss with an extra layer of melted cheese on top. This chili mac and cheese is perfect for meal prep as you can easily make this ahead and simply store it in the fridge.

INGREDIENTS

1/2 medium yellow onion, diced

1 tbsp olive oil

1 lb lean ground beef

2 tbsp chili powder

2 tsp garlic powder

1 (28 oz.) can of fire-roasted diced tomatoes

2 tsp ground cumin

1 (15 oz.) can of kidney beans, drained and rinsed

1 1/2 c. low-sodium beef broth or water

8 oz. elbow macaroni, cooked

1 1/2 c. shredded Monterey Jack cheese (about 6 oz.), divided

1 1/2 c. shredded cheddar cheese (about 6 oz.), divided

4 medium scallions, thinly sliced (optional)

1 (6 oz.) can of tomato paste

1/2 tsp kosher salt

1/4 tsp freshly ground black pepper

How to make Slow Cooker Chili Mac and Cheese

Step 1: Preheat a 5-quart or larger slow cooker. Set it to low.

Step 2: In a large skillet, heat the oil over medium heat. Once the oil is shimmering, add the onion to the skillet and cook for about 5 minutes, stirring often, until softened. Then, add the ground beef and continue to cook for another 6 to 8 minutes, breaking the meat up using a wooden spoon, until browned and completely cooked. Next, add the chili powder, cumin, garlic powder, salt, and pepper. Stir well and cook for an additional minute. Into the slow cooker, transfer the mixture.

Step 3: To the slow cooker, add the tomatoes and their juices along with the beans, tomato paste, and broth or water. Stir well. Put the lid on and set to cook for 7 to 8 hours on low or 3 to 4 hours on high.

Step 4: Remove the cover and stir in the pasta followed by half each of the cheddar and Monterey Jack cheeses. Sprinkle the rest of the cheese on top. Replace the lid and set to cook for additional 15 minutes on low until the cheese has melted.

Step 5: Into bowls, spoon the chili mac and cheese. If desired, garnish with scallions. Enjoy warm!

NOTES:

You can cook the pasta and beef 1 day ahead and separately keep them in covered containers. Store in the fridge until ready to use.

Keep any leftovers in a covered container and store them in the fridge for up to 3 days.

Nutrition Facts:

Calories 702, Fat 37.6 g (57.9%), Saturated 17.3 g (86.6%), Carbs 53.0 g (17.7%), Fiber 9.2 g (36.8%), Sugars 10.3 g, Protein 39.6 g (79.2%), Sodium 1188.2 mg (49.5%)

Slow Cooker Chili Mac and Cheese

Rebecca Yield: 6 servings This is the best chili mac and cheese I’ve ever made! Delicious and a no-fuss with an extra layer of melted cheese on top. This chili mac… General Recipes Slow Cooker Chili Mac and Cheese European Print This
Serves: 6
Nutrition facts: 702 calories 37.6 fat
Rating: 5.0/5
( 1 voted )

Ingredients

  • 1/2 medium yellow onion, diced
  • 1 tbsp olive oil
  • 1 lb lean ground beef
  • 2 tbsp chili powder
  • 2 tsp garlic powder
  • 1 (28 oz.) can of fire-roasted diced tomatoes
  • 2 tsp ground cumin
  • 1 (15 oz.) can of kidney beans, drained and rinsed
  • 1 1/2 c. low-sodium beef broth or water
  • 8 oz. elbow macaroni, cooked
  • 1 1/2 c. shredded Monterey Jack cheese (about 6 oz.), divided
  • 1 1/2 c. shredded cheddar cheese (about 6 oz.), divided
  • 4 medium scallions, thinly sliced (optional)
  • 1 (6 oz.) can of tomato paste
  • 1/2 tsp kosher salt
  • 1/4 tsp freshly ground black pepper

Instructions

Step 1: Preheat a 5-quart or larger slow cooker. Set it to low.

Step 2: In a large skillet, heat the oil over medium heat. Once the oil is shimmering, add the onion to the skillet and cook for about 5 minutes, stirring often, until softened. Then, add the ground beef and continue to cook for another 6 to 8 minutes, breaking the meat up using a wooden spoon, until browned and completely cooked. Next, add the chili powder, cumin, garlic powder, salt, and pepper. Stir well and cook for an additional minute. Into the slow cooker, transfer the mixture.

Step 3: To the slow cooker, add the tomatoes and their juices along with the beans, tomato paste, and broth or water. Stir well. Put the lid on and set to cook for 7 to 8 hours on low or 3 to 4 hours on high.

Step 4: Remove the cover and stir in the pasta followed by half each of the cheddar and Monterey Jack cheeses. Sprinkle the rest of the cheese on top. Replace the lid and set to cook for additional 15 minutes on low until the cheese has melted.

Step 5: Into bowls, spoon the chili mac and cheese. If desired, garnish with scallions. Enjoy warm!

Notes

You can cook the pasta and beef 1 day ahead and separately keep them in covered containers. Store in the fridge until ready to use. Keep any leftovers in a covered container and store them in the fridge for up to 3 days.

August 29, 2022 0 comment
0 FacebookTwitterPinterestEmail
General Recipes

Loaded Juicy Lucy Sheet Pan Sliders

by Rebecca August 29, 2022
written by Rebecca

Prep Time: 30 mins | Cook Time: 40 mins | Total Time: 1 hr 10 mins | Yield: 12 juicy Lucy sliders

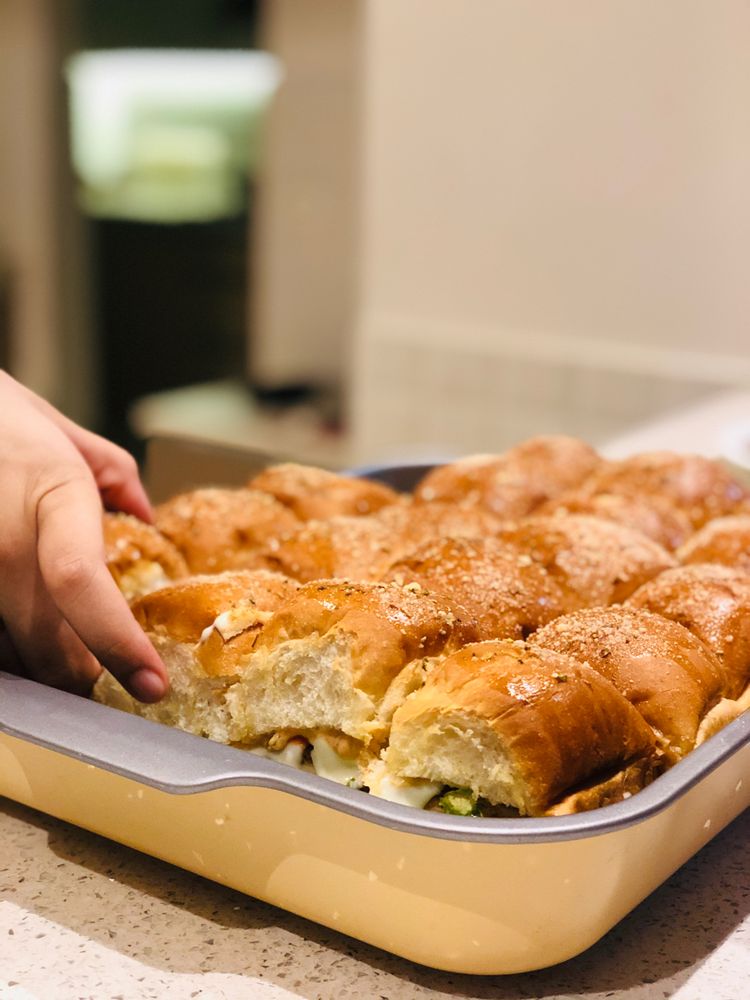
This Loaded Juicy Lucy Sheet Pan Slider is incredibly easy to make with the least amount of effort. Sauteing, grilling, or shaping is not required. Simply layer the burger meat, cheese, and bacon on a sheet pan and bake. In the end, you’ll have a delicious giant hamburger that you can slice into individual servings!

INGREDIENTS

BURGERS:

12 strips of uncooked bacon

2 1/4 lbs lean ground beef

2 tsp Worcestershire sauce

6 slices of sharp cheddar cheese

6 slices of American cheese

1/2 c. grated onion

6 slices of mozzarella cheese

1 tbsp kosher salt (or to taste)

2 tsp black pepper

BURGER SAUCE:

1/4 c. thousand island dressing

1/4 c. mayonnaise

2 tsp hot sauce (or to taste)

TO ASSEMBLE:

3–4 large leaves of green lettuce

12 brioche slider buns

Dill pickle chips, optional, to top

2 tomatoes, sliced thin

How to make Loaded Juicy Lucy Sheet Pan Sliders

Step 1: Prepare the oven. Preheat it to 400 degrees F. Ready a 13 x 9-inch non-stick rimmed sheet pan.

Step 2: Place the ground beef, salt, pepper, Worcestershire sauce, and grated onion in a large bowl. Mix well until combined.

Step 3: Into a thin layer on the sheet pan, press half of the ground beef. Into 2 rows, layer the cheeses, making sure to leave room around the edges. Then, cover the cheese with the rest of the beef mixture.

Step 4: On top of the sheet pan burger, weave the bacon, tucking down any edges that might be hanging over. If you think you might have issues with grease dripping as the bacon cooks, you can put a smaller sheet pan over a larger one.

Step 5: Place the sheet pan into the preheated oven and bake for about 30 minutes or until the sheet pan burgers are completely cooked and the bacon is starting to cook through. Then, broil for a few minutes until the bacon is crisp.

Step 6: In the meantime, whisk the mayonnaise, hot sauce, and thousand island dressing until well combined. Set the burger sauce aside.

Step 7: With lettuce and tomato, layer the bottom slider buns.

Step 8: Drain the excess grease off once the burger has finished cooking. To the slider buns, gently transfer the giant burger using spatulas or tongs. If desired, top with pickle chips, then drizzle with the burger sauce. Place the top slider buns on top.

Step 9: Slice between the rows and columns of the sliders using a large knife. Serve the sliders warm. Enjoy!

Loaded Juicy Lucy Sheet Pan Sliders

Rebecca Prep Time: 30 mins | Cook Time: 40 mins | Total Time: 1 hr 10 mins | Yield: 12 juicy Lucy sliders This Loaded Juicy Lucy Sheet Pan Slider is… General Recipes Loaded Juicy Lucy Sheet Pan Sliders European Print This
Serves: 12 Prep Time: 30 mins Cooking Time: 40 mins 40 mins
Nutrition facts: 200 calories 20 grams fat
Rating: 5.0/5
( 1 voted )

Ingredients

  • BURGERS:
  • 12 strips of uncooked bacon
  • 2 1/4 lbs lean ground beef
  • 2 tsp Worcestershire sauce
  • 6 slices of sharp cheddar cheese
  • 6 slices of American cheese
  • 1/2 c. grated onion
  • 6 slices of mozzarella cheese
  • 1 tbsp kosher salt (or to taste)
  • 2 tsp black pepper
  • BURGER SAUCE:
  • 1/4 c. thousand island dressing
  • 1/4 c. mayonnaise
  • 2 tsp hot sauce (or to taste)
  • TO ASSEMBLE:
  • 3–4 large leaves of green lettuce
  • 12 brioche slider buns
  • Dill pickle chips, optional, to top
  • 2 tomatoes, sliced thin

Instructions

Step 1: Prepare the oven. Preheat it to 400 degrees F. Ready a 13 x 9-inch non-stick rimmed sheet pan.

Step 2: Place the ground beef, salt, pepper, Worcestershire sauce, and grated onion in a large bowl. Mix well until combined.

Step 3: Into a thin layer on the sheet pan, press half of the ground beef. Into 2 rows, layer the cheeses, making sure to leave room around the edges. Then, cover the cheese with the rest of the beef mixture.

Step 4: On top of the sheet pan burger, weave the bacon, tucking down any edges that might be hanging over. If you think you might have issues with grease dripping as the bacon cooks, you can put a smaller sheet pan over a larger one.

Step 5: Place the sheet pan into the preheated oven and bake for about 30 minutes or until the sheet pan burgers are completely cooked and the bacon is starting to cook through. Then, broil for a few minutes until the bacon is crisp.

Step 6: In the meantime, whisk the mayonnaise, hot sauce, and thousand island dressing until well combined. Set the burger sauce aside.

Step 7: With lettuce and tomato, layer the bottom slider buns.

Step 8: Drain the excess grease off once the burger has finished cooking. To the slider buns, gently transfer the giant burger using spatulas or tongs. If desired, top with pickle chips, then drizzle with the burger sauce. Place the top slider buns on top.

Step 9: Slice between the rows and columns of the sliders using a large knife. Serve the sliders warm. Enjoy!

August 29, 2022 0 comment
0 FacebookTwitterPinterestEmail
General Recipes

Patty Melt

by Rebecca August 29, 2022
written by Rebecca

Time: 1 hr | Yield: Makes 6 sandwiches

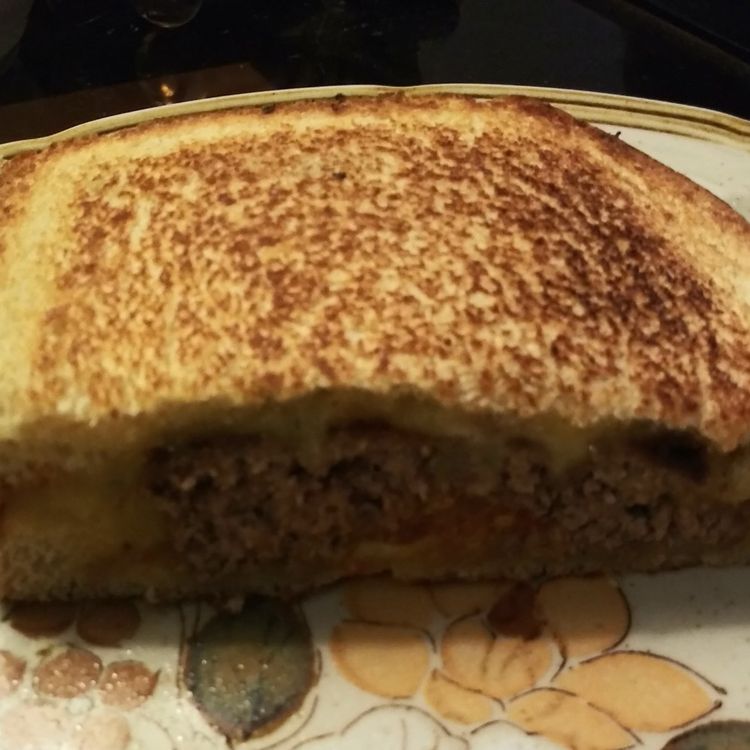
Patty melt is a staple at home. It is so easy to make and ready in a snap. Rye bread is sandwiched with sweet caramelized onions, melted cheese, and ground beef patty and cooked to golden brown perfection. My husband is obsessed! He pairs this Patty Melt with a fruity Belgian-style beer for an afternoon meal or dinner.

Ingredients

5 tablespoons canola oil

1½ pound ground beef

2 yellow onions, halved and thinly sliced

12 thin slices of cheddar, Swiss, or American cheese

12 slices of rye bread

8 tablespoons unsalted butter, room temperature

Kosher salt and freshly ground black pepper

How to make Patty Melt

Step 1: Sprinkle the beef with salt and pepper. Into six 1/4-inch thick patties slightly wider and longer than the bread, divide the mixture.

Step 2: Heat 2 tbsp oil in a 12-inch cast-iron skillet over medium-high heat. Once the oil is hot, add the onions to the skillet and season with salt and pepper. Cook for about 20 to 25 minutes, stirring often, until the onions have softened and browned. To a bowl, transfer the onions, then wipe the skillet clean.

Step 3: In the same skillet, heat 1 tbsp oil over high heat. Add 2 patties to the hot oil and cook for about 2 to 4 minutes total until both sides are well browned. To a plate, transfer the patties. Wipe the skillet and cook the rest of the patties, adding the remaining oil in between.

Step 4: With some onions, top every 6 slices of bread followed by a slice of cheese and 1 patty. Then, top each patty with another slice of cheese and top with the top bun. Spread the butter on top and bottom of the sandwiches using a table knife.

Step 5: Heat the same skillet on medium heat. Cook the sandwiches in 3 batches for about 6 minutes, flipping once until hot and golden brown.

Patty Melt

Rebecca Time: 1 hr | Yield: Makes 6 sandwiches Patty melt is a staple at home. It is so easy to make and ready in a snap. Rye bread is sandwiched… General Recipes Patty Melt European Print This
Serves: 6
Nutrition facts: 200 calories 20 grams fat
Rating: 5.0/5
( 1 voted )

Ingredients

  • 5 tablespoons canola oil
  • 1½ pound ground beef
  • 2 yellow onions, halved and thinly sliced
  • 12 thin slices of cheddar, Swiss, or American cheese
  • 12 slices of rye bread
  • 8 tablespoons unsalted butter, room temperature
  • Kosher salt and freshly ground black pepper

Instructions

Step 1: Sprinkle the beef with salt and pepper. Into six 1/4-inch thick patties slightly wider and longer than the bread, divide the mixture.

Step 2: Heat 2 tbsp oil in a 12-inch cast-iron skillet over medium-high heat. Once the oil is hot, add the onions to the skillet and season with salt and pepper. Cook for about 20 to 25 minutes, stirring often, until the onions have softened and browned. To a bowl, transfer the onions, then wipe the skillet clean.

Step 3: In the same skillet, heat 1 tbsp oil over high heat. Add 2 patties to the hot oil and cook for about 2 to 4 minutes total until both sides are well browned. To a plate, transfer the patties. Wipe the skillet and cook the rest of the patties, adding the remaining oil in between.

Step 4: With some onions, top every 6 slices of bread followed by a slice of cheese and 1 patty. Then, top each patty with another slice of cheese and top with the top bun. Spread the butter on top and bottom of the sandwiches using a table knife.

Step 5: Heat the same skillet on medium heat. Cook the sandwiches in 3 batches for about 6 minutes, flipping once until hot and golden brown.

August 29, 2022 0 comment
0 FacebookTwitterPinterestEmail
General Recipes

Cheesy Bacon and Beer Sloppy Joes

by Rebecca August 29, 2022
written by Rebecca

Prep time: 30 mins | Total time: 35 mins | Servings: 4

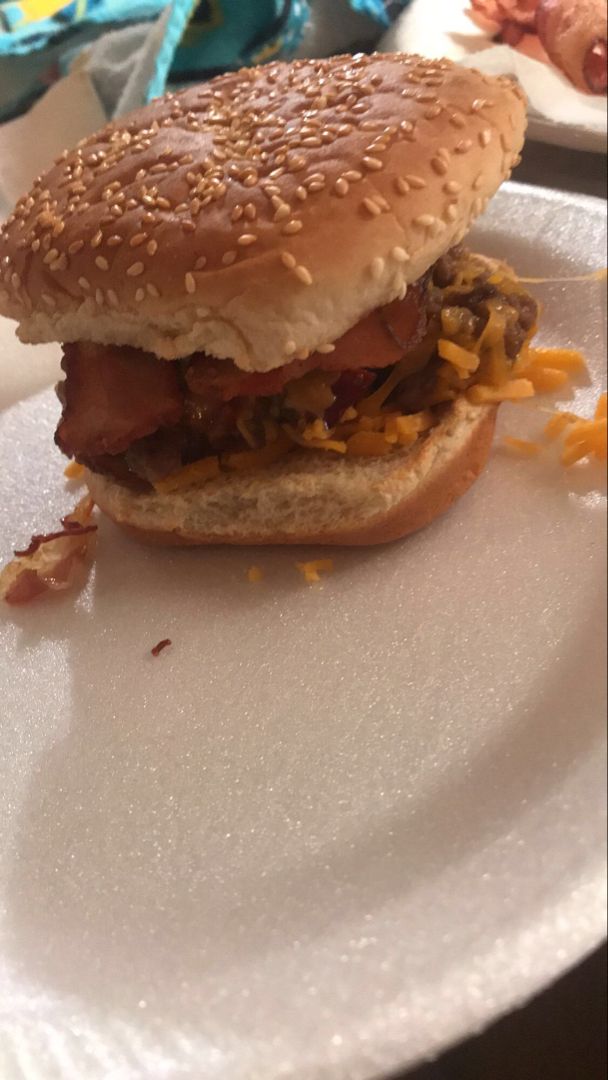
Enjoy a decedent dinner with this over-the-top sloppy Joe with gooey cheese and smoky bacon. The addition of beer makes this sloppy Joe tastes better!

Ingredients

1/2 c. chopped onion

2 tbsp Gold Medal™ all-purpose flour

1 pound ground beef (at least 80% lean)

1/2 c. Progresso™ beef flavored broth (from 32 ounces carton)

2 tsp Worcestershire sauce

2 tsp Dijon mustard

12 slices of cooked bacon

2 c. shredded Cheddar cheese (8 ounces)

4 burger buns, toasted

1 c. lager beer

How to make Cheesy Bacon and Beer Sloppy Joe

Step 1: Cook the beef in a 12-inch nonstick skillet for about 6 to 8 minutes over medium-high heat until the beef is completely cooked, stirring often. Then, add the flour. Stir and continue to cook for another minute. Pour in the beer and broth. Add the Worcestershire sauce and mustard. Stir well and bring to a boil. Adjust the heat to medium and simmer for about 5 to 10 minutes until the sauce has thickened, stirring often. Take the skillet off the heat and whisk in 1 c cheese followed by 4 crumbled bacon.

Step 2: Over the beef mixture, sprinkle the rest of the 1 c cheese. DO NOT STIR. Put the lid on and allow to rest for about 5 minutes until the cheese has melted.

Step 3: Onto the bottom halves of the toasted buns, spoon the mixture, and top with 2 bacon slices. On top, place the top toasted bun.

Tips:

Make sure not to stir the last cup of cheese and just let it melt on top of the beef mixture.

For an added crunch and to prevent the buns from getting soggy, take the time to toast them before topping them with the beef mixture.

For this recipe, I recommend using lager beer. It is lighter and will keep the dish from tasting hoppy, malty or bitter like some IPAs or ales.

Nutrition Facts:

700 Calories, 43g Total Fat, 46g Protein, 31g Total Carbohydrate, 4g Sugars

Cheesy Bacon and Beer Sloppy Joes

Rebecca Prep time: 30 mins | Total time: 35 mins | Servings: 4 Enjoy a decedent dinner with this over-the-top sloppy Joe with gooey cheese and smoky bacon. The addition of… General Recipes Cheesy Bacon and Beer Sloppy Joes European Print This
Serves: 4 Prep Time: 30 mins
Nutrition facts: 700 calories 46 fat
Rating: 5.0/5
( 1 voted )

Ingredients

  • 1/2 c. chopped onion
  • 2 tbsp Gold Medal™ all-purpose flour
  • 1 pound ground beef (at least 80% lean)
  • 1/2 c. Progresso™ beef flavored broth (from 32 ounces carton)
  • 2 tsp Worcestershire sauce
  • 2 tsp Dijon mustard
  • 12 slices of cooked bacon
  • 2 c. shredded Cheddar cheese (8 ounces)
  • 4 burger buns, toasted
  • 1 c. lager beer

Instructions

Step 1: Cook the beef in a 12-inch nonstick skillet for about 6 to 8 minutes over medium-high heat until the beef is completely cooked, stirring often. Then, add the flour. Stir and continue to cook for another minute. Pour in the beer and broth. Add the Worcestershire sauce and mustard. Stir well and bring to a boil. Adjust the heat to medium and simmer for about 5 to 10 minutes until the sauce has thickened, stirring often. Take the skillet off the heat and whisk in 1 c cheese followed by 4 crumbled bacon.

Step 2: Over the beef mixture, sprinkle the rest of the 1 c cheese. DO NOT STIR. Put the lid on and allow to rest for about 5 minutes until the cheese has melted.

Step 3: Onto the bottom halves of the toasted buns, spoon the mixture, and top with 2 bacon slices. On top, place the top toasted bun.

Notes

Make sure not to stir the last cup of cheese and just let it melt on top of the beef mixture. For an added crunch and to prevent the buns from getting soggy, take the time to toast them before topping them with the beef mixture. For this recipe, I recommend using lager beer. It is lighter and will keep the dish from tasting hoppy, malty or bitter like some IPAs or ales.

August 29, 2022 0 comment
0 FacebookTwitterPinterestEmail
General Recipes

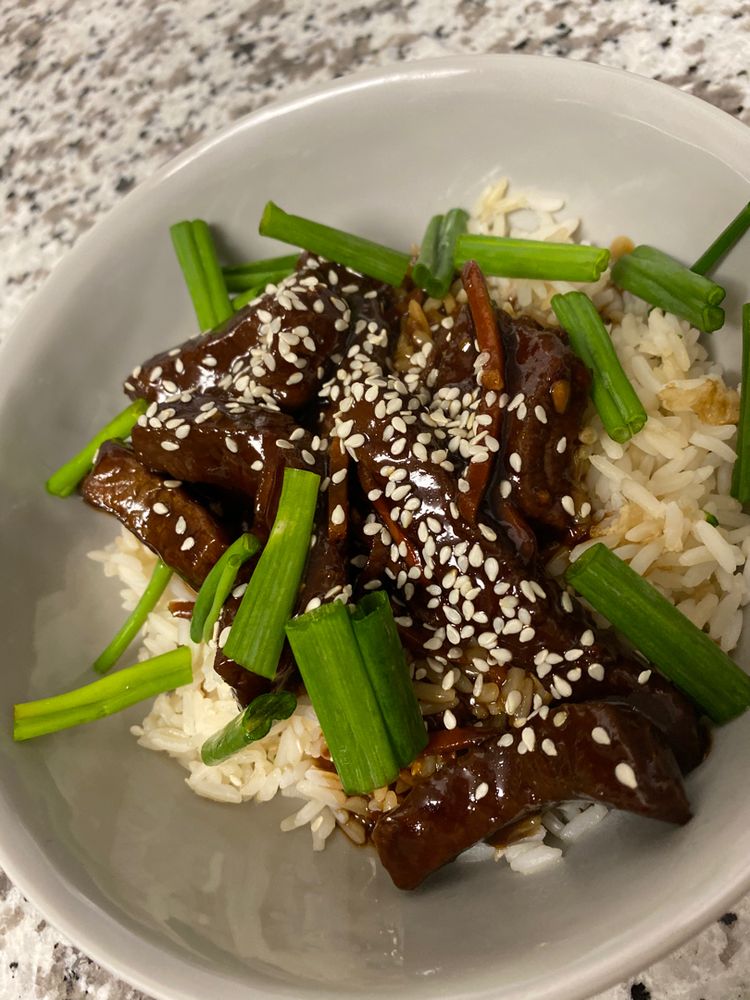
Easy Slow Cooker Mongolian Beef Recipe

by Rebecca August 29, 2022
written by Rebecca

Prep Time: 10 mins | Cook Time: 2 hrs | Total Time: 2 hrs 10 mins | Servings: 6

Mongolian Beef is one of my favorite take-out dishes. To be able to make this at home any time and easily is a game changer for me. This easy Slow Cooker recipe makes life so much easier. To make this Mongolian Beef all you need are a few simple ingredients. Set to cook either on high or low. To boost the flavors, add more ginger and Sriracha.

Enjoy a melt-in-your-mouth tender beef coated in an incredibly silky, sweet, and spicy sauce. Serve this luscious dish over rice with a side of broccoli for a filling, complete weeknight meal that your entire family will surely love!

Ingredients

3-4 cloves garlic, minced

1 1/2 pounds thinly sliced flank steak (1/4” thick)

1 tablespoon vegetable oil

2 teaspoons fresh ginger, minced

1/4 c. cornstarch

3/4 c. reduced-sodium soy sauce

3/4 c. light brown sugar, packed

4-6 green onions, thinly sliced

1 cup shredded carrots

3/4 c. water

sesame seeds, for garnish

1-2 teaspoons Sriracha sauce (or swap with red pepper flakes or cayenne)

How to make Easy Slow Cooker Mongolian Beef

Step 1: Into a large resealable plastic bag, add the sliced flank steak and cornstarch. Seal the bag and shake to coat. Alternatively, you can place them in a large mixing bowl and mix well.

Step 2: Add the vegetable oil to the bottom of a slow cooker along with the garlic, ginger, water, soy sauce, brown sugar, and Sriracha sauce. Mix well until combined. Then, add the coated flank steak and carrots. Mix until well-coated.

Step 3: Put the lid on and set to cook for 2 to 3 hours on high or 4 hours on low until the steak is completely cooked and tender.

Step 4: When done, serve the Mongolian Beef right away over rice. If desired, garnish with some green onions and sesame seeds. Enjoy!

Easy Slow Cooker Mongolian Beef Recipe

Rebecca Prep Time: 10 mins | Cook Time: 2 hrs | Total Time: 2 hrs 10 mins | Servings: 6 Mongolian Beef is one of my favorite take-out dishes. To be… General Recipes Easy Slow Cooker Mongolian Beef Recipe European Print This
Serves: 6 Prep Time: 10 mins Cooking Time: 2 hrs 2 hrs
Nutrition facts: 200 calories 20 grams fat
Rating: 5.0/5
( 2 voted )

Ingredients

  • 3-4 cloves garlic, minced
  • 1 1/2 pounds thinly sliced flank steak (1/4” thick)
  • 1 tablespoon vegetable oil
  • 2 teaspoons fresh ginger, minced
  • 1/4 c. cornstarch
  • 3/4 c. reduced-sodium soy sauce
  • 3/4 c. light brown sugar, packed
  • 4-6 green onions, thinly sliced
  • 1 cup shredded carrots
  • 3/4 c. water
  • sesame seeds, for garnish
  • 1-2 teaspoons Sriracha sauce (or swap with red pepper flakes or cayenne)

Instructions

Step 1: Into a large resealable plastic bag, add the sliced flank steak and cornstarch. Seal the bag and shake to coat. Alternatively, you can place them in a large mixing bowl and mix well.

Step 2: Add the vegetable oil to the bottom of a slow cooker along with the garlic, ginger, water, soy sauce, brown sugar, and Sriracha sauce. Mix well until combined. Then, add the coated flank steak and carrots. Mix until well-coated.

Step 3: Put the lid on and set to cook for 2 to 3 hours on high or 4 hours on low until the steak is completely cooked and tender.

Step 4: When done, serve the Mongolian Beef right away over rice. If desired, garnish with some green onions and sesame seeds. Enjoy!

August 29, 2022 0 comment
0 FacebookTwitterPinterestEmail
General Recipes

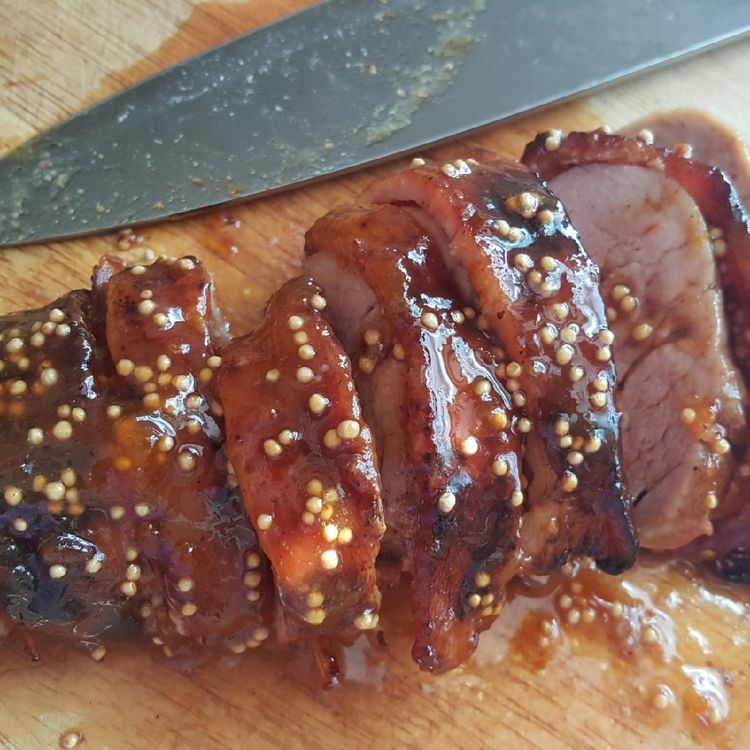
Apricot Glazed Bacon Wrapped Cajun Pork Tenderloin

by Rebecca August 29, 2022
written by Rebecca

Prep Time: 5 mins | Cook Time: 25 mins | Total Time: 30 mins | Servings: 4

I have been making this Apricot Glazed Bacon Wrapped Cajun Pork Tenderloin for years! I love the moist and juicy Cajun seasoned pork tenderloin clothed in crispy bacon and covered in an apricot Dijon sauce. The combination of sweet and salty flavors is simply perfect!

This mouthwatering Apricot Glazed Bacon Wrapped Cajun Pork Tenderloin is made with just a few simple ingredients that you might already have on hand. The steps are pretty straightforward. This dish is overall an easy weeknight dinner option that is also amazing for entertaining. This recipe is the easiest roast pork recipe you’ll ever make! It is made in just a single pan/skillet and ready in under thirty minutes, making this an excellent weeknight dinner idea for busy days. And this is also perfect if you are expecting a company.

Say no more to those boring roast pork loin recipes and give this pleasing apricot-glazed bacon-wrapped Cajun pork tenderloin a try very soon!

Ingredients

6 strips bacon

1 1/2 lb pork tenderloin

2 tbsp brown sugar

3 tbsp apricot preserves

1 tbsp grainy Dijon mustard

1 tbsp Cajun seasoning

How to make Apricot Glazed Bacon Wrapped Cajun Pork Tenderloin

Step 1: Mix the Cajun seasoning and brown sugar. Evenly sprinkle the pork tenderloin with the mixture and gently rub to coat all sides. Then, wrap the pork tenderloin with the bacon.

Step 2: Into a hot oven-safe skillet over medium heat, cook the bacon-wrapped pork tenderloin for about 10 to 15 minutes until all sides are browned.

Step 3: Into a preheated 400 degrees F or 200 degrees C oven, transfer the pan and roast the pork for about 10 to 15 minutes until the internal temperature of the pork reaches 140 degrees F. Near the end of cooking, brush the pork with the mixture of apricot preserves and mustard.

Step 4: Remove from the oven when done and allow the pork to rest for about 5 minutes, covered.

Nutrition Facts:

Calories 361, Fat 10.2g (Saturated 3.4g, Trans 0), Cholesterol 135mg, Sodium 619mg, Carbs 15.2g (Fiber 0, Sugars 11.3g), Protein 48.8g

Apricot Glazed Bacon Wrapped Cajun Pork Tenderloin

Rebecca Prep Time: 5 mins | Cook Time: 25 mins | Total Time: 30 mins | Servings: 4 I have been making this Apricot Glazed Bacon Wrapped Cajun Pork Tenderloin for… General Recipes Apricot Glazed Bacon Wrapped Cajun Pork Tenderloin European Print This
Serves: 4 Prep Time: 5 mins Cooking Time: 25 mins 25 mins
Nutrition facts: 361 calories 10.2 fat
Rating: 5.0/5
( 1 voted )

Ingredients

  • 6 strips bacon
  • 1 1/2 lb pork tenderloin
  • 2 tbsp brown sugar
  • 3 tbsp apricot preserves
  • 1 tbsp grainy Dijon mustard
  • 1 tbsp Cajun seasoning

Instructions

Step 1: Mix the Cajun seasoning and brown sugar. Evenly sprinkle the pork tenderloin with the mixture and gently rub to coat all sides. Then, wrap the pork tenderloin with the bacon.

Step 2: Into a hot oven-safe skillet over medium heat, cook the bacon-wrapped pork tenderloin for about 10 to 15 minutes until all sides are browned.

Step 3: Into a preheated 400 degrees F or 200 degrees C oven, transfer the pan and roast the pork for about 10 to 15 minutes until the internal temperature of the pork reaches 140 degrees F. Near the end of cooking, brush the pork with the mixture of apricot preserves and mustard.

Step 4: Remove from the oven when done and allow the pork to rest for about 5 minutes, covered.

August 29, 2022 0 comment
0 FacebookTwitterPinterestEmail
Newer Posts
Older Posts

Popular Posts

  • 1

    Crispy Crunchy Parmesan Potatoes

    March 21, 2020
  • 2

    CROCK POT SMOTHERED PORK CHOPS

    March 21, 2020
  • Facebook
  • Twitter

@2019 - All Right Reserved.


Back To Top