Cook it once
  • Home
  • Privacy Policy
  • Recipes
    • KETO
    • LC
    • WW
  • Tips
  • Contact
Cook it once
  • Home
  • Privacy Policy
  • Recipes
    • KETO
    • LC
    • WW
  • Tips
  • Contact
Category:

General Recipes

General Recipes

Swiss Pork Chops Casserole

by Rebecca September 5, 2022
written by Rebecca

Prep time: 10 mins | Cook time: 35 mins | Serves: 6

I have made this Swiss Pork Chops Casserole a few nights ago and my family absolutely loved this! This amazing casserole instantly made it to my top spot of favorites. My family is again requesting this tonight! This casserole is crazy good and incredibly easy and quick to throw together. It is super comforting, creamy, and delicious!

This casserole is a no-fuss to make and requires only a few basic ingredients to make. Tender and juicy pork chops smothered in an irresistibly creamy sauce. And the topping is genius! All that goodness is covered with crushed croutons. If you are searching for another easy, fast, and delicious casserole, you have to give this Swiss Pork Chops Casserole a try soon. This is no doubt one of the best pork chops dishes I have made in years!

INGREDIENTS

4 tbsp butter, melted

6 boneless pork chops

9 slices of Swiss cheese

1/3 c. white wine

1 (10.75 ounces) can cream of chicken soup

Kosher salt and freshly ground black pepper, to taste

1 (5 ounces) bag Texas toast croutons, crushed

How to make Swiss Pork Chops Casserole

Step 1: Prepare the oven. Preheat it to 350 degrees F.

Step 2: Into the bottom of a 9 x 13-inch baking dish, pour the melted butter.

Step 3: Then, season the pork chops and lay them over the melted butter. On top of each pork chop, place 1 1/2 slices of cheese.

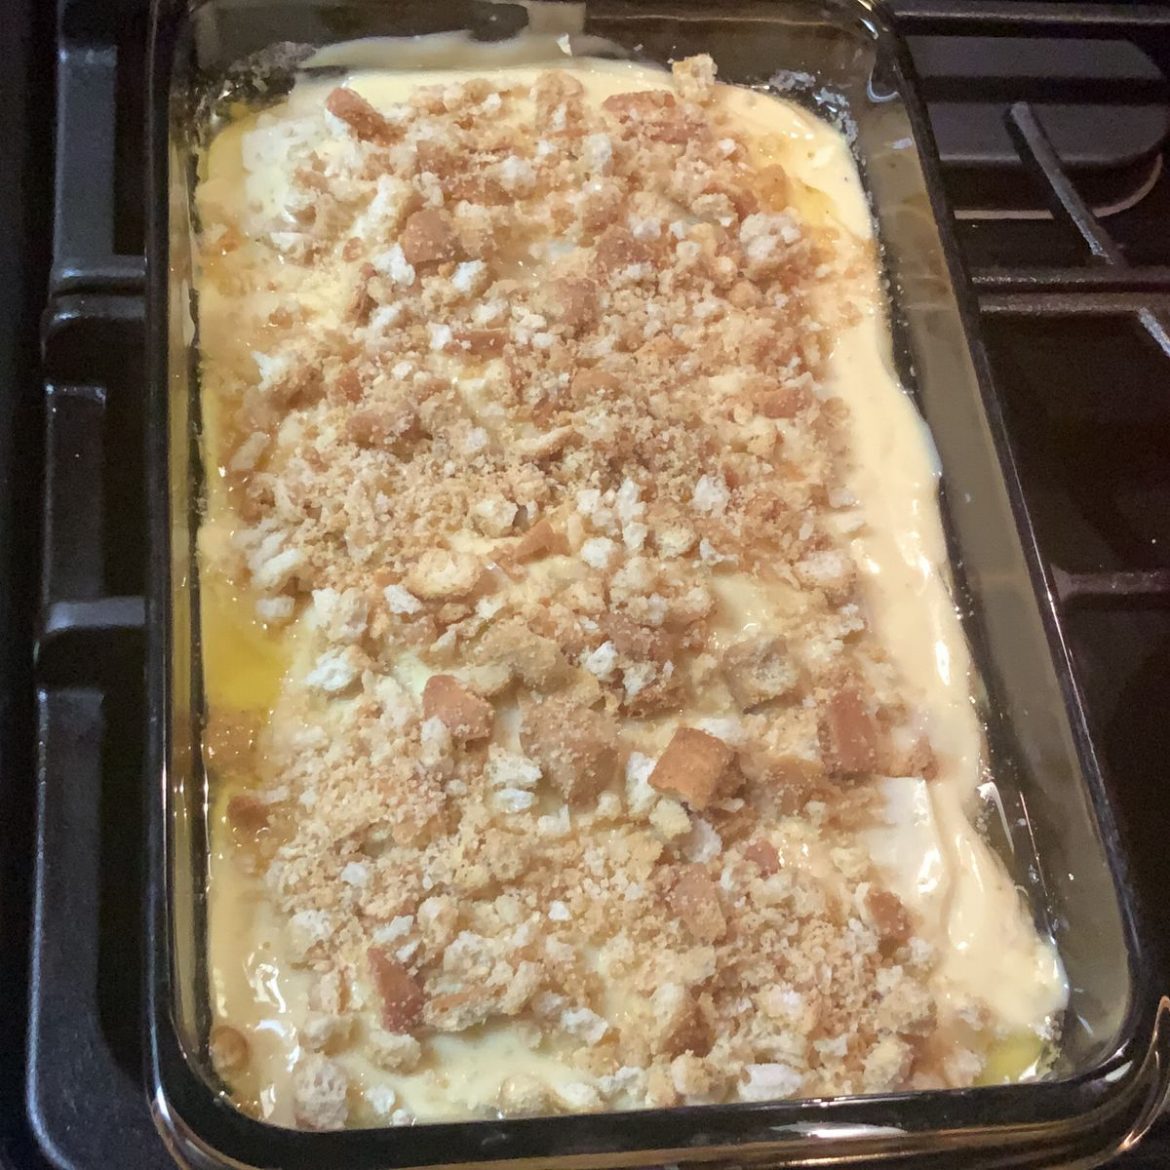
Step 4: Combine the cream of chicken soup and wine until well blended. Pour this over the pork chops, then place the crushed croutons on top.

Step 5: Place in the preheated oven and bake for about 35 to 45 minutes until the internal temperature of the chops reaches 145 degrees F.

Step 6: Remove from the oven when done and serve the Swiss Pork Chops Casserole immediately. Enjoy!
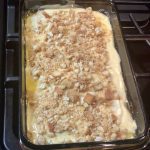
Swiss Pork Chops Casserole

Rebecca Prep time: 10 mins | Cook time: 35 mins | Serves: 6 I have made this Swiss Pork Chops Casserole a few nights ago and my family absolutely loved this!… General Recipes Swiss Pork Chops Casserole European Print This
Serves: 6 Prep Time: 10 mins Cooking Time: 35 mins 35 mins
Nutrition facts: 200 calories 20 grams fat
Rating: 5.0/5
( 1 voted )

Ingredients

  • 4 tbsp butter, melted
  • 6 boneless pork chops
  • 9 slices of Swiss cheese
  • 1/3 c. white wine
  • 1 (10.75 ounces) can cream of chicken soup
  • Kosher salt and freshly ground black pepper, to taste
  • 1 (5 ounces) bag Texas toast croutons, crushed

Instructions

Step 1: Prepare the oven. Preheat it to 350 degrees F.

Step 2: Into the bottom of a 9 x 13-inch baking dish, pour the melted butter.

Step 3: Then, season the pork chops and lay them over the melted butter. On top of each pork chop, place 1 1/2 slices of cheese.

Step 4: Combine the cream of chicken soup and wine until well blended. Pour this over the pork chops, then place the crushed croutons on top.

Step 5: Place in the preheated oven and bake for about 35 to 45 minutes until the internal temperature of the chops reaches 145 degrees F.

Step 6: Remove from the oven when done and serve the Swiss Pork Chops Casserole immediately. Enjoy!
September 5, 2022 0 comment
0 FacebookTwitterPinterestEmail
General Recipes

Baked Chicken Tacos: Easier Than You Think

by Rebecca September 5, 2022
written by Rebecca

Prep time: 10 mins | Cook time: 15 mins | Serves: 4

I love to serve tacos any day! We used to have Taco Tuesdays at home, but we figured since we love tacos so much we can just have them any day of the week! Our favorite are these Baked Chicken Tacos! They are super easy to make using simple ingredients. They are perfect for easy weeknight dinners. Stress-free, packed with flavor, and the ultimate tacos recipe if serving a crowd! These Baked Chicken Tacos are one of the best tacos I’ve made in years! Serve these tacos right out of the oven and top with your favorite toppings.

INGREDIENTS

2 c. cooked, shredded chicken

1 packet of taco seasoning

2 tbsp olive oil

1/2 white onion, diced

1 (4.5 ounces) can be chopped green chiles, drained

1 (14.5 ounces) can of diced tomatoes, drained

1 can of refried beans

2 c. Mexican blend shredded cheese

10 flat-bottom taco shells

Lettuce, shredded, for topping

Salsa, for topping

Sour cream, for topping

How to make Baked Chicken Tacos

Step 1: Prepare the oven. Preheat it to 400 degrees F. Using a nonstick spray, grease a 9 x 13-inch baking dish.

Step 2: In a skillet, heat the olive oil over medium heat. Once the oil is hot, add the onion to the skillet and cook for about 2 to 3 minutes until translucent. Then, add the chicken, taco seasoning, tomatoes, and green chiles. Stir and bring to a simmer. Continue to cook for another 5 minutes.

Step 3: Into the prepared baking dish, place the taco shells, and bake in the preheated oven for about 5 minutes.

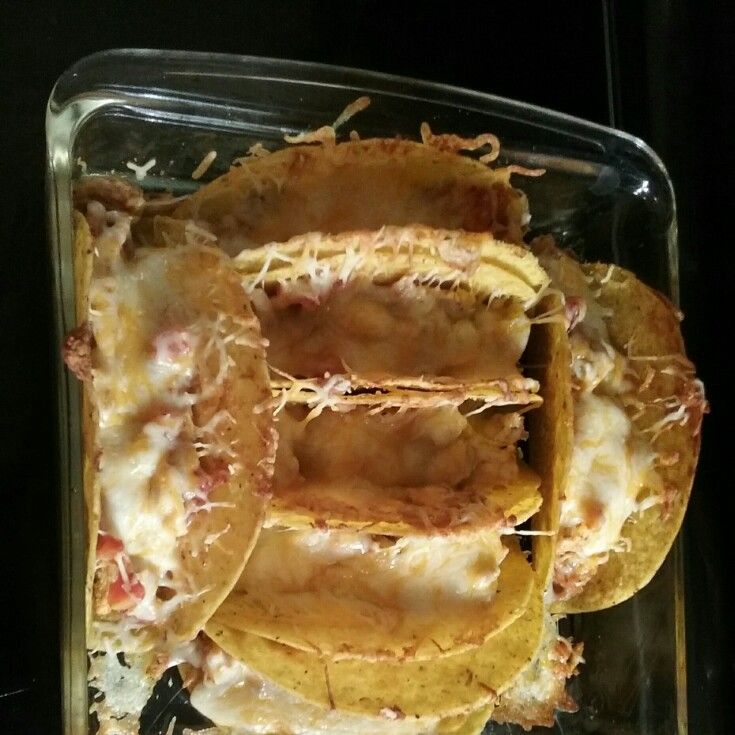
Step 4: Take the baking dish out of the oven, then fill the taco shells. In each shell, spoon about 1 to 2 tbsp of the beans and top each with chicken and sprinkle with cheese. Return to the oven and bake for an additional 8 to 10 minutes until the cheese has melted.

Step 5: Serve the Baked Chicken Tacos right away and top with your preferred toppings. Enjoy!

Baked Chicken Tacos: Easier Than You Think

Rebecca Prep time: 10 mins | Cook time: 15 mins | Serves: 4 I love to serve tacos any day! We used to have Taco Tuesdays at home, but we figured… General Recipes Baked Chicken Tacos: Easier Than You Think European Print This
Serves: 4 Prep Time: 10 mins Cooking Time: 15 mins 15 mins
Nutrition facts: 200 calories 20 grams fat
Rating: 5.0/5
( 1 voted )

Ingredients

  • 2 c. cooked, shredded chicken
  • 1 packet of taco seasoning
  • 2 tbsp olive oil
  • 1/2 white onion, diced
  • 1 (4.5 ounces) can be chopped green chiles, drained
  • 1 (14.5 ounces) can of diced tomatoes, drained
  • 1 can of refried beans
  • 2 c. Mexican blend shredded cheese
  • 10 flat-bottom taco shells
  • Lettuce, shredded, for topping
  • Salsa, for topping
  • Sour cream, for topping

Instructions

Step 1: Prepare the oven. Preheat it to 400 degrees F. Using a nonstick spray, grease a 9 x 13-inch baking dish.

Step 2: In a skillet, heat the olive oil over medium heat. Once the oil is hot, add the onion to the skillet and cook for about 2 to 3 minutes until translucent. Then, add the chicken, taco seasoning, tomatoes, and green chiles. Stir and bring to a simmer. Continue to cook for another 5 minutes.

Step 3: Into the prepared baking dish, place the taco shells, and bake in the preheated oven for about 5 minutes.

Step 4: Take the baking dish out of the oven, then fill the taco shells. In each shell, spoon about 1 to 2 tbsp of the beans and top each with chicken and sprinkle with cheese. Return to the oven and bake for an additional 8 to 10 minutes until the cheese has melted.

Step 5: Serve the Baked Chicken Tacos right away and top with your preferred toppings. Enjoy!

September 5, 2022 0 comment
0 FacebookTwitterPinterestEmail
General Recipes

Mongolian Ground Beef For Dinner Tonight

by Rebecca September 3, 2022
written by Rebecca

Prep time: 5 mins | Cook time: 15 mins | Serves: 4

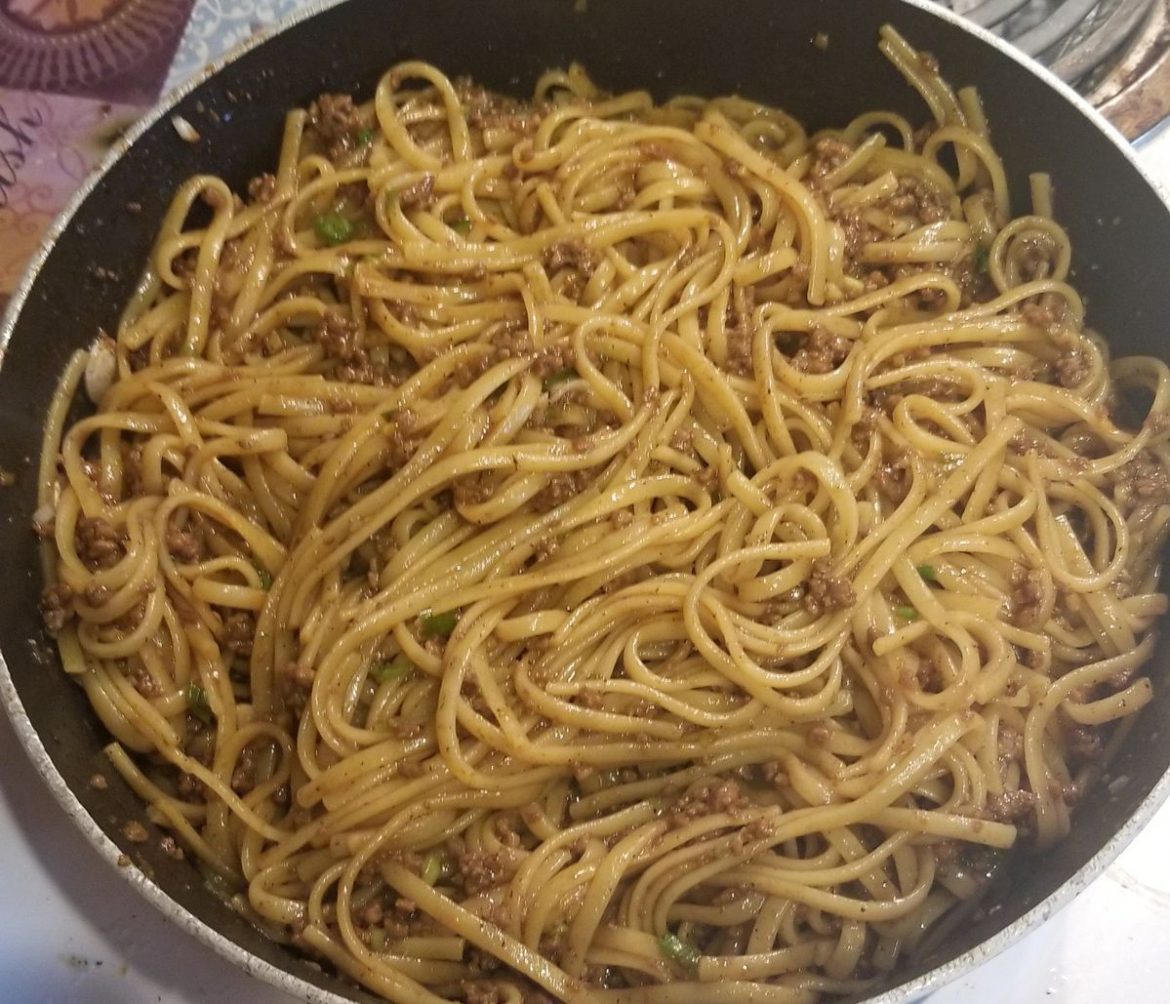
Mongolian Ground Beef is one of my top favorite Chinese takeout dishes. But that is the thing of the pasta now because I get to make it at home with this easy recipe. It is incredibly easy to throw together and I can get it ready in no time! This savory Mongolian Ground Beef is a classic. This is made with just basic pantry ingredients. I serve this over white rice with veggies like broccoli on the side for a simple, yet filling, delicious meal.

I love the combination of the sweet and slightly spicy flavor of this Mongolian Ground Beef. This tastes better than takeout and I can adjust the spice level according to my preference. Downright delicious and fantastic to serve over a bed of hot rice!

INGREDIENTS

4 cloves garlic, minced

1 pound of ground beef

1/4 c. beef broth

2 tbsp brown sugar

2 tsp rice vinegar

1 tbsp cornstarch

1/3 c. tamari or soy sauce

1” piece ginger, grated

White rice, for serving

3-4 green onions, sliced

1 tsp salt

1/2 tsp black pepper

How to make Mongolian Ground Beef

Step 1: Place the soy sauce, broth, rice vinegar, brown sugar, and cornstarch in a small bowl. Mix well until combined and set aside.

Step 2: Place the ground beef in a large skillet and season with salt and pepper. Cook the meat over medium heat until browned.

Step 3: Adjust the heat to medium-low. To the pan, add the garlic and ginger. Continue to cook for an additional 2 to 3 minutes until aromatic.

Step 4: Add the sauce, stir, and let it simmer for about 1 to 2 minutes until the sauce has thickened.

Step 5: Stir well until the ground beef is coated in sauce. Then, add the green onions and briefly cook until wilted. This takes another 2 minutes.

Step 6: When done, serve the Mongolian Ground Beef right away over white rice with steamed veggies on the side. Enjoy!

Mongolian Ground Beef For Dinner Tonight

Rebecca Prep time: 5 mins | Cook time: 15 mins | Serves: 4 Mongolian Ground Beef is one of my top favorite Chinese takeout dishes. But that is the thing of… General Recipes Mongolian Ground Beef For Dinner Tonight European Print This
Nutrition facts: 200 calories 20 grams fat
Rating: 3.9/5
( 8 voted )

Ingredients

  • 4 cloves garlic, minced
  • 1 pound of ground beef
  • 1/4 c. beef broth
  • 2 tbsp brown sugar
  • 2 tsp rice vinegar
  • 1 tbsp cornstarch
  • 1/3 c. tamari or soy sauce
  • 1” piece ginger, grated
  • White rice, for serving
  • 3-4 green onions, sliced
  • 1 tsp salt
  • 1/2 tsp black pepper

Instructions

Step 1: Place the soy sauce, broth, rice vinegar, brown sugar, and cornstarch in a small bowl. Mix well until combined and set aside.

Step 2: Place the ground beef in a large skillet and season with salt and pepper. Cook the meat over medium heat until browned.

Step 3: Adjust the heat to medium-low. To the pan, add the garlic and ginger. Continue to cook for an additional 2 to 3 minutes until aromatic.

Step 4: Add the sauce, stir, and let it simmer for about 1 to 2 minutes until the sauce has thickened.

Step 5: Stir well until the ground beef is coated in sauce. Then, add the green onions and briefly cook until wilted. This takes another 2 minutes.

Step 6: When done, serve the Mongolian Ground Beef right away over white rice with steamed veggies on the side. Enjoy!

September 3, 2022 0 comment
0 FacebookTwitterPinterestEmail
General Recipes

Cheese Shrimp Penne Pasta & Spinach

by Rebecca September 3, 2022
written by Rebecca

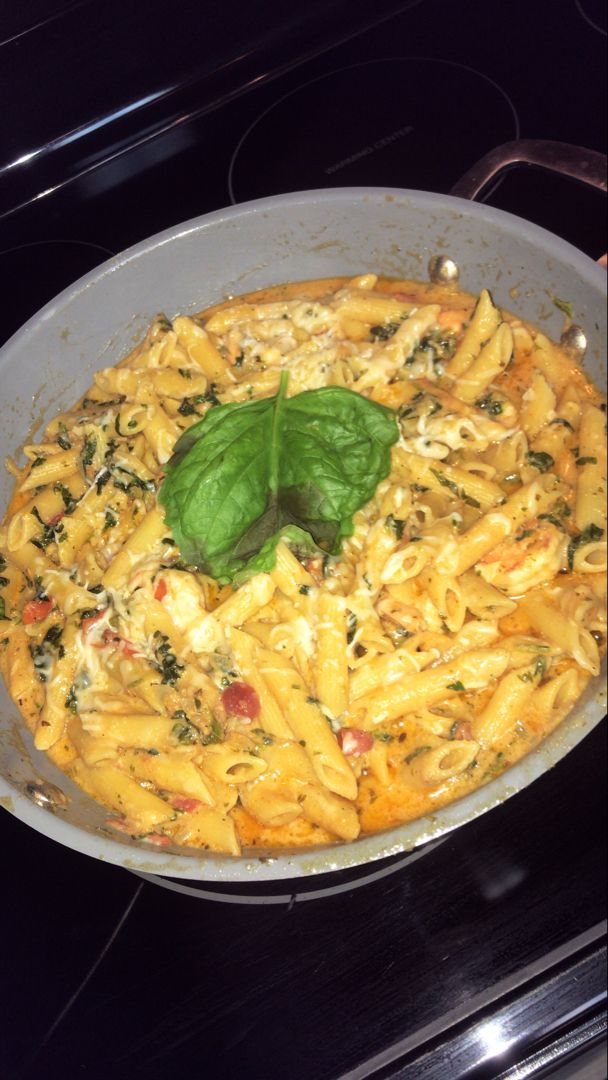
I love shrimp and penne pasta, the main reason I am obsessed with this amazing Cheese Shrimp Penne Pasta & Spinach! I can get two of my favorites in a single dish! Incredibly easy and quick to make. And perfect to serve by itself or with some bread on the side.

Ingredients

1 tablespoon Oil

3 Garlic cloves (minced)

1 box Penne Pasta

8 cups Water

1 pound Shrimp (peeled and deveined)

2 tablespoons Butter

3 cups Fresh Chopped Spinach, Kale, or Arugula (do not use frozen)

1 cup Mozzarella or Swiss Cheese

2 teaspoons Salt, Pepper & Garlic Salt

How to make Cheese Shrimp Penne Pasta & Spinach

Step 1: Following the package directions, cook the pasta. Add the shrimp to the pasta in the last five minutes of cooking and cook until the shrimp is no longer pink.

Step 2: Reserve 1 c. of the pasta water and drain the rest. Keep the shrimp and pasta warm.

Step 3: In a pan, add the oil and butter. Let the butter melt over medium heat. Then, add the pasta and season it to taste. Cook for a few minutes more.

Step 4: Add the spinach to the pan and continue to cook for a minute more until the spinach has wilted. Pour in 1/3 c. of the reserved pasta water. Next, add the cheese and shrimp. Toss well and gently simmer until the cheese has melted.

Step 5: Adjust the seasoning if needed. Serve right away garnished with some freshly chopped cilantro. Enjoy!

Tips:

For this recipe, I prefer to remove the tails of the shrimp but keep the shell intact for flavor.

I like to use penne pasta for this recipe, but you are welcome to use any kind of pasta you prefer. You can even use whole wheat pasta.

You can store any leftovers in the fridge for up to 5 days. To reheat, I suggest slowly heating it on the stove and adding extra cheese.

This dish is excellent by itself, but you can also serve this with bread along the side.

Cheese Shrimp Penne Pasta & Spinach

Rebecca I love shrimp and penne pasta, the main reason I am obsessed with this amazing Cheese Shrimp Penne Pasta & Spinach! I can get two of my favorites in a… General Recipes Cheese Shrimp Penne Pasta & Spinach European Print This
Nutrition facts: 200 calories 20 grams fat
Rating: 5.0/5
( 1 voted )

Ingredients

  • 1 tablespoon Oil
  • 3 Garlic cloves (minced)
  • 1 box Penne Pasta
  • 8 cups Water
  • 1 pound Shrimp (peeled and deveined)
  • 2 tablespoons Butter
  • 3 cups Fresh Chopped Spinach, Kale, or Arugula (do not use frozen)
  • 1 cup Mozzarella or Swiss Cheese
  • 2 teaspoons Salt, Pepper & Garlic Salt

Instructions

Step 1: Following the package directions, cook the pasta. Add the shrimp to the pasta in the last five minutes of cooking and cook until the shrimp is no longer pink.

Step 2: Reserve 1 c. of the pasta water and drain the rest. Keep the shrimp and pasta warm.

Step 3: In a pan, add the oil and butter. Let the butter melt over medium heat. Then, add the pasta and season it to taste. Cook for a few minutes more.

Step 4: Add the spinach to the pan and continue to cook for a minute more until the spinach has wilted. Pour in 1/3 c. of the reserved pasta water. Next, add the cheese and shrimp. Toss well and gently simmer until the cheese has melted.

Step 5: Adjust the seasoning if needed. Serve right away garnished with some freshly chopped cilantro. Enjoy!

September 3, 2022 0 comment
0 FacebookTwitterPinterestEmail
General Recipes

Best Steak Marinade In Existence ever

by Rebecca September 3, 2022
written by Rebecca

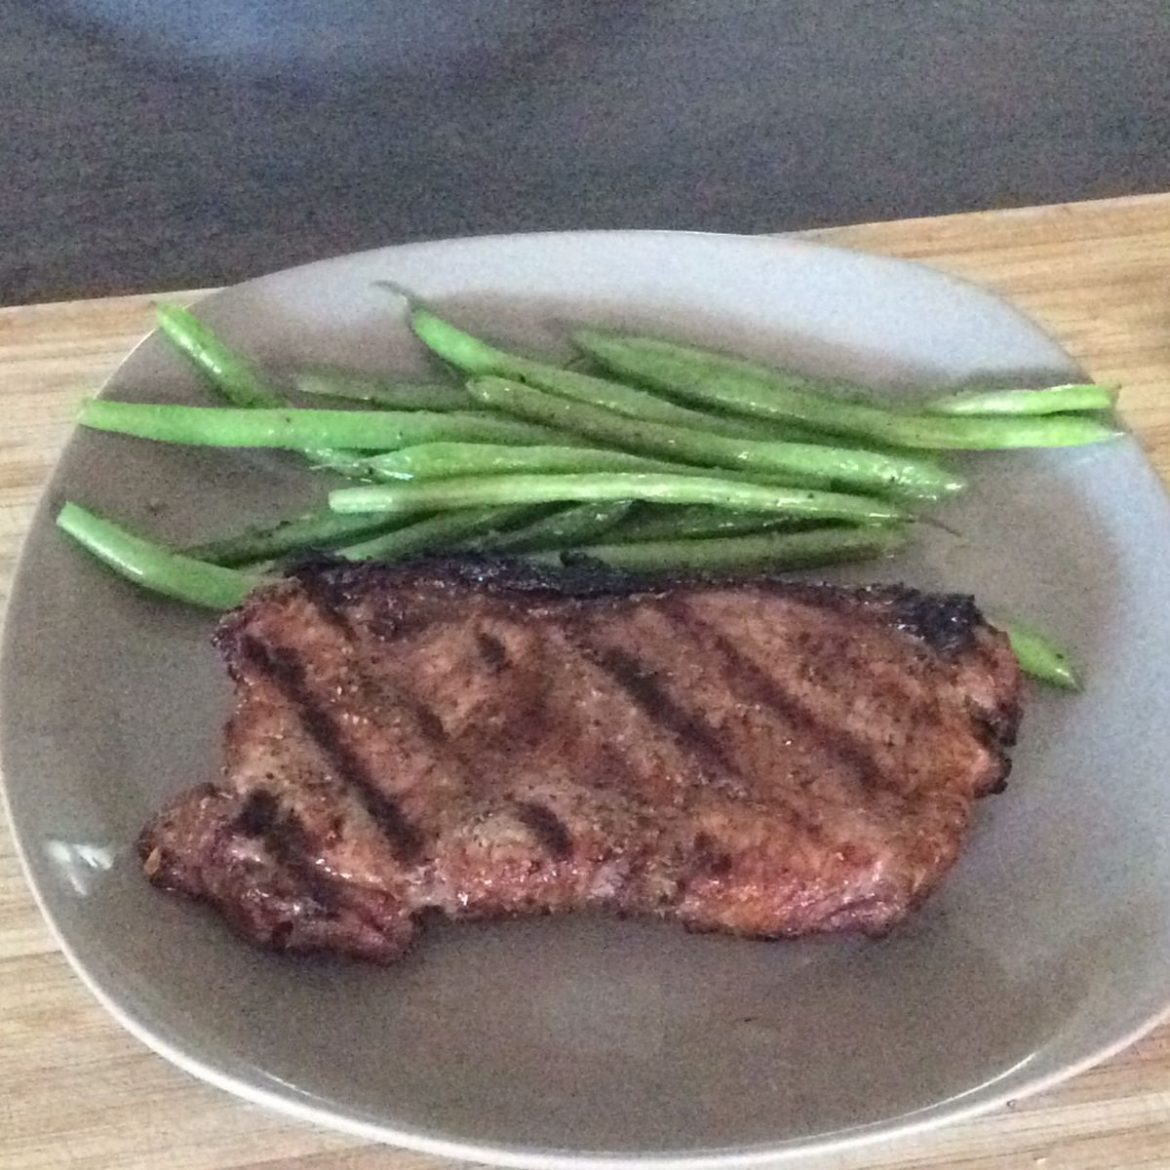
I have tried many steak marinade recipes before and nothing beats this Best Steak Marinade! It is quite simple, the ingredients you need are just basic pantry essentials. Simply mix everything and let your meat marinate for a couple of hours for the best result. This marinade is great for anything – burgers, chicken, fish, and of course steak.

I love this simple marinade for steak. This marinade brings your steak to the next level with mind-blowing flavors and an exceptional finish. All the flavors from the marinade coat the steak deep and just a single bite is enough for you to know the difference. This marinade recipe is another must-try and a keeper!

Ingredients

1/2 c. olive oil

1/3 c. Soy sauce

1/3 c. fresh lemon juice

1 1/2 tbsp garlic powder

1/4 c. Worcestershire sauce

3 tbsp dried basil

1/4 tsp hot pepper sauce

1 tsp ground white pepper

1 tsp dried minced garlic

1 1/2 tbsp dried parsley flakes

How to make The Best Steak Marinade

Step 1: Into the blender, place the soy sauce, lemon juice, olive oil, Worcester sauce, parsley, garlic powder, pepper, and basil. If desired, add extra garlic and hot pepper sauce. On high speed, blend the ingredients for about 30 seconds until completely mixed.

Step 2: Over your preferred meat, pour the marinade.

Step 3: Using a plastic bag, cover the meat. I put the meat and marinade in a plastic bag and seal. Keep this in the fridge for a few hours.

Step 4: After marinating the meat, remove it from the marinade and cook.

Tips:

For that extra spice, feel free to add hot pepper sauce or flakes. Note that a little amount goes a long way. So just add enough.

Keep the chicken in the marinade for a couple of hours for the best flavor. When ready to serve, place the chicken on the stove or grill and cook until done.

Best Steak Marinade In Existence ever

Rebecca I have tried many steak marinade recipes before and nothing beats this Best Steak Marinade! It is quite simple, the ingredients you need are just basic pantry essentials. Simply mix… General Recipes Best Steak Marinade In Existence ever European Print This
Nutrition facts: 200 calories 20 grams fat
Rating: 4.5/5
( 2 voted )

Ingredients

  • 1/2 c. olive oil
  • 1/3 c. Soy sauce
  • 1/3 c. fresh lemon juice
  • 1 1/2 tbsp garlic powder
  • 1/4 c. Worcestershire sauce
  • 3 tbsp dried basil
  • 1/4 tsp hot pepper sauce
  • 1 tsp ground white pepper
  • 1 tsp dried minced garlic
  • 1 1/2 tbsp dried parsley flakes

Instructions

Step 1: Into the blender, place the soy sauce, lemon juice, olive oil, Worcester sauce, parsley, garlic powder, pepper, and basil. If desired, add extra garlic and hot pepper sauce. On high speed, blend the ingredients for about 30 seconds until completely mixed.

Step 2: Over your preferred meat, pour the marinade.

Step 3: Using a plastic bag, cover the meat. I put the meat and marinade in a plastic bag and seal. Keep this in the fridge for a few hours.

Step 4: After marinating the meat, remove it from the marinade and cook.

Notes

For that extra spice, feel free to add hot pepper sauce or flakes. Note that a little amount goes a long way. So just add enough. Keep the chicken in the marinade for a couple of hours for the best flavor. When ready to serve, place the chicken on the stove or grill and cook until done.

September 3, 2022 0 comment
0 FacebookTwitterPinterestEmail
General Recipes

Mini Strawberry Cheesecake Bites

by Rebecca September 3, 2022
written by Rebecca

These Mini Strawberry Cheesecake Bites are a luscious, fun treat! A delicious summer months dessert. Super adorable, bite-sized treat that is made with just a few simple ingredients. If you love bite-sized desserts, cheesecake, and strawberries, then these Mini Strawberry Cheesecake Bites are all you are looking for!

If you are searching for another cute, fun, easy-to-make dessert to add to an evening of entertaining, then you must not miss these Mini Strawberry Cheesecake Bites! These are crazy good you’ll find yourself eating a whole bunch of them! I always make sure to whip up a big batch because these go out fast. To make this Mini Strawberry Cheesecake Bites prettier, add a sliced fresh strawberry on top.

Ingredients

3 (large) eggs

2 8-ounces pkg of cream cheese (softened to Room Temp)

3/4 c. of Sugar

1 teaspoon Vanilla Extract

Mini Nilla Wafers (REGULAR)

1 tablespoon lemon juice (freshly squeezed)

1 can pie filling of your choice (Strawberry has always been my favorite!)

Dash or 2 of lemon zest (optional)

How to make Mini Strawberry Cheesecake Bites

Step 1: Fill the cupcake pan with liners. Into the pan, place the little mini wafers, mounded-side upwards.

Step 2: Combine the filling ingredients (sugar, cream cheese, vanilla extract, lemon juice, eggs, and lemon zest) until silky smooth. I do this using my blender.

Step 3: Fill the cupcake liners with the filling to about 3/4 full.

Step 4: Place into the preheated oven and bake for about 18 to 20 minutes at 350 degrees until cooked through.

Step 5: Remove from the oven when done and allow the crust to cool. To speed up the process, place them in the fridge.

Step 6: On top of the cheesecake cups, add the filling.

Step 7: Return to the fridge to chill (at least 1 hour up to 3 hours) before serving. Enjoy!

Mini Strawberry Cheesecake Bites

Rebecca These Mini Strawberry Cheesecake Bites are a luscious, fun treat! A delicious summer months dessert. Super adorable, bite-sized treat that is made with just a few simple ingredients. If you… General Recipes Mini Strawberry Cheesecake Bites European Print This
Nutrition facts: 200 calories 20 grams fat
Rating: 3.5/5
( 2 voted )

Ingredients

  • 3 (large) eggs
  • 2 8-ounces pkg of cream cheese (softened to Room Temp)
  • 3/4 c. of Sugar
  • 1 teaspoon Vanilla Extract
  • Mini Nilla Wafers (REGULAR)
  • 1 tablespoon lemon juice (freshly squeezed)
  • 1 can pie filling of your choice (Strawberry has always been my favorite!)
  • Dash or 2 of lemon zest (optional)

Instructions

Step 1: Fill the cupcake pan with liners. Into the pan, place the little mini wafers, mounded-side upwards.

Step 2: Combine the filling ingredients (sugar, cream cheese, vanilla extract, lemon juice, eggs, and lemon zest) until silky smooth. I do this using my blender.

Step 3: Fill the cupcake liners with the filling to about 3/4 full.

Step 4: Place into the preheated oven and bake for about 18 to 20 minutes at 350 degrees until cooked through.

Step 5: Remove from the oven when done and allow the crust to cool. To speed up the process, place them in the fridge.

Step 6: On top of the cheesecake cups, add the filling.

Step 7: Return to the fridge to chill (at least 1 hour up to 3 hours) before serving. Enjoy!

September 3, 2022 0 comment
0 FacebookTwitterPinterestEmail
General Recipes

Pizza Burgers

by Rebecca September 3, 2022
written by Rebecca

I am obsessed with these Pizza Burgers! I grew up eating English muffin pizzas and these pizza burgers bring so many memories. I do not know what my childhood would be like without these pizza burgers! I am in love with these since I was little. They are like a pizza-burger hybrid. Super comforting and a family-approved meal.

To make these pizza burgers all you need are a couple of simple ingredients. Super good, you’ll want to make these delicious pizza burgers every night! It is like eating our two favorites in one – pizza and burgers.

INGREDIENTS

3 tbsp Butter

1 whole Medium Onion, Chopped

1 lb Lean Ground Beef

¼ c. Water

1 can (10 ounces) Tomato Soup

1 tbsp Pizza Or Italian Seasoning

4 whole English Muffins, Split In Half

32 slices Pepperoni

1 tsp Canola Or Vegetable Oil

2 c. Shredded Mozzarella Cheese

1 tbsp Garlic Salt

How to make Pizza Burgers

Step 1: To a skillet, heat some vegetable or canola oil over medium-high heat. Once the oil is hot, add the onions and cook until softened. Then, add the ground meat and continue to cook until no longer pink.

Step 2: To the skillet, pour in the water and tomato soup. Add the seasoning and let this come to a boil. Adjust the heat to low and simmer.

Step 3: Prepare the oven. Set it to broil.

Step 4: Place butter on half of the English muffins. Top with garlic salt and about 4 pepperonis. On a sheet, place the English muffins and broil for about 2 minutes or so until the edges begin to brown. Remove from the oven when done and top the English muffins with 1/4 c of the meat and sprinkle with cheese. Return to the oven and broil for a few minutes until bubbly and browned.

Step 5: Allow the pizza burgers to cool a little. Serve and enjoy!

Pizza Burgers

Rebecca I am obsessed with these Pizza Burgers! I grew up eating English muffin pizzas and these pizza burgers bring so many memories. I do not know what my childhood would… General Recipes Pizza Burgers European Print This
Nutrition facts: 200 calories 20 grams fat
Rating: 5.0/5
( 1 voted )

Ingredients

  • 3 tbsp Butter
  • 1 whole Medium Onion, Chopped
  • 1 lb Lean Ground Beef
  • ¼ c. Water
  • 1 can (10 ounces) Tomato Soup
  • 1 tbsp Pizza Or Italian Seasoning
  • 4 whole English Muffins, Split In Half
  • 32 slices Pepperoni
  • 1 tsp Canola Or Vegetable Oil
  • 2 c. Shredded Mozzarella Cheese
  • 1 tbsp Garlic Salt

Instructions

Step 1: To a skillet, heat some vegetable or canola oil over medium-high heat. Once the oil is hot, add the onions and cook until softened. Then, add the ground meat and continue to cook until no longer pink.

Step 2: To the skillet, pour in the water and tomato soup. Add the seasoning and let this come to a boil. Adjust the heat to low and simmer.

Step 3: Prepare the oven. Set it to broil.

Step 4: Place butter on half of the English muffins. Top with garlic salt and about 4 pepperonis. On a sheet, place the English muffins and broil for about 2 minutes or so until the edges begin to brown. Remove from the oven when done and top the English muffins with 1/4 c of the meat and sprinkle with cheese. Return to the oven and broil for a few minutes until bubbly and browned.

Step 5: Allow the pizza burgers to cool a little. Serve and enjoy!

September 3, 2022 0 comment
0 FacebookTwitterPinterestEmail
General Recipes

Sweet Amish Macaroni Salad

by Rebecca September 3, 2022
written by Rebecca

This Sweet Amish Macaroni Salad is one of the best salads I’ve made! Easy to throw together using a few simple ingredients. The secret is keeping the salad in the fridge for at least an hour, preferably longer for better flavor!

INGREDIENTS

Salad:

3 celery ribs – diced small

1 pound salad, macaroni

1 small onion – finely diced

1 small, sweet pepper – seeded and diced small (red or orange)

4 hard-boiled eggs -chopped

Dressing:

2 tablespoons dill pickle relish

2 c. light mayonnaise – If you prefer Miracle Whip, See Notes

3/4 teaspoon celery seed

1-2 tablespoons yellow or Dijon mustard

1 tablespoon white vinegar OR 1 tablespoon apple cider vinegar

1/2 c. sugar

paprika (to garnish)

1/4 teaspoon salt

How to make Sweet Amish Macaroni Salad

Step 1: Following the package directions, cook the macaroni in a large pot with salted boiling water. Drain when done and rinse with cold water. To a large bowl, transfer the cooked macaroni.

Step 2: In the meantime, whisk the dressing ingredients until well combined and set aside. Next, chop up the veggies and hard-boiled eggs. Set aside.

Step 3: To the cooled macaroni, add the veggies and chopped hard-boiled eggs. Mix gently. If you prefer an extra creamy salad, add all the dressing. Or set aside 1/2 – 3/4 c. of the dressing in the fridge if you do not like your salad extra creamy.

Step 4: Place the salad in the fridge for at least 1 hour or longer if you prefer a better flavor.

Step 5: Before serving, sprinkle the paprika over the salad. Enjoy!

NOTES:

Decrease the sugar to 1/4 c. if you desire a less sweet dressing.

If desired, you can decrease the amount of mustard.

Splenda is an amazing sugar substitute.

If using Miracle Whip, reduce the amount of sugar.

For this salad, you can use either dill pickle relish or sweet pickle relish.

If preferred, skip the bell peppers. Or swap it with shredded carrots. You can even use both!

In an airtight container, keep any leftovers and store them in the fridge for up to 3 days.

Sweet Amish Macaroni Salad

Rebecca This Sweet Amish Macaroni Salad is one of the best salads I’ve made! Easy to throw together using a few simple ingredients. The secret is keeping the salad in the… General Recipes Sweet Amish Macaroni Salad European Print This
Nutrition facts: 200 calories 20 grams fat
Rating: 5.0/5
( 1 voted )

Ingredients

  • Salad:
  • 3 celery ribs – diced small
  • 1 pound salad, macaroni
  • 1 small onion – finely diced
  • 1 small, sweet pepper – seeded and diced small (red or orange)
  • 4 hard-boiled eggs -chopped
  • Dressing:
  • 2 tablespoons dill pickle relish
  • 2 c. light mayonnaise – If you prefer Miracle Whip, See Notes
  • 3/4 teaspoon celery seed
  • 1-2 tablespoons yellow or Dijon mustard
  • 1 tablespoon white vinegar OR 1 tablespoon apple cider vinegar
  • 1/2 c. sugar
  • paprika (to garnish)
  • 1/4 teaspoon salt

Instructions

Step 1: Following the package directions, cook the macaroni in a large pot with salted boiling water. Drain when done and rinse with cold water. To a large bowl, transfer the cooked macaroni.

Step 2: In the meantime, whisk the dressing ingredients until well combined and set aside. Next, chop up the veggies and hard-boiled eggs. Set aside.

Step 3: To the cooled macaroni, add the veggies and chopped hard-boiled eggs. Mix gently. If you prefer an extra creamy salad, add all the dressing. Or set aside 1/2 - 3/4 c. of the dressing in the fridge if you do not like your salad extra creamy.

Step 4: Place the salad in the fridge for at least 1 hour or longer if you prefer a better flavor.

Step 5: Before serving, sprinkle the paprika over the salad. Enjoy!

Notes

Decrease the sugar to 1/4 c. if you desire a less sweet dressing. If desired, you can decrease the amount of mustard. Splenda is an amazing sugar substitute. If using Miracle Whip, reduce the amount of sugar. For this salad, you can use either dill pickle relish or sweet pickle relish. If preferred, skip the bell peppers. Or swap it with shredded carrots. You can even use both! In an airtight container, keep any leftovers and store them in the fridge for up to 3 days.

September 3, 2022 0 comment
0 FacebookTwitterPinterestEmail
General Recipes

Easy Beef Chili

by Rebecca September 3, 2022
written by Rebecca

This Beef Chili is an incredibly easy recipe that you can make without too much fuss. It is perfectly seasoned with a nice and thick texture like a stew. For an extra level of flavor, top the beef chili with some shredded cheddar cheese, sour cream, sliced green onions, diced avocado, or saltine crackers.

INGREDIENTS

3 cloves garlic, minced

1 1/2 pound ground beef

1 (28 ounces) can of crushed tomatoes

1 tablespoon extra-virgin olive oil

1 teaspoon ground cumin

2 tablespoons tomato paste

1 1/2 tablespoons chili powder

1 (15 ounces) can of kidney beans, drained

1 teaspoon dried oregano

1/2 teaspoon paprika

1/2 large white onion, chopped

Freshly ground black pepper

Kosher salt

1/4 teaspoon cayenne pepper (optional)

TOPPINGS:

Sour cream

Thinly sliced green onions

Shredded cheddar

How to make Easy Beef Chili

Step 1: In a pot, heat the oil over medium heat. Then, add the onions and cook for about 5 minutes until tender.

Step 2: To the pot, add the tomato paste. Stir and add the ground beef. Continue to cook until the meat is no longer pink. Drain when done and return the pot to the heat.

Step 3: Into the mixture, add the chili powder, oregano, cayenne, cumin, paprika, salt, and pepper. Add the kidney beans and crushed tomatoes. Bring everything to a boil.

Step 4: Decrease the heat and let the chili simmer for about 20 minutes. As needed, season with more salt and pepper.

Step 5: Into serving bowls, ladle the chili, and enjoy right away!

Tips:

A good chili has a texture of a stew – nice and thick.

If the chili is too thin, add some flour, cornstarch, or oatmeal. Let this boil, then simmer for a minute until the chili has thickened. To increase the flavor, allow the chili to cook a bit longer.

If the chili is too thick, add a splash of water and lightly season.

Do not cover the pot while simmering the chili. If the liquid doesn’t evaporate too quickly, put the lid on but make sure the chili does not burn.

Easy Beef Chili

Rebecca This Beef Chili is an incredibly easy recipe that you can make without too much fuss. It is perfectly seasoned with a nice and thick texture like a stew. For… General Recipes Easy Beef Chili European Print This
Nutrition facts: 200 calories 20 grams fat
Rating: 4.0/5
( 2 voted )

Ingredients

  • 3 cloves garlic, minced
  • 1 1/2 pound ground beef
  • 1 (28 ounces) can of crushed tomatoes
  • 1 tablespoon extra-virgin olive oil
  • 1 teaspoon ground cumin
  • 2 tablespoons tomato paste
  • 1 1/2 tablespoons chili powder
  • 1 (15 ounces) can of kidney beans, drained
  • 1 teaspoon dried oregano
  • 1/2 teaspoon paprika
  • 1/2 large white onion, chopped
  • Freshly ground black pepper
  • Kosher salt
  • 1/4 teaspoon cayenne pepper (optional)
  • TOPPINGS:
  • Sour cream
  • Thinly sliced green onions
  • Shredded cheddar

Instructions

Step 1: In a pot, heat the oil over medium heat. Then, add the onions and cook for about 5 minutes until tender.

Step 2: To the pot, add the tomato paste. Stir and add the ground beef. Continue to cook until the meat is no longer pink. Drain when done and return the pot to the heat.

Step 3: Into the mixture, add the chili powder, oregano, cayenne, cumin, paprika, salt, and pepper. Add the kidney beans and crushed tomatoes. Bring everything to a boil.

Step 4: Decrease the heat and let the chili simmer for about 20 minutes. As needed, season with more salt and pepper.

Step 5: Into serving bowls, ladle the chili, and enjoy right away!

Notes

A good chili has a texture of a stew - nice and thick. If the chili is too thin, add some flour, cornstarch, or oatmeal. Let this boil, then simmer for a minute until the chili has thickened. To increase the flavor, allow the chili to cook a bit longer. If the chili is too thick, add a splash of water and lightly season. Do not cover the pot while simmering the chili. If the liquid doesn’t evaporate too quickly, put the lid on but make sure the chili does not burn.

September 3, 2022 0 comment
0 FacebookTwitterPinterestEmail
General Recipes

Classic Bruschetta

by Rebecca September 3, 2022
written by Rebecca

I love Bruschetta. They are especially great during hot summer days. Packed with flavor and the addition of tomatoes gives this a fun texture. Bruschetta is an excellent appetizer. Also excellent to serve with a side of pasta. And for an extra layer of flavor, you can top the Bruschetta with some cheese like ricotta or Parmesan cheese.

INGREDIENTS

TOMATOES:

4 tablespoons extra-virgin olive oil

2 cloves garlic, thinly sliced

Pinch of crushed red pepper flakes

2 tablespoons balsamic vinegar

1/4 cup thinly sliced basil

4 large tomatoes, diced

1 teaspoon kosher salt

BREAD:

1 large baguette, sliced ¼-inch thick on the bias

2 cloves garlic, halved

Extra-virgin olive oil, for brushing

How to Make Classic Bruschetta

Step 1: Heat the oil in a skillet over low-medium heat. Then, add the garlic and cook until golden. Remove the skillet from the heat and allow the garlic to cool down.

Step 2: In a big bowl, place the tomatoes, vinegar, basil, red pepper flakes, and salt. Mix well, then add the oil and garlic. Allow this to sit for about half an hour.

Step 3: Prepare the oven. Preheat it to 400 degrees.

Step 4: Slightly brush two sides of the bread with oil. Lay the bread on a sheet and toast for about 15 minutes until golden, turning the bread halfway.

Step 5: Remove the bread from the oven and allow it to cool for a couple of minutes. On top of the bread, place halved cloves of garlic.

Step 6: With some tomatoes, coat the top of each bread piece. Enjoy!

Tips:

You can store these in the fridge for up to a week. You can even freeze the bruschetta mix.

Place a spoonful of bruschetta on top of the bread.

Bruschetta is a wonderful appetizer. You can also serve this with a side of pasta. If desired, top the bruschetta with cheese such as ricotta or Parmesan cheese for an extra dose of flavor.

Nutritional Facts:

Serving size: 2 pieces of bread., Calories: 151 Protein: 3g Fiber: 1g Carbs: 18g Sagar: 3g Fat: 7g Saturated fat: 1g Sodium: 333 mg.

Classic Bruschetta

Rebecca I love Bruschetta. They are especially great during hot summer days. Packed with flavor and the addition of tomatoes gives this a fun texture. Bruschetta is an excellent appetizer. Also… General Recipes Classic Bruschetta European Print This
Nutrition facts: 151 calories 7 fat
Rating: 5.0/5
( 1 voted )

Ingredients

  • TOMATOES:
  • 4 tablespoons extra-virgin olive oil
  • 2 cloves garlic, thinly sliced
  • Pinch of crushed red pepper flakes
  • 2 tablespoons balsamic vinegar
  • 1/4 cup thinly sliced basil
  • 4 large tomatoes, diced
  • 1 teaspoon kosher salt
  • BREAD:
  • 1 large baguette, sliced ¼-inch thick on the bias
  • 2 cloves garlic, halved
  • Extra-virgin olive oil, for brushing

Instructions

Step 1: Heat the oil in a skillet over low-medium heat. Then, add the garlic and cook until golden. Remove the skillet from the heat and allow the garlic to cool down.

Step 2: In a big bowl, place the tomatoes, vinegar, basil, red pepper flakes, and salt. Mix well, then add the oil and garlic. Allow this to sit for about half an hour.

Step 3: Prepare the oven. Preheat it to 400 degrees.

Step 4: Slightly brush two sides of the bread with oil. Lay the bread on a sheet and toast for about 15 minutes until golden, turning the bread halfway.

Step 5: Remove the bread from the oven and allow it to cool for a couple of minutes. On top of the bread, place halved cloves of garlic.

Step 6: With some tomatoes, coat the top of each bread piece. Enjoy!

Notes

You can store these in the fridge for up to a week. You can even freeze the bruschetta mix. Place a spoonful of bruschetta on top of the bread. Bruschetta is a wonderful appetizer. You can also serve this with a side of pasta. If desired, top the bruschetta with cheese such as ricotta or Parmesan cheese for an extra dose of flavor.

September 3, 2022 0 comment
0 FacebookTwitterPinterestEmail
Newer Posts
Older Posts

Popular Posts

  • 1

    Crispy Crunchy Parmesan Potatoes

    March 21, 2020
  • 2

    CROCK POT SMOTHERED PORK CHOPS

    March 21, 2020
  • Facebook
  • Twitter

@2019 - All Right Reserved.


Back To Top