Cook it once
  • Home
  • Privacy Policy
  • Recipes
    • KETO
    • LC
    • WW
  • Tips
  • Contact
Cook it once
  • Home
  • Privacy Policy
  • Recipes
    • KETO
    • LC
    • WW
  • Tips
  • Contact
Category:

General Recipes

General Recipes

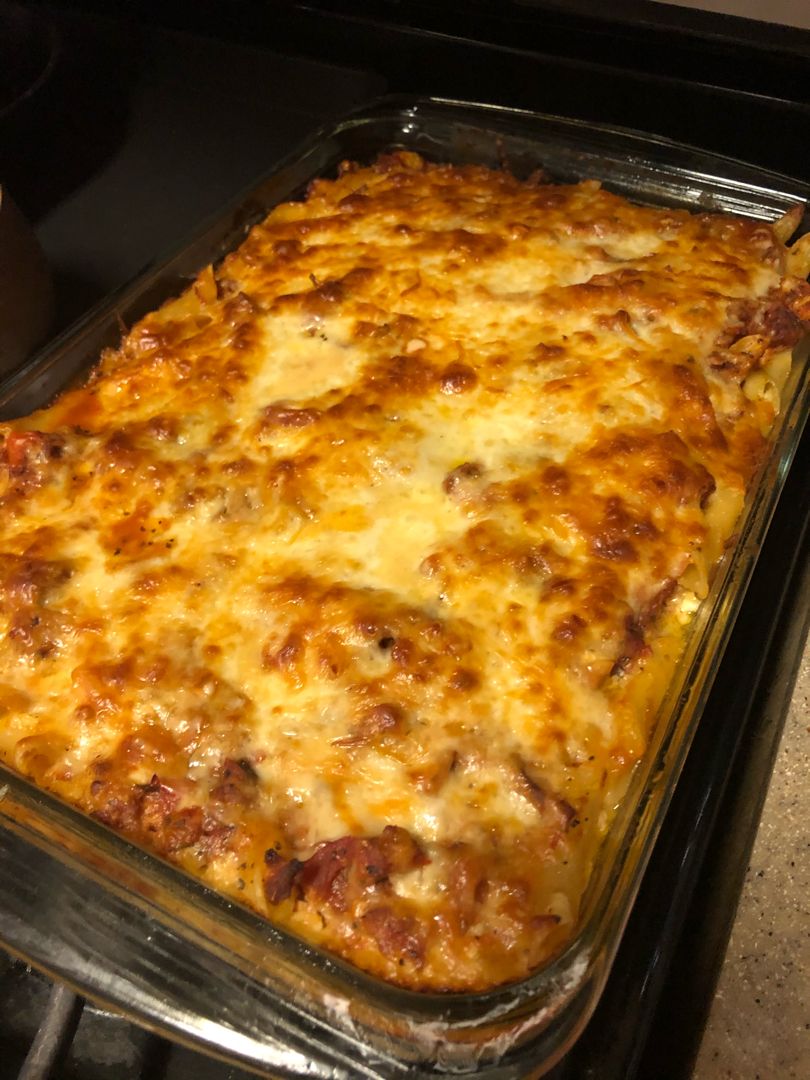
Italian Bake

by Rebecca September 6, 2022
written by Rebecca

Prep time: 15 mins | Cook time: 1 hr 5 mins | Total time: 1 hr 20 mins | Servings: 10

This Italian Bake recipe is super simple and quick to make. It is made with layers of marinara sauce, pasta, and three kinds of cheese. This dish has been one of my family’s favorites. It is super good and comforting. A five-ingredient dish that is loaded with amazing layers of flavors! If you love pasta and easy recipes, this Italian Bake is another great dinner option. Feel free to add sauteed mushrooms or browned ground beef for another layer of goodness!

Ingredients

4 c. marinara sauce, homemade or purchased

1 package of uncooked pasta, like penne, ziti, rotini, or rigatoni

½ c. grated Parmesan or Romano cheese

2 c. shredded mozzarella cheese

1 container ricotta cheese

How to make Italian Bake

Step 1: Following the package directions, cook the pasta in a large pot of salted boiling water until al dente. Drain when done.

Step 2: Prepare the oven. Preheat it to 350 degrees F. Using cooking spray, lightly grease a glass baking dish.

Step 3: Into the prepared baking dish, place 2 cups of marinara sauce. Add the pasta and toss well. On top, sprinkle 1/4 c. of the Parmesan cheese and add the ricotta cheese in dollops followed by 1 c of the mozzarella cheese. Repeat the layers, ending with mozzarella cheese. Lightly tent the dish with foil, making sure the foil is not touching the cheese.

Step 4: Place in the preheated oven and bake for about 35 minutes. Remove the foil and continue baking for an additional 10 to 15 minutes or until the center is completely heated and bubbly.

Step 5: Remove from the oven when done and let the Italian Bake, cool for about 10 to 15 minutes.

Step 6: Serve and enjoy!

Tips:

To prevent the pasta from getting too soft when baking, cook the pasta a couple of minutes less than what is directed on the package.

Another great combo is sauteed mushrooms or browned ground beef.

Nutritional Facts:

Calories: 410 Kcal, Total Fat: 12g, Protein: 21g, Total Carbohydrate: 54g, Sugars C: 9g
Italian Bake

Rebecca Prep time: 15 mins | Cook time: 1 hr 5 mins | Total time: 1 hr 20 mins | Servings: 10 This Italian Bake recipe is super simple and quick… General Recipes Italian Bake European Print This
Serves: 10 Prep Time: 15 mins Cooking Time: 1 hr 5 mins 1 hr 5 mins
Nutrition facts: 410 calories 12 fat
Rating: 3.5/5
( 2 voted )

Ingredients

  • 4 c. marinara sauce, homemade or purchased
  • 1 package of uncooked pasta, like penne, ziti, rotini, or rigatoni
  • ½ c. grated Parmesan or Romano cheese
  • 2 c. shredded mozzarella cheese
  • 1 container ricotta cheese

Instructions

Step 1: Following the package directions, cook the pasta in a large pot of salted boiling water until al dente. Drain when done.

Step 2: Prepare the oven. Preheat it to 350 degrees F. Using cooking spray, lightly grease a glass baking dish.

Step 3: Into the prepared baking dish, place 2 cups of marinara sauce. Add the pasta and toss well. On top, sprinkle 1/4 c. of the Parmesan cheese and add the ricotta cheese in dollops followed by 1 c of the mozzarella cheese. Repeat the layers, ending with mozzarella cheese. Lightly tent the dish with foil, making sure the foil is not touching the cheese.

Step 4: Place in the preheated oven and bake for about 35 minutes. Remove the foil and continue baking for an additional 10 to 15 minutes or until the center is completely heated and bubbly.

Step 5: Remove from the oven when done and let the Italian Bake, cool for about 10 to 15 minutes.

Step 6: Serve and enjoy!

Notes

To prevent the pasta from getting too soft when baking, cook the pasta a couple of minutes less than what is directed on the package. Another great combo is sauteed mushrooms or browned ground beef.
September 6, 2022 0 comment
0 FacebookTwitterPinterestEmail
General Recipes

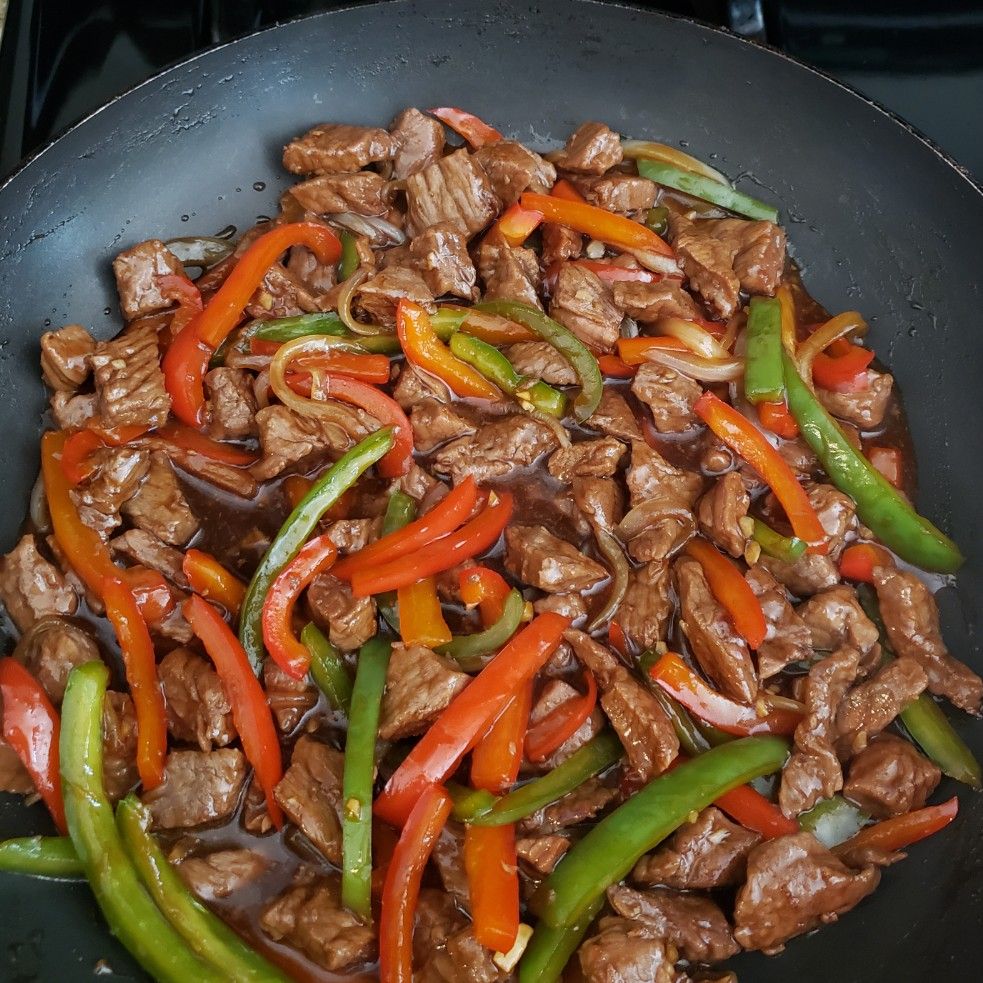
Best Ever Pepper Steak

by Rebecca September 6, 2022
written by Rebecca

Prep time: 20 mins | Cook time: 10 mins | Total time: 30 mins | Servings: 4

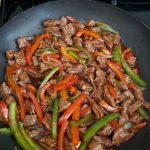
Savory and incredibly easy to make. Pepper Steak has been one of my family’s favorites. It not only tastes amazing, but smells fantastic too! Pan-seared juicy and tender steak tossed in colorful sauteed veggies and a simple, yet flavorful sauce.

Ingredients

1 tablespoon minced garlic

1 tablespoon peeled and minced fresh ginger

1 ¼ pound top sirloin steak

⅓ c. low-sodium chicken broth

6 teaspoons vegetable oil, divided

3 tablespoons soy sauce

1 tablespoon granulated sugar

1 tablespoon rice vinegar

2 teaspoons dark sesame oil

1 tablespoon cornstarch

1 green bell pepper, chopped into bite-size pieces

1 red bell pepper, chopped into bite-size pieces

6 green onions, white portions sliced, green portion chopped into 2” pieces

¼ c. Shaoxing wine

2 teaspoons cracked black pepper

Salt

How to make Best Ever Pepper Steak

Step 1: Place the steak on a cutting board and cover it with plastic wrap. Using the flat side of the meat mallet, lightly pound the steak. Into 1/3 inch thick strips about 2 inches long, slice the steak. Then, pat dry with paper towels, separating the pieces. Set aside.

Step 2: In a mixing bowl, place the Shaoxing wine, soy sauce, rice vinegar, granulated sugar, black pepper, sesame oil, and cornstarch. Mix well and set aside.

Step 3: Drizzle 2 teaspoons of vegetable oil in a preheated non-stick skillet over moderately high heat. Add half of the steak and immediately spread them apart into one layer, making sure every piece has spaces between. Then, lightly sprinkle with salt.

Step 4: Sear the steak for about 45 to 60 seconds until the first side is nicely browned. Flip and sear the other side for another 45 to 60 minutes. To a sheet of foil or plate, transfer the steak.

Step 5: Add another 2 tablespoons of vegetable oil to the skillet and sear the rest of the steak. Once the steak is seared, move them into the same plate/foil. Then, add the last oil into the skillet and let it heat over moderately high heat. Next, add the bell peppers and saute for about 3 to 4 minutes until a little soft.

Step 6: To the bell peppers, add the green onions, garlic, and ginger. Saute for another minute. Give the sauce mixture a nice stir, then pour this into the skillet. Let it cook until thickened. Return the steak to the skillet.

Step 7: Serve the Pepper Steak immediately. Enjoy!

Nutrition Facts:

Calories: 341Kcl, Fat: 13g20%, Saturated Fat: 7g44%, Cholesterol: 84mg28%, Sodium: 847mg37%, Potassium: 806mg23%, Carbohydrates: 15g5%, Fiber: 3g13%, Sugar: 7g8%, Protein: 35g70%, Vitamin C: 100mg121%, Calcium: 66mg7%, Iron 3mg17%.

Best Ever Pepper Steak

Rebecca Prep time: 20 mins | Cook time: 10 mins | Total time: 30 mins | Servings: 4 Savory and incredibly easy to make. Pepper Steak has been one of my… General Recipes Best Ever Pepper Steak European Print This
Serves: 4 Prep Time: 20 mins Cooking Time: 10 mins 10 mins
Nutrition facts: 341 calories 13 fat
Rating: 5.0/5
( 1 voted )

Ingredients

  • 1 tablespoon minced garlic
  • 1 tablespoon peeled and minced fresh ginger
  • 1 ¼ pound top sirloin steak
  • ⅓ c. low-sodium chicken broth
  • 6 teaspoons vegetable oil, divided
  • 3 tablespoons soy sauce
  • 1 tablespoon granulated sugar
  • 1 tablespoon rice vinegar
  • 2 teaspoons dark sesame oil
  • 1 tablespoon cornstarch
  • 1 green bell pepper, chopped into bite-size pieces
  • 1 red bell pepper, chopped into bite-size pieces
  • 6 green onions, white portions sliced, green portion chopped into 2” pieces
  • ¼ c. Shaoxing wine
  • 2 teaspoons cracked black pepper
  • Salt

Instructions

Step 1: Place the steak on a cutting board and cover it with plastic wrap. Using the flat side of the meat mallet, lightly pound the steak. Into 1/3 inch thick strips about 2 inches long, slice the steak. Then, pat dry with paper towels, separating the pieces. Set aside.

Step 2: In a mixing bowl, place the Shaoxing wine, soy sauce, rice vinegar, granulated sugar, black pepper, sesame oil, and cornstarch. Mix well and set aside.

Step 3: Drizzle 2 teaspoons of vegetable oil in a preheated non-stick skillet over moderately high heat. Add half of the steak and immediately spread them apart into one layer, making sure every piece has spaces between. Then, lightly sprinkle with salt.

Step 4: Sear the steak for about 45 to 60 seconds until the first side is nicely browned. Flip and sear the other side for another 45 to 60 minutes. To a sheet of foil or plate, transfer the steak.

Step 5: Add another 2 tablespoons of vegetable oil to the skillet and sear the rest of the steak. Once the steak is seared, move them into the same plate/foil. Then, add the last oil into the skillet and let it heat over moderately high heat. Next, add the bell peppers and saute for about 3 to 4 minutes until a little soft.

Step 6: To the bell peppers, add the green onions, garlic, and ginger. Saute for another minute. Give the sauce mixture a nice stir, then pour this into the skillet. Let it cook until thickened. Return the steak to the skillet.

Step 7: Serve the Pepper Steak immediately. Enjoy!

September 6, 2022 0 comment
0 FacebookTwitterPinterestEmail
General Recipes

Scalloped Pineapple Casserole

by Rebecca September 5, 2022
written by Rebecca

Prep time: 15 mins | Cook time: 40 mins | Yield: 6 Servings

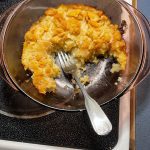
Scalloped Pineapple Casserole is a sweet and super satisfying side dish. Everyone loves this casserole and I guarantee that there will be no leftovers! It is a classic, Southern pineapple casserole that has been around for ages!

I love casseroles and I have a list of my favorites and go-to. This Scalloped Pineapple Casserole is one of my top faves! It is incredibly easy and quick to make and pairs great with just about anything. Sweet and packed with amazing flavors – this casserole is here to impress everyone around the dinner table. This casserole is made with just a few simple ingredients. The base is made with cubed bread, butter, sugar, eggs, and crushed pineapple. For extra flavor, I added a couple of spices and ingredients. This casserole is different from the usual savory casserole. It is sweet and very delightful and packed with crushed pineapples.

INGREDIENTS

1/2 tsp cinnamon

3/4 c. butter, softened

1/4 c. brown sugar

1/2 tsp nutmeg

1 c. granulated sugar

3 large eggs

1-1/2 tsp lemon juice

4 c. firmly packed cubed white bread (crusts removed)

1 can (20 oz.) crushed pineapple, well-drained

How to make Scalloped Pineapple Casserole

Step 1: Prepare the oven. Preheat it to 350 degrees. Ready 2-quart baking dish. Grease and set aside.

Step 2: Place the butter, sugars, cinnamon, and nutmeg in a large bowl. Cream until light and fluffy. Then, add the eggs, one piece at a time, beating well after each addition.

Step 3: Then, whisk in the pineapple and lemon juice. Next, fold in the bread crumbs.

Step 4: Into the prepared baking dish, spoon the pineapple mixture.

Step 5: Place in the preheated oven and bake for about 40 to 45 minutes, uncovered, until the top of the casserole is lightly golden.

Step 6: Remove from the oven when done and serve the casserole warm. Enjoy!

Scalloped Pineapple Casserole

Rebecca Prep time: 15 mins | Cook time: 40 mins | Yield: 6 Servings Scalloped Pineapple Casserole is a sweet and super satisfying side dish. Everyone loves this casserole and I… General Recipes Scalloped Pineapple Casserole European Print This
Serves: 6 Prep Time: 15 mins Cooking Time: 40 mins 40 mins
Nutrition facts: 200 calories 20 grams fat
Rating: 5.0/5
( 1 voted )

Ingredients

  • 1/2 tsp cinnamon
  • 3/4 c. butter, softened
  • 1/4 c. brown sugar
  • 1/2 tsp nutmeg
  • 1 c. granulated sugar
  • 3 large eggs
  • 1-1/2 tsp lemon juice
  • 4 c. firmly packed cubed white bread (crusts removed)
  • 1 can (20 oz.) crushed pineapple, well-drained

Instructions

Step 1: Prepare the oven. Preheat it to 350 degrees. Ready 2-quart baking dish. Grease and set aside.

Step 2: Place the butter, sugars, cinnamon, and nutmeg in a large bowl. Cream until light and fluffy. Then, add the eggs, one piece at a time, beating well after each addition.

Step 3: Then, whisk in the pineapple and lemon juice. Next, fold in the bread crumbs.

Step 4: Into the prepared baking dish, spoon the pineapple mixture.

Step 5: Place in the preheated oven and bake for about 40 to 45 minutes, uncovered, until the top of the casserole is lightly golden.

Step 6: Remove from the oven when done and serve the casserole warm. Enjoy!

September 5, 2022 0 comment
0 FacebookTwitterPinterestEmail
General Recipes

Crispy Cheddar Chicken: The Absolute Best Recipe For Dinner

by Rebecca September 5, 2022
written by Rebecca

Total minutes: 45 mins | Serves: 4

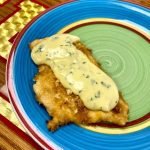
This Crispy Cheddar Chicken is the best, winner chicken weeknight dinner! Crispy, juicy, and tender chicken with bold flavors. For the perfect family dinner, serve this satisfying, elegant Crispy Cheddar Chicken alongside roasted broccoli or mashed potatoes, and enjoy this amazing chicken that is coated in a cheesy crumb crust and baked to golden perfection!

INGREDIENTS

2 eggs, beaten

2 pounds boneless, skinless chicken tenders or breasts

1 tsp garlic powder

1 1/2 c. cheddar cheese, grated

1 tsp dried parsley

2 tbsp milk

2 sleeves butter crackers, such as Ritz

1/2 tsp salt

1/4 tsp black pepper

Sauce:

2 tbsp butter

2 tbsp sour cream

Milk, as needed

1 can cream of chicken soup

How to make Crispy Cheddar Chicken

Step 1: Prepare the oven. Preheat it to 400 degrees F. Using a nonstick spray, grease a 9 x 13-inch baking pan.

Step 2: Cut the chicken breasts into two or three large pieces.

Step 3: In a food processor, place the cheese, garlic powder, salt, pepper, and parsley. Pulse until you have fine crumbs.

Step 4: In a small bowl, whisk the milk and eggs. Mix the cheese/cracker mixture in another bowl.

Step 5: In the egg mixture, dip the pieces of chicken. Then, coat in the cracker mix. Next, press the chicken pieces in the crumbs until completely coated.

Step 6: Using cooking spray, lightly spray the chicken pieces. Place the pieces of chicken into the prepared pan. Place in the preheated oven and bake for about 20 minutes. Tent with foil and continue baking for additional 10 minutes or until the chicken is crispy and golden brown.

Step 7: In the meantime, heat the butter and chicken soup in a saucepan. Feel free to add milk until you reached your preferred consistency.

Step 8: Serve the crispy cheddar chicken immediately with drizzles of the butter and chicken soup mixture. Enjoy!

Crispy Cheddar Chicken: The Absolute Best Recipe For Dinner

Rebecca Total minutes: 45 mins | Serves: 4 This Crispy Cheddar Chicken is the best, winner chicken weeknight dinner! Crispy, juicy, and tender chicken with bold flavors. For the perfect family… General Recipes Crispy Cheddar Chicken: The Absolute Best Recipe For Dinner European Print This
Serves: 4
Nutrition facts: 200 calories 20 grams fat
Rating: 4.0/5
( 2 voted )

Ingredients

  • 2 eggs, beaten
  • 2 pounds boneless, skinless chicken tenders or breasts
  • 1 tsp garlic powder
  • 1 1/2 c. cheddar cheese, grated
  • 1 tsp dried parsley
  • 2 tbsp milk
  • 2 sleeves butter crackers, such as Ritz
  • 1/2 tsp salt
  • 1/4 tsp black pepper
  • Sauce:
  • 2 tbsp butter
  • 2 tbsp sour cream
  • Milk, as needed
  • 1 can cream of chicken soup

Instructions

Step 1: Prepare the oven. Preheat it to 400 degrees F. Using a nonstick spray, grease a 9 x 13-inch baking pan.

Step 2: Cut the chicken breasts into two or three large pieces.

Step 3: In a food processor, place the cheese, garlic powder, salt, pepper, and parsley. Pulse until you have fine crumbs.

Step 4: In a small bowl, whisk the milk and eggs. Mix the cheese/cracker mixture in another bowl.

Step 5: In the egg mixture, dip the pieces of chicken. Then, coat in the cracker mix. Next, press the chicken pieces in the crumbs until completely coated.

Step 6: Using cooking spray, lightly spray the chicken pieces. Place the pieces of chicken into the prepared pan. Place in the preheated oven and bake for about 20 minutes. Tent with foil and continue baking for additional 10 minutes or until the chicken is crispy and golden brown.

Step 7: In the meantime, heat the butter and chicken soup in a saucepan. Feel free to add milk until you reached your preferred consistency.

Step 8: Serve the crispy cheddar chicken immediately with drizzles of the butter and chicken soup mixture. Enjoy!

September 5, 2022 0 comment
0 FacebookTwitterPinterestEmail
General Recipes

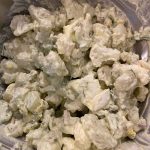
Low Carb Cauliflower Potato Salad

by Rebecca September 5, 2022
written by Rebecca

Prep Time: 15 mins | Cook Time: 20 mins | Total Time: 35 mins | Servings: 6

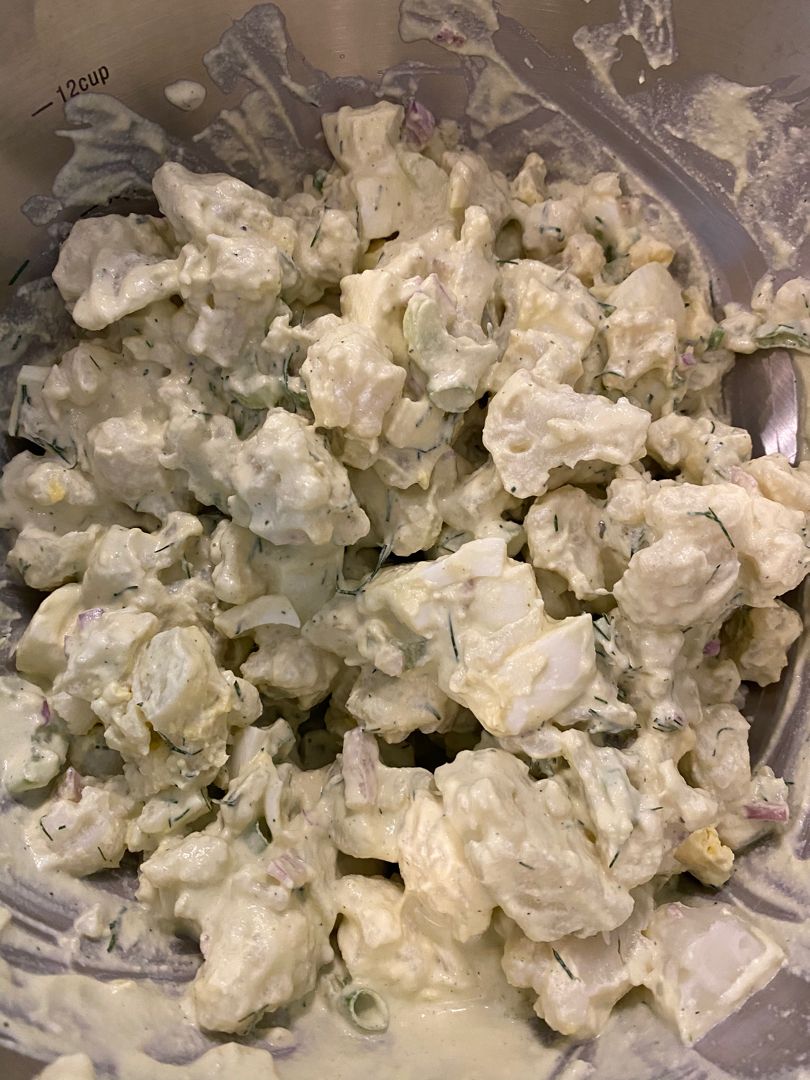
This Cauliflower Potato Salad is a dairy-free, low-carb salad. This is made with cauliflower and a creamy cashew dressing in place of mayo. The star of this salad is the amazing creamy cashew dressing. This has been one of my favorite (and in my opinion, the best salad dressing!) salad dressings of all time!

Ingredients

3 hard-boiled eggs, chopped

5 c. cauliflower florets

¼ c. chopped green onion

½ c. chopped celery

2 tbsp fresh dill, chopped

¼ c. chopped red onion or shallot

Creamy Cashew Dressing:

1 clove garlic

1 c. soaked raw cashews

1 tbsp prepared mustard, yellow or Dijon

2 tbsp fresh dill

2 ½ tbsp apple cider vinegar

1 tbsp shallot

⅓ c. water

1 tsp sea salt

½ tsp ground pepper

How to make Low Carb Cauliflower Potato Salad

Step 1: In a bowl, place the cashews. Pour in enough water to cover the cashews. Let the cashews soak in water for about 1 to 2 hours. Then, drain and thoroughly rinse the cashews.

Step 2: Add the cauliflower to a large pot with boiling water and cook for about 10 minutes until tender and firm. Drain the cauliflowers and run under cold water to cool. Then, drain the cauliflower completely.

Step 3: In a saucepan, place the eggs and cover them with cold water. Bring to a boil. Then, put the lid on and take the pan off the heat. Allow the eggs to stand for about 10 to 12 minutes in hot water. Then, take the eggs out of the hot water. Let them cool, then peel the eggs and chop.

Step 4: Place the dressing ingredients in a blender, then blend until smooth.

Step 5: Add the cauliflower, eggs, celery, green onion, shallot, and dill to a large bowl. Then, add the dressing. Mix well, then place in the fridge until the salad is chilled.

Step 6: Serve the salad within 1 to 2 days. Enjoy!

Notes:

To make a mayo-based dressing, swap half a cup of mayo with cashews, and do not add any water.

Nutrition Facts:

Serving: 1cup Calories: 214 kcal Carbohydrates: 12g Protein: 12g Fat: 14g Saturated Fat: 1g Polyunsaturated Fat: 3g Cholesterol: 164mg Sodium: 582mg Fiber: 3g Sugar: 3g

Low Carb Cauliflower Potato Salad

Rebecca Prep Time: 15 mins | Cook Time: 20 mins | Total Time: 35 mins | Servings: 6 This Cauliflower Potato Salad is a dairy-free, low-carb salad. This is made with… General Recipes Low Carb Cauliflower Potato Salad European Print This
Serves: 6 Prep Time: 15 mins Cooking Time: 20 mins 20 mins
Nutrition facts: 200 calories 20 grams fat
Rating: 5.0/5
( 1 voted )

Ingredients

  • 3 hard-boiled eggs, chopped
  • 5 c. cauliflower florets
  • ¼ c. chopped green onion
  • ½ c. chopped celery
  • 2 tbsp fresh dill, chopped
  • ¼ c. chopped red onion or shallot
  • Creamy Cashew Dressing:
  • 1 clove garlic
  • 1 c. soaked raw cashews
  • 1 tbsp prepared mustard, yellow or Dijon
  • 2 tbsp fresh dill
  • 2 ½ tbsp apple cider vinegar
  • 1 tbsp shallot
  • ⅓ c. water
  • 1 tsp sea salt
  • ½ tsp ground pepper

Instructions

Step 1: In a bowl, place the cashews. Pour in enough water to cover the cashews. Let the cashews soak in water for about 1 to 2 hours. Then, drain and thoroughly rinse the cashews.

Step 2: Add the cauliflower to a large pot with boiling water and cook for about 10 minutes until tender and firm. Drain the cauliflowers and run under cold water to cool. Then, drain the cauliflower completely.

Step 3: In a saucepan, place the eggs and cover them with cold water. Bring to a boil. Then, put the lid on and take the pan off the heat. Allow the eggs to stand for about 10 to 12 minutes in hot water. Then, take the eggs out of the hot water. Let them cool, then peel the eggs and chop.

Step 4: Place the dressing ingredients in a blender, then blend until smooth.

Step 5: Add the cauliflower, eggs, celery, green onion, shallot, and dill to a large bowl. Then, add the dressing. Mix well, then place in the fridge until the salad is chilled.

Step 6: Serve the salad within 1 to 2 days. Enjoy!

Notes

To make a mayo-based dressing, swap half a cup of mayo with cashews, and do not add any water.

September 5, 2022 0 comment
0 FacebookTwitterPinterestEmail
General Recipes

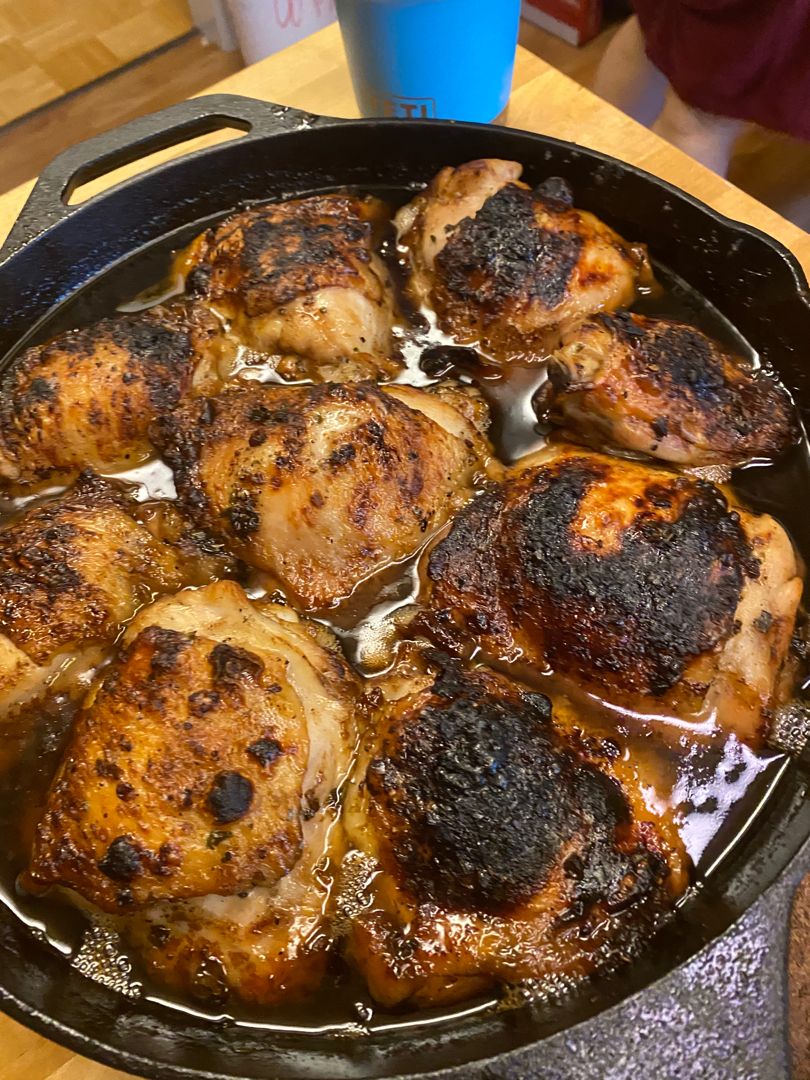
Garlic-Brown Sugar Chicken Thighs Recipe: Dad’s Favorite Dish

by Rebecca September 5, 2022
written by Rebecca

Prep time: 10 mins | Cook time: 35 mins | Total time: 45 mins | Servings: 8 | Yield: 8 chicken thighs

Juicy, tender chicken thighs with a delightful golden crust on top. The chicken thighs are pan-seared and roasted in a simple, most amazing sweet honey-garlic sauce. This Garlic-Brown Sugar Chicken Thighs recipe is one of the best chicken dishes that you can easily make at any time.

Ingredients

4 cloves garlic, minced

3 tbsp unsalted butter, divided

8 (5 oz.) bone-in, skin-on chicken thighs

¼ c. packed brown sugar

1 tbsp honey

¼ tsp dried thyme

½ tsp dried oregano

¼ tsp dried basil

salt and ground black pepper to taste

How to make Garlic-Brown Sugar Chicken Thighs

Step 1: Prepare the oven. Preheat it to 400 degrees F or 200 degrees C.

Step 2: Sprinkle the chicken thighs with salt and pepper.

Step 3: In a large oven-proof skillet, melt 2 tbsp butter over medium-high heat. Once the butter has melted, add the chicken, skin-side down. Sear for about 2 to 3 minutes on each side. To a plate, transfer the chicken when done.

Step 4: In the same skillet, melt the rest of 1 tbsp butter, stirring to loosen any browned bits on the bottom. Then, add the garlic and cook for about 30 seconds until aromatic. Next, add the brown sugar, honey, oregano, thyme, and basil. Stir well, then turn the heat off. Add the chicken back to the skillet, skin-side down.

Step 5: Transfer the skillet to the preheated oven and roast for about 25 to 40 minutes or until the chicken is no longer pink and the juices run clear. The chicken is done once the internal temperature of the chicken reaches 165 degrees F or 74 degrees C.

Step 6: Remove from the oven when done and serve right away. Drizzle the pan sauce over the chicken thighs. Enjoy!

Tips:

Note that the cooking time of bone-in chicken thighs takes longer to cook than boneless. To ensure they are done, check using an instant-read thermometer.

Nutrition Facts:

Per Serving: 264 calories; protein 19.3g; carbohydrates 9.5g; fat 16.2g; cholesterol 82.5mg; sodium 86.5mg.

Garlic-Brown Sugar Chicken Thighs Recipe: Dad’s Favorite Dish

Rebecca Prep time: 10 mins | Cook time: 35 mins | Total time: 45 mins | Servings: 8 | Yield: 8 chicken thighs Juicy, tender chicken thighs with a delightful golden… General Recipes Garlic-Brown Sugar Chicken Thighs Recipe: Dad’s Favorite Dish European Print This
Serves: 8 Prep Time: 10 mins Cooking Time: 35 mins 35 mins
Nutrition facts: 264 calories 16.2 fat
Rating: 4.0/5
( 2 voted )

Ingredients

  • 4 cloves garlic, minced
  • 3 tbsp unsalted butter, divided
  • 8 (5 oz.) bone-in, skin-on chicken thighs
  • ¼ c. packed brown sugar
  • 1 tbsp honey
  • ¼ tsp dried thyme
  • ½ tsp dried oregano
  • ¼ tsp dried basil
  • salt and ground black pepper to taste

Instructions

Step 1: Prepare the oven. Preheat it to 400 degrees F or 200 degrees C.

Step 2: Sprinkle the chicken thighs with salt and pepper.

Step 3: In a large oven-proof skillet, melt 2 tbsp butter over medium-high heat. Once the butter has melted, add the chicken, skin-side down. Sear for about 2 to 3 minutes on each side. To a plate, transfer the chicken when done.

Step 4: In the same skillet, melt the rest of 1 tbsp butter, stirring to loosen any browned bits on the bottom. Then, add the garlic and cook for about 30 seconds until aromatic. Next, add the brown sugar, honey, oregano, thyme, and basil. Stir well, then turn the heat off. Add the chicken back to the skillet, skin-side down.

Step 5: Transfer the skillet to the preheated oven and roast for about 25 to 40 minutes or until the chicken is no longer pink and the juices run clear. The chicken is done once the internal temperature of the chicken reaches 165 degrees F or 74 degrees C.

Step 6: Remove from the oven when done and serve right away. Drizzle the pan sauce over the chicken thighs. Enjoy!

Notes

Note that the cooking time of bone-in chicken thighs takes longer to cook than boneless. To ensure they are done, check using an instant-read thermometer.

September 5, 2022 0 comment
0 FacebookTwitterPinterestEmail
General Recipes

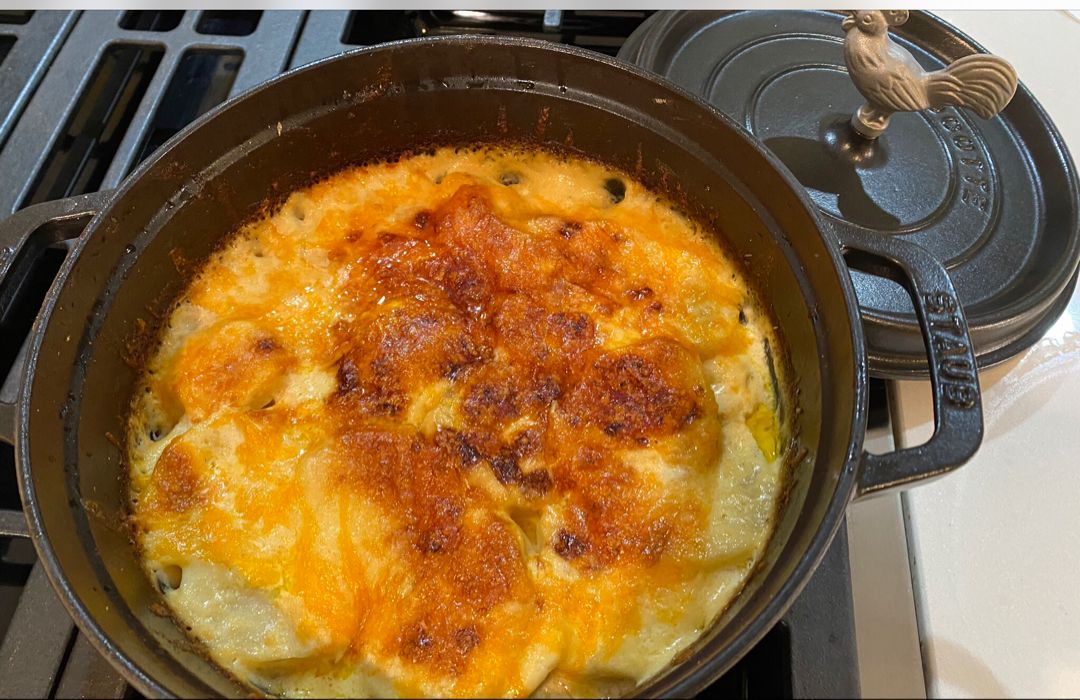
Copycat Ruth’s Chris Potatoes au Gratin

by Rebecca September 5, 2022
written by Rebecca

Prep time: 10 mins | Cook time: 25 mins | Serves: 4

This copycat recipe is one of the best I’ve tried in years! I love Ruth’s Chris Potatoes Au Gratin and this copycat tastes like the real deal!

Bring your potato game to the next level with this easy copycat recipe. To make this creamy, cheesy, and luscious Potatoes Au Gratin all you need are just the basic ingredients. You’ll be surprised how you can easily and quickly make this at home. Serve this with steak for a restaurant-quality dinner at home!

INGREDIENTS

1 1/2 pounds russet potatoes, peeled and sliced 1/8” thick

2 tbsp butter, plus more for greasing the baking dish

2 garlic cloves, minced

1/2 c. chicken stock

1/2 white onion, minced

1 1/4 c. heavy cream, plus more if needed

1/2 c. Parmesan cheese, grated

2 c. cheddar cheese, grated

3/4 c. provolone cheese, grated

Fresh parsley, chopped, for garnish

1 1/2 tsp salt

1/2 tsp freshly ground black pepper

How to make Copycat Ruth’s Chris Potatoes au Gratin

Step 1: Prepare the oven. Preheat it to 425 degrees F. Using butter, grease an 8 x 8-inch baking dish.

Step 2: Melt the butter in a large pot over medium heat. Once the butter has melted, add the onion to the pot and cook for about 5 minutes until translucent. Then, add the garlic and season with salt and pepper. Continue to cook for additional 30 seconds.

Step 3: To the pot, whisk in the stock, cream, and potatoes. Bring everything to a low simmer. DO NOT BOIL. Put the lid on and adjust the heat to medium-low. Allow the potatoes to cook for about 15 to 20 minutes until tender. As needed, adjust the seasoning.

Step 4: Into the prepared baking dish, transfer the mixture, and top with cheese. Place in the preheated oven and bake for about 10 to 15 minutes until the cheese has melted.

Step 5: Remove from the oven when done and serve the Potatoes Au Gratin right away garnished with some parsley. Enjoy!

Copycat Ruth’s Chris Potatoes au Gratin

Rebecca Prep time: 10 mins | Cook time: 25 mins | Serves: 4 This copycat recipe is one of the best I’ve tried in years! I love Ruth’s Chris Potatoes Au… General Recipes Copycat Ruth’s Chris Potatoes au Gratin European Print This
Serves: 4 Prep Time: 10 mins Cooking Time: 25 mins 25 mins
Nutrition facts: 200 calories 20 grams fat
Rating: 5.0/5
( 2 voted )

Ingredients

  • 1 1/2 pounds russet potatoes, peeled and sliced 1/8” thick
  • 2 tbsp butter, plus more for greasing the baking dish
  • 2 garlic cloves, minced
  • 1/2 c. chicken stock
  • 1/2 white onion, minced
  • 1 1/4 c. heavy cream, plus more if needed
  • 1/2 c. Parmesan cheese, grated
  • 2 c. cheddar cheese, grated
  • 3/4 c. provolone cheese, grated
  • Fresh parsley, chopped, for garnish
  • 1 1/2 tsp salt
  • 1/2 tsp freshly ground black pepper

Instructions

Step 1: Prepare the oven. Preheat it to 425 degrees F. Using butter, grease an 8 x 8-inch baking dish.

Step 2: Melt the butter in a large pot over medium heat. Once the butter has melted, add the onion to the pot and cook for about 5 minutes until translucent. Then, add the garlic and season with salt and pepper. Continue to cook for additional 30 seconds.

Step 3: To the pot, whisk in the stock, cream, and potatoes. Bring everything to a low simmer. DO NOT BOIL. Put the lid on and adjust the heat to medium-low. Allow the potatoes to cook for about 15 to 20 minutes until tender. As needed, adjust the seasoning.

Step 4: Into the prepared baking dish, transfer the mixture, and top with cheese. Place in the preheated oven and bake for about 10 to 15 minutes until the cheese has melted.

Step 5: Remove from the oven when done and serve the Potatoes Au Gratin right away garnished with some parsley. Enjoy!

September 5, 2022 0 comment
0 FacebookTwitterPinterestEmail
General Recipes

Easy No Bake Cheesecake Recipe: Tasty Yet Refreshing

by Rebecca September 5, 2022
written by Rebecca

Active: 20 mins | Inactive: 4 hrs | Serves: 10-12

This no-bake Cheesecake with bright lemon flavor is a great dessert option all year round! Creamy, luscious, and super easy to whip up using just a few basic ingredients. I especially love no-bake desserts during the hot summer days when I do not want to be sitting in a hot kitchen. I enjoy how I can easily make this. The catch is you’ll have to let this cake set in the fridge for a couple of hours. But I promise the waiting time is worth it!

INGREDIENTS

1/2 c. (1 stick) unsalted butter, melted

1 1/2 c. powdered sugar

2 packages of lemon jello

1 c. boiling water

2 c Graham cracker crumbs

3 (8 ounces) packages of cream cheese, softened

Zest and juice from one lemon

2 c. heavy whipping cream, chilled

1/2 tsp salt

Additional lemon zest, for serving, optional

Whipped cream, for serving, optional

How to make Easy No Bake Cheesecake

Step 1: Using nonstick cooking spray, grease a 9 x 9-inch baking dish and set aside.

Step 2: Place the Graham cracker crumbs, butter, and salt in a medium bowl. Mix well until combined. Into the prepared pan, pour the mixture and firmly press it into the bottom of the pan. Chill in the fridge until ready to use.

Step 3: Whisk the jello and boiling water in a small bowl until the jello is dissolved. Set aside at room temperature to cool

Step 4: Place the cream cheese and powdered sugar in another large bowl. Beat using an electric mixer until smooth. Pour in the cooled jello mixture along with the whipping cream, lemon zest, and lemon juice. Mix well until blended. Beat further on high until the mixture begins to thicken.

Step 5: Over the crust, pour the cheesecake mixture. Place in the fridge for at least 4 hours until the filling has set.

Step 6: Before serving, slice the cheesecake into squares. If desired, top with whipped cream and lemon zest. Enjoy!

Easy No Bake Cheesecake Recipe: Tasty Yet Refreshing

Rebecca Active: 20 mins | Inactive: 4 hrs | Serves: 10-12 This no-bake Cheesecake with bright lemon flavor is a great dessert option all year round! Creamy, luscious, and super easy… General Recipes Easy No Bake Cheesecake Recipe: Tasty Yet Refreshing European Print This
Serves: 10-12
Nutrition facts: 200 calories 20 grams fat
Rating: 5.0/5
( 2 voted )

Ingredients

  • 1/2 c. (1 stick) unsalted butter, melted
  • 1 1/2 c. powdered sugar
  • 2 packages of lemon jello
  • 1 c. boiling water
  • 2 c Graham cracker crumbs
  • 3 (8 ounces) packages of cream cheese, softened
  • Zest and juice from one lemon
  • 2 c. heavy whipping cream, chilled
  • 1/2 tsp salt
  • Additional lemon zest, for serving, optional
  • Whipped cream, for serving, optional

Instructions

Step 1: Using nonstick cooking spray, grease a 9 x 9-inch baking dish and set aside.

Step 2: Place the Graham cracker crumbs, butter, and salt in a medium bowl. Mix well until combined. Into the prepared pan, pour the mixture and firmly press it into the bottom of the pan. Chill in the fridge until ready to use.

Step 3: Whisk the jello and boiling water in a small bowl until the jello is dissolved. Set aside at room temperature to cool

Step 4: Place the cream cheese and powdered sugar in another large bowl. Beat using an electric mixer until smooth. Pour in the cooled jello mixture along with the whipping cream, lemon zest, and lemon juice. Mix well until blended. Beat further on high until the mixture begins to thicken.

Step 5: Over the crust, pour the cheesecake mixture. Place in the fridge for at least 4 hours until the filling has set.

Step 6: Before serving, slice the cheesecake into squares. If desired, top with whipped cream and lemon zest. Enjoy!

September 5, 2022 0 comment
0 FacebookTwitterPinterestEmail
General Recipes

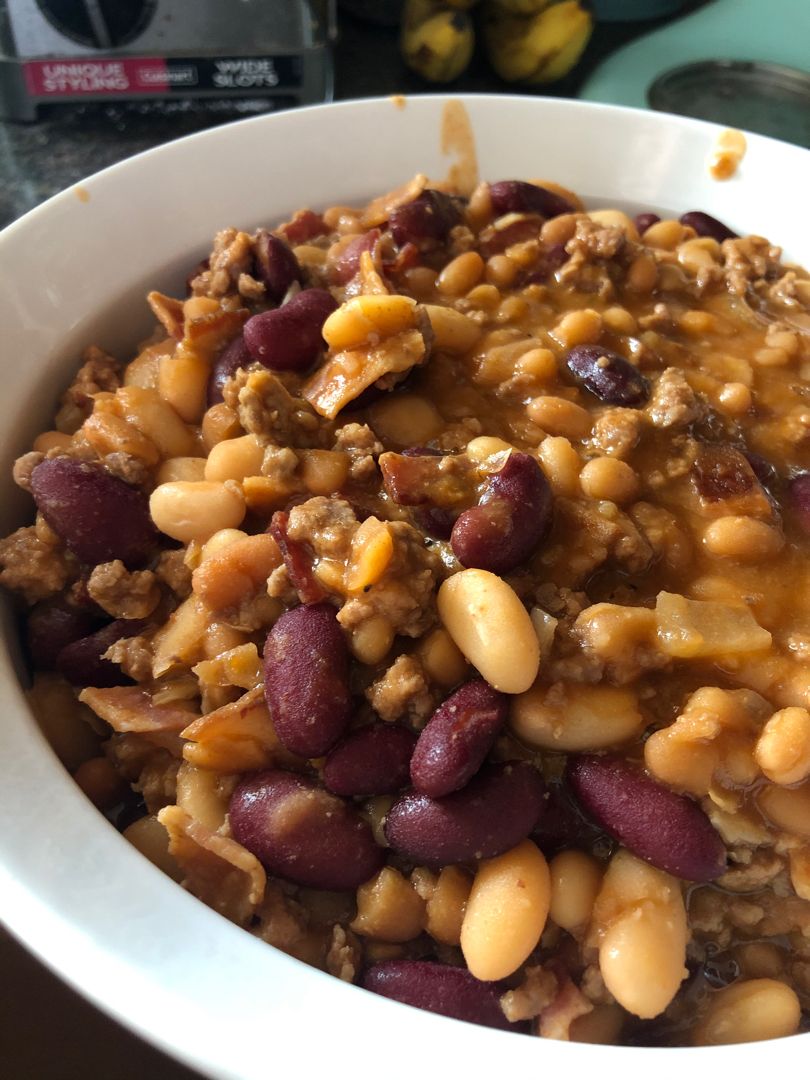
Slow Cooker Calico Beans

by Rebecca September 5, 2022
written by Rebecca

Prep time: 15 mins | Cook time: 5 hrs | Serves: 8

I love this Slow Cooker Calico Beans recipe. It has been one of my favorites and go-to beans recipe for years! It is incredibly easy to throw together, almost a dump-and-go dish. After browning the ground beef, you simply have to dump everything in your slow cooker and set it to cook for a few hours. When done, serve these Calico Beans right away with rice, bread, or cornbread.

My family is crazy over this Slow Cooker Calico Beans. It is loaded with beef and cans of different varieties of beans! These Calico Beans are an incredible option for parties, cookouts, or if you are just searching for an easy meal. Smoky, chili, salty – these Slow Cooker Calico Beans are purely satisfying and filling!

These Slow Cooker Calico Beans are great all year round! Although, I particularly enjoy these Calico Beans when the weather turns chilly. If you want a dish that really sticks to the ribs, these delicious Calico Beans are your perfect option! If you have not tried this recipe before, you should soon! It’s an amazing, meaty meal that everyone will love!

INGREDIENTS

1 pound lean ground beef

1/2 tsp vegetable oil

1 onion, diced

1/4 c. ketchup

3 tbsp apple cider vinegar

1/2 c. brown sugar, packed

2 tbsp Dijon mustard

1 (15 ounces) can of tomato sauce

1 (16 ounces) can of kidney beans, rinsed and drained

1 (16 ounces) can butter beans, drained

1 (16 ounces) can of pinto beans, rinsed and drained

1 (16 ounces) can of pork and beans

1/4 tsp crushed red pepper flakes

How to make Slow Cooker Calico Beans

Step 1: In a skillet, heat oil over medium-high heat. Once hot, add the ground beef and cook for about 5 minutes until browned.

Step 2: Into a slow cooker, place the beef and the remaining ingredients. Cook for 4 to 5 hours on low.

Step 3: When done, serve the Calico Beans immediately with cornbread, rice, or bread. Enjoy!

Slow Cooker Calico Beans

Rebecca Prep time: 15 mins | Cook time: 5 hrs | Serves: 8 I love this Slow Cooker Calico Beans recipe. It has been one of my favorites and go-to beans… General Recipes Slow Cooker Calico Beans European Print This
Serves: 8 Prep Time: 15 mins Cooking Time: 5 hrs 5 hrs
Nutrition facts: 200 calories 20 grams fat
Rating: 5.0/5
( 1 voted )

Ingredients

  • 1 pound lean ground beef
  • 1/2 tsp vegetable oil
  • 1 onion, diced
  • 1/4 c. ketchup
  • 3 tbsp apple cider vinegar
  • 1/2 c. brown sugar, packed
  • 2 tbsp Dijon mustard
  • 1 (15 ounces) can of tomato sauce
  • 1 (16 ounces) can of kidney beans, rinsed and drained
  • 1 (16 ounces) can butter beans, drained
  • 1 (16 ounces) can of pinto beans, rinsed and drained
  • 1 (16 ounces) can of pork and beans
  • 1/4 tsp crushed red pepper flakes

Instructions

Step 1: In a skillet, heat oil over medium-high heat. Once hot, add the ground beef and cook for about 5 minutes until browned.

Step 2: Into a slow cooker, place the beef and the remaining ingredients. Cook for 4 to 5 hours on low.

Step 3: When done, serve the Calico Beans immediately with cornbread, rice, or bread. Enjoy!

September 5, 2022 0 comment
0 FacebookTwitterPinterestEmail
General Recipes

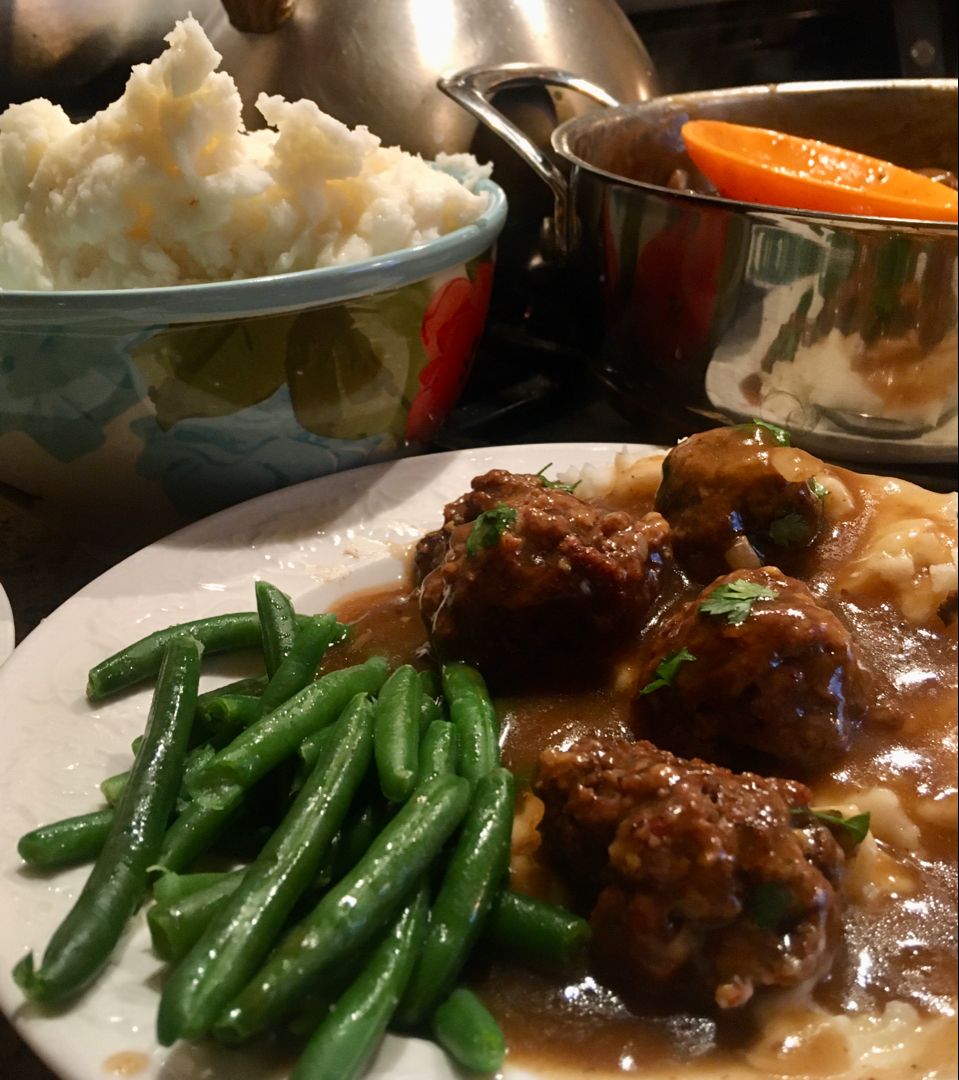
Salisbury Steak Meatballs

by Rebecca September 5, 2022
written by Rebecca

Cook time: 1 hr 20 mins | Prep time: 35 mins | Serves: 4

These Salisbury Steak Meatballs are a classic! They are insanely delicious and a great weeknight dinner option that you can easily and quickly make any time! If you are looking for a comforting, flavorful dish, then you have to give these Salisbury Steak Meatballs a try soon.

Meatballs are a staple at home. I have several meatball recipes and these Salisbury Steak Meatballs are on the top of my list. They are incredibly flavorful and a no-fuss to make. To make these Salisbury Steak Meatballs you do not need a long list of ingredients. All you need are a few basic ingredients. These meatballs are made from ground beef combined with a few condiments. For a simple, yet filling meal, serve these Salisbury Steak Meatballs over noodles or mashed potatoes.

Ingredients

2 tablespoons vegetable oil

2 pounds of ground beef

1 pkg dry onion soup mix

1/4 cup milk

1/4 cup all-purpose flour

2 can cream of chicken soup

1/2 cup Italian bread crumbs

3/4 cup water

1 pkg dry au jus mix

How to make Salisbury Steak Meatballs

Step 1: Place the ground beef, onion soup mix, bread crumbs, and milk in a large bowl. Mix well using your hands until just combined, then form the mixture into meatballs.

Step 2: In the flour, lightly dredge the meatballs, shaking the excess flour.

Step 3: Heat oil in a skillet over medium-high heat. Once the oil is hot, add the meatballs (in batches) to the skillet and cook until all sides are browned.

Step 4: Into a slow cooker, add the meatballs.

Step 5: Place the cream of chicken soup, au jus mix, and water in a large bowl. Mix well until blended and smooth. Then, pour this over the meatballs.

Step 6: Set to cook the meatballs for 3 to 4 hours on high or 4 to 5 hours on low.

Step 7: When done, serve the Salisbury Steak Meatballs over egg noodles or rice. Enjoy!

Salisbury Steak Meatballs

Rebecca Cook time: 1 hr 20 mins | Prep time: 35 mins | Serves: 4 These Salisbury Steak Meatballs are a classic! They are insanely delicious and a great weeknight dinner… General Recipes Salisbury Steak Meatballs European Print This
Serves: 4 Prep Time: 1 hr 20 mins Cooking Time: 35 mins 35 mins
Nutrition facts: 200 calories 20 grams fat
Rating: 3.7/5
( 3 voted )

Ingredients

  • 2 tablespoons vegetable oil
  • 2 pounds of ground beef
  • 1 pkg dry onion soup mix
  • 1/4 cup milk
  • 1/4 cup all-purpose flour
  • 2 can cream of chicken soup
  • 1/2 cup Italian bread crumbs
  • 3/4 cup water
  • 1 pkg dry au jus mix

Instructions

Step 1: Place the ground beef, onion soup mix, bread crumbs, and milk in a large bowl. Mix well using your hands until just combined, then form the mixture into meatballs.

Step 2: In the flour, lightly dredge the meatballs, shaking the excess flour.

Step 3: Heat oil in a skillet over medium-high heat. Once the oil is hot, add the meatballs (in batches) to the skillet and cook until all sides are browned.

Step 4: Into a slow cooker, add the meatballs.

Step 5: Place the cream of chicken soup, au jus mix, and water in a large bowl. Mix well until blended and smooth. Then, pour this over the meatballs.

Step 6: Set to cook the meatballs for 3 to 4 hours on high or 4 to 5 hours on low.

Step 7: When done, serve the Salisbury Steak Meatballs over egg noodles or rice. Enjoy!

September 5, 2022 0 comment
0 FacebookTwitterPinterestEmail
Newer Posts
Older Posts

Popular Posts

  • 1

    Crispy Crunchy Parmesan Potatoes

    March 21, 2020
  • 2

    CROCK POT SMOTHERED PORK CHOPS

    March 21, 2020
  • Facebook
  • Twitter

@2019 - All Right Reserved.


Back To Top