Cook it once
  • Home
  • Privacy Policy
  • Recipes
    • KETO
    • LC
    • WW
  • Tips
  • Contact
Cook it once
  • Home
  • Privacy Policy
  • Recipes
    • KETO
    • LC
    • WW
  • Tips
  • Contact
Monthly Archives

May 2020

Main Dish Recipes

Patty Melts with Secret Sauce

by Rebecca May 29, 2020
written by Rebecca

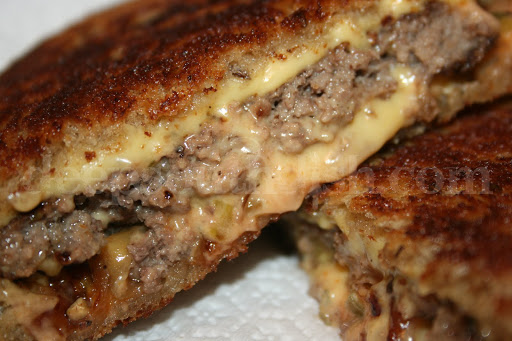
Melt sandwiches are the best! Easy to put together, and quick to make. This recipe uses the classic combination of ground beef patty, caramelized onions (I’m obsessed), and cheese. The secret sauce gives this sandwich that creamy, and flavorful balance that perfectly compliments the sandwich. Just make sure to not overcook the patties, as this makes the sandwich juicy and gives it more flavor. This quickly becomes my family’s favorite; my kids love it, and I’m crazy about it. Unlike other melt sandwiches, this is not overwhelming, but plain delicious!

Ingredients

1½ pounds ground beef

2 teaspoons of Worcestershire sauce

1 teaspoon of kosher salt

½ teaspoon of ground black pepper

12 slices sourdough bread

½ cup of Secret Sauce

3 medium Vidalia onions, thinly sliced

6 slices Cheddar cheese

8 tablespoons of unsalted butter

How to make Patty Melts with Secret Sauce

Step 1: Combine the ground beef, Worcestershire, salt, and pepper in a large bowl. Mix until incorporated.

Step 2: Shape the ground beef mixture into 6 oval patties.

Step 3: Melt 2 tablespoons butter in a medium cast-iron skillet over medium heat. Cook the onion and stir occasionally for about 35 minutes until soft and golden brown.

Step 4: Place the patties in a large iron skillet and cook them over medium-high heat for 2 minutes on each side or until browned and cooked through. Then, remove the patties from the skillet.

Step 5: Meanwhile, layer 1 slice of bread with 1 tablespoon of secret sauce, 2-3 tablespoons of caramelized onion, 1 slice of cheese, 1 patty, and top with another 1 tablespoon of secret sauce. Grab 1 slice of bread, place it on top, and repeat the process for the remaining bread and patties.

Step 6: Melt 2 tablespoons of butter in a skillet over medium-high heat. Cook the sandwiches in batches for about 3 minutes on each side. Flip once until golden brown and heated through. Add the remaining butter to the skillet if needed. Serve immediately. Enjoy!

Patty Melts with Secret Sauce

Rebecca Melt sandwiches are the best! Easy to put together, and quick to make. This recipe uses the classic combination of ground beef patty, caramelized onions (I’m obsessed), and cheese. The… Main Dish Recipes Patty Melts with Secret Sauce European Print This
Nutrition facts: 200 calories 20 grams fat
Rating: 3.5/5
( 94 voted )

Ingredients

  • 1½ pounds ground beef
  • 2 teaspoons of Worcestershire sauce
  • 1 teaspoon of kosher salt
  • ½ teaspoon of ground black pepper
  • 12 slices sourdough bread
  • ½ cup of Secret Sauce
  • 3 medium Vidalia onions, thinly sliced
  • 6 slices Cheddar cheese
  • 8 tablespoons of unsalted butter

Instructions

Step 1: Combine the ground beef, Worcestershire, salt, and pepper in a large bowl. Mix until incorporated.

Step 2: Shape the ground beef mixture into 6 oval patties.

Step 3: Melt 2 tablespoons butter in a medium cast-iron skillet over medium heat. Cook the onion and stir occasionally for about 35 minutes until soft and golden brown.

Step 4: Place the patties in a large iron skillet and cook them over medium-high heat for 2 minutes on each side or until browned and cooked through. Then, remove the patties from the skillet.

Step 5: Meanwhile, layer 1 slice of bread with 1 tablespoon of secret sauce, 2-3 tablespoons of caramelized onion, 1 slice of cheese, 1 patty, and top with another 1 tablespoon of secret sauce. Grab 1 slice of bread, place it on top, and repeat the process for the remaining bread and patties.

Step 6: Melt 2 tablespoons of butter in a skillet over medium-high heat. Cook the sandwiches in batches for about 3 minutes on each side. Flip once until golden brown and heated through. Add the remaining butter to the skillet if needed. Serve immediately. Enjoy!
May 29, 2020 0 comment
0 FacebookTwitterPinterestEmail
Main Dish Recipes

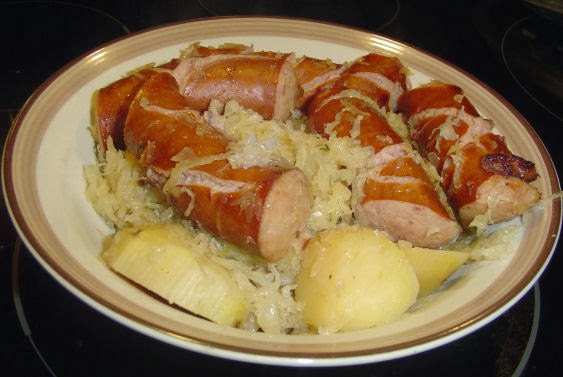
Polish Sausage Sauerkraut & Potatoes – Crockpot

by Rebecca May 29, 2020
written by Rebecca

Today, I’ve planned to treat myself for all the hard work. I really wanted to go out shopping and eat out. But the weather is on my side, it’s raining all afternoon makes me want to just hide under my blanket. Ah, too lazy to even move a muscle. I’ve been working all week, and I felt that I needed a break from all the hustle and bustle. Well, today is not the day. Might as well just go to the kitchen and cook.

An hour later, I’ve found some potatoes, polish sausages, and sauerkraut – so I am making myself a Polish Sausage Sauerkraut & Potatoes. I guess I’ll have a decent meal tonight after all. I seldom make this dish, most of the time I only make this if I have some friends coming over. But today, I think I deserve this. This is pretty easy to make. Just toss everything into the crockpot and let the crockpot do all the work. It’s so comforting, fulfilling, and hands-down delicious. And it is always a 5 star, definitely a keeper.

INGREDIENTS

2 (14-ounce) cans sauerkraut, undrained

6 potatoes, peeled and cut into large chunks

1/3 cup of brown sugar

1 cup of water

1 pound Polish sausage, cut into chunks

1 1/2 teaspoons of caraway seeds

2 bay leaves

1/2 teaspoon of pepper

How to make Polish Sausage Sauerkraut & Potatoes

Step 1: Put the sauerkraut and potatoes into the slow cooker.

Step 2: Add in the spices, brown sugar, and water.

Step 3: Then, stir in the sausage chunks.

Step 4: Cook on high for 4 hours. Adjust the low and cook for another 6 hours until the potatoes are tender.

Tip:

If you prefer you can use pork chops, too. Just combine the ingredients except for the potatoes and pork chops. When the sauerkraut mixture is made, you can then layer in the potatoes and chops.

Polish Sausage Sauerkraut & Potatoes - Crockpot

Rebecca Today, I’ve planned to treat myself for all the hard work. I really wanted to go out shopping and eat out. But the weather is on my side, it’s raining… Main Dish Recipes Polish Sausage Sauerkraut & Potatoes – Crockpot European Print This
Nutrition facts: 200 calories 20 grams fat
Rating: 5.0/5
( 1 voted )

Ingredients

  • 2 (14-ounce) cans sauerkraut, undrained
  • 6 potatoes, peeled and cut into large chunks
  • 1/3 cup of brown sugar
  • 1 cup of water
  • 1 pound Polish sausage, cut into chunks
  • 1 1/2 teaspoons of caraway seeds
  • 2 bay leaves
  • 1/2 teaspoon of pepper

Instructions

Step 1: Put the sauerkraut and potatoes into the slow cooker.

Step 2: Add in the spices, brown sugar, and water.

Step 3: Then, stir in the sausage chunks.

Step 4: Cook on high for 4 hours. Adjust the low and cook for another 6 hours until the potatoes are tender.

Tip:

If you prefer you can use pork chops, too. Just combine the ingredients except for the potatoes and pork chops. When the sauerkraut mixture is made, you can then layer in the potatoes and chops.

May 29, 2020 0 comment
0 FacebookTwitterPinterestEmail
Main Dish Recipes

Grandpa’s Classic Coney Sauce

by Rebecca May 29, 2020
written by Rebecca

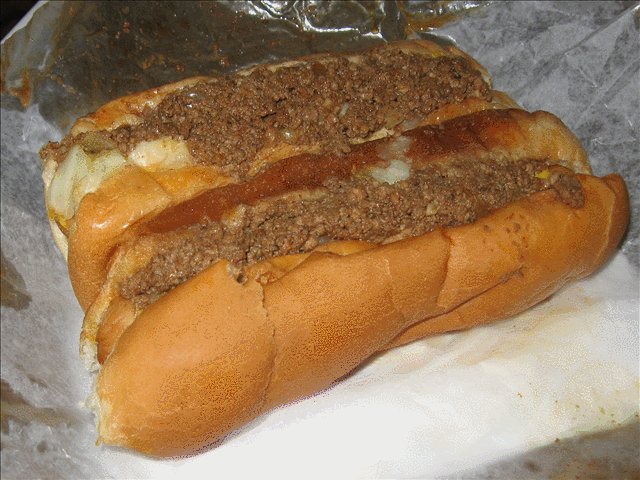
This is the classic coney sauce, not chili! I’ve been looking for this recipe for a long time, and finally found the perfect Coney recipe that everyone is craving especially during game nights. This is absolutely amazing, easy to put together, and truly delightful.

One day, a friend messaged me and asked if I can host the biggest game night we’ve had, and of course, I said yes. So, like many other game nights, I almost settled for the usual. Then, my husband suggested why not serve a Coney instead of chili dogs? Then, I remembered we were just talking about the classic coney sauce we’ve had years before and why I never tied to make it. I didn’t want to disappoint so I checked for the recipe online and found this. Glad I did because this is easy to follow, although, I modified it a bit (added a little bit of ketchup and Worcestershire) it is still is amazing. Everyone enjoyed it, complimented my classic coney sauce, and even asked for the recipe! This truly is a great replacement for chili dogs, and my new recipe to go to.

Ingredients

2 pounds ground beef

½ cup of chopped onion

1 ½ cups of ketchup

¼ cup of white sugar

¼ cup of white vinegar

¼ cup of prepared yellow mustard

½ teaspoon of celery seed

¾ teaspoon of Worcestershire sauce

½ teaspoon of ground black pepper

¾ teaspoon of salt

How to make Grandpa’s Classic Coney Sauce

Step 1: In a skillet, cook the ground beef and onion over medium-high heat. Cook and stir to crumble, and until the beef is browned. Drain any excess fat.

Step 2: Transfer the beef and onion into a slow cooker. Then, stir in the ketchup, sugar, vinegar, and mustard. Season with celery seed, Worcestershire sauce, pepper, and salt.

Step 3: Simmer on low for a few hours, covered.

Grandpa's Classic Coney Sauce

Rebecca This is the classic coney sauce, not chili! I’ve been looking for this recipe for a long time, and finally found the perfect Coney recipe that everyone is craving especially… Main Dish Recipes Grandpa’s Classic Coney Sauce European Print This
Nutrition facts: 200 calories 20 grams fat
Rating: 4.5/5
( 2 voted )

Ingredients

  • 2 pounds ground beef
  • ½ cup of chopped onion
  • 1 ½ cups of ketchup
  • ¼ cup of white sugar
  • ¼ cup of white vinegar
  • ¼ cup of prepared yellow mustard
  • ½ teaspoon of celery seed
  • ¾ teaspoon of Worcestershire sauce
  • ½ teaspoon of ground black pepper
  • ¾ teaspoon of salt

Instructions

Step 1: In a skillet, cook the ground beef and onion over medium-high heat. Cook and stir to crumble, and until the beef is browned. Drain any excess fat.

Step 2: Transfer the beef and onion into a slow cooker. Then, stir in the ketchup, sugar, vinegar, and mustard. Season with celery seed, Worcestershire sauce, pepper, and salt.

Step 3: Simmer on low for a few hours, covered.

May 29, 2020 0 comment
0 FacebookTwitterPinterestEmail
Main Dish Recipes

Old Fashioned Salmon Patties

by Rebecca May 29, 2020
written by Rebecca

What I love most about traveling is I get to see the world and eat. Well, mostly eat. I’ve been to many countries and adapted a lot of dishes, those that struck my taste buds. One of the many is this Salmon Patties. I first tasted it when we visited Seattle. It’s unusual but the good kind of unusual. I mean I’m not used to seafood patties so I never thought that I would love it. Preparing it from scratch though is heavy work; first, we are required to cook the salmon, then flaking the salmon, then adding the remaining ingredients to turn the salmon into a salmon patty, then, cooking it again. Plus, fresh salmon needs spending. It’s too much if you know what I mean; the cost, the preparation. So instead of going through a lot of hassle, I used canned salmon to turn this fancy old-fashioned salmon patties into an any-night healthy meal. And it’s equally great so kudos to canned salmon. It’s tender, creamy on the inside, crisp outside, and to spice things up you can add garlic powder, onion powder, and Cayenne for that Southern touch.

Ingredients

6 oz. can skinless/boneless pink salmon, drained

2 tablespoons diced onion

good pinch each of salt and pepper

1 large egg

1 tablespoon buttermilk

2 tablespoons cornmeal

4 tablespoons all-purpose flour

Vegetable oil for frying

How to make Old Fashioned Salmon Patties

Step 1: Combine the salmon, onion, salt, and pepper in a bowl. Mix in the egg, buttermilk, cornmeal, and flour. Combine until incorporated.

Step 2: In a medium-sized iron skillet, heat about 1/4 inch of oil over medium heat. When the oil is heated, drop spoonfuls of the salmon mixture and flatten them out.

Step 3: Fry in batches. Cook the patties for a minute on each side or until golden brown.

Step 4: Drain the patties on a paper sack or paper towel-lined plate (this recipe makes 10 servings). Serve immediately. Enjoy!

Old Fashioned Salmon Patties

Rebecca What I love most about traveling is I get to see the world and eat. Well, mostly eat. I’ve been to many countries and adapted a lot of dishes, those… Main Dish Recipes Old Fashioned Salmon Patties European Print This
Nutrition facts: 200 calories 20 grams fat
Rating: 3.7/5
( 3 voted )

Ingredients

  • 6 oz. can skinless/boneless pink salmon, drained
  • 2 tablespoons diced onion
  • good pinch each of salt and pepper
  • 1 large egg
  • 1 tablespoon buttermilk
  • 2 tablespoons cornmeal
  • 4 tablespoons all-purpose flour
  • Vegetable oil for frying

Instructions

Step 1: Combine the salmon, onion, salt, and pepper in a bowl. Mix in the egg, buttermilk, cornmeal, and flour. Combine until incorporated.

Step 2: In a medium-sized iron skillet, heat about 1/4 inch of oil over medium heat. When the oil is heated, drop spoonfuls of the salmon mixture and flatten them out.

Step 3: Fry in batches. Cook the patties for a minute on each side or until golden brown.

Step 4: Drain the patties on a paper sack or paper towel-lined plate (this recipe makes 10 servings). Serve immediately. Enjoy!
May 29, 2020 0 comment
0 FacebookTwitterPinterestEmail
Main Dish Recipes

Blueberry Cheesecake Cookies

by Rebecca May 29, 2020
written by Rebecca

The best cookie you will ever have! My friend introduced me to this recipe and I could not be happier that I tried it! 6 simple ingredients and 7 easy steps. Those are the only things you’ll be needing for this recipe. You will be surprised how amazing these cookies taste. Well, because of the ingredients. Who would have thought that you only need 6 basic ingredients to make the perfect treat? My kids love Saturday mainly because of this. It is something that we love to do on weekends. Bonding with your kids in the kitchen is the best! Instead of them spending their time on their gadgets, I found a way to somehow limit their time on technologies. They really love it! Nowadays, we need to remind our kids of the simplicity of life that we once had. Anyway, I hope you give this a try! I am sure you are gonna love it! Enjoy!

INGREDIENTS

2 (7-ounce) boxes Jiffy Blueberry Muffin mix

4 ounces cream cheese

1 stick butter

1/2 cup light brown sugar, firmly packed

2 eggs

1 1/2 cups white chocolate chips

How to make Blueberry Cheesecake Cookies

Step 1: Ready the oven and preheat to 325 degrees F.

Step 2: In a medium bowl, add cream cheese, brown sugar, and butter. Whisk in the eggs one at a time until all ingredients are well-mixed and creamy.

Step 3: Add in the muffin in the same bowl with the egg mixture. Stir until well-mixed.

Step 4: Add the white chocolates and let it chill for about 1 hour.

Step 5: Scoop and arrange the cookies in circle shapes using a spoon into the prepared cookie sheets. Leave at least 2 inches apart from each cookie.

Step 6: Place in the oven and bake for about 12 to 15 minutes or until the sides of the cookies turn color brown or toasted.

Step 7: Remove from the oven and place on a wire rack to cool completely. Enjoy!

Blueberry Cheesecake Cookies

Rebecca The best cookie you will ever have! My friend introduced me to this recipe and I could not be happier that I tried it! 6 simple ingredients and 7 easy… Main Dish Recipes Blueberry Cheesecake Cookies European Print This
Nutrition facts: 200 calories 20 grams fat
Rating: 5.0/5
( 2 voted )

Ingredients

  • 2 (7-ounce) boxes Jiffy Blueberry Muffin mix
  • 4 ounces cream cheese
  • 1 stick butter
  • 1/2 cup light brown sugar, firmly packed
  • 2 eggs
  • 1 1/2 cups white chocolate chips

Instructions

Step 1: Ready the oven and preheat to 325 degrees F.

Step 2: In a medium bowl, add cream cheese, brown sugar, and butter. Whisk in the eggs one at a time until all ingredients are well-mixed and creamy.

Step 3: Add in the muffin in the same bowl with the egg mixture. Stir until well-mixed.

Step 4: Add the white chocolates and let it chill for about 1 hour.

Step 5: Scoop and arrange the cookies in circle shapes using a spoon into the prepared cookie sheets. Leave at least 2 inches apart from each cookie.

Step 6: Place in the oven and bake for about 12 to 15 minutes or until the sides of the cookies turn color brown or toasted.

Step 7: Remove from the oven and place on a wire rack to cool completely. Enjoy!

May 29, 2020 0 comment
0 FacebookTwitterPinterestEmail
Main Dish Recipes

A Lemon Cake to Die for!

by Rebecca May 29, 2020
written by Rebecca

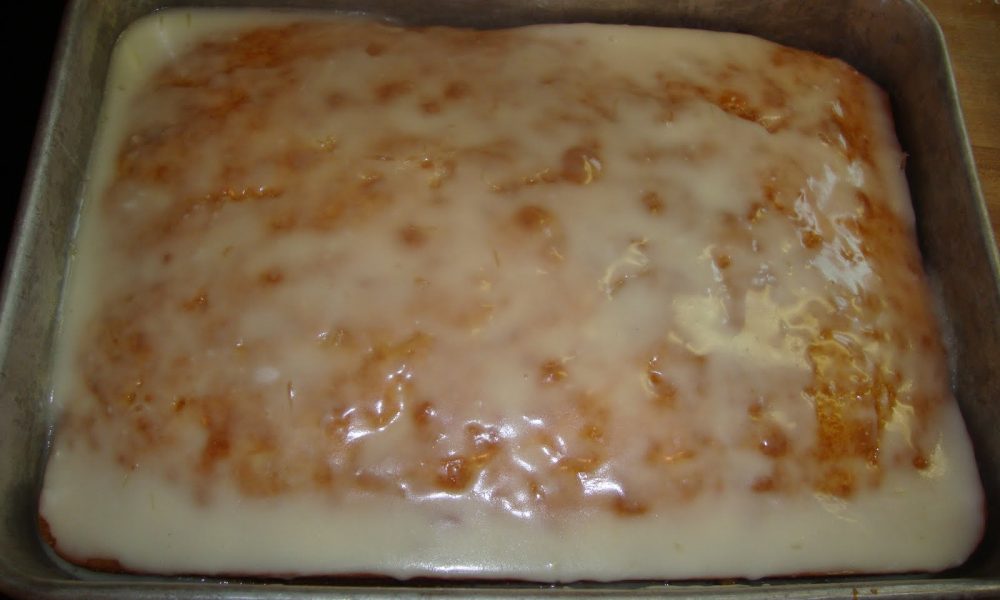
I remember the first time I had this incredible lemon cake. I was visiting a friend that I hadn’t seen in a while. At that time she was studying to become a pastry chef. This was the cake that she was baking that day. The smell instantly got my attention. It was so aromatic. She said it was some kind of a project that she was gonna submit that’s why she was baking it. I had a slice of it and boy, was it awesome! I remember telling her that she was gonna be a heck of a pastry chef. I was not wrong. Today, she has her own successful pastry shop and she hasn’t forgotten about this amazing lemon cake. To Jenny, if you are reading this, I am so proud of you! Thank you for the recipe.

Ingredients

A box of yellow cake mix

A small box of instant lemon pudding mix

¾ cup oil

¾ cup of water

4 beaten eggs

For the Glaze:

2 cups powdered sugar

2 tablespoons melted butter

2 tablespoons water

⅓ cup lemon juice

How to make Lemon Cake

Step 1: Apply cooking spray in a 9×13 baking pan.

Step 2: Crack eggs and add them in a medium bowl. Beat until the eggs are creamy.

Step 3: In the same bowl with the eggs, add water, oil, cake mix, and lemon pudding. Stir until well-mixed.

Step 4: Transfer the batter into the greased 9×13 pan.

Step 5: Place in the oven and bake at 350 degrees for about 35 minutes.

Step 6: Place the cake on a wire rack and poke holes on it using a fork.

Step 7: Add the glaze and spread evenly.

Step 8: To make the glaze: Place a skillet on the stove then turn the heat to low. Put the butter and allow it to melt. Pour in water and lemon juice. Add the powdered sugar and mix well using a fork or a spatula. Pour into the cake, Enjoy!

A Lemon Cake to Die for!

Rebecca I remember the first time I had this incredible lemon cake. I was visiting a friend that I hadn’t seen in a while. At that time she was studying to… Main Dish Recipes A Lemon Cake to Die for! European Print This
Nutrition facts: 200 calories 20 grams fat
Rating: 3.7/5
( 6 voted )

Ingredients

  • A box of yellow cake mix
  • A small box of instant lemon pudding mix
  • ¾ cup oil
  • ¾ cup of water
  • 4 beaten eggs
  • For the Glaze:
  • 2 cups powdered sugar
  • 2 tablespoons melted butter
  • 2 tablespoons water
  • ⅓ cup lemon juice

Instructions

Step 1: Apply cooking spray in a 9x13 baking pan.

Step 2: Crack eggs and add them in a medium bowl. Beat until the eggs are creamy.

Step 3: In the same bowl with the eggs, add water, oil, cake mix, and lemon pudding. Stir until well-mixed.

Step 4: Transfer the batter into the greased 9x13 pan.

Step 5: Place in the oven and bake at 350 degrees for about 35 minutes.

Step 6: Place the cake on a wire rack and poke holes on it using a fork.

Step 7: Add the glaze and spread evenly.

Step 8: To make the glaze: Place a skillet on the stove then turn the heat to low. Put the butter and allow it to melt. Pour in water and lemon juice. Add the powdered sugar and mix well using a fork or a spatula. Pour into the cake, Enjoy!

May 29, 2020 0 comment
0 FacebookTwitterPinterestEmail
Main Dish Recipes

Best Stuffed Cabbages

by Rebecca May 29, 2020
written by Rebecca

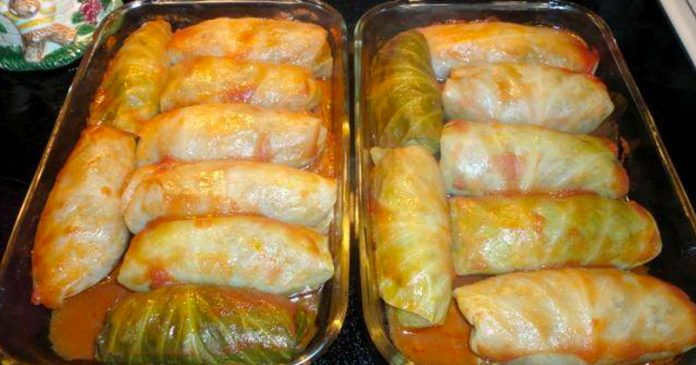
This is one of those odd recipes that surprisingly tastes amazing. Stuffed cabbage rolls are cabbage leaves that are filled with beef and rice, then coated with tomato sauce. A super easy dish to make, meaty, hearty, and fulfilling. I don’t know where I got this recipe from but this is a keeper. My family loves this so much so I see to it that I cook and serve this at least once every week so we wouldn’t miss it. And these stuffed cabbage rolls brings me compliments every time without fail. It’s great to serve a crowd, too. Definitely delicious!

Ingredients

2 heads of cabbage

2 lbs ground beef (or veal/beef/pork mix)

3 cups cooked rice

1 egg

1 teaspoon garlic

1 tablespoon parsley

2 slices diced onion

1 – 15 oz. can tomato sauce

1 – 28 oz. can crushed tomatoes

1/4 cup tomato sauce (in meat)

salt and pepper to taste

How to make Best Stuffed Cabbages

Step 1: In boiling water, place the head of the cabbage, and peel off the leaves one at a time. Cut with a sharp knife the rough part on the end of the cabbage leaf.

Step 2: In a bowl, mix the ground beef, cooked rice, egg, garlic, parsley, onion, salat, and pepper.

Step 3: Put a small amount of the mixture on a cabbage lea. Roll it up like a fajita and place them seam side down in a casserole dish. Put either the tomato sauce and 1 to 2 cabbage leaf on the bottom of the dish to prevent the Halupky from burning.

Step 4: Then, pour the crushed tomatoes over the Halupkys.

Step 5: Place in the oven, and bake at 357 degrees for approximately 75 minutes, covered. Then, adjust to 325 degrees and continue baking for another 90 minutes until the cabbage is tender. Make sure to baste every hour.

Step 6: When done, remove from the oven and serve with tomato sauce. Enjoy!

Best Stuffed Cabbages

Rebecca This is one of those odd recipes that surprisingly tastes amazing. Stuffed cabbage rolls are cabbage leaves that are filled with beef and rice, then coated with tomato sauce. A… Main Dish Recipes Best Stuffed Cabbages European Print This
Nutrition facts: 200 calories 20 grams fat
Rating: 5.0/5
( 1 voted )

Ingredients

  • 2 heads of cabbage
  • 2 lbs ground beef (or veal/beef/pork mix)
  • 3 cups cooked rice
  • 1 egg
  • 1 teaspoon garlic
  • 1 tablespoon parsley
  • 2 slices diced onion
  • 1 - 15 oz. can tomato sauce
  • 1 - 28 oz. can crushed tomatoes
  • 1/4 cup tomato sauce (in meat)
  • salt and pepper to taste

Instructions

Step 1: In boiling water, place the head of the cabbage, and peel off the leaves one at a time. Cut with a sharp knife the rough part on the end of the cabbage leaf.

Step 2: In a bowl, mix the ground beef, cooked rice, egg, garlic, parsley, onion, salat, and pepper.

Step 3: Put a small amount of the mixture on a cabbage lea. Roll it up like a fajita and place them seam side down in a casserole dish. Put either the tomato sauce and 1 to 2 cabbage leaf on the bottom of the dish to prevent the Halupky from burning.

Step 4: Then, pour the crushed tomatoes over the Halupkys.

Step 5: Place in the oven, and bake at 357 degrees for approximately 75 minutes, covered. Then, adjust to 325 degrees and continue baking for another 90 minutes until the cabbage is tender. Make sure to baste every hour.

Step 6: When done, remove from the oven and serve with tomato sauce. Enjoy!

May 29, 2020 0 comment
0 FacebookTwitterPinterestEmail
Main Dish Recipes

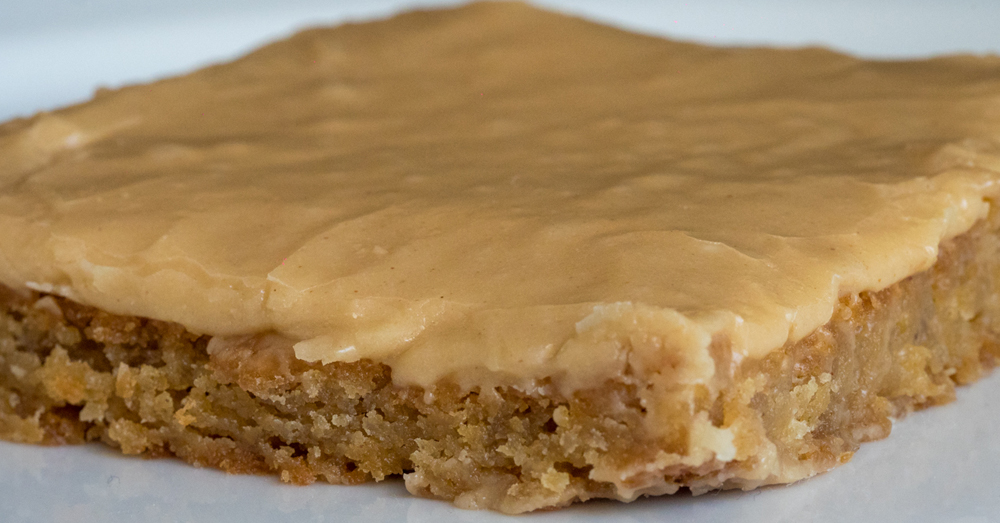
Peanut Butter Lunch Lady Cookie Bars

by Rebecca May 29, 2020
written by Rebecca

Do not take this cookie for granted! The simplicity yet complex flavor of this will make your day complete! This is what I always prepare pretty much 2 times a week. It is something that my kids love! Try eating it with a nice and cold lemon or cucumber juice. I hope this brings a smile on your face. Enjoy!

INGREDIENTS

2 cups of flour

2 cups of sugar

2 large eggs, beaten

1 ½ cup of peanut butter, divided

1 ½ cups or 3 sticks of unsalted butter, softened

½ cup milk + 2 tablespoons, divided

1 teaspoon of baking soda

1 teaspoon of vanilla extract

1 teaspoon of salt

4 cups of powdered sugar

How to make Peanut Butter Lunch Lady Cookie Bars

Step 1: Ready the oven and preheat to 400 degrees F. Apply cooking spray into a cookie sheet or use a parchment paper.

Step 2: Combine the dry ingredients. Mix sugar, flour, salt, and baking soda then set aside.

Step 3: In a small bowl, add eggs, vanilla extract, and 1/2 cup milk. Whisk until well-mixed.

Step 4: Place a saucepan on the stove and turn the heat to low. Add 1 cup of butter and melt. Add in 1 cup of peanut butter then bring to boil.

Step 5: Turn off the heat and gently add the flour mixture. Next, pour in the egg and milk mixture. Stir until well-mixed.

Step 6: Transfer the batter into the cookie sheet. Evenly spread the batter to the sides.

Step 7: Place the batter inside the oven and bake for 20 minutes or until cooked through. Insert a toothpick in the center of the cake. If it comes out clean, you are good to go!

Step 8: Place on a wire rack to cool. Once cool, add frosting.

Step 9: For the frosting mixture: Melt 1 cup of butter and add 1/2 cup of peanut butter in a saucepan then bring to boil. Pour 2 tablespoons of milk and gently add the powdered sugar and stir until well-mixed.

Step 10: Spread the frosting over the cookies. Let the frosting cool before serving. Enjoy!

Peanut Butter Lunch Lady Cookie Bars

Rebecca Do not take this cookie for granted! The simplicity yet complex flavor of this will make your day complete! This is what I always prepare pretty much 2 times a… Main Dish Recipes Peanut Butter Lunch Lady Cookie Bars European Print This
Nutrition facts: 200 calories 20 grams fat
Rating: 5.0/5
( 1 voted )

Ingredients

  • 2 cups of flour
  • 2 cups of sugar
  • 2 large eggs, beaten
  • 1 ½ cup of peanut butter, divided
  • 1 ½ cups or 3 sticks of unsalted butter, softened
  • ½ cup milk + 2 tablespoons, divided
  • 1 teaspoon of baking soda
  • 1 teaspoon of vanilla extract
  • 1 teaspoon of salt
  • 4 cups of powdered sugar

Instructions

Step 1: Ready the oven and preheat to 400 degrees F. Apply cooking spray into a cookie sheet or use a parchment paper.

Step 2: Combine the dry ingredients. Mix sugar, flour, salt, and baking soda then set aside.

Step 3: In a small bowl, add eggs, vanilla extract, and 1/2 cup milk. Whisk until well-mixed.

Step 4: Place a saucepan on the stove and turn the heat to low. Add 1 cup of butter and melt. Add in 1 cup of peanut butter then bring to boil.

Step 5: Turn off the heat and gently add the flour mixture. Next, pour in the egg and milk mixture. Stir until well-mixed.

Step 6: Transfer the batter into the cookie sheet. Evenly spread the batter to the sides.

Step 7: Place the batter inside the oven and bake for 20 minutes or until cooked through. Insert a toothpick in the center of the cake. If it comes out clean, you are good to go!

Step 8: Place on a wire rack to cool. Once cool, add frosting.

Step 9: For the frosting mixture: Melt 1 cup of butter and add 1/2 cup of peanut butter in a saucepan then bring to boil. Pour 2 tablespoons of milk and gently add the powdered sugar and stir until well-mixed.

Step 10: Spread the frosting over the cookies. Let the frosting cool before serving. Enjoy!

May 29, 2020 0 comment
0 FacebookTwitterPinterestEmail
Main Dish Recipes

Old Fashioned Butter Cake

by Rebecca May 29, 2020
written by Rebecca

A traditional, old-fashioned cake that has been the crowd favorite for a long time. It’s fluffy, rich, buttery, and it’s all that we’re looking for a nice slice of cake. Butter cake is like a black canvas, you can freely dress it up with your favorite frosting, maybe a simple whipped cream, fresh strawberries, or any of your favorite fruit preserves. And this cake is super easy to put together too, and if you noticed, it only calls for basic ingredients; flour, sugar, baking powder, salt, butter, milk, vanilla extract, and eggs. Easy peasy, right? Try it with buttercream frosting, I promise you’ll love it! Or enjoy it plain with a freshly brewed coffee for an afternoon snack.

INGREDIENTS

2 cups of all-purpose flour, sifted

1 1/4 cup of sugar

1 tablespoon of baking powder

1 teaspoon of salt

1/2 cup of butter, softened

1 cup of milk

1 teaspoon of vanilla extract

2 eggs

How to make Old Fashioned Butter Cake

Step 1: Prepare the oven. Preheat it to 350 degrees F. Then, grease and flour a two 8 x 2-inch baking pans. Set aside.

Step 2: Sift the flour, sugar, baking powder, and salt in a large mixing bowl.

Step 3: Stir in the butter, milk, and vanilla. Beat with a hand mixer for 2 minutes while occasionally scraping the sides of the bowl.

Step 4: Then, add in the eggs and beat for another 2 minutes.

Step 5: Divide and pour the batter equally into the greased and floured pans.

Step 6: Place inside the preheated oven and bake for 30 to 35 minutes. Insert a toothpick in the middle and when it comes out clean the cakes are done.

Step 7: Remove from the oven and let them cool in the pans for 10 minutes. Then, carefully turn the cakes out onto a cooling rack and cool completely.

Step 8: Before serving, frost the cakes with your favorite frosting. Enjoy!

Old Fashioned Butter Cake

Rebecca A traditional, old-fashioned cake that has been the crowd favorite for a long time. It’s fluffy, rich, buttery, and it’s all that we’re looking for a nice slice of cake.… Main Dish Recipes Old Fashioned Butter Cake European Print This
Nutrition facts: 200 calories 20 grams fat
Rating: 5.0/5
( 1 voted )

Ingredients

  • 2 cups of all-purpose flour, sifted
  • 1 1/4 cup of sugar
  • 1 tablespoon of baking powder
  • 1 teaspoon of salt
  • 1/2 cup of butter, softened
  • 1 cup of milk
  • 1 teaspoon of vanilla extract
  • 2 eggs

Instructions

Step 1: Prepare the oven. Preheat it to 350 degrees F. Then, grease and flour a two 8 x 2-inch baking pans. Set aside.

Step 2: Sift the flour, sugar, baking powder, and salt in a large mixing bowl.

Step 3: Stir in the butter, milk, and vanilla. Beat with a hand mixer for 2 minutes while occasionally scraping the sides of the bowl.

Step 4: Then, add in the eggs and beat for another 2 minutes.

Step 5: Divide and pour the batter equally into the greased and floured pans.

Step 6: Place inside the preheated oven and bake for 30 to 35 minutes. Insert a toothpick in the middle and when it comes out clean the cakes are done.

Step 7: Remove from the oven and let them cool in the pans for 10 minutes. Then, carefully turn the cakes out onto a cooling rack and cool completely.

Step 8: Before serving, frost the cakes with your favorite frosting. Enjoy!

May 29, 2020 0 comment
0 FacebookTwitterPinterestEmail
Main Dish Recipes

Crock-Pot Brown Sugar & Balsamic–Glazed Pork Tenderloin

by Rebecca May 29, 2020
written by Rebecca

This is one of those crockpot recipes that I love. The roast is tender, perfectly cooked, and the brown sugar and balsamic glaze is thick, sweet-salty, you could put it on anything! I am crazy with crockpot because it’s like opening a gift, you’ll be surprised every time a dish comes out of it. This pork tenderloin takes time to cook but that’s a great deal for a busy mom like me. I get to prepare dinner and do my everyday mommy duties at the same time. And this beauty is decent enough to serve on gatherings, the most requested dish actually.

Ingredients

1 teaspoon of ground sage

1/2 teaspoon of salt

1/4 teaspoon of pepper

1 garlic clove, crushed

1/2 cup of water

2 pounds pork tenderloin

1/2 cup of brown sugar

1 tablespoon of cornstarch

1/4 cup of balsamic vinegar

1/2 cup of water

2 tablespoons of soy sauce

How to make Crock-Pot Brown Sugar & Balsamic–Glazed Pork Tenderloin

Step 1: Mix the sage, salt, pepper, and garlic. Then rub it over the tenderloin.

Step 2: In a slow cooker, place a half cup of water, then put in the tenderloin and cook for 6 to 8 hours on low.

Step 3: Meanwhile, for the glaze, mix the brown sugar, cornstarch, balsamic vinegar, water, and soy sauce in a small saucepan. Heat for about 4 minutes over medium heat while stirring continuously until the mixture thickened.

Step 4: On the last hour of cooking the tenderloin, brush the roast with glaze 2 to 3 times.

Step 5: If you want to have a more caramelized crust, remove the roast from the crockpot, place it on the aluminum lined sheet pan, and glaze again before setting under the broiler for 1 to 2 minutes until bubbly and caramelized. Repeat the same process 2 to 3 times until you achieve your desired crust.

Step 6: Serve the roast with the remaining glaze on the side and enjoy!

Crock-Pot Brown Sugar & Balsamic–Glazed Pork Tenderloin

Rebecca This is one of those crockpot recipes that I love. The roast is tender, perfectly cooked, and the brown sugar and balsamic glaze is thick, sweet-salty, you could put it… Main Dish Recipes Crock-Pot Brown Sugar & Balsamic–Glazed Pork Tenderloin European Print This
Nutrition facts: 200 calories 20 grams fat
Rating: 3.5/5
( 2 voted )

Ingredients

  • 1 teaspoon of ground sage
  • 1/2 teaspoon of salt
  • 1/4 teaspoon of pepper
  • 1 garlic clove, crushed
  • 1/2 cup of water
  • 2 pounds pork tenderloin
  • 1/2 cup of brown sugar
  • 1 tablespoon of cornstarch
  • 1/4 cup of balsamic vinegar
  • 1/2 cup of water
  • 2 tablespoons of soy sauce

Instructions

Step 1: Mix the sage, salt, pepper, and garlic. Then rub it over the tenderloin.

Step 2: In a slow cooker, place a half cup of water, then put in the tenderloin and cook for 6 to 8 hours on low.

Step 3: Meanwhile, for the glaze, mix the brown sugar, cornstarch, balsamic vinegar, water, and soy sauce in a small saucepan. Heat for about 4 minutes over medium heat while stirring continuously until the mixture thickened.

Step 4: On the last hour of cooking the tenderloin, brush the roast with glaze 2 to 3 times.

Step 5: If you want to have a more caramelized crust, remove the roast from the crockpot, place it on the aluminum lined sheet pan, and glaze again before setting under the broiler for 1 to 2 minutes until bubbly and caramelized. Repeat the same process 2 to 3 times until you achieve your desired crust.

Step 6: Serve the roast with the remaining glaze on the side and enjoy!

May 29, 2020 0 comment
0 FacebookTwitterPinterestEmail
Newer Posts
Older Posts

Popular Posts

  • 1

    Crispy Crunchy Parmesan Potatoes

    March 21, 2020
  • 2

    CROCK POT SMOTHERED PORK CHOPS

    March 21, 2020
  • Facebook
  • Twitter

@2019 - All Right Reserved.


Back To Top