Cook it once
  • Home
  • Privacy Policy
  • Recipes
    • KETO
    • LC
    • WW
  • Tips
  • Contact
Cook it once
  • Home
  • Privacy Policy
  • Recipes
    • KETO
    • LC
    • WW
  • Tips
  • Contact
Category:

Main Dish Recipes

Main Dish Recipes

Million Dollar Pie with Cream Cheese

by Rebecca August 4, 2020
written by Rebecca

Serves: 6-8 | Prep: 10 Min

This may be the easiest treat I have ever made. Don’t get me wrong though, even if it is really easy to make, the flavor is really good! I discovered this amazing treat with the help of my sister. She introduced me to this recipe and I am so glad that she did because I never would have known a very simple recipe that I can pull off! If this delicious pie can’t please you, I don’t know what will. I mean, it is very hard not to fall in love with this pie. I remember the first time I tasted it. I was so blown away with how the ingredients compliment well with each other. I don’t know but coconut and pineapple in one dish or dessert gave me doubts. I never thought that it would be so good! I am sure that you will e able to make this easy and simple pie. Just follow all the steps and you are so in for a treat! By the way, be very generous with the coconut and pineapple for they are the main acts of this treat. I hope you all love it. Invite your friends over and surprise them with the amazing taste of this Million Dollar Pie with Cream Cheese. Enjoy!

Ingredients

2/3 cup sugar

8 oz cream cheese

1/2 small tub of cool whip

1/2 cup coconut

1/2 cup pecans

1 small can of crushed pineapple, drained

1 graham cracker pie crust

How to Make Million Dollar Pie with Cream Cheese

Step 1: In a large mixing bowl, add cream cheese and sugar. Stir until well mixed.

Step 2: Add in the cool whip and stir until well blended.

Step 3: Add in the coconut, pecans, and crushed pineapple. Stir until well mixed.

Step 4: Pour the mixture into the pie crust.

Step 5: Place inside the fridge to chill for at least 1 hour.

Step 6: Serve chill and enjoy!
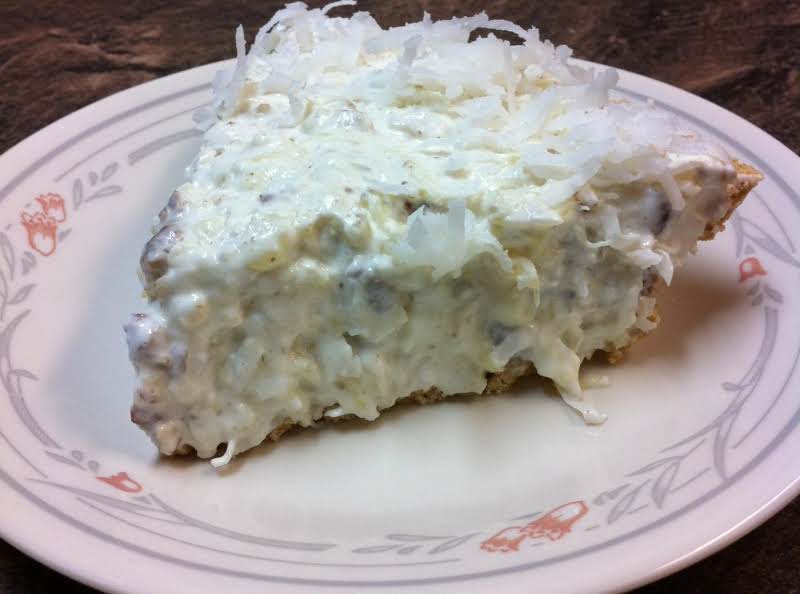
Million Dollar Pie with Cream Cheese

Rebecca Serves: 6-8 | Prep: 10 Min This may be the easiest treat I have ever made. Don’t get me wrong though, even if it is really easy to make, the… Main Dish Recipes Million Dollar Pie with Cream Cheese European Print This
Serves: 6-8 Prep Time: 10 mins
Nutrition facts: 200 calories 20 grams fat
Rating: 5.0/5
( 1 voted )

Ingredients

  • 2/3 cup sugar
  • 8 oz cream cheese
  • 1/2 small tub of cool whip
  • 1/2 cup coconut
  • 1/2 cup pecans
  • 1 small can of crushed pineapple, drained
  • 1 graham cracker pie crust

Instructions

Step 1: In a large mixing bowl, add cream cheese and sugar. Stir until well mixed.

Step 2: Add in the cool whip and stir until well blended.

Step 3: Add in the coconut, pecans, and crushed pineapple. Stir until well mixed.

Step 4: Pour the mixture into the pie crust.

Step 5: Place inside the fridge to chill for at least 1 hour.

Step 6: Serve chill and enjoy!
August 4, 2020 0 comment
0 FacebookTwitterPinterestEmail
Main Dish Recipes

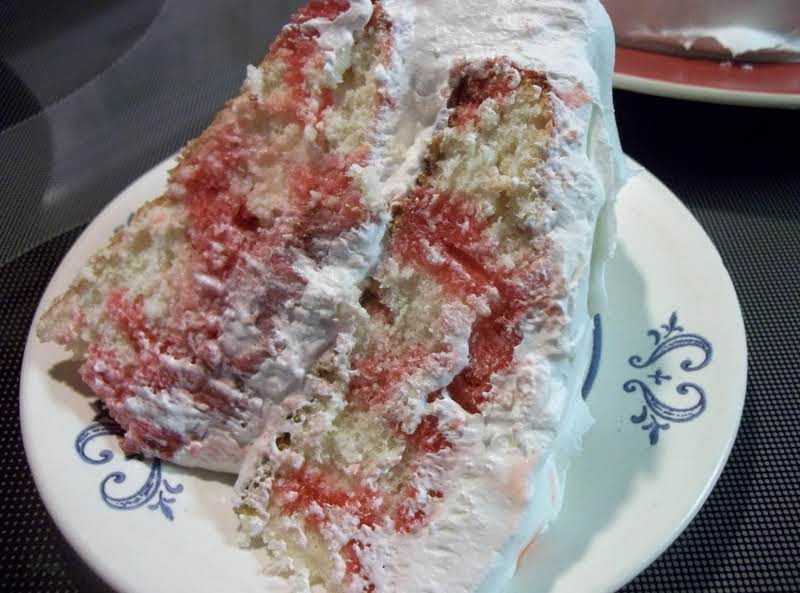
Strawberry Poke Cake

by Rebecca August 4, 2020
written by Rebecca

Serves: 10 – 12 | Prep: 25 Min | Cook: 25 Min

Nice and sweet cake! This will be the highlight of your day, I am one hundred percent sure about that! The taste of the fresh strawberries is the highlight of this cake so make sure to be very generous.

Ingredients

1 pkg ( 18 1/4 ounces ) white cake

1 1/4 cups water

1/4 cup vegetable oil

2 eggs

1 pkg (16 ounces) frozen sweetened sliced strawberries, thawed

2 pkg (3 ounces each) strawberry gelatin

1 (12-ounce tub) frozen whipped topping, thawed, divided. (i used 1 1/2 containers)

fresh strawberries, optional

How to Make Strawberry Poke Cake

Step 1: Add cake mix, eggs, oil, and water in a large mixing bowl. Beat for 30 seconds at low speed then 2 minutes for medium speed.

Step 2: Transfer the batter into the 9-inch baking pans. Greased and floured.

Step 3: Place inside the oven and bake for 25 to 35 minutes at 350 degrees or until the toothpick inserted in middle comes out clean.

Step 4: Remove from the oven and let it sit on a wire rack to cool for 10 minutes.

Step 5: Level the top of the cake with a serrated knife.

Step 6: Arrange the top side up into two 9-inch baking pans.

Step 7: Poke the cakes using a wooden skewer. Leave a 1/2-inch space between each cake.

Step 8: Drain the strawberries and pour the juice in a 2-cup measuring cup.

Step 9: Place strawberries inside the fridge to chill.

Step 10: Add 2 cups of water into the measuring cups.

Step 11: Transfer the mixture into a small saucepan.

Step 12: Place the saucepan on the stove and bring it a boil. Add in gelatin and stir until it dissolves completely.

Step 13: Remove from the heat and place inside the fridge to chill for at least 30 minutes.

Step 14: Top the cakes with the gelatin mixture using a spoon. Place inside the fridge to chill for 2 to 3 hours.

Step 15: Dip a pan with warm water for 10 seconds.

Step 16: Transfer the cake into a serving plate and arrange it invertedly.

Step 17: Top with1 cup of whipped topping and the strawberries.

Step 18: Add the 2nd cake over the topping.

Step 19: Add the remaining whipped topping on top of the 2nd cake.

Step 20: Place inside the fridge to chill for 1 hour.

Step 21: Serve and enjoy!

NOTE: I usually serve it with fresh strawberries. Put the leftovers inside the fridge.

Strawberry Poke Cake

Rebecca Serves: 10 – 12 | Prep: 25 Min | Cook: 25 Min Nice and sweet cake! This will be the highlight of your day, I am one hundred percent sure… Main Dish Recipes Strawberry Poke Cake European Print This
Serves: 10-12 Prep Time: 25 mins Cooking Time: 25 mins 25 mins
Nutrition facts: 200 calories 20 grams fat
Rating: 5.0/5
( 1 voted )

Ingredients

  • 1 pkg ( 18 1/4 ounces ) white cake
  • 1 1/4 cups water
  • 1/4 cup vegetable oil
  • 2 eggs
  • 1 pkg (16 ounces) frozen sweetened sliced strawberries, thawed
  • 2 pkg (3 ounces each) strawberry gelatin
  • 1 (12-ounce tub) frozen whipped topping, thawed, divided. (i used 1 1/2 containers)
  • fresh strawberries, optional

Instructions

Step 1: Add cake mix, eggs, oil, and water in a large mixing bowl. Beat for 30 seconds at low speed then 2 minutes for medium speed.

Step 2: Transfer the batter into the 9-inch baking pans. Greased and floured.

Step 3: Place inside the oven and bake for 25 to 35 minutes at 350 degrees or until the toothpick inserted in middle comes out clean.

Step 4: Remove from the oven and let it sit on a wire rack to cool for 10 minutes.

Step 5: Level the top of the cake with a serrated knife.

Step 6: Arrange the top side up into two 9-inch baking pans.

Step 7: Poke the cakes using a wooden skewer. Leave a 1/2-inch space between each cake.

Step 8: Drain the strawberries and pour the juice in a 2-cup measuring cup.

Step 9: Place strawberries inside the fridge to chill.

Step 10: Add 2 cups of water into the measuring cups.

Step 11: Transfer the mixture into a small saucepan.

Step 12: Place the saucepan on the stove and bring it a boil. Add in gelatin and stir until it dissolves completely.

Step 13: Remove from the heat and place inside the fridge to chill for at least 30 minutes.

Step 14: Top the cakes with the gelatin mixture using a spoon. Place inside the fridge to chill for 2 to 3 hours.

Step 15: Dip a pan with warm water for 10 seconds.

Step 16: Transfer the cake into a serving plate and arrange it invertedly.

Step 17: Top with1 cup of whipped topping and the strawberries.

Step 18: Add the 2nd cake over the topping.

Step 19: Add the remaining whipped topping on top of the 2nd cake.

Step 20: Place inside the fridge to chill for 1 hour.

Step 21: Serve and enjoy!

NOTE: I usually serve it with fresh strawberries. Put the leftovers inside the fridge.

August 4, 2020 0 comment
0 FacebookTwitterPinterestEmail
Main Dish Recipes

Blueberry Cream Cheese French Toast Casserole

by Rebecca August 4, 2020
written by Rebecca

Serves 8-10 | Prep: 24 hours 30 min.| Cook: 1 hour

This gorgeous brunch or breakfast casserole is a classic! A super easy to make and a heavenly dessert-like dish that you cannot be able to resist. It’s mouth-watering and is loaded with fresh blueberries.

Ingredients

FOR THE FRENCH TOAST:

12 slice bread, any kind or loaf of French bread

2 pkg cream cheese, room temperature, 8 oz each

1 cup blueberries, fresh or frozen

12 large eggs

1 cup milk, add a little at a time until milk is absorbed by the bread

1/3 cup maple syrup or honey

FOR THE BLUEBERRY SAUCE:

1 cup of sugar

2 tablespoons corn starch

1 cup of water

1 cup blueberries, fresh or frozen

1 tablespoon butter

How to Make Blueberry Cream Cheese French Toast Casserole

Step 1: Use spam to spray a 9 x 13-inch dish. Then, slice or tear the bread into cubes before arranging them in the bottom of the prepared dish.

Step 2: Slice the cream cheese into inch cubes and place them on the top of the bread. Then, sprinkle a cup of blueberries on top.

Step 3: Combine 12 eggs, 1 cup of milk, and 1/3 cup maple syrup in a mixing bowl. Once mixed, gradually pour the mixture over the bread making sure that the bread soaks up the milk. We don’t want the bread to be soggy before baking because it’ll still be soggy even after you bake it. Then, cover the bread mixture with foil and chill overnight.

Step 4: To make the Blueberry Sauce, combine 1 cup of sugar with 2 tablespoons of corn starch in a medium saucepan. Then, add in a cup of water and mix until smooth and not clumpy. Heat the mixture for 2 to 3 minutes until thickened.

Step 5: Add in a cup of blueberries and continue to simmer for 8 to 10 minutes while occasionally string until the blueberries start to burst. But don’t let all the blueberries burst. We want those whole blueberries for texture.

Step 6: Remove the pan from the heat before stirring in a tablespoon of butter. This blueberry sauce can be stored in a plastic or glass container until ready to use.

Step 7: On the next day, start by preheating the oven to 350 degrees. Then, take the casserole out of the fridge and place inside the preheated oven to bake for 30 minutes.

Step 8: After 30 minutes, remove the foil and continue baking for 25 to 30 minutes more or until the top of the casserole is golden brown and the center is set.

Step 9: Meanwhile, heat the blueberry sauce in the microwave or on top of the oven until warm. When warm and the casserole is set, pour the sauce over the casserole.

NOTE: In 30 minutes, you can put everything together. You need to wait though for at least 8 hours or preferably 24 hours for everything to set in. So refrigerate the casserole and cook for an hour the next day.

This what I call the lazy sauce, you can use jam or preserves or whatever fruit-flavored jam you’d prefer. Warm the preserves in a small saucepan and add in a tablespoon of corn starch and mix until smooth. You can stir in additional fruit if desired. Serve this over french toast, ice cream, or anything! Enjoy!

Blueberry Cream Cheese French Toast Casserole

Rebecca Serves 8-10 | Prep: 24 hours 30 min.| Cook: 1 hour This gorgeous brunch or breakfast casserole is a classic! A super easy to make and a heavenly dessert-like dish that… Main Dish Recipes Blueberry Cream Cheese French Toast Casserole European Print This
Serves: 8-10 Prep Time: 24 hrs 30 mins Cooking Time: 1 hr 1 hr
Nutrition facts: 200 calories 20 grams fat
Rating: 5.0/5
( 1 voted )

Ingredients

  • FOR THE FRENCH TOAST:
  • 12 slice bread, any kind or loaf of French bread
  • 2 pkg cream cheese, room temperature, 8 oz each
  • 1 cup blueberries, fresh or frozen
  • 12 large eggs
  • 1 cup milk, add a little at a time until milk is absorbed by the bread
  • 1/3 cup maple syrup or honey
  • FOR THE BLUEBERRY SAUCE:
  • 1 cup of sugar
  • 2 tablespoons corn starch
  • 1 cup of water
  • 1 cup blueberries, fresh or frozen
  • 1 tablespoon butter

Instructions

Step 1: Use spam to spray a 9 x 13-inch dish. Then, slice or tear the bread into cubes before arranging them in the bottom of the prepared dish.

Step 2: Slice the cream cheese into inch cubes and place them on the top of the bread. Then, sprinkle a cup of blueberries on top.

Step 3: Combine 12 eggs, 1 cup of milk, and 1/3 cup maple syrup in a mixing bowl. Once mixed, gradually pour the mixture over the bread making sure that the bread soaks up the milk. We don't want the bread to be soggy before baking because it'll still be soggy even after you bake it. Then, cover the bread mixture with foil and chill overnight.

Step 4: To make the Blueberry Sauce, combine 1 cup of sugar with 2 tablespoons of corn starch in a medium saucepan. Then, add in a cup of water and mix until smooth and not clumpy. Heat the mixture for 2 to 3 minutes until thickened.

Step 5: Add in a cup of blueberries and continue to simmer for 8 to 10 minutes while occasionally string until the blueberries start to burst. But don't let all the blueberries burst. We want those whole blueberries for texture.

Step 6: Remove the pan from the heat before stirring in a tablespoon of butter. This blueberry sauce can be stored in a plastic or glass container until ready to use.

Step 7: On the next day, start by preheating the oven to 350 degrees. Then, take the casserole out of the fridge and place inside the preheated oven to bake for 30 minutes.

Step 8: After 30 minutes, remove the foil and continue baking for 25 to 30 minutes more or until the top of the casserole is golden brown and the center is set.

Step 9: Meanwhile, heat the blueberry sauce in the microwave or on top of the oven until warm. When warm and the casserole is set, pour the sauce over the casserole.

NOTE: In 30 minutes, you can put everything together. You need to wait though for at least 8 hours or preferably 24 hours for everything to set in. So refrigerate the casserole and cook for an hour the next day.

This what I call the lazy sauce, you can use jam or preserves or whatever fruit-flavored jam you'd prefer. Warm the preserves in a small saucepan and add in a tablespoon of corn starch and mix until smooth. You can stir in additional fruit if desired. Serve this over french toast, ice cream, or anything! Enjoy!

August 4, 2020 0 comment
0 FacebookTwitterPinterestEmail
Main Dish Recipes

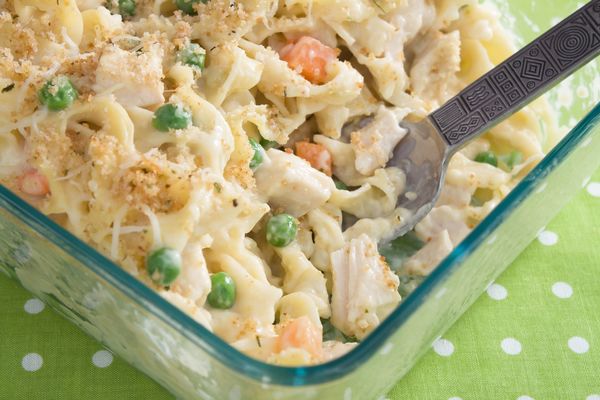
Thick And Creamy Chicken Noodle Casserole

by Rebecca August 4, 2020
written by Rebecca

Serves: 8 | Cook time: 30 minutes

This just made my day! I tried this recipe today and I am so glad that I did because I never would have tasted perfection! I recently learned about this recipe while I was browsing the internet for new and easy dishes that I can try at home. The taste of all the ingredients compliment really well with each other. I think the only concern in this recipe is to make sure that the noodles are al dente’. Overcooked noodles are never good! Just follow these simple steps and it will guide you to perfection. Enjoy!

INGREDIENTS

1 pound egg noodles

2-3 cups cooked chicken, cubed

1 (14 oz.) can cream of chicken soup

1 (10.75 oz.) can condensed cream of mushroom soup

1 (16 oz.) bag frozen peas and carrots

3/4 cup heavy cream

2/3 cup parmesan cheese, grated

1/2 cup cheddar cheese, grated

1/3 cup seasoned Italian breadcrumbs

2 tablespoons unsalted butter, melted

1 teaspoon garlic salt

kosher salt and freshly ground pepper, to taste

How to make Thick And Creamy Chicken Noodle Casserole

Step 1: Ready the oven and preheat to 375 degrees F.

Step 2: In a large pot, pour water and add salt. Refer to the directions provided on the package of the noodles.

Step 3: Drain the noodles. Set aside.

Step 4: Add heavy cream and soups in a large bowl. Stir until it becomes creamy.

Step 5: Add in the sliced chicken, cheddar cheese, frozen veggies, and egg noodles. Stir until well mixed. Season with salt and pepper to taste.

Step 6: Transfer the mixture into a large casserole dish. Tap the corner to remove the bubbles. Arrange until smooth.

Step 7: Add melted butter, parmesan cheese, and breadcrumbs in another mixing bowl. Whisk until well mixed then add the mixture on top of the casserole.

Step 8: Place inside the oven and bake for 30 to 35 minutes or until the sauce is bubbly and the veggies are soft.

Step 9: Remove from the oven and let it sit at room to temperature to cool for 5 minutes.

Step 10: Transfer into bowls then sprinkle more cheese on top.

Step 11: Serve and enjoy!

Thick And Creamy Chicken Noodle Casserole

Rebecca Serves: 8 | Cook time: 30 minutes This just made my day! I tried this recipe today and I am so glad that I did because I never would have… Main Dish Recipes Thick And Creamy Chicken Noodle Casserole European Print This
Serves: 8 Cooking Time: 30 mins 30 mins
Nutrition facts: 200 calories 20 grams fat
Rating: 5.0/5
( 1 voted )

Ingredients

  • 1 pound egg noodles
  • 2-3 cups cooked chicken, cubed
  • 1 (14 oz.) can cream of chicken soup
  • 1 (10.75 oz.) can condensed cream of mushroom soup
  • 1 (16 oz.) bag frozen peas and carrots
  • 3/4 cup heavy cream
  • 2/3 cup parmesan cheese, grated
  • 1/2 cup cheddar cheese, grated
  • 1/3 cup seasoned Italian breadcrumbs
  • 2 tablespoons unsalted butter, melted
  • 1 teaspoon garlic salt
  • kosher salt and freshly ground pepper, to taste

Instructions

Step 1: Ready the oven and preheat to 375 degrees F.

Step 2: In a large pot, pour water and add salt. Refer to the directions provided on the package of the noodles.

Step 3: Drain the noodles. Set aside.

Step 4: Add heavy cream and soups in a large bowl. Stir until it becomes creamy.

Step 5: Add in the sliced chicken, cheddar cheese, frozen veggies, and egg noodles. Stir until well mixed. Season with salt and pepper to taste.

Step 6: Transfer the mixture into a large casserole dish. Tap the corner to remove the bubbles. Arrange until smooth.

Step 7: Add melted butter, parmesan cheese, and breadcrumbs in another mixing bowl. Whisk until well mixed then add the mixture on top of the casserole.

Step 8: Place inside the oven and bake for 30 to 35 minutes or until the sauce is bubbly and the veggies are soft.

Step 9: Remove from the oven and let it sit at room to temperature to cool for 5 minutes.

Step 10: Transfer into bowls then sprinkle more cheese on top.

Step 11: Serve and enjoy!

August 4, 2020 0 comment
0 FacebookTwitterPinterestEmail
Main Dish Recipes

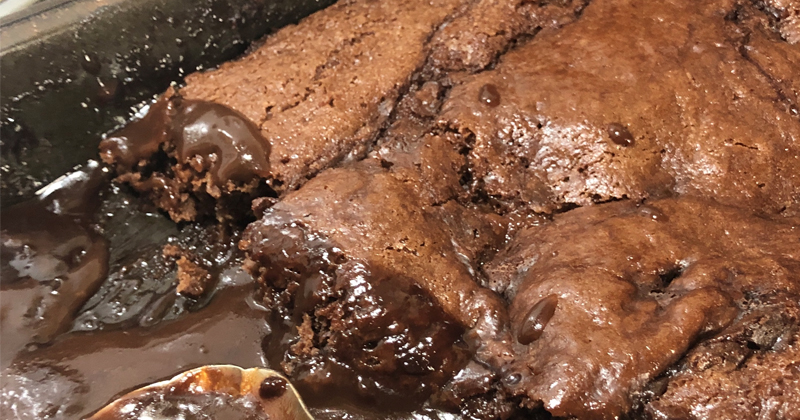
Chocolate Cobbler

by Rebecca August 4, 2020
written by Rebecca

Serves: 6-8 | Prep: 10 Min | Cook: 30 Min

Nothing is simpler than this decadent chocolate cobbler. This has a buttery and tender crust with a mouthwatering chocolate sauce. A real treat for the chocoholics including myself. This cobbler is a breeze to make. Perfect for potlucks if you require an easy dessert to the recipe. This dark, super-rich, the oozy treat is freaking delicious and is addicting! I remembered when I first made it, it’s gone in a blink! My kids did not stop until they finish the whole thing!

This chocolate cobbler reminds me of chocolate pudding and lava cake. It’s a mashed-up of my two favorite desserts that’s why I am obsessed! Just the look of it makes my mouth water. This melt-in-your-mouth dessert deserves a 5 star and is amazing in every way. A simple dessert that undeniably pleases the crowd! It is not only a delight to look at but this cobbler is heaven! Once you dig into it you’ll never stop until it is all finished. Easy to whip up and even easier to devour.

Ingredients

6 tablespoons butter, unsalted

1 cup self-rising flour

1 3/4 cups sugar

1 1/2 tablespoons cocoa powder

1/2 cup whole milk

1/4 cup cocoa powder

1 teaspoon vanilla extract

1 1/2 cup boiling water

How to Make Chocolate Cobbler

Step 1: Prepare the oven. Preheat it to 350 degrees.

Step 2: Meanwhile, in an 8 x 8-inch baking dish, melt the butter.

Step 3: In a mixing bowl, combine the flour, 3/4 cup sugar, and 1 1/2 tablespoons of cocoa. Mix well.

Step 4: Then, stir in the milk and vanilla until smooth.

Step 5: Gradually, transfer the mixture into the melted butter.

Step 6: In a separate bowl, mix the rest of the sugar and 1/4 cup of cocoa powder.

Step 7: Sprinkle the remaining mixture over the batter.

Step 8: Carefully and slowly pour the boiling water over the mixture.

Step 9: Place inside the preheated oven and bake for about 30 minutes.

Chocolate Cobbler

Rebecca Serves: 6-8 | Prep: 10 Min | Cook: 30 Min Nothing is simpler than this decadent chocolate cobbler. This has a buttery and tender crust with a mouthwatering chocolate sauce.… Main Dish Recipes Chocolate Cobbler European Print This
Serves: 6-8 Prep Time: 10 mins Cooking Time: 30 mins 30 mins
Nutrition facts: 200 calories 20 grams fat
Rating: 5.0/5
( 1 voted )

Ingredients

  • 6 tablespoons butter, unsalted
  • 1 cup self-rising flour
  • 1 3/4 cups sugar
  • 1 1/2 tablespoons cocoa powder
  • 1/2 cup whole milk
  • 1/4 cup cocoa powder
  • 1 teaspoon vanilla extract
  • 1 1/2 cup boiling water

Instructions

Step 1: Prepare the oven. Preheat it to 350 degrees.

Step 2: Meanwhile, in an 8 x 8-inch baking dish, melt the butter.

Step 3: In a mixing bowl, combine the flour, 3/4 cup sugar, and 1 1/2 tablespoons of cocoa. Mix well.

Step 4: Then, stir in the milk and vanilla until smooth.

Step 5: Gradually, transfer the mixture into the melted butter.

Step 6: In a separate bowl, mix the rest of the sugar and 1/4 cup of cocoa powder.

Step 7: Sprinkle the remaining mixture over the batter.

Step 8: Carefully and slowly pour the boiling water over the mixture.

Step 9: Place inside the preheated oven and bake for about 30 minutes.

August 4, 2020 0 comment
0 FacebookTwitterPinterestEmail
Main Dish Recipes

Old Fashioned Homemade Chicken & Dumplings

by Rebecca August 4, 2020
written by Rebecca

Serves: 8 to 10 | Prep: 1 Hr | Cook: 1 Hr

This awesome dish will make your dinner super special! The creaminess of this Chicken and Dumpling is the best thing I have ever tasted in my life! You should give this one a try and surprise your family with the best homemade Chicken & Dumplings like our Grandma’s!

Ingredients

FOR THE CHICKEN & BROTH:

2-4 chicken breasts (bone-in with skin) or 1 whole 3 lb chicken

1 stick butter

2 pkg chicken bouillon (or 2 spoonfuls)

FOR THE DUMPLINGS:

1 stick butter, melted

3 large eggs

1/2 cup milk, 2%

5 cups all-purpose flour, divided

1 teaspoon salt

1 teaspoon pepper

2 drops of yellow food coloring (or substitute a pinch of Turmeric)

How to Make Old Fashioned Homemade Chicken & Dumplings

TO MAKE CHICKEN AND BROTH: 

Step 1: In a Dutch oven, place the whole chicken or chicken breast. Pour enough water to cover the chicken.

Step 2: Add in the chicken bouillon and 1 stick of butter.

Step 3: Turn the heat to medium and cover. Cook for 45 minutes until the chicken is tender. ( 1 hour and 15 minutes for the whole chicken.)

Step 4: Remove the chicken and transfer it to a clean plate and allow it to cool. Set aside the broth.

Step 5: Remove the bones and skin. Chop or shred the meat into small pieces.

TO MAKE DUMPLINGS:

Step 1: Add melted butter and eggs in a small bowl. Whisk until creamy.

Step 2: Add milk into half a shell an egg and mix then pour it into the egg and butter mixture. Season with salt and pepper to taste.

Step 3: Add 3 cups of flour gradually until the dough becomes sticky.

Step 4: Add 4 or 5 drops of yellow food coloring.

Step 5: Load 2 cups of flour onto the counter or any wooden board.

Step 6: Add 1 tablespoon of flour into the middle of the flour.

Step 7: Mold the flour until it becomes a dough the roll it very thin.

Step 8: Cut the dough into strips using a pizza cutter.

Step 9: Add the strips into the boiling broth. ( Make sure to have enough broth to prevent the dumplings from burning.)

Step 10: Reduce the heat to low while you are making the next load.

Step 11: After the last dumpling load, put back the chicken into the Dutch oven and carefully stir.

Step 12: Remove from the heat and cover with the lid.

Step 13: Allow it to sit and cool for 10 minutes.

Step 14: Serve and enjoy!

Old Fashioned Homemade Chicken & Dumplings

Rebecca Serves: 8 to 10 | Prep: 1 Hr | Cook: 1 Hr This awesome dish will make your dinner super special! The creaminess of this Chicken and Dumpling is the… Main Dish Recipes Old Fashioned Homemade Chicken & Dumplings European Print This
Serves: 8-10 Prep Time: 1 hr Cooking Time: 1 hr 1 hr
Nutrition facts: 200 calories 20 grams fat
Rating: 5.0/5
( 1 voted )

Ingredients

  • FOR THE CHICKEN & BROTH:
  • 2-4 chicken breasts (bone-in with skin) or 1 whole 3 lb chicken
  • 1 stick butter
  • 2 pkg chicken bouillon (or 2 spoonfuls)
  • FOR THE DUMPLINGS:
  • 1 stick butter, melted
  • 3 large eggs
  • 1/2 cup milk, 2%
  • 5 cups all-purpose flour, divided
  • 1 teaspoon salt
  • 1 teaspoon pepper
  • 2 drops of yellow food coloring (or substitute a pinch of Turmeric)

Instructions

TO MAKE CHICKEN AND BROTH: 

Step 1: In a Dutch oven, place the whole chicken or chicken breast. Pour enough water to cover the chicken.

Step 2: Add in the chicken bouillon and 1 stick of butter.

Step 3: Turn the heat to medium and cover. Cook for 45 minutes until the chicken is tender. ( 1 hour and 15 minutes for the whole chicken.)

Step 4: Remove the chicken and transfer it to a clean plate and allow it to cool. Set aside the broth.

Step 5: Remove the bones and skin. Chop or shred the meat into small pieces.

TO MAKE DUMPLINGS:

Step 1: Add melted butter and eggs in a small bowl. Whisk until creamy.

Step 2: Add milk into half a shell an egg and mix then pour it into the egg and butter mixture. Season with salt and pepper to taste.

Step 3: Add 3 cups of flour gradually until the dough becomes sticky.

Step 4: Add 4 or 5 drops of yellow food coloring.

Step 5: Load 2 cups of flour onto the counter or any wooden board.

Step 6: Add 1 tablespoon of flour into the middle of the flour.

Step 7: Mold the flour until it becomes a dough the roll it very thin.

Step 8: Cut the dough into strips using a pizza cutter.

Step 9: Add the strips into the boiling broth. ( Make sure to have enough broth to prevent the dumplings from burning.)

Step 10: Reduce the heat to low while you are making the next load.

Step 11: After the last dumpling load, put back the chicken into the Dutch oven and carefully stir.

Step 12: Remove from the heat and cover with the lid.

Step 13: Allow it to sit and cool for 10 minutes.

Step 14: Serve and enjoy!

August 4, 2020 0 comment
0 FacebookTwitterPinterestEmail
Main Dish Recipes

BACON CHEESE BISCUITS

by Rebecca August 4, 2020
written by Rebecca

Cooking Time: 20 | Makes: 6

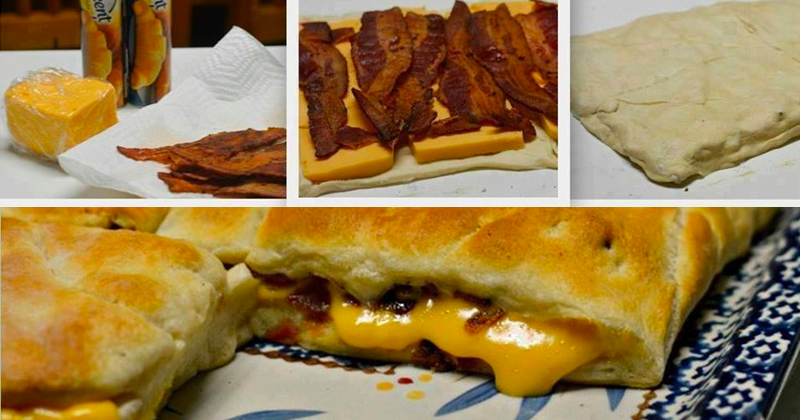
These biscuits are the perfect side of any meal! They are savory, buttery, and cheesy. It’s going to be hard to resist these flaky freakylicious bacon cheese biscuits! Transform your traditional biscuits into savory, cheesy individual-sized bread by adding in bacon, cheese, and some green onions. This can be a perfect breakfast or brunch, too. Just add scrambled eggs on the bottom then the layer of bacon and cheese.

In my house, bacon and cheese is a must. So this recipe has been my go-to and it is super easy and quick to make which is a plus point for a busy bee like me.

INGREDIENTS

2 cans of crescent rolls (you can use biscuits too)

Cheese (Whatever type you like)

12oz or 16oz package of bacon, cooked

flour for dusting (optional)

HOW TO MAKE BACON CHEESE BISCUITS

Step 1: Prepare the oven. Preheat it to 375 degrees.

Step 2: Use a non-stick cooking spray to grease your baking sheet and set aside.

Step 3: And flour your work surface a little.

Step 4: On your work surface, unroll one can of crescent roll or half can of biscuits. Press the seams together with your hands or rolling pin. Then, lightly press and stretch the roll a little to form a rectangle.

Step 5: For the first layer, sprinkle the cheese and top with bacon.

Step 6: Then, unroll the other can of the crescent roll and place it on top of the cheese and bacon layer. Press the seams to close.

Step 7: Slice the biscuit into squares with either a pizza cutter or a knife.

Step 8: Transfer the squares on the prepared baking sheet making sure that the slices are touching each other.

Step 9: Place the baking sheet inside the preheated oven and bake for about 12 to 15 minutes or until the top of the crescent rolls are mildly browned.

Step 10: Once done, remove from the oven and let the biscuits cool for at least 3 to 5 minutes on a wire rack. Enjoy!

Calories: 386 | Carbs: 22 | Fat: 23 | Protein: 21.6

BACON CHEESE BISCUITS

Rebecca Cooking Time: 20 | Makes: 6 These biscuits are the perfect side of any meal! They are savory, buttery, and cheesy. It’s going to be hard to resist these flaky… Main Dish Recipes BACON CHEESE BISCUITS European Print This
Serves: 6 Cooking Time: 20 mins 20 mins
Nutrition facts: 386 calories 23 fat
Rating: 5.0/5
( 1 voted )

Ingredients

  • 2 cans of crescent rolls (you can use biscuits too)
  • Cheese (Whatever type you like)
  • 12oz or 16oz package of bacon, cooked
  • flour for dusting (optional)

Instructions

Step 1: Prepare the oven. Preheat it to 375 degrees.

Step 2: Use a non-stick cooking spray to grease your baking sheet and set aside.

Step 3: And flour your work surface a little.

Step 4: On your work surface, unroll one can of crescent roll or half can of biscuits. Press the seams together with your hands or rolling pin. Then, lightly press and stretch the roll a little to form a rectangle.

Step 5: For the first layer, sprinkle the cheese and top with bacon.

Step 6: Then, unroll the other can of the crescent roll and place it on top of the cheese and bacon layer. Press the seams to close.

Step 7: Slice the biscuit into squares with either a pizza cutter or a knife.

Step 8: Transfer the squares on the prepared baking sheet making sure that the slices are touching each other.

Step 9: Place the baking sheet inside the preheated oven and bake for about 12 to 15 minutes or until the top of the crescent rolls are mildly browned.

Step 10: Once done, remove from the oven and let the biscuits cool for at least 3 to 5 minutes on a wire rack. Enjoy!

August 4, 2020 0 comment
0 FacebookTwitterPinterestEmail
Main Dish Recipes

Bacon Cheeseburger Grilled Cheese Casserole

by Rebecca August 4, 2020
written by Rebecca

Serves: 6 | Prep: 15 minutes | Cook time: 20 minutes

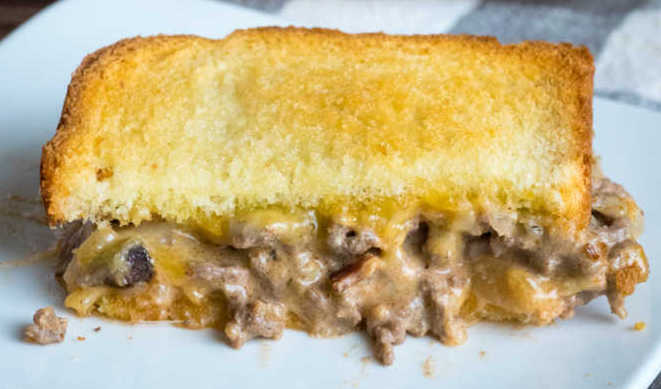
I can eat this every day! My favorite comfort food with a toasty sandwich and a bacon cheeseburger. This casserole is amazing in every way! This casserole reminds me of sloppy joes with mouthwatering bacon cheeseburger flavor. It’s gooey, cheesy, savory, and simply superb! This Bacon Cheeseburger Grilled Cheese Casserole is to die for and will leave you salivating!

INGREDIENTS

1 lb lean ground beef

1 small yellow onion, diced

1/2 cup bacon, cooked and chopped

1/4 cup mayonnaise

1/4 cup ketchup

1 tablespoon yellow mustard

1 tablespoon sweet pickle relish

2 teaspoons onion powder

12 slices white bread

1/2 cup (1 stick) butter, softened

2 cups mozzarella cheese, grated

2 cups cheddar cheese, grated

Kosher salt and freshly ground black pepper, to taste

How to make Bacon Cheeseburger Grilled Cheese Casserole

Step 1: Prepare the oven. Preheat it to 400 degrees.

Step 2: Place the ground beef in a large skillet and season. Cook over medium-high heat until almost cooked through.

Step 3: When the ground beef is almost cooked through, drain excess grease before adding in the onions. Continue cooking for approximately 3 minutes or until softened.

Step 4: Once the onions are soft, remove the pan from the heat. Stir in the bacon, mayo, ketchup, mustard, and onion powder. You can season with more salt and pepper to taste.

Step 5: Grab 6 slices of bread of spread the butter over each slice and cut the pieces of bread in half.

Step 6: In a 9 x 13-inch baking dish, lay butter side down the pieces of bread.

Step 7: Top the bread with half of each cheese and spoon the beef mixture over the cheese. Then, sprinkle the rest of the cheese on top.

Step 8: Repeat the steps with the remaining pieces of bread; butter, slice in half and arrange in the pan butter side up.

Step 9: Place inside the preheated oven and bake for about 20 to 25 minutes or until the bread is golden brown and the cheese is melted.

Bacon Cheeseburger Grilled Cheese Casserole

Rebecca Serves: 6 | Prep: 15 minutes | Cook time: 20 minutes I can eat this every day! My favorite comfort food with a toasty sandwich and a bacon cheeseburger. This… Main Dish Recipes Bacon Cheeseburger Grilled Cheese Casserole European Print This
Serves: 6 Prep Time: 15 mins Cooking Time: 20 mins 20 mins
Nutrition facts: 200 calories 20 grams fat
Rating: 4.0/5
( 2 voted )

Ingredients

  • 1 lb lean ground beef
  • 1 small yellow onion, diced
  • 1/2 cup bacon, cooked and chopped
  • 1/4 cup mayonnaise
  • 1/4 cup ketchup
  • 1 tablespoon yellow mustard
  • 1 tablespoon sweet pickle relish
  • 2 teaspoons onion powder
  • 12 slices white bread
  • 1/2 cup (1 stick) butter, softened
  • 2 cups mozzarella cheese, grated
  • 2 cups cheddar cheese, grated
  • Kosher salt and freshly ground black pepper, to taste

Instructions

Step 1: Prepare the oven. Preheat it to 400 degrees.

Step 2: Place the ground beef in a large skillet and season. Cook over medium-high heat until almost cooked through.

Step 3: When the ground beef is almost cooked through, drain excess grease before adding in the onions. Continue cooking for approximately 3 minutes or until softened.

Step 4: Once the onions are soft, remove the pan from the heat. Stir in the bacon, mayo, ketchup, mustard, and onion powder. You can season with more salt and pepper to taste.

Step 5: Grab 6 slices of bread of spread the butter over each slice and cut the pieces of bread in half.

Step 6: In a 9 x 13-inch baking dish, lay butter side down the pieces of bread.

Step 7: Top the bread with half of each cheese and spoon the beef mixture over the cheese. Then, sprinkle the rest of the cheese on top.

Step 8: Repeat the steps with the remaining pieces of bread; butter, slice in half and arrange in the pan butter side up.

Step 9: Place inside the preheated oven and bake for about 20 to 25 minutes or until the bread is golden brown and the cheese is melted.

August 4, 2020 0 comment
0 FacebookTwitterPinterestEmail
Main Dish Recipes

Mama Seward’s Strawberry Cake Recipe

by Rebecca August 4, 2020
written by Rebecca

Prep: 10 Min | Cook: 40 Min

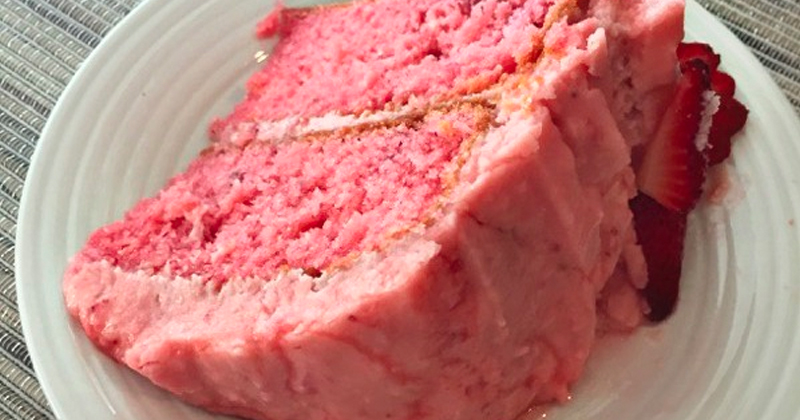
This cake is super moist and heavenly delicious! Whenever I make this my kitchen smells like a strawberry field! Such a pretty cake that you can make in a breeze. If you are a fan of strawberries, you’ll surely love this cake. The frosting tastes like strawberry ice cream! Yum! Try closing your eyes when you eat this cake and it’ll feel like you are eating fresh strawberries.

I am obsessed with this delightful cake. I made it on my daughter’s birthday, brought it many times on potluck, and events. This Strawberry Cake never fails to please the crowd. It is the cake for all ages and gender. My husband never liked strawberries but when he tasted this cake his whole believes changed! I always make this in 2 smaller pans and layer the cakes. Be generous on frosting, though. It’s a game-changer!

Ingredients

FOR THE CAKE:

1 box white cake mix

1 box strawberry gelatin (small box)

1 cup oil

1/2 cup milk

4 eggs

1 cup mashed sweetened strawberries (not drained)

FOR THE FROSTING:

1 stick butter, softened

1 lb box of powdered sugar

1/2 cup mashed strawberries, drained

How to Make Mama Seward’s Strawberry Cake

Step 1: To make the cake, combine the white cake mix, strawberry gelatin, oil, milk, eggs, and mashed sweetened strawberries. Once combined, pour the cake batter into a 9 x 11-inch pan or you can opt to use 2 smaller pans if you’d like. Make sure to not fill the pan or else the batter will bake up super tall.

Step 2: Place the pan inside the oven and bake at 350 degrees for about 35 to 40 minutes.

Step 3: To make the frosting, mix the softened butter, powdered sugar, and drained mashed strawberries. It is a must to drain the strawberries before adding them in. If the frosting is too thick, just add in the strawberries until you reached the right consistency.

Mama Seward's Strawberry Cake Recipe

Rebecca Prep: 10 Min | Cook: 40 Min This cake is super moist and heavenly delicious! Whenever I make this my kitchen smells like a strawberry field! Such a pretty cake… Main Dish Recipes Mama Seward’s Strawberry Cake Recipe European Print This
Prep Time: 10 mins Cooking Time: 40 mins 40 mins
Nutrition facts: 200 calories 20 grams fat
Rating: 4.5/5
( 2 voted )

Ingredients

  • FOR THE CAKE:
  • 1 box white cake mix
  • 1 box strawberry gelatin (small box)
  • 1 cup oil
  • 1/2 cup milk
  • 4 eggs
  • 1 cup mashed sweetened strawberries (not drained)
  • FOR THE FROSTING:
  • 1 stick butter, softened
  • 1 lb box of powdered sugar
  • 1/2 cup mashed strawberries, drained

Instructions

Step 1: To make the cake, combine the white cake mix, strawberry gelatin, oil, milk, eggs, and mashed sweetened strawberries. Once combined, pour the cake batter into a 9 x 11-inch pan or you can opt to use 2 smaller pans if you'd like. Make sure to not fill the pan or else the batter will bake up super tall.

Step 2: Place the pan inside the oven and bake at 350 degrees for about 35 to 40 minutes.

Step 3: To make the frosting, mix the softened butter, powdered sugar, and drained mashed strawberries. It is a must to drain the strawberries before adding them in. If the frosting is too thick, just add in the strawberries until you reached the right consistency.

August 4, 2020 0 comment
0 FacebookTwitterPinterestEmail
Main Dish Recipes

Coconut Cake / Cream Cheese Coconut Frosting

by Rebecca August 3, 2020
written by Rebecca

Serves: 12 – 16 | Prep: 10 Min | Cook: 30 Min

This is undeniably a delicious and moist cake. The coconut flavor is amazing and every bite is paradise! And cream cheese coconut frosting takes this cake to the next level. This Coconut Cake sure pleases the crowd!

This cake is my Mom’s favorite. She likes the texture, the flavor, and everything about this lovely cake. When I first made this, she went crazy! She instantly fell in love. I can’t blame her because truly this cake is one of a kind.

Ingredients

1 (18.25-ounce) package white cake mix

1/4 cup vegetable oil

3 eggs

8 oz coconut milk or could use cream of coconut

1 1/2 teaspoons coconut extract

1 cup sour cream

FOR THE FROSTING

1/4 cup butter, softened

1 – 8 oz cream cheese, softened

1 1/2 teaspoon coconut extract ( optional)

1 teaspoon vanilla extract

1 oz coconut milk

4 cups sifted, confectioners’ sugar

1 – 2 cups coconut for garnishing

How to Make Coconut Cake / Cream Cheese Coconut Frosting

Step 1: Prepare the oven. Preheat it to 350 degrees F,

Step 2: Then, grease and flour a 9 x 13-inch pan.

Step 3: In a large mixing bowl, combine the cake mix, eggs, extract vegetable oil, coconut milk, and sour cream. With an electric mixer, beat for about 4 minutes.

Step 4: Once the mixture is combined, pour it into the prepared pan.

Step 5: Place inside the preheated oven and bake for about 35 minutes or until a wooden toothpick inserted in the middle comes out clean.

Step 6: Once done, remove the cake from the oven and cool completely. When the cake is cooled, generously frost with homemade cream cheese coconut frosting.

To make the Frosting:

Step 7: In a mixing bowl, combine the cream cheese, butter, vanilla, coconut extract (if using), coconut milk, and sifted powdered sugar. Beat with an electric mixer until smooth. This will make enough frosting to frost a 9 x 13 x 2-inch cake or a two-layer cake.

Coconut Cake / Cream Cheese Coconut Frosting

Rebecca Serves: 12 – 16 | Prep: 10 Min | Cook: 30 Min This is undeniably a delicious and moist cake. The coconut flavor is amazing and every bite is paradise!… Main Dish Recipes Coconut Cake / Cream Cheese Coconut Frosting European Print This
Serves: 12-16 Prep Time: 10 mins Cooking Time: 30 mins 30 mins
Nutrition facts: 200 calories 20 grams fat
Rating: 5.0/5
( 1 voted )

Ingredients

  • 1 (18.25-ounce) package white cake mix
  • 1/4 cup vegetable oil
  • 3 eggs
  • 8 oz coconut milk or could use cream of coconut
  • 1 1/2 teaspoons coconut extract
  • 1 cup sour cream
  • FOR THE FROSTING
  • 1/4 cup butter, softened
  • 1 - 8 oz cream cheese, softened
  • 1 1/2 teaspoon coconut extract ( optional)
  • 1 teaspoon vanilla extract
  • 1 oz coconut milk
  • 4 cups sifted, confectioners' sugar
  • 1 - 2 cups coconut for garnishing

Instructions

Step 1: Prepare the oven. Preheat it to 350 degrees F,

Step 2: Then, grease and flour a 9 x 13-inch pan.

Step 3: In a large mixing bowl, combine the cake mix, eggs, extract vegetable oil, coconut milk, and sour cream. With an electric mixer, beat for about 4 minutes.

Step 4: Once the mixture is combined, pour it into the prepared pan.

Step 5: Place inside the preheated oven and bake for about 35 minutes or until a wooden toothpick inserted in the middle comes out clean.

Step 6: Once done, remove the cake from the oven and cool completely. When the cake is cooled, generously frost with homemade cream cheese coconut frosting.

To make the Frosting:

Step 7: In a mixing bowl, combine the cream cheese, butter, vanilla, coconut extract (if using), coconut milk, and sifted powdered sugar. Beat with an electric mixer until smooth. This will make enough frosting to frost a 9 x 13 x 2-inch cake or a two-layer cake.

August 3, 2020 0 comment
0 FacebookTwitterPinterestEmail
Newer Posts
Older Posts

Popular Posts

  • 1

    Crispy Crunchy Parmesan Potatoes

    March 21, 2020
  • 2

    CROCK POT SMOTHERED PORK CHOPS

    March 21, 2020
  • Facebook
  • Twitter

@2019 - All Right Reserved.


Back To Top