Cook it once
  • Home
  • Privacy Policy
  • Recipes
    • KETO
    • LC
    • WW
  • Tips
  • Contact
Cook it once
  • Home
  • Privacy Policy
  • Recipes
    • KETO
    • LC
    • WW
  • Tips
  • Contact
Category:

Main Dish Recipes

Main Dish Recipes

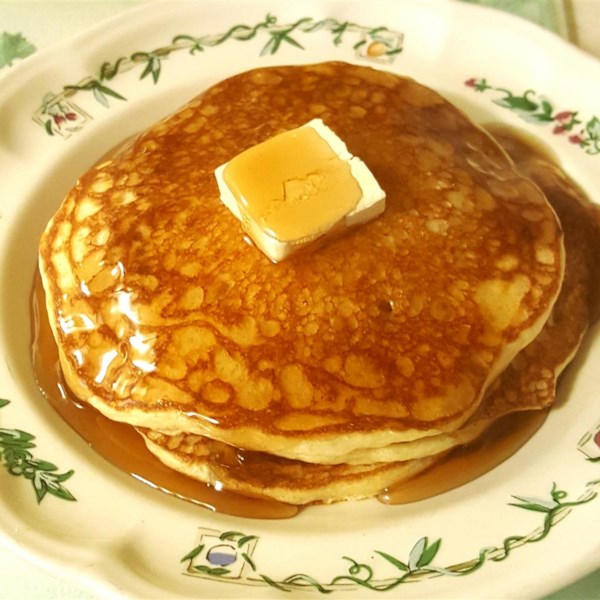
Fluffy Pancakes

by Rebecca August 20, 2020
written by Rebecca

Prep: 10 mins | Cook: 10 mins | Additional: 5 mins | Total: 25 mins | Servings: 4 | Yield: 8 pancakes

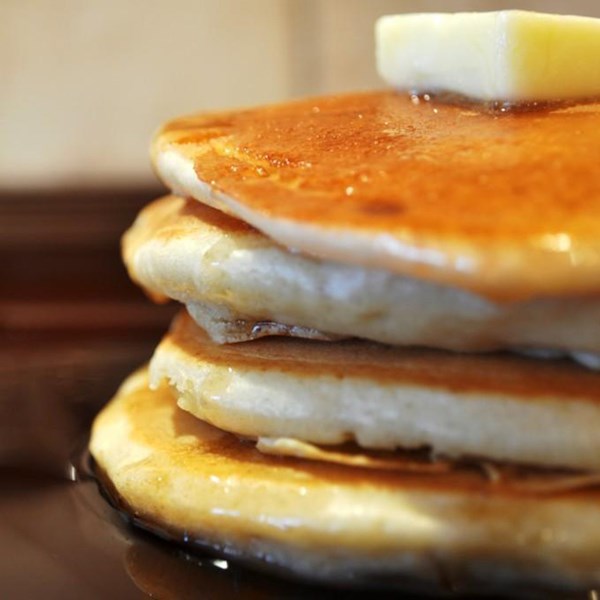
These pancakes are delightful! I enjoyed every bite of these amazing round shaped treats. If you feel like adding syrup, feel free to do so. I prefer not because the butter on top is more than enough for me. Breakfast will be great again with the help of these amazing pancakes. So what are you waiting for? Turn on that coffee maker and pour yourself a cup of hot coffee or hot cocoa and dig in right away! Hassle-free and very easy to make pancakes that I am sure you are gonna love! Just follow all the steps for it will guide you to perfection. You all have a wonderful day ahead. Enjoy!

Ingredients

¾ cup milk

2 tablespoons white vinegar

1 cup all-purpose flour

2 tablespoons white sugar

1 teaspoon baking powder

½ teaspoon baking soda

½ teaspoon salt

1 egg

2 tablespoons butter, melted

2 servings cooking spray

How to make Fluffy Pancakes

Step 1: In a medium mixing bowl, pour milk and vinegar. Stir until well mixed then set aside for 5 minutes to incorporate the flavors.

Step 2: In a large mixing bowl, add in baking powder, flour, baking soda, and salt. Whisk until well mixed.

Step 3: Add in butter and egg into the milk and vinegar mixture.

Step 4: Transfer the flour mixture into the milk vinegar mixture. Whisk until well mixed and no lumps.

Step 5: Place a large skillet on the stove and turn the heat to medium.

Step 6: Apply cooking spray and allow it to heat through.

Step 7: Spoon about 1/4 of the batter and place it on the skillet. Cook both sides until bubbles appear and the color turns brown.

Step 8: Place the pancakes on a clean plate and put butter on top.

Step 9: Serve and enjoy!

Nutrition Facts

Per Serving: 230.4 calories; protein 6.4g 13% DV; carbohydrates 32.7g 11% DV; fat 8.2g 13% DV; cholesterol 65.4mg 22% DV; sodium 649.6mg 26% DV
Fluffy Pancakes

Rebecca Prep: 10 mins | Cook: 10 mins | Additional: 5 mins | Total: 25 mins | Servings: 4 | Yield: 8 pancakes These pancakes are delightful! I enjoyed every bite… Main Dish Recipes Fluffy Pancakes European Print This
Serves: 4 Prep Time: 10 mins Cooking Time: 15 mins 15 mins
Nutrition facts: 230.4 calories 8.2 fat
Rating: 5.0/5
( 1 voted )

Ingredients

  • ¾ cup milk
  • 2 tablespoons white vinegar
  • 1 cup all-purpose flour
  • 2 tablespoons white sugar
  • 1 teaspoon baking powder
  • ½ teaspoon baking soda
  • ½ teaspoon salt
  • 1 egg
  • 2 tablespoons butter, melted
  • 2 servings cooking spray

Instructions

Step 1: In a medium mixing bowl, pour milk and vinegar. Stir until well mixed then set aside for 5 minutes to incorporate the flavors.

Step 2: In a large mixing bowl, add in baking powder, flour, baking soda, and salt. Whisk until well mixed.

Step 3: Add in butter and egg into the milk and vinegar mixture.

Step 4: Transfer the flour mixture into the milk vinegar mixture. Whisk until well mixed and no lumps.

Step 5: Place a large skillet on the stove and turn the heat to medium.

Step 6: Apply cooking spray and allow it to heat through.

Step 7: Spoon about 1/4 of the batter and place it on the skillet. Cook both sides until bubbles appear and the color turns brown.

Step 8: Place the pancakes on a clean plate and put butter on top.

Step 9: Serve and enjoy!
August 20, 2020 0 comment
0 FacebookTwitterPinterestEmail
Main Dish Recipes

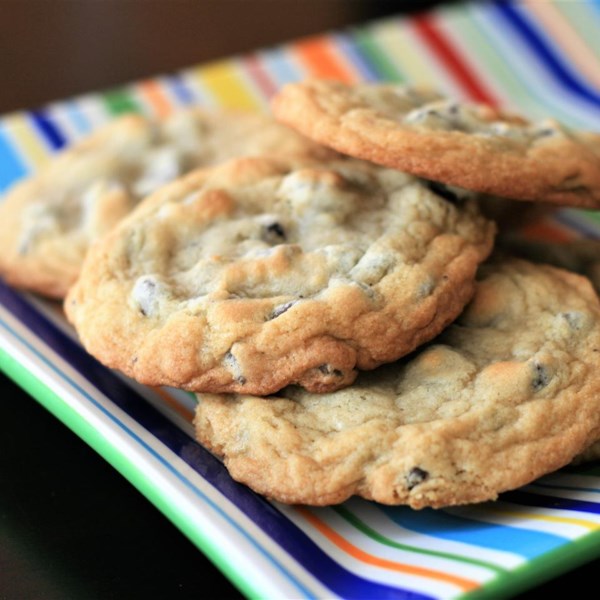
Best Chocolate Chip Cookies

by Rebecca August 20, 2020
written by Rebecca

Prep: 20 mins | Cook: 10 mins | Additional: 30 mins | Total: 1 hr | Servings: 24 | Yield: 4 dozen

These little treats just made my day! I never thought that it would be this good. I have had lots of Chocolate Chip Cookies in my life but this surely made it to my top 1. I don’t know, maybe because I made it myself! But no kidding, these little wonders are legit. It tastes exactly like store-bought cookies! I have listed all the ingredients and all the steps that you need to follow. I am sure that once you get a bite, you will never stop eating! You all have an awesome day. Enjoy!

Ingredients

1 cup butter, softened

1 cup white sugar

1 cup packed brown sugar

2 large eggs eggs

2 teaspoons vanilla extract

1 teaspoon baking soda

2 teaspoons hot water

½ teaspoon salt

3 cups all-purpose flour

2 cups semisweet chocolate chips

1 cup chopped walnuts

How to make Best Chocolate Chip Cookies

Step 1: Ready the oven and preheat to 175 degrees C or 450 degrees F.

Step 2: In a medium mixing bowl, add in the butter, brown sugar, and white sugar. Whisk until well mixed and creamy.

Step 3: Add in one egg at a time and beat until creamy.

Step 4: Add in the vanilla and stir until well mixed.

Step 5: In a small mixing bowl, pour water and add in baking soda. Stir until dissolved completely.

Step 6: Pour the water with baking soda into the batter. Add in the flour, nuts, and chocolate chips. Stir until well blended.

Step 7: Scoop the batter and place it into the prepared pans.

Step 8: Place inside the preheated oven and bake for 10 minutes or until the sides turn light brown.

Step 9: Remove from the oven and let it sit on a wire rack to cool for at least 5 minutes to room temperature.

Step 10: Serve and enjoy!

Nutrition Facts

Per Serving: 297.8 calories; protein 3.6g 7% DV; carbohydrates 38.9g 13% DV; fat 15.6g 24% DV; cholesterol 35.8mg 12% DV; sodium 165.8mg 7% DV

Best Chocolate Chip Cookies

Rebecca Prep: 20 mins | Cook: 10 mins | Additional: 30 mins | Total: 1 hr | Servings: 24 | Yield: 4 dozen These little treats just made my day! I… Main Dish Recipes Best Chocolate Chip Cookies European Print This
Serves: 24 Prep Time: 20 mins Cooking Time: 40 mins 40 mins
Nutrition facts: 297.8 calories 15.6 fat
Rating: 5.0/5
( 1 voted )

Ingredients

  • 1 cup butter, softened
  • 1 cup white sugar
  • 1 cup packed brown sugar
  • 2 large eggs eggs
  • 2 teaspoons vanilla extract
  • 1 teaspoon baking soda
  • 2 teaspoons hot water
  • ½ teaspoon salt
  • 3 cups all-purpose flour
  • 2 cups semisweet chocolate chips
  • 1 cup chopped walnuts

Instructions

Step 1: Ready the oven and preheat to 175 degrees C or 450 degrees F.

Step 2: In a medium mixing bowl, add in the butter, brown sugar, and white sugar. Whisk until well mixed and creamy.

Step 3: Add in one egg at a time and beat until creamy.

Step 4: Add in the vanilla and stir until well mixed.

Step 5: In a small mixing bowl, pour water and add in baking soda. Stir until dissolved completely.

Step 6: Pour the water with baking soda into the batter. Add in the flour, nuts, and chocolate chips. Stir until well blended.

Step 7: Scoop the batter and place it into the prepared pans.

Step 8: Place inside the preheated oven and bake for 10 minutes or until the sides turn light brown.

Step 9: Remove from the oven and let it sit on a wire rack to cool for at least 5 minutes to room temperature.

Step 10: Serve and enjoy!

August 20, 2020 0 comment
0 FacebookTwitterPinterestEmail
Main Dish Recipes

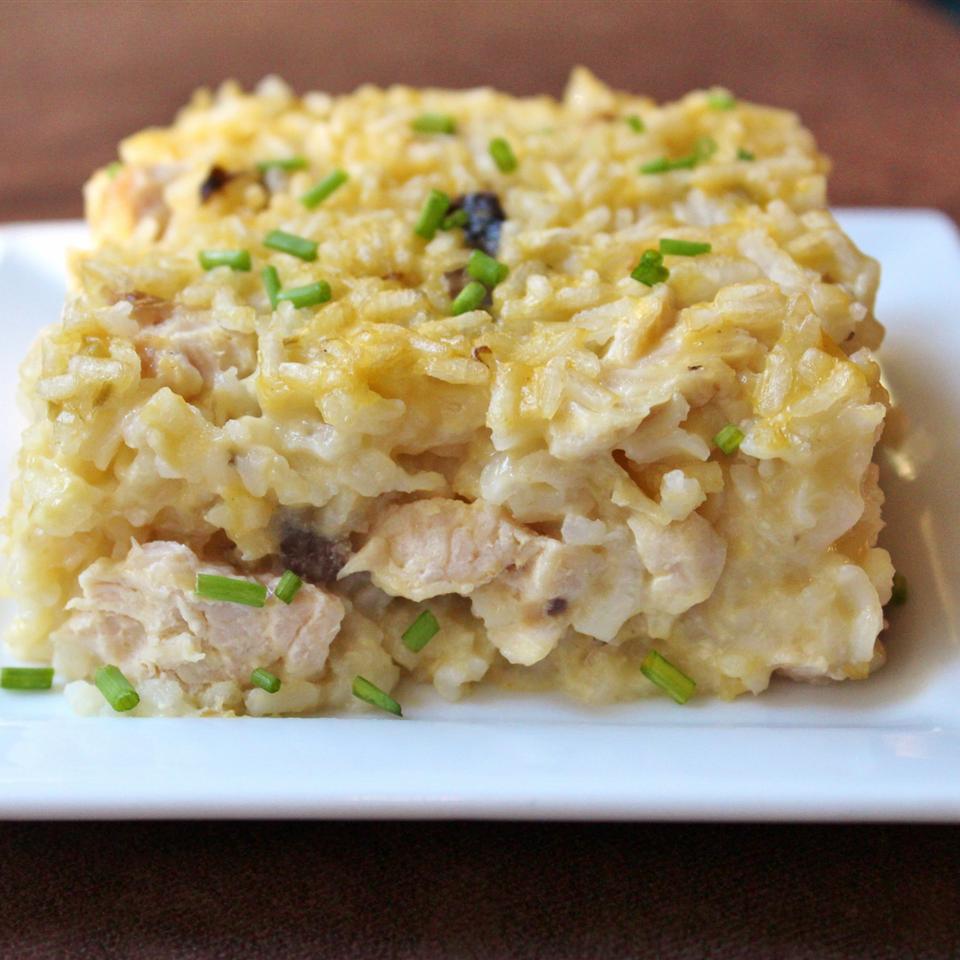
Mamaw’s Chicken and Rice Casserole

by Rebecca August 20, 2020
written by Rebecca

Prep: 10 mins | Cook: 1 hr | Additional: 10 mins | Total: 1 hr 20 mins | Servings: 6 | Yield: 6 servings

Talk about a full-packed meal! This Chicken and rice casserole is best served warm. After eating this, I assure you that you will be full for the rest of the day! I love how simple it is to make. You just need to put all the ingredients in the casserole and let the oven do its magic. Wait for about an hour and you are good to go! The creaminess and juiciness of this meal is so good! Tweak the ingredients a little if you have more than six friends or family members to serve to. I hope you all love this recipe. Enjoy!

Ingredients

3 breast half, bone and skin removed (blank)s chicken breasts, cut into cubes

2 cups water

2 cups instant white rice

1 10.75 ounce can cream of chicken soup

1 10.75 ounce can cream of celery soup

1 10.75 ounce can cream of mushroom soup

1 pinch salt and ground black pepper to taste

½ cup butter, sliced into pats

How to make Mamaw’s Chicken and Rice Casserole

Step 1: Ready the oven and preheat to 200 degrees C or 400 degrees F.

Step 2: Apply cooking spray on the bottom and sides of the casserole dish.

Step 3: Pour water into the greased casserole dish.

Step 4: Add in the chicken, rice, cream of celery, cream of soup, and mushroom soup. Stir until well mixed then season with salt and pepper to taste.

Step 5: Add and arrange the butter over the chicken mixture.

Step 6: Place the casserole inside the preheated oven and bake for 1 hour to 1 hour and 15 minutes or until the chicken is cooked through and the rice is nice and soft.

Step 7: Remove from the oven and let it sit a room temperature for at least 15 minutes.

Step 8: Serve and enjoy!

Nutrition Facts

Per Serving: 441.2 calories; protein 16.8g 34% DV; carbohydrates 36.7g 12% DV; fat 25g 39% DV; cholesterol 80.7mg 27% DV; sodium 1211.2mg 48% DV

Mamaw's Chicken and Rice Casserole

Rebecca Prep: 10 mins | Cook: 1 hr | Additional: 10 mins | Total: 1 hr 20 mins | Servings: 6 | Yield: 6 servings Talk about a full-packed meal! This… Main Dish Recipes Mamaw’s Chicken and Rice Casserole European Print This
Serves: 6 Prep Time: 10 mins Cooking Time: 1 hr 10 mins 1 hr 10 mins
Nutrition facts: 441.2 calories 25 fat
Rating: 5.0/5
( 1 voted )

Ingredients

  • 3 breast half, bone and skin removed (blank)s chicken breasts, cut into cubes
  • 2 cups water
  • 2 cups instant white rice
  • 1 10.75 ounce can cream of chicken soup
  • 1 10.75 ounce can cream of celery soup
  • 1 10.75 ounce can cream of mushroom soup
  • 1 pinch salt and ground black pepper to taste
  • ½ cup butter, sliced into pats

Instructions

Step 1: Ready the oven and preheat to 200 degrees C or 400 degrees F.

Step 2: Apply cooking spray on the bottom and sides of the casserole dish.

Step 3: Pour water into the greased casserole dish.

Step 4: Add in the chicken, rice, cream of celery, cream of soup, and mushroom soup. Stir until well mixed then season with salt and pepper to taste.

Step 5: Add and arrange the butter over the chicken mixture.

Step 6: Place the casserole inside the preheated oven and bake for 1 hour to 1 hour and 15 minutes or until the chicken is cooked through and the rice is nice and soft.

Step 7: Remove from the oven and let it sit a room temperature for at least 15 minutes.

Step 8: Serve and enjoy!

August 20, 2020 0 comment
0 FacebookTwitterPinterestEmail
Main Dish Recipes

Mom’s Buttermilk Pancakes

by Rebecca August 20, 2020
written by Rebecca

Prep: 15 mins | Cook: 15 mins | Total: 30 mins | Servings: 4 | Yield: 12 6-inch pancakes

Pancakes will never get old. They are the simplest and quickest to serve. The favorite for many years ahead and to come. I have never known anyone who hates pancakes. It is the go-to breakfast of everyone at any age.

For years now, pancakes unfold in countless varieties. And all of them are superb! There is the good old pancake from the box, pancake from scratch, and a lot more! When I was younger I ate pancakes not only from breakfast but lunch, snack, even dinner! I can say the same with my kids now and with many kids around the globe. We have our favorites and mine is this Buttermilk Pancakes. Fluffy, light, and perfect with berry syrups! These adorable pancakes are cost-efficient, you only need six simple and readily available ingredients. A no fussy and perfect for any day and anytime!

Our days will not be complete without these delicious pancakes! Simple yet a special treat for a happy tummy, happy kids, and happy family!

Ingredients

1 cup flour

1 teaspoon salt

1 teaspoon baking soda

1 egg

1 ⅛ cups buttermilk

2 tablespoons butter, melted

How to make Mom’s Buttermilk Pancakes

Step 1: Lightly grease a large skillet or electric griddle and preheat.

Step 2: In a bowl, combine the flour, salt, and baking soda. Then, add in the egg, buttermilk, and butter. Lightly stir to keep the mixture lumpy. The consistency of the batter should be thick, spongy, and puffy.

Step 3: Put 1/3 cup of the batter onto your cooking surface and lightly spread using the bottom of a cup.

Step 4: Cook for about 1 to 2 minutes on each side until lightly brown.

Step 5: Do the same for the remaining batter.

Nutrition Facts

Per Serving: 210.1 calories; protein 7.1g 14% DV; carbohydrates 27.2g 9% DV; fat 7.9g 12% DV; cholesterol 64.5mg 22% DV; sodium 1027.4mg 41% DV

Mom's Buttermilk Pancakes

Rebecca Prep: 15 mins | Cook: 15 mins | Total: 30 mins | Servings: 4 | Yield: 12 6-inch pancakes Pancakes will never get old. They are the simplest and quickest… Main Dish Recipes Mom’s Buttermilk Pancakes European Print This
Serves: 4 Prep Time: 15 mins Cooking Time: 15 mins 15 mins
Nutrition facts: 210.1 calories 7.9 fat
Rating: 4.0/5
( 2 voted )

Ingredients

  • 1 cup flour
  • 1 teaspoon salt
  • 1 teaspoon baking soda
  • 1 egg
  • 1 ⅛ cups buttermilk
  • 2 tablespoons butter, melted

Instructions

Step 1: Lightly grease a large skillet or electric griddle and preheat.

Step 2: In a bowl, combine the flour, salt, and baking soda. Then, add in the egg, buttermilk, and butter. Lightly stir to keep the mixture lumpy. The consistency of the batter should be thick, spongy, and puffy.

Step 3: Put 1/3 cup of the batter onto your cooking surface and lightly spread using the bottom of a cup.

Step 4: Cook for about 1 to 2 minutes on each side until lightly brown.

Step 5: Do the same for the remaining batter.


August 20, 2020 0 comment
0 FacebookTwitterPinterestEmail
Main Dish Recipes

Cheesy Scalloped Potatoes with Ham

by Rebecca August 20, 2020
written by Rebecca

Prep: 25 mins | Cook: 1 hr 25 mins | Total: 1 hr 50 mins | Servings: 6 | Yield: 6 servings

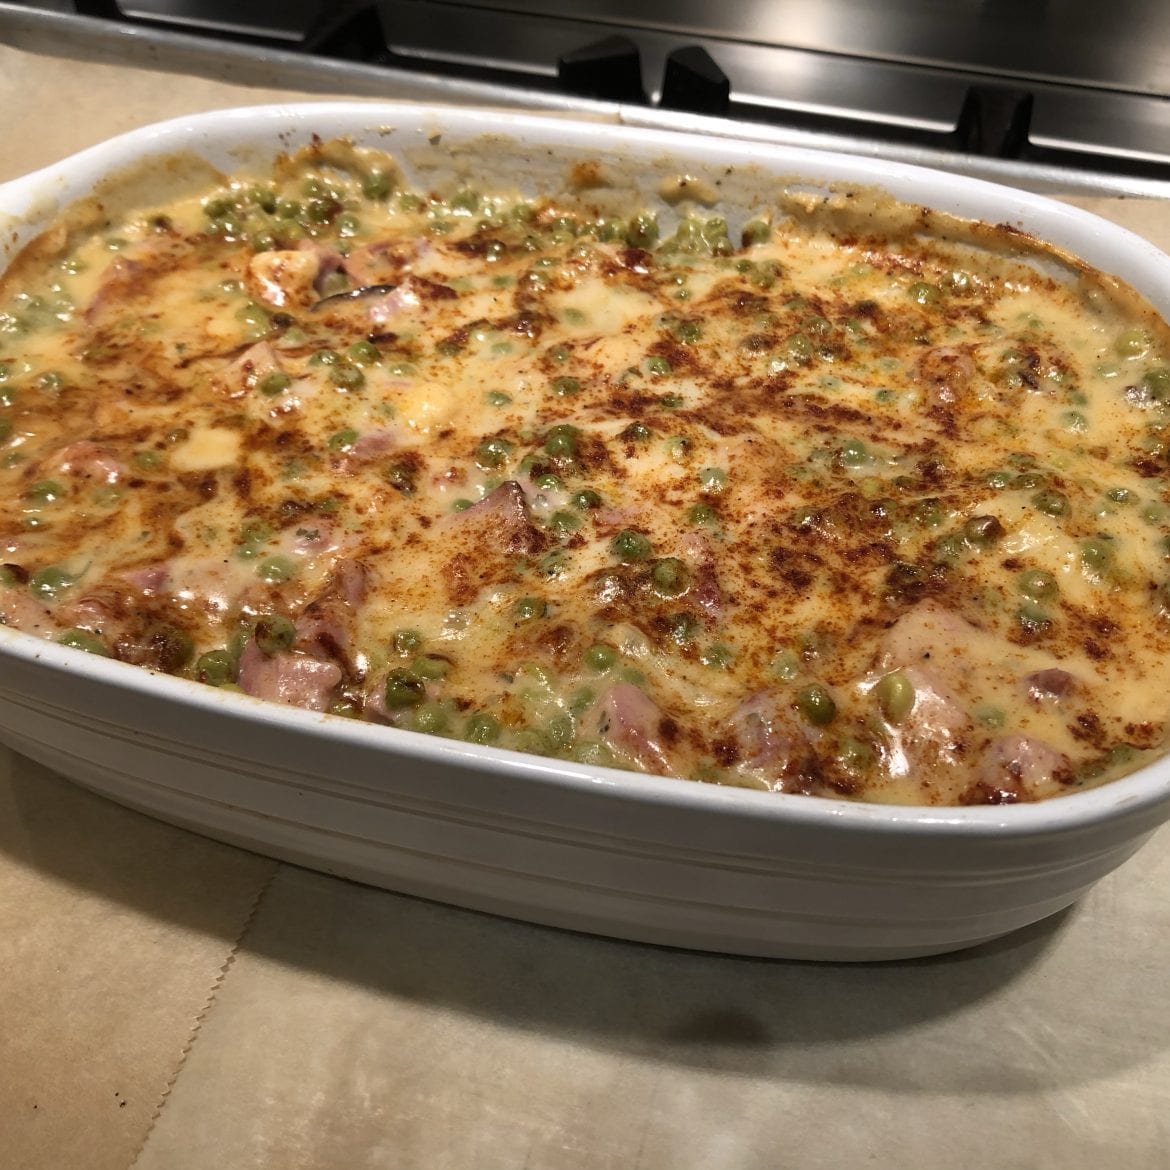
Nothing will taste better than this pretty simple, not fussy Chessy Scalloped Potatoes with Ham. It’s super easy on the wallet and calls for leftover ham and potato. So take those leftovers out and prepare this rich and creamy dish for your dinner tonight. You will lose your mind a little bit with how good this dish is. The ham and potato casserole is smothered in a homemade cheese sauce which will make your mouth water. This is a certified crowd’s favorite! One of the best you’ll ever lay your hands on!

Ingredients

4 cups peeled and sliced potatoes

2 cups diced ham

½ onion, chopped

2 cups milk

1 cup frozen peas

3 tablespoons all-purpose flour

2 tablespoons butter

½ teaspoon salt

½ teaspoon ground black pepper

⅛ teaspoon garlic powder

⅛ teaspoon onion powder

1 teaspoon dried parsley

¼ pound Cheddar cheese, diced

1 pinch paprika, or to taste

How to make Cheesy Scalloped Potatoes with Ham

Step 1: Prepare the oven. Preheat it to 350 degrees F or 175 degrees C.

Step 2: In a 2-quart baking dish, layer the half of potatoes, half the ham, and half the onion. Repeat the same layer for the remaining ingredients.

Step 3: In a saucepan, heat the milk, peas, flour, butter, salt, black pepper, garlic powder, and onion powder over medium heat. Constantly stir for 7 to 10 minutes until thickened.

Step 4: Then, add in the cheddar cheese into the sauce. Stir until melted.

Step 5: Once done, remove from the heat and pour the sauce over the potato-and-ham mixture.

Step 6: Sprinkle the top with paprika.

Step 7: Use an aluminum foil to cover the dish.

Step 8: Place inside the preheated oven and bake for about an hour until the potatoes are tender.

Step 9: After an hour, remove the foil and bake for another 15 minutes or more until lightly browned.

Nutrition Facts

Per Serving: 337.3 calories; protein 17.7g 35% DV; carbohydrates 31.3g 10% DV; fat 15.9g 24% DV; cholesterol 58.8mg 20% DV; sodium 910mg 36% DV

Cheesy Scalloped Potatoes with Ham

Rebecca Prep: 25 mins | Cook: 1 hr 25 mins | Total: 1 hr 50 mins | Servings: 6 | Yield: 6 servings Nothing will taste better than this pretty simple,… Main Dish Recipes Cheesy Scalloped Potatoes with Ham European Print This
Serves: 6 Prep Time: 25 mins Cooking Time: 1 hr 25 mins 1 hr 25 mins
Nutrition facts: 337.3 calories 15.9 fat
Rating: 5.0/5
( 1 voted )

Ingredients

  • 4 cups peeled and sliced potatoes
  • 2 cups diced ham
  • ½ onion, chopped
  • 2 cups milk
  • 1 cup frozen peas
  • 3 tablespoons all-purpose flour
  • 2 tablespoons butter
  • ½ teaspoon salt
  • ½ teaspoon ground black pepper
  • ⅛ teaspoon garlic powder
  • ⅛ teaspoon onion powder
  • 1 teaspoon dried parsley
  • ¼ pound Cheddar cheese, diced
  • 1 pinch paprika, or to taste

Instructions

Step 1: Prepare the oven. Preheat it to 350 degrees F or 175 degrees C.

Step 2: In a 2-quart baking dish, layer the half of potatoes, half the ham, and half the onion. Repeat the same layer for the remaining ingredients.

Step 3: In a saucepan, heat the milk, peas, flour, butter, salt, black pepper, garlic powder, and onion powder over medium heat. Constantly stir for 7 to 10 minutes until thickened.

Step 4: Then, add in the cheddar cheese into the sauce. Stir until melted.

Step 5: Once done, remove from the heat and pour the sauce over the potato-and-ham mixture.

Step 6: Sprinkle the top with paprika.

Step 7: Use an aluminum foil to cover the dish.

Step 8: Place inside the preheated oven and bake for about an hour until the potatoes are tender.

Step 9: After an hour, remove the foil and bake for another 15 minutes or more until lightly browned.

August 20, 2020 0 comment
0 FacebookTwitterPinterestEmail
Main Dish Recipes

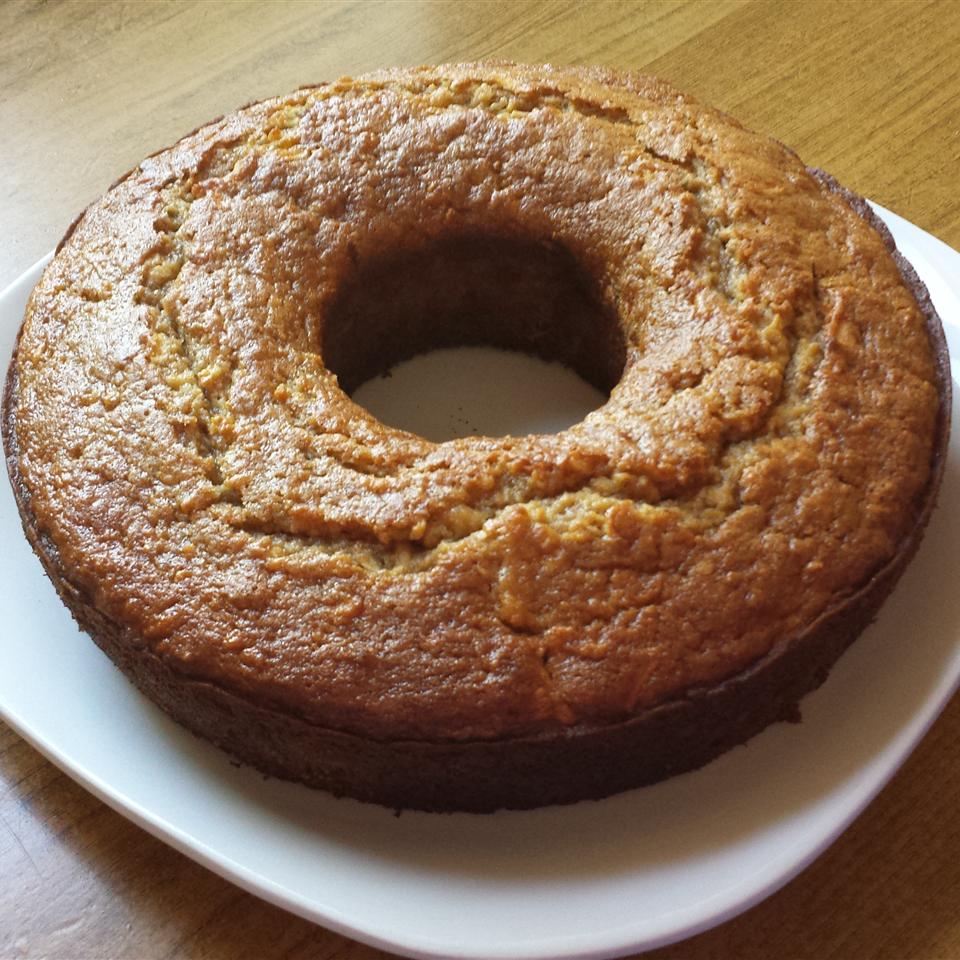
GRANDMA’S FRESH APPLE CAKE

by Rebecca August 19, 2020
written by Rebecca

Prep time: 25 min | Cooking: 1 hr | Total: 1 hr and 25 min | Servings: 12 | Yield: 1 cake

A wonderful cake with an amazing combination of flavors and texture. The variety of fresh apples gave this cake away. This cake is simple yet it is so darn good. I love everything about it from the fresh apples to walnuts and raisins. This cake is dense and soft at the same time. Dust it with powdered sugar or eat it as is. It doesn’t matter because this cake is superb the way it is!

INGREDIENTS

1 cup all-purpose flour

1 teaspoon baking soda

1 teaspoon ground cinnamon

½ teaspoon salt

1 cup white sugar

1 egg

¼ cup of vegetable oil

2 cups peeled and chopped apple

½ cup chopped walnuts

½ cup raisins

HOW TO MAKE GRANDMA’S FRESH APPLE CAKE

Step 1: Prepare the oven. Preheat it to 350 degrees F or 175 degrees C.

Step 2: Then, grease and flour a fluted tube pan or bundt pan.

Step 3: Sift the flour, baking soda, cinnamon, and salt in a bowl and set aside.

Step 4: In a separate bowl, combine the sugar, egg, and oil. Mix in the flour mixture until just combined before folding in the apple, walnuts, and raisins.

Step 5: Place inside the preheated oven and bake for approximately an hour. Check the doneness by inserting a toothpick in the center of the cake. When it comes out clean the cake is perfect!

NOTES:

You can use dates or any sort of chopped nut instead of raisins.

For an amazing apple cake, you may want to use varieties of apples for flavor and texture combination – sweet, sour, crisp, and gentle. Combine Honeycrisp and Granny Smith for a more tart cake and if you prefer a sweeter cake try Gala or Fuji.

This apple cake can stay fresh for up to 12 months and it can be thaw and serve at room temperature.

Nutrition Facts:

Per Serving: 212.6 calories; 15.5 mg cholesterol; 208.9 mg sodium; 2.6 g protein; 33.8 g carbohydrates

GRANDMA’S FRESH APPLE CAKE

Rebecca Prep time: 25 min | Cooking: 1 hr | Total: 1 hr and 25 min | Servings: 12 | Yield: 1 cake A wonderful cake with an amazing combination of flavors and texture. The variety of fresh apples gave… Main Dish Recipes GRANDMA’S FRESH APPLE CAKE European Print This
Serves: 12 Prep Time: 25 mins Cooking Time: 1 hr 1 hr
Nutrition facts: 212.6 calories 20 grams fat
Rating: 5.0/5
( 1 voted )

Ingredients

  • 1 cup all-purpose flour
  • 1 teaspoon baking soda
  • 1 teaspoon ground cinnamon
  • ½ teaspoon salt
  • 1 cup white sugar
  • 1 egg
  • ¼ cup of vegetable oil
  • 2 cups peeled and chopped apple
  • ½ cup chopped walnuts
  • ½ cup raisins

Instructions

Step 1: Prepare the oven. Preheat it to 350 degrees F or 175 degrees C.

Step 2: Then, grease and flour a fluted tube pan or bundt pan.

Step 3: Sift the flour, baking soda, cinnamon, and salt in a bowl and set aside.

Step 4: In a separate bowl, combine the sugar, egg, and oil. Mix in the flour mixture until just combined before folding in the apple, walnuts, and raisins.

Step 5: Place inside the preheated oven and bake for approximately an hour. Check the doneness by inserting a toothpick in the center of the cake. When it comes out clean the cake is perfect!

NOTES:

You can use dates or any sort of chopped nut instead of raisins.

For an amazing apple cake, you may want to use varieties of apples for flavor and texture combination - sweet, sour, crisp, and gentle. Combine Honeycrisp and Granny Smith for a more tart cake and if you prefer a sweeter cake try Gala or Fuji.

This apple cake can stay fresh for up to 12 months and it can be thaw and serve at room temperature.

August 19, 2020 0 comment
0 FacebookTwitterPinterestEmail
Main Dish Recipes

PARMESAN-CRUSTED FRIED ZUCCHINI

by Rebecca August 19, 2020
written by Rebecca

Prep time: 15 min | Cooking: 15 min | Total: 30 min | Servings: 6 | Yield: 6 servings

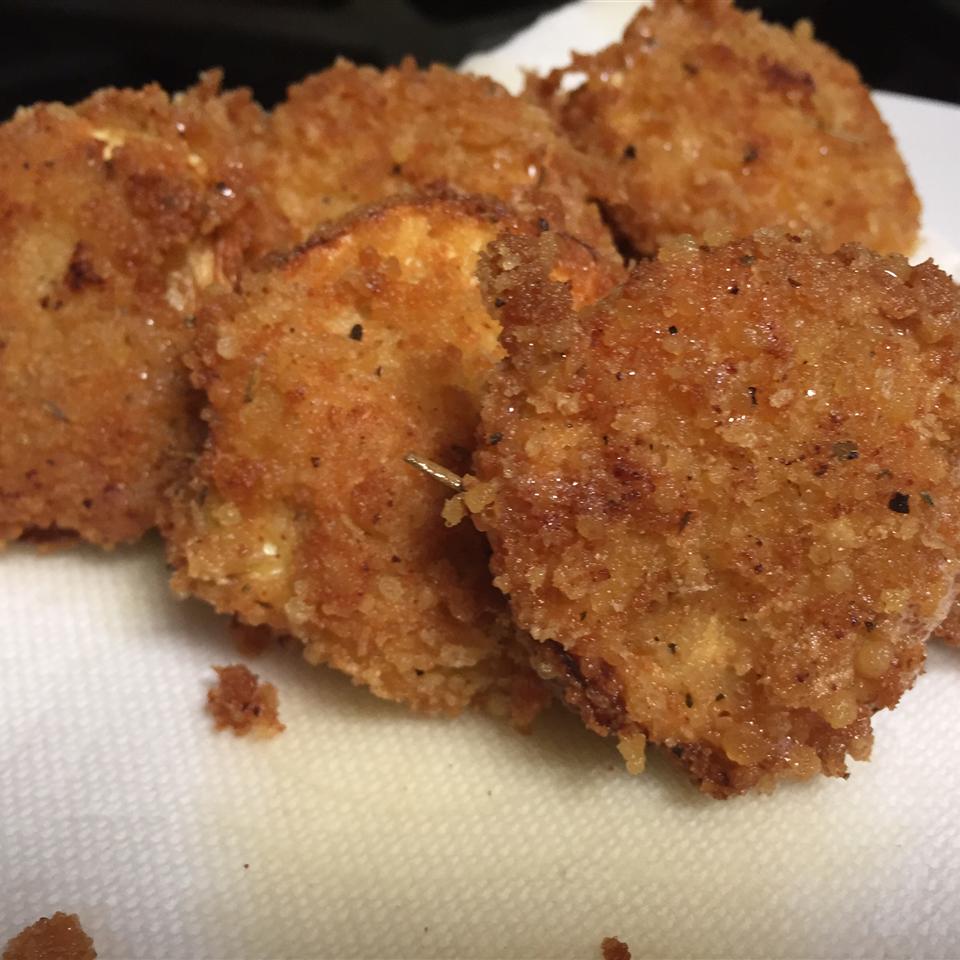
Zucchini is booming big time! Everywhere I look, there is a zucchini recipe that will blow you away. A.k.a summer squash, zucchini has many amazing health benefits not to mention it is so versatile it’s great with just about anything! For instance, this Parmesan-Crusted Fried Zucchini. It’s a no fussy, pretty simple, and darn delicious! A great side dish with the perfect crunch in every bite. I normally double this recipe because the kids are crazy about this fried zucchini and they always end up fighting for the last piece!

INGREDIENTS

½ cup Italian seasoned bread crumbs

½ cup grated Parmesan cheese

2 teaspoons garlic powder

1 teaspoon dried parsley

1 pinch ground black pepper

3 zucchinis, sliced

2 eggs, beaten

1 cup vegetable oil for frying

1 tablespoon grated Parmesan cheese

1 pinch salt to taste

HOW TO MAKE PARMESAN-CRUSTED FRIED ZUCCHINI

Step 1: In a large mixing bowl, add in the bread crumbs, garlic powder, 1/2 cup of Parmesan cheese, parsley, and black pepper. Stir until well mixed.

Step 2: Dip the sliced zucchinis into the eggs and dip into the bread crumb mixture. Make sure to shake and remove the excess crumbs.

Step 3: Prepare a clean plate. Place the coated zucchinis on the plate and make sure not to stack to prevent it from sticking and ruining the coating.

Step 4: Place a large skillet on the stove and turn the heat to medium.

Step 5: Add in vegetable oil and wait for it to bubble.

Step 6: Once the oil is hot, add in the breaded zucchini and fry it until golden brown for 2 to 3 minutes each.

Step 7: Line a clean plate with a paper towel. Place the fried zucchinis on the plate to drain the excess oil.

Step 8: Sprinkle salt and parmesan cheese on top.

Step 9: Serve and enjoy!
Nutrition Facts:

Per Serving: 146.3 calories; 68.7 mg cholesterol; 350.2 mg sodium; 7.8 g protein; 11.4 g carbohydrates

PARMESAN-CRUSTED FRIED ZUCCHINI

Rebecca Prep time: 15 min | Cooking: 15 min | Total: 30 min | Servings: 6 | Yield: 6 servings Zucchini is booming big time! Everywhere I look, there is a zucchini recipe that will blow you away. A.k.a summer… Main Dish Recipes PARMESAN-CRUSTED FRIED ZUCCHINI European Print This
Serves: 6 Prep Time: 15 mins Cooking Time: 15 mins 15 mins
Nutrition facts: 146.3 calories 20 grams fat
Rating: 5.0/5
( 1 voted )

Ingredients

  • ½ cup Italian seasoned bread crumbs
  • ½ cup grated Parmesan cheese
  • 2 teaspoons garlic powder
  • 1 teaspoon dried parsley
  • 1 pinch ground black pepper
  • 3 zucchinis, sliced
  • 2 eggs, beaten
  • 1 cup vegetable oil for frying
  • 1 tablespoon grated Parmesan cheese
  • 1 pinch salt to taste

Instructions

Step 1: In a large mixing bowl, add in the bread crumbs, garlic powder, 1/2 cup of Parmesan cheese, parsley, and black pepper. Stir until well mixed.

Step 2: Dip the sliced zucchinis into the eggs and dip into the bread crumb mixture. Make sure to shake and remove the excess crumbs.

Step 3: Prepare a clean plate. Place the coated zucchinis on the plate and make sure not to stack to prevent it from sticking and ruining the coating.

Step 4: Place a large skillet on the stove and turn the heat to medium.

Step 5: Add in vegetable oil and wait for it to bubble.

Step 6: Once the oil is hot, add in the breaded zucchini and fry it until golden brown for 2 to 3 minutes each.

Step 7: Line a clean plate with a paper towel. Place the fried zucchinis on the plate to drain the excess oil.

Step 8: Sprinkle salt and parmesan cheese on top.

Step 9: Serve and enjoy!
August 19, 2020 0 comment
0 FacebookTwitterPinterestEmail
Main Dish Recipes

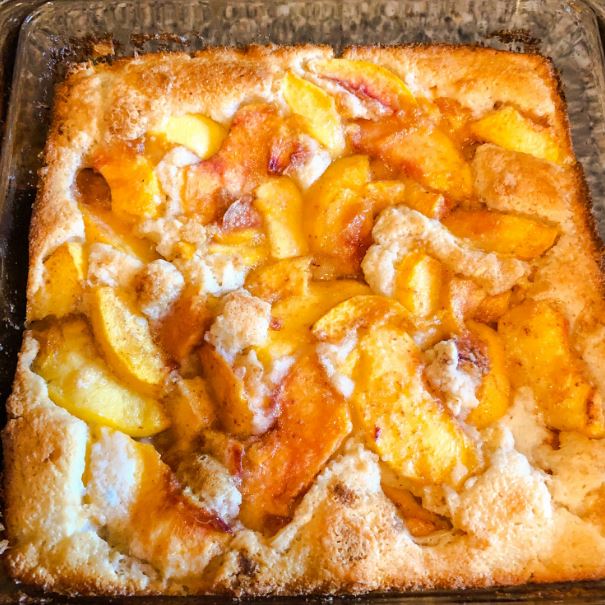
JACKIE’S FRESH PEACH COBBLER

by Rebecca August 19, 2020
written by Rebecca

Prep time: 15 min | Cooking: 45 min | Total: 1hr| Servings: 12 | Yield: 12 servings

I am not a huge fan of peach but after eating this delicious Peach Cobbler, it blew my mind and my taste buds! I have never tasted anything like this before and I so thankful to my sister for introducing me to this recipe. By the way, make sure to follow all the amount of ingredients. You don’t want to overpower the taste of each ingredient. For example, do not put a lot of butter because it might overpower the taste of the rest of the ingredients. You can also about 1/4 cup of Cheddar cheese just to balance the sweetness and also to give it a little twist. You are more than welcome to add your preferred ingredients. Anyway, that’s just a small reminder. I hope you all love it. Enjoy!

INGREDIENTS

½ cup butter, melted

2 large peaches, peeled and sliced

1 ½ cups white sugar, divided

1 cup all-purpose flour

2 teaspoons baking powder

¼ teaspoon salt

1 pinch ground nutmeg

¾ cup milk

HOW TO MAKE JACKIE’S FRESH PEACH COBBLER

Step 1: Ready the oven and preheat to 190 degrees C or 375 degrees F.

Step 2: Prepare an 8-inch square baking dish. Add in butter and spread it.

Step 3: In a large mixing bowl, add 3/4 cup of sugar and peaches. Stir until well mixed.

Step 4: Add in baking powder, flour, nutmeg, salt, and the rest of the sugar. Whisk until well mixed.

Step 5: Pour in the milk and stir until well blended.

Step 6: Transfer the batter into the prepared baking dish with the butter.

Step 7: Place inside the preheated oven and bake for 40 to 45 minutes or until the cobbler turns golden brown. ‘

Step 8: Remove from the oven and let it sit on a wire rack to cool to room temperature.

Step 9: Serve warm and enjoy!

Nutrition Facts:

Per Serving: 216.5 calories; 21.6 mg cholesterol; 191.5 mg sodium; 1.7 g protein; 35.3 g carbohydrates

JACKIE’S FRESH PEACH COBBLER

Rebecca Prep time: 15 min | Cooking: 45 min | Total: 1hr| Servings: 12 | Yield: 12 servings I am not a huge fan of peach but after eating this delicious Peach Cobbler, it blew my mind and my taste… Main Dish Recipes JACKIE’S FRESH PEACH COBBLER European Print This
Serves: 12 Prep Time: 15 mins Cooking Time: 45 mins 45 mins
Nutrition facts: 216.5 calories 20 grams fat
Rating: 5.0/5
( 1 voted )

Ingredients

  • ½ cup butter, melted
  • 2 large peaches, peeled and sliced
  • 1 ½ cups white sugar, divided
  • 1 cup all-purpose flour
  • 2 teaspoons baking powder
  • ¼ teaspoon salt
  • 1 pinch ground nutmeg
  • ¾ cup milk

Instructions

Step 1: Ready the oven and preheat to 190 degrees C or 375 degrees F.

Step 2: Prepare an 8-inch square baking dish. Add in butter and spread it.

Step 3: In a large mixing bowl, add 3/4 cup of sugar and peaches. Stir until well mixed.

Step 4: Add in baking powder, flour, nutmeg, salt, and the rest of the sugar. Whisk until well mixed.

Step 5: Pour in the milk and stir until well blended.

Step 6: Transfer the batter into the prepared baking dish with the butter.

Step 7: Place inside the preheated oven and bake for 40 to 45 minutes or until the cobbler turns golden brown. '

Step 8: Remove from the oven and let it sit on a wire rack to cool to room temperature.

Step 9: Serve warm and enjoy!

August 19, 2020 0 comment
0 FacebookTwitterPinterestEmail
Main Dish Recipes

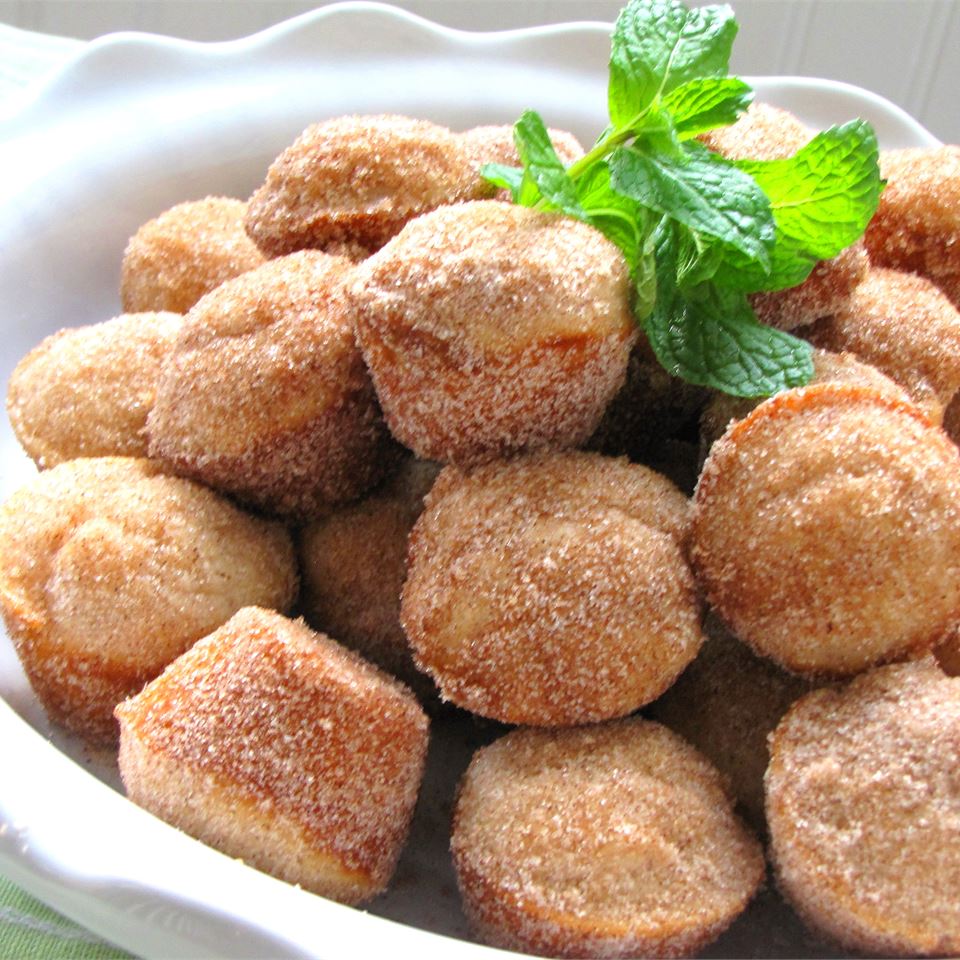
MINI DONUT MUFFINS

by Rebecca August 19, 2020
written by Rebecca

Prep time: 15 min | Cooking: 15 min | Additional: 10 min | Total: 40 min | Servings: 24 | Yield: 24 muffins

These little treats are the best! I never thought it would be this good. This is best eaten with a hot coffee or hot cocoa. Your afternoon will be extra awesome if you give this a try. I have listed all the steps and ingredients that you need to follow and you are good to go. Feel free to add your preferred ingredients. Try adding cheese in the middle of each muffin. It will give and extra flavor. You can also sprinkle sesame seeds on top of each muffin to give it a nice fancy look. I can’t wait for you to try this. Enjoy!

INGREDIENTS

½ cup white sugar

¼ cup margarine, melted

¾ teaspoon ground nutmeg

½ cup milk

1 teaspoon baking powder

1 cup all-purpose flour

¼ cup margarine, melted

½ cup white sugar

1 teaspoon ground cinnamon

HOW TO MAKE MINI DONUT MUFFINS

Step 1: Ready the oven and preheat to 190 degrees C or 375 degrees F.

Step 2: Spray 24 mini-muffin cups with cooking spray.

Step 3: Prepare a large mixing bowl. Add in 1/4 cup of margarine, nutmeg, and 1/2 cup sugar.

Step 4: Add in the flour and baking powder. Whisk until well mixed.

Step 5: Transfer into the greased mini muffins. Put about half full each muffin.

Step 6: Place inside the preheated oven and bake for 15 to 20 minutes or until the tops become lightly golden in color.

Step 7: In a small mixing bowl, add about 1/4 cup of the melted butter.

Step 8: In another mixing bowl, add 1/2 cup of sugar and cinnamon.

Step 9: Remove the muffins from the oven. Remove from the cups and dip each into the bowl with the melted butter and lastly into the sugar mixture.

Step 10: Serve warm and enjoy!

Note: 

If you do not have margarine, you can also use butter.

Nutrition Facts:

Per Serving: 88 calories; 0.8 g protein; 12.8 g carbohydrates; 0.4 mg cholesterol; 66.3 mg sodium

MINI DONUT MUFFINS

Rebecca Prep time: 15 min | Cooking: 15 min | Additional: 10 min | Total: 40 min | Servings: 24 | Yield: 24 muffins These little treats are the best! I never thought it would be this good. This is best eaten… Main Dish Recipes MINI DONUT MUFFINS European Print This
Serves: 24 Prep Time: 15 mins Cooking Time: 25 mins 25 mins
Nutrition facts: 88 calories 20 grams fat
Rating: 5.0/5
( 1 voted )

Ingredients

  • ½ cup white sugar
  • ¼ cup margarine, melted
  • ¾ teaspoon ground nutmeg
  • ½ cup milk
  • 1 teaspoon baking powder
  • 1 cup all-purpose flour
  • ¼ cup margarine, melted
  • ½ cup white sugar
  • 1 teaspoon ground cinnamon

Instructions

Step 1: Ready the oven and preheat to 190 degrees C or 375 degrees F.

Step 2: Spray 24 mini-muffin cups with cooking spray.

Step 3: Prepare a large mixing bowl. Add in 1/4 cup of margarine, nutmeg, and 1/2 cup sugar.

Step 4: Add in the flour and baking powder. Whisk until well mixed.

Step 5: Transfer into the greased mini muffins. Put about half full each muffin.

Step 6: Place inside the preheated oven and bake for 15 to 20 minutes or until the tops become lightly golden in color.

Step 7: In a small mixing bowl, add about 1/4 cup of the melted butter.

Step 8: In another mixing bowl, add 1/2 cup of sugar and cinnamon.

Step 9: Remove the muffins from the oven. Remove from the cups and dip each into the bowl with the melted butter and lastly into the sugar mixture.

Step 10: Serve warm and enjoy!

Note: 

If you do not have margarine, you can also use butter.

August 19, 2020 0 comment
0 FacebookTwitterPinterestEmail
Main Dish Recipes

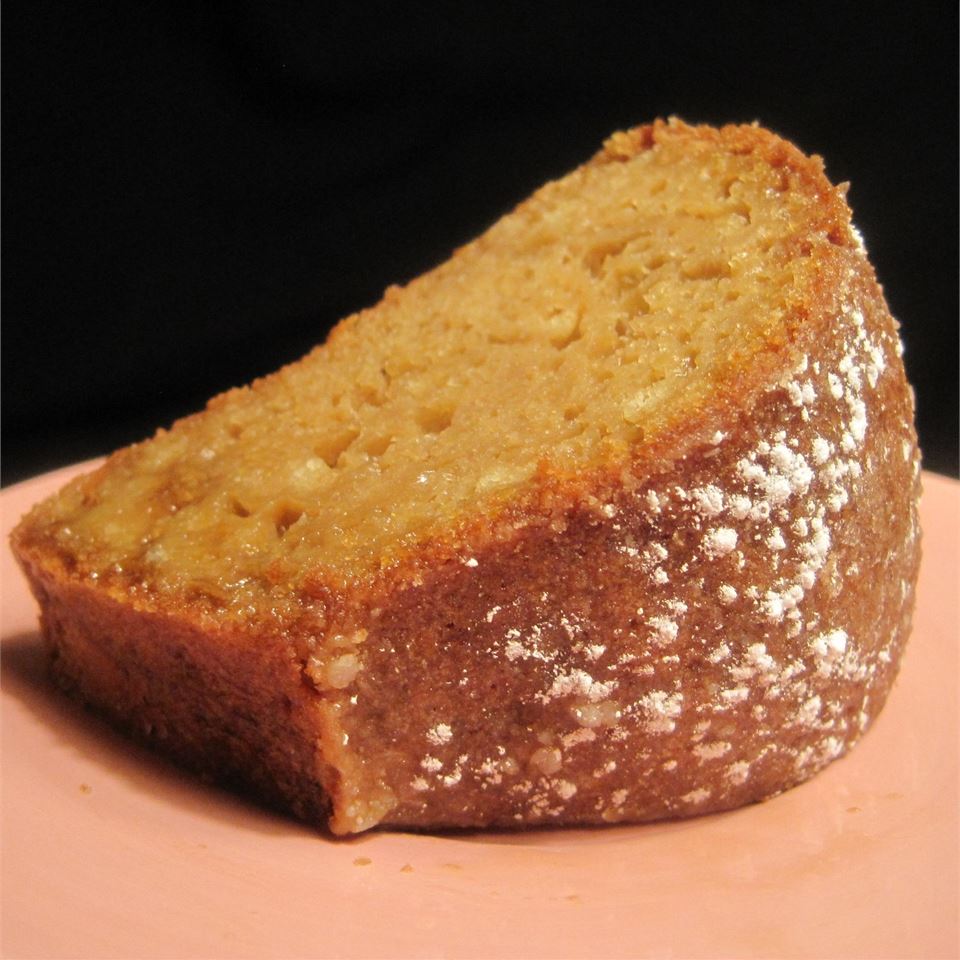
ROOT BEER FLOAT CAKE IS A GENIUS DESSERT

by Rebecca August 19, 2020
written by Rebecca

Prep time: 20 min | Cooking: 40 min | Total: 1 hr | Servings: 14 | Yield: 1-10 inch Bundt cake

This simple yet luscious cake has an amazing good old-fashioned flavor! The kids adore this cake a lot. Sprinkle over some crushed root beer candies or serve with a scoop vanilla ice cream. This reminds me of my childhood. The taste is pretty simple but it’s so good. Every bite is nostalgic. This is a pretty straightforward cake, a breeze to make, and you only need six simple and readily available ingredients. It is the perfect breakfast, snack, even dessert. My personal favorite besides a freshly brewed coffee for an afternoon munch.

INGREDIENTS

1 18.25 ounce package yellow cake mix

1 12 fluid ounce can or bottle root beer

¼ cup of vegetable oil

3 eggs

½ cup confectioners’ sugar

3 tablespoons root beer

HOW TO MAKE ROOT BEER FLOAT CAKE

Step 1: Prepare the oven. Preheat it to 350 degrees F or 175 degrees C.

Step 2: Then, grease and flour a 10-inch bundt pan.

Step 3: Add the cake mix, 12 ounces root beer, oil, and eggs in a medium bowl. Stir until smooth.

Step 4: Pour the root beer batter into the prepared pan.

Step 5: Place inside the preheated oven and bake for about 35 to 40 minutes. Check the doneness by inserting a toothpick in the center of the cake. When it comes out clean the cake is perfect!

Step 6: Remove the cake from the oven and allow it cool in the saucepan for at least 15 minutes. Then, invert the cake over the wire rack to cool completely.

Step 7: Use a skewer to poke holes in a 2-inch interval in the cake.

Step 8: Evenly pour the root beer glaze all over the cake.

Step 9: For the Root Beer Glaze, combine the confectioner’s sugar and 3 tablespoons of root beer in a small bowl. Beat until the glaze is smooth.

Nutrition Facts:

Per Serving: 239.3 calories; 40.6 mg cholesterol; 261.6 mg sodium; 3 g protein; 36.6 g carbohydrates

ROOT BEER FLOAT CAKE IS A GENIUS DESSERT

Rebecca Prep time: 20 min | Cooking: 40 min | Total: 1 hr | Servings: 14 | Yield: 1-10 inch Bundt cake This simple yet luscious cake has an amazing good old-fashioned flavor! The kids adore this cake a lot.… Main Dish Recipes ROOT BEER FLOAT CAKE IS A GENIUS DESSERT European Print This
Serves: 14 Prep Time: 20 Cooking Time: 40 mins 40 mins
Nutrition facts: 239.3 calories 20 grams fat
Rating: 5.0/5
( 1 voted )

Ingredients

  • 1 18.25 ounce package yellow cake mix
  • 1 12 fluid ounce can or bottle root beer
  • ¼ cup of vegetable oil
  • 3 eggs
  • ½ cup confectioners' sugar
  • 3 tablespoons root beer

Instructions

Step 1: Prepare the oven. Preheat it to 350 degrees F or 175 degrees C.

Step 2: Then, grease and flour a 10-inch bundt pan.

Step 3: Add the cake mix, 12 ounces root beer, oil, and eggs in a medium bowl. Stir until smooth.

Step 4: Pour the root beer batter into the prepared pan.

Step 5: Place inside the preheated oven and bake for about 35 to 40 minutes. Check the doneness by inserting a toothpick in the center of the cake. When it comes out clean the cake is perfect!

Step 6: Remove the cake from the oven and allow it cool in the saucepan for at least 15 minutes. Then, invert the cake over the wire rack to cool completely.

Step 7: Use a skewer to poke holes in a 2-inch interval in the cake.

Step 8: Evenly pour the root beer glaze all over the cake.

Step 9: For the Root Beer Glaze, combine the confectioner's sugar and 3 tablespoons of root beer in a small bowl. Beat until the glaze is smooth.

August 19, 2020 0 comment
0 FacebookTwitterPinterestEmail
Newer Posts
Older Posts

Popular Posts

  • 1

    Crispy Crunchy Parmesan Potatoes

    March 21, 2020
  • 2

    CROCK POT SMOTHERED PORK CHOPS

    March 21, 2020
  • Facebook
  • Twitter

@2019 - All Right Reserved.


Back To Top