Cook it once
  • Home
  • Privacy Policy
  • Recipes
    • KETO
    • LC
    • WW
  • Tips
  • Contact
Cook it once
  • Home
  • Privacy Policy
  • Recipes
    • KETO
    • LC
    • WW
  • Tips
  • Contact
Category:

Main Dish Recipes

Main Dish Recipes

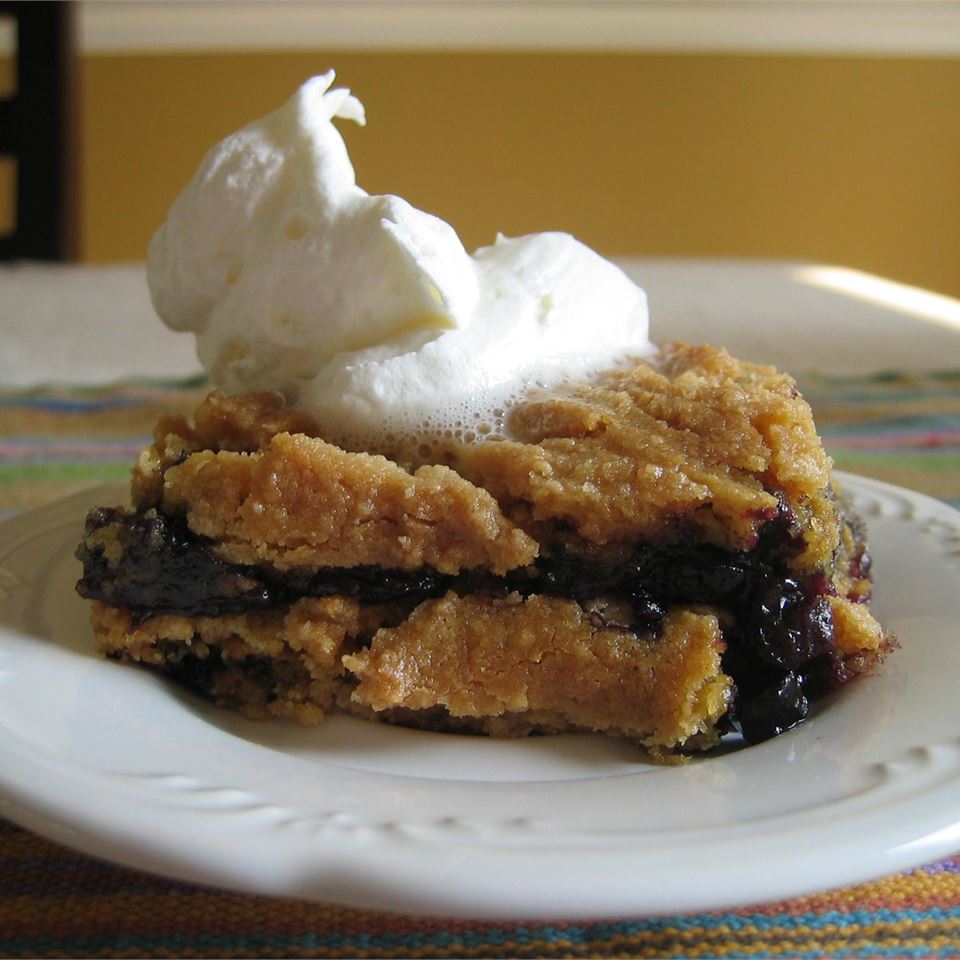
BLUEBERRY DUMP CAKE

by Rebecca August 22, 2020
written by Rebecca

Servings: 18 | Yield: 1 9×13-inch pan

Come on, dig straight in! This dump cake does not need a fussy prepping, it’s pretty simple yet the taste is extraordinary! Loaded with fresh blueberries, this time saving sweet treat is your next go-to. And a scoop of vanilla ice cream surely complements the buttery, cakey, and luscious blueberry flavors of this dump cake.

With only a few simple ingredients you’ll be able to make this heavenly dessert. You don’t even need to spend eternity in the kitchen because it’s quick and easy to whip up. Perfect to serve either warm or cold with a scoop of vanilla ice cream or a dollop of whip cream. This bursting with fresh blueberries dump cake unquestionably pleases everyone!

INGREDIENTS

1 18.25-oz package yellow cake mix

4 cups fresh blueberries

½ cup white sugar

½ cup butter, melted

1 teaspoon ground cinnamon

HOW TO MAKE BLUEBERRY DUMP CAKE

Step 1: Prepare the oven. Preheat it to 350 degrees F or 175 degrees C.

Step 2: In the bottom of a 9 x 13-inch pan, combine the berries, sugar, and cinnamon. Top the berries with the dry cake mix. Drizzle the butter over the cake mix but do not stir.

Step 3: Place inside the preheated oven and bake for about 30 minutes or until light brown.

Step 4: Once done, remove from the oven. Serve warm and cold with ice cream on top. Enjoy!

NOTE:

The topping options for this blueberry dump cake are whipped cream or ice cream. You can take this to a whole new level. A coffee or coffee bean is a staple for ice cream so it is great if you have some sitting in the freezer. This dump cake is buttery, cakey, with blueberry flavors and the vanilla ice cream will complement all that.

Nutrition Facts:

Per Serving: 209.5 calories; 14.1 mg cholesterol; 225.4 mg sodium; 1.6 g protein; 32.8 g carbohydrates
BLUEBERRY DUMP CAKE

Rebecca Servings: 18 | Yield: 1 9×13-inch pan Come on, dig straight in! This dump cake does not need a fussy prepping, it’s pretty simple yet the taste is extraordinary! Loaded with fresh blueberries,… Main Dish Recipes BLUEBERRY DUMP CAKE European Print This
Serves: 18
Nutrition facts: 209.5 calories 20 grams fat
Rating: 5.0/5
( 1 voted )

Ingredients

  • 1 18.25-oz package yellow cake mix
  • 4 cups fresh blueberries
  • ½ cup white sugar
  • ½ cup butter, melted
  • 1 teaspoon ground cinnamon

Instructions

Step 1: Prepare the oven. Preheat it to 350 degrees F or 175 degrees C.

Step 2: In the bottom of a 9 x 13-inch pan, combine the berries, sugar, and cinnamon. Top the berries with the dry cake mix. Drizzle the butter over the cake mix but do not stir.

Step 3: Place inside the preheated oven and bake for about 30 minutes or until light brown.

Step 4: Once done, remove from the oven. Serve warm and cold with ice cream on top. Enjoy!

NOTE:

The topping options for this blueberry dump cake are whipped cream or ice cream. You can take this to a whole new level. A coffee or coffee bean is a staple for ice cream so it is great if you have some sitting in the freezer. This dump cake is buttery, cakey, with blueberry flavors and the vanilla ice cream will complement all that.
August 22, 2020 0 comment
0 FacebookTwitterPinterestEmail
Main Dish Recipes

WHITE CHOCOLATE-RASPBERRY CHEESECAKE BARS

by Rebecca August 22, 2020
written by Rebecca

Prep time: 20 min | Cook: 25 min | Additional: 3 hr 43 mins | Total: 4 hr 28 min | Servings: 9

Craving for cheesecake? This is the easiest and the quickest cheesecake fix. Simpler than the full-size cheesecake yet incredibly and equally delicious. These Chocolate-Raspberry Cheesecake Bars are luxuriously smooth, perfectly sweet, with layers of raspberry sauce. Creamy and smooth, every bite is like a delightful cloud of deliciousness!

INGREDIENTS

12 OREO Cookies, finely crushed

2 tablespoons butter

3 ounces white baking chocolate, divided

2 8-oz packages cream cheese softened

½ cup white sugar

1 teaspoon vanilla

2 eggs

¼ cup red raspberry preserves

HOW TO MAKE WHITE CHOCOLATE-RASPBERRY CHEESECAKE BARS

Step 1: Prepare the oven. Preheat it to 350 degrees F.

Step 2: In a bowl, mix the cookie crumbs and butter. Then, press this onto the bottom of an 8 or 9-inch square pan.

Step 3: Melt a 2 ounces chocolate according to package instruction.

Step 4: Add the beat cream cheese, sugar, and vanilla in a large bowl. Beat with a mixer until blended. Stir in the melted chocolate. Beat well. Add in the eggs one at a time. Beating on low speed until just blended.

Step 5: Pour the cream cheese mixture on top of the crust.

Step 6: Place inside the preheated oven and bake for about 25 to 28 minutes or until the center is almost set.

Step 7: Remove from the oven and allow to cool for at least 5 minutes before spreading over the preserves.

Step 8: Meanwhile, melt the rest of the chocolate. And drizzle over the cheesecake. Allow the cheesecake to cool completely.

Step 9: Put in the fridge for at least 4 hours before cutting into 18 bars.

NOTE:

Double the recipe if desired. Prepare as mentioned, doubling the ingredients, and bake in a 13 x 9-inch pan. This will give you 18 servings of this recipe.

Nutrition Information:

Per Serving: 400 calories, 125mg cholesterol, 310mg sodium, 35g carbohydrate, less than 1g dietary fiber, 28g sugars, 6g protein, 26g total fat, 15g saturated fat

WHITE CHOCOLATE-RASPBERRY CHEESECAKE BARS

Rebecca Prep time: 20 min | Cook: 25 min | Additional: 3 hr 43 mins | Total: 4 hr 28 min | Servings: 9 Craving for cheesecake? This is the easiest and the quickest cheesecake fix. Simpler than the full-size… Main Dish Recipes WHITE CHOCOLATE-RASPBERRY CHEESECAKE BARS European Print This
Serves: 9 Prep Time: 20 mins Cooking Time: 4 hrs 8 mins 4 hrs 8 mins
Nutrition facts: 400 calories 26 fat
Rating: 5.0/5
( 1 voted )

Ingredients

  • 12 OREO Cookies, finely crushed
  • 2 tablespoons butter
  • 3 ounces white baking chocolate, divided
  • 2 8-oz packages cream cheese softened
  • ½ cup white sugar
  • 1 teaspoon vanilla
  • 2 eggs
  • ¼ cup red raspberry preserves

Instructions

Step 1: Prepare the oven. Preheat it to 350 degrees F.

Step 2: In a bowl, mix the cookie crumbs and butter. Then, press this onto the bottom of an 8 or 9-inch square pan.

Step 3: Melt a 2 ounces chocolate according to package instruction.

Step 4: Add the beat cream cheese, sugar, and vanilla in a large bowl. Beat with a mixer until blended. Stir in the melted chocolate. Beat well. Add in the eggs one at a time. Beating on low speed until just blended.

Step 5: Pour the cream cheese mixture on top of the crust.

Step 6: Place inside the preheated oven and bake for about 25 to 28 minutes or until the center is almost set.

Step 7: Remove from the oven and allow to cool for at least 5 minutes before spreading over the preserves.

Step 8: Meanwhile, melt the rest of the chocolate. And drizzle over the cheesecake. Allow the cheesecake to cool completely.

Step 9: Put in the fridge for at least 4 hours before cutting into 18 bars.

NOTE:

Double the recipe if desired. Prepare as mentioned, doubling the ingredients, and bake in a 13 x 9-inch pan. This will give you 18 servings of this recipe.

August 22, 2020 0 comment
0 FacebookTwitterPinterestEmail
Main Dish Recipes

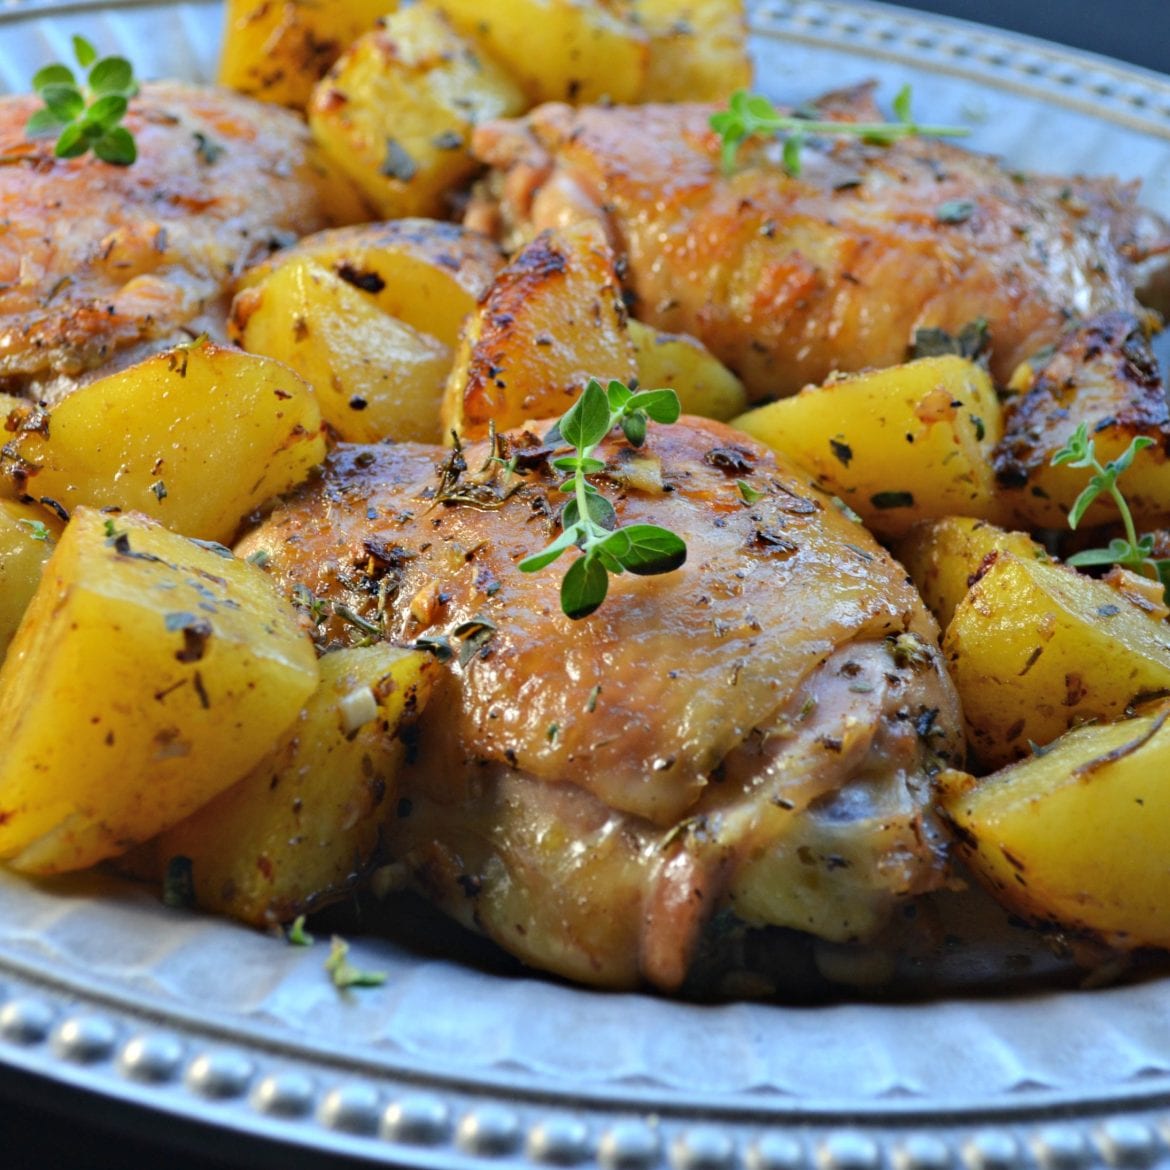
GREEK LEMON CHICKEN AND POTATOES

by Rebecca August 22, 2020
written by Rebecca

Prep time: 10 min | Cook: 50 min | Total: 1 hr | Servings: 4 | Yield: 4 servings

Made this today and everyone went crazy! These garlicky oven-roasted potatoes, lemon-herbal chicken are seriously good. Crisp on the outside and tender on the inside. It is the perfect dish – savory, insanely delicious, and mouth-watering.

INGREDIENTS

4 lbs skin-on, bone-in chicken thighs

1 tablespoon kosher salt

1 tablespoon dried oregano

1 teaspoon freshly ground black pepper

1 teaspoon dried rosemary

1 pinch cayenne pepper

½ cup fresh lemon juice

½ cup olive oil

6 cloves garlic, minced

3 medium (2-1/4″ to 3″ dia, raw) russet potatoes, peeled and quartered

⅔ cup chicken broth, plus splash to deglaze pan

1 sprig chopped fresh oregano for garnish

HOW TO MAKE GREEK LEMON CHICKEN AND POTATOES

Step 1: Prepare the oven. Preheat it to 425 degrees F or 220 degrees C.

Step 2: Then, lightly oil a large roasting pan.

Step 3: In a large bowl, add the chicken pieces and season with salt, oregano, pepper, rosemary, and cayenne pepper. Add in the fresh lemon juice, olive oil, and garlic. Put the potatoes in and stir until the chicken and the potatoes are completely coated with the marinade.

Step 4: Transfer the chicken pieces, skin side up in the prepared roasting pan. Reserve the marinade.

Step 5: Set the potatoes evenly among the chicken thighs, then, drizzle with 2/3 cup of chicken broth. Pour the rest of the marinade over the chicken and potatoes.

Step 6: Place inside the preheated oven and bake for about 20 minutes. Then, toss the chicken and potatoes but make sure to keep the chicken skin side up. Continue to bake for another 25 minutes or until the chicken is browned and cooked through. If using an instant-read thermometer, it will read 165 degrees F or 74 degrees C.

Step 7: Remove from the oven and transfer the chicken to a serving platter and keep them warm.

Step 8: Adjust your oven to broil or to the highest heat setting. Again, toss the potatoes in pan juice and place the pan under the broiler. Broil for about 3 minutes until caramelized. Remove from the oven and transfer the caramelized potatoes to the serving plate with the chicken.

Step 9: Put the roasting pan on the stove over medium heat, then, add a dash the broth. Stir up the browned bits from the bottom of the pan.

Step 10: Once done, strain and spoon the juice over the chicken and potatoes. Top with chopped oregano before serving. Enjoy!

Nutrition Facts:

Per Serving: 1138.8 calories; 283.6 mg cholesterol; 1865.5 mg sodium; 80.4 g protein; 34.5 g carbohydrates

GREEK LEMON CHICKEN AND POTATOES

Rebecca Prep time: 10 min | Cook: 50 min | Total: 1 hr | Servings: 4 | Yield: 4 servings Made this today and everyone went crazy! These garlicky oven-roasted potatoes, lemon-herbal chicken are seriously good. Crisp on the outside and… Main Dish Recipes GREEK LEMON CHICKEN AND POTATOES European Print This
Serves: 4 Prep Time: 10 mins Cooking Time: 50 mins 50 mins
Nutrition facts: 1138.8 calories 20 grams fat
Rating: 5.0/5
( 1 voted )

Ingredients

  • 4 lbs skin-on, bone-in chicken thighs
  • 1 tablespoon kosher salt
  • 1 tablespoon dried oregano
  • 1 teaspoon freshly ground black pepper
  • 1 teaspoon dried rosemary
  • 1 pinch cayenne pepper
  • ½ cup fresh lemon juice
  • ½ cup olive oil
  • 6 cloves garlic, minced
  • 3 medium (2-1/4" to 3" dia, raw) russet potatoes, peeled and quartered
  • ⅔ cup chicken broth, plus splash to deglaze pan
  • 1 sprig chopped fresh oregano for garnish

Instructions

Step 1: Prepare the oven. Preheat it to 425 degrees F or 220 degrees C.

Step 2: Then, lightly oil a large roasting pan.

Step 3: In a large bowl, add the chicken pieces and season with salt, oregano, pepper, rosemary, and cayenne pepper. Add in the fresh lemon juice, olive oil, and garlic. Put the potatoes in and stir until the chicken and the potatoes are completely coated with the marinade.

Step 4: Transfer the chicken pieces, skin side up in the prepared roasting pan. Reserve the marinade.

Step 5: Set the potatoes evenly among the chicken thighs, then, drizzle with 2/3 cup of chicken broth. Pour the rest of the marinade over the chicken and potatoes.

Step 6: Place inside the preheated oven and bake for about 20 minutes. Then, toss the chicken and potatoes but make sure to keep the chicken skin side up. Continue to bake for another 25 minutes or until the chicken is browned and cooked through. If using an instant-read thermometer, it will read 165 degrees F or 74 degrees C.

Step 7: Remove from the oven and transfer the chicken to a serving platter and keep them warm.

Step 8: Adjust your oven to broil or to the highest heat setting. Again, toss the potatoes in pan juice and place the pan under the broiler. Broil for about 3 minutes until caramelized. Remove from the oven and transfer the caramelized potatoes to the serving plate with the chicken.

Step 9: Put the roasting pan on the stove over medium heat, then, add a dash the broth. Stir up the browned bits from the bottom of the pan.

Step 10: Once done, strain and spoon the juice over the chicken and potatoes. Top with chopped oregano before serving. Enjoy!

August 22, 2020 0 comment
0 FacebookTwitterPinterestEmail
Main Dish Recipes

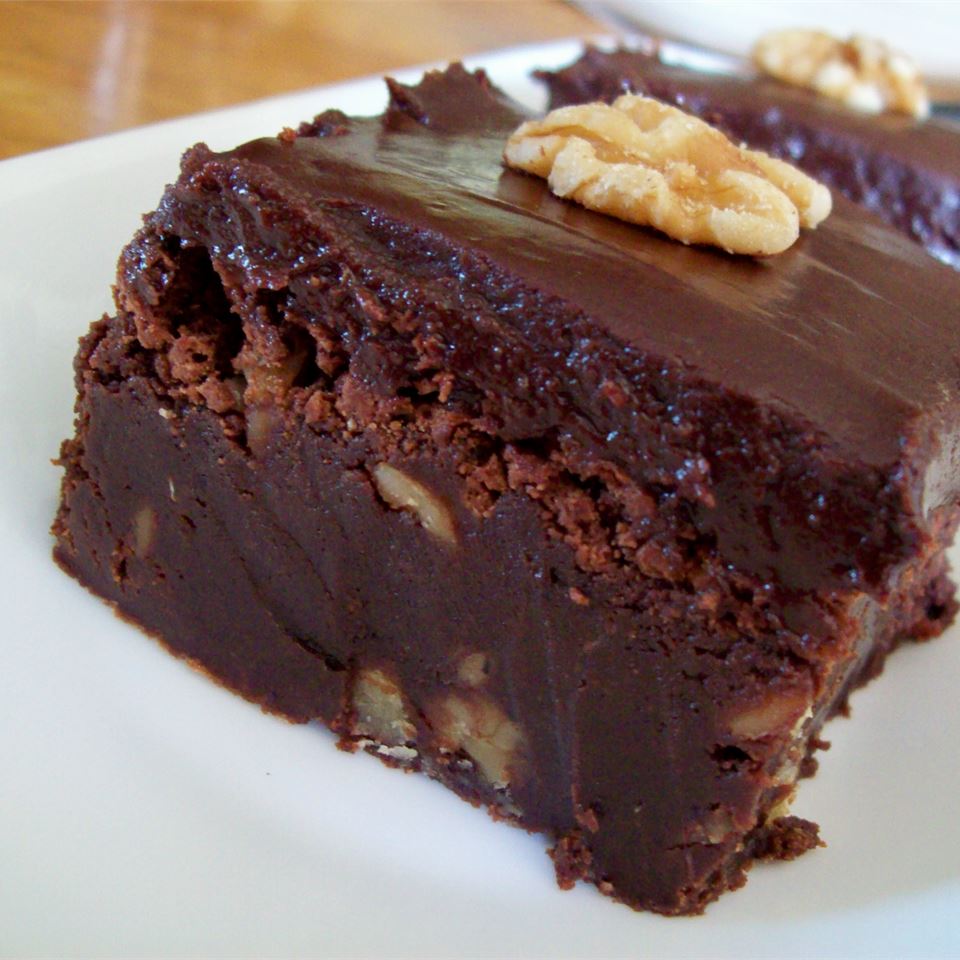
SCRUMPTIOUS FROSTED FUDGY BROWNIES

by Rebecca August 22, 2020
written by Rebecca

Prep time: 20 min | Cook: 40 min | Total: 1 hr | Servings: 32 | Yield: 1 9×13-inch pan of brownies

Slight crumbly, thick, and chewy. These brownies are heaven! They are amazingly rich, super chocolatey, and smooth. Dangerously addicting, you will lose your mind a little bit.

INGREDIENTS

8 1-ounce squares unsweetened baking chocolate

1 cup butter

5 eggs

3 cups white sugar

1 tablespoon vanilla extract

1 ½ cups all-purpose flour

2 cups chopped walnuts

1 ¼ cups white sugar

1 cup heavy cream

5 1-ounce squares unsweetened baking chocolate

½ cup butter softened

1 teaspoon vanilla extract

HOW TO MAKE FROSTED FUDGY BROWNIES

Step 1: Prepare the oven. Preheat it to 375 degrees F or 190 degrees C.

Step 2: Then, grease a 13 x 9-inch baking pan.

Step 3: Add the 8 ounces baking chocolate and a cup of butter in a microwave-safe bowl. Melt in the microwave over high heat for about 2 minutes until soft and butter has melted.

Step 4: Add the eggs, 3 cups of sugar, and 1 tablespoon of vanilla extract in a large bowl. Beat using an electric mixer for about 2 minutes on high speed. Adjust to low and beat in the melted butter-and-chocolate mixture. Add in the flour and beat until just combined. Make sure to not overbeat, then, stir in the chopped walnuts.

Step 5: Transfer the batter into the prepared pan and spread.

Step 6: Place inside the preheated oven and bake for about 35 minutes until the toothpick inserted in the middle comes out with fudgy crumbs.

Step 7: Remove from the oven and allow the brownie to cool in the pan before frosting.

Step 8: For the frosting, combine the 1 1/4 cup of sugar and heavy cream in a saucepan. Cook over medium heat. Stir for 3 minutes until the sugar is dissolved and begins to simmer. Adjust the heat to low and let the mixture simmer for 7 minutes more without stirring.

Step 9: Remove the cream mixture from the heat before stirring in the 5 ounces baking chocolate and half a cup of butter. Mix until melted and blended. Add a teaspoon of vanilla extract and whisk until smooth. Refrigerate the frosting for about 30 minutes, whisking every few minutes until chilled.

Step 10: Once the frosting is chilled, frost the brownies, then, cut them into squares.

NOTES:

If using a glass bowl, preheat your oven to about 350 degrees F or 175 degrees C.

Use macadamia nuts in place with walnuts if you prefer.

Nutrition Facts:

Per Serving: 343.6 calories; 62.1 mg cholesterol; 78.1 mg sodium; 4.4 g protein; 35.8 g carbohydrates

SCRUMPTIOUS FROSTED FUDGY BROWNIES

Rebecca Prep time: 20 min | Cook: 40 min | Total: 1 hr | Servings: 32 | Yield: 1 9×13-inch pan of brownies Slight crumbly, thick, and chewy. These brownies are heaven! They are amazingly rich, super chocolatey, and smooth.… Main Dish Recipes SCRUMPTIOUS FROSTED FUDGY BROWNIES European Print This
Serves: 32 Prep Time: 20 mins Cooking Time: 40 mins 40 mins
Nutrition facts: 343.6 calories 20 grams fat
Rating: 5.0/5
( 1 voted )

Ingredients

  • 8 1-ounce squares unsweetened baking chocolate
  • 1 cup butter
  • 5 eggs
  • 3 cups white sugar
  • 1 tablespoon vanilla extract
  • 1 ½ cups all-purpose flour
  • 2 cups chopped walnuts
  • 1 ¼ cups white sugar
  • 1 cup heavy cream
  • 5 1-ounce squares unsweetened baking chocolate
  • ½ cup butter softened
  • 1 teaspoon vanilla extract

Instructions

Step 1: Prepare the oven. Preheat it to 375 degrees F or 190 degrees C.

Step 2: Then, grease a 13 x 9-inch baking pan.

Step 3: Add the 8 ounces baking chocolate and a cup of butter in a microwave-safe bowl. Melt in the microwave over high heat for about 2 minutes until soft and butter has melted.

Step 4: Add the eggs, 3 cups of sugar, and 1 tablespoon of vanilla extract in a large bowl. Beat using an electric mixer for about 2 minutes on high speed. Adjust to low and beat in the melted butter-and-chocolate mixture. Add in the flour and beat until just combined. Make sure to not overbeat, then, stir in the chopped walnuts.

Step 5: Transfer the batter into the prepared pan and spread.

Step 6: Place inside the preheated oven and bake for about 35 minutes until the toothpick inserted in the middle comes out with fudgy crumbs.

Step 7: Remove from the oven and allow the brownie to cool in the pan before frosting.

Step 8: For the frosting, combine the 1 1/4 cup of sugar and heavy cream in a saucepan. Cook over medium heat. Stir for 3 minutes until the sugar is dissolved and begins to simmer. Adjust the heat to low and let the mixture simmer for 7 minutes more without stirring.

Step 9: Remove the cream mixture from the heat before stirring in the 5 ounces baking chocolate and half a cup of butter. Mix until melted and blended. Add a teaspoon of vanilla extract and whisk until smooth. Refrigerate the frosting for about 30 minutes, whisking every few minutes until chilled.

Step 10: Once the frosting is chilled, frost the brownies, then, cut them into squares.

NOTES:

If using a glass bowl, preheat your oven to about 350 degrees F or 175 degrees C.

Use macadamia nuts in place with walnuts if you prefer.

August 22, 2020 0 comment
0 FacebookTwitterPinterestEmail
Main Dish Recipes

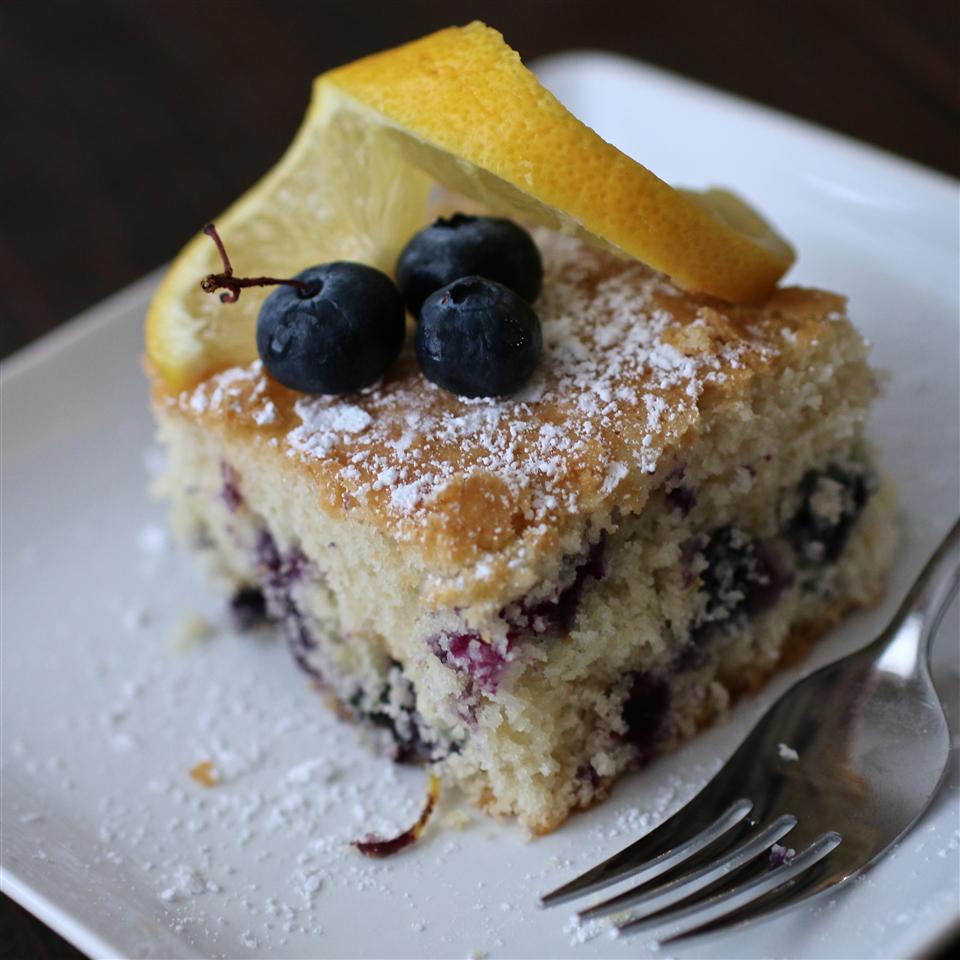
FRESH BLUEBERRY CAKE

by Rebecca August 22, 2020
written by Rebecca

Prep time: 15 min | Cook: 50 min | Total: 1 hr 5 min | Servings: 8 | Yield: 8 servings

This cake is infused with fresh blueberries. And the added fresh lemon juice and lemon zest make this so much better! It’s super indulgent and most loved by my kids. Nothing can compare to this homemade Fresh Blueberry Cake. It’s refreshing, has that beautiful natural flavor, moist, and melts in your mouth!

If you love blueberries then you will undoubtedly enjoy this cake. It is my personal favorite. If only I can make this every day I would! This cake is filled with delicious fresh blueberries and has that perfect zing from the lemon juice and zest. One bite and this cake makes its way to my heart. I’m in love!

INGREDIENTS

2 cups all-purpose flour

2 teaspoons baking powder

1 cup white sugar

¼ teaspoon salt

⅓ cup shortening

¾ cup milk

1 egg

1 teaspoon lemon zest

1 cup blueberries

HOW TO MAKE FRESH BLUEBERRY CAKE

Step 1: Prepare the oven. Preheat it to 350 degrees F or 175 degrees C.

Step 2: In a large bowl, sift the flour, baking powder, sugar, and salt.

Step 3: In another bowl, beat the shortening until creamy.

Step 4: Stir the shortening into the flour mixture alternately with milk.

Step 5: Beat well for about 2 minutes until fully mixed. Then, add in the egg and beat for a minute.

Step 6: In a separate bowl, combine the lemon zest and blueberries. Fold this into the batter.

Step 7: Transfer the batter into the prepared pan.

Step 8: Place inside the preheated oven and bake for about 50 minutes or until the toothpick inserted in the middle comes out clean.

NOTES:

I prefer fresh blueberries but if you are using the frozen ones don’t thaw.

It is so much better to use fresh lemon juice and lemon zest for this recipe.

Nutrition Facts:

Per Serving: 317.4 calories; 25.1 mg cholesterol; 213.5 mg sodium; 4.9 g protein; 52.9 g carbohydrates

FRESH BLUEBERRY CAKE

Rebecca Prep time: 15 min | Cook: 50 min | Total: 1 hr 5 min | Servings: 8 | Yield: 8 servings This cake is infused with fresh blueberries. And the added fresh lemon juice and lemon zest make this… Main Dish Recipes FRESH BLUEBERRY CAKE European Print This
Serves: 8 Prep Time: 15 mins Cooking Time: 50 mins 50 mins
Nutrition facts: 317.4 calories 20 grams fat
Rating: 5.0/5
( 1 voted )

Ingredients

  • 2 cups all-purpose flour
  • 2 teaspoons baking powder
  • 1 cup white sugar
  • ¼ teaspoon salt
  • ⅓ cup shortening
  • ¾ cup milk
  • 1 egg
  • 1 teaspoon lemon zest
  • 1 cup blueberries

Instructions

Step 1: Prepare the oven. Preheat it to 350 degrees F or 175 degrees C.

Step 2: In a large bowl, sift the flour, baking powder, sugar, and salt.

Step 3: In another bowl, beat the shortening until creamy.

Step 4: Stir the shortening into the flour mixture alternately with milk.

Step 5: Beat well for about 2 minutes until fully mixed. Then, add in the egg and beat for a minute.

Step 6: In a separate bowl, combine the lemon zest and blueberries. Fold this into the batter.

Step 7: Transfer the batter into the prepared pan.

Step 8: Place inside the preheated oven and bake for about 50 minutes or until the toothpick inserted in the middle comes out clean.

NOTES:

I prefer fresh blueberries but if you are using the frozen ones don't thaw.

It is so much better to use fresh lemon juice and lemon zest for this recipe.

August 22, 2020 0 comment
0 FacebookTwitterPinterestEmail
Main Dish Recipes

CREAMY CHICKEN STROGANOFF

by Rebecca August 21, 2020
written by Rebecca

Servings: 4 | Yield: 4 servings

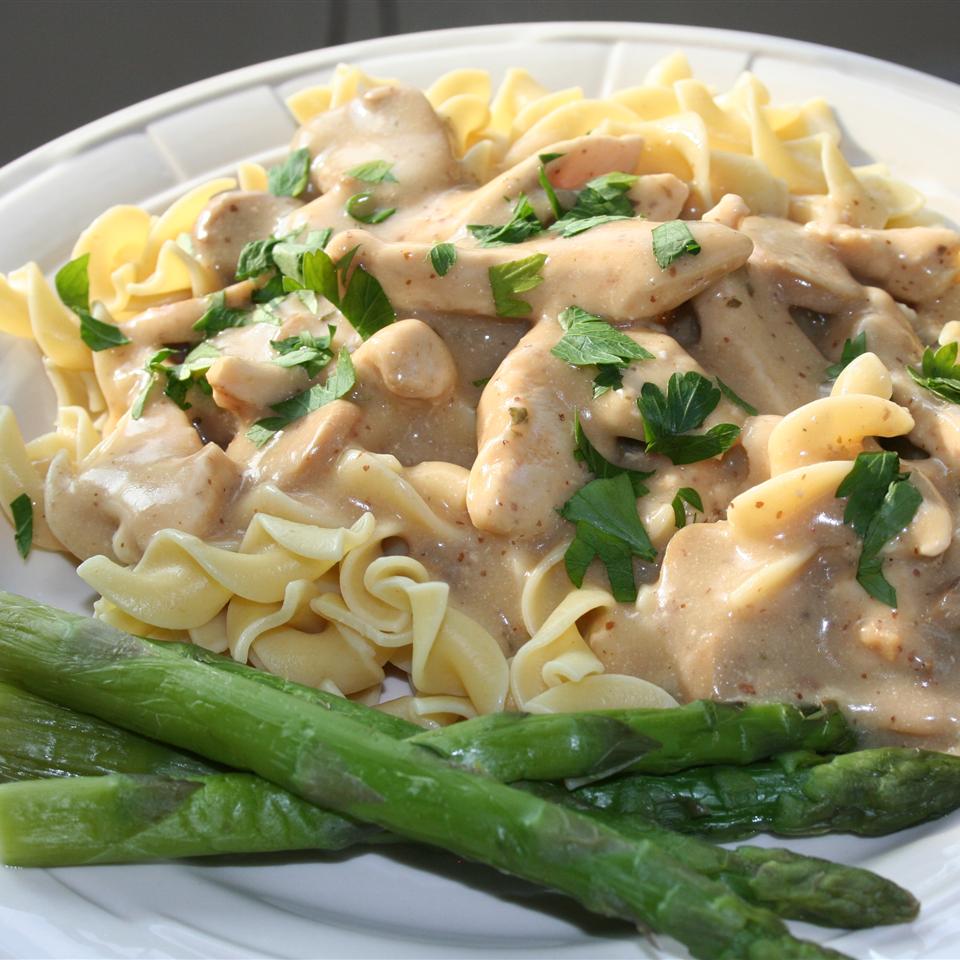
This is a fantastic dish that is worth everything! It’s creamy, rich, overflowing with tender mushrooms-and-chicken, with savory sauce over noodles or rice. Satisfying in every bite. With this Creamy Chicken Stroganoff, you got the flavors, you got the smell, then, you got the texture in a snap that just burst in your mouth! I love how pretty simple this is to make. It’s convenient and great for a quick and easy dinner that the whole family will enjoy. This Stroganoff has been my family’s favorite and the most requested. I can’t blame them though because this is just perfect in every way!

INGREDIENTS

4 skinless, boneless chicken breast halves

2 cups all-purpose flour for coating

salt and pepper to taste

1 tablespoon butter

1 10.75 oz can condense cream of chicken soup

1 ¼ cups half-and-half cream

1 1 oz package dry onion soup mix

2 tablespoons chopped fresh parsley

2 cloves garlic, minced

2 cups fresh sliced mushrooms

¼ teaspoon ground nutmeg

1 teaspoon browning sauce

1 cup sour cream

⅛ cup chopped green onion for topping

HOW TO MAKE CREAMY CHICKEN STROGANOFF

Step 1: Add the flour in a shallow dish or bowl. Season with salt and pepper to taste.

Step 2: Coat the chicken with the flour mixture.

Step 3: In a large skillet, melt the butter or margarine and cook the chicken until golden brown.

Step 4: Combine the soup, half-and-half, dry onion soup mix, parsley, garlic, mushrooms, nutmeg, and browning sauce in a medium bowl. Mix well, then, pour over the chicken.

Step 5: Adjust the heat to low and allow the mixture to simmer for an hour, covered.

Step 6: Then, stir in the sour cream and continue to heat. Make sure to not boil the mixture.

Step 7: Remove from the heat and sprinkle over the green onion.

Step 8: Serve over noodles or rice. Enjoy!

Nutrition Facts:

Per Serving: 704.2 calories; 135.5 mg cholesterol; 1281.5 mg sodium; 41.4 g protein; 65.4 g carbohydrates

CREAMY CHICKEN STROGANOFF

Rebecca Servings: 4 | Yield: 4 servings This is a fantastic dish that is worth everything! It’s creamy, rich, overflowing with tender mushrooms-and-chicken, with savory sauce over noodles or rice. Satisfying in every bite.… Main Dish Recipes CREAMY CHICKEN STROGANOFF European Print This
Serves: 4
Nutrition facts: 704.2 calories 20 grams fat
Rating: 5.0/5
( 1 voted )

Ingredients

  • 4 skinless, boneless chicken breast halves
  • 2 cups all-purpose flour for coating
  • salt and pepper to taste
  • 1 tablespoon butter
  • 1 10.75 oz can condense cream of chicken soup
  • 1 ¼ cups half-and-half cream
  • 1 1 oz package dry onion soup mix
  • 2 tablespoons chopped fresh parsley
  • 2 cloves garlic, minced
  • 2 cups fresh sliced mushrooms
  • ¼ teaspoon ground nutmeg
  • 1 teaspoon browning sauce
  • 1 cup sour cream
  • ⅛ cup chopped green onion for topping

Instructions

Step 1: Add the flour in a shallow dish or bowl. Season with salt and pepper to taste.

Step 2: Coat the chicken with the flour mixture.

Step 3: In a large skillet, melt the butter or margarine and cook the chicken until golden brown.

Step 4: Combine the soup, half-and-half, dry onion soup mix, parsley, garlic, mushrooms, nutmeg, and browning sauce in a medium bowl. Mix well, then, pour over the chicken.

Step 5: Adjust the heat to low and allow the mixture to simmer for an hour, covered.

Step 6: Then, stir in the sour cream and continue to heat. Make sure to not boil the mixture.

Step 7: Remove from the heat and sprinkle over the green onion.

Step 8: Serve over noodles or rice. Enjoy!

August 21, 2020 0 comment
0 FacebookTwitterPinterestEmail
Main Dish Recipes

PISTACHIO BREAD IS AN EASY DELIGHT

by Rebecca August 21, 2020
written by Rebecca

Servings: 24 | Yield: 2 – 9×5 inch loaves

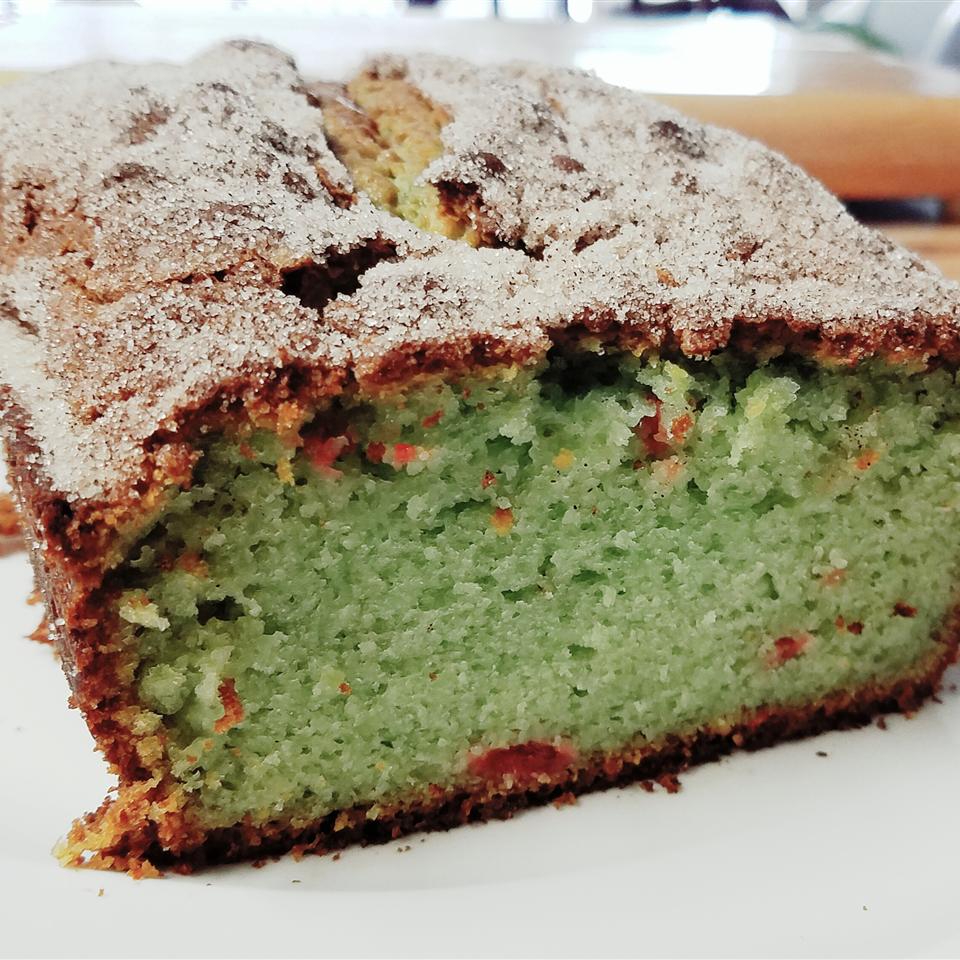
This right out of the cake mix bread and pudding mix is surprisingly good! It is soft and delicious. A real treat for all the pistachio lovers out there!

Pretty simple and no fussy that is perfect for all occasions! The green surprise inside when you slice this bread is a-ma-zing! It’s like Christmas wrap inside a bread. And pistachio has lots of astonishing health benefits from it is high in antioxidants, low in calories, high in protein, and many more! My family loves Pistachio nuts and they love everything Pistachio. I have been searching for that perfect bread recipe that will wow them and this Pistachio Bread did not disappoint. It is perfect inside and out! I love this Pistachio bread the most with a freshly brewed coffee or tea for an afternoon snack.

I am planning to make batches of this bread to give as homemade gifts for Christmas. I think it’ll be great and everyone will love it!

INGREDIENTS

1 18.25 oz package yellow cake mix

4 eggs

¼ cup of vegetable oil

2 tablespoons water

1 3 oz package instant pistachio pudding mix

1 cup sour cream

½ cup maraschino cherries

½ teaspoon green food coloring

½ teaspoon ground cinnamon

2 tablespoons white sugar

HOW TO MAKE PISTACHIO BREAD

Step 1: Prepare the oven. Preheat it to 350 degrees F or 175 degrees C.

Step 2: Then, grease and flour two 9 x 5-inch loaf pans.

Step 3: In a bowl, combine the cake mix, eggs, oil, water, pudding mix, sour cream, cherries, and food coloring. Pour this into the prepared pan.

Step 4: In another bowl, stir in the cinnamon and sugar. Sprinkle over the loaves.

Step 5: Place inside the preheated oven and bake for approximately 45 minutes.

Step 6: Once done, remove from the oven and allow the bread to cool. Enjoy!

Nutrition Facts:

Per Serving: 172.3 calories; 35.6 mg cholesterol; 217.2 mg sodium; 2.3 g protein; 23.7 g carbohydrates

PISTACHIO BREAD IS AN EASY DELIGHT

Rebecca Servings: 24 | Yield: 2 – 9×5 inch loaves This right out of the cake mix bread and pudding mix is surprisingly good! It is soft and delicious. A real treat for all… Main Dish Recipes PISTACHIO BREAD IS AN EASY DELIGHT European Print This
Serves: 24
Nutrition facts: 172.3 calories 20 grams fat
Rating: 4.0/5
( 2 voted )

Ingredients

  • 1 18.25 oz package yellow cake mix
  • 4 eggs
  • ¼ cup of vegetable oil
  • 2 tablespoons water
  • 1 3 oz package instant pistachio pudding mix
  • 1 cup sour cream
  • ½ cup maraschino cherries
  • ½ teaspoon green food coloring
  • ½ teaspoon ground cinnamon
  • 2 tablespoons white sugar

Instructions

Step 1: Prepare the oven. Preheat it to 350 degrees F or 175 degrees C.

Step 2: Then, grease and flour two 9 x 5-inch loaf pans.

Step 3: In a bowl, combine the cake mix, eggs, oil, water, pudding mix, sour cream, cherries, and food coloring. Pour this into the prepared pan.

Step 4: In another bowl, stir in the cinnamon and sugar. Sprinkle over the loaves.

Step 5: Place inside the preheated oven and bake for approximately 45 minutes.

Step 6: Once done, remove from the oven and allow the bread to cool. Enjoy!

August 21, 2020 0 comment
1 FacebookTwitterPinterestEmail
Main Dish Recipes

GRANDMA’S APPLE PIE ‘A LA MODE’ “MOONSHINE”

by Rebecca August 21, 2020
written by Rebecca

Prep time: 5 min | Cook: 20 min | Additional: 1 hr | Total: 1 hr 25 min | Servings: 46 | Yield: 21 cups

This pandemic taught me a lot of things. That we don’t need all the things we thought we need just to be happy, that we can be contented, and small things matter. I also learned how to cook varieties of dishes, resulting in an immense weight gain! Frustrating as it is but weight can be gone in days with proper diet and exercise but good food lasts!

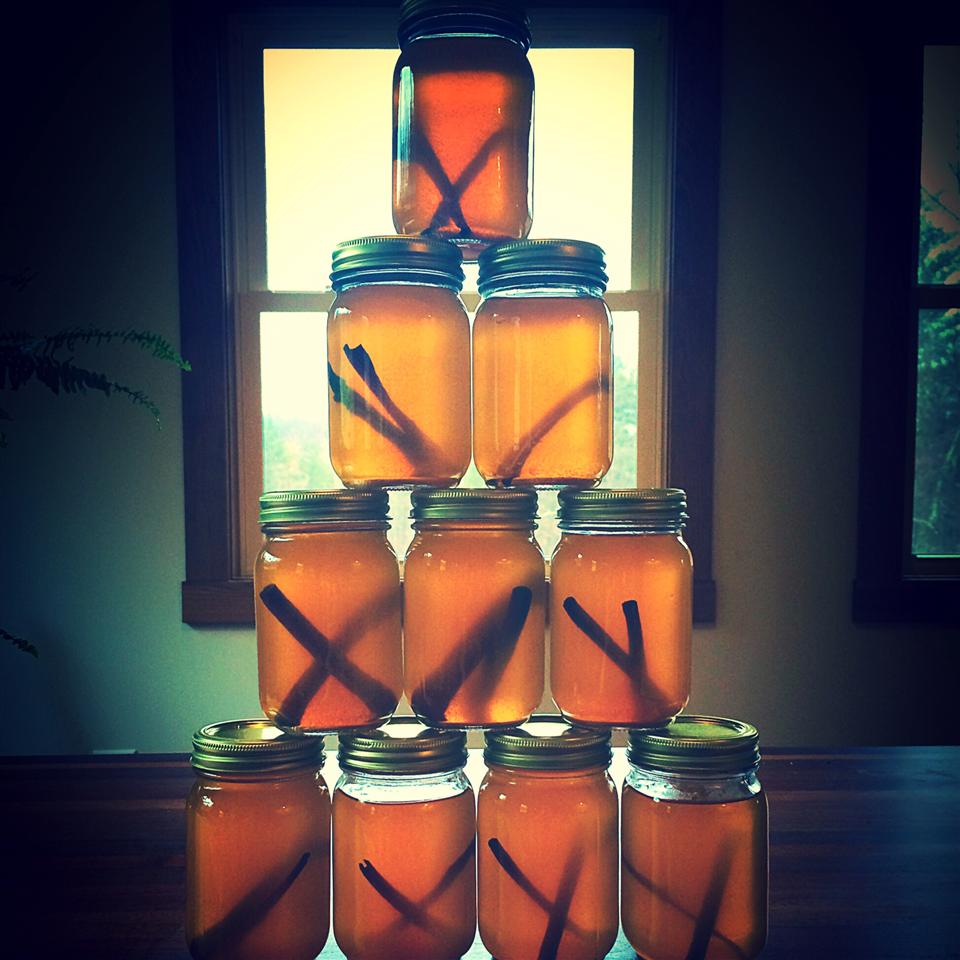
Now, I am into drinks and punches. Preparing maybe for the next big gathering after quarantine or for this fast-approaching holiday? This Moonshine is your next thing. It’s dangerously good, sweet, smooth yet should be taken in moderation, or else it’ll punch you in the face!  This liquid form of an apple pie has 190 proof grain (Everclear) alcohol so you should be cautious. I know it’s so good you cannot even taste the alcohol. But hey, I warned you!

INGREDIENTS

½ gallon apple cider

½ gallon apple juice

4 cinnamon sticks

1 whole clove

1 cup white sugar

1 cup brown sugar

3 cups 190 proof grain alcohol, just like Everclear

2 cups vanilla vodka

HOW TO MAKE GRANDMA’S APPLE PIE

Step 1: In a large pot, add the apple cider, apple juice, cinnamon sticks, whole clove, white sugar, and brown sugar. Allow it to boil, then, adjust the heat to medium-low and simmer for about 20 minutes.

Step 2: Remove from the heat and let the mixture cool completely.

Step 3: Once cooled, stir in the grain alcohol and vanilla vodka.

Step 4: Pour the mixture into the bottles, seal, and refrigerate.

NOTE:

If you want to consume this Moonshine Apple Pie instantly that’s okay. But I prefer to store them in the fridge in a sealed container for about 3 to 4 weeks for best result. Make sure to shake well before drinking.

Nutrition Facts:

Per Serving: 149.8 calories; 0 mg cholesterol; 7.8 mg sodium; 0 g protein; 20 g carbohydrates

GRANDMA’S APPLE PIE ‘A LA MODE’ “MOONSHINE”

Rebecca Prep time: 5 min | Cook: 20 min | Additional: 1 hr | Total: 1 hr 25 min | Servings: 46 | Yield: 21 cups This pandemic taught me a lot of things. That we don’t need all the things we… Main Dish Recipes GRANDMA’S APPLE PIE ‘A LA MODE’ “MOONSHINE” European Print This
Serves: 46 Prep Time: 5 mins Cooking Time: 1 hr 20 mins 1 hr 20 mins
Nutrition facts: 149.8 calories 20 grams fat
Rating: 5.0/5
( 1 voted )

Ingredients

  • ½ gallon apple cider
  • ½ gallon apple juice
  • 4 cinnamon sticks
  • 1 whole clove
  • 1 cup white sugar
  • 1 cup brown sugar
  • 3 cups 190 proof grain alcohol, just like Everclear
  • 2 cups vanilla vodka

Instructions

Step 1: In a large pot, add the apple cider, apple juice, cinnamon sticks, whole clove, white sugar, and brown sugar. Allow it to boil, then, adjust the heat to medium-low and simmer for about 20 minutes.

Step 2: Remove from the heat and let the mixture cool completely.

Step 3: Once cooled, stir in the grain alcohol and vanilla vodka.

Step 4: Pour the mixture into the bottles, seal, and refrigerate.

NOTE:

If you want to consume this Moonshine Apple Pie instantly that's okay. But I prefer to store them in the fridge in a sealed container for about 3 to 4 weeks for best result. Make sure to shake well before drinking.

August 21, 2020 0 comment
0 FacebookTwitterPinterestEmail
Main Dish Recipes

TENDER STRAWBERRY MUFFINS

by Rebecca August 21, 2020
written by Rebecca

Servings: 8 | Yield: 8 muffins

I love these little wonders so much! If you are looking for a new and easy dessert that you can serve your friends and family, then, you have come to the right page. This recipe is not only easy but it is also very delicious! The taste of strawberries is the highlight of this recipe. I only use fresh sweet ripped strawberries because it gives more flavor. I have listed all the steps that you need to follow. Make sure not to skip 1 step for a perfect result. Enjoy!

INGREDIENTS

¼ cup canola oil

½ cup milk

1 egg

½ teaspoon salt

2 teaspoons baking powder

½ cup white sugar

1 ¾ cups all-purpose flour

1 cup chopped strawberries

HOW TO MAKE TENDER STRAWBERRY MUFFINS

Step 1: Ready the oven and preheat to 190 degrees C or 375 degrees F.

Step 2: Apply cooking spray in an 8-cup muffin tin. Use paper liners if you do not have cooking spray.

Step 3: Add egg, milk, and oil in a small bowl. Beat until texture becomes light.

Step 4: In a separate medium bowl, add flour, baking powder, sugar, and salt. Whisk until well mixed.

Step 5: Add in the chopped strawberries and coat completely with the flour mixture.

Step 6: Transfer in the milk mixture and stir until well blended.

Step 7: Fill each muffin cup with the mixture.

Step 8: Place inside the preheated oven and bake for 25 minutes or until it bounces back after poking with your finger.

Step 9: Remove from the oven and allow it to cool to room temperature for at least 10 minutes.

Step 10: Remove from the pans. Serve and enjoy!

NOTES:

Do not apply too much pressure when pounding the batter.

Only use sweet strawberries for the best flavor.

Slice small strawberries to lessen the moisture.

You can use frozen or fresh strawberries.

Nutrition Facts:

Per Serving: 233.1 calories; 24.5 mg cholesterol; 283 mg sodium; 4.2 g protein; 35.9 g carbohydrates

TENDER STRAWBERRY MUFFINS

Rebecca Servings: 8 | Yield: 8 muffins I love these little wonders so much! If you are looking for a new and easy dessert that you can serve your friends and family, then,… Main Dish Recipes TENDER STRAWBERRY MUFFINS European Print This
Serves: 8
Nutrition facts: 233.1 calories 20 grams fat
Rating: 5.0/5
( 1 voted )

Ingredients

  • ¼ cup canola oil
  • ½ cup milk
  • 1 egg
  • ½ teaspoon salt
  • 2 teaspoons baking powder
  • ½ cup white sugar
  • 1 ¾ cups all-purpose flour
  • 1 cup chopped strawberries

Instructions

Step 1: Ready the oven and preheat to 190 degrees C or 375 degrees F.

Step 2: Apply cooking spray in an 8-cup muffin tin. Use paper liners if you do not have cooking spray.

Step 3: Add egg, milk, and oil in a small bowl. Beat until texture becomes light.

Step 4: In a separate medium bowl, add flour, baking powder, sugar, and salt. Whisk until well mixed.

Step 5: Add in the chopped strawberries and coat completely with the flour mixture.

Step 6: Transfer in the milk mixture and stir until well blended.

Step 7: Fill each muffin cup with the mixture.

Step 8: Place inside the preheated oven and bake for 25 minutes or until it bounces back after poking with your finger.

Step 9: Remove from the oven and allow it to cool to room temperature for at least 10 minutes.

Step 10: Remove from the pans. Serve and enjoy!

NOTES:

Do not apply too much pressure when pounding the batter.

Only use sweet strawberries for the best flavor.

Slice small strawberries to lessen the moisture.

You can use frozen or fresh strawberries.

August 21, 2020 0 comment
0 FacebookTwitterPinterestEmail
Main Dish Recipes

BAKED PHILLY CHEESESTEAK SLIDERS

by Rebecca August 21, 2020
written by Rebecca

Prep time: 30 min | Cook: 30 min | Total: 1 hr | Servings: 10 | Yield: 10 mini sliders

These little treats are so good! I have never tried anything like this and I so glad that I tried it because I never would have tasted perfection! Give this one a try today and taste it yourself. Just follow these steps and you are in for a treat. Enjoy!

INGREDIENTS

1 tablespoon olive oil

1 pound beef (top) sirloin steaks

1 pinch salt and freshly ground black pepper

1 pinch cayenne pepper to taste

½ cup diced onion

10 eaches mini sandwich rolls

½ cup chopped pickled peppers

½ cup cream cheese softened

2 ½ cups freshly shredded provolone cheese

1 teaspoon kosher salt

¼ teaspoon freshly ground black pepper

HOW TO MAKE BAKED PHILLY CHEESESTEAK SLIDERS

Step 1: Place a skillet on the stove and turn the heat to medium-high.

Step 2: Add olive oil and allow it to bubble.

Step 3: Season the steak with cayenne, salt, and pepper to taste.

Step 4: Place the steak on the skillet and sear for 5 to 6 minutes on each side. Add in the sliced onions beside the steak.

Step 5: Cook until the steak is medium-rare and is no longer pink in the middle.

Step 6: Place the cooked steaks on a clean plate.

Step 7: Ready the oven and preheat to 220 degrees C or 425 degrees F.

Step 8: Line a baking pan with aluminum foil. Place the rolls and cut a 45-degrees angle and remove some of the bread inside for the filling later.

Step 9: Cut the steaks into slices then place them in a medium mixing bowl. Add in the cooked onions and its juices.

Step 10: Add in the cream cheese, 1 1/2 cup of provolone, pickled peppers, salt, and pepper. Toss until well mixed. Add more salt if necessary.

Step 11: Scoop the filling into the prepared rolls and top each with the provolone cheese.

Step 12: Place inside the preheated oven and bake 15 minutes or until the cheese has melted completely.

Step 13: Remove from the oven and let it sit on a wire rack to cool to room temperature.

Step 14: Serve and enjoy!

NOTE:

Serve with crusty unsweetened rolls or mini rolls if you prefer.

Nutrition Facts:

Per Serving: 297.6 calories; 63 mg cholesterol; 629.8 mg sodium; 18.3 g protein; 11.2 g carbohydrates

BAKED PHILLY CHEESESTEAK SLIDERS

Rebecca Prep time: 30 min | Cook: 30 min | Total: 1 hr | Servings: 10 | Yield: 10 mini sliders These little treats are so good! I have never tried anything like this and I so glad that I… Main Dish Recipes BAKED PHILLY CHEESESTEAK SLIDERS European Print This
Serves: 10 Prep Time: 30 mins Cooking Time: 30 mins 30 mins
Nutrition facts: 297.6 calories 20 grams fat
Rating: 5.0/5
( 1 voted )

Ingredients

  • 1 tablespoon olive oil
  • 1 pound beef (top) sirloin steaks
  • 1 pinch salt and freshly ground black pepper
  • 1 pinch cayenne pepper to taste
  • ½ cup diced onion
  • 10 eaches mini sandwich rolls
  • ½ cup chopped pickled peppers
  • ½ cup cream cheese softened
  • 2 ½ cups freshly shredded provolone cheese
  • 1 teaspoon kosher salt
  • ¼ teaspoon freshly ground black pepper

Instructions

Step 1: Place a skillet on the stove and turn the heat to medium-high.

Step 2: Add olive oil and allow it to bubble.

Step 3: Season the steak with cayenne, salt, and pepper to taste.

Step 4: Place the steak on the skillet and sear for 5 to 6 minutes on each side. Add in the sliced onions beside the steak.

Step 5: Cook until the steak is medium-rare and is no longer pink in the middle.

Step 6: Place the cooked steaks on a clean plate.

Step 7: Ready the oven and preheat to 220 degrees C or 425 degrees F.

Step 8: Line a baking pan with aluminum foil. Place the rolls and cut a 45-degrees angle and remove some of the bread inside for the filling later.

Step 9: Cut the steaks into slices then place them in a medium mixing bowl. Add in the cooked onions and its juices.

Step 10: Add in the cream cheese, 1 1/2 cup of provolone, pickled peppers, salt, and pepper. Toss until well mixed. Add more salt if necessary.

Step 11: Scoop the filling into the prepared rolls and top each with the provolone cheese.

Step 12: Place inside the preheated oven and bake 15 minutes or until the cheese has melted completely.

Step 13: Remove from the oven and let it sit on a wire rack to cool to room temperature.

Step 14: Serve and enjoy!

NOTE:

Serve with crusty unsweetened rolls or mini rolls if you prefer.

August 21, 2020 0 comment
0 FacebookTwitterPinterestEmail
Newer Posts
Older Posts

Popular Posts

  • 1

    Crispy Crunchy Parmesan Potatoes

    March 21, 2020
  • 2

    CROCK POT SMOTHERED PORK CHOPS

    March 21, 2020
  • Facebook
  • Twitter

@2019 - All Right Reserved.


Back To Top