Cook it once
  • Home
  • Privacy Policy
  • Recipes
    • KETO
    • LC
    • WW
  • Tips
  • Contact
Cook it once
  • Home
  • Privacy Policy
  • Recipes
    • KETO
    • LC
    • WW
  • Tips
  • Contact
Category:

Main Dish Recipes

Main Dish Recipes

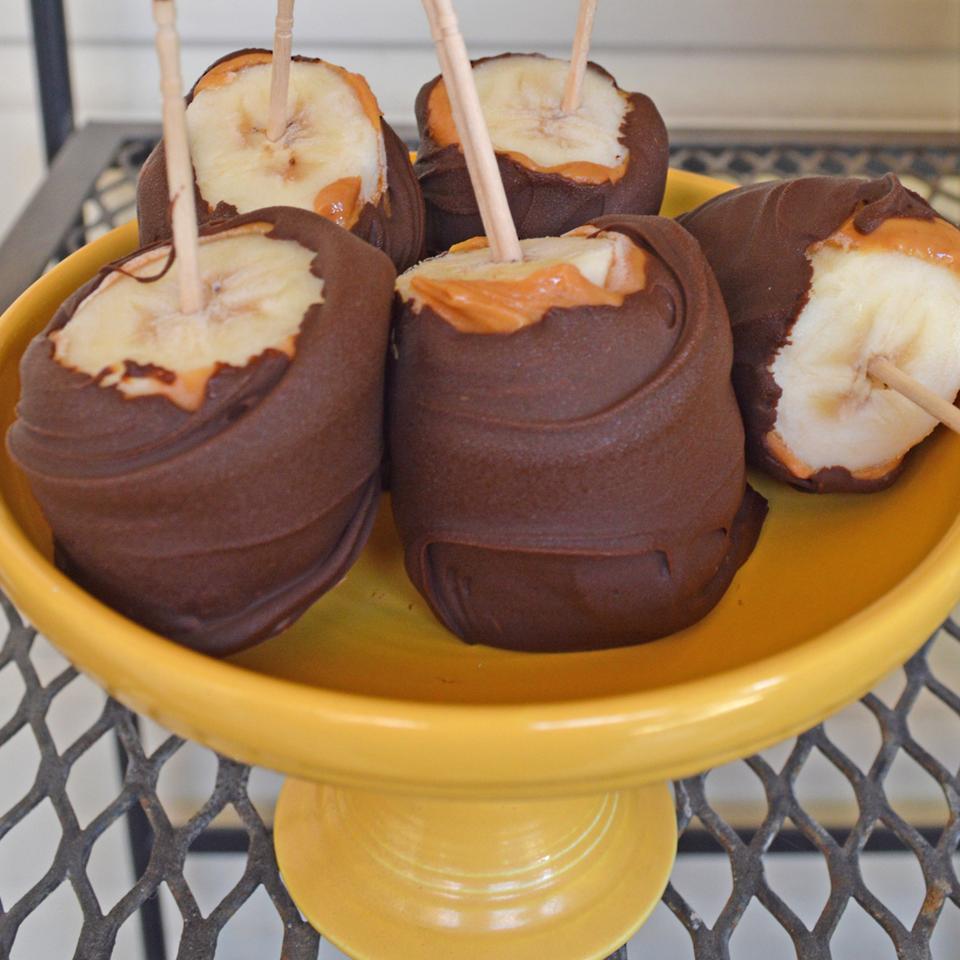
FROZEN BANANA BITES

by Rebecca August 31, 2020
written by Rebecca

Prep: 30mins | Cook: 1hr 45mins | Total: 2hrs15min| Servings: 48 | Yield: 48 servings

They look so cute! These Frozen Banana Bites are the easiest and quickest treat you can make whenever you want. A healthy warm-weather treat that your family will enjoy. With only a few simple ingredients that are already sitting in your pantry, you can make this in a heartbeat. Ask the kids to help and I am sure they will gladly say yes. Make and eat, a great family bonding that everyone will say yes to.

INGREDIENTS

1 cup of Peanut butter, smooth style, with salt

4 Bananas, raw

8 1oz squares Bakers Choc Semi-Sweet Chocolate Bar KFT

1 tablespoon Shortening, household, soybean (hydrogenated)-cottonseed (hydrogenated)

⅓ cup toffee baking bits – Hershey Skor Baking Bits HER

HOW TO MAKE FROZEN BANANA BITES

Step 1: Using a wax paper, cover your baking sheet.

Step 2: Spoon a thin layer of peanut butter on top of each banana slices. Then, insert a toothpick through the peanut butter layer going into the banana.

Step 3: Transfer the banana bites onto the prepared baking sheet.

Step 4: Place inside the freezer for at least 30 minutes or overnight.

Step 5: At the top of a double boiler, melt the chocolate and shortening over the simmering water while frequently stirring. Scarpe down and sides with a rubber spatula to avoid scorching.

Step 6: Use a new waxed paper to cover another baking sheet.

Step 7: Remove 2 to 4 pieces of banana bites from the freezer at a time. Coat each bite with the chocolate mixture and place onto the second baking sheet. Sprinkle each coated bites with toffee bits. Repeat this step for the rest of the banana bites.

Step 8: Then, return the coated banana bites into the freezer for an hour. Before serving, let the bites sit at room temperature for at least 15 minutes. Enjoy!

Nutrition Facts:

Per Serving: 75.6 calories; 1.4 mg cholesterol; 32.9 mg sodium; 1.8 g protein; 6.9 g carbohydrates
FROZEN BANANA BITES

Rebecca Prep: 30mins | Cook: 1hr 45mins | Total: 2hrs15min| Servings: 48 | Yield: 48 servings They look so cute! These Frozen Banana Bites are the easiest and quickest treat you can make whenever you want. A healthy warm-weather treat… Main Dish Recipes FROZEN BANANA BITES European Print This
Serves: 48 Prep Time: 30 mins Cooking Time: 1 hr 45 mins 1 hr 45 mins
Nutrition facts: 75.6 calories 20 grams fat
Rating: 5.0/5
( 1 voted )

Ingredients

  • 1 cup of Peanut butter, smooth style, with salt
  • 4 Bananas, raw
  • 8 1oz squares Bakers Choc Semi-Sweet Chocolate Bar KFT
  • 1 tablespoon Shortening, household, soybean (hydrogenated)-cottonseed (hydrogenated)
  • ⅓ cup toffee baking bits - Hershey Skor Baking Bits HER

Instructions

Step 1: Using a wax paper, cover your baking sheet.

Step 2: Spoon a thin layer of peanut butter on top of each banana slices. Then, insert a toothpick through the peanut butter layer going into the banana.

Step 3: Transfer the banana bites onto the prepared baking sheet.

Step 4: Place inside the freezer for at least 30 minutes or overnight.

Step 5: At the top of a double boiler, melt the chocolate and shortening over the simmering water while frequently stirring. Scarpe down and sides with a rubber spatula to avoid scorching.

Step 6: Use a new waxed paper to cover another baking sheet.

Step 7: Remove 2 to 4 pieces of banana bites from the freezer at a time. Coat each bite with the chocolate mixture and place onto the second baking sheet. Sprinkle each coated bites with toffee bits. Repeat this step for the rest of the banana bites.

Step 8: Then, return the coated banana bites into the freezer for an hour. Before serving, let the bites sit at room temperature for at least 15 minutes. Enjoy!
August 31, 2020 0 comment
0 FacebookTwitterPinterestEmail
Main Dish Recipes

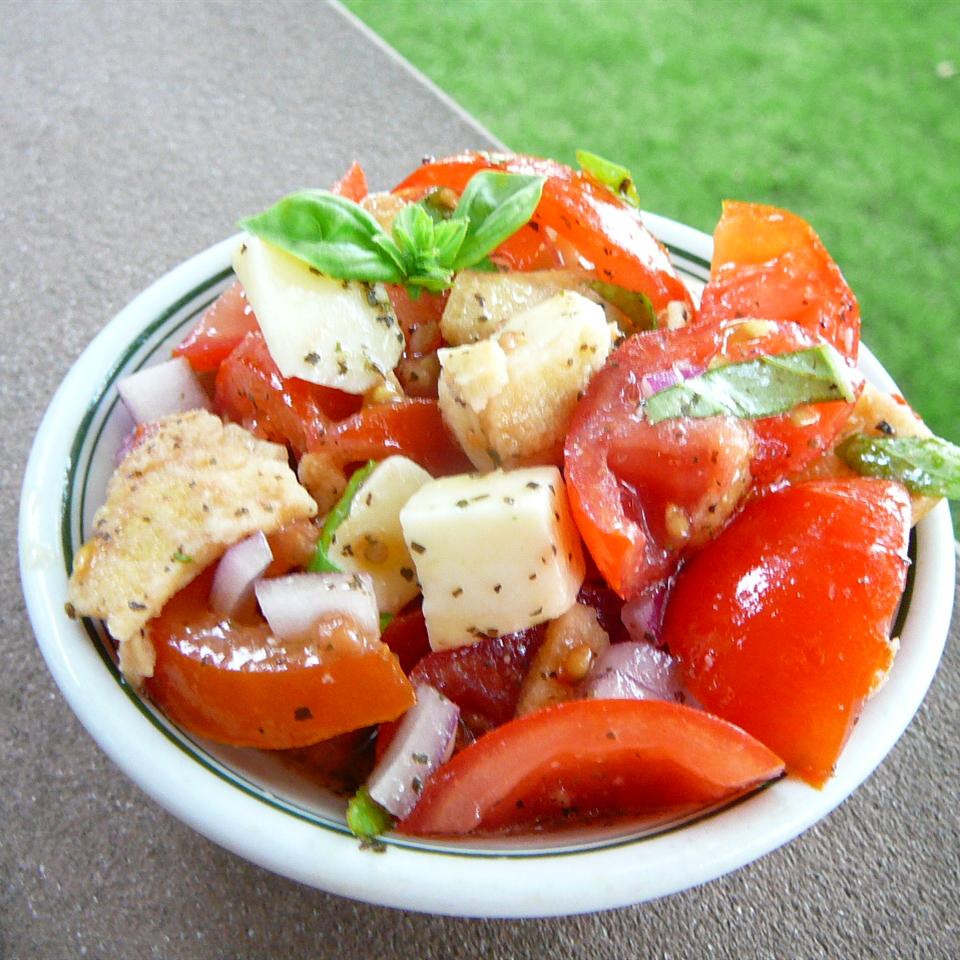
BRUSCHETTA SALAD

by Rebecca August 31, 2020
written by Rebecca

Prep: 15mins | Additional: 15mins | Total: 30mins | Servings: 4 | Yield: 4 servings

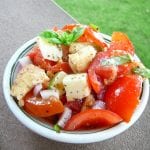
This is the perfect summer salad. It is bursting with freshness that insanely explodes in your mouth. A light and delicious salad that you can make all year round. Made with fresh tomatoes, mozzarella, Toasted Onion and garlic bagel chips, wine vinegar, and spices. You can easily customize this by skipping the cheese for a vegan Bruschetta Salad. But if you prefer more Bruschetta, just add some toasted bread or croutons. Either way, this salad is amazing! A no-fuss, super simple, and quick salad recipe to keep.

So what is a Bruschetta? It is an Italian snack or appetizer, pronounced as Bru-Sketta, that is eaten before dinner. I’ve never been to Italy but according to my good friend, Google, Bruschetta is a staple in every restaurant in Italy.

INGREDIENTS

6 Roma (plum) tomato

½ pound Cheese, mozzarella, part skim milk

1 cup Toasted Onion & Garlic Bagel Chips

½ cup Basil, fresh

½ red onion

¼ cup olive oil, extra light

3 tablespoons Regina Red Wine Vinegar-50 grain NB

2 large cloves Garlic, raw

1 tablespoon dried basil leaves

1 pinch Salt, table

HOW TO MAKE BRUSCHETTA SALAD

Step 1: In a bowl, combine the tomatoes, mozzarella cheese, bagel chips, basil, red onion, olive oil, red wine vinegar, garlic, basil, salt, and black pepper. Toss until everything is evenly combined.

Step 2: Place inside the fridge to chill for at least 15 to 30 minutes before serving.

NOTES:

This recipe is a basic salad which is a great base for all the salad mix-ins and extras you prefer.

You are welcome to use feta or parmesan cheese in place of mozzarella cheese.

Want a Vegan variety? You can skip the cheese and just add some more vegetables.

Add toasted bread or croutons to make this salad more bruschetta.

Nutrition Facts:

Per Serving: 434.1 calories; 36.3 mg cholesterol; 746 mg sodium; 19 g protein; 31.1 g carbohydrates

BRUSCHETTA SALAD

Rebecca Prep: 15mins | Additional: 15mins | Total: 30mins | Servings: 4 | Yield: 4 servings This is the perfect summer salad. It is bursting with freshness that insanely explodes in your mouth. A light and delicious salad that you… Main Dish Recipes BRUSCHETTA SALAD European Print This
Serves: 4 Prep Time: 30 mins
Nutrition facts: 434.1 calories 20 grams fat
Rating: 5.0/5
( 1 voted )

Ingredients

  • 6 Roma (plum) tomato
  • ½ pound Cheese, mozzarella, part skim milk
  • 1 cup Toasted Onion & Garlic Bagel Chips
  • ½ cup Basil, fresh
  • ½ red onion
  • ¼ cup olive oil, extra light
  • 3 tablespoons Regina Red Wine Vinegar-50 grain NB
  • 2 large cloves Garlic, raw
  • 1 tablespoon dried basil leaves
  • 1 pinch Salt, table

Instructions

Step 1: In a bowl, combine the tomatoes, mozzarella cheese, bagel chips, basil, red onion, olive oil, red wine vinegar, garlic, basil, salt, and black pepper. Toss until everything is evenly combined.

Step 2: Place inside the fridge to chill for at least 15 to 30 minutes before serving.

NOTES:

This recipe is a basic salad which is a great base for all the salad mix-ins and extras you prefer.

You are welcome to use feta or parmesan cheese in place of mozzarella cheese.

Want a Vegan variety? You can skip the cheese and just add some more vegetables.

Add toasted bread or croutons to make this salad more bruschetta.

August 31, 2020 0 comment
0 FacebookTwitterPinterestEmail
Main Dish Recipes

BANANA PEACH BREAD

by Rebecca August 31, 2020
written by Rebecca

Prep: 20mins | Cook: 50mins | Additional: 1hr | Total: 2hrs 10mins | Servings: 16 | Yield: 1 5×9-inch loaf

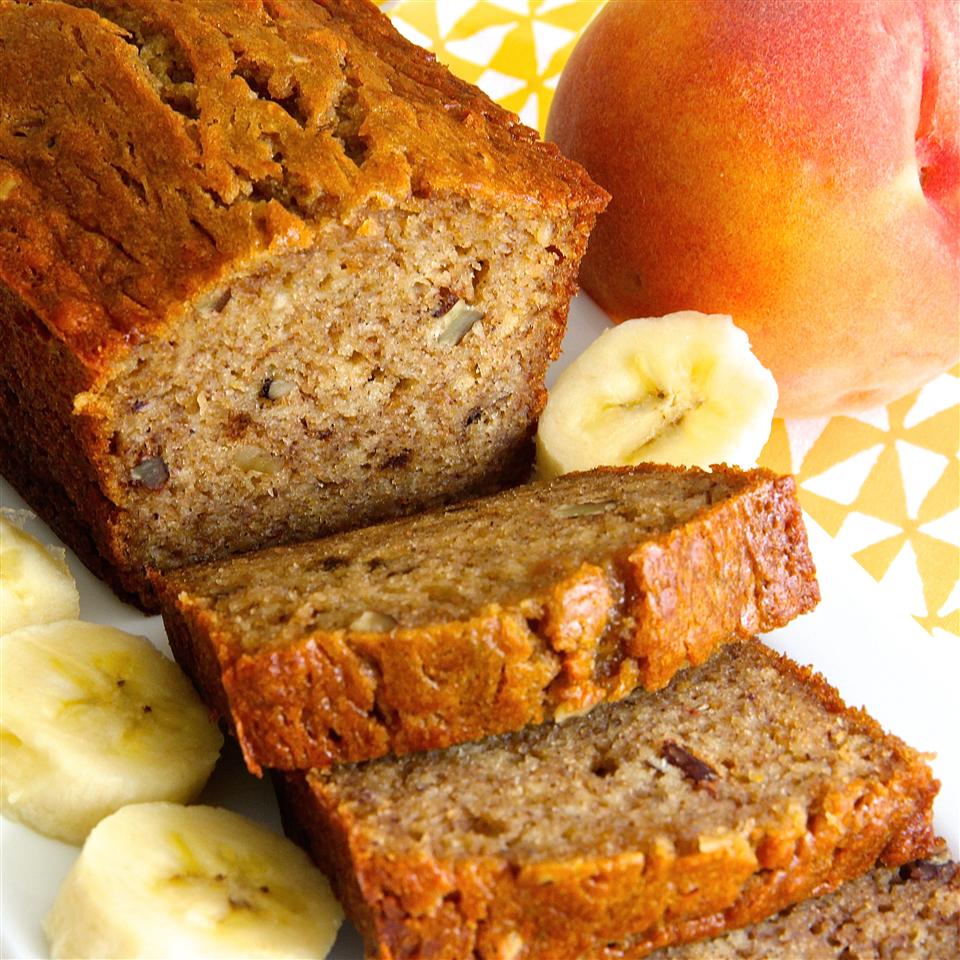
Phenomenal! That might be an understatement but nothing will compare to this Banana Peach Bread. This is delicately flavored with peach, really smooth thanks to the bananas, and super tasty. A real treat for everyone especially to all the banana and peach lovers out there! This refreshing, perfectly sweet, filled with raw bananas, peaches, and walnuts bread will steal your heart.

INGREDIENTS

¾ cup Sugars, granulated

½ cup Butter, with salt

1 tablespoon Sugars, brown

1 tablespoon Cocoa mix, without added nutrients, powder

3 eaches Bananas, raw

1 large of peaches, raw

¼ cup Milk, reduced fat, fluid, 2% milkfat, with added vitamin A

2 egg, whole, raw, fresh

1 tablespoon Vanilla extract

2 cups wheat flour, white, all-purpose, enriched, bleached

½ cup nuts, walnuts, English

1 teaspoon Leavening agents, baking soda

1 teaspoon salt, table

HOW TO MAKE BANANA PEACH BREAD

Step 1: Prepare the oven. Preheat it to 350 degrees F or 175 degrees C.

Step 2: Then, grease the bottom of a 5 x 9-inch loaf pan.

Step 3: In a large bowl, beat the white sugar and butter using an electric mixer until light and fluffy. Stir in the brown sugar and hot chocolate mix. Beat well.

Step 4: In a blender, blend the bananas, peach, milk, eggs, and vanilla extract until smooth. Then, stir it into the butter mixture and mix until incorporated.

Step 5: In another bowl, add the flour, walnuts, baking soda, and salt. Mix well, then, stir it into the banana-butter mixture. Mix until the flour mixture is just moist.

Step 6: Transfer the batter into the prepared loaf pan.

Step 7: Place inside the preheated oven and bake for about 50 to 60 minutes or until a toothpick inserted in the middle of the bread comes out clean.

Step 8: Remove from the oven and allow the bread to cool in the pan for at least 5 minutes before transferring onto a wire rack to completely cool.

Nutrition Facts:

Per Serving: 208.1 calories; 38.8 mg cholesterol; 278.9 mg sodium; 3.4 g protein; 28.9 g carbohydrates

BANANA PEACH BREAD

Rebecca Prep: 20mins | Cook: 50mins | Additional: 1hr | Total: 2hrs 10mins | Servings: 16 | Yield: 1 5×9-inch loaf Phenomenal! That might be an understatement but nothing will compare to this Banana Peach Bread. This is delicately flavored with peach,… Main Dish Recipes BANANA PEACH BREAD European Print This
Serves: 16 Prep Time: 20 mins Cooking Time: 1 hr 50 mins 1 hr 50 mins
Nutrition facts: 208.1 calories 20 grams fat
Rating: 5.0/5
( 1 voted )

Ingredients

  • ¾ cup Sugars, granulated
  • ½ cup Butter, with salt
  • 1 tablespoon Sugars, brown
  • 1 tablespoon Cocoa mix, without added nutrients, powder
  • 3 eaches Bananas, raw
  • 1 large of peaches, raw
  • ¼ cup Milk, reduced fat, fluid, 2% milkfat, with added vitamin A
  • 2 egg, whole, raw, fresh
  • 1 tablespoon Vanilla extract
  • 2 cups wheat flour, white, all-purpose, enriched, bleached
  • ½ cup nuts, walnuts, English
  • 1 teaspoon Leavening agents, baking soda
  • 1 teaspoon salt, table

Instructions

Step 1: Prepare the oven. Preheat it to 350 degrees F or 175 degrees C.

Step 2: Then, grease the bottom of a 5 x 9-inch loaf pan.

Step 3: In a large bowl, beat the white sugar and butter using an electric mixer until light and fluffy. Stir in the brown sugar and hot chocolate mix. Beat well.

Step 4: In a blender, blend the bananas, peach, milk, eggs, and vanilla extract until smooth. Then, stir it into the butter mixture and mix until incorporated.

Step 5: In another bowl, add the flour, walnuts, baking soda, and salt. Mix well, then, stir it into the banana-butter mixture. Mix until the flour mixture is just moist.

Step 6: Transfer the batter into the prepared loaf pan.

Step 7: Place inside the preheated oven and bake for about 50 to 60 minutes or until a toothpick inserted in the middle of the bread comes out clean.

Step 8: Remove from the oven and allow the bread to cool in the pan for at least 5 minutes before transferring onto a wire rack to completely cool.

August 31, 2020 0 comment
0 FacebookTwitterPinterestEmail
Main Dish Recipes

PHILLY CHEESESTEAK QUESADILLAS

by Rebecca August 31, 2020
written by Rebecca

Prep: 10mins | Cook: 35mins | Total: 45mins | Servings: 4 | Yield: 4 servings

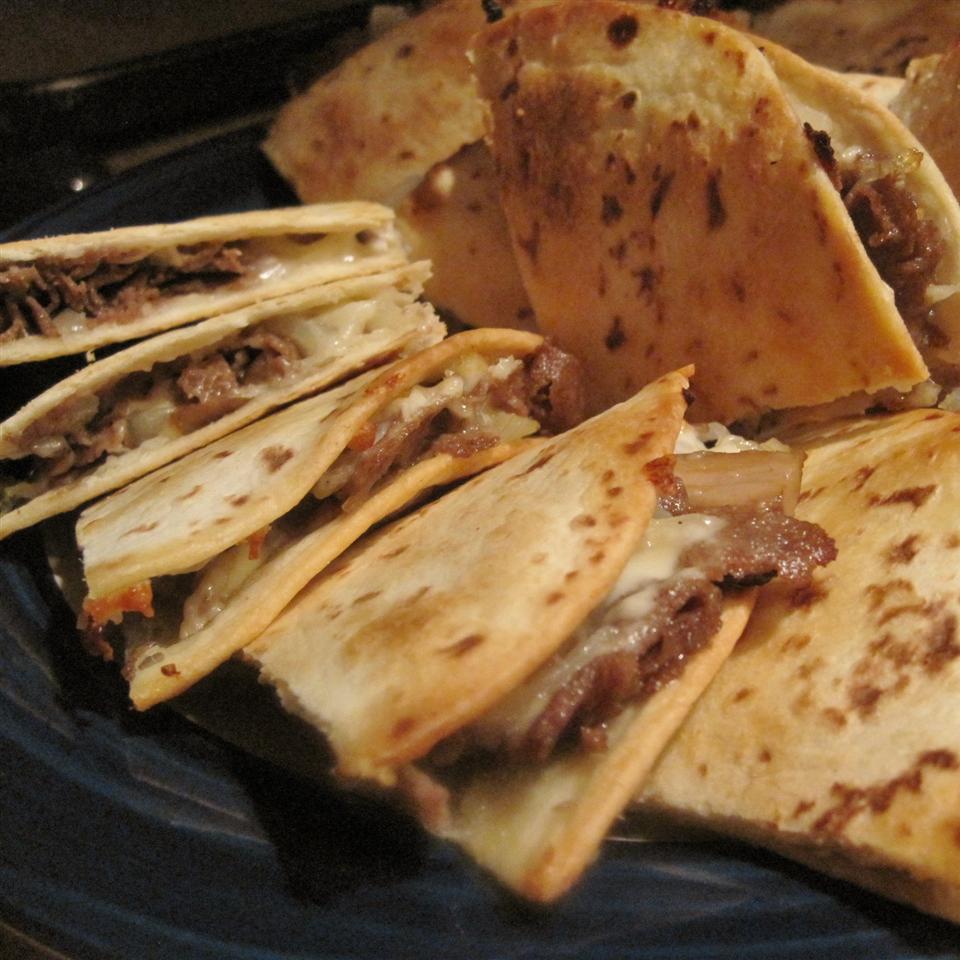
I’m in the mood for a Mexican kind of dinner today. I prepared my kids favorite, Philly Cheesesteak Quesadillas. Quick and easy to make quesadillas filled with beef and melted cheese plus crisp onions and peppers in a toasted tortilla. Yum! A perfect make-ahead dish that is insanely good and perfect for the whole family! The amazing crispy quesadillas sandwich the savory Philly Cheesesteak. Mouthwatering and insanely delicious.

INGREDIENTS

1 1lb top sirloin Beef, separable lean only, trimmed to 1/4″ fat, all grades, raw

2 small Onions, raw

2 eaches Peppers, sweet, green, raw; green bell pepper

1 cup sauce, barbeque sauce

8 10inches flour tortilla

2 cups Cheddar cheese

HOW TO MAKE PHILLY CHEESESTEAK QUESADILLAS

Step 1: Prepare the oven. Preheat it to 425 degrees F or 220 degrees C.

Step 2: Place the beef into a skillet and cook over medium heat for about 5 to 7 minutes, stirring often. Stir in the onions and green bell peppers and continue cooking for 5 to 10 minutes more until the vegetables softened.

Step 3: Then, pour the barbeque sauce over the beef mixture. Allow to simmer for about 10 minutes until the sauce slightly reduces.

Step 4: Lay 4 tortillas on a baking sheet and spoon each with the beef mixture. Sprinkle each with cheddar cheese.

Step 5: Place inside the preheated oven and bake for about 10 minutes. Then, flip the quesadillas and continue to bake for 5 minutes more until the cheese has melted.

NOTES:

If you want a hint of spice, add some hot sauce or sriracha to your sauce when spreading over the tortillas.

I prefer smaller tortillas as they need less filling and I can make more quesadillas but you can use any size of tortilla that you desire.

For this recipe, you can use beef round in place of beef sirloin.

Nutrition Facts:

Per Serving: 926.7 calories; 108.4 mg cholesterol; 1984.8 mg sodium; 46.3 g protein; 101.3 g carbohydrates

PHILLY CHEESESTEAK QUESADILLAS

Rebecca Prep: 10mins | Cook: 35mins | Total: 45mins | Servings: 4 | Yield: 4 servings I’m in the mood for a Mexican kind of dinner today. I prepared my kids favorite, Philly Cheesesteak Quesadillas. Quick and easy to make… Main Dish Recipes PHILLY CHEESESTEAK QUESADILLAS European Print This
Serves: 4 Prep Time: 10 mins Cooking Time: 35 mins 35 mins
Nutrition facts: 926.7 calories 20 grams fat
Rating: 5.0/5
( 1 voted )

Ingredients

  • 1 1lb top sirloin Beef, separable lean only, trimmed to 1/4" fat, all grades, raw
  • 2 small Onions, raw
  • 2 eaches Peppers, sweet, green, raw; green bell pepper
  • 1 cup sauce, barbeque sauce
  • 8 10inches flour tortilla
  • 2 cups Cheddar cheese

Instructions

Step 1: Prepare the oven. Preheat it to 425 degrees F or 220 degrees C.

Step 2: Place the beef into a skillet and cook over medium heat for about 5 to 7 minutes, stirring often. Stir in the onions and green bell peppers and continue cooking for 5 to 10 minutes more until the vegetables softened.

Step 3: Then, pour the barbeque sauce over the beef mixture. Allow to simmer for about 10 minutes until the sauce slightly reduces.

Step 4: Lay 4 tortillas on a baking sheet and spoon each with the beef mixture. Sprinkle each with cheddar cheese.

Step 5: Place inside the preheated oven and bake for about 10 minutes. Then, flip the quesadillas and continue to bake for 5 minutes more until the cheese has melted.

NOTES:

If you want a hint of spice, add some hot sauce or sriracha to your sauce when spreading over the tortillas.

I prefer smaller tortillas as they need less filling and I can make more quesadillas but you can use any size of tortilla that you desire.

For this recipe, you can use beef round in place of beef sirloin.

August 31, 2020 0 comment
0 FacebookTwitterPinterestEmail
Main Dish Recipes

FRIED CABBAGE WITH BACON, ONION, AND GARLIC

by Rebecca August 31, 2020
written by Rebecca

Prep: 15mins | Cook: 1hr | Total: 1hr 15mins | Servings: 6 | Yield: 6 servings

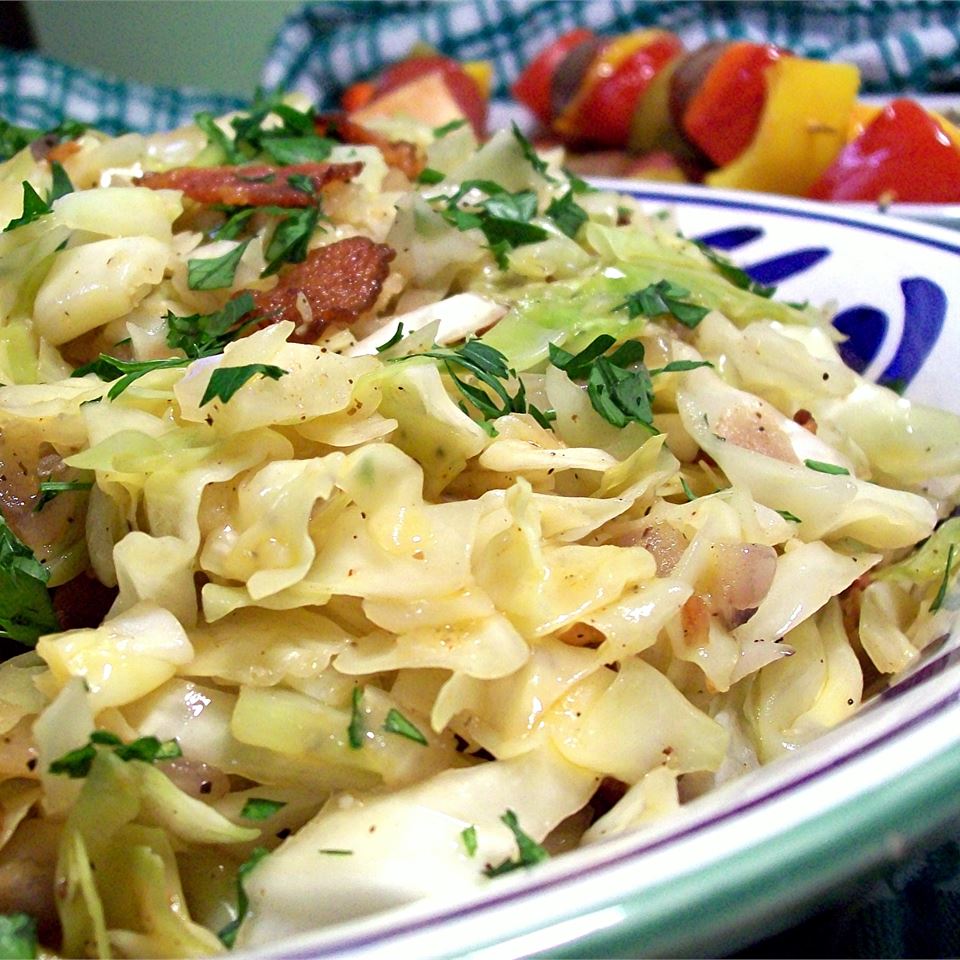
Warning, this dish is crazy addictive! Simple yet bursting with savory taste that will make your mouth water every time. A fragrant dish with salty, sweet, buttery flavor that is a breeze to make. This no-fuss cabbage dish is cooked in tender perfection with bacon, onion, and garlic. Goes perfectly with corned beef, pot roast, grilled chicken, or pork. My personal favorite and my go-to. This recipe is a keeper and a must-try. Even your picky eaters will love this. A family-friendly dish that goes a long way. I made this last week and my friends were obsessed! This Fried Cabbage with Bacon, Onion, and Garlic never disappoints. Always a spotlight stealer!

INGREDIENTS

6 slices Pork, cured, bacon, raw

1 large onions, raw

2 cloves Garlic, raw

1 large head Cabbage, raw

1 tablespoon of salt, table

1 teaspoon spices, pepper, black

½ teaspoon spices, onion powder

½ teaspoon spices, garlic powder

⅛ teaspoon spices, paprika

HOW TO MAKE FRIED CABBAGE WITH BACON, ONION, AND GARLIC

Step 1: In a large stockpot, cook the bacon over medium-high heat for about 10 minutes until crispy. Sautee the onion and garlic and cook for another 10 minutes until the onion caramelizes.

Step 2: Stir in the cabbage quickly and cook for 10 minutes more.

Step 3: Season with salt and pepper, onion powder, garlic powder, and paprika.

Step 4: Adjust the heat to low and simmer for another 30 minutes, covered, while occasionally stirring.

NOTES:

This goes well with corned beef, pot roast, grilled chicken, or pork. There are many varieties to fry the cabbage but I love this simple recipe with bacon and onion.

Remove the core of the cabbage before cooking by cutting the head of the cabbage in half, using a knife to slice around the core to remove it.

Nutrition Facts:

Per Serving: 194.1 calories; 19 mg cholesterol; 1434.9 mg sodium; 6.4 g protein; 15.5 g carbohydrates

FRIED CABBAGE WITH BACON, ONION, AND GARLIC

Rebecca Prep: 15mins | Cook: 1hr | Total: 1hr 15mins | Servings: 6 | Yield: 6 servings Warning, this dish is crazy addictive! Simple yet bursting with savory taste that will make your mouth water every time. A fragrant dish… Main Dish Recipes FRIED CABBAGE WITH BACON, ONION, AND GARLIC European Print This
Serves: 6 Prep Time: 15 mins Cooking Time: 1 hr 1 hr
Nutrition facts: 194.1 calories 20 grams fat
Rating: 5.0/5
( 1 voted )

Ingredients

  • 6 slices Pork, cured, bacon, raw
  • 1 large onions, raw
  • 2 cloves Garlic, raw
  • 1 large head Cabbage, raw
  • 1 tablespoon of salt, table
  • 1 teaspoon spices, pepper, black
  • ½ teaspoon spices, onion powder
  • ½ teaspoon spices, garlic powder
  • ⅛ teaspoon spices, paprika

Instructions

Step 1: In a large stockpot, cook the bacon over medium-high heat for about 10 minutes until crispy. Sautee the onion and garlic and cook for another 10 minutes until the onion caramelizes.

Step 2: Stir in the cabbage quickly and cook for 10 minutes more.

Step 3: Season with salt and pepper, onion powder, garlic powder, and paprika.

Step 4: Adjust the heat to low and simmer for another 30 minutes, covered, while occasionally stirring.

NOTES:

This goes well with corned beef, pot roast, grilled chicken, or pork. There are many varieties to fry the cabbage but I love this simple recipe with bacon and onion.

Remove the core of the cabbage before cooking by cutting the head of the cabbage in half, using a knife to slice around the core to remove it.

August 31, 2020 0 comment
0 FacebookTwitterPinterestEmail
Main Dish Recipes

BAKED PARMESAN ZUCCHINI CURLY FRIES

by Rebecca August 29, 2020
written by Rebecca

Total: 45mins | Serving: 6

This is not your ordinary fries! Give this recipe a try and you will have a new perspective in fries! Yes, you read it right. I have listed all the steps and ingredients. All you need to do is to follow them and you are on the way to fries land! I hope you all love these amazing appetizers. Enjoy!

INGREDIENTS

Cooking spray

¼ cup cornstarch

4 large egg whites, lightly beaten

1 cup panko (Japanese-style breadcrumbs)

¾ ounce Parmesan cheese, finely grated (see Tip)

1 ½ teaspoons dried oregano

12 ounces spiralized zucchini noodles (see Tip)

¼ teaspoon salt

¼ cup light ranch dressing

¼ cup lower-sodium marinara sauce

HOW TO MAKE BAKED PARMESAN ZUCCHINI CURLY FRIES

Step 1: Ready the oven and preheat 425 degrees F.

Step 2: Line with parchment paper 2 baking sheets then apply cooking spray.

Step 3: In a shallow dish, add cornstarch.

Step 4: In a different shallow dish, add in egg whites.

Step 5: In another shallow dish, add in panko, oregano, and parmesan.

Step 6: Slice the zucchini noodles into 5 to 6-inch long cuts.

Step 7: Coat the sliced noodles into the cornstarch. Shake off the excess.

Step 8: Toss the coated noodles into the panko mixture and shake off excess.

Step 9: Place the coated noodles on the prepared baking sheets and arrange them in a single layer. Spray cooking spray on top.

Step 10: Place inside the preheated oven and bake for 10 to 12 minutes or until cooked through.

Step 11: Remove from the oven and let sit on a wire rack. Sprinkle with salt to taste.

Step 12: In a shallow bowl, add in the marinara and ranch. Stir until well mixed.

Step 13: Serve with the dip and enjoy!

TIPS:

Use a medium box grater holes to grate Parmesan thinly (you should get around 1/4 cup).

Check the food section for a pack of fresh zucchini noodles, or make your zucchini noodles; you’ll need around (3) medium or (2) large zucchini for 12 ounces of noodles.

Nutrition Facts:

Per Serving: 137 calories; 4 mg cholesterol; 340 mg sodium. 240 mg potassium; 17.6 g carbohydrates; 2.2 g fiber; 2 g sugar; 6.3 g protein; 101 IU vitamin a iu; 2 mcg folate; 48 mg calcium; 1 mg iron; 4 mg magnesium; 3.6 g total fat; 0.7 g saturated fat

BAKED PARMESAN ZUCCHINI CURLY FRIES

Rebecca Total: 45mins | Serving: 6 This is not your ordinary fries! Give this recipe a try and you will have a new perspective in fries! Yes, you read it right. I have listed… Main Dish Recipes BAKED PARMESAN ZUCCHINI CURLY FRIES European Print This
Serves: 6
Nutrition facts: 137 calories 3.6 fat
Rating: 5.0/5
( 1 voted )

Ingredients

  • Cooking spray
  • ¼ cup cornstarch
  • 4 large egg whites, lightly beaten
  • 1 cup panko (Japanese-style breadcrumbs)
  • ¾ ounce Parmesan cheese, finely grated (see Tip)
  • 1 ½ teaspoons dried oregano
  • 12 ounces spiralized zucchini noodles (see Tip)
  • ¼ teaspoon salt
  • ¼ cup light ranch dressing
  • ¼ cup lower-sodium marinara sauce

Instructions

Step 1: Ready the oven and preheat 425 degrees F.

Step 2: Line with parchment paper 2 baking sheets then apply cooking spray.

Step 3: In a shallow dish, add cornstarch.

Step 4: In a different shallow dish, add in egg whites.

Step 5: In another shallow dish, add in panko, oregano, and parmesan.

Step 6: Slice the zucchini noodles into 5 to 6-inch long cuts.

Step 7: Coat the sliced noodles into the cornstarch. Shake off the excess.

Step 8: Toss the coated noodles into the panko mixture and shake off excess.

Step 9: Place the coated noodles on the prepared baking sheets and arrange them in a single layer. Spray cooking spray on top.

Step 10: Place inside the preheated oven and bake for 10 to 12 minutes or until cooked through.

Step 11: Remove from the oven and let sit on a wire rack. Sprinkle with salt to taste.

Step 12: In a shallow bowl, add in the marinara and ranch. Stir until well mixed.

Step 13: Serve with the dip and enjoy!

TIPS:

Use a medium box grater holes to grate Parmesan thinly (you should get around 1/4 cup).

Check the food section for a pack of fresh zucchini noodles, or make your zucchini noodles; you'll need around (3) medium or (2) large zucchini for 12 ounces of noodles.

August 29, 2020 0 comment
0 FacebookTwitterPinterestEmail
Main Dish Recipes

OLD-FASHIONED PASTA SALAD

by Rebecca August 29, 2020
written by Rebecca

Prep: 20mins | Cook: 15mins | Additional: 13hrs 20mins | Total: 13hrs 55mins | Servings: 6 | Yield: 6 servings

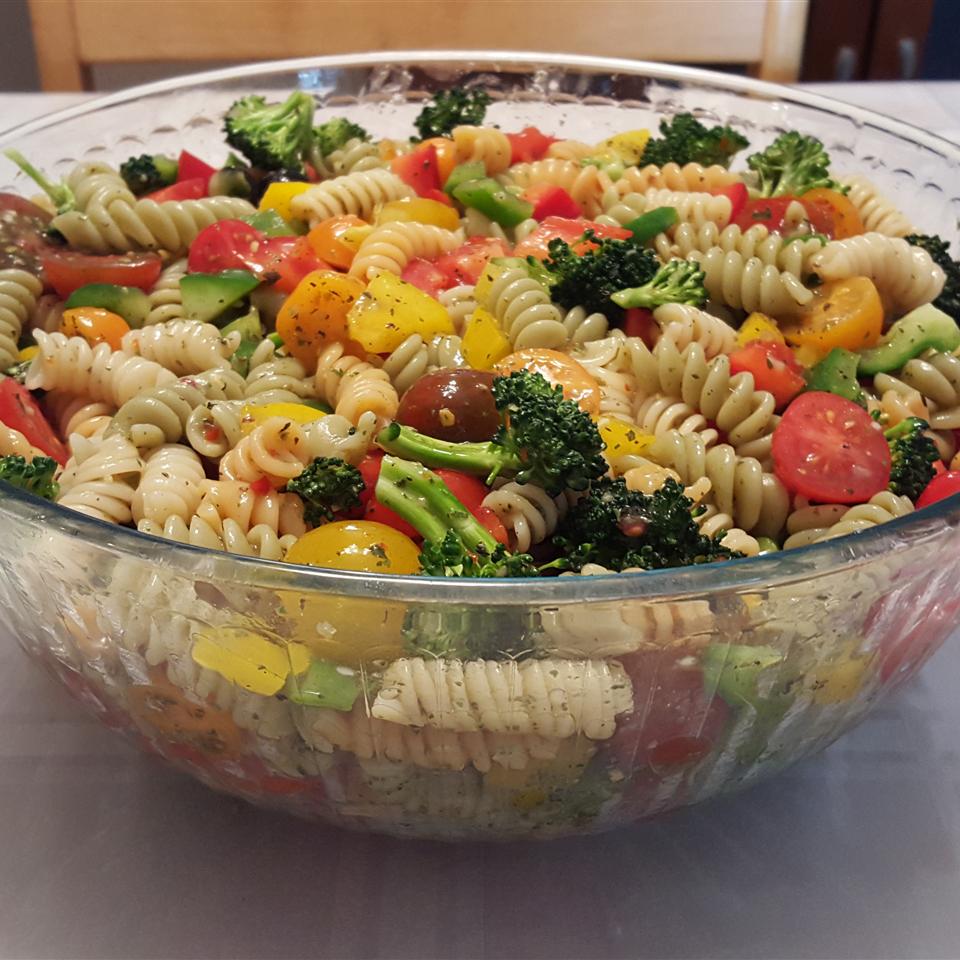
What a meal! This amazing pasta salad is the best. I have never tried anything like this and I am so glad that I finally decided to give it a try. I am so satisfied with the taste and the convenience of this recipe. Another good thing about this recipe is that you can tweak the ingredients a little bit to make it desirable for kids! For example, I have tried adding crispy bacon in it and my kids went nuts! They loved it so much! I know your kids are gonna love it too!

INGREDIENTS

1 pound Bernardi’s Veggie Rotini Pasta KBLR

6 tablespoons Salad seasoning blend

1 16oz bottle of Salad dressing, Italian, commercial, regular, with salt

2 cups Cherry Tomatoes, cup

1 pepper, sweet, green, raw; green bell pepper

1 pepper, sweet, red, raw; red bell pepper

½ pepper, sweet, yellow, raw; yellow bell pepper

1 2.25oz can Olives, ripe, canned (small-extra large)

HOW TO MAKE OLD-FASHIONED PASTA SALAD

Step 1: Place a large pot on the stove and add enough water to submerge the pasta.

Step 2: Add in the pasta and cook until the texture is al dente’.

Step 3: Drain the noodles and rinse with cold water.

Step 4: In a small bowl, add in the Italian dressing and salad spice. Whisk until well mixed.

Step 5: In a medium salad bowl, add in the pasta, bell peppers, cherry tomatoes, and olives. Pour the dressing on top toss to coat the pasta with the sauce.

Step 6: Place inside the fridge and chill overnight.

Step 7: Serve and enjoy!

TIPS:

This dish is best served with kabobs. The flavor I go with for the kabobs is barbecue pineapple chicken. Either chicken or shrimp works!

You can use your preferred pasta for this dish.

Nutrition Facts:

Per Serving: 400.1 calories; 2.7 mg cholesterol; 1904.2 mg sodium; 7.9 g protein; 39 g carbohydrates

OLD-FASHIONED PASTA SALAD

Rebecca Prep: 20mins | Cook: 15mins | Additional: 13hrs 20mins | Total: 13hrs 55mins | Servings: 6 | Yield: 6 servings What a meal! This amazing pasta salad is the best. I have never tried anything like this and I am so… Main Dish Recipes OLD-FASHIONED PASTA SALAD European Print This
Serves: 6 Prep Time: 20 mins Cooking Time: 13 hrs 35 mins 13 hrs 35 mins
Nutrition facts: 400.1 calories 20 grams fat
Rating: 5.0/5
( 1 voted )

Ingredients

  • 1 pound Bernardi's Veggie Rotini Pasta KBLR
  • 6 tablespoons Salad seasoning blend
  • 1 16oz bottle of Salad dressing, Italian, commercial, regular, with salt
  • 2 cups Cherry Tomatoes, cup
  • 1 pepper, sweet, green, raw; green bell pepper
  • 1 pepper, sweet, red, raw; red bell pepper
  • ½ pepper, sweet, yellow, raw; yellow bell pepper
  • 1 2.25oz can Olives, ripe, canned (small-extra large)

Instructions

Step 1: Place a large pot on the stove and add enough water to submerge the pasta.

Step 2: Add in the pasta and cook until the texture is al dente'.

Step 3: Drain the noodles and rinse with cold water.

Step 4: In a small bowl, add in the Italian dressing and salad spice. Whisk until well mixed.

Step 5: In a medium salad bowl, add in the pasta, bell peppers, cherry tomatoes, and olives. Pour the dressing on top toss to coat the pasta with the sauce.

Step 6: Place inside the fridge and chill overnight.

Step 7: Serve and enjoy!

TIPS:

This dish is best served with kabobs. The flavor I go with for the kabobs is barbecue pineapple chicken. Either chicken or shrimp works!

You can use your preferred pasta for this dish.

August 29, 2020 0 comment
0 FacebookTwitterPinterestEmail
Main Dish Recipes

HONEY GARLIC CARROTS ARE BETTER THAN CANDY

by Rebecca August 29, 2020
written by Rebecca

Prep: 10mins | Cook: 15mins | Total: 25mins | Servings: 6 | Yield: 6 servings

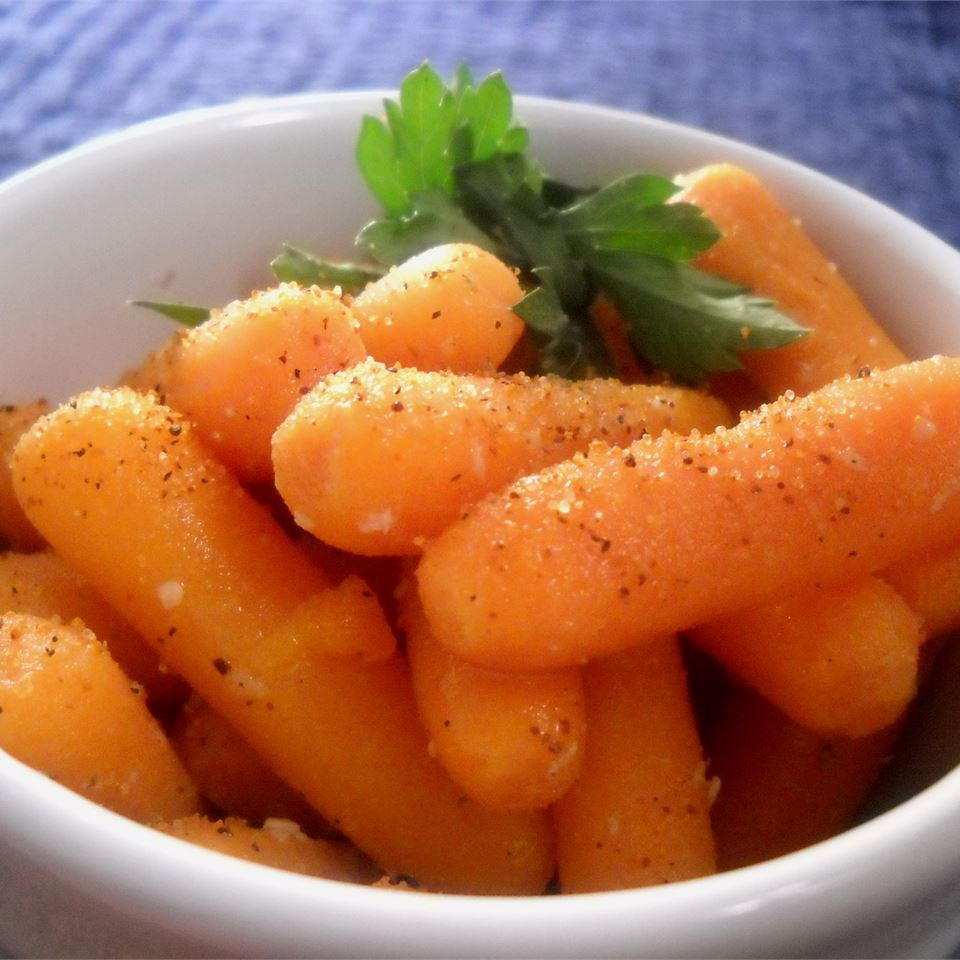
I got to tell you. My kids are super picky. I cannot further describe my everyday scenario just to have them eat healthy. Good thing there are recipes that I can always turn to like this Honey Garlic Carrots. At first, they were very hesitant to even touch it, funny but they looked as if they are investigating something. Then, that first bite changed everything! Now, every time I am making these honey-sweet, garlicky carrots they feel excited. It is so healthy delicious, I need to double the recipe because it never settles long. They want each a bowl. I feel good watching them eat healthy. And it’s never an easy journey. So if you have picky eaters like me. You should try this and I promise even the grown-ups will go crazy over these yummy carrots. Pretty easy, not fussy, you can make this in batches in a heartbeat. A healthy variety that your whole family will love. Enjoy simple, freaking delicious treat the healthy way. And don’t forget to share this with your friends, I’m pretty sure they’ll thank you.

INGREDIENTS

1 tablespoon butter, with salt

2 16oz packages Carrots, baby, raw

3 tablespoons Honey, strained or extracted

2 cloves Garlic, raw

1 teaspoon Salt, table

½ teaspoon spices, pepper, black

⅓ cup Water, municipal

HOW TO MAKE HONEY GARLIC CARROTS

Step 1: Melt the butter in a large skillet over medium heat.

Step 2: When the butter has melted, stir in the carrots, honey, and garlic. Season with some salt and black pepper.

Step 3: Then, pour in the water and cover. Bring to a boil. Cook the carrots for about 4 minutes.

Step 4: Uncover and continue to cook for another 10 to 15 minutes until the carrots are tender. Making sure to often stir.

Nutrition Facts:

Per Serving: 103.1 calories; 5.1 mg cholesterol; 518.8 mg sodium; 1.1 g protein; 21.4 g carbohydrates

HONEY GARLIC CARROTS ARE BETTER THAN CANDY

Rebecca Prep: 10mins | Cook: 15mins | Total: 25mins | Servings: 6 | Yield: 6 servings I got to tell you. My kids are super picky. I cannot further describe my everyday scenario just to have them eat healthy. Good… Main Dish Recipes HONEY GARLIC CARROTS ARE BETTER THAN CANDY European Print This
Serves: 6 Prep Time: 10 mins Cooking Time: 15 mins 15 mins
Nutrition facts: 103.1 calories 20 grams fat
Rating: 5.0/5
( 1 voted )

Ingredients

  • 1 tablespoon butter, with salt
  • 2 16oz packages Carrots, baby, raw
  • 3 tablespoons Honey, strained or extracted
  • 2 cloves Garlic, raw
  • 1 teaspoon Salt, table
  • ½ teaspoon spices, pepper, black
  • ⅓ cup Water, municipal

Instructions

Step 1: Melt the butter in a large skillet over medium heat.

Step 2: When the butter has melted, stir in the carrots, honey, and garlic. Season with some salt and black pepper.

Step 3: Then, pour in the water and cover. Bring to a boil. Cook the carrots for about 4 minutes.

Step 4: Uncover and continue to cook for another 10 to 15 minutes until the carrots are tender. Making sure to often stir.

August 29, 2020 0 comment
0 FacebookTwitterPinterestEmail
Main Dish Recipes

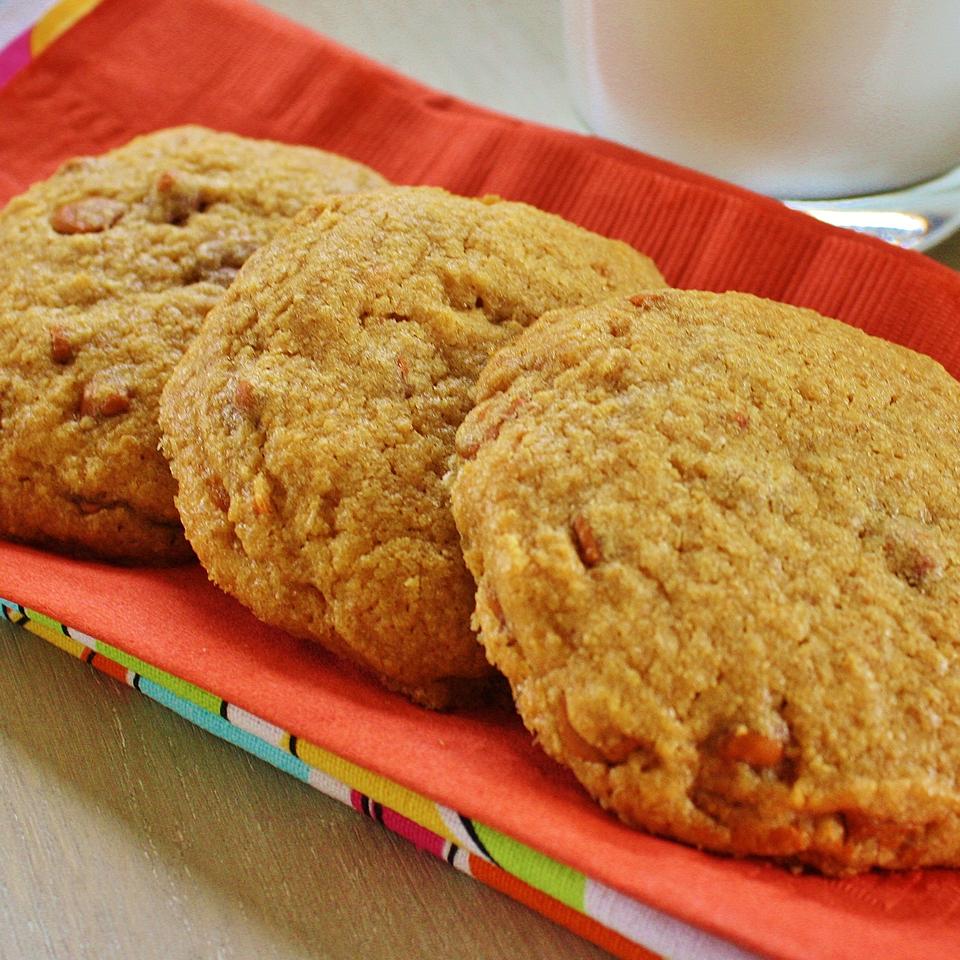
CHEWY CINNAMON COOKIES

by Rebecca August 29, 2020
written by Rebecca

Prep: 15mins | Cook: 10mins | Additional: 10mins | Total: 35mins | Servings: 24 | Yield: 4 dozen cookies

These amazing cinnamon cookies are soft in the middle with crispy edges. The perfect Chewy Cinnamon Cookies that are over the top delicious! The kids will go crazy over this sweet treat. Easy and quick to make, perfect for a cookie exchange, as homemade giveaways, and afternoon snack.

INGREDIENTS

2 cups Cookies, graham crackers, plain or honey

1 ½ cups Wheat flour, white, all-purpose, enriched, bleached

1 teaspoon Spices, cinnamon, ground

1 teaspoon Leavening agents, baking soda

1 teaspoon Salt, table

1 cup of butter, with salt

¼ cup Sugars, granulated

1 ¼ cups Sugars, brown

2 egg, whole, raw, fresh

1 teaspoon Vanilla extract

HOW TO MAKE CHEWY CINNAMON COOKIES

Step 1: Prepare the oven. Preheat it to 350 degrees F or 175 degrees C.

Step 2: In a mixing bowl, combine the graham cracker crumbs, flour, cinnamon, baking soda, and salt. Set aside.

Step 3: In a large bowl, add the butter, white sugar, and brown sugar. Beat using an electric mixer until smooth. Then, beat in the eggs, a piece at a time to allow the eggs to blend into the butter mixture. Stir in the vanilla, then, mix in the flour mixture.

Step 4: Scoop by rounded spoonfuls the dough onto ungreased baking sheets.

Step 5: Place inside the preheated oven and bake for about 9 to 11 minutes until the edges are slightly brown.

NOTE:

The baking time will vary from oven to oven. Check the cookies after 9 minutes of baking to see if they are done. The cookies will look a bit baked and too soft. Don’t worry as they will be firm because the cookies will still rest on the baking sheet for 15 minutes.

Gently press the cookies with the back of the spoon after removing them from the oven to hold their shape.

Nutrition Facts:

Per Serving: 184.2 calories; 35.8 mg cholesterol; 255.4 mg sodium; 1.9 g protein; 24.8 g carbohydrates

CHEWY CINNAMON COOKIES

Rebecca Prep: 15mins | Cook: 10mins | Additional: 10mins | Total: 35mins | Servings: 24 | Yield: 4 dozen cookies These amazing cinnamon cookies are soft in the middle with crispy edges. The perfect Chewy Cinnamon Cookies that are over the top… Main Dish Recipes CHEWY CINNAMON COOKIES European Print This
Serves: 24 Prep Time: 15 mins Cooking Time: 20 mins 20 mins
Nutrition facts: 184.2 calories 20 grams fat
Rating: 5.0/5
( 1 voted )

Ingredients

  • 2 cups Cookies, graham crackers, plain or honey
  • 1 ½ cups Wheat flour, white, all-purpose, enriched, bleached
  • 1 teaspoon Spices, cinnamon, ground
  • 1 teaspoon Leavening agents, baking soda
  • 1 teaspoon Salt, table
  • 1 cup of butter, with salt
  • ¼ cup Sugars, granulated
  • 1 ¼ cups Sugars, brown
  • 2 egg, whole, raw, fresh
  • 1 teaspoon Vanilla extract

Instructions

Step 1: Prepare the oven. Preheat it to 350 degrees F or 175 degrees C.

Step 2: In a mixing bowl, combine the graham cracker crumbs, flour, cinnamon, baking soda, and salt. Set aside.

Step 3: In a large bowl, add the butter, white sugar, and brown sugar. Beat using an electric mixer until smooth. Then, beat in the eggs, a piece at a time to allow the eggs to blend into the butter mixture. Stir in the vanilla, then, mix in the flour mixture.

Step 4: Scoop by rounded spoonfuls the dough onto ungreased baking sheets.

Step 5: Place inside the preheated oven and bake for about 9 to 11 minutes until the edges are slightly brown.

NOTE:

The baking time will vary from oven to oven. Check the cookies after 9 minutes of baking to see if they are done. The cookies will look a bit baked and too soft. Don't worry as they will be firm because the cookies will still rest on the baking sheet for 15 minutes.

Gently press the cookies with the back of the spoon after removing them from the oven to hold their shape.

August 29, 2020 0 comment
0 FacebookTwitterPinterestEmail
Main Dish Recipes

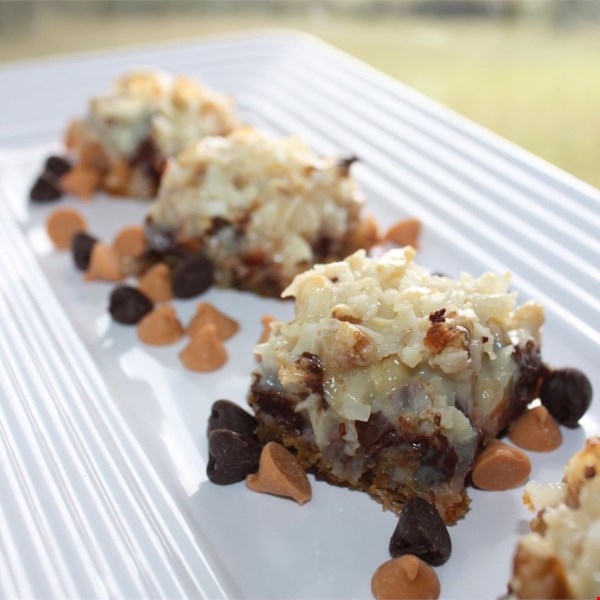
SEVEN LAYER MAGIC COOKIE BARS

by Rebecca August 29, 2020
written by Rebecca

Prep: 10mins | Cook: 25mins | Total: 35mins

Look at that! Aren’t these pretty? I want them all for myself! These mini bars are filled with everything that makes me happy – butter, chocolate, butterscotch, and nuts. These are so good I want them for breakfast with a freshly brewed coffee. And I want them more for dessert, too! Perfectly sweet, outrageously chewy with courses of graham cracker crust, sweetened condensed milk, coconut, chocolate chips, and nuts!

INGREDIENTS

1 1/2 cups graham cracker crumbs

1/2 cup butter or margarine, melted

1 14oz can EAGLE BRAND® Sweetened Condensed Milk

1 cup semi-sweet chocolate chips

1 cup butterscotch-flavored chips

1 1/3 cups flaked coconut

1 cup chopped nuts

HOW TO MAKE SEVEN LAYER MAGIC COOKIE BARS

Step 1: Prepare the oven. Preheat it to 350 degrees F or 325 degrees F if using a glass baking pan.

Step 2: Combine the graham cracker crumbs and butter in a small bowl. Then, firmly press this on the bottom of the 13 x 9-inch baking pan.

Step 3: Evenly pour the sweetened condensed milk over the crumb mixture. And evenly layer with the rest of the ingredients. Use a fork to firmly press down the ingredients.

Step 4: Place inside the preheated oven and bake for about 25 minutes until lightly browned.

Step 5: Remove from the oven and allow to cool. Chill if desired.

Step 6: Then, cut into bars or diamonds. Store at room temperature, covered.

NOTES:

Use broken pretzels or M&Ms to make monster bars. You can use varieties of nuts that you desire such as pecans, walnuts, mixed nuts, or almonds. Or just left them out entirely if you are not a fan of nuts.

Try using a package of Schar brand Graham crackers to make a gluten-free cookie bars. One package will provide you with the exact amount of graham crackers you need for this recipe.

Nutrition Facts:

Per Serving: 257 calories; 2.3 g protein; 16 mg cholesterol; 103 mg sodium; 14.6 g fat; 21.1 g carbohydrates

SEVEN LAYER MAGIC COOKIE BARS

Rebecca Prep: 10mins | Cook: 25mins | Total: 35mins Look at that! Aren’t these pretty? I want them all for myself! These mini bars are filled with everything that makes me happy – butter, chocolate, butterscotch,… Main Dish Recipes SEVEN LAYER MAGIC COOKIE BARS European Print This
Prep Time: 10 mins Cooking Time: 25 mins 25 mins
Nutrition facts: 257 calories 14.6 fat
Rating: 5.0/5
( 1 voted )

Ingredients

  • 1 1/2 cups graham cracker crumbs
  • 1/2 cup butter or margarine, melted
  • 1 14oz can EAGLE BRAND® Sweetened Condensed Milk
  • 1 cup semi-sweet chocolate chips
  • 1 cup butterscotch-flavored chips
  • 1 1/3 cups flaked coconut
  • 1 cup chopped nuts

Instructions

Step 1: Prepare the oven. Preheat it to 350 degrees F or 325 degrees F if using a glass baking pan.

Step 2: Combine the graham cracker crumbs and butter in a small bowl. Then, firmly press this on the bottom of the 13 x 9-inch baking pan.

Step 3: Evenly pour the sweetened condensed milk over the crumb mixture. And evenly layer with the rest of the ingredients. Use a fork to firmly press down the ingredients.

Step 4: Place inside the preheated oven and bake for about 25 minutes until lightly browned.

Step 5: Remove from the oven and allow to cool. Chill if desired.

Step 6: Then, cut into bars or diamonds. Store at room temperature, covered.

NOTES:

Use broken pretzels or M&Ms to make monster bars. You can use varieties of nuts that you desire such as pecans, walnuts, mixed nuts, or almonds. Or just left them out entirely if you are not a fan of nuts.

Try using a package of Schar brand Graham crackers to make a gluten-free cookie bars. One package will provide you with the exact amount of graham crackers you need for this recipe.

August 29, 2020 0 comment
0 FacebookTwitterPinterestEmail
Newer Posts
Older Posts

Popular Posts

  • 1

    Crispy Crunchy Parmesan Potatoes

    March 21, 2020
  • 2

    CROCK POT SMOTHERED PORK CHOPS

    March 21, 2020
  • Facebook
  • Twitter

@2019 - All Right Reserved.


Back To Top