Cook it once
  • Home
  • Privacy Policy
  • Recipes
    • KETO
    • LC
    • WW
  • Tips
  • Contact
Cook it once
  • Home
  • Privacy Policy
  • Recipes
    • KETO
    • LC
    • WW
  • Tips
  • Contact
Category:

Main Dish Recipes

Main Dish Recipes

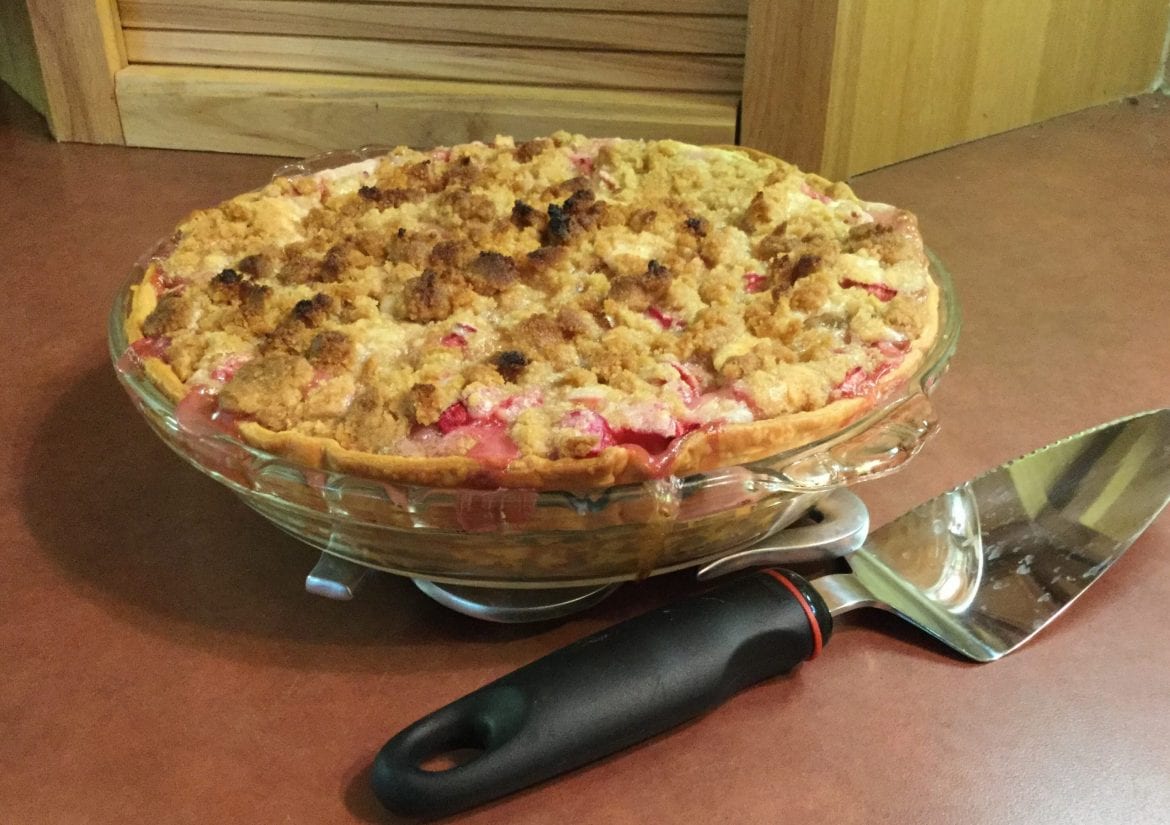
RHUBARB SOUR CREAM PIE

by Rebecca September 1, 2020
written by Rebecca

Prep: 15 mins | Cook: 55 mins | Total: 1hr 10 mins | Serving: 8 | Yield: 8 servings

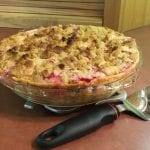
I love the sweet creamy taste of this classic Rhubarb Sour Cream Pie. A simple, not fussy dessert to make that is enjoyed by everyone. I love all kinds of pie and this is one of the best. I grew up watching my mother make this and now that I have a family of my own, just like my mom I plan on passing the tradition to my kids. My family completely enjoy this amazing pie. At first, pies are a bit intimidating but trust me, once you get the hang of it you’ll enjoy making them. Pies including this Rhubarb is the easiest and quirkiest to make.

INGREDIENTS

1 9inches Pie crust, standard-type, prepared from recipe, unbaked

4 cups Rhubarb, raw

1 egg, whole, raw, fresh

1 ½ cups Sugars, granulated

1 cup Cream, sour, cultured

⅓ cup Wheat flour, white, all-purpose, enriched, bleached

½ cup Wheat flour, white, all-purpose, enriched, bleached

½ cup sugars, brown

¼ cup butter, with salt

HOW TO MAKE RHUBARB SOUR CREAM PIE

Step 1: Prepare the oven. Preheat it to 450 degrees F or 220 degrees C.

Step 2: Add and press the pie crust into a 9-inch pie pan. Add in the rhubarb and evenly spread in the bottom of the crust.

Step 3: Whisk the egg, white sugar, sour cream, and 1/3 cup of flour in a medium bowl until smooth. Pour this mixture over the rhubarb.

Step 4: In a small bowl, mix half a cup of flour and brown sugar. Then, stir in the melted butter until crumbly. Sprinkle this on top of the pie.

Step 5: Place inside the preheated oven and bake for about 15 minutes. Adjust the heat to about 350 degrees F or 175 degrees C, and continue baking for another 40 minutes until the edges puffed and the topping is golden. You might notice that the middle is still jiggly and that is okay. Allow the pie to cool completely before slicing. Enjoy!

Nutrition Facts:

Per Serving: 492.6 calories; 51.2 mg cholesterol; 188.3 mg sodium; 5 g protein; 75.2 g carbohydrates
RHUBARB SOUR CREAM PIE

Rebecca Prep: 15 mins | Cook: 55 mins | Total: 1hr 10 mins | Serving: 8 | Yield: 8 servings I love the sweet creamy taste of this classic Rhubarb Sour Cream Pie. A simple, not fussy dessert to make… Main Dish Recipes RHUBARB SOUR CREAM PIE European Print This
Serves: 8 Prep Time: 15 mins Cooking Time: 55 mins 55 mins
Nutrition facts: 492.6 calories 20 grams fat
Rating: 5.0/5
( 1 voted )

Ingredients

  • 1 9inches Pie crust, standard-type, prepared from recipe, unbaked
  • 4 cups Rhubarb, raw
  • 1 egg, whole, raw, fresh
  • 1 ½ cups Sugars, granulated
  • 1 cup Cream, sour, cultured
  • ⅓ cup Wheat flour, white, all-purpose, enriched, bleached
  • ½ cup Wheat flour, white, all-purpose, enriched, bleached
  • ½ cup sugars, brown
  • ¼ cup butter, with salt

Instructions

Step 1: Prepare the oven. Preheat it to 450 degrees F or 220 degrees C.

Step 2: Add and press the pie crust into a 9-inch pie pan. Add in the rhubarb and evenly spread in the bottom of the crust.

Step 3: Whisk the egg, white sugar, sour cream, and 1/3 cup of flour in a medium bowl until smooth. Pour this mixture over the rhubarb.

Step 4: In a small bowl, mix half a cup of flour and brown sugar. Then, stir in the melted butter until crumbly. Sprinkle this on top of the pie.

Step 5: Place inside the preheated oven and bake for about 15 minutes. Adjust the heat to about 350 degrees F or 175 degrees C, and continue baking for another 40 minutes until the edges puffed and the topping is golden. You might notice that the middle is still jiggly and that is okay. Allow the pie to cool completely before slicing. Enjoy!
September 1, 2020 0 comment
0 FacebookTwitterPinterestEmail
Main Dish Recipes

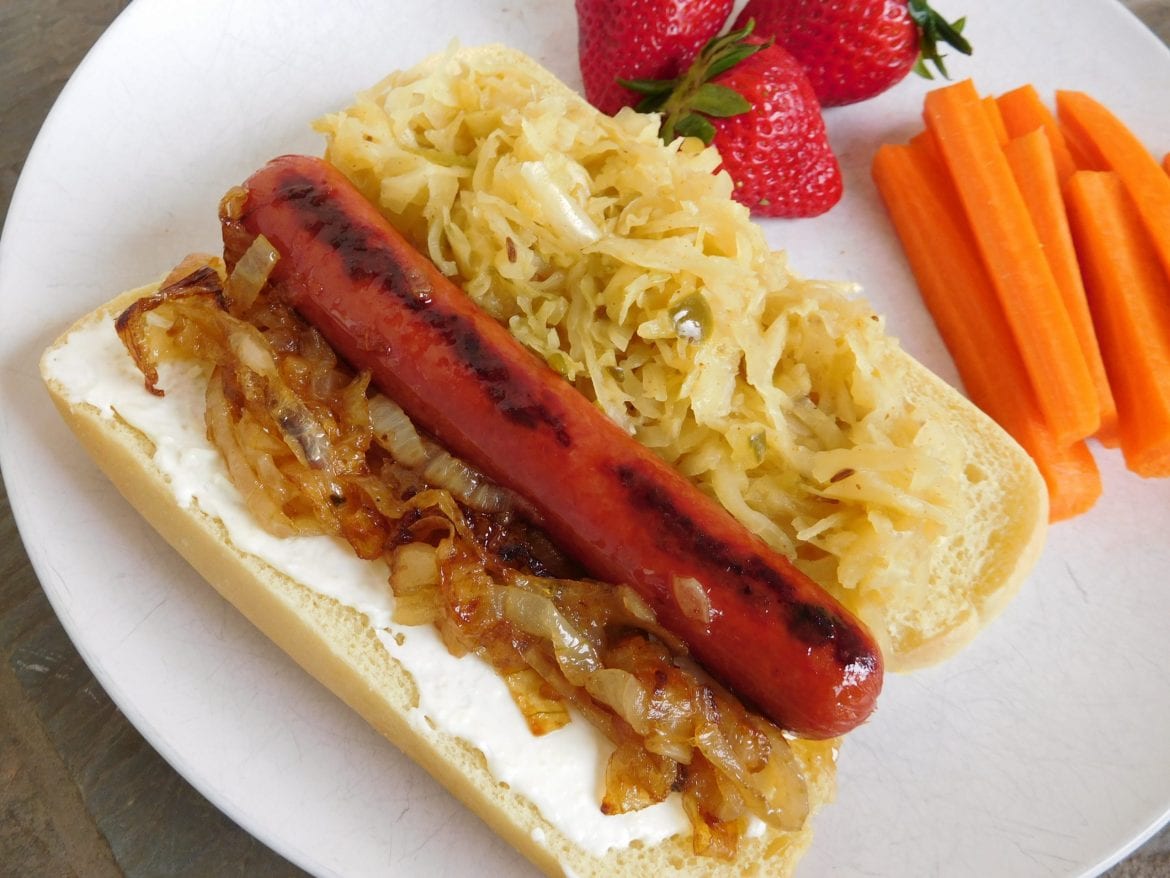
SEATTLE CREAM CHEESE DOGS RECIPE

by Rebecca September 1, 2020
written by Rebecca

Prep: 10 mins | Cook: 20mins | Total: 30 mins | Serving: 4 | Yield: 4 servings

This is my thing. Hot dog bar with all the toppings you can lay your hands on! I had a party last year, and my guests were agape and obsessed with my hot dog bar. It is super cool to set-up a hot dog bar. And this is the simpler version. This quick, easy, and fool-proof Cream Cheese Dogs recipe. I am pretty sure that once you taste this you’ll never want to eat hot dogs any other way! It is dang delicious! The caramelized onion, warm cream cheese, the slightly toasted buns, hot dogs, among the other things are evil in a good way. This is super addicting, unquestionably mouthwatering, and a lot more!

INGREDIENTS

¼ cup Butter, with salt

1 sweet onion

1 4oz package Cheese, cream

4 Frankfurter, beef

4 Rolls, hotdog, plain

2 tablespoons Brown Mustard-Prepared

1 cup Sauerkraut, canned, solids, and liquids

HOW TO MAKE SEATTLE CREAM CHEESE DOGS

Step 1: Prepare the grill or grill pan. Preheat to medium-high heat.

Step 2: In a skillet, melt the butter over medium heat. Sautee the onions and cook slowly for about 15 minutes until softened and deep brown.

Step 3: In a small skillet, warm the cream cheese over low heat until very soft.

Step 4: Meanwhile, grill the hot dogs until well browned. And lightly grill the hot dog buns on both sides.

Step 5:  Time to assemble. On the toasted hot dog bun, first spread the warm cream cheese, then, put the hot dog or sausage, then top onions, mustard, and if desired, sauerkraut.

NOTE:

You are welcome to use any variety of hot dogs or sausages that you already have in your pantry. It will taste amazing!

Either use all of the topping choices at the same time or you can set up a hot dog topping bar where your guests can pick their preferred hot dog toppings.

Nutrition Facts:

Per Serving: 532.9 calories; 91.8 mg cholesterol; 1354.1 mg sodium; 13.8 g protein; 28.8 g carbohydrates

SEATTLE CREAM CHEESE DOGS RECIPE

Rebecca Prep: 10 mins | Cook: 20mins | Total: 30 mins | Serving: 4 | Yield: 4 servings This is my thing. Hot dog bar with all the toppings you can lay your hands on! I had a party last… Main Dish Recipes SEATTLE CREAM CHEESE DOGS RECIPE European Print This
Serves: 4 Prep Time: 10 mins Cooking Time: 20 mins 20 mins
Nutrition facts: 532.9 calories 20 grams fat
Rating: 5.0/5
( 1 voted )

Ingredients

  • ¼ cup Butter, with salt
  • 1 sweet onion
  • 1 4oz package Cheese, cream
  • 4 Frankfurter, beef
  • 4 Rolls, hotdog, plain
  • 2 tablespoons Brown Mustard-Prepared
  • 1 cup Sauerkraut, canned, solids, and liquids

Instructions

Step 1: Prepare the grill or grill pan. Preheat to medium-high heat.

Step 2: In a skillet, melt the butter over medium heat. Sautee the onions and cook slowly for about 15 minutes until softened and deep brown.

Step 3: In a small skillet, warm the cream cheese over low heat until very soft.

Step 4: Meanwhile, grill the hot dogs until well browned. And lightly grill the hot dog buns on both sides.

Step 5:  Time to assemble. On the toasted hot dog bun, first spread the warm cream cheese, then, put the hot dog or sausage, then top onions, mustard, and if desired, sauerkraut.

NOTE:

You are welcome to use any variety of hot dogs or sausages that you already have in your pantry. It will taste amazing!

Either use all of the topping choices at the same time or you can set up a hot dog topping bar where your guests can pick their preferred hot dog toppings.

September 1, 2020 0 comment
0 FacebookTwitterPinterestEmail
Main Dish Recipes

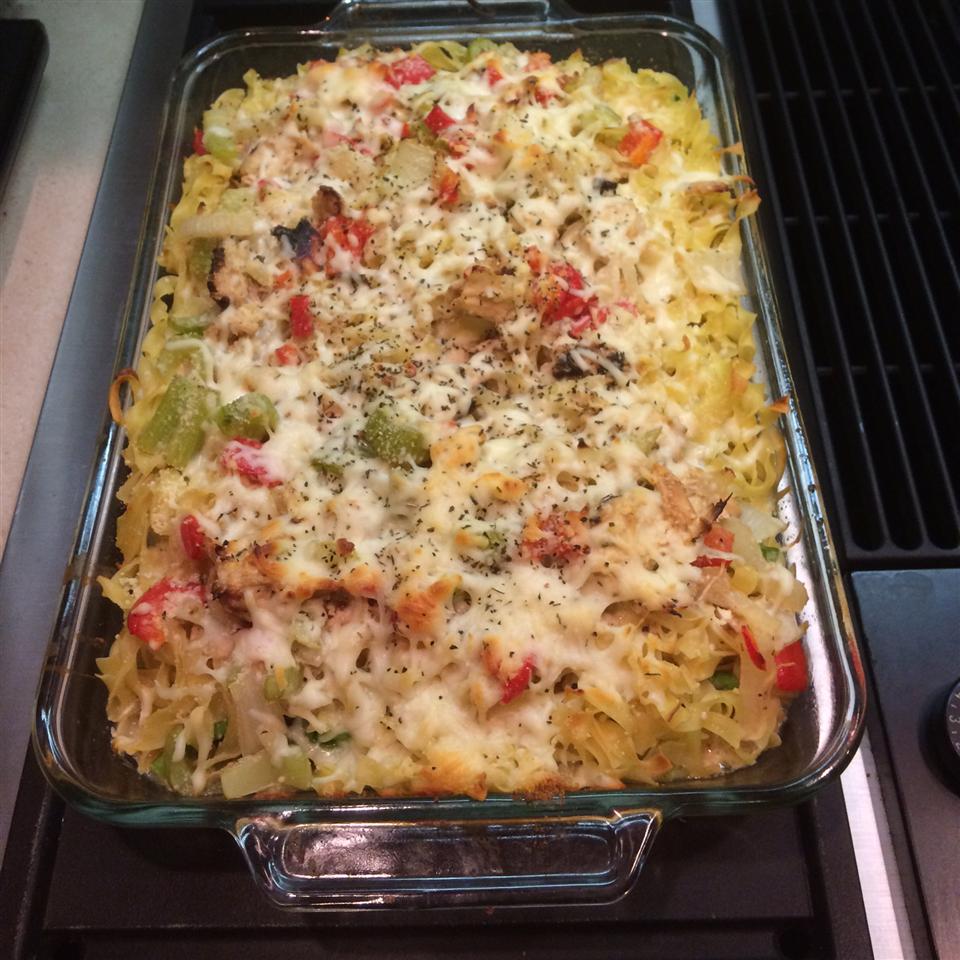
FRESH ASPARAGUS AND CHICKEN CASSEROLE

by Rebecca September 1, 2020
written by Rebecca

Prep: 30mins | Cook: 45mins | Total: 1hr15mins | Serving: 6 | Yield: 6 servings

This one-pot wonder is a staple during the asparagus season when you can get it fresh. Well, it is perfect all year round! A no-fuss casserole that is loaded with chicken, noodles, cheese, asparagus, and spices. A mouthwatering, creamy, and insanely delicious dish that is perfect for a weeknight family meal. This Fresh Asparagus and Chicken Casserole is pretty satisfying, a crowd favorite, and one of the best comfort food!

INGREDIENTS

1 8oz package Noodles, egg, dry, enriched

1 ⅓ tablespoon Oil, olive, salad or cooking

1 onions, raw

1 cup of chicken, roasting, light meat, meat only, cooked, roasted

1 pepper, sweet, red, raw; red bell pepper

2 stalks Celery, raw

1 cup Swanson Clear Chicken Broth CAM

1 ½ cups Cream, sour, cultured

½ teaspoon Spices, oregano, ground

1 pound Asparagus, raw

8 tablespoons Parmesan cheese, grated

HOW TO MAKE FRESH ASPARAGUS AND CHICKEN CASSEROLE

Step 1: Prepare the oven. Preheat it to 350 degrees F or 175 degrees C.

Step 2: Then, grease lightly a 1 1/2-quart casserole dish.

Step 3: Boil a large pot of water. Add in the noodles and cook for about 5 minutes until almost tender. Drain and rinse the noodles under cold water.

Step 4: In a heavy skillet, heat the olive oil over medium heat. Sautee the onion for 4 to 5 minutes while frequently stirring. Stir in the chicken, red bell pepper, celery, and chicken stock.  Allow to boil and simmer for 5 minutes. Then, stir in the sour cream and oregano.

Step 5: Into the prepared dish, spoon half of the chicken mixture and spread. Place the asparagus over the chicken, evenly spreading the cooked noodles on top. Sprinkle over 5 tablespoons of parmesan cheese. Place the rest of the chicken mixture on top and sprinkle over the reserved parmesan cheese.

Step 6: Place inside the preheated oven and bake for about 30 minutes until lightly brown.

Nutrition Facts:

Per Serving: 376.4 calories; 76.6 mg cholesterol; 322.8 mg sodium; 17.3 g protein; 32.7 g carbohydrates

FRESH ASPARAGUS AND CHICKEN CASSEROLE

Rebecca Prep: 30mins | Cook: 45mins | Total: 1hr15mins | Serving: 6 | Yield: 6 servings This one-pot wonder is a staple during the asparagus season when you can get it fresh. Well, it is perfect all year round! A… Main Dish Recipes FRESH ASPARAGUS AND CHICKEN CASSEROLE European Print This
Serves: 6 Prep Time: 30 mins Cooking Time: 45 mins 45 mins
Nutrition facts: 376.4 calories 20 grams fat
Rating: 5.0/5
( 1 voted )

Ingredients

  • 1 8oz package Noodles, egg, dry, enriched
  • 1 ⅓ tablespoon Oil, olive, salad or cooking
  • 1 onions, raw
  • 1 cup of chicken, roasting, light meat, meat only, cooked, roasted
  • 1 pepper, sweet, red, raw; red bell pepper
  • 2 stalks Celery, raw
  • 1 cup Swanson Clear Chicken Broth CAM
  • 1 ½ cups Cream, sour, cultured
  • ½ teaspoon Spices, oregano, ground
  • 1 pound Asparagus, raw
  • 8 tablespoons Parmesan cheese, grated

Instructions

Step 1: Prepare the oven. Preheat it to 350 degrees F or 175 degrees C.

Step 2: Then, grease lightly a 1 1/2-quart casserole dish.

Step 3: Boil a large pot of water. Add in the noodles and cook for about 5 minutes until almost tender. Drain and rinse the noodles under cold water.

Step 4: In a heavy skillet, heat the olive oil over medium heat. Sautee the onion for 4 to 5 minutes while frequently stirring. Stir in the chicken, red bell pepper, celery, and chicken stock.  Allow to boil and simmer for 5 minutes. Then, stir in the sour cream and oregano.

Step 5: Into the prepared dish, spoon half of the chicken mixture and spread. Place the asparagus over the chicken, evenly spreading the cooked noodles on top. Sprinkle over 5 tablespoons of parmesan cheese. Place the rest of the chicken mixture on top and sprinkle over the reserved parmesan cheese.

Step 6: Place inside the preheated oven and bake for about 30 minutes until lightly brown.

September 1, 2020 0 comment
0 FacebookTwitterPinterestEmail
Main Dish Recipes

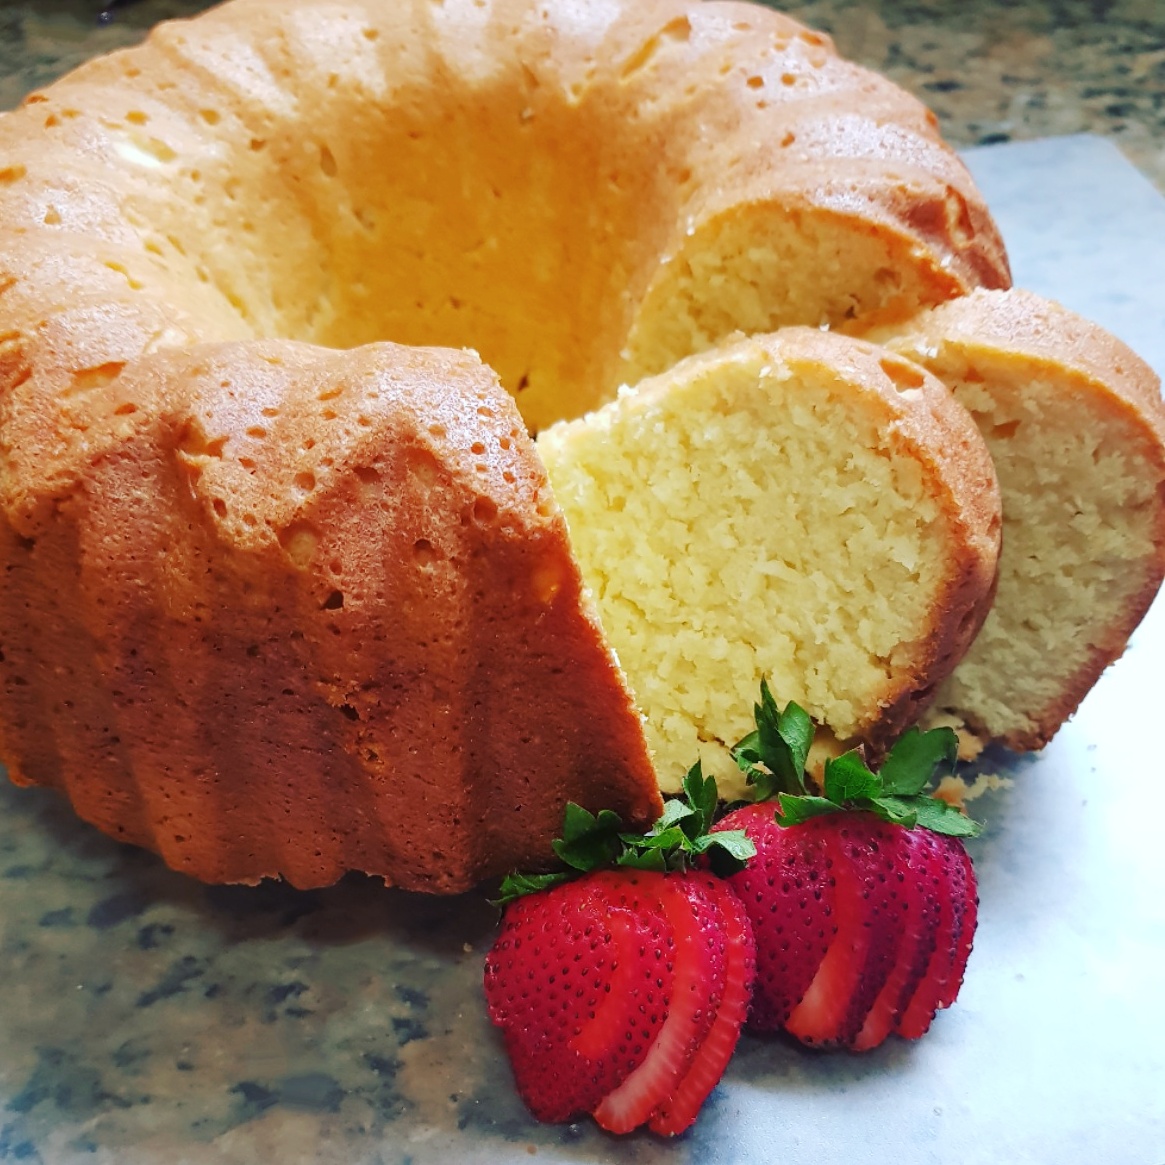
COCONUT CREAM POUND CAKE

by Rebecca September 1, 2020
written by Rebecca

Prep: 15mins | Cook: 1hr 20mins | Total: 1hr 35mins | Serving: 16 | Yield: 1- 10-inch tube pan

This is such a refreshing cake to look at. Dense, moist, and buttery. A crazy rich cake with just the right amount of sweetness filled with coconut. This Coconut Cream Pound Cake is a must on every occasion. Heavenly delicious and an ultimate crowd-pleaser!

INGREDIENTS

1 cup butter, with salt

1 8oz package Cheese, cream

3 cups Sugars, granulated

6 Egg, whole, raw, fresh

1 teaspoon coconut extract

3 cups Wheat flour, white, all-purpose, enriched, bleached

½ teaspoon leavening agents, sodium aluminum sulfate, baking powder, double-acting

2 cups nuts, coconut meat, dried (desiccated), sweetened, flaked, packaged

HOW TO MAKE COCONUT CREAM POUND CAKE

Step 1: Prepare the oven. Preheat it to 325 degrees F or 165 degrees C.

Step 2: Then, grease and flour a 10-inch tube pan.

Step 3: Add the butter and cream cheese in a large bowl. Cream until incorporated. Beat in the sugar until light and fluffy. Add in the eggs, one at a time, beating every after each addition. Stir in the coconut extract before adding in the flour and baking powder. Combine until just moist and stir in the coconut.

Step 4: Transfer the batter into the prepared pan.

Step 5: Place inside the preheated oven and bake for about an hour and twenty minutes until a knife inserted in the middle of the cake comes out clean.

Step 6: Remove from the oven and allow the cake to cool in the pan for at least 10 minutes before inverting onto a cooling rack.

NOTES:

If you intend to use a bundt pan in place of the tube pan, make sure that you use a taller bundt, around 5-inches tall.

I would suggest using a strong vegetable shortening and sugar instead of flour. For me, it is the best way to brush the pan to prevent sticking. By using sugar in place of flour, it is guaranteed you won’t get white spots on the cake, but you can still use flour if desired.

Nutrition Facts:

Per Serving: 450.7 calories; 115.7 mg cholesterol; 191.5 mg sodium; 6.2 g protein; 60.7 g carbohydrates

COCONUT CREAM POUND CAKE

Rebecca Prep: 15mins | Cook: 1hr 20mins | Total: 1hr 35mins | Serving: 16 | Yield: 1- 10-inch tube pan This is such a refreshing cake to look at. Dense, moist, and buttery. A crazy rich cake with just the right… Main Dish Recipes COCONUT CREAM POUND CAKE European Print This
Serves: 16 Prep Time: 15 mins Cooking Time: 1 hr 20 mins 1 hr 20 mins
Nutrition facts: 450.7 calories 20 grams fat
Rating: 5.0/5
( 1 voted )

Ingredients

  • 1 cup butter, with salt
  • 1 8oz package Cheese, cream
  • 3 cups Sugars, granulated
  • 6 Egg, whole, raw, fresh
  • 1 teaspoon coconut extract
  • 3 cups Wheat flour, white, all-purpose, enriched, bleached
  • ½ teaspoon leavening agents, sodium aluminum sulfate, baking powder, double-acting
  • 2 cups nuts, coconut meat, dried (desiccated), sweetened, flaked, packaged

Instructions

Step 1: Prepare the oven. Preheat it to 325 degrees F or 165 degrees C.

Step 2: Then, grease and flour a 10-inch tube pan.

Step 3: Add the butter and cream cheese in a large bowl. Cream until incorporated. Beat in the sugar until light and fluffy. Add in the eggs, one at a time, beating every after each addition. Stir in the coconut extract before adding in the flour and baking powder. Combine until just moist and stir in the coconut.

Step 4: Transfer the batter into the prepared pan.

Step 5: Place inside the preheated oven and bake for about an hour and twenty minutes until a knife inserted in the middle of the cake comes out clean.

Step 6: Remove from the oven and allow the cake to cool in the pan for at least 10 minutes before inverting onto a cooling rack.

NOTES:

If you intend to use a bundt pan in place of the tube pan, make sure that you use a taller bundt, around 5-inches tall.

I would suggest using a strong vegetable shortening and sugar instead of flour. For me, it is the best way to brush the pan to prevent sticking. By using sugar in place of flour, it is guaranteed you won't get white spots on the cake, but you can still use flour if desired.

September 1, 2020 0 comment
0 FacebookTwitterPinterestEmail
Main Dish Recipes

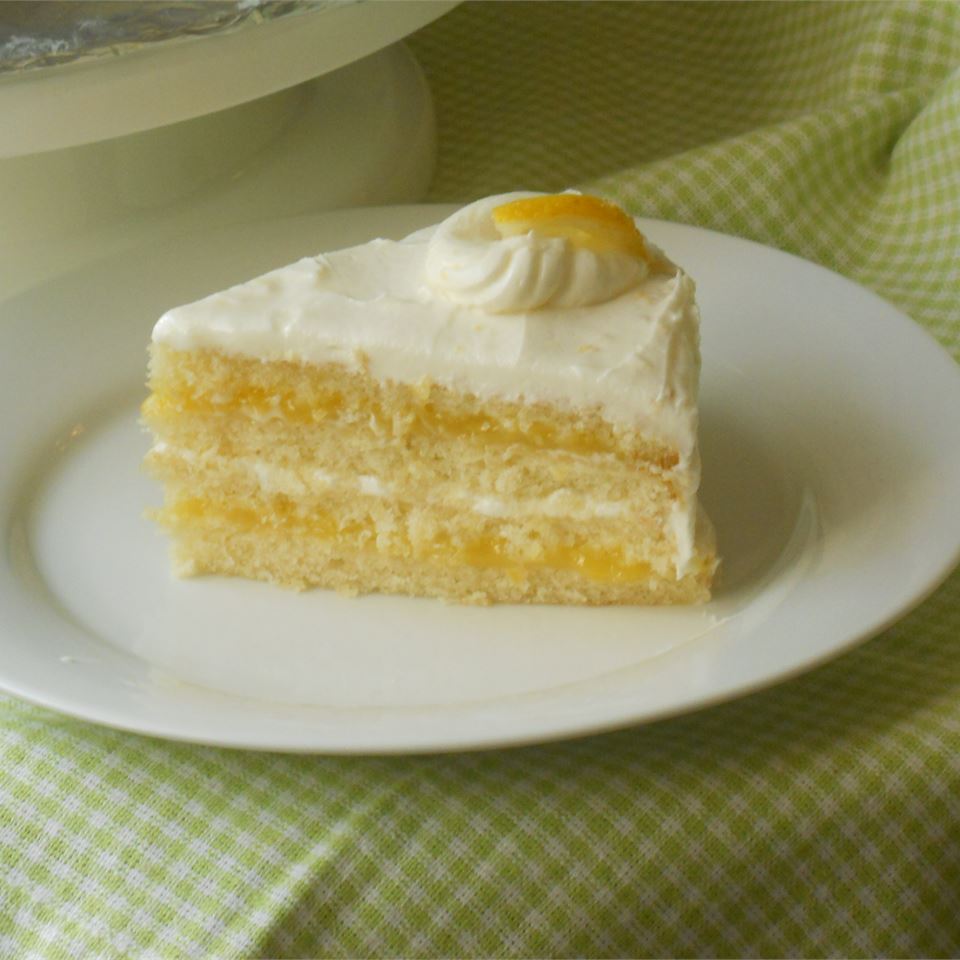
LEMON CAKE WITH LEMON FILLING AND LEMON BUTTER FROSTING

by Rebecca September 1, 2020
written by Rebecca

Prep: 1hr | Cook: 1hr | Additional: 2hrs | Total: 4hrs | Serving: 12 | Yield: 1- 4 layer 8-inch cake

Soft, creamy, with the right amount of sweetness. This extraordinary lemon cake is all you need to have an amazing day every day!

INGREDIENTS

2 cups Wheat flour, white, all-purpose, enriched, bleached

2 teaspoons Baking Powder

1 teaspoon Salt, table

½ cup Butter, with salt

1 ¼ cups Sugars, granulated

3 Egg, whole, raw, fresh

1 teaspoon Vanilla extract

1 cup of milk, reduced fat, fluid, 2% milkfat, with added vitamin A

For the Filling:

1 tablespoon Lemon peel, raw

½ cup Lemon juice, raw

1 tablespoon Cornstarch

6 tablespoons of butter, with salt

¾ cup Sugars, granulated

4 Egg, yolk, raw, fresh

For the Frosting:

4 cups Sugars, powdered

½ cup Butter, with salt

2 tablespoons Lemon juice, raw

1 teaspoon Lemon peel, raw

2 tablespoons Milk, reduced fat, fluid, 2% milkfat, with added vitamin A

HOW TO MAKE LEMON CAKE WITH LEMON FILLING AND LEMON BUTTER FROSTING

Step 1: Prepare the oven. Preheat it to 350 degrees F or 175 degrees C.

Step 2: Then, grease and flour two 8-inch round pans.

Step 3: In a bowl, combine the flour, baking powder, and salt. Set aside.

Step 4: Add the butter and sugar in a large bowl. Cream for about 5 minutes until light and fluffy. Add in the eggs, one at a time, beating every after each addition. Alternately beat in the flour mixture with the milk, making sure to mix just until incorporated.

Step 5: Transfer the batter into the prepared pans. Place inside the preheated oven and bake for about 30 minutes until a toothpick inserted in the center of the cake comes out clean.

Step 6: Remove the cakes from the oven and allow to cool in the pans for at least 10 minutes before inverting onto the wire racks to completely cool.

Step 7: To make the filling, combine a tablespoon of lemon zest, half a cup of lemon juice, and 1 tablespoon of cornstarch in a medium saucepan until smooth. Stir in 6 tablespoons of butter and 3/4 cup sugar. Bring to a boil over medium heat. Boil the mixture for a minute while constantly stirring. Beat the egg yolks in a small bowl using a wire whisk until smooth. Whisk in a bit of the hot lemon mixture into the egg mixture, then, pour everything into the pan beating rapidly. Adjust the heat to low and continue cooking for 5 minutes or until the mixture has thickened. Make sure to just simmer not boil the mixture and constantly stir.

Step 8: In a medium bowl, transfer the filling. To keep skin from forming onto the surface, press the plastic wrap as the mixture cools. Allow it to cool to room temperature. Then, place in the fridge to chill for 3 hours.

Step 9: Time to make the frosting. In a large bowl, beat the confectioners’ sugar, half a cup butter, 2 tablespoons lemon juice, and a teaspoon of lemon zest until smooth. Add in the milk, increasing the speed and beating the frosting continuously until light and fluffy.

Step 10: To assemble the lemon cake, use a serrated knife to split each cake layer in half horizontally to make 4 layers. On a serving plate, place the first layer cut side up. Adding another layer on top and spreading half a cup of frosting on top. Then, the third layer, spreading the rest of the lemon filling after. Top with the final cake layer. Frost the top and sides of the cake with the rest of the frosting.

Step 11: Place the cake in the fridge until ready to serve.

Nutrition Facts:

Per Serving: 601.2 calories; 172.5 mg cholesterol; 434.2 mg sodium; 5.6 g protein; 92.5 g carbohydrates

LEMON CAKE WITH LEMON FILLING AND LEMON BUTTER FROSTING

Rebecca Prep: 1hr | Cook: 1hr | Additional: 2hrs | Total: 4hrs | Serving: 12 | Yield: 1- 4 layer 8-inch cake Soft, creamy, with the right amount of sweetness. This extraordinary lemon cake is all you need to have an amazing… Main Dish Recipes LEMON CAKE WITH LEMON FILLING AND LEMON BUTTER FROSTING European Print This
Serves: 12 Prep Time: 1 hr Cooking Time: 3 hrs 3 hrs
Nutrition facts: 601.2 calories 20 grams fat
Rating: 5.0/5
( 1 voted )

Ingredients

  • 2 cups Wheat flour, white, all-purpose, enriched, bleached
  • 2 teaspoons Baking Powder
  • 1 teaspoon Salt, table
  • ½ cup Butter, with salt
  • 1 ¼ cups Sugars, granulated
  • 3 Egg, whole, raw, fresh
  • 1 teaspoon Vanilla extract
  • 1 cup of milk, reduced fat, fluid, 2% milkfat, with added vitamin A
  • For the Filling:
  • 1 tablespoon Lemon peel, raw
  • ½ cup Lemon juice, raw
  • 1 tablespoon Cornstarch
  • 6 tablespoons of butter, with salt
  • ¾ cup Sugars, granulated
  • 4 Egg, yolk, raw, fresh
  • For the Frosting:
  • 4 cups Sugars, powdered
  • ½ cup Butter, with salt
  • 2 tablespoons Lemon juice, raw
  • 1 teaspoon Lemon peel, raw
  • 2 tablespoons Milk, reduced fat, fluid, 2% milkfat, with added vitamin A

Instructions

Step 1: Prepare the oven. Preheat it to 350 degrees F or 175 degrees C.

Step 2: Then, grease and flour two 8-inch round pans.

Step 3: In a bowl, combine the flour, baking powder, and salt. Set aside.

Step 4: Add the butter and sugar in a large bowl. Cream for about 5 minutes until light and fluffy. Add in the eggs, one at a time, beating every after each addition. Alternately beat in the flour mixture with the milk, making sure to mix just until incorporated.

Step 5: Transfer the batter into the prepared pans. Place inside the preheated oven and bake for about 30 minutes until a toothpick inserted in the center of the cake comes out clean.

Step 6: Remove the cakes from the oven and allow to cool in the pans for at least 10 minutes before inverting onto the wire racks to completely cool.

Step 7: To make the filling, combine a tablespoon of lemon zest, half a cup of lemon juice, and 1 tablespoon of cornstarch in a medium saucepan until smooth. Stir in 6 tablespoons of butter and 3/4 cup sugar. Bring to a boil over medium heat. Boil the mixture for a minute while constantly stirring. Beat the egg yolks in a small bowl using a wire whisk until smooth. Whisk in a bit of the hot lemon mixture into the egg mixture, then, pour everything into the pan beating rapidly. Adjust the heat to low and continue cooking for 5 minutes or until the mixture has thickened. Make sure to just simmer not boil the mixture and constantly stir.

Step 8: In a medium bowl, transfer the filling. To keep skin from forming onto the surface, press the plastic wrap as the mixture cools. Allow it to cool to room temperature. Then, place in the fridge to chill for 3 hours.

Step 9: Time to make the frosting. In a large bowl, beat the confectioners' sugar, half a cup butter, 2 tablespoons lemon juice, and a teaspoon of lemon zest until smooth. Add in the milk, increasing the speed and beating the frosting continuously until light and fluffy.

Step 10: To assemble the lemon cake, use a serrated knife to split each cake layer in half horizontally to make 4 layers. On a serving plate, place the first layer cut side up. Adding another layer on top and spreading half a cup of frosting on top. Then, the third layer, spreading the rest of the lemon filling after. Top with the final cake layer. Frost the top and sides of the cake with the rest of the frosting.

Step 11: Place the cake in the fridge until ready to serve.

September 1, 2020 0 comment
0 FacebookTwitterPinterestEmail
Main Dish Recipes

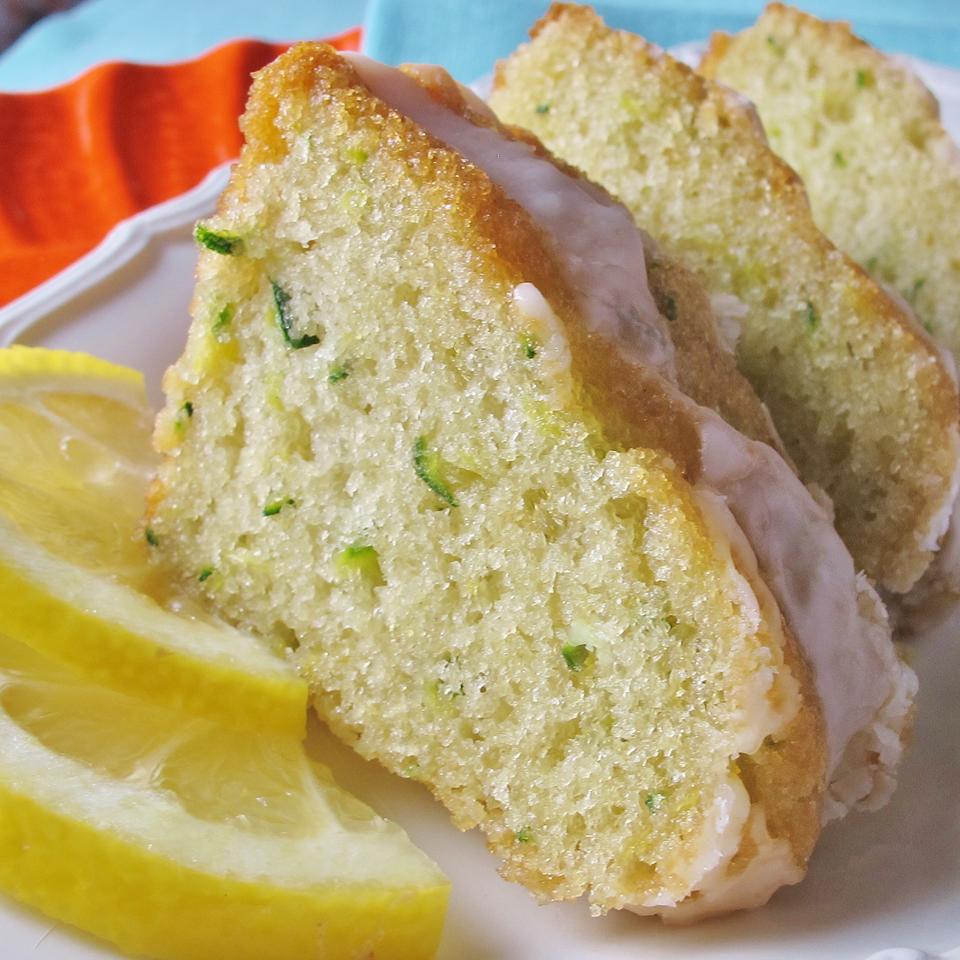
LEMON ZUCCHINI BARS

by Rebecca August 31, 2020
written by Rebecca

Prep: 25 mins | Cook: 35mins | Additional: 1 hr | Total: 2 hrs | Serving: 12 | Yield: 2 dozen

I am so impressed with this amazing recipe! The taste of zucchini is so perfect with the rest of the ingredients. I am telling you, every bite of this is both refreshing and satisfying. Give this one a try today and surprise your friends and family with the awesome flavors of these perfect slices of heaven. Enjoy!

INGREDIENTS

1 ¼ cups Sugars, granulated

1 cup Oil, vegetable corn, salad or cooking

3 Egg, whole, raw, fresh

2 teaspoons Lemon peel, raw

¼ cup Lemon juice, raw

1 ¾ cups Zucchini, raw

2 cups of Wheat flour, white, all-purpose, enriched, bleached

¼ teaspoon Leavening agents, baking powder, double-acting, sodium aluminum sulfate

2 teaspoons Leavening agents, baking soda

1 teaspoon Salt, table

1 cup Nuts, walnuts, English

⅓ cup Sugars, powdered

HOW TO MAKE LEMON ZUCCHINI BARS

Step 1: Ready the oven and preheat to 175 degrees C or 350 degrees F.

Step 2: Apply cooking spray into a 9×13-inch baking pan.

Step 3: In a large mixing bowl, add in the eggs, oil, sugar, lemon juice, and lemon rin. Stir until well mixed.

Step 4: Add in the shredded zucchini and stir until well blended.

Step 5: In another large mixing bowl, add in the baking soda, baking powder, and salt. Whisk until well mixed.

Step 6: Transfer the baking powder mixture into the zucchini mixture. Transfer it gradually.

Step 7: Stir the mixture and add in the walnuts until well blended.

Step 8: Transfer the batter into the greased baking pan.

Step 9: Place inside the preheated oven and bake for 35 to 45 minutes or until a toothpick inserted in the middle comes out clean.

Step 10: Remove from the oven and let it sit on a wire rack to cool for at least 5 minutes.

Step 11: Sprinkle the confectioners’ sugar on top then slice into even bars.

Step 12: Serve and enjoy!

Nutrition Facts:

Per Serving: 417.2 calories; 46.5 mg cholesterol; 433.6 mg sodium; 5.4 g protein; 42.6 g carbohydrates

LEMON ZUCCHINI BARS

Rebecca Prep: 25 mins | Cook: 35mins | Additional: 1 hr | Total: 2 hrs | Serving: 12 | Yield: 2 dozen I am so impressed with this amazing recipe! The taste of zucchini is so perfect with the rest… Main Dish Recipes LEMON ZUCCHINI BARS European Print This
Serves: 12 Prep Time: 25 mins Cooking Time: 1 hr 35 mins 1 hr 35 mins
Nutrition facts: 417.2 calories 20 grams fat
Rating: 5.0/5
( 1 voted )

Ingredients

  • 1 ¼ cups Sugars, granulated
  • 1 cup Oil, vegetable corn, salad or cooking
  • 3 Egg, whole, raw, fresh
  • 2 teaspoons Lemon peel, raw
  • ¼ cup Lemon juice, raw
  • 1 ¾ cups Zucchini, raw
  • 2 cups of Wheat flour, white, all-purpose, enriched, bleached
  • ¼ teaspoon Leavening agents, baking powder, double-acting, sodium aluminum sulfate
  • 2 teaspoons Leavening agents, baking soda
  • 1 teaspoon Salt, table
  • 1 cup Nuts, walnuts, English
  • ⅓ cup Sugars, powdered

Instructions

Step 1: Ready the oven and preheat to 175 degrees C or 350 degrees F.

Step 2: Apply cooking spray into a 9x13-inch baking pan.

Step 3: In a large mixing bowl, add in the eggs, oil, sugar, lemon juice, and lemon rin. Stir until well mixed.

Step 4: Add in the shredded zucchini and stir until well blended.

Step 5: In another large mixing bowl, add in the baking soda, baking powder, and salt. Whisk until well mixed.

Step 6: Transfer the baking powder mixture into the zucchini mixture. Transfer it gradually.

Step 7: Stir the mixture and add in the walnuts until well blended.

Step 8: Transfer the batter into the greased baking pan.

Step 9: Place inside the preheated oven and bake for 35 to 45 minutes or until a toothpick inserted in the middle comes out clean.

Step 10: Remove from the oven and let it sit on a wire rack to cool for at least 5 minutes.

Step 11: Sprinkle the confectioners' sugar on top then slice into even bars.

Step 12: Serve and enjoy!

August 31, 2020 0 comment
0 FacebookTwitterPinterestEmail
Main Dish Recipes

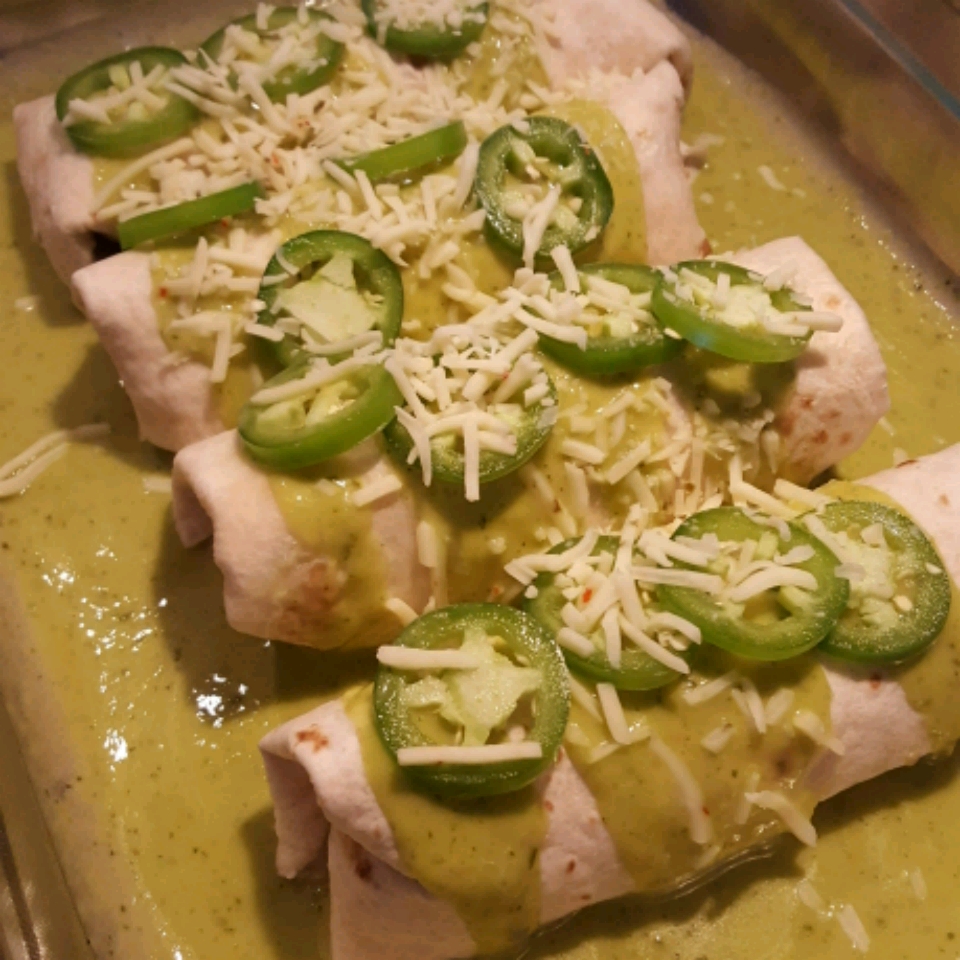
JALAPENO CREAM CHEESE CHICKEN ENCHILADAS

by Rebecca August 31, 2020
written by Rebecca

Prep: 25mins | Cook: 1hr 15mins | Total: 1hr 40mins | Servings: 7 | Yield: 7 servings

The most amazing dish I have ever cooked! This recipe has been the highlight of my day. The balanced taste of saltiness and creaminess of this recipe will make you want to eat a lot! Make sure to cook enough if you have guests coming over. Enjoy!

INGREDIENTS

3 Chicken breast, meat only, broilers or fryers, raw

1 teaspoon spices, pepper, red or cayenne

½ teaspoon spices, garlic powder

1 pinch salt, table

2 tablespoons butter, with salt

1 large Onions, raw

2 Peppers, jalapeno, raw

1 8oz package Cheese, cream

1 tablespoon Spices, garlic powder

½ teaspoon Spices, pepper, red or cayenne

½ teaspoon Spices, paprika

½ teaspoon Spices, chili powder

½ teaspoon cumin, ground

1 28oz can Green Enchilada Sauce

7 eaches flour tortilla (7-8 inch)

8 ounces Cheese, Monterey

HOW TO MAKE JALAPENO CREAM CHEESE CHICKEN ENCHILADAS

Step 1: Ready the oven and preheat to 350 degrees F or 175 degrees C.

Step 2: Place the chicken breasts in a mixing bowl.

Step 3: Season the chicken with 1/2 teaspoon of garlic powder, cayenne pepper, black pepper, and salt. Use your hands to coat the chicken evenly.

Step 4: Place the seasoned chicken breasts into a baking dish.

Step 5: Place inside the preheated oven and bake for 45 minutes or until the inside is no longer pink in color and the juices become clear.

Step 6: Remove from the oven and let it sit a room temperature then shred it using 2 forks. Set aside.

Step 7: Place a skillet on the stove and turn the heat to medium. Add in the butter and allow it to melt.

Step 8: Saute’ the jalapenos and onion for 5 minutes or until it becomes translucent.

Step 9: Add in the softened cream cheese, cayenne powder, garlic powder, chili powder, cumin, and paprika.

Step 10: Add in the cooked chicken and remove the skillet from the heat.

Step 11: Add in half of the enchilada sauce into the 9×13-inch baking dish and arrange them in the bottom part.

Step 12: Line the chicken mixture in the middle of each tortilla and sprinkle 1 tablespoon of Monterey Jack  Cheese on top.

Step 13: Roll up the tortillas and lay them on the sauce and pour the rest of the sauce on top of the enchiladas.

Step 14: Sprinkle the rest of the Monterey Jack Cheese on top.

Step 15: Place inside the preheated oven and bake for 30 to 35 minutes or until the cheese has melted.

Step 16: Remove from the oven, Serve and enjoy!

Nutrition Facts:

Per Serving: 583.5 calories; 122.9 mg cholesterol; 598.8 mg sodium; 28.7 g protein; 38.4 g carbohydrates

JALAPENO CREAM CHEESE CHICKEN ENCHILADAS

Rebecca Prep: 25mins | Cook: 1hr 15mins | Total: 1hr 40mins | Servings: 7 | Yield: 7 servings The most amazing dish I have ever cooked! This recipe has been the highlight of my day. The balanced taste of saltiness… Main Dish Recipes JALAPENO CREAM CHEESE CHICKEN ENCHILADAS European Print This
Serves: 7 Prep Time: 25 mins Cooking Time: 1 hr 15 mins 1 hr 15 mins
Nutrition facts: 583.5 calories 20 grams fat
Rating: 5.0/5
( 1 voted )

Ingredients

  • 3 Chicken breast, meat only, broilers or fryers, raw
  • 1 teaspoon spices, pepper, red or cayenne
  • ½ teaspoon spices, garlic powder
  • 1 pinch salt, table
  • 2 tablespoons butter, with salt
  • 1 large Onions, raw
  • 2 Peppers, jalapeno, raw
  • 1 8oz package Cheese, cream
  • 1 tablespoon Spices, garlic powder
  • ½ teaspoon Spices, pepper, red or cayenne
  • ½ teaspoon Spices, paprika
  • ½ teaspoon Spices, chili powder
  • ½ teaspoon cumin, ground
  • 1 28oz can Green Enchilada Sauce
  • 7 eaches flour tortilla (7-8 inch)
  • 8 ounces Cheese, Monterey

Instructions

Step 1: Ready the oven and preheat to 350 degrees F or 175 degrees C.

Step 2: Place the chicken breasts in a mixing bowl.

Step 3: Season the chicken with 1/2 teaspoon of garlic powder, cayenne pepper, black pepper, and salt. Use your hands to coat the chicken evenly.

Step 4: Place the seasoned chicken breasts into a baking dish.

Step 5: Place inside the preheated oven and bake for 45 minutes or until the inside is no longer pink in color and the juices become clear.

Step 6: Remove from the oven and let it sit a room temperature then shred it using 2 forks. Set aside.

Step 7: Place a skillet on the stove and turn the heat to medium. Add in the butter and allow it to melt.

Step 8: Saute' the jalapenos and onion for 5 minutes or until it becomes translucent.

Step 9: Add in the softened cream cheese, cayenne powder, garlic powder, chili powder, cumin, and paprika.

Step 10: Add in the cooked chicken and remove the skillet from the heat.

Step 11: Add in half of the enchilada sauce into the 9x13-inch baking dish and arrange them in the bottom part.

Step 12: Line the chicken mixture in the middle of each tortilla and sprinkle 1 tablespoon of Monterey Jack  Cheese on top.

Step 13: Roll up the tortillas and lay them on the sauce and pour the rest of the sauce on top of the enchiladas.

Step 14: Sprinkle the rest of the Monterey Jack Cheese on top.

Step 15: Place inside the preheated oven and bake for 30 to 35 minutes or until the cheese has melted.

Step 16: Remove from the oven, Serve and enjoy!

August 31, 2020 0 comment
0 FacebookTwitterPinterestEmail
Main Dish Recipes

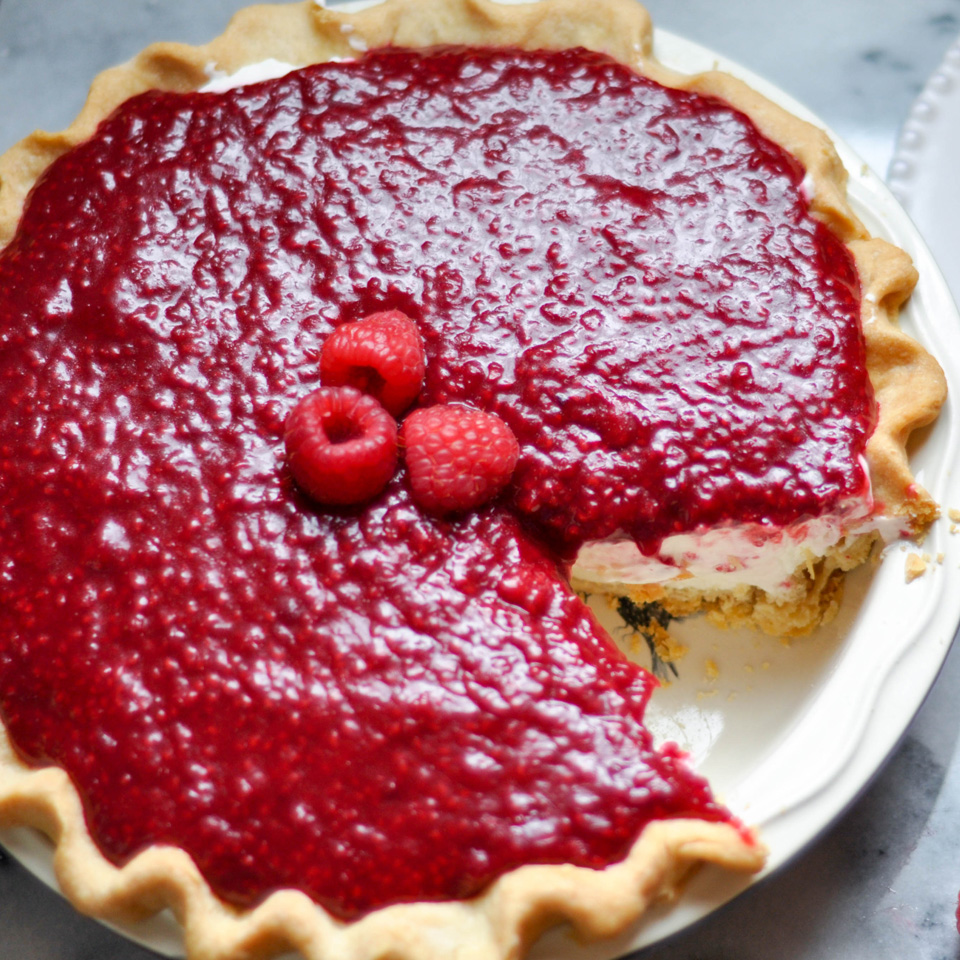
RASPBERRY CREAM PIE

by Rebecca August 31, 2020
written by Rebecca

Prep: 20mins | Cook: 45mins | Additional: 2hrs | Total: 3hr5mins | Servings: 8 | Yield: 1 9-inch pie

The best pie I have ever eaten! This Raspberry Pie will make your day. It is so delicious and very easy to make. Give it a try today and taste it yourself. Enjoy!

INGREDIENTS

1 recipe of pie crust, standard-type, prepared from recipe, unbaked

For Raspberry Topping:

¼ cup Sugars, granulated

1 tablespoon Cornstarch

1 12oz package IQF Red Raspberry OBC

1 ½ tablespoons Water, municipal

1 ½ tablespoons Lemon juice, raw

1 tablespoon of butter, with salt

½ teaspoon Vanilla extract

For the Cream Filling:

1 ½ cups Cream, fluid, heavy whipping

1 8oz package Cheese, cream

¾ cup Sugars, powdered

1 tablespoon Vanilla extract

½ cup Cream, sour, cultured

HOW TO MAKE RASPBERRY CREAM PIE

Step 1: Ready the oven and preheat to 175 degrees C or 350 degrees F.

Step 2: Roll out the pie crust into a 9-inch pie dish.

Step 3: Press the dough and make sure to press in on the sides.

Step 4: Poke small holes using a fork on the bottom of the crust. Line with parchment paper and fill it with dried beans.

Step 5: Place inside the preheated oven and bake for 20 minutes. Remove the parchment paper and beans and bake for another 15 minutes or until the color becomes golden.

Step 6: Remove from the oven and let it sit on a wire rack to cool at room temperature.

Step 7: Place a medium saucepan on the stove and add in cornstarch and sugar. Whisk until well mixed.

Step 8: Add in the water, lemon juice, and raspberries. Allow it to boil for 5 minutes and stir.

Step 9: Remove from the heat ad add in the butter and vanilla. Stir until well mixed. Let it sit on a wire rack to cool.

Step 10: Add in the heavy cream into the bowl of the stand mixer. Beat at medium speed until stiff peaks. Transfer into a medium mixing bowl.

Step 11: In the same bowl, add in the powdered sugar, vanilla extract, and cream cheese. Beat for 2 minutes until well mixed.

Step 12: Add in the sour cream and whipped cream and stir until well blended.

Step 13: Spread the filling into the cooled pie crust and spread raspberry on top.

Step 14: Place inside the fridge for 2 hours or overnight to chill.

Step 15: Serve and enjoy!

NOTE:

You can try fresh raspberries as well.

Nutrition Facts:

Per Serving: 505.1 calories; 102.1 mg cholesterol; 235.7 mg sodium; 5.4 g protein; 35.6 g carbohydrates

RASPBERRY CREAM PIE

Rebecca Prep: 20mins | Cook: 45mins | Additional: 2hrs | Total: 3hr5mins | Servings: 8 | Yield: 1 9-inch pie The best pie I have ever eaten! This Raspberry Pie will make your day. It is so delicious and very easy to… Main Dish Recipes RASPBERRY CREAM PIE European Print This
Serves: 8 Prep Time: 20 mins Cooking Time: 2 hrs 45 mins 2 hrs 45 mins
Nutrition facts: 505.1 calories 20 grams fat
Rating: 5.0/5
( 1 voted )

Ingredients

  • 1 recipe of pie crust, standard-type, prepared from recipe, unbaked
  • For Raspberry Topping:
  • ¼ cup Sugars, granulated
  • 1 tablespoon Cornstarch
  • 1 12oz package IQF Red Raspberry OBC
  • 1 ½ tablespoons Water, municipal
  • 1 ½ tablespoons Lemon juice, raw
  • 1 tablespoon of butter, with salt
  • ½ teaspoon Vanilla extract
  • For the Cream Filling:
  • 1 ½ cups Cream, fluid, heavy whipping
  • 1 8oz package Cheese, cream
  • ¾ cup Sugars, powdered
  • 1 tablespoon Vanilla extract
  • ½ cup Cream, sour, cultured

Instructions

Step 1: Ready the oven and preheat to 175 degrees C or 350 degrees F.

Step 2: Roll out the pie crust into a 9-inch pie dish.

Step 3: Press the dough and make sure to press in on the sides.

Step 4: Poke small holes using a fork on the bottom of the crust. Line with parchment paper and fill it with dried beans.

Step 5: Place inside the preheated oven and bake for 20 minutes. Remove the parchment paper and beans and bake for another 15 minutes or until the color becomes golden.

Step 6: Remove from the oven and let it sit on a wire rack to cool at room temperature.

Step 7: Place a medium saucepan on the stove and add in cornstarch and sugar. Whisk until well mixed.

Step 8: Add in the water, lemon juice, and raspberries. Allow it to boil for 5 minutes and stir.

Step 9: Remove from the heat ad add in the butter and vanilla. Stir until well mixed. Let it sit on a wire rack to cool.

Step 10: Add in the heavy cream into the bowl of the stand mixer. Beat at medium speed until stiff peaks. Transfer into a medium mixing bowl.

Step 11: In the same bowl, add in the powdered sugar, vanilla extract, and cream cheese. Beat for 2 minutes until well mixed.

Step 12: Add in the sour cream and whipped cream and stir until well blended.

Step 13: Spread the filling into the cooled pie crust and spread raspberry on top.

Step 14: Place inside the fridge for 2 hours or overnight to chill.

Step 15: Serve and enjoy!

NOTE:

You can try fresh raspberries as well.

August 31, 2020 0 comment
0 FacebookTwitterPinterestEmail
Main Dish Recipes

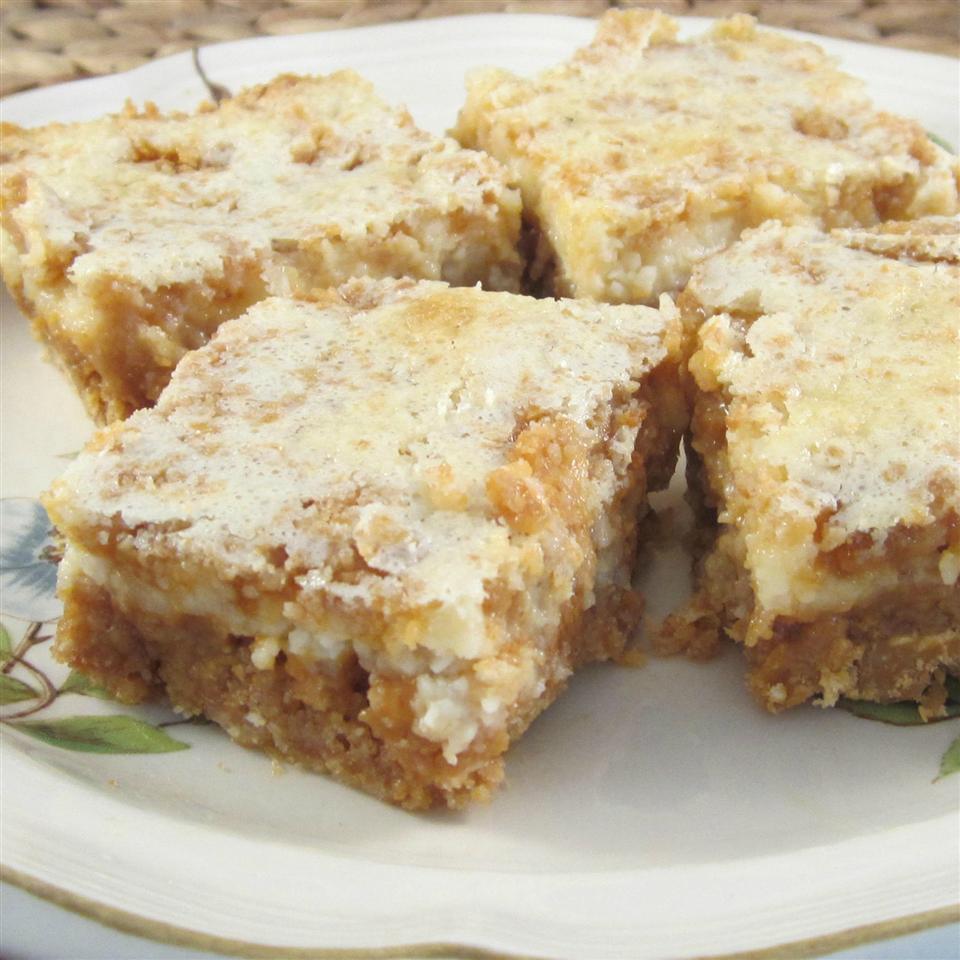
BUTTERSCOTCH CHEESECAKE BARS

by Rebecca August 31, 2020
written by Rebecca

Prep: 20mins | Cook: 25mins | Total: 45mins | Serving: 16 | Yield: 16 servings

It was love at first bite. This is my new addiction. Butterscotch Cheesecake Bars are everything. Rich and creamy with a buttery graham cracker crust. A pretty simple, not fussy dessert bars that call for just a few easy to find ingredients. One bite and I am sure you will fall head over heels. I made this yesterday and brought some to the office, everyone loved it!

INGREDIENTS

1 serving of Pam Butter Cooking Spray-1/3 Sec Spray IHF

1 11oz package Toll House Butterscotch Morsels NF

½ cup Butter, with salt

2 cups Cookies, graham crackers, plain or honey

1 8oz package Cheese, cream

1 14oz can Milk, canned, condensed, sweetened

1 egg, whole, raw, fresh

1 teaspoon Vanilla extract

HOW TO MAKE BUTTERSCOTCH CHEESECAKE BARS

Step 1: Prepare the oven. Preheat it to 350 degrees F or 175 degrees C.

Step 2: Use a cooking spray to grease a 9 x 13-inch baking dish.

Step 3: In a saucepan, heat the butterscotch and butter over low heat for about 5 minutes until melted. Make sure to frequently stir. Then, remove the saucepan from the heat and stir in the graham cracker crumbs. Set aside 2/3 cup of graham cracker-butterscotch mixture. For the rest of the mixture, form a crust by pressing it into the prepared baking dish.

Step 4: In a mixing bowl, beat the cream cheese until light and fluffy. Mix in the sweetened condensed milk, egg, and vanilla extract. Beat well with an electric mixer.

Step 5: Then, pour the cream cheese mixture over the graham crust.

Step 6: Sprinkle the reserved graham cracker-butterscotch mixture on top of the cream cheese mixture layer.

Step 7: Place inside the preheated oven and bake for about 20 to 30 minutes until a toothpick inserted in the middle comes out clean.

Nutrition Facts:

Per Serving: 336.8 calories; 50.6 mg cholesterol; 201.7 mg sodium; 4.2 g protein; 34 g carbohydrates

BUTTERSCOTCH CHEESECAKE BARS

Rebecca Prep: 20mins | Cook: 25mins | Total: 45mins | Serving: 16 | Yield: 16 servings It was love at first bite. This is my new addiction. Butterscotch Cheesecake Bars are everything. Rich and creamy with a buttery graham cracker… Main Dish Recipes BUTTERSCOTCH CHEESECAKE BARS European Print This
Serves: 16 Prep Time: 20 mins Cooking Time: 25 mins 25 mins
Nutrition facts: 336.8 calories 20 grams fat
Rating: 5.0/5
( 1 voted )

Ingredients

  • 1 serving of Pam Butter Cooking Spray-1/3 Sec Spray IHF
  • 1 11oz package Toll House Butterscotch Morsels NF
  • ½ cup Butter, with salt
  • 2 cups Cookies, graham crackers, plain or honey
  • 1 8oz package Cheese, cream
  • 1 14oz can Milk, canned, condensed, sweetened
  • 1 egg, whole, raw, fresh
  • 1 teaspoon Vanilla extract

Instructions

Step 1: Prepare the oven. Preheat it to 350 degrees F or 175 degrees C.

Step 2: Use a cooking spray to grease a 9 x 13-inch baking dish.

Step 3: In a saucepan, heat the butterscotch and butter over low heat for about 5 minutes until melted. Make sure to frequently stir. Then, remove the saucepan from the heat and stir in the graham cracker crumbs. Set aside 2/3 cup of graham cracker-butterscotch mixture. For the rest of the mixture, form a crust by pressing it into the prepared baking dish.

Step 4: In a mixing bowl, beat the cream cheese until light and fluffy. Mix in the sweetened condensed milk, egg, and vanilla extract. Beat well with an electric mixer.

Step 5: Then, pour the cream cheese mixture over the graham crust.

Step 6: Sprinkle the reserved graham cracker-butterscotch mixture on top of the cream cheese mixture layer.

Step 7: Place inside the preheated oven and bake for about 20 to 30 minutes until a toothpick inserted in the middle comes out clean.

August 31, 2020 0 comment
0 FacebookTwitterPinterestEmail
Main Dish Recipes

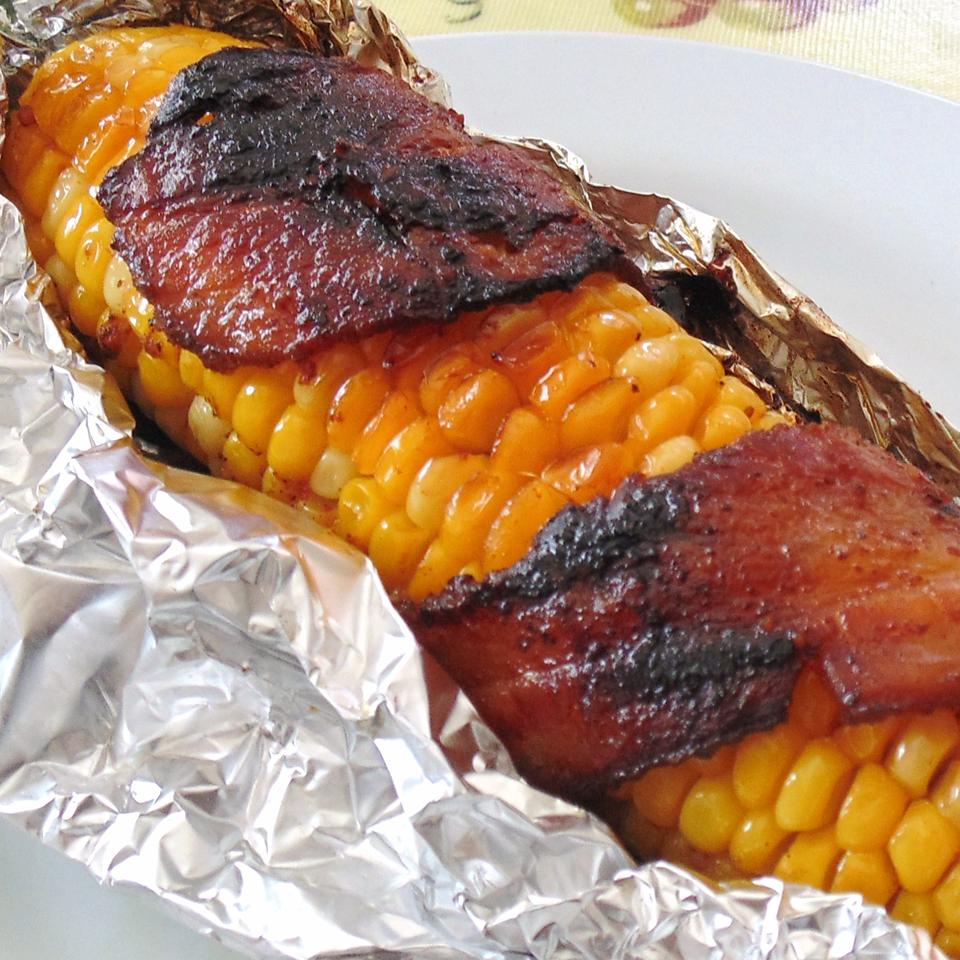
GRILLED BACON-WRAPPED CORN ON THE COB

by Rebecca August 31, 2020
written by Rebecca

Prep: 20mins | Cook: 1hr5mins | Total: 1hr25mins | Servings: 10 | Yield: 10 ears of corn

This is my heaven! Grilled Bacon-Wrapped Corn is my weakness. I can never say no to this. Well, no one can say no to this mouthwatering and freaking delicious corn on the cob. It is pretty straightforward, easy peasy, and always the highlight of my weekend. Everything is great with bacon!

INGREDIENTS

10 ears Corn, sweet, yellow, raw

1 pinch Cajun Seasoning LF

1 pinch Salt, table

1 1lb package Pork, cured, bacon, raw

10 eaches aluminum foil

HOW TO MAKE GRILLED BACON-WRAPPED CORN ON THE COB

Step 1: Prepare your outdoor grill. Preheat it to high heat.

Step 2: Sprinkle each ear of corn with Cajun seasoning, salt, and pepper. Then, wrap the corn with 2 slices of bacon each to cover the ears thoroughly as possible. (You might need to use 3 pieces bacon to wrap a big ear of corn.) Use an aluminum foil to wrap the corn and twist the ends to seal tightly.

Step 3: Place the wrapped corn onto the preheated grill. Cook for about 10 minutes on high heat until the corn is hot.

Step 4: Adjust the heat to low and continue to grill for another 45 minutes until the bacon is cooked and the corn is tender.

NOTES:

To cut the cooking time, do not use a thick-cut form of bacon.

I would suggest buying corn from your local farmers market for the best flavor and make sure to cook it the same day you bought it. Corn is better and as it sweetest when freshly picked.

Loosely wrap the corn instead of tightly wrapping it.

Adding a pinch or two of cayenne pepper will give your corn a bit of spice. If you don’t want spicy, then stick to the ingredients specified above.

Nutrition Facts:

Per Serving: 285.4 calories; 30.8 mg cholesterol; 422.6 mg sodium; 8.2 g protein; 17.5 g carbohydrates

GRILLED BACON-WRAPPED CORN ON THE COB

Rebecca Prep: 20mins | Cook: 1hr5mins | Total: 1hr25mins | Servings: 10 | Yield: 10 ears of corn This is my heaven! Grilled Bacon-Wrapped Corn is my weakness. I can never say no to this. Well, no one can say… Main Dish Recipes GRILLED BACON-WRAPPED CORN ON THE COB European Print This
Serves: 10 Prep Time: 20 mins Cooking Time: 1 hr 25 mins 1 hr 25 mins
Nutrition facts: 285.4 calories 20 grams fat
Rating: 4.5/5
( 2 voted )

Ingredients

  • 10 ears Corn, sweet, yellow, raw
  • 1 pinch Cajun Seasoning LF
  • 1 pinch Salt, table
  • 1 1lb package Pork, cured, bacon, raw
  • 10 eaches aluminum foil

Instructions

Step 1: Prepare your outdoor grill. Preheat it to high heat.

Step 2: Sprinkle each ear of corn with Cajun seasoning, salt, and pepper. Then, wrap the corn with 2 slices of bacon each to cover the ears thoroughly as possible. (You might need to use 3 pieces bacon to wrap a big ear of corn.) Use an aluminum foil to wrap the corn and twist the ends to seal tightly.

Step 3: Place the wrapped corn onto the preheated grill. Cook for about 10 minutes on high heat until the corn is hot.

Step 4: Adjust the heat to low and continue to grill for another 45 minutes until the bacon is cooked and the corn is tender.

NOTES:

To cut the cooking time, do not use a thick-cut form of bacon.

I would suggest buying corn from your local farmers market for the best flavor and make sure to cook it the same day you bought it. Corn is better and as it sweetest when freshly picked.

Loosely wrap the corn instead of tightly wrapping it.

Adding a pinch or two of cayenne pepper will give your corn a bit of spice. If you don't want spicy, then stick to the ingredients specified above.

August 31, 2020 0 comment
0 FacebookTwitterPinterestEmail
Newer Posts
Older Posts

Popular Posts

  • 1

    Crispy Crunchy Parmesan Potatoes

    March 21, 2020
  • 2

    CROCK POT SMOTHERED PORK CHOPS

    March 21, 2020
  • Facebook
  • Twitter

@2019 - All Right Reserved.


Back To Top