Cook it once
  • Home
  • Privacy Policy
  • Recipes
    • KETO
    • LC
    • WW
  • Tips
  • Contact
Cook it once
  • Home
  • Privacy Policy
  • Recipes
    • KETO
    • LC
    • WW
  • Tips
  • Contact
Category:

Main Dish Recipes

Main Dish Recipes

BOSTON CREAM PIE CUPCAKES

by Rebecca September 3, 2020
written by Rebecca

Prep Time: 35 minutes | Cook Time: 15 minutes | Total Time: 50 minutes | Yield: 12-14

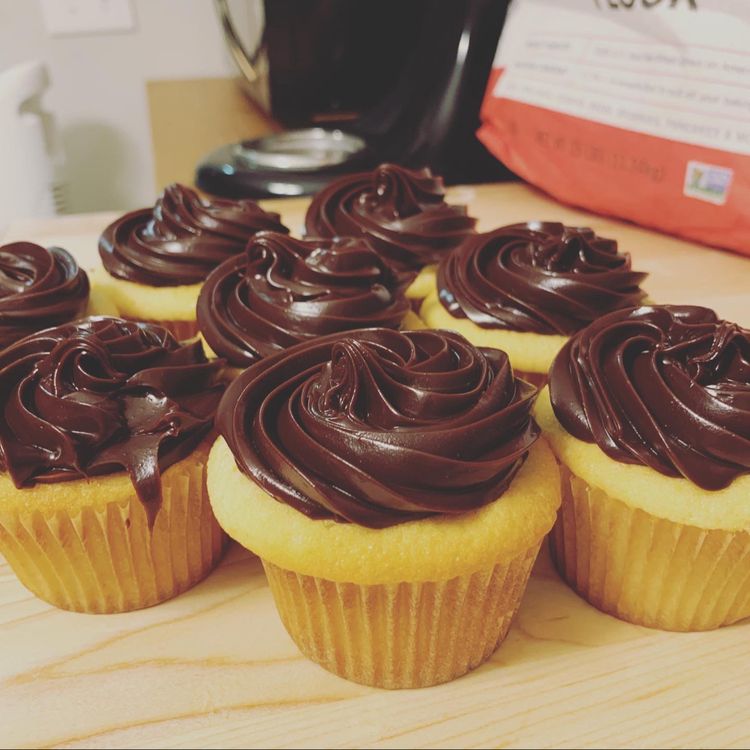
Look at these pretty chocolate swirls and these light and soft cupcakes. I’ll tell you, they are dangerously delicious! Every bite is heaven! If you are looking for gifts or giveaways, these Cream Pie Cupcakes will work best.

INGREDIENTS

VANILLA CUPCAKES:

6 tbsp (84g), unsalted butter, room temperature (I use Challenge Butter)

3/4 cups (155g) sugar

6 tbsp (86g) sour cream, room temperature

2 tsp (10ml) vanilla extract

3 large egg whites, room temperature

1 1/4 cups (163g) all-purpose flour

2 tsp (8g) baking powder

¼ tsp salt

6 tbsp (90ml) milk, room temperature

2 tbsp (30ml) water, room temperature

PASTRY CREAM FILLING:

2 egg yolks

6 tablespoons (78g) sugar

1 1/2 tbsp cornstarch

1 cup + 2 tablespoons (270ml) milk

1 tablespoon (14g) salted butter

1 teaspoon vanilla extract

CHOCOLATE GANACHE:

12 oz (338g) semi-sweet chocolate chips

2 tablespoons (30ml) light corn syrup

3/4 cup + 2 tablespoons (210ml) heavy whipping cream

HOW TO MAKE BOSTON CREAM PIE CUPCAKES

Step 1: Prepare the oven. Preheat it to 350 degrees F or 176 degrees C.

Step 2: Line with liners the cupcake pan.

Step 3: Add the butter and sugar in a large mixing bowl. Cream for about 3 to 4 minutes until light. Make sure to not skimp on the amount of creaming time.

Step 4: Stir in the sour cream and vanilla extract until incorporated.

Step 5: Stir in the egg whites in 2 batches, making sure to mix well every after each addition. To make sure that all the ingredients are well combined, scrape down the sides of the bowl as needed.

Step 6: In a separate bowl, combine the dry ingredients. And the milk and water in a small measuring cup.

Step 7: Mix well half of the dry ingredients into the batter. Then, add in the milk mixture and mix thoroughly. Mix in the rest of the dry ingredients until well combined.

Step 8: Add spoonfuls of the batter into the cupcake liners. Fill them about halfway. Place inside the preheated oven and bake for about 15 to 17 minutes or until a toothpick inserted in the middle of the cupcake comes out with few crumbs.

Step 9: When done, remove the cupcakes from the oven and cool for about 2 to 3 minutes before transferring onto a cooling rack to completely cool.

Step 10: Meanwhile, make the pastry cream by adding the egg yolks in a medium-sized bowl. Gently beat and set aside.

Step 11: In a large saucepan, add the sugar, cornstarch, and milk. Mix until smooth.

Step 12: Cook the sugar mixture over medium-high heat while continuously stirring until it starts to thicken and bubble.

Step 13: Adjust the heat to medium and simmer for about 2 minutes before removing the saucepan from the heat.

Step 14: Whisk in a little amount of the milk mixture into the egg yolks. Then, add in the egg mixture into the milk mixture. This will make sure that the egg yolks won’t be cooked.

Step 15: Put the pan back on the heat and lightly boil for 2 minutes while continuously stirring.

Step 16: Remove the pan from the heat before adding in the butter and vanilla extract. Stir well until smooth and allow to cool to room temperature.

Step 17: To make the chocolate ganache, add the chocolate chips and corn syrup in a large bowl.

Step 18: Then, bring the heavy cream to a boil and pour it over the chocolate chips. Let it sit for about 3 to 5 minutes before whisking until smooth.

Step 19: Put the chocolate ganache in the fridge for at least 1 to 2 hours until completely cool and firm.

Step 20: If everything is ready and cooled, cut out the centers of the cupcakes. Use a cupcake core for this or a knife works well, too.

Step 21: Split the pastry cream between each cupcake and stuff in the center.

Step 22: Top each cupcake with the chocolate ganache. If available, you can use an Ateco tip 844 (Wilton 2D or 1M)  to pipe roses on top of the cupcakes. To make the roses, start to pipe in the center, then, create a swirl moving outward. finish 2 to 3 rotations until the cupcake is completely covered, releasing the pressure and pulling away from the piping bag.

Step 23: Place the cupcakes in the fridge until ready to serve. Consume before the 4th day.

Nutrition Facts:

Amount Per Serving:  Calories 364 | Total Fat 18.8g 24% | Cholesterol 58.3mg 19% | Sodium 82.5mg 4% | Total Carbohydrate 46.2g 17% | Sugars 34.2g | Protein 5.6g 11% | Vitamin A13%

BOSTON CREAM PIE CUPCAKES

Rebecca Prep Time: 35 minutes | Cook Time: 15 minutes | Total Time: 50 minutes | Yield: 12-14 Look at these pretty chocolate swirls and these light and soft cupcakes. I’ll… Main Dish Recipes BOSTON CREAM PIE CUPCAKES European Print This
Serves: 12-14 Prep Time: 35 mins Cooking Time: 15 mins 15 mins
Nutrition facts: 364 calories 18.8 fat
Rating: 5.0/5
( 1 voted )

Ingredients

  • VANILLA CUPCAKES:
  • 6 tbsp (84g), unsalted butter, room temperature (I use Challenge Butter)
  • 3/4 cups (155g) sugar
  • 6 tbsp (86g) sour cream, room temperature
  • 2 tsp (10ml) vanilla extract
  • 3 large egg whites, room temperature
  • 1 1/4 cups (163g) all-purpose flour
  • 2 tsp (8g) baking powder
  • ¼ tsp salt
  • 6 tbsp (90ml) milk, room temperature
  • 2 tbsp (30ml) water, room temperature
  • PASTRY CREAM FILLING:
  • 2 egg yolks
  • 6 tablespoons (78g) sugar
  • 1 1/2 tbsp cornstarch
  • 1 cup + 2 tablespoons (270ml) milk
  • 1 tablespoon (14g) salted butter
  • 1 teaspoon vanilla extract
  • CHOCOLATE GANACHE:
  • 12 oz (338g) semi-sweet chocolate chips
  • 2 tablespoons (30ml) light corn syrup
  • 3/4 cup + 2 tablespoons (210ml) heavy whipping cream

Instructions

Step 1: Prepare the oven. Preheat it to 350 degrees F or 176 degrees C.

Step 2: Line with liners the cupcake pan.

Step 3: Add the butter and sugar in a large mixing bowl. Cream for about 3 to 4 minutes until light. Make sure to not skimp on the amount of creaming time.

Step 4: Stir in the sour cream and vanilla extract until incorporated.

Step 5: Stir in the egg whites in 2 batches, making sure to mix well every after each addition. To make sure that all the ingredients are well combined, scrape down the sides of the bowl as needed.

Step 6: In a separate bowl, combine the dry ingredients. And the milk and water in a small measuring cup.

Step 7: Mix well half of the dry ingredients into the batter. Then, add in the milk mixture and mix thoroughly. Mix in the rest of the dry ingredients until well combined.

Step 8: Add spoonfuls of the batter into the cupcake liners. Fill them about halfway. Place inside the preheated oven and bake for about 15 to 17 minutes or until a toothpick inserted in the middle of the cupcake comes out with few crumbs.

Step 9: When done, remove the cupcakes from the oven and cool for about 2 to 3 minutes before transferring onto a cooling rack to completely cool.

Step 10: Meanwhile, make the pastry cream by adding the egg yolks in a medium-sized bowl. Gently beat and set aside.

Step 11: In a large saucepan, add the sugar, cornstarch, and milk. Mix until smooth.

Step 12: Cook the sugar mixture over medium-high heat while continuously stirring until it starts to thicken and bubble.

Step 13: Adjust the heat to medium and simmer for about 2 minutes before removing the saucepan from the heat.

Step 14: Whisk in a little amount of the milk mixture into the egg yolks. Then, add in the egg mixture into the milk mixture. This will make sure that the egg yolks won't be cooked.

Step 15: Put the pan back on the heat and lightly boil for 2 minutes while continuously stirring.

Step 16: Remove the pan from the heat before adding in the butter and vanilla extract. Stir well until smooth and allow to cool to room temperature.

Step 17: To make the chocolate ganache, add the chocolate chips and corn syrup in a large bowl.

Step 18: Then, bring the heavy cream to a boil and pour it over the chocolate chips. Let it sit for about 3 to 5 minutes before whisking until smooth.

Step 19: Put the chocolate ganache in the fridge for at least 1 to 2 hours until completely cool and firm.

Step 20: If everything is ready and cooled, cut out the centers of the cupcakes. Use a cupcake core for this or a knife works well, too.

Step 21: Split the pastry cream between each cupcake and stuff in the center.

Step 22: Top each cupcake with the chocolate ganache. If available, you can use an Ateco tip 844 (Wilton 2D or 1M)  to pipe roses on top of the cupcakes. To make the roses, start to pipe in the center, then, create a swirl moving outward. finish 2 to 3 rotations until the cupcake is completely covered, releasing the pressure and pulling away from the piping bag.

Step 23: Place the cupcakes in the fridge until ready to serve. Consume before the 4th day.
September 3, 2020 0 comment
0 FacebookTwitterPinterestEmail
Main Dish Recipes

Blueberry Crème Fraîche Cheesecake

by Rebecca September 3, 2020
written by Rebecca

Cook time: 1 HOUR | Total time: 12 HOURS | Yield: 16 SERVINGS

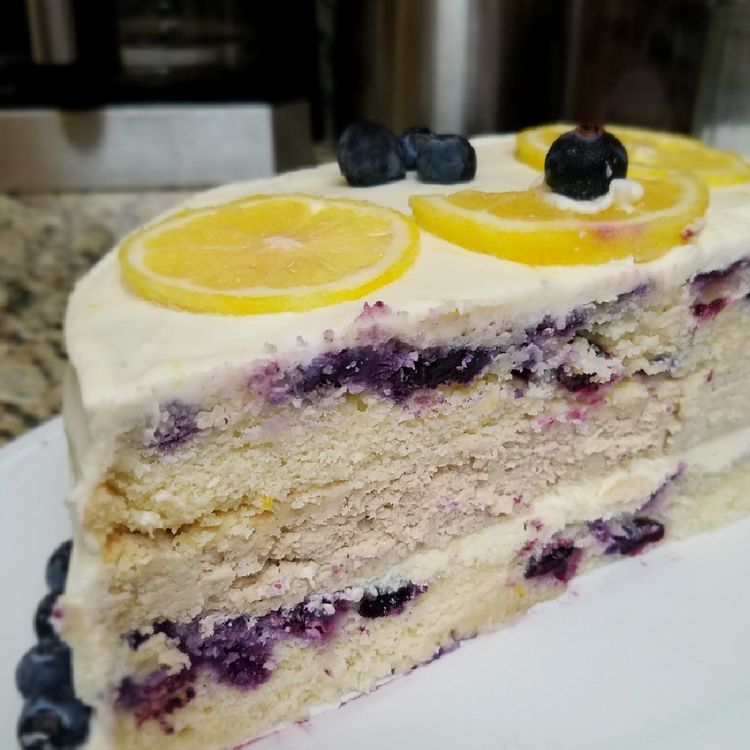
This is the most amazing cake! The vibrant purple color from the blueberries and the light and silky texture is mind-blowing! And wait until you taste this because I am pretty sure you’ll crave this over and over again.

Ingredients

15 ounces (about 3 cups) fresh blueberries

3 tbsp. brown sugar

1 tsp. pure maple syrup

For Crust:

1 1/2 cups vanilla wafer cookie crumbs (from about 7 ounces)

1/4 cup almond meal or finely ground almonds

2 tbsp. brown sugar

pinch salt

5 tbsp. butter, melted

For Filling:

16 ounces full-fat cream cheese, room temperature*

2/3 cup granulated sugar

1 tsp. fine sea salt

3 tbsp. all-purpose flour

4 large eggs, room temperature

2/3 cup crème fraîche or sour cream, room temperature

2 tbsp.  freshly squeezed lemon juice

1 1/2 tsp. vanilla extract

3/4 tsp. almond extract

For Glaze:

1 cup crème fraîche (chilled) or sour cream (room temperature)

1/4 cup granulated sugar

1/2 tsp. almond extract

How to make Blueberry Crème Fraîche Cheesecake

Step 1: Prepare the oven. Preheat it to 400 degrees.

Step 2: Toss the blueberries in brown sugar and maple syrup mix.

Step 3: Line a rimmed baking sheet with foil and spread the blueberry on the bottom. Roast for about 15 minutes or until juicy and bubbly. Take it out from the oven and allow to cool for at least 10 to 15 minutes. Pour this into a food processor or blender, scraping all the berries and juices. Puree until smooth. Set the pureed blueberries aside.

Step 4: Adjust the oven temperature to 350 degrees F. Grease a 9-inch cake pan with removable bottom with butter. And line the bottom using a round parchment paper if you like.

Step 5: In a food processor, crush the cookies until the crumbs are fine. Add in the almond meal, sugar, and salt and pulse until blended. Add in the butter and pulse until evenly moist. Pour this into the prepared pan, pressing on the bottom. Place inside the preheated oven and bake for about 10 minutes. When set, remove from the oven and allow the crust to cool completely.

Step 6: Then, adjust the oven temperature to 325 degrees F.

Step 7: Add the cream cheese in a food processor or stand mixer, and pulse along with sugar until smooth. Add in salt and flour. Pulse, then, add in the eggs, two at a time. Make sure to mix every after each addition and scrape down the sides to ensure that everything is evenly combined. Add in the crème fraîche, lemon juice, vanilla and almond extracts, and pureed blueberries. Pulse again until the color is even and no visible white streaks. Don’t forget to scrape the bowl.

Step 8: Into the cooled crust, pour the batter. Place in the oven and bake for about 45 to 50 minutes.

Step 9: Meanwhile, add the crème fraîche, sugar, and almond extract in a bowl. Whisk until smooth. If you plan on using crème fraîche, refrigerate this mixture until ready to use.

Step 10: Pour the glaze over the cheesecake while the center of the cake is still barely jiggly. Spread evenly. Place back in the oven and bake for 5 minutes more.

Step 11: Remove from the oven and allow to cool on a wire rack at room temperature.

Step 12: Place the cheesecake in the fridge overnight or until ready to use. When serving, remove the edges of the springform pan and slice the cake into 16 wedges and serve chilled or at room temperature. Topped the slices with berries or any leftover roasted blueberry puree if you want. This cheesecake will stay fresh up to 5 days. make sure to refrigerate.

NOTE:

Make sure that before you use the cream cheese, eggs, and crème fraîche that they are at room temperature. This ensures that you will have a silky smooth filling. I would recommend taking your ingredients out of the fridge at least 2 hours before using them.

Crème fraîche is a french cultured cream. It is similar to sour cream but the flavor is a bit more mild and delicate. Though, you can make your own easily or just substitute with sour cream if you can’t find Crème fraîche.

If using crème fraîche to glaze, I would suggest keeping it cool because it tends to get too liquidy when mixed with sugar.

Blueberry Crème Fraîche Cheesecake

Rebecca Cook time: 1 HOUR | Total time: 12 HOURS | Yield: 16 SERVINGS This is the most amazing cake! The vibrant purple color from the blueberries and the light and… Main Dish Recipes Blueberry Crème Fraîche Cheesecake European Print This
Cooking Time: 1 hr 1 hr
Nutrition facts: 200 calories 20 grams fat
Rating: 5.0/5
( 1 voted )

Ingredients

  • 15 ounces (about 3 cups) fresh blueberries
  • 3 tbsp. brown sugar
  • 1 tsp. pure maple syrup
  • For Crust:
  • 1 1/2 cups vanilla wafer cookie crumbs (from about 7 ounces)
  • 1/4 cup almond meal or finely ground almonds
  • 2 tbsp. brown sugar
  • pinch salt
  • 5 tbsp. butter, melted
  • For Filling:
  • 16 ounces full-fat cream cheese, room temperature*
  • 2/3 cup granulated sugar
  • 1 tsp. fine sea salt
  • 3 tbsp. all-purpose flour
  • 4 large eggs, room temperature
  • 2/3 cup crème fraîche or sour cream, room temperature
  • 2 tbsp.  freshly squeezed lemon juice
  • 1 1/2 tsp. vanilla extract
  • 3/4 tsp. almond extract
  • For Glaze:
  • 1 cup crème fraîche (chilled) or sour cream (room temperature)
  • 1/4 cup granulated sugar
  • 1/2 tsp. almond extract

Instructions

Step 1: Prepare the oven. Preheat it to 400 degrees.

Step 2: Toss the blueberries in brown sugar and maple syrup mix.

Step 3: Line a rimmed baking sheet with foil and spread the blueberry on the bottom. Roast for about 15 minutes or until juicy and bubbly. Take it out from the oven and allow to cool for at least 10 to 15 minutes. Pour this into a food processor or blender, scraping all the berries and juices. Puree until smooth. Set the pureed blueberries aside.

Step 4: Adjust the oven temperature to 350 degrees F. Grease a 9-inch cake pan with removable bottom with butter. And line the bottom using a round parchment paper if you like.

Step 5: In a food processor, crush the cookies until the crumbs are fine. Add in the almond meal, sugar, and salt and pulse until blended. Add in the butter and pulse until evenly moist. Pour this into the prepared pan, pressing on the bottom. Place inside the preheated oven and bake for about 10 minutes. When set, remove from the oven and allow the crust to cool completely.

Step 6: Then, adjust the oven temperature to 325 degrees F.

Step 7: Add the cream cheese in a food processor or stand mixer, and pulse along with sugar until smooth. Add in salt and flour. Pulse, then, add in the eggs, two at a time. Make sure to mix every after each addition and scrape down the sides to ensure that everything is evenly combined. Add in the crème fraîche, lemon juice, vanilla and almond extracts, and pureed blueberries. Pulse again until the color is even and no visible white streaks. Don't forget to scrape the bowl.

Step 8: Into the cooled crust, pour the batter. Place in the oven and bake for about 45 to 50 minutes.

Step 9: Meanwhile, add the crème fraîche, sugar, and almond extract in a bowl. Whisk until smooth. If you plan on using crème fraîche, refrigerate this mixture until ready to use.

Step 10: Pour the glaze over the cheesecake while the center of the cake is still barely jiggly. Spread evenly. Place back in the oven and bake for 5 minutes more.

Step 11: Remove from the oven and allow to cool on a wire rack at room temperature.

Step 12: Place the cheesecake in the fridge overnight or until ready to use. When serving, remove the edges of the springform pan and slice the cake into 16 wedges and serve chilled or at room temperature. Topped the slices with berries or any leftover roasted blueberry puree if you want. This cheesecake will stay fresh up to 5 days. make sure to refrigerate.

NOTE:

Make sure that before you use the cream cheese, eggs, and crème fraîche that they are at room temperature. This ensures that you will have a silky smooth filling. I would recommend taking your ingredients out of the fridge at least 2 hours before using them.

Crème fraîche is a french cultured cream. It is similar to sour cream but the flavor is a bit more mild and delicate. Though, you can make your own easily or just substitute with sour cream if you can't find Crème fraîche.

If using crème fraîche to glaze, I would suggest keeping it cool because it tends to get too liquidy when mixed with sugar.

September 3, 2020 0 comment
0 FacebookTwitterPinterestEmail
Main Dish Recipes

Chicken Broccoli Alfredo Stuffed Shells

by Rebecca September 3, 2020
written by Rebecca

Prep time: 20 mins | Cook time: 35 mins | Total time: 55 mins

I want to dig straight in! These stuffed shells are outrageously cheesy, mouthwatering, and freaking delicious! All the good stuff from cheesy shredded chicken and broccoli mixture smothered in an easy homemade alfredo sauce. I rate this 5 stars always! Pretty simple to assemble and a perfect make-ahead dish. A certified show stealer!

Ingredients

1 jar 16oz alfredo sauce

2 cups cooked chicken, shredded

2 cups cooked broccoli, chopped

1 cup shredded cheddar (or mozzarella) cheese

¼ cup shredded parmesan

21 jumbo pasta shells, cooked

1½ – 2 cups spaghetti sauce (optional, but I love the combination of alfredo with tomato sauce!)

Salt/Pepper to season (if needed)

How to make Chicken Broccoli Alfredo Stuffed Shells

Step 1: Prepare the oven. Preheat it to 350 degrees.

Step 2: Combine the alfredo, chicken, broccoli, and cheeses in a large bowl.

Step 3: Place spoonfuls of the alfredo mixture into the pasta shells.

Step 4: Use butter or cooking spray to grease a 13 x 9-inch baking dish.

Step 5: On the bottom of the prepared baking dish, spread evenly the spaghetti sauce.

Step 6: Add the shells in the baking pan.

Step 7: Place inside the preheated oven and bake for about 35 minutes, covered, until heated through.

NOTES:

Before stuffing, the noodles need to be cooked. Follow the package direction to cook the noodles, around 1 to 2 minutes cooking time, that way the noodles will completely cook when baking.

You can easily alter this recipe to your liking. I like adding in chopped bacon and it makes a great difference!

TIPS:

Prepare what you will need ahead. Just cover them and keep in the fridge until ready to bake.

If you have a cookie scoop, I would suggest you use it to stuff the shells.

Freeze this if you want. All you got to do is pre-assemble the noodles with the filling without the red sauce. When ready to bake, thaw and you are all set!

Chicken Broccoli Alfredo Stuffed Shells

Rebecca Prep time: 20 mins | Cook time: 35 mins | Total time: 55 mins I want to dig straight in! These stuffed shells are outrageously cheesy, mouthwatering, and freaking delicious!… Main Dish Recipes Chicken Broccoli Alfredo Stuffed Shells European Print This
Prep Time: 20 mins Cooking Time: 35 mins 35 mins
Nutrition facts: 200 calories 20 grams fat
Rating: 5.0/5
( 1 voted )

Ingredients

  • 1 jar 16oz alfredo sauce
  • 2 cups cooked chicken, shredded
  • 2 cups cooked broccoli, chopped
  • 1 cup shredded cheddar (or mozzarella) cheese
  • ¼ cup shredded parmesan
  • 21 jumbo pasta shells, cooked
  • 1½ - 2 cups spaghetti sauce (optional, but I love the combination of alfredo with tomato sauce!)
  • Salt/Pepper to season (if needed)

Instructions

Step 1: Prepare the oven. Preheat it to 350 degrees.

Step 2: Combine the alfredo, chicken, broccoli, and cheeses in a large bowl.

Step 3: Place spoonfuls of the alfredo mixture into the pasta shells.

Step 4: Use butter or cooking spray to grease a 13 x 9-inch baking dish.

Step 5: On the bottom of the prepared baking dish, spread evenly the spaghetti sauce.

Step 6: Add the shells in the baking pan.

Step 7: Place inside the preheated oven and bake for about 35 minutes, covered, until heated through.

NOTES:

Before stuffing, the noodles need to be cooked. Follow the package direction to cook the noodles, around 1 to 2 minutes cooking time, that way the noodles will completely cook when baking.

You can easily alter this recipe to your liking. I like adding in chopped bacon and it makes a great difference!

TIPS:

Prepare what you will need ahead. Just cover them and keep in the fridge until ready to bake.

If you have a cookie scoop, I would suggest you use it to stuff the shells.

Freeze this if you want. All you got to do is pre-assemble the noodles with the filling without the red sauce. When ready to bake, thaw and you are all set!

September 3, 2020 0 comment
0 FacebookTwitterPinterestEmail
Main Dish Recipes

Southern Strawberry Sweet Tea!

by Rebecca September 3, 2020
written by Rebecca

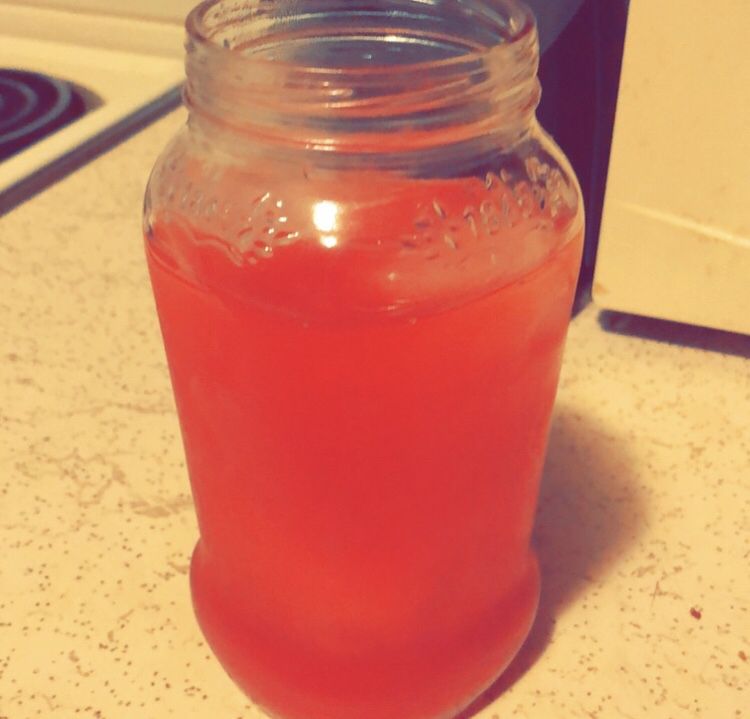
Looking for a perfect homemade tea for the hot summer days? This Southern Strawberry Sweet Tea is all you need. Pretty simple and quick to prepare. All you need are a few basic ingredients and of course fresh strawberries. No one can say no this bursting with freshness tea. A not too sweet, fresh, and wonderful sweet tea made of fresh strawberries. I have made this four times already today and still, we cannot get over this pink refreshment. I even stored a pitcher of this in my fridge because why not? The kids are a huge fan of strawberries and they are obsessed with this tea. You can even add bits and pieces of fresh strawberries, just make sure to remove the seeds, like what I did the last time. This is delicious and a fantastic addition to your strawberry recipe collection. Enjoy summer at the comfort of your home with this fresh Strawberry Sweet Tea.

Ingredients

3 cups water in a pot

6 tea bags

1 cup of sugar

7 cups of water in a pitcher

1 lemon juiced

1/2 lime juiced

1 basket of fresh Strawberries

How to make Southern Strawberry Sweet Tea

Step 1: Bring to a boil 3 cups of water. When, boiling, add in 6 tea bags. Then, adjust the heat to low and simmer for about 10 minutes.

Step 2: After 10 minutes, remove the tea bags from the water.

Step 3: Add a cup of sugar while the tea is still hot and mix well.

Step 4: Hull the strawberries and slice in half.

Step 5: Add the strawberries into a food processor or blender and puree for 45 seconds.

Step 6: Pour the tea and sugar mixture into a pitcher with 7 cups of water. Blend well.

Step 7: Then, pour the strawberry puree into the tea.

Step 8: Add in the lemon and lime juice and stir well.

Step 9: Taste and adjust the sweetness to your desire.

Step 10: Make sure to stir until well combined.

Step 11: Serve with ice. Enjoy!

Southern Strawberry Sweet Tea!

Rebecca Looking for a perfect homemade tea for the hot summer days? This Southern Strawberry Sweet Tea is all you need. Pretty simple and quick to prepare. All you need are… Main Dish Recipes Southern Strawberry Sweet Tea! European Print This
Nutrition facts: 200 calories 20 grams fat
Rating: 5.0/5
( 1 voted )

Ingredients

  • 3 cups water in a pot
  • 6 tea bags
  • 1 cup of sugar
  • 7 cups of water in a pitcher
  • 1 lemon juiced
  • 1/2 lime juiced
  • 1 basket of fresh Strawberries

Instructions

Step 1: Bring to a boil 3 cups of water. When, boiling, add in 6 tea bags. Then, adjust the heat to low and simmer for about 10 minutes.

Step 2: After 10 minutes, remove the tea bags from the water.

Step 3: Add a cup of sugar while the tea is still hot and mix well.

Step 4: Hull the strawberries and slice in half.

Step 5: Add the strawberries into a food processor or blender and puree for 45 seconds.

Step 6: Pour the tea and sugar mixture into a pitcher with 7 cups of water. Blend well.

Step 7: Then, pour the strawberry puree into the tea.

Step 8: Add in the lemon and lime juice and stir well.

Step 9: Taste and adjust the sweetness to your desire.

Step 10: Make sure to stir until well combined.

Step 11: Serve with ice. Enjoy!

September 3, 2020 0 comment
0 FacebookTwitterPinterestEmail
Main Dish Recipes

Slow Cooker Chicken Chile Relleno Soup

by Rebecca September 3, 2020
written by Rebecca

This Soup is very satisfying. Yesterday, I was feeling a little sick so I was craving soup. Good thing, I had chicken breasts in the fridge. I browsed the internet for amazing recipes. This was probably the third recipe I saw. What I love about this is the cheese. It gives a nice flavor to the soup. So, just a piece of advice, be very generous with the amount of cheese that you are gonna put in it. If you happen to have bread, just brush butter and sprinkle with garlic. Toast until the garlic turns brown. Serve this soup with the bread you just toasted. Oh man, it’s the best! Feel free to add more ingredients to this soup. It is awesome as is but you can make it perfect by giving it your take. Enjoy!

Ingredients

3 medium-large boneless skinless chicken breasts

4 cups chicken broth

1 white onion, diced

4 diced poblano peppers

A generous pinch of salt and pepper

2 bay leaves

1 8oz package cream cheese

1 8oz block sharp cheddar cheese, shredded

How to make Slow Cooker Chicken Chile Relleno Soup

Step 1: In the bowl of the slow cooker, add in the skinless chicken, chicken broth, onion, poblano peppers, bay leaves, salt, and pepper.

Step 2: Turn the setting to low and cover. Cook for 6 to 8 hours.

Step 3: Open the slow cooker and remove the bay leaves.

Step 4: Place the cooked chicken breasts on a large chopping board. Use two forks to shred the chicken.

Step 5: Add about 3 scoops of the broth into a blender followed by the cream cheese.

Step 6: Cover and blend until the texture becomes smooth.

Step 7: Transfer the broth and cream cheese mixture into the slow cooker with the rest of the ingredients.

Step 8: Put the shredded chicken back to the slow cooker.

Step 9: Add in the cheese and stir until well mixed.

Step 10: Serve and enjoy!

Slow Cooker Chicken Chile Relleno Soup

Rebecca This Soup is very satisfying. Yesterday, I was feeling a little sick so I was craving soup. Good thing, I had chicken breasts in the fridge. I browsed the internet… Main Dish Recipes Slow Cooker Chicken Chile Relleno Soup European Print This
Nutrition facts: 200 calories 20 grams fat
Rating: 5.0/5
( 1 voted )

Ingredients

  • 3 medium-large boneless skinless chicken breasts
  • 4 cups chicken broth
  • 1 white onion, diced
  • 4 diced poblano peppers
  • A generous pinch of salt and pepper
  • 2 bay leaves
  • 1 8oz package cream cheese
  • 1 8oz block sharp cheddar cheese, shredded

Instructions

Step 1: In the bowl of the slow cooker, add in the skinless chicken, chicken broth, onion, poblano peppers, bay leaves, salt, and pepper.

Step 2: Turn the setting to low and cover. Cook for 6 to 8 hours.

Step 3: Open the slow cooker and remove the bay leaves.

Step 4: Place the cooked chicken breasts on a large chopping board. Use two forks to shred the chicken.

Step 5: Add about 3 scoops of the broth into a blender followed by the cream cheese.

Step 6: Cover and blend until the texture becomes smooth.

Step 7: Transfer the broth and cream cheese mixture into the slow cooker with the rest of the ingredients.

Step 8: Put the shredded chicken back to the slow cooker.

Step 9: Add in the cheese and stir until well mixed.

Step 10: Serve and enjoy!

September 3, 2020 0 comment
0 FacebookTwitterPinterestEmail
Main Dish Recipes

GRANDMA’S BUTTERSCOTCH PIE

by Rebecca September 2, 2020
written by Rebecca

Prep: 25 mins | Cook: 35mins | Total: 1 hr | Serving: 8 | Yield: 1 9-inch pie

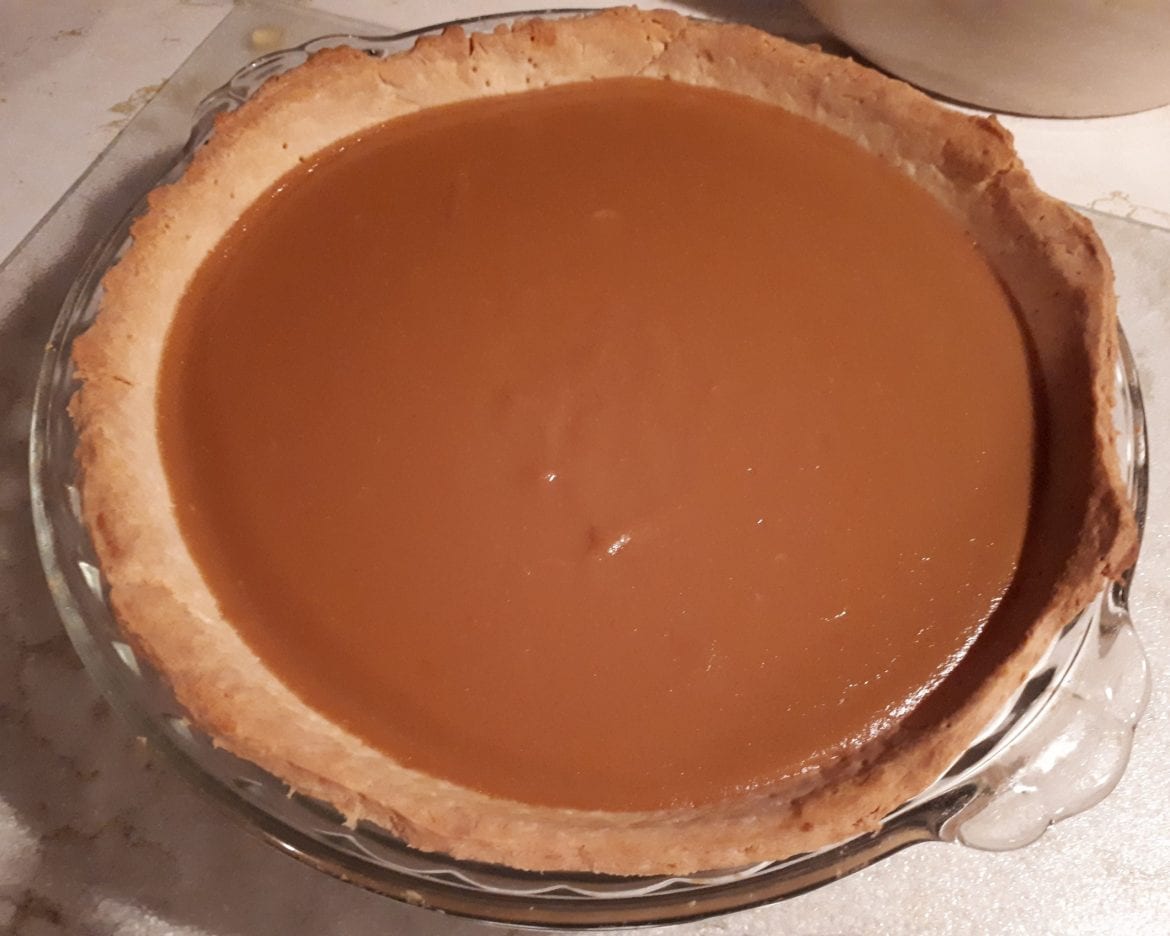
This might be one of the best Pie I have ever tasted. The texture and flavor of this Pie will impress you for sure. Give this one a try and I am 100 percent sure that you can pull this off! I have listed all the steps and ingredients that you need to follow. Feel free to add more ingredients though, as much as perfect this recipe is, give it your twist. Enjoy!

INGREDIENTS

1 cup Sugars, brown

4 tablespoons Cornstarch

½ teaspoon Salt, table

2 cups Milk, reduced fat, fluid, 2% milkfat, with added vitamin A

2 Egg, yolk, raw, fresh

1 tablespoon butter, with salt

1 cup Sugars, brown

4 tablespoons Cornstarch

½ teaspoon Salt, table

2 cups Milk, reduced fat, fluid, 2% milkfat, with added vitamin A

2 Egg, yolk, raw, fresh

1 tablespoon butter, with salt

1 teaspoon Vanilla extract

1 9inches Pie crust, standard-type, frozen, ready-to-bake, baked

1 teaspoon Vanilla extract

1 9inches Pie crust, standard-type, frozen, ready-to-bake, baked

HOW TO MAKE GRANDMA’S BUTTERSCOTCH PIE

Step 1: Add in the cornstarch, brown sugar, milk, and salt into the first part of a double broiler.

Step 2: Turn the heat and cook for 20 minutes until the mixture becomes thick. Stir the mixture constantly.

Step 3: Add in the egg yolks then whisk and cook until the texture becomes thicker.

Step 4: Ready the oven and preheat to 200 degrees C or 400 degrees F while the pudding is cooking inside the broiler.

Step 5: Remove the filling from the heat then add in the vanilla and butter. Stir until well mixed.

Step 6: Transfer the filling into the pie crust and spread.

Step 7: Place inside the preheated oven and bake for 5 minutes or until the top of the pie turns brown.

Step 8: Remove from the oven and let it sit on a wire rack to cool for at least 5 minutes.

Step 9: Serve and enjoy!

Nutrition Facts:

Per Serving: 258.6 calories; 59.9 mg cholesterol; 292.6 mg sodium; 3.4 g protein; 41.5 g carbohydrates

GRANDMA’S BUTTERSCOTCH PIE

Rebecca Prep: 25 mins | Cook: 35mins | Total: 1 hr | Serving: 8 | Yield: 1 9-inch pie This might be one of the best Pie I have ever tasted. The texture and flavor of this Pie will impress… Main Dish Recipes GRANDMA’S BUTTERSCOTCH PIE European Print This
Serves: 8 Prep Time: 25 mins Cooking Time: 35 mins 35 mins
Nutrition facts: 258.6 calories 20 grams fat
Rating: 5.0/5
( 1 voted )

Ingredients

  • 1 cup Sugars, brown
  • 4 tablespoons Cornstarch
  • ½ teaspoon Salt, table
  • 2 cups Milk, reduced fat, fluid, 2% milkfat, with added vitamin A
  • 2 Egg, yolk, raw, fresh
  • 1 tablespoon butter, with salt
  • 1 cup Sugars, brown
  • 4 tablespoons Cornstarch
  • ½ teaspoon Salt, table
  • 2 cups Milk, reduced fat, fluid, 2% milkfat, with added vitamin A
  • 2 Egg, yolk, raw, fresh
  • 1 tablespoon butter, with salt
  • 1 teaspoon Vanilla extract
  • 1 9inches Pie crust, standard-type, frozen, ready-to-bake, baked
  • 1 teaspoon Vanilla extract
  • 1 9inches Pie crust, standard-type, frozen, ready-to-bake, baked

Instructions

Step 1: Add in the cornstarch, brown sugar, milk, and salt into the first part of a double broiler.

Step 2: Turn the heat and cook for 20 minutes until the mixture becomes thick. Stir the mixture constantly.

Step 3: Add in the egg yolks then whisk and cook until the texture becomes thicker.

Step 4: Ready the oven and preheat to 200 degrees C or 400 degrees F while the pudding is cooking inside the broiler.

Step 5: Remove the filling from the heat then add in the vanilla and butter. Stir until well mixed.

Step 6: Transfer the filling into the pie crust and spread.

Step 7: Place inside the preheated oven and bake for 5 minutes or until the top of the pie turns brown.

Step 8: Remove from the oven and let it sit on a wire rack to cool for at least 5 minutes.

Step 9: Serve and enjoy!

September 2, 2020 0 comment
0 FacebookTwitterPinterestEmail
Main Dish Recipes

HORSERADISH CREAM CHEESE DEVILED EGGS

by Rebecca September 2, 2020
written by Rebecca

Prep: 25 mins | Cook: 15mins | Additional: 15 mins | Total: 55 mins | Serving: 24 | Yield: 24 deviled eggs

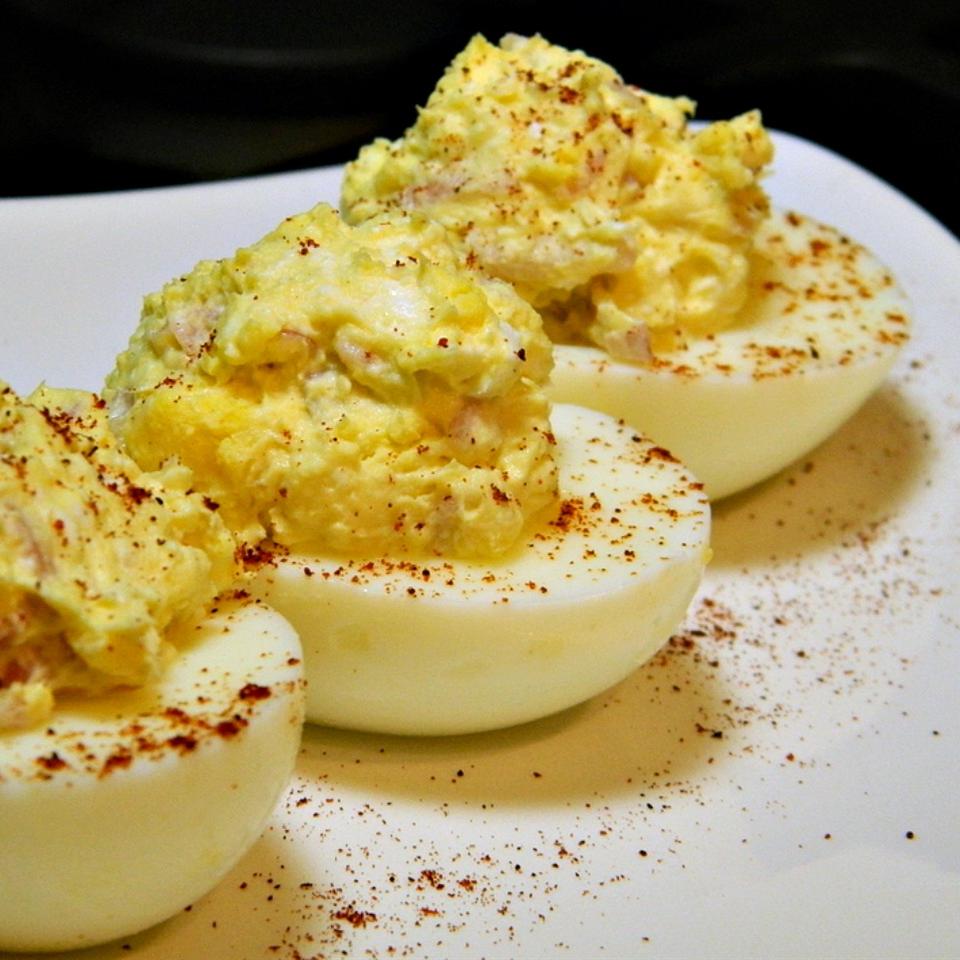
For those who are intrigued by Deviled Eggs, this is your lucky day because what I am sharing with you today is one of the best recipes of Deviled Eggs. It is very easy to make so there is nothing to worry about. Everyone can pull this off! So, next time you have friends and relatives over, surprise them with the awesome flavor of these delicious eggs. Feel free to add more ingredients. For example, try adding crispy bacon on top of each egg. It will give a very nice meaty flavor to the eggs. Enjoy!

INGREDIENTS

12 Egg, whole, raw, fresh

½ onions, raw

½ 8oz package Cheese, cream

⅓ cup Salad dressing, mayonnaise, soybean oil, with salt

2 tablespoons Horseradish, prepared

2 teaspoons cumin, ground

1 tablespoon Mustard Flour (Dry Mustard) ASTA

1 teaspoon Spices, chili powder

HOW TO MAKE HORSERADISH CREAM CHEESE DEVILED EGGS

Step 1: Place a saucepan on the stove and turn the heat to medium.

Step 2: Pour enough water to submerge the eggs.

Step 3: Add in the eggs and bring to a boil.

Step 4: Remove from the heat and let the eggs sit on the hot water for 15 minutes.

Step 5: Remove the eggs and rinse in cold running water then peel.

Step 6: Cut the eggs in half (Lengthwise) and separate the yolk from the whites. Put the yolks in a small mixing bowl.

Step 7: Mash the egg yolks and add in the onion, mayonnaise, cream cheese, cumin, dry mustard, and horseradish.  Stir using a fork until well mixed.

Step 8: Place the egg whites on a serving plate. Spoon the egg yolk mixture into the egg whites and fill each.

Step 9: Sprinkle chili powder on each deviled eggs.

Step 10: Serve and enjoy!

NOTE: 

Egg contains cholesterol that is why I advise you to use cholesterol-free mayonnaise and non-fat cream cheese to somehow lessen the risk of high cholesterol.

Nutrition Facts:

Per Serving: 78.5 calories; 99.3 mg cholesterol; 71.6 mg sodium; 3.7 g protein; 1 g carbohydrates

HORSERADISH CREAM CHEESE DEVILED EGGS

Rebecca Prep: 25 mins | Cook: 15mins | Additional: 15 mins | Total: 55 mins | Serving: 24 | Yield: 24 deviled eggs For those who are intrigued by Deviled Eggs, this is your lucky day because what I am sharing… Main Dish Recipes HORSERADISH CREAM CHEESE DEVILED EGGS European Print This
Serves: 24 Prep Time: 25 mins Cooking Time: 30 mins 30 mins
Nutrition facts: 78.5 calories 20 grams fat
Rating: 5.0/5
( 1 voted )

Ingredients

  • 12 Egg, whole, raw, fresh
  • ½ onions, raw
  • ½ 8oz package Cheese, cream
  • ⅓ cup Salad dressing, mayonnaise, soybean oil, with salt
  • 2 tablespoons Horseradish, prepared
  • 2 teaspoons cumin, ground
  • 1 tablespoon Mustard Flour (Dry Mustard) ASTA
  • 1 teaspoon Spices, chili powder

Instructions

Step 1: Place a saucepan on the stove and turn the heat to medium.

Step 2: Pour enough water to submerge the eggs.

Step 3: Add in the eggs and bring to a boil.

Step 4: Remove from the heat and let the eggs sit on the hot water for 15 minutes.

Step 5: Remove the eggs and rinse in cold running water then peel.

Step 6: Cut the eggs in half (Lengthwise) and separate the yolk from the whites. Put the yolks in a small mixing bowl.

Step 7: Mash the egg yolks and add in the onion, mayonnaise, cream cheese, cumin, dry mustard, and horseradish.  Stir using a fork until well mixed.

Step 8: Place the egg whites on a serving plate. Spoon the egg yolk mixture into the egg whites and fill each.

Step 9: Sprinkle chili powder on each deviled eggs.

Step 10: Serve and enjoy!

NOTE: 

Egg contains cholesterol that is why I advise you to use cholesterol-free mayonnaise and non-fat cream cheese to somehow lessen the risk of high cholesterol.

September 2, 2020 0 comment
0 FacebookTwitterPinterestEmail
Main Dish Recipes

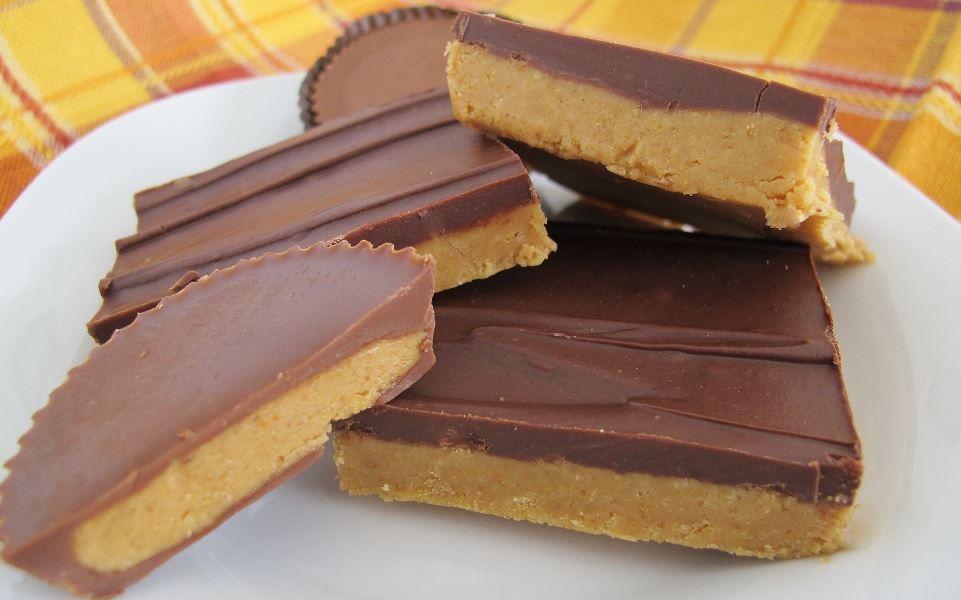
THESE PEANUT BUTTER BARS TASTE JUST LIKE REESE’S

by Rebecca September 2, 2020
written by Rebecca

Prep: 25 mins | Additional: 1hr | Total: 1 hr 25 mins | Serving: 12 | Yield: 1- 9×13 inch pan

These little treats will make your day! I love how subtle yet sweet the flavors are. This is best served with a nice hot coffee or cocoa. Imagine a rainy Sunday afternoon, you are sitting on your bedroom or front porch, drinking your awesome coffee and chewing these little wonders, Oh man, it’s perfect! Give this one a try today and I am sure you’ll never look at peanut butter bars the same way again! For the people who know me well, I am obsessed with Reese’s especially those little cups? I used to buy a lot of those. But after I learned how to make these peanut butter bars, I seldom buy Reese’s anymore. Not that I don’t like it anymore, but I think these bars are just amazing! Perfectly sweet, nutty, and adorably delicious.

INGREDIENTS

1 cup butter, with salt

2 cups of Cookies, graham crackers, plain or honey

2 cups Sugars, powdered

1 cup Peanut butter, smooth style, with salt

1 ½ cups semisweet chocolate chips

4 tablespoons Peanut butter, smooth style, with salt

HOW TO MAKE PEANUT BUTTER BARS

Step 1: Add in the graham cracker, confectioners’ sugar, butter or margarine, and 1 cup of peanut butter in a medium mixing bowl. Whisk until well mixed.

Step 2: Prepare an ungreased 9×13-inch pan. Press the mixture evenly on the bottom of the pan.

Step 3: Place a metal bowl on the stove and turn the heat to low. Add in the chocolate chips, water, and 4 tablespoons of peanut butter. Stir gradually.

Step 4: Transfer the mixture on top of the crust and spread evenly.

Step 5: Place inside the fridge and chill for about 1 hour.

Step 6: Cut into medium squares.

Step 7: Serve and enjoy!

NOTE:

Serve these Peanut Butter Bars with peanut butter chips. It is the best! You can also eat it with butterscotch, it is perfect as well. Also, for a smooth texture, try combining chocolate chips with milk chocolate chips.

Nutrition Facts:

Per Serving: 531.5 calories; 40.7 mg cholesterol; 319.7 mg sodium; 8.8 g protein; 49.2 g carbohydrates

September 2, 2020 0 comment
0 FacebookTwitterPinterestEmail
Main Dish Recipes

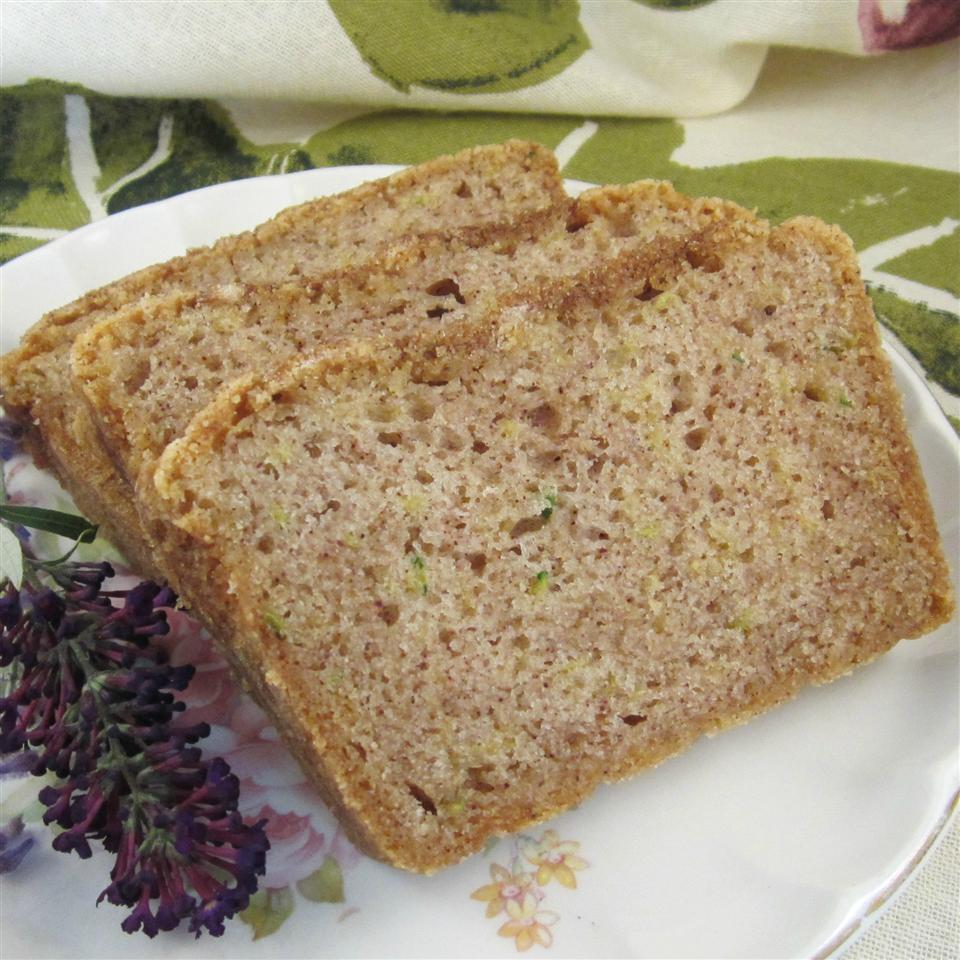
ZUCCHINI BREAD WITH CINNAMON SUGAR TOPPING

by Rebecca September 2, 2020
written by Rebecca

Prep: 20 mins | Cook: 1hr | Total: 1 hr 20 mins | Serving: 18 | Yield: 2 loaves

Oh, zucchini! Who here is not a fan? I think we all love zucchini. It is the most versatile not to mention has lots of health benefits. With crunchy cinnamon sugar topping that baked right in and the freshness of zucchini makes this bread one of the best! This is super good, my kids munched this until it’s gone!

INGREDIENTS

3 Egg, whole, raw, fresh

1 cup Oil, soybean, salad or cooking

2 cups Sugars, granulated

2 cups Zucchini, raw

2 teaspoons Vanilla extract

½ cup Raisins, golden seedless

3 cups Wheat flour, white, all-purpose, enriched, bleached

1 teaspoon Leavening agents, baking soda

½ teaspoon of leavening agents, double-acting, baking powder, sodium aluminum sulfate

1 teaspoon Salt, table

1 teaspoon Spices, cinnamon, ground

¼ cup Sugars, brown

¼ teaspoon Spices, cinnamon, ground

HOW TO MAKE ZUCCHINI BREAD WITH CINNAMON SUGAR TOPPING

Step 1: Ready the oven and preheat to 165 degrees C or 325 degrees F.

Step 2: Apply cooking spray in two loaf pans.

Step 3: In a large bowl, add the eggs, vegetable oil, sugar, zucchini, and vanilla extract. Mix well before adding in the raisins.

Step 4: Add the flour, baking soda, baking powder, salt, and 1 teaspoon cinnamon in a different bowl. Mix until incorporated.

Step 5: Now, add the flour mixture into the zucchini mixture. Whisk until almost all the lumps are gone. Then, split the batter between the prepared loaf pans and sprinkle on top of each batter the brown sugar-cinnamon mixture.

Step 6: Place inside the preheated oven and bake for about an hour or until a toothpick inserted in the middle of the bread comes out clean.

Step 7: Remove from the oven and let the bread cool in the pan for at least 10 minutes, then, invert it onto a wire rack to cool completely.

Nutrition Facts:

Per Serving: 310.3 calories; 31 mg cholesterol; 227.6 mg sodium; 3.5 g protein; 45.5 g carbohydrates

ZUCCHINI BREAD WITH CINNAMON SUGAR TOPPING

Rebecca Prep: 20 mins | Cook: 1hr | Total: 1 hr 20 mins | Serving: 18 | Yield: 2 loaves Oh, zucchini! Who here is not a fan? I think we all love zucchini. It is the most versatile not… Main Dish Recipes ZUCCHINI BREAD WITH CINNAMON SUGAR TOPPING European Print This
Serves: 18 Prep Time: 20 mins Cooking Time: 1 hr 1 hr
Nutrition facts: 310.3 calories 20 grams fat
Rating: 5.0/5
( 1 voted )

Ingredients

  • 3 Egg, whole, raw, fresh
  • 1 cup Oil, soybean, salad or cooking
  • 2 cups Sugars, granulated
  • 2 cups Zucchini, raw
  • 2 teaspoons Vanilla extract
  • ½ cup Raisins, golden seedless
  • 3 cups Wheat flour, white, all-purpose, enriched, bleached
  • 1 teaspoon Leavening agents, baking soda
  • ½ teaspoon of leavening agents, double-acting, baking powder, sodium aluminum sulfate
  • 1 teaspoon Salt, table
  • 1 teaspoon Spices, cinnamon, ground
  • ¼ cup Sugars, brown
  • ¼ teaspoon Spices, cinnamon, ground

Instructions

Step 1: Ready the oven and preheat to 165 degrees C or 325 degrees F.

Step 2: Apply cooking spray in two loaf pans.

Step 3: In a large bowl, add the eggs, vegetable oil, sugar, zucchini, and vanilla extract. Mix well before adding in the raisins.

Step 4: Add the flour, baking soda, baking powder, salt, and 1 teaspoon cinnamon in a different bowl. Mix until incorporated.

Step 5: Now, add the flour mixture into the zucchini mixture. Whisk until almost all the lumps are gone. Then, split the batter between the prepared loaf pans and sprinkle on top of each batter the brown sugar-cinnamon mixture.

Step 6: Place inside the preheated oven and bake for about an hour or until a toothpick inserted in the middle of the bread comes out clean.

Step 7: Remove from the oven and let the bread cool in the pan for at least 10 minutes, then, invert it onto a wire rack to cool completely.

September 2, 2020 0 comment
0 FacebookTwitterPinterestEmail
Main Dish Recipes

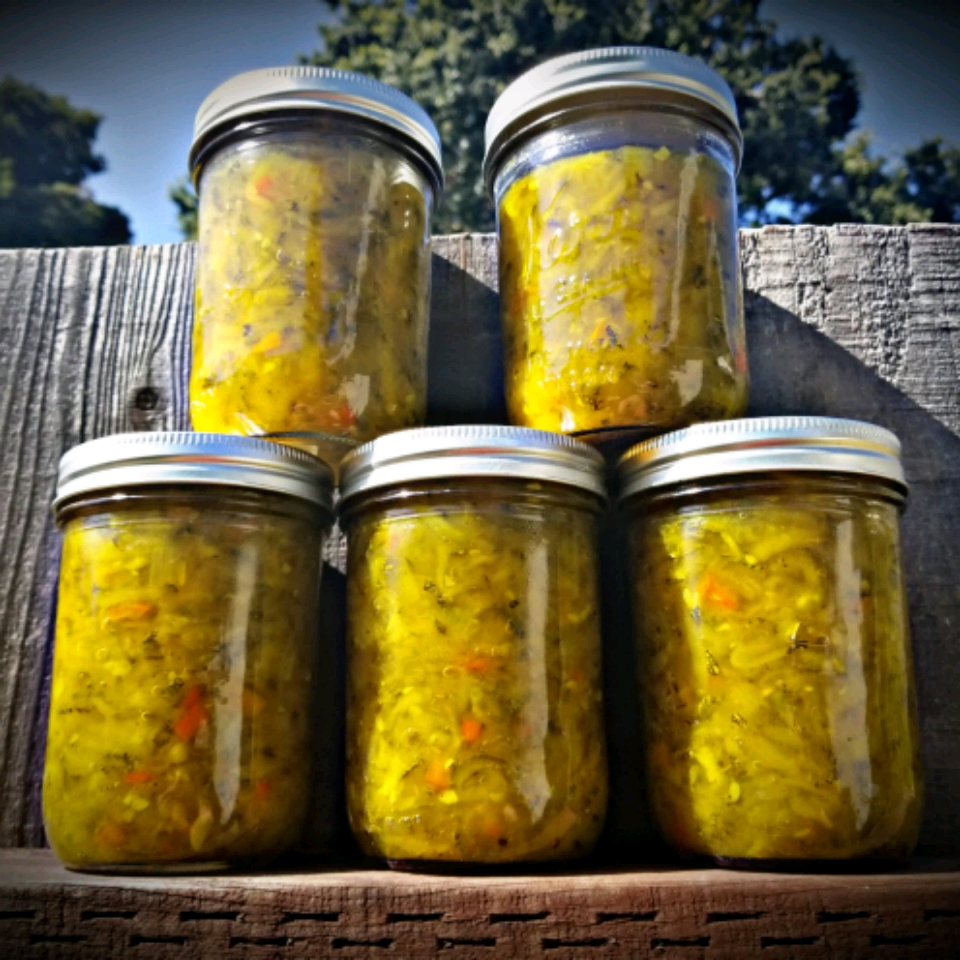
SWEET ZUCCHINI RELISH IS YOUR NEW SUMMER ESSENTIAL

by Rebecca September 2, 2020
written by Rebecca

Prep: 50 mins | Cook: 1hr 10mins | Additional: 10 hrs | Total: 12 hrs | Serving: 112 | Yield: 7 pint jars

A big yes to this Sweet Zucchini Relish! Healthy thanks to zucchini with a sweet and tangy taste. These jars are your new summer essentials. And this sweet relish goes perfectly with hot dogs and hamburgers.

INGREDIENTS

12 cups Zucchini, raw

4 cups Onions, raw

5 tablespoons pickling salt

1 Pepper, sweet, red, raw; red bell pepper

1 Pepper, sweet, green, raw; green bell pepper

6 cups Sugars, granulated

2 ½ cups Distilled Vinegar

1 tablespoon Cornstarch

¾ teaspoon Spices, nutmeg, ground

¾ teaspoon Spices, turmeric, ground

1 ½ teaspoon Spices, celery seed

½ teaspoon Spices, pepper, black

HOW TO MAKE SWEET ZUCCHINI RELISH

Step 1: In a large, non-metallic bowl, add the zucchini and onion. sprinkle the top with salt. Using your hands, evenly mix the salt throughout the zucchini. Place in the fridge, covered, overnight.

Step 2: On the following day, drain the zucchini in a colander. Rinse with cool water. In a large pot, add the red and green bell pepper, sugar, vinegar, and cornstarch. Add in the nutmeg, turmeric, celery seed, and pepper. Mix well before adding in the drained zucchini. Bring this to a boil over medium-high heat, then, adjust to medium-low and simmer for 30 minutes.

step 3: In the meantime, sterilize 7 pieces one-pint jars and lids. These will hold the relish. Make sure that when you place the relish inside that there will be no spaces or air pockets. Fill these jars all the way to top and securely screw on the lids.

Step 4: At the bottom of a large stockpot, place a rack and fill the pot with boiling water until halfway. Carefully lower the jars into the pot with a holder, making sure to leave a 2-inch space between the jars. Pour in more boiling water until the tops are covered by 2 inches of water. Allow the water to come to a full boil. Then, cover the pot and process for 30 minutes.

step 5: Take the jars out from the pot and transfer onto a cloth-covered surface or wood surface. Making sure that the jars are a few inches apart until cool. To ensure that the seal is secure and are not moving up or down, press a finger on top of each lid once the jars are cool.

Nutrition Facts:

Per Serving: 46.9 calories; 0 mg cholesterol; 313 mg sodium; 0.2 g protein; 11.9 g carbohydrates

SWEET ZUCCHINI RELISH IS YOUR NEW SUMMER ESSENTIAL

Rebecca Prep: 50 mins | Cook: 1hr 10mins | Additional: 10 hrs | Total: 12 hrs | Serving: 112 | Yield: 7 pint jars A big yes to this Sweet Zucchini Relish! Healthy thanks to zucchini with a sweet and tangy taste.… Main Dish Recipes SWEET ZUCCHINI RELISH IS YOUR NEW SUMMER ESSENTIAL European Print This
Serves: 112 Prep Time: 50 mins Cooking Time: 11 hrs 10 mins 11 hrs 10 mins
Nutrition facts: 46.9 calories 20 grams fat
Rating: 5.0/5
( 1 voted )

Ingredients

  • 12 cups Zucchini, raw
  • 4 cups Onions, raw
  • 5 tablespoons pickling salt
  • 1 Pepper, sweet, red, raw; red bell pepper
  • 1 Pepper, sweet, green, raw; green bell pepper
  • 6 cups Sugars, granulated
  • 2 ½ cups Distilled Vinegar
  • 1 tablespoon Cornstarch
  • ¾ teaspoon Spices, nutmeg, ground
  • ¾ teaspoon Spices, turmeric, ground
  • 1 ½ teaspoon Spices, celery seed
  • ½ teaspoon Spices, pepper, black

Instructions

Step 1: In a large, non-metallic bowl, add the zucchini and onion. sprinkle the top with salt. Using your hands, evenly mix the salt throughout the zucchini. Place in the fridge, covered, overnight.

Step 2: On the following day, drain the zucchini in a colander. Rinse with cool water. In a large pot, add the red and green bell pepper, sugar, vinegar, and cornstarch. Add in the nutmeg, turmeric, celery seed, and pepper. Mix well before adding in the drained zucchini. Bring this to a boil over medium-high heat, then, adjust to medium-low and simmer for 30 minutes.

step 3: In the meantime, sterilize 7 pieces one-pint jars and lids. These will hold the relish. Make sure that when you place the relish inside that there will be no spaces or air pockets. Fill these jars all the way to top and securely screw on the lids.

Step 4: At the bottom of a large stockpot, place a rack and fill the pot with boiling water until halfway. Carefully lower the jars into the pot with a holder, making sure to leave a 2-inch space between the jars. Pour in more boiling water until the tops are covered by 2 inches of water. Allow the water to come to a full boil. Then, cover the pot and process for 30 minutes.

step 5: Take the jars out from the pot and transfer onto a cloth-covered surface or wood surface. Making sure that the jars are a few inches apart until cool. To ensure that the seal is secure and are not moving up or down, press a finger on top of each lid once the jars are cool.

September 2, 2020 0 comment
0 FacebookTwitterPinterestEmail
Newer Posts
Older Posts

Popular Posts

  • 1

    Crispy Crunchy Parmesan Potatoes

    March 21, 2020
  • 2

    CROCK POT SMOTHERED PORK CHOPS

    March 21, 2020
  • Facebook
  • Twitter

@2019 - All Right Reserved.


Back To Top