Cook it once
  • Home
  • Privacy Policy
  • Recipes
    • KETO
    • LC
    • WW
  • Tips
  • Contact
Cook it once
  • Home
  • Privacy Policy
  • Recipes
    • KETO
    • LC
    • WW
  • Tips
  • Contact
Category:

Main Dish Recipes

Main Dish Recipes

POOR MAN HUSBAND CASSEROLE

by Rebecca September 22, 2020
written by Rebecca

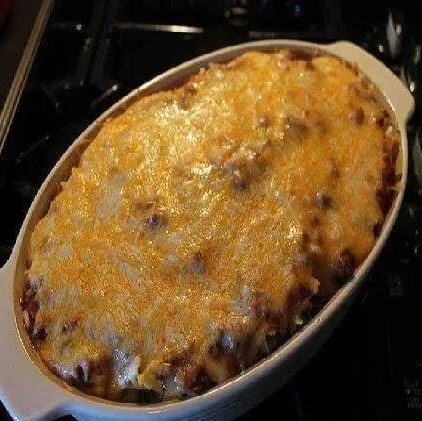
True to its words, poor man husband casserole, this economic dish never disappoints. All the simple, readily available ingredients complement each other and give you a delicious meal that will water your mouth. A crowd favorite with only a few simple ingredients. This is one of the best cheapest meals you’ll find. A no fussy casserole that you can make whenever. So if you are looking for a budget-friendly meal that does not compromise the quality, then, this casserole is all that you are looking for. Tasty and convenient – pretty sure everyone will love this. What is best is you can modify the ingredients depending on what you have at home or you can make it as is. Doesn’t matter because this casserole is still the same delicious! Nothing gets better than this casserole – it does not break the bank but still guarantees you a tasty meal that your family will enjoy.

INGREDIENTS

1 pound ground beef

garlic to taste

1 teaspoon salt

1 teaspoon sugar

2 cans (8-ounces) tomato sauce

8 ounces egg noodles

8 ounces sour cream

8 ounces cream cheese

1 1/2 cup Cheddar cheese, shredded

HOW TO MAKE POOR MAN HUSBAND CASSEROLE

Step 1: Prepare the oven. Preheat it to 350 degrees F.

Step 2: Ready the ground beef. Cook, then, drain any excess fat.

Step 3: In a saucepan, combine the beef, garlic, salt, sugar, and tomato sauce. Let it simmer for about 15 minutes, covered.

Step 4: Cook the egg noodles, then, drain.

Step 5: In a small bowl, add the sour cream and cream cheese. Mix well.

Step 6: To layer, first the noodles, then, the sour cream mixture followed by meat. Repeat the layer. And sprinkle over the cheddar cheese.

Step 7: Place inside the oven and bake for about 20 minutes at 350 degrees.

POOR MAN HUSBAND CASSEROLE

Rebecca True to its words, poor man husband casserole, this economic dish never disappoints. All the simple, readily available ingredients complement each other and give you a delicious meal that will… Main Dish Recipes POOR MAN HUSBAND CASSEROLE European Print This
Nutrition facts: 200 calories 20 grams fat
Rating: 4.3/5
( 8 voted )

Ingredients

  • 1 pound ground beef
  • garlic to taste
  • 1 teaspoon salt
  • 1 teaspoon sugar
  • 2 cans (8-ounces) tomato sauce
  • 8 ounces egg noodles
  • 8 ounces sour cream
  • 8 ounces cream cheese
  • 1 1/2 cup Cheddar cheese, shredded

Instructions

Step 1: Prepare the oven. Preheat it to 350 degrees F.

Step 2: Ready the ground beef. Cook, then, drain any excess fat.

Step 3: In a saucepan, combine the beef, garlic, salt, sugar, and tomato sauce. Let it simmer for about 15 minutes, covered.

Step 4: Cook the egg noodles, then, drain.

Step 5: In a small bowl, add the sour cream and cream cheese. Mix well.

Step 6: To layer, first the noodles, then, the sour cream mixture followed by meat. Repeat the layer. And sprinkle over the cheddar cheese.

Step 7: Place inside the oven and bake for about 20 minutes at 350 degrees.
September 22, 2020 0 comment
0 FacebookTwitterPinterestEmail
Main Dish Recipes

THE BEST DIP IN THE WORLD

by Rebecca September 21, 2020
written by Rebecca

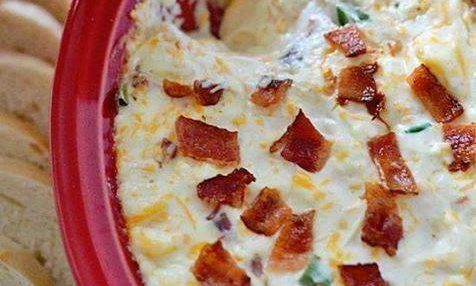
This dip goes along with anything! Not only that it best served with veggies, crackers, or bread but it is excellent with fries, too. My kids are obsessed with this dip. They asked me many times to pour a generous amount of this dip on fries and I was not surprised that it tasted great. Plus, this dip is so simple and with minimal ingredients, you can whip this up in a heartbeat. This oven cooked dip is one of the best dips I have ever made. And I have everyone to testify. This is indeed a must-have and to keep. I tried a lot of dip recipes and this by far hits the top spot. There are countless of a dip in the world and I have never tasted anything like this before. And what I love most about this, is this is perfect with anything and oh, this dip is efficient. make this from scratch and be a surprise.

INGREDIENTS

8 ounces cream cheese, softened

2 cups sour cream (I used light)

1 1/2 cups shredded cheddar cheese

6 slices bacon, cooked and crumbled

1/2 cup sliced green onion

HOW TO MAKE THE BEST DIP

Step 1: Prepare the oven and preheat to 400 degrees F.

Step 2: In a medium mixing bowl, add the Cheddar cheese, bacon, cream cheese, onion, and sour cream. Mix using an electric mixer. Set the speed to low. Beat until well blended.

Step 3: Transfer the mixture into a 1-quart baking dish.

Step 4: Place inside the preheated oven and bake for 25 to 30 minutes or until the cheese is melted.

Step 5: Remove from the oven and let it sit on a wire rack to cool at room temperature.

Step 6: Serve and enjoy!

Note:

This dish is best served with veggies, crackers, or bread.

THE BEST DIP IN THE WORLD

Rebecca This dip goes along with anything! Not only that it best served with veggies, crackers, or bread but it is excellent with fries, too. My kids are obsessed with this… Main Dish Recipes THE BEST DIP IN THE WORLD European Print This
Nutrition facts: 200 calories 20 grams fat
Rating: 2.4/5
( 12 voted )

Ingredients

  • 8 ounces cream cheese, softened
  • 2 cups sour cream (I used light)
  • 1 1/2 cups shredded cheddar cheese
  • 6 slices bacon, cooked and crumbled
  • 1/2 cup sliced green onion

Instructions

Step 1: Prepare the oven and preheat to 400 degrees F.

Step 2: In a medium mixing bowl, add the Cheddar cheese, bacon, cream cheese, onion, and sour cream. Mix using an electric mixer. Set the speed to low. Beat until well blended.

Step 3: Transfer the mixture into a 1-quart baking dish.

Step 4: Place inside the preheated oven and bake for 25 to 30 minutes or until the cheese is melted.

Step 5: Remove from the oven and let it sit on a wire rack to cool at room temperature.

Step 6: Serve and enjoy!

Note:

This dish is best served with veggies, crackers, or bread.

September 21, 2020 0 comment
0 FacebookTwitterPinterestEmail
Main Dish Recipes

Pecan Praline Cake

by Rebecca September 21, 2020
written by Rebecca

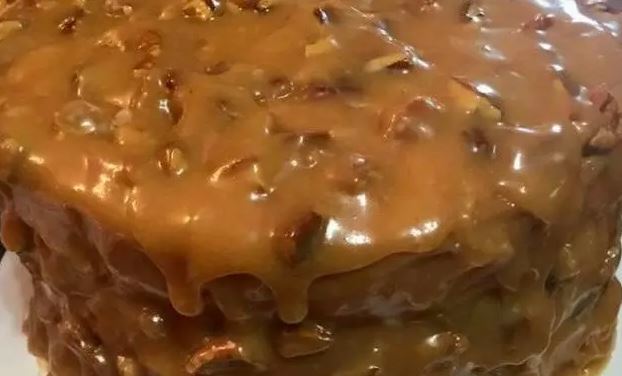
I always enjoy the pecan praline. And this cake version is so good with the same rich and nutty flavor. This cake is a game-changer. A must-try and a huge hit every time.

INGREDIENTS

FOR THE PRALINE CREAM CHEESE FILLING :

1 Philadelphia cream cheese

4 cups powdered sugar

half cup butter

4 tablespoons chopped pecans

1 tablespoon pure vanilla extract

FOR PRALINE TOPPING :

1 cup and half evaporated milk

2 cups granulated sugar

1 teaspoon vanilla extract

1/2 cup softened butter

1 cup and half of the pecan pieces

How to make Pecan Praline Cake

Step 1: With an electric mixer, blend the cream cheese and buttermilk until smooth.

Step 2: Add in the vanilla extract, then, the powdered sugar and continue to beat for about 4 minutes until incorporated.

Step 3: Lastly, stir in the pecans and chill for a bit.

Step 4: In a medium saucepan, add the butter, evaporated milk, and sugar. Stir until the butter has melted and fully combined.

Step 5: Let the mixture boil slowly before adjusting the heat to medium or low. Cook for approximately 15 minutes and don’t stir.

Step 6: Then, add in a teaspoon of pure vanilla extract and stir until mixed.

Step 7: Take the pan out of the heat and pour 1 1/2 cups of pecan into the mixture, stirring until completely mixed.

Step 8: To make the cake layers, use any of your favorite yellow cake recipes. Then, spread as much of the praline cream cheese frosting on the first cake layer. Top with the second cake layer, spreading again the frosting, then, the third layer.

Step 9: Place the cake in the fridge to chill for at least 30 minutes before frosting the sides and top. Return the cake into the fridge to sir for another 2 hours.

Step 10: When ready, serve. Enjoy!

Pecan Praline Cake

Rebecca I always enjoy the pecan praline. And this cake version is so good with the same rich and nutty flavor. This cake is a game-changer. A must-try and a huge… Main Dish Recipes Pecan Praline Cake European Print This
Nutrition facts: 200 calories 20 grams fat
Rating: 5.0/5
( 1 voted )

Ingredients

  • FOR THE PRALINE CREAM CHEESE FILLING :
  • 1 Philadelphia cream cheese
  • 4 cups powdered sugar
  • half cup butter
  • 4 tablespoons chopped pecans
  • 1 tablespoon pure vanilla extract
  • FOR PRALINE TOPPING :
  • 1 cup and half evaporated milk
  • 2 cups granulated sugar
  • 1 teaspoon vanilla extract
  • 1/2 cup softened butter
  • 1 cup and half of the pecan pieces

Instructions

Step 1: With an electric mixer, blend the cream cheese and buttermilk until smooth.

Step 2: Add in the vanilla extract, then, the powdered sugar and continue to beat for about 4 minutes until incorporated.

Step 3: Lastly, stir in the pecans and chill for a bit.

Step 4: In a medium saucepan, add the butter, evaporated milk, and sugar. Stir until the butter has melted and fully combined.

Step 5: Let the mixture boil slowly before adjusting the heat to medium or low. Cook for approximately 15 minutes and don't stir.

Step 6: Then, add in a teaspoon of pure vanilla extract and stir until mixed.

Step 7: Take the pan out of the heat and pour 1 1/2 cups of pecan into the mixture, stirring until completely mixed.

Step 8: To make the cake layers, use any of your favorite yellow cake recipes. Then, spread as much of the praline cream cheese frosting on the first cake layer. Top with the second cake layer, spreading again the frosting, then, the third layer.

Step 9: Place the cake in the fridge to chill for at least 30 minutes before frosting the sides and top. Return the cake into the fridge to sir for another 2 hours.

Step 10: When ready, serve. Enjoy!

September 21, 2020 0 comment
0 FacebookTwitterPinterestEmail
Main Dish Recipes

STRAWBERRY CINNAMON ROLLS WITH LEMON CREAM CHEESE GLAZE

by Rebecca September 21, 2020
written by Rebecca

Prep time: 40 mins | Cook time: 30 mins | Total time: 1 hour 10 mins

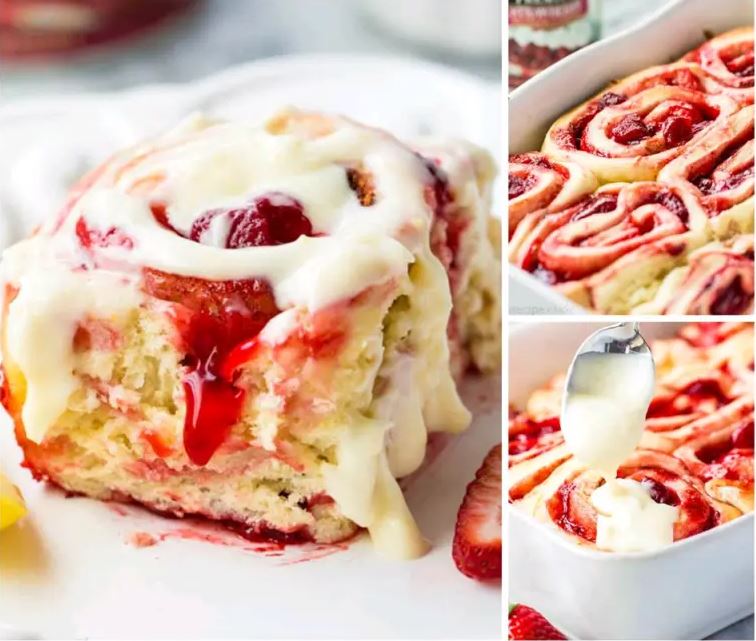
Don’t be afraid nor intimated by these lovely rolls. They are easy as they look. Not to mention, pretty sweet and delicious.

INGREDIENTS

Dough Ingredients:

3¼ cups flour

2 tsp instant yeast

¼ cup white sugar

½ teaspoon salt

1 egg

¼ cup of water

¾ cup milk

⅓ cup butter softened

Filling Ingredients:

21 ounce can Lucky Leaf Strawberry Pie Filling

2 teaspoons cinnamon

½ teaspoon sugar

Lemon Cream Cheese Frosting:

4-ounce cream cheese softened

3 Tablespoons butter, softened

1 cup powdered sugar

¼ cup half and half

2 teaspoons lemon juice

1 Tablespoon lemon zest (one lemon)

1 teaspoon vanilla

HOW TO MAKE STRAWBERRY CINNAMON ROLLS WITH LEMON CREAM CHEESE GLAZE

To make the Dough:

Step 1: Add the milk and butter in a small saucepan. Cook over medium-low heat, stirring until the butter has melted. Then, remove from the heat and allow to sit until lukewarm.

Step 2: Whisk 21/4 cups flour with yeast, sugar, and salt in a large mixing bowl. Add in the egg and water. Mix well until just beginning to combine. Gradually add in the milk mixture and a cup of flour until it forms a dough and smooth. You can even do this without a stand mixer, knead with your hands after all the ingredients are added, then, set aside to rest for at least 10 minutes.

Step 3: Roll the dough on a lightly floured surface. Make a large 9 x 15-inch square with about 1/4-1/2-inch thickness.

Step 4: Evenly spread the strawberry pie filling over the dough.

Step 5: Mix the cinnamon and sugar in a small bowl. Then, sprinkle over the strawberry filling.

Step 6: Roll into a log the 15-inch side. Pinch the seams to secure. Then, slice into 9 to 12 pieces depending on how thick you prefer the cinnamon rolls. Transfer the rolls in a greased 9 x 13-inch pan. Let them rise for at least 30 minutes making sure to cover first with a damp cloth.

Step 7: Meanwhile, prepare the oven. Preheat it to 375 degrees.

Step 8: Place the rolls in the preheated oven and bake for about 30 minutes or until the tops are just golden brown.

To make the Glaze:

Step 1: In a bowl, beat the cream cheese, butter, and powdered sugar until smooth.

Step 2: Add in the half and half, vanilla, lemon juice, and zest. Beat until incorporated.

Step 3: When the rolls are ready, frost them while warm.

Step 4: Serve and enjoy!

STRAWBERRY CINNAMON ROLLS WITH LEMON CREAM CHEESE GLAZE

Rebecca Prep time: 40 mins | Cook time: 30 mins | Total time: 1 hour 10 mins Don’t be afraid nor intimated by these lovely rolls. They are easy as they… Main Dish Recipes STRAWBERRY CINNAMON ROLLS WITH LEMON CREAM CHEESE GLAZE European Print This
Prep Time: 40 mins Cooking Time: 30 mins 30 mins
Nutrition facts: 200 calories 20 grams fat
Rating: 5.0/5
( 1 voted )

Ingredients

  • Dough Ingredients:
  • 3¼ cups flour
  • 2 tsp instant yeast
  • ¼ cup white sugar
  • ½ teaspoon salt
  • 1 egg
  • ¼ cup of water
  • ¾ cup milk
  • ⅓ cup butter softened
  • Filling Ingredients:
  • 21 ounce can Lucky Leaf Strawberry Pie Filling
  • 2 teaspoons cinnamon
  • ½ teaspoon sugar
  • Lemon Cream Cheese Frosting:
  • 4-ounce cream cheese softened
  • 3 Tablespoons butter, softened
  • 1 cup powdered sugar
  • ¼ cup half and half
  • 2 teaspoons lemon juice
  • 1 Tablespoon lemon zest (one lemon)
  • 1 teaspoon vanilla

Instructions

To make the Dough:

Step 1: Add the milk and butter in a small saucepan. Cook over medium-low heat, stirring until the butter has melted. Then, remove from the heat and allow to sit until lukewarm.

Step 2: Whisk 21/4 cups flour with yeast, sugar, and salt in a large mixing bowl. Add in the egg and water. Mix well until just beginning to combine. Gradually add in the milk mixture and a cup of flour until it forms a dough and smooth. You can even do this without a stand mixer, knead with your hands after all the ingredients are added, then, set aside to rest for at least 10 minutes.

Step 3: Roll the dough on a lightly floured surface. Make a large 9 x 15-inch square with about 1/4-1/2-inch thickness.

Step 4: Evenly spread the strawberry pie filling over the dough.

Step 5: Mix the cinnamon and sugar in a small bowl. Then, sprinkle over the strawberry filling.

Step 6: Roll into a log the 15-inch side. Pinch the seams to secure. Then, slice into 9 to 12 pieces depending on how thick you prefer the cinnamon rolls. Transfer the rolls in a greased 9 x 13-inch pan. Let them rise for at least 30 minutes making sure to cover first with a damp cloth.

Step 7: Meanwhile, prepare the oven. Preheat it to 375 degrees.

Step 8: Place the rolls in the preheated oven and bake for about 30 minutes or until the tops are just golden brown.

To make the Glaze:

Step 1: In a bowl, beat the cream cheese, butter, and powdered sugar until smooth.

Step 2: Add in the half and half, vanilla, lemon juice, and zest. Beat until incorporated.

Step 3: When the rolls are ready, frost them while warm.

Step 4: Serve and enjoy!

September 21, 2020 0 comment
0 FacebookTwitterPinterestEmail
Main Dish Recipes

COUNTRY CABBAGE ROLLS STRAIGHT FROM A MENNONITE KITCHEN

by Rebecca September 21, 2020
written by Rebecca

My kids were a bit hesitant to try this at first. But one bite and everything changed! They love it so much and they’ve been asking for this since.

INGREDIENTS

1 large savoy cabbage

2 pounds lean ground beef

2 medium to large onions

2 tablespoons canola or Bertolli olive oil or even butter is fine

1 cup white or brown rice.and 2 cups water

3 Eggland’s Best eggs

1 1/2 teaspoons Morton salt

1 teaspoon pepper

2 cans tomato soup

2 small bottles (individual serving sizes) tomato juice or a vegetable cocktail like V8

1 can or small carton chicken broth

HOW TO MAKE COUNTRY CABBAGE ROLLS

Step 1: Put the cabbage in the freezer for 12 hours or overnight.

Step 2: When ready to prepare, remove from the fridge to thaw at room temperature.

Step 3: Cook the rice in a small saucepan or a microwave-safe dish, covered.

Step 4: Finely chop the onions. Sautee until golden brown. Set aside.

Step 5: Put the ground beef in a large bowl. Break the pieces apart and season with salt and pepper. Add in the eggs, sauteed onions, and rice. Using your hands, mix to combine.

Step 6: Cut the tough part of the cabbage closest to the core and remove the leaves.

Step 7: With cooking spray, grease a large casserole or two small casserole dishes.

Step 8: At the bottom of the leaf add 1/3 to 1/2 cup of meat mixture. Roll it up. Remember that the amount varies depending on the size of the cabbage leaf. Do this for the rest of the meat.

Step 9: Combine the tomato soup, juice, and broth in a large mixing bowl. Evenly pour the mixture over the cabbage rolls. Secure with foil or cover the lid.

Step 10: Place inside the oven and bake for 2 hours at 325 degrees.

Step 11: Remove from the oven and allow to cool on the counter. making sure to remove the foil or you’ll have bits and pieces of foil on the cabbage rolls.

Step 12: Serve or refrigerate with plastic wrap cover.

NOTE:

Thaw the rolls first before preheating. Take the plastic cover off and replace it with lid or foil. Place in the oven and reheat for about an hour at 325 degrees. Or just microwave on sensor heat.

COUNTRY CABBAGE ROLLS STRAIGHT FROM A MENNONITE KITCHEN

Rebecca My kids were a bit hesitant to try this at first. But one bite and everything changed! They love it so much and they’ve been asking for this since. INGREDIENTS… Main Dish Recipes COUNTRY CABBAGE ROLLS STRAIGHT FROM A MENNONITE KITCHEN European Print This
Nutrition facts: 200 calories 20 grams fat
Rating: 4.3/5
( 3 voted )

Ingredients

  • 1 large savoy cabbage
  • 2 pounds lean ground beef
  • 2 medium to large onions
  • 2 tablespoons canola or Bertolli olive oil or even butter is fine
  • 1 cup white or brown rice.and 2 cups water
  • 3 Eggland’s Best eggs
  • 1 1/2 teaspoons Morton salt
  • 1 teaspoon pepper
  • 2 cans tomato soup
  • 2 small bottles (individual serving sizes) tomato juice or a vegetable cocktail like V8
  • 1 can or small carton chicken broth

Instructions

Step 1: Put the cabbage in the freezer for 12 hours or overnight.

Step 2: When ready to prepare, remove from the fridge to thaw at room temperature.

Step 3: Cook the rice in a small saucepan or a microwave-safe dish, covered.

Step 4: Finely chop the onions. Sautee until golden brown. Set aside.

Step 5: Put the ground beef in a large bowl. Break the pieces apart and season with salt and pepper. Add in the eggs, sauteed onions, and rice. Using your hands, mix to combine.

Step 6: Cut the tough part of the cabbage closest to the core and remove the leaves.

Step 7: With cooking spray, grease a large casserole or two small casserole dishes.

Step 8: At the bottom of the leaf add 1/3 to 1/2 cup of meat mixture. Roll it up. Remember that the amount varies depending on the size of the cabbage leaf. Do this for the rest of the meat.

Step 9: Combine the tomato soup, juice, and broth in a large mixing bowl. Evenly pour the mixture over the cabbage rolls. Secure with foil or cover the lid.

Step 10: Place inside the oven and bake for 2 hours at 325 degrees.

Step 11: Remove from the oven and allow to cool on the counter. making sure to remove the foil or you'll have bits and pieces of foil on the cabbage rolls.

Step 12: Serve or refrigerate with plastic wrap cover.

NOTE:

Thaw the rolls first before preheating. Take the plastic cover off and replace it with lid or foil. Place in the oven and reheat for about an hour at 325 degrees. Or just microwave on sensor heat.

September 21, 2020 0 comment
0 FacebookTwitterPinterestEmail
Main Dish Recipes

Nanny’s Famous Coconut-Pineapple Cake

by Rebecca September 21, 2020
written by Rebecca

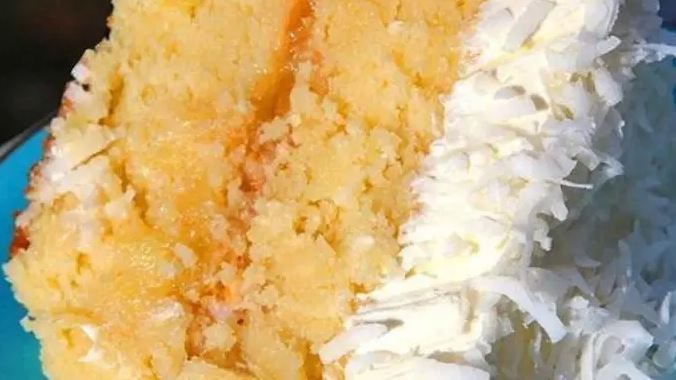
I have only one word to describe this cake, beautiful. This lovely cake for all occasions is heaven! Sweet, moist, and delicious!

Ingredients

1 (15 1/4-ounce) can crushed pineapple in juice, undrained

1 1/2 cups butter or margarine, softened

3 cups of sugar

5 large eggs

1/2 cup lemon-lime soft drink

3 cups cake flour, sifted

1 teaspoon lemon extract

1 teaspoon vanilla extract

Pineapple Filling

For the Cream Cheese Frosting:

1 (6-ounce) package frozen flaked coconut, thawed Garnish: fresh mint sprig

How to make Nanny’s Famous Coconut-Pineapple Cake

Step 1: Grease three 9-inch round cake pans. Use a wax paper to line the bottom of the pan, then, grease and flour the wax paper.

Step 2: Drain the pineapple and set aside 3/4 cup of juice.

Step 3: For the cream cheese frosting, make sure to reserve 1/4 cup of pineapple juice and for the pineapple filling, reserve crush pineapple.

Step 4: In a mixing bowl, add the butter and beat using an electric mixer at medium speed until creamy.

Step 5: Slowly add in the sugar while beating well. Add the eggs, a piece at a time, beating every after each addition until blended.

Step 6: Then, add in half a cup of reserved pineapple juice and soft drink. Beat until combined.

Step 7: Mix the flour alternately with the juice mixture into the batter. Making sure to start and end with flour. Beat every after each addition at low speed until incorporated. Then, stir in the extracts.

Step 8: Divide the batter into the prepared cake pans.

Step 9: Place in the oven and bake for about 25 to 30 minutes at 350 degrees. To check the doneness, insert a toothpick in the center. When it comes out clean, the cake is done.

Step 10: Remove from the oven and immediately take the cakes out of the pan. Transfer on wire racks to cool.

Step 11: Between the cake layers, spread 3/4 cup pineapple filling, then, the rest of the filling over the cake. Spread the frosting on each side of the cake. And around the top, pipe the frosting if you’d like, then, sprinkle over the coconut.

NOTE:

You can garnish the cake if desired.

I use 7-Up for the lemon-lime soft drink as the carbonation of 7-Up makes the layers of the cake rise magnificently.

Nanny’s Famous Coconut-Pineapple Cake

Rebecca I have only one word to describe this cake, beautiful. This lovely cake for all occasions is heaven! Sweet, moist, and delicious! Ingredients 1 (15 1/4-ounce) can crushed pineapple in… Main Dish Recipes Nanny’s Famous Coconut-Pineapple Cake European Print This
Nutrition facts: 200 calories 20 grams fat
Rating: 5.0/5
( 1 voted )

Ingredients

  • 1 (15 1/4-ounce) can crushed pineapple in juice, undrained
  • 1 1/2 cups butter or margarine, softened
  • 3 cups of sugar
  • 5 large eggs
  • 1/2 cup lemon-lime soft drink
  • 3 cups cake flour, sifted
  • 1 teaspoon lemon extract
  • 1 teaspoon vanilla extract
  • Pineapple Filling
  • For the Cream Cheese Frosting:
  • 1 (6-ounce) package frozen flaked coconut, thawed Garnish: fresh mint sprig

Instructions

Step 1: Grease three 9-inch round cake pans. Use a wax paper to line the bottom of the pan, then, grease and flour the wax paper.

Step 2: Drain the pineapple and set aside 3/4 cup of juice.

Step 3: For the cream cheese frosting, make sure to reserve 1/4 cup of pineapple juice and for the pineapple filling, reserve crush pineapple.

Step 4: In a mixing bowl, add the butter and beat using an electric mixer at medium speed until creamy.

Step 5: Slowly add in the sugar while beating well. Add the eggs, a piece at a time, beating every after each addition until blended.

Step 6: Then, add in half a cup of reserved pineapple juice and soft drink. Beat until combined.

Step 7: Mix the flour alternately with the juice mixture into the batter. Making sure to start and end with flour. Beat every after each addition at low speed until incorporated. Then, stir in the extracts.

Step 8: Divide the batter into the prepared cake pans.

Step 9: Place in the oven and bake for about 25 to 30 minutes at 350 degrees. To check the doneness, insert a toothpick in the center. When it comes out clean, the cake is done.
Step 10: Remove from the oven and immediately take the cakes out of the pan. Transfer on wire racks to cool.

Step 11: Between the cake layers, spread 3/4 cup pineapple filling, then, the rest of the filling over the cake. Spread the frosting on each side of the cake. And around the top, pipe the frosting if you'd like, then, sprinkle over the coconut.

NOTE:

You can garnish the cake if desired.

I use 7-Up for the lemon-lime soft drink as the carbonation of 7-Up makes the layers of the cake rise magnificently.

September 21, 2020 0 comment
0 FacebookTwitterPinterestEmail
Main Dish Recipes

SLOW COOKER CREAM CHEESE CRACK CHICKEN

by Rebecca September 21, 2020
written by Rebecca

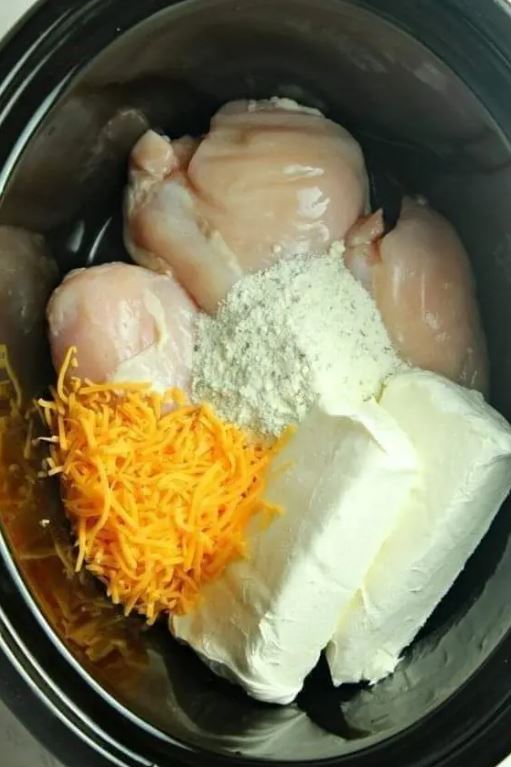
This amazing slow cooker recipe is made with chicken breasts, cream cheese, cheddar cheese, bacon, and ranch seasoning. A simple but excellent addition to your weeknight menu. Not fussy, just put everything in the pan and set to cook for about three to four hours. Slow-cooked dishes are my go-to and my constant companion – never fail to save me on busy days and gives my family one of the best dinner meals.
Crack chicken is simply a creamy shredded chicken made with cream cheese, ranch, bacon, and cheddar. And the ranch dressing gives this a much stronger ranch flavor but is guaranteed not to make the chicken too soupy. Which is a plus point because no one wants a soupy crack chicken. Not many know this, but this is a diet dish even with all the cream as each serving only gives you three grams of fat. Either you are on a diet or not, still, this is gonna be a huge hit. Super delicious, easy peasy, and is worth everything! Perfect for everyone, excellent to serve to guests, and undeniably scrumptious. Wow everyone with this family-friendly dish. I am one hundred percent sure that they’ll ask for it over and over again.

INGREDIENTS

3 chicken breasts

2 (8 oz.) packages cream cheese

1 packet ranch seasoning

1 cup shredded cheddar cheese

1 teaspoon garlic powder

8 slices bacon, cooked and crumbled

8 slices cheddar cheese

8 hoagie rolls

HOW TO MAKE SLOW COOKER CREAM CHEESE CRACK CHICKEN

Step 1: In a slow cooker, add the chicken, cream cheese, ranch seasoning, shredded cheddar cheese, and garlic powder.

Step 2: Cook the ingredients for 3 to 4 hours on high.

Step 3: On a toasted hoagie roll, place the chicken, top with cheddar slice, and crumbled bacon.

Step 4: With this recipe, you can make more than enough 8 hoagie rolls.

Step 5: Serve and enjoy!

SLOW COOKER CREAM CHEESE CRACK CHICKEN

Rebecca This amazing slow cooker recipe is made with chicken breasts, cream cheese, cheddar cheese, bacon, and ranch seasoning. A simple but excellent addition to your weeknight menu. Not fussy, just… Main Dish Recipes SLOW COOKER CREAM CHEESE CRACK CHICKEN European Print This
Nutrition facts: 200 calories 20 grams fat
Rating: 5.0/5
( 1 voted )

Ingredients

  • 3 chicken breasts
  • 2 (8 oz.) packages cream cheese
  • 1 packet ranch seasoning
  • 1 cup shredded cheddar cheese
  • 1 teaspoon garlic powder
  • 8 slices bacon, cooked and crumbled
  • 8 slices cheddar cheese
  • 8 hoagie rolls

Instructions

Step 1: In a slow cooker, add the chicken, cream cheese, ranch seasoning, shredded cheddar cheese, and garlic powder.

Step 2: Cook the ingredients for 3 to 4 hours on high.

Step 3: On a toasted hoagie roll, place the chicken, top with cheddar slice, and crumbled bacon.

Step 4: With this recipe, you can make more than enough 8 hoagie rolls.

Step 5: Serve and enjoy!

September 21, 2020 0 comment
0 FacebookTwitterPinterestEmail
Main Dish Recipes

SOUTHERN FRIED CHICKEN

by Rebecca September 21, 2020
written by Rebecca

This pan-fried chicken coated in seasoned batter has a crisp coating or crust and juicy in every bite. This simple chicken dish is the juicier, crunchier, and the easiest fried chicken you’ll ever have. I am pretty sure that your whole family especially your kids will go gaga over this flavorful pan-fried chicken. I love the crust, I am obsessed with the juiciness, and how all the amazing flavors of this Southern Fried Chicken just burst inside your mouth. This is a must-try and a must-have. Always a huge hit and a crowd-pleaser. Not mention, this recipe calls for just a few simple ingredients that you can easily find in your pantry. If you love crispy fried chicken, then, I urge you to try this. Surely a game-changer.

INGREDIENTS

2 beaten egg

1 cup milk

2 teaspoon paprika

1/2 teaspoon poultry seasoning

4 teaspoons garlic salt

2 teaspoon black pepper

2 cup all-purpose flour

HOW TO MAKE SOUTHERN FRIED CHICKEN

Step 1: In a bowl, add the egg and milk. Beat until combined.

Step 2: In a big plastic bag, combine the flour, garlic salt, pepper, poultry seasoning, and paprika.

Step 3: Add the chicken in the bag and completely seal. Shake to coat the chicken.

Step 4: Then, dip each floured-coated chicken first in the egg mixture, then, in the flour mixture.

Step 5: In a skillet, heat the oil to about 365 degrees F.

Step 6: Once the oil is hot, add the chicken and cook on every side until browned.

Step 7: Adjust the heat to medium-low and continue cooking the chicken for half an hour more or until cooked through.

Step 8: Transfer the chicken on paper towels to drain.

Step 9: Serve and enjoy!

NOTE :

Enjoy meals like this once in a while because ingredients like meat, cheese, sugar, fats, etc. may damage your health.

SOUTHERN FRIED CHICKEN

Rebecca This pan-fried chicken coated in seasoned batter has a crisp coating or crust and juicy in every bite. This simple chicken dish is the juicier, crunchier, and the easiest fried… Main Dish Recipes SOUTHERN FRIED CHICKEN European Print This
Nutrition facts: 200 calories 20 grams fat
Rating: 5.0/5
( 1 voted )

Ingredients

  • 2 beaten egg
  • 1 cup milk
  • 2 teaspoon paprika
  • 1/2 teaspoon poultry seasoning
  • 4 teaspoons garlic salt
  • 2 teaspoon black pepper
  • 2 cup all-purpose flour

Instructions

Step 1: In a bowl, add the egg and milk. Beat until combined.

Step 2: In a big plastic bag, combine the flour, garlic salt, pepper, poultry seasoning, and paprika.

Step 3: Add the chicken in the bag and completely seal. Shake to coat the chicken.

Step 4: Then, dip each floured-coated chicken first in the egg mixture, then, in the flour mixture.

Step 5: In a skillet, heat the oil to about 365 degrees F.

Step 6: Once the oil is hot, add the chicken and cook on every side until browned.

Step 7: Adjust the heat to medium-low and continue cooking the chicken for half an hour more or until cooked through.

Step 8: Transfer the chicken on paper towels to drain.

Step 9: Serve and enjoy!

NOTE :

Enjoy meals like this once in a while because ingredients like meat, cheese, sugar, fats, etc. may damage your health.

September 21, 2020 0 comment
0 FacebookTwitterPinterestEmail
Main Dish Recipes

BEST STEAK MARINADE IN EXISTENCE

by Rebecca September 21, 2020
written by Rebecca

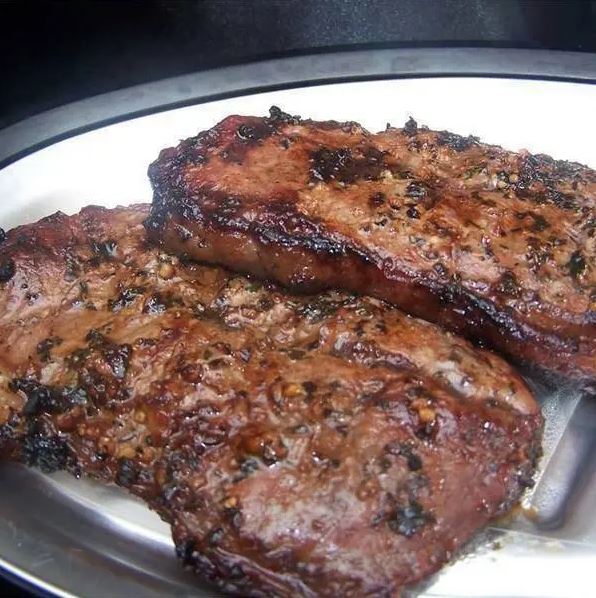
You will never have a boring steak ever again with this excellent steak marinade. This is the best existing steak marinade you’ll ever lay your hands on. Have a blast in the comfort of your home. Impress your loved ones with a mouthwatering, full of flavor, and delicious steak. However, you do steak marinade before all that will change because of this outrageously easy, quick, and savory steak marinade. This simple steak marinade will transform the economical steak in a high-value steak – tender, juicy, and gives the ordinary steak extra flavor but not empowering the natural beef flavor. You know what they say, steaks are like wine – the more you spend on them, the better they are. Thus, you are guaranteed the best of the best steak. Juicier, more tender, extremely flavorful without any random ligament. Let’s face it, as much as we want to splurge on premium quality beef, in reality, most of us cannot. But with this simple steak marinade, you can have the most mouthwatering steak whenever.

INGREDIENTS

1/3 cup Soy sauce

1/2 cup olive oil

1/3 cup fresh lemon juice

1/4 cup Worcestershire sauce

1 1/2 tablespoons garlic powder

3 tablespoons dried basil

1 1/2 tablespoons dried parsley flakes

1 teaspoon ground white pepper

1/4 teaspoon hot pepper sauce

1 teaspoon dried minced garlic

HOW TO MAKE THE BEST STEAK MARINADE

Step 1: In a blender, add the soy sauce, olive oil, lemon juice, Worcestershire sauce, garlic powder, basil, parsley, and pepper.

Step 2: If desired, add hot pepper sauce and garlic. Then, on high speed blend for about 30 seconds until fully combined.

Step 3: Marinade any type of meat in the blended mixture. Place in the fridge, covered, for up to 8 hours.

Step 4: When ready to cook, prepare the meat as desired.

BEST STEAK MARINADE IN EXISTENCE

Rebecca You will never have a boring steak ever again with this excellent steak marinade. This is the best existing steak marinade you’ll ever lay your hands on. Have a blast… Main Dish Recipes BEST STEAK MARINADE IN EXISTENCE European Print This
Nutrition facts: 200 calories 20 grams fat
Rating: 5.0/5
( 1 voted )

Ingredients

  • 1/3 cup Soy sauce
  • 1/2 cup olive oil
  • 1/3 cup fresh lemon juice
  • 1/4 cup Worcestershire sauce
  • 1 1/2 tablespoons garlic powder
  • 3 tablespoons dried basil
  • 1 1/2 tablespoons dried parsley flakes
  • 1 teaspoon ground white pepper
  • 1/4 teaspoon hot pepper sauce
  • 1 teaspoon dried minced garlic

Instructions

Step 1: In a blender, add the soy sauce, olive oil, lemon juice, Worcestershire sauce, garlic powder, basil, parsley, and pepper.

Step 2: If desired, add hot pepper sauce and garlic. Then, on high speed blend for about 30 seconds until fully combined.

Step 3: Marinade any type of meat in the blended mixture. Place in the fridge, covered, for up to 8 hours.

Step 4: When ready to cook, prepare the meat as desired.

September 21, 2020 0 comment
0 FacebookTwitterPinterestEmail
Main Dish Recipes

FRIED APPLE OR PEACH PIES

by Rebecca September 21, 2020
written by Rebecca

Serve: 10 pies

If you love apple or peach pie, then, this is for you. These bursting in goodness pies are fried to perfection and are made from easily made from scratch. The perfect summer pies you can make all year round!

INGREDIENTS

8 ounces dried apples or dried peaches

1 cup of water

1/3 cup sugar

1 tablespoon butter

1 tsp. cinnamon or apple pie spice

1 can jumbo refrigerated flaky biscuits

vegetable oil, for frying

HOW TO MAKE FRIED APPLE OR PEACH PIES

Step 1: In a saucepan, combine the apples with water. Bring to a boil, then, decrease the heat. Simmer for about 30 minutes. covered, until tender.

Step 2: When tender, remove from the heat and allow to cool. You may need to slightly mash the larger pieces. Add in the sugar and butter. Mix well and set aside.

Step 3: If you are gonna use fresh apples, melt 2 tablespoons butter into a large saute pan. When melted add 4 peeled, cored, and chopped apples, sugar, cinnamon, and a teaspoon of lemon juice. Cook for about 15 minutes over medium heat until the apples are soft. Remove the pan from the heat, then, slightly mash, and let it cool.

Step 4: On a lightly floured surface, roll the biscuits into a 5-inch circle.

Step 5: Dip your fingers in water and moisten the edges of each circle to seal the pies. Fold them in half and make sure that the edges are even.

Step 6: Firmly press the edges to seal with a fork dipped in flour.

Step 7: In a deep fryer or heavy skillet, pour oil until half-inch depth. When the oil is hot or reached 370 degrees, fry the pies while turning once over medium-high heat or until golden.

Step 8: When cooking, don’t rush to guarantee that the biscuit is thoroughly cooked.

Step 9: Remove from the pan and transfer the pies on paper towels to drain.

FRIED APPLE OR PEACH PIES

Rebecca Serve: 10 pies If you love apple or peach pie, then, this is for you. These bursting in goodness pies are fried to perfection and are made from easily made… Main Dish Recipes FRIED APPLE OR PEACH PIES European Print This
Serves: 10
Nutrition facts: 200 calories 20 grams fat
Rating: 5.0/5
( 1 voted )

Ingredients

  • 8 ounces dried apples or dried peaches
  • 1 cup of water
  • 1/3 cup sugar
  • 1 tablespoon butter
  • 1 tsp. cinnamon or apple pie spice
  • 1 can jumbo refrigerated flaky biscuits
  • vegetable oil, for frying

Instructions

Step 1: In a saucepan, combine the apples with water. Bring to a boil, then, decrease the heat. Simmer for about 30 minutes. covered, until tender.

Step 2: When tender, remove from the heat and allow to cool. You may need to slightly mash the larger pieces. Add in the sugar and butter. Mix well and set aside.

Step 3: If you are gonna use fresh apples, melt 2 tablespoons butter into a large saute pan. When melted add 4 peeled, cored, and chopped apples, sugar, cinnamon, and a teaspoon of lemon juice. Cook for about 15 minutes over medium heat until the apples are soft. Remove the pan from the heat, then, slightly mash, and let it cool.

Step 4: On a lightly floured surface, roll the biscuits into a 5-inch circle.

Step 5: Dip your fingers in water and moisten the edges of each circle to seal the pies. Fold them in half and make sure that the edges are even.

Step 6: Firmly press the edges to seal with a fork dipped in flour.

Step 7: In a deep fryer or heavy skillet, pour oil until half-inch depth. When the oil is hot or reached 370 degrees, fry the pies while turning once over medium-high heat or until golden.

Step 8: When cooking, don't rush to guarantee that the biscuit is thoroughly cooked.

Step 9: Remove from the pan and transfer the pies on paper towels to drain.

September 21, 2020 0 comment
0 FacebookTwitterPinterestEmail
Newer Posts
Older Posts

Popular Posts

  • 1

    Crispy Crunchy Parmesan Potatoes

    March 21, 2020
  • 2

    CROCK POT SMOTHERED PORK CHOPS

    March 21, 2020
  • Facebook
  • Twitter

@2019 - All Right Reserved.


Back To Top