Cook it once
  • Home
  • Privacy Policy
  • Recipes
    • KETO
    • LC
    • WW
  • Tips
  • Contact
Cook it once
  • Home
  • Privacy Policy
  • Recipes
    • KETO
    • LC
    • WW
  • Tips
  • Contact
Category:

Main Dish Recipes

Main Dish Recipes

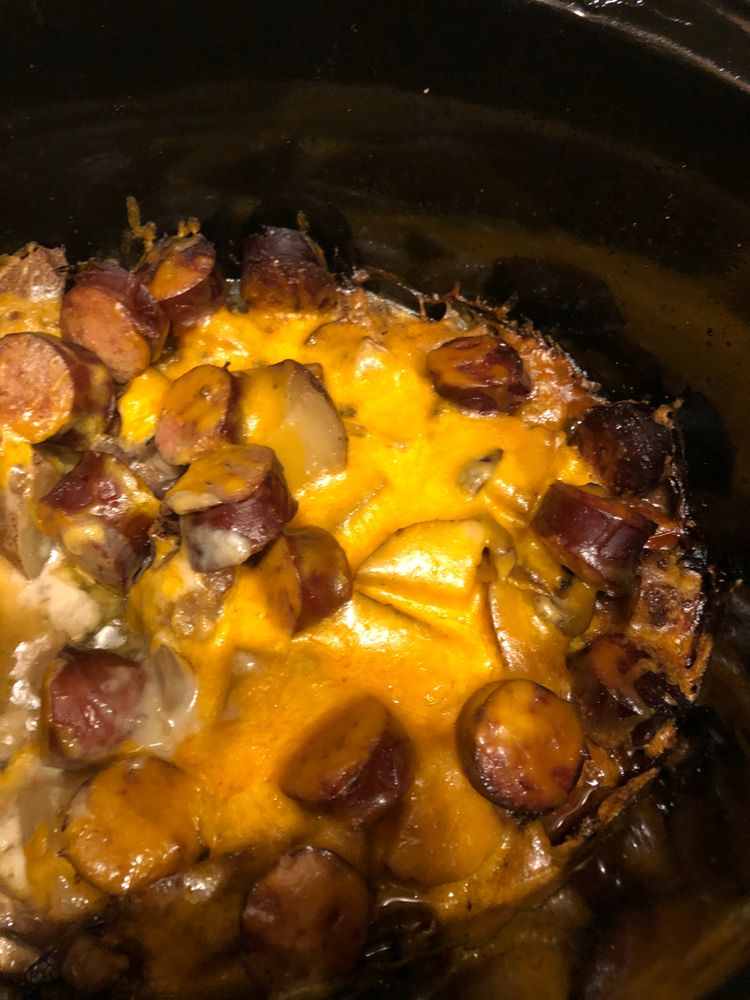
Slow Cooker Sausage and Potatoes

by Rebecca October 1, 2020
written by Rebecca

PREP TIME: 10 mins | COOK TIME: 7 hrs | TOTAL TIME: 7 hrs 10 mins | SERVINGS: 8

Want an easy slow cooker recipe that guaranteed a delicious result every time? This Sausage and Potatoes are pretty easy to assemble and needs only seven simple ingredients. So good, it’ll make your mouth water all the time!

INGREDIENTS

2 pounds sausage links diced into 1-inch pieces

2 pounds potatoes washed and diced into chunks

1 large onion sliced (optional)

6 to 12 garlic cloves optional

1 can cream of chicken soup

3/4 cup chicken broth

2 tbsp Worcestershire sauce

How to make Slow Cooker Sausage and Potatoes

Step 1: Butter or oil lightly the crockpot insert.

Step 2: Place the potatoes, onions, and sausage in the prepared crockpot.

Step 3: In a separate bowl, pour the soup, broth, and add in the Worcestershire sauce. Mix well.

Step 4: Add this in the crockpot.

Step 5: Cook for about 6 to 8 hours on low, covered.

Freezer Meal:

Step 1: In a zipper seal freezer bag, add the sausage, onions, and garlic. And toss.

Step 2: In a bowl, mix the broth, Worcestershire sauce, and soup. Add this to the sausage mixture.

Step 3: Lay the freezer bag flat and squeeze out the air.

Step 4: Put a label on the bag. A note that potatoes are needed for this recipe.

Cook Freezer Meal:

Step 1: Defrost in the fridge overnight.

Step 2: Grease the crockpot insert with butter.

Step 3: In the bottom of the pot, add in the washed and diced potatoes.

Step 4: Then, pour on top everything that is in the freezer bag.

Step 5: Cook for about 7 hours or until the potatoes are tender.

NOTES:

If you like a creamier, thicker sauce, mix 2 tbsp cornstarch with 1/4 cup water until combined. Add and stir this to the pot 30 minutes before serving. Adjust the heat to high and continue to cook giving the sauce enough time to thicken.

Adjust the taste and add a little amount of garlic powder, salt, and pepper if needed.

Slow Cooker Sausage and Potatoes

Rebecca PREP TIME: 10 mins | COOK TIME: 7 hrs | TOTAL TIME: 7 hrs 10 mins | SERVINGS: 8 Want an easy slow cooker recipe that guaranteed a delicious result… Main Dish Recipes Slow Cooker Sausage and Potatoes European Print This
Serves: 8 Prep Time: 10 mins Cooking Time: 7 hrs 7 hrs
Nutrition facts: 200 calories 20 grams fat
Rating: 3.1/5
( 31 voted )

Ingredients

  • 2 pounds sausage links diced into 1-inch pieces
  • 2 pounds potatoes washed and diced into chunks
  • 1 large onion sliced (optional)
  • 6 to 12 garlic cloves optional
  • 1 can cream of chicken soup
  • 3/4 cup chicken broth
  • 2 tbsp Worcestershire sauce

Instructions

Step 1: Butter or oil lightly the crockpot insert.

Step 2: Place the potatoes, onions, and sausage in the prepared crockpot.

Step 3: In a separate bowl, pour the soup, broth, and add in the Worcestershire sauce. Mix well.

Step 4: Add this in the crockpot.

Step 5: Cook for about 6 to 8 hours on low, covered.

Freezer Meal:

Step 1: In a zipper seal freezer bag, add the sausage, onions, and garlic. And toss.

Step 2: In a bowl, mix the broth, Worcestershire sauce, and soup. Add this to the sausage mixture.

Step 3: Lay the freezer bag flat and squeeze out the air.

Step 4: Put a label on the bag. A note that potatoes are needed for this recipe.

Cook Freezer Meal:

Step 1: Defrost in the fridge overnight.

Step 2: Grease the crockpot insert with butter.

Step 3: In the bottom of the pot, add in the washed and diced potatoes.

Step 4: Then, pour on top everything that is in the freezer bag.

Step 5: Cook for about 7 hours or until the potatoes are tender.

NOTES:

If you like a creamier, thicker sauce, mix 2 tbsp cornstarch with 1/4 cup water until combined. Add and stir this to the pot 30 minutes before serving. Adjust the heat to high and continue to cook giving the sauce enough time to thicken.

Adjust the taste and add a little amount of garlic powder, salt, and pepper if needed.
October 1, 2020 0 comment
1 FacebookTwitterPinterestEmail
Main Dish Recipes

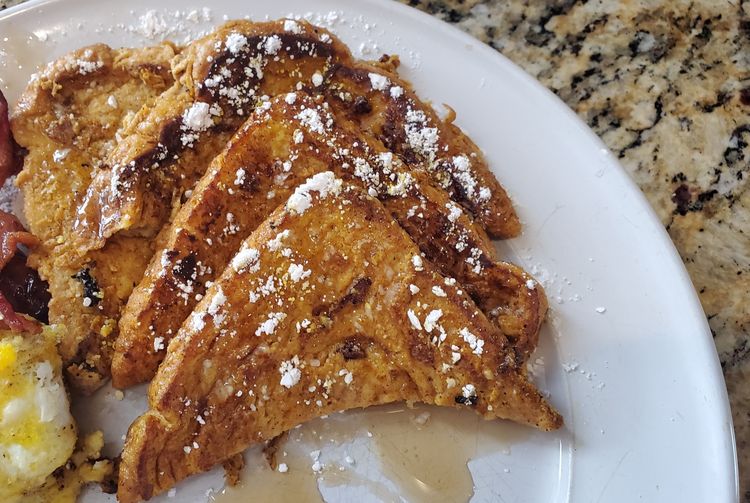
PUMPKIN FRENCH TOAST

by Rebecca September 30, 2020
written by Rebecca

Prep Time: 5 mins | Cook Time: 6 mins | Total Time: 11 mins | Servings: 12

Gosh, this is the best French Toast I’ve ever made! For a perfect Fall, breakfast gives this a try and I’m pretty sure you’ll get hooked in a heartbeat. You’ll love the sweetness, that perfect spice, topped with a super easy homemade whipped pumpkin butter.

INGREDIENTS

4 eggs

2/3 cup milk – (whole, low-fat or skim)

1/2 cup pumpkin puree

1 1/2 tsp vanilla extract

1 tsp ground cinnamon

1 tsp pumpkin pie spice

12 slices Texas toast – OR french bread, OR challah, OR croissant halves

WHIPPED PUMPKIN BUTTER:

1/2 cup salted or unsalted butter – ( 1 stick), room temperature

1/3 cup pumpkin puree

3 tbsp maple syrup – or honey

1 tsp vanilla extract

1/2 tsp cinnamon

1/2 tsp pumpkin pie spice

HOW TO MAKE PUMPKIN FRENCH TOAST

Step 1: Melt a little amount of butter in a large non-stick skillet over medium heat.

Step 2: Add the eggs, milk, pumpkin puree, vanilla, cinnamon, and pumpkin pie spice in a rectangular baking dish. Whisk well.

Step 3: Then, dip each piece of bread into the mixture on both sides before putting into the hot skillet with melted butter.

Step 4: Cook the bread for approximately 2 to 3 minutes on each side or until golden brown. Do this for the rest of the ingredients.

Step 5: Serve the toasts hot with whipped pumpkin butter, maple syrup, and some toasted chopped nuts.

For the pumpkin butter:

Step 1: Add the softened butter in a small mixing bowl. Use a hand mixer to beat for about 2 minutes or until light and fluffy.

Step 2: Then, add in the pumpkin puree, maple syrup or honey, vanilla, cinnamon, and pumpkin pie spice. Continue beating for a minute more or until fluffy.

Step 3: Place in an air-tight container and store in the fridge for up to 5 days.

Notes:

For a sweeter french toast, add a tablespoon of brown sugar to the mixture.

NUTRITION FACTS:

Serving: 12g | Calories: 261kcal | Carbohydrates: 23g | Protein: 6g | Fat: 17g | Saturated Fat: 8g | Cholesterol: 76mg | Sodium: 239mg | Potassium: 84mg | Fiber: 2g | Sugar: 6g | Vitamin A: 2985IU | Vitamin C: 1mg | Calcium: 40mg | Iron: 7mg

PUMPKIN FRENCH TOAST

Rebecca Prep Time: 5 mins | Cook Time: 6 mins | Total Time: 11 mins | Servings: 12 Gosh, this is the best French Toast I’ve ever made! For a perfect… Main Dish Recipes PUMPKIN FRENCH TOAST European Print This
Serves: 12 Prep Time: 5 mins Cooking Time: 6 mins 6 mins
Nutrition facts: 261 calories 17 fat
Rating: 5.0/5
( 1 voted )

Ingredients

  • 4 eggs
  • 2/3 cup milk - (whole, low-fat or skim)
  • 1/2 cup pumpkin puree
  • 1 1/2 tsp vanilla extract
  • 1 tsp ground cinnamon
  • 1 tsp pumpkin pie spice
  • 12 slices Texas toast - OR french bread, OR challah, OR croissant halves
  • WHIPPED PUMPKIN BUTTER:
  • 1/2 cup salted or unsalted butter - ( 1 stick), room temperature
  • 1/3 cup pumpkin puree
  • 3 tbsp maple syrup - or honey
  • 1 tsp vanilla extract
  • 1/2 tsp cinnamon
  • 1/2 tsp pumpkin pie spice

Instructions

Step 1: Melt a little amount of butter in a large non-stick skillet over medium heat.

Step 2: Add the eggs, milk, pumpkin puree, vanilla, cinnamon, and pumpkin pie spice in a rectangular baking dish. Whisk well.

Step 3: Then, dip each piece of bread into the mixture on both sides before putting into the hot skillet with melted butter.

Step 4: Cook the bread for approximately 2 to 3 minutes on each side or until golden brown. Do this for the rest of the ingredients.

Step 5: Serve the toasts hot with whipped pumpkin butter, maple syrup, and some toasted chopped nuts.

For the pumpkin butter:

Step 1: Add the softened butter in a small mixing bowl. Use a hand mixer to beat for about 2 minutes or until light and fluffy.

Step 2: Then, add in the pumpkin puree, maple syrup or honey, vanilla, cinnamon, and pumpkin pie spice. Continue beating for a minute more or until fluffy.

Step 3: Place in an air-tight container and store in the fridge for up to 5 days.

Notes:

For a sweeter french toast, add a tablespoon of brown sugar to the mixture.

September 30, 2020 0 comment
0 FacebookTwitterPinterestEmail
Main Dish Recipes

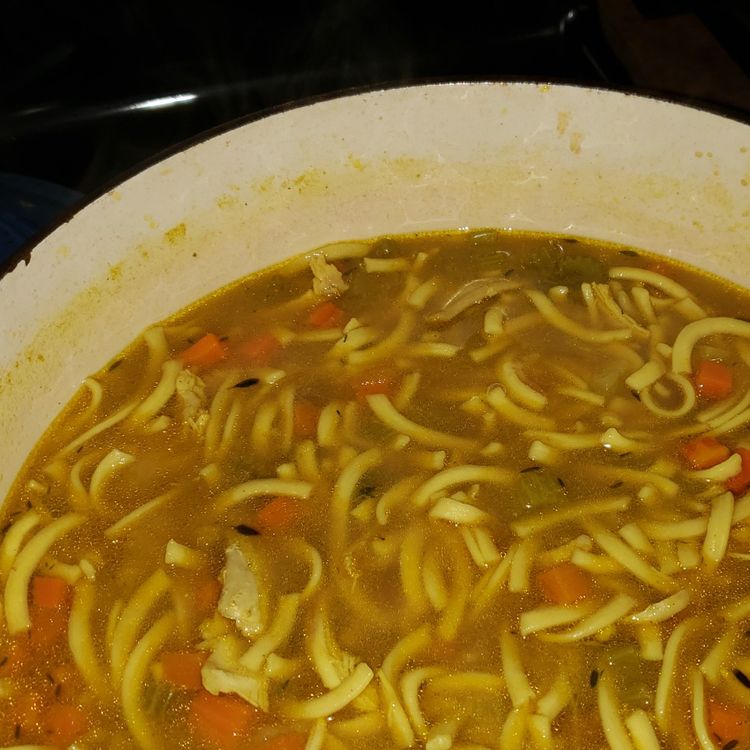
Homemade Chicken Noodle Soup Recipe

by Rebecca September 30, 2020
written by Rebecca

Prep Time: 10 MINUTES | Cook Time: 50 MINUTES | Total Time: 1 HR | Servings: 10

A delicious Noodle Soup that you can make in an Instant Pot or Slow cooker. A homemade classic that has been loved and enjoyed for ages.

Ingredients

1 teaspoon oil or butter

2 1/2 pounds bone-in chicken thighs (or a mix of thighs and breasts)

1 large sweet onion, peeled and chopped

2-4 cloves garlic, minced

1 1/2 cups sliced celery

1 1/2 cups sliced carrots

1 tablespoon fresh thyme leaves (1 teaspoon dried)

12 cups chicken broth

2 bay leaves

1/4 teaspoon turmeric

8-ounce Kluski egg noodles

1/4 cup chopped parsley

2 tablespoons fresh lemon juice

1 1/2 teaspoons cornstarch

Salt and pepper

How to make Homemade Chicken Noodle Soup

Step 1: Add oil in a large 6 to 8-quart soup pot. Set over medium heat.

Step 2: On both sides, generously sprinkle the chicken thighs with salt and pepper. Put in the pot skin-side down.

Step 3: Cook the chicken for about 3 minutes on both sides until brown. Once done, remove the cooked chicken from the pot and set aside.

Step 4: Saute the onions and garlic in the chicken fat for about 3 to 4 minutes. Add in the celery, carrots, and thyme. Stir for 2 minutes more.

Step 5: Pour in the chicken broth and add in the bay leaves and turmeric in the pot.

Step 6: Place the chicken thighs back to the pot and season with 3/4 tsp salt and 1/4 tsp black pepper. Mix well and simmer for about 30 minutes, covered. You can adjust the heat to low if needed.

Step 7: Take the bay leaves and chicken thighs out using tongs.

Step 8: Transfer the thighs on a cutting board.

Step 9: Add in the egg noodles into the soup and stir. Allowing to simmer for 6 to 9 minutes more or until the pasta is cooked.

Step 10: In the meantime, take the skins and bones of the chicken off. Then, shred the chicken using a fork and put the shredded chicken back into the soup.

Step 11: In a small bowl, whisk the cornstarch and lemon juice.

Step 12: When the noodles are almost done, stir the cornstarch-lemon juice mixture into the soup. This will thicken the soup a bit. Then, stir in the chopped parsley. Season according to taste.

Notes:

There are two varieties you can make. The first one is the Crockpot Chicken Noodle Soup. See the steps below.

1. On a stovetop as mentioned, brown the chicken and cook the vegetables.

2. Add in the rest of the ingredients but leave the noodles and parsley. Cook for 6 to 8 hours on low or 4 to 3 hours on high.

3. Then, add in the noodles and stir. Continue cooking for 30 minutes more.

4. In the meantime, remove from the chicken from the pot, remove the skins and bones, and shred. Place the shredded chicken back to the slow cooker. And stir in the parsley.

The second variety is the Instant Pot Chicken Noodle Soup.

1. Do steps 1 and 2 from the original recipe.

2. Place the chicken thighs, chicken broth, bay leaves, and turmeric to the pot. Then, season with 3/4 tsp salt, and 1/4 tsp black pepper. Stir well and cover. Cook on Soup setting for about 10 minutes.

3. Do a natural release. For this, it’ll take about 8 to 10 minutes for the steam valve to drop.

4. Then, simmer by setting the pot on manual. Do steps 4, 5, and 6 from the above recipe.

Nutrition Facts:

Serving: 1.5cups, Calories: 279kcal, Carbohydrates: 23g, Protein: 16g, Fat: 13g, Saturated Fat: 4g, Cholesterol: 87mg, Sodium: 1122mg, Potassium: 573mg, Fiber: 2g, Sugar: 3g, Vitamin A: 3520iu, Vitamin C: 27mg, Calcium: 55mg, Iron: 2mg

Homemade Chicken Noodle Soup Recipe

Rebecca Prep Time: 10 MINUTES | Cook Time: 50 MINUTES | Total Time: 1 HR | Servings: 10 A delicious Noodle Soup that you can make in an Instant Pot or… Main Dish Recipes Homemade Chicken Noodle Soup Recipe European Print This
Serves: 10 Prep Time: 10 mins Cooking Time: 50 mins 50 mins
Nutrition facts: 279 calories 13 fat
Rating: 5.0/5
( 1 voted )

Ingredients

  • 1 teaspoon oil or butter
  • 2 1/2 pounds bone-in chicken thighs (or a mix of thighs and breasts)
  • 1 large sweet onion, peeled and chopped
  • 2-4 cloves garlic, minced
  • 1 1/2 cups sliced celery
  • 1 1/2 cups sliced carrots
  • 1 tablespoon fresh thyme leaves (1 teaspoon dried)
  • 12 cups chicken broth
  • 2 bay leaves
  • 1/4 teaspoon turmeric
  • 8-ounce Kluski egg noodles
  • 1/4 cup chopped parsley
  • 2 tablespoons fresh lemon juice
  • 1 1/2 teaspoons cornstarch
  • Salt and pepper

Instructions

Step 1: Add oil in a large 6 to 8-quart soup pot. Set over medium heat.

Step 2: On both sides, generously sprinkle the chicken thighs with salt and pepper. Put in the pot skin-side down.

Step 3: Cook the chicken for about 3 minutes on both sides until brown. Once done, remove the cooked chicken from the pot and set aside.

Step 4: Saute the onions and garlic in the chicken fat for about 3 to 4 minutes. Add in the celery, carrots, and thyme. Stir for 2 minutes more.

Step 5: Pour in the chicken broth and add in the bay leaves and turmeric in the pot.

Step 6: Place the chicken thighs back to the pot and season with 3/4 tsp salt and 1/4 tsp black pepper. Mix well and simmer for about 30 minutes, covered. You can adjust the heat to low if needed.

Step 7: Take the bay leaves and chicken thighs out using tongs.

Step 8: Transfer the thighs on a cutting board.

Step 9: Add in the egg noodles into the soup and stir. Allowing to simmer for 6 to 9 minutes more or until the pasta is cooked.

Step 10: In the meantime, take the skins and bones of the chicken off. Then, shred the chicken using a fork and put the shredded chicken back into the soup.

Step 11: In a small bowl, whisk the cornstarch and lemon juice.

Step 12: When the noodles are almost done, stir the cornstarch-lemon juice mixture into the soup. This will thicken the soup a bit. Then, stir in the chopped parsley. Season according to taste.

Notes:

There are two varieties you can make. The first one is the Crockpot Chicken Noodle Soup. See the steps below.

1. On a stovetop as mentioned, brown the chicken and cook the vegetables.

2. Add in the rest of the ingredients but leave the noodles and parsley. Cook for 6 to 8 hours on low or 4 to 3 hours on high.

3. Then, add in the noodles and stir. Continue cooking for 30 minutes more.

4. In the meantime, remove from the chicken from the pot, remove the skins and bones, and shred. Place the shredded chicken back to the slow cooker. And stir in the parsley.

The second variety is the Instant Pot Chicken Noodle Soup.

1. Do steps 1 and 2 from the original recipe.

2. Place the chicken thighs, chicken broth, bay leaves, and turmeric to the pot. Then, season with 3/4 tsp salt, and 1/4 tsp black pepper. Stir well and cover. Cook on Soup setting for about 10 minutes.

3. Do a natural release. For this, it'll take about 8 to 10 minutes for the steam valve to drop.

4. Then, simmer by setting the pot on manual. Do steps 4, 5, and 6 from the above recipe.

September 30, 2020 0 comment
0 FacebookTwitterPinterestEmail
Main Dish Recipes

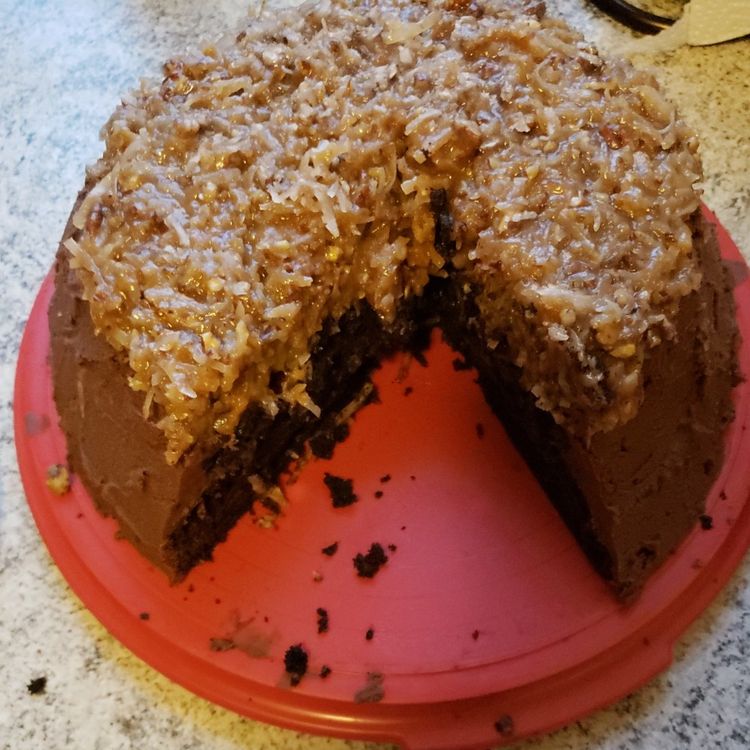
The Best German Chocolate Cake in All the Land

by Rebecca September 30, 2020
written by Rebecca

Holy smokes! I think I’ve found my greatest weakness. This cake is by far the best tasting German Chocolate Cake I’ve made in my entire existence! Plus, it looks divine!

Ingredients:

Cake:

3/4 cup butter (1 1/2 sticks)

1 1/4 cups dark cocoa powder

1 cup brewed coffee (Or any liquid)

2 cups milk (or coconut milk)

1 1/2 cups brown sugar

1 1/2 cups white sugar

3 eggs, lightly beaten

1 tablespoon vanilla

2 1/4 cups all-purpose flour (or rice flour for gluten-free)

1 teaspoon baking soda

3 teaspoons baking powder

3/4 teaspoon salt

German chocolate frosting:

1 cup brown sugar

1 cup evaporated milk

3 egg yolks

1/2 cup butter (1 stick)

3 teaspoons vanilla

3 cups Sweetened Flaked Coconut

1 1/2 cups pecans (lightly toasted in the oven or a pan on the stove)

Milk chocolate frosting:

2 cups chopped Milk Chocolate or milk chocolate chips

2 sticks butter, softened

5 tablespoons cocoa powder

1 teaspoon vanilla

5 cups powdered sugar

3-6 tablespoons milk

How to make German Chocolate Cake

To make the Cake:

Step 1: Prepare the oven. Preheat it to 350 degrees F.

Step 2: On the bottom of three 8-inch pans, put a greased circle parchment. Or grease and dust the pans with cocoa powder.

Step 3: Cook the butter and cocoa on a stove or in the microwave until melted. Gradually add in the coffee and milk. Whisk well to incorporate. Whisk in the sugars, eggs, and vanilla until smooth.

Step 4: In a bowl, add and combine the flour, baking soda, and salt.

Step 5: Add the dry ingredients into the wet ingredients and mix until just combined.

Step 6: Evenly split the batter into the prepared pans.

Step 7: Place inside the preheated oven and bake for about 45 minutes or until the toothpick inserted in the centre of the cake comes out clean.

Step 8: Remove from the oven and allow the cakes to cool for several minutes before removing them from the pans. Loosen the edges with a sharp knife and cool the cakes completely before frosting.

To make the German chocolate frosting:

Step 1: Cook the sugar, milk, yolks, and butter on the stove. Constantly whisking until the mixture is bubbling and thick.

Step 2: Add in the vanilla, coconut, and pecans.

Step 3: Remove from the heat and cool before frosting.

To make the Milk chocolate frosting:

Step 1: Start by melting the chocolate either in the microwave or a stovetop. If using chocolate chips in place of baking chocolate, note to set the microwave power down and stir often.

Step 2: In a mixing bowl, add the melted chocolate with butter and beat well. Stir in the cocoa powder and vanilla.

Step 3: Stir in the powdered sugar alternately with the milk until you reach your desired consistency.

To assemble the cake:

Step 1: Layer the cakes and top with the German Chocolate frosting. Starting from the edges, frost the cake with the chocolate frosting.

The Best German Chocolate Cake in All the Land

Rebecca Holy smokes! I think I’ve found my greatest weakness. This cake is by far the best tasting German Chocolate Cake I’ve made in my entire existence! Plus, it looks divine!… Main Dish Recipes The Best German Chocolate Cake in All the Land European Print This
Nutrition facts: 200 calories 20 grams fat
Rating: 5.0/5
( 1 voted )

Ingredients

  • Cake:
  • 3/4 cup butter (1 1/2 sticks)
  • 1 1/4 cups dark cocoa powder
  • 1 cup brewed coffee (Or any liquid)
  • 2 cups milk (or coconut milk)
  • 1 1/2 cups brown sugar
  • 1 1/2 cups white sugar
  • 3 eggs, lightly beaten
  • 1 tablespoon vanilla
  • 2 1/4 cups all-purpose flour (or rice flour for gluten-free)
  • 1 teaspoon baking soda
  • 3 teaspoons baking powder
  • 3/4 teaspoon salt
  • German chocolate frosting:
  • 1 cup brown sugar
  • 1 cup evaporated milk
  • 3 egg yolks
  • 1/2 cup butter (1 stick)
  • 3 teaspoons vanilla
  • 3 cups Sweetened Flaked Coconut
  • 1 1/2 cups pecans (lightly toasted in the oven or a pan on the stove)
  • Milk chocolate frosting:
  • 2 cups chopped Milk Chocolate or milk chocolate chips
  • 2 sticks butter, softened
  • 5 tablespoons cocoa powder
  • 1 teaspoon vanilla
  • 5 cups powdered sugar
  • 3-6 tablespoons milk

Instructions

To make the Cake:

Step 1: Prepare the oven. Preheat it to 350 degrees F.

Step 2: On the bottom of three 8-inch pans, put a greased circle parchment. Or grease and dust the pans with cocoa powder.

Step 3: Cook the butter and cocoa on a stove or in the microwave until melted. Gradually add in the coffee and milk. Whisk well to incorporate. Whisk in the sugars, eggs, and vanilla until smooth.

Step 4: In a bowl, add and combine the flour, baking soda, and salt.

Step 5: Add the dry ingredients into the wet ingredients and mix until just combined.

Step 6: Evenly split the batter into the prepared pans.

Step 7: Place inside the preheated oven and bake for about 45 minutes or until the toothpick inserted in the centre of the cake comes out clean.

Step 8: Remove from the oven and allow the cakes to cool for several minutes before removing them from the pans. Loosen the edges with a sharp knife and cool the cakes completely before frosting.

To make the German chocolate frosting:

Step 1: Cook the sugar, milk, yolks, and butter on the stove. Constantly whisking until the mixture is bubbling and thick.

Step 2: Add in the vanilla, coconut, and pecans.

Step 3: Remove from the heat and cool before frosting.

To make the Milk chocolate frosting:

Step 1: Start by melting the chocolate either in the microwave or a stovetop. If using chocolate chips in place of baking chocolate, note to set the microwave power down and stir often.

Step 2: In a mixing bowl, add the melted chocolate with butter and beat well. Stir in the cocoa powder and vanilla.

Step 3: Stir in the powdered sugar alternately with the milk until you reach your desired consistency.

To assemble the cake:

Step 1: Layer the cakes and top with the German Chocolate frosting. Starting from the edges, frost the cake with the chocolate frosting.

September 30, 2020 0 comment
0 FacebookTwitterPinterestEmail
Main Dish Recipes

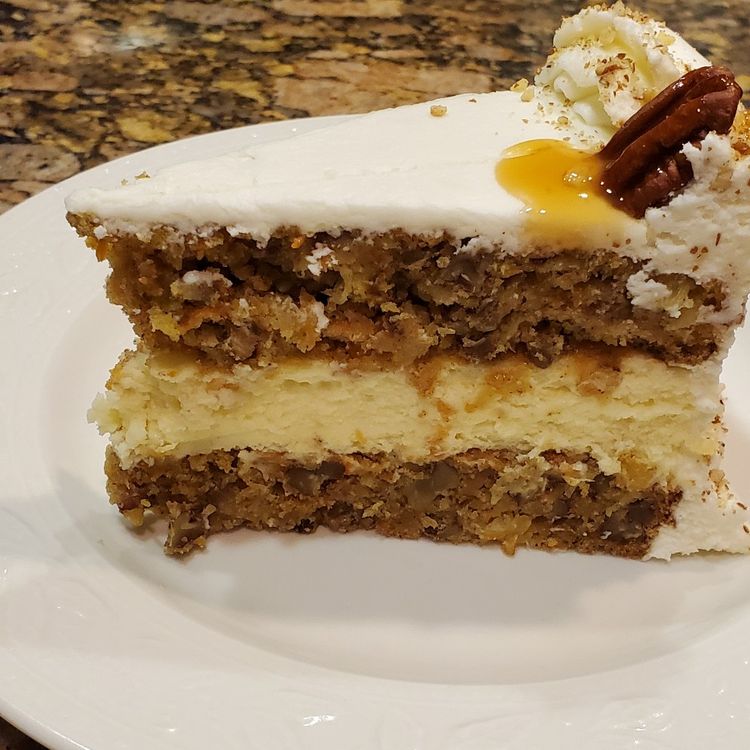
Carrot Cake Cheesecake Cake

by Rebecca September 30, 2020
written by Rebecca

Prep Time: 2 hrs | Cook Time: 2 hrs | Additional Time: 2 hrs | Total Time: 6 hrs | Yield: 16

This three-layer cake with a glorious cream cheese frosting is to die for! First, the carrot cake, then, the cream cheese followed by another layer of carrot, topped and frosted with a heavenly frosting.

Ingredients

Carrot cake:

2 cups granulated sugar

1 cup canola oil

4 large eggs

2 cups all-purpose flour

1 tsp baking soda

1 tsp baking powder

1/4 tsp kosher salt

2 tsp ground cinnamon

2 cups shredded carrots

Cheesecake layer:

2 packages (8 oz each) cream cheese, softened

1 cup granulated sugar

1/4 tsp kosher salt

2 large eggs

1/4 cup sour cream

1/3 cup heavy whipping cream

Frosting:

1 cup unsalted butter, softened

1 package (8 oz) cream cheese, softened

1 tsp vanilla extract

1/4 cup heavy cream

4 cups powdered sugar

1 cup chopped pecans

How to make Carrot Cake Cheesecake Cake

To make the cheesecake layer:

Step 1: Prepare the oven. Preheat it to 325 degrees.

Step 2: Pour inch water into a large roasting pan and put it on the bottom 2/3 of the oven before preheating the oven.

Step 3: Use a foil to wrap the outside bottom of a 9-inch springform pan. Then, line the inside with a circle shape parchment paper.

Step 4: In a mixing bowl, add the cream cheese and granulated sugar. Beat for about 2 to 3 minutes or until creamy before adding in the salt and eggs. Add the eggs a piece at a time, beating well every after each addition.

Step 5: Add in the sour cream and heavy cream. Beat for about 2 minutes or until light and fluffy.

Step 6: Pour this into the prepared pan. Position the pan in the middle of the roasting pan in the preheated oven. Be careful not to spill the water.

Step 7: Bake for approximately 45 minutes. Then, turn the oven off but don’t take the cheesecake out. Let it sit in the oven for 30 minutes.

Step 8: After the additional 30 minutes, remove the cheesecake from the oven and let it cool completely on the counter.

Step 9: Once the cheesecake is completely cooled. Place the pan in the freezer for a couple of hours or overnight. Or just refrigerate if using the cheesecake within 24 hours.

For the carrot cake layers:

Step 1: Prepare the oven. Preheat it to 350 degrees.

Step 2: Then, grease and flour two 9-inch cake pans.

Step 3: Add the sugar, oil, and eggs in a large mixing bowl. Mix well until blended. Stir in the flour, baking soda, baking powder, salt, and cinnamon. And beat for approximately 2 minutes before adding in the shredded carrots.

Step 4: Evenly divide the batter into the prepared cake pans.

Step 5: Place in the preheated oven and bake for about 30 minutes.

Step 6: Remove from the oven and allow the cakes to cool on wire racks for at least 10 minutes before removing them in the pans to completely cool.

For the frosting:

Step 1: Add the cream cheese and butter in a large mixing bowl. Using a whisk attachment, beat for about 3 minutes.

Step 2: Add in the sugar, vanilla, and the heavy cream. Beat for another 3 to 4 minutes or until light and fluffy before folding in the chopped pecan.

To construct the Cake:

Step 1: The bottom layer is the carrot cake, followed by the cheesecake, then, the other carrot cake.

Step 2: Starting on the sides, frost the cake, then, the top.

Step 3: Place in the fridge for up to 3 days, covered.

Nutrition facts:

Amount Per Serving: Calories: 674 Total Fat: 38g Saturated Fat: 13g Trans Fat: 0g Unsaturated Fat: 23g Cholesterol: 119mg Sodium: 246mg Carbohydrates: 80g Fiber: 2g Sugar: 66g Protein: 6g

Carrot Cake Cheesecake Cake

Rebecca Prep Time: 2 hrs | Cook Time: 2 hrs | Additional Time: 2 hrs | Total Time: 6 hrs | Yield: 16 This three-layer cake with a glorious cream cheese… Main Dish Recipes Carrot Cake Cheesecake Cake European Print This
Serves: 16 Prep Time: 2 hrs Cooking Time: 4 hrs 4 hrs
Nutrition facts: 674 calories 38 fat
Rating: 5.0/5
( 1 voted )

Ingredients

  • Carrot cake:
  • 2 cups granulated sugar
  • 1 cup canola oil
  • 4 large eggs
  • 2 cups all-purpose flour
  • 1 tsp baking soda
  • 1 tsp baking powder
  • 1/4 tsp kosher salt
  • 2 tsp ground cinnamon
  • 2 cups shredded carrots
  • Cheesecake layer:
  • 2 packages (8 oz each) cream cheese, softened
  • 1 cup granulated sugar
  • 1/4 tsp kosher salt
  • 2 large eggs
  • 1/4 cup sour cream
  • 1/3 cup heavy whipping cream
  • Frosting:
  • 1 cup unsalted butter, softened
  • 1 package (8 oz) cream cheese, softened
  • 1 tsp vanilla extract
  • 1/4 cup heavy cream
  • 4 cups powdered sugar
  • 1 cup chopped pecans

Instructions

To make the cheesecake layer:

Step 1: Prepare the oven. Preheat it to 325 degrees.

Step 2: Pour inch water into a large roasting pan and put it on the bottom 2/3 of the oven before preheating the oven.

Step 3: Use a foil to wrap the outside bottom of a 9-inch springform pan. Then, line the inside with a circle shape parchment paper.

Step 4: In a mixing bowl, add the cream cheese and granulated sugar. Beat for about 2 to 3 minutes or until creamy before adding in the salt and eggs. Add the eggs a piece at a time, beating well every after each addition.

Step 5: Add in the sour cream and heavy cream. Beat for about 2 minutes or until light and fluffy.

Step 6: Pour this into the prepared pan. Position the pan in the middle of the roasting pan in the preheated oven. Be careful not to spill the water.

Step 7: Bake for approximately 45 minutes. Then, turn the oven off but don't take the cheesecake out. Let it sit in the oven for 30 minutes.

Step 8: After the additional 30 minutes, remove the cheesecake from the oven and let it cool completely on the counter.

Step 9: Once the cheesecake is completely cooled. Place the pan in the freezer for a couple of hours or overnight. Or just refrigerate if using the cheesecake within 24 hours.

For the carrot cake layers:

Step 1: Prepare the oven. Preheat it to 350 degrees.

Step 2: Then, grease and flour two 9-inch cake pans.

Step 3: Add the sugar, oil, and eggs in a large mixing bowl. Mix well until blended. Stir in the flour, baking soda, baking powder, salt, and cinnamon. And beat for approximately 2 minutes before adding in the shredded carrots.

Step 4: Evenly divide the batter into the prepared cake pans.

Step 5: Place in the preheated oven and bake for about 30 minutes.

Step 6: Remove from the oven and allow the cakes to cool on wire racks for at least 10 minutes before removing them in the pans to completely cool.

For the frosting:

Step 1: Add the cream cheese and butter in a large mixing bowl. Using a whisk attachment, beat for about 3 minutes.

Step 2: Add in the sugar, vanilla, and the heavy cream. Beat for another 3 to 4 minutes or until light and fluffy before folding in the chopped pecan.

To construct the Cake:

Step 1: The bottom layer is the carrot cake, followed by the cheesecake, then, the other carrot cake.

Step 2: Starting on the sides, frost the cake, then, the top.

Step 3: Place in the fridge for up to 3 days, covered.

September 30, 2020 0 comment
0 FacebookTwitterPinterestEmail
Main Dish Recipes

Halloween Cupcakes

by Rebecca September 30, 2020
written by Rebecca

How amusing are these cupcakes? Channel your inner artist by creating these cute and fun cupcake frosting designs for Halloween. I bet the kids and everyone will love them!

Ingredients

Cupcakes

Vanilla frosting

Chocolate Ganache/chocolate frosting

Neon green food colouring

Pink food colouring

Candy eyes

Marshmallows

Blue M&Ms

Tic Tacs

Toothpicks

Piping bags

#47 icing tip

#12 icing tip

How to make Halloween Cupcakes

Step 1: For the spider web cupcakes, using vanilla frosting frost your cupcake.

Step 2: Fill a piping bag with chocolate ganache. To make the ganache, combine 100 grams or 4-ounces chocolate with 6 tablespoons of boiling heavy cream. Or use chocolate or black frosting.

Step 3: At the bottom of the piping bag, snip a small opening. Start by piping about 3 to 6 circles onto the cupcake.

Step 4: To make a spider web effect, draw lines with a toothpick from the innermost circle until the outer circle.

Step 5: For the mummy cupcakes, just pipe two little dots of frosting on the cupcake. Add the candy eyes over the frosting dots.

Step 6: Grab the #47 icing tip piping bag. Fill it in with vanilla frosting and start piping diagonal lines across the cupcake. Note to keep the eyes in place to make a mummy-like appearance.

Step 7: On to the monster cupcakes. Start by dyeing the vanilla frosting green or any suitable colour.

Step 8: On top of the cupcake, smear the frosting.

Step 9: Then, cut the marshmallow with kitchen scissors. Making about 4 slices in a single marshmallow. To prevent sticking, I would suggest greasing your scissors with a bit of oil.

Step 10: In the middle of the green-frosted cupcake, add a slice of marshmallow.

Step 11: And add a piece of M&M in the middle of the marshmallow slice.

Step 12: To make a smile, cut the white tic-tac in half and put it under the marshmallow. The tic-tac is the teeth.

Step 13: For the brain cupcakes, start by packing in a #12 tip piping bag with pink frosting.

Step 14: Make a circle outline on the cupcake. And draw two lines in the centre. These lines should meet in the middle.

Step 15: In the semi-circles, draw a squiggly line each to make the brain.

Halloween Cupcakes

Rebecca How amusing are these cupcakes? Channel your inner artist by creating these cute and fun cupcake frosting designs for Halloween. I bet the kids and everyone will love them! Ingredients… Main Dish Recipes Halloween Cupcakes European Print This
Nutrition facts: 200 calories 20 grams fat
Rating: 5.0/5
( 1 voted )

Ingredients

  • Cupcakes
  • Vanilla frosting
  • Chocolate Ganache/chocolate frosting
  • Neon green food colouring
  • Pink food colouring
  • Candy eyes
  • Marshmallows
  • Blue M&Ms
  • Tic Tacs
  • Toothpicks
  • Piping bags
  • #47 icing tip
  • #12 icing tip

Instructions

Step 1: For the spider web cupcakes, using vanilla frosting frost your cupcake.

Step 2: Fill a piping bag with chocolate ganache. To make the ganache, combine 100 grams or 4-ounces chocolate with 6 tablespoons of boiling heavy cream. Or use chocolate or black frosting.

Step 3: At the bottom of the piping bag, snip a small opening. Start by piping about 3 to 6 circles onto the cupcake.

Step 4: To make a spider web effect, draw lines with a toothpick from the innermost circle until the outer circle.

Step 5: For the mummy cupcakes, just pipe two little dots of frosting on the cupcake. Add the candy eyes over the frosting dots.

Step 6: Grab the #47 icing tip piping bag. Fill it in with vanilla frosting and start piping diagonal lines across the cupcake. Note to keep the eyes in place to make a mummy-like appearance.

Step 7: On to the monster cupcakes. Start by dyeing the vanilla frosting green or any suitable colour.

Step 8: On top of the cupcake, smear the frosting.

Step 9: Then, cut the marshmallow with kitchen scissors. Making about 4 slices in a single marshmallow. To prevent sticking, I would suggest greasing your scissors with a bit of oil.

Step 10: In the middle of the green-frosted cupcake, add a slice of marshmallow.

Step 11: And add a piece of M&M in the middle of the marshmallow slice.

Step 12: To make a smile, cut the white tic-tac in half and put it under the marshmallow. The tic-tac is the teeth.

Step 13: For the brain cupcakes, start by packing in a #12 tip piping bag with pink frosting.

Step 14: Make a circle outline on the cupcake. And draw two lines in the centre. These lines should meet in the middle.

Step 15: In the semi-circles, draw a squiggly line each to make the brain.

September 30, 2020 0 comment
0 FacebookTwitterPinterestEmail
Main Dish Recipes

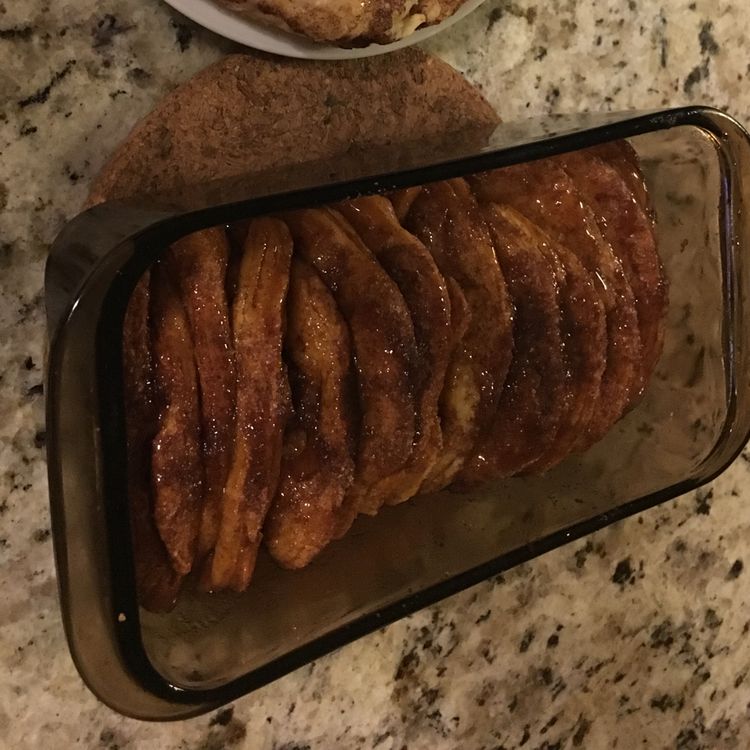
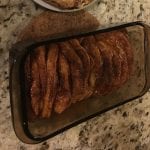
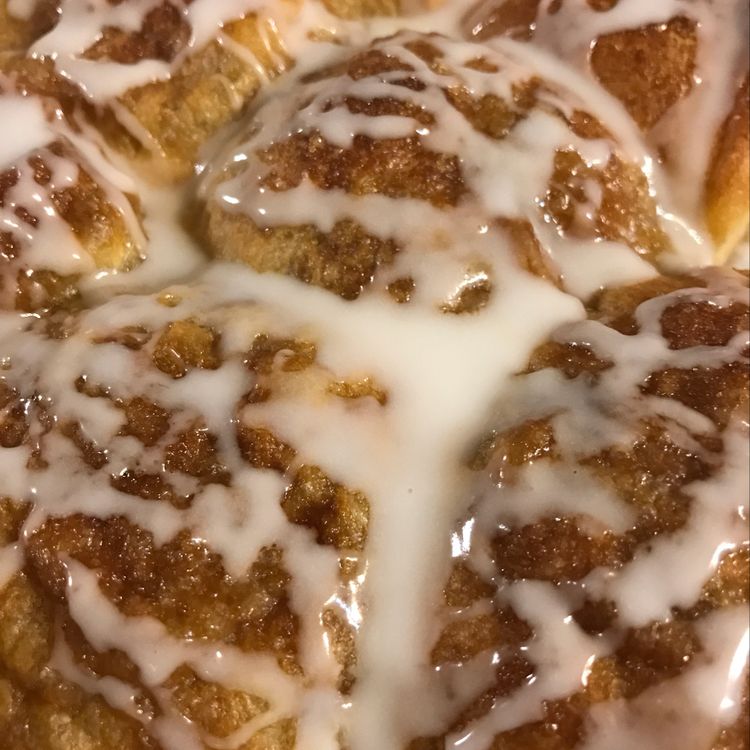
Caramel Apple Pull-Apart Bread

by Rebecca September 30, 2020
written by Rebecca

YIELDS: 4 | PREP TIME: 20 MINS | TOTAL TIME: 1 HOUR

Start your day awesome with this sticky, sweet Caramel Apple Pull-Apart Bread. The perfect fall goals that you can enjoy whenever. This pull-apart bread is so good you’ll not settle for just a bite. It’ll stick to your taste buds and makes you crave for it over and over again. And it’s easy, quick, pretty straightforward, and delicately delicious! The soft and pillowy dough is smothered in butter, cinnamon-sugar and topped with apples and a mouthwatering salted caramel sauce.

INGREDIENTS

1 tube refrigerated biscuit dough (such as Pillsbury)

3 tbsp. unsalted butter, melted

1/4 cup brown sugar

2 tbsp. granulated sugar

1 tsp. cinnamon

kosher salt

1 cup minced granny smith apple

Warm caramel, for drizzling

How to make Caramel Apple Pull-Apart Bread

Step 1: Prepare the oven. Preheat it to 350 degrees.

Step 2: Then, grease a 9 x 5-inch oaf pan.

Step 3: Break the biscuit in half, then, brush each side with melted butter.

Step 4: Combine the sugars, cinnamon, and an ample pinch of salt in a medium bowl.

Step 5: Dip the biscuits to coat in the cinnamon-sugar mixture. Tap to remove the excess.

Step 6: To make the initial stack, sprinkle a generous amount of apples onto one biscuit and cover with another biscuit. Do this for the rest of the biscuit dough and end on apples. Make 3 more stacks ending on a biscuit.

Step 7: Add the stacks of biscuits on their sides into the prepared loaf pan. The layers should stand upright.

Step 8: Place inside the preheated oven and bake for about 38 to 40 minutes or until puffy and golden.

Step 9: Remove from the oven and allow to cool for a bit before removing the bread from the pan.

Step 10: Before serving, drizzle with warm caramel. Enjoy!

Caramel Apple Pull-Apart Bread

Rebecca YIELDS: 4 | PREP TIME: 20 MINS | TOTAL TIME: 1 HOUR Start your day awesome with this sticky, sweet Caramel Apple Pull-Apart Bread. The perfect fall goals that you… Main Dish Recipes Caramel Apple Pull-Apart Bread European Print This
Serves: 4 Prep Time: 20 mins Cooking Time: 40 mins 40 mins
Nutrition facts: 200 calories 20 grams fat
Rating: 5.0/5
( 1 voted )

Ingredients

  • 1 tube refrigerated biscuit dough (such as Pillsbury)
  • 3 tbsp. unsalted butter, melted
  • 1/4 cup brown sugar
  • 2 tbsp. granulated sugar
  • 1 tsp. cinnamon
  • kosher salt
  • 1 cup minced granny smith apple
  • Warm caramel, for drizzling

Instructions

Step 1: Prepare the oven. Preheat it to 350 degrees.

Step 2: Then, grease a 9 x 5-inch oaf pan.

Step 3: Break the biscuit in half, then, brush each side with melted butter.

Step 4: Combine the sugars, cinnamon, and an ample pinch of salt in a medium bowl.

Step 5: Dip the biscuits to coat in the cinnamon-sugar mixture. Tap to remove the excess.

Step 6: To make the initial stack, sprinkle a generous amount of apples onto one biscuit and cover with another biscuit. Do this for the rest of the biscuit dough and end on apples. Make 3 more stacks ending on a biscuit.

Step 7: Add the stacks of biscuits on their sides into the prepared loaf pan. The layers should stand upright.

Step 8: Place inside the preheated oven and bake for about 38 to 40 minutes or until puffy and golden.

Step 9: Remove from the oven and allow to cool for a bit before removing the bread from the pan.

Step 10: Before serving, drizzle with warm caramel. Enjoy!

September 30, 2020 0 comment
0 FacebookTwitterPinterestEmail
Main Dish Recipes

Pumpkin Pie Bombs

by Rebecca September 30, 2020
written by Rebecca

YIELDS: 2 DOZEN | PREP TIME: 10 MINS | TOTAL TIME: 45 MINS

These make a perfectly sweet dessert and a super fun breakfast. Give this a try and see how easy and quickly these Pumpkin Pie Bombs come together.

INGREDIENTS

Cooking spray

1 c. pumpkin puree

3 oz. cream cheese softened

1 large egg

2/3 c. granulated sugar, divided

3 tsp. pumpkin pie spice, divided

1 tsp. pure vanilla extract

Pinch kosher salt

3 (8-oz.) tube refrigerated Crescent rolls

2 tbsp. melted butter

1/2 c. powdered sugar

1 tbsp. milk

How to make Pumpkin Pie Bombs

Step 1: Prepare the oven. Preheat it to 375 degrees.

Step 2: Use a cooking spray to grease a 3-quart baking dish.

Step 3: Add the pumpkin, cream cheese, egg, 1/3 cup sugar, 2 tbsp pumpkin pie spice, and vanilla in a large bowl. Mix with a hand mixer until smooth. Then, season with salt.

Step 4: Unroll a crescent dough tube. To make one solid sheet, pinch the holes together. Do this for the rest of the tubes and cut the sheets into 8 squares.

Step 5: On each square, add a rounded tablespoon for pumpkin mixture. Create a ball by pinching the corners together.

Step 6: Combine the rest of the 1/3 cup sugar and 1 tsp pumpkin pie spice in a small bowl.

Step 7: Brush each ball with the melted butter, then, roll them in the sugar mixture.

Step 8: Transfer the balls in the prepared baking dish. Place inside the preheated oven and bake for about 30 minutes or until golden and puffy.

Step 9: To make the glaze: Add the powdered sugar and milk in a medium bowl. Mix until smooth. You can add more powdered sugar or milk to reach your desired consistency.

Step 10: Once done baking, allow the balls to cool for several minutes. Serve them slightly cooled alongside the glaze for dipping.

Pumpkin Pie Bombs

Rebecca YIELDS: 2 DOZEN | PREP TIME: 10 MINS | TOTAL TIME: 45 MINS These make a perfectly sweet dessert and a super fun breakfast. Give this a try and see… Main Dish Recipes Pumpkin Pie Bombs European Print This
Serves: 24 Prep Time: 10 mins Cooking Time: 35 mins 35 mins
Nutrition facts: 200 calories 20 grams fat
Rating: 5.0/5
( 1 voted )

Ingredients

  • Cooking spray
  • 1 c. pumpkin puree
  • 3 oz. cream cheese softened
  • 1 large egg
  • 2/3 c. granulated sugar, divided
  • 3 tsp. pumpkin pie spice, divided
  • 1 tsp. pure vanilla extract
  • Pinch kosher salt
  • 3 (8-oz.) tube refrigerated Crescent rolls
  • 2 tbsp. melted butter
  • 1/2 c. powdered sugar
  • 1 tbsp. milk

Instructions

Step 1: Prepare the oven. Preheat it to 375 degrees.

Step 2: Use a cooking spray to grease a 3-quart baking dish.

Step 3: Add the pumpkin, cream cheese, egg, 1/3 cup sugar, 2 tbsp pumpkin pie spice, and vanilla in a large bowl. Mix with a hand mixer until smooth. Then, season with salt.

Step 4: Unroll a crescent dough tube. To make one solid sheet, pinch the holes together. Do this for the rest of the tubes and cut the sheets into 8 squares.

Step 5: On each square, add a rounded tablespoon for pumpkin mixture. Create a ball by pinching the corners together.

Step 6: Combine the rest of the 1/3 cup sugar and 1 tsp pumpkin pie spice in a small bowl.

Step 7: Brush each ball with the melted butter, then, roll them in the sugar mixture.

Step 8: Transfer the balls in the prepared baking dish. Place inside the preheated oven and bake for about 30 minutes or until golden and puffy.

Step 9: To make the glaze: Add the powdered sugar and milk in a medium bowl. Mix until smooth. You can add more powdered sugar or milk to reach your desired consistency.

Step 10: Once done baking, allow the balls to cool for several minutes. Serve them slightly cooled alongside the glaze for dipping.

September 30, 2020 0 comment
0 FacebookTwitterPinterestEmail
Main Dish Recipes

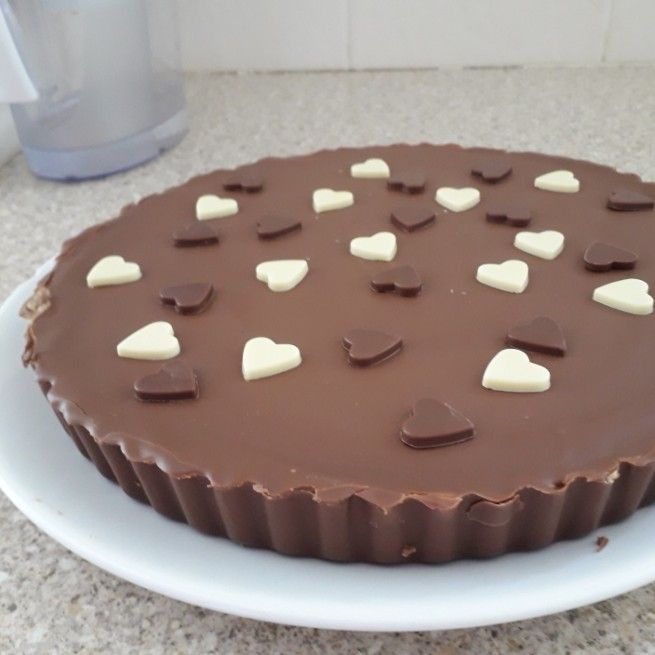
Giant Peanut Butter Cup

by Rebecca September 30, 2020
written by Rebecca

Servings: 10

Giant peanut butter cup? Heck yes! I love Reese’s and when I found out about this recipe I didn’t think twice. I made it immediately. I fell hard for this gigantic peanut butter cup – fun to make, delicious, and a quick sweet fix! It tastes exactly like my Reese’s, not too sweet, nor thick. The perfect copycat of the World’s famous treat. If you love all chocolate and peanut butter, not to mention the classic Reese’s, then, you’ll be obsessed with this supervised version. Super easy and quick, you can whip it up any time! And this peanut butter cup has the texture of creamy and crumbly in between.

Ingredients

4 cups milk chocolate chips(700 g), divided

2 cups creamy peanut butter(480 g)

2 cups powdered sugar(320 g), sifted

8 tablespoons butter, softened

How to make Giant Peanut Butter Cup

Step 1: Add half of the chocolate chips in a small bowl.

Step 2: Place in the microwave to melt in 30 seconds interval. Note to stir in between intervals until completely melted.

Step 3: In a 10-inch (25 cm) tart pan, pour the entire melted chocolate. Coat the whole pan including the sides.

Step 4: Place in the fridge until set.

Step 5: Add the peanut butter, powdered sugar, and softened butter in a large bowl. Mix well until smooth.

Step 6: Pour the peanut butter over the first layer in the pan. And evenly smooth the surface.

Step 7: Melt the rest of the chocolate and add on top of the peanut butter layer.

Step 8: Evenly smooth out the melted chocolate to cover the entire surface.

Step 9: Place in the fridge for at least an hour or until set.

Step 10: When ready, slice, and serve. Enjoy!

Nutrition Facts:

Calories 878 | Fat 57g | Carbs 80g | Fiber 5g | Sugar 65g | Protein 17g

Giant Peanut Butter Cup

Rebecca Servings: 10 Giant peanut butter cup? Heck yes! I love Reese’s and when I found out about this recipe I didn’t think twice. I made it immediately. I fell hard… Main Dish Recipes Giant Peanut Butter Cup European Print This
Serves: 10
Nutrition facts: 878 calories 57 fat
Rating: 5.0/5
( 1 voted )

Ingredients

  • 4 cups milk chocolate chips(700 g), divided
  • 2 cups creamy peanut butter(480 g)
  • 2 cups powdered sugar(320 g), sifted
  • 8 tablespoons butter, softened

Instructions

Step 1: Add half of the chocolate chips in a small bowl.

Step 2: Place in the microwave to melt in 30 seconds interval. Note to stir in between intervals until completely melted.

Step 3: In a 10-inch (25 cm) tart pan, pour the entire melted chocolate. Coat the whole pan including the sides.

Step 4: Place in the fridge until set.

Step 5: Add the peanut butter, powdered sugar, and softened butter in a large bowl. Mix well until smooth.

Step 6: Pour the peanut butter over the first layer in the pan. And evenly smooth the surface.

Step 7: Melt the rest of the chocolate and add on top of the peanut butter layer.

Step 8: Evenly smooth out the melted chocolate to cover the entire surface.

Step 9: Place in the fridge for at least an hour or until set.

Step 10: When ready, slice, and serve. Enjoy!

September 30, 2020 0 comment
0 FacebookTwitterPinterestEmail
Main Dish Recipes

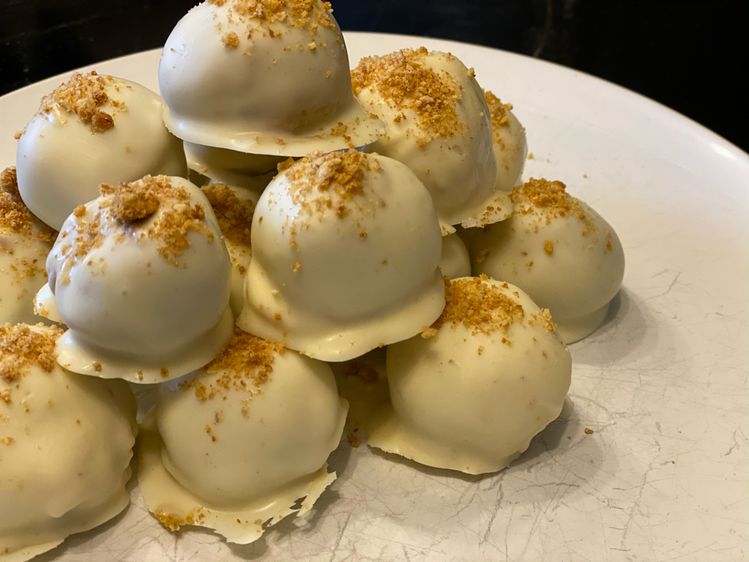
Pumpkin Cheesecake Bites

by Rebecca September 30, 2020
written by Rebecca

YIELDS: 19 | PREP TIME: 15 MINS | TOTAL TIME: 2 HRS 10 MINS

I cannot think of a good way to start fall but by making these easy and quick Pumpkin Cheesecake Bites. Another amazing no-bake dessert with a simple mixture that is rolled and coated in white chocolate. Not too sweet and perfectly delicious!

INGREDIENTS

1 cup crushed ginger snaps

3/4 cup crushed graham crackers

4 oz. cream cheese softened

2 1/2 cups melted white chocolate, divided

1/2 cup pumpkin puree

1 tsp. pumpkin pie spice

Pinch kosher salt

1 tbsp. coconut oil

How to make Pumpkin Cheesecake Bites

Step 1: Using a parchment paper, line a large baking sheet.

Step 2: Add the ginger snaps with the graham cracker crumbs in a small bowl. Mix well. Note to reserve 2 tbsp for the topping.

Step 3: Place the cream cheese in a large bowl and beat until light and fluffy. Adding in half a cup melted white chocolate, pumpkin puree, pumpkin pie spice, and salt in the bowl once the cream cheese is fluffy. Beat well until everything is combined before mixing in the cookie crumbs.

Step 4: Shape the mixture into tablespoon-sized balls. Freeze the balls for about 40 minutes or until solid.

Step 5: Take the chilled balls out of the freezer and smoothen out the edges by rolling each between your palms. Put them back again in the fridge for another 5 minutes to chill.

Step 6: Meanwhile, combine the rest of the melted white chocolate with coconut oil.

Step 7: Dip each truffle in the melted chocolate-coconut oil mixture and coat evenly. Place the dipped truffle on the prepared baking sheet and sprinkle over the reserved cookie crumbs.

Step 8: Place in the fridge to chill for at least an hour or until it’s time to serve.

Pumpkin Cheesecake Bites

Rebecca YIELDS: 19 | PREP TIME: 15 MINS | TOTAL TIME: 2 HRS 10 MINS I cannot think of a good way to start fall but by making these easy and… Main Dish Recipes Pumpkin Cheesecake Bites European Print This
Serves: 19 Prep Time: 15 mins Cooking Time: 1 hr 55 mins 1 hr 55 mins
Nutrition facts: 200 calories 20 grams fat
Rating: 5.0/5
( 1 voted )

Ingredients

  • 1 cup crushed ginger snaps
  • 3/4 cup crushed graham crackers
  • 4 oz. cream cheese softened
  • 2 1/2 cups melted white chocolate, divided
  • 1/2 cup pumpkin puree
  • 1 tsp. pumpkin pie spice
  • Pinch kosher salt
  • 1 tbsp. coconut oil

Instructions

Step 1: Using a parchment paper, line a large baking sheet.

Step 2: Add the ginger snaps with the graham cracker crumbs in a small bowl. Mix well. Note to reserve 2 tbsp for the topping.

Step 3: Place the cream cheese in a large bowl and beat until light and fluffy. Adding in half a cup melted white chocolate, pumpkin puree, pumpkin pie spice, and salt in the bowl once the cream cheese is fluffy. Beat well until everything is combined before mixing in the cookie crumbs.

Step 4: Shape the mixture into tablespoon-sized balls. Freeze the balls for about 40 minutes or until solid.

Step 5: Take the chilled balls out of the freezer and smoothen out the edges by rolling each between your palms. Put them back again in the fridge for another 5 minutes to chill.

Step 6: Meanwhile, combine the rest of the melted white chocolate with coconut oil.

Step 7: Dip each truffle in the melted chocolate-coconut oil mixture and coat evenly. Place the dipped truffle on the prepared baking sheet and sprinkle over the reserved cookie crumbs.

Step 8: Place in the fridge to chill for at least an hour or until it's time to serve.

September 30, 2020 0 comment
0 FacebookTwitterPinterestEmail
Newer Posts
Older Posts

Popular Posts

  • 1

    Crispy Crunchy Parmesan Potatoes

    March 21, 2020
  • 2

    CROCK POT SMOTHERED PORK CHOPS

    March 21, 2020
  • Facebook
  • Twitter

@2019 - All Right Reserved.


Back To Top