Cook it once
  • Home
  • Privacy Policy
  • Recipes
    • KETO
    • LC
    • WW
  • Tips
  • Contact
Cook it once
  • Home
  • Privacy Policy
  • Recipes
    • KETO
    • LC
    • WW
  • Tips
  • Contact
Category:

General Recipes

General Recipes

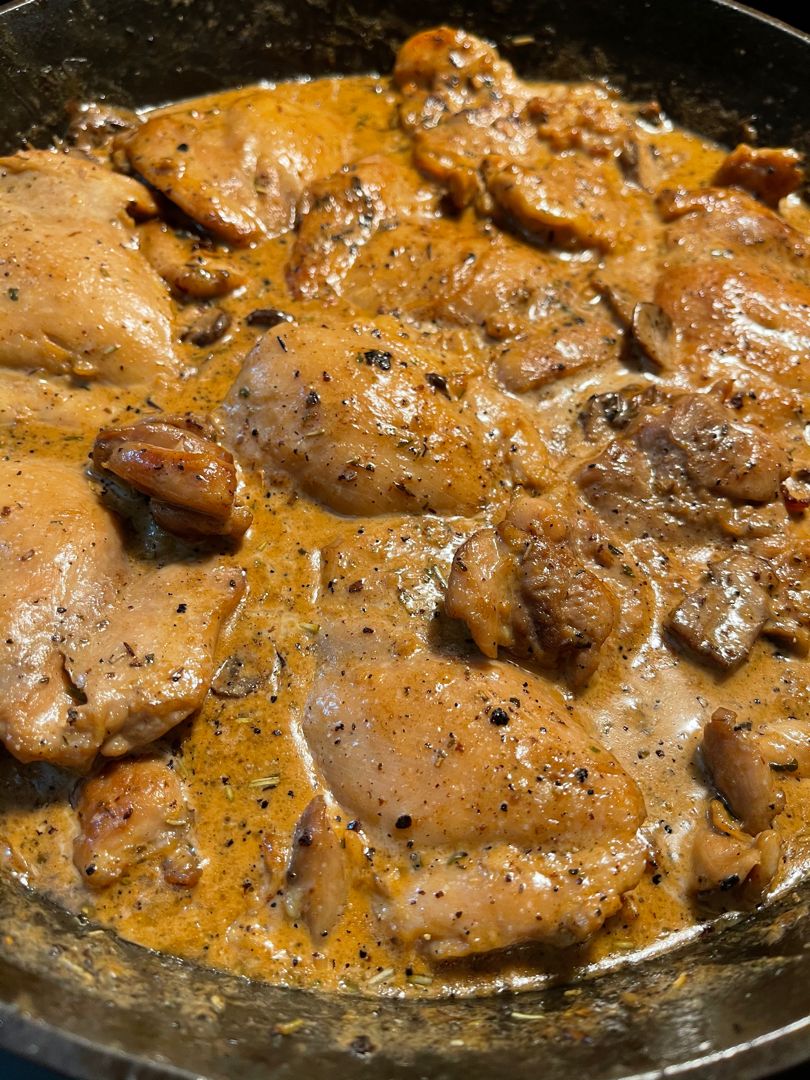
CREAMY GARLIC MUSHROOM CHICKEN THIGHS

by Rebecca September 8, 2022
written by Rebecca

Tender and juicy chicken thighs smothered in a mouthwatering thick, and creamy mushroom sauce. It’s an amazing dinner that you can easily and quickly make at any time.

INGREDIENTS

Chicken:

2 tablespoons olive oil

1 ½ pounds boneless, skinless chicken thighs (around 6-8 fillets)

1 teaspoon garlic powder

½ teaspoon dried thyme

1 teaspoon onion powder

½ teaspoon dried rosemary

¼ teaspoon cracked black pepper

½ teaspoon salt

Sauce:

4 cloves garlic, minced (or 1 tablespoon minced garlic)

8 ounces sliced brown mushrooms

1 tablespoon fresh chopped parsley

1 ½ c. heavy cream/half and half

1 tablespoon butter

½ c. fresh shredded Parmesan cheese

½ – 1 teaspoon dried thyme (adjust according to taste)

½ – 1 teaspoon dried rosemary (adjust according to taste)

HOW TO MAKE CREAMY GARLIC MUSHROOM CHICKEN THIGHS

Step 1: Using paper towels, pat the chicken thighs dry and trim the excess fat off.

Step 2: Mix the onion powder with garlic powder, herbs, salt, and pepper. Evenly coat all sides of the chicken with the seasoning.

Step 3: In a large pan or skillet, heat 1 tbsp oil over medium-high heat. Once the oil is hot, add the chicken thighs to the pan/skillet and sear for about 8 minutes on each side until the internal temperature of the thighs reaches 165 degrees F.

Step 4: You can add the rest of the oil if needed to the pan if cooking the chicken thighs in batches.

Step 5: To a plate, transfer the chicken thighs. Set aside and keep them warm.

Step 6: Melt the butter in the same pan/skillet. Add the mushrooms and season with salt and pepper. Cook the mushrooms for about 3 minutes until tender. Next, add the garlic, parsley, thyme, and rosemary. Continue to cook for a minute more until aromatic.

Step 7: To the pan/skillet, add the cream. Stir and bring to a simmer. Decrease the heat and cook further until the sauce has slightly thickened. Then, whisk in the Parmesan cheese. Continue to cook for another 2 minutes, stirring often, until the cheese has melted.

Step 8: Add the chicken back to the pan and season with extra salt and pepper.

Step 9: Serve the Creamy Garlic Mushroom Chicken Thighs immediately, garnished with some fresh parsley. Enjoy!

Notes:

For this recipe, you can use fresh herbs. I use 2 teaspoons each. You can also swap thyme or rosemary with basil and oregano, or tarragon.

I do not recommend using low-fat milk. For proper consistency, use cream/half&half.

Feel free to add 1/3 c dry white wine with the mushrooms for an extra layer of flavor. Reduce to half, then add the garlic and cream.

Serve this chicken dish over mashed potatoes, pasta, rice, cauliflower rice, or zucchini noodles. If desired, serve this with a simple veggie on the side.

CREAMY GARLIC MUSHROOM CHICKEN THIGHS

Rebecca Tender and juicy chicken thighs smothered in a mouthwatering thick, and creamy mushroom sauce. It’s an amazing dinner that you can easily and quickly make at any time. INGREDIENTS Chicken:… General Recipes CREAMY GARLIC MUSHROOM CHICKEN THIGHS European Print This
Nutrition facts: 200 calories 20 grams fat
Rating: 5.0/5
( 1 voted )

Ingredients

  • Chicken:
  • 2 tablespoons olive oil
  • 1 ½ pounds boneless, skinless chicken thighs (around 6-8 fillets)
  • 1 teaspoon garlic powder
  • ½ teaspoon dried thyme
  • 1 teaspoon onion powder
  • ½ teaspoon dried rosemary
  • ¼ teaspoon cracked black pepper
  • ½ teaspoon salt
  • Sauce:
  • 4 cloves garlic, minced (or 1 tablespoon minced garlic)
  • 8 ounces sliced brown mushrooms
  • 1 tablespoon fresh chopped parsley
  • 1 ½ c. heavy cream/half and half
  • 1 tablespoon butter
  • ½ c. fresh shredded Parmesan cheese
  • ½ – 1 teaspoon dried thyme (adjust according to taste)
  • ½ – 1 teaspoon dried rosemary (adjust according to taste)

Instructions

Step 1: Using paper towels, pat the chicken thighs dry and trim the excess fat off.

Step 2: Mix the onion powder with garlic powder, herbs, salt, and pepper. Evenly coat all sides of the chicken with the seasoning.

Step 3: In a large pan or skillet, heat 1 tbsp oil over medium-high heat. Once the oil is hot, add the chicken thighs to the pan/skillet and sear for about 8 minutes on each side until the internal temperature of the thighs reaches 165 degrees F.

Step 4: You can add the rest of the oil if needed to the pan if cooking the chicken thighs in batches.

Step 5: To a plate, transfer the chicken thighs. Set aside and keep them warm.

Step 6: Melt the butter in the same pan/skillet. Add the mushrooms and season with salt and pepper. Cook the mushrooms for about 3 minutes until tender. Next, add the garlic, parsley, thyme, and rosemary. Continue to cook for a minute more until aromatic.

Step 7: To the pan/skillet, add the cream. Stir and bring to a simmer. Decrease the heat and cook further until the sauce has slightly thickened. Then, whisk in the Parmesan cheese. Continue to cook for another 2 minutes, stirring often, until the cheese has melted.

Step 8: Add the chicken back to the pan and season with extra salt and pepper.

Step 9: Serve the Creamy Garlic Mushroom Chicken Thighs immediately, garnished with some fresh parsley. Enjoy!

Notes

For this recipe, you can use fresh herbs. I use 2 teaspoons each. You can also swap thyme or rosemary with basil and oregano, or tarragon. I do not recommend using low-fat milk. For proper consistency, use cream/half&half. Feel free to add 1/3 c dry white wine with the mushrooms for an extra layer of flavor. Reduce to half, then add the garlic and cream. Serve this chicken dish over mashed potatoes, pasta, rice, cauliflower rice, or zucchini noodles. If desired, serve this with a simple veggie on the side.
September 8, 2022 0 comment
0 FacebookTwitterPinterestEmail
General Recipes

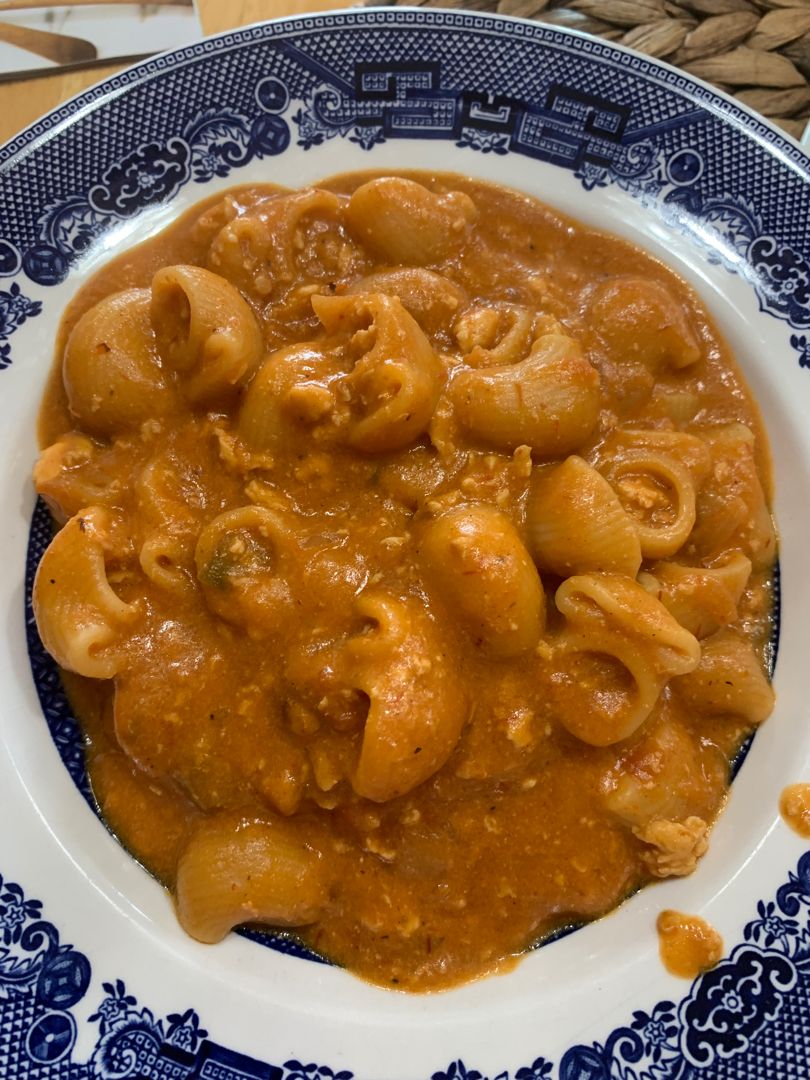
Mexican Pasta Shells with Ground Beef

by Rebecca September 7, 2022
written by Rebecca

Prep time: 15 mins | Cook time: 30 mins | Total time: 45 mins | Servings: 4

Mexican Pasta Shells with Ground Beef is an insanely easy and quick dish to make. A great weeknight dinner option that is made with ground beef, garlic, pasta shells, serrano chiles, Rotel, red sazon, cilantro, and other basic ingredients. A delicious, filling meal perfect for your entire family!

Ingredients

2 c. of medium-size pasta shells

1.5 lb of ground beef

Garlic clove

3 diced serrano chiles

Sazon perfecta seasoning

¼ c. of oil

4 c. of water

4 tbsp of the granulated knorr tomato bouillon

2 tbsp of granulated knorr chicken bouillon

Half of an onion

1 can of Rotel

A handful of chopped cilantro

2 packets of the red sazon

Black pepper

1 bay leaf

Garlic and onion powder to taste

How to make Mexican Pasta Shells with Ground Beef

Step 1: Start by cooking the ground beef, chopped garlic, black pepper, and Sazon perfecta seasoning.

Step 2: In the meantime, place the brown pasta shells in a deep skillet with 1/4 c oil.

Step 3: Once the meat is done, drain the excess grease and add the ground beef mixture to the pasta shells followed by 4 c water, 2 tbsp of granulated Knorr chicken bouillon, 3 diced Serrano chiles, 4 tbsp of the granulated Knorr tomato bouillon, onion (chopped in half), a can of Rotel, a handful of chopped cilantro, 2 packets red Sazon, 1 bay leaf, garlic and onion powder (according to taste). Stir well. Put the lid on and cook over medium-high heat until the shells are al dente.

Step 4: Take the skillet off the heat and serve the Mexican Pasta Shells with Ground Beef immediately. Enjoy!

Tips:

You can omit the meat and use beans or quinoa instead to make this dish vegetarian. You can also use plant-based cheese.

For this recipe, you can use ground chicken or turkey in place of ground beef.

Feel free to add more vegetables such as black beans, diced carrots, or red onion.

Add some diced jalapeno, cayenne pepper, or red pepper flakes to spice things up.

Place any leftovers in an airtight container and store them in the fridge for up to 5 days.

To reheat the frozen Mexican pasta shell with ground beef, prep a baking dish with salsa and cheese. Reheat for about 45 to 60 minutes until bubbling and completely warmed.

Mexican Pasta Shells with Ground Beef

Rebecca Prep time: 15 mins | Cook time: 30 mins | Total time: 45 mins | Servings: 4 Mexican Pasta Shells with Ground Beef is an insanely easy and quick dish… General Recipes Mexican Pasta Shells with Ground Beef European Print This
Serves: 4 Prep Time: 15 mins Cooking Time: 30 mins 30 mins
Nutrition facts: 200 calories 20 grams fat
Rating: 5.0/5
( 1 voted )

Ingredients

  • 2 c. of medium-size pasta shells
  • 1.5 lb of ground beef
  • Garlic clove
  • 3 diced serrano chiles
  • Sazon perfecta seasoning
  • ¼ c. of oil
  • 4 c. of water
  • 4 tbsp of the granulated knorr tomato bouillon
  • 2 tbsp of granulated knorr chicken bouillon
  • Half of an onion
  • 1 can of Rotel
  • A handful of chopped cilantro
  • 2 packets of the red sazon
  • Black pepper
  • 1 bay leaf
  • Garlic and onion powder to taste

Instructions

Step 1: Start by cooking the ground beef, chopped garlic, black pepper, and Sazon perfecta seasoning.

Step 2: In the meantime, place the brown pasta shells in a deep skillet with 1/4 c oil.

Step 3: Once the meat is done, drain the excess grease and add the ground beef mixture to the pasta shells followed by 4 c water, 2 tbsp of granulated Knorr chicken bouillon, 3 diced Serrano chiles, 4 tbsp of the granulated Knorr tomato bouillon, onion (chopped in half), a can of Rotel, a handful of chopped cilantro, 2 packets red Sazon, 1 bay leaf, garlic and onion powder (according to taste). Stir well. Put the lid on and cook over medium-high heat until the shells are al dente.

Step 4: Take the skillet off the heat and serve the Mexican Pasta Shells with Ground Beef immediately. Enjoy!

Notes

You can omit the meat and use beans or quinoa instead to make this dish vegetarian. You can also use plant-based cheese. For this recipe, you can use ground chicken or turkey in place of ground beef. Feel free to add more vegetables such as black beans, diced carrots, or red onion. Add some diced jalapeno, cayenne pepper, or red pepper flakes to spice things up. Place any leftovers in an airtight container and store them in the fridge for up to 5 days. To reheat the frozen Mexican pasta shell with ground beef, prep a baking dish with salsa and cheese. Reheat for about 45 to 60 minutes until bubbling and completely warmed.

September 7, 2022 0 comment
0 FacebookTwitterPinterestEmail
General Recipes

Teriyaki Chicken and Rice Casserole

by Rebecca September 7, 2022
written by Rebecca

Prep time: 15 mins | Cook time: 45 mins | Total time: 1 hr | Servings: 4

This Teriyaki Chicken and Rice Casserole is a complete meal in one! Super easy and quick to make. This casserole is an amazing and filling weeknight dinner with shredded chicken, veggies, and rice tossed in a simple, yet flavorful sauce!

Ingredients

1 tbsp honey

32 ounces frozen mixed vegetables, un-sauced stir fry, or Asian varieties that only include zero-point veggies for WW

⅓ c. packed brown sugar

1 tsp olive oil

½ tsp minced garlic

¾ tsp ground ginger

2 tbsp cornstarch

2 tbsp water

1 ½ pound boneless, skinless chicken breasts

1 c. drained canned pineapple tidbits or chunks, packed in juice or with no added sugar

3 c. cooked brown rice

¾ c. low sodium soy sauce

½ c. water

How to make Teriyaki Chicken and Rice Casserole

Step 1: Prepare the oven. Preheat it to 350 degrees F. In a small saucepan, place the soy sauce, ½ cup water, brown sugar, honey, ginger, olive oil, and garlic. Mix well. Put the lid on and let the mixture boil over medium heat. Take the lid off once the mixture begins boiling and cook for a minute.

Step 2: In another dish, whisk the cornstarch and 2 tbsp water until smooth. Stir this into the mixture in the pan once the sauce is boiling. Cook for an additional minute until the sauce begins to thicken. Then, take the pan off the heat.

Step 3: Lay the raw chicken breasts flat in a casserole dish. Pour over about 1 c of the sauce. Place the casserole in the preheated oven and bake for about 30 to 35 minutes or until the chicken breasts are completely cooked. Take the dish out of the oven and shred the chicken with two forks.

Step 4: In the meantime, steak or cook the frozen veggies following the package directions. Add the cooked/steamed veggies to the shredded chicken along with the veggies, pineapple, and rice.

Step 5: Reserve a bit of the sauce and add the remaining to the dish. Stir well and resume baking for another 15 minutes.

Step 6: Before serving, drizzle the reserved sauce on top of the casserole. Enjoy!

Nutrition Facts:

Calories: 321Kcl, carbs: 43g, sugar: 18g, fat: 3g, saturated fat: 1g, Protein: 26g, fiber: 4g

Teriyaki Chicken and Rice Casserole

Rebecca Prep time: 15 mins | Cook time: 45 mins | Total time: 1 hr | Servings: 4 This Teriyaki Chicken and Rice Casserole is a complete meal in one! Super… General Recipes Teriyaki Chicken and Rice Casserole European Print This
Serves: 4 Prep Time: 15 mins Cooking Time: 45 mins 45 mins
Nutrition facts: 321 calories 3 fat
Rating: 5.0/5
( 1 voted )

Ingredients

  • 1 tbsp honey
  • 32 ounces frozen mixed vegetables, un-sauced stir fry, or Asian varieties that only include zero-point veggies for WW
  • ⅓ c. packed brown sugar
  • 1 tsp olive oil
  • ½ tsp minced garlic
  • ¾ tsp ground ginger
  • 2 tbsp cornstarch
  • 2 tbsp water
  • 1 ½ pound boneless, skinless chicken breasts
  • 1 c. drained canned pineapple tidbits or chunks, packed in juice or with no added sugar
  • 3 c. cooked brown rice
  • ¾ c. low sodium soy sauce
  • ½ c. water

Instructions

Step 1: Prepare the oven. Preheat it to 350 degrees F. In a small saucepan, place the soy sauce, ½ cup water, brown sugar, honey, ginger, olive oil, and garlic. Mix well. Put the lid on and let the mixture boil over medium heat. Take the lid off once the mixture begins boiling and cook for a minute.

Step 2: In another dish, whisk the cornstarch and 2 tbsp water until smooth. Stir this into the mixture in the pan once the sauce is boiling. Cook for an additional minute until the sauce begins to thicken. Then, take the pan off the heat.

Step 3: Lay the raw chicken breasts flat in a casserole dish. Pour over about 1 c of the sauce. Place the casserole in the preheated oven and bake for about 30 to 35 minutes or until the chicken breasts are completely cooked. Take the dish out of the oven and shred the chicken with two forks.

Step 4: In the meantime, steak or cook the frozen veggies following the package directions. Add the cooked/steamed veggies to the shredded chicken along with the veggies, pineapple, and rice.

Step 5: Reserve a bit of the sauce and add the remaining to the dish. Stir well and resume baking for another 15 minutes.

Step 6: Before serving, drizzle the reserved sauce on top of the casserole. Enjoy!

September 7, 2022 0 comment
0 FacebookTwitterPinterestEmail
General Recipes

Snickerdoodle Cookie Bars—A Truly Heavenly Comfort Food

by Rebecca September 7, 2022
written by Rebecca

Prep time: 10 mins | Yield: 12 cookie bars

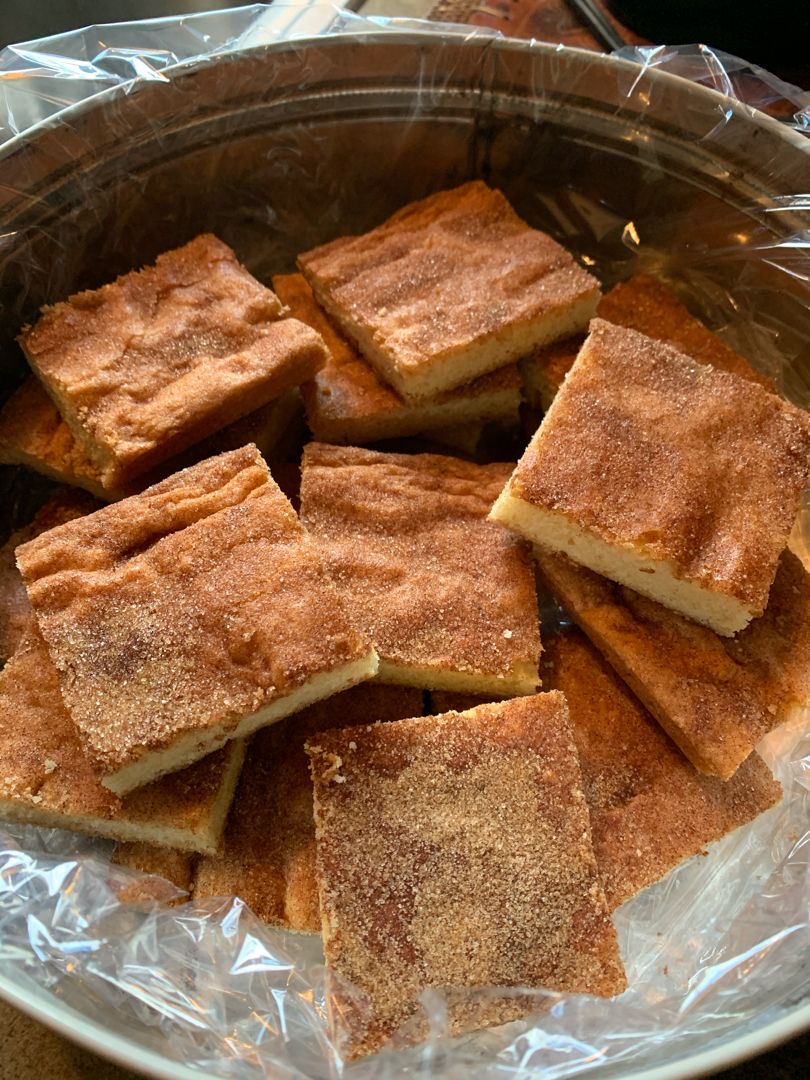
These out-of-this-world Snickerdoodle Cookie Bars are heavenly comfort food! If you are a huge dessert lover, I am pretty sure that you’ll love these delicious bars. They are great as an after-meal dessert to complete the whole course. Satisfy your sweet cravings with these Snickerdoodle Cookie Bars!

These soft and chewy Snickerdoodle Cookie Bars taste exactly like snickerdoodle cookies! I am a big fan of snickerdoodle cookies, and these bars are the easiest and quickest to quench my snickerdoodle cookie cravings! This Snickerdoodle Cookie Bars recipe is a no-fuss. This does not need a mixer, chilling the dough, or cutting it into individual cookies. This dessert is an amazing one-bowl treat that you can make in no time!

INGREDIENTS

DOUGH:

2 eggs

¾ c. butter, fully melted

1 c. sugar

2 c. flour

1 tsp cream of tartar

1 tsp baking powder

¾ brown sugar

½ tsp salt

2 tsp vanilla extract

TOPPING:

2 tsp cinnamon

¼ c. sugar

How to make Snickerdoodle Cookie Bars

Step 1: Prepare the oven. Preheat it to 350 degrees. Then, grease a 9 x 13-inch pan.

Step 2: In a large bowl, place the melted butter and sugars. Mix well until smooth. While mixing, add the eggs and vanilla.

Step 3: To the wet ingredients, add the flour, baking powder, cream of tartar, and salt, mixing until blended.

Step 4: Into the prepared baking pan, pour the batter, pressing it into an even layer.

Step 5: To make the toppings, place the sugar and cinnamon in a small bowl. Mix well, then sprinkle over the batter.

Step 6: Place in the preheated oven and bake for about 20 to 25 minutes or until the top is just starting to turn golden.

Step 7: Remove from the oven when done, and let the bar cool for about 30 minutes before slicing. Enjoy!

Snickerdoodle Cookie Bars—A Truly Heavenly Comfort Food

Rebecca Prep time: 10 mins | Yield: 12 cookie bars These out-of-this-world Snickerdoodle Cookie Bars are heavenly comfort food! If you are a huge dessert lover, I am pretty sure that… General Recipes Snickerdoodle Cookie Bars—A Truly Heavenly Comfort Food European Print This
Serves: 12 Prep Time: 10 mins
Nutrition facts: 200 calories 20 grams fat
Rating: 5.0/5
( 1 voted )

Ingredients

  • DOUGH:
  • 2 eggs
  • ¾ c. butter, fully melted
  • 1 c. sugar
  • 2 c. flour
  • 1 tsp cream of tartar
  • 1 tsp baking powder
  • ¾ brown sugar
  • ½ tsp salt
  • 2 tsp vanilla extract
  • TOPPING:
  • 2 tsp cinnamon
  • ¼ c. sugar

Instructions

Step 1: Prepare the oven. Preheat it to 350 degrees. Then, grease a 9 x 13-inch pan.

Step 2: In a large bowl, place the melted butter and sugars. Mix well until smooth. While mixing, add the eggs and vanilla.

Step 3: To the wet ingredients, add the flour, baking powder, cream of tartar, and salt, mixing until blended.

Step 4: Into the prepared baking pan, pour the batter, pressing it into an even layer.

Step 5: To make the toppings, place the sugar and cinnamon in a small bowl. Mix well, then sprinkle over the batter.

Step 6: Place in the preheated oven and bake for about 20 to 25 minutes or until the top is just starting to turn golden.

Step 7: Remove from the oven when done, and let the bar cool for about 30 minutes before slicing. Enjoy!

September 7, 2022 0 comment
0 FacebookTwitterPinterestEmail
General Recipes

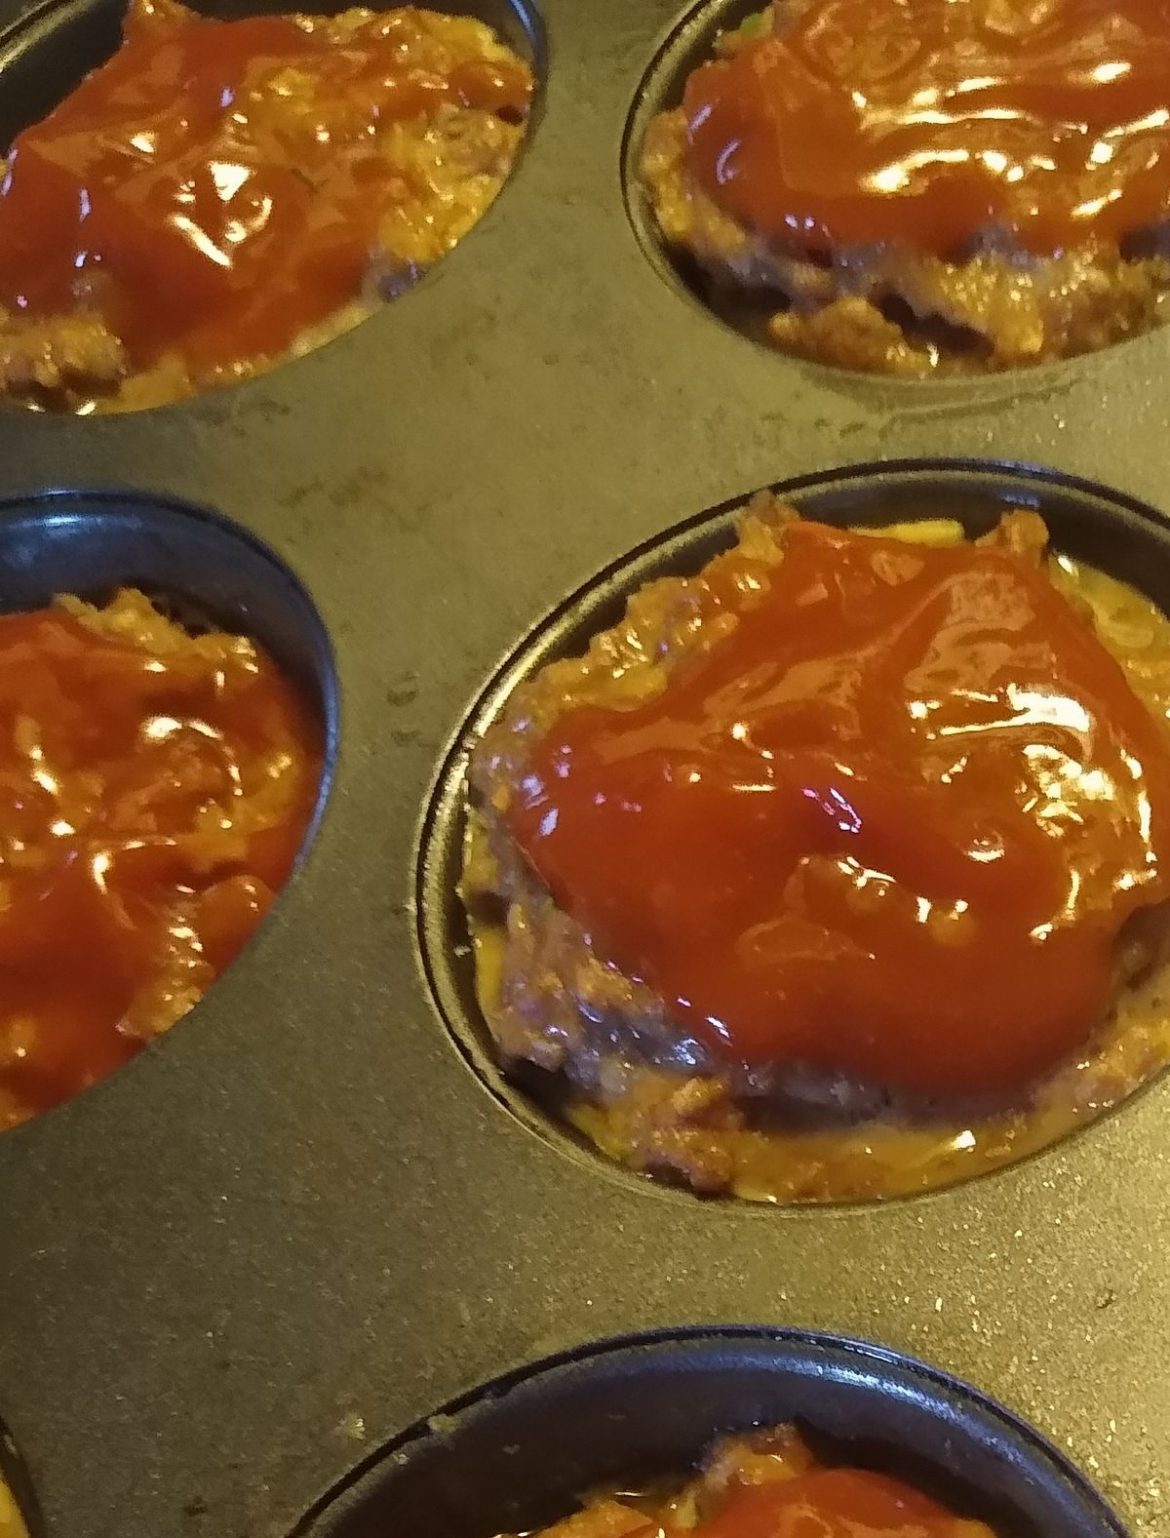
Meatloaf in a muffin pan

by Rebecca September 7, 2022
written by Rebecca

Prep time: 25 mins | Cook time: 35 mins | Total time: 60 mins | Servings: 6

These mini meatloaves are a fun, great alternative to the traditional full-sized meatloaf. To make the meatloaf in a muffin tin, the baking time will be shortened. Plus, the kids will absolutely adore these mini bad boys!

Ingredients

1 ½ lb ground beef chuck

1 medium clove garlic, finely minced

1 tsp extra-virgin olive oil

½ c. finely chopped onion

1 c. ketchup, divided

1 large egg, beaten

1 tsp Worcestershire sauce

½ tsp dried oregano

1/2 c. soft fine breadcrumbs

½ tsp dried thyme

Cooking spray, or melted butter, for greasing pan

¾ tsp kosher salt

½ tsp freshly ground black pepper

How to make Meatloaf in a muffin pan

Step 1: Prepare the oven. Preheat it to 350 degrees F. Using nonstick cooking spray, lightly grease a muffin pan. As an alternative, you can grease the pan with melted butter.

Step 2: In a medium skillet, heat the olive oil over medium heat. Once the oil is hot, add the onion and saute for about 3 minutes or until the onion is tender and lightly browned.

Step 3: To the skillet, add the finely minced garlic and cook for another minute, stirring.

Step 4: In a small bowl, place the ground beef, half c ketchup, bread crumbs, beaten egg, Worcestershire sauce, salt, black pepper, oregano, and thyme. Mix well until just combined.

Step 5: Into the meat mixture, add the sauteed vegetables and mix until incorporated. Into the prepared muffin cups, pack the meat mixture. Place in the preheated oven and bake for about 20 minutes.

Step 6: Remove from the oven and top each meatloaf muffin with about 1 tbsp of the rest of the ketchup. Resume baking the meatloaf for another 5 to 10 minutes. The meatloaf is done, once the thermometer inserted in the center of the muffin reaches at least 160 degrees F.

Tips:

Make sure to finely chop the onion and garlic to ensure the muffins stay together.

If you overfill the muffin cups, just put a rimmed baking pan or sheet foil under the muffin tin. This will catch any overflow.

If desired, you can also add some finely minced veggies to the mixture such as half c carrots or bell peppers.

Feel free to add 1/4 c freshly grated Parmesan or Romano cheese to the mixture.

Swap ketchup with chili sauce to top the muffins.

Meatloaf in a muffin pan

Rebecca Prep time: 25 mins | Cook time: 35 mins | Total time: 60 mins | Servings: 6 These mini meatloaves are a fun, great alternative to the traditional full-sized meatloaf.… General Recipes Meatloaf in a muffin pan European Print This
Serves: 6 Prep Time: 25 mins Cooking Time: 35 mins 35 mins
Nutrition facts: 200 calories 20 grams fat
Rating: 5.0/5
( 1 voted )

Ingredients

  • 1 ½ lb ground beef chuck
  • 1 medium clove garlic, finely minced
  • 1 tsp extra-virgin olive oil
  • ½ c. finely chopped onion
  • 1 c. ketchup, divided
  • 1 large egg, beaten
  • 1 tsp Worcestershire sauce
  • ½ tsp dried oregano
  • 1/2 c. soft fine breadcrumbs
  • ½ tsp dried thyme
  • Cooking spray, or melted butter, for greasing pan
  • ¾ tsp kosher salt
  • ½ tsp freshly ground black pepper

Instructions

Step 1: Prepare the oven. Preheat it to 350 degrees F. Using nonstick cooking spray, lightly grease a muffin pan. As an alternative, you can grease the pan with melted butter.

Step 2: In a medium skillet, heat the olive oil over medium heat. Once the oil is hot, add the onion and saute for about 3 minutes or until the onion is tender and lightly browned.

Step 3: To the skillet, add the finely minced garlic and cook for another minute, stirring.

Step 4: In a small bowl, place the ground beef, half c ketchup, bread crumbs, beaten egg, Worcestershire sauce, salt, black pepper, oregano, and thyme. Mix well until just combined.

Step 5: Into the meat mixture, add the sauteed vegetables and mix until incorporated. Into the prepared muffin cups, pack the meat mixture. Place in the preheated oven and bake for about 20 minutes.

Step 6: Remove from the oven and top each meatloaf muffin with about 1 tbsp of the rest of the ketchup. Resume baking the meatloaf for another 5 to 10 minutes. The meatloaf is done, once the thermometer inserted in the center of the muffin reaches at least 160 degrees F.

September 7, 2022 0 comment
0 FacebookTwitterPinterestEmail
General Recipes

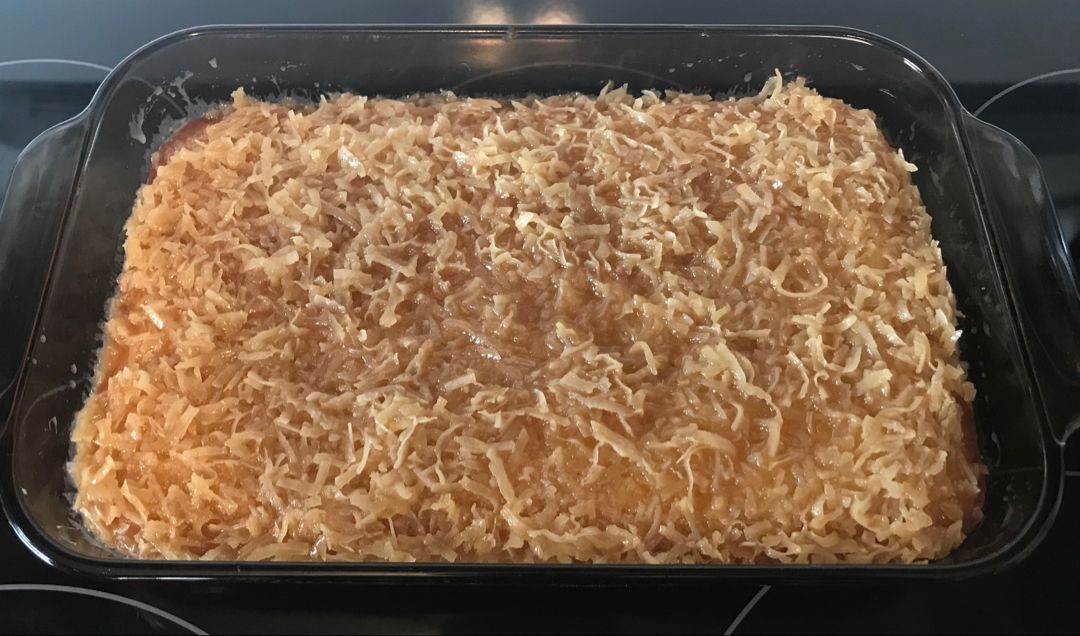
Lazy Daisy Cake Recipe: An Old-Fashioned, Yet Full Of Joy Treat

by Rebecca September 7, 2022
written by Rebecca

Cook time: 35 mins | Prep time: 15 mins | Serves: 12–15

This Lazy daisy Cake is a simple, yet luscious buttery yellow cake with the most amazing coconut icing! This cake is super moist and light. Incredibly easy to whip up and guarantee to please everyone!

If you are looking for a wonderful hostess gift or housewarming gift, then this Lazy Daisy Cake is a great option. Serve this cake right in the pan and watch everyone devour this cake up to the last bite!

Ingredients

4 tablespoons butter

2 cups ap flour

4 eggs – room temperature

1 cup milk

1 teaspoon vanilla

2 cups sugar

2 teaspoons baking powder

1/2 teaspoon salt

TOPPING:

6 tablespoons evaporated milk

3/4 cup packed, light brown sugar

1 1/2 cups shredded coconut

9 tablespoons butter – melted

How to make Lazy Daisy Cake

Step 1: Prepare the oven. Preheat it to 350 degrees F. Ready a 13 x 9-inch pan. Grease, flour, and set aside.

Step 2: Place the flour, baking powder, salt, and sugar in a large bowl. Mix well until combined.

Step 3: Heat the butter and milk in a medium saucepan over medium heat until the butter has melted. Then, add the vanilla.

Step 4: Beat the eggs and sugar using an electric mixer at medium-high speed for about 6 minutes until pale and creamy. Then, fold in the flour mixture using a rubber spatula.

Step 5: Place in the preheated oven and bake for about 30 to 35 minutes or until a toothpick inserted in the middle of the cake comes out clean. Remove from the oven when done, and let the cake cool for about 10 minutes in the pan.

Step 6: To make the topping, whisk the butter, brown sugar, and evaporated milk in a medium bowl. On top of the cake, evenly sprinkle the topping. Broil for about 3 to 4 minutes or until the topping starts to brown and bubbles.

Step 7: Enjoy the cake warm or store it at room temperature for up to 4 days.

Lazy Daisy Cake Recipe: An Old-Fashioned, Yet Full Of Joy Treat

Rebecca Cook time: 35 mins | Prep time: 15 mins | Serves: 12–15 This Lazy daisy Cake is a simple, yet luscious buttery yellow cake with the most amazing coconut icing!… General Recipes Lazy Daisy Cake Recipe: An Old-Fashioned, Yet Full Of Joy Treat European Print This
Serves: 12-15 Prep Time: 35 mins Cooking Time: 15 mins 15 mins
Nutrition facts: 200 calories 20 grams fat
Rating: 5.0/5
( 1 voted )

Ingredients

  • 4 tablespoons butter
  • 2 cups ap flour
  • 4 eggs – room temperature
  • 1 cup milk
  • 1 teaspoon vanilla
  • 2 cups sugar
  • 2 teaspoons baking powder
  • 1/2 teaspoon salt
  • TOPPING:
  • 6 tablespoons evaporated milk
  • 3/4 cup packed, light brown sugar
  • 1 1/2 cups shredded coconut
  • 9 tablespoons butter – melted

Instructions

Step 1: Prepare the oven. Preheat it to 350 degrees F. Ready a 13 x 9-inch pan. Grease, flour, and set aside.

Step 2: Place the flour, baking powder, salt, and sugar in a large bowl. Mix well until combined.

Step 3: Heat the butter and milk in a medium saucepan over medium heat until the butter has melted. Then, add the vanilla.

Step 4: Beat the eggs and sugar using an electric mixer at medium-high speed for about 6 minutes until pale and creamy. Then, fold in the flour mixture using a rubber spatula.

Step 5: Place in the preheated oven and bake for about 30 to 35 minutes or until a toothpick inserted in the middle of the cake comes out clean. Remove from the oven when done, and let the cake cool for about 10 minutes in the pan.

Step 6: To make the topping, whisk the butter, brown sugar, and evaporated milk in a medium bowl. On top of the cake, evenly sprinkle the topping. Broil for about 3 to 4 minutes or until the topping starts to brown and bubbles.

Step 7: Enjoy the cake warm or store it at room temperature for up to 4 days.

September 7, 2022 0 comment
0 FacebookTwitterPinterestEmail
General Recipes

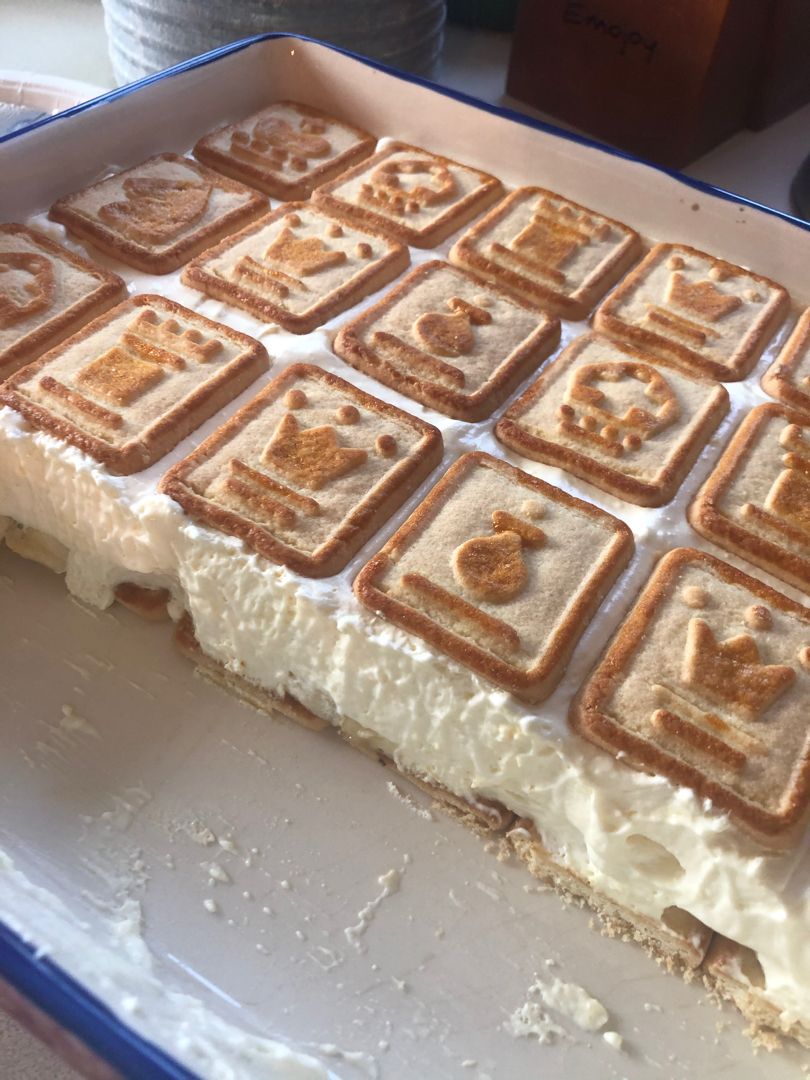
Paula Deen’s Not Yo’ Mama’s Banana Pudding

by Rebecca September 7, 2022
written by Rebecca

Prep time: 15 mins | Chill time: 2 hrs | Total time: 2 hrs 15 mins | Servings: 10 people

This Not Yo’ Mama’s Banana Pudding is an amazing pudding recipe made with fresh bananas, French Vanilla pudding mix, condensed milk, and cream cheese along with some basic ingredients. A no-fuss recipe that guarantees one of the best puddings you’ll ever make! If you love bananas and pudding, this recipe is for you!

I remembered the first time I made this, everyone went crazy! I bought this banana pudding at my aunt’s dinner party, and everyone loved it! If you have not tried banana pudding before or if you are searching for another banana pudding recipe, then this Not Yo’ Mama’s Banana Pudding is a must!

I have made this banana pudding many times already. I always stick to the recipe, but I also tried changing this up a little. I tried using a small box of Instant banana pudding and 1 small box of French or regular vanilla pudding and it also turned out amazing! Either way, the results will be awesome!

Ingredients

1 can sweeten condensed milk

1 container of frozen whipped topping, thawed, or an equal amount of sweetened whipped cream

1 package cream cheese, softened

2 bags of chessmen cookies

2 c. milk

6-8 bananas, sliced

1 box instant French vanilla pudding mix

How to make Paula Deen’s Not Yo’ Mama’s Banana Pudding

Step 1: Start by lining the bottom of a baking dish with 1 bag of cookies. On top, layer the bananas.

Step 2: In a bowl, place the milk and pudding mix. Using a handheld electric mixer, beat the ingredients until well blended.

Step 3: In a different bowl, whisk the cream cheese and condensed milk until smooth. Then, fold in the whipped toppings. To the pudding mixture, add the cream cheese mixture and mix well until combined.

Step 4: Over the cookies and bananas, pour the mixture, then cover with the rest of the cookies.

Step 5: Place the pudding in the fridge until ready to serve. Enjoy!

Nutritional Facts:

Calories: 77 kcal | Carbohydrates: 15g | Protein: 2g | Fat: 1g | Saturated Fat: 1g | Polyunsaturated Fat: 1g | Monounsaturated Fat: 1g | Cholesterol: 5mg | Sodium: 16mg | Potassium: 272mg | Fiber: 2g | Sugar: 9g | Vitamin A: 104IU | Vitamin C: 5mg | Calcium: 53 mg | Iron: 1mg

Paula Deen’s Not Yo’ Mama’s Banana Pudding

Rebecca Prep time: 15 mins | Chill time: 2 hrs | Total time: 2 hrs 15 mins | Servings: 10 people This Not Yo’ Mama’s Banana Pudding is an amazing pudding… General Recipes Paula Deen’s Not Yo’ Mama’s Banana Pudding European Print This
Serves: 10 Prep Time: 15 mins
Nutrition facts: 77 calories 1 fat
Rating: 5.0/5
( 1 voted )

Ingredients

  • 1 can sweeten condensed milk
  • 1 container of frozen whipped topping, thawed, or an equal amount of sweetened whipped cream
  • 1 package cream cheese, softened
  • 2 bags of chessmen cookies
  • 2 c. milk
  • 6-8 bananas, sliced
  • 1 box instant French vanilla pudding mix

Instructions

Step 1: Start by lining the bottom of a baking dish with 1 bag of cookies. On top, layer the bananas.

Step 2: In a bowl, place the milk and pudding mix. Using a handheld electric mixer, beat the ingredients until well blended.

Step 3: In a different bowl, whisk the cream cheese and condensed milk until smooth. Then, fold in the whipped toppings. To the pudding mixture, add the cream cheese mixture and mix well until combined.

Step 4: Over the cookies and bananas, pour the mixture, then cover with the rest of the cookies.

Step 5: Place the pudding in the fridge until ready to serve. Enjoy!

September 7, 2022 0 comment
0 FacebookTwitterPinterestEmail
General Recipes

3 Ingredient Crock Pot BBQ Wings

by Rebecca September 7, 2022
written by Rebecca

Prep time: 15 mins | Cook time: 2 hrs | Total time: 2 hrs 15 mins | Yield: 6-8 servings

This is another amazing crock pot recipe that requires just three ingredients to make! Packed with so much flavor, super juicy, and incredibly tender. If you love chicken wings and you are searching for a wonderful recipe, then this Three Ingredient Crock Pot BBQ Wings recipe is a must-try!

Ingredients

1 c. BBQ Sauce, divided

Salt and pepper, to taste

3 pounds of uncooked chicken wings, fresh or frozen

How to make 3 Ingredient Crock Pot BBQ Wings

Step 1: If the chicken wings are frozen, let them thaw in the fridge for at least 4 hours or overnight. To taste, season the uncooked wings with salt and pepper.

Step 2: Using a nonstick spray, grease the bottom and sides of a slow cooker. On the bottom, place the chicken wings and pour over half c of the BBQ sauce. Toss well until the chicken wings are completely coated.

Step 3: Set to cook for about 2 hours on high or 4 hours on low. You’ll know once the chicken is done when the internal temperature of the wings reaches 165 degrees F.

Step 4: On a greased baking sheet, transfer the chicken wings and brush both sides of the wings with an extra half cup of BBQ sauce.

Step 5: Place in a 400 degrees F preheated oven and bake the chicken wings for about 15 to 20 minutes, flipping halfway. Then, broil the wings for 2 to 5 minutes on high, flipping halfway.

Step 6: To grill, lay the chicken wings on a preheated grill (450 degrees F) for about 10 to 15 minutes, flipping halfway.

Step 7: Set the BBQ wings aside to cool for about 5 minutes before serving. Enjoy with your fave sauce!

Tips:

Make sure to thaw the chicken wings to make sure they soak up all the flavor.

After rinsing the frozen wings, place them in your crockpot.

Pour in the cola (or sprite). This will guarantee tender, juicy BBQ wings

Just barely cover the wings with cola.

Nutritional Facts:

Calories: 365 kcl, Sugar: 4 mg, Fat: 25 mg, Carbohydrates: 6 mg, Fiber: 0 mg, Protein: 29 mg

3 Ingredient Crock Pot BBQ Wings

Rebecca Prep time: 15 mins | Cook time: 2 hrs | Total time: 2 hrs 15 mins | Yield: 6-8 servings This is another amazing crock pot recipe that requires just… General Recipes 3 Ingredient Crock Pot BBQ Wings European Print This
Serves: 6-8 Prep Time: 15 mins Cooking Time: 2 hrs 2 hrs
Nutrition facts: 365 calories 25 fat
Rating: 5.0/5
( 1 voted )

Ingredients

  • 1 c. BBQ Sauce, divided
  • Salt and pepper, to taste
  • 3 pounds of uncooked chicken wings, fresh or frozen

Instructions

Step 1: If the chicken wings are frozen, let them thaw in the fridge for at least 4 hours or overnight. To taste, season the uncooked wings with salt and pepper.

Step 2: Using a nonstick spray, grease the bottom and sides of a slow cooker. On the bottom, place the chicken wings and pour over half c of the BBQ sauce. Toss well until the chicken wings are completely coated.

Step 3: Set to cook for about 2 hours on high or 4 hours on low. You’ll know once the chicken is done when the internal temperature of the wings reaches 165 degrees F.

Step 4: On a greased baking sheet, transfer the chicken wings and brush both sides of the wings with an extra half cup of BBQ sauce.

Step 5: Place in a 400 degrees F preheated oven and bake the chicken wings for about 15 to 20 minutes, flipping halfway. Then, broil the wings for 2 to 5 minutes on high, flipping halfway.

Step 6: To grill, lay the chicken wings on a preheated grill (450 degrees F) for about 10 to 15 minutes, flipping halfway.

Step 7: Set the BBQ wings aside to cool for about 5 minutes before serving. Enjoy with your fave sauce!

Notes

Make sure to thaw the chicken wings to make sure they soak up all the flavor. After rinsing the frozen wings, place them in your crockpot. Pour in the cola (or sprite). This will guarantee tender, juicy BBQ wings Just barely cover the wings with cola.

September 7, 2022 0 comment
0 FacebookTwitterPinterestEmail
General Recipes

Soft Sour Cream Sugar Cookies

by Rebecca September 7, 2022
written by Rebecca

Prep time: 15 mins | Cook time: 8 mins | Chilling time: 15 mins | Total time: 38 mins | Yield: about 25 3 1/2-inch round cookies

These Soft Sour Cream, Sugar Cookies are one of the best cookies I’ve made! They are thick, incredibly soft, and wonderful to serve on all occasions!

Ingredients

COOKIE DOUGH:

1 c. granulated sugar

1 large egg, room temperature

½ c. full fat sour cream

1 teaspoon lemon zest

1 ½ teaspoon baking powder

½ c. unsalted butter, room temperature

2 ¾ c. all-purpose flour

¼ teaspoon kosher salt

FROSTING:

2 c. powdered, icing, or confectioners sugar

1 tablespoon lemon juice

1 stick unsalted butter, room temperature

2-3 tablespoons milk or heavy cream

1 teaspoon vanilla extract

How to make Soft Sour Cream, Sugar Cookies

Cookies:

Step 1: Place the butter, granulated sugar, and lemon zest in a large bowl. Beat using a hand mixer until light and fluffy. Add the egg along with the sour cream and mix again until blended.

Step 2: Into the mixing bowl, add the baking powder and salt. Mix well. In half, divide the dough and place each dough onto a piece of parchment paper.

Step 3: Lay another piece of parchment paper on each dough. Then, roll the dough using a rolling pin to about 1/4-inch thick. Into the freezer, transfer the dough, and freeze for about 10 to 15 minutes until firm.

Step 4: Prepare the oven. Preheat it to 375 degrees F. Using the parchment paper, line two sheet pans.

Step 5: In flour, dip the cookie cutters and stamp out the cookies to your preferred shape. On the prepared baking sheets, place the cutout cookies.

Step 6: Place in the preheated oven and bake for about 6 to 9 minutes or until the edges of the cookies are firm and lightly browned. Remove from the oven and let the cookies cool on the baking sheets for about 5 minutes before transferring them to cooling racks to cool fully.

Frosting:

Step 7: Beat the butter in a large bowl, using a hand mixer on high speed until light and fluffy. Add the powdered sugar and beat on low, slowly increasing the speed to cream the sugar into the butter.

Step 8: Beat the frosting for about 3 to 4 minutes on high speed until light and fluffy. Next, add the vanilla extract and lemon juice. To thin out the mixture, you can add a little amount of milk or heavy cream if needed.

To Assemble:

Step 9: Grab each cooled cookie and frost. If you desire to add sprinkles, do it now while the frosting is still not set.

Step 10: In an airtight container, place the cookies and store either at room temperature or fridge for up to 3 to 4 days.

Soft Sour Cream Sugar Cookies

Rebecca Prep time: 15 mins | Cook time: 8 mins | Chilling time: 15 mins | Total time: 38 mins | Yield: about 25 3 1/2-inch round cookies These Soft Sour… General Recipes Soft Sour Cream Sugar Cookies European Print This
Prep Time: 15 mins Cooking Time: 8 mins 8 mins
Nutrition facts: 200 calories 20 grams fat
Rating: 5.0/5
( 1 voted )

Ingredients

  • COOKIE DOUGH:
  • 1 c. granulated sugar
  • 1 large egg, room temperature
  • ½ c. full fat sour cream
  • 1 teaspoon lemon zest
  • 1 ½ teaspoon baking powder
  • ½ c. unsalted butter, room temperature
  • 2 ¾ c. all-purpose flour
  • ¼ teaspoon kosher salt
  • FROSTING:
  • 2 c. powdered, icing, or confectioners sugar
  • 1 tablespoon lemon juice
  • 1 stick unsalted butter, room temperature
  • 2-3 tablespoons milk or heavy cream
  • 1 teaspoon vanilla extract

Instructions

Cookies:

Step 1: Place the butter, granulated sugar, and lemon zest in a large bowl. Beat using a hand mixer until light and fluffy. Add the egg along with the sour cream and mix again until blended.

Step 2: Into the mixing bowl, add the baking powder and salt. Mix well. In half, divide the dough and place each dough onto a piece of parchment paper.

Step 3: Lay another piece of parchment paper on each dough. Then, roll the dough using a rolling pin to about 1/4-inch thick. Into the freezer, transfer the dough, and freeze for about 10 to 15 minutes until firm.

Step 4: Prepare the oven. Preheat it to 375 degrees F. Using the parchment paper, line two sheet pans.

Step 5: In flour, dip the cookie cutters and stamp out the cookies to your preferred shape. On the prepared baking sheets, place the cutout cookies.

Step 6: Place in the preheated oven and bake for about 6 to 9 minutes or until the edges of the cookies are firm and lightly browned. Remove from the oven and let the cookies cool on the baking sheets for about 5 minutes before transferring them to cooling racks to cool fully.

Frosting:

Step 7: Beat the butter in a large bowl, using a hand mixer on high speed until light and fluffy. Add the powdered sugar and beat on low, slowly increasing the speed to cream the sugar into the butter.

Step 8: Beat the frosting for about 3 to 4 minutes on high speed until light and fluffy. Next, add the vanilla extract and lemon juice. To thin out the mixture, you can add a little amount of milk or heavy cream if needed.

To Assemble:

Step 9: Grab each cooled cookie and frost. If you desire to add sprinkles, do it now while the frosting is still not set.

Step 10: In an airtight container, place the cookies and store either at room temperature or fridge for up to 3 to 4 days.

September 7, 2022 0 comment
0 FacebookTwitterPinterestEmail
General Recipes

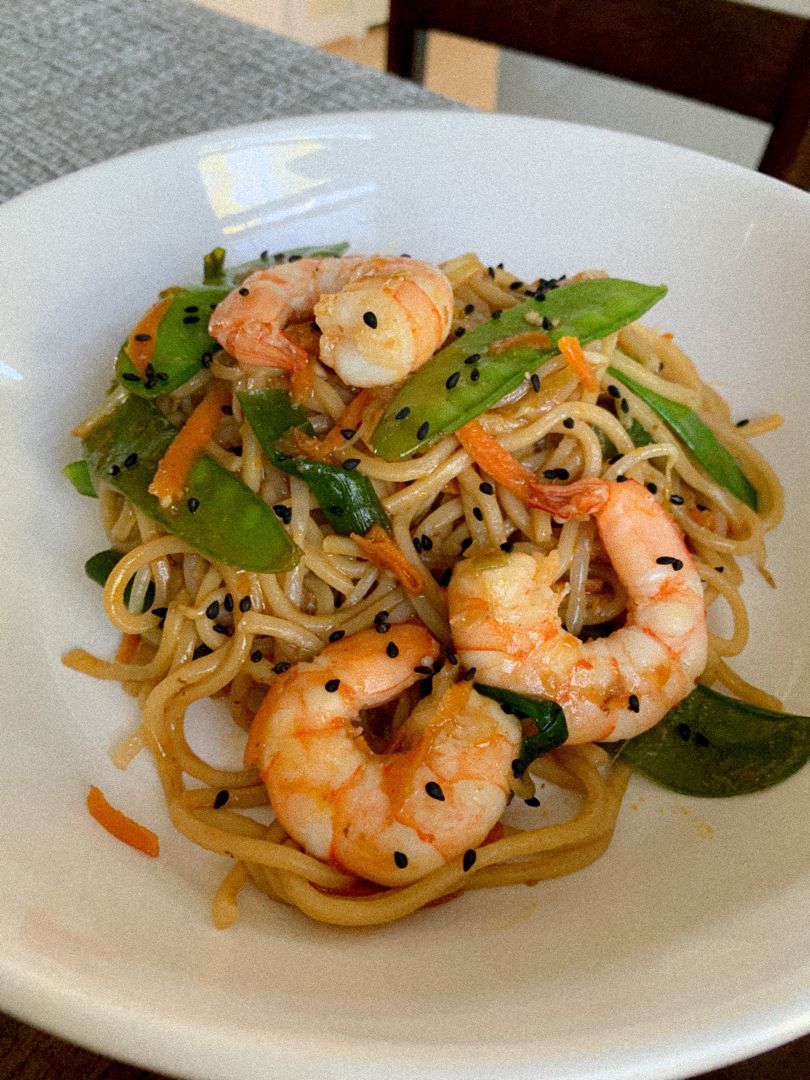
Shrimp Lo Mein

by Rebecca September 7, 2022
written by Rebecca

Prep time: 15 mins | Cook time: 12 mins | Total time: 27 mins | Servings: 4

Shrimp Lo Mein is a nice dish packed with tender, juicy shrimp, veggies, and egg noodles tossed in a simple sauce. It is fresh, healthy, and super delicious! This recipe is a no-fuss to make, quick, and easily modifiable.

Ingredients

1 tbsp vegetable oil

4 oz. dry egg noodles or ramen noodles (discard the seasoning packets)

8 oz. medium shrimp, peeled and deveined, tails removed

½ red or yellow bell pepper, sliced

4 c. coleslaw mix or finely sliced cabbage

2 cloves garlic, minced

1 tsp fresh ginger, grated

SAUCE:

1 tbsp hoisin sauce

1 tsp brown sugar

3 tbsp low sodium soy sauce

1 tsp sesame oil

1 tbsp water

How to make Shrimp Lo Mein

Step 1: Place the sauce ingredients in a small bowl. Mix well and set aside.

Step 2: Following the package directions, cook the noodles until al dente. Drain when done.

Step 3: Heat the oil in a large saucepan over medium-high heat. Meanwhile, season the shrimp with salt and pepper. Once the oil is hot, add the shrimp to the pan and cook for about 2 to 3 minutes or until the shrimp starts to turn pink. Set the shrimp aside when done.

Step 4: If needed, add more oil to the pan. Add the coleslaw mix along with the bell pepper. Stir fry for about 3 to 4 minutes or until the bell peppers start to soften. Next, add the ginger along with garlic and continue to cook for another 30 seconds.

Step 5: Return the shrimp to the pan and pour in the sauce. Cook for additional 2 minutes or until the shrimp is completely cooked. Then, toss in the noodles.

Step 6: Remove from the heat and serve the Shrimp Lo Mein right away. Enjoy!

Tips:

For this recipe, you can use fresh or dried noodles. Spaghetti is a great option, too.

Do not rinse the cooked noodles. The starch will help thicken the sauce.

In an airtight container, keep any leftovers and store them in the fridge for up to 3 days.

To reheat, pop in the microwave or reheat in a saucepan.

Nutritional Facts:

Calories: 248Kcl, Carbohydrates: 30g, Protein: 17g, Fat: 7g, Saturated Fat: 3g, Cholesterol: 167mg, Sodium: 925mg, Potassium: 287 mg, Fiber: 3g, Sugar: 6g, Vitamin A: 552IU, Vitamin C: 47mg, Calcium: 123mg, Iron: 2mg

Shrimp Lo Mein

Rebecca Prep time: 15 mins | Cook time: 12 mins | Total time: 27 mins | Servings: 4 Shrimp Lo Mein is a nice dish packed with tender, juicy shrimp, veggies,… General Recipes Shrimp Lo Mein European Print This
Serves: 4 Prep Time: 15 mins Cooking Time: 12 mins 12 mins
Nutrition facts: 248 calories 7 fat
Rating: 5.0/5
( 1 voted )

Ingredients

  • 1 tbsp vegetable oil
  • 4 oz. dry egg noodles or ramen noodles (discard the seasoning packets)
  • 8 oz. medium shrimp, peeled and deveined, tails removed
  • ½ red or yellow bell pepper, sliced
  • 4 c. coleslaw mix or finely sliced cabbage
  • 2 cloves garlic, minced
  • 1 tsp fresh ginger, grated
  • SAUCE:
  • 1 tbsp hoisin sauce
  • 1 tsp brown sugar
  • 3 tbsp low sodium soy sauce
  • 1 tsp sesame oil
  • 1 tbsp water

Instructions

Step 1: Place the sauce ingredients in a small bowl. Mix well and set aside.

Step 2: Following the package directions, cook the noodles until al dente. Drain when done.

Step 3: Heat the oil in a large saucepan over medium-high heat. Meanwhile, season the shrimp with salt and pepper. Once the oil is hot, add the shrimp to the pan and cook for about 2 to 3 minutes or until the shrimp starts to turn pink. Set the shrimp aside when done.

Step 4: If needed, add more oil to the pan. Add the coleslaw mix along with the bell pepper. Stir fry for about 3 to 4 minutes or until the bell peppers start to soften. Next, add the ginger along with garlic and continue to cook for another 30 seconds.

Step 5: Return the shrimp to the pan and pour in the sauce. Cook for additional 2 minutes or until the shrimp is completely cooked. Then, toss in the noodles.

Step 6: Remove from the heat and serve the Shrimp Lo Mein right away. Enjoy!

Notes

For this recipe, you can use fresh or dried noodles. Spaghetti is a great option, too. Do not rinse the cooked noodles. The starch will help thicken the sauce. In an airtight container, keep any leftovers and store them in the fridge for up to 3 days. To reheat, pop in the microwave or reheat in a saucepan.

September 7, 2022 0 comment
0 FacebookTwitterPinterestEmail
Newer Posts
Older Posts

Popular Posts

  • 1

    Crispy Crunchy Parmesan Potatoes

    March 21, 2020
  • 2

    CROCK POT SMOTHERED PORK CHOPS

    March 21, 2020
  • Facebook
  • Twitter

@2019 - All Right Reserved.


Back To Top