Cook it once
  • Home
  • Privacy Policy
  • Recipes
    • KETO
    • LC
    • WW
  • Tips
  • Contact
Cook it once
  • Home
  • Privacy Policy
  • Recipes
    • KETO
    • LC
    • WW
  • Tips
  • Contact
Category:

General Recipes

General Recipes

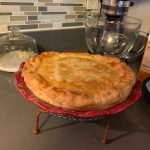
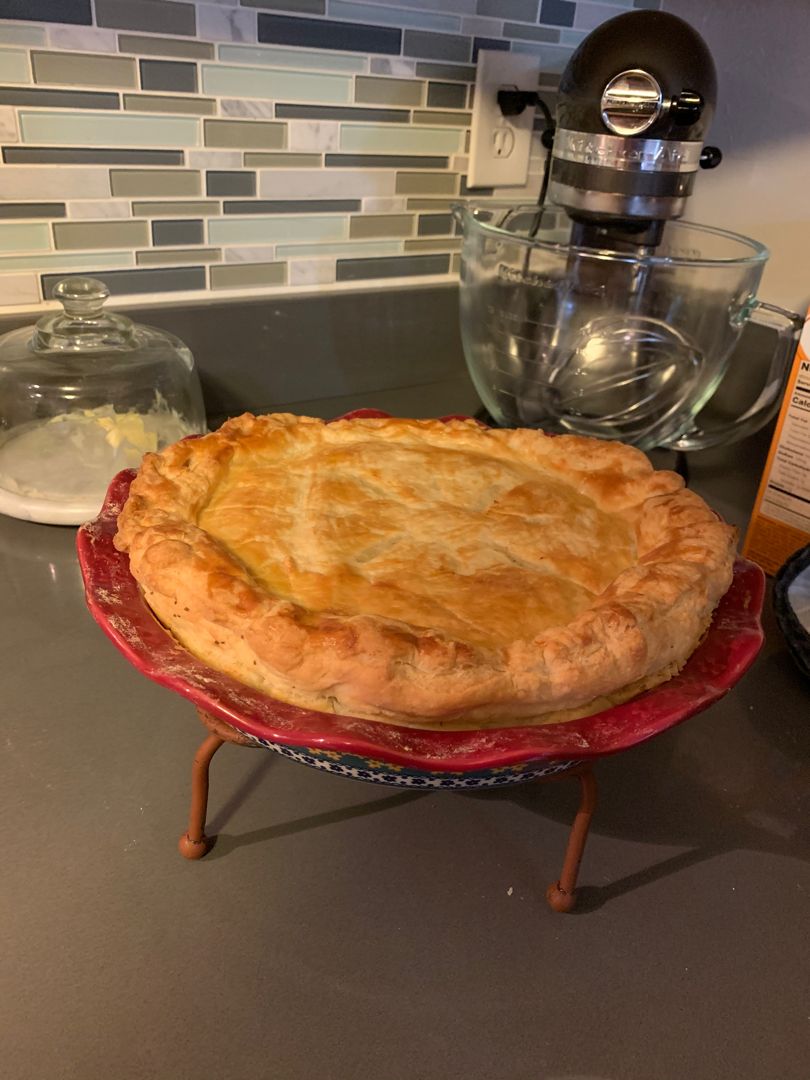
Chicken Enchilada Pot Pie

by Rebecca September 13, 2022
written by Rebecca

Prep time: 10 mins | Cook time: 40 mins | Serves: 6

Chicken Enchilada Pot Pie is my family’s favorite. If you are looking to bring your pie game to the top, this easy pot pie recipe is a must try! Very comforting and delicious with a flaky crust filled with spiced enchilada flavor!

INGREDIENTS

1/4 c. butter

2 refrigerated pie crusts

1 small onion, chopped

2 cloves garlic, minced

1/4 c. flour

1 (4 ounces) can chop green chilies

1 (14 ounces) can of red enchilada sauce

1 (15 ounces) can of black beans, rinsed and drained

2 1/2 c. cooked chicken, chopped or shredded

1 (15 ounces) can of corn, drained

1/2 tsp chili powder

Kosher salt and freshly ground black pepper, to taste

1/2 tsp cumin

1 1/2 c. shredded Mexican blend cheese

How to make Chicken Enchilada Pot Pie

Step 1: Prepare the oven. Preheat it to 400 degrees F.

Step 2: Melt the butter in a large skillet or saucepan over medium heat. Once the butter has melted, add the onion to the skillet and cook for about 3 to 4 minutes or until tender. Then, add the garlic and cook for another minute.

Step 3: To the skillet, add the flour. Stir and cook for a minute. Then, stir in the enchilada sauce and bring it to a simmer. Once simmering, whisk in the green chilies, black beans, corn, chicken, cumin, and chili powder. Continue to cook for additional 5 minutes or until the mixture has thickened. Next, add 1 c of the cheese. Stir and cook until the cheese has melted. Season with salt and pepper to taste. When done, take the skillet off the heat.

Step 4: With the bottom crust, line a pie plate and sprinkle with the rest of the cheese. On top, spoon the filling. Cover with the other pie crust. Then, crimp the edges. In the middle of the top crust, cut a couple of slits.

Step 5: Place in the preheated oven and bake for about 30 to 40 minutes or until the pie is golden brown. If the edges begin to brown too quickly, cover the edges with foil.

Step 6: Remove the pie from the oven when done and allow it to rest for about 5 minutes before serving. Slice and enjoy!
Chicken Enchilada Pot Pie

Rebecca Prep time: 10 mins | Cook time: 40 mins | Serves: 6 Chicken Enchilada Pot Pie is my family’s favorite. If you are looking to bring your pie game to… General Recipes Chicken Enchilada Pot Pie European Print This
Serves: 6 Prep Time: 10 mins Cooking Time: 40 mins 40 mins
Nutrition facts: 200 calories 20 grams fat
Rating: 5.0/5
( 2 voted )

Ingredients

  • 1/4 c. butter
  • 2 refrigerated pie crusts
  • 1 small onion, chopped
  • 2 cloves garlic, minced
  • 1/4 c. flour
  • 1 (4 ounces) can chop green chilies
  • 1 (14 ounces) can of red enchilada sauce
  • 1 (15 ounces) can of black beans, rinsed and drained
  • 2 1/2 c. cooked chicken, chopped or shredded
  • 1 (15 ounces) can of corn, drained
  • 1/2 tsp chili powder
  • Kosher salt and freshly ground black pepper, to taste
  • 1/2 tsp cumin
  • 1 1/2 c. shredded Mexican blend cheese

Instructions

Step 1: Prepare the oven. Preheat it to 400 degrees F.

Step 2: Melt the butter in a large skillet or saucepan over medium heat. Once the butter has melted, add the onion to the skillet and cook for about 3 to 4 minutes or until tender. Then, add the garlic and cook for another minute.

Step 3: To the skillet, add the flour. Stir and cook for a minute. Then, stir in the enchilada sauce and bring it to a simmer. Once simmering, whisk in the green chilies, black beans, corn, chicken, cumin, and chili powder. Continue to cook for additional 5 minutes or until the mixture has thickened. Next, add 1 c of the cheese. Stir and cook until the cheese has melted. Season with salt and pepper to taste. When done, take the skillet off the heat.

Step 4: With the bottom crust, line a pie plate and sprinkle with the rest of the cheese. On top, spoon the filling. Cover with the other pie crust. Then, crimp the edges. In the middle of the top crust, cut a couple of slits.

Step 5: Place in the preheated oven and bake for about 30 to 40 minutes or until the pie is golden brown. If the edges begin to brown too quickly, cover the edges with foil.

Step 6: Remove the pie from the oven when done and allow it to rest for about 5 minutes before serving. Slice and enjoy!
September 13, 2022 0 comment
0 FacebookTwitterPinterestEmail
General Recipes

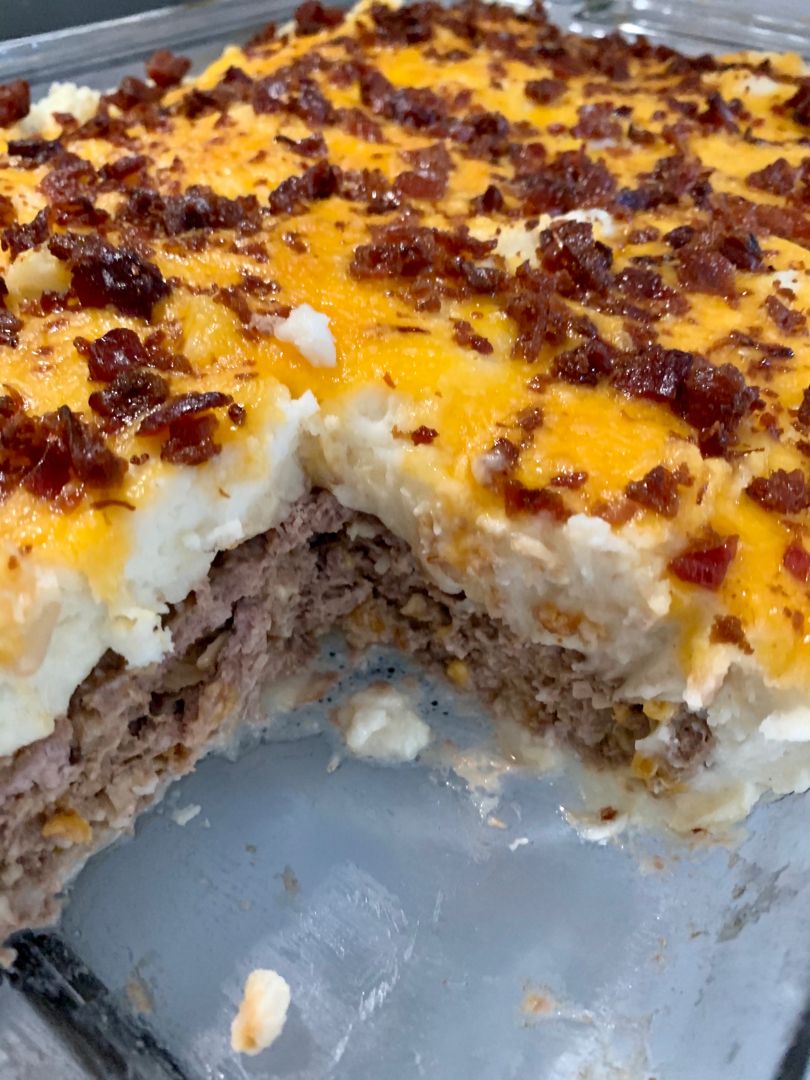
Loaded Meatloaf Casserole: The Ultimate Comfort Food

by Rebecca September 12, 2022
written by Rebecca

Total time: 50 mins | Serves: 6

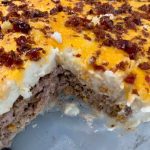
This casserole is a family-friendly meal that you can easily make any time using just a few basic ingredients. This casserole is loaded with mashed potatoes, bacon, and cheese with a meatloaf base. This Loaded Mashed Potato Meatloaf casserole is classic comfort food that everyone loves!

Meatloaf is a staple at every home. I have tried different meatloaf recipes and this Loaded Mashed Potato Meatloaf casserole happened to be one of my top favorites. I love how I can easily make this a breeze. I can even make this casserole in advance. If you also have any leftovers, you can tightly wrap them or keep them in an airtight container. Store in the fridge for up to 3 days. This casserole also freezes beautifully.

INGREDIENTS

1/3 c. bacon (cooked and crumbled) or bacon bits

1 lb lean ground beef

1/2 c. white onion, finely chopped

2 tbsp brown sugar

3 cloves garlic, minced

1 tbsp Worcestershire sauce

1 c. Italian bread crumbs

1 1/2 c. sharp cheddar cheese, grated

3 c. leftover (garlic) mashed potatoes

kosher salt and freshly ground pepper, to taste

1 large egg

How to make Loaded Meatloaf Casserole

Step 1: Prepare the oven. Preheat it to 400 degrees F.

Step 2: Place the ground beef, onion, garlic, and Worcestershire sauce in a large bowl. Mix well using your hands or two forks. Then, generously season with salt and pepper. Add the breadcrumbs and egg. Mix well.

Step 3: Into an 8-inch square baking dish, transfer the ground beef, pressing it into an even layer. On top, spread the mashed potatoes and cover with the cheddar cheese and bacon bits.

Step 4: Using aluminium foil, cover the baking dish. Place in the preheated oven and bake the casserole for about 30 minutes. Uncover and continue baking for an additional 10 to 15 minutes or until the cheese has melted and is bubbly.

Loaded Meatloaf Casserole: The Ultimate Comfort Food

Rebecca Total time: 50 mins | Serves: 6 This casserole is a family-friendly meal that you can easily make any time using just a few basic ingredients. This casserole is loaded… General Recipes Loaded Meatloaf Casserole: The Ultimate Comfort Food European Print This
Serves: 6
Nutrition facts: 200 calories 20 grams fat
Rating: 5.0/5
( 1 voted )

Ingredients

  • 1/3 c. bacon (cooked and crumbled) or bacon bits
  • 1 lb lean ground beef
  • 1/2 c. white onion, finely chopped
  • 2 tbsp brown sugar
  • 3 cloves garlic, minced
  • 1 tbsp Worcestershire sauce
  • 1 c. Italian bread crumbs
  • 1 1/2 c. sharp cheddar cheese, grated
  • 3 c. leftover (garlic) mashed potatoes
  • kosher salt and freshly ground pepper, to taste
  • 1 large egg

Instructions

Step 1: Prepare the oven. Preheat it to 400 degrees F.

Step 2: Place the ground beef, onion, garlic, and Worcestershire sauce in a large bowl. Mix well using your hands or two forks. Then, generously season with salt and pepper. Add the breadcrumbs and egg. Mix well.

Step 3: Into an 8-inch square baking dish, transfer the ground beef, pressing it into an even layer. On top, spread the mashed potatoes and cover with the cheddar cheese and bacon bits.

Step 4: Using aluminium foil, cover the baking dish. Place in the preheated oven and bake the casserole for about 30 minutes. Uncover and continue baking for an additional 10 to 15 minutes or until the cheese has melted and is bubbly.

September 12, 2022 0 comment
0 FacebookTwitterPinterestEmail
General Recipes

Southern Squash Casserole Recipe: A Delicious, Creamy Dish

by Rebecca September 12, 2022
written by Rebecca

Total time: 1 hr 10 mins | Serves: 8

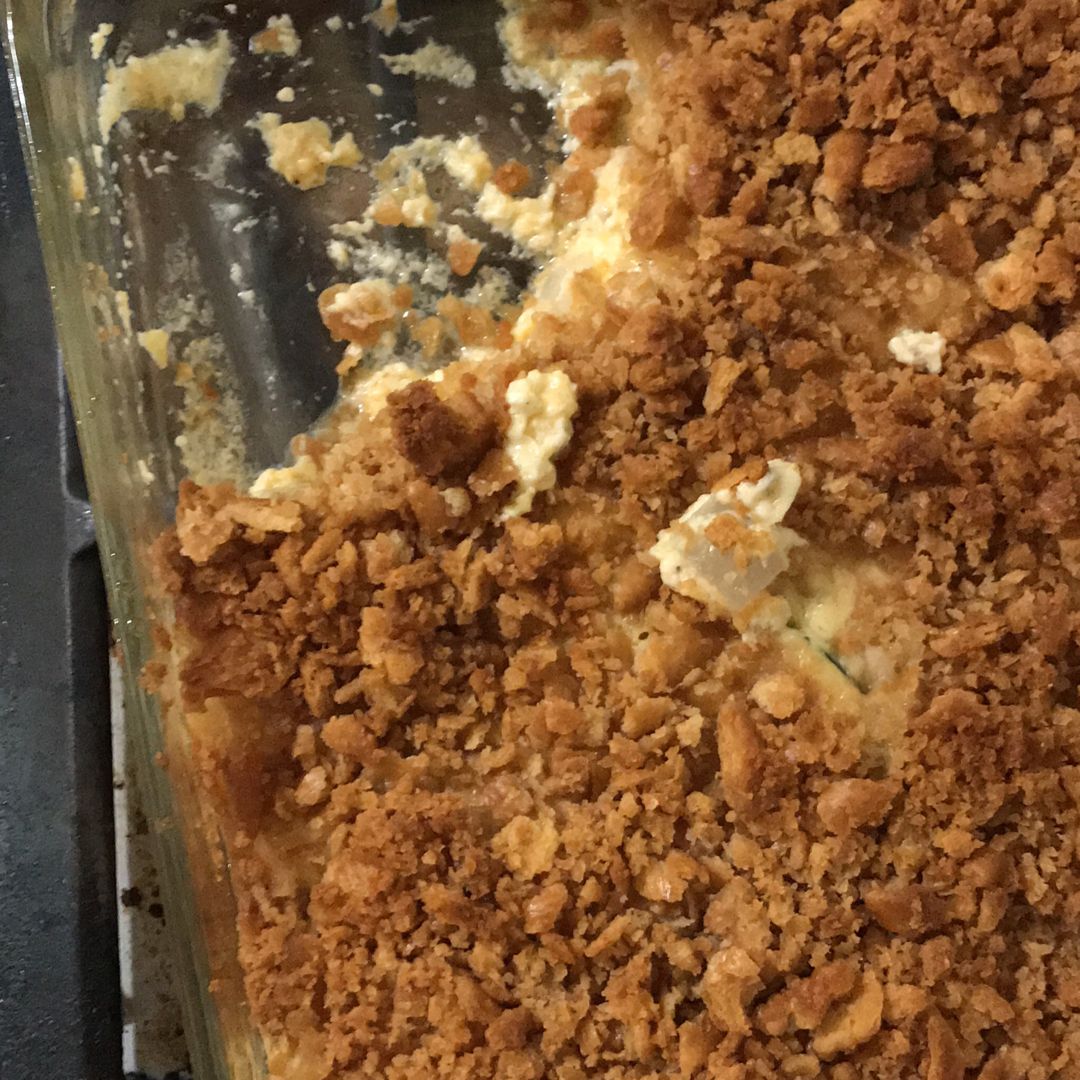
This casserole is a very delightful, creamy dish. Another Southern classic is made with only a few simple ingredients, such as yellow squash and three types of cheese. This Southern Squash Casserole is an amazing recipe to enjoy the bounty of the summer harvest! Have a simple feast and serve this delicious casserole with crispy fried chicken, pork bbq, grilled hamburgers, etc.

INGREDIENTS

¾ c. butter crackers, finely crushed

3 tbsp unsalted butter, divided

1 large egg, beaten

¼ tsp garlic powder

½ c. sour cream

1 c. shredded cheddar cheese

½ c. grated Parmesan cheese, divided

1 tbsp olive oil

Salt and pepper, to taste

2 lbs yellow squash, sliced ¼” thick

How to make Southern Squash Casserole

Step 1: Into a large pot or Dutch oven, heat 1 tbsp each olive oil and butter. Let the butter melt over medium heat. Then, add the spinach and season with a pinch of salt and pepper. Saute the spinach for about 8 to 10 minutes. Put the lid on and continue to cook for another 10 to 15 minutes or until the squash is fork tender/ Take the pot off the heat when done and let the squash cool for a little before mashing.

Step 2: Prepare the oven. Preheat it to 350 degrees F. Using cooking spray, grease an 8 x 8-inch baking dish and set aside.

Step 3: Mash the squash using a potato masher. Add the garlic powder along with the sour cream, butter, cheddar cheese, beaten egg, and ¼ c. Parmesan cheese. Keep mashing until all the ingredients are combined.

Step 4: Into the prepared baking dish, pour the squash mixture. On top, place the cracker crumbs and 1/4 c. Parmesan cheese, then drizzle with 2 tbsp melted butter. Place in the preheated oven and bake for about 35 minutes, covered. Uncover and continue baking for an additional 5 to 7 minutes or until the top is golden brown.

Southern Squash Casserole Recipe: A Delicious, Creamy Dish

Rebecca Total time: 1 hr 10 mins | Serves: 8 This casserole is a very delightful, creamy dish. Another Southern classic is made with only a few simple ingredients, such as… General Recipes Southern Squash Casserole Recipe: A Delicious, Creamy Dish European Print This
Serves: 8
Nutrition facts: 200 calories 20 grams fat
Rating: 5.0/5
( 1 voted )

Ingredients

  • ¾ c. butter crackers, finely crushed
  • 3 tbsp unsalted butter, divided
  • 1 large egg, beaten
  • ¼ tsp garlic powder
  • ½ c. sour cream
  • 1 c. shredded cheddar cheese
  • ½ c. grated Parmesan cheese, divided
  • 1 tbsp olive oil
  • Salt and pepper, to taste
  • 2 lbs yellow squash, sliced ¼” thick

Instructions

Step 1: Into a large pot or Dutch oven, heat 1 tbsp each olive oil and butter. Let the butter melt over medium heat. Then, add the spinach and season with a pinch of salt and pepper. Saute the spinach for about 8 to 10 minutes. Put the lid on and continue to cook for another 10 to 15 minutes or until the squash is fork tender/ Take the pot off the heat when done and let the squash cool for a little before mashing.

Step 2: Prepare the oven. Preheat it to 350 degrees F. Using cooking spray, grease an 8 x 8-inch baking dish and set aside.

Step 3: Mash the squash using a potato masher. Add the garlic powder along with the sour cream, butter, cheddar cheese, beaten egg, and ¼ c. Parmesan cheese. Keep mashing until all the ingredients are combined.

Step 4: Into the prepared baking dish, pour the squash mixture. On top, place the cracker crumbs and 1/4 c. Parmesan cheese, then drizzle with 2 tbsp melted butter. Place in the preheated oven and bake for about 35 minutes, covered. Uncover and continue baking for an additional 5 to 7 minutes or until the top is golden brown.

September 12, 2022 0 comment
0 FacebookTwitterPinterestEmail
General Recipes

Grilled Pork Tenderloin with Balsamic Honey Glaze

by Rebecca September 12, 2022
written by Rebecca

Prep time: 10 mins | Cook time: 40 mins | Additional time: 5 mins | Total time: 55 mins | Servings: 8

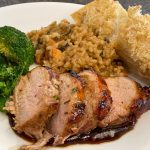
If you are looking for a gourmet-level meal, then this Grilled Pork Tenderloin with Balsamic Honey Glaze is an amazing option! It is quick enough for weeknights, yet super impressive for entertaining! Easy tender, juicy pork tenderloin coated in an insanely good honey balsamic glaze.

This Grilled Pork Tenderloin with Balsamic Honey Glaze is my family’s favorite. Serve this mouthwatering pork tenderloin with mashed potatoes, baked potatoes, or green bean casserole. This grilled pork tenderloin pairs great with homemade Mac and cheese, too!

Ingredients

2 tbsp olive oil, divided

1 (3 lbs) pork tenderloin

1 tbsp garlic powder

2 tsp chili powder

1 tbsp onion powder

2 tsp paprika

¼ c. balsamic vinegar

1 tsp salt

1 tsp Dijon mustard

1 tsp honey

How to make Grilled Pork Tenderloin with Balsamic Honey Glaze

Step 1: Combine the garlic, onion, chili powder, paprika, and salt. Rub and coat the entire pork tenderloin with this.

Step 2: In a skillet, heat 1 tbsp olive oil over medium-high heat. Add the pork once the oil is hot and sear for about 2 minutes on each side until golden brown. When done, wrap the tenderloin in aluminium foil.

Step 3: Lightly oil the grate of your outdoor grill and preheat it to medium-high heat. Place the pork in foil onto the grill and cook for about 20 minutes.

Step 4: Mix the balsamic vinegar, honey, and mustard with the rest of the olive oil. After 20 minutes, unwrap the pork and dangerously glaze all sides with the balsamic vinegar mixture. Continue to grill for another 10 minutes, brushing on more glaze, until the internal temperature of the pork reaches 145 degrees F or 63 degrees C.

Step 5: Take the pork off the grill and let it rest for about 5 minutes at room temperature. Slice and drizzle with the rest of the glaze. Enjoy!

Nutrition Facts:

Per Serving: 251 calories; protein 30.6g; carbohydrates 4.2g; fat 11.8g; cholesterol 94.9mg; sodium 380.6mg.

Grilled Pork Tenderloin with Balsamic Honey Glaze

Rebecca Prep time: 10 mins | Cook time: 40 mins | Additional time: 5 mins | Total time: 55 mins | Servings: 8 If you are looking for a gourmet-level meal,… General Recipes Grilled Pork Tenderloin with Balsamic Honey Glaze European Print This
Serves: 8 Prep Time: 10 mins Cooking Time: 45 mins 45 mins
Nutrition facts: 251 calories 11.8 fat
Rating: 5.0/5
( 1 voted )

Ingredients

  • 2 tbsp olive oil, divided
  • 1 (3 lbs) pork tenderloin
  • 1 tbsp garlic powder
  • 2 tsp chili powder
  • 1 tbsp onion powder
  • 2 tsp paprika
  • ¼ c. balsamic vinegar
  • 1 tsp salt
  • 1 tsp Dijon mustard
  • 1 tsp honey

Instructions

Step 1: Combine the garlic, onion, chili powder, paprika, and salt. Rub and coat the entire pork tenderloin with this.

Step 2: In a skillet, heat 1 tbsp olive oil over medium-high heat. Add the pork once the oil is hot and sear for about 2 minutes on each side until golden brown. When done, wrap the tenderloin in aluminium foil.

Step 3: Lightly oil the grate of your outdoor grill and preheat it to medium-high heat. Place the pork in foil onto the grill and cook for about 20 minutes.

Step 4: Mix the balsamic vinegar, honey, and mustard with the rest of the olive oil. After 20 minutes, unwrap the pork and dangerously glaze all sides with the balsamic vinegar mixture. Continue to grill for another 10 minutes, brushing on more glaze, until the internal temperature of the pork reaches 145 degrees F or 63 degrees C.

Step 5: Take the pork off the grill and let it rest for about 5 minutes at room temperature. Slice and drizzle with the rest of the glaze. Enjoy!

September 12, 2022 0 comment
0 FacebookTwitterPinterestEmail
General Recipes

Baked Mac and Cheese

by Rebecca September 12, 2022
written by Rebecca

Prep Time: 15 mins | Cook Time: 15 mins | Total Time: 30 mins | Servings: 8

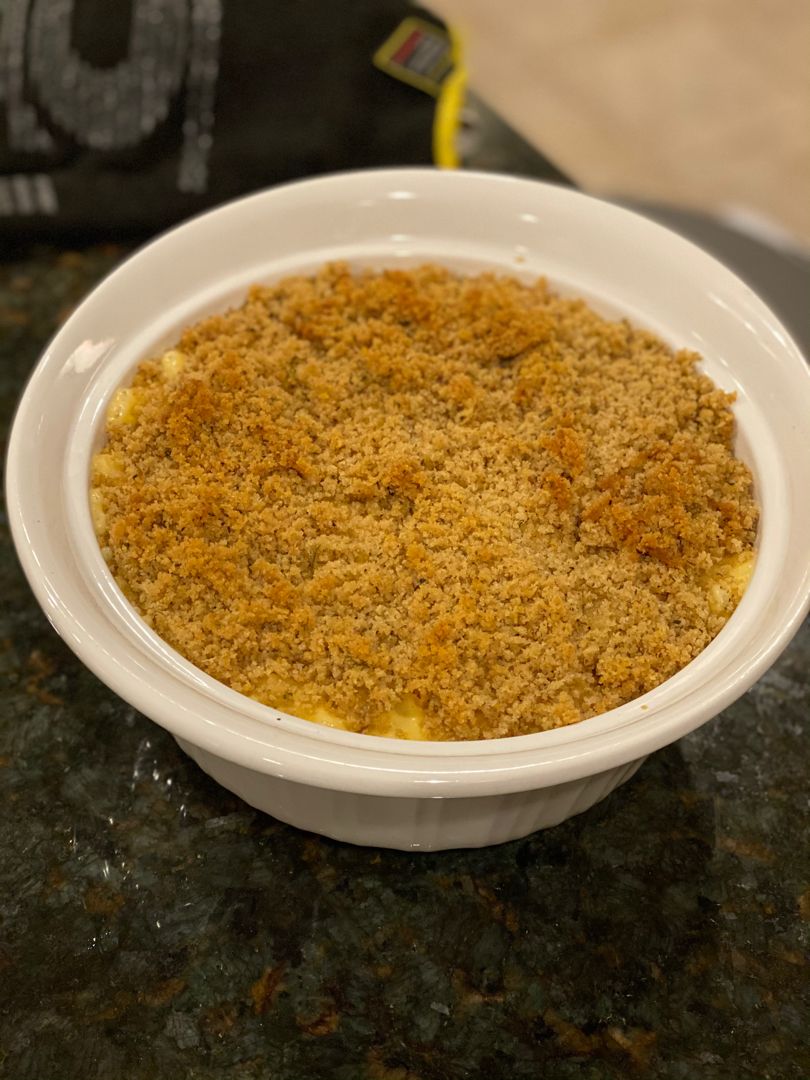
I love this old-fashioned Baked Mac and Cheese. It is super easy to make. A no-fuss, a classic, and incredibly delicious with an impressive buttery, crisp toasted panko topping!

Ingredients

4 tbsp butter (55 grams)

8 ounces dry macaroni noodles (230 grams)

¼ c. all-purpose flour (31 grams)

3 c. whole milk (710ml)

½ tsp garlic powder

½ tsp ground mustard

½ tsp onion powder

2 c. shredded sharp cheddar cheese¹ (226 grams)

1 ½ c. shredded mozzarella cheese (170 grams)

½ tsp salt

½ tsp ground pepper

Panko Topping:

1 c. seasoned panko crumbs (60 grams)

2 tbsp butter

1 tbsp olive oil

How to make Baked Mac and Cheese

Step 1: Prepare the oven. Preheat it to 350 degrees F or 175 degrees C.

Step 2: Following the package directions, cook the pasta a minute less. Drain when done and drizzle with a bit of olive oil. Toss to coat.

Step 3: In a 10-inch cast-iron pan, melt the butter over medium heat. Add the flour once the butter has melted and whisk until smooth. Then, add the milk, salt, pepper, garlic powder, onion powder, and ground mustard. Stir and bring the mixture to a boil. Continue stirring and heating until the milk is heated. Decrease the heat once the mixture comes to a boil and let it simmer until thickened, stirring often.

Step 4: Adjust the heat to low, then add the cheddar and mozzarella cheese. Stir well until completely melted and the mixture has a smooth texture.

Step 5: Toss in the cooked, drained pasta noodles, making sure it is completely coated in the sauce. Set this aside while prepping the Panko topping.

Step 6: In a small saucepan, heat the butter and olive oil over medium heat. Once hot and the butter has melted, add the panko. Constantly stir until the Panko is lightly toasted. Over the Mac and cheese, evenly sprinkle the toasted panko topping.

Step 7: Place in the preheated oven and bake the Mac and cheese for about 15 minutes, uncovered.

Step 8: Remove from the oven when done and serve the Mac and cheese right away garnished with some parsley if desired. Enjoy!

Notes:

For the cheese, you can use other types of shredded cheese, such as Colby, Monterey Jack, and Gruyere. I recommended buying a block of cheese and shredding it yourself. Block cheese melts beautifully!

Instead of a 10-inch cast iron pan, you can use a lightly greased 9 x 9-inch square pan or 1.5qt baking dish.

Nutrition Facts:

Serving: 1serving | Calories: 474 kcal | Carbohydrates: 35g | Protein: 20g | Fat: 28g | Saturated Fat: 16g | Trans Fat: 1g | Cholesterol: 78mg | Sodium: 624mg | Potassium: 255mg | Fiber: 1g | Sugar: 6g | Vitamin A: 836IU | Vitamin C: 1mg | Calcium: 438mg | Iron: 1mg

Baked Mac and Cheese

Rebecca Prep Time: 15 mins | Cook Time: 15 mins | Total Time: 30 mins | Servings: 8 I love this old-fashioned Baked Mac and Cheese. It is super easy to… General Recipes Baked Mac and Cheese European Print This
Serves: 8 Prep Time: 15 mins Cooking Time: 15 mins 15 mins
Nutrition facts: 474 calories 28 fat
Rating: 4.0/5
( 2 voted )

Ingredients

  • 4 tbsp butter (55 grams)
  • 8 ounces dry macaroni noodles (230 grams)
  • ¼ c. all-purpose flour (31 grams)
  • 3 c. whole milk (710ml)
  • ½ tsp garlic powder
  • ½ tsp ground mustard
  • ½ tsp onion powder
  • 2 c. shredded sharp cheddar cheese¹ (226 grams)
  • 1 ½ c. shredded mozzarella cheese (170 grams)
  • ½ tsp salt
  • ½ tsp ground pepper
  • Panko Topping:
  • 1 c. seasoned panko crumbs (60 grams)
  • 2 tbsp butter
  • 1 tbsp olive oil

Instructions

Step 1: Prepare the oven. Preheat it to 350 degrees F or 175 degrees C.

Step 2: Following the package directions, cook the pasta a minute less. Drain when done and drizzle with a bit of olive oil. Toss to coat.

Step 3: In a 10-inch cast-iron pan, melt the butter over medium heat. Add the flour once the butter has melted and whisk until smooth. Then, add the milk, salt, pepper, garlic powder, onion powder, and ground mustard. Stir and bring the mixture to a boil. Continue stirring and heating until the milk is heated. Decrease the heat once the mixture comes to a boil and let it simmer until thickened, stirring often.

Step 4: Adjust the heat to low, then add the cheddar and mozzarella cheese. Stir well until completely melted and the mixture has a smooth texture.

Step 5: Toss in the cooked, drained pasta noodles, making sure it is completely coated in the sauce. Set this aside while prepping the Panko topping.

Step 6: In a small saucepan, heat the butter and olive oil over medium heat. Once hot and the butter has melted, add the panko. Constantly stir until the Panko is lightly toasted. Over the Mac and cheese, evenly sprinkle the toasted panko topping.

Step 7: Place in the preheated oven and bake the Mac and cheese for about 15 minutes, uncovered.

Step 8: Remove from the oven when done and serve the Mac and cheese right away garnished with some parsley if desired. Enjoy!

Notes

For the cheese, you can use other types of shredded cheese, such as Colby, Monterey Jack, and Gruyere. I recommended buying a block of cheese and shredding it yourself. Block cheese melts beautifully! Instead of a 10-inch cast iron pan, you can use a lightly greased 9 x 9-inch square pan or 1.5qt baking dish.

September 12, 2022 0 comment
0 FacebookTwitterPinterestEmail
General Recipes

These Raspberry Oatmeal Crumble Bars Are Insanely Delicious

by Rebecca September 12, 2022
written by Rebecca

Total time: 45 mins | Serves: 12

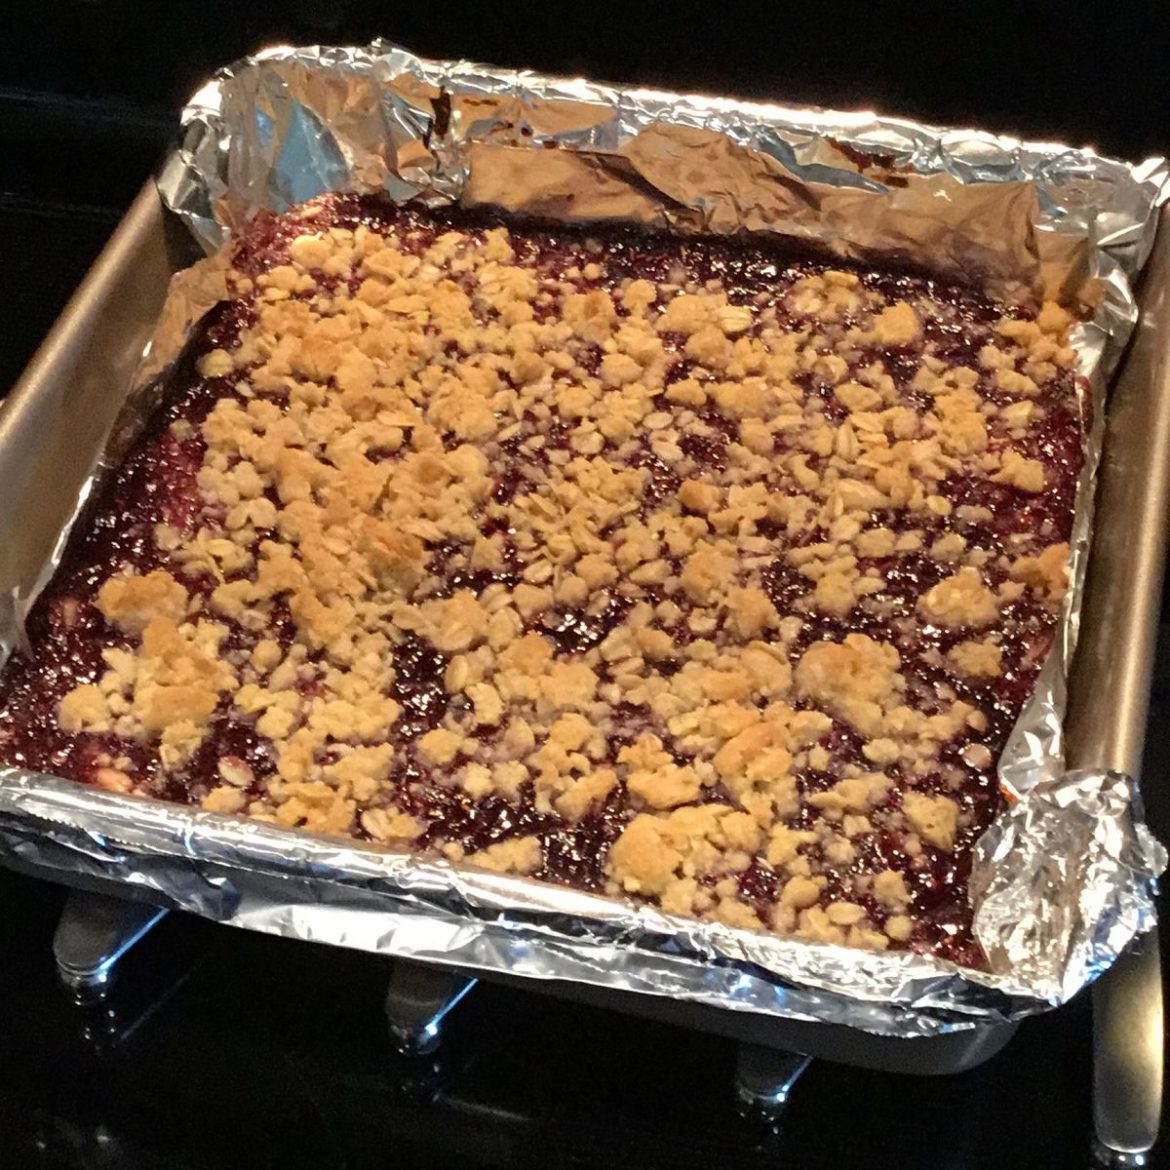
These are one of the best desserts I’ve made! Insanely delicious Raspberry Oatmeal Crumble Bars with buttery, oatmeal crust, (my favorite) sweet raspberry layer topped with oatmeal crumble. I have been obsessed with these beauties! Just last month, I made a super huge batch and took them to my friend’s baby shower and everyone could not stop eating them! These Raspberry Oatmeal Crumble Bars are always the star of the show! Out of this world Delicious and very addictive!

The amazing combination of the buttery oatmeal crust/crumbles and raspberry jam is to die for! The slightly crispy crust matches the soft and slightly chewy jam and crumbles topping perfectly.

INGREDIENTS

1/2 c. brown sugar, packed

1/2 c. granulated sugar

3/4 c. (1 1/2 sticks) unsalted butter, softened

1 tsp vanilla extract

1 1/2 c. all-purpose flour

1/2 tsp baking powder

1 1/2 c. rolled oats, NOT quick cook or instant

1 (18 ounces) jar of raspberry jam

1/2 tsp salt

How to make Raspberry Oatmeal Crumble Bars

Step 1: Prepare the oven. Preheat it to 350 degrees F. Using a nonstick spray, grease an 8-inch square baking dish and set aside.

Step 2: Place the butter and sugars in a large bowl. Using an electric mixer, mix the ingredients well until smooth. Next, add the vanilla extract along with oats, flour, salt, and baking powder. Mix again until well blended.

Step 3: Into the bottom of the prepared pan, firmly press 3/4 of the oat mixture. On top, evenly spread the jam. Crumble the rest of the oat mixture and scatter them on top of the jam.

Step 4: Place in the preheated oven and bake for about 30 to 40 minutes or until light golden brown. Remove from the oven when done and allow the raspberry oatmeal crumble bar to cool for about 2 hours.

Step 5: Slice the bar into squares. Enjoy!

These Raspberry Oatmeal Crumble Bars Are Insanely Delicious

Rebecca Total time: 45 mins | Serves: 12 These are one of the best desserts I’ve made! Insanely delicious Raspberry Oatmeal Crumble Bars with buttery, oatmeal crust, (my favorite) sweet raspberry… General Recipes These Raspberry Oatmeal Crumble Bars Are Insanely Delicious European Print This
Serves: 12
Nutrition facts: 200 calories 20 grams fat
Rating: 5.0/5
( 1 voted )

Ingredients

  • 1/2 c. brown sugar, packed
  • 1/2 c. granulated sugar
  • 3/4 c. (1 1/2 sticks) unsalted butter, softened
  • 1 tsp vanilla extract
  • 1 1/2 c. all-purpose flour
  • 1/2 tsp baking powder
  • 1 1/2 c. rolled oats, NOT quick cook or instant
  • 1 (18 ounces) jar of raspberry jam
  • 1/2 tsp salt

Instructions

Step 1: Prepare the oven. Preheat it to 350 degrees F. Using a nonstick spray, grease an 8-inch square baking dish and set aside.

Step 2: Place the butter and sugars in a large bowl. Using an electric mixer, mix the ingredients well until smooth. Next, add the vanilla extract along with oats, flour, salt, and baking powder. Mix again until well blended.

Step 3: Into the bottom of the prepared pan, firmly press 3/4 of the oat mixture. On top, evenly spread the jam. Crumble the rest of the oat mixture and scatter them on top of the jam.

Step 4: Place in the preheated oven and bake for about 30 to 40 minutes or until light golden brown. Remove from the oven when done and allow the raspberry oatmeal crumble bar to cool for about 2 hours.

Step 5: Slice the bar into squares. Enjoy!

September 12, 2022 0 comment
0 FacebookTwitterPinterestEmail
General Recipes

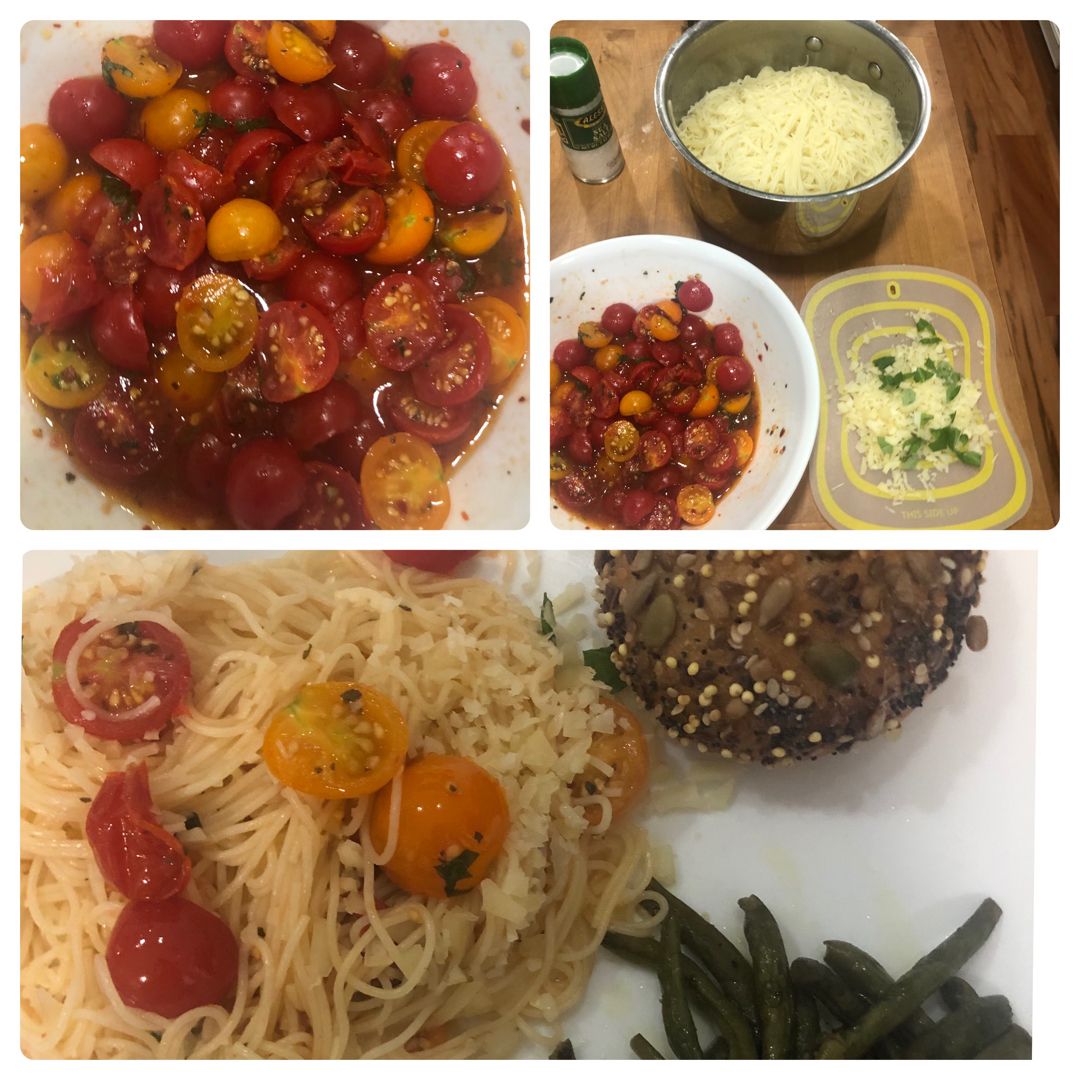
Summer Garden Pasta

by Rebecca September 12, 2022
written by Rebecca

Prep time: 10 mins | Inactive: 4 hrs | Serves: 6

If you are searching for another pasta recipe, you have to give this Summer Garden Pasta a try. It is incredibly easy to make, quick, and delicious!

My family loves pasta. We have our favorites, and the newest addition to our list is this Summer Garden Pasta. I have made this five times in the last month. We adore the simple, fresh flavor of this pasta. It is a no-fuss recipe with an amazing combination of simple ingredients. My husband and I like to enjoy this summer garden pasta without our favorite wine. And the kids love this pasta as is.

For this recipe, I use angel hair pasta, but feel free to use any pasta shape or whatever you have available. For the best result, make sure not to rush this recipe. It is important to give the tomatoes a couple of hours to marinate to allow them to release their juices and take on the flavors of garlic, basil, red, and pepper flake. This step transforms the pasta and gives you a delicious, hearty sauce packed with wonderful flavor!

INGREDIENTS

6 cloves garlic, minced

18 large basil leaves, julienned, plus more for serving

4 pints cherry tomatoes, halved

1/2 tsp crushed red pepper flake

Extra virgin olive oil, as needed

1 pound angel hair pasta

1 1/2 c. freshly grated Parmesan cheese, plus more for serving

Kosher salt, to taste

1/2 tsp freshly ground black pepper

How to make Summer Garden Pasta

Step 1: Place the cherry tomatoes, 1/2 c olive oil, garlic, basil, red pepper flake, 1 tsp of salt, and pepper in a large bowl. Cover the bowl and set aside for 4 hours at room temperature.

Step 2: Drizzle olive oil in a large pot with boiling water. Cook the pasta following the package directions until al dente. When done, drain the pasta. To the bowl with the cherry tomatoes, add the pasta followed by the Parmesan and more fresh basil leaves. Then, toss to combine.

Step 3: Serve the Summer Garden Pasta with extra Parmesan. Enjoy!

Summer Garden Pasta

Rebecca Prep time: 10 mins | Inactive: 4 hrs | Serves: 6 If you are searching for another pasta recipe, you have to give this Summer Garden Pasta a try. It… General Recipes Summer Garden Pasta European Print This
Serves: 6 Prep Time: 10 mins
Nutrition facts: 200 calories 20 grams fat
Rating: 5.0/5
( 1 voted )

Ingredients

  • 6 cloves garlic, minced
  • 18 large basil leaves, julienned, plus more for serving
  • 4 pints cherry tomatoes, halved
  • 1/2 tsp crushed red pepper flake
  • Extra virgin olive oil, as needed
  • 1 pound angel hair pasta
  • 1 1/2 c. freshly grated Parmesan cheese, plus more for serving
  • Kosher salt, to taste
  • 1/2 tsp freshly ground black pepper

Instructions

Step 1: Place the cherry tomatoes, 1/2 c olive oil, garlic, basil, red pepper flake, 1 tsp of salt, and pepper in a large bowl. Cover the bowl and set aside for 4 hours at room temperature.

Step 2: Drizzle olive oil in a large pot with boiling water. Cook the pasta following the package directions until al dente. When done, drain the pasta. To the bowl with the cherry tomatoes, add the pasta followed by the Parmesan and more fresh basil leaves. Then, toss to combine.

Step 3: Serve the Summer Garden Pasta with extra Parmesan. Enjoy!

September 12, 2022 0 comment
0 FacebookTwitterPinterestEmail
General Recipes

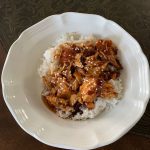
20-Minute Honey Sesame Chicken – Healthy & Delicious!

by Rebecca September 12, 2022
written by Rebecca

Prep time: 5 mins | Cook time: 15 mins | Serves: 4

Healthy and delicious Honey Sesame Chicken ready in less than twenty minutes. This recipe has been one of my favorites and my go-to when I need something easy, quick, and delicious, especially during the busiest days. I love pairing this honey sesame chicken with brown rice (or white rice) and broccolini for a simple, yet filling weeknight meal that even my pickiest eaters love!

Honey Sesame Chicken is one of my husband’s favorite takeouts. I surprised him one day with this homemade recipe and his mind was blown! If you love honey sesame chicken and haven’t tried this easy recipe yet, you should soon! This twenty-minute recipe without a doubt would be your newest favorite!

INGREDIENTS

2 tbsp sesame oil, divided

1 pound boneless, skinless chicken breasts, cut into 1/2” pieces

2 tablespoons cornstarch

1/4 c. soy sauce

1 tsp sriracha

2 cloves garlic, minced

1/2 tsp ground ginger

2 tbsp sesame seeds

2 tbsp honey

Kosher salt and freshly ground black pepper, to taste

Scallions, chopped, for serving

White rice, for serving

How to make 20-Minute Honey Sesame Chicken

Step 1: Place the soy sauce, honey, sriracha, ginger, garlic, sesame seeds, and 1 tbsp of the sesame oil in a medium bowl. Mix well until combined and set aside.

Step 2: Place the in a large bowl. Season with salt and pepper. Then, toss the chicken with cornstarch.

Step 3: Drizzle oil into a hot large skillet over high heat. Add the chicken and fry for about 5 to 6 minutes until golden brown. Pour in the sauce and allow it to simmer for about 3 to 4 minutes or until sticky and the sauce has thickened.

Step 4: Remove from the heat when done and serve the Honey Sesame Chicken immediately over white rice. If desired, sprinkle some scallions and more sesame seeds on top. Enjoy!

20-Minute Honey Sesame Chicken – Healthy & Delicious!

Rebecca Prep time: 5 mins | Cook time: 15 mins | Serves: 4 Healthy and delicious Honey Sesame Chicken ready in less than twenty minutes. This recipe has been one of… General Recipes 20-Minute Honey Sesame Chicken – Healthy & Delicious! European Print This
Serves: 4 Prep Time: 5 mins Cooking Time: 15 mins 15 mins
Nutrition facts: 200 calories 20 grams fat
Rating: 5.0/5
( 1 voted )

Ingredients

  • 2 tbsp sesame oil, divided
  • 1 pound boneless, skinless chicken breasts, cut into 1/2” pieces
  • 2 tablespoons cornstarch
  • 1/4 c. soy sauce
  • 1 tsp sriracha
  • 2 cloves garlic, minced
  • 1/2 tsp ground ginger
  • 2 tbsp sesame seeds
  • 2 tbsp honey
  • Kosher salt and freshly ground black pepper, to taste
  • Scallions, chopped, for serving
  • White rice, for serving

Instructions

Step 1: Place the soy sauce, honey, sriracha, ginger, garlic, sesame seeds, and 1 tbsp of the sesame oil in a medium bowl. Mix well until combined and set aside.

Step 2: Place the in a large bowl. Season with salt and pepper. Then, toss the chicken with cornstarch.

Step 3: Drizzle oil into a hot large skillet over high heat. Add the chicken and fry for about 5 to 6 minutes until golden brown. Pour in the sauce and allow it to simmer for about 3 to 4 minutes or until sticky and the sauce has thickened.

Step 4: Remove from the heat when done and serve the Honey Sesame Chicken immediately over white rice. If desired, sprinkle some scallions and more sesame seeds on top. Enjoy!

September 12, 2022 0 comment
0 FacebookTwitterPinterestEmail
General Recipes

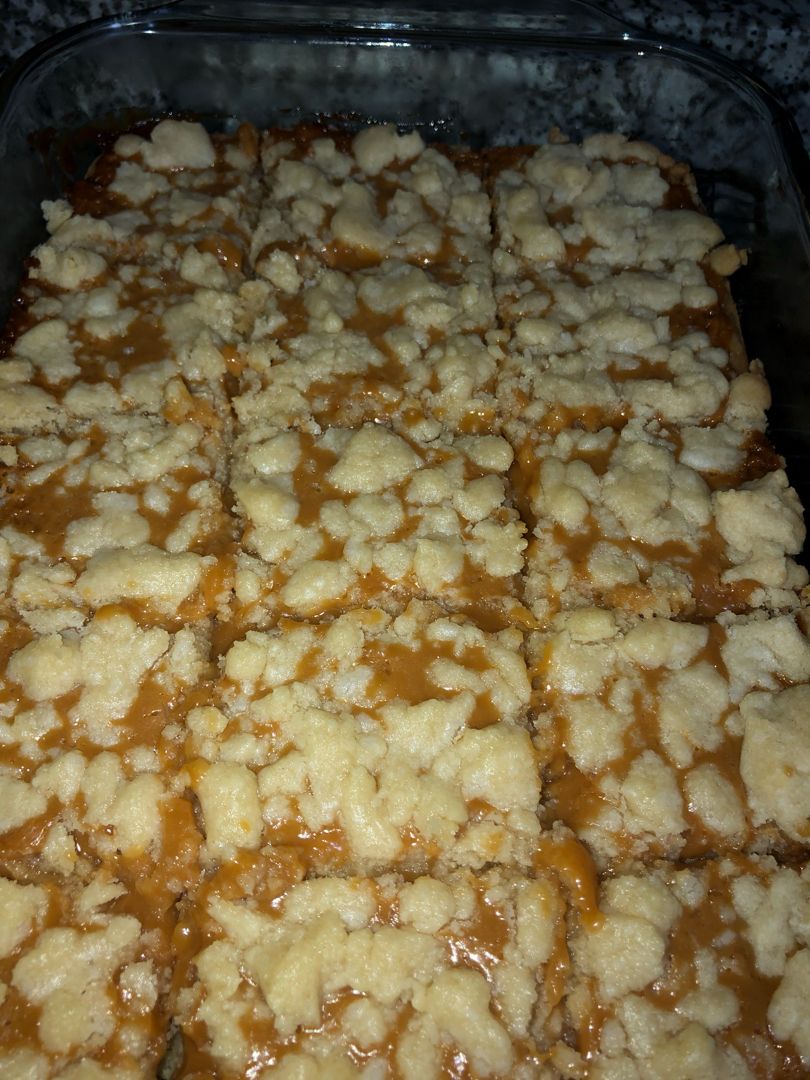
Salted Caramel Butter Bars: Easy Recipe to Make

by Rebecca September 12, 2022
written by Rebecca

Total time: 1 hr | Serves: 12-16

I am dying for another salted caramel dessert! Thank goodness I stumbled upon this easy Salted Caramel Butter Bars recipe. These bad boys are amazing! The buttery crust and the rich and creamy salted caramel filling are to die for!

INGREDIENTS

Crust/Topping:

1 lb (4 sticks) salted butter, room temperature

1 1/4 c. powdered sugar

4 c. all-purpose flour

1 1/2 tbsp vanilla extract

3/4 c. sugar

Filling:

1/3 c. heavy cream

50-60 caramel candies, wrappers removed (14 ounces bag)

1/2 tsp vanilla extract

1/2 tbsp sea salt

How to make Salted Caramel Butter Bars

Step 1: Prepare the oven. Preheat it to 350 degrees F. Using a nonstick spray, lightly grease a 9 x 13-inch dish.

Step 2: In a large bowl, place the butter and sugars. Beat for about 3 to 5 minutes until lightened and fluffy. Add the vanilla extract and stir. Next, slowly beat in the flour until just combined.

Step 3: Into the prepared baking dish, gently press 1/3 of the dough. Place in the preheated oven and bake for about 20 minutes.

Step 4: Tightly wrap the rest of the dough in plastic wrap and keep it in the fridge.

Step 5: Take the crust out of the oven and allow it to cool.

Step 6: In a large, microwave-safe bowl, place the unwrapped caramels and heavy cream. Heat in the microwave for 1 minute. Vigorously stir until smooth. You can microwave in 30-second increments if the mixture is not yet completely melted, stirring in between until smooth. Then, whisk in the vanilla extract. Over the cooled crust, pour the caramel and sprinkle with some sea salt.

Step 7: Take the chilled dough out of the fridge. Over the caramel, evenly distribute the crumble pieces.

Step 8: Return to the preheated oven and bake for another 26 to 28 minutes or until the top is light golden brown. When done, remove from the oven and allow the Salted Caramel Butter Bar to cool.

Step 9: Once the bar is cooled, cut it into squares.

Salted Caramel Butter Bars: Easy Recipe to Make

Rebecca Total time: 1 hr | Serves: 12-16 I am dying for another salted caramel dessert! Thank goodness I stumbled upon this easy Salted Caramel Butter Bars recipe. These bad boys… General Recipes Salted Caramel Butter Bars: Easy Recipe to Make European Print This
Serves: 12-16
Nutrition facts: 200 calories 20 grams fat
Rating: 5.0/5
( 1 voted )

Ingredients

  • Crust/Topping:
  • 1 lb (4 sticks) salted butter, room temperature
  • 1 1/4 c. powdered sugar
  • 4 c. all-purpose flour
  • 1 1/2 tbsp vanilla extract
  • 3/4 c. sugar
  • Filling:
  • 1/3 c. heavy cream
  • 50-60 caramel candies, wrappers removed (14 ounces bag)
  • 1/2 tsp vanilla extract
  • 1/2 tbsp sea salt

Instructions

Step 1: Prepare the oven. Preheat it to 350 degrees F. Using a nonstick spray, lightly grease a 9 x 13-inch dish.

Step 2: In a large bowl, place the butter and sugars. Beat for about 3 to 5 minutes until lightened and fluffy. Add the vanilla extract and stir. Next, slowly beat in the flour until just combined.

Step 3: Into the prepared baking dish, gently press 1/3 of the dough. Place in the preheated oven and bake for about 20 minutes.

Step 4: Tightly wrap the rest of the dough in plastic wrap and keep it in the fridge.

Step 5: Take the crust out of the oven and allow it to cool.

Step 6: In a large, microwave-safe bowl, place the unwrapped caramels and heavy cream. Heat in the microwave for 1 minute. Vigorously stir until smooth. You can microwave in 30-second increments if the mixture is not yet completely melted, stirring in between until smooth. Then, whisk in the vanilla extract. Over the cooled crust, pour the caramel and sprinkle with some sea salt.

Step 7: Take the chilled dough out of the fridge. Over the caramel, evenly distribute the crumble pieces.

Step 8: Return to the preheated oven and bake for another 26 to 28 minutes or until the top is light golden brown. When done, remove from the oven and allow the Salted Caramel Butter Bar to cool.

Step 9: Once the bar is cooled, cut it into squares.

September 12, 2022 0 comment
0 FacebookTwitterPinterestEmail
General Recipes

Baked Garlic Parmesan Chicken And Potatoes

by Rebecca September 12, 2022
written by Rebecca

I love this delicious one-pan dinner with juicy and tender chicken thighs that are crispy and perfectly seasoned on the outside. These chicken thighs, along with the sauteed spinach and halved potatoes are baked in a luscious butter garlic herb sauce. This is a mouthwatering meal that you can easily prepare at any time!

INGREDIENTS

1 lb baby Dutch potatoes, halved or quartered

6 bone-in chicken thighs (skin-on, optional)

3-4 c. baby spinach, chopped

1 tbsp Italian seasoning

4 tbsp unsalted butter, divided

Fresh parsley, optional

Kosher salt and freshly ground pepper, to taste

Sauce:

1/2 c. half and half

1/2 c. Parmesan cheese, grated

1/4 c. all-purpose flour

1/4 c (1/2 stick) unsalted butter

4 cloves garlic, minced

1/2 tsp dried oregano

1 tsp dried thyme

1 c. low-sodium chicken broth

1 tsp dried basil

How to make Baked Garlic Parmesan Chicken And Potatoes

Step 1: Prepare the oven. Preheat it to 400 degrees. Using nonstick spray or butter, lightly grease a 9 x 13-inch baking dish.

Step 2: In a large pan or skillet, melt 2 tbsp butter over medium-high heat. Once the butter has melted, add the spinach and saute until just wilted. Set aside when done.

Step 3: To the skillet, add the butter and melt over medium heat. Then, add the garlic and cook for about 1 to 2 minutes, stirring often. Next, stir in the flour and continue to cook for another minute or until the Roux has thickened and is golden brown. Gradually stir in the chicken broth until well blended. Add the Parmesan cheese along with the half-and-half. Stir well and cook for an additional 3 to 5 minutes or until the sauce has thickened. Finally, stir in the thyme, basil, and oregano and season with salt & pepper.

Step 4: In the meantime, sprinkle the chicken thighs with salt, pepper, and Italian seasoning. Into the prepared baking dish, place the chicken thighs, skin side-up. Top the chicken thighs with sauteed spinach and halved potatoes. Pour the cream sauce on top.

Step 5: Bake in the preheated oven for about 20 to 25 minutes or until the chicken is completely cooked.

Step 6: You can broil the chicken in the last 5 minutes if desired until the skin is crispy (if the chicken is not already seared).

Step 7: Serve the Baked Garlic Parmesan Chicken And Potatoes immediately. Enjoy!

Baked Garlic Parmesan Chicken And Potatoes

Rebecca I love this delicious one-pan dinner with juicy and tender chicken thighs that are crispy and perfectly seasoned on the outside. These chicken thighs, along with the sauteed spinach and… General Recipes Baked Garlic Parmesan Chicken And Potatoes European Print This
Nutrition facts: 200 calories 20 grams fat
Rating: 5.0/5
( 1 voted )

Ingredients

  • 1 lb baby Dutch potatoes, halved or quartered
  • 6 bone-in chicken thighs (skin-on, optional)
  • 3-4 c. baby spinach, chopped
  • 1 tbsp Italian seasoning
  • 4 tbsp unsalted butter, divided
  • Fresh parsley, optional
  • Kosher salt and freshly ground pepper, to taste
  • Sauce:
  • 1/2 c. half and half
  • 1/2 c. Parmesan cheese, grated
  • 1/4 c. all-purpose flour
  • 1/4 c (1/2 stick) unsalted butter
  • 4 cloves garlic, minced
  • 1/2 tsp dried oregano
  • 1 tsp dried thyme
  • 1 c. low-sodium chicken broth
  • 1 tsp dried basil

Instructions

Step 1: Prepare the oven. Preheat it to 400 degrees. Using nonstick spray or butter, lightly grease a 9 x 13-inch baking dish.

Step 2: In a large pan or skillet, melt 2 tbsp butter over medium-high heat. Once the butter has melted, add the spinach and saute until just wilted. Set aside when done.

Step 3: To the skillet, add the butter and melt over medium heat. Then, add the garlic and cook for about 1 to 2 minutes, stirring often. Next, stir in the flour and continue to cook for another minute or until the Roux has thickened and is golden brown. Gradually stir in the chicken broth until well blended. Add the Parmesan cheese along with the half-and-half. Stir well and cook for an additional 3 to 5 minutes or until the sauce has thickened. Finally, stir in the thyme, basil, and oregano and season with salt & pepper.

Step 4: In the meantime, sprinkle the chicken thighs with salt, pepper, and Italian seasoning. Into the prepared baking dish, place the chicken thighs, skin side-up. Top the chicken thighs with sauteed spinach and halved potatoes. Pour the cream sauce on top.

Step 5: Bake in the preheated oven for about 20 to 25 minutes or until the chicken is completely cooked.

Step 6: You can broil the chicken in the last 5 minutes if desired until the skin is crispy (if the chicken is not already seared).

Step 7: Serve the Baked Garlic Parmesan Chicken And Potatoes immediately. Enjoy!

September 12, 2022 0 comment
0 FacebookTwitterPinterestEmail
Newer Posts
Older Posts

Popular Posts

  • 1

    Crispy Crunchy Parmesan Potatoes

    March 21, 2020
  • 2

    CROCK POT SMOTHERED PORK CHOPS

    March 21, 2020
  • Facebook
  • Twitter

@2019 - All Right Reserved.


Back To Top