Cook it once
  • Home
  • Privacy Policy
  • Recipes
    • KETO
    • LC
    • WW
  • Tips
  • Contact
Cook it once
  • Home
  • Privacy Policy
  • Recipes
    • KETO
    • LC
    • WW
  • Tips
  • Contact
Category:

General Recipes

General Recipes

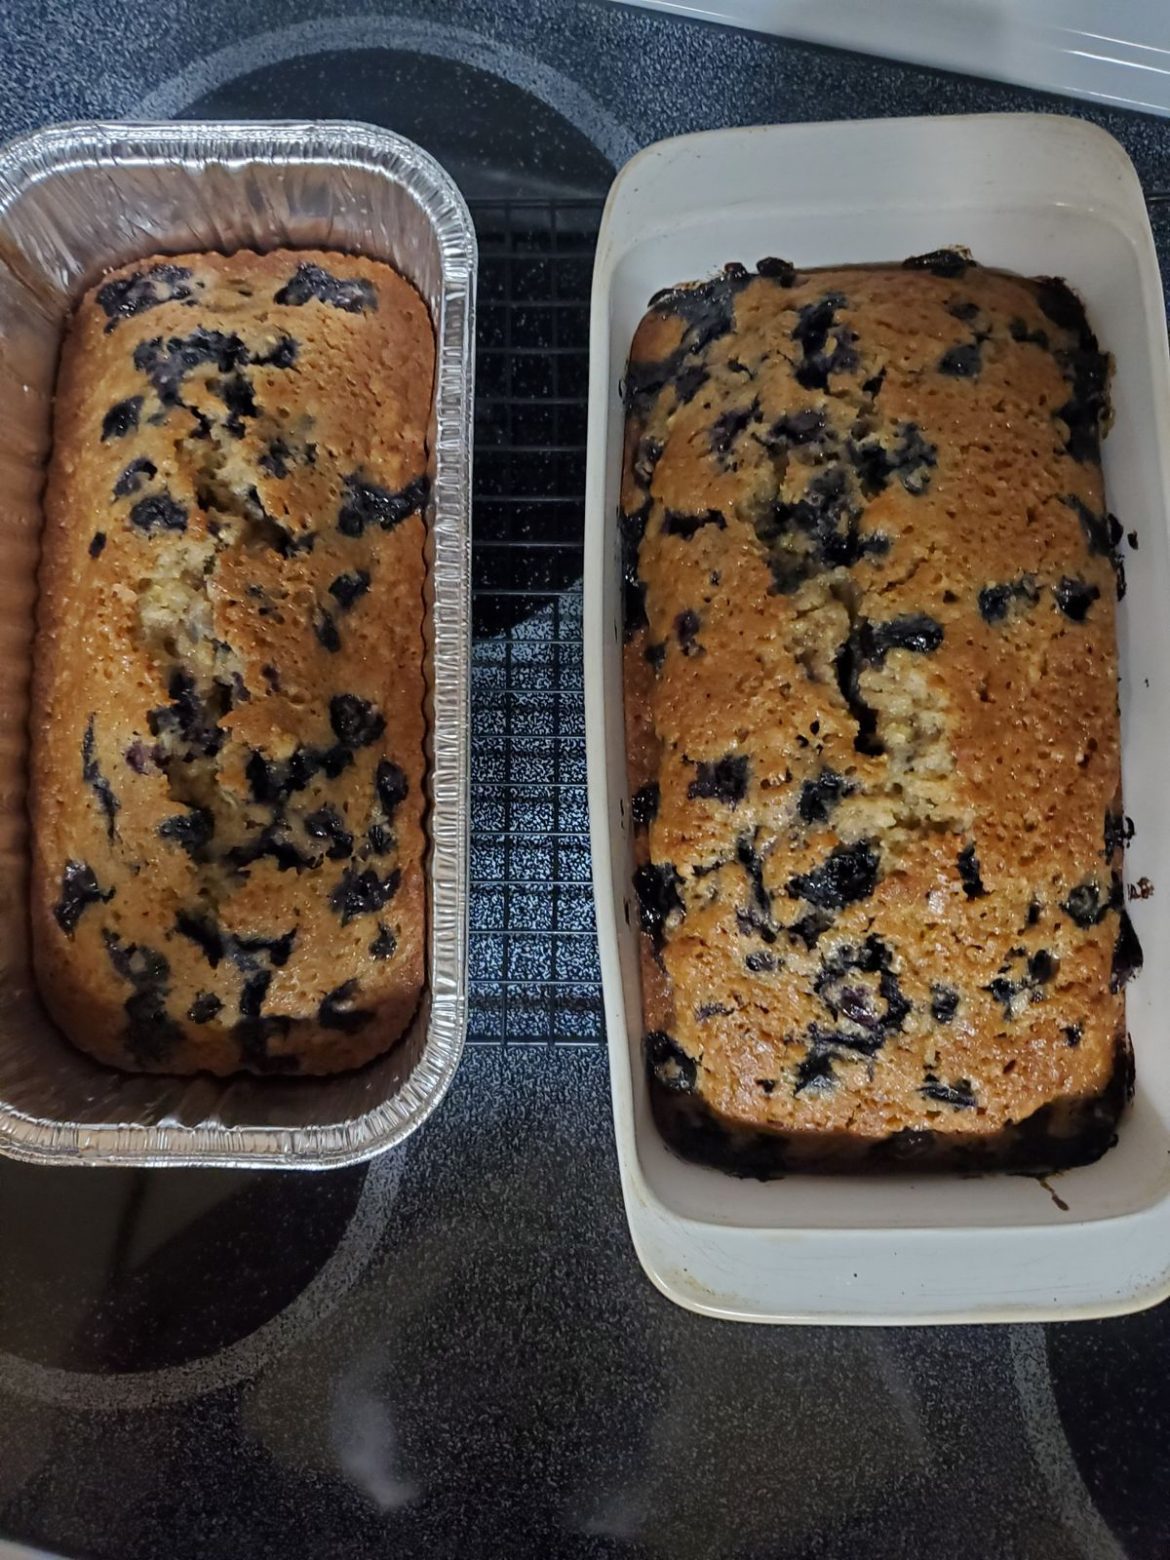
Blueberry Zucchini Bread

by Rebecca September 15, 2022
written by Rebecca

Cooking time: 1 hr 20 mins | Yield: 1 loaf | Serving size: 12

Perfectly sweet, tasty bread, bursting with fresh blueberries. This Blueberry Zucchini Bread is a no-mixer, super easy, and quick one-bowl recipe that you can make at home using just a few basic ingredients. Enjoy juicy blueberries in every bite of this incredibly moist and tender bread. Impress everyone with this no-fuss, delightful bread with layers of deliciousness from the combination of grated zucchini and blueberries with a dash of cinnamon. Not only that, this bread tastes amazing, but this will make your house smell fantastic, too! This Blueberry Zucchini Bread is by far one of my favorite bread and one of the best!

Ingredients

½ c. of canola oil

2 large eggs

2 tsp of lemon extract

½ c. of brown sugar

½ c. of white sugar

1 c. of grated zucchini

½ tsp of baking powder

¾ c. of all-purpose flour

¾ c. of whole wheat

1/8 tsp of baking soda

½ tsp of kosher salt

1 ½ tsp of ground cinnamon

1 c. of fresh blueberries

How to make Blueberry Zucchini Bread

Step 1: Prepare the oven. Preheat it to 350 degrees F. Ready a loaf pan. Grease and set aside.

Step 2: In a bowl, lightly beat the eggs, oil, vanilla, and sugar. Then, fold in the zucchini.

Step 3: Add the flour, salt, baking soda, baking powder, and cinnamon into the bowl and beat again until combined, then gently fold in the blueberries.

Step 4: Into the prepared loaf pan, pour the batter.

Step 5: Place in the preheated oven and bake for about 55 to 65 minutes or until a toothpick inserted in the middle of the cake comes out clean. Remove the bread from the oven when done and allow it to cool for about 20 minutes.

Step 6: Slice and serve. Enjoy!

Tip:

For best results, I recommend using freshly picked blueberries and zucchini.
Blueberry Zucchini Bread

Rebecca Cooking time: 1 hr 20 mins | Yield: 1 loaf | Serving size: 12 Perfectly sweet, tasty bread, bursting with fresh blueberries. This Blueberry Zucchini Bread is a no-mixer, super… General Recipes Blueberry Zucchini Bread European Print This
Serves: 12 Cooking Time: 1 hr 20 mins 1 hr 20 mins
Nutrition facts: 200 calories 20 grams fat
Rating: 5.0/5
( 2 voted )

Ingredients

  • ½ c. of canola oil
  • 2 large eggs
  • 2 tsp of lemon extract
  • ½ c. of brown sugar
  • ½ c. of white sugar
  • 1 c. of grated zucchini
  • ½ tsp of baking powder
  • ¾ c. of all-purpose flour
  • ¾ c. of whole wheat
  • 1/8 tsp of baking soda
  • ½ tsp of kosher salt
  • 1 ½ tsp of ground cinnamon
  • 1 c. of fresh blueberries

Instructions

Step 1: Prepare the oven. Preheat it to 350 degrees F. Ready a loaf pan. Grease and set aside.

Step 2: In a bowl, lightly beat the eggs, oil, vanilla, and sugar. Then, fold in the zucchini.

Step 3: Add the flour, salt, baking soda, baking powder, and cinnamon into the bowl and beat again until combined, then gently fold in the blueberries.

Step 4: Into the prepared loaf pan, pour the batter.

Step 5: Place in the preheated oven and bake for about 55 to 65 minutes or until a toothpick inserted in the middle of the cake comes out clean. Remove the bread from the oven when done and allow it to cool for about 20 minutes.

Step 6: Slice and serve. Enjoy!

Notes

For best results, I recommend using freshly picked blueberries and zucchini.
September 15, 2022 0 comment
0 FacebookTwitterPinterestEmail
General Recipes

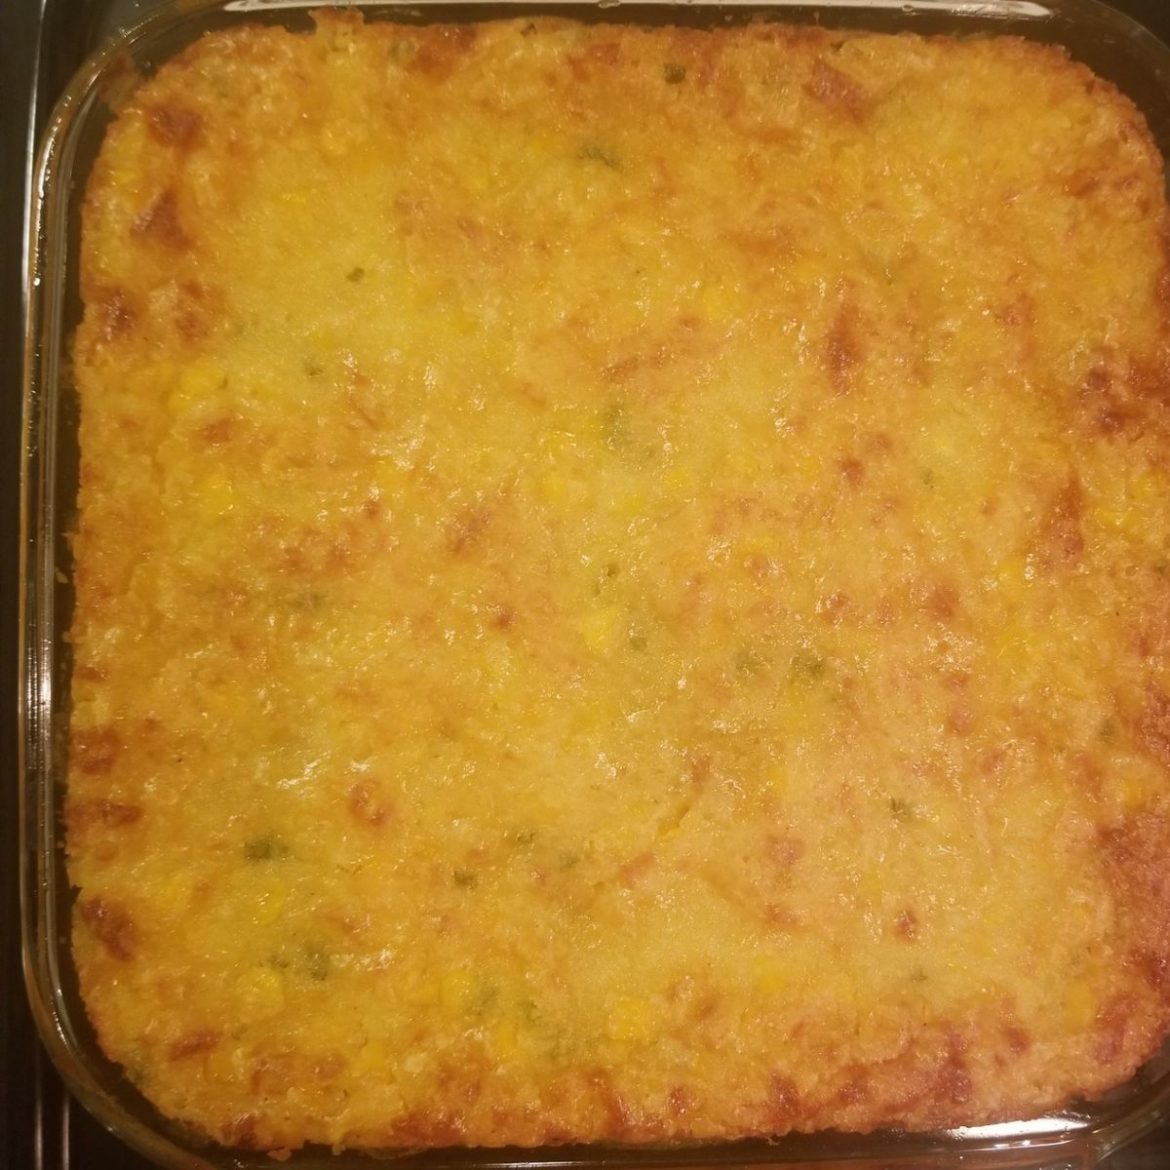
Cream Cheese Corn Casserole: A Delicious Comfort Food Recipe

by Rebecca September 14, 2022
written by Rebecca

Prep Time: 5 mins | Cook Time: 20 mins | Total Time: 25 mins | Yield: 6 Servings

I’ve been cooking this Cream Cheese Corn Casserole forever! It is something that’s been a part of my life. Now, allow me to share it with you as well! The ingredients for this casserole are very simple. I’m pretty sure you already have them right now! In less than 30 minutes, you can enjoy this delicious casserole! With 6 servings, everyone is going to taste just how perfect this is! It is the perfect balance of sweet and savory! The corn is the star of this dish. It is simply the best! Try this recipe now, and prepare to fall in love with each bite. Enjoy!

Ingredients:

1/4 tsp black pepper

1 (18 ounces) bag frozen corn, thawed

1/3 c milk

1 c sharp cheddar cheese, grated

4 tbsp butter

1/4 tsp cayenne pepper (optional)

1/2 tsp salt

1 (8 ounces) package of cream cheese, softened and cubed

Directions:

Prepare the oven and preheat to 175 degrees C or 350 degrees F.

Apply cooking spray to a 2-quart baking dish.

Place a medium pot on the stove and turn the heat to low.

Add butter and cream cheese, then allow them to melt.

Add the milk and stir until well blended. Season the mixture with cayenne pepper, salt, and pepper.

Add the corn and stir until well incorporated.

Transfer the mixture to the prepared baking dish and spread it evenly.

Sprinkle the grated cheddar cheese over the casserole.

Place the baking dish in the preheated oven and bake the casserole in the preheated oven and bake the casserole for 20 minutes or until done.

Remove from the oven and allow it to rest for a few minutes at room temperature.

Serve warm and enjoy!

Cream Cheese Corn Casserole: A Delicious Comfort Food Recipe

Rebecca Prep Time: 5 mins | Cook Time: 20 mins | Total Time: 25 mins | Yield: 6 Servings I’ve been cooking this Cream Cheese Corn Casserole forever! It is something… General Recipes Cream Cheese Corn Casserole: A Delicious Comfort Food Recipe European Print This
Serves: 6 Prep Time: 5 mins Cooking Time: 20 mins 20 mins
Nutrition facts: 200 calories 20 grams fat
Rating: 5.0/5
( 1 voted )

Ingredients

  • 1/4 tsp black pepper
  • 1 (18 ounces) bag frozen corn, thawed
  • 1/3 c milk
  • 1 c sharp cheddar cheese, grated
  • 4 tbsp butter
  • 1/4 tsp cayenne pepper (optional)
  • 1/2 tsp salt
  • 1 (8 ounces) package of cream cheese, softened and cubed

Instructions

Prepare the oven and preheat to 175 degrees C or 350 degrees F.

Apply cooking spray to a 2-quart baking dish.

Place a medium pot on the stove and turn the heat to low.

Add butter and cream cheese, then allow them to melt.

Add the milk and stir until well blended. Season the mixture with cayenne pepper, salt, and pepper.

Add the corn and stir until well incorporated.

Transfer the mixture to the prepared baking dish and spread it evenly.

Sprinkle the grated cheddar cheese over the casserole.

Place the baking dish in the preheated oven and bake the casserole in the preheated oven and bake the casserole for 20 minutes or until done.

Remove from the oven and allow it to rest for a few minutes at room temperature.

Serve warm and enjoy!

September 14, 2022 0 comment
0 FacebookTwitterPinterestEmail
General Recipes

Holiday Maraschino Cherry Shortbread Cookies

by Rebecca September 14, 2022
written by Rebecca

Cherries made these cookies extra special! They are the perfect treats to serve to your loved ones today! With simple ingredients and easy steps, this recipe is one to try. Enjoy!

Ingredients:

3/4 c maraschino cherries, chopped – it is important to spread cherries on a paper towel after chopping to get all the extra

liquid out or you can use dried maraschino cherries

1/2 tablespoon vanilla extract

1/2 c powdered sugar

2/3 c chocolate chips (mini or regular)

1 c unsalted butter, room temperature

1/2 teaspoon salt

2 c all-purpose flour

Directions:

Chop the cherries into small cuts, then put them on paper towels to remove any excess water.

Add salt and flour into a mixing bowl, then whisk until well incorporated.

In the bowl of a stand mixer, add 1/2 cup of powdered sugar and 1 cup of unsalted butter. Beat until well incorporated.

Add the vanilla and stir until well blended.

Add the flour mixture, then beat again until well blended.

Add the cherries and chocolate chips, then stir until well incorporated.

Roll the dough to shape it into a log, then wrap it with plastic. Place it in the fridge to chill for about an hour or two.

Prepare the oven and preheat to 325 degrees F.

Line with parchment paper a baking sheet.

Remove the dough from the fridge and the wrapper. Slice it into 1/4-inch pieces. Place them onto the prepared baking sheet.

Make sure to leave a small space between each slice.

Place them in the preheated oven and bake for about 18 to 20 minutes.

Turn the pan after about 10 minutes of baking.

Remove the cookies from the oven and allow them to cool for a few minutes at room temperature.

Serve and enjoy!

Notes:

Make sure to chill the dough before baking it.

You can store the dough for about 3 to 4 months. Defrost well before baking it.

Holiday Maraschino Cherry Shortbread Cookies

Rebecca Cherries made these cookies extra special! They are the perfect treats to serve to your loved ones today! With simple ingredients and easy steps, this recipe is one to try.… General Recipes Holiday Maraschino Cherry Shortbread Cookies European Print This
Nutrition facts: 200 calories 20 grams fat
Rating: 5.0/5
( 1 voted )

Ingredients

  • 3/4 c maraschino cherries, chopped – it is important to spread cherries on a paper towel after chopping to get all the extra
  • liquid out or you can use dried maraschino cherries
  • 1/2 tablespoon vanilla extract
  • 1/2 c powdered sugar
  • 2/3 c chocolate chips (mini or regular)
  • 1 c unsalted butter, room temperature
  • 1/2 teaspoon salt
  • 2 c all-purpose flour

Instructions

Chop the cherries into small cuts, then put them on paper towels to remove any excess water.

Add salt and flour into a mixing bowl, then whisk until well incorporated.

In the bowl of a stand mixer, add 1/2 cup of powdered sugar and 1 cup of unsalted butter. Beat until well incorporated.

Add the vanilla and stir until well blended.

Add the flour mixture, then beat again until well blended.

Add the cherries and chocolate chips, then stir until well incorporated.

Roll the dough to shape it into a log, then wrap it with plastic. Place it in the fridge to chill for about an hour or two.

Prepare the oven and preheat to 325 degrees F.

Line with parchment paper a baking sheet.

Remove the dough from the fridge and the wrapper. Slice it into 1/4-inch pieces. Place them onto the prepared baking sheet.

Make sure to leave a small space between each slice.

Place them in the preheated oven and bake for about 18 to 20 minutes.

Turn the pan after about 10 minutes of baking.

Remove the cookies from the oven and allow them to cool for a few minutes at room temperature.

Serve and enjoy!

Notes

Make sure to chill the dough before baking it. You can store the dough for about 3 to 4 months. Defrost well before baking it.

September 14, 2022 0 comment
0 FacebookTwitterPinterestEmail
General Recipes

Crockpot Pierogi Casserole with Kielbasa

by Rebecca September 14, 2022
written by Rebecca

You can cook this Pierogi Casserole with Kielbasa in the crockpot or the oven! This casserole is our favorite! I always make this on weekends when everyone is around. Incredible flavors in one casserole, this recipe is surely a must-try. Enjoy!

Ingredients:

1 8-ounces block of cream cheese

1 c shredded cheddar cheese

1 lb. kielbasa – sliced

salt & pepper to taste

4 c chicken broth

3 boxes of Cheddar Pierogi (16 ounces each) – Regular size is preferable

Directions:

Crockpot:

In a crockpot, add everything from the cream cheese to the Cheddar Pierogi.

Cover the crockpot and cook everything for about 3 hours on a high setting or 6 hours on a low setting.

Oven:

Prepare the oven and preheat to about 175 degrees C or 350 degrees F.

Apply cooking spray to a 13×9-inch baking dish.

Place a saucepan pan on the stove and turn the heat to medium.

Add the cream cheese and chicken broth, then stir until well blended. Simmer for a few minutes until the cream cheese has melted.

Place a layer of the frozen pierogis on the bottom of the prepared baking dish.

Top the pierogis with one layer of the kielbasa followed by cream sauce, and shredded cheese. Repeat the process with the rest of the ingredients until everything is arranged in layers.

Place it in the preheated oven and bake for about 30 to 45 minutes or until the cheese has melted completely and turned golden brown.

Remove from the oven.

Serve and enjoy!

Notes

Place any leftovers in an airtight container, then place them in the fridge. They can last up to 4 days.

I always serve this Crockpot Pierogi Casserole with Kielbasa with crusty bread or fresh green salad.

Feel free to use any flavor of pierogi in this recipe.

You cook this in the oven or the crockpot.

Crockpot Pierogi Casserole with Kielbasa

Rebecca You can cook this Pierogi Casserole with Kielbasa in the crockpot or the oven! This casserole is our favorite! I always make this on weekends when everyone is around. Incredible… General Recipes Crockpot Pierogi Casserole with Kielbasa European Print This
Nutrition facts: 200 calories 20 grams fat
Rating: 5.0/5
( 1 voted )

Ingredients

  • 1 8-ounces block of cream cheese
  • 1 c shredded cheddar cheese
  • 1 lb. kielbasa – sliced
  • salt & pepper to taste
  • 4 c chicken broth
  • 3 boxes of Cheddar Pierogi (16 ounces each) – Regular size is preferable

Instructions

Crockpot:

In a crockpot, add everything from the cream cheese to the Cheddar Pierogi.

Cover the crockpot and cook everything for about 3 hours on a high setting or 6 hours on a low setting.

Oven:

Prepare the oven and preheat to about 175 degrees C or 350 degrees F.

Apply cooking spray to a 13x9-inch baking dish.

Place a saucepan pan on the stove and turn the heat to medium.

Add the cream cheese and chicken broth, then stir until well blended. Simmer for a few minutes until the cream cheese has melted.

Place a layer of the frozen pierogis on the bottom of the prepared baking dish.

Top the pierogis with one layer of the kielbasa followed by cream sauce, and shredded cheese. Repeat the process with the rest of the ingredients until everything is arranged in layers.

Place it in the preheated oven and bake for about 30 to 45 minutes or until the cheese has melted completely and turned golden brown.

Remove from the oven.

Serve and enjoy!

Notes

Place any leftovers in an airtight container, then place them in the fridge. They can last up to 4 days. I always serve this Crockpot Pierogi Casserole with Kielbasa with crusty bread or fresh green salad. Feel free to use any flavor of pierogi in this recipe. You cook this in the oven or the crockpot.

September 14, 2022 0 comment
0 FacebookTwitterPinterestEmail
General Recipes

CHEESY FIESTA CORN CASSEROLE

by Rebecca September 14, 2022
written by Rebecca

Prep Time: 10 mins | Cook Time: 30 mins | Total Time: 40 mins | Yield: 8 to 10 Servings

This incredible casserole is ready in less than an hour! This is what I love serving whenever my family and friends would come over for lunch or dinner. It just goes very well with any meal! Also, it is very easy to prepare. All you need to do is to follow these steps, and you are good to go! You will be done in no time. Enjoy!

Ingredients:

2 (15.25 ounces) cans of whole kernel Mexicorn or Fiesta Corn with red & green peppers, drained

2 cups shredded cheddar cheese

2 (15.25 ounces) cans of whole kernel corn, well-drained

2 tablespoons all-purpose flour

2/3 cup sliced green onion, divided

4 ounces cream cheese, softened

1 teaspoon hot sauce

1 cup shredded Monterey Jack cheese

1/2 tablespoon to 1 tablespoon of chopped pickled jalapeno {about 4 to 6 slices}

3/4 cup milk

chopped fresh cilantro for garnish {optional}

1/2 teaspoon black pepper

Directions:

Prepare the oven and preheat to 175 degrees C or 350 degrees F.

In a mixing bowl, add the shredded cheeses, pepper, and flour. Whisk everything until well incorporated.

In a separate mixing bowl, add cream cheese, chopped jalapenos, milk, 1/3 cup of green onions, and hot sauce. Stir everything until well blended.

Transfer the mixture to a 9×13-inch baking dish and spread it evenly.

Add the cheese mixture and corn into the baking dish. Stir until well incorporated. Cover the baking dish with the lid or with foil.

Place the casserole in the preheated oven and bake the casserole for about 30 minutes.

Remove the cover and sprinkle the green onions over the casserole.

Put it back in the oven and bake for 5 more minutes. Remove from the oven.

Sprinkle freshly chopped cilantro on top to garnish.

Serve right away. Enjoy!

CHEESY FIESTA CORN CASSEROLE

Rebecca Prep Time: 10 mins | Cook Time: 30 mins | Total Time: 40 mins | Yield: 8 to 10 Servings This incredible casserole is ready in less than an hour!… General Recipes CHEESY FIESTA CORN CASSEROLE European Print This
Serves: 8-10 Prep Time: 10 mins Cooking Time: 30 mins 30 mins
Nutrition facts: 200 calories 20 grams fat
Rating: 5.0/5
( 1 voted )

Ingredients

  • 2 (15.25 ounces) cans of whole kernel Mexicorn or Fiesta Corn with red & green peppers, drained
  • 2 cups shredded cheddar cheese
  • 2 (15.25 ounces) cans of whole kernel corn, well-drained
  • 2 tablespoons all-purpose flour
  • 2/3 cup sliced green onion, divided
  • 4 ounces cream cheese, softened
  • 1 teaspoon hot sauce
  • 1 cup shredded Monterey Jack cheese
  • 1/2 tablespoon to 1 tablespoon of chopped pickled jalapeno {about 4 to 6 slices}
  • 3/4 cup milk
  • chopped fresh cilantro for garnish {optional}
  • 1/2 teaspoon black pepper

Instructions

Prepare the oven and preheat to 175 degrees C or 350 degrees F.

In a mixing bowl, add the shredded cheeses, pepper, and flour. Whisk everything until well incorporated.

In a separate mixing bowl, add cream cheese, chopped jalapenos, milk, 1/3 cup of green onions, and hot sauce. Stir everything until well blended.

Transfer the mixture to a 9×13-inch baking dish and spread it evenly.

Add the cheese mixture and corn into the baking dish. Stir until well incorporated. Cover the baking dish with the lid or with foil.

Place the casserole in the preheated oven and bake the casserole for about 30 minutes.

Remove the cover and sprinkle the green onions over the casserole.

Put it back in the oven and bake for 5 more minutes. Remove from the oven.

Sprinkle freshly chopped cilantro on top to garnish.

Serve right away. Enjoy!

September 14, 2022 0 comment
0 FacebookTwitterPinterestEmail
General Recipes

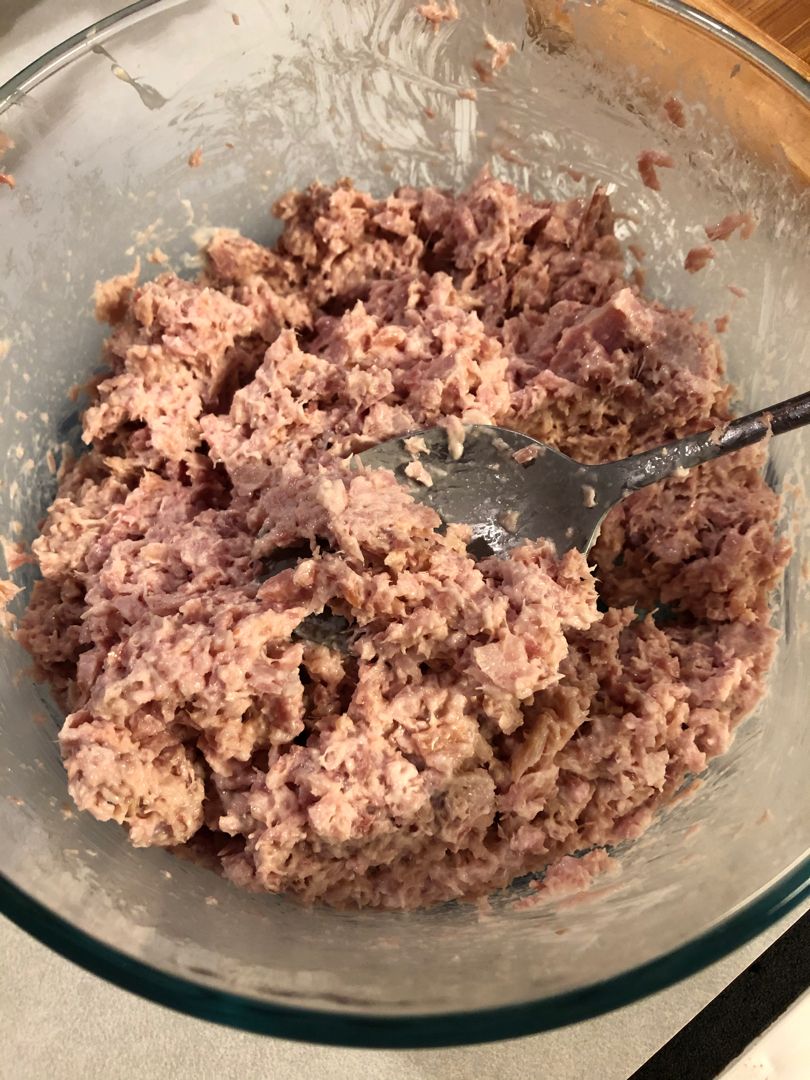
Deviled Ham Salad: A Southern Summer Favorite

by Rebecca September 14, 2022
written by Rebecca

Total Time: 10 mins | Yield: 4 Servings

This Deviled Ham Salad may not look as appetizing as some salads, but it is worth the try! I’m telling you; it is so much more than how it appears! The best thing about this is that it is ready in just 10 minutes! Although you can serve it right away, I highly suggest you let it sit in the fridge for a couple of minutes or hours. It is best served chilled! Trust me on this one and thank me later! It is perfect for any sandwich of your choice. What are you waiting for? It is time to go to your kitchen and start prepping! This recipe is worth all your time and effort today! By the way, this recipe can yield up to 4 people. Perfect for snacks for your kids or pretty much anything! If you are serving more than 4 people, be sure to adjust the ingredients accordingly. Enjoy!

Ingredients:

1/2 tsp apple cider vinegar

1/4 tsp hot sauce

Kosher salt and freshly ground black pepper, to taste

1/2 c mayonnaise

4 c diced ham

1 tbsp Worcestershire

2 tsp Dijon mustard

Directions:

Add ham into the food processor, then pulse a few times until it is chopped finely.

Add mustard, mayonnaise, vinegar, hot sauce, and Worcestershire sauce into a large mixing bowl. Stir everything until well blended.

Add the finely chopped ham into the bowl with the mayonnaise mixture, then stir again until well incorporated.

Add more seasonings if needed. Make sure to taste first before adding anything.

Place it in the fridge to chill for a few minutes or hours.

Serve chilled and enjoy!

Note:

Place any leftovers in an airtight container, then place them in the fridge.

Deviled Ham Salad: A Southern Summer Favorite

Rebecca Total Time: 10 mins | Yield: 4 Servings This Deviled Ham Salad may not look as appetizing as some salads, but it is worth the try! I’m telling you; it… General Recipes Deviled Ham Salad: A Southern Summer Favorite European Print This
Serves: 4
Nutrition facts: 200 calories 20 grams fat
Rating: 5.0/5
( 1 voted )

Ingredients

  • 1/2 tsp apple cider vinegar
  • 1/4 tsp hot sauce
  • Kosher salt and freshly ground black pepper, to taste
  • 1/2 c mayonnaise
  • 4 c diced ham
  • 1 tbsp Worcestershire
  • 2 tsp Dijon mustard

Instructions

Add ham into the food processor, then pulse a few times until it is chopped finely.

Add mustard, mayonnaise, vinegar, hot sauce, and Worcestershire sauce into a large mixing bowl. Stir everything until well blended.

Add the finely chopped ham into the bowl with the mayonnaise mixture, then stir again until well incorporated.

Add more seasonings if needed. Make sure to taste first before adding anything.

Place it in the fridge to chill for a few minutes or hours.

Serve chilled and enjoy!

Notes

Place any leftovers in an airtight container, then place them in the fridge.

September 14, 2022 0 comment
0 FacebookTwitterPinterestEmail
General Recipes

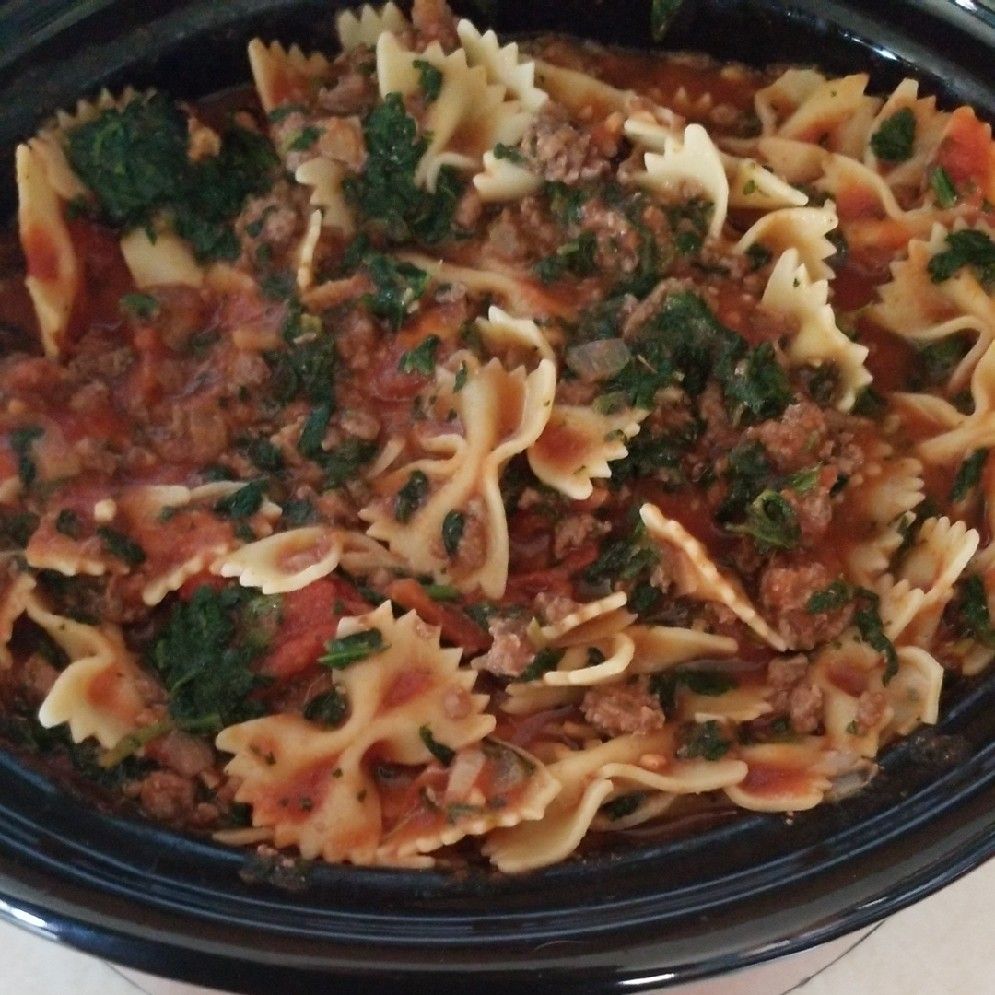
CROCKPOT BOWTIE CASSEROLE

by Rebecca September 14, 2022
written by Rebecca

Total Time: 7 hrs 20 mins | Yield: 3 Servings

I can’t count how many times I’ve cooked this Crockpot Bow tie Casserole! I learned about this recipe a couple of years ago, and I’m still in love with it to this day! It is such a simple recipe yet full of incredible flavors! If you have time to spare before any meal, then this recipe is for you! It may take 7 hours to cook, but I promise you that it is worth the wait! This recipe can yield up to 3 people. Make sure to double the ingredients if you are serving more than that. Enjoy!

Ingredients:

16 ounces bow tie pasta, cooked

½ c Parmesan cheese, shredded

1½ c mozzarella, shredded

1 small onion, chopped

1 tsp Italian seasoning

1 clove of garlic, minced

1 can (15 ounces) tomato sauce

1½ lbs. lean ground beef

1 can (15 ounces) stewed tomatoes

10 ounces frozen spinach, thawed

1 tsp oregano

Salt and pepper, to taste

Directions:

Place a skillet on the stove and turn the heat to medium-high.

Add ground beef, then cook for a few minutes until crumbly and brown.

Add the garlic and onion, then sauté for a few minutes until aromatic and soft.

Transfer the contents of the skillet into a crockpot.

Add the seasonings, sauce, and tomatoes into the crockpot as well. Stir everything until well incorporated.

Cover and seal the crockpot, then cook everything for about 6 to 7 hours on a low setting.

Open the crockpot, then add 1/2 Parmesan cheese, spinach, 1 cup of mozzarella cheese, and pasta. Stir until well combined.

Cover and seal the crockpot again and cook everything for 30 more minutes over high heat.

Sprinkle the rest of the mozzarella cheese on top.

Serve right away. Enjoy!

CROCKPOT BOWTIE CASSEROLE

Rebecca Total Time: 7 hrs 20 mins | Yield: 3 Servings I can’t count how many times I’ve cooked this Crockpot Bow tie Casserole! I learned about this recipe a couple… General Recipes CROCKPOT BOWTIE CASSEROLE European Print This
Serves: 3
Nutrition facts: 200 calories 20 grams fat
Rating: 5.0/5
( 1 voted )

Ingredients

  • 16 ounces bow tie pasta, cooked
  • ½ c Parmesan cheese, shredded
  • 1½ c mozzarella, shredded
  • 1 small onion, chopped
  • 1 tsp Italian seasoning
  • 1 clove of garlic, minced
  • 1 can (15 ounces) tomato sauce
  • 1½ lbs. lean ground beef
  • 1 can (15 ounces) stewed tomatoes
  • 10 ounces frozen spinach, thawed
  • 1 tsp oregano
  • Salt and pepper, to taste

Instructions

Place a skillet on the stove and turn the heat to medium-high.

Add ground beef, then cook for a few minutes until crumbly and brown.

Add the garlic and onion, then sauté for a few minutes until aromatic and soft.

Transfer the contents of the skillet into a crockpot.

Add the seasonings, sauce, and tomatoes into the crockpot as well. Stir everything until well incorporated.

Cover and seal the crockpot, then cook everything for about 6 to 7 hours on a low setting.

Open the crockpot, then add 1/2 Parmesan cheese, spinach, 1 cup of mozzarella cheese, and pasta. Stir until well combined.

Cover and seal the crockpot again and cook everything for 30 more minutes over high heat.

Sprinkle the rest of the mozzarella cheese on top.

Serve right away. Enjoy!

September 14, 2022 0 comment
0 FacebookTwitterPinterestEmail
General Recipes

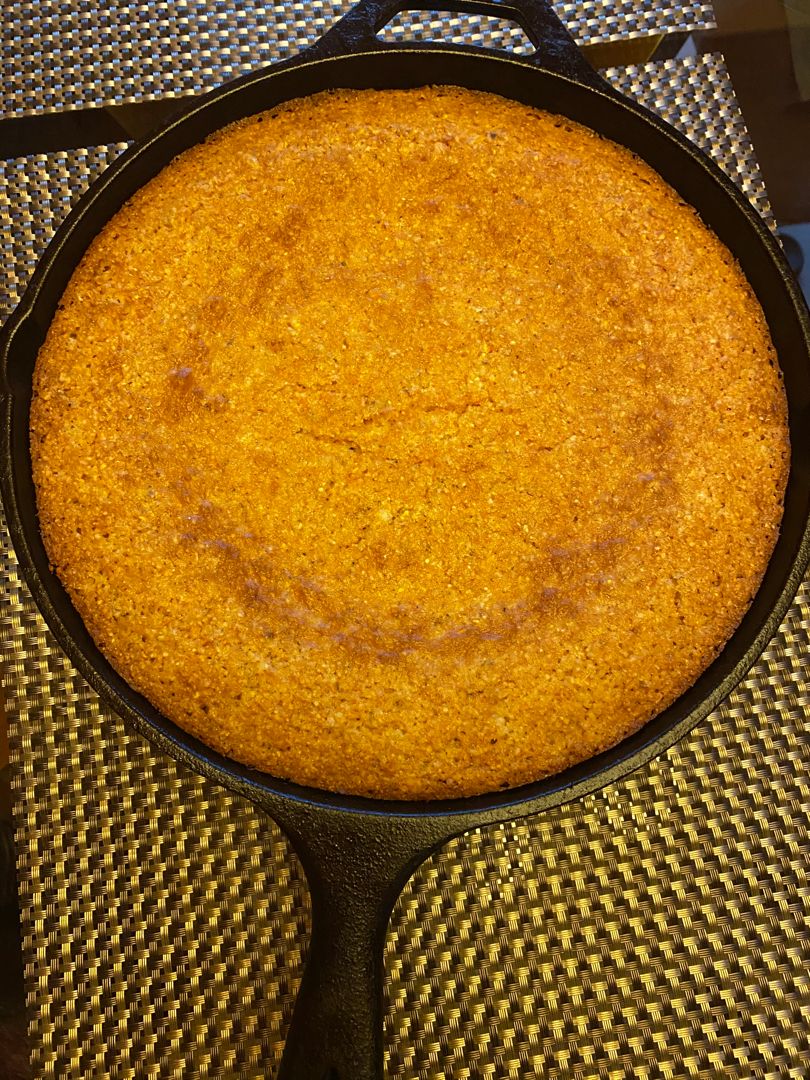
MOIST BUTTERMILK CORNBREAD WITH CREAM-STYLE CORN

by Rebecca September 14, 2022
written by Rebecca

Prep Time: 10 mins | Cook Time: 24 mins | Total Time: 45 mins | Yield: 8 Servings

This will be the best cornbread you will ever have! In just 45 minutes, this delicious treat is ready to be devoured! I like eating this with my favorite cup of coffee. The best thing about this is that you can serve it pretty much any time of the day! Give this recipe a try now!

Ingredients:

4 tbsp melted unsalted butter

Cooking spray (to grease baking pan)

1 tbsp sugar (this is optional. cream-style corn will add desired sweetening)

1 c buttermilk

½ tsp baking soda

1 tsp salt

2 c yellow or white cornmeal

3 large Eggs

1 c all-purpose flour

15 oz. of cream-style corn

3 tsp baking powder

Directions:

Prepare the oven and preheat to 425 degrees F.

Apply cooking spray to a 9-inch square baking pan.

In a mixing bowl, add sugar, salt, baking powder, soda, cornmeal, and flour. Whisk everything until well incorporated.

In a separate mixing bowl, add the eggs and buttermilk. Beat until well blended.

Add the melted butter and cream-style corn, then stir until well combined.

Transfer the wet ingredients into the bowl with the dry ingredients, then stir until well incorporated.

Pour the batter into the prepared baking pan and spread it evenly.

Place the pan in the preheated oven and bake the batter for about 25 minutes or until the top turns golden brown.

Remove from the oven and allow it to cool for a few minutes at room temperature.

Serve and enjoy!

Notes:

Feel free to use your homemade buttermilk for this recipe. Just combined 15 tbsp of milk and 1 tbsp of lemon juice in a mixing bowl. Let it rest for at least 10 minutes at room temperature before mixing it with the rest of the ingredients.

Feel free to add cheddar cheese, onions, or chipotle powder to this recipe.

MOIST BUTTERMILK CORNBREAD WITH CREAM-STYLE CORN

Rebecca Prep Time: 10 mins | Cook Time: 24 mins | Total Time: 45 mins | Yield: 8 Servings This will be the best cornbread you will ever have! In just… General Recipes MOIST BUTTERMILK CORNBREAD WITH CREAM-STYLE CORN European Print This
Serves: 8 Prep Time: 10 mins Cooking Time: 24 mins 24 mins
Nutrition facts: 200 calories 20 grams fat
Rating: 5.0/5
( 1 voted )

Ingredients

  • 4 tbsp melted unsalted butter
  • Cooking spray (to grease baking pan)
  • 1 tbsp sugar (this is optional. cream-style corn will add desired sweetening)
  • 1 c buttermilk
  • ½ tsp baking soda
  • 1 tsp salt
  • 2 c yellow or white cornmeal
  • 3 large Eggs
  • 1 c all-purpose flour
  • 15 oz. of cream-style corn
  • 3 tsp baking powder

Instructions

Prepare the oven and preheat to 425 degrees F.

Apply cooking spray to a 9-inch square baking pan.

In a mixing bowl, add sugar, salt, baking powder, soda, cornmeal, and flour. Whisk everything until well incorporated.

In a separate mixing bowl, add the eggs and buttermilk. Beat until well blended.

Add the melted butter and cream-style corn, then stir until well combined.

Transfer the wet ingredients into the bowl with the dry ingredients, then stir until well incorporated.

Pour the batter into the prepared baking pan and spread it evenly.

Place the pan in the preheated oven and bake the batter for about 25 minutes or until the top turns golden brown.

Remove from the oven and allow it to cool for a few minutes at room temperature.

Serve and enjoy!

Notes

Feel free to use your homemade buttermilk for this recipe. Just combined 15 tbsp of milk and 1 tbsp of lemon juice in a mixing bowl. Let it rest for at least 10 minutes at room temperature before mixing it with the rest of the ingredients. Feel free to add cheddar cheese, onions, or chipotle powder to this recipe.

September 14, 2022 0 comment
0 FacebookTwitterPinterestEmail
General Recipes

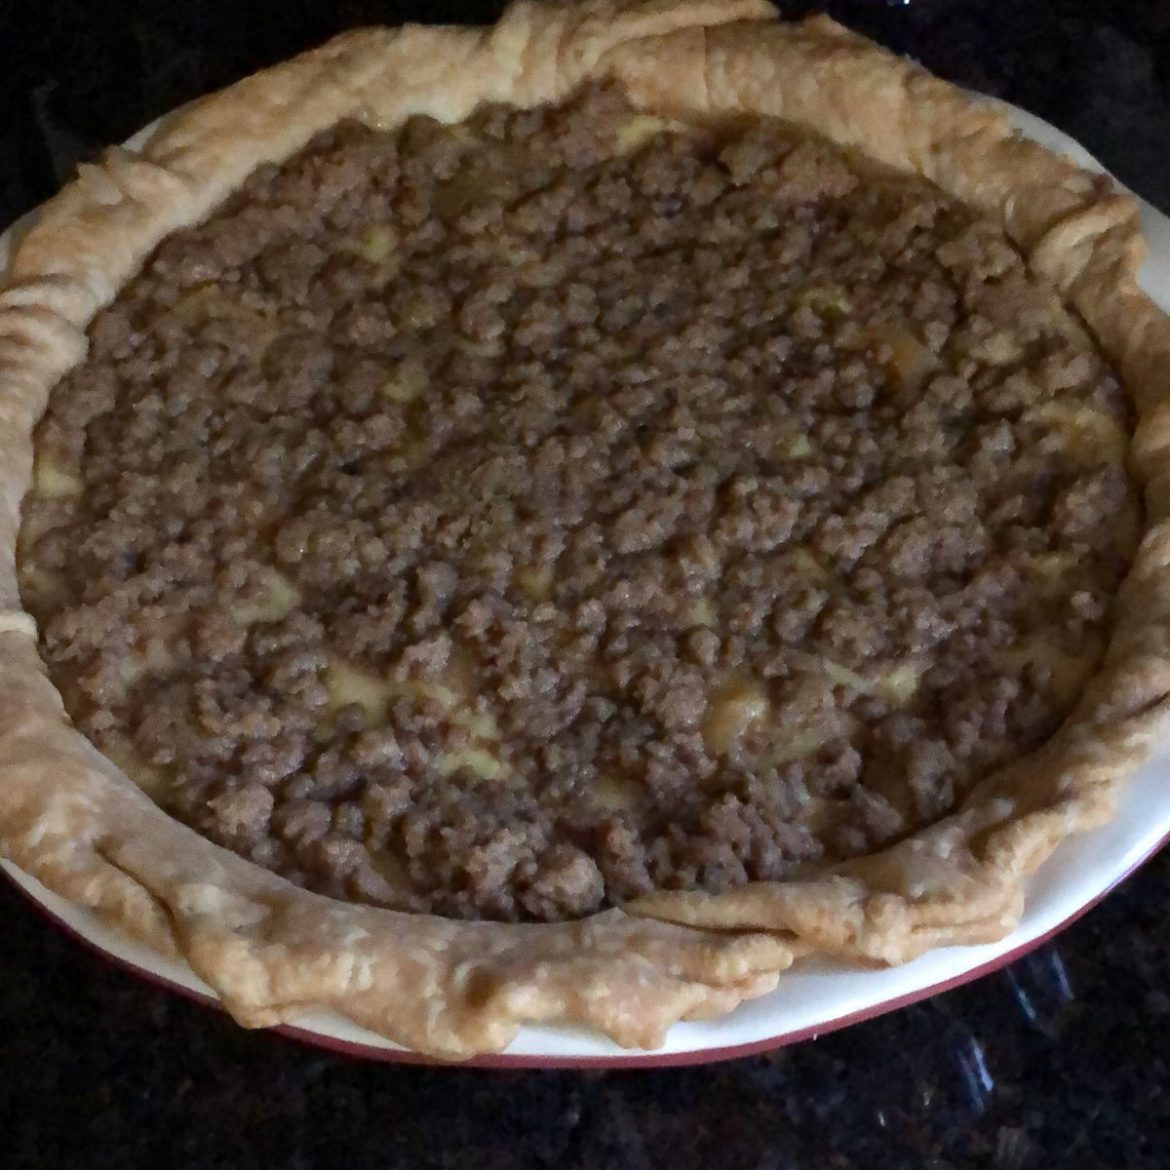
Apple Buttermilk Custard Pie: A Must Make for Your Fourth of July Celebration

by Rebecca September 14, 2022
written by Rebecca

Total Time: 1 hr 30 mins | Yield: 10 to 12 Servings

This Apple Buttermilk Custard Pie is a total family favorite! This recipe will only take you about an hour and a half to prepare. This pie can yield up to 12 servings. More than enough to feed everyone! Try this recipe now. Enjoy!

Ingredients:

1 single pie crust

For the filling:

3 large Eggs

1 3/4 c buttermilk

1/2 tsp ground cinnamon

2 tbsp all-purpose flour

1/2 tsp vanilla extract

5 c (about 2 pounds) apples, peeled and sliced (Granny Smith works well)

1/4 tsp ground nutmeg

1 c granulated sugar, divided

1/4 tsp salt

For the Topping:

1/3 c brown sugar

1/2 tsp cinnamon

1/3 c all-purpose flour

3 tbsp chilled butter, cut into small cubes

Directions:

For the Crust:

Prepare the oven and preheat to 162 degrees C or 325 degrees F.

Unroll the dough into a 14-inch round shape and put it into a 9-inch-deep dish pie pan. Fold the sides of the dough.

Place the crust in the fridge to chill until ready to use.

For the Filling:

Apply cooking spray to a large nonstick skillet. Place it on the stove and turn the heat to medium.

Add the apples, cinnamon, nutmeg, and 1/4 cup of sugar into the preheated skillet. Stir and cook the apples for about 10 minutes.

Move the apple mixture into the prepared crust and spread it evenly.

Add eggs, flour, sugar, vanilla, salt, and buttermilk into a mixing bowl. Whisk everything until well blended.

Transfer the mixture on top of the apple mixture and spread it evenly.

For the Topping:

Add 1/3 cup of flour, cinnamon, and brown sugar into a mixing bowl. Whisk until well incorporated.

Add butter and beat until well blended.

Sprinkle the mixture over the pie.

Turn the heat of the oven down to about 300 degrees F and bake the pie for about 40 minutes.

Remove the pie from the oven and allow it cool for at least an hour at room temperature.

Slice, serve, and enjoy!

Apple Buttermilk Custard Pie: A Must Make for Your Fourth of July Celebration

Rebecca Total Time: 1 hr 30 mins | Yield: 10 to 12 Servings This Apple Buttermilk Custard Pie is a total family favorite! This recipe will only take you about an… General Recipes Apple Buttermilk Custard Pie: A Must Make for Your Fourth of July Celebration European Print This
Serves: 10-12
Nutrition facts: 200 calories 20 grams fat
Rating: 5.0/5
( 1 voted )

Ingredients

  • 1 single pie crust
  • For the filling:
  • 3 large Eggs
  • 1 3/4 c buttermilk
  • 1/2 tsp ground cinnamon
  • 2 tbsp all-purpose flour
  • 1/2 tsp vanilla extract
  • 5 c (about 2 pounds) apples, peeled and sliced (Granny Smith works well)
  • 1/4 tsp ground nutmeg
  • 1 c granulated sugar, divided
  • 1/4 tsp salt
  • For the Topping:
  • 1/3 c brown sugar
  • 1/2 tsp cinnamon
  • 1/3 c all-purpose flour
  • 3 tbsp chilled butter, cut into small cubes

Instructions

For the Crust:

Prepare the oven and preheat to 162 degrees C or 325 degrees F.

Unroll the dough into a 14-inch round shape and put it into a 9-inch-deep dish pie pan. Fold the sides of the dough.

Place the crust in the fridge to chill until ready to use.

For the Filling:

Apply cooking spray to a large nonstick skillet. Place it on the stove and turn the heat to medium.

Add the apples, cinnamon, nutmeg, and 1/4 cup of sugar into the preheated skillet. Stir and cook the apples for about 10 minutes.

Move the apple mixture into the prepared crust and spread it evenly.

Add eggs, flour, sugar, vanilla, salt, and buttermilk into a mixing bowl. Whisk everything until well blended.

Transfer the mixture on top of the apple mixture and spread it evenly.

For the Topping:

Add 1/3 cup of flour, cinnamon, and brown sugar into a mixing bowl. Whisk until well incorporated.

Add butter and beat until well blended.

Sprinkle the mixture over the pie.

Turn the heat of the oven down to about 300 degrees F and bake the pie for about 40 minutes.

Remove the pie from the oven and allow it cool for at least an hour at room temperature.

Slice, serve, and enjoy!

September 14, 2022 0 comment
0 FacebookTwitterPinterestEmail
General Recipes

Chicken Pot Pie Bubble Up

by Rebecca September 14, 2022
written by Rebecca

Total Time: 1 hr | Yield: 8 Servings

This Chicken Pot Pie Bubble Up will surely become your favorite after one bite! I am so psyched to share this recipe with you today because I know that you are going to love it! Whether you are having guests over for dinner or just with your family, this dish is surely a lifesaver! All the ingredients are very easy to find and pretty cheap as well! I have listed all the things you will be needing for this recipe. You just need to follow them step by step, and you are good to go. Enjoy!

Ingredients:

1 c sour cream

1 (12 ounces) package McCormick Simply Better Chicken Gravy

1 c sharp cheddar cheese, grated

2 (6 ounces) cans of refrigerated biscuit dough, cut into small pieces

1 lb. boneless, skinless chicken breasts, cooked and shredded

1 1/2 c frozen peas and carrots, frozen or thawed

1 tsp McCormick garlic powder

kosher salt and freshly ground pepper, to taste

fresh thyme, garnish, optional

1 tsp McCormick ground thyme or thyme leaves

Directions:

Prepare the oven and preheat to 190 degrees C or 375 degrees F.

Apply cooking spray to a 9×13-inch baking dish.

Add the frozen peas, carrots, chicken gravy, sour cream, and shredded chicken into a large mixing bowl. Stir everything until well incorporated.

Add garlic powder, thyme, salt, and pepper. Stir until well blended.

Add biscuit dough and beat everything until well incorporated.

Transfer the mixture to the prepared baking dish and spread it evenly.

Sprinkle the cheddar cheese on top of the mixture in the baking dish.

Place the baking dish in the preheated oven and bake for about 35 to 40 minutes or until the cheese turns golden brown.

Remove from the oven and let it rest for a few minutes.

Serve and enjoy!

Note:

Place any leftovers in an airtight container, then place them in the fridge.

Chicken Pot Pie Bubble Up

Rebecca Total Time: 1 hr | Yield: 8 Servings This Chicken Pot Pie Bubble Up will surely become your favorite after one bite! I am so psyched to share this recipe… General Recipes Chicken Pot Pie Bubble Up European Print This
Serves: 8
Nutrition facts: 200 calories 20 grams fat
Rating: 5.0/5
( 1 voted )

Ingredients

  • 1 c sour cream
  • 1 (12 ounces) package McCormick Simply Better Chicken Gravy
  • 1 c sharp cheddar cheese, grated
  • 2 (6 ounces) cans of refrigerated biscuit dough, cut into small pieces
  • 1 lb. boneless, skinless chicken breasts, cooked and shredded
  • 1 1/2 c frozen peas and carrots, frozen or thawed
  • 1 tsp McCormick garlic powder
  • kosher salt and freshly ground pepper, to taste
  • fresh thyme, garnish, optional
  • 1 tsp McCormick ground thyme or thyme leaves

Instructions

Prepare the oven and preheat to 190 degrees C or 375 degrees F.

Apply cooking spray to a 9x13-inch baking dish.

Add the frozen peas, carrots, chicken gravy, sour cream, and shredded chicken into a large mixing bowl. Stir everything until well incorporated.

Add garlic powder, thyme, salt, and pepper. Stir until well blended.

Add biscuit dough and beat everything until well incorporated.

Transfer the mixture to the prepared baking dish and spread it evenly.

Sprinkle the cheddar cheese on top of the mixture in the baking dish.

Place the baking dish in the preheated oven and bake for about 35 to 40 minutes or until the cheese turns golden brown.

Remove from the oven and let it rest for a few minutes.

Serve and enjoy!

Notes

Place any leftovers in an airtight container, then place them in the fridge.

September 14, 2022 0 comment
0 FacebookTwitterPinterestEmail
Newer Posts
Older Posts

Popular Posts

  • 1

    Crispy Crunchy Parmesan Potatoes

    March 21, 2020
  • 2

    CROCK POT SMOTHERED PORK CHOPS

    March 21, 2020
  • Facebook
  • Twitter

@2019 - All Right Reserved.


Back To Top