Cook it once
  • Home
  • Privacy Policy
  • Recipes
    • KETO
    • LC
    • WW
  • Tips
  • Contact
Cook it once
  • Home
  • Privacy Policy
  • Recipes
    • KETO
    • LC
    • WW
  • Tips
  • Contact
Category:

General Recipes

General Recipes

Heaven On Earth Cake Recipe: The Perfect Sweet Treat

by Rebecca September 21, 2022
written by Rebecca

Active: 20 mins | Inactive: 3+ hrs | Serves: 8

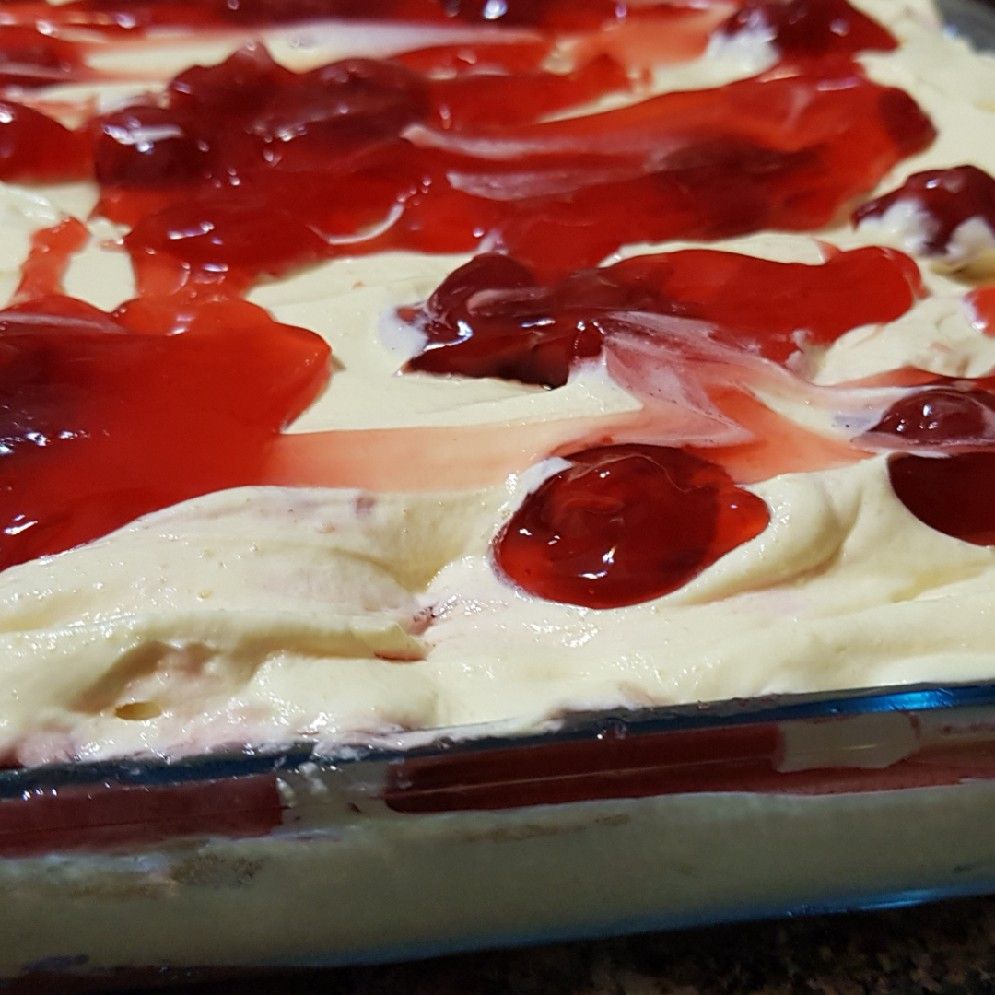
This earth cake is heaven on a plate! Decadent, very creamy, and filled with delicious cherries and cream. Easily whip this heaven-on-earth cake up any time and satisfy your sweet treat cravings!

It is a guarantee that you’ll fall deep with this moist angel food cake topped with tasty tart cherry pie filling, creamy pudding, and lightly whipped cream. This is an impressive no-bake dessert that will surely swap you off your feet!

If you enjoy no-bake desserts, you’ll surely love this heaven-on-earth cake. If desired, you can swap some ingredients to suit your taste. For instance, you can change the filling and use a different pudding flavor. You can also try different pie filling such as strawberry, raspberry, blueberry, or even lemon pie filling. With this recipe, the sky is the limit!

INGREDIENTS

1 (3.4 ounces) instant vanilla pudding mix

1 1/2 c. milk

1-2 store-bought angel food cakes, or homemade

1 c. plain Greek yogurt

1 (8 ounces) container of frozen whipped topping, thawed

almond slivers, garnish, as needed (toasted, optional)

1 (21 ounces) can of cherry pie filling, divided

How to make Heaven On Earth Cake

Step 1: Into bite-sized pieces, cube the angel food cake.

Step 2: Place the pudding mix and cold milk in a large bowl. Mix well, then fold in the Greek yogurt until blended and the mixture is smooth.

Step 3: In a 9 x 13-inch baking dish, evenly spread half of the cake cubes and top with 2/3 of the cherry pie filling. Over the filling, place the rest of the cake cubes and pour the pudding mixture on top. Spread evenly and gently.

Step 4: Over the pudding layer, spread the frozen whipped topping using a rubber or offset spatula. On top, drizzle the rest of the cherry pie filling, then sprinkle with slivered almonds.

Step 5: Put the cake in the fridge to set for at least 3 hours (preferably overnight).

Heaven On Earth Cake Recipe: The Perfect Sweet Treat

Rebecca Active: 20 mins | Inactive: 3+ hrs | Serves: 8 This earth cake is heaven on a plate! Decadent, very creamy, and filled with delicious cherries and cream. Easily whip… General Recipes Heaven On Earth Cake Recipe: The Perfect Sweet Treat European Print This
Serves: 8
Nutrition facts: 200 calories 20 grams fat
Rating: 5.0/5
( 1 voted )

Ingredients

  • 1 (3.4 ounces) instant vanilla pudding mix
  • 1 1/2 c. milk
  • 1-2 store-bought angel food cakes, or homemade
  • 1 c. plain Greek yogurt
  • 1 (8 ounces) container of frozen whipped topping, thawed
  • almond slivers, garnish, as needed (toasted, optional)
  • 1 (21 ounces) can of cherry pie filling, divided

Instructions

Step 1: Into bite-sized pieces, cube the angel food cake.

Step 2: Place the pudding mix and cold milk in a large bowl. Mix well, then fold in the Greek yogurt until blended and the mixture is smooth.

Step 3: In a 9 x 13-inch baking dish, evenly spread half of the cake cubes and top with 2/3 of the cherry pie filling. Over the filling, place the rest of the cake cubes and pour the pudding mixture on top. Spread evenly and gently.

Step 4: Over the pudding layer, spread the frozen whipped topping using a rubber or offset spatula. On top, drizzle the rest of the cherry pie filling, then sprinkle with slivered almonds.

Step 5: Put the cake in the fridge to set for at least 3 hours (preferably overnight).
September 21, 2022 0 comment
0 FacebookTwitterPinterestEmail
General Recipes

Ina Garten’s Cauliflower Toast

by Rebecca September 21, 2022
written by Rebecca

Prep time: 10 mins | Cook time: 30 mins | Serves: 6

This Ina Garten’s Cauliflower Toast is super good, you’ll forget about avocado toast! Try this easy cauliflower toast recipe soon. I am sure this will be your new favorite!

INGREDIENTS

4 tbsp olive oil

1 small head cauliflower

1/4 tsp red pepper flake

1/4 tsp ground nutmeg

1 c. Gruyere cheese, grated

12 ounces mascarpone cheese, at room temperature

4 ounces prosciutto, julienned

6 large slices of country-style bread

Parmesan cheese, freshly grated, as needed

Paprika, as needed

Kosher salt and freshly ground black pepper, to taste

2 tbsp fresh chives, minced

How to make Ina Garten’s Cauliflower Toast

Step 1: Prepare the oven. Preheat it to 400 degrees F.

Step 2: Cut and discard the stems from the cauliflower. Into small florets, about half an inch in size cut the cauliflower.\

Step 3: On a sheet pan, arrange the florets and toss them with olive oil, red pepper flake, salt, and pepper. In a single layer, spread out the florets. Place in the preheated oven and roast the florets for about 25 to 30 minutes or until tender and somewhat browned, tossing the florets about 2 to 3 times as they bake.

Step 4: Remove from the oven when done and set the cauliflower toast aside for about 10 minutes.

Step 5: Place the oven rack about 6 inches below the heat, then set the oven to broil.

Step 6: In a large bowl, place the roasted cauliflower. Then, add the mascarpone and toss to coat. Next, add the gruyere along with prosciutto, and nutmeg. To taste, season with salt and pepper. Stir well.

Step 7: In a toaster, toast the slices of bread until light brown. Transfer the toasted pieces of bread to a baking sheet lined with foil. On top of each piece of bread, add a mound of cauliflower and sprinkle with paprika.

Step 8: Broil for about 2 to 4 minutes or until browned and bubbly. Remove from the oven when done, and sprinkle the toast with some Parmesan, chives, and more salt. Enjoy!

Ina Garten's Cauliflower Toast

Rebecca Prep time: 10 mins | Cook time: 30 mins | Serves: 6 This Ina Garten’s Cauliflower Toast is super good, you’ll forget about avocado toast! Try this easy cauliflower toast… General Recipes Ina Garten’s Cauliflower Toast European Print This
Serves: 6 Prep Time: 10 mins Cooking Time: 30 mins 30 mins
Nutrition facts: 200 calories 20 grams fat
Rating: 5.0/5
( 1 voted )

Ingredients

  • 4 tbsp olive oil
  • 1 small head cauliflower
  • 1/4 tsp red pepper flake
  • 1/4 tsp ground nutmeg
  • 1 c. Gruyere cheese, grated
  • 12 ounces mascarpone cheese, at room temperature
  • 4 ounces prosciutto, julienned
  • 6 large slices of country-style bread
  • Parmesan cheese, freshly grated, as needed
  • Paprika, as needed
  • Kosher salt and freshly ground black pepper, to taste
  • 2 tbsp fresh chives, minced

Instructions

Step 1: Prepare the oven. Preheat it to 400 degrees F.

Step 2: Cut and discard the stems from the cauliflower. Into small florets, about half an inch in size cut the cauliflower.\

Step 3: On a sheet pan, arrange the florets and toss them with olive oil, red pepper flake, salt, and pepper. In a single layer, spread out the florets. Place in the preheated oven and roast the florets for about 25 to 30 minutes or until tender and somewhat browned, tossing the florets about 2 to 3 times as they bake.

Step 4: Remove from the oven when done and set the cauliflower toast aside for about 10 minutes.

Step 5: Place the oven rack about 6 inches below the heat, then set the oven to broil.

Step 6: In a large bowl, place the roasted cauliflower. Then, add the mascarpone and toss to coat. Next, add the gruyere along with prosciutto, and nutmeg. To taste, season with salt and pepper. Stir well.

Step 7: In a toaster, toast the slices of bread until light brown. Transfer the toasted pieces of bread to a baking sheet lined with foil. On top of each piece of bread, add a mound of cauliflower and sprinkle with paprika.

Step 8: Broil for about 2 to 4 minutes or until browned and bubbly. Remove from the oven when done, and sprinkle the toast with some Parmesan, chives, and more salt. Enjoy!

September 21, 2022 0 comment
0 FacebookTwitterPinterestEmail
General Recipes

No Bake Peanut Butter Corn Flake Cookies

by Rebecca September 21, 2022
written by Rebecca

Prep Time: 5 mins | Cook Time: 5 mins | Total Time: 10 mins

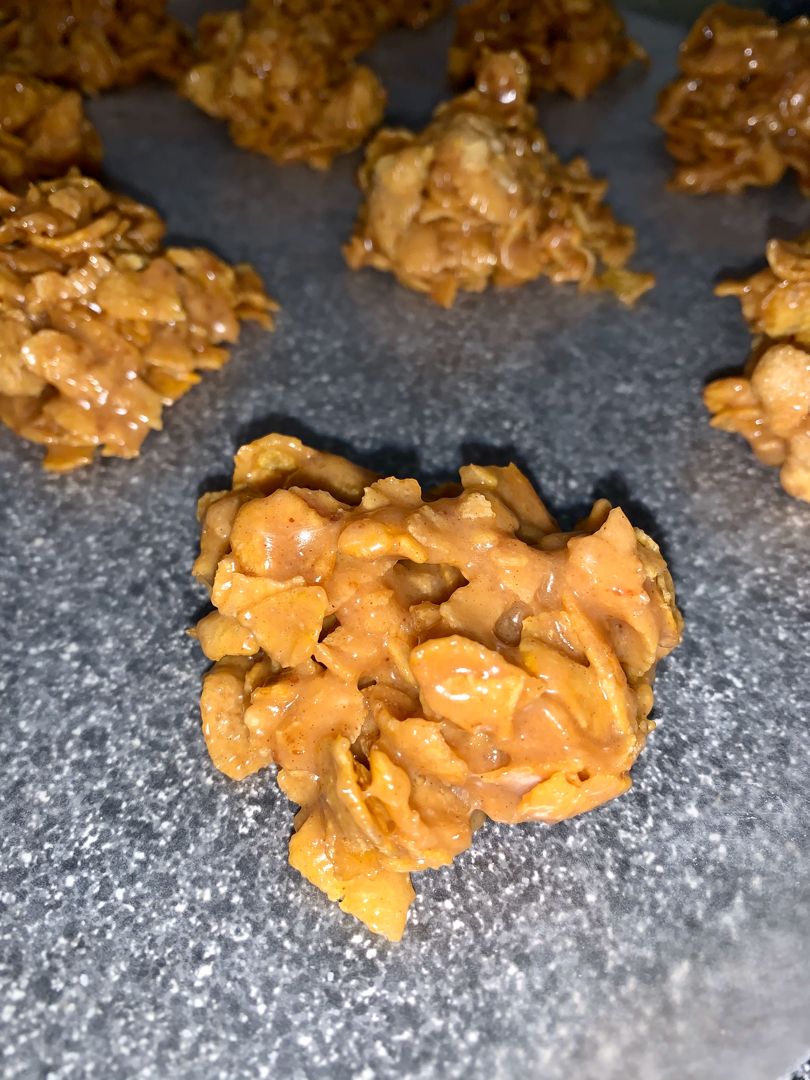
My mom’s favorite – Peanut Butter Corn Flake Cookies! This no-bake treat is super easy to make and ready in a breeze. Delectable Peanut Butter Corn Flake Cookies, are chewy, and would be everyone’s new favorite!

This Peanut Butter Corn Flake Cookies recipe is pretty straightforward. You do not have to worry about these cookies not setting. This recipe is hard to mess up. The only thing you should make sure of is not getting the sugar mixture too hot. Do not let it come to a boil or the sugar will burn. Other than that, these bad boys are always set up!

One main thing I adore about these Peanut Butter Corn Flake Cookies is they are freezer-friendly. You just need to layer these between layers of wax paper, store them in freezer-safe containers, and freeze them.

These Peanut Butter Corn Flake Cookies are crazy good! Simple peanut butter and sugar mixture coated the cornflakes cereal.

Ingredients

1 cup creamy peanut butter

1 cup light corn syrup

6 cups Corn Flakes cereal

1 cup sugar

How to make No Bake Peanut Butter Corn Flake Cookies

Step 1: On the countertop, lay a large sheet of wax paper.

Step 2: In a large bowl, pour the cornflakes.

Step 3: Heat the sugar and syrup in a small saucepan over medium heat until the sugar dissolves completely, stirring. Be very careful not to boil the mixture. Once the sugar has dissolved, take the pan off the heat and stir in the peanut butter.

Step 4: Over the cornflakes, pour the sugar syrup mixture. Mix everything gently until completely coated, making sure not to smash the cornflakes.

Step 5: Onto the wax paper, drop the cornflakes mixture by the spoonful. Allow them to set for a couple of minutes.

Step 6: In an airtight container, place the peanut butter, corn flake cookies and store them at room temperature or in the fridge.

No Bake Peanut Butter Corn Flake Cookies

Rebecca Prep Time: 5 mins | Cook Time: 5 mins | Total Time: 10 mins My mom’s favorite – Peanut Butter Corn Flake Cookies! This no-bake treat is super easy to… General Recipes No Bake Peanut Butter Corn Flake Cookies European Print This
Prep Time: 5 mins Cooking Time: 5 mins 5 mins
Nutrition facts: 200 calories 20 grams fat
Rating: 5.0/5
( 1 voted )

Ingredients

  • 1 cup creamy peanut butter
  • 1 cup light corn syrup
  • 6 cups Corn Flakes cereal
  • 1 cup sugar

Instructions

Step 1: On the countertop, lay a large sheet of wax paper.

Step 2: In a large bowl, pour the cornflakes.

Step 3: Heat the sugar and syrup in a small saucepan over medium heat until the sugar dissolves completely, stirring. Be very careful not to boil the mixture. Once the sugar has dissolved, take the pan off the heat and stir in the peanut butter.

Step 4: Over the cornflakes, pour the sugar syrup mixture. Mix everything gently until completely coated, making sure not to smash the cornflakes.

Step 5: Onto the wax paper, drop the cornflakes mixture by the spoonful. Allow them to set for a couple of minutes.

Step 6: In an airtight container, place the peanut butter, corn flake cookies and store them at room temperature or in the fridge.

September 21, 2022 0 comment
0 FacebookTwitterPinterestEmail
General Recipes

Cinnamon Roll Crescents

by Rebecca September 21, 2022
written by Rebecca

Prep time: 5 mins | Cook time: 10 mins | Serves: 4

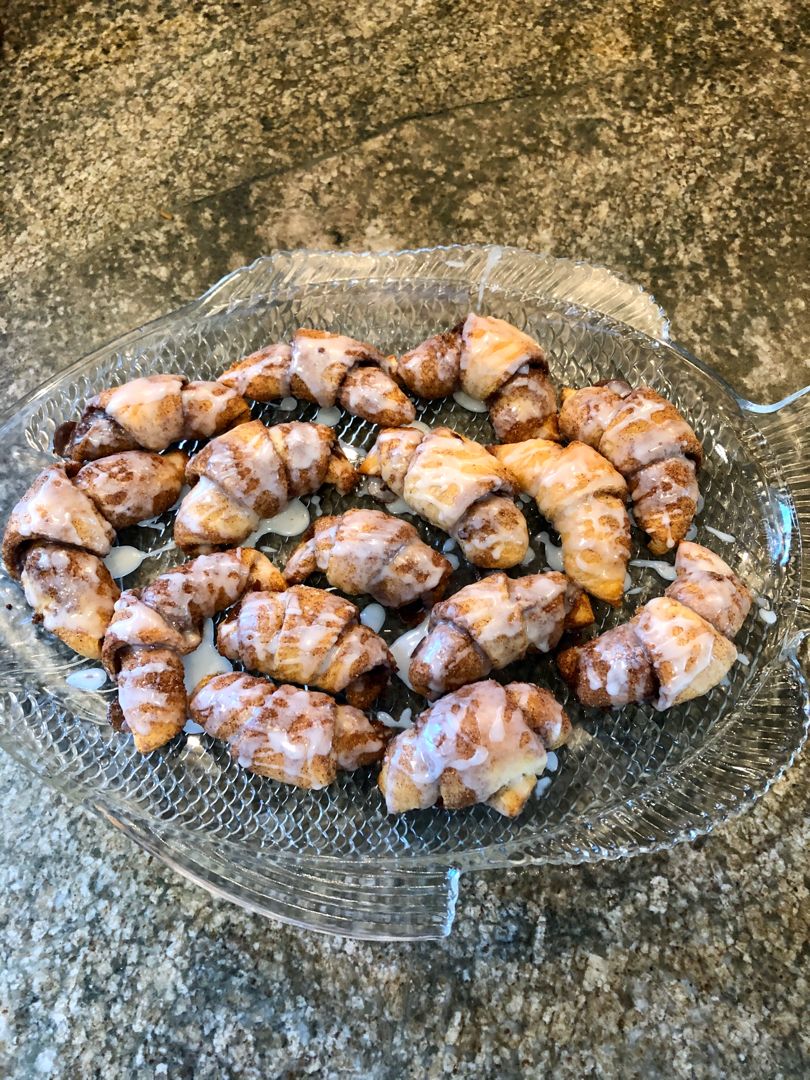
I love these cinnamon roll crescents! They are great for breakfast or dessert. Or have them both ways! These delicious cinnamon roll crescents are made with just a few simple ingredients and are ready in under fifteen minutes.

These cinnamon roll crescents are a staple every Thanksgiving and Christmas dinner. Super good, I cannot wait for special occasions to make these cinnamon roll crescents, so I whip up a batch or two every weekend. Delightful, tasty, and a fun treat/breakfast.

You would not believe how easy these are to make. All you need are tubes of dough. Separate them into triangles and generously spread the butter-sugar-cinnamon mixture on each triangle, then roll the triangles tightly. Pop them in the oven and bake until lightly golden. Pipe or drizzle the simple sugary and buttery glaze over each roll.

These cinnamon crescent rolls are doughy, pillowy, and perfectly sweet! Beware these amazing cinnamon crescent rolls are super addictive!

INGREDIENTS

1 tube of crescent rolls

FILLING:

1/4 c. granulated sugar

2 tsp cinnamon

4 tbsp butter, softened

GLAZE:

1/4 c. plus 2 tbsp powdered sugar

1/2 tsp vanilla extract

2 tbsp butter, melted

How to make Cinnamon Roll Crescents

Step 1: Prepare the oven. Preheat it to 375 degrees F.

Step 2: After unrolling the rolls, separate them and place them on an ungreased baking sheet.

Step 3: Place 4 tbsp butter, sugar, and cinnamon in a small bowl. Mix well until combined. Then, spread this over the rolls. Tightly roll and arrange them on the baking sheet, tip side facing down.

Step 4: Put in the preheated oven and bake for about 10 to 12 minutes or until lightly golden.

Step 5: In the meantime, whisk the melted butter with powdered sugar, and vanilla until smooth. You can either pipe or drizzle this over the rolls.

Step 6: Serve and enjoy!

Cinnamon Roll Crescents

Rebecca Prep time: 5 mins | Cook time: 10 mins | Serves: 4 I love these cinnamon roll crescents! They are great for breakfast or dessert. Or have them both ways!… General Recipes Cinnamon Roll Crescents European Print This
Serves: 4 Prep Time: 5 mins Cooking Time: 10 mins 10 mins
Nutrition facts: 200 calories 20 grams fat
Rating: 5.0/5
( 1 voted )

Ingredients

  • 1 tube of crescent rolls
  • FILLING:
  • 1/4 c. granulated sugar
  • 2 tsp cinnamon
  • 4 tbsp butter, softened
  • GLAZE:
  • 1/4 c. plus 2 tbsp powdered sugar
  • 1/2 tsp vanilla extract
  • 2 tbsp butter, melted

Instructions

Step 1: Prepare the oven. Preheat it to 375 degrees F.

Step 2: After unrolling the rolls, separate them and place them on an ungreased baking sheet.

Step 3: Place 4 tbsp butter, sugar, and cinnamon in a small bowl. Mix well until combined. Then, spread this over the rolls. Tightly roll and arrange them on the baking sheet, tip side facing down.

Step 4: Put in the preheated oven and bake for about 10 to 12 minutes or until lightly golden.

Step 5: In the meantime, whisk the melted butter with powdered sugar, and vanilla until smooth. You can either pipe or drizzle this over the rolls.

Step 6: Serve and enjoy!

September 21, 2022 0 comment
0 FacebookTwitterPinterestEmail
General Recipes

Chili Cornbread Casserole Recipe

by Rebecca September 21, 2022
written by Rebecca

Prep Time: 10 mins | Cook Time: 35 mins | Total Time: 45 mins | Servings: 6

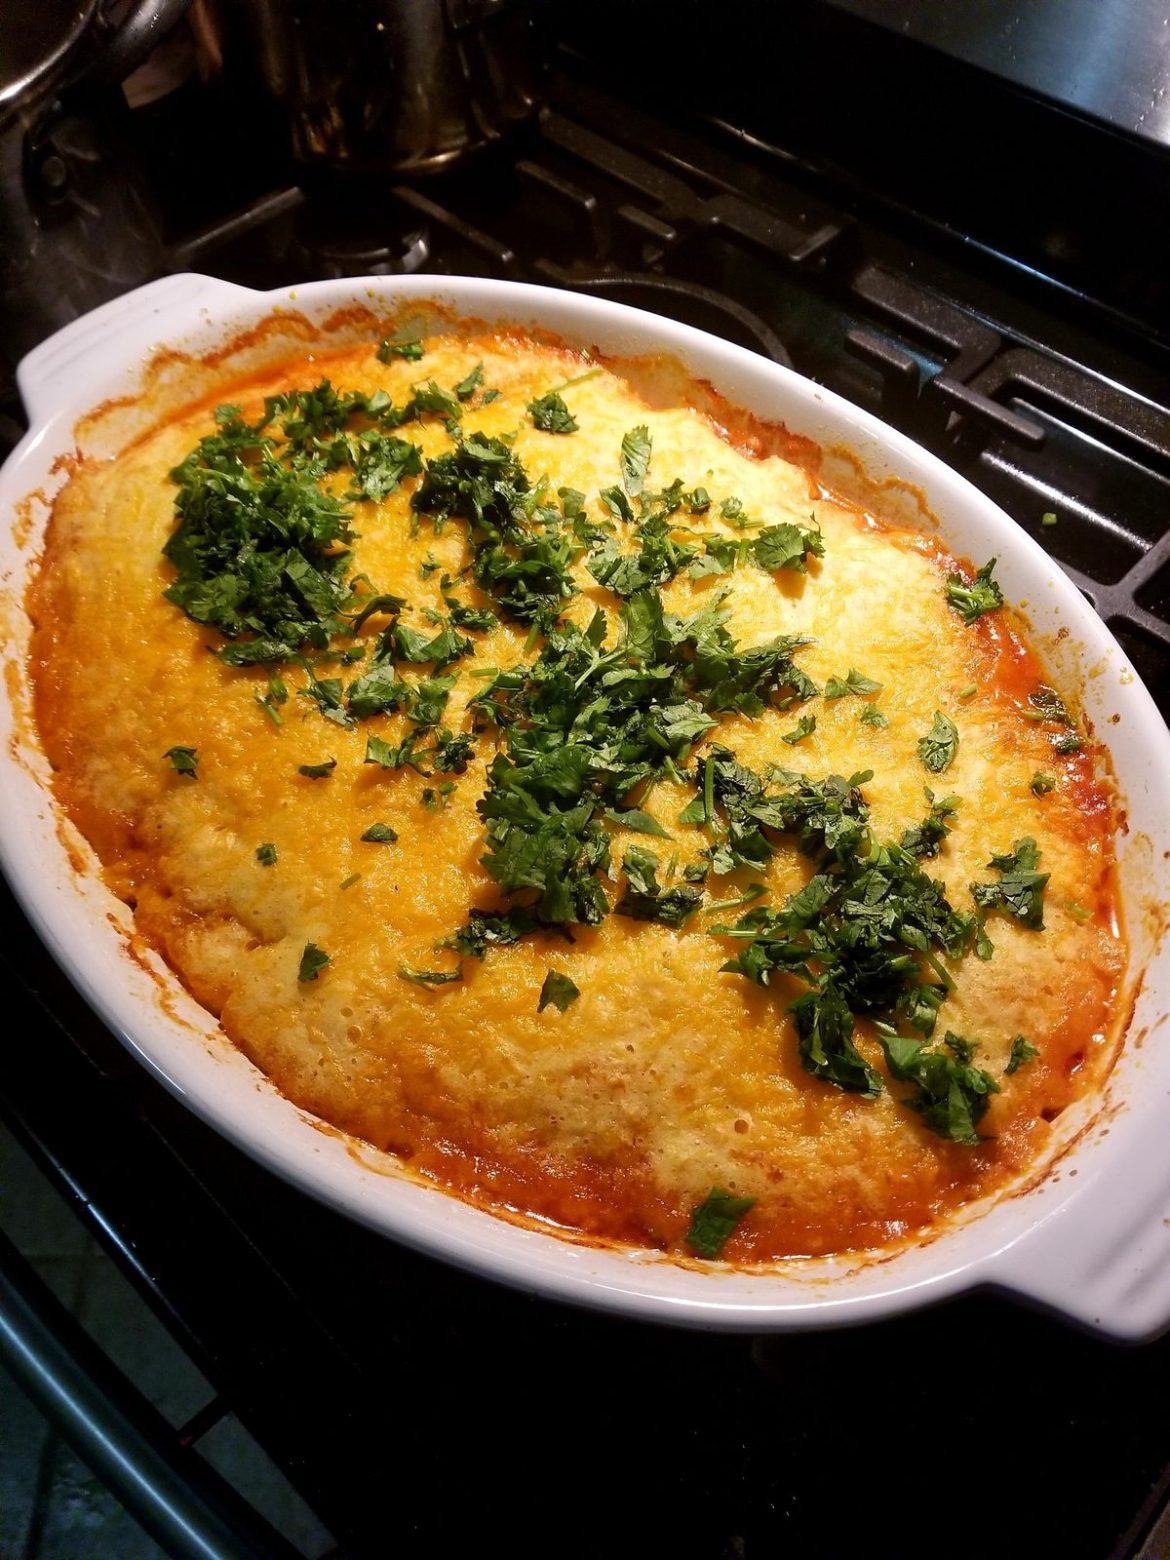
If you are looking for another easy weeknight dinner, this Chili Cornbread Casserole is a must! The homemade chili with cheesy creamy cornbread topping is a mouthwatering dish that you should include in your regular menu rotation.

Ingredients

Chili:

1 small onion, chopped, 1/2 c.

1 1/4 pound ground beef

1 clove of garlic, minced

1 teaspoon ground cumin

1 tablespoon chili powder

1/2 teaspoon kosher salt

1 can (8 oz.) tomato sauce

1 can (10 oz.) diced tomatoes & green chilies, preferably Rotel brand

Cornbread Topping:

1 egg

1 can (8 oz.) cream-style corn

1 box (8.5 oz.) corn muffin mix

1 c. shredded cheddar jack

1 tablespoon cilantro leaves

1/4 c. milk

How to make Chili Cornbread Casserole

Chili:

Step 1: Prepare the oven. Preheat it to 375 degrees F. Using non-stick cooking spray, grease a 2-quart baking dish.

Step 2: Place the ground beef, onion, garlic, chili powder, cumin, and kosher salt in a hot large non-stick skillet over medium-high heat and cook until the meat is browned, stirring often.

Step 3: To the ground beef mixture, stir in the diced tomatoes & green chilies, and tomato sauce.

Step 4: Into the prepared baking dish, transfer the ground beef mixture.

Cornbread Topping:

Step 5: Place the corn muffin mix, egg, cream-style corn, 3/4 cup cheese, and milk in a medium bowl. Mix well until combined, then spread this over the beef mixture. On top, sprinkle the rest of the cheese.

Step 6: Place in the preheated oven and bake for about 25 minutes or until the cornbread topping is completely baked and the mixture is hot and bubbly.

Step 7: Before serving, garnish the casserole with some cilantro. Enjoy with your fave toppings like sour cream, sliced fresh jalapenos, and salsa.

Notes:

You can use 1 can (14.5 oz.) diced tomatoes, preferably with jalapenos or green chilies in place of Rotel brand diced tomatoes & green chilies.

Swirls of Flavor Recipe Tips:

If desired, you can serve the casserole with sour cream and salsa.

For individual servings, bake in individual ramekins.

Substitutions:

Swap taco seasoning with chili powder and cumin.

You can use ground turkey in place of ground beef.

For this recipe, you can use shredded cheddar cheese instead of cheddar jack cheese.

Storage:

You can keep any leftovers in an airtight container and store them in the fridge for up to 3 days.

Allow the chili to come to room temperature, then transfer it into an oven-safe casserole dish. Tent with foil and reheat in the oven until heated through.

Nutrition Facts:

Calories: 346 kcal | Carbohydrates: 3g | Protein: 23g | Fat: 27g | Saturated Fat: 12g | Cholesterol: 115mg | Sodium: 381mg | Potassium: 355mg | Fiber: 1g | Sugar: 1g | Vitamin A: 651IU | Vitamin C: 1mg | Calcium: 183mg | Iron: 3mg

Chili Cornbread Casserole Recipe

Rebecca Prep Time: 10 mins | Cook Time: 35 mins | Total Time: 45 mins | Servings: 6 If you are looking for another easy weeknight dinner, this Chili Cornbread Casserole… General Recipes Chili Cornbread Casserole Recipe European Print This
Serves: 6 Prep Time: 10 mins Cooking Time: 35 mins 35 mins
Nutrition facts: 346 calories 27 fat
Rating: 5.0/5
( 1 voted )

Ingredients

  • Chili:
  • 1 small onion, chopped, 1/2 c.
  • 1 1/4 pound ground beef
  • 1 clove of garlic, minced
  • 1 teaspoon ground cumin
  • 1 tablespoon chili powder
  • 1/2 teaspoon kosher salt
  • 1 can (8 oz.) tomato sauce
  • 1 can (10 oz.) diced tomatoes & green chilies, preferably Rotel brand
  • Cornbread Topping:
  • 1 egg
  • 1 can (8 oz.) cream-style corn
  • 1 box (8.5 oz.) corn muffin mix
  • 1 c. shredded cheddar jack
  • 1 tablespoon cilantro leaves
  • 1/4 c. milk

Instructions

Chili:

Step 1: Prepare the oven. Preheat it to 375 degrees F. Using non-stick cooking spray, grease a 2-quart baking dish.

Step 2: Place the ground beef, onion, garlic, chili powder, cumin, and kosher salt in a hot large non-stick skillet over medium-high heat and cook until the meat is browned, stirring often.

Step 3: To the ground beef mixture, stir in the diced tomatoes & green chilies, and tomato sauce.

Step 4: Into the prepared baking dish, transfer the ground beef mixture.

Cornbread Topping:

Step 5: Place the corn muffin mix, egg, cream-style corn, 3/4 cup cheese, and milk in a medium bowl. Mix well until combined, then spread this over the beef mixture. On top, sprinkle the rest of the cheese.

Step 6: Place in the preheated oven and bake for about 25 minutes or until the cornbread topping is completely baked and the mixture is hot and bubbly.

Step 7: Before serving, garnish the casserole with some cilantro. Enjoy with your fave toppings like sour cream, sliced fresh jalapenos, and salsa.

Notes

You can use 1 can (14.5 oz.) diced tomatoes, preferably with jalapenos or green chilies in place of Rotel brand diced tomatoes & green chilies. Swirls of Flavor Recipe Tips: If desired, you can serve the casserole with sour cream and salsa. For individual servings, bake in individual ramekins. Substitutions: Swap taco seasoning with chili powder and cumin. You can use ground turkey in place of ground beef. For this recipe, you can use shredded cheddar cheese instead of cheddar jack cheese. Storage: You can keep any leftovers in an airtight container and store them in the fridge for up to 3 days. Allow the chili to come to room temperature, then transfer it into an oven-safe casserole dish. Tent with foil and reheat in the oven until heated through.

September 21, 2022 0 comment
0 FacebookTwitterPinterestEmail
General Recipes

Impossible Cheeseburger Pie

by Rebecca September 21, 2022
written by Rebecca

Prep time: 10 mins | Cook time: 25 mins | Total time: 35 mins | Yield: 6

I am obsessed with this Impossible Cheeseburger Pie that’s loaded with cheesy beefy flavor. This pie is incredibly easy to make using just a few basic ingredients (ground beef, onion soup mix, Bisquick, cheddar cheese, and other pantry staples). If you are a huge fan of cheeseburgers, I am sure that you’ll dig this cheeseburger-inspired recipe!

My husband always says that the best pie is savory pies! He loves this cheeseburger pie so much that this is one of his most requested dishes! Not a week goes by that we do not have this on our dinner table!

This cheeseburger pie is freezer-friendly. After baking, allow the pie to cool completely, then wrap it and freeze for up to 3 months. This pie is awesome with mouthwatering flavors of beef and cheese. This recipe is great if you are searching for an easy meat pie recipe. So make sure to give this a try soon. I am very sure that you’ll dig this Impossible Cheeseburger Pie!

Ingredients

2 eggs

1 pound lean ground beef

1 c. cheddar cheese, shredded

2 tablespoons onion soup mix

1 c. milk

1/2 c. Bisquick

1 c. onion, chopped

How to make Impossible Cheeseburger Pie

Step 1: Prepare the oven. Preheat it to 400 degrees F.

Step 2: In a large skillet, add the ground beef and onion. Cook until the meat is no longer pink and the onion has softened. When done, drain the grease.

Step 3: In a 9-ich pie pan, spread the mixture and sprinkle with cheese.

Step 4: In a medium bowl, place the milk, onion soup mix, Bisquick, and eggs. Mix well until blended, then pour this over the mixture on the pie plate.

Step 5: Place in the preheated oven and bake for about 25 minutes. Remove from the oven when done, and allow the cheeseburger pie to cool for a couple of minutes before serving. Enjoy!

Nutrition Facts:

YIELD: 6 SERVING SIZE: 1 slice
Amount Per Serving: CALORIES: 361 | TOTAL FAT: 19g | SATURATED FAT: 9g | TRANS FAT: 0g | UNSATURATED FAT: 8g | CHOLESTEROL: 151mg | SODIUM: 564mg | CARBOHYDRATES: 15g | FIBER: 1g | SUGAR: 3g | PROTEIN: 31g

Impossible Cheeseburger Pie

Rebecca Prep time: 10 mins | Cook time: 25 mins | Total time: 35 mins | Yield: 6 I am obsessed with this Impossible Cheeseburger Pie that’s loaded with cheesy beefy… General Recipes Impossible Cheeseburger Pie European Print This
Serves: 6 Prep Time: 10 mins Cooking Time: 25 mins 25 mins
Nutrition facts: 361 calories 19 fat
Rating: 5.0/5
( 1 voted )

Ingredients

  • 2 eggs
  • 1 pound lean ground beef
  • 1 c. cheddar cheese, shredded
  • 2 tablespoons onion soup mix
  • 1 c. milk
  • 1/2 c. Bisquick
  • 1 c. onion, chopped

Instructions

Step 1: Prepare the oven. Preheat it to 400 degrees F.

Step 2: In a large skillet, add the ground beef and onion. Cook until the meat is no longer pink and the onion has softened. When done, drain the grease.

Step 3: In a 9-ich pie pan, spread the mixture and sprinkle with cheese.

Step 4: In a medium bowl, place the milk, onion soup mix, Bisquick, and eggs. Mix well until blended, then pour this over the mixture on the pie plate.

Step 5: Place in the preheated oven and bake for about 25 minutes. Remove from the oven when done, and allow the cheeseburger pie to cool for a couple of minutes before serving. Enjoy!

September 21, 2022 0 comment
0 FacebookTwitterPinterestEmail
General Recipes

Cream Cheese Chicken Enchiladas

by Rebecca September 21, 2022
written by Rebecca

These delicious cream cheese chicken enchiladas are filled with creamy chicken and corn filling, then topped with salsa and melty cheese. These enchiladas are seriously the best and an amazing weeknight dinner that you’ll crave again and again! Serve these enchiladas alone or enjoy them with refried beans, avocado, tomato salad, etc. for a filling meal any time!

Ingredients

1/4 c. sour cream

2 c. cooked, shredded chicken

1 c. shredded cheddar cheese, divided

1 c. shredded pepper jack cheese, divided

1/2 tsp chili powder

5 ounces cream cheese, softened

1/2 tsp cumin

1 c. frozen corn kernels, thawed

1 (16 ounces) jar of prepared salsa

8 (8”) flour tortillas

4 green onions, thinly sliced, divided

How to make Cream Cheese Chicken Enchiladas

Step 1: Prepare the oven. Preheat it to 325 degrees. Using nonstick cooking spray, grease a baking dish.

Step 2: Place the sour cream and cream cheese in a medium-sized bowl. Add half a cup of salsa, half a cup of cream cheese, and half a cup of pepper jack cheese along with the cumin and chili powder. Mix well until blended.

Step 3: Combine the chicken, half of the green onions, and corn.

Step 4: Place half a cup of salsa in the middle of a tortilla and top with a half cup of the chicken mixture. Roll the tortilla and place into the prepared baking dish, seam-side-down. Do the same with the remaining ingredients.

Step 5: Pour the rest of the salsa on top of the enchiladas and sprinkle with cheese. Place in the preheated oven and bake for about 20 to 25 minutes.

Step 6: Before serving, sprinkle the enchiladas with the remaining green onions. If desired, you can also top the enchiladas with extra cheese, salsa, and your favorite toppings. Enjoy the cream cheese chicken enchiladas with refried beans or rice. Or serve alone. Enjoy!

Cream Cheese Chicken Enchiladas

Rebecca These delicious cream cheese chicken enchiladas are filled with creamy chicken and corn filling, then topped with salsa and melty cheese. These enchiladas are seriously the best and an amazing… General Recipes Cream Cheese Chicken Enchiladas European Print This
Nutrition facts: 200 calories 20 grams fat
Rating: 5.0/5
( 1 voted )

Ingredients

  • 1/4 c. sour cream
  • 2 c. cooked, shredded chicken
  • 1 c. shredded cheddar cheese, divided
  • 1 c. shredded pepper jack cheese, divided
  • 1/2 tsp chili powder
  • 5 ounces cream cheese, softened
  • 1/2 tsp cumin
  • 1 c. frozen corn kernels, thawed
  • 1 (16 ounces) jar of prepared salsa
  • 8 (8”) flour tortillas
  • 4 green onions, thinly sliced, divided

Instructions

Step 1: Prepare the oven. Preheat it to 325 degrees. Using nonstick cooking spray, grease a baking dish.

Step 2: Place the sour cream and cream cheese in a medium-sized bowl. Add half a cup of salsa, half a cup of cream cheese, and half a cup of pepper jack cheese along with the cumin and chili powder. Mix well until blended.

Step 3: Combine the chicken, half of the green onions, and corn.

Step 4: Place half a cup of salsa in the middle of a tortilla and top with a half cup of the chicken mixture. Roll the tortilla and place into the prepared baking dish, seam-side-down. Do the same with the remaining ingredients.

Step 5: Pour the rest of the salsa on top of the enchiladas and sprinkle with cheese. Place in the preheated oven and bake for about 20 to 25 minutes.

Step 6: Before serving, sprinkle the enchiladas with the remaining green onions. If desired, you can also top the enchiladas with extra cheese, salsa, and your favorite toppings. Enjoy the cream cheese chicken enchiladas with refried beans or rice. Or serve alone. Enjoy!

September 21, 2022 0 comment
0 FacebookTwitterPinterestEmail
General Recipes

One Pot Mexican Rice Casserole

by Rebecca September 21, 2022
written by Rebecca

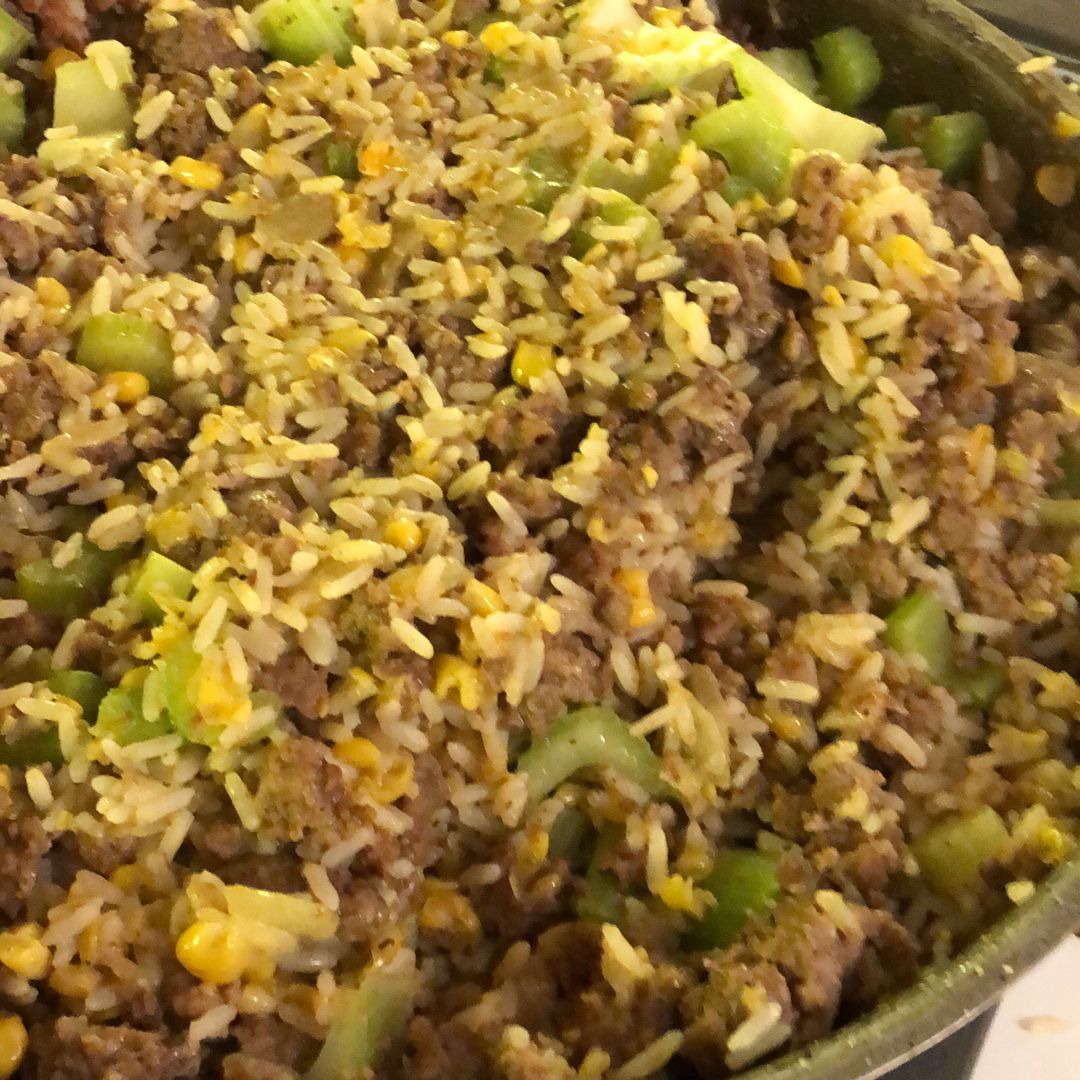
Easy and super quick – this One-pot Mexican Rice Casserole is an amazing dish with loads of beef, rice, corn, and taco flavor! This casserole tastes like your favorite restaurant-style Mexican rice. You can easily make this in under thirty minutes using only a few basic ingredients. If rice casserole is a staple at your house, I am pretty sure that you’ll dig this dish! Enjoy your fave Mexican rice flavors with this easy and amazing Mexican Rice Casserole! Serve this with an extra side of salsa and sour cream for the ultimate dinner that your entire family will absolutely love!

INGREDIENTS

1 small onion, diced

1 pound of ground beef

2 tablespoons Taco seasoning

1 teaspoon garlic powder

1 1/2 c. beef broth

1 c. long-grain white rice

1 15-ounces can of corn, drained

8 ounces tomato sauce

1 c. shredded cheese

1/2 c. salsa

salt & pepper, to taste

How to make One Pot Mexican Rice Casserole

Step 1: Cook the ground beef in a large skillet. Season with salt and pepper. Cook on medium-high heat until no longer pink. Drain the excess grease when done.

Step 2: Return the pan to the stove. Add the garlic powder and taco seasoning to the ground beef. Mix well.

Step 3: Add the rice to the pan. Mix well, then pour in the broth. Next, add the corn, salsa, and tomato sauce. Stir well until everything is combined.

Step 4: Let everything come to a boil. Once boiling, adjust the heat to low and put the lid on. Simmer for about 18 to 20 minutes or until the rice is tender.

Step 5: Remove the lid and sprinkle the cheese on top. Replace the lid and cook for an additional 2 to 3 minutes or until the cheese has completely melted.

Tips:

You can keep this casserole in the fridge for up to 5 days.

Feel free to add extra ingredients to this dish like peppers or chorizo. You can also add herbs if desired.

One Pot Mexican Rice Casserole

Rebecca Easy and super quick – this One-pot Mexican Rice Casserole is an amazing dish with loads of beef, rice, corn, and taco flavor! This casserole tastes like your favorite restaurant-style… General Recipes One Pot Mexican Rice Casserole European Print This
Nutrition facts: 200 calories 20 grams fat
Rating: 5.0/5
( 1 voted )

Ingredients

  • 1 small onion, diced
  • 1 pound of ground beef
  • 2 tablespoons Taco seasoning
  • 1 teaspoon garlic powder
  • 1 1/2 c. beef broth
  • 1 c. long-grain white rice
  • 1 15-ounces can of corn, drained
  • 8 ounces tomato sauce
  • 1 c. shredded cheese
  • 1/2 c. salsa
  • salt & pepper, to taste

Instructions

Step 1: Cook the ground beef in a large skillet. Season with salt and pepper. Cook on medium-high heat until no longer pink. Drain the excess grease when done.

Step 2: Return the pan to the stove. Add the garlic powder and taco seasoning to the ground beef. Mix well.

Step 3: Add the rice to the pan. Mix well, then pour in the broth. Next, add the corn, salsa, and tomato sauce. Stir well until everything is combined.

Step 4: Let everything come to a boil. Once boiling, adjust the heat to low and put the lid on. Simmer for about 18 to 20 minutes or until the rice is tender.

Step 5: Remove the lid and sprinkle the cheese on top. Replace the lid and cook for an additional 2 to 3 minutes or until the cheese has completely melted.

Notes

You can keep this casserole in the fridge for up to 5 days. Feel free to add extra ingredients to this dish like peppers or chorizo. You can also add herbs if desired.

September 21, 2022 0 comment
0 FacebookTwitterPinterestEmail
General Recipes

Earthquake Cake

by Rebecca September 21, 2022
written by Rebecca

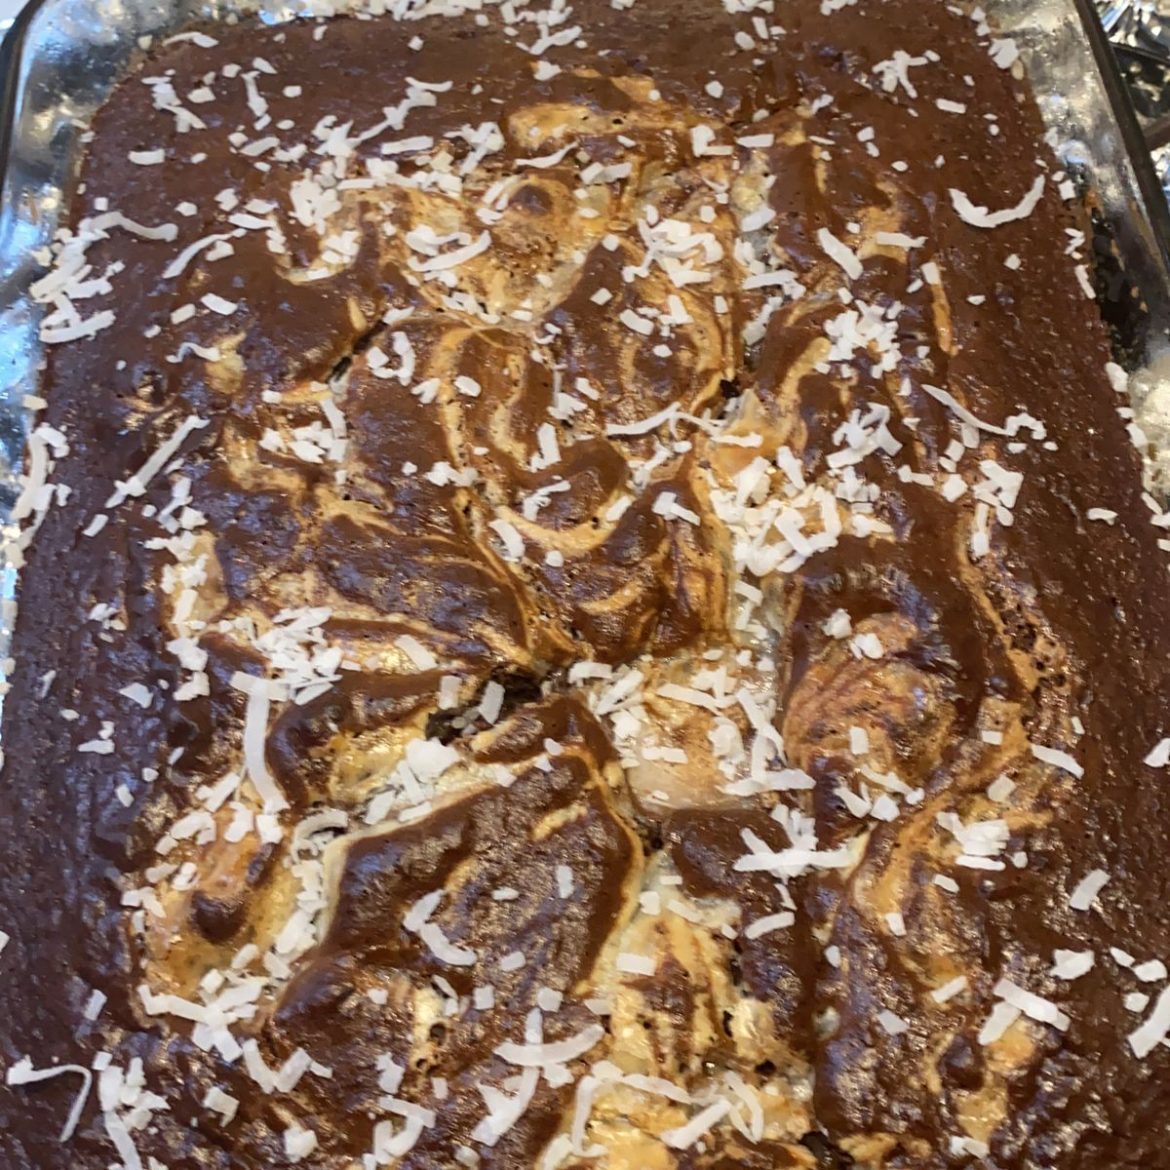
This Earthquake cake is a fun, magical cake made with a box of German chocolate cake mix, coconut, pecans, chocolate chips, and a delightful cream cheese swirl. Frosting the cake is not needed because the cream cheese mixture becomes the layer of frosting. After baking, the cream cheese mixture cracks open, thus the name Earthquake Cake. This Earthquake cake is super easy to whip up and perfect to serve on any occasion! You can even bring this to potlucks! A pretty simple, phenomenal cake, and an awesome dessert that everyone loves!

Ingredients

1/3 c. oil

1 box German Chocolate Cake Mix (prepare as directed below)

3 eggs

1 and 1/3 c. water

8 ounces cream cheese

2/3 c. shredded coconut

1/2 c. butter

1 lb powdered sugar (3 and 3/4 c.)

2/3 c. chocolate chips

1/2 c. chopped pecans

How to make Earthquake Cake

Step 1: Prepare the oven. Preheat it to 350 degrees. Ready a baking pan. Grease and set aside.

Step 2: On the bottom of the prepared pan, place the chocolate chips, coconut, and pecans.

Step 3: Whisk the German chocolate mix with eggs, oil, and water until blended. Then, pour this over the pecan/chocolate chip/coconut layer.

Step 4: Melt the cream cheese and butter in a saucepan. Take the pan off the heat once the cream cheese and butter have melted. Add the powdered sugar and mix well using a spatula until smooth. Pour this over the cake batter. Evenly spread and swirl into the cake with a knife.

Step 5: Place in the preheated oven and bake for about 35 to 45 minutes or until done and the cake is not wobbling.

Step 6: Remove from the oven when done and allow the cake to sit for a couple of minutes before slicing. If you have any leftovers, you can keep them in the fridge. Enjoy!

Earthquake Cake

Rebecca This Earthquake cake is a fun, magical cake made with a box of German chocolate cake mix, coconut, pecans, chocolate chips, and a delightful cream cheese swirl. Frosting the cake… General Recipes Earthquake Cake European Print This
Nutrition facts: 200 calories 20 grams fat
Rating: 5.0/5
( 1 voted )

Ingredients

  • 1/3 c. oil
  • 1 box German Chocolate Cake Mix (prepare as directed below)
  • 3 eggs
  • 1 and 1/3 c. water
  • 8 ounces cream cheese
  • 2/3 c. shredded coconut
  • 1/2 c. butter
  • 1 lb powdered sugar (3 and 3/4 c.)
  • 2/3 c. chocolate chips
  • 1/2 c. chopped pecans

Instructions

Step 1: Prepare the oven. Preheat it to 350 degrees. Ready a baking pan. Grease and set aside.

Step 2: On the bottom of the prepared pan, place the chocolate chips, coconut, and pecans.

Step 3: Whisk the German chocolate mix with eggs, oil, and water until blended. Then, pour this over the pecan/chocolate chip/coconut layer.

Step 4: Melt the cream cheese and butter in a saucepan. Take the pan off the heat once the cream cheese and butter have melted. Add the powdered sugar and mix well using a spatula until smooth. Pour this over the cake batter. Evenly spread and swirl into the cake with a knife.

Step 5: Place in the preheated oven and bake for about 35 to 45 minutes or until done and the cake is not wobbling.

Step 6: Remove from the oven when done and allow the cake to sit for a couple of minutes before slicing. If you have any leftovers, you can keep them in the fridge. Enjoy!

September 21, 2022 0 comment
0 FacebookTwitterPinterestEmail
General Recipes

Two Ingredient Pumpkin Muffins

by Rebecca September 21, 2022
written by Rebecca

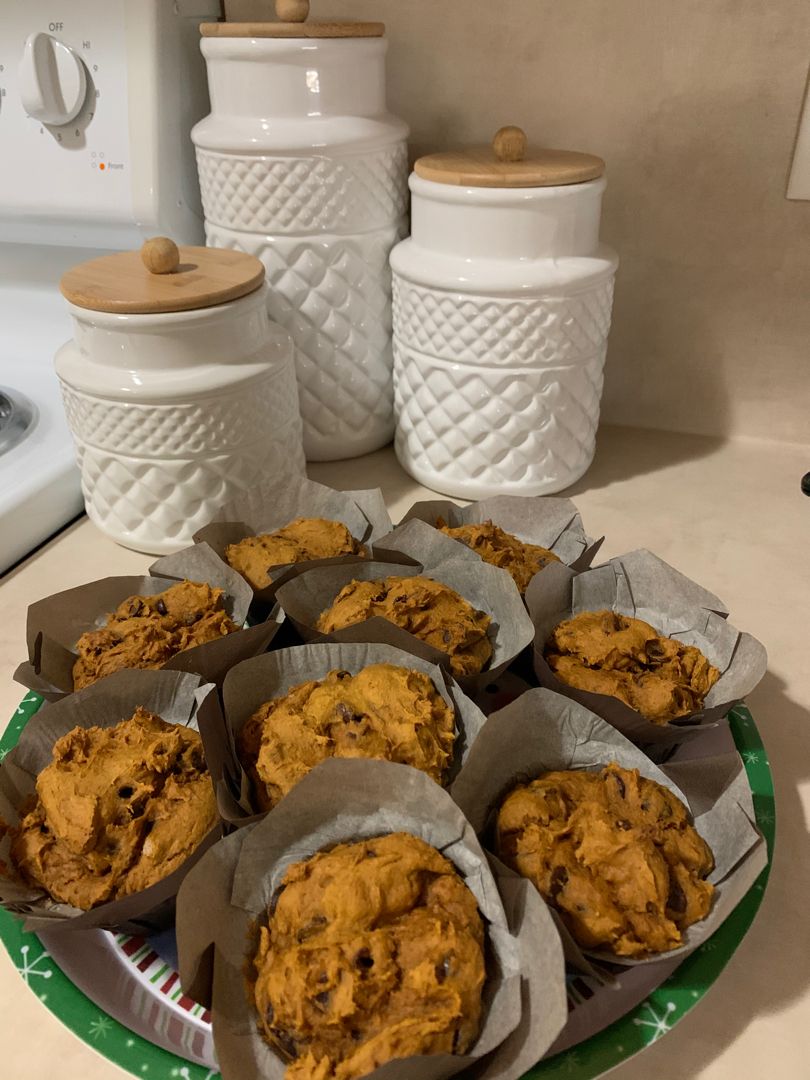
These pumpkin muffins are made with just two ingredients! Yes, two! The raisins and chopped nuts are optional but are a great addition if you want another layer of flavor and texture. These pumpkin muffins take just five minutes to prep. So you can whip up a huge batch if desired! And if you want to sneak in some extra veggies to these pumpkin muffins, you absolutely can!

Satisfy your pumpkin spice cravings with these delicious pumpkin muffins! Made with a box of spice cake mix and a can of pure pumpkin puree. Sweet, tasty, and fun treat that is enjoyed by everyone! Serve these healthy pumpkin muffins for breakfast, snacks, or even as a side dish. As for me, these pumpkin muffins are my favorite for breakfast or brunch paired with fresh fruit salad, your favorite casserole, etc. If served for dinner, these pumpkin muffins are awesome with fried chicken, pork chops, beef barbecue, etc.

Ingredients

1 (15 oz.) can of pure pumpkin puree

Mix in 1/2 c. raisins or chopped nuts, if desired

1 box spice cake mix

How to make Two Ingredient Pumpkin Muffins

Step 1: Combine the pumpkin and spice cake mix powder until well blended.

Step 2: Grease a muffin tin. Into each muffin cup, add a dollop of the mixture.

Step 3: Place in the oven and bake for about 18 to 22 minutes at 350 degrees until a knife inserted in the center of the muffin comes out clean.

Step 4: Remove from the oven when done and serve the Pumpkin Muffins with a dollop of whipped topping on top. Enjoy!

Tips:

For this recipe, you can use fresh pumpkin puree in place of the canned version.

If desired, you can mix in some chopped nuts or raisins to the batter.

Feel free to add other ingredients like milk and butter to the batter. This will prevent the batter from getting dry.

Two Ingredient Pumpkin Muffins

Rebecca These pumpkin muffins are made with just two ingredients! Yes, two! The raisins and chopped nuts are optional but are a great addition if you want another layer of flavor… General Recipes Two Ingredient Pumpkin Muffins European Print This
Nutrition facts: 200 calories 20 grams fat
Rating: 5.0/5
( 1 voted )

Ingredients

  • 1 (15 oz.) can of pure pumpkin puree
  • Mix in 1/2 c. raisins or chopped nuts, if desired
  • 1 box spice cake mix

Instructions

Step 1: Combine the pumpkin and spice cake mix powder until well blended.

Step 2: Grease a muffin tin. Into each muffin cup, add a dollop of the mixture.

Step 3: Place in the oven and bake for about 18 to 22 minutes at 350 degrees until a knife inserted in the center of the muffin comes out clean.

Step 4: Remove from the oven when done and serve the Pumpkin Muffins with a dollop of whipped topping on top. Enjoy!


Notes

For this recipe, you can use fresh pumpkin puree in place of the canned version. If desired, you can mix in some chopped nuts or raisins to the batter. Feel free to add other ingredients like milk and butter to the batter. This will prevent the batter from getting dry.

September 21, 2022 0 comment
0 FacebookTwitterPinterestEmail
Newer Posts
Older Posts

Popular Posts

  • 1

    Crispy Crunchy Parmesan Potatoes

    March 21, 2020
  • 2

    CROCK POT SMOTHERED PORK CHOPS

    March 21, 2020
  • Facebook
  • Twitter

@2019 - All Right Reserved.


Back To Top