Cook it once
  • Home
  • Privacy Policy
  • Recipes
    • KETO
    • LC
    • WW
  • Tips
  • Contact
Cook it once
  • Home
  • Privacy Policy
  • Recipes
    • KETO
    • LC
    • WW
  • Tips
  • Contact
Category:

General Recipes

General Recipes

Fun St. Patty’s Day Dessert

by Rebecca September 24, 2022
written by Rebecca

This dessert is a must every St. Patrick’s day! We love this Fun St. Patty’s Day Dessert so much that we make this all year round! It’s a delightful, fun dessert, excellent not only for St. Patrick’s Day but every occasion. I enjoy how I can dress this dessert up. We usually topped this dessert with powdered sugar. But whenever we are feeling a little fancy, I make a powder sugar glaze, drizzle it on top, and scatter some chopped pistachio’s over the glaze.

Not only that this cake looks amazing, but this taste superb, too! It is a fabulous dessert that never fails to impress everyone! Great for potlucks, picnics, or any occasion!

Ingredients

4 eggs

1 (18.25 oz.) package of yellow cake mix

1 1/2 c. water

1/2 tsp almond extract

1/4 c. vegetable oil

7 drops of green food coloring

1 (3.4 oz.) package of instant pistachio pudding mix

How to make Fun St. Patty’s Day Dessert

Step 1: Prepare the oven. Preheat it to 350 degrees F or 175 degrees C. Ready a 10-inch tube pan. Grease and flour the pan, then set aside.

Step 2: Place the cake mix and pudding mix in a large bowl. Thoroughly mix, then create a well in the middle and pour in the eggs, water, oil, almond extract, and green food coloring. Beat at medium speed for about 2 minutes.

Step 3: Into the prepared tube pan, pour the mixture. Place in the preheated oven and bake for about 50 to 55 minutes or until the cake springs back when pressed lightly. Remove the cake from the oven when done and allow it to cool for about 15 minutes in the pan before inverting the cake onto a wire rack to cool fully.

Step 4: Dust the cooled cake with powdered sugar or drizzle with glaze. Slice and serve. Enjoy!

Fun St. Patty's Day Dessert

Rebecca This dessert is a must every St. Patrick’s day! We love this Fun St. Patty’s Day Dessert so much that we make this all year round! It’s a delightful, fun… General Recipes Fun St. Patty’s Day Dessert European Print This
Nutrition facts: 200 calories 20 grams fat
Rating: 5.0/5
( 1 voted )

Ingredients

  • 4 eggs
  • 1 (18.25 oz.) package of yellow cake mix
  • 1 1/2 c. water
  • 1/2 tsp almond extract
  • 1/4 c. vegetable oil
  • 7 drops of green food coloring
  • 1 (3.4 oz.) package of instant pistachio pudding mix

Instructions

Step 1: Prepare the oven. Preheat it to 350 degrees F or 175 degrees C. Ready a 10-inch tube pan. Grease and flour the pan, then set aside.

Step 2: Place the cake mix and pudding mix in a large bowl. Thoroughly mix, then create a well in the middle and pour in the eggs, water, oil, almond extract, and green food coloring. Beat at medium speed for about 2 minutes.

Step 3: Into the prepared tube pan, pour the mixture. Place in the preheated oven and bake for about 50 to 55 minutes or until the cake springs back when pressed lightly. Remove the cake from the oven when done and allow it to cool for about 15 minutes in the pan before inverting the cake onto a wire rack to cool fully.

Step 4: Dust the cooled cake with powdered sugar or drizzle with glaze. Slice and serve. Enjoy!

September 24, 2022 0 comment
0 FacebookTwitterPinterestEmail
General Recipes

HOMEMADE CARAMEL CAKE

by Rebecca September 23, 2022
written by Rebecca

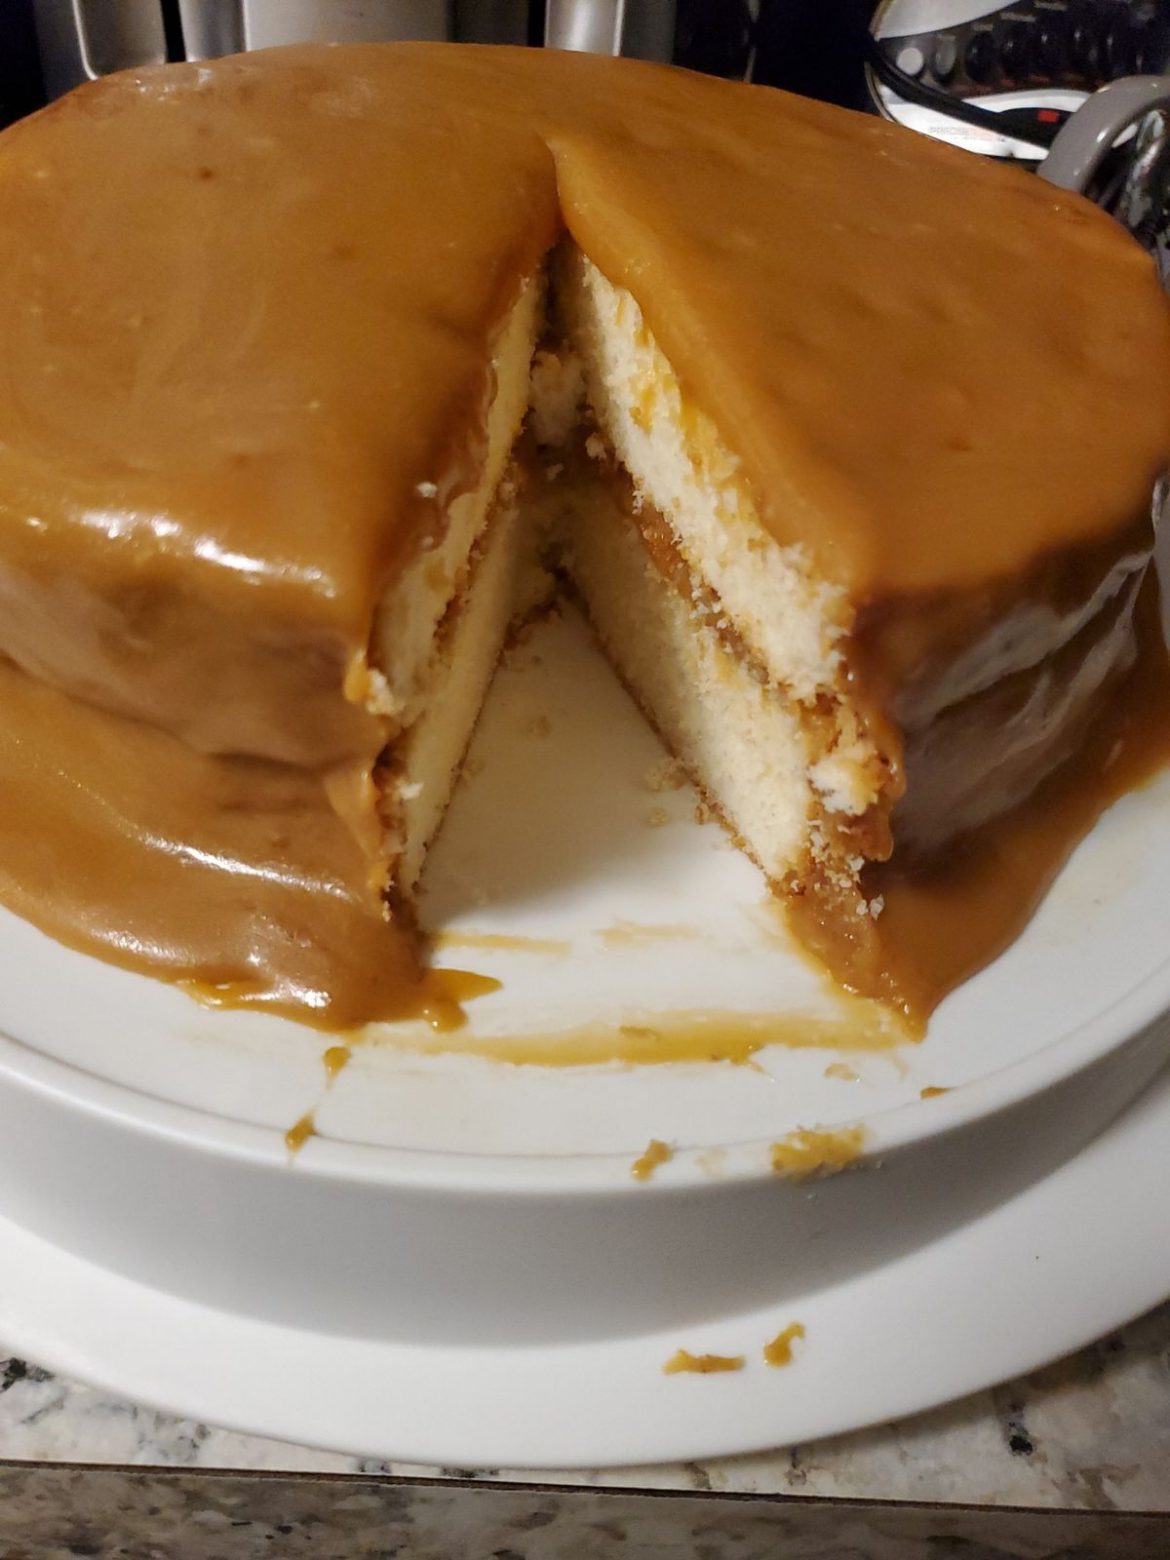
I am obsessed with this delightful Caramel Cake with a soft buttery vanilla layer coated in a simple caramel icing. This sweet, old-fashioned cake is a simple dessert that I am pretty sure everyone will love!

INGREDIENTS

Cake:

2 c. sugar

3 c. flour, self-rising

1 c. buttermilk

1 c. butter (2 sticks) – softened to room temperature

2 teaspoons Vanilla

4 eggs – room temperature

Caramel Icing:

1 c. butter

4 c. sugar

1 c. Crisco – or preferred solid vegetable shortening

1 teaspoon salt

2 teaspoons baking soda

2 teaspoons vanilla extract

2 c. buttermilk

HOW TO MAKE HOMEMADE CARAMEL CAKE

Cake:

Step 1: Prepare the oven. Preheat it to 350 degrees F.

Step 2: Using butter, grease three 9-inch cake pans, then dust them with flour, lightly coating the pans. Set aside.

Step 3: Place the cream and butter in a large mixing bowl. Cream until fluffy. Then, add the sugar and cream. Beat for another 5 to 6 minutes. Next, add the eggs, 1 at a time, beating well after each addition.

Step 4: Add the flour and buttermilk alternately to the butter mixture (starting and ending with flour), mixing well every after each addition. Then, add the vanilla and mix well.

Step 5: Among the prepared pans, evenly divide the batter. Place in the preheated oven and bake for about 25 to 30 minutes or until a toothpick inserted in the middle of the cake comes out clean.

Step 6: Remove from the oven when done and allow the cake to rest in the pan for about 5 minutes before inverting the cake onto cooling racks to cool completely.

Caramel Icing:

Step 7: Place the icing ingredients in a cast iron Dutch oven, or other heavy pot except for the vanilla. Heat over medium heat and place a candy thermometer on the side of the pot to monitor the temperature.

Step 8: Bring the mixture to a simmer, stirring using a wooden spoon. Cook the icing until the soft ball stage (235-245 degrees).

Step 9: Take the pot off the heat and stir the vanilla extract into the mixture.

Step 10: Using a wooden spoon, beat the icing until creamy and ready to spread. Or you can also use a mixer. Then, whip the icing until it holds once the icing has reached the soft ball stage.

NOTES:

For a smooth texture, dip the icing spreader in warm water and smooth the icing.

Wrap each cooled cake in plastic wrap and put them in the freezer for 30 minutes to an hour. Doing so will keep the cake hold together.

Before serving, chill the cake for at least 30 minutes until the frosting is set.

To store the cake, loosely tent the cake using plastic wrap and place it in the fridge for up to 4 days.

For a lovely addition, scatter the toasted pecans neatly over the cake.

HOMEMADE CARAMEL CAKE

Rebecca I am obsessed with this delightful Caramel Cake with a soft buttery vanilla layer coated in a simple caramel icing. This sweet, old-fashioned cake is a simple dessert that I… General Recipes HOMEMADE CARAMEL CAKE European Print This
Nutrition facts: 200 calories 20 grams fat
Rating: 5.0/5
( 1 voted )

Ingredients

  • Cake:
  • 2 c. sugar
  • 3 c. flour, self-rising
  • 1 c. buttermilk
  • 1 c. butter (2 sticks) – softened to room temperature
  • 2 teaspoons Vanilla
  • 4 eggs – room temperature
  • Caramel Icing:
  • 1 c. butter
  • 4 c. sugar
  • 1 c. Crisco – or preferred solid vegetable shortening
  • 1 teaspoon salt
  • 2 teaspoons baking soda
  • 2 teaspoons vanilla extract
  • 2 c. buttermilk

Instructions

Cake:

Step 1: Prepare the oven. Preheat it to 350 degrees F.

Step 2: Using butter, grease three 9-inch cake pans, then dust them with flour, lightly coating the pans. Set aside.

Step 3: Place the cream and butter in a large mixing bowl. Cream until fluffy. Then, add the sugar and cream. Beat for another 5 to 6 minutes. Next, add the eggs, 1 at a time, beating well after each addition.

Step 4: Add the flour and buttermilk alternately to the butter mixture (starting and ending with flour), mixing well every after each addition. Then, add the vanilla and mix well.

Step 5: Among the prepared pans, evenly divide the batter. Place in the preheated oven and bake for about 25 to 30 minutes or until a toothpick inserted in the middle of the cake comes out clean.

Step 6: Remove from the oven when done and allow the cake to rest in the pan for about 5 minutes before inverting the cake onto cooling racks to cool completely.

Caramel Icing:

Step 7: Place the icing ingredients in a cast iron Dutch oven, or other heavy pot except for the vanilla. Heat over medium heat and place a candy thermometer on the side of the pot to monitor the temperature.

Step 8: Bring the mixture to a simmer, stirring using a wooden spoon. Cook the icing until the soft ball stage (235-245 degrees).

Step 9: Take the pot off the heat and stir the vanilla extract into the mixture.

Step 10: Using a wooden spoon, beat the icing until creamy and ready to spread. Or you can also use a mixer. Then, whip the icing until it holds once the icing has reached the soft ball stage.

Notes

For a smooth texture, dip the icing spreader in warm water and smooth the icing. Wrap each cooled cake in plastic wrap and put them in the freezer for 30 minutes to an hour. Doing so will keep the cake hold together. Before serving, chill the cake for at least 30 minutes until the frosting is set. To store the cake, loosely tent the cake using plastic wrap and place it in the fridge for up to 4 days. For a lovely addition, scatter the toasted pecans neatly over the cake.

September 23, 2022 0 comment
0 FacebookTwitterPinterestEmail
General Recipes

Maple Sugar Cream Pie

by Rebecca September 23, 2022
written by Rebecca

Active: 20 mins | Inactive: 2+ hrs | Serves: 8-10

This Maple Cream Pie with a smooth, creamy-like custard cream Brulee filling with an amazing rich maple flavor! This is a super delightful pie that you can easily make at any time! Perfect for cozy fall weather or all year round.

INGREDIENTS

2 c. heavy cream

1 deep dish frozen pie crust

3/4 c. sugar

4 tbsp unsalted butter

1 tsp maple extract

1/4 c. pure maple syrup

1 tsp vanilla extract

1/4 tsp salt

4 tbsp cornstarch

Topping:

3 tbsp sugar

1 1/2 tsp cinnamon

4 tbsp unsalted butter, melted

How to make Maple Sugar Cream Pie

Step 1: Prepare the oven. Preheat it to 325 degrees F. In a standard pie dish, lay the crust. Place in the preheated oven and bake for about 10 to 12 minutes or until the crust is just lightly browned. Set the crust aside when done.

Step 2: Melt 4 tbsp butter in a medium saucepan with heavy cream over medium heat until the butter has melted. Then, stir in the cornstarch and sugar. Heat for about 6 to 7 minutes, stirring constantly until the mixture has thickened. Next, add the maple syrup along with the maple extract, vanilla extract, and salt (if using). Mix well until blended.

Step 3: Into the pie crust, pour the filling. On top, drizzle the rest of the melted butter.

Step 4: To make the topping, combine the rest of the topping ingredients (sugar and cinnamon) until combined, then sprinkle this over the filling.

Step 5: Place in the preheated oven and bake for about 25 to 30 minutes or until the crust is golden brown and the filling is bubbly. The pie is done once the center is set, but still slightly wobbly.

Step 6: Take the pie out of the oven when done and allow this to cool. Place the pie in the fridge for about 2 to 3 hours until set.

Step 7: Before serving, slice the pie. Enjoy!

Maple Sugar Cream Pie

Rebecca Active: 20 mins | Inactive: 2+ hrs | Serves: 8-10 This Maple Cream Pie with a smooth, creamy-like custard cream Brulee filling with an amazing rich maple flavor! This is… General Recipes Maple Sugar Cream Pie European Print This
Serves: 8-10
Nutrition facts: 200 calories 20 grams fat
Rating: 5.0/5
( 1 voted )

Ingredients

  • 2 c. heavy cream
  • 1 deep dish frozen pie crust
  • 3/4 c. sugar
  • 4 tbsp unsalted butter
  • 1 tsp maple extract
  • 1/4 c. pure maple syrup
  • 1 tsp vanilla extract
  • 1/4 tsp salt
  • 4 tbsp cornstarch
  • Topping:
  • 3 tbsp sugar
  • 1 1/2 tsp cinnamon
  • 4 tbsp unsalted butter, melted

Instructions

Step 1: Prepare the oven. Preheat it to 325 degrees F. In a standard pie dish, lay the crust. Place in the preheated oven and bake for about 10 to 12 minutes or until the crust is just lightly browned. Set the crust aside when done.

Step 2: Melt 4 tbsp butter in a medium saucepan with heavy cream over medium heat until the butter has melted. Then, stir in the cornstarch and sugar. Heat for about 6 to 7 minutes, stirring constantly until the mixture has thickened. Next, add the maple syrup along with the maple extract, vanilla extract, and salt (if using). Mix well until blended.

Step 3: Into the pie crust, pour the filling. On top, drizzle the rest of the melted butter.

Step 4: To make the topping, combine the rest of the topping ingredients (sugar and cinnamon) until combined, then sprinkle this over the filling.

Step 5: Place in the preheated oven and bake for about 25 to 30 minutes or until the crust is golden brown and the filling is bubbly. The pie is done once the center is set, but still slightly wobbly.

Step 6: Take the pie out of the oven when done and allow this to cool. Place the pie in the fridge for about 2 to 3 hours until set.

Step 7: Before serving, slice the pie. Enjoy!

September 23, 2022 0 comment
0 FacebookTwitterPinterestEmail
General Recipes

10-MINUTE CREAM CHEESE PASTA

by Rebecca September 23, 2022
written by Rebecca

Cook Time: 10 mins | Servings: 3

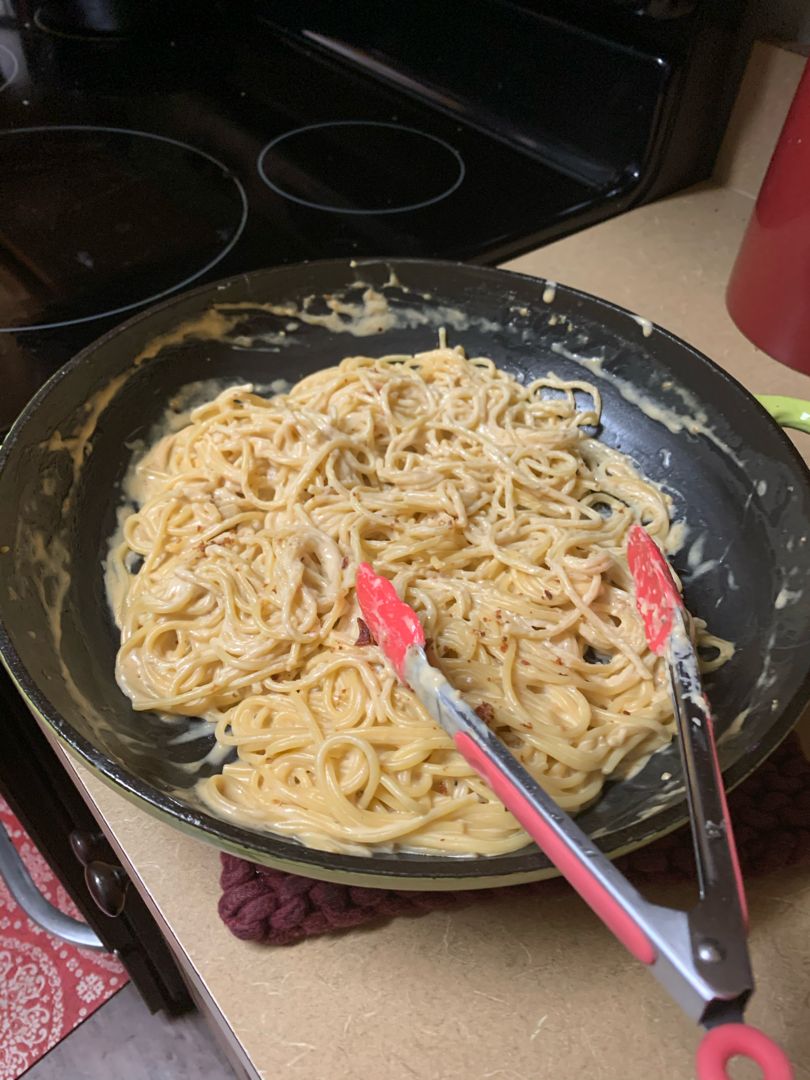
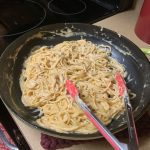
This cream cheese pasta is great for any midweek carb cravings. Budget-friendly and incredibly easy to whip up. Enjoy this filling, creamy, and cosy pasta anytime with this easy recipe.

Ingredients

3/4 c. (160 g.) cream cheese

1/4 c. (30 g.) grated Parmesan, plus more to serve

1/2 pound (225 g.) pasta (spaghetti, penne, fusilli)

1-2 garlic cloves, minced or pressed

1 tablespoon olive oil, plus more to serve

1/2 c. (120 ml) cooking water, plus more if needed

1/4-1/2 teaspoon chili flakes, or according to taste (optional)

salt and pepper, to taste

HOW TO MAKE 10-MINUTE CREAM CHEESE PASTA

Step 1: Following the package directions, cook the pasta in a large pot of boiling salted water until al dente. Set aside 1 c. of the starchy pasta water and drain the rest.

Step 2: Heat 1 tbsp olive oil in a large skillet. Then, add the garlic and a pinch of chili flakes if desired and fry for about 2 to 3 minutes over low flame.

Step 3: To the skillet, add the cream cheese and about half a c. of the starchy pasta water. Stir well before adding in the oil, cream cheese, and water. Stir again until creamy. Next, add the Parmesan cheese and stir well.

Step 4: Add the drained pasta to the skillet and toss well until evenly coated. If needed, add more cooking water until you have a smooth and creamy consistency.

Step 5: Serve the cream cheese pasta right away with drizzles of olive oil or extra virgin olive oil and garnished with freshly grated Parmesan and freshly ground black pepper (to replace the chili flakes). Enjoy!

Notes:

This recipe yield 3 small servings and 2 large ones.

For this recipe, I use cream cheese in a tub.

Adjust the sauce according to taste, keeping in mind that the cooking pasta water already contains salt.

You can use any variety of pasta. Make sure to use dried and not fresh pasta.

I do not recommend using store-bought sandy Parmesan. Use freshly grated Parmesan.

You can keep any leftovers in the fridge. If needed, splash a bit of water to loosen the sauce before reheating the pasta in the microwave/stove.

10-MINUTE CREAM CHEESE PASTA

Rebecca Cook Time: 10 mins | Servings: 3 This cream cheese pasta is great for any midweek carb cravings. Budget-friendly and incredibly easy to whip up. Enjoy this filling, creamy, and… General Recipes 10-MINUTE CREAM CHEESE PASTA European Print This
Serves: 3 Cooking Time: 10 mins 10 mins
Nutrition facts: 200 calories 20 grams fat
Rating: 1.3/5
( 4 voted )

Ingredients

  • 3/4 c. (160 g.) cream cheese
  • 1/4 c. (30 g.) grated Parmesan, plus more to serve
  • 1/2 pound (225 g.) pasta (spaghetti, penne, fusilli)
  • 1-2 garlic cloves, minced or pressed
  • 1 tablespoon olive oil, plus more to serve
  • 1/2 c. (120 ml) cooking water, plus more if needed
  • 1/4-1/2 teaspoon chili flakes, or according to taste (optional)
  • salt and pepper, to taste

Instructions

Step 1: Following the package directions, cook the pasta in a large pot of boiling salted water until al dente. Set aside 1 c. of the starchy pasta water and drain the rest.

Step 2: Heat 1 tbsp olive oil in a large skillet. Then, add the garlic and a pinch of chili flakes if desired and fry for about 2 to 3 minutes over low flame.

Step 3: To the skillet, add the cream cheese and about half a c. of the starchy pasta water. Stir well before adding in the oil, cream cheese, and water. Stir again until creamy. Next, add the Parmesan cheese and stir well.

Step 4: Add the drained pasta to the skillet and toss well until evenly coated. If needed, add more cooking water until you have a smooth and creamy consistency.

Step 5: Serve the cream cheese pasta right away with drizzles of olive oil or extra virgin olive oil and garnished with freshly grated Parmesan and freshly ground black pepper (to replace the chili flakes). Enjoy!

Notes

This recipe yield 3 small servings and 2 large ones. For this recipe, I use cream cheese in a tub. Adjust the sauce according to taste, keeping in mind that the cooking pasta water already contains salt. You can use any variety of pasta. Make sure to use dried and not fresh pasta. I do not recommend using store-bought sandy Parmesan. Use freshly grated Parmesan. You can keep any leftovers in the fridge. If needed, splash a bit of water to loosen the sauce before reheating the pasta in the microwave/stove.

September 23, 2022 0 comment
0 FacebookTwitterPinterestEmail
General Recipes

Chocolate Marble Gooey Butter Cake

by Rebecca September 23, 2022
written by Rebecca

Prep Time: 15 mins | Cook Time: 45 mins | Total Time: 1 hr | Servings: 12

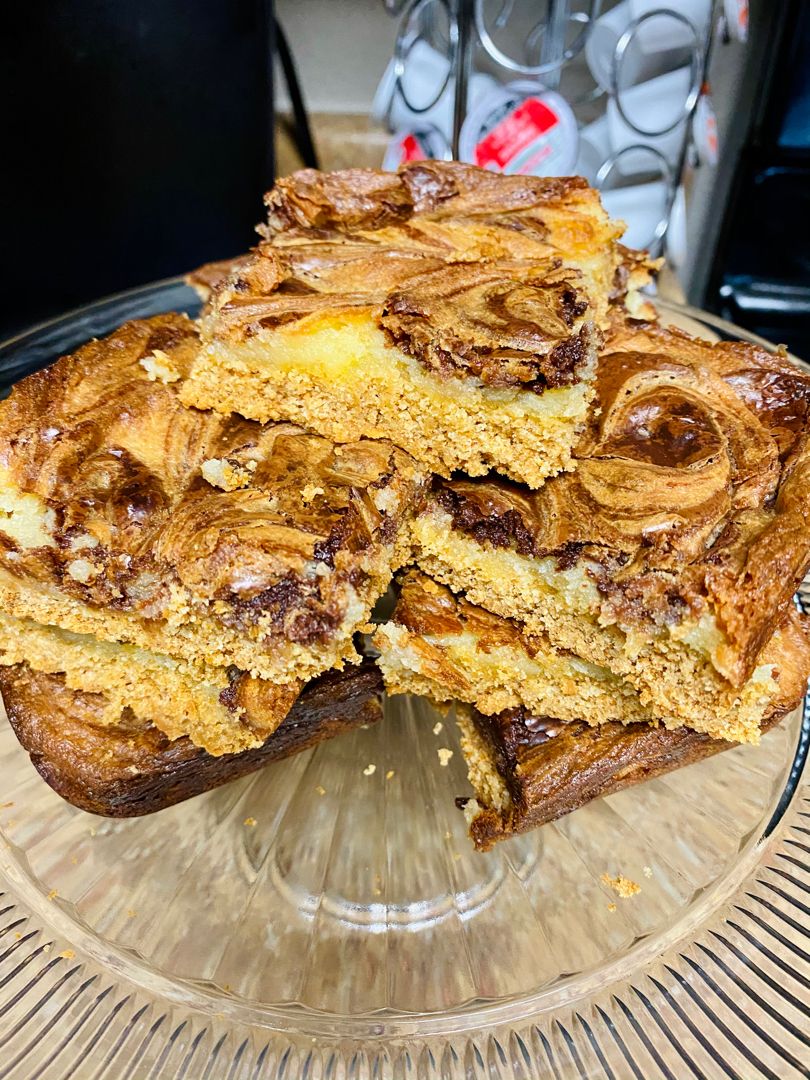
Sweet, tender, and gooey. This chocolate marble gooey butter cake is a delightful dessert with amazing flavors! And the brownie base with a gooey, creamy topping is to die for!

Ingredients

CRUST:

1 large egg

15.25 oz. box yellow cake mix

½ c. salted butter (1 stick), melted

FILLING:

2 large eggs

½ c. salted butter (1 stick), melted

8 oz. block cream cheese, softened to room temperature

1 tsp vanilla extract

1 c. semi-sweet chocolate chips

3 ¾ c. powdered sugar

How to make Chocolate Marble Gooey Butter Cake

Step 1: Prepare the oven. Preheat it to 350 degrees F. Using nonstick cooking spray, grease a 9 x 13-inch baking pan.

Step 2: To make the crust, place the cake mix, melted butter, and egg in a medium bowl. Beat using an electric mixer for about 2 minutes on low speed until the dough begins to pull away from the sides of the bowl.

Step 3: Into the bottom of the prepared baking dish, spread the batter and evenly spread it out.

Step 4: In the same mixing bowl, beat the cream cheese and beat on low until smooth to make the filling. Then, add the eggs along with the melted butter and vanilla extract. Beat for another minute at medium speed. Stir in the powdered sugar until the mixture is smooth. Set aside.

Step 5: Into a microwave-safe bowl or dish, place 1 c chocolate chips. Melt the chocolate chips for about 30 seconds on a high setting. Stir and microwave in 15-second intervals until completely melted.

Step 6: Combine 1 c of the cream cheese filling into the melted chocolate until well blended and the mixture is all one color.

Step 7: Over the crust, pour the filling and evenly spread it out. Dollop the chocolate filling on top using a spoon. Then, swirl the knife around using a butter knife to create the marbled effect.

Step 8: Place in the preheated oven and bake for about 45 minutes. Take the cake out of the oven when done and let it cool for at least 30 minutes before slicing it into squares. Enjoy!

Nutrition Facts:

Calories: 544 kcal | Carbohydrates: 81g | Protein: 4g | Fat: 23g | Saturated Fat: 14g | Cholesterol: 83mg | Sodium: 467mg | Potassium: 120mg | Fiber: 2g | Sugar: 61g | Vitamin A: 540IU | Calcium: 111mg | Iron: 2mg

Chocolate Marble Gooey Butter Cake

Rebecca Prep Time: 15 mins | Cook Time: 45 mins | Total Time: 1 hr | Servings: 12 Sweet, tender, and gooey. This chocolate marble gooey butter cake is a delightful… General Recipes Chocolate Marble Gooey Butter Cake European Print This
Serves: 12 Prep Time: 15 mins Cooking Time: 45 mins 45 mins
Nutrition facts: 544 calories 23 fat
Rating: 5.0/5
( 1 voted )

Ingredients

  • CRUST:
  • 1 large egg
  • 15.25 oz. box yellow cake mix
  • ½ c. salted butter (1 stick), melted
  • FILLING:
  • 2 large eggs
  • ½ c. salted butter (1 stick), melted
  • 8 oz. block cream cheese, softened to room temperature
  • 1 tsp vanilla extract
  • 1 c. semi-sweet chocolate chips
  • 3 ¾ c. powdered sugar

Instructions

Step 1: Prepare the oven. Preheat it to 350 degrees F. Using nonstick cooking spray, grease a 9 x 13-inch baking pan.

Step 2: To make the crust, place the cake mix, melted butter, and egg in a medium bowl. Beat using an electric mixer for about 2 minutes on low speed until the dough begins to pull away from the sides of the bowl.

Step 3: Into the bottom of the prepared baking dish, spread the batter and evenly spread it out.

Step 4: In the same mixing bowl, beat the cream cheese and beat on low until smooth to make the filling. Then, add the eggs along with the melted butter and vanilla extract. Beat for another minute at medium speed. Stir in the powdered sugar until the mixture is smooth. Set aside.

Step 5: Into a microwave-safe bowl or dish, place 1 c chocolate chips. Melt the chocolate chips for about 30 seconds on a high setting. Stir and microwave in 15-second intervals until completely melted.

Step 6: Combine 1 c of the cream cheese filling into the melted chocolate until well blended and the mixture is all one color.

Step 7: Over the crust, pour the filling and evenly spread it out. Dollop the chocolate filling on top using a spoon. Then, swirl the knife around using a butter knife to create the marbled effect.

Step 8: Place in the preheated oven and bake for about 45 minutes. Take the cake out of the oven when done and let it cool for at least 30 minutes before slicing it into squares. Enjoy!

September 23, 2022 0 comment
0 FacebookTwitterPinterestEmail
General Recipes

Yellow Cake Mix Gooey Bars

by Rebecca September 23, 2022
written by Rebecca

Prep Time: 10 mins | Cook Time: 35 mins | Total Time: 45 mins | Servings: 20

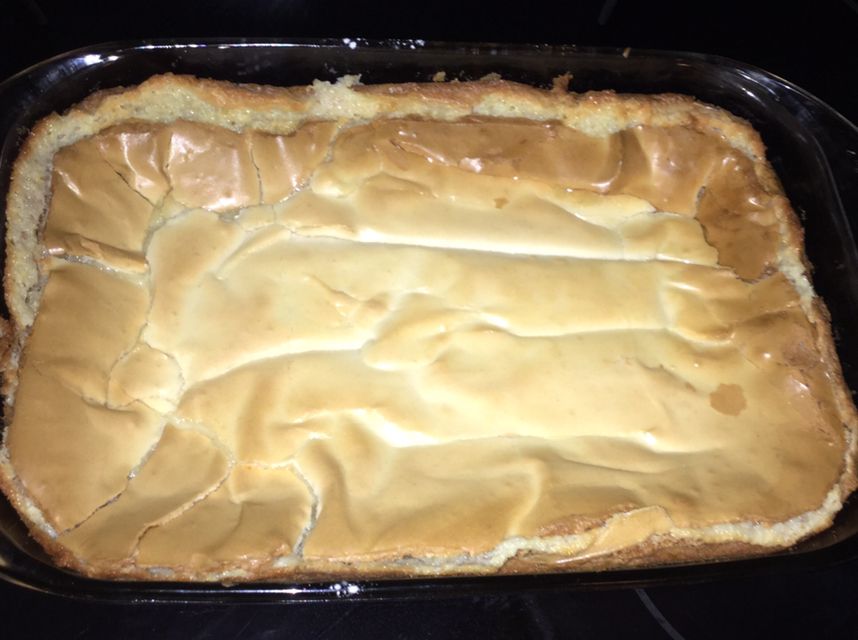
If you are looking for another easy dessert, you have to give this Yellow Cake Mix Gooey Bars. These impressive gooey bars will surely impress your family! Whip this dessert up using just six, easy-to-find ingredients in under an hour, any time. One bite and this dessert will certainly sweep you off your feet!

This dessert starts with a cake mix. Cake mix is no doubt an ultimate time saver. These Yellow Cake Mix Gooey Bars are the perfect last-minute dessert or even an afternoon snack for the kids. This two-layer, decadent, buttery, and rich dessert always disappears pretty fast!

Serve these amazing Yellow Cake Mix Gooey Bars at your next gathering/party or bring these for any pitch-in. I am one hundred percent sure that the kids and adults will enjoy these wonderful, very delightful Yellow Cake Mix Gooey Bars!

Ingredients

Cake Mix:

1/2 c. butter, melted

2 eggs

16.5 ounces yellow cake mix

Gooey Mix:

2 eggs

3 1/2 c. powdered sugar

8 ounces cream cheese, softened

How to make Yellow Cake Mix Gooey Bars

Step 1: Whisk the cake mix, melted butter, and eggs until well-combined. Then, press the mixture into a greased 13 x 9-inch baking dish

Step 2: In a bowl, place the cream cheese, 2 eggs, and powdered sugar. Beat until well blended, then spread this onto the cake mixture.

Step 3: Place in the oven and bake for about 35 minutes at 350 degrees F or until golden brown.

Step 4: Remove from the oven when done and slice the bar into individual servings. Enjoy!

Notes:

To prevent clumps, make sure the cream cheese is at room temperature.

To ensure less-gooey bars, do not overbake the cake mix cream cheese bars.

If needed, you can use a white cake mix in place of yellow.

Nutrition Facts:

Calories: 260 kcal | Carbohydrates: 41g | Protein: 3g | Fat: 10g | Saturated Fat: 6g | Cholesterol: 57mg | Sodium: 260mg | Potassium: 39mg | Fiber: 1g | Sugar: 31g | Vitamin A: 342IU | Calcium: 67mg | Iron: 1mg

Yellow Cake Mix Gooey Bars

Rebecca Prep Time: 10 mins | Cook Time: 35 mins | Total Time: 45 mins | Servings: 20 If you are looking for another easy dessert, you have to give this… General Recipes Yellow Cake Mix Gooey Bars European Print This
Serves: 20 Prep Time: 10 mins Cooking Time: 35 mins 35 mins
Nutrition facts: 260 calories 10 fat
Rating: 5.0/5
( 1 voted )

Ingredients

  • Cake Mix:
  • 1/2 c. butter, melted
  • 2 eggs
  • 16.5 ounces yellow cake mix
  • Gooey Mix:
  • 2 eggs
  • 3 1/2 c. powdered sugar
  • 8 ounces cream cheese, softened

Instructions

Step 1: Whisk the cake mix, melted butter, and eggs until well-combined. Then, press the mixture into a greased 13 x 9-inch baking dish

Step 2: In a bowl, place the cream cheese, 2 eggs, and powdered sugar. Beat until well blended, then spread this onto the cake mixture.

Step 3: Place in the oven and bake for about 35 minutes at 350 degrees F or until golden brown.

Step 4: Remove from the oven when done and slice the bar into individual servings. Enjoy!

Notes

To prevent clumps, make sure the cream cheese is at room temperature. To ensure less-gooey bars, do not overbake the cake mix cream cheese bars. If needed, you can use a white cake mix in place of yellow.

September 23, 2022 0 comment
0 FacebookTwitterPinterestEmail
General Recipes

BEEF TAMALE CASSEROLE

by Rebecca September 23, 2022
written by Rebecca

Prep Time: 15 mins | Cook Time: 40 mins | Total Time: 55 mins | Yield: 8 people

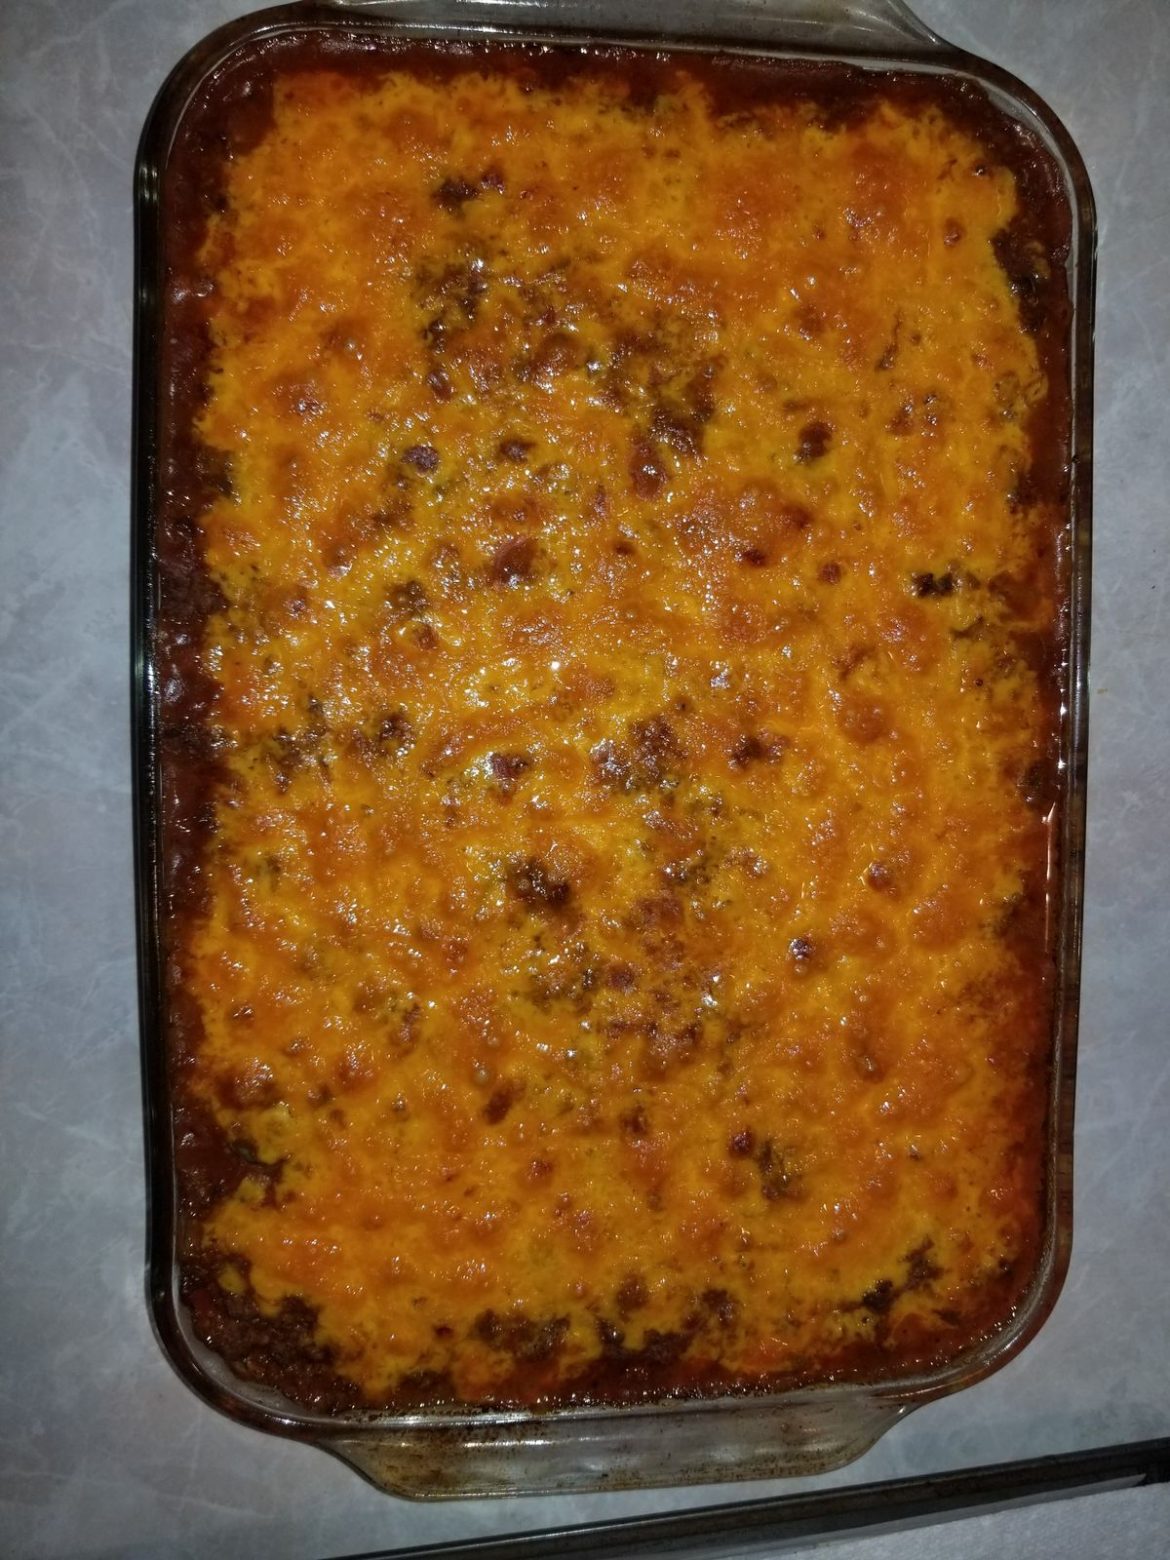
This Beef Tamale Casserole is a true crowd-pleaser! Made with sweet cornbread crust topped with seasoned beef, then enchilada sauce, and finally, loads of melty cheese! This is an amazing Mexican casserole to add to your favorite list! To serve, top a big slice with your fave toppings for that extra layer of goodness!

Ingredients

2 eggs

1 (8.5 ounces) pkg cornbread mix

1 pound of ground beef

1 (14.75 ounces) can creamed corn

1 (1 ounce) package of taco seasoning

⅔ c. salsa

½ c. milk

1 (10 ounces) can of enchilada sauce

2 c. shredded cheddar cheese, divided

HOW TO MAKE BEEF TAMALE CASSEROLE

Step 1: Prepare the oven. Preheat it to 400 degrees F. Using nonstick cooking spray, grease a 13 x 9 x 2-inch baking dish and set aside.

Step 2: Place the muffin mix, corn, eggs, milk, and 1 c. of cheese in a large bowl. Mix well and transfer the mixture into the prepared baking dish. Place in the preheated oven and bake for about 20 minutes.

Step 3: Cook the ground beef in a large skillet over medium heat until browned. Drain when done before adding the seasoning packet and salsa. Continue to cook for another 5 minutes.

Step 4: Into the enchilada sauce, toss the beef. Over the cornbread, pour the beef mixture and top with the rest of the cheese. Place in the oven and bake for 20 minutes more.

Step 5: Take the casserole out of the oven when done and let it cool for about 5 minutes before slicing it into 6 to 8 squares. Serve the casserole, top with your fave taco toppings. Enjoy!

Notes:

You can swap ground beef with ground turkey.

For this recipe, I use a box of Jiffy Mix cornbread mix.

You can use your favorite salsa. Mine are these store-bought salsas; Mateo’s, Kylito’s, Pace Picante Sauce, and Pace Restaurant Style Salsa.

BEEF TAMALE CASSEROLE

Rebecca Prep Time: 15 mins | Cook Time: 40 mins | Total Time: 55 mins | Yield: 8 people This Beef Tamale Casserole is a true crowd-pleaser! Made with sweet cornbread… General Recipes BEEF TAMALE CASSEROLE European Print This
Serves: 8 Prep Time: 15 mins Cooking Time: 40 mins 40 mins
Nutrition facts: 200 calories 20 grams fat
Rating: 5.0/5
( 1 voted )

Ingredients

  • 2 eggs
  • 1 (8.5 ounces) pkg cornbread mix
  • 1 pound of ground beef
  • 1 (14.75 ounces) can creamed corn
  • 1 (1 ounce) package of taco seasoning
  • ⅔ c. salsa
  • ½ c. milk
  • 1 (10 ounces) can of enchilada sauce
  • 2 c. shredded cheddar cheese, divided

Instructions

Step 1: Prepare the oven. Preheat it to 400 degrees F. Using nonstick cooking spray, grease a 13 x 9 x 2-inch baking dish and set aside.

Step 2: Place the muffin mix, corn, eggs, milk, and 1 c. of cheese in a large bowl. Mix well and transfer the mixture into the prepared baking dish. Place in the preheated oven and bake for about 20 minutes.

Step 3: Cook the ground beef in a large skillet over medium heat until browned. Drain when done before adding the seasoning packet and salsa. Continue to cook for another 5 minutes.

Step 4: Into the enchilada sauce, toss the beef. Over the cornbread, pour the beef mixture and top with the rest of the cheese. Place in the oven and bake for 20 minutes more.

Step 5: Take the casserole out of the oven when done and let it cool for about 5 minutes before slicing it into 6 to 8 squares. Serve the casserole, top with your fave taco toppings. Enjoy!

Notes

You can swap ground beef with ground turkey. For this recipe, I use a box of Jiffy Mix cornbread mix. You can use your favorite salsa. Mine are these store-bought salsas; Mateo’s, Kylito’s, Pace Picante Sauce, and Pace Restaurant Style Salsa.

September 23, 2022 0 comment
0 FacebookTwitterPinterestEmail
General Recipes

Hamburger Hash Brown Casserole Recipe

by Rebecca September 23, 2022
written by Rebecca

PREP TIME: 35 mins | COOK TIME: 20 mins | TOTAL TIME: 55 mins | YIELD: 8 servings

Hearty and delicious – this Hamburger Hash Brown Casserole is the best! It is incredibly easy to throw together using just a few simple ingredients. This casserole has a wonderful, satisfying flavor, and the leftovers are amazing, too!

Ingredients

8 ounces mushrooms, sliced

2 pounds of ground beef

2 tablespoons unsalted butter

4 c. hash browns, frozen

1/2 medium yellow onion, chopped

2 tablespoons all-purpose flour

2 c. milk

1 teaspoon salt

1/2 teaspoon pepper

1 tablespoon chili powder

1/2 teaspoon garlic powder

2 c. sharp cheddar cheese, grated

1 green onion, finely chopped

salt and pepper, to taste

How to make Hamburger Hash Brown Casserole

Step 1: Prepare the oven. Preheat it to 350 degrees.

Step 2: Heat the oil in a large (oven-proof) skillet over medium-high heat. Then, add the hash browns and cook for about 5 to 7 minutes, undisturbed, until the bottom is crispy and golden brown. To a plate, transfer the hash browns when done and set aside.

Step 3: In the now-empty skillet, add the ground beef and onions. Season with salt and pepper, then cook until the beef is completely cooked and browned. When done, drain the excess grease. To the ground beef mixture, add the milk and mushrooms. Stir well, scraping any browned bits on the bottom of the pan. Let the mixture come to a boil.

Step 4: Adjust the heat to medium-low, then stir in the spices. Take the pan off the heat. You can add extra flour if the mixture is still too runny.

Step 5: Transfer the mixture to a 2-quart casserole dish if using a non-oven-safe skillet. If using an oven-proof skillet, finish assembling the casserole in the same skillet.

Step 6: On top of the ground beef mixture, sprinkle 1½ cups of shredded cheese (set aside the rest for later). On top, place the hash browns, browned side up, and sprinkle with the rest of the cheese.

Step7: Place in the preheated oven and bake for about 18 to 20 minutes or until the casserole is piping hot. Take the casserole out of the oven when done and let it cool for about 15 minutes.

Step 8: Serve the casserole garnished with some chopped green onions. Enjoy!

Nutrition Facts:

Calories: 584 kcal, Carbohydrates: 22g, Protein: 33g, Fat: 40g, Saturated Fat: 19g, Polyunsaturated Fat: 1g, Monounsaturated Fat: 14g, Trans Fat: 1g, Cholesterol: 125mg, Sodium: 921mg, Potassium: 843mg, Fiber: 1g, Sugar: 4g

Hamburger Hash Brown Casserole Recipe

Rebecca PREP TIME: 35 mins | COOK TIME: 20 mins | TOTAL TIME: 55 mins | YIELD: 8 servings Hearty and delicious – this Hamburger Hash Brown Casserole is the best!… General Recipes Hamburger Hash Brown Casserole Recipe European Print This
Serves: 8 Prep Time: 35 mins Cooking Time: 20 mins 20 mins
Nutrition facts: 584 calories 40 fat
Rating: 5.0/5
( 1 voted )

Ingredients

  • 8 ounces mushrooms, sliced
  • 2 pounds of ground beef
  • 2 tablespoons unsalted butter
  • 4 c. hash browns, frozen
  • 1/2 medium yellow onion, chopped
  • 2 tablespoons all-purpose flour
  • 2 c. milk
  • 1 teaspoon salt
  • 1/2 teaspoon pepper
  • 1 tablespoon chili powder
  • 1/2 teaspoon garlic powder
  • 2 c. sharp cheddar cheese, grated
  • 1 green onion, finely chopped
  • salt and pepper, to taste

Instructions

Step 1: Prepare the oven. Preheat it to 350 degrees.

Step 2: Heat the oil in a large (oven-proof) skillet over medium-high heat. Then, add the hash browns and cook for about 5 to 7 minutes, undisturbed, until the bottom is crispy and golden brown. To a plate, transfer the hash browns when done and set aside.

Step 3: In the now-empty skillet, add the ground beef and onions. Season with salt and pepper, then cook until the beef is completely cooked and browned. When done, drain the excess grease. To the ground beef mixture, add the milk and mushrooms. Stir well, scraping any browned bits on the bottom of the pan. Let the mixture come to a boil.

Step 4: Adjust the heat to medium-low, then stir in the spices. Take the pan off the heat. You can add extra flour if the mixture is still too runny.

Step 5: Transfer the mixture to a 2-quart casserole dish if using a non-oven-safe skillet. If using an oven-proof skillet, finish assembling the casserole in the same skillet.

Step 6: On top of the ground beef mixture, sprinkle 1½ cups of shredded cheese (set aside the rest for later). On top, place the hash browns, browned side up, and sprinkle with the rest of the cheese.

Step7: Place in the preheated oven and bake for about 18 to 20 minutes or until the casserole is piping hot. Take the casserole out of the oven when done and let it cool for about 15 minutes.

Step 8: Serve the casserole garnished with some chopped green onions. Enjoy!

September 23, 2022 0 comment
0 FacebookTwitterPinterestEmail
General Recipes

Impossible Chicken Parmesan Pie

by Rebecca September 23, 2022
written by Rebecca

Prep Time: 10 mins | Cook Time: 35 mins | Servings: 6

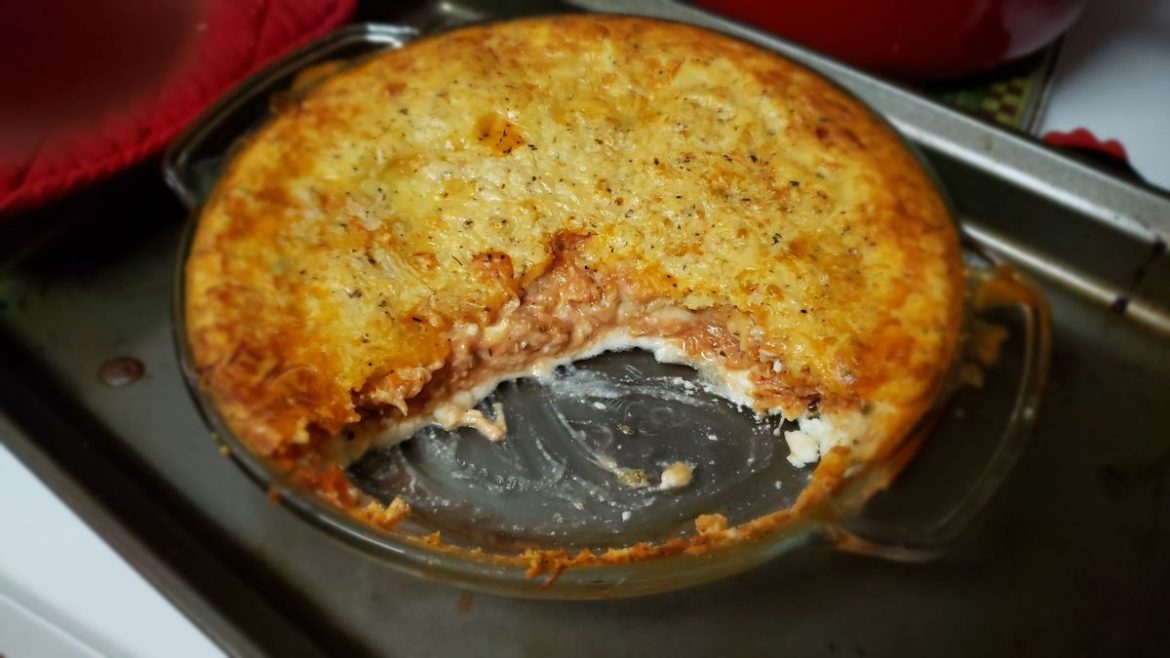
For a quick weeknight meal, you can easily whip up this Impossible Chicken Parmesan Pie. This has three layers of cheese mixed to shape a pie. This pie is seriously delicious and utterly simple and quick to make!

Ingredients

2 eggs

1 1/2 c. cooked chicken, cut up or shredded

3/4 c. cottage cheese

1/3 c. grated Parmesan cheese

1 1/4 c. shredded Mozzarella cheese

1/2 tsp dried oregano

1/2 tsp dried basil

1 c. milk

1/2 tsp garlic powder

2/3 c. Bisquick

1/4 tsp black pepper

6 oz. tomato paste

How to make Impossible Chicken Parmesan Pie

Step 1: Prepare the oven. Preheat it to 400 degrees F. Using non-stick cooking spray, grease a pie pan.

Step 2: Combine the cottage cheese with grated Parmesan cheese, then spread this into the bottom of the prepared pie plate.

Step 3: In a bowl, place the chicken, 1/2 of the shredded Mozzarella cheese, garlic powder, dried oregano, and basil and tomato paste. Mix well until combined, then spoon this over the cheese mixture.

Step 4: Beat the milk, egg, Bisquick, and pepper using a blender for 15 seconds. Pour this over both layers.

Step 5: Place in the preheated oven and bake for about 30 minutes or until a knife inserted in the center of the pie comes out clean. Remove the pie from the oven when done and top it with the rest of the mozzarella. Return the pie to the oven and resume baking for additional 5 minutes. You can broil the pie for a minute until golden brown if desired.

Step 6: Before slicing, allow the pie to stand for about 10 to 15 minutes. Enjoy!

Notes:

This recipe is excellent to use leftover chicken. If desired, you can use canned chicken instead.

This pie recipe uses a small can (6 ounces) of tomato paste.

You can swap fresh herbs instead of dried ones.

I recommend broiling the pie for about a minute or two to achieve the golden brown crust.

Make sure to allow the pie to sit for about 10 to 15 minutes before slicing and serving.

Impossible Chicken Parmesan Pie

Rebecca Prep Time: 10 mins | Cook Time: 35 mins | Servings: 6 For a quick weeknight meal, you can easily whip up this Impossible Chicken Parmesan Pie. This has three… General Recipes Impossible Chicken Parmesan Pie European Print This
Serves: 6 Prep Time: 10 mins Cooking Time: 35 mins 35 mins
Nutrition facts: 200 calories 20 grams fat
Rating: 5.0/5
( 1 voted )

Ingredients

  • 2 eggs
  • 1 1/2 c. cooked chicken, cut up or shredded
  • 3/4 c. cottage cheese
  • 1/3 c. grated Parmesan cheese
  • 1 1/4 c. shredded Mozzarella cheese
  • 1/2 tsp dried oregano
  • 1/2 tsp dried basil
  • 1 c. milk
  • 1/2 tsp garlic powder
  • 2/3 c. Bisquick
  • 1/4 tsp black pepper
  • 6 oz. tomato paste

Instructions

Step 1: Prepare the oven. Preheat it to 400 degrees F. Using non-stick cooking spray, grease a pie pan.

Step 2: Combine the cottage cheese with grated Parmesan cheese, then spread this into the bottom of the prepared pie plate.

Step 3: In a bowl, place the chicken, 1/2 of the shredded Mozzarella cheese, garlic powder, dried oregano, and basil and tomato paste. Mix well until combined, then spoon this over the cheese mixture.

Step 4: Beat the milk, egg, Bisquick, and pepper using a blender for 15 seconds. Pour this over both layers.

Step 5: Place in the preheated oven and bake for about 30 minutes or until a knife inserted in the center of the pie comes out clean. Remove the pie from the oven when done and top it with the rest of the mozzarella. Return the pie to the oven and resume baking for additional 5 minutes. You can broil the pie for a minute until golden brown if desired.

Step 6: Before slicing, allow the pie to stand for about 10 to 15 minutes. Enjoy!

Notes

This recipe is excellent to use leftover chicken. If desired, you can use canned chicken instead. This pie recipe uses a small can (6 ounces) of tomato paste. You can swap fresh herbs instead of dried ones. I recommend broiling the pie for about a minute or two to achieve the golden brown crust. Make sure to allow the pie to sit for about 10 to 15 minutes before slicing and serving.

September 23, 2022 0 comment
0 FacebookTwitterPinterestEmail
General Recipes

White Texas Almond Sheet Cake

by Rebecca September 23, 2022
written by Rebecca

Total time: 40 mins | Serves: 18-22

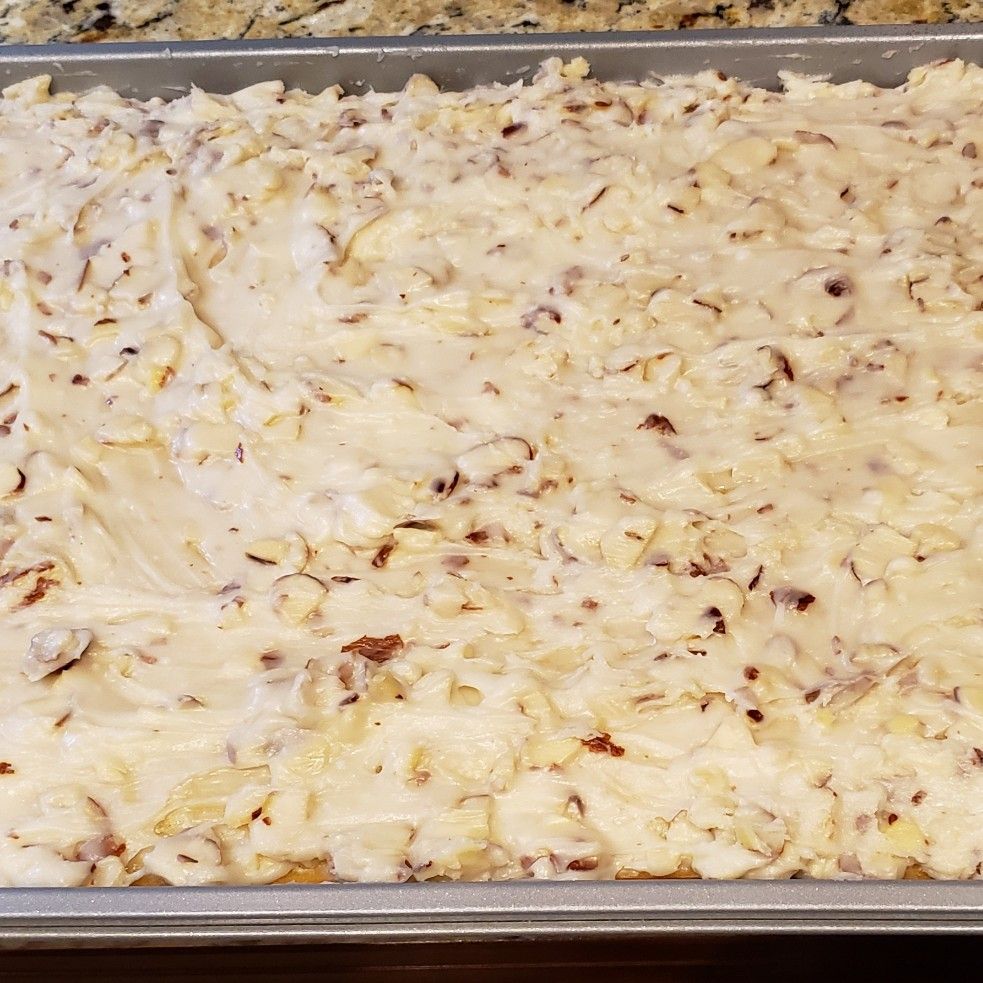
Moist and buttery – I am seriously obsessed with this delightful White Texas Almond Sheet Cake! The simple icing slightly sinks into the cake making the cake crackle a little when sliced. And the sliced almonds on top make this cake extra appetizing.

INGREDIENTS

Cake:

2 large eggs, room temperature

1 c. (2 sticks) unsalted butter, melted

1/2 c. sour cream

1 1/2 tsp vanilla extract

2 c. all-purpose flour

1 tsp baking soda

3/4 tsp salt

2 c. sugar

1 c. water

1 tsp almond extract, optional

Frosting:

1/3 c. whole milk

4 1/2-5 c. powdered sugar

3/4 c. (1 1/2 sticks) unsalted butter, melted

1/2 tsp almond extract

1/2 c. sliced almonds, garnish

1/2 tsp vanilla extract

How to make White Texas Almond Sheet Cake

Step 1: Prepare the oven. Preheat it to 350 degrees F. Using butter or non-stick spray, lightly grease a 13 x 18-inch cake pan.

Step 2: Place the dry ingredients (flour, baking soda, and salt) in a medium bowl. Mix well until combined.

Step 3: Whisk the sugar, water, melted butter, sour cream, eggs, and vanilla and almond extracts in another large bowl until well blended.

Step 4: Into the wet ingredients, slowly stir in the dry ingredients until just combined.

Step 5: Into the prepared cake pan, pour the batter. Place in the preheated oven and bake for about 18 to 21 minutes or until a toothpick inserted in the middle of the cake comes out clean.

Step 6: In the meantime, prep the frosting. Combine the frosting ingredients except for the sliced almonds until smooth.

Step 7: When the cake is done, take it out of the oven and allow it to cool for about 5 minutes. Then, pour the frosting over the cake and scatter the sliced almonds on top. Allow the icing to set before slicing the cake into squares. Enjoy!

White Texas Almond Sheet Cake

Rebecca Total time: 40 mins | Serves: 18-22 Moist and buttery – I am seriously obsessed with this delightful White Texas Almond Sheet Cake! The simple icing slightly sinks into the… General Recipes White Texas Almond Sheet Cake European Print This
Serves: 18-22
Nutrition facts: 200 calories 20 grams fat
Rating: 5.0/5
( 1 voted )

Ingredients

  • Cake:
  • 2 large eggs, room temperature
  • 1 c. (2 sticks) unsalted butter, melted
  • 1/2 c. sour cream
  • 1 1/2 tsp vanilla extract
  • 2 c. all-purpose flour
  • 1 tsp baking soda
  • 3/4 tsp salt
  • 2 c. sugar
  • 1 c. water
  • 1 tsp almond extract, optional
  • Frosting:
  • 1/3 c. whole milk
  • 4 1/2-5 c. powdered sugar
  • 3/4 c. (1 1/2 sticks) unsalted butter, melted
  • 1/2 tsp almond extract
  • 1/2 c. sliced almonds, garnish
  • 1/2 tsp vanilla extract

Instructions

Step 1: Prepare the oven. Preheat it to 350 degrees F. Using butter or non-stick spray, lightly grease a 13 x 18-inch cake pan.

Step 2: Place the dry ingredients (flour, baking soda, and salt) in a medium bowl. Mix well until combined.

Step 3: Whisk the sugar, water, melted butter, sour cream, eggs, and vanilla and almond extracts in another large bowl until well blended.

Step 4: Into the wet ingredients, slowly stir in the dry ingredients until just combined.

Step 5: Into the prepared cake pan, pour the batter. Place in the preheated oven and bake for about 18 to 21 minutes or until a toothpick inserted in the middle of the cake comes out clean.

Step 6: In the meantime, prep the frosting. Combine the frosting ingredients except for the sliced almonds until smooth.

Step 7: When the cake is done, take it out of the oven and allow it to cool for about 5 minutes. Then, pour the frosting over the cake and scatter the sliced almonds on top. Allow the icing to set before slicing the cake into squares. Enjoy!

September 23, 2022 0 comment
0 FacebookTwitterPinterestEmail
Newer Posts
Older Posts

Popular Posts

  • 1

    Crispy Crunchy Parmesan Potatoes

    March 21, 2020
  • 2

    CROCK POT SMOTHERED PORK CHOPS

    March 21, 2020
  • Facebook
  • Twitter

@2019 - All Right Reserved.


Back To Top