Cook it once
  • Home
  • Privacy Policy
  • Recipes
    • KETO
    • LC
    • WW
  • Tips
  • Contact
Cook it once
  • Home
  • Privacy Policy
  • Recipes
    • KETO
    • LC
    • WW
  • Tips
  • Contact
Category:

General Recipes

General Recipes

Bacon Egg and Hash Brown Casserole for a Lazy Weekend Breakfast

by Rebecca September 30, 2022
written by Rebecca

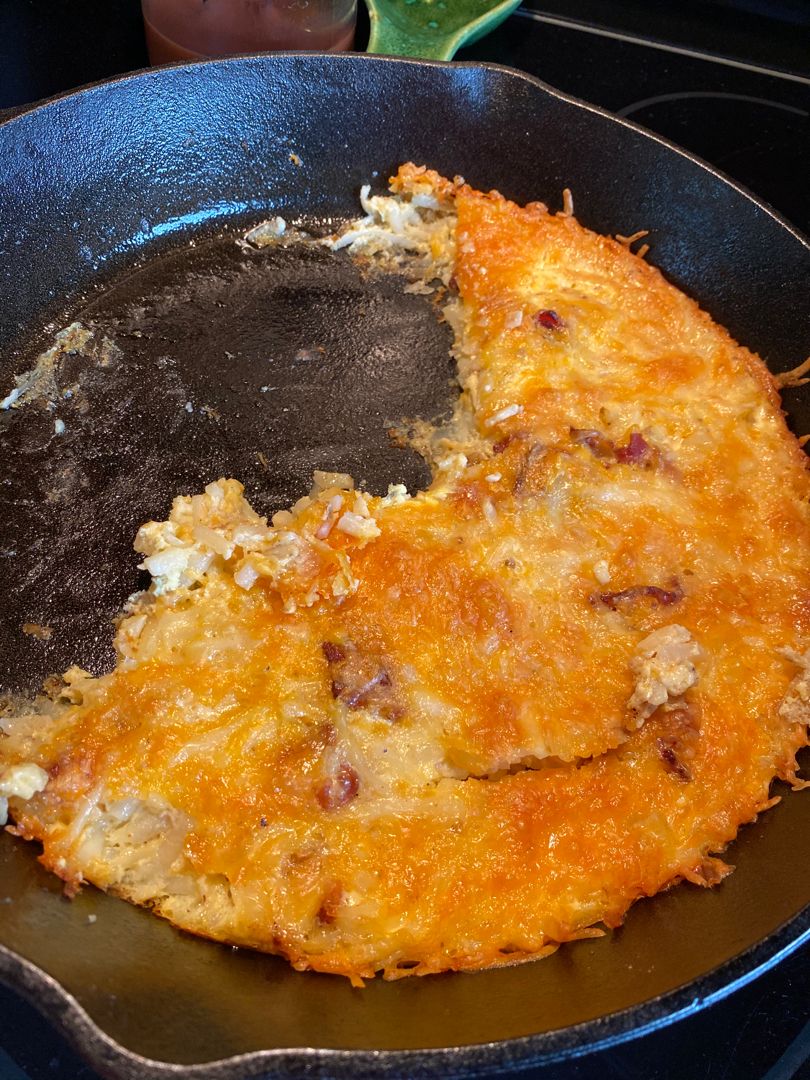
This bacon, egg and hash brown casserole is an amazing weekend breakfast. You can make this casserole in advance and bake it the next day. Or store the completely cooled casserole in the fridge or freezer for an even easier and quicker breakfast at any time.

Ingredients

8 eggs

1 (30 ounces) package of frozen shredded hash browns – thawed

½ c. whole milk or Half and Half

8 ounces shredded cheddar cheese

½ teaspoon onion powder

¼ teaspoon garlic powder

Pinch of cayenne pepper

½ pound bacon – cooked crispy and crumbled

Chopped green onions for garnish, optional

½ teaspoon salt

¼ teaspoon Pepper

How to make Bacon Egg and Hash Brown Casserole

Step 1: Prepare the oven. Preheat it to 350 degrees F. Using butter, lightly grease a 9 x 13-inch baking dish.

Step 2: In the bottom of the prepared pan, evenly spread the hash browns.

Step 3: Place the eggs, milk, salt, onion powder, garlic powder, pepper, and cayenne in a large bowl. Mix well until combined and pour this over the hash browns. On top, sprinkle half of the cheese, all the bacon, and the rest of the cheese.

Step 4: Using foil, tightly cover the dish. Place in the preheated oven and bake for about an hour. Take the foil off and continue to bake for an additional 5 to 10 minutes or until the middle of the casserole is set and a knife inserted in the casserole comes out clean.

Step 5: Remove the casserole from the oven when done and allow the casserole to stand for about 5 to 10 minutes.

Step 6: Before serving, garnish with some chopped green onions. Enjoy!

Notes:

You can make this casserole in advance. Wrap the unbaked casserole using plastic and keep it in the fridge. To bake, you might need to increase the baking time by approximately 10 to 15 minutes.

For this recipe, you can use any melting cheese such as Colby, Monterey Jack, and Colby Jack.

For a little kick, add cayenne pepper. Or omit it if desired. And for extra spice, you can also use add red pepper flakes or a couple of dashes of your fave hot sauce.

In place of hash browns, you can use tater tots or diced fresh potatoes.

For extra richness, use half-and-half. Or swap milk with sour cream.

In an airtight container, store the completely cooled casserole and store in the fridge for up to 4 days.

To freeze, divide the baked casserole into individual portions and place them in freezer containers. You can also transfer the entire casserole into an airtight container. Using two layers of foil, wrap the casserole and freeze for up to 2 months.

To reheat, transfer the casserole to a baking dish and heat at 350 degrees F until hot.

Bacon Egg and Hash Brown Casserole for a Lazy Weekend Breakfast

Rebecca This bacon, egg and hash brown casserole is an amazing weekend breakfast. You can make this casserole in advance and bake it the next day. Or store the completely cooled… General Recipes Bacon Egg and Hash Brown Casserole for a Lazy Weekend Breakfast European Print This
Nutrition facts: 200 calories 20 grams fat
Rating: 5.0/5
( 2 voted )

Ingredients

  • 8 eggs
  • 1 (30 ounces) package of frozen shredded hash browns – thawed
  • ½ c. whole milk or Half and Half
  • 8 ounces shredded cheddar cheese
  • ½ teaspoon onion powder
  • ¼ teaspoon garlic powder
  • Pinch of cayenne pepper
  • ½ pound bacon – cooked crispy and crumbled
  • Chopped green onions for garnish, optional
  • ½ teaspoon salt
  • ¼ teaspoon Pepper

Instructions

Step 1: Prepare the oven. Preheat it to 350 degrees F. Using butter, lightly grease a 9 x 13-inch baking dish.

Step 2: In the bottom of the prepared pan, evenly spread the hash browns.

Step 3: Place the eggs, milk, salt, onion powder, garlic powder, pepper, and cayenne in a large bowl. Mix well until combined and pour this over the hash browns. On top, sprinkle half of the cheese, all the bacon, and the rest of the cheese.

Step 4: Using foil, tightly cover the dish. Place in the preheated oven and bake for about an hour. Take the foil off and continue to bake for an additional 5 to 10 minutes or until the middle of the casserole is set and a knife inserted in the casserole comes out clean.

Step 5: Remove the casserole from the oven when done and allow the casserole to stand for about 5 to 10 minutes.

Step 6: Before serving, garnish with some chopped green onions. Enjoy!

Notes

You can make this casserole in advance. Wrap the unbaked casserole using plastic and keep it in the fridge. To bake, you might need to increase the baking time by approximately 10 to 15 minutes. For this recipe, you can use any melting cheese such as Colby, Monterey Jack, and Colby Jack. For a little kick, add cayenne pepper. Or omit it if desired. And for extra spice, you can also use add red pepper flakes or a couple of dashes of your fave hot sauce. In place of hash browns, you can use tater tots or diced fresh potatoes. For extra richness, use half-and-half. Or swap milk with sour cream. In an airtight container, store the completely cooled casserole and store in the fridge for up to 4 days. To freeze, divide the baked casserole into individual portions and place them in freezer containers. You can also transfer the entire casserole into an airtight container. Using two layers of foil, wrap the casserole and freeze for up to 2 months. To reheat, transfer the casserole to a baking dish and heat at 350 degrees F until hot.
September 30, 2022 0 comment
0 FacebookTwitterPinterestEmail
General Recipes

Lemon Pudding Cake Recipe: Bright and Zesty Taste Of Spring

by Rebecca September 29, 2022
written by Rebecca

Servings: 12 | Yield: 8” square cake

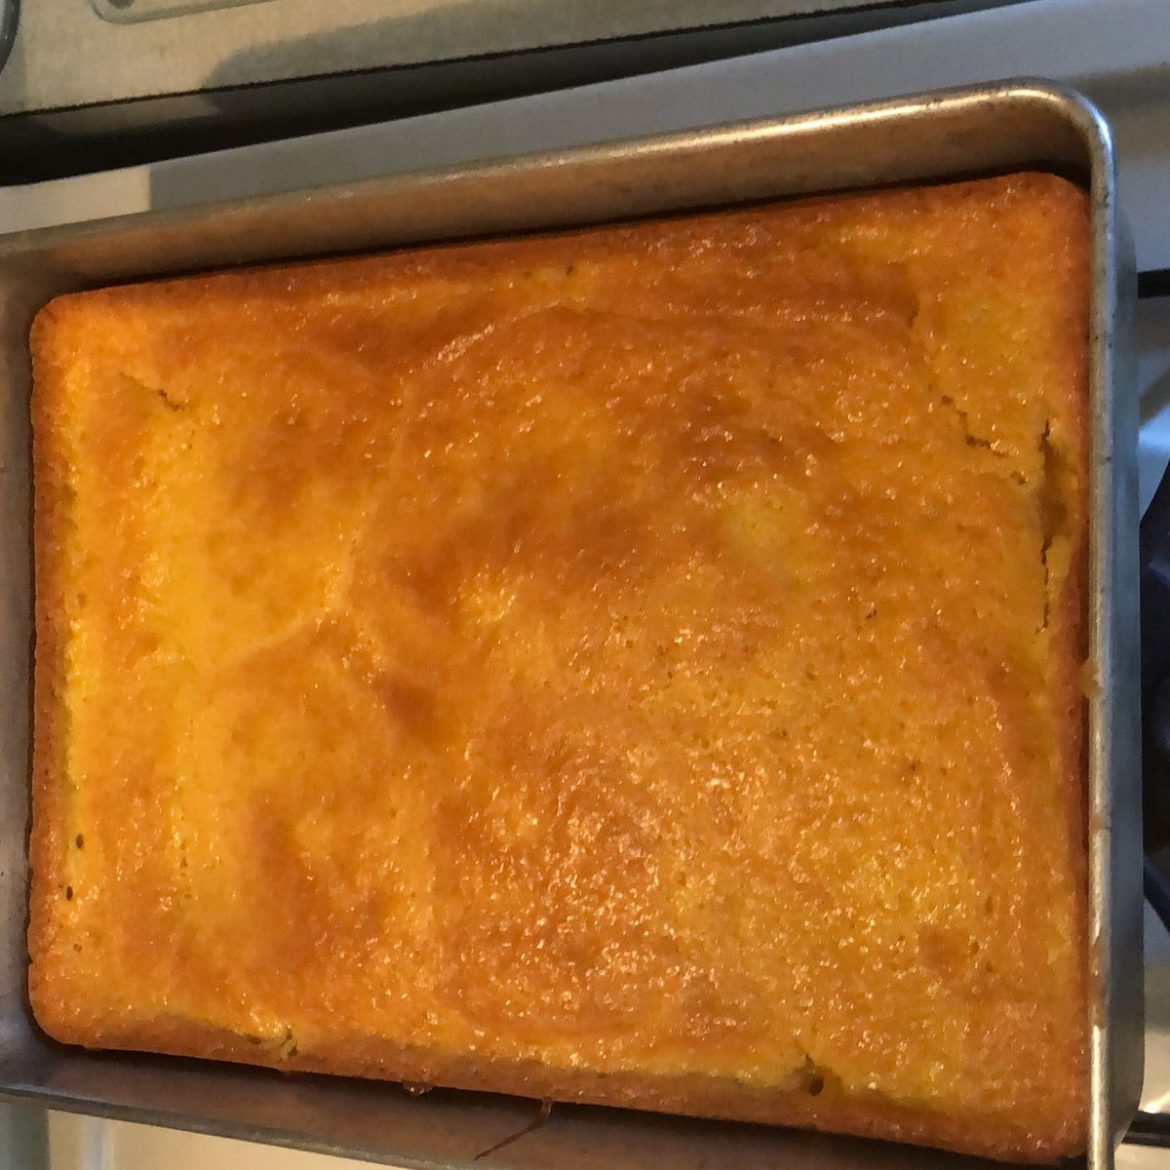
This lemon pudding cake has bright and zesty flavors of Spring. This cake is very indulging. Just a couple of bites, you’ll surely be hooked! I love the little versions of this cake, but this full cake version is as great, especially when serving a crowd. You’ll be surprised how the batter magically separates into a fluffy cake on top of a delightful lemon pudding. Before serving, dust the cake with the Confectioners’ sugar if desired and top with berries.

Moist cake on a delicate custard filling. This lemon pudding cake is one of my ultimate favorite desserts! I love to serve this warm, just out of the oven. But this cake is also excellent chilled. This cake is no doubt the perfect treat for all lemon lovers!

This cake is a refreshing cake with bold lemon flavors! It’s a no-fuss to make, incredibly delightful with soft sponge cake on top and lemon pudding beneath. This is a keeper recipe and a must-try.

Ingredients

1 tbsp butter

4 eggs, separated

1 tsp lemon zest

1 ½ c. white sugar

⅓ c. lemon juice

½ c. sifted all-purpose flour

1 ½ c. milk

½ tsp salt

How to make Lemon Pudding Cake

Step 1: Beat the egg yolks with lemon juice, lemon rind, and butter or margarine until blended, thick, and lemon colored. Add the sugar, flour, and salt, mixing well. Add them alternately with milk, mixing every after each addition.

Step 2: Next, whisk the egg whites until stiff. Into the batter, add the egg whites, beating using an electric mixer on low speed.

Step 3: Into an 8-inch square baking dish, pour the batter.

Step 4: In the oven, place a pan of hot water. Into the pan, set the baking dish, and bake the cake for about 45 minutes at 350 degrees F or 175 degrees C.

Nutrition Facts:

Per Serving: 165 calories; protein 3.7g; carbohydrates 31.1g; fat 3.3g; cholesterol 67mg; sodium 139.7mg.

Lemon Pudding Cake Recipe: Bright and Zesty Taste Of Spring

Rebecca Servings: 12 | Yield: 8” square cake This lemon pudding cake has bright and zesty flavors of Spring. This cake is very indulging. Just a couple of bites, you’ll surely… General Recipes Lemon Pudding Cake Recipe: Bright and Zesty Taste Of Spring European Print This
Serves: 12
Nutrition facts: 165 calories 3.3 fat
Rating: 5.0/5
( 1 voted )

Ingredients

  • 1 tbsp butter
  • 4 eggs, separated
  • 1 tsp lemon zest
  • 1 ½ c. white sugar
  • ⅓ c. lemon juice
  • ½ c. sifted all-purpose flour
  • 1 ½ c. milk
  • ½ tsp salt

Instructions

Step 1: Beat the egg yolks with lemon juice, lemon rind, and butter or margarine until blended, thick, and lemon colored. Add the sugar, flour, and salt, mixing well. Add them alternately with milk, mixing every after each addition.

Step 2: Next, whisk the egg whites until stiff. Into the batter, add the egg whites, beating using an electric mixer on low speed.

Step 3: Into an 8-inch square baking dish, pour the batter.

Step 4: In the oven, place a pan of hot water. Into the pan, set the baking dish, and bake the cake for about 45 minutes at 350 degrees F or 175 degrees C.

September 29, 2022 0 comment
0 FacebookTwitterPinterestEmail
General Recipes

2 Ingredient Lemon Bars Recipe

by Rebecca September 29, 2022
written by Rebecca

Prep Time: 5 mins | Cook Time: 30 mins | Servings: 24

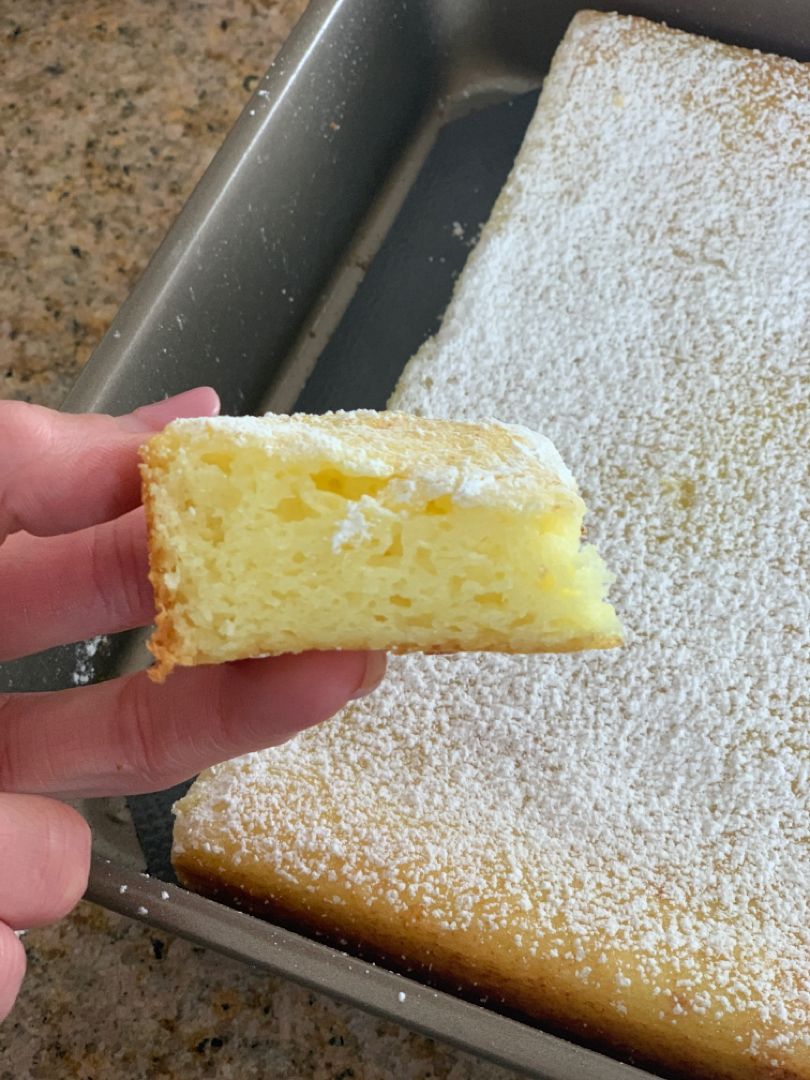
Easy and quick to make – these two-ingredient lemon bars are one of the best out-of-a-box cake mixes that you’ll ever make! Simply mix the Angel Food Cake and can of lemon pie filling until combined and bake for deliciously easy lemon bars any time!

If you love easy recipes, you’ll no doubt enjoy this 2 Ingredient Lemon Bars Recipe. You can easily and quickly throw this together for a scrumptious treat perfect for all occasions! In less than thirty minutes, have this hot, delightful lemon bar on your plate.

I have been making these 2 Ingredient Lemon Bars for years and I am never getting tired of this amazing treat! I remembered the first time I brought this to a party. Everyone was rushing to the dessert table to have a slice! To my surprise, these lemon bars are gone in a blink! Since then, these delightful lemon bars, have been the most requested treat by everyone either in the office or at any party I host. And these lemon bars are also great to bring to potlucks!

These lemon bars never cease to amaze me. I love how I can easily make this using just two ingredients and fast! If desired, you can also dust this cake with powdered sugar before serving. For a more lemony flavor, you can also add lemon zest to the batter or on top of the cake. You can even add slices of lemons across the top of the batter before baking for an extra hint of lemon. For best results, I recommend mixing the batter slowly by hand. And for easier clean-up, line the pan with parchment paper.

Ingredients

21 ounces lemon pie filling

1 box of angel food cake must be the one-step, just-add-water kind

How to make 2 Ingredient Lemon Bars

Step 1: Mix the Angel food cake and lemon pie filling until combined.

Step 2: Into a 9 x 13-inch pan, pour the batter.

Step 3: Place in the oven and bake for about 30 minutes at 350 degrees until done.

Nutrition Facts:

Amount Per Serving: Calories 69, Calories from Fat 9, Fat 1g2%, Saturated Fat 1g6%, Cholesterol 1mg0%, Sodium 155mg7%, Potassium 17mg0%, Carbohydrates 16g5%, Fiber 1g4%, Sugar 12g13%, Protein 1g2%, Calcium 29mg3%, Iron 1mg6%

2 Ingredient Lemon Bars Recipe

Rebecca Prep Time: 5 mins | Cook Time: 30 mins | Servings: 24 Easy and quick to make – these two-ingredient lemon bars are one of the best out-of-a-box cake mixes… General Recipes 2 Ingredient Lemon Bars Recipe European Print This
Serves: 24 Prep Time: 5 mins Cooking Time: 30 mins 30 mins
Nutrition facts: 69 calories 1 fat
Rating: 5.0/5
( 1 voted )

Ingredients

  • 21 ounces lemon pie filling
  • 1 box of angel food cake must be the one-step, just-add-water kind

Instructions

Step 1: Mix the Angel food cake and lemon pie filling until combined.

Step 2: Into a 9 x 13-inch pan, pour the batter.

Step 3: Place in the oven and bake for about 30 minutes at 350 degrees until done.

September 29, 2022 0 comment
0 FacebookTwitterPinterestEmail
General Recipes

Garlic Parmesan Baked Cod: Crispy And Decadent

by Rebecca September 29, 2022
written by Rebecca

Prep time: 5 mins | Cook time: 13 mins | Servings: 4

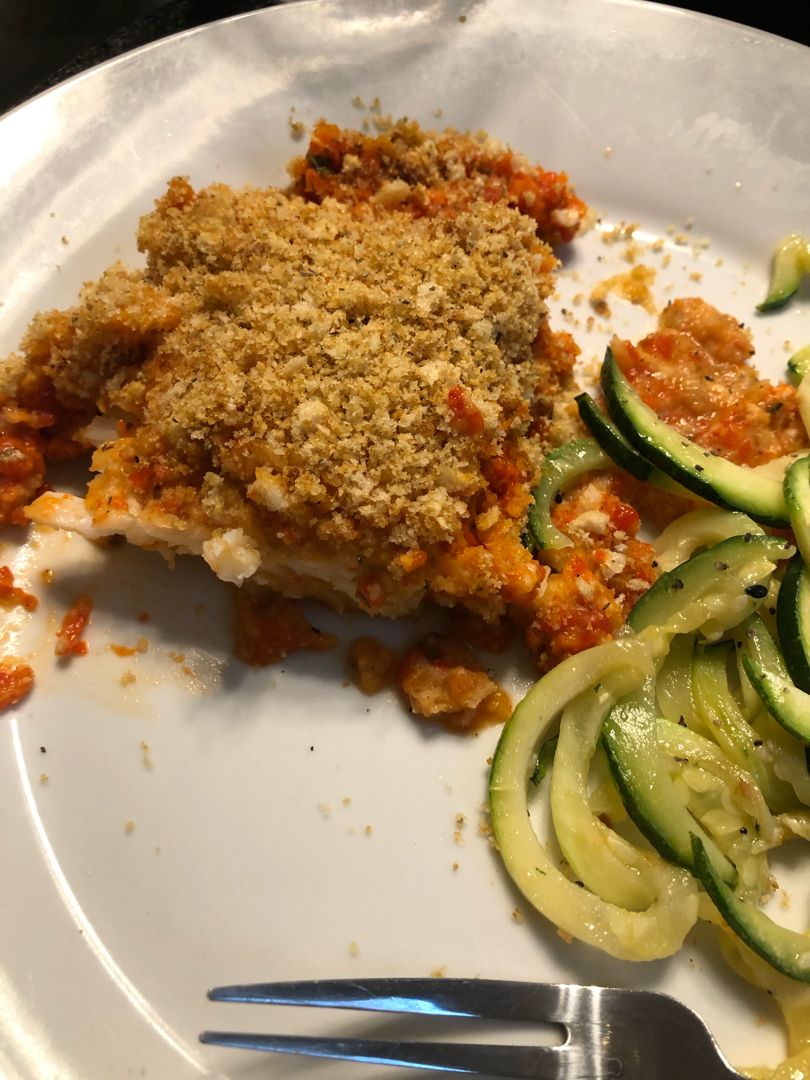
Crispy, decadent, and super easy to throw together – this mouthwatering Garlic Parmesan Baked Cod is a wonderful low-carb, keto, and gluten-free meal option if you want to shy away from pork, beef, or chicken. This dish is incredibly easy to make using just basic ingredients and is ready in less than fifteen minutes. This cod recipe is one of my most loved recipes.

This Garlic Parmesan Baked Cod is one of the best cod recipes I’ve made! If you choose to make this, I’m pretty sure that you’ll be blown away! If you have not tried cod before, this is the perfect recipe to start. This Garlic Parmesan Baked Cod is crazy good, even your fussiest eaters will love this! Serve this any time for a satisfying dinner that your entire family will love! This is also great if you are looking for an excellent dish to serve for Lent.

Cod fillets coated in a mixture of freshly grated Parmesan cheese, lemon zest, paprika, parsley, and garlic powder. Then, dipped in melted butter and baked until tender and flaky. Before serving, squeeze lemon juice over the baked cod for another layer of goodness!

INGREDIENTS

½ c. mayo

½ tbsp Dijon mustard

½ c. Parmesan cheese, grated

½ tbsp dried parsley

1.5 pounds cod filet

Salt and pepper to taste

2 cloves of garlic, minced

How to make Garlic Parmesan Baked Cod

Step 1: Ready a 9 x 13-inch baking dish. Grease and set aside.

Step 2: Prepare the oven. Preheat it to 450 degrees F.

Step 3: Into your desired size, cut the fillets. Onto the prepared baking dish, arrange the fillets.

Step 4: Place the mayo, Parmesan, parsley, garlic, salt, and pepper in a medium bowl. Mix well until blended. On top of the fillets, evenly spoon the mixture, spreading it into a thin layer.

Step 5: Place in the preheated oven and bake for about 11 to 13 minutes or until the fillets are flaky. If desired, broil the fillets for about a minute.

Step 6: Serve the Garlic Parmesan Baked Cod right away. Enjoy!

Garlic Parmesan Baked Cod: Crispy And Decadent

Rebecca Prep time: 5 mins | Cook time: 13 mins | Servings: 4 Crispy, decadent, and super easy to throw together – this mouthwatering Garlic Parmesan Baked Cod is a wonderful… General Recipes Garlic Parmesan Baked Cod: Crispy And Decadent European Print This
Serves: 4 Prep Time: 5 mins Cooking Time: 13 mins 13 mins
Nutrition facts: 200 calories 20 grams fat
Rating: 4.5/5
( 2 voted )

Ingredients

  • ½ c. mayo
  • ½ tbsp Dijon mustard
  • ½ c. Parmesan cheese, grated
  • ½ tbsp dried parsley
  • 1.5 pounds cod filet
  • Salt and pepper to taste
  • 2 cloves of garlic, minced

Instructions

Step 1: Ready a 9 x 13-inch baking dish. Grease and set aside.

Step 2: Prepare the oven. Preheat it to 450 degrees F.

Step 3: Into your desired size, cut the fillets. Onto the prepared baking dish, arrange the fillets.

Step 4: Place the mayo, Parmesan, parsley, garlic, salt, and pepper in a medium bowl. Mix well until blended. On top of the fillets, evenly spoon the mixture, spreading it into a thin layer.

Step 5: Place in the preheated oven and bake for about 11 to 13 minutes or until the fillets are flaky. If desired, broil the fillets for about a minute.

Step 6: Serve the Garlic Parmesan Baked Cod right away. Enjoy!

September 29, 2022 0 comment
0 FacebookTwitterPinterestEmail
General Recipes

Hearty Roasted Tomato And White Bean Stew Is Healthy, Satisfying And Can Be Made In Minutes

by Rebecca September 29, 2022
written by Rebecca

Prep time: 15 mins | Cook time: 1 hr | Serves: 4

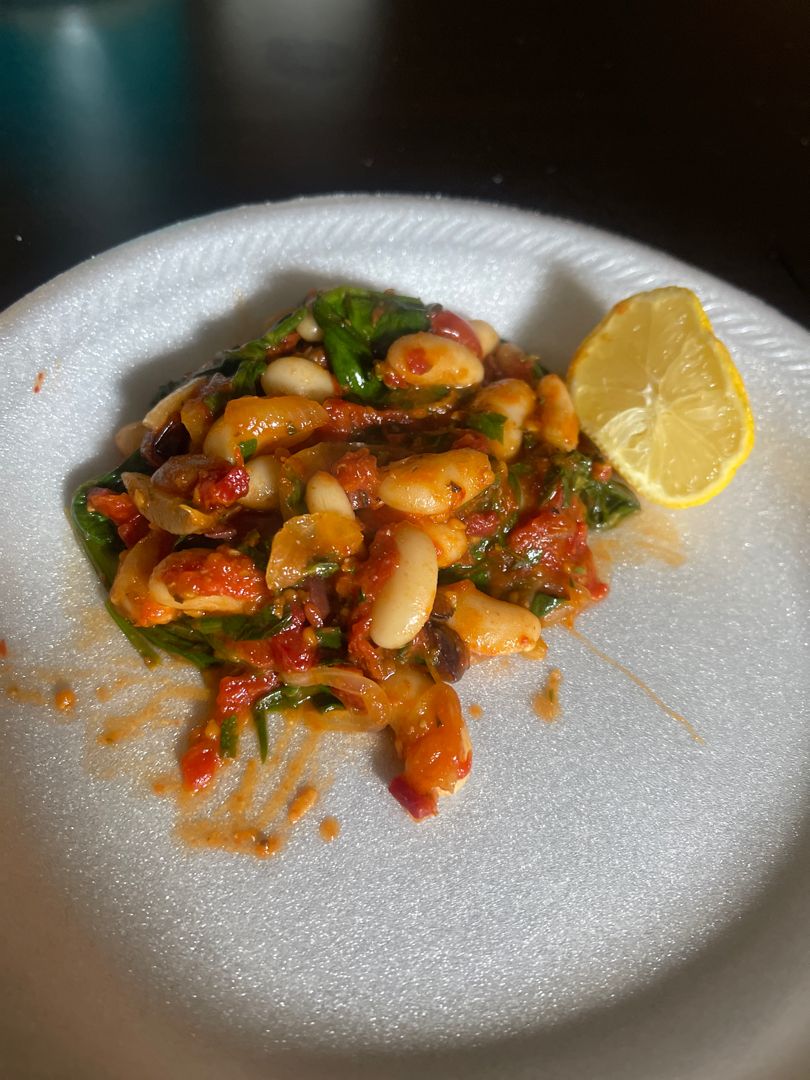
Hearty, very satisfying Roasted Tomato and White Bean Stew. Make this in minutes and enjoy a super comforting dinner to cozy up on cold nights.

INGREDIENTS

10 ounces (2 containers) of cherry or grape tomatoes

1/2 c. rough chopped flat leaf parsley

3 sprigs of fresh thyme, leaves removed from stem

1/2 c. extra virgin olive oil, plus more for drizzling

1 medium yellow onion, thinly sliced

5 cloves of garlic, thinly sliced

1 tsp red pepper flakes

4 tsp lemon zest

3 c. vegetable broth

salt and pepper to taste

sprigs of fresh basil for garnish or shredded Parmesan

thinly sliced baguette (1/2”) toasted for dipping

2 (15 ounces) cans of white beans, drained and rinsed such as cannellini or butter. Butter beans are preferred or a mix of both

flaky salt for garnish

How to make Hearty Roasted Tomato And White Bean Stew

Step 1: Prepare the oven. Preheat it to 425 degrees F.

Step 2: Place the parsley and lemon zest in a small bowl. Gently mix, massaging the parsley and lemon zest to aid release the oils. Set aside.

Step 3: Place the tomatoes, 1/4 of the extra virgin olive oil, and thyme in a large baking dish. Toss well and generously season with salt and pepper. Place the baking dish in the middle rack of the preheated oven and bake for about 20 to 25 minutes or until the tomatoes are tender and the edges start to become golden. To avoid bitterness, try not to allow the tomatoes to get too dark.

Step 4: In a soup pot or Dutch oven, heat the rest of the extra virgin olive oil over medium heat. Then, add the onion along with the garlic and red pepper flakes. Cook for about 4 to 5 minutes or until the onion is a bit translucent and the garlic is aromatic, stirring often.

Step 5: To the pot, add the beans and pour in the broth. Stir and bring everything to a boil. To slightly thicken the broth, smash about a half cup of the beans, mashing it until you reached your desired thickness. To taste, season with salt and pepper.

Step 6: Add the tomatoes to the stew once done along with its juices. Let everything simmer for about 5 to 10 minutes. As needed, season with extra salt.

Step 7: Into serving bowls, ladle the stew and top with the lemon, parsley mixture, and an extra drizzle of extra virgin olive oil. Sprinkle with flaky sea salt and garnish with some fresh basil or cheese. Serve the stew with toasted bread. Enjoy!

Hearty Roasted Tomato And White Bean Stew Is Healthy, Satisfying And Can Be Made In Minutes

Rebecca Prep time: 15 mins | Cook time: 1 hr | Serves: 4 Hearty, very satisfying Roasted Tomato and White Bean Stew. Make this in minutes and enjoy a super comforting… General Recipes Hearty Roasted Tomato And White Bean Stew Is Healthy, Satisfying And Can Be Made In Minutes European Print This
Serves: 4 Prep Time: 15 mins Cooking Time: 1 hr 1 hr
Nutrition facts: 200 calories 20 grams fat
Rating: 5.0/5
( 1 voted )

Ingredients

  • 10 ounces (2 containers) of cherry or grape tomatoes
  • 1/2 c. rough chopped flat leaf parsley
  • 3 sprigs of fresh thyme, leaves removed from stem
  • 1/2 c. extra virgin olive oil, plus more for drizzling
  • 1 medium yellow onion, thinly sliced
  • 5 cloves of garlic, thinly sliced
  • 1 tsp red pepper flakes
  • 4 tsp lemon zest
  • 3 c. vegetable broth
  • salt and pepper to taste
  • sprigs of fresh basil for garnish or shredded Parmesan
  • thinly sliced baguette (1/2”) toasted for dipping
  • 2 (15 ounces) cans of white beans, drained and rinsed such as cannellini or butter. Butter beans are preferred or a mix of both
  • flaky salt for garnish

Instructions

Step 1: Prepare the oven. Preheat it to 425 degrees F.

Step 2: Place the parsley and lemon zest in a small bowl. Gently mix, massaging the parsley and lemon zest to aid release the oils. Set aside.

Step 3: Place the tomatoes, 1/4 of the extra virgin olive oil, and thyme in a large baking dish. Toss well and generously season with salt and pepper. Place the baking dish in the middle rack of the preheated oven and bake for about 20 to 25 minutes or until the tomatoes are tender and the edges start to become golden. To avoid bitterness, try not to allow the tomatoes to get too dark.

Step 4: In a soup pot or Dutch oven, heat the rest of the extra virgin olive oil over medium heat. Then, add the onion along with the garlic and red pepper flakes. Cook for about 4 to 5 minutes or until the onion is a bit translucent and the garlic is aromatic, stirring often.

Step 5: To the pot, add the beans and pour in the broth. Stir and bring everything to a boil. To slightly thicken the broth, smash about a half cup of the beans, mashing it until you reached your desired thickness. To taste, season with salt and pepper.

Step 6: Add the tomatoes to the stew once done along with its juices. Let everything simmer for about 5 to 10 minutes. As needed, season with extra salt.

Step 7: Into serving bowls, ladle the stew and top with the lemon, parsley mixture, and an extra drizzle of extra virgin olive oil. Sprinkle with flaky sea salt and garnish with some fresh basil or cheese. Serve the stew with toasted bread. Enjoy!

September 29, 2022 0 comment
0 FacebookTwitterPinterestEmail
General Recipes

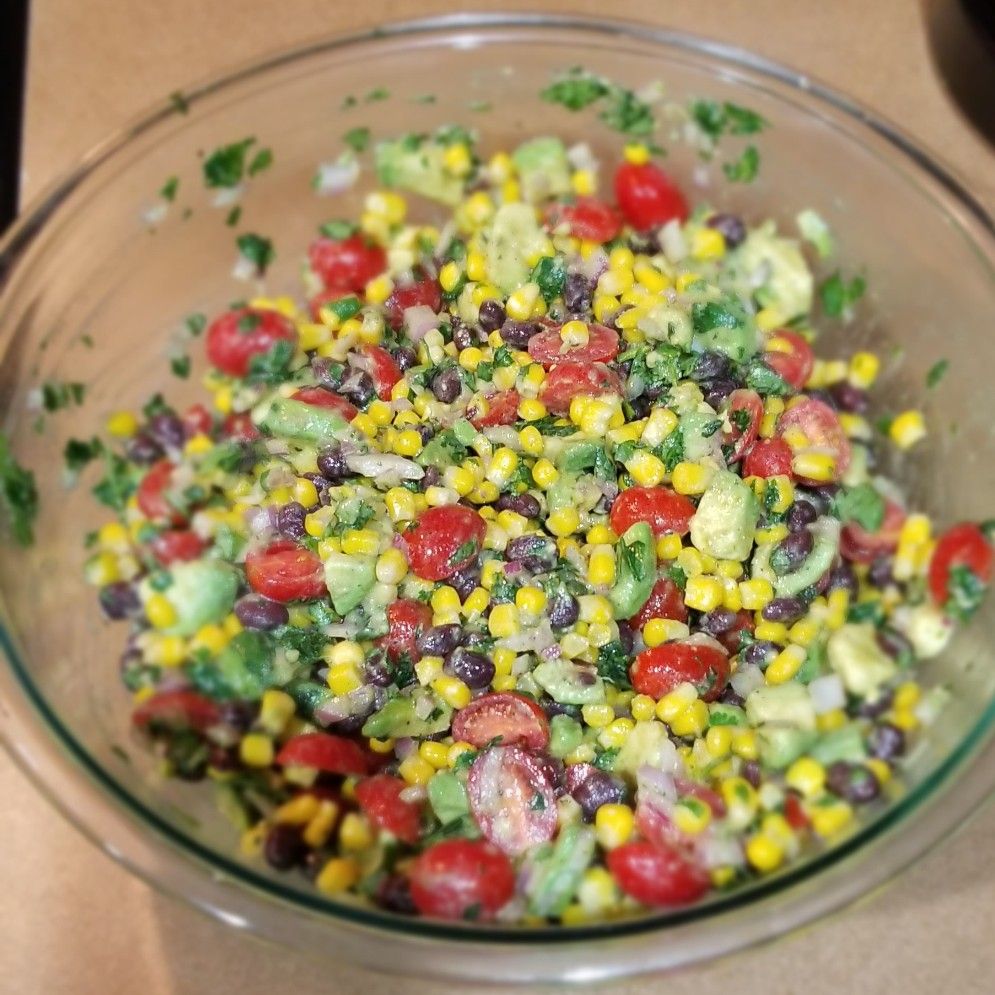
SUMMER CORN, AVOCADO & BLACK BEAN SALAD

by Rebecca September 29, 2022
written by Rebecca

Prep time: 10 mins | Total time: 10 mins | Yield: Serves a crowd

This salad is one of my favorites. This is packed with sweet corn, creamy avocado, tart cherry tomatoes, and black beans combined with other basic ingredients. I usually serve this salad with chips or Fita as a dip, but this is great on its own, too! This is an excellent summer salad to bring to potlucks, and picnics, or serve this salad to any gatherings. An awesome vegan dish that will keep everyone coming back for more!

Fresh, vibrant, and delightful – this summer corn, avocado, and black bean salad are easy and quick to make. It’s wonderful to serve all year round and the perfect salad to serve on hot summer days. This veggie salad not only tastes amazing, but this looks very enticing, too!

Give this salad a try soon. I promise, it’s amazing overall!

Ingredients

2 tablespoons olive oil

1 15-ounces can of sweet corn (it’s better than frozen)

1 red onion, finely diced

40 cherry tomatoes, halved

2 ripe avocados, diced

1/4 c. fresh cilantro, chopped (use the stems, too)

1 lemon (or 2 limes), juiced

1 15-ounces can of black beans, rinsed and drained

1/2 teaspoon ground black pepper

1/2 teaspoon kosher salt

1-2 teaspoons ground cumin, to taste

HOW TO MAKE SUMMER CORN, AVOCADO & BLACK BEAN SALAD

Step 1: Into a large serving bowl, add all the veggies along with cilantro. Mix well until blended.

Step 2: Place the olive oil, juiced lemon, ground cumin, kosher salt, and ground black pepper in a small bowl or measuring cup. Mix well until combined, then pour this over the veggie mixture. Gently toss until the veggies are completely coated. Let it rest for at least 10 minutes.

Step 3: After at least 10 minutes, store the salad in the fridge or serve it by itself or with chips or pita. Enjoy!

SUMMER CORN, AVOCADO & BLACK BEAN SALAD

Rebecca Prep time: 10 mins | Total time: 10 mins | Yield: Serves a crowd This salad is one of my favorites. This is packed with sweet corn, creamy avocado, tart… General Recipes SUMMER CORN, AVOCADO & BLACK BEAN SALAD European Print This
Prep Time: 10 mins
Nutrition facts: 200 calories 20 grams fat
Rating: 5.0/5
( 1 voted )

Ingredients

  • 2 tablespoons olive oil
  • 1 15-ounces can of sweet corn (it’s better than frozen)
  • 1 red onion, finely diced
  • 40 cherry tomatoes, halved
  • 2 ripe avocados, diced
  • 1/4 c. fresh cilantro, chopped (use the stems, too)
  • 1 lemon (or 2 limes), juiced
  • 1 15-ounces can of black beans, rinsed and drained
  • 1/2 teaspoon ground black pepper
  • 1/2 teaspoon kosher salt
  • 1-2 teaspoons ground cumin, to taste

Instructions

Step 1: Into a large serving bowl, add all the veggies along with cilantro. Mix well until blended.

Step 2: Place the olive oil, juiced lemon, ground cumin, kosher salt, and ground black pepper in a small bowl or measuring cup. Mix well until combined, then pour this over the veggie mixture. Gently toss until the veggies are completely coated. Let it rest for at least 10 minutes.

Step 3: After at least 10 minutes, store the salad in the fridge or serve it by itself or with chips or pita. Enjoy!

September 29, 2022 0 comment
0 FacebookTwitterPinterestEmail
General Recipes

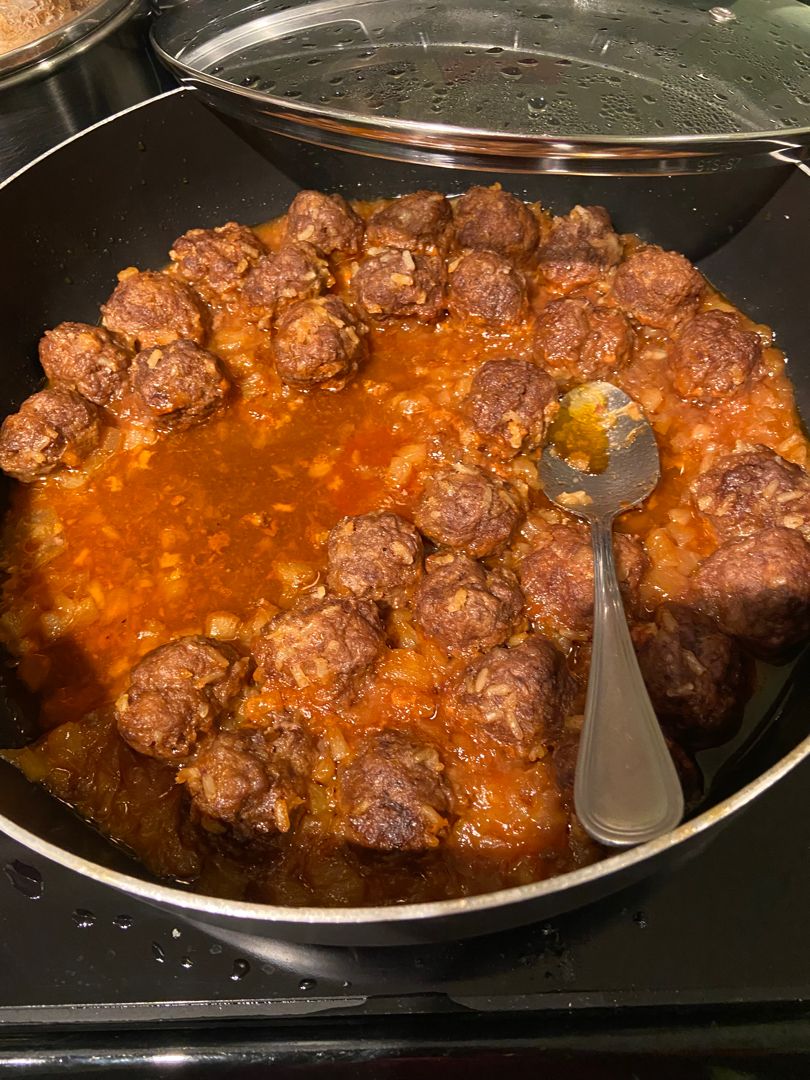
HAWAIIAN MEATBALLS AND RICE

by Rebecca September 29, 2022
written by Rebecca

PREP TIME: 15 mins | TOTAL TIME: 30 mins | SERVINGS: 4

These Hawaiian Meatballs are amazing and one of my ultimate meatball varieties. Tender meatballs that are simmered in barbecue sauce with crushed pineapples. Serve these mouthwatering Hawaiian meatballs over rice and do not forget to spoon the sauce on top. Make sure to give this easy recipe a try soon. These Hawaiian Meatballs with rice will please even your fussiest eaters!

INGREDIENTS

1 lb ground round beef (85% lean)

1/3 c. finely chopped onion

1 c. Hunt’s® Sweet Mesquite Molasses BBQ Sauce

2-1/4 c. instant brown rice, uncooked, divided

1 can (8 ounces each) crushed pineapple in juice, undrained

PAM® Original No-Stick Cooking Spray

3/4 c. chopped green bell pepper

1/4 c. water

1/2 tsp seasoned salt

1/8 tsp ground black pepper

HOW TO MAKE HAWAIIAN MEATBALLS AND RICE

Step 1: In a large bowl, place 1/4 c barbecue sauce, beef, onion, 1/4 c rice, seasoned salt, and pepper until well mixed. Into 24 potions, divide the mixture and firmly roll into about 1-1/4-inch balls.

Step 2: Using cooking spray, grease a skillet and place the skillet on the stove over medium-high heat. Then, add the rest of the barbecue sauce to the skillet along with the pineapple and water. Stir well and add the meatballs.

Step 3: Bring everything to a boil. Once boiling, adjust the heat to medium-low and place the id on. Let the mixture simmer for about 10 to 12 minutes or until the meatballs are completely cooked (internal temperature reaches 160 degrees F), stirring often. Then, remove the cover and simmer for another 2 to 3 minutes or until the sauce has slightly thickened.

Step 4: In the meantime, ready the rest of the 2 c rice following the package directions. Omit the salt and butter, but add the bell pepper.

Step 5: Once done, serve the meatballs over rice and spoon the sauce on top. Enjoy!

NUTRITION FACTS:

603 calories, 80g Carbs

HAWAIIAN MEATBALLS AND RICE

Rebecca PREP TIME: 15 mins | TOTAL TIME: 30 mins | SERVINGS: 4 These Hawaiian Meatballs are amazing and one of my ultimate meatball varieties. Tender meatballs that are simmered in… General Recipes HAWAIIAN MEATBALLS AND RICE European Print This
Serves: 4 Prep Time: 15 mins
Nutrition facts: 603 calories 20 grams fat
Rating: 5.0/5
( 1 voted )

Ingredients

  • 1 lb ground round beef (85% lean)
  • 1/3 c. finely chopped onion
  • 1 c. Hunt's® Sweet Mesquite Molasses BBQ Sauce
  • 2-1/4 c. instant brown rice, uncooked, divided
  • 1 can (8 ounces each) crushed pineapple in juice, undrained
  • PAM® Original No-Stick Cooking Spray
  • 3/4 c. chopped green bell pepper
  • 1/4 c. water
  • 1/2 tsp seasoned salt
  • 1/8 tsp ground black pepper

Instructions

Step 1: In a large bowl, place 1/4 c barbecue sauce, beef, onion, 1/4 c rice, seasoned salt, and pepper until well mixed. Into 24 potions, divide the mixture and firmly roll into about 1-1/4-inch balls.

Step 2: Using cooking spray, grease a skillet and place the skillet on the stove over medium-high heat. Then, add the rest of the barbecue sauce to the skillet along with the pineapple and water. Stir well and add the meatballs.

Step 3: Bring everything to a boil. Once boiling, adjust the heat to medium-low and place the id on. Let the mixture simmer for about 10 to 12 minutes or until the meatballs are completely cooked (internal temperature reaches 160 degrees F), stirring often. Then, remove the cover and simmer for another 2 to 3 minutes or until the sauce has slightly thickened.

Step 4: In the meantime, ready the rest of the 2 c rice following the package directions. Omit the salt and butter, but add the bell pepper.

Step 5: Once done, serve the meatballs over rice and spoon the sauce on top. Enjoy!

September 29, 2022 0 comment
0 FacebookTwitterPinterestEmail
General Recipes

Chicken Piccata

by Rebecca September 29, 2022
written by Rebecca

Prep time: 25 mins | Cook time: 30 mins | Total time: 55 mins | Servings: 4 PEOPLE

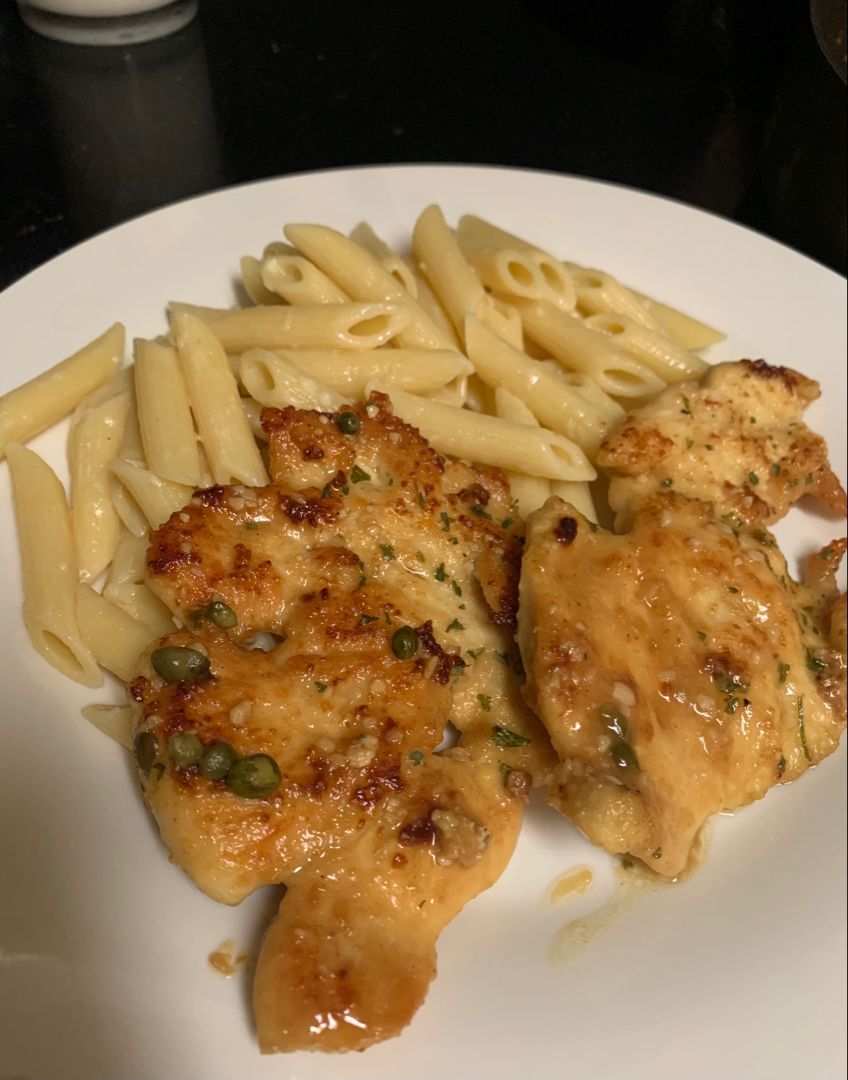
Easily make this restaurant-quality Chicken Piccata at home with this easy recipe. The chicken and smothered in a simple, flavorful white wine sauce reduction sauce that is packed with amazing flavors with the perfect amount of lemon and butter.

Ingredients

Chicken:

3 tbsp olive oil

1 tbsp salted butter

2 large boneless, skinless chicken breasts

½ c. flour

1 tsp garlic powder

¼ c. Parmesan cheese, finely grated

1 tsp salt

½ tsp pepper

Sauce:

2 tbsp cold salted butter

4 cloves garlic, thinly sliced

1 c. chicken broth

2 tbsp capers, drained

2 tbsp lemon juice

1/4 c. fresh parsley, roughly chopped

½ c. dry white wine, like Chardonnay or Pinot Grigio

How to make Chicken Piccata

Step 1: On a large plate, mix the flour, Parmesan cheese, garlic powder, salt, and pepper, then set aside.

Step 2: Into three thinner slices, cut each chicken breast. Place each piece between saran wrap and thinly pound the meat to about 1/4 inch thickness using a meat tenderizer.

Step 3: Next, pat dries the chicken and dredge each in the flour mixture on both sides, tapping the excess off.

Step 4: In a large skillet, heat 3 tbsp olive oil and 1 tbsp butter over medium-high heat. Then, add the chicken (in batches) and sear for about 3 to 4 minutes on each side until golden. As needed, add a splash of olive oil during cooking and/or decrease the heat. On a plate, transfer the seared chicken and set it aside.

Step 5: To make the sauce, wipe clean the pan, leaving only a couple of brown bits.

Step 6: To the skillet, pour in the wine and add the garlic. Set the skillet over medium heat and let the mixture gently bubble for about 4 to 5 minutes or until only a small amount of the liquid remains. Using a silicone spatula, deglaze the pan while simmering. Then, add the capers along with the chicken broth and 2 tbsp lemon juice. Stir well.

Step 7: Return the chicken to the skillet along with any juices from the plate.

Step 8: Over the chicken, spoon the sauce. Partially cover the skillet and continue to cook for another 3 to 5 minutes until the sauce has slightly thickened. Adjust the heat to low and add 2 tbsp cold butter, allowing it to melt into the sauce.

Step 9: To distribute the sauce, tilt the pan. Over the chicken, spoon the sauce. When done, take the skillet off the heat.

Step 10: Serve the Chicken Piccata immediately, garnished with parsley. Enjoy!

Nutrition Facts:

Calories: 303 kcal, Carbohydrates: 16g, Protein: 17g, Fat: 17g, Saturated Fat: 5g, Trans Fat: 1g, Cholesterol: 48mg, Sodium: 1103mg, Potassium: 355mg, Fiber: 1g, Sugar: 1g, Vitamin A: 478IU, Vitamin C: 14mg, Calcium: 101mg, Iron: 2mg

Chicken Piccata

Rebecca Prep time: 25 mins | Cook time: 30 mins | Total time: 55 mins | Servings: 4 PEOPLE Easily make this restaurant-quality Chicken Piccata at home with this easy recipe.… General Recipes Chicken Piccata European Print This
Serves: 4 Prep Time: 25 mins Cooking Time: 30 mins 30 mins
Nutrition facts: 303 calories 17 fat
Rating: 5.0/5
( 1 voted )

Ingredients

  • Chicken:
  • 3 tbsp olive oil
  • 1 tbsp salted butter
  • 2 large boneless, skinless chicken breasts
  • ½ c. flour
  • 1 tsp garlic powder
  • ¼ c. Parmesan cheese, finely grated
  • 1 tsp salt
  • ½ tsp pepper
  • Sauce:
  • 2 tbsp cold salted butter
  • 4 cloves garlic, thinly sliced
  • 1 c. chicken broth
  • 2 tbsp capers, drained
  • 2 tbsp lemon juice
  • 1/4 c. fresh parsley, roughly chopped
  • ½ c. dry white wine, like Chardonnay or Pinot Grigio

Instructions

Step 1: On a large plate, mix the flour, Parmesan cheese, garlic powder, salt, and pepper, then set aside.

Step 2: Into three thinner slices, cut each chicken breast. Place each piece between saran wrap and thinly pound the meat to about 1/4 inch thickness using a meat tenderizer.

Step 3: Next, pat dries the chicken and dredge each in the flour mixture on both sides, tapping the excess off.

Step 4: In a large skillet, heat 3 tbsp olive oil and 1 tbsp butter over medium-high heat. Then, add the chicken (in batches) and sear for about 3 to 4 minutes on each side until golden. As needed, add a splash of olive oil during cooking and/or decrease the heat. On a plate, transfer the seared chicken and set it aside.

Step 5: To make the sauce, wipe clean the pan, leaving only a couple of brown bits.

Step 6: To the skillet, pour in the wine and add the garlic. Set the skillet over medium heat and let the mixture gently bubble for about 4 to 5 minutes or until only a small amount of the liquid remains. Using a silicone spatula, deglaze the pan while simmering. Then, add the capers along with the chicken broth and 2 tbsp lemon juice. Stir well.

Step 7: Return the chicken to the skillet along with any juices from the plate.

Step 8: Over the chicken, spoon the sauce. Partially cover the skillet and continue to cook for another 3 to 5 minutes until the sauce has slightly thickened. Adjust the heat to low and add 2 tbsp cold butter, allowing it to melt into the sauce.

Step 9: To distribute the sauce, tilt the pan. Over the chicken, spoon the sauce. When done, take the skillet off the heat.

Step 10: Serve the Chicken Piccata immediately, garnished with parsley. Enjoy!

September 29, 2022 0 comment
0 FacebookTwitterPinterestEmail
General Recipes

Chicken and Green Bean Stir Fry

by Rebecca September 29, 2022
written by Rebecca

PREP TIME: 20 mins | COOK TIME: 20 mins | TOTAL TIME: 40 mins | SERVINGS: 4 people

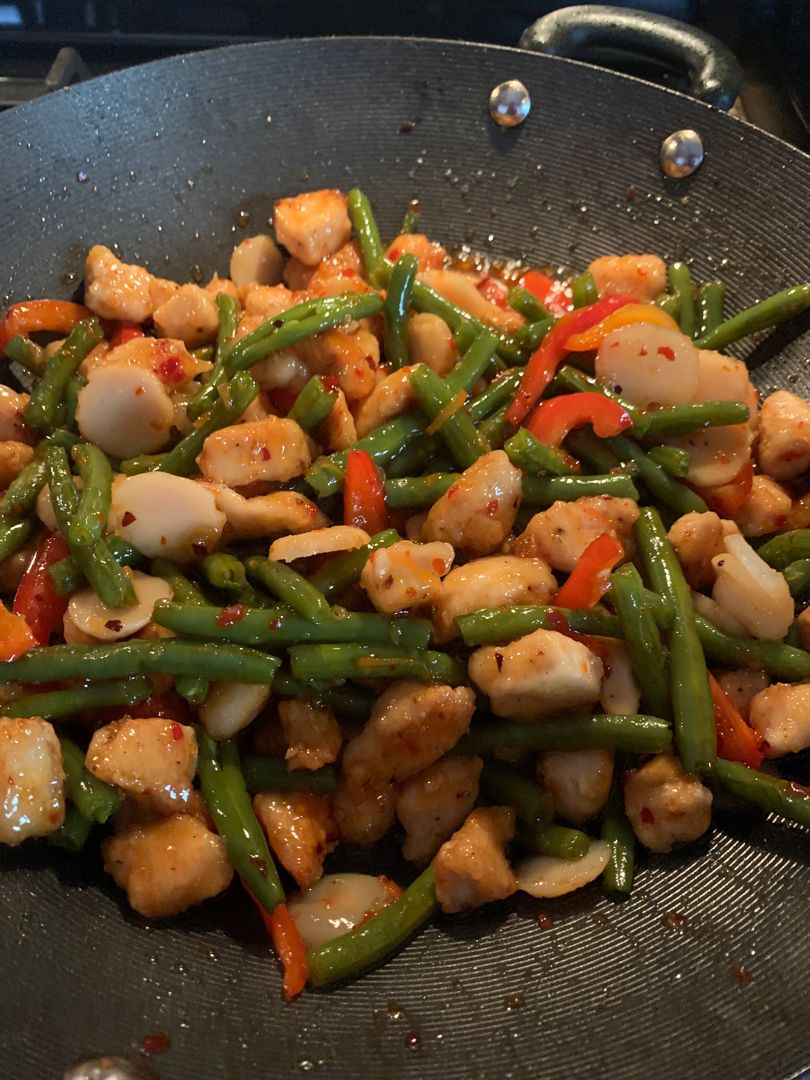
This chicken and green bean stir fry is another ridiculously easy and scrumptious meal that you can make any time without a fuss! For a complete meal, serve these pieces of crispy chicken coated in a sticky sweet chili sauce over rice or with egg rolls and a simple side salad.

INGREDIENTS

Chicken:

¼ c. vegetable oil plus 2 tablespoons or more as needed

2 pounds boneless, skinless chicken thighs, cut into cubes

3 tablespoons cornstarch

Vegetables:

½ tablespoon garlic cloves, minced

1 c. steamed green beans in a bag

¼ teaspoon ginger (optional)

2 bell peppers, sliced

Seasonings:

⅛ teaspoon sesame oil

1 teaspoon crushed red pepper

1 ¼ c. sweet chili Sauce

1 teaspoon garlic powder (add more for taste)

How to make Chicken and Green Bean Stir Fry

Step 1: Place the diced chicken and 1 tbsp oil in a large bowl. Then, add the garlic, half tsp salt, and pepper. Rub the ingredients onto the chicken. Next, add the cornstarch and toss well until all the chicken pieces are coated.

Step 2: Heat 3 tbsp vegetable oil in a large skillet or wok over medium-high heat until the oil is glistening. To the hot oil, add the chicken (do this in batches to prevent overcrowding the pan) and cook until crispy. You can add more oil as needed. Set the cooked chicken aside and cook the rest.

Step 3: To the now-empty skillet/wok, add the bell peppers. Saute until tender. Add the garlic and continue to cook for another minute until aromatic. Return the chicken to the skillet. Then, add the green beans, sweet chili sauce, sesame oil, ginger, and crushed red peppers. Stir well.

Step 4: Remove from the heat when done and serve the Chicken and Green Bean Stir frying right away over rice. Enjoy!

NOTES:

For this recipe, you can use either fresh, frozen, a bag of steamed green beans, or canned green beans. Trim the ends of the green beans if using fresh.

Feel free to use your preferred store brand sweet chili sauce.

Saute the fresh green beans first because they take longer to cook down.

Make sure to use room temperature chicken that has been pat dry with paper towels.

It is best to use chicken thighs as they are loaded with juicy flavor and this cut does not dry out at high temperatures.

Turning the chicken as it cooks until golden brown results in crispy perfection!

Add the canned green beans for a couple of minutes before the stir fry is done.

If using frozen green beans, make sure to thaw them, then gently pat them dry using paper towels before adding them to the stir fry. Cook until completely heated.

For steamed frozen green beans, microwave them while inside the bag or thaw. Gently pat dry the green beans using paper towels. After adding the sweet and chili sauce, add the green beans and cook until heated through.

Feel free to use your fave veggies in place of green beans.

NUTRITION FACTS:

Calories: 616 kcal, Carbohydrates: 53g, Protein: 46g, Fat: 24g, Saturated Fat: 14g, Trans Fat: 1g, Cholesterol: 215mg, Sodium: 1014mg, Potassium: 825mg, Fiber: 4g, Sugar: 43g, Vitamin A: 2474IU, Vitamin C: 83mg, Calcium: 49mg, Iron: 3mg

Chicken and Green Bean Stir Fry

Rebecca PREP TIME: 20 mins | COOK TIME: 20 mins | TOTAL TIME: 40 mins | SERVINGS: 4 people This chicken and green bean stir fry is another ridiculously easy and… General Recipes Chicken and Green Bean Stir Fry European Print This
Serves: 4 Prep Time: 20 mins Cooking Time: 20 mins 20 mins
Nutrition facts: 616 calories 24 fat
Rating: 5.0/5
( 1 voted )

Ingredients

  • Chicken:
  • ¼ c. vegetable oil plus 2 tablespoons or more as needed
  • 2 pounds boneless, skinless chicken thighs, cut into cubes
  • 3 tablespoons cornstarch
  • Vegetables:
  • ½ tablespoon garlic cloves, minced
  • 1 c. steamed green beans in a bag
  • ¼ teaspoon ginger (optional)
  • 2 bell peppers, sliced
  • Seasonings:
  • ⅛ teaspoon sesame oil
  • 1 teaspoon crushed red pepper
  • 1 ¼ c. sweet chili Sauce
  • 1 teaspoon garlic powder (add more for taste)

Instructions

Step 1: Place the diced chicken and 1 tbsp oil in a large bowl. Then, add the garlic, half tsp salt, and pepper. Rub the ingredients onto the chicken. Next, add the cornstarch and toss well until all the chicken pieces are coated.

Step 2: Heat 3 tbsp vegetable oil in a large skillet or wok over medium-high heat until the oil is glistening. To the hot oil, add the chicken (do this in batches to prevent overcrowding the pan) and cook until crispy. You can add more oil as needed. Set the cooked chicken aside and cook the rest.

Step 3: To the now-empty skillet/wok, add the bell peppers. Saute until tender. Add the garlic and continue to cook for another minute until aromatic. Return the chicken to the skillet. Then, add the green beans, sweet chili sauce, sesame oil, ginger, and crushed red peppers. Stir well.

Step 4: Remove from the heat when done and serve the Chicken and Green Bean Stir frying right away over rice. Enjoy!

Notes

For this recipe, you can use either fresh, frozen, a bag of steamed green beans, or canned green beans. Trim the ends of the green beans if using fresh. Feel free to use your preferred store brand sweet chili sauce. Saute the fresh green beans first because they take longer to cook down. Make sure to use room temperature chicken that has been pat dry with paper towels. It is best to use chicken thighs as they are loaded with juicy flavor and this cut does not dry out at high temperatures. Turning the chicken as it cooks until golden brown results in crispy perfection! Add the canned green beans for a couple of minutes before the stir fry is done. If using frozen green beans, make sure to thaw them, then gently pat them dry using paper towels before adding them to the stir fry. Cook until completely heated. For steamed frozen green beans, microwave them while inside the bag or thaw. Gently pat dry the green beans using paper towels. After adding the sweet and chili sauce, add the green beans and cook until heated through. Feel free to use your fave veggies in place of green beans.

September 29, 2022 0 comment
0 FacebookTwitterPinterestEmail
General Recipes

General Tso’s Chicken

by Rebecca September 29, 2022
written by Rebecca

PREP TIME: 15 mins | COOK TIME: 35 mins | TOTAL TIME: 50 mins | SERVINGS: 4

Crispy pan-fried chicken clothed in a lightly spicy and sweet sauce. This homemade version of the classic Chinese takeout dish is way better than your favorite Chinese restaurant! Serve this over brown or white rice garnished with some green onions for a satisfying dinner any time!

INGREDIENTS

1/2 c. vegetable oil

3-4 chicken breasts, cut into cubes

3/4 c. cornstarch

3/4 c. flour

2 large egg whites

1/2 teaspoon salt

1/2 teaspoon black pepper

General Tso’s Sauce:

1/4 c. brown sugar

2/3 c. hoisin sauce

1/3 c. low sodium soy sauce

3 teaspoons minced garlic

2 teaspoons Cornstarch

1/3 c. rice vinegar

1 teaspoon ground ginger

1/2 teaspoon red pepper flakes

How to make General Tso’s Chicken

Step 1: Place the hoisin sauce, rice vinegar, soy sauce, brown sugar, minced garlic, ground ginger, red pepper flakes, and 2 teaspoons of cornstarch in a medium-sized mixing bowl until well blended. Set aside.

Step 2: Place the flour, 3/4 c. Cornstarch, salt, and pepper in a large Ziplock bag. Seal the bag and shake to mix the ingredients.

Step 3: Add the cubed chicken to a medium-sized mixing bowl with the beaten egg whites. Toss well to evenly coat the pieces of chicken.

Step 4: Heat half c oil in a large skillet over medium-high heat. Scoop the pieces of chicken up using a large slotted spoon, letting the egg whites drip off. Place the chicken pieces into the Ziplock bag and shake to coat the chicken.

Step 5: Add the chicken to the hot oil in batches and fry until golden brown and completely cooked. On a sheet pan covered with paper towels, transfer the fried chicken. Repeat with the remaining chicken.

Step 6: Using a paper towel, wipe the skillet clean. Into the cleaned skillet, pour the sauce, and let it simmer until it begins to thicken. Then, add the chicken and toss well.

Step 7: Serve the General Tso’s Chicken right away over brown/white rice. If desired, garnish with some green onions. Enjoy!

NUTRITION FACTS:

Calories: 581 kcal, Carbohydrates: 68.1g, Protein: 11.4g, Fat: 29.4g, Saturated Fat: 4.1g, Cholesterol: 16.3mg, Sodium: 794mg, Potassium: 48mg, Fiber: 1g, Sugar: 27.6g, Vitamin A: 10.7IU, Vitamin C: 1.1mg, Calcium: 9.7mg, Iron: 2.9mg

General Tso’s Chicken

Rebecca PREP TIME: 15 mins | COOK TIME: 35 mins | TOTAL TIME: 50 mins | SERVINGS: 4 Crispy pan-fried chicken clothed in a lightly spicy and sweet sauce. This homemade… General Recipes General Tso’s Chicken European Print This
Serves: 4 Prep Time: 15 mins Cooking Time: 35 mins 35 mins
Nutrition facts: 581 calories 29.4 fat
Rating: 5.0/5
( 1 voted )

Ingredients

  • 1/2 c. vegetable oil
  • 3-4 chicken breasts, cut into cubes
  • 3/4 c. cornstarch
  • 3/4 c. flour
  • 2 large egg whites
  • 1/2 teaspoon salt
  • 1/2 teaspoon black pepper
  • General Tso's Sauce:
  • 1/4 c. brown sugar
  • 2/3 c. hoisin sauce
  • 1/3 c. low sodium soy sauce
  • 3 teaspoons minced garlic
  • 2 teaspoons Cornstarch
  • 1/3 c. rice vinegar
  • 1 teaspoon ground ginger
  • 1/2 teaspoon red pepper flakes

Instructions

Step 1: Place the hoisin sauce, rice vinegar, soy sauce, brown sugar, minced garlic, ground ginger, red pepper flakes, and 2 teaspoons of cornstarch in a medium-sized mixing bowl until well blended. Set aside.

Step 2: Place the flour, 3/4 c. Cornstarch, salt, and pepper in a large Ziplock bag. Seal the bag and shake to mix the ingredients.

Step 3: Add the cubed chicken to a medium-sized mixing bowl with the beaten egg whites. Toss well to evenly coat the pieces of chicken.

Step 4: Heat half c oil in a large skillet over medium-high heat. Scoop the pieces of chicken up using a large slotted spoon, letting the egg whites drip off. Place the chicken pieces into the Ziplock bag and shake to coat the chicken.

Step 5: Add the chicken to the hot oil in batches and fry until golden brown and completely cooked. On a sheet pan covered with paper towels, transfer the fried chicken. Repeat with the remaining chicken.

Step 6: Using a paper towel, wipe the skillet clean. Into the cleaned skillet, pour the sauce, and let it simmer until it begins to thicken. Then, add the chicken and toss well.

Step 7: Serve the General Tso’s Chicken right away over brown/white rice. If desired, garnish with some green onions. Enjoy!

September 29, 2022 0 comment
0 FacebookTwitterPinterestEmail
Newer Posts
Older Posts

Popular Posts

  • 1

    Crispy Crunchy Parmesan Potatoes

    March 21, 2020
  • 2

    CROCK POT SMOTHERED PORK CHOPS

    March 21, 2020
  • Facebook
  • Twitter

@2019 - All Right Reserved.


Back To Top