Cook it once
  • Home
  • Privacy Policy
  • Recipes
    • KETO
    • LC
    • WW
  • Tips
  • Contact
Cook it once
  • Home
  • Privacy Policy
  • Recipes
    • KETO
    • LC
    • WW
  • Tips
  • Contact
Category:

General Recipes

General Recipes

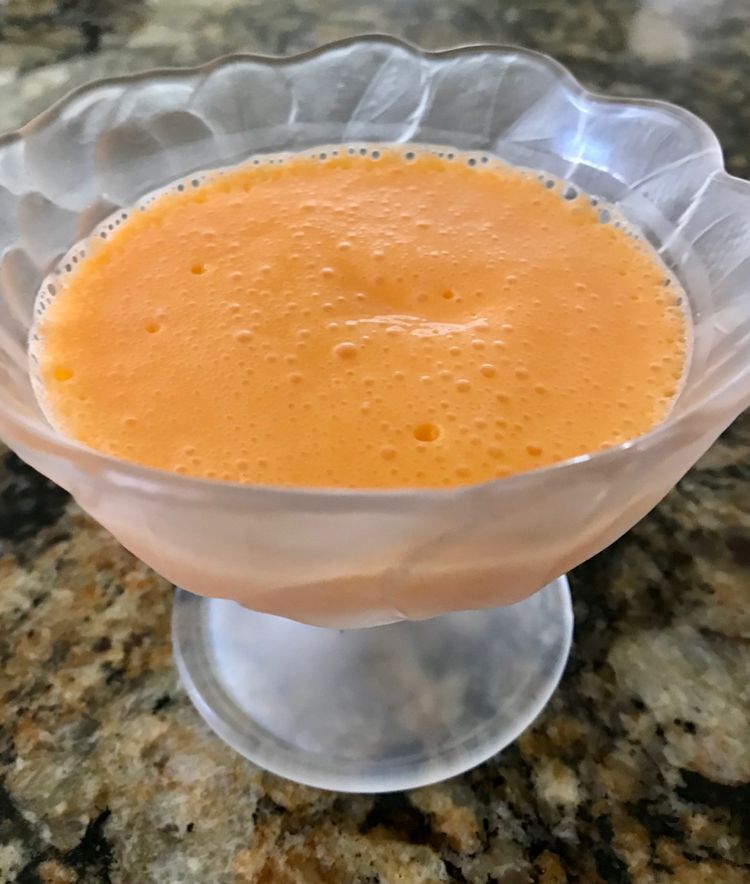
Orange Creamsicle Jello Whips

by Rebecca October 19, 2022
written by Rebecca

Prep Time: 5 mins | Cook Time: 5 mins | Total Time: 10 mins | Yield: 4 Cups

I am so psyched to share this recipe with you today because I know that you are going to love it! These Orange Creamsicle Jello Whips are magnificent drinks that you can serve for your loved ones today! This recipe only requires four main ingredients. Greek Yogurt, boiling water, iced water, and Jello! In just 10 minutes, you can enjoy these delicious drinks! I have listed all the ingredients and directions so all you need to do is to follow them step by step, and you are good to go! The trick to this is to completely dissolve the Jello. Chill time is about 2 hours. It’s best if you make these hours before any meal or snack. Just let them chill in the fridge first. Anyway, I’ll let you start prepping! Don’t forget to share this recipe with your peers as well. Enjoy!

Ingredients:

1 cup (8 ounces) plain non-fat Greek yoghurt

¾ c boiling water

1 c iced water

1 (3 ounces) box of Orange Sugar-Free Jello

Directions:

In a mixing bowl, add 3/4 cup of boiling water.

Add the jello into the bowl with the boiling water, then stir until completely dissolved.

Measure 1 cup of ice, then put it into the bowl with the jello. Let the ice melt and allow the jello to become thick.

Transfer the jello mixture into the blender together with 1 cup of yoghurt. Pulse for about half a minute on a high setting.

Transfer it into individual serving glasses. You can also use bowls.

Place them in the fridge to chill for at least 2 hours.

Serve chilled and enjoy!

Nutrition Facts:

Serving Size: 1 cup Calories: 35 Fat: 0 Carbohydrates: 2 Fiber: 0 Protein: 6

Orange Creamsicle Jello Whips

Rebecca Prep Time: 5 mins | Cook Time: 5 mins | Total Time: 10 mins | Yield: 4 Cups I am so psyched to share this recipe with you today because… General Recipes Orange Creamsicle Jello Whips European Print This
Serves: 4 Prep Time: 5 mins Cooking Time: 5 mins 5 mins
Nutrition facts: 35 calories 20 grams fat
Rating: 5.0/5
( 1 voted )

Ingredients

  • 1 cup (8 ounces) plain non-fat Greek yoghurt
  • ¾ c boiling water
  • 1 c iced water
  • 1 (3 ounces) box of Orange Sugar-Free Jello

Instructions

In a mixing bowl, add 3/4 cup of boiling water.

Add the jello into the bowl with the boiling water, then stir until completely dissolved.

Measure 1 cup of ice, then put it into the bowl with the jello. Let the ice melt and allow the jello to become thick.

Transfer the jello mixture into the blender together with 1 cup of yoghurt. Pulse for about half a minute on a high setting.

Transfer it into individual serving glasses. You can also use bowls.

Place them in the fridge to chill for at least 2 hours.

Serve chilled and enjoy!
October 19, 2022 0 comment
0 FacebookTwitterPinterestEmail
General Recipes

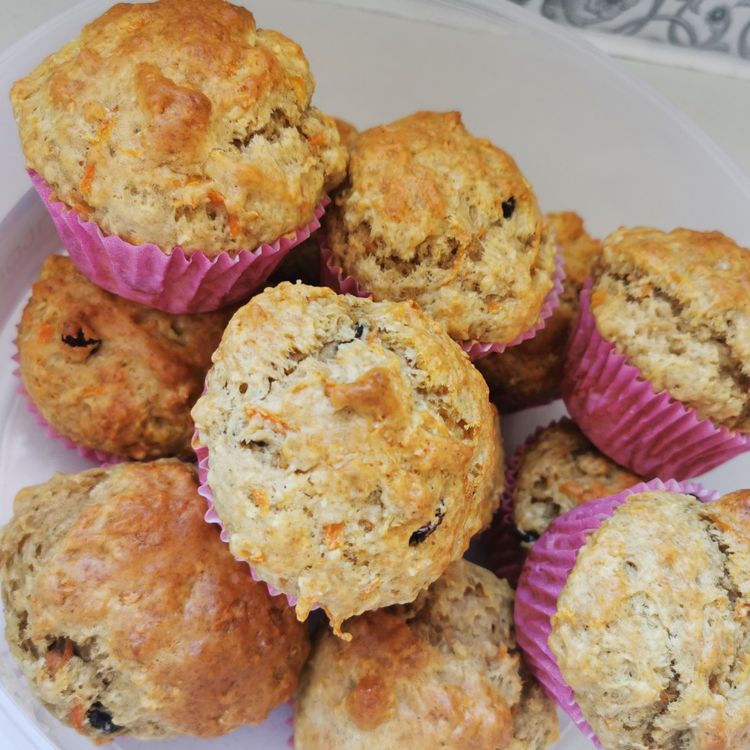
Morning Glory Muffins

by Rebecca October 19, 2022
written by Rebecca

Prep Time: 30 mins | Cook Time: 20 mins | Total Time: 55 mins | Yield: 12 Servings

These delicious treats are simply the best! I can’t recall the first time I made these Morning Glory Muffins but I’m sure it was love at first bite! Try this recipe now. You are so in for a treat!

Ingredients:

1/2 c raisins

1/2 c chopped walnuts

2 tsp baking soda

2 c all-purpose flour

2 tsp ground cinnamon

1 c vegetable oil

1/2 c shredded apple (about 1 medium apple, cored and peeled before shredding)

2 tsp vanilla

1/4 tsp salt

1/2 c flaked coconut (sweetened or unsweetened)

1 1/4 c granulated sugar

2 c shredded carrots (3–4 medium carrots, peeled before shredding)

1/4 c flaxseed (optional)

3 Eggs

Directions:

Prepare the oven and preheat it to 175 degrees C or 350 degrees F.

Apply cooking spray to a 12-cup muffin tin.

Add cinnamon, flour, salt, baking soda, and sugar into a large mixing bowl. Whisk everything until well incorporated. Add the flaxseed, chopped walnuts, carrots, coconut, raisins, and shredded apple. Stir until well combined.

Add vanilla, eggs, and oil into another mixing bowl. Whisk until well incorporated. Transfer the mixture into the bowl with flour mixture, then stir until well blended.

Fill each muffin cup with the batter. Place the muffin cups in the preheated oven and bake for about 20 to 25 minutes or until a toothpick comes out clean after inserting it in the middle.

Remove the Morning Glory Muffins from the oven and allow them to rest for a few minutes at room temperature.

Serve and enjoy!

Notes:

Place any leftovers in an airtight container, then put them in the fridge. They can last up to 2 days. Reheat for a few minutes before serving again.

Feel free to reduce the sugar in these muffins if you prefer.

I recommend using an ice cream scoop to transfer the batter into the muffin cups.

Nutrition Facts:

Total Fat 25.7g 33% Saturated Fat 16.9g Trans Fat 0g Polyunsaturated Fat 4g Monounsaturated Fat 3.3g 0% Cholesterol 46.5mg 16% Sodium 303.5mg 13% Total Carbohydrate 49g 18% Dietary Fiber 3.2g 12% Sugars 28.5g Protein 5.7g 11%

Morning Glory Muffins

Rebecca Prep Time: 30 mins | Cook Time: 20 mins | Total Time: 55 mins | Yield: 12 Servings These delicious treats are simply the best! I can’t recall the first… General Recipes Morning Glory Muffins European Print This
Serves: 12 Prep Time: 30 mins Cooking Time: 20 mins 20 mins
Nutrition facts: 200 calories 25.7 fat
Rating: 5.0/5
( 1 voted )

Ingredients

  • 1/2 c raisins
  • 1/2 c chopped walnuts
  • 2 tsp baking soda
  • 2 c all-purpose flour
  • 2 tsp ground cinnamon
  • 1 c vegetable oil
  • 1/2 c shredded apple (about 1 medium apple, cored and peeled before shredding)
  • 2 tsp vanilla
  • 1/4 tsp salt
  • 1/2 c flaked coconut (sweetened or unsweetened)
  • 1 1/4 c granulated sugar
  • 2 c shredded carrots (3–4 medium carrots, peeled before shredding)
  • 1/4 c flaxseed (optional)
  • 3 Eggs

Instructions

Prepare the oven and preheat it to 175 degrees C or 350 degrees F.

Apply cooking spray to a 12-cup muffin tin.

Add cinnamon, flour, salt, baking soda, and sugar into a large mixing bowl. Whisk everything until well incorporated. Add the flaxseed, chopped walnuts, carrots, coconut, raisins, and shredded apple. Stir until well combined.

Add vanilla, eggs, and oil into another mixing bowl. Whisk until well incorporated. Transfer the mixture into the bowl with flour mixture, then stir until well blended.

Fill each muffin cup with the batter. Place the muffin cups in the preheated oven and bake for about 20 to 25 minutes or until a toothpick comes out clean after inserting it in the middle.

Remove the Morning Glory Muffins from the oven and allow them to rest for a few minutes at room temperature.

Serve and enjoy!

Notes

Place any leftovers in an airtight container, then put them in the fridge. They can last up to 2 days. Reheat for a few minutes before serving again. Feel free to reduce the sugar in these muffins if you prefer. I recommend using an ice cream scoop to transfer the batter into the muffin cups.

October 19, 2022 0 comment
0 FacebookTwitterPinterestEmail
General Recipes

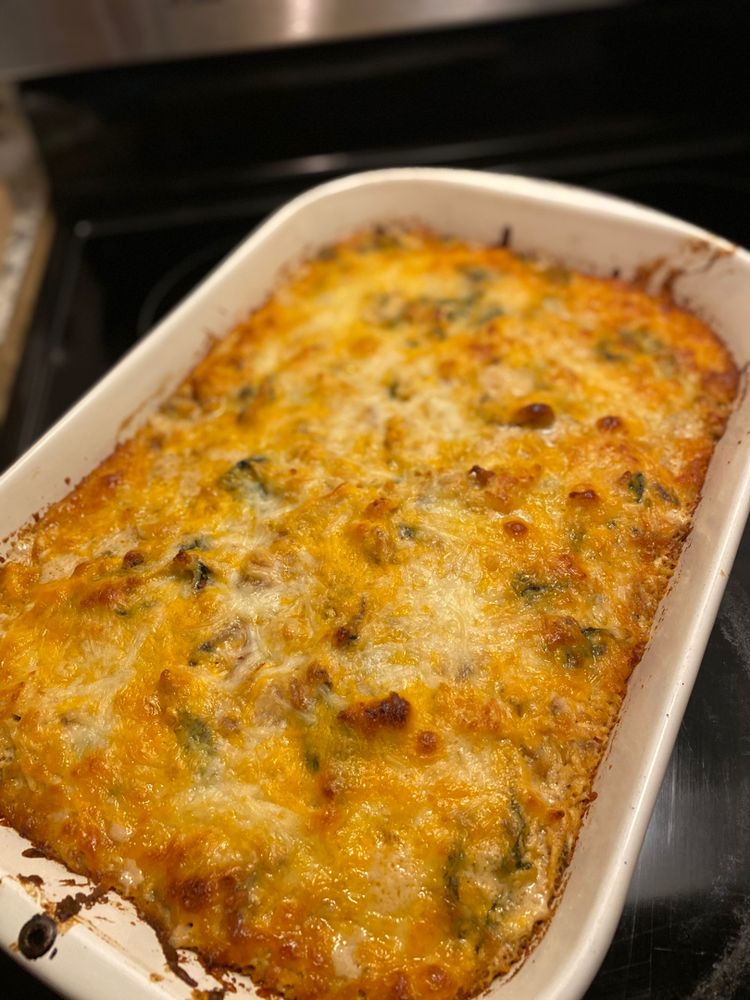
Keto Chicken Cheese Bake

by Rebecca October 18, 2022
written by Rebecca

Prep Time: 25 mins | Cook Time: 35 mins | Total Time: 1 hr | Yield: 10 Servings

The rich sauce of this dish alone is more than enough to let you know that you are in for a treat! This Keto Chicken Cheese Bake is one of my favorite dishes to serve to my loved ones. You will be amazed how these simple ingredients could turn into something very delicious. Enjoy!

Ingredients:

½ c grated Parmesan cheese

½ tsp hot sauce, we used Cholula

1 tsp dry mustard

8 oz. package of cream cheese

1 ½ c sharp cheddar cheese, shredded

1/3 c avocado mayonnaise

1 c heavy cream

½ tsp white pepper

8 oz. of baby Bella mushrooms, sliced

1 lb. bacon

1 tbsp fresh garlic, minced

8 oz. of baby spinach

1 store-bought cooked rotisserie chicken, meat removed and chopped into bite-sized pieces

1 ½ c red onion, diced

2 c mozzarella cheese, shredded

½ tsp onion powder

½ tsp paprika

½ tsp garlic powder

Directions:

Prepare the oven and preheat it to 190 degrees C or 375 degrees F.

Place a large skillet on the stove and turn the heat to medium. Add the bacon and cook for a few minutes until crispy.

Transfer the bacon onto a clean plate lined with paper towels to drain excess grease. Crumble it into small pieces.

Place a pan on the stove and turn the heat to medium. Add mustard, Parmesan cheese, hot sauce, cheddar cheese, cream cheese, avocado mayonnaise, heavy cream, garlic powder, onion powder, paprika, and pepper. Stir and cook for a few minutes until the texture becomes smooth.

Add the crumbled bacon into the pan with the sauce, then stir until well incorporated.

In the same skillet with the bacon grease over medium-high heat, add onions and saute for about 3 minutes until soft.

Add garlic and saute until aromatic. Stir in the spinach and allow it to wilt.

Add the chicken and cream mixture, then stir until well blended. Transfer the mixture to an 8×12-inch casserole dish. Top with 2 cups of mozzarella cheese.

Place it in the preheated oven and bake for about 20 minutes. Broil for about a minute.

Remove from the oven and allow it to rest for a few minutes at room temperature.

Serve and enjoy!

Nutrition Facts:

Total Fat 43.9g56% | Saturated Fat 20.4g | Trans Fat 0.5g | Polyunsaturated Fat 4.9g | Monounsaturated Fat 14.7g0% | Cholesterol 129.3mg43% | Sodium 753.8mg33% | Total Carbohydrate 7.7g3% | Dietary Fiber 1.5g5% | Sugars 3.8g | Protein 29.6g59%

Keto Chicken Cheese Bake

Rebecca Prep Time: 25 mins | Cook Time: 35 mins | Total Time: 1 hr | Yield: 10 Servings The rich sauce of this dish alone is more than enough to… General Recipes Keto Chicken Cheese Bake European Print This
Serves: 10 Prep Time: 25 mins Cooking Time: 35 mins 35 mins
Nutrition facts: 200 calories 43.9 fat
Rating: 5.0/5
( 1 voted )

Ingredients

  • ½ c grated Parmesan cheese
  • ½ tsp hot sauce, we used Cholula
  • 1 tsp dry mustard
  • 8 oz. package of cream cheese
  • 1 ½ c sharp cheddar cheese, shredded
  • 1/3 c avocado mayonnaise
  • 1 c heavy cream
  • ½ tsp white pepper
  • 8 oz. of baby Bella mushrooms, sliced
  • 1 lb. bacon
  • 1 tbsp fresh garlic, minced
  • 8 oz. of baby spinach
  • 1 store-bought cooked rotisserie chicken, meat removed and chopped into bite-sized pieces
  • 1 ½ c red onion, diced
  • 2 c mozzarella cheese, shredded
  • ½ tsp onion powder
  • ½ tsp paprika
  • ½ tsp garlic powder

Instructions

Prepare the oven and preheat it to 190 degrees C or 375 degrees F.

Place a large skillet on the stove and turn the heat to medium. Add the bacon and cook for a few minutes until crispy.

Transfer the bacon onto a clean plate lined with paper towels to drain excess grease. Crumble it into small pieces.

Place a pan on the stove and turn the heat to medium. Add mustard, Parmesan cheese, hot sauce, cheddar cheese, cream cheese, avocado mayonnaise, heavy cream, garlic powder, onion powder, paprika, and pepper. Stir and cook for a few minutes until the texture becomes smooth.

Add the crumbled bacon into the pan with the sauce, then stir until well incorporated.

In the same skillet with the bacon grease over medium-high heat, add onions and saute for about 3 minutes until soft.

Add garlic and saute until aromatic. Stir in the spinach and allow it to wilt.

Add the chicken and cream mixture, then stir until well blended. Transfer the mixture to an 8x12-inch casserole dish. Top with 2 cups of mozzarella cheese.

Place it in the preheated oven and bake for about 20 minutes. Broil for about a minute.

Remove from the oven and allow it to rest for a few minutes at room temperature.

Serve and enjoy!

October 18, 2022 0 comment
0 FacebookTwitterPinterestEmail
General Recipes

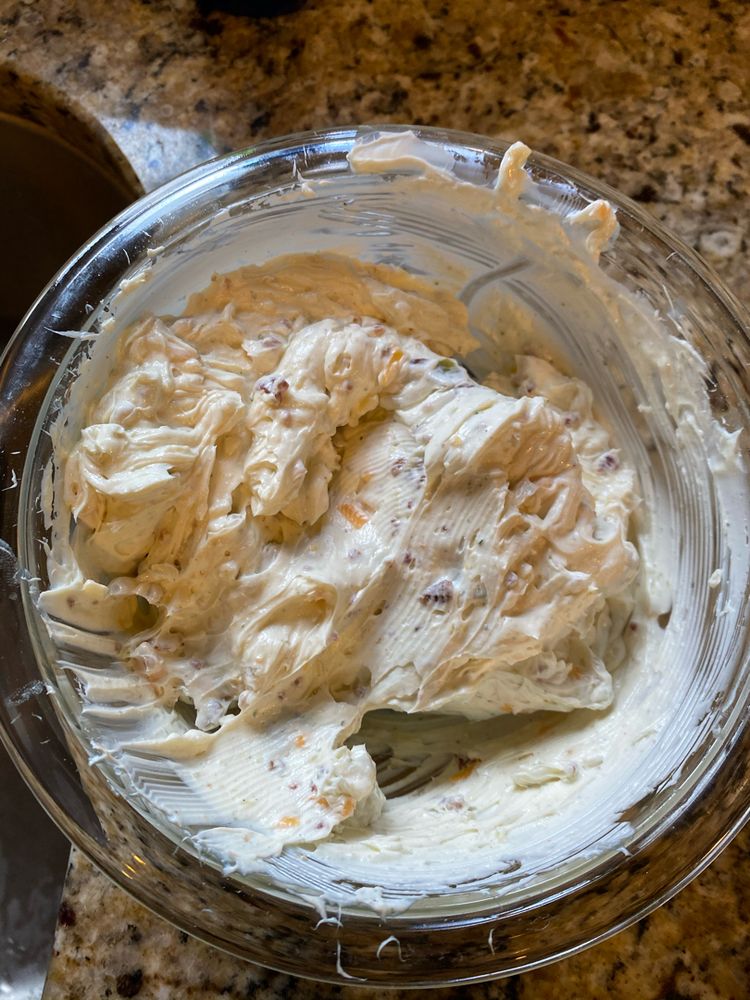
Bacon Ranch Cheese Ball

by Rebecca October 18, 2022
written by Rebecca

Prep Time: 5 mins | Additional Time: 1 hr | Total Time: 1 hr 5 mins | Yield: 20 Servings

This Bacon Ranch Cheese Ball has always been a part of my family since I was little. My aunt used to make this all the time! Now, allow me to share this recipe with you as well! This is pretty easy. All you need to do is to mix all the ingredients, mainly bacon, chives, cream cheese, cheese, and ranch in a mixing bowl. Shape it into a ball, then refrigerate! That’s it! It will only take you 5 minutes to prepare this. It is perfect to go with crackers, celery, etc.! I have listed all the ingredients and directions so all you need to do is to follow them step by step, and you are good to go! Invite your friends over and surprise them with this incredible Bacon Ranch Cheese Ball! Don’t forget to share this recipe with your peers as well. I am sure that they are going to love it as much as we do. Enjoy!

Ingredients:

1 c crumbled cooked bacon

1 tbsp chopped chives

16 oz. cream cheese, softened

1 c grated cheddar

fresh veggies, for serving

1 packet ranch dip powder

Directions:

In a mixing bowl, add bacon, cream cheese, chives, ranch, and cheddar cheese. Stir everything until well incorporated.

Transfer the mixture onto a large plastic wrap, then fold it. Shape it into a ball.

Place the ball in the fridge to chill for at least an hour.

Remove from the fridge and wrapper.

Serve and enjoy!

Notes:

Serve this with some cucumbers, crackers, celery, or mini sweet potatoes.

Place any leftovers in an airtight container, then put them in the fridge to keep them fresh.

Nutrition Facts:

Amount Per Serving: Calories: 161 | Total Fat: 14g | Saturated Fat: 7g | Trans Fat: 0g | Unsaturated Fat: 6g | Cholesterol: 40mg | Sodium: 308mg | Carbohydrates: 2g | Net Carbohydrates: 2g | Fiber: 0g | Sugar: 1g | Protein: 7g

Bacon Ranch Cheese Ball

Rebecca Prep Time: 5 mins | Additional Time: 1 hr | Total Time: 1 hr 5 mins | Yield: 20 Servings This Bacon Ranch Cheese Ball has always been a part… General Recipes Bacon Ranch Cheese Ball European Print This
Serves: 20 Prep Time: 1 hr 5 mins
Nutrition facts: 161 calories 14 fat
Rating: 5.0/5
( 1 voted )

Ingredients

  • 1 c crumbled cooked bacon
  • 1 tbsp chopped chives
  • 16 oz. cream cheese, softened
  • 1 c grated cheddar
  • fresh veggies, for serving
  • 1 packet ranch dip powder

Instructions

In a mixing bowl, add bacon, cream cheese, chives, ranch, and cheddar cheese. Stir everything until well incorporated.

Transfer the mixture onto a large plastic wrap, then fold it. Shape it into a ball.

Place the ball in the fridge to chill for at least an hour.

Remove from the fridge and wrapper.

Serve and enjoy!

Notes

Serve this with some cucumbers, crackers, celery, or mini sweet potatoes. Place any leftovers in an airtight container, then put them in the fridge to keep them fresh.

October 18, 2022 0 comment
0 FacebookTwitterPinterestEmail
General Recipes

Layered Taco Dip with Ground Beef

by Rebecca October 18, 2022
written by Rebecca

Prep Time: 15 mins | Total Time: 15 mins | Yield: 24 Servings

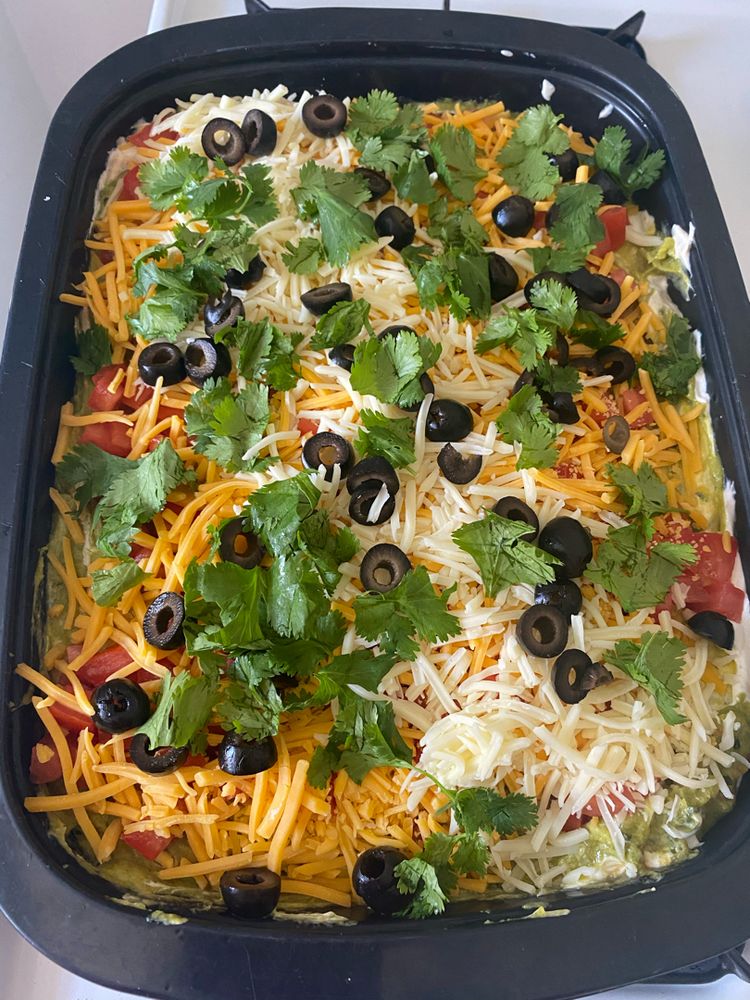
Layer after layer of incredible flavors! This Layered Taco Dip with Ground Beef is a total crowd favorite! It’s pretty easy to make. Just follow these easy steps, and you are good to go!

Ingredients:

Refried Soy Beans (Optional):

1 ½ tsp minced garlic

1 ½ tsp chili powder

1 tbsp unsweetened almond milk or coconut milk

½ tsp salt

15 oz. black soybeans

1 tbsp olive oil extra virgin

Taco Seasoned Ground Beef:

½ tsp garlic powder

½ tsp onion powder

¼ tsp crushed red pepper flakes

1 ½ lb. ground beef

1 tsp cumin

1 ½ tsp sea salt

3 cloves garlic, minced

1 small onion, diced

1 tsp black pepper

1 tbsp chili powder

½ tsp paprika

Additional Toppings:

2 medium tomatoes, diced

8 oz. of cheddar cheese, shredded

8 oz. guacamole

4 oz. sour cream

3.8 oz. can slice black olives, optional

4 oz. of cream cheese, softened

Directions:

If you are using Refried Soy Beans:

Drain the soybeans, then rinse them with water. Put them into the food processor, then pulse a few times.

Add the rest of the ingredients, then put them into the food processor. Pulse again until well incorporated.

Place a skillet on the stove and turn the heat to medium. Add olive oil and allow it to become hot.

Add the bean mixture into the hot skillet, then cook for a few minutes until soft.

For the Taco Seasoned Ground Beef:

Place a large skillet on the stove and turn the heat to medium. Add the ground beef, then cook for a few minutes until crumbly and brown.

Add garlic and onion, then sauté for a few minutes until aromatic and soft. Discard any accumulated grease.

Add the rest of the seasonings, then stir until well incorporated. Remove from the heat.

For the Layers:

Add cream cheese and sour cream into a mixing bowl. Stir until well blended.

Add the soybeans, taco-seasoned beef, sour cream mixture, guacamole, tomatoes, and shredded cheese into a 13×9-inch baking pan. Make sure to put them in layers.

Add the black olives on top of the cheese layer.

Serve with tortilla chips or lettuce. Enjoy!

Notes:

Place any leftovers in an airtight container, then put them in the fridge. They can last up to 3 days.

Nutrition Facts:

Calories: 171 | Carbohydrates: 3.9g | Protein: 7.8g | Fat: 12.9g | Sodium: 316mg | Fiber: 1.9g | Net Carbs: 2 g | % Carbs: 5.2 % | % Protein: 20.1 % | % Fat: 74.8 % | SmartPoints: 4

Layered Taco Dip with Ground Beef

Rebecca Prep Time: 15 mins | Total Time: 15 mins | Yield: 24 Servings Layer after layer of incredible flavors! This Layered Taco Dip with Ground Beef is a total crowd… General Recipes Layered Taco Dip with Ground Beef European Print This
Serves: 24 Prep Time: 15 mins
Nutrition facts: 171 calories 12.9 fat
Rating: 5.0/5
( 1 voted )

Ingredients

  • Refried Soy Beans (Optional):
  • 1 ½ tsp minced garlic
  • 1 ½ tsp chili powder
  • 1 tbsp unsweetened almond milk or coconut milk
  • ½ tsp salt
  • 15 oz. black soybeans
  • 1 tbsp olive oil extra virgin
  • Taco Seasoned Ground Beef:
  • ½ tsp garlic powder
  • ½ tsp onion powder
  • ¼ tsp crushed red pepper flakes
  • 1 ½ lb. ground beef
  • 1 tsp cumin
  • 1 ½ tsp sea salt
  • 3 cloves garlic, minced
  • 1 small onion, diced
  • 1 tsp black pepper
  • 1 tbsp chili powder
  • ½ tsp paprika
  • Additional Toppings:
  • 2 medium tomatoes, diced
  • 8 oz. of cheddar cheese, shredded
  • 8 oz. guacamole
  • 4 oz. sour cream
  • 3.8 oz. can slice black olives, optional
  • 4 oz. of cream cheese, softened

Instructions

If you are using Refried Soy Beans:

Drain the soybeans, then rinse them with water. Put them into the food processor, then pulse a few times.

Add the rest of the ingredients, then put them into the food processor. Pulse again until well incorporated.

Place a skillet on the stove and turn the heat to medium. Add olive oil and allow it to become hot.

Add the bean mixture into the hot skillet, then cook for a few minutes until soft.

For the Taco Seasoned Ground Beef:

Place a large skillet on the stove and turn the heat to medium. Add the ground beef, then cook for a few minutes until crumbly and brown.

Add garlic and onion, then sauté for a few minutes until aromatic and soft. Discard any accumulated grease.

Add the rest of the seasonings, then stir until well incorporated. Remove from the heat.

For the Layers:

Add cream cheese and sour cream into a mixing bowl. Stir until well blended.

Add the soybeans, taco-seasoned beef, sour cream mixture, guacamole, tomatoes, and shredded cheese into a 13x9-inch baking pan. Make sure to put them in layers.

Add the black olives on top of the cheese layer.

Serve with tortilla chips or lettuce. Enjoy!

Notes

Place any leftovers in an airtight container, then put them in the fridge. They can last up to 3 days.

October 18, 2022 0 comment
0 FacebookTwitterPinterestEmail
General Recipes

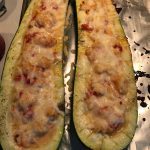
Garlicky Shrimp Zucchini Boats

by Rebecca October 18, 2022
written by Rebecca

Prep Time: 10 mins | Total Time: 1 hr | Yield: 4 Servings

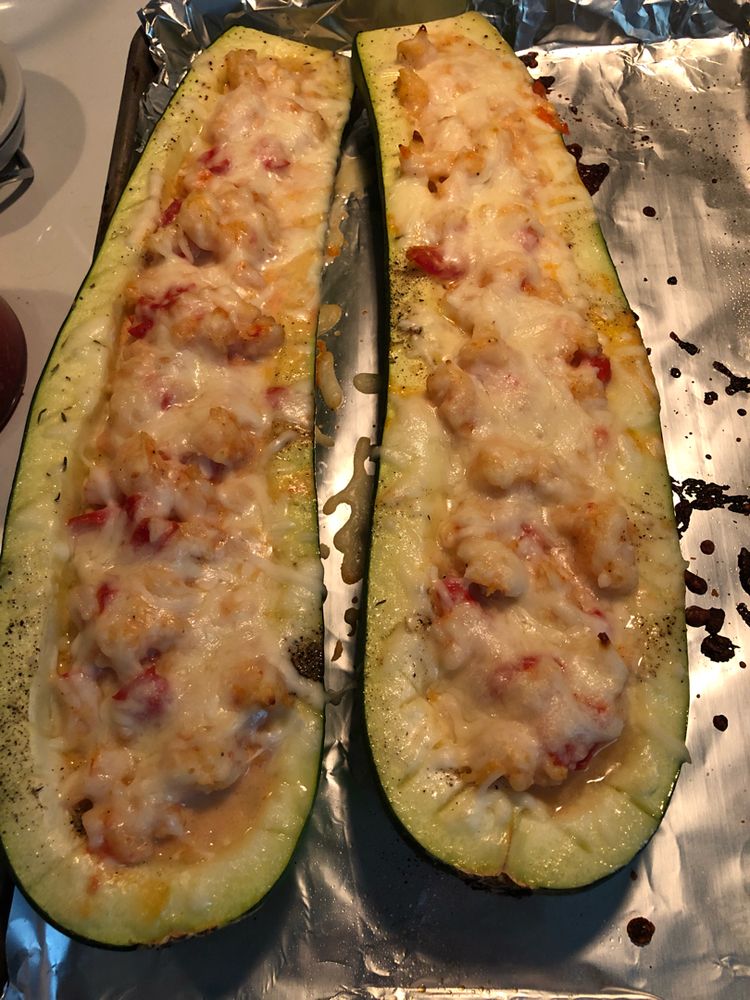
These delicious treats are garlicky and cheesy! They are very difficult to resist! Ready in just an hour, everyone will be impressed by these Garlicky Shrimp Zucchini Boats. Enjoy!

Ingredients:

2 tablespoons butter

Juice of 1/2 lemon

1 cup shredded mozzarella

2 tomatoes, chopped

3 cloves garlic, minced

1 teaspoon fresh thyme leaves

3/4-pound large shrimp, peeled and deveined

1/4 cup heavy cream

Freshly chopped parsley, for garnish (optional)

1/4 cup freshly grated Parmesan

1 tablespoon extra-virgin olive oil

4 large zucchinis, halved lengthwise

Directions:

Prepare the oven and preheat it to 175 degrees C or 350 degrees F.

Slice the zucchini and use a spoon to remove the insides, but make sure to leave about a 1/4-inch-thick border to the sides.

Slice the pulps of the zucchini.

Lay the zucchini boats into a baking dish, then drizzle them with oil. Sprinkle salt, pepper, and thyme over the boats. Place them in the preheated oven and bake for 20 minutes.

Place a large skillet on the stove and turn the heat to medium. Add butter and allow it to melt.

Sprinkle salt and pepper over the shrimp, then put them into the hot skillet. Cook for about 3 minutes or until done.

Transfer the shrimp onto a clean plate, then slice them into small cuts.

Add another tbsp of butter to the same skillet and allow it to melt.

Add the tomatoes, zucchini pulp, salt, pepper, and garlic. Sauté for about a minute or until aromatic.

Add lemon juice, cream, and Parmesan cheese. Stir until well blended. Simmer for about 3 minutes.

Remove the skillet from the heat, then add the shrimp slices. Toss until well combined.

Stuff each zucchini boat with the mixture. Sprinkle a generous amount of mozzarella cheese on top.

Place them in the preheated oven and bake for about 10 minutes or until done.

Remove from the oven, then sprinkle freshly chopped parsley and Parmesan cheese on top to garnish.

Serve right away. Enjoy!

Garlicky Shrimp Zucchini Boats

Rebecca Prep Time: 10 mins | Total Time: 1 hr | Yield: 4 Servings These delicious treats are garlicky and cheesy! They are very difficult to resist! Ready in just an… General Recipes Garlicky Shrimp Zucchini Boats European Print This
Serves: 4 Prep Time: 10 mins
Nutrition facts: 200 calories 20 grams fat
Rating: 5.0/5
( 1 voted )

Ingredients

  • 2 tablespoons butter
  • Juice of 1/2 lemon
  • 1 cup shredded mozzarella
  • 2 tomatoes, chopped
  • 3 cloves garlic, minced
  • 1 teaspoon fresh thyme leaves
  • 3/4-pound large shrimp, peeled and deveined
  • 1/4 cup heavy cream
  • Freshly chopped parsley, for garnish (optional)
  • 1/4 cup freshly grated Parmesan
  • 1 tablespoon extra-virgin olive oil
  • 4 large zucchinis, halved lengthwise

Instructions

Prepare the oven and preheat it to 175 degrees C or 350 degrees F.

Slice the zucchini and use a spoon to remove the insides, but make sure to leave about a 1/4-inch-thick border to the sides.

Slice the pulps of the zucchini.

Lay the zucchini boats into a baking dish, then drizzle them with oil. Sprinkle salt, pepper, and thyme over the boats. Place them in the preheated oven and bake for 20 minutes.

Place a large skillet on the stove and turn the heat to medium. Add butter and allow it to melt.

Sprinkle salt and pepper over the shrimp, then put them into the hot skillet. Cook for about 3 minutes or until done.

Transfer the shrimp onto a clean plate, then slice them into small cuts.

Add another tbsp of butter to the same skillet and allow it to melt.

Add the tomatoes, zucchini pulp, salt, pepper, and garlic. Sauté for about a minute or until aromatic.

Add lemon juice, cream, and Parmesan cheese. Stir until well blended. Simmer for about 3 minutes.

Remove the skillet from the heat, then add the shrimp slices. Toss until well combined.

Stuff each zucchini boat with the mixture. Sprinkle a generous amount of mozzarella cheese on top.

Place them in the preheated oven and bake for about 10 minutes or until done.

Remove from the oven, then sprinkle freshly chopped parsley and Parmesan cheese on top to garnish.

Serve right away. Enjoy!

October 18, 2022 0 comment
0 FacebookTwitterPinterestEmail
General Recipes

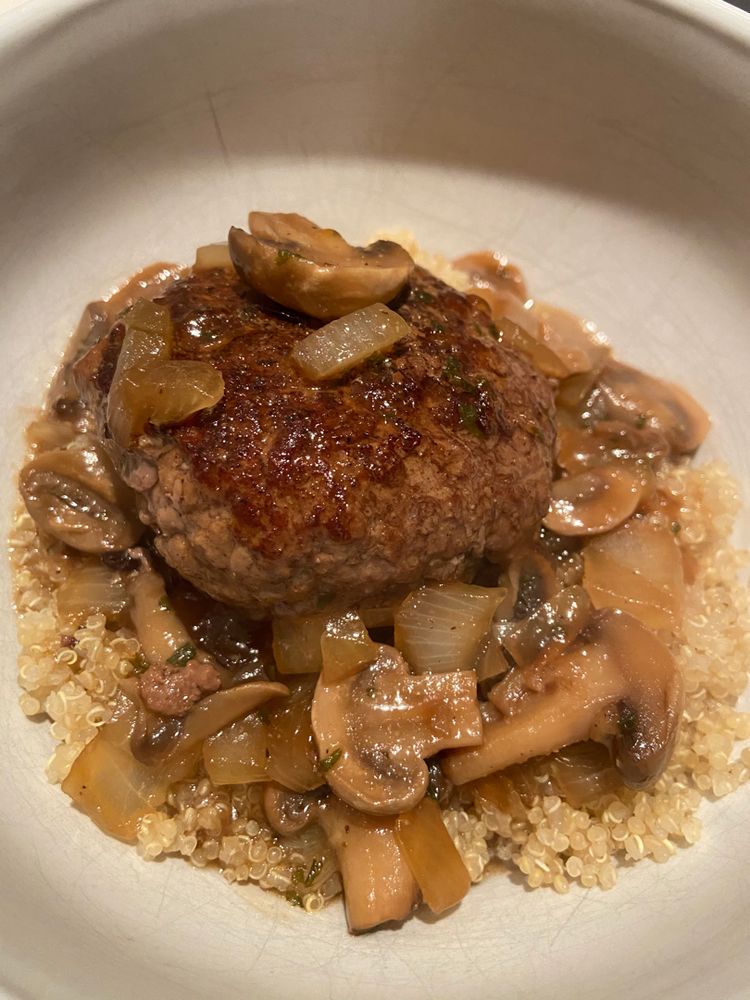
HAMBURGER STEAK

by Rebecca October 18, 2022
written by Rebecca

Prep Time: 10 mins | Cook Time: 25 mins | Total Time: 35 mins | Yield: 3 Servings

If you want only the best for your family, then you have got to give this recipe a try! This Hamburger Steak is a must-try! The savory sauce that smothers the steaks is perfectly seasoned! Don’t wait another minute not knowing how delicious this dish is. Enjoy!

Ingredients:

For the hamburger

1 tablespoon avocado oil

1/4 teaspoon black pepper (omit for AIP)

1 pound ground beef

1 teaspoon sea salt

For the gravy:

2 teaspoons mustard (omit for AIP)

2 teaspoons apple cider vinegar

2 tablespoons avocado oil

2 teaspoons garlic powder

1 c beef broth

2 teaspoons arrowroot starch

1/4 teaspoon black pepper (omit for AIP)

2 c mushrooms, sliced

1 teaspoon dried thyme

1 tablespoon coconut aminos

1 tablespoon chopped parsley, for topping

1 yellow onion, thinly sliced

1/2 teaspoon sea salt

Directions:

Make 3 or 4 patties out of the ground beef, then sprinkle all sides with salt and pepper to season.

Place a large skillet on the stove and turn the heat to medium-high. Add avocado oil and allow it to become hot.

Add the beef patties into the hot skillet, then cook each side for about 5 minutes or until done. Transfer them onto a clean plate.

In the empty skillet, add a bit of oil and allow it to become hot.

Add the onions, then sauté for about 5 minutes or until translucent. Add mushrooms, then sauté for 3 minutes or until soft.

Add the seasonings, apple cider vinegar, broth, coconut aminos, and mustard. Stir everything until well blended.

Add the arrowroot starch, then stir until well incorporated. Simmer for about 2 minutes or until the texture of the sauce becomes thick.

Put the burgers back into the skillet, then toss until fully coated with the delicious sauce. Remove from the heat.

Sprinkle freshly chopped parsley on top to garnish.

Serve right away. Enjoy!

Nutrition Facts:

Serving size: 1 SERVING calories: 414 fats: 26.6G carbohydrates: 6.8G protein: 36.4G

HAMBURGER STEAK

Rebecca Prep Time: 10 mins | Cook Time: 25 mins | Total Time: 35 mins | Yield: 3 Servings If you want only the best for your family, then you have… General Recipes HAMBURGER STEAK European Print This
Serves: 3 Prep Time: 10 mins Cooking Time: 25 mins 25 mins
Nutrition facts: 414 calories 26.6 fat
Rating: 5.0/5
( 1 voted )

Ingredients

  • For the hamburger
  • 1 tablespoon avocado oil
  • 1/4 teaspoon black pepper (omit for AIP)
  • 1 pound ground beef
  • 1 teaspoon sea salt
  • For the gravy:
  • 2 teaspoons mustard (omit for AIP)
  • 2 teaspoons apple cider vinegar
  • 2 tablespoons avocado oil
  • 2 teaspoons garlic powder
  • 1 c beef broth
  • 2 teaspoons arrowroot starch
  • 1/4 teaspoon black pepper (omit for AIP)
  • 2 c mushrooms, sliced
  • 1 teaspoon dried thyme
  • 1 tablespoon coconut aminos
  • 1 tablespoon chopped parsley, for topping
  • 1 yellow onion, thinly sliced
  • 1/2 teaspoon sea salt

Instructions

Make 3 or 4 patties out of the ground beef, then sprinkle all sides with salt and pepper to season.

Place a large skillet on the stove and turn the heat to medium-high. Add avocado oil and allow it to become hot.

Add the beef patties into the hot skillet, then cook each side for about 5 minutes or until done. Transfer them onto a clean plate.

In the empty skillet, add a bit of oil and allow it to become hot.

Add the onions, then sauté for about 5 minutes or until translucent. Add mushrooms, then sauté for 3 minutes or until soft.

Add the seasonings, apple cider vinegar, broth, coconut aminos, and mustard. Stir everything until well blended.

Add the arrowroot starch, then stir until well incorporated. Simmer for about 2 minutes or until the texture of the sauce becomes thick.

Put the burgers back into the skillet, then toss until fully coated with the delicious sauce. Remove from the heat.

Sprinkle freshly chopped parsley on top to garnish.

Serve right away. Enjoy!

October 18, 2022 0 comment
0 FacebookTwitterPinterestEmail
General Recipes

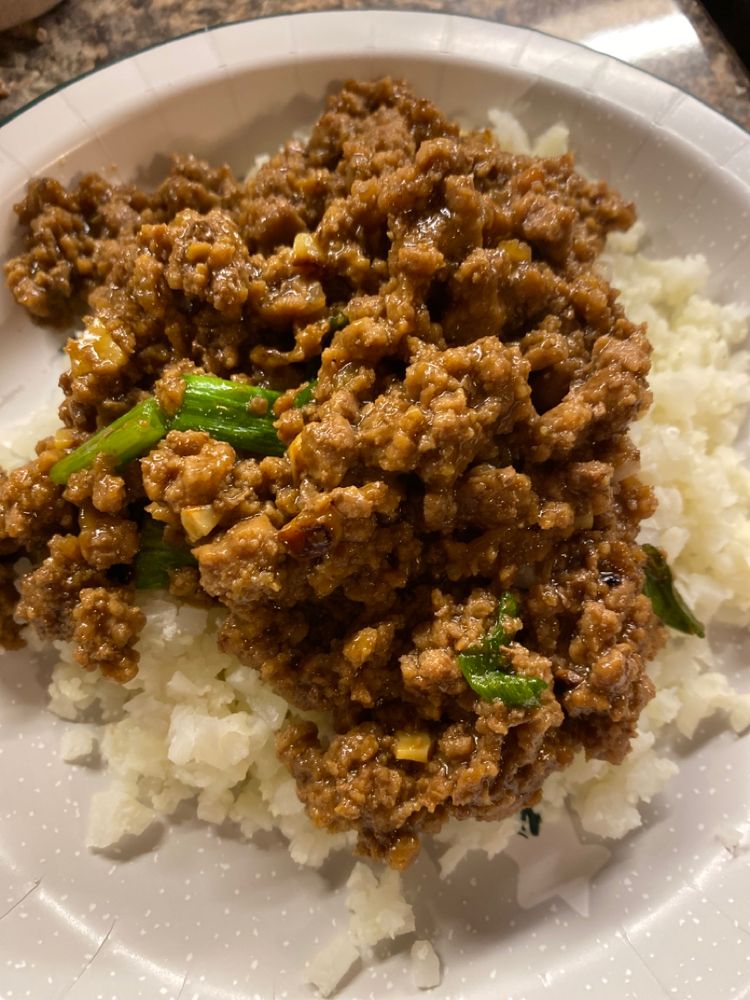
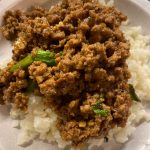
MONGOLIAN GROUND BEEF

by Rebecca October 18, 2022
written by Rebecca

Prep Time: 10 mins | Cook Time: 15 mins | Total Time: 25 mins | Yield: 4 Servings

If you haven’t tried this Mongolian Ground Beef, then you are missing out! It happens to be a savory and very delicious dish that you and your loved ones are going to like! This recipe is very easy to prepare. It will only take you 25 minutes! I highly suggest serving this over rice for the best experience! Just a friendly reminder, you will eat a lot of it. That’s for sure!

Ingredients:

1 thumb ginger, grated

1 tablespoon + 1 teaspoon arrowroot starch

1/4 c broth

3 cloves garlic, minced

1 pound ground beef

2 teaspoons coconut sugar (omit for whole30)

4 green onions, sliced into 1-inch slices

1/3 c coconut aminos

1 teaspoon apple cider vinegar

1 teaspoon sea salt

1/4 teaspoon black pepper (omit for AIP)

Directions:

Place a large skillet on the stove and turn the heat to medium. Add the ground beef, then cook for a few minutes until crumbly and brown. Season with salt and pepper to taste. Transfer the beef onto a clean plate.

In a mixing bowl, add arrowroot starch, coconut aminos, apple cider vinegar, coconut sugar, and broth. Stir everything until well blended.

Add ginger and garlic to the same skillet over low-medium heat. Saute for about 2 minutes or until aromatic.

Add the sauce, then scrape the bottom of the skillet to get the browned bits. Stir everything until well blended. Simmer for about 2 minutes or until the texture becomes thick.

Put the browned ground beef back into the skillet, then stir until completely coated with the delicious sauce. Stir in the green onions and cook the dish for additional 2 minutes. Remove from the heat.

Serve right away over rice or cooked veggies. Enjoy!

Nutrition Facts:

serving size: 1 SERVING calories: 166 fats: 3.6G carbohydrates: 4.9G fiber: 0.4G protein: 27.3G

MONGOLIAN GROUND BEEF

Rebecca Prep Time: 10 mins | Cook Time: 15 mins | Total Time: 25 mins | Yield: 4 Servings If you haven’t tried this Mongolian Ground Beef, then you are missing… General Recipes MONGOLIAN GROUND BEEF European Print This
Serves: 4 Prep Time: 10 mins Cooking Time: 15 mins 15 mins
Nutrition facts: 166 calories 3.6 fat
Rating: 5.0/5
( 1 voted )

Ingredients

  • 1 thumb ginger, grated
  • 1 tablespoon + 1 teaspoon arrowroot starch
  • 1/4 c broth
  • 3 cloves garlic, minced
  • 1 pound ground beef
  • 2 teaspoons coconut sugar (omit for whole30)
  • 4 green onions, sliced into 1-inch slices
  • 1/3 c coconut aminos
  • 1 teaspoon apple cider vinegar
  • 1 teaspoon sea salt
  • 1/4 teaspoon black pepper (omit for AIP)

Instructions

Place a large skillet on the stove and turn the heat to medium. Add the ground beef, then cook for a few minutes until crumbly and brown. Season with salt and pepper to taste. Transfer the beef onto a clean plate.

In a mixing bowl, add arrowroot starch, coconut aminos, apple cider vinegar, coconut sugar, and broth. Stir everything until well blended.

Add ginger and garlic to the same skillet over low-medium heat. Saute for about 2 minutes or until aromatic.

Add the sauce, then scrape the bottom of the skillet to get the browned bits. Stir everything until well blended. Simmer for about 2 minutes or until the texture becomes thick.

Put the browned ground beef back into the skillet, then stir until completely coated with the delicious sauce. Stir in the green onions and cook the dish for additional 2 minutes. Remove from the heat.

Serve right away over rice or cooked veggies. Enjoy!

October 18, 2022 0 comment
0 FacebookTwitterPinterestEmail
General Recipes

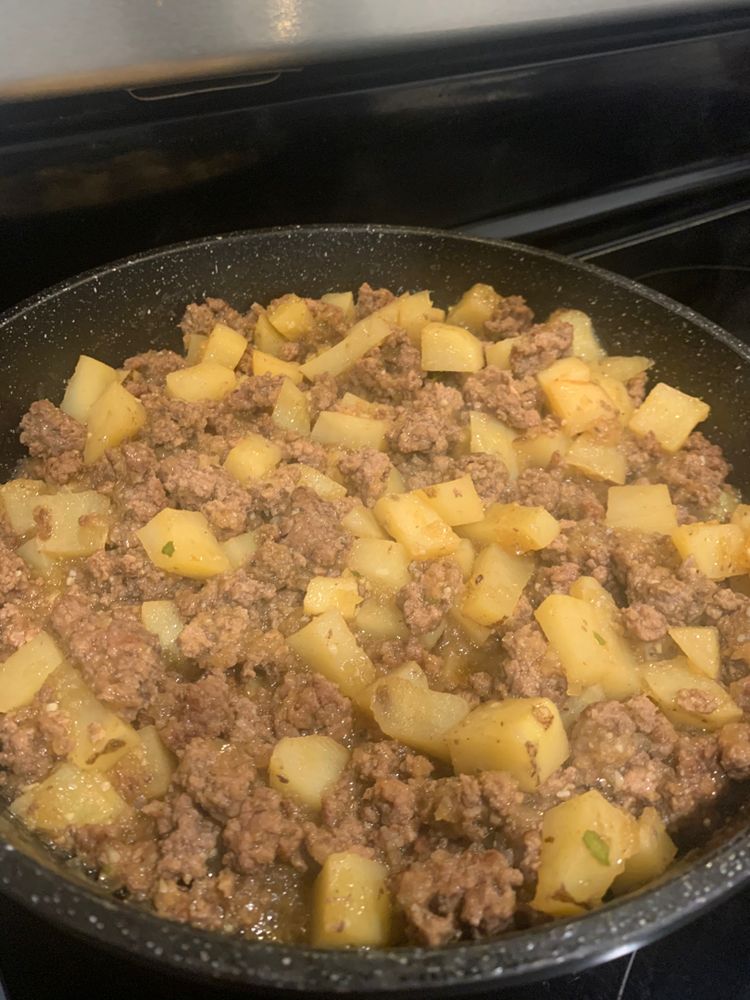
MEXICAN PICADILLO (BEEF & POTATO)

by Rebecca October 18, 2022
written by Rebecca

Prep Time: 10 mins | Cook Time: 30 mins | Total Time: 40 mins | Yield: 6 Servings

This Mexican Picadillo is a delicious dish that the entire family is going to love! It is a combination of mainly beef and potatoes. Cooked to perfection for about 40 minutes, this recipe will be the best decision you will ever make today. Enjoy!

Ingredients:

4 cloves garlic, minced

8 oz. tomato sauce

1 teaspoon ground cumin

1 pound ground beef

¼ teaspoon ground black pepper

1 green bell pepper, diced

1½ c beef broth

1 teaspoon ground coriander

1 teaspoon salt

1 bay leaf

2 c potato, peeled and diced

½ c onion, diced

Directions:

Place a large skillet on the stove and turn the heat to medium.

Add the ground beef into the hot skillet, then cook for a few minutes until crumbly and brown. Discard any accumulated fat.

Add the potatoes, onion slices, and green bell pepper. Sauté for a few minutes until soft.

Add the garlic, then sauté for about a minute or until aromatic.

Add beef broth and tomato sauce, then stir until well blended. Make sure to scrape the bottom of the skillet to get the browned bits.

Stir in coriander, bay leaf, salt, pepper, and cumin to taste.

Cover the skillet and simmer the mixture for about 10 minutes.

Remove the cover, then stir everything until well incorporated. Cook for 10 more minutes or until the potatoes are fork-tender.

Serve right away with rice and flour tortillas. Enjoy!

Notes:

Feel free to add more veggies to this dish such as carrots or peas.

Feel free to use Roma tomatoes in exchange for tomato sauce.

You can use gold potatoes or russet potatoes if you prefer.

Feel free to use beef bouillon in exchange for beef broth.

You can use jalapeno as well.

Nutrition Facts:

Serving: 1, calories: 220 kcal, carbohydrates: 5g, protein: 15g, fat: 16g, saturated fat: 6g, cholesterol: 54mg, sodium: 862mg, potassium: 430mg, fiber: 1g, sugar: 3g, vitamin a: 237iu, vitamin c: 20mg, calcium: 36mg, iron: 2mg

MEXICAN PICADILLO (BEEF & POTATO)

Rebecca Prep Time: 10 mins | Cook Time: 30 mins | Total Time: 40 mins | Yield: 6 Servings This Mexican Picadillo is a delicious dish that the entire family is… General Recipes MEXICAN PICADILLO (BEEF & POTATO) European Print This
Serves: 6 Prep Time: 10 mins Cooking Time: 30 mins 30 mins
Nutrition facts: 220 calories 16 fat
Rating: 5.0/5
( 1 voted )

Ingredients

  • 4 cloves garlic, minced
  • 8 oz. tomato sauce
  • 1 teaspoon ground cumin
  • 1 pound ground beef
  • ¼ teaspoon ground black pepper
  • 1 green bell pepper, diced
  • 1½ c beef broth
  • 1 teaspoon ground coriander
  • 1 teaspoon salt
  • 1 bay leaf
  • 2 c potato, peeled and diced
  • ½ c onion, diced

Instructions

Place a large skillet on the stove and turn the heat to medium.

Add the ground beef into the hot skillet, then cook for a few minutes until crumbly and brown. Discard any accumulated fat.

Add the potatoes, onion slices, and green bell pepper. Sauté for a few minutes until soft.

Add the garlic, then sauté for about a minute or until aromatic.

Add beef broth and tomato sauce, then stir until well blended. Make sure to scrape the bottom of the skillet to get the browned bits.

Stir in coriander, bay leaf, salt, pepper, and cumin to taste.

Cover the skillet and simmer the mixture for about 10 minutes.

Remove the cover, then stir everything until well incorporated. Cook for 10 more minutes or until the potatoes are fork-tender.

Serve right away with rice and flour tortillas. Enjoy!

Notes

Feel free to add more veggies to this dish such as carrots or peas. Feel free to use Roma tomatoes in exchange for tomato sauce. You can use gold potatoes or russet potatoes if you prefer. Feel free to use beef bouillon in exchange for beef broth. You can use jalapeno as well.

October 18, 2022 0 comment
0 FacebookTwitterPinterestEmail
General Recipes

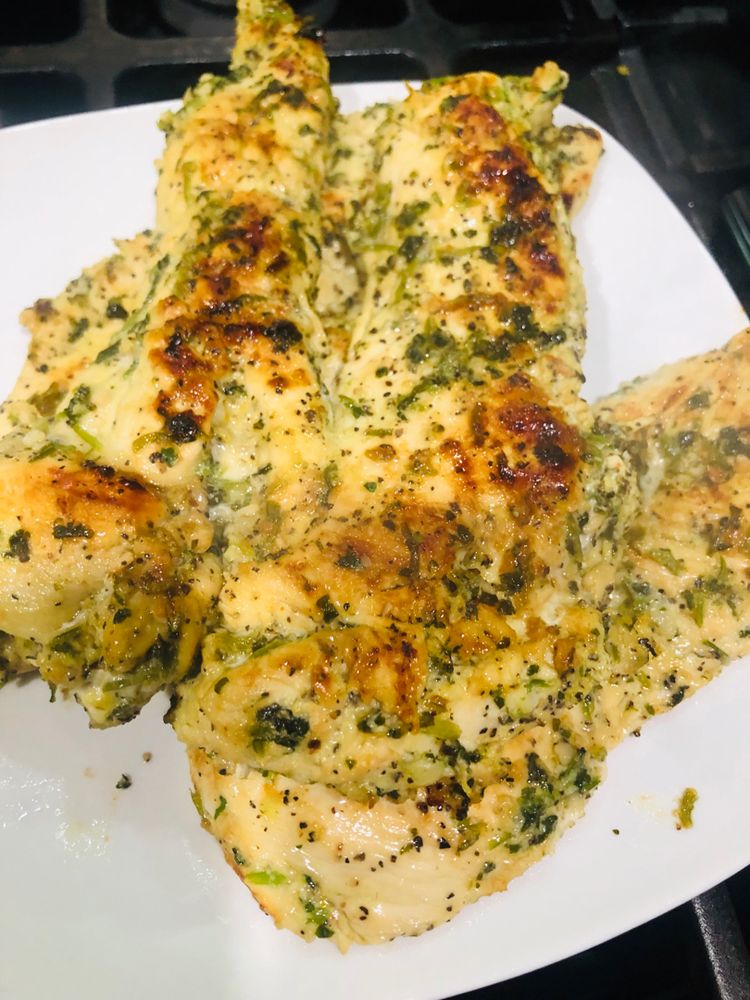
Grilled Cilantro Lime Chicken

by Rebecca October 18, 2022
written by Rebecca

Prep Time: 5 mins | Cook Time: 10 mins | Marinate Time: 1 hr | Total Time: 15 mins | Yield: 8 Servings

I woke up today with a real hankering for grilled chicken. Luckily, I know this amazing recipe! This Grilled Cilantro Lime Chicken satisfied all my cravings today! I’m sure it will satisfy yours as well! Try it now!

Ingredients:

8 Boneless, skinless chicken breasts of about 2 pounds

Marinade:

3 cloves garlic, chopped

2 tablespoons olive oil

1 teaspoon salt

1 teaspoon ground coriander

zest of 1 lime

1 teaspoon black pepper

2/3 bunch fresh cilantro

3 tablespoons lime juice, about 2 limes

Optional Garnishes:

Lime wedges

Cilantro leaves

Directions:

In a food processor, add all the ingredients for the marinade. Pulse a few times until well incorporated.

Place the chicken breast inside a large resealable bag.

Add the marinade inside the bag as well. Seal it and remove the air inside. Shake it until the chicken breasts are fully coated.

Place the bag in the fridge and marinate the chicken breasts for about an hour or overnight.

Prepare the grill and preheat it to medium-high. Brush it with a bit of oil.

Remove the marinated chicken breasts from the bag, then place them over the preheated grill. Cook each side for 5 minutes or until brown. Transfer them onto a clean serving plate.

Sprinkle freshly chopped cilantro leaves on top to garnish.

Serve right away with lime wedges on the sides. Enjoy!

Notes:

Feel free to use a heavy-bottomed pan to cook the chicken.

Don’t forget to brush the grill with oil to prevent the chicken from sticking.

For a quick cook, make sure to slice the chicken breasts thinly.

I highly suggest marinating the chicken overnight for the best flavors!

You can gently pound each chicken breast with a meat mallet as well to tenderize it.

Nutrition Facts:

Calories: 165 kcal | Carbohydrates: 1g | Protein: 24g | Fat: 7g | Saturated Fat: 1g | Cholesterol: 72mg | Sodium: 423mg | Potassium: 440mg | Fiber: 1g | Sugar: 1g | Vitamin A: 169IU | Vitamin C: 5mg | Calcium: 11mg | Iron: 1m

Grilled Cilantro Lime Chicken

Rebecca Prep Time: 5 mins | Cook Time: 10 mins | Marinate Time: 1 hr | Total Time: 15 mins | Yield: 8 Servings I woke up today with a real… General Recipes Grilled Cilantro Lime Chicken European Print This
Serves: 8 Prep Time: 5 mins Cooking Time: 10 mins 10 mins
Nutrition facts: 165 calories 7 fat
Rating: 5.0/5
( 1 voted )

Ingredients

  • 8 Boneless, skinless chicken breasts of about 2 pounds
  • Marinade:
  • 3 cloves garlic, chopped
  • 2 tablespoons olive oil
  • 1 teaspoon salt
  • 1 teaspoon ground coriander
  • zest of 1 lime
  • 1 teaspoon black pepper
  • 2/3 bunch fresh cilantro
  • 3 tablespoons lime juice, about 2 limes
  • Optional Garnishes:
  • Lime wedges
  • Cilantro leaves

Instructions

In a food processor, add all the ingredients for the marinade. Pulse a few times until well incorporated.

Place the chicken breast inside a large resealable bag.

Add the marinade inside the bag as well. Seal it and remove the air inside. Shake it until the chicken breasts are fully coated.

Place the bag in the fridge and marinate the chicken breasts for about an hour or overnight.

Prepare the grill and preheat it to medium-high. Brush it with a bit of oil.

Remove the marinated chicken breasts from the bag, then place them over the preheated grill. Cook each side for 5 minutes or until brown. Transfer them onto a clean serving plate.

Sprinkle freshly chopped cilantro leaves on top to garnish.

Serve right away with lime wedges on the sides. Enjoy!

Notes

Feel free to use a heavy-bottomed pan to cook the chicken. Don't forget to brush the grill with oil to prevent the chicken from sticking. For a quick cook, make sure to slice the chicken breasts thinly. I highly suggest marinating the chicken overnight for the best flavors! You can gently pound each chicken breast with a meat mallet as well to tenderize it.

October 18, 2022 0 comment
0 FacebookTwitterPinterestEmail
Newer Posts
Older Posts

Popular Posts

  • 1

    Crispy Crunchy Parmesan Potatoes

    March 21, 2020
  • 2

    CROCK POT SMOTHERED PORK CHOPS

    March 21, 2020
  • Facebook
  • Twitter

@2019 - All Right Reserved.


Back To Top