Cook it once
  • Home
  • Privacy Policy
  • Recipes
    • KETO
    • LC
    • WW
  • Tips
  • Contact
Cook it once
  • Home
  • Privacy Policy
  • Recipes
    • KETO
    • LC
    • WW
  • Tips
  • Contact
Category:

General Recipes

General Recipes

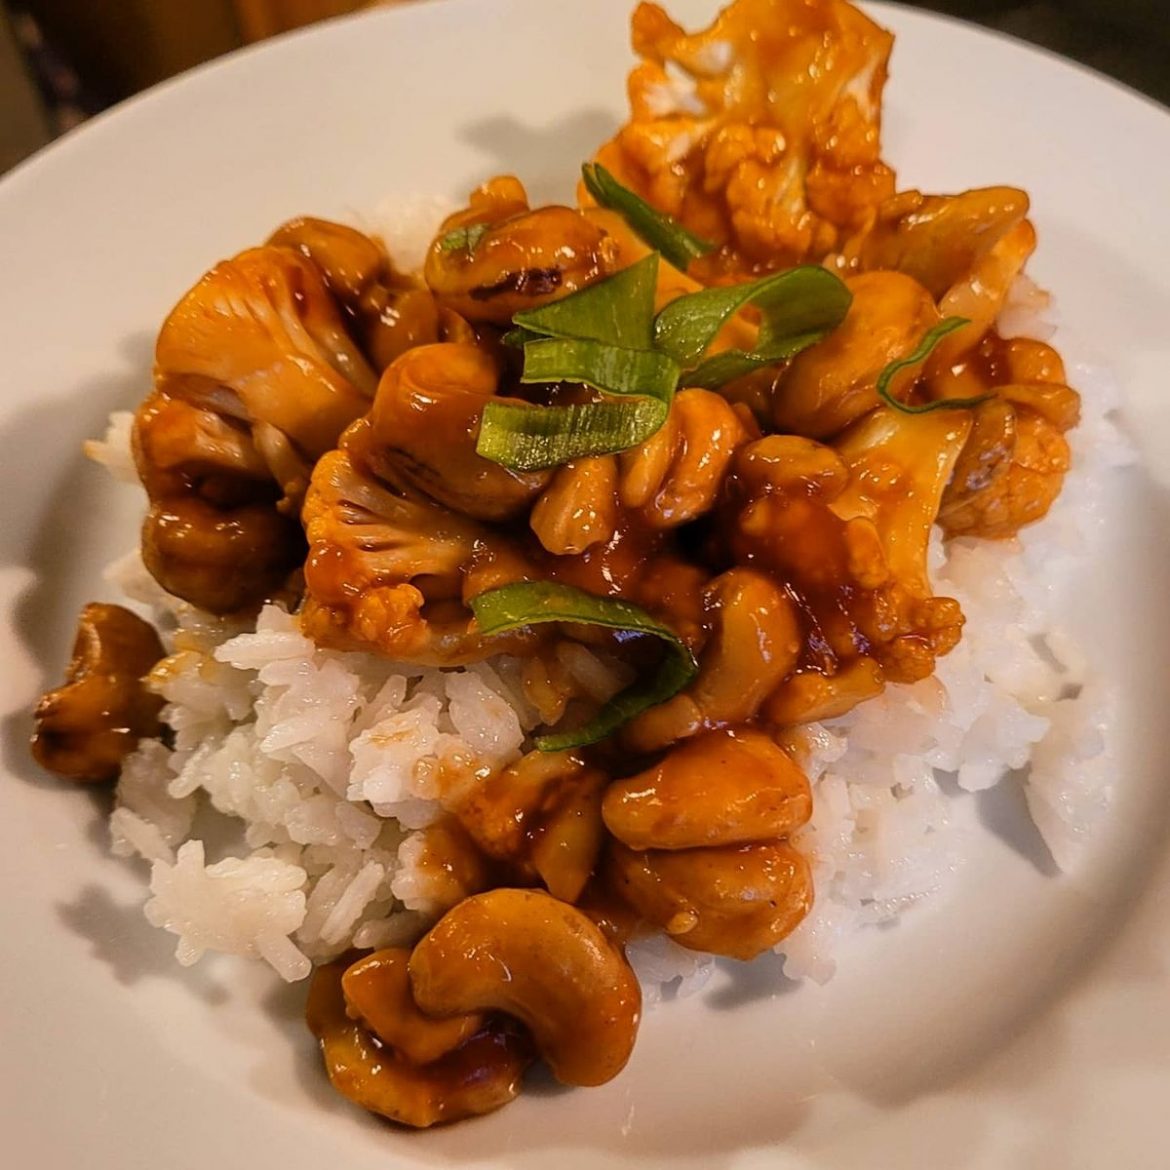
Cashew Cauliflower

by Rebecca October 26, 2022
written by Rebecca

Prep Time: 15 mins | Cook Time: 30 mins | Total Time: 45 mins | Yield: 4 Servings

This healthy dish is ready in 45 minutes! Chicken, cauliflower, cashews, and rich sauce. What’s not to love? Try this recipe now! You will be amazed by how a simple dish could turn your simple day into a perfect one. Enjoy!

Ingredients:

For the Cauliflower:

1/2 c cornstarch

1 large cauliflower, washed, and cut into florets

For the Sauce:

2 cloves garlic, minced

1 tsp fresh ginger, grated

2 tbsp brown sugar

1 c cashews, roasted and unsalted

1/2 c water

1/4 c soy sauce

1/4 tsp ground black pepper

1/4 tsp dried red chili flakes

1/4 c ketchup

1 tsp cornstarch

Directions:

Cauliflower Prep:

Prepare the oven and preheat it to 175 degrees C or 350 degrees F.

Brush olive oil on the insides of a shallow baking dish.

In a large mixing bowl, add cauliflower and 1/2 cup of cornstarch. Toss until fully coated.

Shake off the cauliflower florets to remove excess starch, then put them into the prepared baking dish. Spread them evenly.

Place the baking dish in the preheated oven and bake the cauliflower florets for about 10 minutes.

Sauce Prep:

Add cornstarch and water into a mixing bowl. Stir to dissolve the starch.

Put the rest of the ingredients for the sauce, then stir again until well blended.

Pour the sauce on top of the cauliflower florets, then gently toss to coat. Bake for 5 more minutes.

Toss in the cashews and bake for 15 more minutes or until done.

Remove from the oven.

Serve and enjoy!

Notes:

Place any leftovers in an airtight container, then put them in the fridge. Reheat for a few minutes before serving again. I do not recommend reheating this in the microwave or oven. It will be mushy.

Nutrition Facts:

Calories: 345 kcal | Carbohydrates: 47g | Protein: 12g | Fat: 15g | Saturated Fat: 3g | Sodium: 1020mg | Potassium: 939mg | Fiber: 6g | Sugar: 15g | Vitamin A: 115IU | Vitamin C: 102mg | Calcium: 73mg | Iron: 4mg

Cashew Cauliflower

Rebecca Prep Time: 15 mins | Cook Time: 30 mins | Total Time: 45 mins | Yield: 4 Servings This healthy dish is ready in 45 minutes! Chicken, cauliflower, cashews, and… General Recipes Cashew Cauliflower European Print This
Serves: 4 Prep Time: 15 mins Cooking Time: 30 mins 30 mins
Nutrition facts: 345 calories 15 fat
Rating: 5.0/5
( 1 voted )

Ingredients

  • For the Cauliflower:
  • 1/2 c cornstarch
  • 1 large cauliflower, washed, and cut into florets
  • For the Sauce:
  • 2 cloves garlic, minced
  • 1 tsp fresh ginger, grated
  • 2 tbsp brown sugar
  • 1 c cashews, roasted and unsalted
  • 1/2 c water
  • 1/4 c soy sauce
  • 1/4 tsp ground black pepper
  • 1/4 tsp dried red chili flakes
  • 1/4 c ketchup
  • 1 tsp cornstarch

Instructions

Cauliflower Prep:

Prepare the oven and preheat it to 175 degrees C or 350 degrees F.

Brush olive oil on the insides of a shallow baking dish.

In a large mixing bowl, add cauliflower and 1/2 cup of cornstarch. Toss until fully coated.

Shake off the cauliflower florets to remove excess starch, then put them into the prepared baking dish. Spread them evenly.

Place the baking dish in the preheated oven and bake the cauliflower florets for about 10 minutes.

Sauce Prep:

Add cornstarch and water into a mixing bowl. Stir to dissolve the starch.

Put the rest of the ingredients for the sauce, then stir again until well blended.

Pour the sauce on top of the cauliflower florets, then gently toss to coat. Bake for 5 more minutes.

Toss in the cashews and bake for 15 more minutes or until done.

Remove from the oven.

Serve and enjoy!

Notes

Place any leftovers in an airtight container, then put them in the fridge. Reheat for a few minutes before serving again. I do not recommend reheating this in the microwave or oven. It will be mushy.
October 26, 2022 0 comment
0 FacebookTwitterPinterestEmail
General Recipes

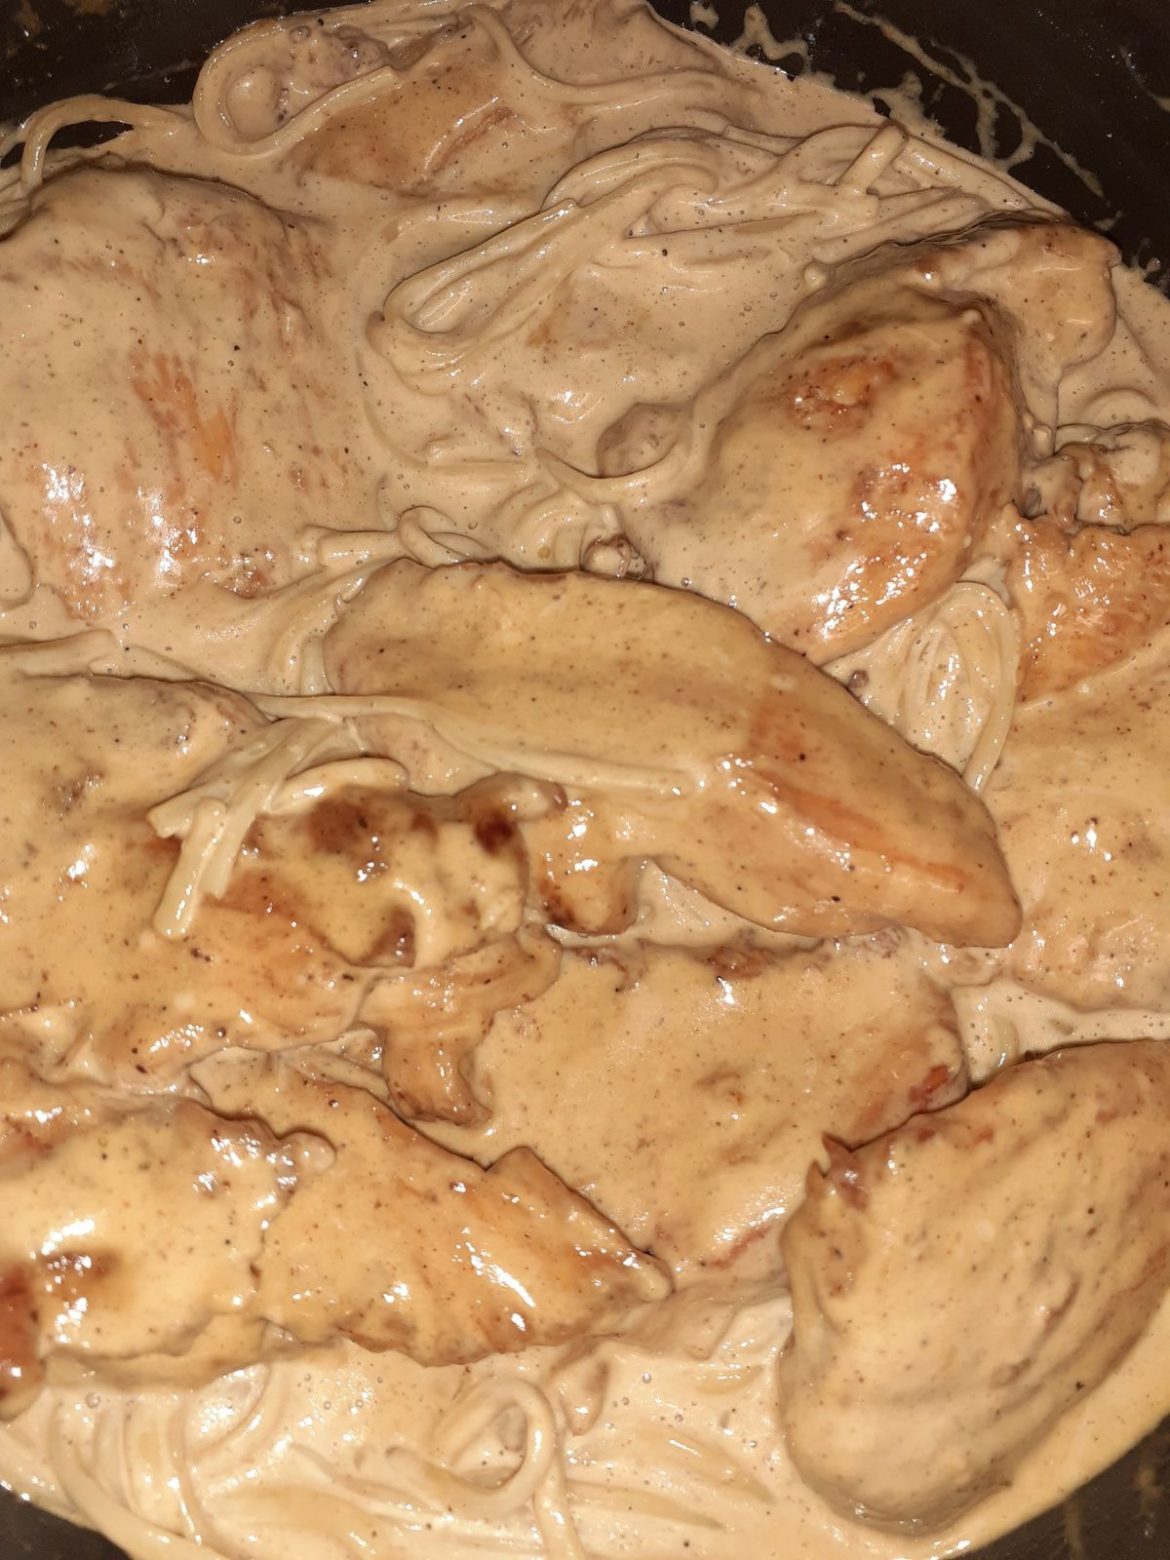
Chicken Lazone

by Rebecca October 26, 2022
written by Rebecca

Prep Time: 5 mins | Cook Time: 20 mins | Total Time: 25 mins | Yield: 6 to 8 Servings

This Chicken Lazone is one of my favorite dishes to serve for dinner! The luscious sauce that coats the chicken and pasta is amazing! This dish is ready in less than 30 minutes. Try it now!

Ingredients:

3 c heavy cream

1 tsp chili powder

1 tsp paprika

2 tsp garlic powder

10-12 ounces spaghetti, cooked

1 tsp salt

2 lbs. chicken breast tenderloins

1/2 c butter, divided

1/2 tsp white pepper

1 tsp onion powder

Directions:

In a mixing bowl, add white pepper, garlic, chili powder, salt, paprika, and onion powder. Whisk everything until well incorporated. Set aside about 2 tsp of the mixture for later use.

Sprinkle the seasonings over the chicken tenderloins, then toss until fully coated.

Place a large skillet on the stove and turn the heat to medium. Add 3 tbsp of butter and allow it to melt.

Add 1/2 of the chicken tenders, then cook each side for a few minutes until brown. Transfer them onto a clean plate.

Add the rest of the butter into the same skillet and allow it to melt. Add the other half of the chicken tenders, then cook each side for a few minutes as well. Transfer to the clean plate with the other chicken tenders.

In the empty skillet, add the reserved spice mixture and cream. Stir until well blended. Make sure to scrape the bottom of the skillet to get the browned bits.

Reduce the heat to medium-low, then simmer the sauce for about 10 minutes or until the texture becomes thick. Season with a bit more garlic powder and salt.

Place some chicken tenders over cooked pasta, then spoon the delicious sauce over. Sprinkle freshly chopped parsley on top to garnish.

Serve and enjoy!

Notes:

For this recipe, I used about 3 cups of cream.

Place any leftovers in an airtight container, then put them in the fridge. Reheat for a few minutes before serving again.

Chicken Lazone

Rebecca Prep Time: 5 mins | Cook Time: 20 mins | Total Time: 25 mins | Yield: 6 to 8 Servings This Chicken Lazone is one of my favorite dishes to… General Recipes Chicken Lazone European Print This
Serves: 6-8 Prep Time: 5 mins Cooking Time: 20 mins2 20 mins2
Nutrition facts: 200 calories 20 grams fat
Rating: 5.0/5
( 1 voted )

Ingredients

  • 3 c heavy cream
  • 1 tsp chili powder
  • 1 tsp paprika
  • 2 tsp garlic powder
  • 10-12 ounces spaghetti, cooked
  • 1 tsp salt
  • 2 lbs. chicken breast tenderloins
  • 1/2 c butter, divided
  • 1/2 tsp white pepper
  • 1 tsp onion powder

Instructions

In a mixing bowl, add white pepper, garlic, chili powder, salt, paprika, and onion powder. Whisk everything until well incorporated. Set aside about 2 tsp of the mixture for later use.

Sprinkle the seasonings over the chicken tenderloins, then toss until fully coated.

Place a large skillet on the stove and turn the heat to medium. Add 3 tbsp of butter and allow it to melt.

Add 1/2 of the chicken tenders, then cook each side for a few minutes until brown. Transfer them onto a clean plate.

Add the rest of the butter into the same skillet and allow it to melt. Add the other half of the chicken tenders, then cook each side for a few minutes as well. Transfer to the clean plate with the other chicken tenders.

In the empty skillet, add the reserved spice mixture and cream. Stir until well blended. Make sure to scrape the bottom of the skillet to get the browned bits.

Reduce the heat to medium-low, then simmer the sauce for about 10 minutes or until the texture becomes thick. Season with a bit more garlic powder and salt.

Place some chicken tenders over cooked pasta, then spoon the delicious sauce over. Sprinkle freshly chopped parsley on top to garnish.

Serve and enjoy!

Notes

For this recipe, I used about 3 cups of cream. Place any leftovers in an airtight container, then put them in the fridge. Reheat for a few minutes before serving again.

October 26, 2022 0 comment
0 FacebookTwitterPinterestEmail
General Recipes

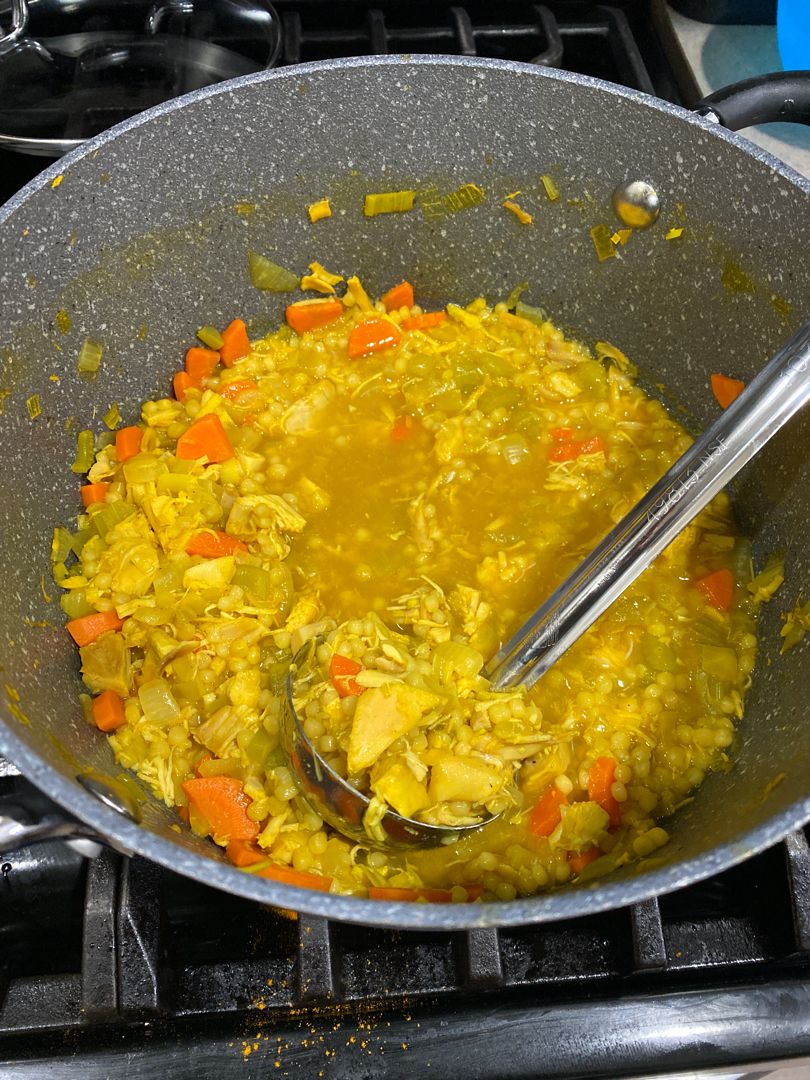
Cold-Fighting Couscous Chicken Soup

by Rebecca October 26, 2022
written by Rebecca

Prep Time: 15 mins | Cook Time: 20 mins | Total Time: 35 mins | Yield: 4 Servings

You can either cook this soup on the stove or in your Instant Pot! The combination of the flavors in this soup is perfectly balanced! A must-try recipe!

Ingredients:

1 tbsp minced ginger

1 c chopped onions about 1/2 of a medium

3/4 c sliced leeks, about 1 medium, white, and light green parts only

4 c chicken stock

1 tbsp minced lemongrass or paste

8 oz. cooked, shredded chicken (FOR STOVE TOP VERSION) (rotisserie chicken is great)

2 cloves minced garlic

3/4 lb. raw chicken breasts (FOR INSTANT POT VERSION)

1 c pearl couscous

1/2 c chopped celery about 2 ribs

1/2 tsp ground turmeric

1/2 c sliced carrots about 1 medium

1/2 tsp Better Than Bouillon chicken seasoning (optional)

chopped fresh parsley for garnish

1/2 of a lemon

salt and pepper

Directions:

Stove Method:

Place a 5-quart Dutch oven on the stove with 1 tbsp of stock. Turn the heat to medium and allow it to become hot.

Add celery, carrots, onions, and leeks. Sauté for a few minutes until soft.

Add garlic, ginger, and lemongrass. Sauté for a few more minutes until aromatic. Season with turmeric.

Add couscous, stock, and chicken. Stir until well combined and allow the mixture to boil.

Turn the heat down to medium-low, then simmer everything for about 15 minutes.

Add salt, pepper, and a squeeze of 1/2 lemon. Stir until well blended. Remove from the heat.

Sprinkle freshly chopped parsley on top to garnish.

Serve and enjoy!

Instant Pot Method:

Press the “Sauté” button on the Instant Pot. Add oil and allow it to become hot.

Add carrots, celery, onions, and leeks. Sauté for a few minutes until soft.

Add garlic, lemongrass, and ginger. Sauté for a few more minutes until aromatic. Season with turmeric. Turn off the Instant Pot.

Pour in chicken broth, couscous, and chicken breasts.

Cover and seal the Instant Pot, then cook for 5 minutes on high pressure. Let the steam release naturally for about 7 minutes.

Transfer the chicken breasts onto a clean plate, then use two forks to shred them into small pieces. Put them back in the

Instant Pot and stir until well combined.

Add salt, pepper, and a squeeze of 1/2 lemon. Stir until well blended.

Sprinkle freshly chopped parsley on top to garnish.

Serve and enjoy!

Cold-Fighting Couscous Chicken Soup

Rebecca Prep Time: 15 mins | Cook Time: 20 mins | Total Time: 35 mins | Yield: 4 Servings You can either cook this soup on the stove or in your… General Recipes Cold-Fighting Couscous Chicken Soup European Print This
Serves: 4 Prep Time: 15 mins Cooking Time: 20 mins 20 mins
Nutrition facts: 200 calories 20 grams fat
Rating: 5.0/5
( 1 voted )

Ingredients

  • 1 tbsp minced ginger
  • 1 c chopped onions about 1/2 of a medium
  • 3/4 c sliced leeks, about 1 medium, white, and light green parts only
  • 4 c chicken stock
  • 1 tbsp minced lemongrass or paste
  • 8 oz. cooked, shredded chicken (FOR STOVE TOP VERSION) (rotisserie chicken is great)
  • 2 cloves minced garlic
  • 3/4 lb. raw chicken breasts (FOR INSTANT POT VERSION)
  • 1 c pearl couscous
  • 1/2 c chopped celery about 2 ribs
  • 1/2 tsp ground turmeric
  • 1/2 c sliced carrots about 1 medium
  • 1/2 tsp Better Than Bouillon chicken seasoning (optional)
  • chopped fresh parsley for garnish
  • 1/2 of a lemon
  • salt and pepper

Instructions

Stove Method:

Place a 5-quart Dutch oven on the stove with 1 tbsp of stock. Turn the heat to medium and allow it to become hot.

Add celery, carrots, onions, and leeks. Sauté for a few minutes until soft.

Add garlic, ginger, and lemongrass. Sauté for a few more minutes until aromatic. Season with turmeric.

Add couscous, stock, and chicken. Stir until well combined and allow the mixture to boil.

Turn the heat down to medium-low, then simmer everything for about 15 minutes.

Add salt, pepper, and a squeeze of 1/2 lemon. Stir until well blended. Remove from the heat.

Sprinkle freshly chopped parsley on top to garnish.

Serve and enjoy!

Instant Pot Method:

Press the "Sauté" button on the Instant Pot. Add oil and allow it to become hot.

Add carrots, celery, onions, and leeks. Sauté for a few minutes until soft.

Add garlic, lemongrass, and ginger. Sauté for a few more minutes until aromatic. Season with turmeric. Turn off the Instant Pot.

Pour in chicken broth, couscous, and chicken breasts.

Cover and seal the Instant Pot, then cook for 5 minutes on high pressure. Let the steam release naturally for about 7 minutes.

Transfer the chicken breasts onto a clean plate, then use two forks to shred them into small pieces. Put them back in the

Instant Pot and stir until well combined.

Add salt, pepper, and a squeeze of 1/2 lemon. Stir until well blended.

Sprinkle freshly chopped parsley on top to garnish.

Serve and enjoy!

October 26, 2022 0 comment
0 FacebookTwitterPinterestEmail
General Recipes

Asian Beef with Mushrooms & Snow Peas

by Rebecca October 26, 2022
written by Rebecca

Prep Time: 20 mins | Cook Time: 30 mins | Total Time: 50 mins | Yield: 4 Servings

If you want only the best for your family, then you have got to give this recipe a try! This Asian Beef with Mushrooms & Snow Peas dish is a total family favorite! Ready in less than an hour, you will not be disappointed with this at all. Enjoy!

Ingredients:

Homemade Asian Sauce:

6 garlic cloves, minced

2 tsp rice vinegar

½ tsp ginger

½ c tamari or low-sodium soy sauce

5 tbsp brown sugar

Beef:

1 lb. beef thinly sliced (sirloin steak strips, flank steak, or any other steak)

4 tbsp olive oil

10 ounces mushrooms, sliced thinly

10 ounces snow peas

Directions:

In a mixing bowl, add all the ingredients under the Homemade Asian Sauce. Stir everything until well blended.

Place a medium pan with water on the stove and turn the heat to high. Allow the water to boil.

Add the snow peas to the boiling water, then cook for about 5 minutes. Drain and put them onto a clean plate.

Place a large skillet on the stove and turn the heat to medium. Add 2 tbsp of olive oil and allow it to become hot.

Add the mushroom slices into the hot skillet, then sauté for a few minutes until brown and soft. Sprinkle salt to season.

Transfer them onto a clean plate.

Add another 2 tbsp of olive oil to the empty skillet and allow it to become hot.

Add 1/2 of the meat slices, then cook each side for a few minutes until brown. Transfer them onto a clean plate. Repeat the process with the rest of the meat.

Put the meat slices back into the skillet together with Asian sauce, snow peas, and mushrooms. Stir everything until well combined. Simmer the dish for a minute.

Remove the skillet from the heat.

Serve and enjoy!

Notes:

This dish is best served with rice or noodles.

You can use sirloin steak strips or flank steak for this recipe.

Nutrition Facts:

Calories538 Fat37g57% SaturatedFat10g63% Cholesterol80mg27% Sodium1707mg74% Potassium 772mg22% Carbohydrates25g8% Fiber2g8% Sugar 19g21% Protein27g54% Vitamin A770IU15% Vitamin C45.5mg55% Calcium77mg8% Iron5mg28%

Asian Beef with Mushrooms & Snow Peas

Rebecca Prep Time: 20 mins | Cook Time: 30 mins | Total Time: 50 mins | Yield: 4 Servings If you want only the best for your family, then you have… General Recipes Asian Beef with Mushrooms & Snow Peas European Print This
Serves: 4 Prep Time: 20 mins Cooking Time: 30 mins 30 mins
Nutrition facts: 538 calories 37 fat
Rating: 5.0/5
( 1 voted )

Ingredients

  • Homemade Asian Sauce:
  • 6 garlic cloves, minced
  • 2 tsp rice vinegar
  • ½ tsp ginger
  • ½ c tamari or low-sodium soy sauce
  • 5 tbsp brown sugar
  • Beef:
  • 1 lb. beef thinly sliced (sirloin steak strips, flank steak, or any other steak)
  • 4 tbsp olive oil
  • 10 ounces mushrooms, sliced thinly
  • 10 ounces snow peas

Instructions

In a mixing bowl, add all the ingredients under the Homemade Asian Sauce. Stir everything until well blended.

Place a medium pan with water on the stove and turn the heat to high. Allow the water to boil.

Add the snow peas to the boiling water, then cook for about 5 minutes. Drain and put them onto a clean plate.

Place a large skillet on the stove and turn the heat to medium. Add 2 tbsp of olive oil and allow it to become hot.

Add the mushroom slices into the hot skillet, then sauté for a few minutes until brown and soft. Sprinkle salt to season.

Transfer them onto a clean plate.

Add another 2 tbsp of olive oil to the empty skillet and allow it to become hot.

Add 1/2 of the meat slices, then cook each side for a few minutes until brown. Transfer them onto a clean plate. Repeat the process with the rest of the meat.

Put the meat slices back into the skillet together with Asian sauce, snow peas, and mushrooms. Stir everything until well combined. Simmer the dish for a minute.

Remove the skillet from the heat.

Serve and enjoy!

Notes

This dish is best served with rice or noodles. You can use sirloin steak strips or flank steak for this recipe.

October 26, 2022 0 comment
0 FacebookTwitterPinterestEmail
General Recipes

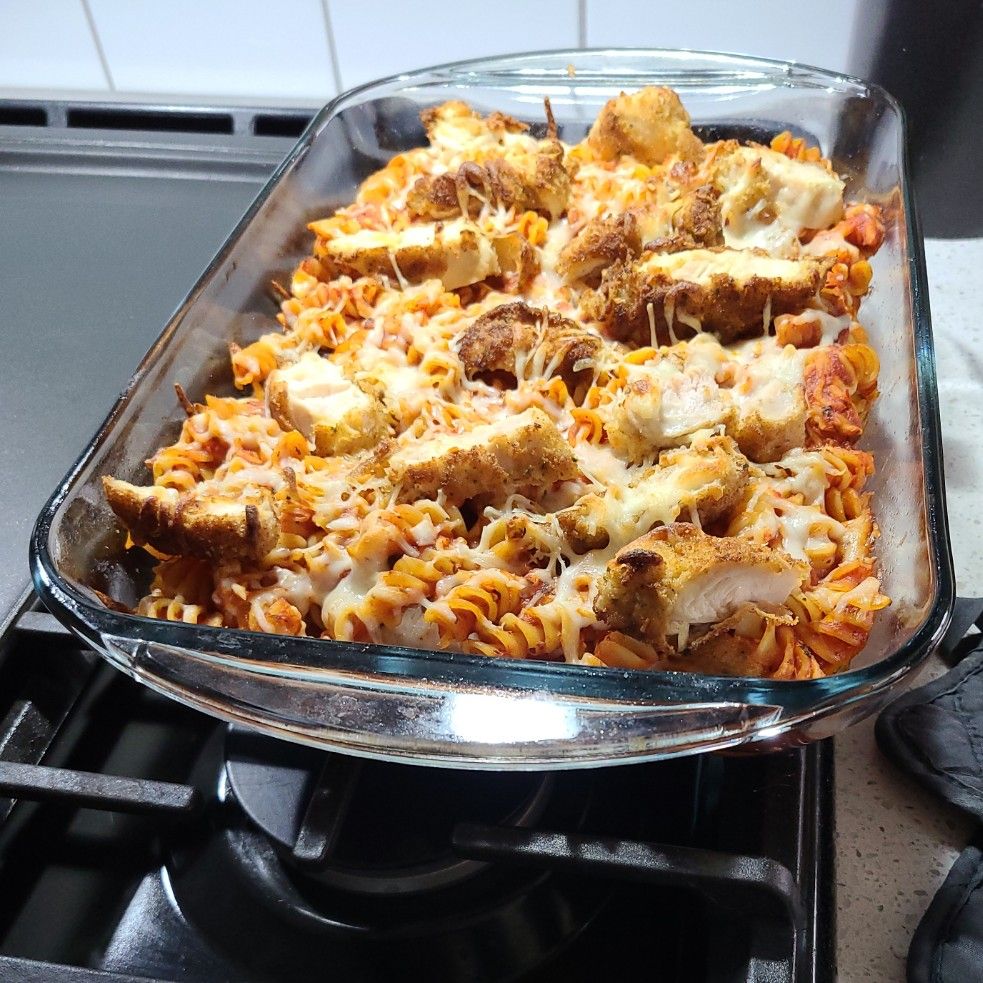
Chicken Parmesan Casserole

by Rebecca October 26, 2022
written by Rebecca

Prep Time: 40 mins | Cook Time: 40 mins | Total Time: 1 hr 20 mins | Yield: 5 Servings

Pasta and chicken smothered in a scrumptious sauce; this recipe is one to try! If you have leftover rotisserie chicken, it is perfect for this dish! You can enjoy this dish in about 1 hour and 20 minutes!

Ingredients:

3 c mozzarella cheese, shredded & separated

1 ½ c Italian bread crumbs

32 ounces of marinara sauce

2 Eggs

¾ lb. rigatoni pasta

1/3 c Parmesan cheese, finely grated

¾ c vegetable oil

2 tsp seasoned salt

1/4 tsp pepper

2 small boneless skinless chicken breasts

¾ c flour

Fresh Parsley, to garnish

2 tbsp butter

Directions:

For the Pasta:

Refer to the directions provided on the package of pasta on how to cook it. Drain and rinse with cold water to stop the cooking process.

Add 1/3 of the Parmesan cheese, 32 ounces of marinara sauce, and 1 cup of mozzarella cheese. Stir everything until well incorporated.

For the Chicken and Breading:

Use paper towels to pat dry the chicken, then slice them into 1/2-inch pieces.

In three bowls, add the following:

1st bowl: Mix 2 teaspoons of salt, 3/4 cup of flour, and 1/4 teaspoon of pepper.

2nd bowl: Mix cracked eggs until smooth.

3rd bowl: Add the breadcrumbs.

Coat each chicken slice with the flour mixture, beaten eggs, and breadcrumbs. Remove any excess by shaking it. Repeat the process with the rest of the chicken.

Place a pan on the stove and turn the heat to medium-high. Add butter and 1/4-inch of oil, then allow them to become hot.

Add the coated chicken pieces then cook each side for about 4 minutes or until they become golden brown.

Transfer the chicken pieces onto a clean plate lined with paper towels to drain any excess oil. Slice them into small portions.

Prepare the oven and preheat it to 190 degrees C or 375 degrees F.

Apply cooking spray to a 9×13-inch casserole dish. Add 1/2 of the rigatoni mixture and spread it evenly.

Add 1/2 of the chicken strips on top of the rigatoni mixture. Make sure to cover the top entirely.

Add Parmesan cheese and 1 cup of mozzarella cheese on top. Repeat the process with the rest of the ingredients until everything is arranged in layers.

Place the casserole dish in the preheated oven and bake the Chicken Parmesan Casserole for about 25 minutes or until done.

Bake for 5 more minutes at 425 degrees F.

Remove from the oven, then sprinkle freshly chopped parsley on top.

Serve with Garlic-cheese bread. Enjoy!

Notes:

Place any leftovers in an airtight container, then put them in the fridge. They can last up to 3 days. Reheat for a few minutes before serving again.

Feel free to use frozen chicken tenders or Rotisserie chicken for this recipe.

Nutrition Facts:

Calories: 740 kcal, Carbohydrates: 80g, Protein: 42g, Fat: 28g, Saturated Fat: 16g, Cholesterol: 122mg, Sodium: 2645mg, Potassium: 1025mg, Fiber: 6g, Sugar: 12g, Vitamin A: 1388IU, Vitamin C: 13mg, Calcium: 502mg, Iron: 5mg

Chicken Parmesan Casserole

Rebecca Prep Time: 40 mins | Cook Time: 40 mins | Total Time: 1 hr 20 mins | Yield: 5 Servings Pasta and chicken smothered in a scrumptious sauce; this recipe… General Recipes Chicken Parmesan Casserole European Print This
Serves: 5 Prep Time: 40 mins Cooking Time: 40 mins 40 mins
Nutrition facts: 740 calories 28 fat
Rating: 5.0/5
( 1 voted )

Ingredients

  • 3 c mozzarella cheese, shredded & separated
  • 1 ½ c Italian bread crumbs
  • 32 ounces of marinara sauce
  • 2 Eggs
  • ¾ lb. rigatoni pasta
  • 1/3 c Parmesan cheese, finely grated
  • ¾ c vegetable oil
  • 2 tsp seasoned salt
  • 1/4 tsp pepper
  • 2 small boneless skinless chicken breasts
  • ¾ c flour
  • Fresh Parsley, to garnish
  • 2 tbsp butter

Instructions

For the Pasta:

Refer to the directions provided on the package of pasta on how to cook it. Drain and rinse with cold water to stop the cooking process.

Add 1/3 of the Parmesan cheese, 32 ounces of marinara sauce, and 1 cup of mozzarella cheese. Stir everything until well incorporated.

For the Chicken and Breading:

Use paper towels to pat dry the chicken, then slice them into 1/2-inch pieces.

In three bowls, add the following:

1st bowl: Mix 2 teaspoons of salt, 3/4 cup of flour, and 1/4 teaspoon of pepper.

2nd bowl: Mix cracked eggs until smooth.

3rd bowl: Add the breadcrumbs.

Coat each chicken slice with the flour mixture, beaten eggs, and breadcrumbs. Remove any excess by shaking it. Repeat the process with the rest of the chicken.

Place a pan on the stove and turn the heat to medium-high. Add butter and 1/4-inch of oil, then allow them to become hot.

Add the coated chicken pieces then cook each side for about 4 minutes or until they become golden brown.

Transfer the chicken pieces onto a clean plate lined with paper towels to drain any excess oil. Slice them into small portions.

Prepare the oven and preheat it to 190 degrees C or 375 degrees F.

Apply cooking spray to a 9×13-inch casserole dish. Add 1/2 of the rigatoni mixture and spread it evenly.

Add 1/2 of the chicken strips on top of the rigatoni mixture. Make sure to cover the top entirely.

Add Parmesan cheese and 1 cup of mozzarella cheese on top. Repeat the process with the rest of the ingredients until everything is arranged in layers.

Place the casserole dish in the preheated oven and bake the Chicken Parmesan Casserole for about 25 minutes or until done.

Bake for 5 more minutes at 425 degrees F.

Remove from the oven, then sprinkle freshly chopped parsley on top.

Serve with Garlic-cheese bread. Enjoy!

Notes

Place any leftovers in an airtight container, then put them in the fridge. They can last up to 3 days. Reheat for a few minutes before serving again. Feel free to use frozen chicken tenders or Rotisserie chicken for this recipe.

October 26, 2022 0 comment
0 FacebookTwitterPinterestEmail
General Recipes

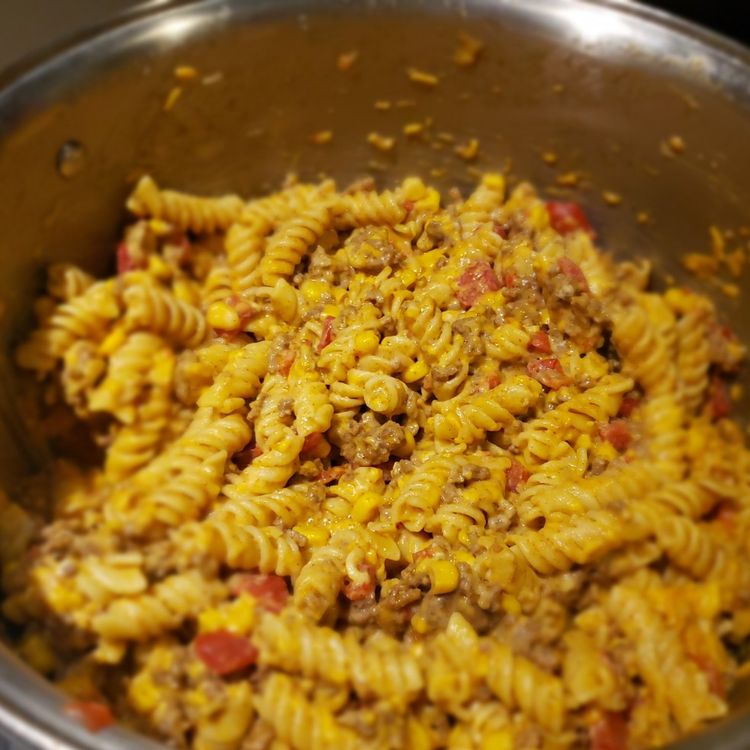
Cheesy Taco Pasta

by Rebecca October 25, 2022
written by Rebecca

Prep Time: 15 mins | Cook Time: 15 mins | Total Time: 30 mins | Yield: 5 Servings

All you need for this Cheesy Taco Pasta are five basic ingredients! This recipe can serve up to five people. In half an hour, dinner with your loved ones will be amazing! This is a must-try recipe. Meat, pasta, taco seasoning, salsa, and cheese in one dish. What’s not to love? Enjoy!

Ingredients:

1-ounce Taco seasoning

2 c Shredded Mexican cheese (divided)

1 ½ c Salsa

8 ounces Rotini

1 lb. Ground beef

½ c water

Directions:

Place a large pot with water on the stove and turn the heat to high. Allow the water to boil.

Add the rotini pasta and a bit of salt into the boiling water, then cook for a few minutes until al dente. Drain and rinse with cold water to stop the cooking process.

Place another pot on the stove and turn the heat to medium-high. Add the ground beef, then cook for a few minutes until crumbly and brown. Discard any accumulated grease.

Add water and taco seasoning, then stir until well blended with the browned beef. Cook for a few more minutes until the water has dried up.

Put the cooked pasta together with salsa, then toss everything until well combined.

Scatter 1 1/2 cups of cheese over the pasta dish, then stir until completely melted.

Turn off the heat, then stir in the rest of the cheese until completely melted as well. Sprinkle freshly chopped parsley on top to garnish.

Serve right away. Enjoy!

Notes:

Place any leftovers in an airtight container, then put them in the fridge. They can last up to 5 days to one week. Reheat for a few minutes in the microwave before serving again.

Nutrition Facts:

Calories: 592 kcal | Carbohydrates: 43g | Protein: 33g | Fat: 31g | Saturated Fat: 14g | Cholesterol: 106mg | Sodium: 1382mg | Potassium: 606mg | Fiber: 3g | Sugar: 5g | Vitamin A: 1200IU | Vitamin C: 4mg | Calcium: 344mg | Iron: 3.3mg

Cheesy Taco Pasta

Rebecca Prep Time: 15 mins | Cook Time: 15 mins | Total Time: 30 mins | Yield: 5 Servings All you need for this Cheesy Taco Pasta are five basic ingredients!… General Recipes Cheesy Taco Pasta European Print This
Serves: 5 Prep Time: 15 mins Cooking Time: 15 mins 15 mins
Nutrition facts: 592 calories 31 fat
Rating: 5.0/5
( 1 voted )

Ingredients

  • 1-ounce Taco seasoning
  • 2 c Shredded Mexican cheese (divided)
  • 1 ½ c Salsa
  • 8 ounces Rotini
  • 1 lb. Ground beef
  • ½ c water

Instructions

Place a large pot with water on the stove and turn the heat to high. Allow the water to boil.

Add the rotini pasta and a bit of salt into the boiling water, then cook for a few minutes until al dente. Drain and rinse with cold water to stop the cooking process.

Place another pot on the stove and turn the heat to medium-high. Add the ground beef, then cook for a few minutes until crumbly and brown. Discard any accumulated grease.

Add water and taco seasoning, then stir until well blended with the browned beef. Cook for a few more minutes until the water has dried up.

Put the cooked pasta together with salsa, then toss everything until well combined.

Scatter 1 1/2 cups of cheese over the pasta dish, then stir until completely melted.

Turn off the heat, then stir in the rest of the cheese until completely melted as well. Sprinkle freshly chopped parsley on top to garnish.

Serve right away. Enjoy!

Notes

Place any leftovers in an airtight container, then put them in the fridge. They can last up to 5 days to one week. Reheat for a few minutes in the microwave before serving again.

October 25, 2022 0 comment
0 FacebookTwitterPinterestEmail
General Recipes

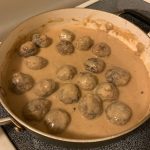
Easy Meatballs in Dijon Gravy

by Rebecca October 25, 2022
written by Rebecca

Prep Time: 7 mins | Cook Time: 23 mins | Total Time: 30 mins

These meatballs smothered in Dijon gravy are perfect for dinner with your loved ones! This recipe will only take you half an hour to prepare and cook. What are you waiting for? It is time to go to your kitchen and start prepping. Enjoy!

Ingredients:

Meatballs:

1 large Egg

1/4 teaspoon ground allspice

2 teaspoons dried parsley

1/4 teaspoon ground nutmeg

1/2 teaspoon salt

2 tablespoons milk

1 clove garlic, minced

1/4 teaspoon ground pepper

1/4 c seasoned bread crumbs

1 small onion, finely chopped

1.5-pound ground beef

Dijon Gravy:

3 tablespoons salted butter

1 c milk

2 teaspoons Dijon mustard

2 tablespoons all-purpose flour

1 1/2 c beef broth

Directions:

Add all the ingredients for the meatballs into a large mixing bowl. Coat your clean hands with a bit of oil, then mix everything until well incorporated. Form small balls out of the meat mixture. Put them onto a baking sheet and arrange them in a single layer.

Place the baking sheet in the freezer and allow the meatballs to chill for at least 10 minutes.

Place a large skillet on the stove and turn the heat to medium. Add a bit of oil and allow it to become hot.

Add the meatballs into the hot skillet, then cook each side for a few minutes until brown. Place the meatballs onto a clean plate.

In the same empty skillet, add butter and allow it to melt.

Add flour, then whisk and cook for a minute until it turns into a roux.

Add the broth, then scrape the bottom of the skillet to get the browned bits. Stir everything until well blended. Simmer until thick. Stir in mustard and milk.

Put the meatballs back into the skillet, then toss to coat with the sauce. Let the meatballs simmer for a few more minutes.

Serve and enjoy!

Easy Meatballs in Dijon Gravy

Rebecca Prep Time: 7 mins | Cook Time: 23 mins | Total Time: 30 mins These meatballs smothered in Dijon gravy are perfect for dinner with your loved ones! This recipe… General Recipes Easy Meatballs in Dijon Gravy European Print This
Prep Time: 7 mins Cooking Time: 23 mins 23 mins
Nutrition facts: 200 calories 20 grams fat
Rating: 5.0/5
( 1 voted )

Ingredients

  • Meatballs:
  • 1 large Egg
  • 1/4 teaspoon ground allspice
  • 2 teaspoons dried parsley
  • 1/4 teaspoon ground nutmeg
  • 1/2 teaspoon salt
  • 2 tablespoons milk
  • 1 clove garlic, minced
  • 1/4 teaspoon ground pepper
  • 1/4 c seasoned bread crumbs
  • 1 small onion, finely chopped
  • 1.5-pound ground beef
  • Dijon Gravy:
  • 3 tablespoons salted butter
  • 1 c milk
  • 2 teaspoons Dijon mustard
  • 2 tablespoons all-purpose flour
  • 1 1/2 c beef broth

Instructions

Add all the ingredients for the meatballs into a large mixing bowl. Coat your clean hands with a bit of oil, then mix everything until well incorporated. Form small balls out of the meat mixture. Put them onto a baking sheet and arrange them in a single layer.

Place the baking sheet in the freezer and allow the meatballs to chill for at least 10 minutes.

Place a large skillet on the stove and turn the heat to medium. Add a bit of oil and allow it to become hot.

Add the meatballs into the hot skillet, then cook each side for a few minutes until brown. Place the meatballs onto a clean plate.

In the same empty skillet, add butter and allow it to melt.

Add flour, then whisk and cook for a minute until it turns into a roux.

Add the broth, then scrape the bottom of the skillet to get the browned bits. Stir everything until well blended. Simmer until thick. Stir in mustard and milk.

Put the meatballs back into the skillet, then toss to coat with the sauce. Let the meatballs simmer for a few more minutes.

Serve and enjoy!

October 25, 2022 0 comment
0 FacebookTwitterPinterestEmail
General Recipes

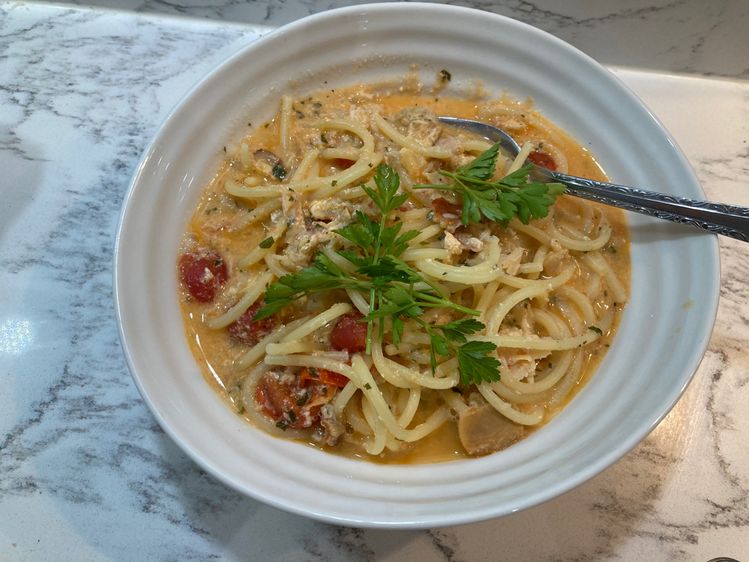
Creamy Crab, Chili, and Cherry Tomato Pasta

by Rebecca October 25, 2022
written by Rebecca

Prep Time: 10 mins | Cook Time: 15 mins | Total Time: 25 mins | Yield: 2 Servings

Enjoy this dish in less than 30 minutes! This Creamy Crab, Chili, and Cherry Tomato Pasta is a quick and easy recipe that you can try for dinner tonight! It has everything you need to satisfy your cravings. Enjoy!

Ingredients:

Approx. 20 cherry tomatoes, halved

3 tbsp of low-fat cream cheese

1 clove of garlic, crushed

160 grams of spaghetti

Cooking Oil Spray

fresh Italian Parsley to serve

black pepper

2 red chilies, very finely chopped

150 grams of fresh crab meat (I use a mix of claw and white crab meat) – can use canned, if you prefer

Directions:

Place a large pot with water on the stove and turn the heat to high. Allow the water to boil.

Add the pasta and a bit of salt, then cook for a few minutes until al dente. Drain the pasta and rinse with cold water to stop the cooking process. Make sure to set aside some of the pasta water for later use.

Place a frying pan on the stove and turn the heat to medium. Add a bit of oil and allow it to become hot. Add garlic clove, then cook for about a minute or until aromatic.

Add chili and tomatoes, then cook for a few more minutes until soft.

Add a bit of pasta water and cream cheese, then stir until well blended.

Put the cooked pasta into the pan together with the crab meat, then toss everything until well incorporated. Cook for a few more minutes, then remove the pan from the heat.

Sprinkle freshly chopped parsley on top to garnish.

Serve and enjoy!

Notes:

Place any leftovers in an airtight container, then put them in the fridge. Reheat for a few minutes before serving again.

Nutrition Facts:

Calories 419 Total Fat 2.3 g 4% Saturated Fat 0.9 g5% Cholesterol 64 mg 21% Sodium 305 mg 13% Total Carbohydrates 68.4 g 23% Dietary Fiber 4 g16% Sugars 8.2 g Protein 27 g 54%

Creamy Crab, Chili, and Cherry Tomato Pasta

Rebecca Prep Time: 10 mins | Cook Time: 15 mins | Total Time: 25 mins | Yield: 2 Servings Enjoy this dish in less than 30 minutes! This Creamy Crab, Chili,… General Recipes Creamy Crab, Chili, and Cherry Tomato Pasta European Print This
Serves: 2 Prep Time: 10 mins Cooking Time: 15 mins 15 mins
Nutrition facts: 419 calories 2.3 fat
Rating: 5.0/5
( 1 voted )

Ingredients

  • Approx. 20 cherry tomatoes, halved
  • 3 tbsp of low-fat cream cheese
  • 1 clove of garlic, crushed
  • 160 grams of spaghetti
  • Cooking Oil Spray
  • fresh Italian Parsley to serve
  • black pepper
  • 2 red chilies, very finely chopped
  • 150 grams of fresh crab meat (I use a mix of claw and white crab meat) - can use canned, if you prefer

Instructions

Place a large pot with water on the stove and turn the heat to high. Allow the water to boil.

Add the pasta and a bit of salt, then cook for a few minutes until al dente. Drain the pasta and rinse with cold water to stop the cooking process. Make sure to set aside some of the pasta water for later use.

Place a frying pan on the stove and turn the heat to medium. Add a bit of oil and allow it to become hot. Add garlic clove, then cook for about a minute or until aromatic.

Add chili and tomatoes, then cook for a few more minutes until soft.

Add a bit of pasta water and cream cheese, then stir until well blended.

Put the cooked pasta into the pan together with the crab meat, then toss everything until well incorporated. Cook for a few more minutes, then remove the pan from the heat.

Sprinkle freshly chopped parsley on top to garnish.

Serve and enjoy!

Notes

Place any leftovers in an airtight container, then put them in the fridge. Reheat for a few minutes before serving again.

October 25, 2022 0 comment
0 FacebookTwitterPinterestEmail
General Recipes

Simple Lemon Loaf

by Rebecca October 25, 2022
written by Rebecca

The flavors in this Simple Lemon Loaf are spectacular! From the butter to the lemon juice, it is very difficult to resist! I love serving this with my favorite cup of coffee. The perfect treat to serve today is just about an hour from achieving! Just think about sitting with your loved ones, talking about life, and eating this Lemon Loaf. Isn’t it perfect? Well, all you need to do is to follow these directions step by step, and you are good to go! Experience perfection in the comfort of your home. Enjoy and don’t forget to share this recipe with everyone!

Ingredients:

½ c milk

Zest of 1 lemon

Juice of ½ lemon

1½ c flour

1 c white sugar

Salt

2 Eggs

6 tbsp butter

2 tsp baking powder

Directions:

Prepare the oven and preheat it to 325 degrees F or 162 degrees C.

Apply cooking spray to a baking pan.

In the bowl of a stand mixer or just a mixing bowl, add sugar and butter. Beat a few times until well incorporated.

Add salt, baking powder, eggs, flour, and lemon zest. Beat again until well blended.

Add the milk and stir until well blended as well.

Transfer the batter to the prepared baking pan.

Place the baking pan in the preheated oven and bake for about an hour or until a toothpick comes out clean after inserting it in the middle.

Remove from the oven, then pour lemon juice on top and spread it evenly.

Sprinkle sugar over the Lemon Loaf.

Let it rest for a few minutes at room temperature.

Slice the loaf into even servings.

Serve and enjoy!

Notes:

Place any leftovers in an airtight container, then put them in the fridge or at room temperature.

This loaf is best-served with coffee!

Simple Lemon Loaf

Rebecca The flavors in this Simple Lemon Loaf are spectacular! From the butter to the lemon juice, it is very difficult to resist! I love serving this with my favorite cup… General Recipes Simple Lemon Loaf European Print This
Nutrition facts: 200 calories 20 grams fat
Rating: 5.0/5
( 1 voted )

Ingredients

  • ½ c milk
  • Zest of 1 lemon
  • Juice of ½ lemon
  • 1½ c flour
  • 1 c white sugar
  • Salt
  • 2 Eggs
  • 6 tbsp butter
  • 2 tsp baking powder

Instructions

Prepare the oven and preheat it to 325 degrees F or 162 degrees C.

Apply cooking spray to a baking pan.

In the bowl of a stand mixer or just a mixing bowl, add sugar and butter. Beat a few times until well incorporated.

Add salt, baking powder, eggs, flour, and lemon zest. Beat again until well blended.

Add the milk and stir until well blended as well.

Transfer the batter to the prepared baking pan.

Place the baking pan in the preheated oven and bake for about an hour or until a toothpick comes out clean after inserting it in the middle.

Remove from the oven, then pour lemon juice on top and spread it evenly.

Sprinkle sugar over the Lemon Loaf.

Let it rest for a few minutes at room temperature.

Slice the loaf into even servings.

Serve and enjoy!

Notes

Place any leftovers in an airtight container, then put them in the fridge or at room temperature. This loaf is best-served with coffee!

October 25, 2022 0 comment
0 FacebookTwitterPinterestEmail
General Recipes

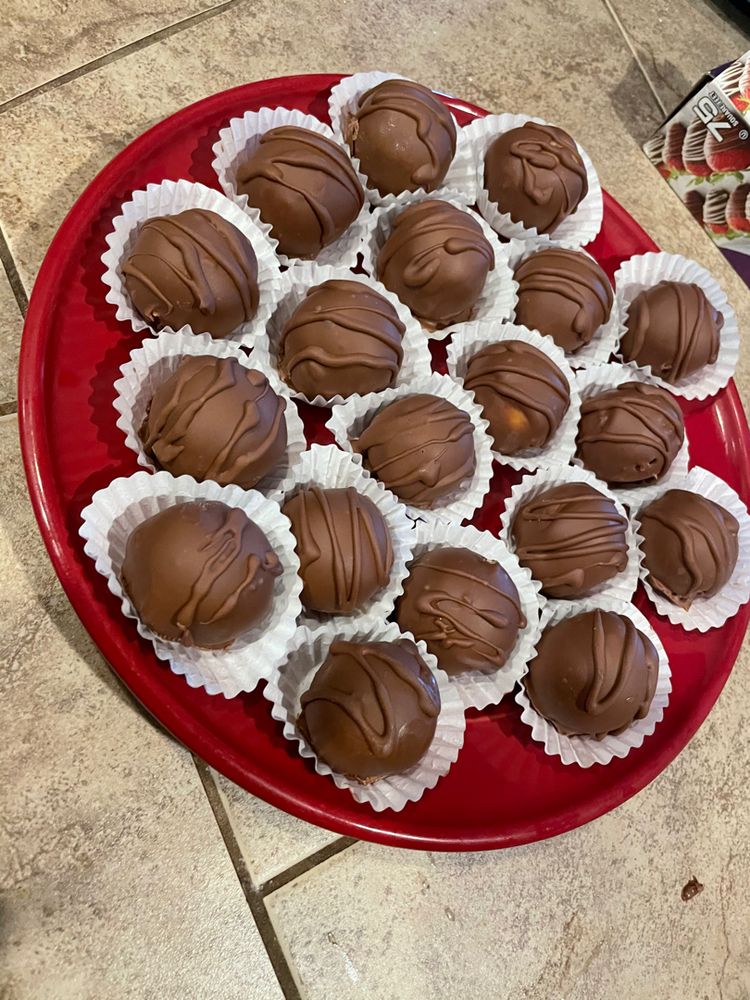
Peanut Butter Balls

by Rebecca October 25, 2022
written by Rebecca

Yield: 2 dozen

I can’t count how many times I made these Peanut Butter Balls! I learned about this recipe from my grandma. She used to make these heavenly treats all the time! Now, allow me to share this recipe with you as well! The best thing about this recipe is that you only need four basic ingredients. Yes, you read it right! Butter, chocolate bark, peanut butter, and sugar! You are so in for a treat! Try this recipe. Enjoy!

Ingredients:

6 tablespoons unsalted butter – softened

16 ounces of chocolate bark

1 c creamy peanut butter – avoid natural peanut butter with oils

2 c powdered sugar

Directions:

Add butter and peanut butter into a mixing bowl. Beat a few times until well blended.

Gradually add the powdered sugar, then beat every addition until well incorporated.

Wrap the bowl with plastic, then place it in the fridge to chill for a few hours.

Form small balls out of the mixture and arrange them in a single layer on a cookie sheet. Use a scoop for this step. Put them in the freezer to chill while you prepare the rest of the ingredients.

In a pan with water, put a heat-proof bowl in the middle. Add the chocolate bark to the bowl. Place the pan on the stove and turn the heat to medium-high. Let the chocolate melt. Stir until smooth.

Place the peanut butter balls at room temperature, then dip each into the melted chocolate. Make sure to coat each well.

Place the Peanut Butter Balls onto wax paper, then allow them to set for a couple of minutes.

Serve and enjoy!

Notes:

Place any leftovers in an airtight container, then put them in the fridge or at room temperature. These Peanut Butter Balls are best-served warm or chilled.

Peanut Butter Balls

Rebecca Yield: 2 dozen I can’t count how many times I made these Peanut Butter Balls! I learned about this recipe from my grandma. She used to make these heavenly treats… General Recipes Peanut Butter Balls European Print This
Serves: 24
Nutrition facts: 200 calories 20 grams fat
Rating: 5.0/5
( 1 voted )

Ingredients

  • 6 tablespoons unsalted butter – softened
  • 16 ounces of chocolate bark
  • 1 c creamy peanut butter – avoid natural peanut butter with oils
  • 2 c powdered sugar

Instructions

Add butter and peanut butter into a mixing bowl. Beat a few times until well blended.

Gradually add the powdered sugar, then beat every addition until well incorporated.

Wrap the bowl with plastic, then place it in the fridge to chill for a few hours.

Form small balls out of the mixture and arrange them in a single layer on a cookie sheet. Use a scoop for this step. Put them in the freezer to chill while you prepare the rest of the ingredients.

In a pan with water, put a heat-proof bowl in the middle. Add the chocolate bark to the bowl. Place the pan on the stove and turn the heat to medium-high. Let the chocolate melt. Stir until smooth.

Place the peanut butter balls at room temperature, then dip each into the melted chocolate. Make sure to coat each well.

Place the Peanut Butter Balls onto wax paper, then allow them to set for a couple of minutes.

Serve and enjoy!


Notes

Place any leftovers in an airtight container, then put them in the fridge or at room temperature. These Peanut Butter Balls are best-served warm or chilled.

October 25, 2022 0 comment
0 FacebookTwitterPinterestEmail
Newer Posts
Older Posts

Popular Posts

  • 1

    Crispy Crunchy Parmesan Potatoes

    March 21, 2020
  • 2

    CROCK POT SMOTHERED PORK CHOPS

    March 21, 2020
  • Facebook
  • Twitter

@2019 - All Right Reserved.


Back To Top