Cook it once
  • Home
  • Privacy Policy
  • Recipes
    • KETO
    • LC
    • WW
  • Tips
  • Contact
Cook it once
  • Home
  • Privacy Policy
  • Recipes
    • KETO
    • LC
    • WW
  • Tips
  • Contact
Category:

General Recipes

General Recipes

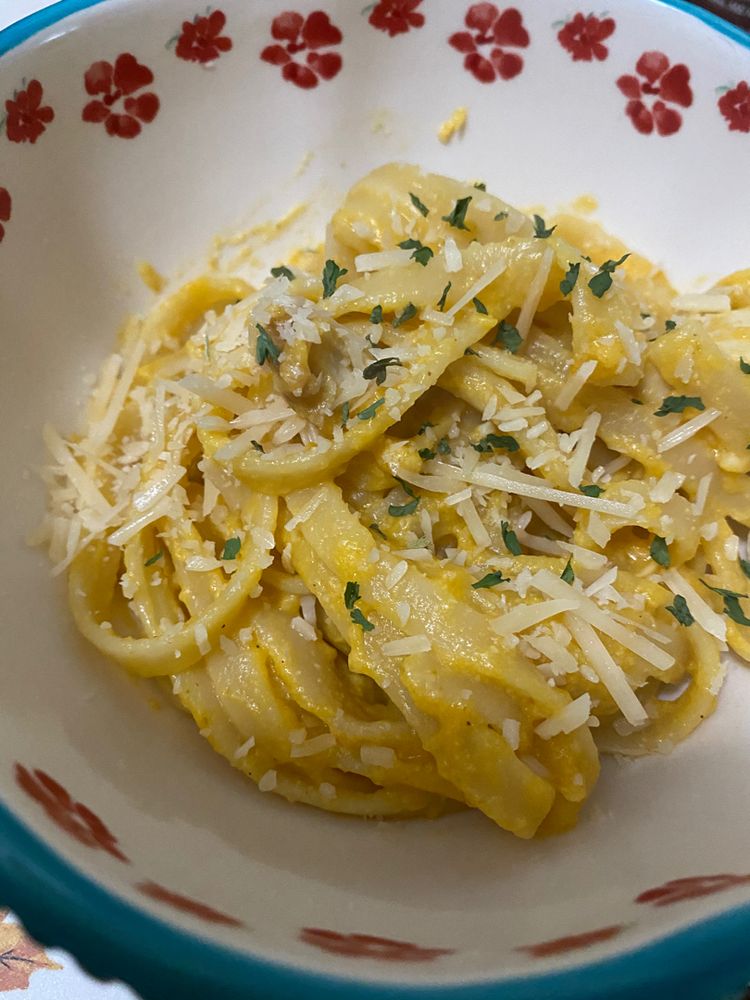
Pumpkin Alfredo

by Rebecca November 28, 2022
written by Rebecca

Prep Time: 5 mins | Cook Time: 15 mins | Total Time: 20 mins | Yield: 6 Servings

The sauce alone of this Pumpkin Alfredo is more than enough to let you know that you are in for a treat! Just follow these easy steps, and you are good to go. Enjoy!

Ingredients:

1/8 tsp nutmeg

1 tbsp fresh chopped parsley

1 c pumpkin puree, not pie filling

2/3 c half & half

1 lb. fettuccine cooked to al dente, reserve 1 c of pasta water

1/2 c freshly grated Parmesan cheese off the block

2 garlic cloves, minced

6 tbsp butter

Directions:

Place a large pot with water on the stove and turn the heat to high. Allow the water to boil.

Add the fettuccine and a bit of salt to the boiling water. Cook for a few minutes until al dente. Set aside about 1 cup of the pasta water for later use and drain the fettuccine.

Place a skillet on the stove and turn the heat to medium-low. Add butter and allow it to melt.

Add garlic, then sauté for a minute or until aromatic. Add half & half, nutmeg, Parmesan cheese, and pumpkin. Stir everything until well blended.

Add a bit of pasta water and stir every addition until the texture becomes smooth.

Put the cooked pasta, then toss until coated with the delicious sauce. Cook for 2 more minutes.

Sprinkle freshly chopped parsley and grated Parmesan cheese over each serving to garnish.

Serve and enjoy!

Notes:

Place any leftovers in an airtight container, then put them in the fridge. They can last up to 2 to 3 days. Reheat for a few minutes before serving again.

Make sure to always freshly grated Parmesan cheese for this recipe.

Feel free to use non-dairy milk for this recipe.

Any type of pasta noodles will do for this recipe.

You can add your preferred herbs to this recipe.

Nutrition Facts:

Calories: 477.38 kcal | Carbohydrates: 59.08g | Protein: 15.36g | Fat: 20.33g | Saturated Fat: 11.52g | Cholesterol: 110.88mg | Sodium: 256.87mg | Potassium: 313.95mg | Fiber: 3.68g | Sugar: 2.92g | Vitamin A: 6975.05IU | Vitamin C: 3.15mg | Calcium: 162.9mg | Iron: 2.12mg
Pumpkin Alfredo

Rebecca Prep Time: 5 mins | Cook Time: 15 mins | Total Time: 20 mins | Yield: 6 Servings The sauce alone of this Pumpkin Alfredo is more than enough to… General Recipes Pumpkin Alfredo European Print This
Serves: 6 Prep Time: 5 mins Cooking Time: 15 mins 15 mins
Nutrition facts: 477.38 calories 20.33 fat
Rating: 5.0/5
( 1 voted )

Ingredients

  • 1/8 tsp nutmeg
  • 1 tbsp fresh chopped parsley
  • 1 c pumpkin puree, not pie filling
  • 2/3 c half & half
  • 1 lb. fettuccine cooked to al dente, reserve 1 c of pasta water
  • 1/2 c freshly grated Parmesan cheese off the block
  • 2 garlic cloves, minced
  • 6 tbsp butter

Instructions

Place a large pot with water on the stove and turn the heat to high. Allow the water to boil.

Add the fettuccine and a bit of salt to the boiling water. Cook for a few minutes until al dente. Set aside about 1 cup of the pasta water for later use and drain the fettuccine.

Place a skillet on the stove and turn the heat to medium-low. Add butter and allow it to melt.

Add garlic, then sauté for a minute or until aromatic. Add half & half, nutmeg, Parmesan cheese, and pumpkin. Stir everything until well blended.

Add a bit of pasta water and stir every addition until the texture becomes smooth.

Put the cooked pasta, then toss until coated with the delicious sauce. Cook for 2 more minutes.

Sprinkle freshly chopped parsley and grated Parmesan cheese over each serving to garnish.

Serve and enjoy!

Notes

Place any leftovers in an airtight container, then put them in the fridge. They can last up to 2 to 3 days. Reheat for a few minutes before serving again. Make sure to always freshly grated Parmesan cheese for this recipe. Feel free to use non-dairy milk for this recipe. Any type of pasta noodles will do for this recipe. You can add your preferred herbs to this recipe.
November 28, 2022 0 comment
0 FacebookTwitterPinterestEmail
General Recipes

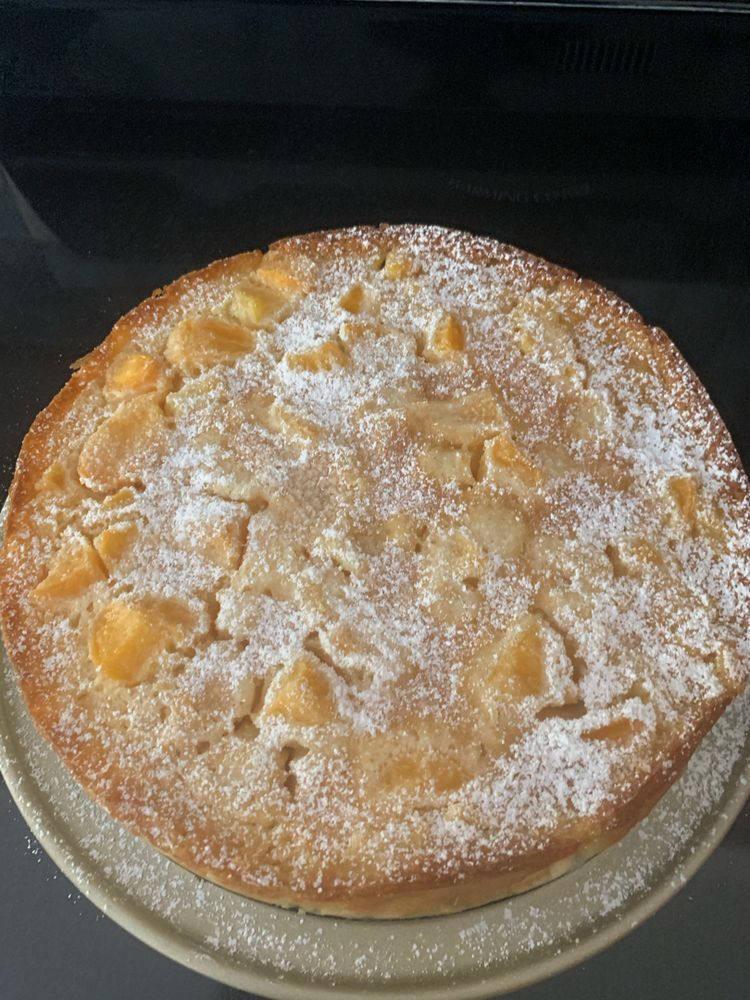
Peaches and Cream Cake

by Rebecca November 28, 2022
written by Rebecca

Prep Time: 15 mins | Cook Time: 55 mins | Total Time: 1 hr 10 mins | Yield: 8 Servings

The taste of the peaches in the cake is so good! This cake recipe is all you need for today’s dessert! Try it now!

Ingredients:

1 teaspoon (5 grams) baking powder

A pinch of salt, if using unsalted butter

1/3 c (75 grams) butter, melted, salted or unsalted

1 large Egg yolk

2/3 c (133 grams) white granulated sugar, scant 2/3 c

1/2 c (62 grams) all-purpose flour

6-8 (6) fresh peaches, about 3 1/2 c chopped

Icing/confectioners’ sugar, for dusting before serving

6 tablespoons (90 ml) whole milk, at room temperature (3% b.f.)

1 large Egg

1 teaspoon (5 ml) vanilla, or vanilla bean paste

Directions:

Apply cooking spray to the inside of an 8-inch springform pan, then sprinkle a pinch of brown sugar in it. Wrap it with foil, then put it onto a large baking sheet.

Prepare the oven and preheat it to 355 degrees F.

Slice the peeled peaches into large pieces.

Add the butter into a heat-proof bowl, then place it in the microwave. Heat for a few minutes until melted completely. Allow it to cool.

Add a pinch of salt, flour, and baking powder into a mixing bowl. Whisk everything until well incorporated.

In another bowl, add sugar and eggs. Whisk until well blended. Stir in the vanilla until well blended as well.

Add melted butter, flour mixture, and milk. Whisk to combine. Add the peaches and stir to combine.

Transfer the batter to the greased pan and spread it evenly. Place it in the preheated oven and bake for about 55 minutes or until the top turns golden brown.

Remove the cake from the oven and let it cool at room temperature.

Sprinkle a bit of icing sugar on top.

Serve and enjoy!

Notes:

Leftovers should be kept in an airtight container.

Feel free to use canned peaches for this recipe if you prefer.

Nutrition Facts:

calories: 229 kcal, carbohydrates: 34g, Protein: 3g, fat: 9g, saturated fat: 5g, Cholesterol: 67mg, Sodium: 83mg, potassium: 308mg, fiber: 1g, sugar: 26g, vitamin a: 685iu, vitamin c: 7.4mg, calcium: 55mg, iron: 0.9mg

Peaches and Cream Cake

Rebecca Prep Time: 15 mins | Cook Time: 55 mins | Total Time: 1 hr 10 mins | Yield: 8 Servings The taste of the peaches in the cake is so… General Recipes Peaches and Cream Cake European Print This
Serves: 8 Prep Time: 15 mins Cooking Time: 55 mins 55 mins
Nutrition facts: 229 calories 9 fat
Rating: 5.0/5
( 1 voted )

Ingredients

  • 1 teaspoon (5 grams) baking powder
  • A pinch of salt, if using unsalted butter
  • 1/3 c (75 grams) butter, melted, salted or unsalted
  • 1 large Egg yolk
  • 2/3 c (133 grams) white granulated sugar, scant 2/3 c
  • 1/2 c (62 grams) all-purpose flour
  • 6-8 (6) fresh peaches, about 3 1/2 c chopped
  • Icing/confectioners' sugar, for dusting before serving
  • 6 tablespoons (90 ml) whole milk, at room temperature (3% b.f.)
  • 1 large Egg
  • 1 teaspoon (5 ml) vanilla, or vanilla bean paste

Instructions

Apply cooking spray to the inside of an 8-inch springform pan, then sprinkle a pinch of brown sugar in it. Wrap it with foil, then put it onto a large baking sheet.

Prepare the oven and preheat it to 355 degrees F.

Slice the peeled peaches into large pieces.

Add the butter into a heat-proof bowl, then place it in the microwave. Heat for a few minutes until melted completely. Allow it to cool.

Add a pinch of salt, flour, and baking powder into a mixing bowl. Whisk everything until well incorporated.

In another bowl, add sugar and eggs. Whisk until well blended. Stir in the vanilla until well blended as well.

Add melted butter, flour mixture, and milk. Whisk to combine. Add the peaches and stir to combine.

Transfer the batter to the greased pan and spread it evenly. Place it in the preheated oven and bake for about 55 minutes or until the top turns golden brown.

Remove the cake from the oven and let it cool at room temperature.

Sprinkle a bit of icing sugar on top.

Serve and enjoy!

Notes

Leftovers should be kept in an airtight container. Feel free to use canned peaches for this recipe if you prefer.

November 28, 2022 0 comment
0 FacebookTwitterPinterestEmail
General Recipes

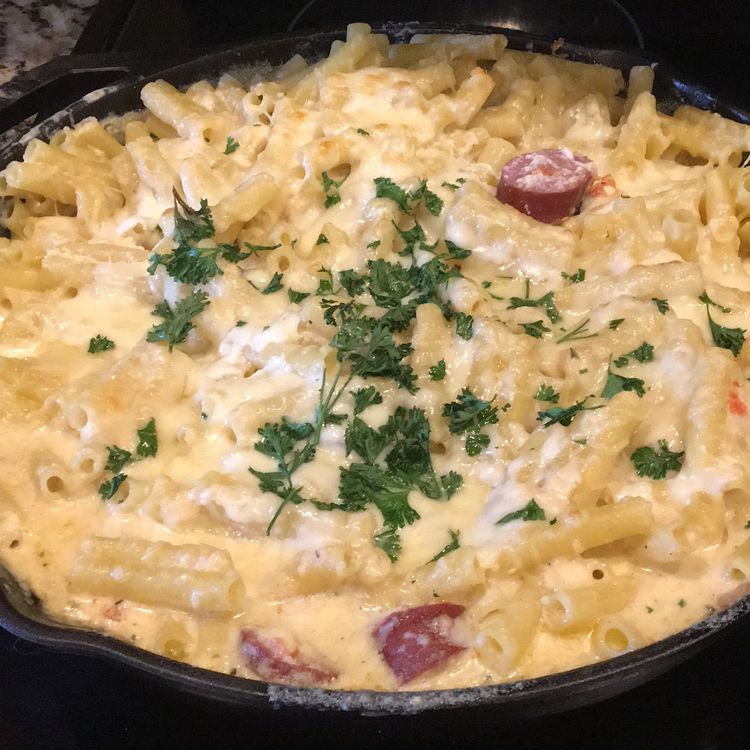
SPICY SMOKED SAUSAGE ALFREDO BAKE

by Rebecca November 26, 2022
written by Rebecca

Prep Time: 5 mins | Cook Time: 20 mins | Total Time: 25 mins | Yield: 8 Servings

Everything about this dish is perfect! From the al dente pasta to the creamy sauce, you will surely love it! This is ready to be devoured in just about 25 minutes. It can serve up to 8 people. Try it now!

Ingredients:

1/2 c grated Parmesan cheese

2-3 cloves garlic, minced

1 c chicken broth

3 tbsp butter

1/4 tsp red pepper flakes

3 tbsp flour

2 c half and half

2 c grated mozzarella cheese, divided

1/4 tsp pepper

1-2 tbsp chopped fresh parsley

16 oz. dry pasta

1/4 tsp cayenne pepper

1/2 tsp salt

1 (12 ounces) fully cooked smoked sausage, any variety

Directions:

Refer to the directions provided on the package of noodles on how to cook them. Drain and rinse them with cold water to stop the cooking process.

Place a large skillet on the stove and turn the heat to medium. Add butter and allow it to melt.

Add garlic and sauté for about a minute or just until aromatic. Add flour, then whisk and cook for about a minute.

Add broth and half & half, then stir until well blended. Add salt, pepper, cayenne, and red pepper flakes to season.

Stir in 1 cup of mozzarella cheese and Parmesan cheese until melted.

Slice the sausage into 1/4-inch round pieces, then put them into the skillet. Stir to combine.

Add the cooked pasta and freshly chopped parsley into the skillet with the sauce, then toss to coat.

Apply cooking spray to the inside of a 9×13-inch baking dish.

Move the mixture in the skillet into the prepared baking dish. Top with the rest of the mozzarella cheese. Broil for 3 minutes or until the cheese turns golden brown.

Serve and enjoy!

Nutrition Facts:

Amount Per Serving: CALORIES: 476 | TOTAL FAT: 22g | SATURATED FAT: 13g | TRANS FAT: 1g | UNSATURATED FAT: 8g | CHOLESTEROL: 66mg | SODIUM: 682mg | CARBOHYDRATES: 50g | FIBER: 2g | SUGAR: 5g | PROTEIN: 19g

SPICY SMOKED SAUSAGE ALFREDO BAKE

Rebecca Prep Time: 5 mins | Cook Time: 20 mins | Total Time: 25 mins | Yield: 8 Servings Everything about this dish is perfect! From the al dente pasta to… General Recipes SPICY SMOKED SAUSAGE ALFREDO BAKE European Print This
Serves: 8 Prep Time: 5 mins Cooking Time: 20 mins 20 mins
Nutrition facts: 476 calories 22 fat
Rating: 5.0/5
( 1 voted )

Ingredients

  • 1/2 c grated Parmesan cheese
  • 2-3 cloves garlic, minced
  • 1 c chicken broth
  • 3 tbsp butter
  • 1/4 tsp red pepper flakes
  • 3 tbsp flour
  • 2 c half and half
  • 2 c grated mozzarella cheese, divided
  • 1/4 tsp pepper
  • 1-2 tbsp chopped fresh parsley
  • 16 oz. dry pasta
  • 1/4 tsp cayenne pepper
  • 1/2 tsp salt
  • 1 (12 ounces) fully cooked smoked sausage, any variety

Instructions

Refer to the directions provided on the package of noodles on how to cook them. Drain and rinse them with cold water to stop the cooking process.

Place a large skillet on the stove and turn the heat to medium. Add butter and allow it to melt.

Add garlic and sauté for about a minute or just until aromatic. Add flour, then whisk and cook for about a minute.

Add broth and half & half, then stir until well blended. Add salt, pepper, cayenne, and red pepper flakes to season.

Stir in 1 cup of mozzarella cheese and Parmesan cheese until melted.

Slice the sausage into 1/4-inch round pieces, then put them into the skillet. Stir to combine.

Add the cooked pasta and freshly chopped parsley into the skillet with the sauce, then toss to coat.

Apply cooking spray to the inside of a 9×13-inch baking dish.

Move the mixture in the skillet into the prepared baking dish. Top with the rest of the mozzarella cheese. Broil for 3 minutes or until the cheese turns golden brown.

Serve and enjoy!

November 26, 2022 0 comment
0 FacebookTwitterPinterestEmail
General Recipes

NEW YEAR’S DAY BLACK-EYED PEA CASSEROLE

by Rebecca November 26, 2022
written by Rebecca

Prep Time: 5 mins | Cook Time: 1 hr | Total Time: 1 hr 5 mins | Yield: 6 to 8 Servings

This traditional dish is perfect for any occasion! Made with simple ingredients, you can enjoy this in just about an hour!

Ingredients:

4 c collard greens, stems removed and thinly sliced

1 small onion, chopped

4-5 slices of bacon (I use thick-cut)

2 cans of black-eyed peas, rinsed and drained

2 c shredded cheddar cheese, divided

1/8 tsp cayenne (optional)

2 cloves garlic, minced

3 cups low-sodium chicken broth (plus extra for a casserole, if needed)

1/4 tsp black pepper

1 1/2 c brown rice

1/4 c sliced green onions

1/2 tsp salt

Directions:

Place a large skillet on the stove and turn the heat to medium. Add the bacon, then cook for a few minutes until crispy. Move the bacon to a clean plate with paper towels to drain the fat. Crumble them.

In the same skillet, add the sliced onion and sauté for a few minutes just until soft. Add garlic and sauté for about a minute or until aromatic. Toss in the rice, salt, cayenne, and pepper.

Add the chicken broth and scrape the bottom of the skillet to get the browned bits. Stir again until well blended and allow the mixture to boil.

Cover the skillet with the lid, then turn the heat down to low. Cook for 2 more minutes.

Prepare the oven and preheat it to 175 degrees C or 350 degrees F.

Apply cooking spray to the inside of a 9×13-inch casserole dish.

Stir in the collard greens into the skillet. Cover and remove from the heat. Transfer into a large mixing bowl together with the black-eyed peas and 1 cup of cheddar cheese. Stir everything to combine.

Move the mixture into the greased casserole dish and spread it evenly.

Place the casserole dish in the preheated oven and bake for about 20 minutes.

Sprinkle more cheddar cheese on top and bake for additional 5 minutes. Remove from the oven.

Sprinkle the rest of the crumbled bacon and green onions on top.

Serve and enjoy!

Nutrition Facts:

Amount Per Serving: CALORIES: 563 | TOTAL FAT: 24g | SATURATED FAT: 11g | CHOLESTEROL: 52mg | SODIUM: 970mg | FIBER: 8g | SUGAR: 1g | PROTEIN: 26g

NEW YEAR’S DAY BLACK-EYED PEA CASSEROLE

Rebecca Prep Time: 5 mins | Cook Time: 1 hr | Total Time: 1 hr 5 mins | Yield: 6 to 8 Servings This traditional dish is perfect for any occasion!… General Recipes NEW YEAR’S DAY BLACK-EYED PEA CASSEROLE European Print This
Serves: 6-8 Prep Time: 5 mins Cooking Time: 1 hr 1 hr
Nutrition facts: 563 calories 24 fat
Rating: 5.0/5
( 1 voted )

Ingredients

  • 4 c collard greens, stems removed and thinly sliced
  • 1 small onion, chopped
  • 4-5 slices of bacon (I use thick-cut)
  • 2 cans of black-eyed peas, rinsed and drained
  • 2 c shredded cheddar cheese, divided
  • 1/8 tsp cayenne (optional)
  • 2 cloves garlic, minced
  • 3 cups low-sodium chicken broth (plus extra for a casserole, if needed)
  • 1/4 tsp black pepper
  • 1 1/2 c brown rice
  • 1/4 c sliced green onions
  • 1/2 tsp salt

Instructions

Place a large skillet on the stove and turn the heat to medium. Add the bacon, then cook for a few minutes until crispy. Move the bacon to a clean plate with paper towels to drain the fat. Crumble them.

In the same skillet, add the sliced onion and sauté for a few minutes just until soft. Add garlic and sauté for about a minute or until aromatic. Toss in the rice, salt, cayenne, and pepper.

Add the chicken broth and scrape the bottom of the skillet to get the browned bits. Stir again until well blended and allow the mixture to boil.

Cover the skillet with the lid, then turn the heat down to low. Cook for 2 more minutes.

Prepare the oven and preheat it to 175 degrees C or 350 degrees F.

Apply cooking spray to the inside of a 9×13-inch casserole dish.

Stir in the collard greens into the skillet. Cover and remove from the heat. Transfer into a large mixing bowl together with the black-eyed peas and 1 cup of cheddar cheese. Stir everything to combine.

Move the mixture into the greased casserole dish and spread it evenly.

Place the casserole dish in the preheated oven and bake for about 20 minutes.

Sprinkle more cheddar cheese on top and bake for additional 5 minutes. Remove from the oven.

Sprinkle the rest of the crumbled bacon and green onions on top.

Serve and enjoy!

November 26, 2022 0 comment
0 FacebookTwitterPinterestEmail
General Recipes

Rustic Roasted Garlic Chicken with Asiago Gravy

by Rebecca November 26, 2022
written by Rebecca

Prep Time: 5 mins | Cook Time: 25 mins | Total Time: 30 mins | Yield: 4 Servings

The Asiago gravy is what I like the most about this dish. It tastes insanely delicious! You will surely enjoy this dish! Chicken smothered in sauce, what’s not to like?

Ingredients:

1 c chicken broth

1/2 c Asiago cheese (or Parmesan), grated

2 tsp fresh thyme, chopped (or 1 tsp dry thyme)

1 onion, diced

salt and pepper to taste

20 cloves garlic, peeled

1 1/2 lbs. bone-in and skin-on chicken thighs (4-6 thighs)

2 tbsp flour

1 tbsp oil

Directions:

Place a large skillet on the stove and turn the heat to medium-high. Add oil and allow it to become hot.

Sprinkle salt and pepper over the chicken, then toss to coat. Add them into the hot skillet, then sear each side for about 5 minutes or until they turn golden brown. Transfer them onto a clean plate.

In the same skillet, add garlic and onion. Sauté for a few minutes until soft and aromatic.

Add flour and thyme, then whisk and cook for about a minute.

Add the broth, then deglaze the skillet by scraping the bottom to get the browned bits. Add pepper, Asiago, and salt to season. Stir everything until well blended.

Bring the chicken breasts back into the skillet with the sauce, then toss to coat.

Reduce the heat to medium-low, then cover the skillet with the lid and cook the chicken for 15 minutes. Remove from the heat.

Serve and enjoy!

Notes:

You can cook this in the slow cooker. (2 to 4 hours on a high setting or 4 to 10 minutes on a low setting.)

Place any leftovers in an airtight container, then put them in the fridge. Reheat for a few minutes before serving again.

Nutrition Facts:

Calories 524, Fat 33.6g (Saturated 12.3g, Trans 0), Cholesterol 116mg, Sodium 464mg, Carbs 20.9g (Fiber 3.5g, Sugars 6.9g), Protein 32.2g

Rustic Roasted Garlic Chicken with Asiago Gravy

Rebecca Prep Time: 5 mins | Cook Time: 25 mins | Total Time: 30 mins | Yield: 4 Servings The Asiago gravy is what I like the most about this dish.… General Recipes Rustic Roasted Garlic Chicken with Asiago Gravy European Print This
Serves: 4 Prep Time: 5 mins Cooking Time: 25 mins 25 mins
Nutrition facts: 524 calories 33 fat
Rating: 5.0/5
( 1 voted )

Ingredients

  • 1 c chicken broth
  • 1/2 c Asiago cheese (or Parmesan), grated
  • 2 tsp fresh thyme, chopped (or 1 tsp dry thyme)
  • 1 onion, diced
  • salt and pepper to taste
  • 20 cloves garlic, peeled
  • 1 1/2 lbs. bone-in and skin-on chicken thighs (4-6 thighs)
  • 2 tbsp flour
  • 1 tbsp oil

Instructions

Place a large skillet on the stove and turn the heat to medium-high. Add oil and allow it to become hot.

Sprinkle salt and pepper over the chicken, then toss to coat. Add them into the hot skillet, then sear each side for about 5 minutes or until they turn golden brown. Transfer them onto a clean plate.

In the same skillet, add garlic and onion. Sauté for a few minutes until soft and aromatic.

Add flour and thyme, then whisk and cook for about a minute.

Add the broth, then deglaze the skillet by scraping the bottom to get the browned bits. Add pepper, Asiago, and salt to season. Stir everything until well blended.

Bring the chicken breasts back into the skillet with the sauce, then toss to coat.

Reduce the heat to medium-low, then cover the skillet with the lid and cook the chicken for 15 minutes. Remove from the heat.

Serve and enjoy!

Notes

You can cook this in the slow cooker. (2 to 4 hours on a high setting or 4 to 10 minutes on a low setting.) Place any leftovers in an airtight container, then put them in the fridge. Reheat for a few minutes before serving again.

November 26, 2022 0 comment
0 FacebookTwitterPinterestEmail
General Recipes

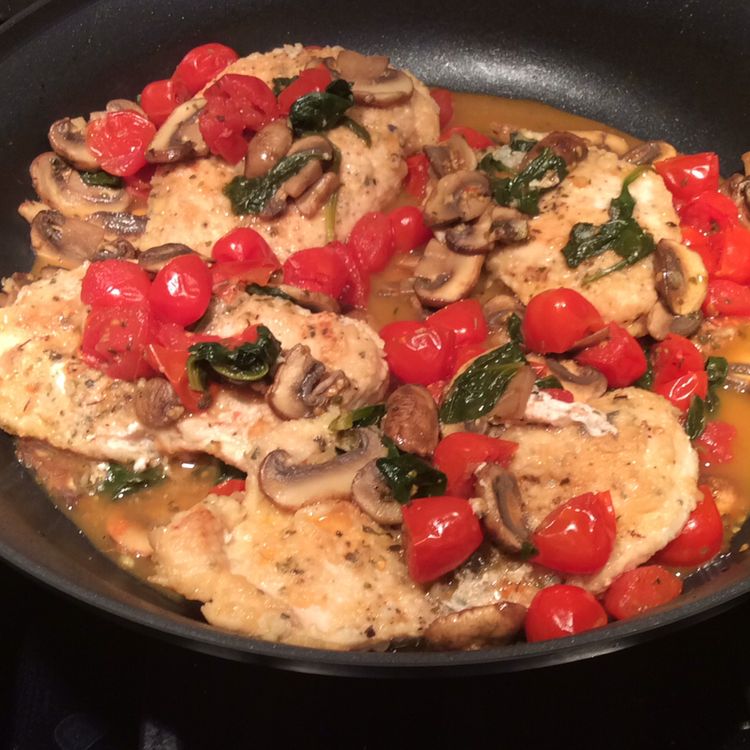
Italian-Style Skillet Chicken with Tomatoes and Mushrooms

by Rebecca November 26, 2022
written by Rebecca

Prep Time: 10 mins | Cook Time: 20 mins | Total Time: 30 mins | Yield: 4 Servings

If you are looking for a quick and easy recipe to try for tonight’s dinner, then this is for you! This Italian-Style Skillet Chicken with Tomatoes and Mushrooms is perfectly seasoned! It is ready to be devoured in just 30 minutes. Enjoy!

Ingredients:

1 tbsp freshly squeezed lemon juice, juice of ½ lemon

½ c all-purpose flour, more for later

1 tsp salt, divided

4 large chicken cutlets, boneless, skinless chicken breasts, cut into ¼-inch thin cutlets

14 ounces grape tomatoes, halved

1 tbsp dried oregano, divided

½ c white wine

A handful of baby spinach, optional

8 ounces Baby Bella or white mushrooms, cleaned, trimmed, and sliced

1 tsp black pepper, divided

2 tbsp chopped fresh garlic

¾ c chicken broth

Extra Virgin Olive Oil

Directions:

Use paper towels to pat dry the chicken breasts.

Sprinkle 1/2 tsp salt, 1/2 tbsp dried oregano, and 1/2 tsp black pepper over the chicken. Rub each to coat. Sprinkle flour as and toss.

Place a large cast-iron skillet on the stove and turn the heat to medium. Add 2 tbsp of olive oil and allow it to become hot.

Add the chicken breasts into the hot skillet, then sear each side for about 3 minutes or until they turn golden brown. Move onto a clean plate.

In the empty skillet, add more oil and allow it to become hot. Add the mushrooms and sauté just until soft.

Add garlic, 2 tsp of flour, 1/2 tsp salt, 1/2 tbsp of oregano, 1/2 tsp pepper, and tomatoes. Stir and cook for about 3 minutes or until aromatic.

Add white wine and stir until well blended. Deglaze the skillet by scraping the bottom to get the browned bits.

Add chicken broth and lemon juice, then stir until well blended. Let it boil.

Bring the chicken breasts back into the skillet, then toss to coat. Turn the heat up to high and cook for 3 minutes.

Turn the heat down to medium-low and cook for 8 more minutes.

Serve and enjoy!

Notes:

Place any leftovers in an airtight container, then put them in the fridge. They can last up to 4 days. Reheat for a few minutes before serving again.

Nutrition Facts:

Calories: 306.7 kcal | Carbohydrates: 19.5g | Protein: 39.2g | Fat: 4.9g | Saturated Fat: 1.1g | Trans Fat: 0.1g | Cholesterol: 108.8mg | Sodium: 947.7mg | Potassium: 979.8mg | Fiber: 2.4g | Vitamin A: 903IU | Vitamin C: 21.4mg | Calcium: 56.1mg | Iron: 2.4mg

Italian-Style Skillet Chicken with Tomatoes and Mushrooms

Rebecca Prep Time: 10 mins | Cook Time: 20 mins | Total Time: 30 mins | Yield: 4 Servings If you are looking for a quick and easy recipe to try… General Recipes Italian-Style Skillet Chicken with Tomatoes and Mushrooms European Print This
Serves: 4 Prep Time: 10 mins Cooking Time: 20 mins 20 mins
Nutrition facts: 306.7 calories 4.9 fat
Rating: 5.0/5
( 1 voted )

Ingredients

  • 1 tbsp freshly squeezed lemon juice, juice of ½ lemon
  • ½ c all-purpose flour, more for later
  • 1 tsp salt, divided
  • 4 large chicken cutlets, boneless, skinless chicken breasts, cut into ¼-inch thin cutlets
  • 14 ounces grape tomatoes, halved
  • 1 tbsp dried oregano, divided
  • ½ c white wine
  • A handful of baby spinach, optional
  • 8 ounces Baby Bella or white mushrooms, cleaned, trimmed, and sliced
  • 1 tsp black pepper, divided
  • 2 tbsp chopped fresh garlic
  • ¾ c chicken broth
  • Extra Virgin Olive Oil

Instructions

Use paper towels to pat dry the chicken breasts.

Sprinkle 1/2 tsp salt, 1/2 tbsp dried oregano, and 1/2 tsp black pepper over the chicken. Rub each to coat. Sprinkle flour as and toss.

Place a large cast-iron skillet on the stove and turn the heat to medium. Add 2 tbsp of olive oil and allow it to become hot.

Add the chicken breasts into the hot skillet, then sear each side for about 3 minutes or until they turn golden brown. Move onto a clean plate.

In the empty skillet, add more oil and allow it to become hot. Add the mushrooms and sauté just until soft.

Add garlic, 2 tsp of flour, 1/2 tsp salt, 1/2 tbsp of oregano, 1/2 tsp pepper, and tomatoes. Stir and cook for about 3 minutes or until aromatic.

Add white wine and stir until well blended. Deglaze the skillet by scraping the bottom to get the browned bits.

Add chicken broth and lemon juice, then stir until well blended. Let it boil.

Bring the chicken breasts back into the skillet, then toss to coat. Turn the heat up to high and cook for 3 minutes.

Turn the heat down to medium-low and cook for 8 more minutes.

Serve and enjoy!

Notes

Place any leftovers in an airtight container, then put them in the fridge. They can last up to 4 days. Reheat for a few minutes before serving again.

November 26, 2022 0 comment
0 FacebookTwitterPinterestEmail
General Recipes

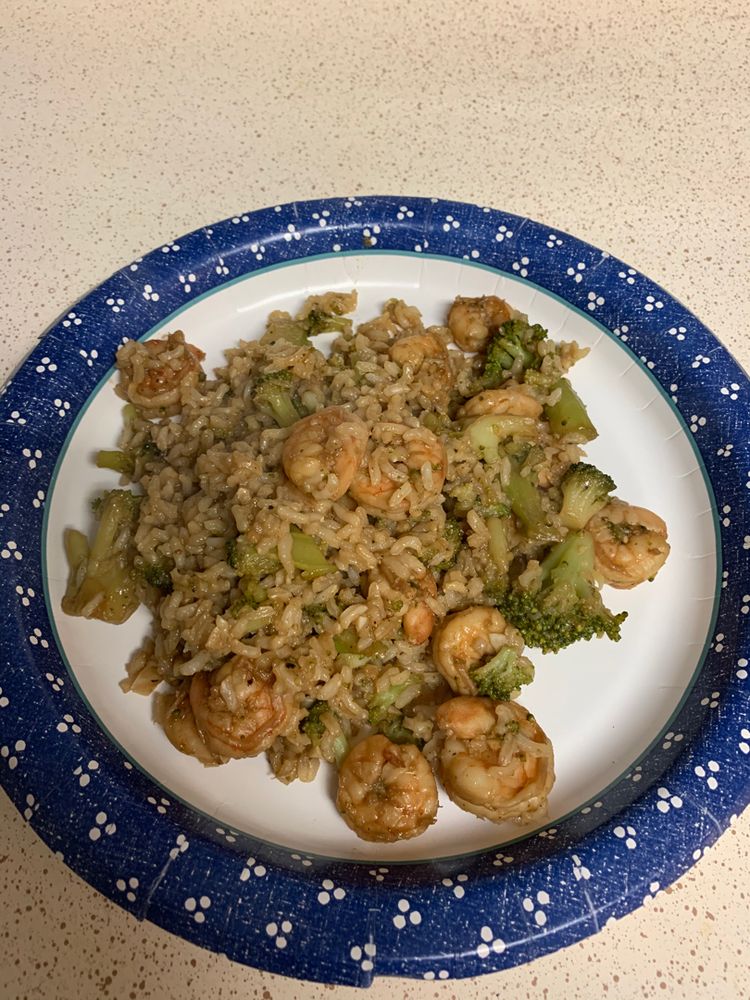
Honey Lime Shrimp and Broccoli

by Rebecca November 26, 2022
written by Rebecca

Prep Time: 20 mins | Cook Time: 5 mins | Total Time: 25 mins | Yield: 4 Servings

You can enjoy this delicious dish in less than 30 minutes! This Honey Lime Shrimp and Broccoli is total comfort food! With these basic ingredients, you can have the best thing to serve your loved ones! Serve this with rice, and you have yourself a meal to remember. Enjoy!

Ingredients:

2 c steamed broccoli (I use Publix “steam in bag”)

Juice of 1 lime

3 large garlic cloves (minced)

1.5 lbs. medium shrimp (peeled and deveined)

1/3 c soy sauce

1 tablespoon butter (you could also use olive oil)

1/4 c honey

Directions:

Add garlic, soy sauce, lime juice, and honey into a mixing bowl. Whisk everything until well incorporated. Reserve about 1/3 cup of the sauce for later use.

In the bowl with the rest of the marinade, toss in the shrimp to coat. Place the bowl in the fridge and let the shrimp marinate for at least 20 minutes.

Steam the veggies in the microwave or cook the rice while you marinate the shrimp.

Place a skillet on the stove and turn the heat to medium. Add butter and allow it to melt.

Remove the shrimp from the marinade and put them into the hot skillet. Cook each side for about a minute or until they turn pink.

Add the steamed veggies and the reserved sauce into the skillet with the shrimp. Toss to combine and cook everything for additional 2 minutes.

Remove the skillet from the heat.

Serve right away over rice. Enjoy!

Notes:

You can use your preferred veggies for this recipe.

Place any leftovers in an airtight container, then put them in the fridge. Reheat for a few minutes before serving again.

Honey Lime Shrimp and Broccoli

Rebecca Prep Time: 20 mins | Cook Time: 5 mins | Total Time: 25 mins | Yield: 4 Servings You can enjoy this delicious dish in less than 30 minutes! This… General Recipes Honey Lime Shrimp and Broccoli European Print This
Serves: 4 Prep Time: 20 mins Cooking Time: 5 mins 5 mins
Nutrition facts: 200 calories 20 grams fat
Rating: 5.0/5
( 1 voted )

Ingredients

  • 2 c steamed broccoli (I use Publix “steam in bag”)
  • Juice of 1 lime
  • 3 large garlic cloves (minced)
  • 1.5 lbs. medium shrimp (peeled and deveined)
  • 1/3 c soy sauce
  • 1 tablespoon butter (you could also use olive oil)
  • 1/4 c honey

Instructions

Add garlic, soy sauce, lime juice, and honey into a mixing bowl. Whisk everything until well incorporated. Reserve about 1/3 cup of the sauce for later use.

In the bowl with the rest of the marinade, toss in the shrimp to coat. Place the bowl in the fridge and let the shrimp marinate for at least 20 minutes.

Steam the veggies in the microwave or cook the rice while you marinate the shrimp.

Place a skillet on the stove and turn the heat to medium. Add butter and allow it to melt.

Remove the shrimp from the marinade and put them into the hot skillet. Cook each side for about a minute or until they turn pink.

Add the steamed veggies and the reserved sauce into the skillet with the shrimp. Toss to combine and cook everything for additional 2 minutes.

Remove the skillet from the heat.

Serve right away over rice. Enjoy!

Notes

You can use your preferred veggies for this recipe. Place any leftovers in an airtight container, then put them in the fridge. Reheat for a few minutes before serving again.

November 26, 2022 0 comment
0 FacebookTwitterPinterestEmail
General Recipes

Chicken and Mushroom Skillet in a Creamy Asiago and Mustard Sauce

by Rebecca November 26, 2022
written by Rebecca

Prep Time: 5 mins | Cook Time: 25 mins | Total Time: 30 mins | Yield: 4 Servings

The creamy sauce alone of this dish is more than enough to let you know that you are in for a treat! This is by far the best chicken breast recipe I have ever tried. You will surely love it. Enjoy!

Ingredients:

1 teaspoon thyme, chopped

1/2 c Asiago cheese, grated

8 oz. mushrooms, sliced

1/2 c heavy/whipping cream

1 tbsp Dijon mustard

1 small onion, diced

4 (6 oz.) boneless, skinless chicken breasts, pounded thin

1/2 c chicken broth

salt and pepper to taste

1 tbsp grainy mustard

2 cloves garlic, chopped

1/4 c dry white wine or chicken broth

2 tbsp oil or butter

Directions:

Put a heavy-bottomed skillet on the stove and turn the heat to medium-high. Add oil and allow it to become hot.

Sprinkle salt and pepper over the chicken breasts, then rub each to coat. Put them into the skillet, then sear each side for about 4 to 6 minutes or until they turn golden brown. Move them onto a clean plate.

In the same empty skillet, add onion and mushrooms. Sauté for about 10 minutes or until soft.

Add garlic and thyme, then sauté for about a minute or until aromatic.

Pour in the wine, then deglaze the skillet by scraping the bottom of it to get the browned bits.

Add the cream, mustard, pepper, broth, and salt. Stir everything to combine.

Bring the chicken back into the skillet, then toss to coat with the sauce. Let the mixture boil.

Reduce the heat to low, then simmer the dish for about 5 minutes or until the sauce becomes thick.

Stir in the Asiago until completely melted.

Serve right away. Enjoy!

Notes:

Make sure to brown the mushrooms.

You can use soy sauce to season the chicken instead of salt.

Nutrition Facts:

Calories 384, Fat 19.5g (Saturated 6.8g, Trans 0), Cholesterol 117mg, Sodium 318mg, Carbs 6.1g (Fiber 1.2g, Sugars 3g), Protein 44.3g

Chicken and Mushroom Skillet in a Creamy Asiago and Mustard Sauce

Rebecca Prep Time: 5 mins | Cook Time: 25 mins | Total Time: 30 mins | Yield: 4 Servings The creamy sauce alone of this dish is more than enough to… General Recipes Chicken and Mushroom Skillet in a Creamy Asiago and Mustard Sauce European Print This
Serves: 4 Prep Time: 5 mins Cooking Time: 25 mins 25 mins
Nutrition facts: 384 calories 19.5 fat
Rating: 5.0/5
( 1 voted )

Ingredients

  • 1 teaspoon thyme, chopped
  • 1/2 c Asiago cheese, grated
  • 8 oz. mushrooms, sliced
  • 1/2 c heavy/whipping cream
  • 1 tbsp Dijon mustard
  • 1 small onion, diced
  • 4 (6 oz.) boneless, skinless chicken breasts, pounded thin
  • 1/2 c chicken broth
  • salt and pepper to taste
  • 1 tbsp grainy mustard
  • 2 cloves garlic, chopped
  • 1/4 c dry white wine or chicken broth
  • 2 tbsp oil or butter

Instructions

Put a heavy-bottomed skillet on the stove and turn the heat to medium-high. Add oil and allow it to become hot.

Sprinkle salt and pepper over the chicken breasts, then rub each to coat. Put them into the skillet, then sear each side for about 4 to 6 minutes or until they turn golden brown. Move them onto a clean plate.

In the same empty skillet, add onion and mushrooms. Sauté for about 10 minutes or until soft.

Add garlic and thyme, then sauté for about a minute or until aromatic.

Pour in the wine, then deglaze the skillet by scraping the bottom of it to get the browned bits.

Add the cream, mustard, pepper, broth, and salt. Stir everything to combine.

Bring the chicken back into the skillet, then toss to coat with the sauce. Let the mixture boil.

Reduce the heat to low, then simmer the dish for about 5 minutes or until the sauce becomes thick.

Stir in the Asiago until completely melted.

Serve right away. Enjoy!

Notes

Make sure to brown the mushrooms. You can use soy sauce to season the chicken instead of salt.

November 26, 2022 0 comment
0 FacebookTwitterPinterestEmail
General Recipes

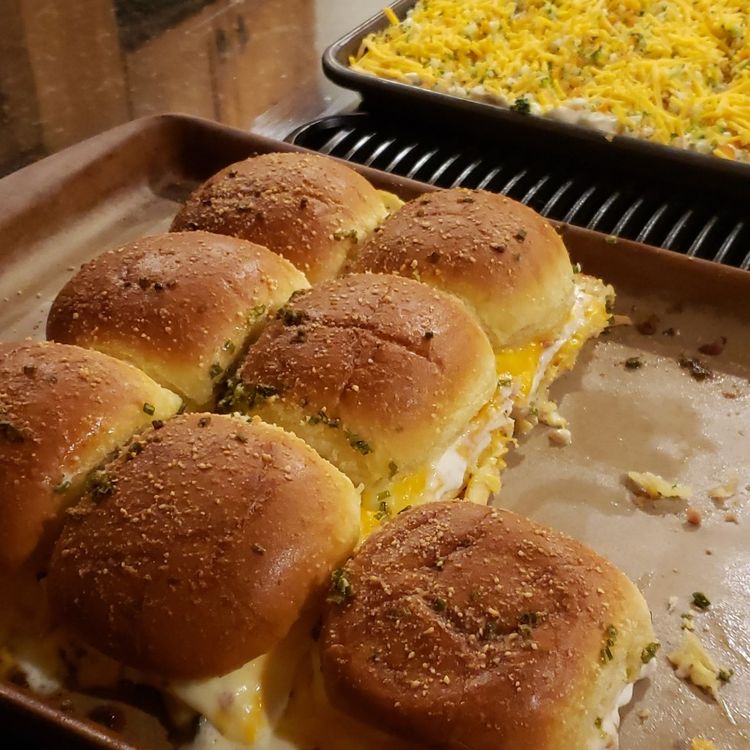
Chicken Bacon Ranch Pull-Apart Rolls

by Rebecca November 26, 2022
written by Rebecca

Prep Time: 10 mins | Cook Time: 30 mins | Total Time: 40 mins | Yield: 12 Servings

Cheesy, buttery, and loaded with protein, these Chicken Bacon Ranch Pull-Apart Rolls are perfect for any occasion! They are total crowd-pleasers! Try this recipe now, and I promise you that it is worth all your time and effort. Enjoy!

Ingredients:

⅓ c prepared Ranch salad dressing

1 pound thinly sliced deli chicken

8 slices of bacon, cooked and crumbled

12 slices Colby Jack cheese

½ c butter

1 tablespoon chopped fresh chives

½ teaspoon onion powder

2 tablespoons grated Parmesan cheese

1 teaspoon garlic salt

1 15-ounce pkg 12-count potato rolls (i.e., Martin’s)

Directions:

Prepare the oven and preheat it to 175 degrees C or 350 degrees F.

Line the inside of a large baking sheet with parchment paper.

Slice through the center of each potato roll with a serrated knife.

Place the prepared potatoes onto the prepared baking sheet. Put aside the tops for later use.

Place a saucepan on the stove and turn the heat to medium. Add butter and allow it to melt.

Add garlic salt, onion powder, and chives. Stir everything until well blended with the melted butter. Remove the pan from the heat. Brush each bottom roll with 1/3 of it.

Add half of the cheese to each of the bottom rolls followed by chicken and bacon.

Spread the Ranch dressing over the rolls, then sprinkle more cheese on top. Brush each with the rest of the butter mixture.

Place the reserved rolls over each of the bottom rolls. Add more grated Parmesan cheese on top. Cover them with aluminum foil.

Bake the rolls for about 20 minutes, then remove the foil cover and bake for 10 more minutes or until the top turns golden brown.

Serve with Ranch dressing. Enjoy!

Notes:

You can prepare these rolls the night before. Just cover them with plastic, and put them in the fridge. Bake them the next day, according to the steps.

Leftovers should be kept in an airtight container, then in the fridge. Reheat for a few minutes before serving again.

Nutrition Facts:

Serving: 1serving | Calories: 264 kcal | Carbohydrates: 29g | Protein: 16g | Fat: 18g | Saturated Fat: 14g | Polyunsaturated Fat: 4g | Monounsaturated Fat: 8g | Trans Fat: 1g | Cholesterol: 79mg | Sodium: 993mg | Potassium: 220mg | Fiber: 1g | Sugar: 1g | Vitamin A: 544IU | Vitamin C: 1mg | Calcium: 214mg | Iron: 1mg

Chicken Bacon Ranch Pull-Apart Rolls

Rebecca Prep Time: 10 mins | Cook Time: 30 mins | Total Time: 40 mins | Yield: 12 Servings Cheesy, buttery, and loaded with protein, these Chicken Bacon Ranch Pull-Apart Rolls… General Recipes Chicken Bacon Ranch Pull-Apart Rolls European Print This
Serves: 12 Prep Time: 10 mins Cooking Time: 30 mins 30 mins
Nutrition facts: 264 calories 18 fat
Rating: 5.0/5
( 1 voted )

Ingredients

  • ⅓ c prepared Ranch salad dressing
  • 1 pound thinly sliced deli chicken
  • 8 slices of bacon, cooked and crumbled
  • 12 slices Colby Jack cheese
  • ½ c butter
  • 1 tablespoon chopped fresh chives
  • ½ teaspoon onion powder
  • 2 tablespoons grated Parmesan cheese
  • 1 teaspoon garlic salt
  • 1 15-ounce pkg 12-count potato rolls (i.e., Martin’s)

Instructions

Prepare the oven and preheat it to 175 degrees C or 350 degrees F.

Line the inside of a large baking sheet with parchment paper.

Slice through the center of each potato roll with a serrated knife.

Place the prepared potatoes onto the prepared baking sheet. Put aside the tops for later use.

Place a saucepan on the stove and turn the heat to medium. Add butter and allow it to melt.

Add garlic salt, onion powder, and chives. Stir everything until well blended with the melted butter. Remove the pan from the heat. Brush each bottom roll with 1/3 of it.

Add half of the cheese to each of the bottom rolls followed by chicken and bacon.

Spread the Ranch dressing over the rolls, then sprinkle more cheese on top. Brush each with the rest of the butter mixture.

Place the reserved rolls over each of the bottom rolls. Add more grated Parmesan cheese on top. Cover them with aluminum foil.

Bake the rolls for about 20 minutes, then remove the foil cover and bake for 10 more minutes or until the top turns golden brown.

Serve with Ranch dressing. Enjoy!

Notes

You can prepare these rolls the night before. Just cover them with plastic, and put them in the fridge. Bake them the next day, according to the steps. Leftovers should be kept in an airtight container, then in the fridge. Reheat for a few minutes before serving again.

November 26, 2022 0 comment
0 FacebookTwitterPinterestEmail
General Recipes

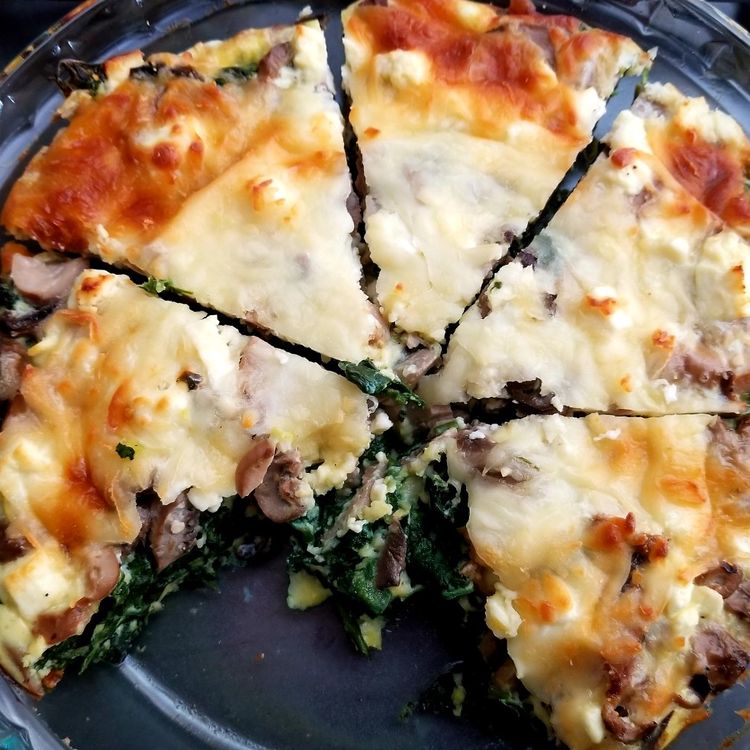
SPINACH MUSHROOM AND FETA CRUSTLESS QUICHE

by Rebecca November 26, 2022
written by Rebecca

Prep Time: 15 mins | Cook Time: 50 mins | Total Time: 1 hr 5 mins | Yield: 6 Servings

Enjoy this low-carb breakfast dish in the comfort of your home! Loaded with scrumptious flavors, this Spinach, Mushroom, and Feta Crustless Quiche is surely a must-try!

Ingredients:

1 10-ounce box of frozen chopped spinach

1/4 teaspoon pepper

8 ounces mushrooms

1/8 teaspoon salt

1 clove of garlic, minced

2 ounces of feta cheese

1/4 c grated Parmesan

1 tablespoon cooking oil, divided

1 c milk

4 large Eggs

1/2 c shredded mozzarella

Directions:

Prepare the oven and preheat it to 175 degrees C or 350 degrees F.

Apply cooking spray to the inside of a 9-inch pie plate.

Squeeze the spinach to remove the water contents.

Place the mushrooms under running water to remove any dirt, then slice them into thin cuts. Mince the garlic as well.

Place a skillet on the stove and turn the heat to medium. Add 1/2 tbsp of cooking oil and allow it to become hot.

Add the mushrooms and minced garlic into the hot skillet, then sauté for a few minutes until soft and aromatic. Sprinkle a bit of salt to season.

Transfer the sauteed veggies to the prepared pie plate followed by the crumbled feta and spinach. Arrange them in even layers.

Add milk, Parmesan cheese, eggs, and pepper into a mixing bowl. Whisk everything to combine.

Spread the egg mixture on top of the crumbled feta layer.

Scatter the shredded mozzarella cheese over the egg mixture.

Place the pie plate in the preheated oven and bake the quiche for about 50 minutes or until the top turns golden brown.

Remove the quiche from the oven and let it rest for a few minutes at room temperature.

Serve and enjoy!

Notes:

Place any leftovers in an airtight container, then put them in the fridge. They can last up to 4 days. Reheat for a few minutes before serving again.

Nutrition Facts:

Serving: 1 slice Calories: 187 kcal Carbohydrates: 6 g Protein: 13 g Fat: 13 g Sodium: 378 mg Fiber: 2 g

SPINACH MUSHROOM AND FETA CRUSTLESS QUICHE

Rebecca Prep Time: 15 mins | Cook Time: 50 mins | Total Time: 1 hr 5 mins | Yield: 6 Servings Enjoy this low-carb breakfast dish in the comfort of your… General Recipes SPINACH MUSHROOM AND FETA CRUSTLESS QUICHE European Print This
Serves: 6 Prep Time: 15 mins Cooking Time: 50 mins 50 mins
Nutrition facts: 187 calories 13 fat
Rating: 5.0/5
( 1 voted )

Ingredients

  • 1 10-ounce box of frozen chopped spinach
  • 1/4 teaspoon pepper
  • 8 ounces mushrooms
  • 1/8 teaspoon salt
  • 1 clove of garlic, minced
  • 2 ounces of feta cheese
  • 1/4 c grated Parmesan
  • 1 tablespoon cooking oil, divided
  • 1 c milk
  • 4 large Eggs
  • 1/2 c shredded mozzarella

Instructions

Prepare the oven and preheat it to 175 degrees C or 350 degrees F.

Apply cooking spray to the inside of a 9-inch pie plate.

Squeeze the spinach to remove the water contents.

Place the mushrooms under running water to remove any dirt, then slice them into thin cuts. Mince the garlic as well.

Place a skillet on the stove and turn the heat to medium. Add 1/2 tbsp of cooking oil and allow it to become hot.

Add the mushrooms and minced garlic into the hot skillet, then sauté for a few minutes until soft and aromatic. Sprinkle a bit of salt to season.

Transfer the sauteed veggies to the prepared pie plate followed by the crumbled feta and spinach. Arrange them in even layers.

Add milk, Parmesan cheese, eggs, and pepper into a mixing bowl. Whisk everything to combine.

Spread the egg mixture on top of the crumbled feta layer.

Scatter the shredded mozzarella cheese over the egg mixture.

Place the pie plate in the preheated oven and bake the quiche for about 50 minutes or until the top turns golden brown.

Remove the quiche from the oven and let it rest for a few minutes at room temperature.

Serve and enjoy!

Notes

Place any leftovers in an airtight container, then put them in the fridge. They can last up to 4 days. Reheat for a few minutes before serving again.

November 26, 2022 0 comment
0 FacebookTwitterPinterestEmail
Newer Posts
Older Posts

Popular Posts

  • 1

    Crispy Crunchy Parmesan Potatoes

    March 21, 2020
  • 2

    CROCK POT SMOTHERED PORK CHOPS

    March 21, 2020
  • Facebook
  • Twitter

@2019 - All Right Reserved.


Back To Top