Cook it once
  • Home
  • Privacy Policy
  • Recipes
    • KETO
    • LC
    • WW
  • Tips
  • Contact
Cook it once
  • Home
  • Privacy Policy
  • Recipes
    • KETO
    • LC
    • WW
  • Tips
  • Contact
Category:

General Recipes

General Recipes

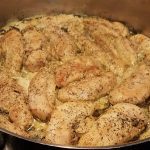
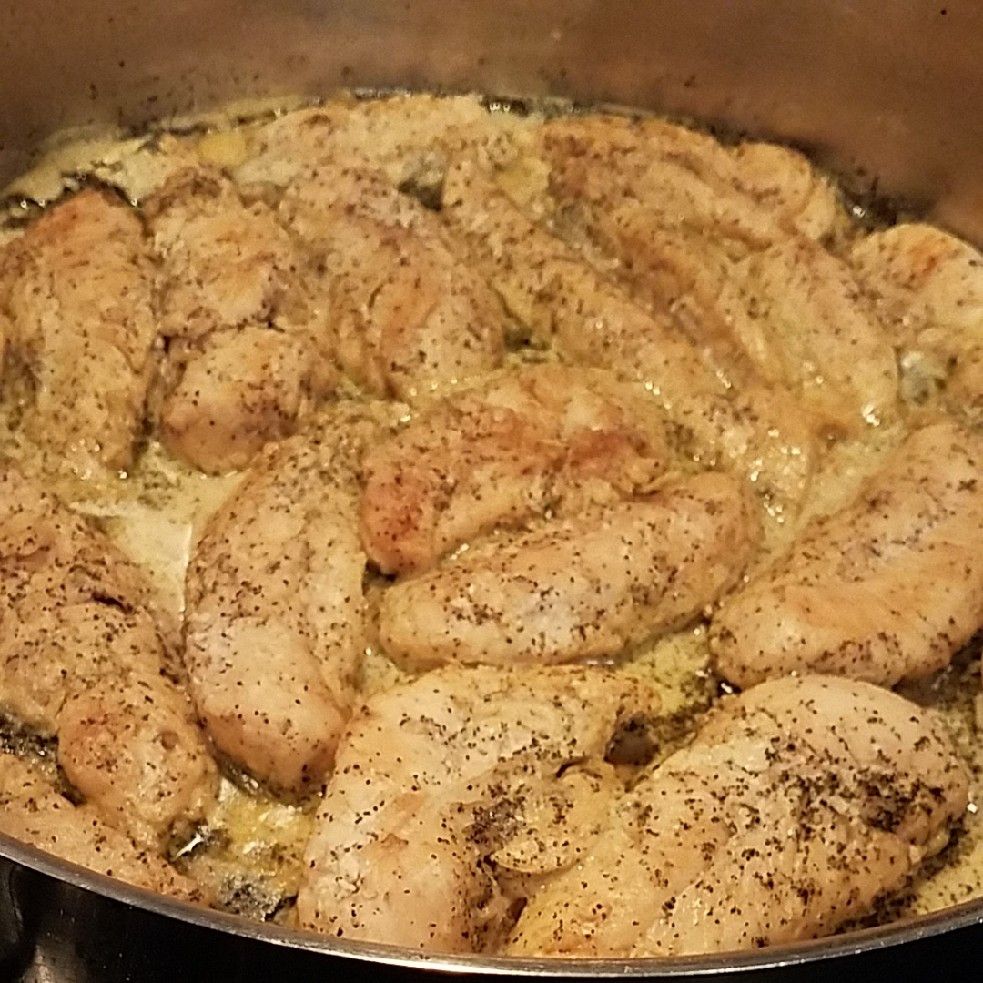
CHICKEN WITH MUSTARD CREAM SAUCE

by Rebecca April 29, 2022
written by Rebecca

Prep time: 5 mins | Cook time: 15 mins | Total time: 20 mins | Yield: 4 SERVINGS

This is another chicken dish that you should try very soon! Pan-seared, lush chicken with mustard cream sauce. Incredibly easy to make using simple ingredients and ready in under twenty minutes! Serve this with mashed potatoes, veggies, and even rice for an easy and quick-filling meal at any time.

I have tried so many chicken recipes, and it’ll not hurt to try another, especially if a chicken is a staple at your home. I have been making this chicken with mustard cream sauce for almost a year now, and this instantly made it to our top picks. Super easy to throw together and ready in no time, making this excellent for even the busiest days. Who would not love easy and quick recipes, right? Especially the ones that guarantee the best results.

This chicken with mustard sauce is also my favorite go-to when I have no inspiration to cook. It’s a fool-proof recipe that you should never miss! A must-try and (obviously) for keeping!

INGREDIENTS

2 tbsp olive oil

4 boneless, skinless chicken breast halves

1/2 c. heavy cream

1/4 c. chicken broth

1 tsp dried tarragon or oregano

2 tbsp Dijon mustard

Salt and pepper, to taste

HOW TO MAKE CHICKEN WITH MUSTARD CREAM SAUCE

Step 1: In a large skillet, heat the olive oil over medium-high heat.

Step 2: Sprinkle with salt and pepper on both sides of the chicken breasts.

Step 3: To the hot oil in the skillet, add the chicken and cook for about 10 to 12 minutes, flipping once. To a plate, transfer the cooked chicken and keep them warm.

Step 4: Into the hot skillet, pour in the chicken broth, then stir in the cream, mustard, tarragon, or oregano. Cook while stirring for approximately 2 minutes.

Step 5: Over the chicken, pour the sauce. Serve immediately. Enjoy!

NUTRITION FACTS:

YIELD: 4 SERVING SIZE: 1
Amount Per Serving: CALORIES: 366 | TOTAL FAT: 22g | SATURATED FAT: 9g | TRANS FAT: 0g | UNSATURATED FAT: 11g | CHOLESTEROL: 136mg | SODIUM: 431mg | CARBOHYDRATES: 2g | FIBER: 0g | SUGAR: 1g | PROTEIN: 39g
CHICKEN WITH MUSTARD CREAM SAUCE

Rebecca Prep time: 5 mins | Cook time: 15 mins | Total time: 20 mins | Yield: 4 SERVINGS This is another chicken dish that you should try very soon! Pan-seared,… General Recipes CHICKEN WITH MUSTARD CREAM SAUCE European Print This
Serves: 4 Prep Time: 5 mins Cooking Time: 15 mins 15 mins
Nutrition facts: 366 calories 22 fat
Rating: 5.0/5
( 1 voted )

Ingredients

  • 2 tbsp olive oil
  • 4 boneless, skinless chicken breast halves
  • 1/2 c. heavy cream
  • 1/4 c. chicken broth
  • 1 tsp dried tarragon or oregano
  • 2 tbsp Dijon mustard
  • Salt and pepper, to taste

Instructions

Step 1: In a large skillet, heat the olive oil over medium-high heat.

Step 2: Sprinkle with salt and pepper on both sides of the chicken breasts.

Step 3: To the hot oil in the skillet, add the chicken and cook for about 10 to 12 minutes, flipping once. To a plate, transfer the cooked chicken and keep them warm.

Step 4: Into the hot skillet, pour in the chicken broth, then stir in the cream, mustard, tarragon, or oregano. Cook while stirring for approximately 2 minutes.

Step 5: Over the chicken, pour the sauce. Serve immediately. Enjoy!
April 29, 2022 0 comment
0 FacebookTwitterPinterestEmail
General Recipes

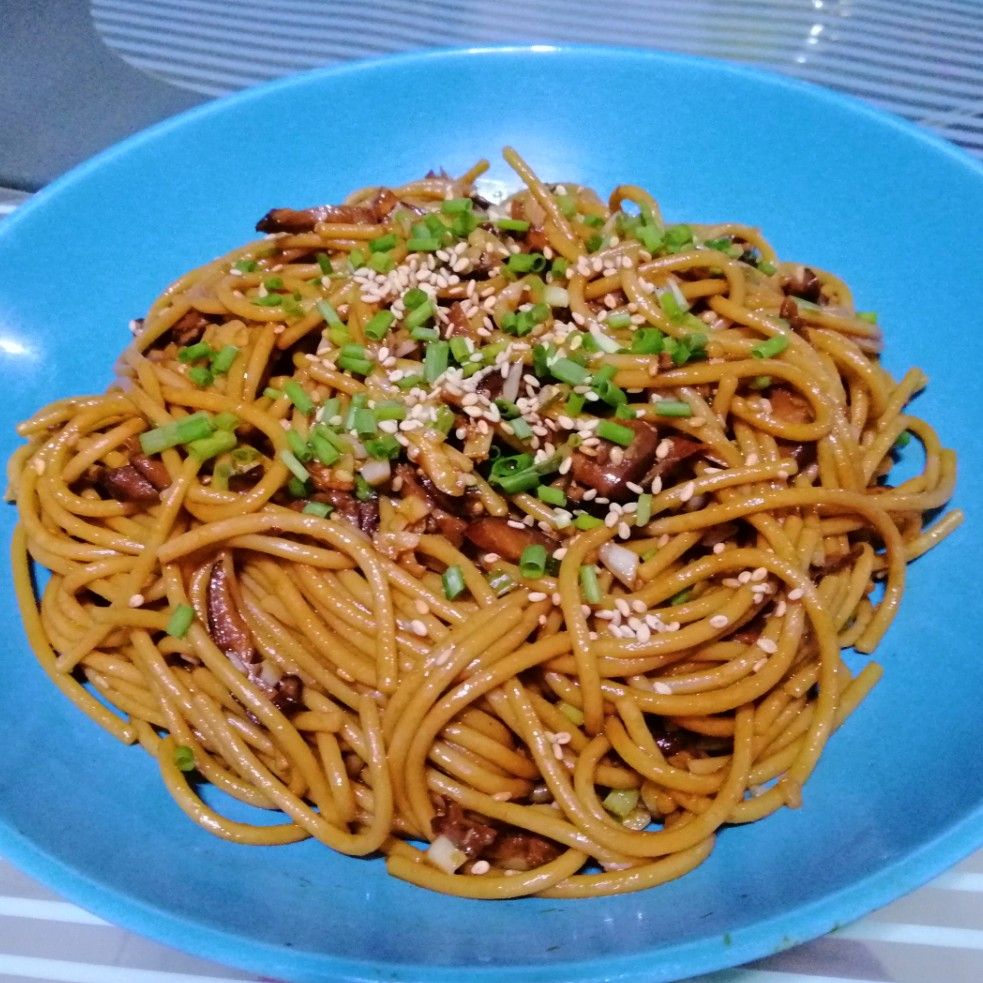
Simple Sesame Noodles

by Rebecca April 29, 2022
written by Rebecca

PREP TIME: 10 MINS | COOK TIME: 10 MINS | TOTAL TIME: 20 MINS | YIELDS: 8 servings

I prefer simple meals because they are the ones which turn out to be the best. Just like these simple sesame seeds. The ingredients you need are already available, and all you need is twenty minutes from start to finish and you have a family-approved meal perfect for any day.

Sesame noodles are my favorite since I can remember. It’s a pretty simple dish made with pantry ingredients. I like these sesame noodles by themselves, but they are great with roasted beef tenderloin, red bell pepper, fresh cilantro, or cooked, chopped shrimp.

For this recipe, I use thin noodles. You can choose from linguine, angel hair, Japanese noodles, or thin spaghetti. For the simple sauce/dressing, I adjust the measurements according to my preference. The measurements below are just approximations. Simply mix everything and toss with the warm noodles. Easy peasy!

The sauce is light with a sweet and savory combination. The minced garlic cloves added a wonderful flare. And the sesame oil makes everything amazing! Add the sesame oil with caution because it has a strong flavor. I start adding two tablespoons and simply adjust depending on my preference. For the chili oil, I sometimes kick it up a notch because I like my sesame noodles spicy.

Ingredients

3 tablespoons pure sesame oil

12 ounces thin noodles, cooked and drained

2 tablespoons sugar

1/4 cup soy sauce

4 cloves garlic, minced

1/2 teaspoon hot chili oil

2 tablespoons rice vinegar

4 whole green onions, sliced thin

4 tablespoons canola oil

How to make Simple Sesame Noodles

Step 1: In a bowl, place the sesame oil, sugar, soy sauce, minced garlic, hot chili oil, rice vinegar, and canola oil. Mix well until blended. As needed, adjust the ingredients.

Step 2: Over the warm noodles, pour the sauce and toss to coat. Lastly, sprinkle the noodles with some green onions.

Step 3: Toss again and serve. Enjoy!

Simple Sesame Noodles

Rebecca PREP TIME: 10 MINS | COOK TIME: 10 MINS | TOTAL TIME: 20 MINS | YIELDS: 8 servings I prefer simple meals because they are the ones which turn out… General Recipes Simple Sesame Noodles European Print This
Serves: 8 Prep Time: 10 mins Cooking Time: 10 mins 10 mins
Nutrition facts: 200 calories 20 grams fat
Rating: 5.0/5
( 1 voted )

Ingredients

  • 3 tablespoons pure sesame oil
  • 12 ounces thin noodles, cooked and drained
  • 2 tablespoons sugar
  • 1/4 cup soy sauce
  • 4 cloves garlic, minced
  • 1/2 teaspoon hot chili oil
  • 2 tablespoons rice vinegar
  • 4 whole green onions, sliced thin
  • 4 tablespoons canola oil

Instructions

Step 1: In a bowl, place the sesame oil, sugar, soy sauce, minced garlic, hot chili oil, rice vinegar, and canola oil. Mix well until blended. As needed, adjust the ingredients.

Step 2: Over the warm noodles, pour the sauce and toss to coat. Lastly, sprinkle the noodles with some green onions.

Step 3: Toss again and serve. Enjoy!

April 29, 2022 0 comment
0 FacebookTwitterPinterestEmail
General Recipes

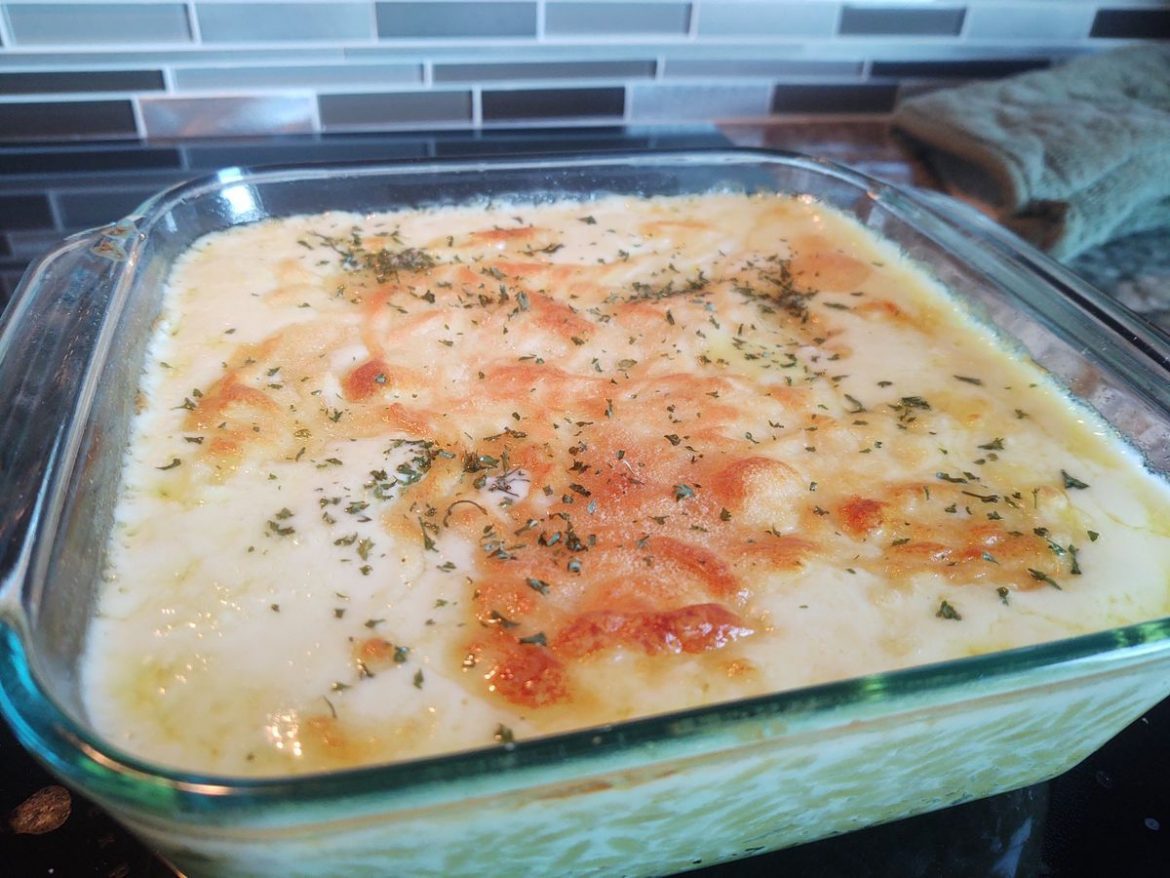
Cheesy Baked Orzo

by Rebecca April 29, 2022
written by Rebecca

Prep Time: 5 mins | Cook Time: 23 mins | Total Time: 28 mins | Servings: 8

Everyone loves this cheesy baked orzo. It’s my favorite and go-to way of preparing these tiny noodles. We love pairing this rich and super cheesy baked orzo with breaded chicken strips for an easy and quick weeknight dinner any time.

This simple recipe is made with five main ingredients and takes only thirty minutes to make. The perfect quick, easy, and delicious dinner that even your fussiest eaters will love!

To find recipes like this is like finding a treasure. There are tons of simple recipes you can find everywhere. They save our lives, especially during the busiest (or laziest) days. This cheesy baked orzo does not need fancy ingredients or steps that are hard to understand or follow. It’s pretty straightforward and always comes out tasting rich and delicious!

If you are looking for another fun way to serve a pasta dish, this cheesy baked orzo is a must! And the best part is, you can use this exact recipe with other pasta verities such as bow-tie pasta or even angel hair pasta

Ingredients

1 pound orzo uncooked

1-2 garlic cloves, grated

1 c. shredded mozzarella cheese

1 1/2 c. shredded Parmesan cheese

Salt to taste

1-pint heavy whipping cream

How to make Cheesy Baked Orzo

Step 1: In a saucepan, heat the heavy cream over medium-high heat. Then, add the grated garlic followed by 1 c shredded Parmesan cheese once the cream is hot.

Step 2: Following the package directions, cook the orzo in a large pot of salted boiling water. Drain when done.

Step 3: Into the pot with the pasta, add the hot cheesy cream. Mix well. Then, pour everything into a greased 9 x 13-inch baking dish and sprinkle with 1 c shredded mozzarella, followed by half c shredded Parmesan.

Step 4: Place in the oven and bake for about 15 minutes at 350 degrees F or until the cheese is golden brown.

Nutrition Facts:

Calories: 530 kcal | Carbohydrates: 45g | Protein: 18g | Fat: 31g | Saturated Fat: 19g | Polyunsaturated Fat: 1g | Monounsaturated Fat: 9g | Cholesterol: 105mg | Sodium: 414mg | Potassium: 200mg | Fiber: 2g | Sugar: 2g | Vitamin A: 1111IU | Vitamin C: 1mg | Calcium: 344mg | Iron: 1mg

Cheesy Baked Orzo

Rebecca Prep Time: 5 mins | Cook Time: 23 mins | Total Time: 28 mins | Servings: 8 Everyone loves this cheesy baked orzo. It’s my favorite and go-to way of… General Recipes Cheesy Baked Orzo European Print This
Serves: 8 Prep Time: 5 mins Cooking Time: 23 mins 23 mins
Nutrition facts: 530 calories 31 fat
Rating: 5.0/5
( 1 voted )

Ingredients

  • 1 pound orzo uncooked
  • 1-2 garlic cloves, grated
  • 1 c. shredded mozzarella cheese
  • 1 1/2 c. shredded Parmesan cheese
  • Salt to taste
  • 1-pint heavy whipping cream

Instructions

Step 1: In a saucepan, heat the heavy cream over medium-high heat. Then, add the grated garlic followed by 1 c shredded Parmesan cheese once the cream is hot.

Step 2: Following the package directions, cook the orzo in a large pot of salted boiling water. Drain when done.

Step 3: Into the pot with the pasta, add the hot cheesy cream. Mix well. Then, pour everything into a greased 9 x 13-inch baking dish and sprinkle with 1 c shredded mozzarella, followed by half c shredded Parmesan.

Step 4: Place in the oven and bake for about 15 minutes at 350 degrees F or until the cheese is golden brown.

April 29, 2022 0 comment
0 FacebookTwitterPinterestEmail
General Recipes

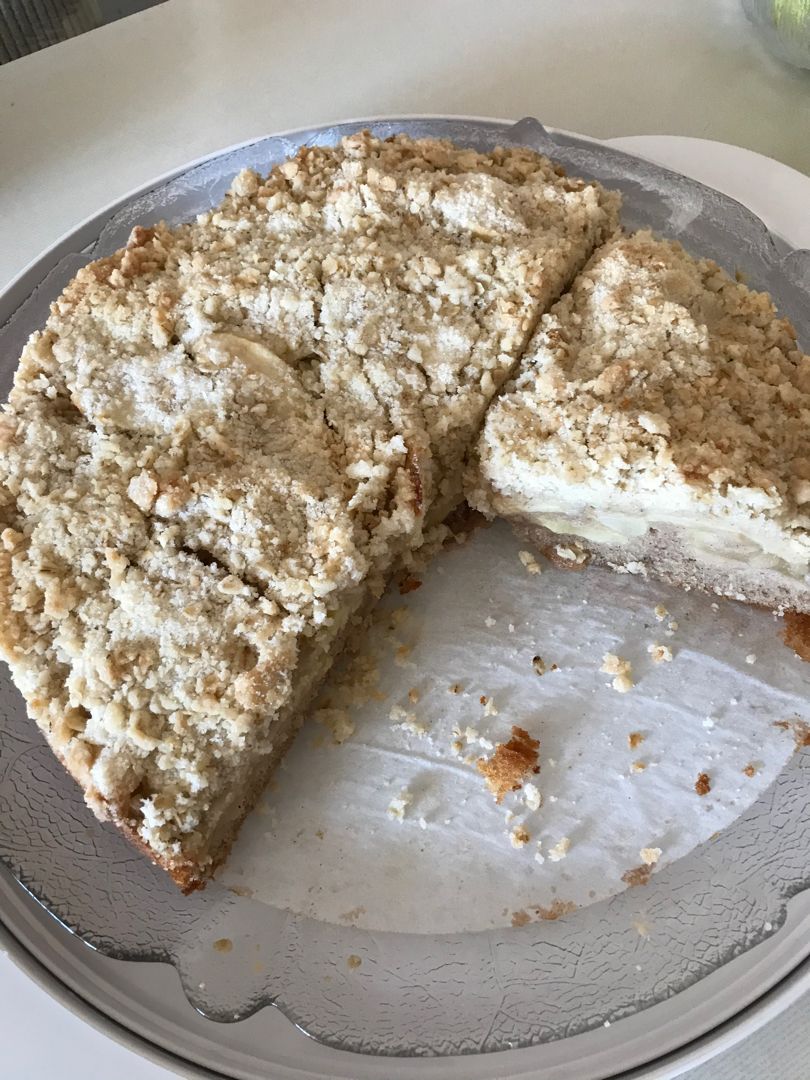
Irish Apple Cake

by Rebecca April 29, 2022
written by Rebecca

Prep Time: 35 mins | Cook Time: 1 hr | Total Time: 1 hr 35 mins | Yield: 10 servings

Now I understand why everyone is raving about this Irish Apple Cake. It’s pretty great, incredibly easy to throw together, and amazing with or without the custard sauce!

Ingredients

Cake:

2 large eggs

1/2 c. (100 g.) granulated sugar

3 tablespoons (or 45 ml) whole milk or cream

1/2 c. (113 g.) unsalted butter at room temperature

1 1/4 c. (150 g.) all-purpose flour

1 teaspoon cinnamon

1 teaspoon baking powder

1/8 teaspoon salt

confectioner’s sugar for dusting

about 3 Granny Smith apples, peeled and thinly sliced (mine weighed a little over one pound after slicing)

Streusel topping:

1/4 c. (25 g.) old fashioned rolled oats

3/4 c. (96 g.) all-purpose flour

1/2 c. (100 g.) granulated sugar

6 tablespoons (85 g.) unsalted cold butter, cut into small pieces

Custard sauce:

6 tablespoons (76 g.) granulated sugar

6 large egg yolks

1 1/2 teaspoon vanilla

1 1/2 c. (or 375 ml) whole milk (you can also use half and half or cream)

How to make Irish Apple Cake

Step 1: Prepare the oven. Preheat it to 350 degrees F. Ready a 9-inch springform pan. Grease and set aside.

Step 2: Prep the sauce in advance. Start by bringing the milk to a simmer over medium heat. In the meantime, whisk the yolks and sugar until well combined. Into the egg mixture, drizzle a bit of the hot milk, stirring constantly. Then, drizzle a bit more before placing it back into the pan of the hot milk. Continue to cook until the mixture coats the back of a spoon, stirring constantly. Make sure to do this gradually over medium heat, stirring using a silicone spatula or spoon and scraping the sides and bottom of the pan as you go. Lastly, whisk in the vanilla.

Step 3: Through a sieve, pour the custard into a heat-proof jar or bowl. Make sure to lay a piece of plastic wrap onto the surface. This will prevent skin from forming once the filling cools. Then, chill in the fridge.

Step 4: For the streusel topping, combine the bits of butter with flour, sugar, and oats until the butter is completely blended and you have a coarse crumbly mixture. Keep this in the fridge.

Step 5: Next, cream the butter and sugar until light and fluffy. Then, add in the eggs, one piece at a time, beating every after each addition. Add the flour along with the baking powder, cinnamon, and salt. Mix well until everything is combined. Into the butter/sugar mixture, fold in the dry ingredients, milk, and cream.

Step 6: Into the prepared pan, spoon the batter and evenly smooth it out. On top, evenly arrange the sliced apples followed by the streusel topping.

Step 7: Place in the preheated oven and bake for about 50 minutes to 1 hour or until a toothpick inserted in the center of the cake come out clean, and the top of the cake is lightly browned.

Step 8: Remove from the oven when done and allow the cake to slightly cool in the pan. Then, take the cake out of the pan and dust it with the confectioner’s sugar.

Step 9: Slice and serve. Enjoy!

Nutrition Facts:

Calories: 372.87 kcal | Carbohydrates: 49.8g | Protein: 4.66g | Fat: 17.7g | Saturated Fat: 10.67g | Sodium: 85.04mg | Fiber: 2.47g | Sugar: 26.94g

Irish Apple Cake

Rebecca Prep Time: 35 mins | Cook Time: 1 hr | Total Time: 1 hr 35 mins | Yield: 10 servings Now I understand why everyone is raving about this Irish… General Recipes Irish Apple Cake European Print This
Serves: 10 Prep Time: 35 mins Cooking Time: 1 hr 1 hr
Nutrition facts: 372.87 calories 17.7 fat
Rating: 5.0/5
( 1 voted )

Ingredients

  • Cake:
  • 2 large eggs
  • 1/2 c. (100 g.) granulated sugar
  • 3 tablespoons (or 45 ml) whole milk or cream
  • 1/2 c. (113 g.) unsalted butter at room temperature
  • 1 1/4 c. (150 g.) all-purpose flour
  • 1 teaspoon cinnamon
  • 1 teaspoon baking powder
  • 1/8 teaspoon salt
  • confectioner's sugar for dusting
  • about 3 Granny Smith apples, peeled and thinly sliced (mine weighed a little over one pound after slicing)
  • Streusel topping:
  • 1/4 c. (25 g.) old fashioned rolled oats
  • 3/4 c. (96 g.) all-purpose flour
  • 1/2 c. (100 g.) granulated sugar
  • 6 tablespoons (85 g.) unsalted cold butter, cut into small pieces
  • Custard sauce:
  • 6 tablespoons (76 g.) granulated sugar
  • 6 large egg yolks
  • 1 1/2 teaspoon vanilla
  • 1 1/2 c. (or 375 ml) whole milk (you can also use half and half or cream)

Instructions

Step 1: Prepare the oven. Preheat it to 350 degrees F. Ready a 9-inch springform pan. Grease and set aside.

Step 2: Prep the sauce in advance. Start by bringing the milk to a simmer over medium heat. In the meantime, whisk the yolks and sugar until well combined. Into the egg mixture, drizzle a bit of the hot milk, stirring constantly. Then, drizzle a bit more before placing it back into the pan of the hot milk. Continue to cook until the mixture coats the back of a spoon, stirring constantly. Make sure to do this gradually over medium heat, stirring using a silicone spatula or spoon and scraping the sides and bottom of the pan as you go. Lastly, whisk in the vanilla.

Step 3: Through a sieve, pour the custard into a heat-proof jar or bowl. Make sure to lay a piece of plastic wrap onto the surface. This will prevent skin from forming once the filling cools. Then, chill in the fridge.

Step 4: For the streusel topping, combine the bits of butter with flour, sugar, and oats until the butter is completely blended and you have a coarse crumbly mixture. Keep this in the fridge.

Step 5: Next, cream the butter and sugar until light and fluffy. Then, add in the eggs, one piece at a time, beating every after each addition. Add the flour along with the baking powder, cinnamon, and salt. Mix well until everything is combined. Into the butter/sugar mixture, fold in the dry ingredients, milk, and cream.

Step 6: Into the prepared pan, spoon the batter and evenly smooth it out. On top, evenly arrange the sliced apples followed by the streusel topping.

Step 7: Place in the preheated oven and bake for about 50 minutes to 1 hour or until a toothpick inserted in the center of the cake come out clean, and the top of the cake is lightly browned.

Step 8: Remove from the oven when done and allow the cake to slightly cool in the pan. Then, take the cake out of the pan and dust it with the confectioner's sugar.

Step 9: Slice and serve. Enjoy!

April 29, 2022 0 comment
0 FacebookTwitterPinterestEmail
General Recipes

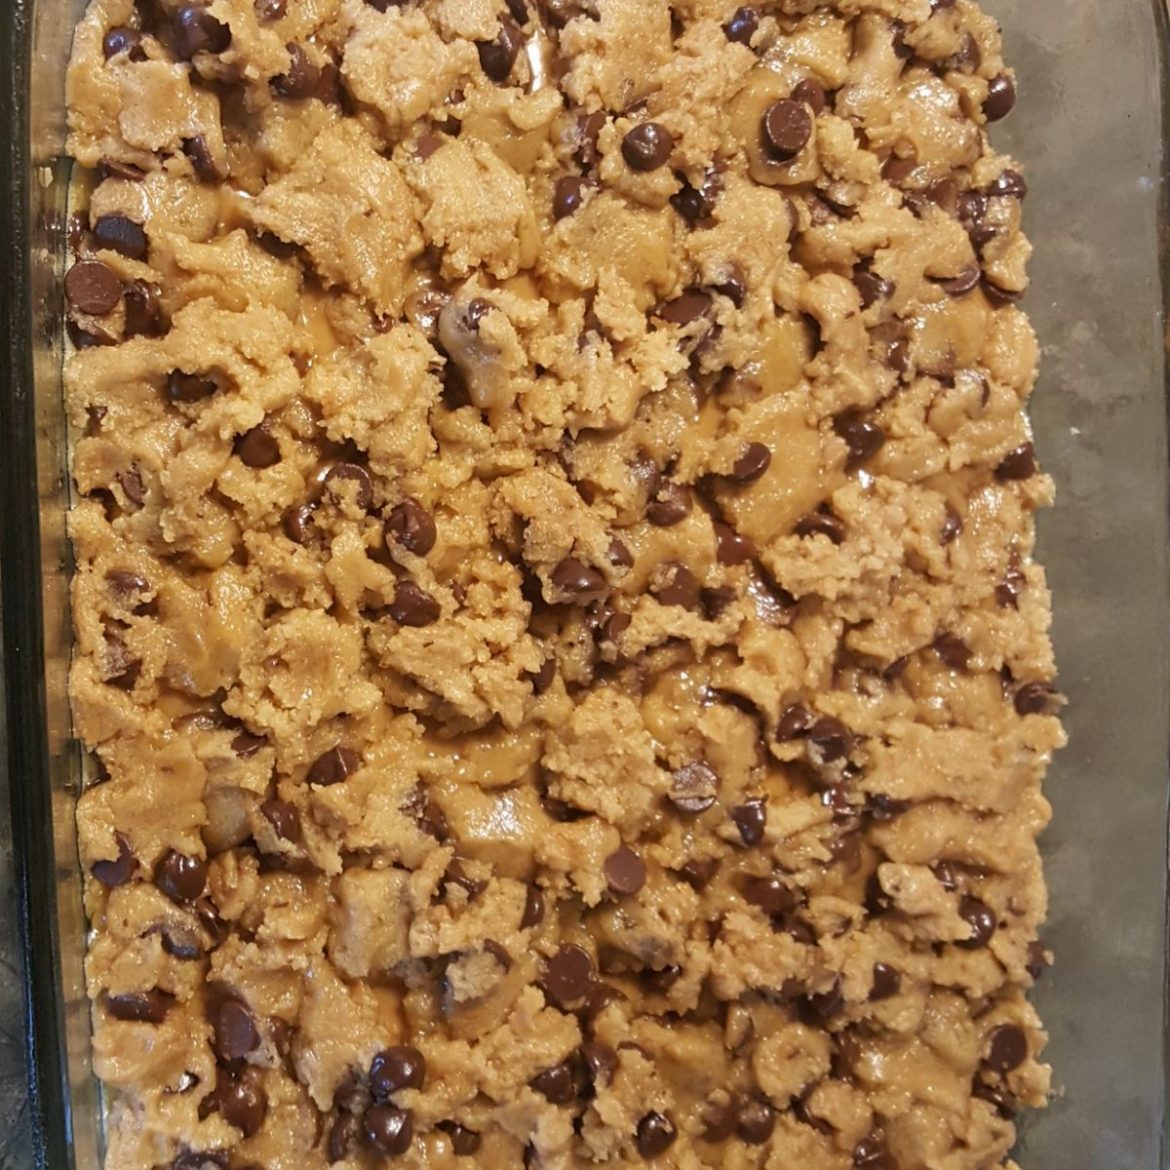
Salted Caramel Chocolate Chip Cookie Bars

by Rebecca April 29, 2022
written by Rebecca

Prep time: 15 mins | Cook time: 30 mins | Total time: 45 mins | Servings: 30 BARS

Moist, super soft, and decadent – this salted caramel, chocolate chip cookie bars are my heaven! And the gooey caramel centers are to die for! I always make sure to whip up a big batch and freeze it.

Ingredients

2 large eggs

1 c. unsalted butter, softened

10 oz. soft caramels, unwrapped

14 oz. sweetened condensed milk

1/2 c. granulated sugar

1 c. packed light brown sugar

1 tsp vanilla extract

1 tsp baking soda

2 c. semisweet chocolate chips

2 1/2 c. all-purpose flour

1 tsp flaked sea salt

1 tsp kosher salt

How to make Salted Caramel Chocolate Chip Cookie Bars

Step 1: Prepare the oven. Preheat it to 350 degrees F. Using foil, line a 9 x 13-inch baking dish and generously grease with nonstick cooking spray.

Step 2: Beat the softened butter in the bowl of an electric mixer with the granulated sugar and light brown sugar for about 2 minutes until light and fluffy. Then, add the eggs along with the vanilla, salt, and baking soda. Mix again, scraping the sides of the bowl using a spatula.

Step 3: Adjust the speed to low, then add the flour. Beat well and fold in the chocolate chips.

Step 4: Into the bottom of the prepared baking dish, press half of the cookie dough.

Step 5: Add the sweetened condensed milk and unwrapped caramels to a medium saucepot over medium-low. Stir well until the caramels have melted and you have a smooth filling. Over the cookie dough base, pour the filling and drop on top the rest of the cookie dough into small teaspoon-sized clumps.

Step 6: Place in the preheated oven and bake for about 25 to 30 minutes or until the center of the bar is just set.

Step 7: Remove from the oven when done and sprinkle on top the sea salt flakes. Let the bar cool fully before lifting it out of the pan using the edges of the foil. Slice and keep the bars in an airtight container for up to 3 days at room temperature.

Note:

You can also freeze these bars for up to a month. Thaw before serving.

Nutrition Facts:

Serving: 1bar, calories: 285 kcal, carbohydrates: 39g, protein: 3g, fat: 13g, saturated fat: 7g, cholesterol: 33mg, sodium: 239mg, potassium: 164mg, fiber: 1g, sugar: 28g, vitamin a: 250iu, vitamin c: 0.4mg, calcium: 69mg, iron: 1.4mg

Salted Caramel Chocolate Chip Cookie Bars

Rebecca Prep time: 15 mins | Cook time: 30 mins | Total time: 45 mins | Servings: 30 BARS Moist, super soft, and decadent – this salted caramel, chocolate chip cookie… General Recipes Salted Caramel Chocolate Chip Cookie Bars European Print This
Serves: 30 Prep Time: 15 mins Cooking Time: 30 mins 30 mins
Nutrition facts: 285 calories 13 fat
Rating: 5.0/5
( 1 voted )

Ingredients

  • 2 large eggs
  • 1 c. unsalted butter, softened
  • 10 oz. soft caramels, unwrapped
  • 14 oz. sweetened condensed milk
  • 1/2 c. granulated sugar
  • 1 c. packed light brown sugar
  • 1 tsp vanilla extract
  • 1 tsp baking soda
  • 2 c. semisweet chocolate chips
  • 2 1/2 c. all-purpose flour
  • 1 tsp flaked sea salt
  • 1 tsp kosher salt

Instructions

Step 1: Prepare the oven. Preheat it to 350 degrees F. Using foil, line a 9 x 13-inch baking dish and generously grease with nonstick cooking spray.

Step 2: Beat the softened butter in the bowl of an electric mixer with the granulated sugar and light brown sugar for about 2 minutes until light and fluffy. Then, add the eggs along with the vanilla, salt, and baking soda. Mix again, scraping the sides of the bowl using a spatula.

Step 3: Adjust the speed to low, then add the flour. Beat well and fold in the chocolate chips.

Step 4: Into the bottom of the prepared baking dish, press half of the cookie dough.

Step 5: Add the sweetened condensed milk and unwrapped caramels to a medium saucepot over medium-low. Stir well until the caramels have melted and you have a smooth filling. Over the cookie dough base, pour the filling and drop on top the rest of the cookie dough into small teaspoon-sized clumps.

Step 6: Place in the preheated oven and bake for about 25 to 30 minutes or until the center of the bar is just set.

Step 7: Remove from the oven when done and sprinkle on top the sea salt flakes. Let the bar cool fully before lifting it out of the pan using the edges of the foil. Slice and keep the bars in an airtight container for up to 3 days at room temperature.

Notes

You can also freeze these bars for up to a month. Thaw before serving.

April 29, 2022 0 comment
0 FacebookTwitterPinterestEmail
General Recipes

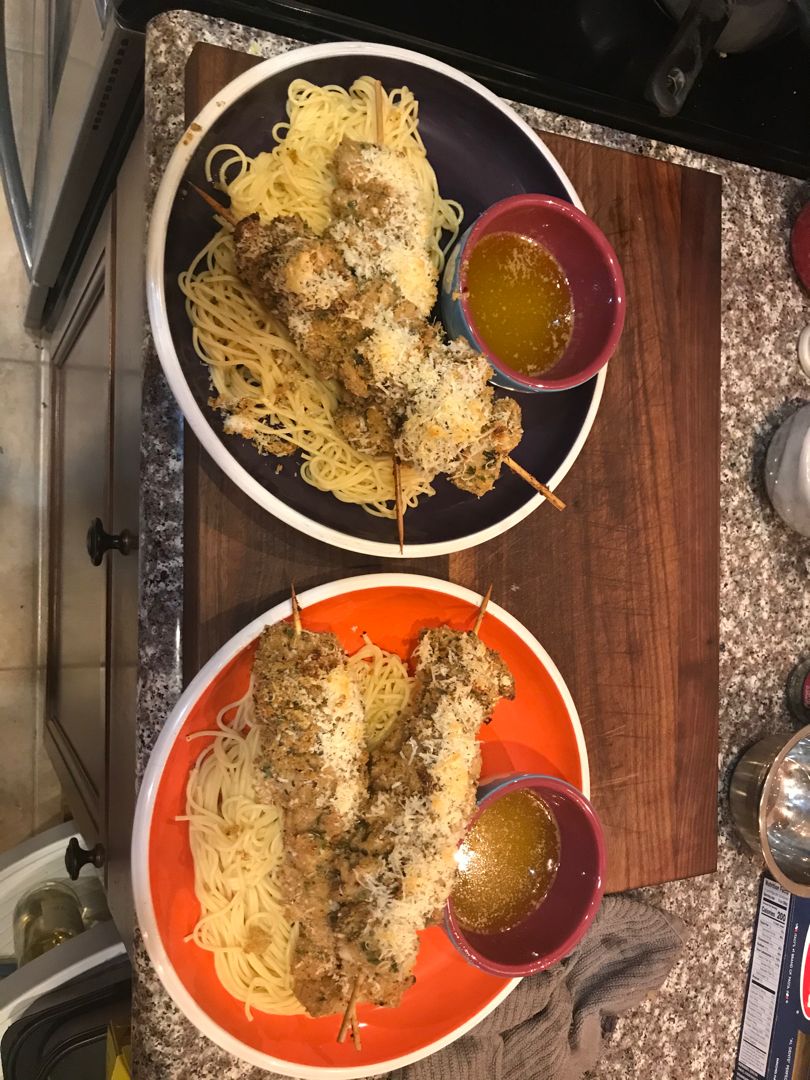
Chicken Spiedini with Amogio Sauce

by Rebecca April 28, 2022
written by Rebecca

Prep Time: 45 mins | Cook Time: 1 hr | Total Time: 1 hr 45 mins | Servings: 4 people

This easy recipe for chicken spiedini is a must try and guarantee the best chicken spiedini with amogio sauce you’ll ever make! Everyone also says that this is a million better than what they get from their local restaurant.

Ingredients

Chicken Spiedini:

2 cloves garlic, minced

2 lbs chicken breasts, skinless and boneless

1/3 c Parmesan cheese, grated

1 c. bread crumbs

1 tbsp fresh Italian parsley

2 tbsp olive oil

2 tbsp butter

2 tsp lemon zest

Amogio Sauce:

1/2 c. butter

1 c. olive oil

1 tbsp garlic

1 tbsp parsley

1/2 c. lemon juice

1 tbsp basil, chopped

1/2 tsp red chili pepper flakes

1/2 tsp each salt & pepper

How to make Chicken Spiedini with Amogio Sauce

Chicken Spiedini:

Step 1: Grate the Parmesan cheese and zest of lemon using a Microplane. Using a garlic press, press the garlic (or chop). Then, chop the parsley.

Step 2: In a shallow pan, place the cheese, lemon zest, bread crumbs, parsley, and garlic. Mix well until combined and set aside.

Step 3: Place the chicken in a plastic bag, making sure to remove the air from the bag. Then, gently pound the chicken using a meat mallet to about 1/4 to 1/2-inch thickness. Take the chicken out of the bag and slice it into 1 1/2 width strips to make 12 pieces.

Step 4: Add the olive oil to a shallow bowl, then add the melted butter.

Step 5: Dip the chicken strips in the butter/oil mixture one at a time. Then dredge into the breadcrumbs, evenly coating the chicken. Into a ball, gently roll three chicken strips individually and prick with a skewer. Set aside. To ensure the chicken will fit into the pan, cut the excess kabob off.

Amogio Sauce:

Step 6: Whisk the extra-virgin olive oil, butter, lemon juice, salt, pepper, garlic, fresh chopped parsley and basil, red pepper, chili flakes in a medium saucier pan over medium heat until the mixture starts to boil. Then, take the pan off the heat.

Step 7: Over the chicken skewers, spoon just enough sauce to cover the bottom of the baking dish. Place in the oven and bake for about 15 minutes at 400 degrees F. Flip the chicken and continue baking for 15 minutes more.

Step 8: Take the baking pan out of the oven and very carefully tip the pan upward. Then, take some of the amogio sauce using a spoon and drizzle it on top of the chicken. Place the baking pan back into the oven and resume baking for another 15 minutes.

Step 9: Meanwhile, cook the Angel Hair Pasta following the package directions. Drain the pasta when done and return it to the pan. Over the pasta, pour the amogio sauce and toss to coat.

Step 10: In a serving dish, ladle the pasta. Serve with the chicken. Enjoy!

Chicken Spiedini with Amogio Sauce

Rebecca Prep Time: 45 mins | Cook Time: 1 hr | Total Time: 1 hr 45 mins | Servings: 4 people This easy recipe for chicken spiedini is a must try… General Recipes Chicken Spiedini with Amogio Sauce European Print This
Serves: 4 Prep Time: 45 mins Cooking Time: 1 hr 1 hr
Nutrition facts: 200 calories 20 grams fat
Rating: 5.0/5
( 1 voted )

Ingredients

  • Chicken Spiedini:
  • 2 cloves garlic, minced
  • 2 lbs chicken breasts, skinless and boneless
  • 1/3 c Parmesan cheese, grated
  • 1 c. bread crumbs
  • 1 tbsp fresh Italian parsley
  • 2 tbsp olive oil
  • 2 tbsp butter
  • 2 tsp lemon zest
  • Amogio Sauce:
  • 1/2 c. butter
  • 1 c. olive oil
  • 1 tbsp garlic
  • 1 tbsp parsley
  • 1/2 c. lemon juice
  • 1 tbsp basil, chopped
  • 1/2 tsp red chili pepper flakes
  • 1/2 tsp each salt & pepper

Instructions

Chicken Spiedini:

Step 1: Grate the Parmesan cheese and zest of lemon using a Microplane. Using a garlic press, press the garlic (or chop). Then, chop the parsley.

Step 2: In a shallow pan, place the cheese, lemon zest, bread crumbs, parsley, and garlic. Mix well until combined and set aside.

Step 3: Place the chicken in a plastic bag, making sure to remove the air from the bag. Then, gently pound the chicken using a meat mallet to about 1/4 to 1/2-inch thickness. Take the chicken out of the bag and slice it into 1 1/2 width strips to make 12 pieces.

Step 4: Add the olive oil to a shallow bowl, then add the melted butter.

Step 5: Dip the chicken strips in the butter/oil mixture one at a time. Then dredge into the breadcrumbs, evenly coating the chicken. Into a ball, gently roll three chicken strips individually and prick with a skewer. Set aside. To ensure the chicken will fit into the pan, cut the excess kabob off.

Amogio Sauce:

Step 6: Whisk the extra-virgin olive oil, butter, lemon juice, salt, pepper, garlic, fresh chopped parsley and basil, red pepper, chili flakes in a medium saucier pan over medium heat until the mixture starts to boil. Then, take the pan off the heat.

Step 7: Over the chicken skewers, spoon just enough sauce to cover the bottom of the baking dish. Place in the oven and bake for about 15 minutes at 400 degrees F. Flip the chicken and continue baking for 15 minutes more.

Step 8: Take the baking pan out of the oven and very carefully tip the pan upward. Then, take some of the amogio sauce using a spoon and drizzle it on top of the chicken. Place the baking pan back into the oven and resume baking for another 15 minutes.

Step 9: Meanwhile, cook the Angel Hair Pasta following the package directions. Drain the pasta when done and return it to the pan. Over the pasta, pour the amogio sauce and toss to coat.

Step 10: In a serving dish, ladle the pasta. Serve with the chicken. Enjoy!

April 28, 2022 0 comment
0 FacebookTwitterPinterestEmail
General Recipes

Spinach Ricotta Pasta with Lemon Butter Chicken

by Rebecca April 28, 2022
written by Rebecca

Prep Time: 5 mins | Cook Time: 30 mins | Servings: 4

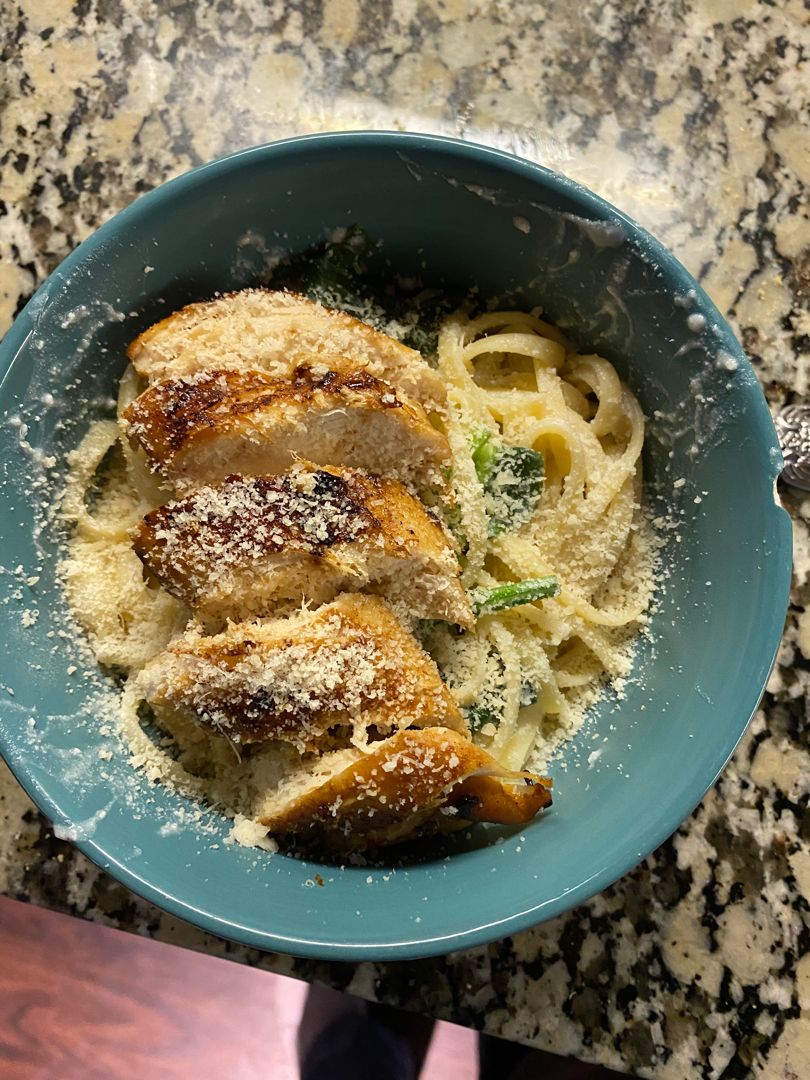
This is one of the best dishes I’ve made this week! The pasta is tossed in delightfully creamy spinach, and ricotta sauce and is top with strips of lush lemon butter chicken breasts. I’m pretty sure everyone will love the hint of lemon and garlic in this dish, too!

Ingredients

Lemon butter chicken:

2 chicken breasts, skinless and boneless

1 tablespoon olive oil

1 clove of sliced garlic

1 tablespoon butter

1 lemon

salt and pepper

Spinach, ricotta pasta:

1 tablespoon butter

2 cloves garlic

250 grams/1 c. ricotta cheese

1 lemon, zest, and juice

125 ml/1/2 c. reserved pasta water

1 tablespoon fresh chopped mint or 1 tsp dried mint

1 pound pasta (use linguine or any of your favorite)

2 tablespoons fresh chopped basil or 2 teaspoons dried basil

100 grams/2 c. fresh spinach

2 tablespoons grated Parmesan cheese for serving

Salt

How to make Spinach Ricotta Pasta with Lemon Butter Chicken

Lemon butter chicken:

Step 1: Season both sides of two chicken breasts with salt and pepper.

Step 2: In a frying pan, heat 1 tablespoon of olive oil. Once the oil is hot, add the chicken breasts to the pan and sear both sides are golden.

Step 3: Decrease the heat and add the butter to the pan along with the sliced garlic. Cook for another 30 seconds before pouring in the lemon juice and adding a couple of slices of lemon. Stir well.

Step 4: Put the lid on and continue to cook the chicken breasts for another 10 minutes over low heat, flipping the chicken breasts once and basting them with the juices a few times until the chicken breasts are cooked through and no longer pink inside.

Step 5: In a plate, transfer the chicken and keep them warm.

Spinach, ricotta pasta:

Step 6: Following the package directions, cook the pasta in a large pot of boiling salted water until al dente.

Step 7: In the meantime, add 1 tbsp butter in a large pan. Allow the butter to melt, then add the sliced garlic. Saute for about 30 seconds over low heat. Next, add the lemon zest, lemon juice, ricotta cheese, and half a cup of pasta water. Stir well until the ricotta is completely blended.

Step 8: To the large pan, add the fresh spinach, chopped mint, and basil. Put the lid on and cook the greens for about 2 minutes until wilted. Remove the cover and mix well. To taste, season with salt.

Step 9: Once the pasta is done, drain and directly add to the pan with the spinach ricotta sauce. Toss well.

Step 10: Over the pasta, lay the sliced lemon butter chicken and sprinkle with grated Parmesan cheese. Enjoy right away.

Nutrition Facts:

Calories: 766 kcal | Carbohydrates: 91g | Protein: 48g | Fat: 23g | Saturated Fat: 11g | Cholesterol: 121mg | Sodium: 324mg | Potassium: 844mg | Fiber: 5g | Sugar: 4g | Vitamin A: 1770IU | Vitamin C: 23mg | Calcium: 229mg | Iron: 2.6mg

Spinach Ricotta Pasta with Lemon Butter Chicken

Rebecca Prep Time: 5 mins | Cook Time: 30 mins | Servings: 4 This is one of the best dishes I’ve made this week! The pasta is tossed in delightfully creamy… General Recipes Spinach Ricotta Pasta with Lemon Butter Chicken European Print This
Serves: 4 Prep Time: 5 mins Cooking Time: 30 mins 30 mins
Nutrition facts: 766 calories 23 fat
Rating: 5.0/5
( 1 voted )

Ingredients

  • Lemon butter chicken:
  • 2 chicken breasts, skinless and boneless
  • 1 tablespoon olive oil
  • 1 clove of sliced garlic
  • 1 tablespoon butter
  • 1 lemon
  • salt and pepper
  • Spinach, ricotta pasta:
  • 1 tablespoon butter
  • 2 cloves garlic
  • 250 grams/1 c. ricotta cheese
  • 1 lemon, zest, and juice
  • 125 ml/1/2 c. reserved pasta water
  • 1 tablespoon fresh chopped mint or 1 tsp dried mint
  • 1 pound pasta (use linguine or any of your favorite)
  • 2 tablespoons fresh chopped basil or 2 teaspoons dried basil
  • 100 grams/2 c. fresh spinach
  • 2 tablespoons grated Parmesan cheese for serving
  • Salt

Instructions

Lemon butter chicken:

Step 1: Season both sides of two chicken breasts with salt and pepper.

Step 2: In a frying pan, heat 1 tablespoon of olive oil. Once the oil is hot, add the chicken breasts to the pan and sear both sides are golden.

Step 3: Decrease the heat and add the butter to the pan along with the sliced garlic. Cook for another 30 seconds before pouring in the lemon juice and adding a couple of slices of lemon. Stir well.

Step 4: Put the lid on and continue to cook the chicken breasts for another 10 minutes over low heat, flipping the chicken breasts once and basting them with the juices a few times until the chicken breasts are cooked through and no longer pink inside.

Step 5: In a plate, transfer the chicken and keep them warm.

Spinach, ricotta pasta:

Step 6: Following the package directions, cook the pasta in a large pot of boiling salted water until al dente.

Step 7: In the meantime, add 1 tbsp butter in a large pan. Allow the butter to melt, then add the sliced garlic. Saute for about 30 seconds over low heat. Next, add the lemon zest, lemon juice, ricotta cheese, and half a cup of pasta water. Stir well until the ricotta is completely blended.

Step 8: To the large pan, add the fresh spinach, chopped mint, and basil. Put the lid on and cook the greens for about 2 minutes until wilted. Remove the cover and mix well. To taste, season with salt.

Step 9: Once the pasta is done, drain and directly add to the pan with the spinach ricotta sauce. Toss well.

Step 10: Over the pasta, lay the sliced lemon butter chicken and sprinkle with grated Parmesan cheese. Enjoy right away.

April 28, 2022 0 comment
0 FacebookTwitterPinterestEmail
General Recipes

Crispy Oven Fried Fish

by Rebecca April 28, 2022
written by Rebecca

Prep time: 20 mins | Cook time: 20 mins | Total time: 40 mins | Servings: 4

Fries and chips are waving! The kids super love these crispy oven-fried fish. These are a million better than store-bought and incredibly easy to make. We also enjoy these delicious crispy oven-fried fish in a sandwich on a bun with coleslaw, mashed potatoes, veggies, and more!

Ingredients

Dry breading:

¼ c. breadcrumbs

1 c. all-purpose flour

2 tbsp fine cornmeal

2 tsp ground paprika

½ tsp dried garlic powder

½ tsp dried onion powder

¼ tsp baking powder

1 tsp fine sea salt

Eggs:

2 large eggs

Fish:

1 lb thick white fish fillets (I prefer cod, cut into pieces, about 8-10 pieces)

For the pan:

¼ c. unsalted butter

How to make Crispy Oven Fried Fish

Step 1: Place a baking sheet or dark-colored roaster in the oven, then preheat to 430 degrees F or 220 degrees C.

Step 2: In a shallow dish, place the Dry Breading ingredients. Mix well.

Step 3: In another bowl, add the eggs and beat well.

Step 4: Into the breading, dip the fish, and lightly coat. Transfer the fish into the egg, then into the breading again, pressing the fish to coat completely. Repeat with the remaining fish.

Step 5: Carefully take the pan out of the oven. Place 3 tbsp butter in the hot pan and let it melt. Then spread the melted butter on the bottom of the pan. Lay the breaded fish into the melted butter.

Step 6: Return the pan to the preheated oven and bake the fish for about 10 minutes. After 10 minutes, flip the fish and add the rest of the 1 tbsp butter. Continue to bake for another 5 to 10 minutes or until the fish is completely cooked and the coating is crispy. Lastly, set the oven to broil for about 2 to 3 minutes.

Step 7: After baking, allow the fish to rest for about 5 minutes on the pan. Serve warm. Enjoy!

Nutrition Facts:

Serving: 1 serving, Calories: 390 kcal, Carbohydrates: 33g, Protein: 27g, Fat: 15g, Saturated Fat: 8g, Cholesterol: 161mg, Sodium: 726mg, Potassium: 609mg, Fiber: 1g, Vitamin A: 1010IU, Vitamin C: 1.2mg, Calcium: 62mg, Iron: 3mg

Crispy Oven Fried Fish

Rebecca Prep time: 20 mins | Cook time: 20 mins | Total time: 40 mins | Servings: 4 Fries and chips are waving! The kids super love these crispy oven-fried fish.… General Recipes Crispy Oven Fried Fish European Print This
Serves: 4 Prep Time: 20 mins Cooking Time: 20 mins 20 mins
Nutrition facts: 390 calories 15 fat
Rating: 5.0/5
( 1 voted )

Ingredients

  • Dry breading:
  • ¼ c. breadcrumbs
  • 1 c. all-purpose flour
  • 2 tbsp fine cornmeal
  • 2 tsp ground paprika
  • ½ tsp dried garlic powder
  • ½ tsp dried onion powder
  • ¼ tsp baking powder
  • 1 tsp fine sea salt
  • Eggs:
  • 2 large eggs
  • Fish:
  • 1 lb thick white fish fillets (I prefer cod, cut into pieces, about 8-10 pieces)
  • For the pan:
  • ¼ c. unsalted butter

Instructions

Step 1: Place a baking sheet or dark-colored roaster in the oven, then preheat to 430 degrees F or 220 degrees C.

Step 2: In a shallow dish, place the Dry Breading ingredients. Mix well.

Step 3: In another bowl, add the eggs and beat well.

Step 4: Into the breading, dip the fish, and lightly coat. Transfer the fish into the egg, then into the breading again, pressing the fish to coat completely. Repeat with the remaining fish.

Step 5: Carefully take the pan out of the oven. Place 3 tbsp butter in the hot pan and let it melt. Then spread the melted butter on the bottom of the pan. Lay the breaded fish into the melted butter.

Step 6: Return the pan to the preheated oven and bake the fish for about 10 minutes. After 10 minutes, flip the fish and add the rest of the 1 tbsp butter. Continue to bake for another 5 to 10 minutes or until the fish is completely cooked and the coating is crispy. Lastly, set the oven to broil for about 2 to 3 minutes.

Step 7: After baking, allow the fish to rest for about 5 minutes on the pan. Serve warm. Enjoy!

April 28, 2022 0 comment
0 FacebookTwitterPinterestEmail
General Recipes

Crispy Cheddar Chicken

by Rebecca April 28, 2022
written by Rebecca

Prep Time: 15 mins | Cook Time: 35 mins | Total Time: 50 mins | Yield: 7 servings

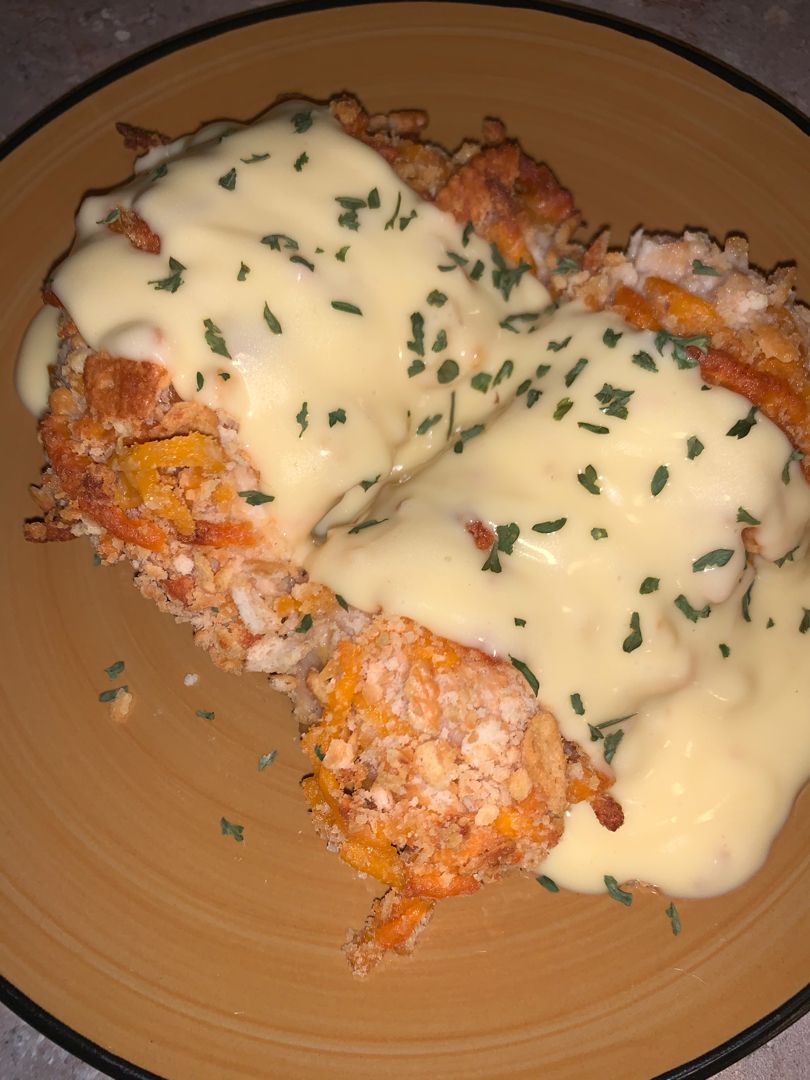
Simple dinners should never be boring. Try this delicious baked crispy cheddar chicken with your favorite side dishes, such as roasted asparagus, French fries, roasted garlic mashed potatoes, and more. And never forget to pour the cream of chicken soup over the chicken. Your entire family will surely love and ask for this lush, crispy cheddar chicken over and over again!

Ingredients

Chicken:

2 sleeves Ritz crackers

4 large chicken breasts

3 cups cheddar cheese, grated

1/2 cup of milk

1 teaspoon dried parsley

1/4 teaspoon salt

1/8 teaspoon pepper

Sauce:

2 tablespoons butter

2 tablespoons sour cream

1 10-oz. can cream of chicken soup

How to make Crispy Cheddar Chicken

Step 1: Into three large pieces, cut each chicken breast.

Step 2: Place the Ritz crackers in a small food processor and grind them up.

Step 3: Pour the milk into a small pan. Place the cheese in another small pan and the cracker crumbs in a separate small pan. Into the cracker crumbs, stir in 1/4 tsp salt and 1/8 tsp pepper.

Step 4: Into the milk, dip the chicken piece by piece. Coat with cheese, pressing each chicken using your fingers. Then, dredge the chicken into the cracker crumbs, pressing to coat.

Step 5: Using cooking spray, greased 9 x 13-inch pan. Inside the pan, lay the chicken and sprinkle it with dried parsley.

Step 6: Using foil, cover the pan. Place in 400 degrees preheated oven and bake for about 35 minutes. Uncover and continue to bake for another 10 minutes or until the edges of the chicken are crispy and golden brown.

Step 7: In the meantime, place the cream of chicken soup, sour cream, and butter in a medium-sized saucepan. Stir well and heat over medium-high heat until the sauce is hot.

Step 8: Remove the chicken from the oven when done and serve right away. Pour the sauce over the chicken. Enjoy!

Crispy Cheddar Chicken

Rebecca Prep Time: 15 mins | Cook Time: 35 mins | Total Time: 50 mins | Yield: 7 servings Simple dinners should never be boring. Try this delicious baked crispy cheddar… General Recipes Crispy Cheddar Chicken European Print This
Serves: 7 Prep Time: 15 mins Cooking Time: 35 mins 35 mins
Nutrition facts: 200 calories 20 grams fat
Rating: 5.0/5
( 1 voted )

Ingredients

  • Chicken:
  • 2 sleeves Ritz crackers
  • 4 large chicken breasts
  • 3 cups cheddar cheese, grated
  • 1/2 cup of milk
  • 1 teaspoon dried parsley
  • 1/4 teaspoon salt
  • 1/8 teaspoon pepper
  • Sauce:
  • 2 tablespoons butter
  • 2 tablespoons sour cream
  • 1 10-oz. can cream of chicken soup

Instructions

Step 1: Into three large pieces, cut each chicken breast.

Step 2: Place the Ritz crackers in a small food processor and grind them up.

Step 3: Pour the milk into a small pan. Place the cheese in another small pan and the cracker crumbs in a separate small pan. Into the cracker crumbs, stir in 1/4 tsp salt and 1/8 tsp pepper.

Step 4: Into the milk, dip the chicken piece by piece. Coat with cheese, pressing each chicken using your fingers. Then, dredge the chicken into the cracker crumbs, pressing to coat.

Step 5: Using cooking spray, greased 9 x 13-inch pan. Inside the pan, lay the chicken and sprinkle it with dried parsley.

Step 6: Using foil, cover the pan. Place in 400 degrees preheated oven and bake for about 35 minutes. Uncover and continue to bake for another 10 minutes or until the edges of the chicken are crispy and golden brown.

Step 7: In the meantime, place the cream of chicken soup, sour cream, and butter in a medium-sized saucepan. Stir well and heat over medium-high heat until the sauce is hot.

Step 8: Remove the chicken from the oven when done and serve right away. Pour the sauce over the chicken. Enjoy!

April 28, 2022 0 comment
0 FacebookTwitterPinterestEmail
General Recipes

Janet’s Rich Banana Bread

by Rebecca April 28, 2022
written by Rebecca

Cook time: 1 hr | Total time: 1 hr 10 mins | Prep time: 10 mins | Servings: 15 | Yield: 1 9×5-inch loaf

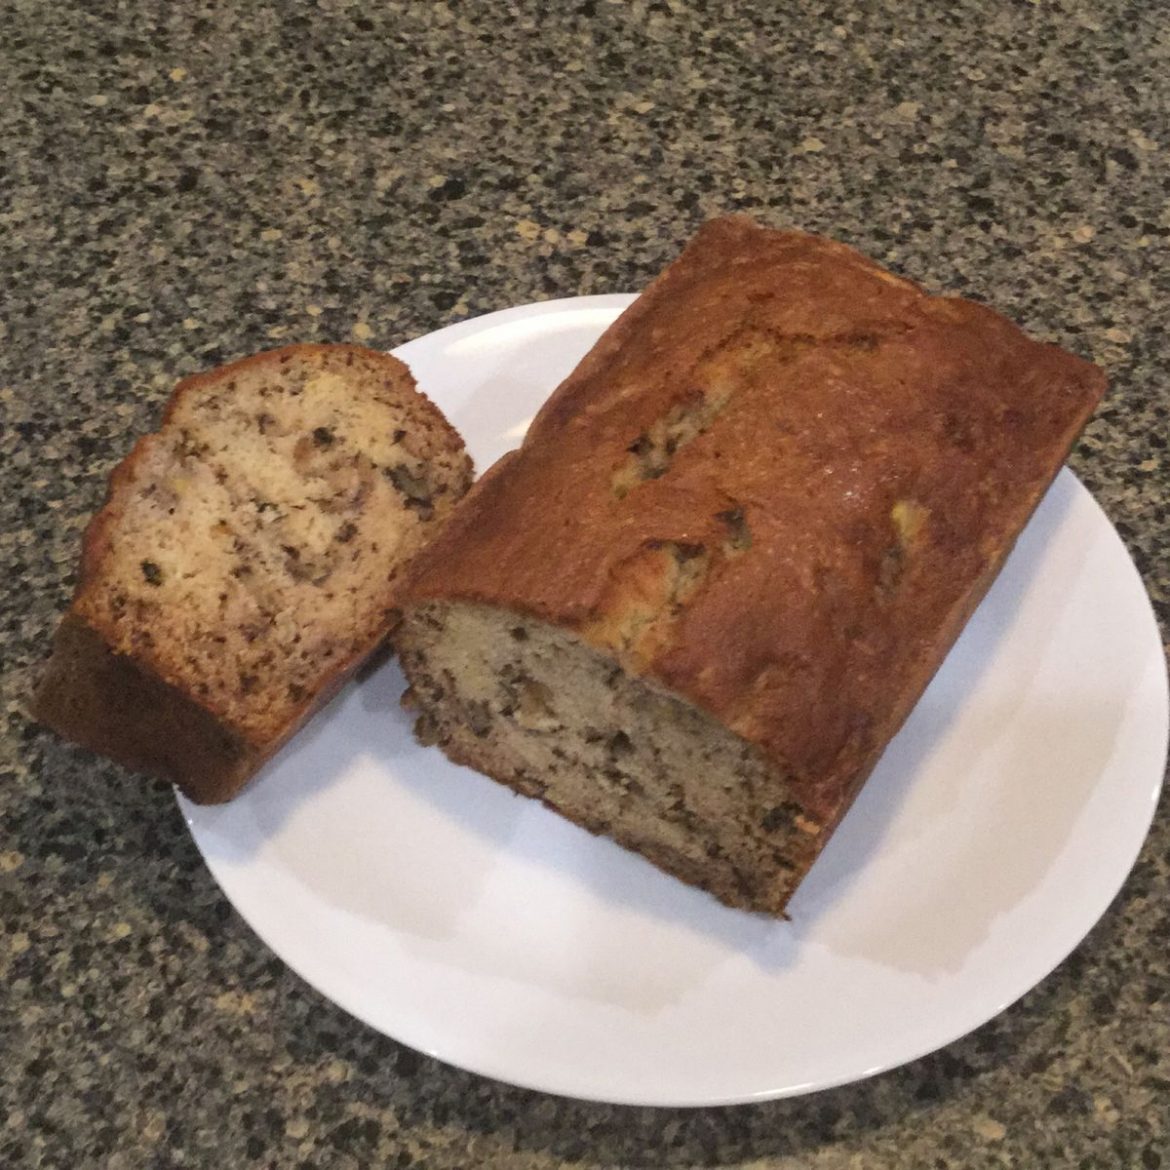
Incredibly easy to make and the best banana bread you’ll ever make! This very moist, delicious, and rich banana bread has been my favorite for years. I make this always and even serve this to guests. Everyone thinks that this is a wonderful recipe, and I could not agree more. This does not only guarantee the best banana bread, but it is insanely easy to whip up using only simple ingredients we already have on hand. Serve this banana bread right away for breakfast with a cup of hot coffee or as an after-school snack. I even enjoy a slice or two for a midnight snack!

Ingredients

2 eggs

½ c. butter, melted

1 c. white sugar

1 tsp vanilla extract

1 tsp baking soda

½ c. chopped walnuts

½ c. sour cream

1 ½ c. all-purpose flour

2 medium bananas, sliced

½ tsp salt

How to make Janet’s Rich Banana Bread

Step 1: Prepare the oven. Preheat it to 350 degrees F or 175 degrees C. Ready a 9 x 5-inch loaf pan. Grease and set aside.

Step 2: Place the melted butter and sugar in a large bowl. Mix well, then add the eggs and vanilla. Mix again until well combined.

Step 3: Into the butter mixture, add the flour, baking soda, and salt. Mix well until smooth. Next, fold in the sour cream along with the walnuts and bananas.

Step 4: Into the prepared pan, transfer the mixture and evenly spread.

Step 5: Place in the preheated oven and bake for about 60 minutes. To check the doneness, insert a toothpick in the middle of the loaf. Once it comes out clean, the loaf is done.

Step 6: Remove the bread from the oven when done and let it cool for about 10 minutes in the pan. Then, invert onto a cooling rack to cool fully.

Nutrition Facts:

Per Serving: 218 calories; protein 3.2g; carbohydrates 27.4g; fat 11.1g; cholesterol 44.4mg; sodium 218.9mg.

Janet's Rich Banana Bread

Rebecca Cook time: 1 hr | Total time: 1 hr 10 mins | Prep time: 10 mins | Servings: 15 | Yield: 1 9×5-inch loaf Incredibly easy to make and the… General Recipes Janet’s Rich Banana Bread European Print This
Serves: 15 Prep Time: 10 mins Cooking Time: 1 hr 1 hr
Nutrition facts: 218 calories 11.1 fat
Rating: 5.0/5
( 1 voted )

Ingredients

  • 2 eggs
  • ½ c. butter, melted
  • 1 c. white sugar
  • 1 tsp vanilla extract
  • 1 tsp baking soda
  • ½ c. chopped walnuts
  • ½ c. sour cream
  • 1 ½ c. all-purpose flour
  • 2 medium bananas, sliced
  • ½ tsp salt

Instructions

Step 1: Prepare the oven. Preheat it to 350 degrees F or 175 degrees C. Ready a 9 x 5-inch loaf pan. Grease and set aside.

Step 2: Place the melted butter and sugar in a large bowl. Mix well, then add the eggs and vanilla. Mix again until well combined.

Step 3: Into the butter mixture, add the flour, baking soda, and salt. Mix well until smooth. Next, fold in the sour cream along with the walnuts and bananas.

Step 4: Into the prepared pan, transfer the mixture and evenly spread.

Step 5: Place in the preheated oven and bake for about 60 minutes. To check the doneness, insert a toothpick in the middle of the loaf. Once it comes out clean, the loaf is done.

Step 6: Remove the bread from the oven when done and let it cool for about 10 minutes in the pan. Then, invert onto a cooling rack to cool fully.

April 28, 2022 0 comment
0 FacebookTwitterPinterestEmail
Newer Posts
Older Posts

Popular Posts

  • 1

    Crispy Crunchy Parmesan Potatoes

    March 21, 2020
  • 2

    CROCK POT SMOTHERED PORK CHOPS

    March 21, 2020
  • Facebook
  • Twitter

@2019 - All Right Reserved.


Back To Top