Cook it once
  • Home
  • Privacy Policy
  • Recipes
    • KETO
    • LC
    • WW
  • Tips
  • Contact
Cook it once
  • Home
  • Privacy Policy
  • Recipes
    • KETO
    • LC
    • WW
  • Tips
  • Contact
Category:

General Recipes

General Recipes

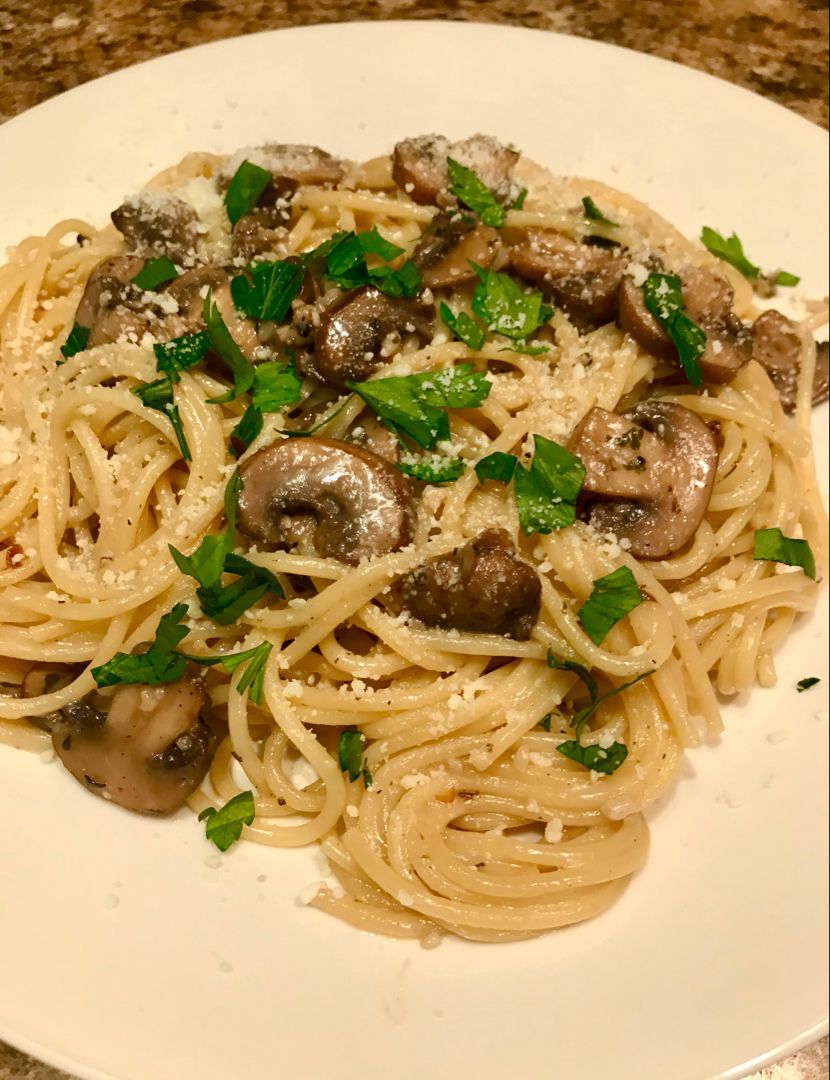
Mushroom and Garlic Spaghetti Dinner

by Rebecca May 9, 2022
written by Rebecca

YIELD: Serves 4 to 6

If you are looking for another easy and quick spaghetti recipe, then you have to try this mushroom and garlic spaghetti dinner. It’s a flavor-packed dish with sauteed mushroom, garlic, and spaghetti tossed in a delightful butter sauce. The meaty texture and umami-rich flavor of the mushroom is more than enough for this spaghetti dinner to leap to the top of our favorites list!

INGREDIENTS

1 tbsp olive oil

3 tbsp unsalted butter, divided

1 lb cremini mushrooms, sliced

1 lb dried spaghetti

6 cloves garlic, minced

1/4 tsp red pepper flakes (optional)

2 tbsp coarsely chopped fresh parsley leaves

1/2 c. grated Pecorino Romano cheese, plus more for serving

Kosher salt

Freshly ground black pepper

How to make Mushroom and Garlic Spaghetti Dinner

Step 1: Following the package directions, cook the pasta in a large pot of salted boiling water until al dente.

Step 2: In a large skillet, beat 1 tbsp butter and oil over medium heat. Once the oil is shimmering, add the mushrooms to the skillet and season with salt and pepper. Cook for about 5 minutes or until the mushrooms are browned and tender, stirring often. Next, add the garlic along with the red pepper flakes (optional) and the rest of the 2 tbsp butter. Continue to cook for another minute.

Step 3: Drain the pasta when done, making sure to set aside 3/4 c. of the cooking water. To the skillet, add the pasta, reserved cooking water, and cheese. Stir well and continue to cook for about 2 minutes over medium heat until the cheese has melted and the sauce has thickened. Lastly, stir in the parsley.

Step 4: Take the skillet off the heat when done and ladle the mushroom and garlic spaghetti into shallow bowls. Serve garnished with extra cheese. Enjoy!

NOTE:

In an airtight container, keep any leftovers and store them in the fridge for up to 4 days.

Nutrition Facts:

Calories 417, Fat 12.2 g (18.8%), Saturated 6.1 g (30.4%), Carbs 61.5 g (20.5%), Fiber 3.1 g (12.4%), Sugars 3.4 g, Protein 15.6 g (31.2%), Sodium 168.9 mg (7.0%)
Mushroom and Garlic Spaghetti Dinner

Rebecca YIELD: Serves 4 to 6 If you are looking for another easy and quick spaghetti recipe, then you have to try this mushroom and garlic spaghetti dinner. It’s a flavor-packed… General Recipes Mushroom and Garlic Spaghetti Dinner European Print This
Serves: 4-6
Nutrition facts: 417 calories 12.2 fat
Rating: 5.0/5
( 1 voted )

Ingredients

  • 1 tbsp olive oil
  • 3 tbsp unsalted butter, divided
  • 1 lb cremini mushrooms, sliced
  • 1 lb dried spaghetti
  • 6 cloves garlic, minced
  • 1/4 tsp red pepper flakes (optional)
  • 2 tbsp coarsely chopped fresh parsley leaves
  • 1/2 c. grated Pecorino Romano cheese, plus more for serving
  • Kosher salt
  • Freshly ground black pepper

Instructions

Step 1: Following the package directions, cook the pasta in a large pot of salted boiling water until al dente.

Step 2: In a large skillet, beat 1 tbsp butter and oil over medium heat. Once the oil is shimmering, add the mushrooms to the skillet and season with salt and pepper. Cook for about 5 minutes or until the mushrooms are browned and tender, stirring often. Next, add the garlic along with the red pepper flakes (optional) and the rest of the 2 tbsp butter. Continue to cook for another minute.

Step 3: Drain the pasta when done, making sure to set aside 3/4 c. of the cooking water. To the skillet, add the pasta, reserved cooking water, and cheese. Stir well and continue to cook for about 2 minutes over medium heat until the cheese has melted and the sauce has thickened. Lastly, stir in the parsley.

Step 4: Take the skillet off the heat when done and ladle the mushroom and garlic spaghetti into shallow bowls. Serve garnished with extra cheese. Enjoy!

Notes

In an airtight container, keep any leftovers and store them in the fridge for up to 4 days.
May 9, 2022 0 comment
0 FacebookTwitterPinterestEmail
General Recipes

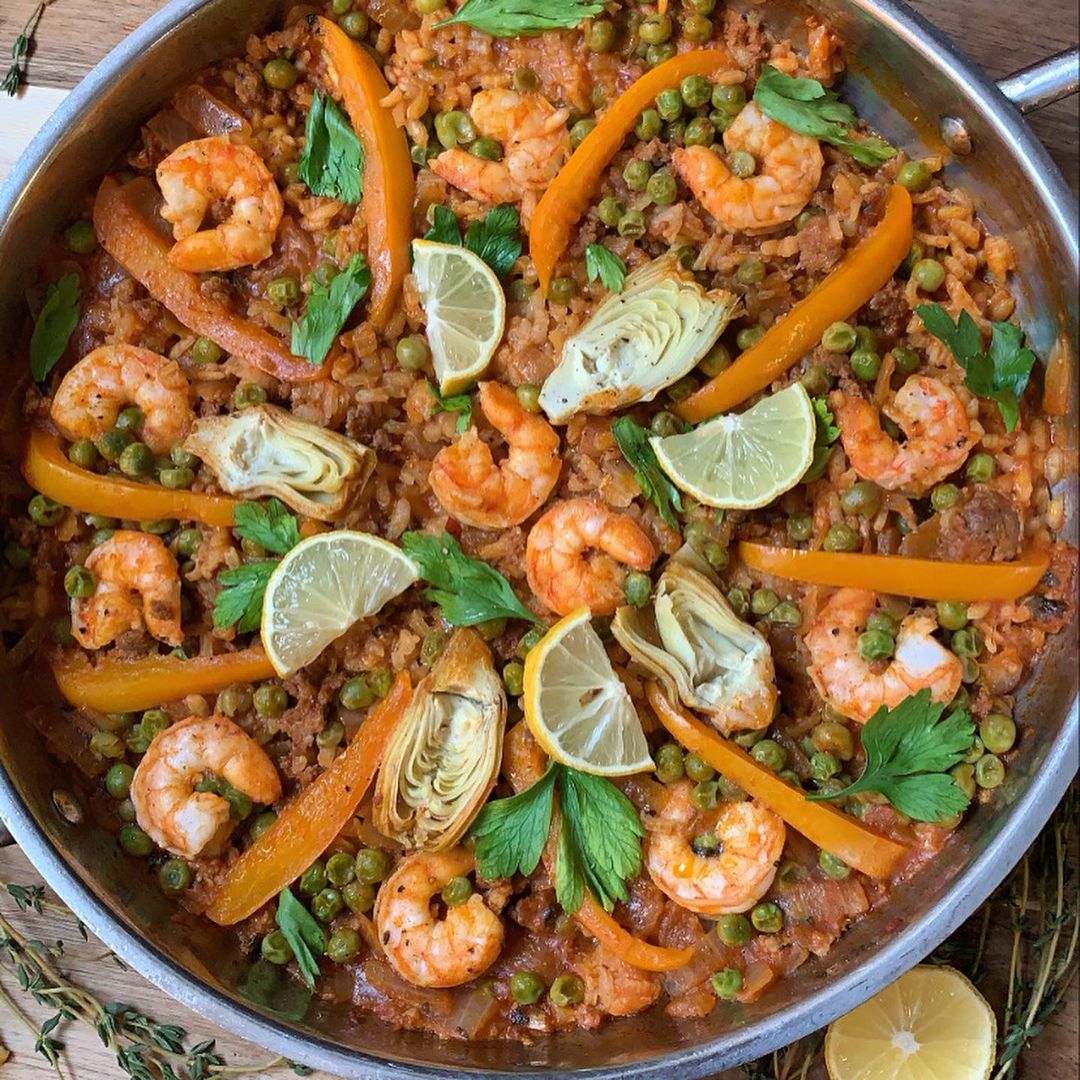
Weeknight Paella

by Rebecca May 9, 2022
written by Rebecca

Prep Time: 10 mins | Cook Time: 30 mins | Total Time: 40 mins | Servings: 6

Make this easy weeknight paella any time with traditional paella ingredients in less than one hour. It’s a very flavorful meal, delicious, and filling. This paella is also great and very impressive to serve for entertaining.

Ingredients

3 cloves garlic, minced

2 tbsp extra-virgin olive oil

1 lb. medium shrimp, thawed if frozen, peeled and deveined, tails on or off

1 1/2 c. Arborio rice

5 oz. cooked smoked Spanish chorizo sausage, cut into 1/2” rounds (dried and cured NOT Mexican chorizo which is ground)

2 tbsp tomato paste

3/4 tsp paprika (sweet or smoked)

1 medium sweet onion, cut into 1” wedges

3 1/2 c. low sodium chicken stock

2 tbsp finely chopped parsley

1/2 c. frozen peas, thawed

pinch of saffron threads

2 tsp kosher salt (not table salt)

A few turns of freshly cracked black pepper

How to make Weeknight Paella

Step 1: In a 12 to 14-inch paella pan, warm the oil over medium-high heat. Add the chorizo and onion once the oil is hot and cook for about 3 minutes. Then, add the garlic and continue to cook for another 30 seconds until aromatic. For this recipe, you can also use a large stainless-steel skillet.

Step 2: To the pan, add the tomato paste. Stir and cook until fully blended and coated.

Step 3: Next, add the paprika along with salt, pepper, and saffron. Stir well, then add the rice. Stir again to coat.

Step 4: To the pan, pour in the chicken stock. Bring to a boil. Using the back of a spatula, gently flatten the rice. Adjust the heat to low and bring everything to a light simmer, without stirring, for about 15 minutes.

Step 5: Nestle the shrimp in the liquid in the pan and continue to cook for another 10 minutes or until the liquid has been absorbed.

Step 6: Lastly, stir in the peas and heat until warmed through.

Step 7: Take the pan off the heat when done and serve the paella garnished with some parley. Enjoy!

Nutrition Facts:

Calories: 457 kcal | Carbohydrates: 49g | Protein: 28g | Fat: 16g | Saturated Fat: 5g | Cholesterol: 211mg | Sodium: 1366mg | Potassium: 474mg | Fiber: 3g | Sugar: 4g | Vitamin A: 1466IU | Vitamin C: 10mg | Calcium: 138mg | Iron: 5mg

Weeknight Paella

Rebecca Prep Time: 10 mins | Cook Time: 30 mins | Total Time: 40 mins | Servings: 6 Make this easy weeknight paella any time with traditional paella ingredients in less… General Recipes Weeknight Paella European Print This
Serves: 6 Prep Time: 10 mins Cooking Time: 30 mins 30 mins
Nutrition facts: 457 calories 16 fat
Rating: 5.0/5
( 1 voted )

Ingredients

  • 3 cloves garlic, minced
  • 2 tbsp extra-virgin olive oil
  • 1 lb. medium shrimp, thawed if frozen, peeled and deveined, tails on or off
  • 1 1/2 c. Arborio rice
  • 5 oz. cooked smoked Spanish chorizo sausage, cut into 1/2” rounds (dried and cured NOT Mexican chorizo which is ground)
  • 2 tbsp tomato paste
  • 3/4 tsp paprika (sweet or smoked)
  • 1 medium sweet onion, cut into 1” wedges
  • 3 1/2 c. low sodium chicken stock
  • 2 tbsp finely chopped parsley
  • 1/2 c. frozen peas, thawed
  • pinch of saffron threads
  • 2 tsp kosher salt (not table salt)
  • A few turns of freshly cracked black pepper

Instructions

Step 1: In a 12 to 14-inch paella pan, warm the oil over medium-high heat. Add the chorizo and onion once the oil is hot and cook for about 3 minutes. Then, add the garlic and continue to cook for another 30 seconds until aromatic. For this recipe, you can also use a large stainless-steel skillet.

Step 2: To the pan, add the tomato paste. Stir and cook until fully blended and coated.

Step 3: Next, add the paprika along with salt, pepper, and saffron. Stir well, then add the rice. Stir again to coat.

Step 4: To the pan, pour in the chicken stock. Bring to a boil. Using the back of a spatula, gently flatten the rice. Adjust the heat to low and bring everything to a light simmer, without stirring, for about 15 minutes.

Step 5: Nestle the shrimp in the liquid in the pan and continue to cook for another 10 minutes or until the liquid has been absorbed.

Step 6: Lastly, stir in the peas and heat until warmed through.

Step 7: Take the pan off the heat when done and serve the paella garnished with some parley. Enjoy!

May 9, 2022 0 comment
0 FacebookTwitterPinterestEmail
General Recipes

Pineapple Coconut Bread

by Rebecca May 9, 2022
written by Rebecca

Prep Time: 10 mins | Cook Time: 1 hr 5 mins | Total Time: 1 hr 15 mins | Yield: 12 Servings

This pineapple coconut bread is a moist and rich bread with a hint of tropical flavor. A summer treat that you can easily make all year round and perfect to serve for breakfast, brunch, or even dessert. I like to drizzle a slice with a generous amount of caramel sauce and top it with a big scoop of ice cream for the ultimate dessert. Or enjoy with your favorite cup of freshly brewed coffee in the morning to start your day right.

Ingredients

3 large eggs

1/2 c. butter

2 c. sweetened shredded coconut

1/2 tsp baking soda

1 c. sugar

1 c. sour cream

1 1/2 c. flour

20 oz. crushed pineapple – drained well

1/2 tsp salt

How to make Pineapple Coconut Bread

Step 1: Prepare the oven. Preheat it to 325 degrees. Using a baking spray, grease a loaf pan.

Step 2: On the prepared baking sheet, spread the coconut. Place in the preheated oven and bake for about 6 to 10 minutes, shaking the tray often.

Step 3: Add the butter and sugar to a stand mixer. Cream for about 1 to 2 minutes on high speed until light and fluffy.

Step 4: Into a bowl, add the flour, baking soda, and salt. Mix well until blended.

Step 5: Then, add the eggs, a piece at a time until well incorporated. Next, add the flour mixture alternately with the sour cream (I added ⅓ of the amount each time).

Step 6: Using a spatula, fold in the pineapple and 1 c of the coconut flakes.

Step 7: Into the prepared loaf pan, transfer the batter, and sprinkle with the rest of the coconut. Place in the preheated oven and bake for about 65 to 70 minutes or until a toothpick inserted in the center of the loaf comes out clean.

Step 8: Slice and serve for breakfast, brunch, or dessert. Enjoy!

Nutrition Facts:

Calories: 360 kcal | Carbohydrates: 44g | Protein: 4g | Fat: 20g | Saturated Fat: 15g | Cholesterol: 63mg | Sodium: 173mg | Potassium: 172mg | Fiber: 2g | Sugar: 30g | Vitamin A: 220IU | Vitamin C: 5mg | Calcium: 41mg | Iron: 1mg

Pineapple Coconut Bread

Rebecca Prep Time: 10 mins | Cook Time: 1 hr 5 mins | Total Time: 1 hr 15 mins | Yield: 12 Servings This pineapple coconut bread is a moist and… General Recipes Pineapple Coconut Bread European Print This
Serves: 12 Prep Time: 10 mins Cooking Time: 1 hr 5 mins 1 hr 5 mins
Nutrition facts: 360 calories 20 fat
Rating: 5.0/5
( 1 voted )

Ingredients

  • 3 large eggs
  • 1/2 c. butter
  • 2 c. sweetened shredded coconut
  • 1/2 tsp baking soda
  • 1 c. sugar
  • 1 c. sour cream
  • 1 1/2 c. flour
  • 20 oz. crushed pineapple - drained well
  • 1/2 tsp salt

Instructions

Step 1: Prepare the oven. Preheat it to 325 degrees. Using a baking spray, grease a loaf pan.

Step 2: On the prepared baking sheet, spread the coconut. Place in the preheated oven and bake for about 6 to 10 minutes, shaking the tray often.

Step 3: Add the butter and sugar to a stand mixer. Cream for about 1 to 2 minutes on high speed until light and fluffy.

Step 4: Into a bowl, add the flour, baking soda, and salt. Mix well until blended.

Step 5: Then, add the eggs, a piece at a time until well incorporated. Next, add the flour mixture alternately with the sour cream (I added ⅓ of the amount each time).

Step 6: Using a spatula, fold in the pineapple and 1 c of the coconut flakes.

Step 7: Into the prepared loaf pan, transfer the batter, and sprinkle with the rest of the coconut. Place in the preheated oven and bake for about 65 to 70 minutes or until a toothpick inserted in the center of the loaf comes out clean.

Step 8: Slice and serve for breakfast, brunch, or dessert. Enjoy!

May 9, 2022 0 comment
0 FacebookTwitterPinterestEmail
General Recipes

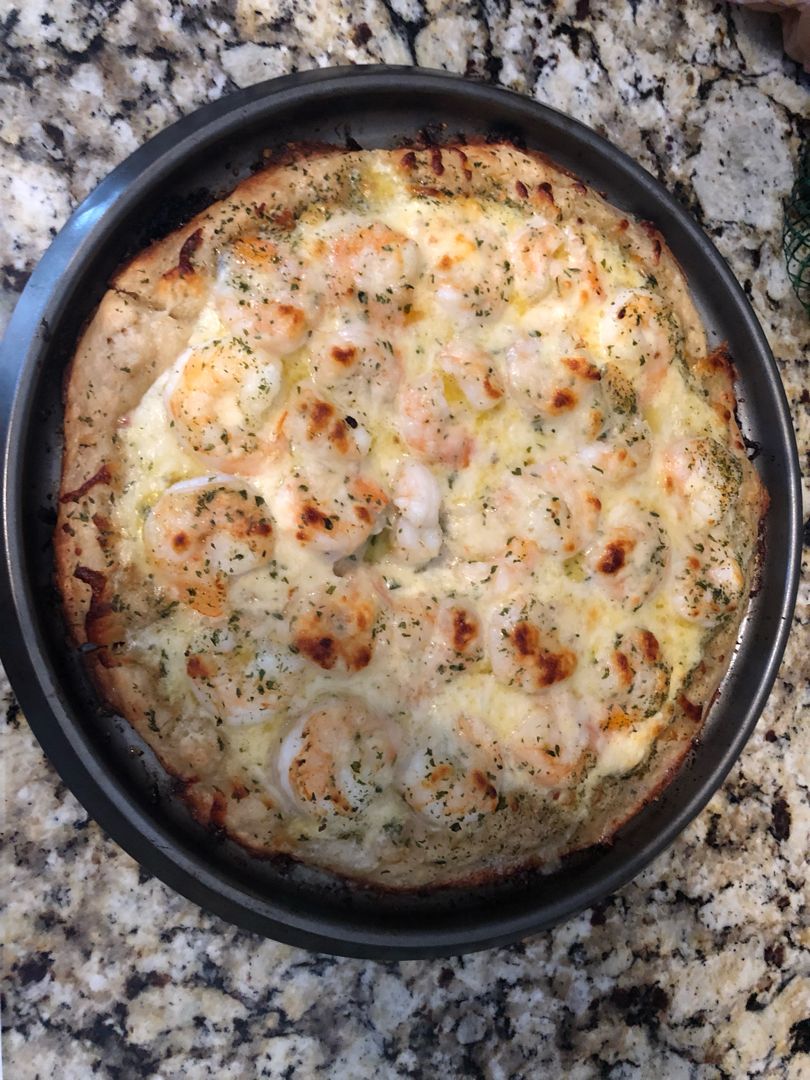
Shrimp Scampi Pizza

by Rebecca May 9, 2022
written by Rebecca

Prep Time: 10 mins | Cook Time: 10 mins | Total Time: 20 mins | Servings: 4

It is pizza day today and the star of the show is this tasty shrimp scampi pizza with a garlic butter sauce. An incredibly easy and quick pizza recipe that you should never miss! It is the same garlic butter sauce I love to serve over pasta. Serve this delicious pizza while hot garnished with some fresh chopped parsley and lemon wedges to squeeze onto the slices before devouring.

This is a wonderful and pretty simple shrimp scampi pizza recipe. This is the perfect pizza for all shrimp lovers out there! Crazy good, everyone will love this even those that are not a fan of shrimp. If you have not tried shrimp pizza before, you should try this easy and quick shrimp scampi pizza very recipe soon. One bite and you’ll want to make this again and again!

Ingredients

1 lb shrimp, shelled and deveined

6 cloves garlic, chopped

1 pizza dough

4 tbsp butter

2 tbsp lemon juice

1/4 c. parmigiano Reggiano (Parmesan), grated

1 c. mozzarella, shredded

1 pinch of red pepper flakes (optional)

How to make Shrimp Scampi Pizza

Step 1: In a pan, melt the butter over medium heat. Once the butter has melted, add the garlic to the pan along with red pepper flakes and shrimp. Cook the shrimp for a minute on each side until just cooked through. Then, add the lemon juice.

Step 2: On a baking sheet, spread the dough out and top with the shrimp and lemon butter garlic sauce. Over the shrimp, sprinkle the cheese.

Step 3: Place the baking sheet in a 500 degrees F or 260 degrees C preheated oven and bake for about 10 minutes until the cheese has melted and the crust is crispy and golden brown.

Step 4: Remove the shrimps from the oven when done and sprinkle with parsley. Allow the shrimp scampi pizza to cool before serving. If desired, garnish with some fresh parsley and lemon wedges. Enjoy!

Nutrition Facts:

Calories 456, Fat 22g (Saturated 12g, Trans 0.3g), Cholesterol 200mg, Sodium 1266mg, Carbs 32g (Fiber 1g, Sugars 1g), Protein 29g

Shrimp Scampi Pizza

Rebecca Prep Time: 10 mins | Cook Time: 10 mins | Total Time: 20 mins | Servings: 4 It is pizza day today and the star of the show is this… General Recipes Shrimp Scampi Pizza European Print This
Serves: 4 Prep Time: 10 mins Cooking Time: 10 mins 10 mins
Nutrition facts: 456 calories 22 fat
Rating: 5.0/5
( 1 voted )

Ingredients

  • 1 lb shrimp, shelled and deveined
  • 6 cloves garlic, chopped
  • 1 pizza dough
  • 4 tbsp butter
  • 2 tbsp lemon juice
  • 1/4 c. parmigiano Reggiano (Parmesan), grated
  • 1 c. mozzarella, shredded
  • 1 pinch of red pepper flakes (optional)

Instructions

Step 1: In a pan, melt the butter over medium heat. Once the butter has melted, add the garlic to the pan along with red pepper flakes and shrimp. Cook the shrimp for a minute on each side until just cooked through. Then, add the lemon juice.

Step 2: On a baking sheet, spread the dough out and top with the shrimp and lemon butter garlic sauce. Over the shrimp, sprinkle the cheese.

Step 3: Place the baking sheet in a 500 degrees F or 260 degrees C preheated oven and bake for about 10 minutes until the cheese has melted and the crust is crispy and golden brown.

Step 4: Remove the shrimps from the oven when done and sprinkle with parsley. Allow the shrimp scampi pizza to cool before serving. If desired, garnish with some fresh parsley and lemon wedges. Enjoy!

May 9, 2022 0 comment
0 FacebookTwitterPinterestEmail
General Recipes

The Best Banana Cake

by Rebecca May 9, 2022
written by Rebecca

PREP TIME: 20 MINS | COOK TIME: 1 HR 15 MINS | TOTAL TIME: 1 HR 35 MINS | SERVINGS: 15

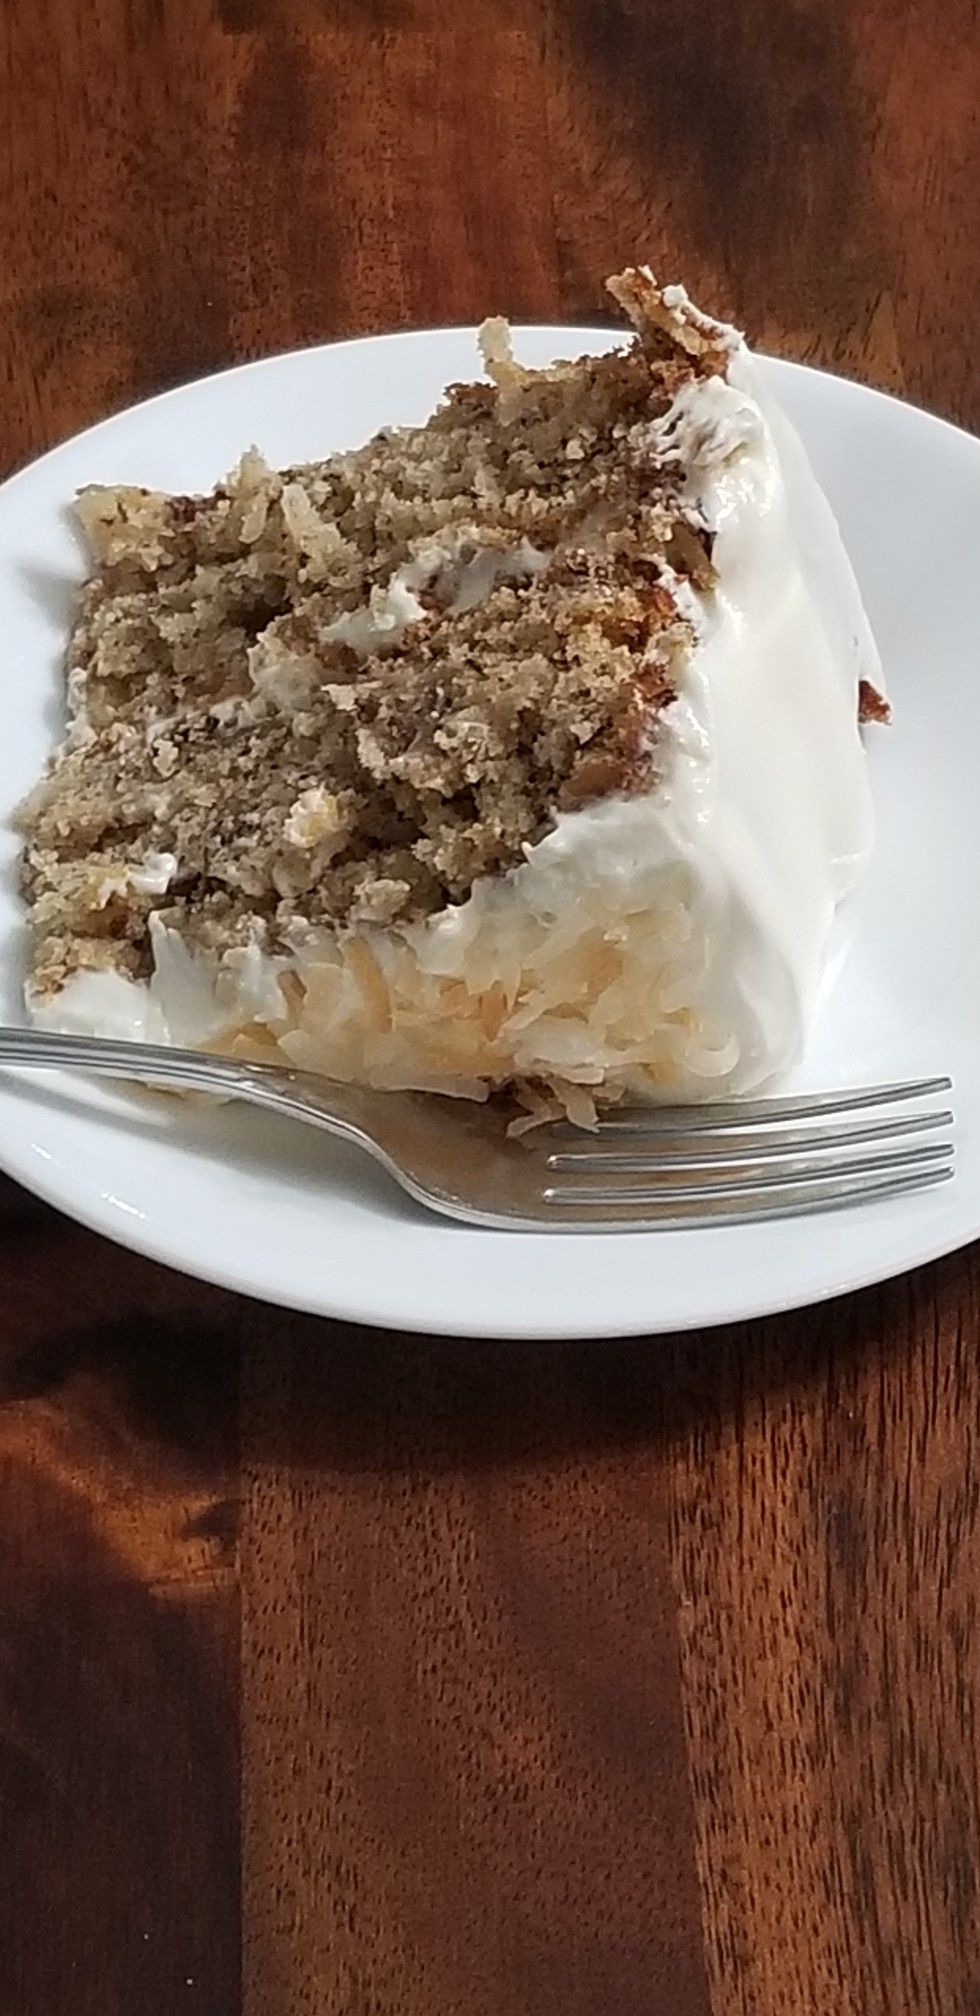
Moist, fluffy, and rich banana cake. It’s the perfect dessert topped with decadent lemon cream cheese frosting. My favorite and the best banana cake recipe you’ll ever get your hands on!

Ingredients

3 large eggs

1 ½ c. milk

2 ½ tbsp lemon juice, divided

⅔ c. butter, softened

¼ tsp salt

1 c. white sugar

½ c. brown sugar

1 ⅓ c. mashed bananas

1 tsp vanilla

1 ½ tsp baking soda

3 c. flour

FROSTING:

⅓ c butter, softened

8 oz. cream cheese

1 ½ tsp lemon zest from 1 lemon

3-3 ½ c. powdered sugar

1 tsp lemon juice

How to make The Best Banana Cake

Step 1: Prepare the oven. Preheat it to 350 degrees. Ready a 9 x 13-inch pan. Grease, flour, and set aside.

Step 2: In a measuring cup, place 1 1/2 tbsp lemon juice and top with 1 1/2 c milk. Keep the cup aside.

Step 3: Combine the mashed banana with 1 tbsp lemon juice until well mixed and set aside.

Step 4: Whisk the butter, brown sugar, and white sugar until well blended. Add in the eggs, one at a time, followed by the vanilla. Beat on high for a few minutes until light and fluffy.

Step 5: In a medium bowl, mix the flour, baking soda, and salt. Add the flour mixture alternately with the milk to the egg mixture until just mixed. Then, fold in the bananas. Pour everything into the prepared pan.

Step 6: Place in the preheated oven and adjust the oven temperature to 300 degrees F. Bake the cake for about 60 to 70 minutes or until a toothpick inserted in the middle of the cake comes out clean. Note that the cooking time varies depending on your oven.

Step 7: Take the pan off the oven when done. To make the cake extra moist, place the pan in the freezer for about 45 minutes. Allow the cake to cool fully before frosting.

FROSTING:

Step 8: Cream the butter and cream cheese until you have a fluffy mixture. Then, add the lemon zest and juice.

Step 9: Slowly add the powdered sugar until you have reached your preferred consistency.

Step 10: Over the cooled cake, spread the frosting.

NUTRITION FACTS:

Calories: 470, Carbohydrates: 70g, Protein: 5g, Fat: 19g, Saturated Fat: 11g, Cholesterol: 84mg, Sodium: 331mg, Potassium: 178mg, Fiber: 1g, Sugar: 48g, Vitamin A: 680IU, Vitamin C: 3.1mg, Calcium: 62mg, Iron: 1.5mg

The Best Banana Cake

Rebecca PREP TIME: 20 MINS | COOK TIME: 1 HR 15 MINS | TOTAL TIME: 1 HR 35 MINS | SERVINGS: 15 Moist, fluffy, and rich banana cake. It’s the perfect… General Recipes The Best Banana Cake European Print This
Serves: 15 Prep Time: 20 mins Cooking Time: 1 hr 15 mins 1 hr 15 mins
Nutrition facts: 470 calories 19 fat
Rating: 5.0/5
( 1 voted )

Ingredients

  • 3 large eggs
  • 1 ½ c. milk
  • 2 ½ tbsp lemon juice, divided
  • ⅔ c. butter, softened
  • ¼ tsp salt
  • 1 c. white sugar
  • ½ c. brown sugar
  • 1 ⅓ c. mashed bananas
  • 1 tsp vanilla
  • 1 ½ tsp baking soda
  • 3 c. flour
  • FROSTING:
  • ⅓ c butter, softened
  • 8 oz. cream cheese
  • 1 ½ tsp lemon zest from 1 lemon
  • 3-3 ½ c. powdered sugar
  • 1 tsp lemon juice

Instructions

Step 1: Prepare the oven. Preheat it to 350 degrees. Ready a 9 x 13-inch pan. Grease, flour, and set aside.

Step 2: In a measuring cup, place 1 1/2 tbsp lemon juice and top with 1 1/2 c milk. Keep the cup aside.

Step 3: Combine the mashed banana with 1 tbsp lemon juice until well mixed and set aside.

Step 4: Whisk the butter, brown sugar, and white sugar until well blended. Add in the eggs, one at a time, followed by the vanilla. Beat on high for a few minutes until light and fluffy.

Step 5: In a medium bowl, mix the flour, baking soda, and salt. Add the flour mixture alternately with the milk to the egg mixture until just mixed. Then, fold in the bananas. Pour everything into the prepared pan.

Step 6: Place in the preheated oven and adjust the oven temperature to 300 degrees F. Bake the cake for about 60 to 70 minutes or until a toothpick inserted in the middle of the cake comes out clean. Note that the cooking time varies depending on your oven.

Step 7: Take the pan off the oven when done. To make the cake extra moist, place the pan in the freezer for about 45 minutes. Allow the cake to cool fully before frosting.

FROSTING:

Step 8: Cream the butter and cream cheese until you have a fluffy mixture. Then, add the lemon zest and juice.

Step 9: Slowly add the powdered sugar until you have reached your preferred consistency.

Step 10: Over the cooled cake, spread the frosting.

May 9, 2022 0 comment
0 FacebookTwitterPinterestEmail
General Recipes

briam: traditional Greek roasted vegetables

by Rebecca May 9, 2022
written by Rebecca

Prep Time: 20 mins | Cook Time: 75 mins | Total Time: 1 hr 35 mins | Yield: Serves 6 or more

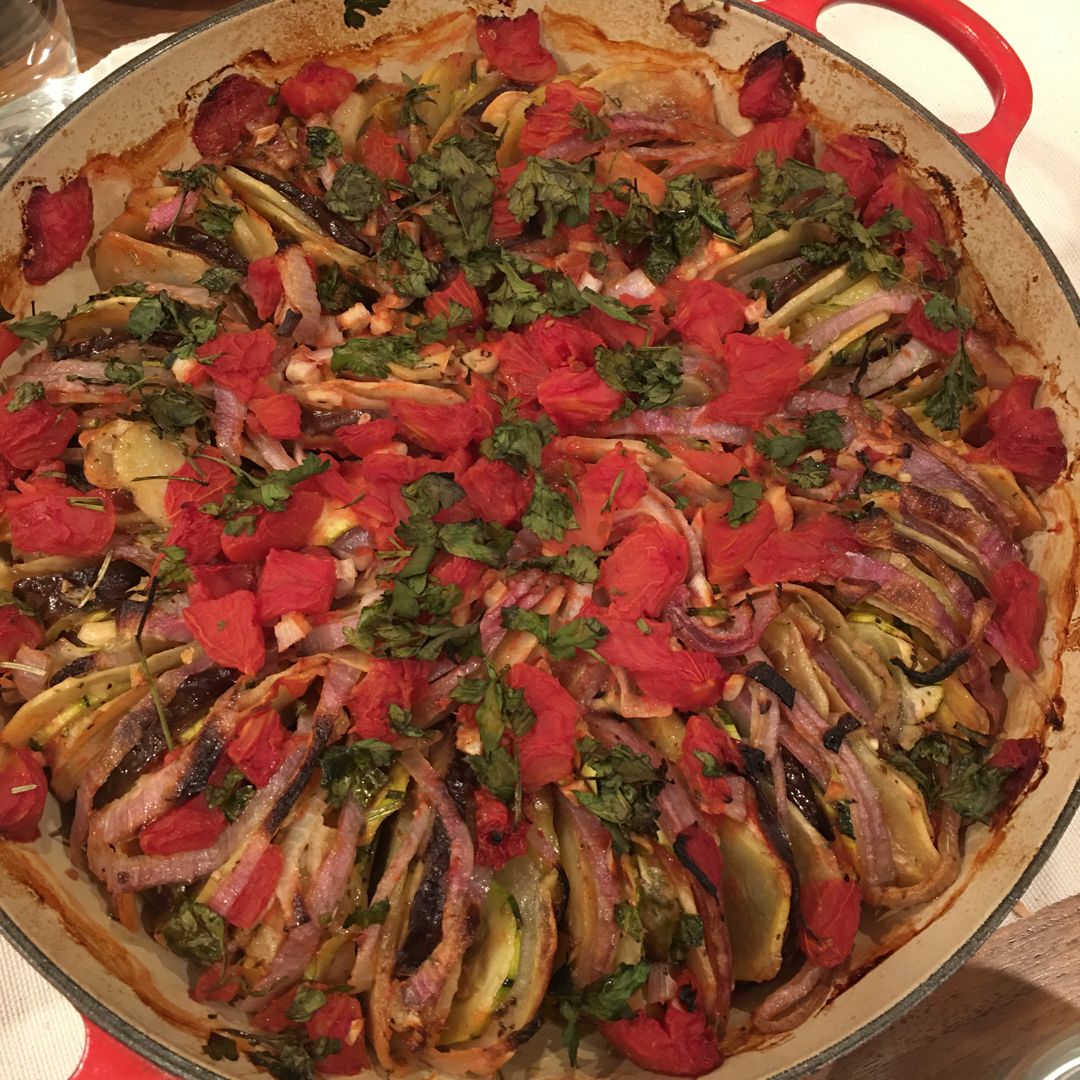
Vegan, healthy, and delicious Traditional Greek Roasted Vegetables. A great main dish by itself or served with crusty or whole wheat pita bread, rice, or your preferred grain. You can also make this the night before and simply cool it fully before storing it in the fridge. Reheat the next day in a medium-heated oven for an easy and quick meal. Or freeze for later.

INGREDIENTS

1 ¼ pounds/570 grams zucchini squash (2 to 3 zucchini), thinly sliced into rounds (about ¼-inch thick)

1 ¼ pounds/570 grams gold potatoes (about 3 medium-size potatoes), peeled and thinly sliced into rounds (about ⅛” thick)

scant 1 teaspoon/1.2 grams dried rosemary

2 teaspoons/3.6 grams dried oregano

½ c/35 grams chopped fresh parsley

4 garlic cloves, minced

1 large red onion or 2 small red onions, thinly sliced into rounds (if large, you’ll want to cut the onion in half first, and then slice)

1 28-ounces/794 grams canned diced tomatoes with juice (no-salt-added organic tomatoes are recommended)

Early Harvest Greek extra virgin olive oil

Salt and pepper

How to make briam: traditional Greek roasted vegetables

Step 1: Ready the oven. Position the oven rack in the middle, then, preheat the oven to 400 degrees F.

Step 2: In a large mixing bowl, place the sliced potatoes and zucchini. Sprinkle with kosher salt, pepper, oregano, and rosemary Then, add the fresh parsley along with garlic and a generous drizzle of extra virgin olive oil. Toss until the veggies are well coated.

Step 3: Pour half of the canned diced tomatoes into a large round pan/skillet (such as an 11-inch oven-safe pan). Spread the diced tomatoes to cover the bottom of the pan. On top, arrange in rows the seasoned potatoes, zucchini, and sliced onions. Pour any of the extra virgin olive oil and garlic mixtures on the veggies, then top with the rest of the diced tomatoes in the can.

Step 4: Tent the pan with foil and place it in the preheated oven. Bake for about 45 minutes. Uncover and resume baking for an additional 30 to 40 minutes or until the veggies have softened & charred and most of the liquid is gone.

Step 5: Take the pan out of the oven when done and serve the roasted veggies warm or at room temperature with extra drizzles of extra virgin olive oil. Enjoy by itself or with crusty or whole wheat pita bread, rice, or your preferred grain.

Nutrition Facts:

Amount Per Serving: Calories 68, Total Fat 2.6g 3%, Saturated Fat 0.4g, Trans Fat 0g, Cholesterol 0mg 0%, Sodium 12.7mg 1%, Total Carbohydrate 10.6g 4%, Sugars 2.8g, Protein 1.7g 3%

briam: traditional Greek roasted vegetables

Rebecca Prep Time: 20 mins | Cook Time: 75 mins | Total Time: 1 hr 35 mins | Yield: Serves 6 or more Vegan, healthy, and delicious Traditional Greek Roasted Vegetables.… General Recipes briam: traditional Greek roasted vegetables European Print This
Serves: 6 Prep Time: 20 mins Cooking Time: 75 mins 75 mins
Nutrition facts: 68 calories 2.6 fat
Rating: 5.0/5
( 1 voted )

Ingredients

  • 1 ¼ pounds/570 grams zucchini squash (2 to 3 zucchini), thinly sliced into rounds (about ¼-inch thick)
  • 1 ¼ pounds/570 grams gold potatoes (about 3 medium-size potatoes), peeled and thinly sliced into rounds (about ⅛” thick)
  • scant 1 teaspoon/1.2 grams dried rosemary
  • 2 teaspoons/3.6 grams dried oregano
  • ½ c/35 grams chopped fresh parsley
  • 4 garlic cloves, minced
  • 1 large red onion or 2 small red onions, thinly sliced into rounds (if large, you'll want to cut the onion in half first, and then slice)
  • 1 28-ounces/794 grams canned diced tomatoes with juice (no-salt-added organic tomatoes are recommended)
  • Early Harvest Greek extra virgin olive oil
  • Salt and pepper

Instructions

Step 1: Ready the oven. Position the oven rack in the middle, then, preheat the oven to 400 degrees F.

Step 2: In a large mixing bowl, place the sliced potatoes and zucchini. Sprinkle with kosher salt, pepper, oregano, and rosemary Then, add the fresh parsley along with garlic and a generous drizzle of extra virgin olive oil. Toss until the veggies are well coated.

Step 3: Pour half of the canned diced tomatoes into a large round pan/skillet (such as an 11-inch oven-safe pan). Spread the diced tomatoes to cover the bottom of the pan. On top, arrange in rows the seasoned potatoes, zucchini, and sliced onions. Pour any of the extra virgin olive oil and garlic mixtures on the veggies, then top with the rest of the diced tomatoes in the can.

Step 4: Tent the pan with foil and place it in the preheated oven. Bake for about 45 minutes. Uncover and resume baking for an additional 30 to 40 minutes or until the veggies have softened & charred and most of the liquid is gone.

Step 5: Take the pan out of the oven when done and serve the roasted veggies warm or at room temperature with extra drizzles of extra virgin olive oil. Enjoy by itself or with crusty or whole wheat pita bread, rice, or your preferred grain.

May 9, 2022 0 comment
0 FacebookTwitterPinterestEmail
General Recipes

ONE PAN CHICKEN AND POTATOES WITH GARLIC PARMESAN SPINACH CREAM SAUCE

by Rebecca May 9, 2022
written by Rebecca

PREP TIME: 5 MINS | COOK TIME: 25 MINS | YIELD: 4 servings

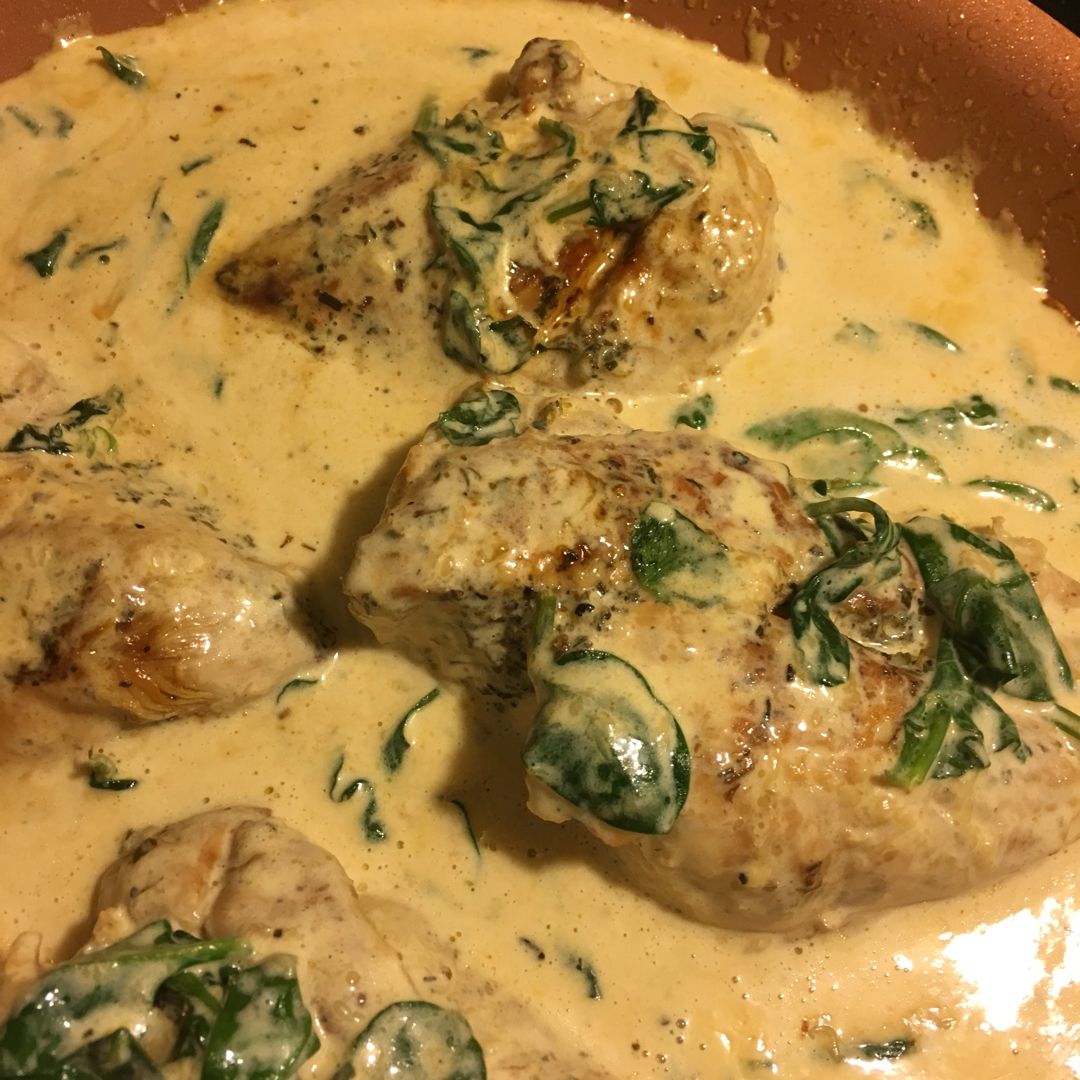
This one-pan meal is super easy and quick to throw together with lush chicken thighs and tender potatoes smothered in an amazing garlic Parmesan spinach cream sauce. A filling and flavor-packed meal perfect for busy weeknights and your entire family!

INGREDIENTS

1 lb chicken thighs, bone-in, skin-on

2 tbsp butter

2 c. baby red potatoes, washed and quartered

1 tsp paprika

2 tsp Italian seasoning (thyme, oregano, basil – combined)

4 garlic cloves, minced

1 c. fresh spinach

2 medium tomatoes, diced

1 tsp crushed red pepper flakes

1 c. Parmesan cheese, grated

1 c (240ml) chicken stock

Salt and pepper

1 c (240ml) half and a half (half cream mixed with half milk, for a lighter cream)

HOW TO MAKE ONE-PAN CHICKEN AND POTATOES WITH GARLIC PARMESAN SPINACH CREAM SAUCE

Step 1: Sprinkle the chicken thighs with 1 tsp Italian seasoning and salt & pepper.

Step 2: In a large skillet or pot, melt 1 tbsp butter over medium-high heat. Once the butter has melted, add the chicken thighs to the skillet/pot, skin-side-down. Sear the chicken for about 4 to 5 minutes on each side until golden brown. When done, drain the excess grease and set the chicken thighs aside.

Step 3: In the now-empty skillet, melt the rest of the butter. Then, add the garlic along with paprika and 1 tsp Italian seasoning. Next, add the potatoes and saute for approximately 2 to 3 minutes.

Step 4: To the potatoes, stir in the tomato and chicken broth. Let everything simmer for about 4 to 5 minutes.

Step 5: Add the half-and-half/cream, grated Parmesan cheese, spinach, and crushed chili pepper flakes. Stir well and decrease the heat. Simmer for about 2 to 3 minutes.

Step 6: Place the chicken thighs back in the skillet, skin-side-up. Allow everything to simmer for about 15 minutes or until the chicken and potatoes are completely cooked. Adjust the salt and pepper according to taste.

Step 7: Take off the heat when done and serve the chicken and potatoes right away with extra red pepper flakes and Parmesan. Enjoy!

Nutrition Facts:

Energy 830.37 kcal, Fat 41.78 g, Protein 79.21 g, Carbs 33.23 g, Saturated Fat 17.59 g, Polyunsat Fat 5.6 g, Monounsat Fat 14.22 g, Sugars 15.92 g, Cholesterol 320.44 mg, Sodium 1030.53 mg, Potassium 1877.05 mg, Fiber 3.65 g

ONE PAN CHICKEN AND POTATOES WITH GARLIC PARMESAN SPINACH CREAM SAUCE

Rebecca PREP TIME: 5 MINS | COOK TIME: 25 MINS | YIELD: 4 servings This one-pan meal is super easy and quick to throw together with lush chicken thighs and tender… General Recipes ONE PAN CHICKEN AND POTATOES WITH GARLIC PARMESAN SPINACH CREAM SAUCE European Print This
Serves: 4 Prep Time: 5 mins Cooking Time: 25 mins 25 mins
Nutrition facts: 830.37 calories 41.78 fat
Rating: 5.0/5
( 1 voted )

Ingredients

  • 1 lb chicken thighs, bone-in, skin-on
  • 2 tbsp butter
  • 2 c. baby red potatoes, washed and quartered
  • 1 tsp paprika
  • 2 tsp Italian seasoning (thyme, oregano, basil – combined)
  • 4 garlic cloves, minced
  • 1 c. fresh spinach
  • 2 medium tomatoes, diced
  • 1 tsp crushed red pepper flakes
  • 1 c. Parmesan cheese, grated
  • 1 c (240ml) chicken stock
  • Salt and pepper
  • 1 c (240ml) half and a half (half cream mixed with half milk, for a lighter cream)

Instructions

Step 1: Sprinkle the chicken thighs with 1 tsp Italian seasoning and salt & pepper.

Step 2: In a large skillet or pot, melt 1 tbsp butter over medium-high heat. Once the butter has melted, add the chicken thighs to the skillet/pot, skin-side-down. Sear the chicken for about 4 to 5 minutes on each side until golden brown. When done, drain the excess grease and set the chicken thighs aside.

Step 3: In the now-empty skillet, melt the rest of the butter. Then, add the garlic along with paprika and 1 tsp Italian seasoning. Next, add the potatoes and saute for approximately 2 to 3 minutes.

Step 4: To the potatoes, stir in the tomato and chicken broth. Let everything simmer for about 4 to 5 minutes.

Step 5: Add the half-and-half/cream, grated Parmesan cheese, spinach, and crushed chili pepper flakes. Stir well and decrease the heat. Simmer for about 2 to 3 minutes.

Step 6: Place the chicken thighs back in the skillet, skin-side-up. Allow everything to simmer for about 15 minutes or until the chicken and potatoes are completely cooked. Adjust the salt and pepper according to taste.

Step 7: Take off the heat when done and serve the chicken and potatoes right away with extra red pepper flakes and Parmesan. Enjoy!

May 9, 2022 0 comment
0 FacebookTwitterPinterestEmail
General Recipes

Vanilla Magic Custard Cake

by Rebecca May 7, 2022
written by Rebecca

Prep Time: 15 mins | Cook Time: 45 mins | Yield: 10 slices

This creamy vanilla magic custard cake is a melt-in-your-mouth dessert that you can easily whip up in minutes using a few simple ingredients. A three-layer cake with a dense cake bottom and custard-like vanilla filling that makes a light, fluffy layer on top. This has been my favorite (and the ultimate) vanilla cake recipe for years! This amazing cake is truly magical. Make sure not to miss this, easy vanilla magic custard cake recipe and try this very soon!

Ingredients

4 eggs-separated

2 c. milk-lukewarm

1/2 c. unsalted butter-melted and slightly cooled

1 1/4 c (150 grams) powdered sugar

1 tbsp water

powdered sugar for dusting

1 c (115 grams) flour

2 tsp vanilla extract

How to make Vanilla Magic Custard Cake

Step 1: Prepare the oven. Preheat it to 325 degrees F. Ready an 8 x 8-inch baking dish. Lightly grease and set aside.

Step 2: Beat the egg whites until stiff peaks form. Set aside.

Step 3: Beat the egg yolks with powdered sugar until pale yellow.

Step 4: Whisk in the melted butter with 1 tbsp water for approximately 2 minutes or until fully blended.

Step 5: Then, beat in the flour until combined.

Step 6: Gradually pour in the milk and vanilla, mixing until well mixed.

Step 7: Next, fold in the egg whites around 1/3 at a time until all the egg whites are added.

Step 8: Into the prepared pan, transfer the batter. Place in the preheated oven and bake for aboutn40 to 60 minutes or until the cake is barely jiggly in the middle. Note that the baking time changes depending on your oven and pan. I suggest beginning checking after 40 minutes. Tent the cake with aluminium foil if the top browns too quickly.

Step 9: Remove the cake from the oven when done and allow it to cool fully before dusting with powdered sugar.

Vanilla Magic Custard Cake

Rebecca Prep Time: 15 mins | Cook Time: 45 mins | Yield: 10 slices This creamy vanilla magic custard cake is a melt-in-your-mouth dessert that you can easily whip up in… General Recipes Vanilla Magic Custard Cake European Print This
Serves: 10 Prep Time: 15 mins Cooking Time: 45 mins 45 mins
Nutrition facts: 200 calories 20 grams fat
Rating: 5.0/5
( 1 voted )

Ingredients

  • 4 eggs-separated
  • 2 c. milk-lukewarm
  • 1/2 c. unsalted butter-melted and slightly cooled
  • 1 1/4 c (150 grams) powdered sugar
  • 1 tbsp water
  • powdered sugar for dusting
  • 1 c (115 grams) flour
  • 2 tsp vanilla extract

Instructions

Step 1: Prepare the oven. Preheat it to 325 degrees F. Ready an 8 x 8-inch baking dish. Lightly grease and set aside.

Step 2: Beat the egg whites until stiff peaks form. Set aside.

Step 3: Beat the egg yolks with powdered sugar until pale yellow.

Step 4: Whisk in the melted butter with 1 tbsp water for approximately 2 minutes or until fully blended.

Step 5: Then, beat in the flour until combined.

Step 6: Gradually pour in the milk and vanilla, mixing until well mixed.

Step 7: Next, fold in the egg whites around 1/3 at a time until all the egg whites are added.

Step 8: Into the prepared pan, transfer the batter. Place in the preheated oven and bake for aboutn40 to 60 minutes or until the cake is barely jiggly in the middle. Note that the baking time changes depending on your oven and pan. I suggest beginning checking after 40 minutes. Tent the cake with aluminium foil if the top browns too quickly.

Step 9: Remove the cake from the oven when done and allow it to cool fully before dusting with powdered sugar.

May 7, 2022 0 comment
0 FacebookTwitterPinterestEmail
General Recipes

Quiche with Sausage Gravy

by Rebecca May 7, 2022
written by Rebecca

Prep Time: 10 mins | Cook Time: 55 mins | Total Time: 1 hr 5 mins | Servings: 6

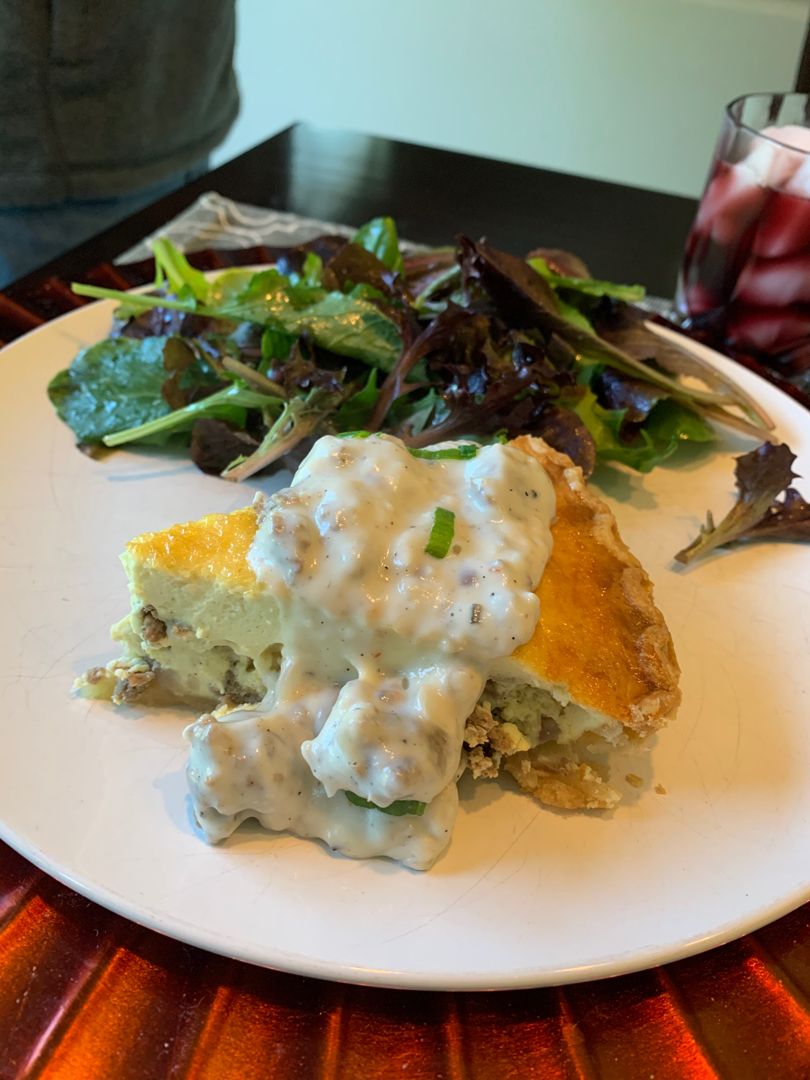
Simplicity at its finest. This quiche is a very simple dish that you can whip up easily. It’s packed with onions and sausage and topped with homemade sausage gravy. A very comforting quiche with sausage gravy that is perfect for everyone!

Ingredients

24 ounces ground breakfast sausage (or use broken up raw breakfast sausage patties)

2 tablespoons canola oil

1 Vidalia onion, finely diced

Sausage Quiche:

6 eggs

1 pie crust dough (or use a deep dish frozen pie shell)

1/2 c. sour cream

fresh cracked black pepper

salt

2/3 of the cooked sausage and onion mixture

1/2 c. heavy whipping cream

Sausage gravy:

2 c. whole milk

fresh cracked black pepper

remaining 1/3 of the cooked sausage and onion mixture

salt

1/4 c. all-purpose flour

How to make Quiche with Sausage Gravy

Step 1: Heat the oil in a cooking pan over medium heat. Then, add the diced onion and cook until translucent. Next, add the sausage and cook until browned, breaking it into small pieces as it cooks. When done, take the pan off the heat.

Quiche:

Step 2: Prepare the oven. Preheat it to 350 degrees.

Step 3: Gently fit the pie crust in a greased deep-dish pie pan.

Step 4: Beat the eggs with sour cream, heavy whipping cream, salt, and pepper until smooth. Then, whisk in 2/3 of the cooked sausage mixture. Pour this over the pie pan, evenly spreading the mixture.

Step 5: Transfer the pie pan to a baking sheet and place it in the preheated oven. Bake for about 40 to 45 minutes.

Sausage gravy:

Step 6: On medium heat, heat the rest of the sausage and sprinkle with flour. Mix well until the sausage is completely coated in flour.

Step 7: Gradually pour in the milk while constantly and slowly stirring until thickened. Then, remove it from the heat.

Step 8: To serve, top each slice of quiche with some gravy. Enjoy!

Nutrition Facts:

Calories: 816 kcal | Carbohydrates: 31g | Protein: 29g | Fat: 63g | Saturated Fat: 23g | Cholesterol: 290mg | Sodium: 979mg | Potassium: 591mg | Fiber: 1g | Sugar: 7g | Vitamin A: 865IU | Vitamin C: 3.6mg | Calcium: 179mg | Iron: 3.3mg

Quiche with Sausage Gravy

Rebecca Prep Time: 10 mins | Cook Time: 55 mins | Total Time: 1 hr 5 mins | Servings: 6 Simplicity at its finest. This quiche is a very simple dish… General Recipes Quiche with Sausage Gravy European Print This
Serves: 6 Prep Time: 10 mins Cooking Time: 55 mins 55 mins
Nutrition facts: 816 calories 63 fat
Rating: 5.0/5
( 1 voted )

Ingredients

  • 24 ounces ground breakfast sausage (or use broken up raw breakfast sausage patties)
  • 2 tablespoons canola oil
  • 1 Vidalia onion, finely diced
  • Sausage Quiche:
  • 6 eggs
  • 1 pie crust dough (or use a deep dish frozen pie shell)
  • 1/2 c. sour cream
  • fresh cracked black pepper
  • salt
  • 2/3 of the cooked sausage and onion mixture
  • 1/2 c. heavy whipping cream
  • Sausage gravy:
  • 2 c. whole milk
  • fresh cracked black pepper
  • remaining 1/3 of the cooked sausage and onion mixture
  • salt
  • 1/4 c. all-purpose flour

Instructions

Step 1: Heat the oil in a cooking pan over medium heat. Then, add the diced onion and cook until translucent. Next, add the sausage and cook until browned, breaking it into small pieces as it cooks. When done, take the pan off the heat.

Quiche:

Step 2: Prepare the oven. Preheat it to 350 degrees.

Step 3: Gently fit the pie crust in a greased deep-dish pie pan.

Step 4: Beat the eggs with sour cream, heavy whipping cream, salt, and pepper until smooth. Then, whisk in 2/3 of the cooked sausage mixture. Pour this over the pie pan, evenly spreading the mixture.

Step 5: Transfer the pie pan to a baking sheet and place it in the preheated oven. Bake for about 40 to 45 minutes.

Sausage gravy:

Step 6: On medium heat, heat the rest of the sausage and sprinkle with flour. Mix well until the sausage is completely coated in flour.

Step 7: Gradually pour in the milk while constantly and slowly stirring until thickened. Then, remove it from the heat.

Step 8: To serve, top each slice of quiche with some gravy. Enjoy!

May 7, 2022 0 comment
0 FacebookTwitterPinterestEmail
General Recipes

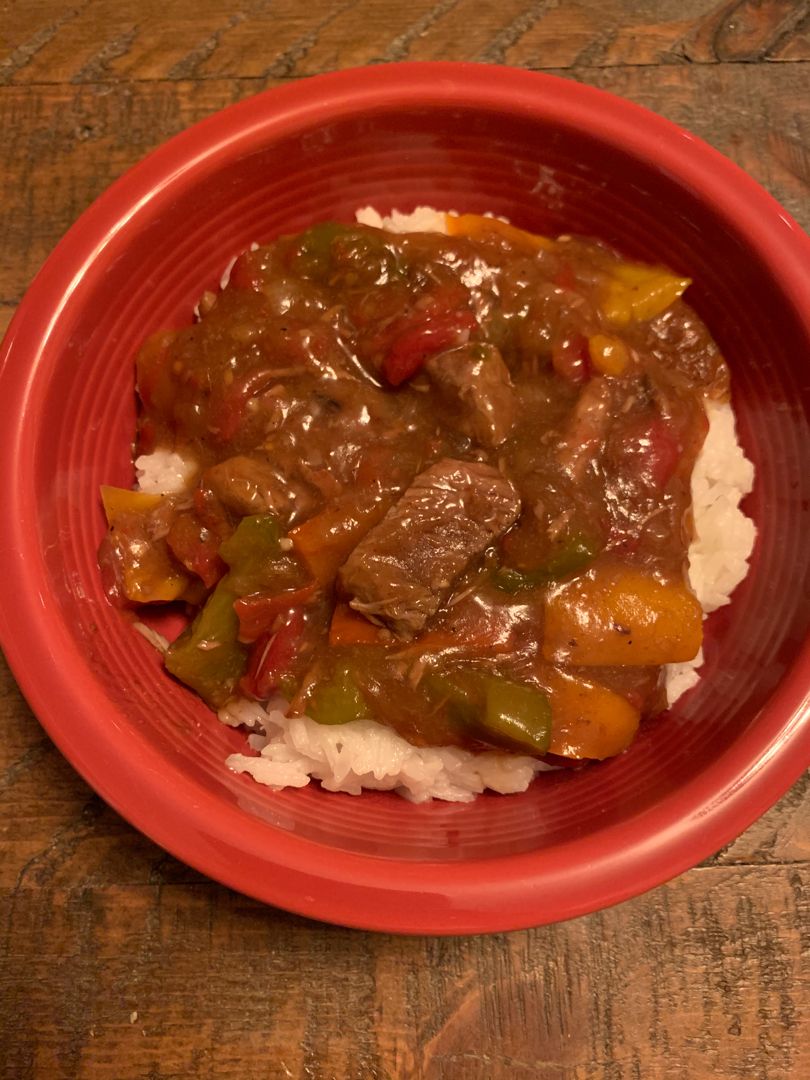
Crock Pot Pepper Steak

by Rebecca May 7, 2022
written by Rebecca

PREP TIME: 15 MINS | COOK TIME: 6 HRS 15 MINS | TOTAL TIME: 6 HRS 30 MINS | SERVINGS: 5

This easy homemade pepper steak is made in a crockpot and cooked low and slow. A mouthwatering tender beef in a rich and thick sauce. Serve this over rice for a filling meal perfect for everyone!

Ingredients

1 large yellow onion

2 lbs sirloin, cut into 2 x ½-inch strips

2 tsp garlic powder

1 tbsp canola oil, grapeseed oil, or a different neutral oil

¼ c. plus 2 tablespoons water, divided

2 red, yellow, or orange bell peppers, cored and cut into ½” strips

2 green bell peppers, cored and cut into ½” strips

¼ c. low sodium soy sauce plus additional to taste

2 tbsp Worcestershire sauce

1 15-oz. can of fire-roasted diced tomatoes with their juices

2 tbsp honey

1 tbsp minced fresh ginger

½ tsp kosher salt

1/2 tsp black pepper

5 tbsp cornstarch divided

Prepared brown rice, quinoa or cauliflower rice, for serving

¼ tsp red pepper flakes plus additional to taste

How to make Crock Pot Pepper Steak

Step 1: In a bowl, place the butter and sprinkle with garlic powder, salt, and black pepper. Mix well.

Step 2: In a large skillet, heat the oil over medium-high heat. To the hot oil, add the beef and cook for about 5 minutes until all sides are lightly browned. To a 6-quart slow cooker, transfer the beef with the accumulated cooking juices.

Step 3: Add the onions to the now-empty skillet. Adjust the heat to high and pour in 1/4 c water, stirring to scrape the browned bits from the bottom of the pan. Cook the onions for about 3 minutes until they start to soften and turn lightly brown and the liquid has cooked off. Into the slow cooker with the beef, transfer the cooked onions.

Step 4: Add the green and red bell peppers along with the tomatoes to the slow cooker. Whisk the soy sauce, Worcestershire sauce, honey, ginger, red pepper flakes, and 3 tbsp cornstarch in a small bowl until well mixed. Then, pour this into the slow cooker.

Step 5: Put the lid on and set to cook for 6 to 7 hours on low or 3 to 4 hours on high until the beef is tender.

Step 6: Place the rest of the cornstarch and 2 tbsp water in a small bowl. Mix well until combined, then stir this into the slow cooker. Set the slow cooker on high and cook for another 10 minutes, uncovered, until the sauce has thickened. Give everything a final stir and adjust the salt, soy sauce, and/or red pepper flakes according to taste.

Step 7: Serve the pepper steak right away over your prepared brown rice garnished with some green onions. Enjoy!

Nutrition Facts:

SERVING: 1(of 5); about 1.5 slightly heaped cups
CALORIES: 396 kcal, CARBOHYDRATES: 29g, PROTEIN: 42g, FAT: 11g, SATURATED FAT: 3g, CHOLESTEROL: 111mg, POTASSIUM: 928mg, FIBER: 3g, SUGAR: 14g, VITAMIN A: 2036IU, VITAMIN C: 103mg, CALCIUM: 99mg, IRON: 5mg

Crock Pot Pepper Steak

Rebecca PREP TIME: 15 MINS | COOK TIME: 6 HRS 15 MINS | TOTAL TIME: 6 HRS 30 MINS | SERVINGS: 5 This easy homemade pepper steak is made in a… General Recipes Crock Pot Pepper Steak European Print This
Serves: 5 Prep Time: 15 mins1 Cooking Time: 6 hrs 15 mins 6 hrs 15 mins
Nutrition facts: 396 calories 11 fat
Rating: 5.0/5
( 1 voted )

Ingredients

  • 1 large yellow onion
  • 2 lbs sirloin, cut into 2 x ½-inch strips
  • 2 tsp garlic powder
  • 1 tbsp canola oil, grapeseed oil, or a different neutral oil
  • ¼ c. plus 2 tablespoons water, divided
  • 2 red, yellow, or orange bell peppers, cored and cut into ½” strips
  • 2 green bell peppers, cored and cut into ½” strips
  • ¼ c. low sodium soy sauce plus additional to taste
  • 2 tbsp Worcestershire sauce
  • 1 15-oz. can of fire-roasted diced tomatoes with their juices
  • 2 tbsp honey
  • 1 tbsp minced fresh ginger
  • ½ tsp kosher salt
  • 1/2 tsp black pepper
  • 5 tbsp cornstarch divided
  • Prepared brown rice, quinoa or cauliflower rice, for serving
  • ¼ tsp red pepper flakes plus additional to taste

Instructions

Step 1: In a bowl, place the butter and sprinkle with garlic powder, salt, and black pepper. Mix well.

Step 2: In a large skillet, heat the oil over medium-high heat. To the hot oil, add the beef and cook for about 5 minutes until all sides are lightly browned. To a 6-quart slow cooker, transfer the beef with the accumulated cooking juices.

Step 3: Add the onions to the now-empty skillet. Adjust the heat to high and pour in 1/4 c water, stirring to scrape the browned bits from the bottom of the pan. Cook the onions for about 3 minutes until they start to soften and turn lightly brown and the liquid has cooked off. Into the slow cooker with the beef, transfer the cooked onions.

Step 4: Add the green and red bell peppers along with the tomatoes to the slow cooker. Whisk the soy sauce, Worcestershire sauce, honey, ginger, red pepper flakes, and 3 tbsp cornstarch in a small bowl until well mixed. Then, pour this into the slow cooker.

Step 5: Put the lid on and set to cook for 6 to 7 hours on low or 3 to 4 hours on high until the beef is tender.

Step 6: Place the rest of the cornstarch and 2 tbsp water in a small bowl. Mix well until combined, then stir this into the slow cooker. Set the slow cooker on high and cook for another 10 minutes, uncovered, until the sauce has thickened. Give everything a final stir and adjust the salt, soy sauce, and/or red pepper flakes according to taste.

Step 7: Serve the pepper steak right away over your prepared brown rice garnished with some green onions. Enjoy!

May 7, 2022 0 comment
0 FacebookTwitterPinterestEmail
Newer Posts
Older Posts

Popular Posts

  • 1

    Crispy Crunchy Parmesan Potatoes

    March 21, 2020
  • 2

    CROCK POT SMOTHERED PORK CHOPS

    March 21, 2020
  • Facebook
  • Twitter

@2019 - All Right Reserved.


Back To Top