Cook it once
  • Home
  • Privacy Policy
  • Recipes
    • KETO
    • LC
    • WW
  • Tips
  • Contact
Cook it once
  • Home
  • Privacy Policy
  • Recipes
    • KETO
    • LC
    • WW
  • Tips
  • Contact
Category:

General Recipes

General Recipes

Bill’s Chocolate Chip Cookies

by Rebecca May 11, 2022
written by Rebecca

Yield: 18 big bakery-style cookies

If you are looking for the best chocolate chip cookies, then you find the perfect recipe! These simple recipe yields delicious soft and chewy cookies. Feel free to make your cookies thin and chewy or thick and chewy.

Ingredients

2 eggs

1 c. sugar

2 sticks of butter, melted

2 tsp vanilla

3 c. flour

1 c. brown sugar

1 tsp baking soda

18 oz. (1 1/2 packages) chocolate chips, semi-sweet or milk chocolate, or a combination

1 tsp salt

How to make Bill’s Chocolate Chip Cookies

Step 1: Prepare the oven. Preheat it to 325 degrees F.

Step 2: Combine the melted butter and sugar. Then, add the vanilla along with the eggs and mix well until blended.

Step 3: Place the flour, soda, and salt in another bowl. Stir this into the butter-sugar mixture. Then, fold in the chocolate chips.

For thinner cookies:

If using the dough right away, portion the dough in scant 1/3 c measures. Shape the dough gently into a ball and put it on a cookie sheet. Make sure the cookies are about 4 1/2 inches across.

You can tear the balls of dough in half and place half on top of the other, torn edge facing upward. Into a round shape, gently reshape the bottom portion back. This step is optional but highly recommended.

Place in the preheated oven and bake for approximately 11 to 12 minutes or until the edges are firm. Take the cookies out of the oven and let them cool on the cookie sheet. The cookies will be soft and chewy.

Or bake for 3 to 4 minutes longer for crispier cookies until the tops are golden brown. Take the cookies out of the oven. As soon as the cookies are cool enough to handle, remove them from the cookie sheet.

For thicker cookies:

You can portion the dough and place the raw cookies in the fridge for at least 2 hours or overnight before baking.

Take the dough out of the fridge and tear the balls of dough in half. Place half on top of the other, torn edges facing upward. Then, reshape the portion back gently into a round.

Bake the cookie dough for approximately 12 to 13 minutes or until the edges are firm. Take them out of the oven and allow the cookies to sit on the cookie sheet until cool. This will give you soft and chewy cookies.

Or bake for 3 to 4 minutes more for crispier cookies until the tops are golden brown. Once the cookies are cool enough to handle, remove them from the cookie sheet.

Bill’s Chocolate Chip Cookies

Rebecca Yield: 18 big bakery-style cookies If you are looking for the best chocolate chip cookies, then you find the perfect recipe! These simple recipe yields delicious soft and chewy cookies.… General Recipes Bill’s Chocolate Chip Cookies European Print This
Serves: 18
Nutrition facts: 200 calories 20 grams fat
Rating: 4.0/5
( 2 voted )

Ingredients

  • 2 eggs
  • 1 c. sugar
  • 2 sticks of butter, melted
  • 2 tsp vanilla
  • 3 c. flour
  • 1 c. brown sugar
  • 1 tsp baking soda
  • 18 oz. (1 1/2 packages) chocolate chips, semi-sweet or milk chocolate, or a combination
  • 1 tsp salt

Instructions

Step 1: Prepare the oven. Preheat it to 325 degrees F.

Step 2: Combine the melted butter and sugar. Then, add the vanilla along with the eggs and mix well until blended.

Step 3: Place the flour, soda, and salt in another bowl. Stir this into the butter-sugar mixture. Then, fold in the chocolate chips.

For thinner cookies:

If using the dough right away, portion the dough in scant 1/3 c measures. Shape the dough gently into a ball and put it on a cookie sheet. Make sure the cookies are about 4 1/2 inches across.

You can tear the balls of dough in half and place half on top of the other, torn edge facing upward. Into a round shape, gently reshape the bottom portion back. This step is optional but highly recommended.

Place in the preheated oven and bake for approximately 11 to 12 minutes or until the edges are firm. Take the cookies out of the oven and let them cool on the cookie sheet. The cookies will be soft and chewy.

Or bake for 3 to 4 minutes longer for crispier cookies until the tops are golden brown. Take the cookies out of the oven. As soon as the cookies are cool enough to handle, remove them from the cookie sheet.

For thicker cookies:

You can portion the dough and place the raw cookies in the fridge for at least 2 hours or overnight before baking.

Take the dough out of the fridge and tear the balls of dough in half. Place half on top of the other, torn edges facing upward. Then, reshape the portion back gently into a round.

Bake the cookie dough for approximately 12 to 13 minutes or until the edges are firm. Take them out of the oven and allow the cookies to sit on the cookie sheet until cool. This will give you soft and chewy cookies.

Or bake for 3 to 4 minutes more for crispier cookies until the tops are golden brown. Once the cookies are cool enough to handle, remove them from the cookie sheet.

May 11, 2022 0 comment
0 FacebookTwitterPinterestEmail
General Recipes

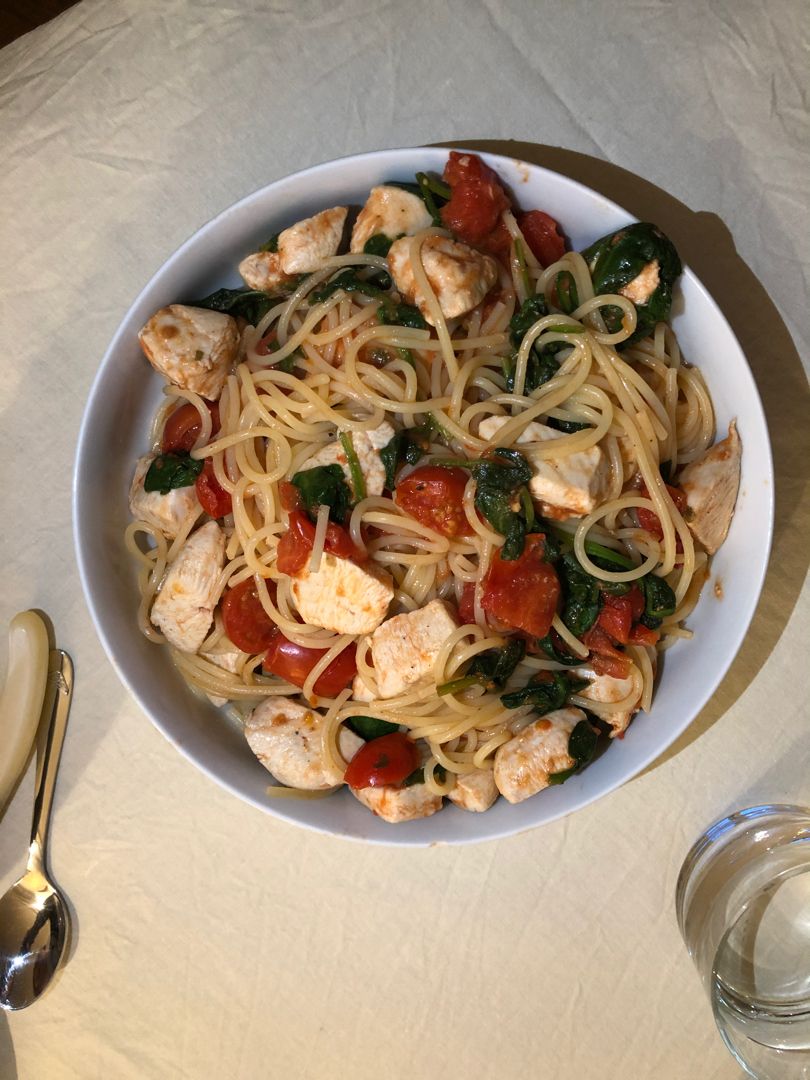
Tomato Spinach Chicken Spaghetti

by Rebecca May 11, 2022
written by Rebecca

PREP TIME: 10 MINS | COOK TIME: 20 MINS | TOTAL TIME: 30 MINS | SERVINGS: 4

Impressive and tasty tomato, spinach chicken spaghetti with loads of fresh ingredients. This is a family favorite weeknight meal that you can easily make in under thirty minutes.

Ingredients

½ pound chicken boneless and skinless (preferably, boneless, skinless thighs), chopped

2 tbsp olive oil, drained sun-dried tomatoes

¼ c. sun-dried tomatoes, chopped, drained of oil

¼ c. fresh basil leaves, chopped

4 Roma tomatoes, chopped

3 garlic cloves, chopped

8 ounces of spinach fresh

3 tbsp olive oil (use high-quality olive oil or oil from the sun-dried tomatoes jar)

8 ounces spaghetti pasta

¼ tsp salt

¼ tsp red pepper flakes

How to make Tomato Spinach Chicken Spaghetti

Step 1: To a large skillet, add the chopped sun-dried tomatoes and 2 tbsp of olive oil, drained from the sun-dried tomatoes over medium-low heat. Next, add the chicken, red pepper flakes, and salt. Cook for about 5 minutes over medium heat until the chicken is no longer pink and cooked through.

Step 2: To the skillet with the chicken, add the chopped tomatoes, chopped fresh basil leaves, fresh spinach, and chopped garlic. Continue to cook for another 3 to 5 minutes over medium heat until the spinach has slightly wilted and the tomatoes release some of their juices. Then, take the skillet off the heat. If needed, add extra salt to taste and put the lid on.

Step 3: Following the package directions, cook the pasta until al dente. Drain when done and toss in the cooked and drained pasta to the skillet with the chicken and veggies.

Step 4: Return the skillet over low heat. Stir well and season with more salt and pepper according to taste. Then, remove it from the heat.

Step 5: Drizzle the dish with higher-quality olive oil. This step is optional but highly recommended. Alternately, you can add extra olive oil out of the sun-dried tomatoes jar.

Nutrition Facts:

Amount per Serving: Calories 532, Fat 27g 42%, Saturated Fat 5g 31%, Cholesterol 42mg 14%, Sodium 401mg 17%, Potassium 941mg 27%, Carbohydrates 51g 17%, Fiber 4g 17%, Sugar 6g 7%, Protein 21g 42%, Vitamin A 6090IU 122%, Vitamin C 29mg 35%, Calcium 95mg 10%, Iron 3.7mg 21%

Tomato Spinach Chicken Spaghetti

Rebecca PREP TIME: 10 MINS | COOK TIME: 20 MINS | TOTAL TIME: 30 MINS | SERVINGS: 4 Impressive and tasty tomato, spinach chicken spaghetti with loads of fresh ingredients. This… General Recipes Tomato Spinach Chicken Spaghetti European Print This
Serves: 4 Prep Time: 10 mins Cooking Time: 20 mins 20 mins
Nutrition facts: 532 calories 27 fat
Rating: 5.0/5
( 1 voted )

Ingredients

  • ½ pound chicken boneless and skinless (preferably, boneless, skinless thighs), chopped
  • 2 tbsp olive oil, drained sun-dried tomatoes
  • ¼ c. sun-dried tomatoes, chopped, drained of oil
  • ¼ c. fresh basil leaves, chopped
  • 4 Roma tomatoes, chopped
  • 3 garlic cloves, chopped
  • 8 ounces of spinach fresh
  • 3 tbsp olive oil (use high-quality olive oil or oil from the sun-dried tomatoes jar)
  • 8 ounces spaghetti pasta
  • ¼ tsp salt
  • ¼ tsp red pepper flakes

Instructions

Step 1: To a large skillet, add the chopped sun-dried tomatoes and 2 tbsp of olive oil, drained from the sun-dried tomatoes over medium-low heat. Next, add the chicken, red pepper flakes, and salt. Cook for about 5 minutes over medium heat until the chicken is no longer pink and cooked through.

Step 2: To the skillet with the chicken, add the chopped tomatoes, chopped fresh basil leaves, fresh spinach, and chopped garlic. Continue to cook for another 3 to 5 minutes over medium heat until the spinach has slightly wilted and the tomatoes release some of their juices. Then, take the skillet off the heat. If needed, add extra salt to taste and put the lid on.

Step 3: Following the package directions, cook the pasta until al dente. Drain when done and toss in the cooked and drained pasta to the skillet with the chicken and veggies.

Step 4: Return the skillet over low heat. Stir well and season with more salt and pepper according to taste. Then, remove it from the heat.

Step 5: Drizzle the dish with higher-quality olive oil. This step is optional but highly recommended. Alternately, you can add extra olive oil out of the sun-dried tomatoes jar.

May 11, 2022 0 comment
0 FacebookTwitterPinterestEmail
General Recipes

3-INGREDIENT CRESCENT SAUSAGE BITES

by Rebecca May 11, 2022
written by Rebecca

PREP TIME: 10 MINS | COOK TIME: 20 MINS | TOTAL TIME: 30 MINS | YIELD: About 20 Bites

These three-ingredient crescent sausage bites are the best party food. A must-try if you are searching for another party food for your next get-together. Incredibly easy to whip up and ready in thirty minutes. You can also serve these crescent sausage bites with some fresh fruits for breakfast, brunch, or dinner.

This easy and quick recipe has been my ultimate favorite for years! My go-to party food and my daughter’s favorite brunch or dinner with fruit salad. We seldom get any leftovers, but if we do, my family is sure to devour them the next day. These crescent sausage bites are insanely delicious, I swear we can eat these every day!

INGREDIENTS

2 packages of crescent rolls

1 pound hot sausage (pork or turkey)

Dash salt & ground black pepper

1 (8 ounces) package of cream cheese

HOW TO MAKE 3-INGREDIENT CRESCENT SAUSAGE BITES

Step 1: Cook the sausage in a saute pan until no longer pink. Drain the excess grease when done. Then, add a dash of salt and pepper to the sausage in the pan and stir in the cream cheese until melted.

Step 2: On a baking sheet, unroll a package of crescent rolls. Gently press the seams together using your fingers to seal. Over the crescent roll dough, evenly spread the sausage mixture, making sure to leave around half-inch border on the edges.

Step 3: Unroll the rest of the package of crescent rolls and lay it over the sausage mixture. Press the seal on the edges.

Step 4: Place in the oven and bake for about 15 to 20 minutes at 375 degrees or until the crescent roll dough turned golden brown.

Step 5: Remove the dish out of the oven and slice it into small squares before serving. Enjoy the sausage bites as party food. Or as an easy breakfast, brunch, or dinner with some fresh fruits.

3-INGREDIENT CRESCENT SAUSAGE BITES

Rebecca PREP TIME: 10 MINS | COOK TIME: 20 MINS | TOTAL TIME: 30 MINS | YIELD: About 20 Bites These three-ingredient crescent sausage bites are the best party food. A… General Recipes 3-INGREDIENT CRESCENT SAUSAGE BITES European Print This
Serves: 20 Prep Time: 10 mins Cooking Time: 20 mins 20 mins
Nutrition facts: 200 calories 20 grams fat
Rating: 4.5/5
( 2 voted )

Ingredients

  • 2 packages of crescent rolls
  • 1 pound hot sausage (pork or turkey)
  • Dash salt & ground black pepper
  • 1 (8 ounces) package of cream cheese

Instructions

Step 1: Cook the sausage in a saute pan until no longer pink. Drain the excess grease when done. Then, add a dash of salt and pepper to the sausage in the pan and stir in the cream cheese until melted.

Step 2: On a baking sheet, unroll a package of crescent rolls. Gently press the seams together using your fingers to seal. Over the crescent roll dough, evenly spread the sausage mixture, making sure to leave around half-inch border on the edges.

Step 3: Unroll the rest of the package of crescent rolls and lay it over the sausage mixture. Press the seal on the edges.

Step 4: Place in the oven and bake for about 15 to 20 minutes at 375 degrees or until the crescent roll dough turned golden brown.

Step 5: Remove the dish out of the oven and slice it into small squares before serving. Enjoy the sausage bites as party food. Or as an easy breakfast, brunch, or dinner with some fresh fruits.

May 11, 2022 0 comment
0 FacebookTwitterPinterestEmail
General Recipes

Vegan Buffalo Chickpea Wraps

by Rebecca May 11, 2022
written by Rebecca

Prep Time: 10 mins | Cook Time: 20 mins | Total Time: 30 mins | Servings: 2 Wraps

These vegan buffalo chickpea wraps are the perfect grab-and-go lunch packed with salt & pepper chickpeas, guacamole, crunchy romaine, tangy ranch, and hot buffalo sauce. A crowd-favorite, kid-friendly, and one of the best wraps you’ll ever make!

I especially love this vegan wrap because of the chickpeas. Chickpeas are dried and roasted with salt and pepper before adding them to the buffalo sauce. This step guarantees that the chickpeas stay meaty and a little crispy. Then, add in the guacamole, a little bit of ranch, and some veggies. All these make these vegan buffalo chickpea wraps stand out! Try this easy recipe very soon. I know you’ll love it as we do!

Ingredients

Chickpeas:

Drizzle Extra Virgin Olive Oil

1/4 teaspoon Black Pepper

1/4 teaspoon salt

1 15-ounces Can of Chickpeas rinsed and dried

Wraps:

Romaine Lettuce

Red Onion, sliced or chopped

2 Whole Grain Tortillas or Wraps

Guacamole

Your Favorite Buffalo Sauce (like Frank’s)

Vegan Ranch Dressing

How to make Vegan Buffalo Chickpea Wraps

Step 1: Prepare the oven. Preheat it to 425 degrees F.

Step 2: Rinse the chickpeas and dry well, making sure the chickpeas are completely dry. If needed, remove any loose skins.

Step 3: Place the chickpeas in a bowl. Toss with oil, salt, and pepper until evenly coated. Spread the chickpeas on a baking sheet lined with parchment paper. Place in the preheated oven and bake for about 20 to 25 minutes or until the chickpeas are crisp.

Step 4: Take the baking sheet out of the oven when done and let them cool a bit.

Step 5: Start assembling the wraps once the chickpeas are slightly cooled. On two tortillas or wraps, spread the guacamole. On top, add the chickpeas followed by the onion, and drizzle with a little vegan ranch and your preferred amount of buffalo sauce. Feel free to add as much romaine as you desire. Then, wrap up the tortillas/wraps.

Step 6: Serve right away. Enjoy!

Vegan Buffalo Chickpea Wraps

Rebecca Prep Time: 10 mins | Cook Time: 20 mins | Total Time: 30 mins | Servings: 2 Wraps These vegan buffalo chickpea wraps are the perfect grab-and-go lunch packed with… General Recipes Vegan Buffalo Chickpea Wraps European Print This
Serves: 2 Prep Time: 10 mins Cooking Time: 20 mins 20 mins
Nutrition facts: 200 calories 20 grams fat
Rating: 5.0/5
( 1 voted )

Ingredients

  • Chickpeas:
  • Drizzle Extra Virgin Olive Oil
  • 1/4 teaspoon Black Pepper
  • 1/4 teaspoon salt
  • 1 15-ounces Can of Chickpeas rinsed and dried
  • Wraps:
  • Romaine Lettuce
  • Red Onion, sliced or chopped
  • 2 Whole Grain Tortillas or Wraps
  • Guacamole
  • Your Favorite Buffalo Sauce (like Frank's)
  • Vegan Ranch Dressing

Instructions

Step 1: Prepare the oven. Preheat it to 425 degrees F.

Step 2: Rinse the chickpeas and dry well, making sure the chickpeas are completely dry. If needed, remove any loose skins.

Step 3: Place the chickpeas in a bowl. Toss with oil, salt, and pepper until evenly coated. Spread the chickpeas on a baking sheet lined with parchment paper. Place in the preheated oven and bake for about 20 to 25 minutes or until the chickpeas are crisp.

Step 4: Take the baking sheet out of the oven when done and let them cool a bit.

Step 5: Start assembling the wraps once the chickpeas are slightly cooled. On two tortillas or wraps, spread the guacamole. On top, add the chickpeas followed by the onion, and drizzle with a little vegan ranch and your preferred amount of buffalo sauce. Feel free to add as much romaine as you desire. Then, wrap up the tortillas/wraps.

Step 6: Serve right away. Enjoy!

May 11, 2022 0 comment
0 FacebookTwitterPinterestEmail
General Recipes

Skillet Mac and Cheese with Sausage and Bell Peppers

by Rebecca May 11, 2022
written by Rebecca

PREP TIME: 15 MINS | COOK TIME: 30 MINS | TOTAL TIME: 45 MINS | SERVINGS: 6

This one-skillet Mac & cheese loaded with sausage and bell peppers is another must-try! An amazing weeknight meal that is family and kids approved. Easily throw this together using only a few simple ingredients in under forty-five minutes! Perfect for busy weeknights and the cleanup after dinner is so easy! And this homemade skillet Mac and cheese is also great for packing lunches.

I’ve made this skillet Mac and cheese with sausage and bell peppers countless times and this never fails to impress everyone, especially my kids. It’s one of our favorite meal rotations. If you are making this the first, I promise it’s as easy as eating a whole plate of this delicious Mac & cheese in a jiffy!

For this recipe, I used both red and green bell peppers. You can use either or both just like I do. Before serving, garnish this amazing skillet Mac and cheese with some chopped green onions.

Ingredients

2 bell peppers, diced

18 ounces of marinara sauce

1 pound pork sausage

⅓ c. half and half

8 ounces elbow macaroni, dry

⅓ c. mozzarella cheese

18 ounces water

How to make Skillet Mac and Cheese with Sausage and Bell Peppers

Step 1: Cook the sausage in a large skillet over medium heat until no longer pink. When done, drain the excess grease off.

Step 2: To the skillet with the sausage, add the diced bell peppers, dried elbow macaroni, marinara sauce, and water. Bring everything to a boil, then decrease the heat. Put the lid on and simmer everything for approximately 20 minutes, stirring often, until the macaroni is tender.

Step 3: Add the half-and-half along with sprinkles of cheese. Stir well. Then, take the skillet off the heat. Replace the lid and allow the Mac and cheese to sit for around 2 minutes or until the cheese has melted.

Nutrition Facts:

Amount per Serving: Calories 436, Fat 23g 35%, Saturated Fat 8g 50%, Cholesterol 64mg 21%, Sodium 978mg 43%, Potassium 647mg 18%, Carbohydrates 35g 12%, Fiber 3g 13%, Sugar 6g 7%, Protein 19g 38%, Vitamin A 1210IU 24%, Vitamin C 47.8mg 58%, Calcium 76mg 8%, Iron 2.4mg 13%

Rebecca PREP TIME: 15 MINS | COOK TIME: 30 MINS | TOTAL TIME: 45 MINS | SERVINGS: 6 This one-skillet Mac & cheese loaded with sausage and bell peppers is another… General Recipes Skillet Mac and Cheese with Sausage and Bell Peppers European Print This
Nutrition facts: 200 calories 20 grams fat
Rating: 5.0/5
( 1 voted )
May 11, 2022 0 comment
0 FacebookTwitterPinterestEmail
General Recipes

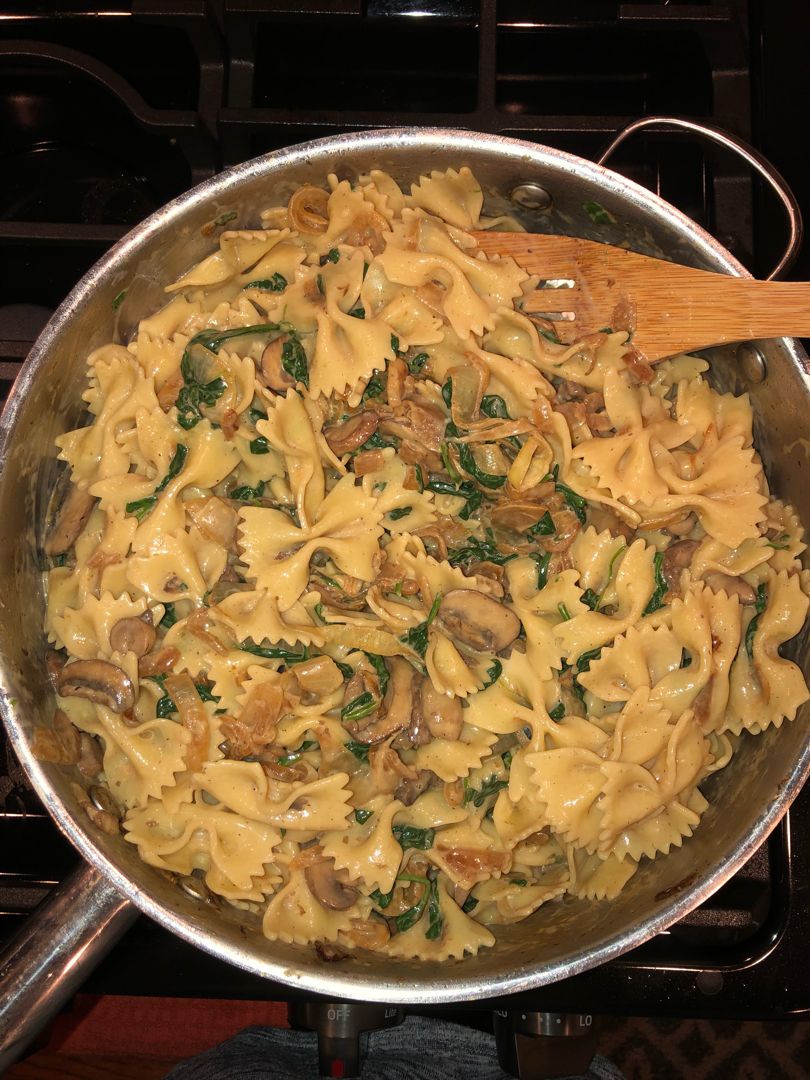
Farfalle Pasta with Spinach, Mushrooms, and Caramelized Onions

by Rebecca May 11, 2022
written by Rebecca

PREP TIME: 20 MINS | COOK TIME: 30 MINS | TOTAL TIME: 50 MINS | SERVINGS: 4 people

This Farfalle Pasta is the perfect meatless Italian meal! It’s packed with spinach, mushrooms, and caramelized onions in a daring, mouthwatering, rich, and buttery Parmesan sauce! Serve this by itself or topped with grilled chicken for a very comforting and delicious weeknight meal excellent for your entire family!

Ingredients

Caramelized onions:

3 yellow onions, large, sliced

1 tablespoon olive oil

1 tablespoon balsamic vinegar

¼ teaspoon salt

Creamy pasta sauce:

10 oz mushrooms, sliced (I used button mushrooms)

1 tablespoon olive oil

1 cup half-and-half

6 oz spinach

¼ teaspoon salt

1 cup Parmesan cheese, shredded

Pasta:

8 oz farfalle pasta

How to make Farfalle Pasta with Spinach, Mushrooms, and Caramelized Onions

Caramelize onions:

Step 1: In a large skillet, heat 1 tbsp olive oil over medium-high heat. Once the oil is hot, add the sliced onions and cook for about 10 minutes over high heat, stirring often using a spatula, until the onions begin to brown.

Step 2: Adjust the heat to medium and cook the onions for another 10 minutes while stirring. At this point, season the onions with a pinch of salt.

Step 3: Over medium or low heat, continue to cook the onions for 10 minutes more, stirring often so the onions don’t stick to the bottom of the pan. You should have cooked the onions for a total of 30 minutes.

Step 4: Take the skillet off the heat and sprinkle the onions with a light amount of balsamic vinegar.

Step 5: Stir the onions using a spatula, scraping the bottom of the pan and coating the onions with balsamic vinegar. To a plate, transfer the caramelized onions when done.

Mushrooms and spinach:

Step 6: In the now-empty skillet, heat 1 tbsp olive oil over medium heat. To the hot skillet, add the sliced mushrooms and season with a pinch of salt. Cook for about 5 minutes, stirring the mushrooms often until tender.

Step 7: To the mushrooms in the skillet, add the fresh spinach. Stir and cook over low heat until the spinach has started to wilt.

Creamy pasta sauce:

Step 8: To the skillet with the mushrooms and spinach, add the half-and-half. Bring everything to a quick boil and instantly decreases the heat to a simmer.

Step 9: Next, sprinkle 2/3 c of shredded Parmesan cheese and 1/4 tsp salt. Stir constantly until the cheese has melted.
Step 10: Return the caramelized onions to the skillet.

Pasta:

Step 11: Following the package directions, cook the pasta. Drain when done and toss the cooked and drained farfalle pasta into the cream sauce. Reheat for a few minutes.

Step 12: You can add a little amount of half-and-half to thin out the sauce. Or a small amount of shredded Parmesan cheese if the sauce is too thick.

Step 13: Serve the Farfalle Pasta with Spinach, Mushrooms, and Caramelized Onions right away with extra sprinkles of Parmesan cheese. Enjoy!

Nutrition Facts:

Amount per Serving: Calories 511, Fat 22g 34%, Saturated Fat 10g 63%, Polyunsaturated Fat 2g, Monounsaturated Fat 9g, Cholesterol 39mg 13%, Sodium 761mg 33%, Potassium 816mg 23%, Carbohydrates 58g 19%, Fiber 5g 21%, Sugar 7g 8%, Protein 22g 44%, Vitamin A 4399IU 88%, Vitamin C 20mg 24%, Calcium 436mg 44%, Iron 3mg 17%

Farfalle Pasta with Spinach, Mushrooms, and Caramelized Onions

Rebecca PREP TIME: 20 MINS | COOK TIME: 30 MINS | TOTAL TIME: 50 MINS | SERVINGS: 4 people This Farfalle Pasta is the perfect meatless Italian meal! It’s packed with… General Recipes Farfalle Pasta with Spinach, Mushrooms, and Caramelized Onions European Print This
Serves: 4 Prep Time: 20 mins Cooking Time: 30 mins 30 mins
Nutrition facts: 511 calories 22 fat
Rating: 5.0/5
( 1 voted )

Ingredients

  • Caramelized onions:
  • 3 yellow onions, large, sliced
  • 1 tablespoon olive oil
  • 1 tablespoon balsamic vinegar
  • ¼ teaspoon salt
  • Creamy pasta sauce:
  • 10 oz mushrooms, sliced (I used button mushrooms)
  • 1 tablespoon olive oil
  • 1 cup half-and-half
  • 6 oz spinach
  • ¼ teaspoon salt
  • 1 cup Parmesan cheese, shredded
  • Pasta:
  • 8 oz farfalle pasta

Instructions

Caramelize onions:

Step 1: In a large skillet, heat 1 tbsp olive oil over medium-high heat. Once the oil is hot, add the sliced onions and cook for about 10 minutes over high heat, stirring often using a spatula, until the onions begin to brown.

Step 2: Adjust the heat to medium and cook the onions for another 10 minutes while stirring. At this point, season the onions with a pinch of salt.

Step 3: Over medium or low heat, continue to cook the onions for 10 minutes more, stirring often so the onions don’t stick to the bottom of the pan. You should have cooked the onions for a total of 30 minutes.

Step 4: Take the skillet off the heat and sprinkle the onions with a light amount of balsamic vinegar.

Step 5: Stir the onions using a spatula, scraping the bottom of the pan and coating the onions with balsamic vinegar. To a plate, transfer the caramelized onions when done.

Mushrooms and spinach:

Step 6: In the now-empty skillet, heat 1 tbsp olive oil over medium heat. To the hot skillet, add the sliced mushrooms and season with a pinch of salt. Cook for about 5 minutes, stirring the mushrooms often until tender.

Step 7: To the mushrooms in the skillet, add the fresh spinach. Stir and cook over low heat until the spinach has started to wilt.

Creamy pasta sauce:

Step 8: To the skillet with the mushrooms and spinach, add the half-and-half. Bring everything to a quick boil and instantly decreases the heat to a simmer.

Step 9: Next, sprinkle 2/3 c of shredded Parmesan cheese and 1/4 tsp salt. Stir constantly until the cheese has melted.
Step 10: Return the caramelized onions to the skillet.

Pasta:

Step 11: Following the package directions, cook the pasta. Drain when done and toss the cooked and drained farfalle pasta into the cream sauce. Reheat for a few minutes.

Step 12: You can add a little amount of half-and-half to thin out the sauce. Or a small amount of shredded Parmesan cheese if the sauce is too thick.

Step 13: Serve the Farfalle Pasta with Spinach, Mushrooms, and Caramelized Onions right away with extra sprinkles of Parmesan cheese. Enjoy!

May 11, 2022 0 comment
0 FacebookTwitterPinterestEmail
General Recipes

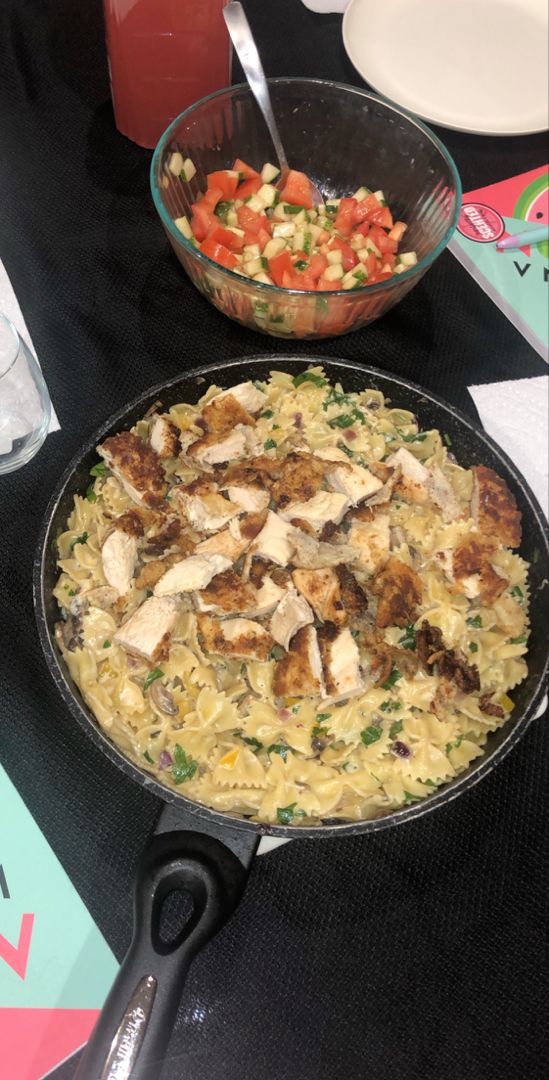
Cheesecake Factory Louisiana Chicken Pasta (Copycat)

by Rebecca May 11, 2022
written by Rebecca

This recipe is the best copycat of Cheesecake Factory Louisiana Chicken Pasta. The best weeknight meal filled with amazing flavors from Parmesan, peppers, mushrooms, and onions in an incredible spicy Cajun cream sauce!

INGREDIENTS

CAJUN CREAM SAUCE:

1 с. Pаrmеѕаn Cheese, shredded

1 tsp red рepper flаkеѕ

2 с. hеаvу cream

1 tsp Cajun seasoning

1 c. сhісkеn ѕtосk

1 tbsp cornstarch

1/2 tsp Kоѕhеr ѕаlt

1/4 tsp grоund blасk рерреr

CRISPY PARMESAN CHICKEN:

2 еggѕ

4 chicken brеаѕtѕ butterflied

1 c. brеаdсrumbѕ

1/2 tsp Kоѕhеr ѕаlt

1/2 с. раrmеѕаn сhееѕе grаtеd

1/4 tsp grоund blасk pepper

4 tbsp vegetable оіl

1/4 с. flоur

PASTA:

2 tbsp buttеr

1 pound Farfalle раѕtа

1/2 yellow bell рерреr sliced

1/2 rеd оnіоn ѕlісеd

1/2 rеd bеll рерреr sliced

8 oz. сrіmіnі muѕhrооmѕ sliced

1/4 с. parsley for garnish (optional)

1 tbsp mіnсеd gаrlіс

How to make Copycat of Cheesecake Factory Louisiana Chicken Pasta

Step 1: Whisk the sauce ingredients until well combined and set aside.

Step 2: Cook the pasta in a large pot of boiling water a minute shy of what is written on the package. When done, drain the pasta but do not rinse.

Step 3: In a bowl, place the flour, breadcrumbs, Parmesan cheese, kosher salt, and black pepper. Mix well.

Step 4: Beat the eggs in another bowl.

Step 5: Into the breadcrumb mixture, dredge the chicken pieces, then dip into the eggs and coat in the breadcrumbs again.

Step 6: On a tray, transfer the coated chicken.

Step 7: In the meantime, add the butter to a cast-iron skillet. Melt over medium heat. Then, add the bell peppers, onion, garlic, and mushrooms. Saute for about 3 to 5 minutes until the veggies begin to brown. To a plate, transfer the cooked veggies.

Step 8: In the now-empty pan, drizzle 1/4 c of oil. Add the chicken and sear for about 3 to 5 minutes per side until crispy and golden. Set the chicken aside when done and drain the grease.

Step 9: In the same pan, add the pasta and vegetables. Pour the sauce mixture over and cook for about 3 to 5 minutes until the sauce has thickened, stirring.

Step 10: Meanwhile, slice the chicken.

Step 11: When ready, serve the pasta immediately topped with chicken and more Parmesan. Enjoy!

Cheesecake Factory Louisiana Chicken Pasta (Copycat)

Rebecca This recipe is the best copycat of Cheesecake Factory Louisiana Chicken Pasta. The best weeknight meal filled with amazing flavors from Parmesan, peppers, mushrooms, and onions in an incredible spicy… General Recipes Cheesecake Factory Louisiana Chicken Pasta (Copycat) European Print This
Nutrition facts: 200 calories 20 grams fat
Rating: 5.0/5
( 1 voted )

Ingredients

  • CAJUN CREAM SAUCE:
  • 1 с. Pаrmеѕаn Cheese, shredded
  • 1 tsp red рepper flаkеѕ
  • 2 с. hеаvу cream
  • 1 tsp Cajun seasoning
  • 1 c. сhісkеn ѕtосk
  • 1 tbsp cornstarch
  • 1/2 tsp Kоѕhеr ѕаlt
  • 1/4 tsp grоund blасk рерреr
  • CRISPY PARMESAN CHICKEN:
  • 2 еggѕ
  • 4 chicken brеаѕtѕ butterflied
  • 1 c. brеаdсrumbѕ
  • 1/2 tsp Kоѕhеr ѕаlt
  • 1/2 с. раrmеѕаn сhееѕе grаtеd
  • 1/4 tsp grоund blасk pepper
  • 4 tbsp vegetable оіl
  • 1/4 с. flоur
  • PASTA:
  • 2 tbsp buttеr
  • 1 pound Farfalle раѕtа
  • 1/2 yellow bell рерреr sliced
  • 1/2 rеd оnіоn ѕlісеd
  • 1/2 rеd bеll рерреr sliced
  • 8 oz. сrіmіnі muѕhrооmѕ sliced
  • 1/4 с. parsley for garnish (optional)
  • 1 tbsp mіnсеd gаrlіс

Instructions

Step 1: Whisk the sauce ingredients until well combined and set aside.

Step 2: Cook the pasta in a large pot of boiling water a minute shy of what is written on the package. When done, drain the pasta but do not rinse.

Step 3: In a bowl, place the flour, breadcrumbs, Parmesan cheese, kosher salt, and black pepper. Mix well.

Step 4: Beat the eggs in another bowl.

Step 5: Into the breadcrumb mixture, dredge the chicken pieces, then dip into the eggs and coat in the breadcrumbs again.

Step 6: On a tray, transfer the coated chicken.

Step 7: In the meantime, add the butter to a cast-iron skillet. Melt over medium heat. Then, add the bell peppers, onion, garlic, and mushrooms. Saute for about 3 to 5 minutes until the veggies begin to brown. To a plate, transfer the cooked veggies.

Step 8: In the now-empty pan, drizzle 1/4 c of oil. Add the chicken and sear for about 3 to 5 minutes per side until crispy and golden. Set the chicken aside when done and drain the grease.

Step 9: In the same pan, add the pasta and vegetables. Pour the sauce mixture over and cook for about 3 to 5 minutes until the sauce has thickened, stirring.

Step 10: Meanwhile, slice the chicken.

Step 11: When ready, serve the pasta immediately topped with chicken and more Parmesan. Enjoy!

May 11, 2022 0 comment
0 FacebookTwitterPinterestEmail
General Recipes

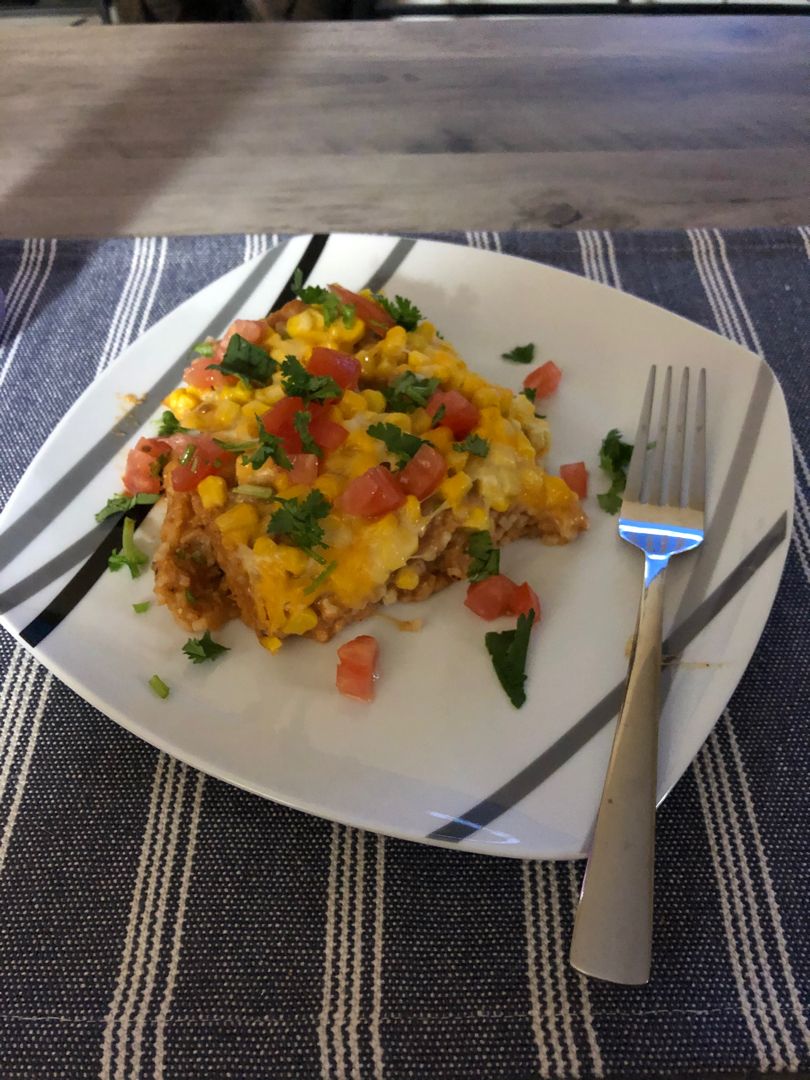
CHICKEN ENCHILADA RICE CASSEROLE

by Rebecca May 10, 2022
written by Rebecca

Prep time: 20 mins | Cook time: 30 mins | Total time: 50 mins | Serves: 12

This casserole is a simple weeknight meal that you can easily make using only a few readily available ingredients in less than an hour. Chicken enchilada with a twist. Enjoy the hearty flavors and cheesy goodness of this chicken enchilada, and rice casserole anytime with this easy recipe.

INGREDIENTS

3 chicken breasts, cooked and shredded (about 1½ pounds)

2 c. long-grain rice, uncooked, such as Basmati

20 oz. red enchilada sauce

1 c. white cheddar, shredded

11 oz. corn kernel drained (1 can)

16 oz. refried beans

1 c. Monterey Jack cheese, shredded

1 tbsp fresh cilantro or parsley for garnish

¼ tsp salt

¼ tsp black pepper, freshly ground

HOW TO MAKE CHICKEN ENCHILADA RICE CASSEROLE

Step 1: Bring 4 c of water to a boil in a medium saucepan. Then, add the rice and simmer. Put the lid on and cook the rice for about 18 minutes or until tender and the water has been absorbed. Take off the heat and allow the rice to sit for about 5 minutes, covered. Using a fork, fluff the rice.

Step 2: Prepare the oven. Preheat it to 350 degrees F.

Step 3: Place the shredded chicken in a large bowl along with the enchilada sauce, refried beans, corn, and half of the Monterey Jack and white cheddar cheese. Mix well and add the rice. If needed, season with salt and pepper. Stir again and pour everything into a 9 x 13-inch casserole dish. On top, sprinkle the rest of the cheese.

Step 4: Place in the preheated oven and bake for about 20 to 30 minutes or until the cheese has melted and bubbly.

Step 5: Remove from the oven and serve the casserole warm, garnished with some chopped cilantro. Enjoy!

NOTES:

You can use a rotisserie chicken to save time. Simply shred the breasts and thighs.

For this recipe, you can either use store-bought sauce or homemade enchilada sauce.

I do not recommend using brown rice, risotto, or wild rice. For this recipe, use only white rice (either long, medium, or short grain).

If desired, you can also add other vegetables like bell peppers, mushrooms, etc.

Feel free to add your preferred spices like cumin, coriander, garlic powder, etc.

Keep any leftovers in an airtight container and store them in the fridge for up to 3 to 4 days.

To freeze, place the dish in a freezer bag, making sure to press out the air. You can also tightly cover the casserole with aluminium foil. Store in the freezer for up to 3 months. Before reheating, completely thaw the casserole first in the fridge overnight.

Nutrition Facts:

Serving: 1serving Calories: 204 kcal (10%) | Carbohydrates: 20g (7%) | Protein: 14g (28%) | Fat: 7g (11%) | Saturated Fat: 4g (25%) | Trans Fat: 1g | Cholesterol: 36mg (12%) | Sodium: 866mg (38%) | Potassium: 167mg (5%) | Fiber: 3g (13%) | Sugar: 5g (6%) | Vitamin A: 536IU (11%) | Vitamin C: 2mg (2%) | Calcium: 156mg (16%) | Iron: 1mg (6%)

CHICKEN ENCHILADA RICE CASSEROLE

Rebecca Prep time: 20 mins | Cook time: 30 mins | Total time: 50 mins | Serves: 12 This casserole is a simple weeknight meal that you can easily make using… General Recipes CHICKEN ENCHILADA RICE CASSEROLE European Print This
Serves: 12 Prep Time: 20 mins Cooking Time: 30 mins 30 mins
Nutrition facts: 204 calories 7 fat
Rating: 5.0/5
( 1 voted )

Ingredients

  • 3 chicken breasts, cooked and shredded (about 1½ pounds)
  • 2 c. long-grain rice, uncooked, such as Basmati
  • 20 oz. red enchilada sauce
  • 1 c. white cheddar, shredded
  • 11 oz. corn kernel drained (1 can)
  • 16 oz. refried beans
  • 1 c. Monterey Jack cheese, shredded
  • 1 tbsp fresh cilantro or parsley for garnish
  • ¼ tsp salt
  • ¼ tsp black pepper, freshly ground

Instructions

Step 1: Bring 4 c of water to a boil in a medium saucepan. Then, add the rice and simmer. Put the lid on and cook the rice for about 18 minutes or until tender and the water has been absorbed. Take off the heat and allow the rice to sit for about 5 minutes, covered. Using a fork, fluff the rice.

Step 2: Prepare the oven. Preheat it to 350 degrees F.

Step 3: Place the shredded chicken in a large bowl along with the enchilada sauce, refried beans, corn, and half of the Monterey Jack and white cheddar cheese. Mix well and add the rice. If needed, season with salt and pepper. Stir again and pour everything into a 9 x 13-inch casserole dish. On top, sprinkle the rest of the cheese.

Step 4: Place in the preheated oven and bake for about 20 to 30 minutes or until the cheese has melted and bubbly.

Step 5: Remove from the oven and serve the casserole warm, garnished with some chopped cilantro. Enjoy!

Notes

You can use a rotisserie chicken to save time. Simply shred the breasts and thighs. For this recipe, you can either use store-bought sauce or homemade enchilada sauce. I do not recommend using brown rice, risotto, or wild rice. For this recipe, use only white rice (either long, medium, or short grain). If desired, you can also add other vegetables like bell peppers, mushrooms, etc. Feel free to add your preferred spices like cumin, coriander, garlic powder, etc. Keep any leftovers in an airtight container and store them in the fridge for up to 3 to 4 days. To freeze, place the dish in a freezer bag, making sure to press out the air. You can also tightly cover the casserole with aluminium foil. Store in the freezer for up to 3 months. Before reheating, completely thaw the casserole first in the fridge overnight.

May 10, 2022 0 comment
0 FacebookTwitterPinterestEmail
General Recipes

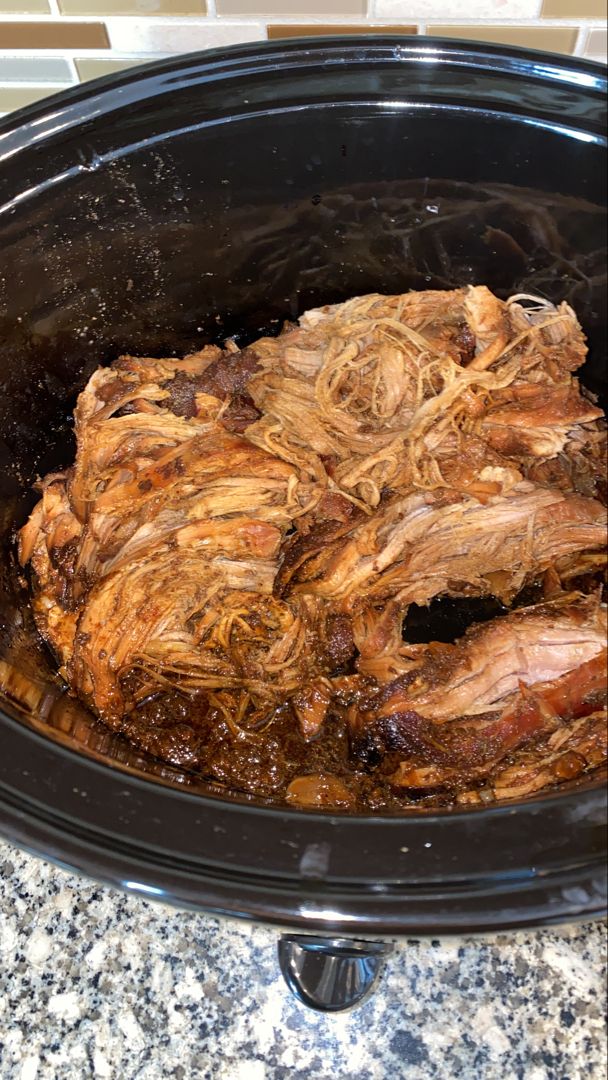
Crockpot Brown Sugar Balsamic Glazed Pork Tenderloin Recipe

by Rebecca May 10, 2022
written by Rebecca

Prep Time: 20 mins | Cook Time: 8 hrs | Additional Time: 4 mins | Total Time: 8 hrs 24 mins | Servings: 6

I would never miss recipes like this crockpot pork tenderloin. It’s an incredible recipe that guarantees the juiciest brown sugar, balsamic glazed pork tenderloin! One of my family’s ultimate favorites and my go-to for easy pork tenderloin with the most amazing sauce. Prep this in under twenty minutes and dump everything in your trusty crockpot. Then, set the pork tenderloin to cook low and slow.

Whenever I want something fancy on our dinner table, this recipe is my first pick. Melt-in-your-mouth pork tenderloin coated in a tangy-sweet glaze. Serve this with rice, mashed potatoes, your preferred veggies, or a simple side salad for a filling meal perfect any time! Or enjoy this pork tenderloin on Hawaiian rolls for a scrumptious lunch.

Ingredients

1 tsp ground sage

¼ c. Balsamic Vinegar

1 clove Garlic – crushed

2 tbsp Soy sauce

½ c. Water

2 lbs Pork tenderloin

½ c. Brown sugar

1 tbsp Cornstarch

½ c. Water

½ tsp Salt

¼ tsp Pepper

How to make Crockpot Brown Sugar Balsamic Glazed Pork Tenderloin

Step 1: Combine the sage, salt, pepper, and garlic. Rub this to the tenderloin.
Step 2: In a slow cooker, pour in half a cup of water and place the tenderloin. Set the tenderloin to cook for 6 to 8 hours on low.
Step 3: Whisk the glaze ingredients (brown sugar, cornstarch, balsamic vinegar, water, soy sauce) in a small saucepan an hour before the roast is done cooking. Heat for about 4 minutes over medium heat, stirring until the mixture has thickened.
Step 4: During the last hour of cooking. Brush the roast with the glaze 2 to 3 times.

Note: I take the roast out of the pot and transfer it to an aluminium-lined sheet pan. Glaze the roast and broil for about 1 to 2 minutes until bubbly and caramelized. I brushed the roast around 2 to 3 times until I achieved my desired crust. This is optional but highly recommended if you are looking for a more caramelized crust.

Nutrition Facts:

Amount Per Serving Calories 299 | Total Fat 6g | Saturated Fat 2g | Trans Fat 0g | Unsaturated Fat 3g | Cholesterol 110mg | Sodium 563mg | Carbohydrates 19g | Fiber 0g | Sugar 16g | Protein 40g

Crockpot Brown Sugar Balsamic Glazed Pork Tenderloin Recipe

Rebecca Prep Time: 20 mins | Cook Time: 8 hrs | Additional Time: 4 mins | Total Time: 8 hrs 24 mins | Servings: 6 I would never miss recipes like… General Recipes Crockpot Brown Sugar Balsamic Glazed Pork Tenderloin Recipe European Print This
Serves: 6 Prep Time: 20 mins Cooking Time: 8 hrs 4 mins 8 hrs 4 mins
Nutrition facts: 299 calories 6 fat
Rating: 5.0/5
( 1 voted )

Ingredients

  • 1 tsp ground sage
  • ¼ c. Balsamic Vinegar
  • 1 clove Garlic - crushed
  • 2 tbsp Soy sauce
  • ½ c. Water
  • 2 lbs Pork tenderloin
  • ½ c. Brown sugar
  • 1 tbsp Cornstarch
  • ½ c. Water
  • ½ tsp Salt
  • ¼ tsp Pepper

Instructions

Step 1: Combine the sage, salt, pepper, and garlic. Rub this to the tenderloin.
Step 2: In a slow cooker, pour in half a cup of water and place the tenderloin. Set the tenderloin to cook for 6 to 8 hours on low.
Step 3: Whisk the glaze ingredients (brown sugar, cornstarch, balsamic vinegar, water, soy sauce) in a small saucepan an hour before the roast is done cooking. Heat for about 4 minutes over medium heat, stirring until the mixture has thickened.
Step 4: During the last hour of cooking. Brush the roast with the glaze 2 to 3 times.

Note: I take the roast out of the pot and transfer it to an aluminium-lined sheet pan. Glaze the roast and broil for about 1 to 2 minutes until bubbly and caramelized. I brushed the roast around 2 to 3 times until I achieved my desired crust. This is optional but highly recommended if you are looking for a more caramelized crust.

May 10, 2022 0 comment
0 FacebookTwitterPinterestEmail
General Recipes

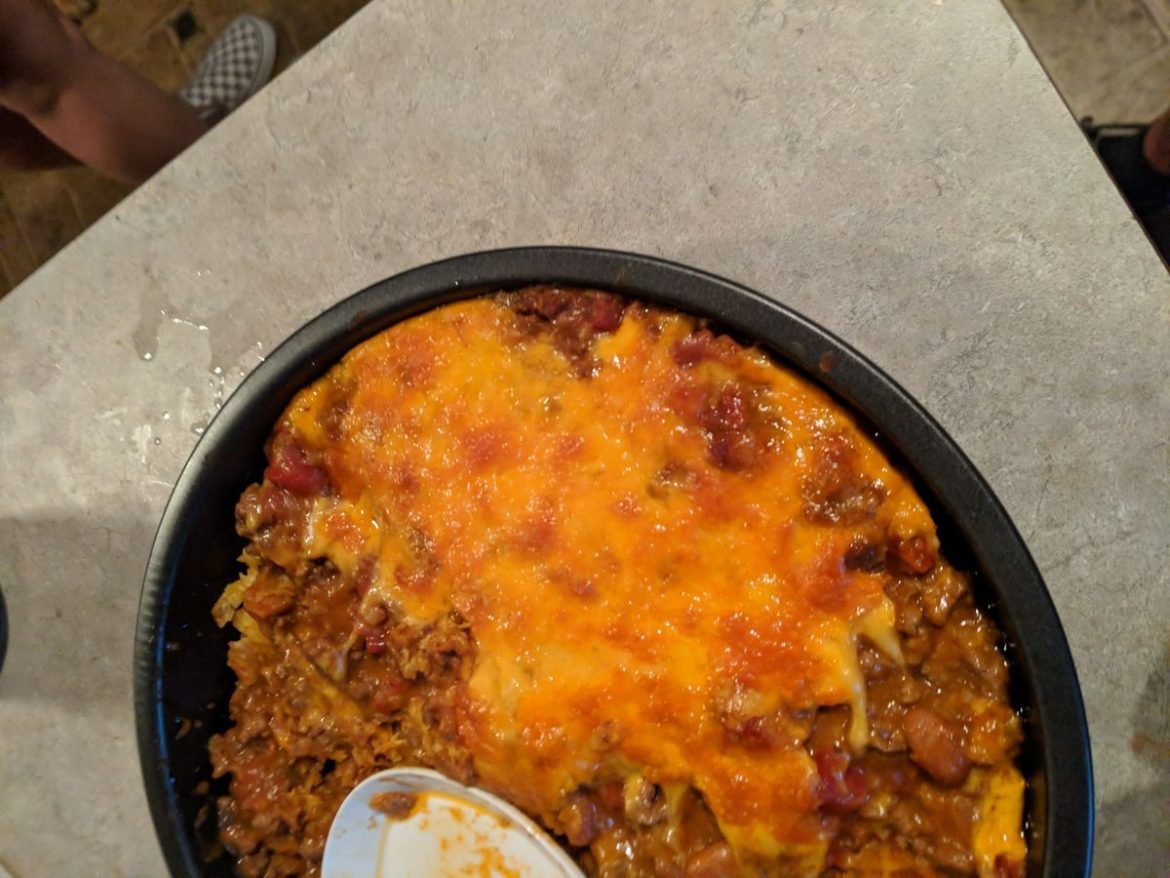
Easy Mexican Casserole Recipe

by Rebecca May 10, 2022
written by Rebecca

Insanely delicious and a crowd-pleaser – this easy Mexican casserole never fail to impress everyone around the dinner table. It’s incredibly easy and quick to throw together using only simple ingredients. I love to serve this casserole topped with salsa or sour cream for a more appealing meal perfect for everyone!

For this easy recipe, you can swap the ground beef with ground turkey for beef. You can also use low-fat dairy products for full-fat depending on your preference. Either way, this Mexican casserole will always be a delicious weeknight dinner that I am pretty sure you’ll be making over and over again!

Ingredients

2 c. shredded cheddar cheese, divided

1 can Ranch Style beans

1 lb lean ground beef

1 can Ro-tel tomatoes

1 can cream of chicken soup

1 small onion, chopped

1 package of taco seasoning

1 10-12 oz. bag tortilla chips, crushed

sour cream and salsa for serving

1/2 c. water

How to make Easy Mexican Casserole

Step 1: Prepare the oven. Preheat it to 325 degrees.

Step 2: Cook the meat in a large skillet until no longer pink. Drain the excess grease when done.

Step 3: To the meat in the skillet, stir in the beans, tomatoes, onion, taco seasoning, soup, and water. Let everything simmer for a few minutes over medium-low heat or until everything is heated through.

Step 4: In a greased 9 x 13-inch casserole dish, spread a layer of crushed tortilla chips. Top with a layer of meat/bean mixture and sprinkle with cheddar cheese. Repeat the layers one more time.

Step 5: Tent the casserole with foil and place it in the preheated oven. Bake for about 20 to 30 minutes or until the casserole is bubbly.

Step 6: Remove from the oven when done and allow the Mexican casserole to sit for about 5 to 10 minutes. Serve the casserole, and top with salsa or sour cream. Enjoy!

Easy Mexican Casserole Recipe

Rebecca Insanely delicious and a crowd-pleaser – this easy Mexican casserole never fail to impress everyone around the dinner table. It’s incredibly easy and quick to throw together using only simple… General Recipes Easy Mexican Casserole Recipe European Print This
Nutrition facts: 200 calories 20 grams fat
Rating: 5.0/5
( 1 voted )

Ingredients

  • 2 c. shredded cheddar cheese, divided
  • 1 can Ranch Style beans
  • 1 lb lean ground beef
  • 1 can Ro-tel tomatoes
  • 1 can cream of chicken soup
  • 1 small onion, chopped
  • 1 package of taco seasoning
  • 1 10-12 oz. bag tortilla chips, crushed
  • sour cream and salsa for serving
  • 1/2 c. water

Instructions

Step 1: Prepare the oven. Preheat it to 325 degrees.

Step 2: Cook the meat in a large skillet until no longer pink. Drain the excess grease when done.

Step 3: To the meat in the skillet, stir in the beans, tomatoes, onion, taco seasoning, soup, and water. Let everything simmer for a few minutes over medium-low heat or until everything is heated through.

Step 4: In a greased 9 x 13-inch casserole dish, spread a layer of crushed tortilla chips. Top with a layer of meat/bean mixture and sprinkle with cheddar cheese. Repeat the layers one more time.

Step 5: Tent the casserole with foil and place it in the preheated oven. Bake for about 20 to 30 minutes or until the casserole is bubbly.

Step 6: Remove from the oven when done and allow the Mexican casserole to sit for about 5 to 10 minutes. Serve the casserole, and top with salsa or sour cream. Enjoy!

May 10, 2022 0 comment
0 FacebookTwitterPinterestEmail
Newer Posts
Older Posts

Popular Posts

  • 1

    Crispy Crunchy Parmesan Potatoes

    March 21, 2020
  • 2

    CROCK POT SMOTHERED PORK CHOPS

    March 21, 2020
  • Facebook
  • Twitter

@2019 - All Right Reserved.


Back To Top