Cook it once
  • Home
  • Privacy Policy
  • Recipes
    • KETO
    • LC
    • WW
  • Tips
  • Contact
Cook it once
  • Home
  • Privacy Policy
  • Recipes
    • KETO
    • LC
    • WW
  • Tips
  • Contact
Category:

General Recipes

General Recipes

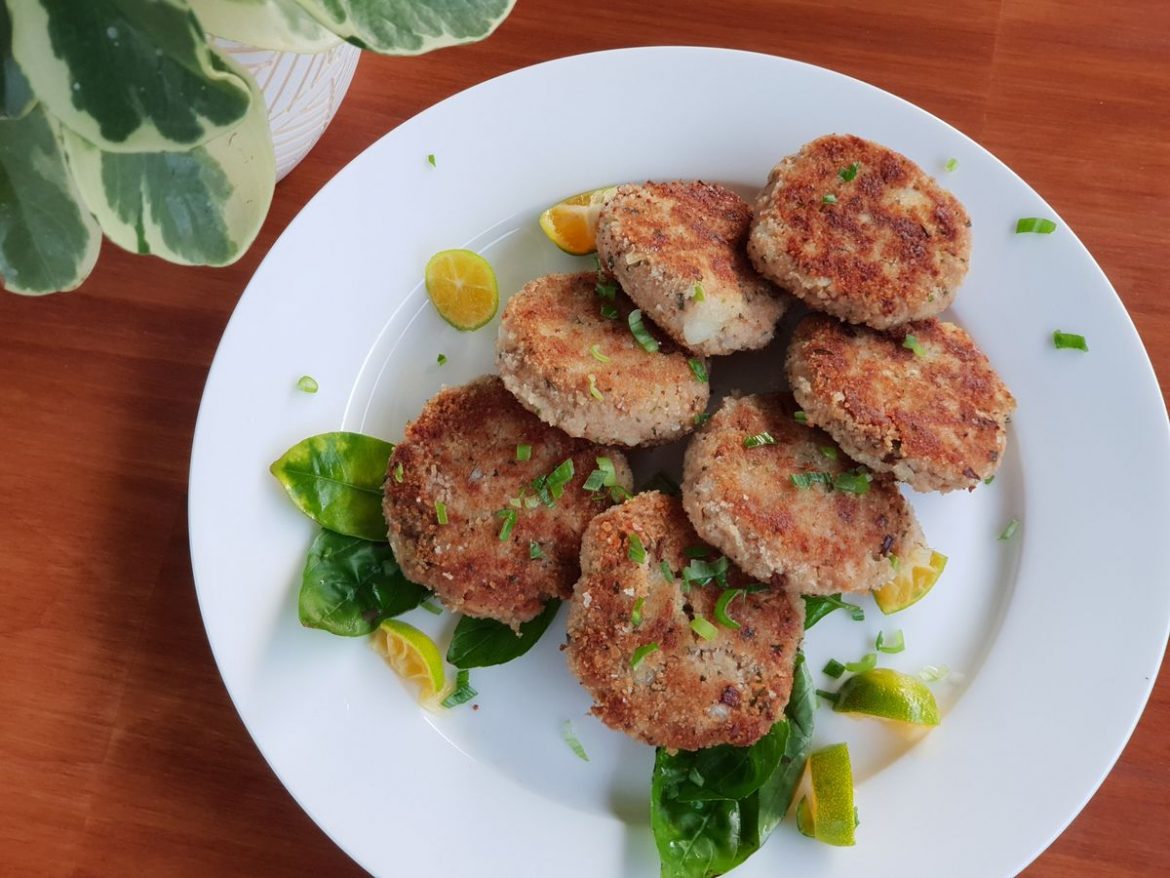
Crispy Tuna Patties

by Rebecca May 14, 2022
written by Rebecca

PREP TIME: 10 MINS | COOK TIME: 8 MINS | SERVINGS: 5 people

Simple yet incredibly delicious crispy tuna patties made with cans of tuna.

INGREDIENTS

1 12-ounces can of tuna in water, drained very well

1 5-ounces tuna in water, drained very well

¼ c. panko plus an additional 2 tablespoons

½ c. chopped red onions

½ c. Parmesan

2 teaspoons dried parsley

⅛ teaspoon crushed red pepper

¼ teaspoon onion powder

¼ teaspoon dried dill

½ teaspoon celery seeds

3 tablespoons mayonnaise

3 teaspoons minced garlic

3 teaspoons lemon juice

2 teaspoons lemon zest

3 eggs, lightly beaten

2 teaspoons pepper

1 ¼ teaspoons salt

Patties:

6 tablespoons vegetable oil, add more as needed

¼-1/2 c. panko

How to make Crispy Tuna Patties

Step 1: In a bowl, combine all the ingredients except for the patties ingredients until well mixed.

Step 2: To scoop the mixture, use a 1/4 measuring cup and form it into patties.

Patties:

Step 3: To a shallow dish, add 1/4 of the panko. Lightly coat both sides of the patties with the panko. If needed, you can add more panko.

Step 4: Heat 3 tablespoons of oil in a large skillet over medium-high heat. Once the oil is hot, add about 4 to 5 patties to the skillet and flatten to around 1/8-inch thick using a spatula. Sear for about 3 to 4 minutes on each side until golden brown, Carefully flip the patties.

Step 5: On a paper towel, transfer the cooked patties. Let the patties cool for a couple of minutes. Serve and enjoy!

TIPS:

This recipe is the perfect way to use cans of tuna.

Make sure not to overcrowd the pan and add extra oil to the pan if needed.

I suggest cleaning the pan before frying the remaining patties.

To freeze the uncooked tuna fish patties in advance:

After mixing the ingredients, shape them into patties. Place on baking sheets lined with parchment paper or freezer paper and flash freeze for up to 2 hours. In freezer bags or airtight freezer-safe containers, store the patties, then freeze.

To freeze the cooked tuna cakes in advance:

After the tuna patties are cooked, allow them to cool completely before placing them on a baking sheet in a single layer. Freeze them for about 2 to 3 hours. Then, transfer into a freezer-safe zipper bag or an airtight freezer-safe container. Freeze for up to 2 months.

Remove from the freezer when ready to serve and defrost in the fridge overnight.

To reheat frozen fish cakes:

Pop in the oven and bake for about 8 to 10 minutes at 350 degrees F or until golden brown and crispy.

NUTRITION FACTS:

Calories: 360 kcal, Carbohydrates: 7g, Protein: 20g, Fat: 24g, Saturated Fat: 16g, Cholesterol: 129mg, Sodium: 1043mg, Potassium: 169mg, Fiber: 1g, Sugar: 1g, Vitamin A: 271IU, Vitamin C: 2mg, Calcium: 162mg, Iron: 2mg
Crispy Tuna Patties

Rebecca PREP TIME: 10 MINS | COOK TIME: 8 MINS | SERVINGS: 5 people Simple yet incredibly delicious crispy tuna patties made with cans of tuna. INGREDIENTS 1 12-ounces can of… General Recipes Crispy Tuna Patties European Print This
Serves: 5 Prep Time: 10 mins Cooking Time: 8 mins 8 mins
Nutrition facts: 360 calories 24 fat
Rating: 5.0/5
( 1 voted )

Ingredients

  • 1 12-ounces can of tuna in water, drained very well
  • 1 5-ounces tuna in water, drained very well
  • ¼ c. panko plus an additional 2 tablespoons
  • ½ c. chopped red onions
  • ½ c. Parmesan
  • 2 teaspoons dried parsley
  • ⅛ teaspoon crushed red pepper
  • ¼ teaspoon onion powder
  • ¼ teaspoon dried dill
  • ½ teaspoon celery seeds
  • 3 tablespoons mayonnaise
  • 3 teaspoons minced garlic
  • 3 teaspoons lemon juice
  • 2 teaspoons lemon zest
  • 3 eggs lightly beaten
  • 2 teaspoons pepper
  • 1 ¼ teaspoons salt
  • Patties:
  • 6 tablespoons vegetable oil add more as needed
  • ¼-1/2 c. panko

Instructions

Step 1: In a bowl, combine all the ingredients except for the patties ingredients until well mixed.

Step 2: To scoop the mixture, use a 1/4 measuring cup and form it into patties.

Patties:

Step 3: To a shallow dish, add 1/4 of the panko. Lightly coat both sides of the patties with the panko. If needed, you can add more panko.

Step 4: Heat 3 tablespoons of oil in a large skillet over medium-high heat. Once the oil is hot, add about 4 to 5 patties to the skillet and flatten to around 1/8-inch thick using a spatula. Sear for about 3 to 4 minutes on each side until golden brown, Carefully flip the patties.

Step 5: On a paper towel, transfer the cooked patties. Let the patties cool for a couple of minutes. Serve and enjoy!

TIPS:

This recipe is the perfect way to use cans of tuna.

Make sure not to overcrowd the pan and add extra oil to the pan if needed.

I suggest cleaning the pan before frying the remaining patties.

To freeze the uncooked tuna fish patties in advance:

After mixing the ingredients, shape them into patties. Place on baking sheets lined with parchment paper or freezer paper and flash freeze for up to 2 hours. In freezer bags or airtight freezer-safe containers, store the patties, then freeze.

To freeze the cooked tuna cakes in advance:

After the tuna patties are cooked, allow them to cool completely before placing them on a baking sheet in a single layer. Freeze them for about 2 to 3 hours. Then, transfer into a freezer-safe zipper bag or an airtight freezer-safe container. Freeze for up to 2 months.

Remove from the freezer when ready to serve and defrost in the fridge overnight.

To reheat frozen fish cakes:

Pop in the oven and bake for about 8 to 10 minutes at 350 degrees F or until golden brown and crispy.
May 14, 2022 0 comment
0 FacebookTwitterPinterestEmail
General Recipes

Lunch Lady Brownies

by Rebecca May 14, 2022
written by Rebecca

Prep Time: 15 mins | Cook Time: 30 mins | Total Time: 45 mins | Servings: 16

This is the perfect brownie recipe. My go-to brownies recipe for years that guarantee to deliver the most incredible, chewy, and fudgy brownies! Moist, chocolatey, and insanely delicious! I always make sure to whip up a big batch as this tasty treat goes super fast! These brownies remind me of the ones the lunch ladies served at school for lunch, but a million better! A homemade version that you can easily make using only simple ingredients. These amazing brownies surely kick off the notch!

Ingredients

4 large eggs

1 c. butter, melted

2 c. granulated sugar

2 c. all-purpose flour

4 tsp vanilla extract

1/2 c. unsweetened cocoa powder

Chocolate Frosting:

1/4 c. milk I use 2%

1/4 c. butter, softened

3 c. powdered sugar

1/4 c. unsweetened cocoa powder

How to make Lunch Lady Brownies

Step 1: Prepare the oven. Preheat it to 350 degrees F. Using foil, line a 9 x 13-inch baking dish and grease with a non-stick spray. Set aside.

Step 2: Add the melted butter and cocoa powder to the bowl of an electric stand mixer. Blend using the paddle attachment until smooth. Then, add the flour and sugar. Add the eggs and vanilla. Mix well until just blended and you have a thick batter. Make sure not to overmix the batter.

Step 3: Into the prepared baking dish, pour the batter and evenly spread it out. Place in the preheated oven and bake for about 25 to 30 minutes or until a toothpick inserted in the middle of the brownie comes out clean. When done, take the baking dish out of the oven and allow the brownie to stand for about 15 minutes. Frost the brownies while still warm.

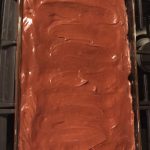
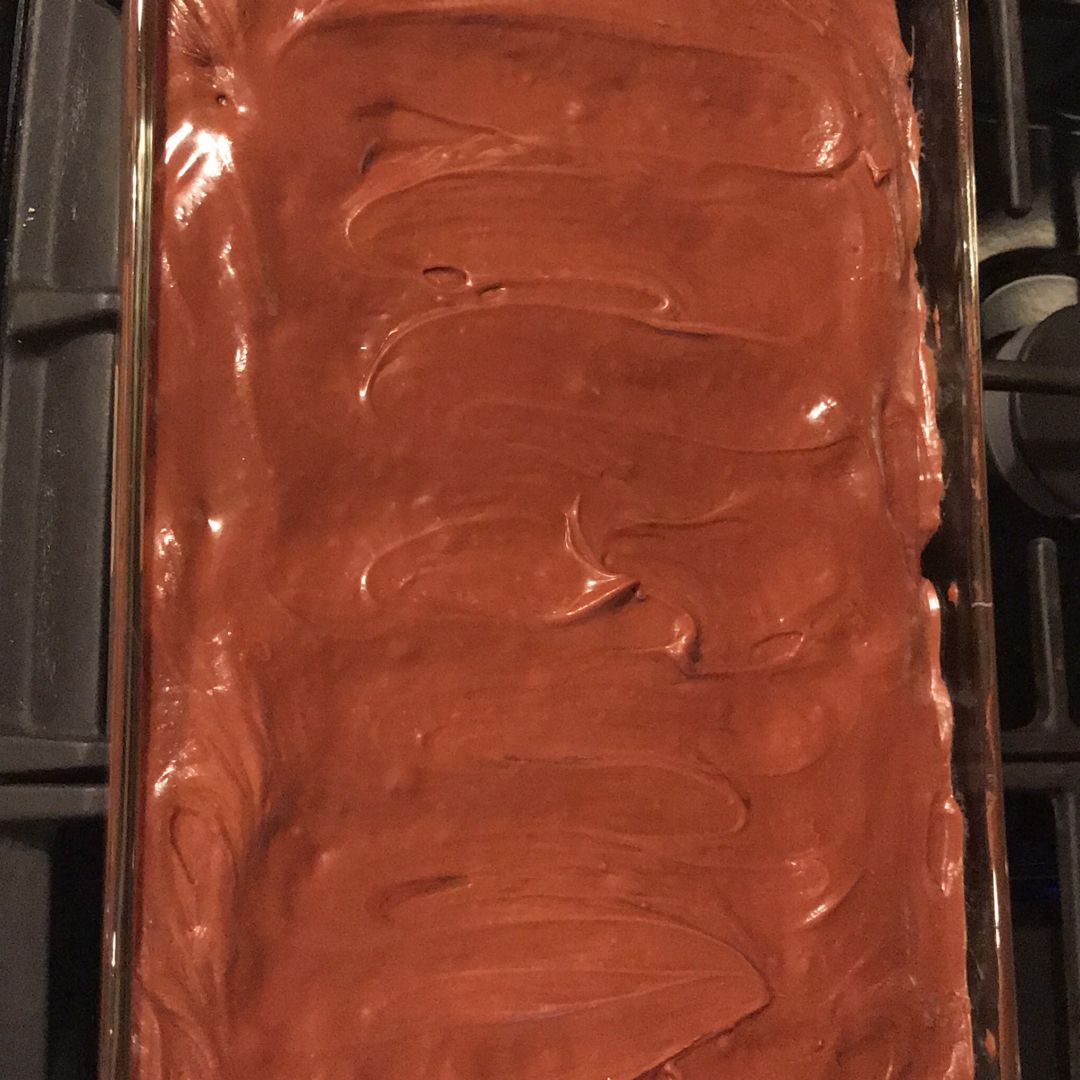
Step 4: In the meantime, combine the frosting ingredients until smooth. Then, pour this on top of the warm brownies. Allow the brownie to cool fully before cutting it into squares.

Step 5: Serve and enjoy!

Lunch Lady Brownies

Rebecca Prep Time: 15 mins | Cook Time: 30 mins | Total Time: 45 mins | Servings: 16 This is the perfect brownie recipe. My go-to brownies recipe for years that… General Recipes Lunch Lady Brownies European Print This
Serves: 16 Prep Time: 15 mins Cooking Time: 30 mins 30 mins
Nutrition facts: 200 calories 20 grams fat
Rating: 5.0/5
( 1 voted )

Ingredients

  • 4 large eggs
  • 1 c. butter, melted
  • 2 c. granulated sugar
  • 2 c. all-purpose flour
  • 4 tsp vanilla extract
  • 1/2 c. unsweetened cocoa powder
  • Chocolate Frosting:
  • 1/4 c. milk I use 2%
  • 1/4 c. butter, softened
  • 3 c. powdered sugar
  • 1/4 c. unsweetened cocoa powder

Instructions

Step 1: Prepare the oven. Preheat it to 350 degrees F. Using foil, line a 9 x 13-inch baking dish and grease with a non-stick spray. Set aside.

Step 2: Add the melted butter and cocoa powder to the bowl of an electric stand mixer. Blend using the paddle attachment until smooth. Then, add the flour and sugar. Add the eggs and vanilla. Mix well until just blended and you have a thick batter. Make sure not to overmix the batter.

Step 3: Into the prepared baking dish, pour the batter and evenly spread it out. Place in the preheated oven and bake for about 25 to 30 minutes or until a toothpick inserted in the middle of the brownie comes out clean. When done, take the baking dish out of the oven and allow the brownie to stand for about 15 minutes. Frost the brownies while still warm.

Step 4: In the meantime, combine the frosting ingredients until smooth. Then, pour this on top of the warm brownies. Allow the brownie to cool fully before cutting it into squares.

Step 5: Serve and enjoy!

May 14, 2022 0 comment
0 FacebookTwitterPinterestEmail
General Recipes

FAMILY NIGHT CHICKEN AND BROCCOLI PASTA BAKE

by Rebecca May 14, 2022
written by Rebecca

Prep Time: 10 mins | Cook Time: 40 mins | Total Time: 50 mins | Yield: 6

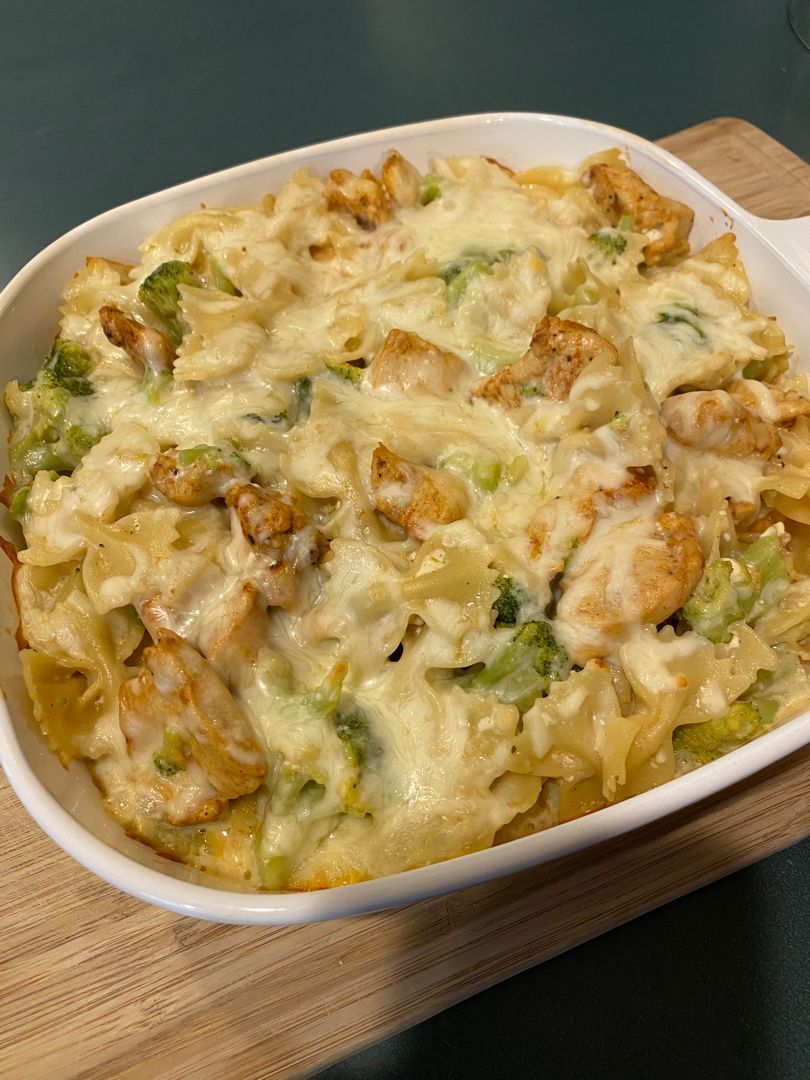
Easily make this chicken and broccoli pasta bake at home with real ingredients in no time. A no-fuss meal with tender and juicy chicken with broccoli tossed in a delightfully creamy sauce. Sprinkle in some red pepper flakes for an amazing contrast and some kick, if desired.

INGREDIENTS

1 pound chicken tenders, cut into bite-size pieces

3 c. fresh broccoli florets

1 1/2 c. dry small shaped pasta

2 tablespoons olive oil

1 teaspoon paprika

1/2 teaspoon garlic powder

Kosher salt and fresh black pepper

1/2 teaspoon onion powder

3/4–1 c. chicken broth

2 tablespoons shredded Parmesan cheese

4 ounces cream cheese, cut into cubes

1 1/2 c. shredded mozzarella cheese, divided

HOW TO MAKE FAMILY NIGHT CHICKEN AND BROCCOLI PASTA BAKE

Step 1: Following the package directions, cook the pasta in a pot of salted boiling water until al dente. Stir in the broccoli florets in the last 2 minutes of cooking the pasta. Drain when done and set aside.

Step 2: Toss the chicken with paprika, garlic powder, onion powder, and salt and pepper in a bowl.

Step 3: In a large saute pan, heat the olive oil over medium-high heat. Once the oil is hot, add the chicken to the pan and sear for a couple of minutes until browned.

Step 4: Pour in the chicken broth and allow it to come to a simmer. Add the cream cheese once the broth is simmering and stir well until melted. Then, add 3/4 c mozzarella. Stir well until melted and the sauce has slightly thickened.

Step 5: Turn the heat off and gently toss in the cooked pasta and broccoli.

Step 6: To a baking dish, transfer everything and cover with foil. Place in a 375 degrees F preheated oven and bake for about 15 minutes. Remove from the oven when topped with the rest of the mozzarella cheese and Parmesan cheese. Return to the oven and continue to bake for another 3 minutes, uncovered, until the cheese has melted.

Step 7: Before serving, allow the chicken and broccoli pasta to rest for about 5 minutes.

NOTES:

For this recipe, you can use your preferred small-shaped pasta. Or use whole wheat pasta for a nutrient-dense meal.

You can also use chicken thighs, chicken breasts, and chicken tenders. I prefer chicken thighs as they are incredibly tender and give the most delicious flavor.

For some kick and great contrast, sprinkle some red pepper flakes.

Nutrition Facts

Amount Per Serving: Calories 531, Total Fat 18.3g 23%, Cholesterol 192.3mg 64%, Sodium 685.6mg 30%, Total Carbohydrate 22.9g 8%, Sugars 2.9g, Protein 66.5g 133%, Vitamin A16%, Vitamin C44%

FAMILY NIGHT CHICKEN AND BROCCOLI PASTA BAKE

Rebecca Prep Time: 10 mins | Cook Time: 40 mins | Total Time: 50 mins | Yield: 6 Easily make this chicken and broccoli pasta bake at home with real ingredients… General Recipes FAMILY NIGHT CHICKEN AND BROCCOLI PASTA BAKE European Print This
Serves: 6 Prep Time: 10 mins Cooking Time: 40 mins 40 mins
Nutrition facts: 531 calories 18.3 fat
Rating: 5.0/5
( 1 voted )

Ingredients

  • 1 pound chicken tenders, cut into bite-size pieces
  • 3 c. fresh broccoli florets
  • 1 1/2 c. dry small shaped pasta
  • 2 tablespoons olive oil
  • 1 teaspoon paprika
  • 1/2 teaspoon garlic powder
  • Kosher salt and fresh black pepper
  • 1/2 teaspoon onion powder
  • 3/4–1 c. chicken broth
  • 2 tablespoons shredded Parmesan cheese
  • 4 ounces cream cheese, cut into cubes
  • 1 1/2 c. shredded mozzarella cheese, divided

Instructions

Step 1: Following the package directions, cook the pasta in a pot of salted boiling water until al dente. Stir in the broccoli florets in the last 2 minutes of cooking the pasta. Drain when done and set aside.

Step 2: Toss the chicken with paprika, garlic powder, onion powder, and salt and pepper in a bowl.

Step 3: In a large saute pan, heat the olive oil over medium-high heat. Once the oil is hot, add the chicken to the pan and sear for a couple of minutes until browned.

Step 4: Pour in the chicken broth and allow it to come to a simmer. Add the cream cheese once the broth is simmering and stir well until melted. Then, add 3/4 c mozzarella. Stir well until melted and the sauce has slightly thickened.

Step 5: Turn the heat off and gently toss in the cooked pasta and broccoli.

Step 6: To a baking dish, transfer everything and cover with foil. Place in a 375 degrees F preheated oven and bake for about 15 minutes. Remove from the oven when topped with the rest of the mozzarella cheese and Parmesan cheese. Return to the oven and continue to bake for another 3 minutes, uncovered, until the cheese has melted.

Step 7: Before serving, allow the chicken and broccoli pasta to rest for about 5 minutes.

Notes

For this recipe, you can use your preferred small-shaped pasta. Or use whole wheat pasta for a nutrient-dense meal. You can also use chicken thighs, chicken breasts, and chicken tenders. I prefer chicken thighs as they are incredibly tender and give the most delicious flavor. For some kick and great contrast, sprinkle some red pepper flakes.

May 14, 2022 0 comment
0 FacebookTwitterPinterestEmail
General Recipes

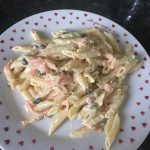
PENNE WITH SMOKED SALMON & CREAM CHEESE SAUCE

by Rebecca May 14, 2022
written by Rebecca

YIELD: 4 servings

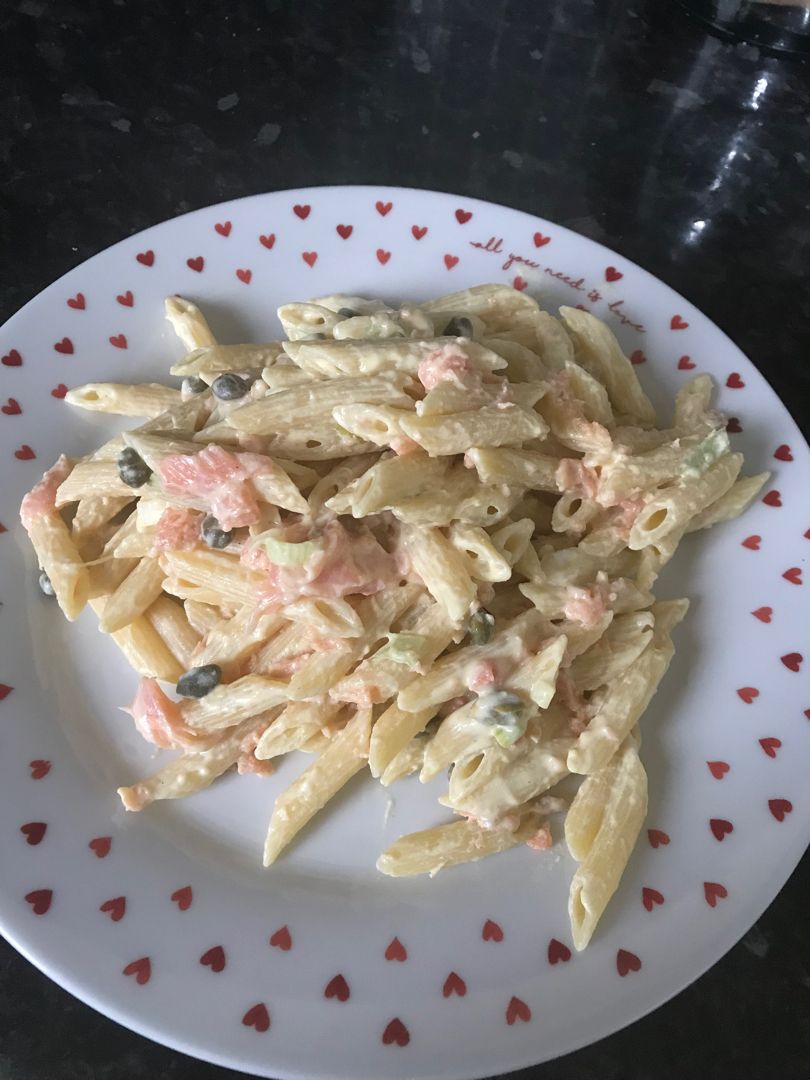
This delicious penne with smoked salmon and cream cheese sauce has been my family’s favorite for years! A great pasta dish for an easy and quick weeknight meal and impressive to serve on dinner dates and dinner parties. The pasta is tossed in an incredibly smooth luxurious sauce. And the smoked salmon adds lavishness to this dish balanced by the well-known flavors of capers along with dill, lemon, onion, and mustard. This truly is a five-star, restaurant-quality meal!

Ingredients

8 oz. smoked salmon, or more, cut into ribbons

1 1-lb. box penne pasta

1/4 c. capers

1 c. cream cheese, softened

4 green onions, thinly sliced

1 tbsp Dijon mustard

1 bunch of fresh dill, chopped

a sprinkle or two of sea salt and freshly ground pepper

1 lemon, zest, and juice

HOW TO MAKE PENNE WITH SMOKED SALMON & CREAM CHEESE SAUCE

Step 1: In a pot of boiling salted water, cook the penne until al dente. Scoop out some of the starchy cooking water from the pot and reserve before draining the pasta but not all the way through. Into the pot, return the pasta, and add 1 to 2 splashes of the reserved water.

Step 2: Add the remaining ingredients to the pot while the pasta is still steaming hot except for the salmon. Using a wooden spoon, stir until the cheese has melted and creates a creamy sauce.

Step 3: Lastly, carefully stir in the smoked salmon. To taste, season with salt and pepper.

Step 4: Serve the penne with smoked salmon and cream cheese sauce right away. Enjoy!

NOTES:

For this dish, you can use your preferred shaped pasta such as bow ties. Although, ribbon pasta such as spaghetti does not work well.

You can also use any kind of smoked fish.

Swap green onions with finely minced red onion.

Sub capers with a spoonful of standard green hot dog relish.

PENNE WITH SMOKED SALMON & CREAM CHEESE SAUCE

Rebecca YIELD: 4 servings This delicious penne with smoked salmon and cream cheese sauce has been my family’s favorite for years! A great pasta dish for an easy and quick weeknight… General Recipes PENNE WITH SMOKED SALMON & CREAM CHEESE SAUCE European Print This
Serves: 4
Nutrition facts: 200 calories 20 grams fat
Rating: 5.0/5
( 1 voted )

Ingredients

  • 8 oz. smoked salmon, or more, cut into ribbons
  • 1 1-lb. box penne pasta
  • 1/4 c. capers
  • 1 c. cream cheese, softened
  • 4 green onions, thinly sliced
  • 1 tbsp Dijon mustard
  • 1 bunch of fresh dill, chopped
  • a sprinkle or two of sea salt and freshly ground pepper
  • 1 lemon, zest, and juice

Instructions

Step 1: In a pot of boiling salted water, cook the penne until al dente. Scoop out some of the starchy cooking water from the pot and reserve before draining the pasta but not all the way through. Into the pot, return the pasta, and add 1 to 2 splashes of the reserved water.

Step 2: Add the remaining ingredients to the pot while the pasta is still steaming hot except for the salmon. Using a wooden spoon, stir until the cheese has melted and creates a creamy sauce.

Step 3: Lastly, carefully stir in the smoked salmon. To taste, season with salt and pepper.

Step 4: Serve the penne with smoked salmon and cream cheese sauce right away. Enjoy!

May 14, 2022 0 comment
0 FacebookTwitterPinterestEmail
General Recipes

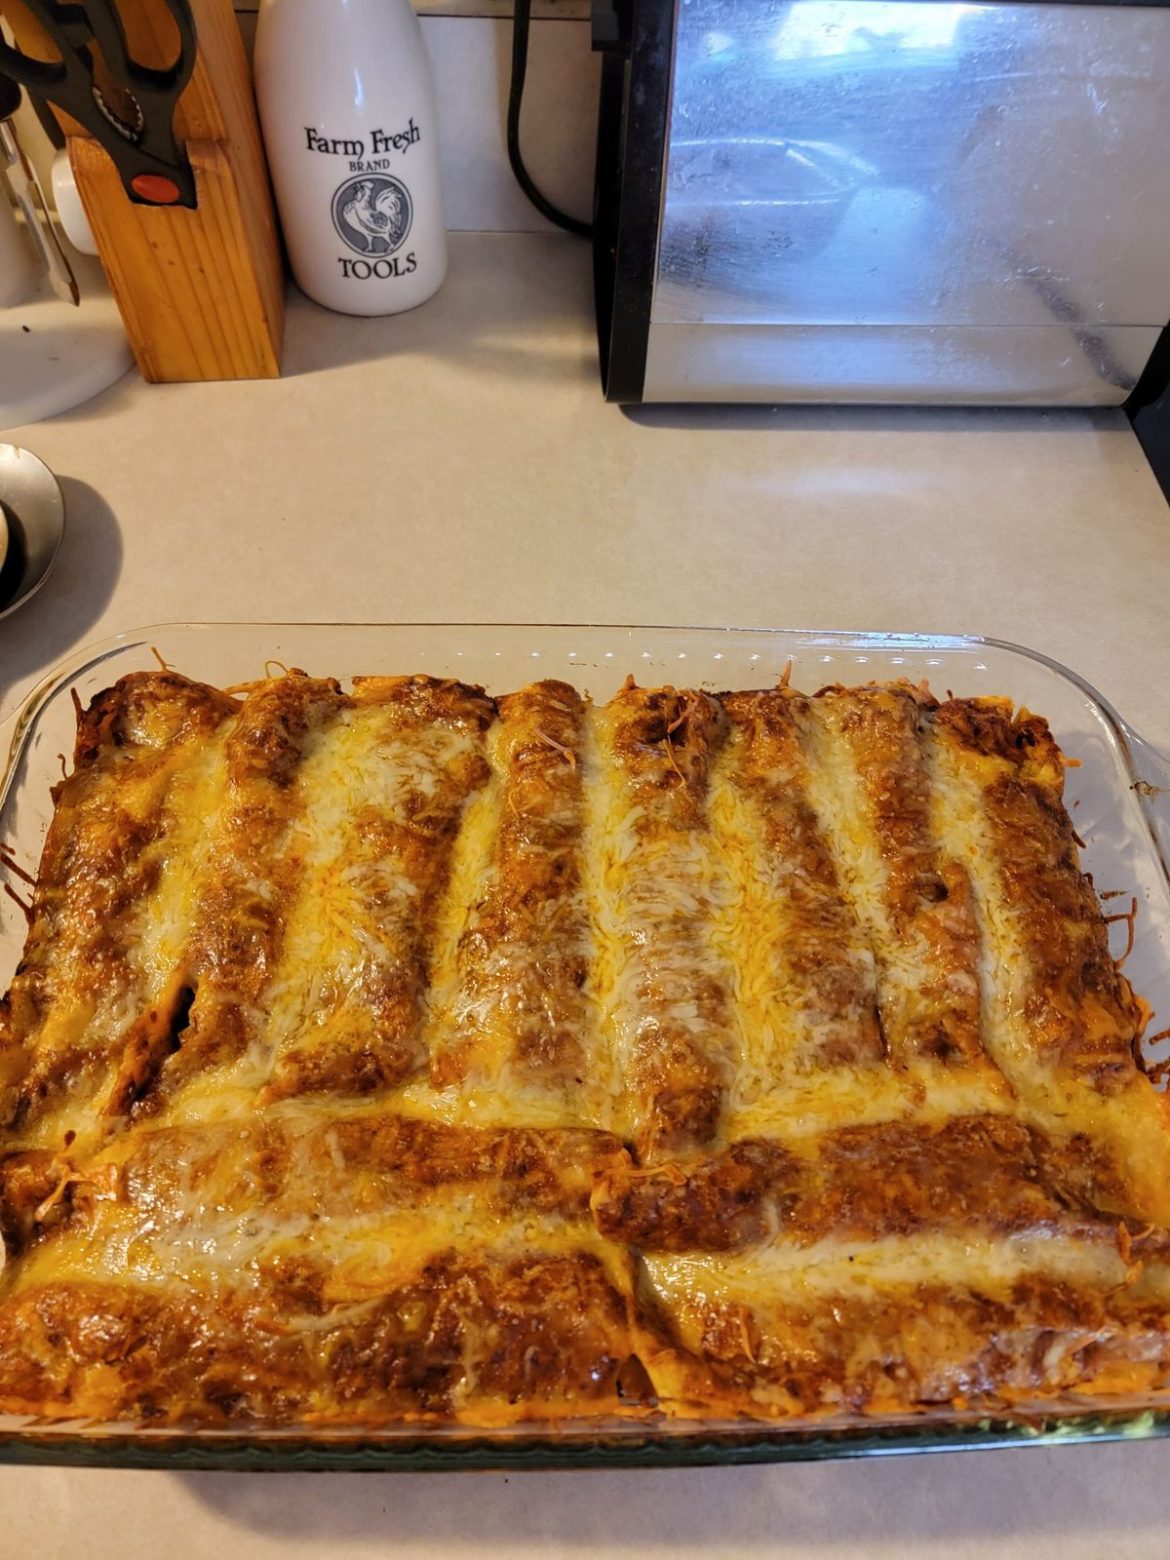
The Best Authentic Beef Enchiladas

by Rebecca May 14, 2022
written by Rebecca

Prep time: 30 mins | Cook time: 2 hrs | Total time: 2 hrs 30 mins | Yield: 4 TO 6 SERVINGS

These are the best enchiladas! Incredibly saucy and cheesy with a milk kick. The ultimate comfort food and one of my family’s favorite dinner rotations!

Ingredients

1¼ lbs (566.99 grams) boneless chuck steaks, trimmed of fat

12 6” corn tortillas

3 cloves garlic, minced

2 tsp ground cumin

2 tsp ground coriander

3 tbsp chili powder

1 tsp granulated sugar

1 tbsp vegetable oil

15 oz (425.24 grams) can tomato sauce

2 yellow onions, finely chopped

½ c (125 ml) water

4 oz (113.4 grams) sharp cheddar cheese, shredded, divided

4 oz (113.4 grams) Monterey Jack cheese, shredded, divided

¼ c (39.25 grams) chopped canned pickled jalapenos

⅓ c (5.33 grams) chopped fresh cilantro

1 tsp salt

How to make The Best Authentic Beef Enchiladas

Step 1: Combine the garlic, chili powder, cumin, coriander, sugar, and salt in a small bowl until well mixed.

Step 2: In a Dutch oven, heat the oil over medium-high heat. Meanwhile, season the meat with salt. Once the oil is shimmering, add the meat to the Dutch oven and cook for about 6 to 8 minutes until both sides are browned. To a plate, transfer the meat.

Step 3: Adjust the heat to medium, then add the onions to the pot. Continue to cook for another 5 minutes until golden brown. Next, stir in the garlic mixture and cook for a minute more until aromatic. Pour in the tomato sauce and water. Bring everything to a boil and place the meat back in the pot with any accumulated juices. Put the lid on and adjust the heat to low. Let everything simmer for 1½ hours until the meat is fork-tender.

Step 4: Prepare the oven. Preheat it to 350 degrees F.

Step 5: Over a medium bowl, strain the beef mixture. To another medium bowl, transfer the meat and any other solids. Break them into small pieces and combine them with half of the shredded cheeses, cilantro, and jalapenos.

Step 6: In the bottom of a 9 x 13-inch baking dish, spread ¾ cup of the sauce. Following the package directions, microwave the tortillas to soften. Down the middle of each tortilla, spread around ⅓ cup of the beef mixture. Tightly roll and lay in the baking dish, seam-side down. Over the enchiladas, evenly pour the rest of the sauce, spreading to cover the ends of the enchiladas.

Step 7: On top of the enchiladas, sprinkle the rest of the cheese. Using foil, tent the baking dish and places it in the preheated oven. Bake for about 25 minutes. Uncover and bake for another 5 to 10 minutes until the cheese browns slightly.

Step 8: Serve right away. You can keep any leftovers in an airtight container and store them in the fridge for up to 3 days.

Note:

To make ahead: You can prep the beef filling and sauce until step 5, then keep in a separate container and store in the fridge for up to 2 days. As directed, prep the rest of the recipe. Simply increase the covered baking time by 5 minutes.

Nutrition Facts:

calories: 708 kcal, carbohydrates: 63g, protein: 51g, fat: 51g, saturated fat: 25g, cholesterol: 151mg, sodium: 1427mg, potassium: 1278mg, fiber: 7g, sugar: 12g, vitamin a: 3010IU, vitamin c: 13.6mg, calcium: 598mg, iron: 9.6mg

The Best Authentic Beef Enchiladas

Rebecca Prep time: 30 mins | Cook time: 2 hrs | Total time: 2 hrs 30 mins | Yield: 4 TO 6 SERVINGS These are the best enchiladas! Incredibly saucy and… General Recipes The Best Authentic Beef Enchiladas European Print This
Serves: 4-6 Prep Time: 30 mins Cooking Time: 2 hrs 2 hrs
Nutrition facts: 708 calories 51 fat
Rating: 5.0/5
( 1 voted )

Ingredients

  • 1¼ lbs (566.99 grams) boneless chuck steaks, trimmed of fat
  • 12 6” corn tortillas
  • 3 cloves garlic, minced
  • 2 tsp ground cumin
  • 2 tsp ground coriander
  • 3 tbsp chili powder
  • 1 tsp granulated sugar
  • 1 tbsp vegetable oil
  • 15 oz (425.24 grams) can tomato sauce
  • 2 yellow onions, finely chopped
  • ½ c (125 ml) water
  • 4 oz (113.4 grams) sharp cheddar cheese, shredded, divided
  • 4 oz (113.4 grams) Monterey Jack cheese, shredded, divided
  • ¼ c (39.25 grams) chopped canned pickled jalapenos
  • ⅓ c (5.33 grams) chopped fresh cilantro
  • 1 tsp salt

Instructions

Step 1: Combine the garlic, chili powder, cumin, coriander, sugar, and salt in a small bowl until well mixed.

Step 2: In a Dutch oven, heat the oil over medium-high heat. Meanwhile, season the meat with salt. Once the oil is shimmering, add the meat to the Dutch oven and cook for about 6 to 8 minutes until both sides are browned. To a plate, transfer the meat.

Step 3: Adjust the heat to medium, then add the onions to the pot. Continue to cook for another 5 minutes until golden brown. Next, stir in the garlic mixture and cook for a minute more until aromatic. Pour in the tomato sauce and water. Bring everything to a boil and place the meat back in the pot with any accumulated juices. Put the lid on and adjust the heat to low. Let everything simmer for 1½ hours until the meat is fork-tender.

Step 4: Prepare the oven. Preheat it to 350 degrees F.

Step 5: Over a medium bowl, strain the beef mixture. To another medium bowl, transfer the meat and any other solids. Break them into small pieces and combine them with half of the shredded cheeses, cilantro, and jalapenos.

Step 6: In the bottom of a 9 x 13-inch baking dish, spread ¾ cup of the sauce. Following the package directions, microwave the tortillas to soften. Down the middle of each tortilla, spread around ⅓ cup of the beef mixture. Tightly roll and lay in the baking dish, seam-side down. Over the enchiladas, evenly pour the rest of the sauce, spreading to cover the ends of the enchiladas.

Step 7: On top of the enchiladas, sprinkle the rest of the cheese. Using foil, tent the baking dish and place it in the preheated oven. Bake for about 25 minutes. Uncover and bake for another 5 to 10 minutes until the cheese browns slightly.

Step 8: Serve right away. You can keep any leftovers in an airtight container and store them in the fridge for up to 3 days.

Notes

To make ahead: You can prep the beef filling and sauce until step 5, then keep in a separate container and store in the fridge for up to 2 days. As directed, prep the rest of the recipe. Simply increase the covered baking time by 5 minutes.

May 14, 2022 0 comment
0 FacebookTwitterPinterestEmail
General Recipes

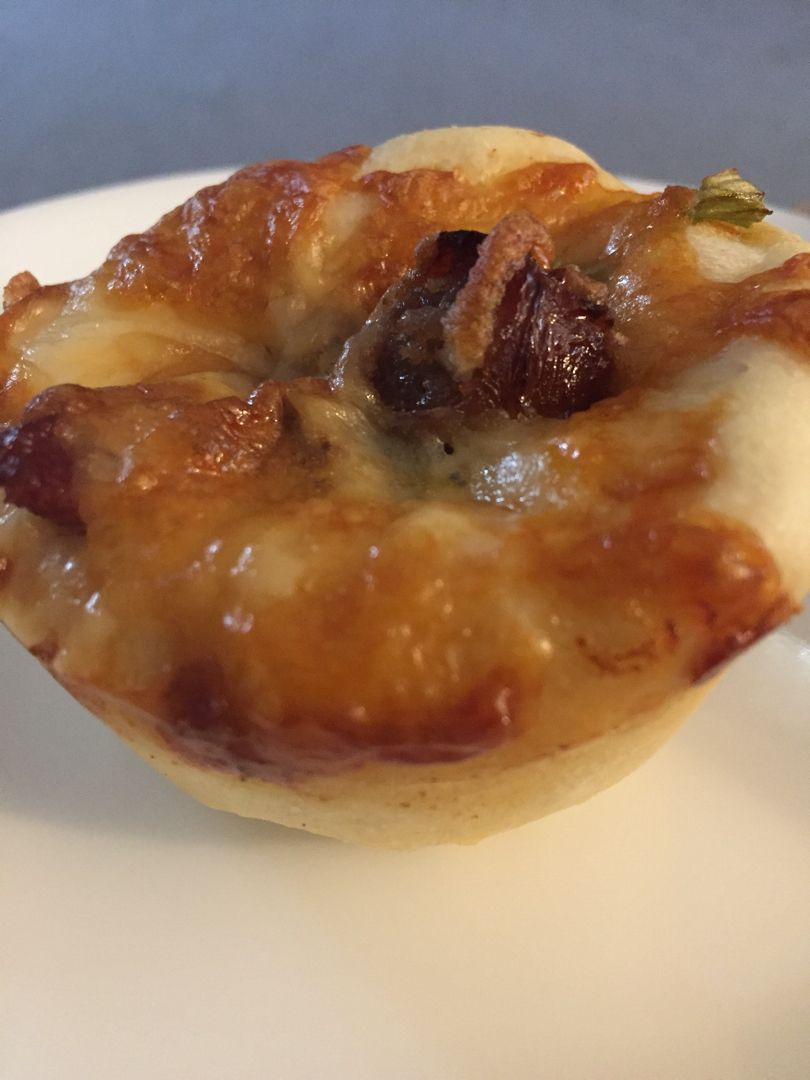
Deep Dish Pizza Cups Recipe

by Rebecca May 14, 2022
written by Rebecca

PREP TIME: 5 mins | COOK TIME: 20 mins | SERVINGS: 6

Super easy and quick to whip up – these deep-dish pizza cups bring your favorite pizza to the table without any fuss! It’s a fun and delicious way to enjoy pizza. Easily customize these deep-dish pizza cups. Feel free to make your favorite pepperoni pizza or cheese pizza, or white cheese pizza in cups. If you love pizza, then this simple recipe is a must! Perfect for a quick lunch or afternoon snack and an excellent way to put a fun twist to your pizza night.

Ingredients

pepperoni

1/2 c. Parmesan cheese, grated

1/2 c. pizza sauce

1 c. mozzarella cheese, grated

1/4 c. ricotta cheese

1 recipe pizza dough, homemade or store-bought

How to make Deep Dish Pizza Cups

Step 1: Prepare the oven. Preheat it to 375 degrees F. Using olive oil or cooking spray, grease a 12-cup muffin pan.

Step 2: Into 12 equal portions, divide the pizza dough. Into individual muffin cups, press each of the portions.

Step 3: Feel free to customize your deep dish pizza cups:

PEPPERONI PIZZA CUPS:

With a tbsp pizza sauce, top each of the pizza cups. Sprinkle around 2 tbsp each mozzarella cheese, followed by 1 tbsp Parmesan cheese. Add the pieces of pepperoni on top of each pizza cup.

CHEESE PIZZA CUPS:

With about 1 tbsp pizza sauce, top each pizza cup. Sprinkle with 2 tbsp each of mozzarella cheese, followed by 1 tbsp Parmesan cheese.

WHITE CHEESE PIZZA CUPS:

With around 1 tbsp each of ricotta cheese, to each pizza cup and sprinkle with 2 tbsp each mozzarella cheese followed with 1 tbsp Parmesan cheese.

Step 4: Place in the preheated oven and bake for about 20 minutes or until the cheese has melted and the pizza cups are completely cooked. When done, remove from the oven and let the pizza cups rest for approximately 3 to 5 minutes.

Step 5: Serve and enjoy!

Nutritional Facts:

Serving: 2cups | Calories: 271 kcal | Carbohydrates: 33g | Protein: 13g | Fat: 9g | Saturated Fat: 5g | Cholesterol: 25mg | Sodium: 837mg | Potassium: 100mg | Fiber: 1g | Sugar: 5g | Vitamin A: 325IU | Vitamin C: 1.4mg | Calcium: 217mg | Iron: 2.2mg

Deep Dish Pizza Cups Recipe

Rebecca PREP TIME: 5 mins | COOK TIME: 20 mins | SERVINGS: 6 Super easy and quick to whip up – these deep-dish pizza cups bring your favorite pizza to the… General Recipes Deep Dish Pizza Cups Recipe European Print This
Serves: 6 Prep Time: 5 mins Cooking Time: 20 mins 20 mins
Nutrition facts: 271 calories 9 fat
Rating: 5.0/5
( 1 voted )

Ingredients

  • pepperoni
  • 1/2 c. Parmesan cheese, grated
  • 1/2 c. pizza sauce
  • 1 c. mozzarella cheese, grated
  • 1/4 c. ricotta cheese
  • 1 recipe pizza dough, homemade or store-bought

Instructions

Step 1: Prepare the oven. Preheat it to 375 degrees F. Using olive oil or cooking spray, grease a 12-cup muffin pan.

Step 2: Into 12 equal portions, divide the pizza dough. Into individual muffin cups, press each of the portions.

Step 3: Feel free to customize your deep dish pizza cups:

PEPPERONI PIZZA CUPS:

With a tbsp pizza sauce, top each of the pizza cups. Sprinkle around 2 tbsp each mozzarella cheese, followed by 1 tbsp Parmesan cheese. Add the pieces of pepperoni on top of each pizza cup.

CHEESE PIZZA CUPS:

With about 1 tbsp pizza sauce, top each pizza cup. Sprinkle with 2 tbsp each of mozzarella cheese, followed by 1 tbsp Parmesan cheese.

WHITE CHEESE PIZZA CUPS:

With around 1 tbsp each of ricotta cheese, to each pizza cup and sprinkle with 2 tbsp each mozzarella cheese followed with 1 tbsp Parmesan cheese.

Step 4: Place in the preheated oven and bake for about 20 minutes or until the cheese has melted and the pizza cups are completely cooked. When done, remove from the oven and let the pizza cups rest for approximately 3 to 5 minutes.

Step 5: Serve and enjoy!

May 14, 2022 0 comment
0 FacebookTwitterPinterestEmail
General Recipes

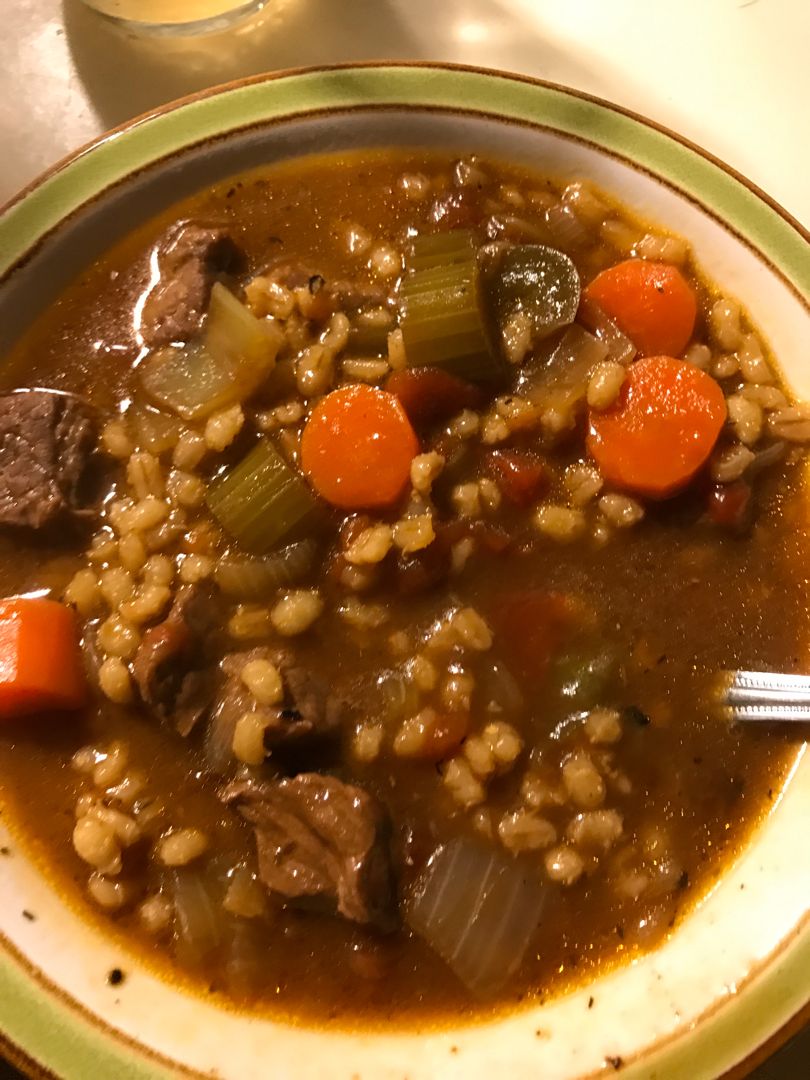
Beef Barley Soup

by Rebecca May 14, 2022
written by Rebecca

PREP TIME: 20 MINS | COOK TIME: 50 MINS | TOTAL TIME: 1 HR 10 MINS | SERVINGS: 8

This beef barley soup is a complete meal in a bowl. A flavorful-packed soup loaded with nutritious veggies, tender beef, and plump barley. The best part is you can whip this up in advance and freeze it. This beef barley soup is rich and hearty. This will warm you up inside and out. Every spoonful screams comfort! Serve a big bowl of this delicious soup with biscuits or salad on the side.

Winter is not yet over and what’s the best way to warm you up from inside and out? I can name a bunch, but on top of my list is this nutritious beef barley soup. I use leftover cooked beef such as pot roast, steak, or roast beef. If you do not have any leftovers, you can also use a cubed chuck of flank steak.

This low in calorie soup is superbly the perfect choice for a healthy meal that your family deserves!

Ingredients

2 c. cooked beef

1 onion, chopped

1 garlic clove, minced

1 tbsp olive oil

2 carrots, sliced

1 bay leaf

1 stalk celery, sliced

6 c. reduced-sodium beef broth

½ green pepper, diced

⅔ c. barley

¼ tsp dried thyme

1 tbsp Worcestershire sauce

1 package beef gravy mix

2 tbsp fresh parsley or 2 tsp dried

salt & pepper to taste

2 tbsp red wine optional

1 can petite diced tomatoes 14-15 ounces, undrained

How to make Beef Barley Soup

Step 1: In oil, cook the onions and garlic over medium heat until tender. Then, add the rest of the ingredients. Bring everything to a boil, then decrease the heat. Put the lid on and simmer the soup for approximately 40 to 50 minutes or until the barley is cooked.

Step 2: When done, remove the bay leaves, and discard them.

Step 3: Ladle the beef barley soup into serving bowls and serve. Enjoy!

Note:

To reach your desired consistency, add more broth or water.

NUTRITION FACTS:

Calories: 149, Carbohydrates: 15g, Protein: 10g, Fat: 5g, Saturated Fat: 1g, Cholesterol: 17mg, Sodium: 385mg, Potassium: 623mg, Fiber: 3g, Sugar: 1g, Vitamin A: 2680IU, Vitamin C: 9.7mg, Calcium: 25mg, Iron: 1.5mg

Beef Barley Soup

Rebecca PREP TIME: 20 MINS | COOK TIME: 50 MINS | TOTAL TIME: 1 HR 10 MINS | SERVINGS: 8 This beef barley soup is a complete meal in a bowl.… General Recipes Beef Barley Soup European Print This
Serves: 8 Prep Time: 20 mins Cooking Time: 50 mins 50 mins
Nutrition facts: 149 calories 5 fat
Rating: 5.0/5
( 1 voted )

Ingredients

  • 2 c. cooked beef
  • 1 onion, chopped
  • 1 garlic clove, minced
  • 1 tbsp olive oil
  • 2 carrots, sliced
  • 1 bay leaf
  • 1 stalk celery, sliced
  • 6 c. reduced-sodium beef broth
  • ½ green pepper, diced
  • ⅔ c. barley
  • ¼ tsp dried thyme
  • 1 tbsp Worcestershire sauce
  • 1 package beef gravy mix
  • 2 tbsp fresh parsley or 2 tsp dried
  • salt & pepper to taste
  • 2 tbsp red wine optional
  • 1 can petite diced tomatoes 14-15 ounces, undrained

Instructions

Step 1: In oil, cook the onions and garlic over medium heat until tender. Then, add the rest of the ingredients. Bring everything to a boil, then decrease the heat. Put the lid on and simmer the soup for approximately 40 to 50 minutes or until the barley is cooked.

Step 2: When done, remove the bay leaves, and discard them.

Step 3: Ladle the beef barley soup into serving bowls and serve. Enjoy!

Notes

To reach your desired consistency, add more broth or water.

May 14, 2022 0 comment
0 FacebookTwitterPinterestEmail
General Recipes

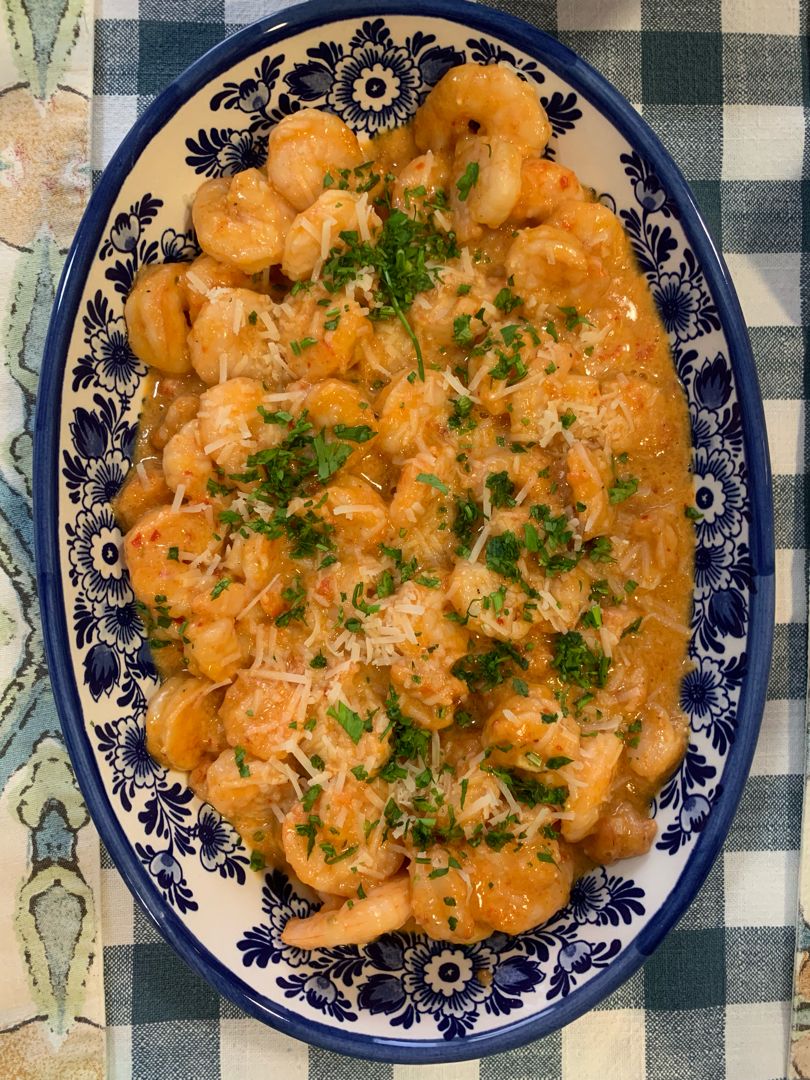
SHRIMP IN ROASTED PEPPER SAUCE

by Rebecca May 13, 2022
written by Rebecca

PREP TIME: 10 MINS | COOK TIME: 20 MINS | TOTAL TIME: 30 MINS | SERVINGS: 4

This is a very delightful shrimp dish with roasted bell pepper matched with cream and Parmesan that makes a mouthwatering and lip-smacking sauce. A very easy and quick dish that requires only a few readily available ingredients to make. If you love shrimp and looking for another shrimp recipe to try, then this is a must! Feel free to use peeled shrimp. I prefer to use raw, medium-sized deveined shrimp with tails on. You can serve this shrimp with roasted pepper sauce over rice, with pasta, or even as a dip.

INGREDIENTS

3 tablespoons butter

1 pound peeled, deveined shrimps

½ tablespoon paprika

2 garlic cloves

½ teaspoon red pepper flakes, optional

12-ounce jar of roasted peppers

¾ c. Parmesan cheese, shredded

¾ c. Half and Half or heavy cream

chopped parsley to garnish

salt to taste

HOW TO MAKE SHRIMP IN ROASTED PEPPER SAUCE

Step 1: Into a blender or smoothie cup, place the roasted peppers along with the liquid from the jar and process until smooth.

Step 2: Melt the butter in a large skillet over medium-high heat. Once the butter has melted, add the shrimps to the skillet and sprinkle with paprika and red pepper flakes. Cook the shrimps for approximately 5 minutes.

Step 3: Adjust the heat to low. Add the garlic to the shrimp and season with salt. Continue to cook for another minute. When done, set the shrimps aside.

Step 4: Add the roasted pepper puree to the same skillet. Adjust the heat to medium and cook for approximately 7 to 10 minutes until most of the liquid is gone. Next, add the half-and-half and Parmesan. Stir well and bring everything to a gentle simmer.

Step 5: Add the shrimps back to the skillet. Stir and heat the shrimp back up for another minute or two.

Step 6: Serve the shrimp in roasted pepper sauce right away garnished with some parsley and Parmesan. Enjoy!

NUTRITION FACTS:

Calories: 255 kcal, Carbohydrates: 12g, Protein: 10g, Fat: 19g, Saturated Fat: 12g, Cholesterol: 53mg, Sodium: 1736mg, Potassium: 467mg, Fiber: 3g, Sugar: 3g, Vitamin A: 2250IU, Vitamin C: 51mg, Calcium: 349mg, Iron: 2.4mg

SHRIMP IN ROASTED PEPPER SAUCE

Rebecca PREP TIME: 10 MINS | COOK TIME: 20 MINS | TOTAL TIME: 30 MINS | SERVINGS: 4 This is a very delightful shrimp dish with roasted bell pepper matched with… General Recipes SHRIMP IN ROASTED PEPPER SAUCE European Print This
Serves: 4 Prep Time: 10 mins Cooking Time: 20 mins 20 mins
Nutrition facts: 255 calories 19 fat
Rating: 5.0/5
( 1 voted )

Ingredients

  • 3 tablespoons butter
  • 1 pound peeled, deveined shrimps
  • ½ tablespoon paprika
  • 2 garlic cloves
  • ½ teaspoon red pepper flakes, optional
  • 12-ounce jar of roasted peppers
  • ¾ c. Parmesan cheese, shredded
  • ¾ c. Half and Half or heavy cream
  • chopped parsley to garnish
  • salt to taste

Instructions

Step 1: Into a blender or smoothie cup, place the roasted peppers along with the liquid from the jar and process until smooth.

Step 2: Melt the butter in a large skillet over medium-high heat. Once the butter has melted, add the shrimps to the skillet and sprinkle with paprika and red pepper flakes. Cook the shrimps for approximately 5 minutes.

Step 3: Adjust the heat to low. Add the garlic to the shrimp and season with salt. Continue to cook for another minute. When done, set the shrimps aside.

Step 4: Add the roasted pepper puree to the same skillet. Adjust the heat to medium and cook for approximately 7 to 10 minutes until most of the liquid is gone. Next, add the half-and-half and Parmesan. Stir well and bring everything to a gentle simmer.

Step 5: Add the shrimps back to the skillet. Stir and heat the shrimp back up for another minute or two.

Step 6: Serve the shrimp in roasted pepper sauce right away garnished with some parsley and Parmesan. Enjoy!

May 13, 2022 0 comment
0 FacebookTwitterPinterestEmail
General Recipes

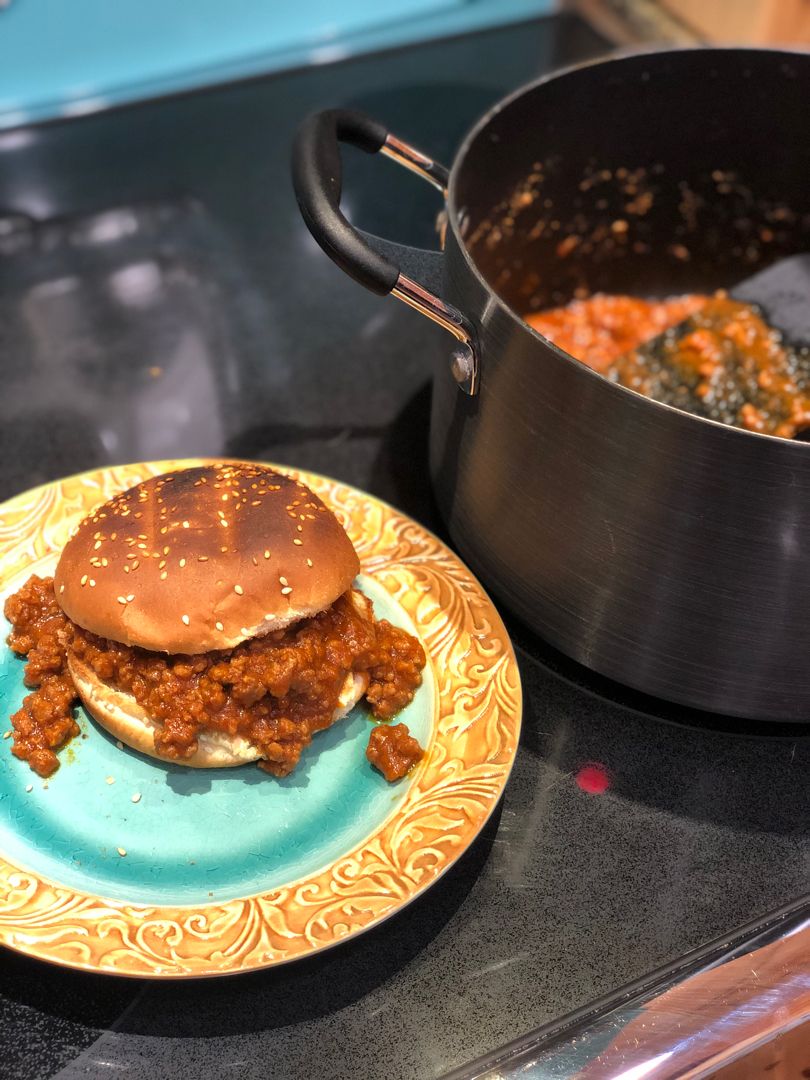
Slow Cooker Sloppy Joes

by Rebecca May 13, 2022
written by Rebecca

Prep Time: 30 mins | Cook Time: 6 hrs | Total Time: 6 hrs 30 mins | Servings: 6

Sloppy Joes are a true classic. A child’s favorite and a must in every home. This easy slow cooker sloppy Joe is my family’s favorite. It is my go-to recipe that I can prep in less than thirty minutes. All I need is to dump everything in my trusty slow cooker and set it to cook either on low or high. It’s perfect for busy weeknights as I can set it to cook without staying in the kitchen forever.

Sloppy Joes are made with ground beef, tomato sauce, brown sugar, and seasoning. A mixture of simple ingredients that combined to give you the best tasting sloppy Joes. Feel free to use ground turkey or a mix of ground beef and turkey. If you want a bit of heat, you can also add some chopped jalapenos. Serve this sloppy joe between buns, pizza topping, or on slider buns/bread rolls.

Ingredients

1 1/2 lbs ground beef

2 tsp vegetable oil

16 oz. tomato sauce

1/2 c. ketchup

1 tbsp Worcestershire sauce

2 tbsp brown sugar

1/2 tsp garlic powder

1 tsp prepared mustard

1/2 tsp onion powder

1/2 tsp smoked paprika

6 hamburger buns

6 slices of yellow cheese

Salt and pepper (to taste)

How to make Slow Cooker Sloppy Joes

Step 1: In a large pan, heat the oil over medium-high heat.

Step 2: Once the oil is hot, add the ground beef to the pan and sprinkle with salt and pepper. Cook the ground beef for about 6 to 8 minutes, breaking the meat into small chunks with a wooden spoon until no longer pink.

Step 3: To a slow cooker, transfer the ground beef and add the remaining ingredients. Mix well and set to cook for 3 hours on high or 6 hours on low.

Step 4: Onto the hamburger buns, spoon the meat, and top with cheese. Serve right away. Enjoy!

Nutrition Facts:

Calories: 592 kcal | Carbohydrates: 36g | Protein: 32g | Fat: 35g | Saturated Fat: 16g | Cholesterol: 110mg | Sodium: 1081mg | Potassium: 724mg | Fiber: 2g | Sugar: 15g | Vitamin A: 793IU | Vitamin C: 7mg | Calcium: 316mg | Iron: 5mg

Slow Cooker Sloppy Joes

Rebecca Prep Time: 30 mins | Cook Time: 6 hrs | Total Time: 6 hrs 30 mins | Servings: 6 Sloppy Joes are a true classic. A child’s favorite and a… General Recipes Slow Cooker Sloppy Joes European Print This
Serves: 6 Prep Time: 30 mins Cooking Time: 6 hrs 6 hrs
Nutrition facts: 592 calories 35 fat
Rating: 5.0/5
( 1 voted )

Ingredients

  • 1 1/2 lbs ground beef
  • 2 tsp vegetable oil
  • 16 oz. tomato sauce
  • 1/2 c. ketchup
  • 1 tbsp Worcestershire sauce
  • 2 tbsp brown sugar
  • 1/2 tsp garlic powder
  • 1 tsp prepared mustard
  • 1/2 tsp onion powder
  • 1/2 tsp smoked paprika
  • 6 hamburger buns
  • 6 slices of yellow cheese
  • Salt and pepper (to taste)

Instructions

Step 1: In a large pan, heat the oil over medium-high heat.

Step 2: Once the oil is hot, add the ground beef to the pan and sprinkle with salt and pepper. Cook the ground beef for about 6 to 8 minutes, breaking the meat into small chunks with a wooden spoon until no longer pink.

Step 3: To a slow cooker, transfer the ground beef and add the remaining ingredients. Mix well and set to cook for 3 hours on high or 6 hours on low.

Step 4: Onto the hamburger buns, spoon the meat, and top with cheese. Serve right away. Enjoy!

May 13, 2022 0 comment
0 FacebookTwitterPinterestEmail
General Recipes

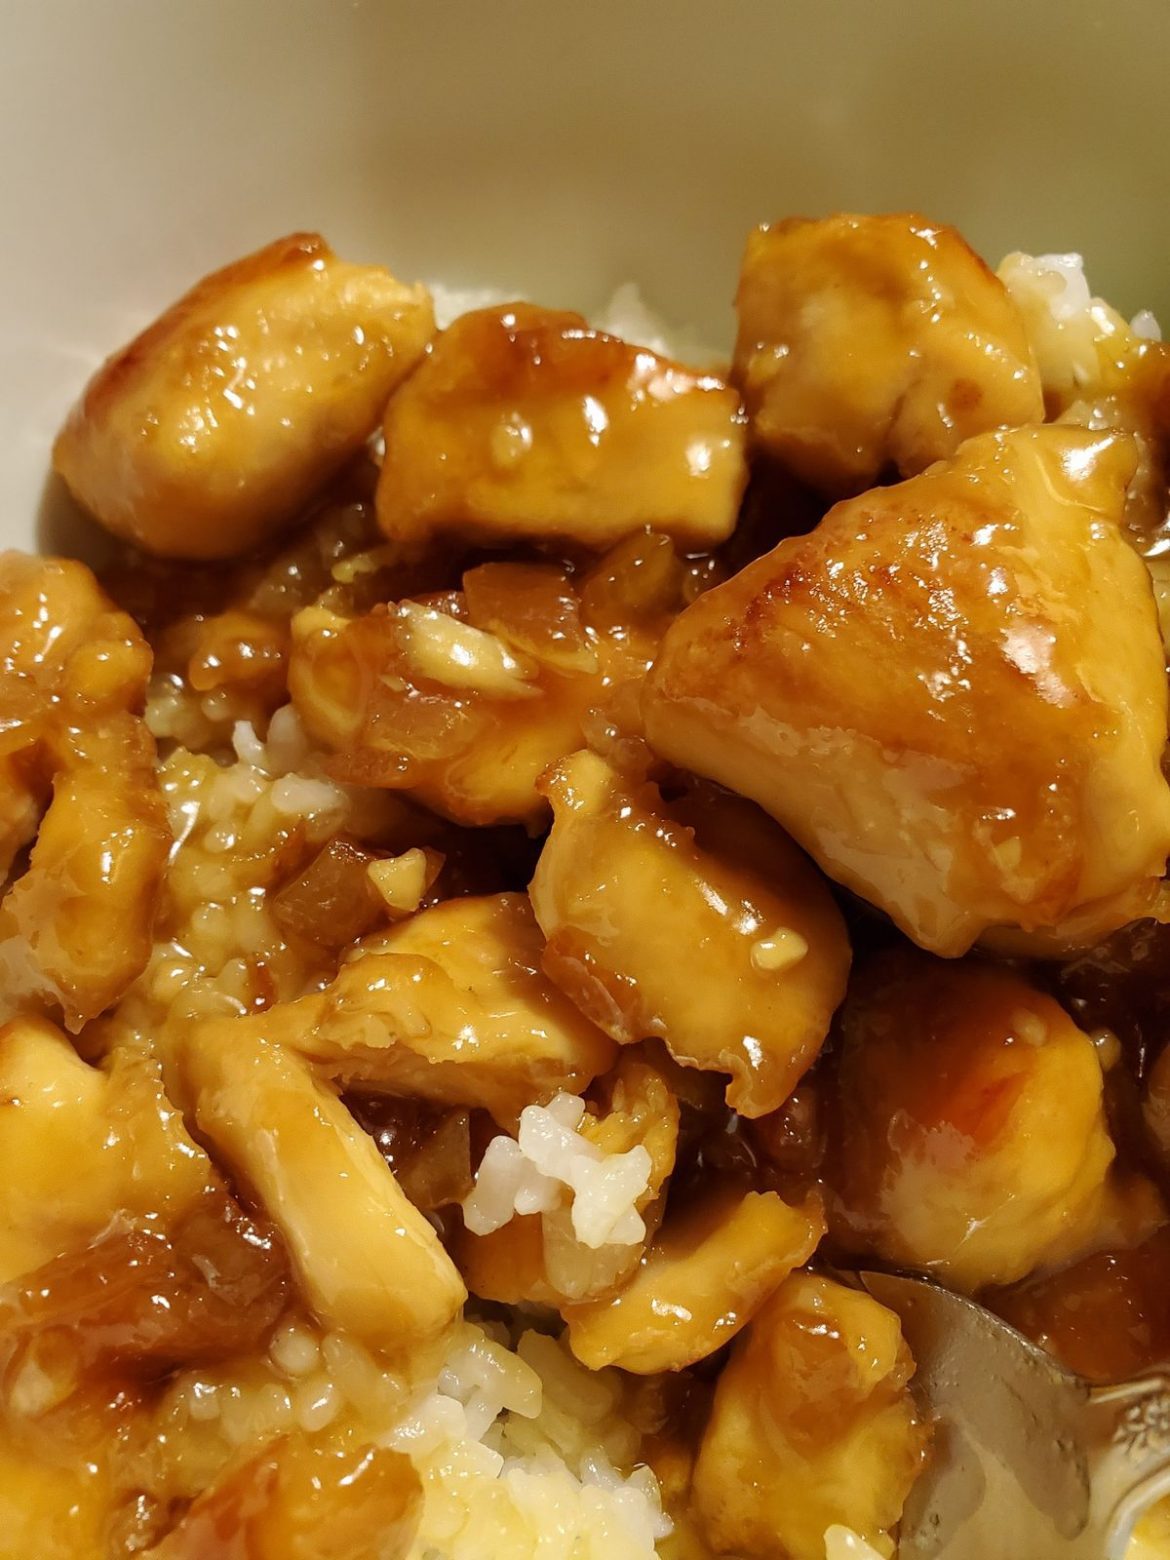
Orange Chicken Recipe

by Rebecca May 13, 2022
written by Rebecca

Prep Time: 15 mins | Cook Time: 15 mins | Total Time: 30 mins | Servings: 6

Make this delicious orange chicken at home with this easy and quick recipe. Bite-sized chicken pieces in a sweet and slightly spicy orange sauce are best to serve over steamed rice for a simple, filling meal that’s better than takeout!

Ingredients

1 egg

2 pounds boneless, skinless chicken thighs, cut into bite-sized pieces

2 teaspoons sesame oil

1/3 c. corn starch

Canola Oil for frying

3 tablespoons soy sauce

Sauce:

3 cloves garlic, finely minced

3 tablespoons soy sauce

1/3 c. rice wine vinegar, or dry sherry

3 tablespoons water

1/3 c. sugar

1/3 c. chicken broth

1 teaspoon canola oil

2 tablespoons corn starch

1 1/2 teaspoons minced ginger

pinch of red pepper flakes, optional

1 1/2 teaspoons fresh orange zest

2 tablespoons fresh orange juice

Garnish:

orange slices

sliced green onions

How to make Orange Chicken

Step 1: In a small deep fryer or heavy-bottomed pot, drizzle 1 to 2 inches of canola oil. Heat the oil to 375 degrees F.

Step 2: Place the sesame oil, egg, 3 tbsp soy sauce, and 1/3 c cornstarch in a large bowl. Mix well until you have a thin batter. Then, add the chicken pieces and toss to coat. Set aside for a couple of minutes. Once the oil is hot, add the chicken to the pot (in batches) and fry until done. Transfer the cooked chicken to a paper towel-lined plate while you prepare the sauce.

Sauce:

Step 3: In a bowl, whisk the orange zest, orange juice, 3 tbsp soy sauce, 3 tbsp water, 1/3 c sugar, 1/3 c rice wine vinegar, or dry sherry, 1/3 c chicken broth, and 2 tbsp corn starch until well blended. Set aside.

Step 4: In a large wok or skillet, heat 1 tsp canola oil over medium-high heat. To the hot oil, add the ginger. Garlic, and red pepper flakes (optional). Stir well and cook for about 30 seconds until aromatic. Add the sauce and continue to cook while stirring often, over medium heat until the sauce has thickened. This takes about 3 to 4 minutes.

Step 5: Toss in the chicken and serve immediately, garnished with some sliced green onions and slices of orange. Enjoy!

Nutrition Facts:

Calories: 310 kcal | Carbohydrates: 22g | Protein: 32g | Fat: 9g | Saturated Fat: 2g | Cholesterol: 171mg | Sodium: 1200mg | Potassium: 447mg | Fiber: 1g | Sugar: 12g | Vitamin A: 87IU | Vitamin C: 5mg | Calcium: 24mg | Iron: 2mg

Orange Chicken Recipe

Rebecca Prep Time: 15 mins | Cook Time: 15 mins | Total Time: 30 mins | Servings: 6 Make this delicious orange chicken at home with this easy and quick recipe.… General Recipes Orange Chicken Recipe European Print This
Serves: 6 Prep Time: 15 mins Cooking Time: 15 mins 15 mins
Nutrition facts: 310 calories 9 fat
Rating: 5.0/5
( 1 voted )

Ingredients

  • 1 egg
  • 2 pounds boneless, skinless chicken thighs, cut into bite-sized pieces
  • 2 teaspoons sesame oil
  • 1/3 c. corn starch
  • Canola Oil for frying
  • 3 tablespoons soy sauce
  • Sauce:
  • 3 cloves garlic, finely minced
  • 3 tablespoons soy sauce
  • 1/3 c. rice wine vinegar, or dry sherry
  • 3 tablespoons water
  • 1/3 c. sugar
  • 1/3 c. chicken broth
  • 1 teaspoon canola oil
  • 2 tablespoons corn starch
  • 1 1/2 teaspoons minced ginger
  • pinch of red pepper flakes, optional
  • 1 1/2 teaspoons fresh orange zest
  • 2 tablespoons fresh orange juice
  • Garnish:
  • orange slices
  • sliced green onions

Instructions

Step 1: In a small deep fryer or heavy-bottomed pot, drizzle 1 to 2 inches of canola oil. Heat the oil to 375 degrees F.

Step 2: Place the sesame oil, egg, 3 tbsp soy sauce, and 1/3 c cornstarch in a large bowl. Mix well until you have a thin batter. Then, add the chicken pieces and toss to coat. Set aside for a couple of minutes. Once the oil is hot, add the chicken to the pot (in batches) and fry until done. Transfer the cooked chicken to a paper towel-lined plate while you prepare the sauce.

Sauce:

Step 3: In a bowl, whisk the orange zest, orange juice, 3 tbsp soy sauce, 3 tbsp water, 1/3 c sugar, 1/3 c rice wine vinegar, or dry sherry, 1/3 c chicken broth, and 2 tbsp corn starch until well blended. Set aside.

Step 4: In a large wok or skillet, heat 1 tsp canola oil over medium-high heat. To the hot oil, add the ginger. Garlic, and red pepper flakes (optional). Stir well and cook for about 30 seconds until aromatic. Add the sauce and continue to cook while stirring often, over medium heat until the sauce has thickened. This takes about 3 to 4 minutes.

Step 5: Toss in the chicken and serve immediately, garnished with some sliced green onions and slices of orange. Enjoy!

May 13, 2022 0 comment
0 FacebookTwitterPinterestEmail
Newer Posts
Older Posts

Popular Posts

  • 1

    Crispy Crunchy Parmesan Potatoes

    March 21, 2020
  • 2

    CROCK POT SMOTHERED PORK CHOPS

    March 21, 2020
  • Facebook
  • Twitter

@2019 - All Right Reserved.


Back To Top