Cook it once
  • Home
  • Privacy Policy
  • Recipes
    • KETO
    • LC
    • WW
  • Tips
  • Contact
Cook it once
  • Home
  • Privacy Policy
  • Recipes
    • KETO
    • LC
    • WW
  • Tips
  • Contact
Category:

General Recipes

General Recipes

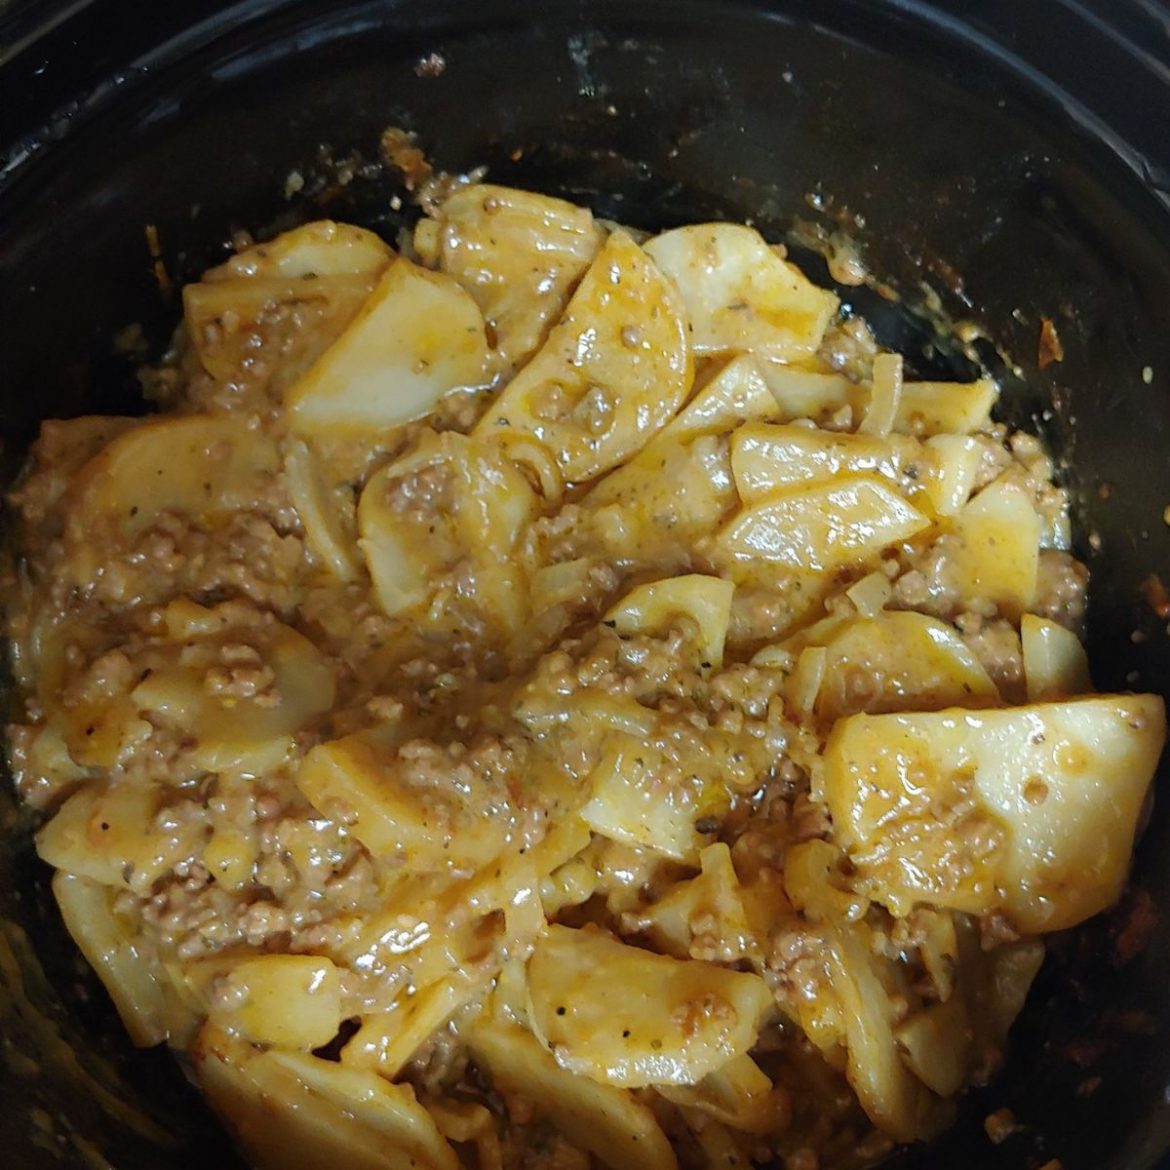
Slow Cooker Beef and Potatoes Au Gratin

by Rebecca May 20, 2022
written by Rebecca

Prep Time: 25 mins | Cook Time: 4 hrs | Total Time: 4 hrs 25 mins | Servings: 6

If you want another slow cooker recipe, then this beef and potatoes Au Gratin is a must-try! In your slow cooker, layer the beef, potatoes, and cheese and set to cook for a couple of hours. This is perfect for busy weeknights as you do not have to spend too much time in the kitchen. All you need to do is sear the ground beef and mix the spices. Then, layer everything in your trusty slow cooker, and that’s it! You can even use any kind of potatoes you have on hand, simply slice them thinly. If desired, you can even swap the ground beef with 12 to 16 ounces of cooked and crumbled bacon. This recipe is pretty versatile, and the result is superb!

Ingredients

1 c. thinly sliced white onion

3 pounds peeled russet potatoes, sliced a ¼ inch thick (around 7 c. total after being sliced)

1 pound ground beef plus a touch of salt and pepper to season

1 teaspoon paprika

1 teaspoon parsley

3 c. shredded sharp cheese

1/2 teaspoon garlic powder

1/2 c. chicken broth or beef broth

1 teaspoon salt

1/4 teaspoon pepper

How to make Slow Cooker Beef and Potatoes Au Gratin

Step 1: On the stovetop, cook the ground beef until brown. Season with a pinch of salt and pepper.

Step 2: Place the paprika, garlic powder, parsley, salt, and pepper in a small bowl. Mix well until combined.

Step 3: In a slow cooker, add half of the potatoes. On top, sprinkle half each of the onions, seasonings, meat, and cheese. Do another layer and evenly drizzle over the broth.

Step 4: Put the lid on and set to cook for 4 hours on high until the potatoes are tender.

Notes:

For this recipe, you can use any kind of potato. Simply slice them thinly.

Swap ground beef with about 12 to 16 ounces of cooked and crumbled bacon.

Nutrition Facts:

Calories: 556 kcal | Carbohydrates: 45g | Protein: 35g | Fat: 27g | Saturated Fat: 15g | Cholesterol: 108mg | Sodium: 874mg | Potassium: 1317mg | Fiber: 4g | Sugar: 3g | Vitamin A: 1040IU | Vitamin C: 17mg | Calcium: 454mg | Iron: 4mg
Slow Cooker Beef and Potatoes Au Gratin

Rebecca Prep Time: 25 mins | Cook Time: 4 hrs | Total Time: 4 hrs 25 mins | Servings: 6 If you want another slow cooker recipe, then this beef and… General Recipes Slow Cooker Beef and Potatoes Au Gratin European Print This
Serves: 6 Prep Time: 25 mins Cooking Time: 4 hrs 4 hrs
Nutrition facts: 556 calories 27 fat
Rating: 5.0/5
( 1 voted )

Ingredients

  • 1 c. thinly sliced white onion
  • 3 pounds peeled russet potatoes, sliced a ¼ inch thick (around 7 c. total after being sliced)
  • 1 pound ground beef plus a touch of salt and pepper to season
  • 1 teaspoon paprika
  • 1 teaspoon parsley
  • 3 c. shredded sharp cheese
  • 1/2 teaspoon garlic powder
  • 1/2 c. chicken broth or beef broth
  • 1 teaspoon salt
  • 1/4 teaspoon pepper

Instructions

Step 1: On the stovetop, cook the ground beef until brown. Season with a pinch of salt and pepper.

Step 2: Place the paprika, garlic powder, parsley, salt, and pepper in a small bowl. Mix well until combined.

Step 3: In a slow cooker, add half of the potatoes. On top, sprinkle half each of the onions, seasonings, meat, and cheese. Do another layer and evenly drizzle over the broth.

Step 4: Put the lid on and set to cook for 4 hours on high until the potatoes are tender.

Notes

For this recipe, you can use any kind of potato. Simply slice them thinly. Swap ground beef with about 12 to 16 ounces of cooked and crumbled bacon.
May 20, 2022 0 comment
0 FacebookTwitterPinterestEmail
General Recipes

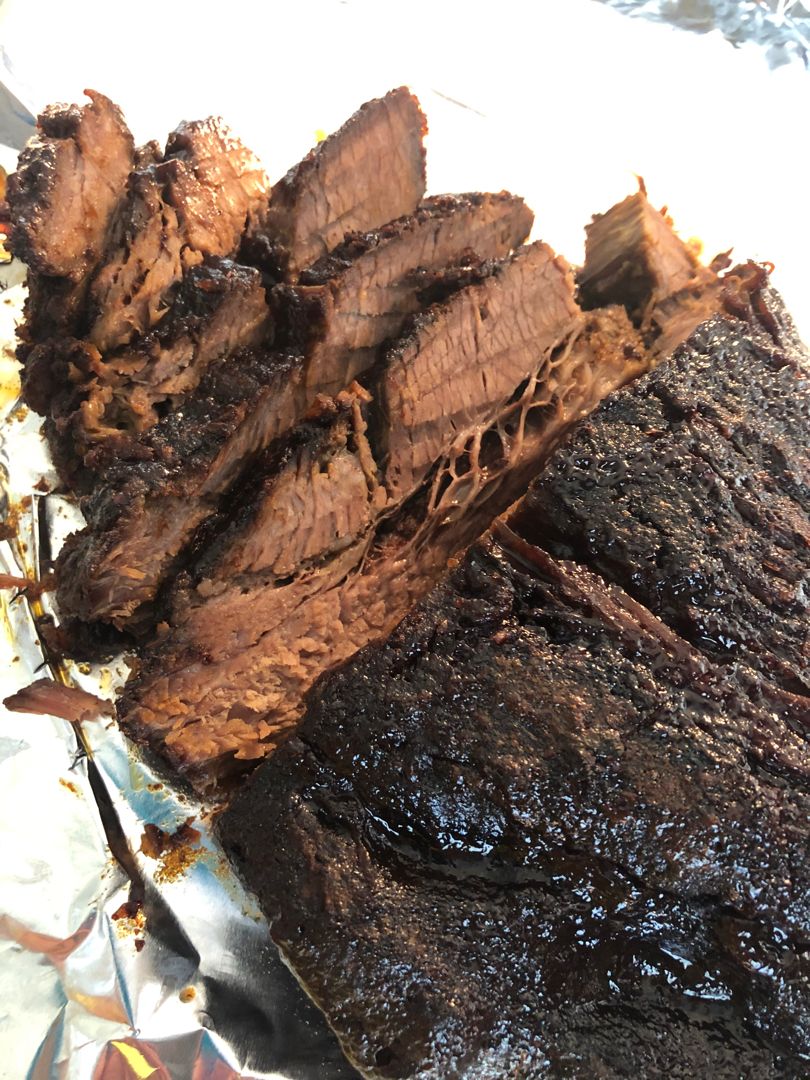
SLOW COOKER BEEF BRISKET

by Rebecca May 20, 2022
written by Rebecca

TOTAL TIME: 8 hrs 15 mins | PREP TIME: 15 mins | COOK TIME: 8 hrs | SERVINGS: 8-10 people

Melt-in-your-mouth beef brisket clothed in a simple barbecue sauce. This slow cooker beef brisket is exploding with amazing flavors, incredibly juicy, and a million better than what you can get from any restaurant. Easily make this any time or in advance and serve a no-fuss, stress-free weeknight meal perfect for entertaining.

INGREDIENTS

SLOW COOKER:

1 c. water

4-5 lbs beef brisket, trimmed of excess fat

2 tbsp Worcestershire sauce

1/2 c. homemade barbecue sauce

1 tbsp beef bouillon

1 tbsp reduced-sodium soy sauce

SPICE RUB:

2 tbsp packed brown sugar

2 tbsp paprika

1 tbsp chili powder

1/2 tsp dried thyme

1 teaspoon EACH onion powder, chipotle powder, pepper

1/4 tsp cayenne pepper is optional for more heat

2 teaspoons EACH garlic powder, salt

BARBECUE SAUCE:

1/3 c. molasses

1 1/2 c. ketchup

1/3 c. packed brown sugar

1/4 c. apple cider vinegar

1/4 c. seedless blackberry preserves

1 tbsp mesquite liquid smoke, optional but recommended

1 tbsp reserved Spice Rub (from above)

HOW TO MAKE SLOW COOKER BEEF BRISKET

Step 1: Prepare the oven. Preheat it to 425 degrees F. Using parchment paper or foil, line a large baking sheet with sides (or use a jelly roll pan). Set aside.

Step 2: Using non-stick cooking spray, grease a 6-quart or larger slow cooker.

Step 3: Trim the excess fat on the brisket. Rinse and pat the brisket dry. Slice the brisket in half if they are extra long so they’ll fit in your slow cooker.

Step 4: Combine the Spice Rub ingredients in a medium bowl. Reserve 1 tbsp Spice Rub for the barbecue sauce. All over the meat, evenly rub the rest of the Spice Rub. Then, place the brisket on the prepared baking sheet. Allow the brisket to sit for 30 minutes at room temperature or keep it in the fridge for up to 24 hours.

Step 5: Place the brisket in the preheated oven and bake for about 30 minutes, uncovered.

Step 6: In the meantime, combine the barbecue sauce ingredients and the reserved Spice Rub until well blended. To the slow cooker, add half a cup of the barbecue sauce, 1 c water, 2 tbsp Worcestershire, 1 tbsp reduced-sodium soy sauce, and 1 tbsp beef bouillon. Mix well.

Step 7: Carefully transfer the brisket to the slow cooker, squishing it to fit. Put the lid on and set to cook for 8 to 10 hours on low or until the brisket is very tender. Halfway through cooking, flip the brisket. Feel free to cook the brisket longer if it is still tough.

Step 8: To a foil-lined baking sheet, transfer the brisket. Brush the brisket with barbecue sauce and pop it in the oven. Broil for about 5 to 10 minutes or until a little caramelized. In the meantime, warm the rest of the barbecue sauce in the microwave or stovetop.

Step 9: Again, brush the brisket with barbecue sauce. Then, slice the brisket across the grain or chop. Serve plain with the rest of the barbecue sauce or in sandwiches.

Note:

You can make this brisket in advance. Cook the brisket until tender. Keep the brisket in the juices and refrigerate. Skip off the hardened fat the next day and cook in the slow cooker for 1 to 2 hours on low or until warmed through. Then, continue with the recipe.

SLOW COOKER BEEF BRISKET

Rebecca TOTAL TIME: 8 hrs 15 mins | PREP TIME: 15 mins | COOK TIME: 8 hrs | SERVINGS: 8-10 people Melt-in-your-mouth beef brisket clothed in a simple barbecue sauce. This… General Recipes SLOW COOKER BEEF BRISKET European Print This
Serves: 8-10 Prep Time: 15 mins Cooking Time: 8 hrs 8 hrs
Nutrition facts: 200 calories 20 grams fat
Rating: 5.0/5
( 1 voted )

Ingredients

  • SLOW COOKER:
  • 1 c. water
  • 4-5 lbs beef brisket, trimmed of excess fat
  • 2 tbsp Worcestershire sauce
  • 1/2 c. homemade barbecue sauce
  • 1 tbsp beef bouillon
  • 1 tbsp reduced-sodium soy sauce
  • SPICE RUB:
  • 2 tbsp packed brown sugar
  • 2 tbsp paprika
  • 1 tbsp chili powder
  • 1/2 tsp dried thyme
  • 1 teaspoon EACH onion powder, chipotle powder, pepper
  • 1/4 tsp cayenne pepper is optional for more heat
  • 2 teaspoons EACH garlic powder, salt
  • BARBECUE SAUCE:
  • 1/3 c. molasses
  • 1 1/2 c. ketchup
  • 1/3 c. packed brown sugar
  • 1/4 c. apple cider vinegar
  • 1/4 c. seedless blackberry preserves
  • 1 tbsp mesquite liquid smoke, optional but recommended
  • 1 tbsp reserved Spice Rub (from above)

Instructions

Step 1: Prepare the oven. Preheat it to 425 degrees F. Using parchment paper or foil, line a large baking sheet with sides (or use a jelly roll pan). Set aside.

Step 2: Using non-stick cooking spray, grease a 6-quart or larger slow cooker.

Step 3: Trim the excess fat on the brisket. Rinse and pat the brisket dry. Slice the brisket in half if they are extra long so they’ll fit in your slow cooker.

Step 4: Combine the Spice Rub ingredients in a medium bowl. Reserve 1 tbsp Spice Rub for the barbecue sauce. All over the meat, evenly rub the rest of the Spice Rub. Then, place the brisket on the prepared baking sheet. Allow the brisket to sit for 30 minutes at room temperature or keep it in the fridge for up to 24 hours.

Step 5: Place the brisket in the preheated oven and bake for about 30 minutes, uncovered.

Step 6: In the meantime, combine the barbecue sauce ingredients and the reserved Spice Rub until well blended. To the slow cooker, add half a cup of the barbecue sauce, 1 c water, 2 tbsp Worcestershire, 1 tbsp reduced-sodium soy sauce, and 1 tbsp beef bouillon. Mix well.

Step 7: Carefully transfer the brisket to the slow cooker, squishing it to fit. Put the lid on and set to cook for 8 to 10 hours on low or until the brisket is very tender. Halfway through cooking, flip the brisket. Feel free to cook the brisket longer if it is still tough.

Step 8: To a foil-lined baking sheet, transfer the brisket. Brush the brisket with barbecue sauce and pop it in the oven. Broil for about 5 to 10 minutes or until a little caramelized. In the meantime, warm the rest of the barbecue sauce in the microwave or stovetop.

Step 9: Again, brush the brisket with barbecue sauce. Then, slice the brisket across the grain or chop. Serve plain with the rest of the barbecue sauce or in sandwiches.

Notes

You can make this brisket in advance. Cook the brisket until tender. Keep the brisket in the juices and refrigerate. Skip off the hardened fat the next day and cook in the slow cooker for 1 to 2 hours on low or until warmed through. Then, continue with the recipe.

May 20, 2022 0 comment
0 FacebookTwitterPinterestEmail
General Recipes

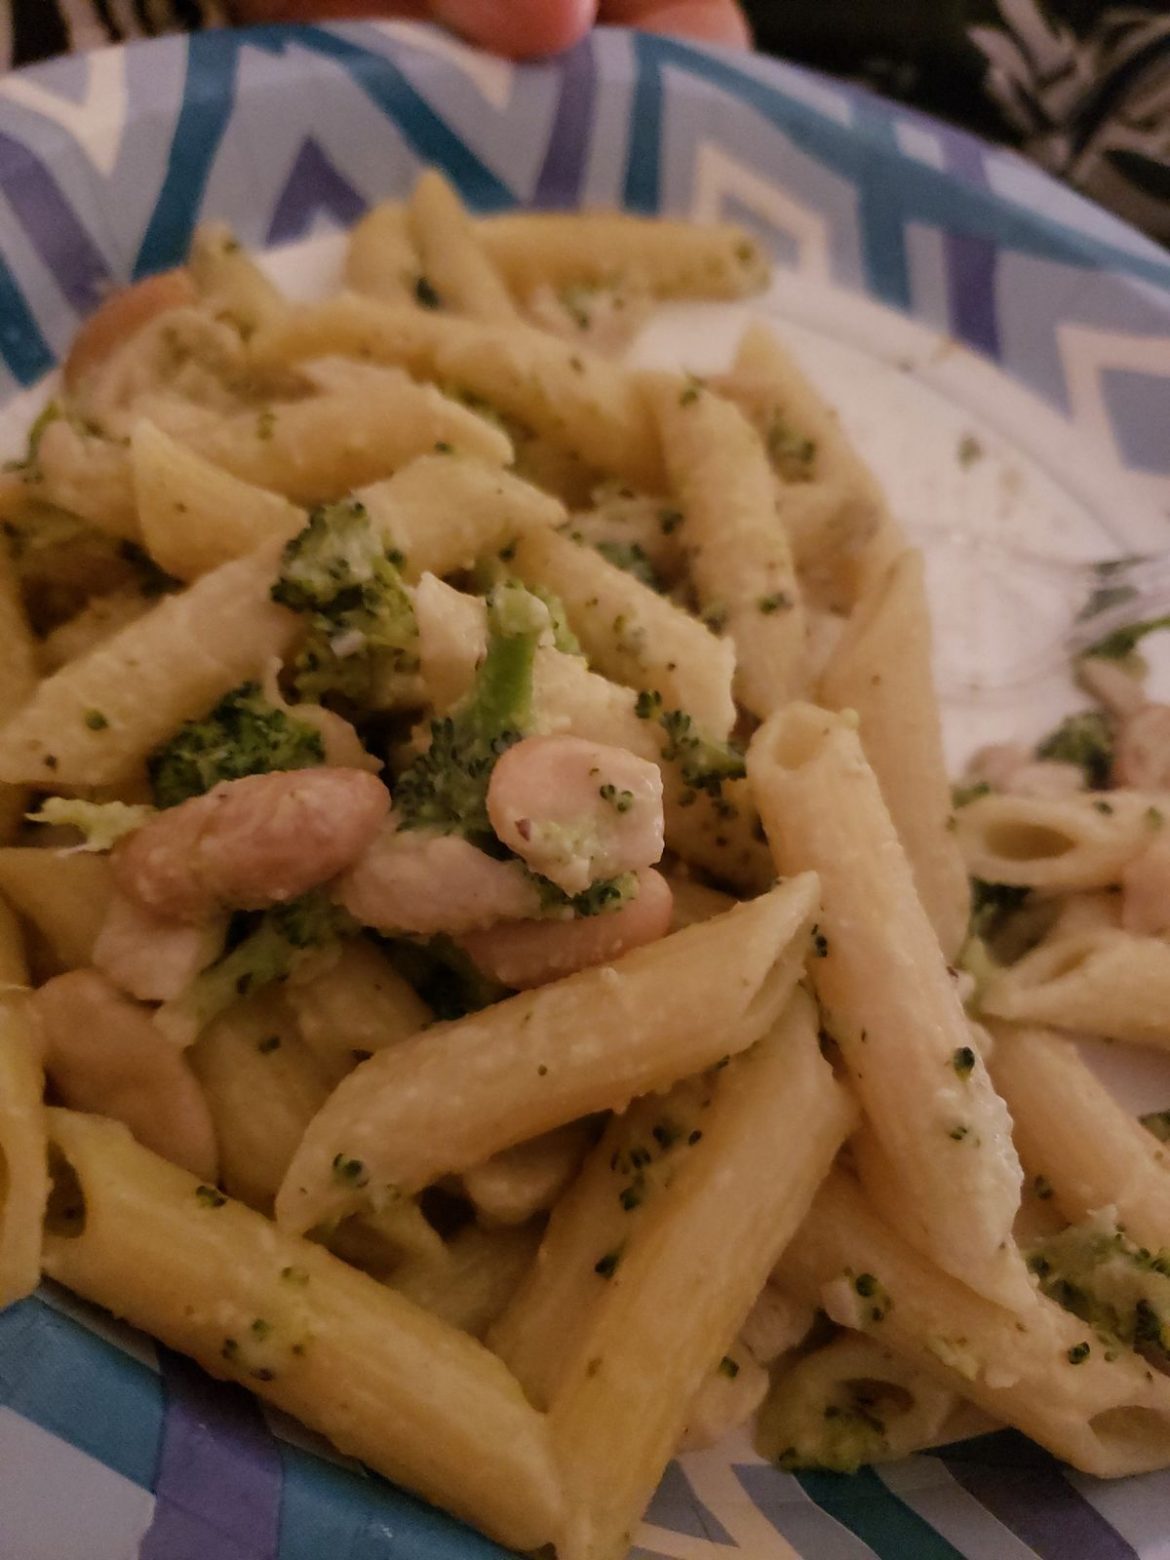
Easy 20 minute Pesto Chicken and Broccoli Pasta

by Rebecca May 20, 2022
written by Rebecca

Prep Time: 10 mins | Cook Time: 15 mins | Total Time: 25 mins | Servings: 4

Level up your pesto pasta experience with this easy twenty-minute pasta recipe. It is made with a few simple ingredients and ready in no time. The addition of pesto and Parmesan takes this already amazing dish to the top!

Easy to make, hearty, and one of the most requested weeknight dinners – this pesto chicken and broccoli pasta is a must and for keeps! Packed with garlic, Parmesan, pesto, and chicken plus broccoli, this will easily make it to your top favorite weeknight dinner.

Ingredients

2 chicken breasts, sliced into ½” strips

1 tbsp olive oil

2 c. broccoli florets frozen or fresh

4 cloves garlic, minced

1/2 onion minced

1 c. light cream

1/4 c. pesto

1/4 grated Parmesan cheese

4 c. al dente pasta, drained

1/2 tsp salt

1/4 tsp pepper or to taste

How to make Easy 20 minute Pesto Chicken and Broccoli Pasta

Step 1: Following the package directions, cook the pasta in a large pot of salted boiling water. A minute before turning the heat off, add the broccoli. Then, drain and set aside.

Step 2: In the meantime, heat 1 tbsp oil into a large pan. Add the onion once the oil is hot and cook for about 3 to 4 minutes or until golden brown. Next, add the garlic and continue to cook for a couple of seconds before adding the sliced chicken. To taste, season with salt and pepper. Cook for another 5 to 7 minutes or until the chicken has browned.

Step 3: To the pan, add the Parmesan along with the cream, pesto, and salt & pepper. Let everything simmer for about 2 to 3 minutes. Then, toss in the cooked pasta and broccoli. Continue to simmer for an additional 2 to 3 minutes.

Step 4: When done, take the pan off the heat and serve the pesto chicken and broccoli pasta right away garnished with extra Parmesan. Enjoy!

Nutrition Facts:

Serving: 1serving | Calories: 467 kcal | Carbohydrates: 34g | Protein: 32g | Fat: 22g | Saturated Fat: 8g | Cholesterol: 107mg | Sodium: 595mg | Potassium: 660mg | Fiber: 3g | Sugar: 2g | Vitamin A: 934IU | Vitamin C: 44mg | Calcium: 87mg | Iron: 2mg

Easy 20 minute Pesto Chicken and Broccoli Pasta

Rebecca Prep Time: 10 mins | Cook Time: 15 mins | Total Time: 25 mins | Servings: 4 Level up your pesto pasta experience with this easy twenty-minute pasta recipe. It… General Recipes Easy 20 minute Pesto Chicken and Broccoli Pasta European Print This
Serves: 4 Prep Time: 10 mins Cooking Time: 15 mins 15 mins
Nutrition facts: 467 calories 22 fat
Rating: 5.0/5
( 1 voted )

Ingredients

  • 2 chicken breasts, sliced into ½” strips
  • 1 tbsp olive oil
  • 2 c. broccoli florets frozen or fresh
  • 4 cloves garlic, minced
  • 1/2 onion minced
  • 1 c. light cream
  • 1/4 c. pesto
  • 1/4 grated Parmesan cheese
  • 4 c. al dente pasta, drained
  • 1/2 tsp salt
  • 1/4 tsp pepper or to taste

Instructions

Step 1: Following the package directions, cook the pasta in a large pot of salted boiling water. A minute before turning the heat off, add the broccoli. Then, drain and set aside.

Step 2: In the meantime, heat 1 tbsp oil into a large pan. Add the onion once the oil is hot and cook for about 3 to 4 minutes or until golden brown. Next, add the garlic and continue to cook for a couple of seconds before adding the sliced chicken. To taste, season with salt and pepper. Cook for another 5 to 7 minutes or until the chicken has browned.

Step 3: To the pan, add the Parmesan along with the cream, pesto, and salt & pepper. Let everything simmer for about 2 to 3 minutes. Then, toss in the cooked pasta and broccoli. Continue to simmer for an additional 2 to 3 minutes.

Step 4: When done, take the pan off the heat and serve the pesto chicken and broccoli pasta right away garnished with extra Parmesan. Enjoy!

May 20, 2022 0 comment
0 FacebookTwitterPinterestEmail
General Recipes

GIANT CHOCOLATE CHIP COOKIE ICE CREAM SANDWICH

by Rebecca May 20, 2022
written by Rebecca

My kids are obsessed with this giant chocolate chip cookie ice cream sandwich! It’s a show-stopping treat excellent for every occasion. Tastes amazing and is super easy to whip up!

INGREDIENTS

1 large egg + 1 egg yolk

¾ c. (1½ sticks) unsalted butter, softened

1/3 c. sugar

3/4 c. packed light brown sugar

1 tsp baking soda

1 tbsp vanilla extract

2 c. all-purpose flour

1/3 c. milk chocolate chips (or dark)

1 and ¼ c. semi-sweet chocolate chips

1.5 quarts of vanilla bean ice cream

optional: mini chocolate chips or sprinkles for the side of the cookie sandwich

1/2 tsp kosher salt

HOW TO MAKE A GIANT CHOCOLATE CHIP COOKIE ICE CREAM SANDWICH

Step 1: Prepare the oven. Preheat it to 350 degrees F. After greasing lightly two 9-inch springform pans, line them with parchment paper.

Step 2: In the bowl of a stand mixer with the paddle attachment, place the butter and sugars. Beat at medium speed until light and fluffy. Next, add the egg along with the egg yolk and vanilla extract. Beat well before stirring in the baking soda and salt. Then, slowly add in the flour, mixing until completely blended. Lastly, mix in 1 1/4 cups of semi-sweet chocolate chips and 1/3 c of milk or dark chocolate chips.

Step 3: In half, divide the dough and press the cookie dough into the prepared springform pans. Place in the preheated oven and bake for about 13 to 15 minutes or until light golden brown and almost set. Remove from the oven when done and allow the cookie dough to cool in the springform pans on a wire rack.

TO ASSEMBLE:

Step 4: Using two pieces of plastic wrap, line one of the 9-inch springform pans and make a T-shape with an overhang on the sides. Do this once the cookies are cool and set. In the bottom of the pan, invert one cookie top side down. Add a smooth layer of the softened ice cream using a rubber spatula. On top, gently place another cookie, top side up, slightly pressing it down until it is even. Wrap the top of the cookie cake with plastic wrap. Keep in the freezer for at least 2 hours or overnight.

Step 5: To serve, add the mini chocolate chips or sprinkles to the sides. Allow it to soften for about 5 to 10 minutes before slicing. Enjoy!

GIANT CHOCOLATE CHIP COOKIE ICE CREAM SANDWICH

Rebecca My kids are obsessed with this giant chocolate chip cookie ice cream sandwich! It’s a show-stopping treat excellent for every occasion. Tastes amazing and is super easy to whip up!… General Recipes GIANT CHOCOLATE CHIP COOKIE ICE CREAM SANDWICH European Print This
Nutrition facts: 200 calories 20 grams fat
Rating: 5.0/5
( 1 voted )

Ingredients

  • 1 large egg + 1 egg yolk
  • ¾ c. (1½ sticks) unsalted butter, softened
  • 1/3 c. sugar
  • 3/4 c. packed light brown sugar
  • 1 tsp baking soda
  • 1 tbsp vanilla extract
  • 2 c. all-purpose flour
  • 1/3 c. milk chocolate chips (or dark)
  • 1 and ¼ c. semi-sweet chocolate chips
  • 1.5 quarts of vanilla bean ice cream
  • optional: mini chocolate chips or sprinkles for the side of the cookie sandwich
  • 1/2 tsp kosher salt

Instructions

Step 1: Prepare the oven. Preheat it to 350 degrees F. After greasing lightly two 9-inch springform pans, line them with parchment paper.

Step 2: In the bowl of a stand mixer with the paddle attachment, place the butter and sugars. Beat at medium speed until light and fluffy. Next, add the egg along with the egg yolk and vanilla extract. Beat well before stirring in the baking soda and salt. Then, slowly add in the flour, mixing until completely blended. Lastly, mix in 1 1/4 cups of semi-sweet chocolate chips and 1/3 c of milk or dark chocolate chips.

Step 3: In half, divide the dough and press the cookie dough into the prepared springform pans. Place in the preheated oven and bake for about 13 to 15 minutes or until light golden brown and almost set. Remove from the oven when done and allow the cookie dough to cool in the springform pans on a wire rack.

TO ASSEMBLE:

Step 4: Using two pieces of plastic wrap, line one of the 9-inch springform pans and make a T-shape with an overhang on the sides. Do this once the cookies are cool and set. In the bottom of the pan, invert one cookie top side down. Add a smooth layer of the softened ice cream using a rubber spatula. On top, gently place another cookie, top side up, slightly pressing it down until it is even. Wrap the top of the cookie cake with plastic wrap. Keep in the freezer for at least 2 hours or overnight.

Step 5: To serve, add the mini chocolate chips or sprinkles to the sides. Allow it to soften for about 5 to 10 minutes before slicing. Enjoy!

May 20, 2022 0 comment
0 FacebookTwitterPinterestEmail
General Recipes

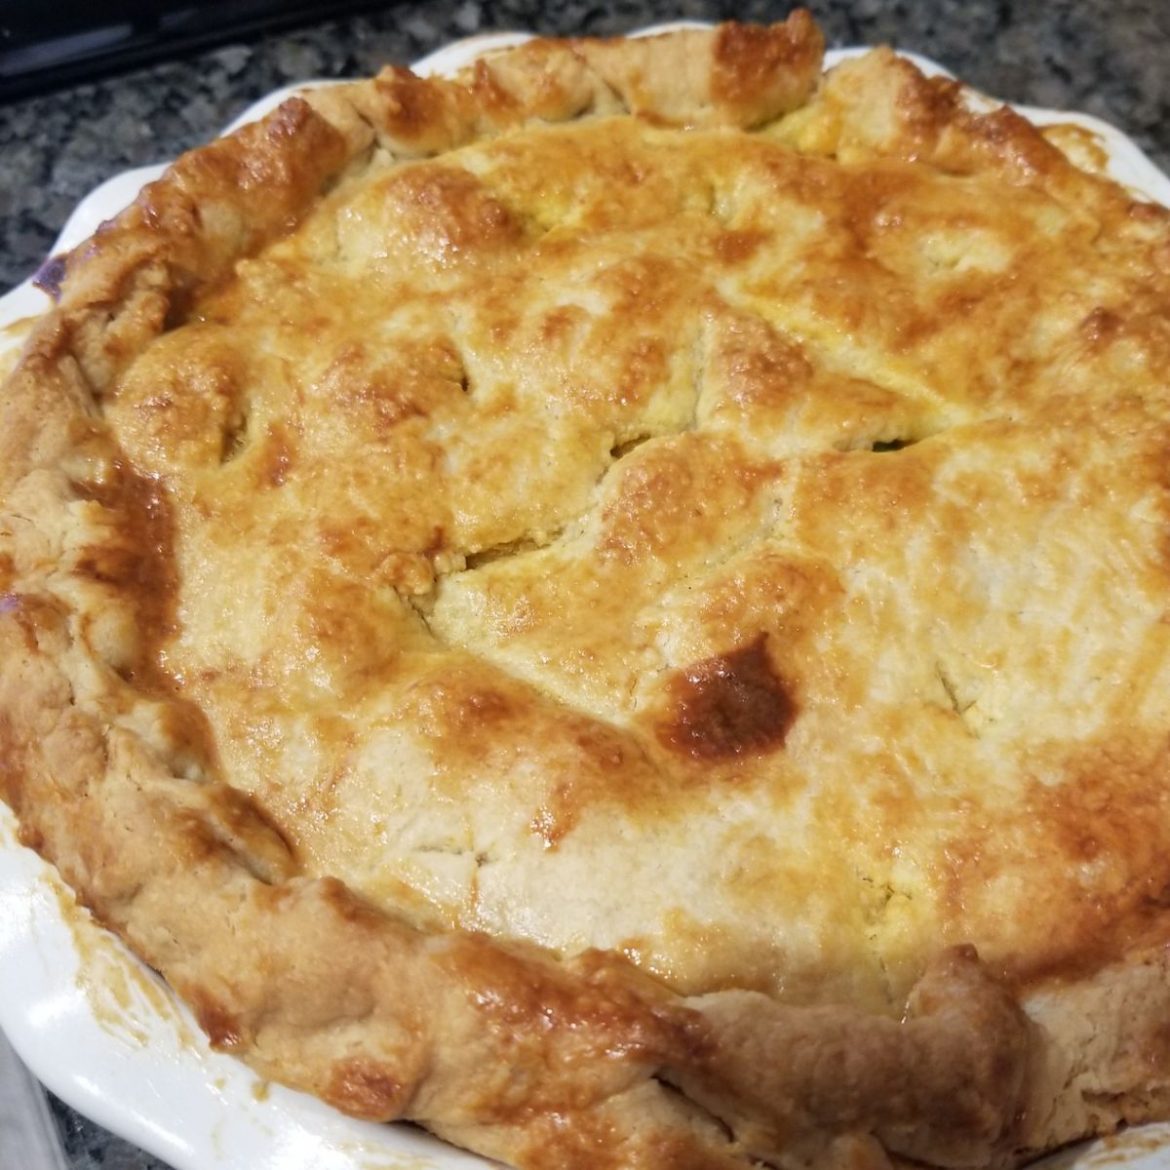
Chicken Pot Pie Recipe

by Rebecca May 20, 2022
written by Rebecca

Prep Time: 25 mins | Cook Time: 1 hr 20 mins | Refrigeration: 1 hr | Total Time: 2 hrs 45 mins | Servings: 8

Creamy, rich, and full of amazing flavors – this chicken pot pie is comforting food at its finest! The golden-brown buttery-soft, flaky pie crust is filled with a delicious chicken filling. Make a large pie or four small ramekins. Or you can easily double the recipe if you are very hungry!

Ingredients

Filling:

1/2 c. milk

1/4 c. all-purpose flour

6 tablespoons unsalted butter, softened

1 tablespoon cornstarch

A medium carrot, peeled and diced

Small onion, finely chopped

1 celery stalk, diced

1/2 medium-size russet potato, peeled and diced

1 c. condensed chicken broth or 1 c. water plus 2 chicken bouillon cubes

2 medium-size baked chicken breasts diced

1/2 c. frozen peas

Freshly ground black pepper to taste

Salt to taste

Pie pastry:

1 egg yolk plus 2 teaspoons milk mixed well, for brushing

2 c. all-purpose flour

1 c. 227 grams cold unsalted butter, cut into cubes

1 tablespoon white vinegar

1/4 c. ice water

1/2 teaspoon kosher salt

How to make Chicken Pot Pie

Step 1: In a small bowl, whisk 4 tbsp softened butter with flour.

Step 2: Dissolve the cornstarch in milk in another bowl and set aside.

Step 3: Melt 2 tbsp butter in a large saucepan. Once the butter has melted, add the onion, carrot, and celery. Saute for about 3 minutes over medium-high heat. Next, pour in the broth and add the potatoes. Bring everything to a boil, then decrease the heat to simmer. Put the lid on and cook for about 10 minutes or until the veggies are just tender.

Step 4: To the pan, add the butter and flour mix. Bring everything to a gentle boil while stirring constantly.

Step 5: Add in the milk and the cornstarch mixture. Bring to a boil and season with salt & pepper. Add the chicken and peas. Stir and cover. Allow the mixture to cool.

Step 6: For the pie dough, combine the flour and salt in a food processor. Then, add the butter and process it a couple of times until the butter is the size of peas. Pour in the water and vinegar. Pulse a couple more times until the dough forms into a ball.

Step 7: On a large piece of Saran wrap, transfer the dough. Twist to tighten the plastic and shape the dough into a ball. Cut the dough ball into two pieces and flatten each into a disk. Cover the disk with a plastic wrap and keep it in the fridge for an hour. Or you can twist both ends of the plastic wrap like wrapping a candy. Then, cut the dough into 8 discs to make 2 smaller chicken pot pies.

Step 8: Prepare the oven. Preheat it to 400 degrees F.

Step 9: Roll the two dough discs into circles (the first one around 13 inches in diameter and the second one to about 10 inches) on a lightly floured work surface. Make a couple of slits in the second (10 inches) dough circle using a sharp knife. With the larger dough circle, line a 9-inch pie dish, overhanging the dish by about half inches. You can make smaller pot pies in ramekins, and roll out 4 disks into 8 to 9-inch circles and 4 disks into 5 to 6-inches circles.

Step 10: Into the baking dish of or ramekins, spoon the chicken filling. Tent using the second sheet of dough, then crimp the edges and tuck them in. With the egg yolk wash, brush the top.

Step 11: Place in the middle rack of the preheated oven and bake for approximately 50 minutes or until the pastry is golden brown. Remove from the oven when done and allow the chicken pot pie to rest for about 15 minutes before serving.

Nutrition Facts:

Calories: 519 kcal | Carbohydrates: 32g | Protein: 19g | Fat: 34g | Saturated Fat: 21g | Cholesterol: 146mg | Sodium: 302mg | Potassium: 284mg | Fiber: 1g | Sugar: 1g | Vitamin A: 1135IU | Vitamin C: 6.6mg | Calcium: 48mg | Iron: 2.4mg

Chicken Pot Pie Recipe

Rebecca Prep Time: 25 mins | Cook Time: 1 hr 20 mins | Refrigeration: 1 hr | Total Time: 2 hrs 45 mins | Servings: 8 Creamy, rich, and full of… General Recipes Chicken Pot Pie Recipe European Print This
Serves: 8 Prep Time: 25 mins Cooking Time: 1 hr 20 mins 1 hr 20 mins
Nutrition facts: 519 calories 34 fat
Rating: 5.0/5
( 1 voted )

Ingredients

  • Filling:
  • 1/2 c. milk
  • 1/4 c. all-purpose flour
  • 6 tablespoons unsalted butter, softened
  • 1 tablespoon cornstarch
  • A medium carrot, peeled and diced
  • Small onion, finely chopped
  • 1 celery stalk, diced
  • 1/2 medium-size russet potato, peeled and diced
  • 1 c. condensed chicken broth or 1 c. water plus 2 chicken bouillon cubes
  • 2 medium-size baked chicken breasts diced
  • 1/2 c. frozen peas
  • Freshly ground black pepper to taste
  • Salt to taste
  • Pie pastry:
  • 1 egg yolk plus 2 teaspoons milk mixed well, for brushing
  • 2 c. all-purpose flour
  • 1 c. 227 grams cold unsalted butter, cut into cubes
  • 1 tablespoon white vinegar
  • 1/4 c. ice water
  • 1/2 teaspoon kosher salt

Instructions

Step 1: In a small bowl, whisk 4 tbsp softened butter with flour.

Step 2: Dissolve the cornstarch in milk in another bowl and set aside.

Step 3: Melt 2 tbsp butter in a large saucepan. Once the butter has melted, add the onion, carrot, and celery. Saute for about 3 minutes over medium-high heat. Next, pour in the broth and add the potatoes. Bring everything to a boil, then decrease the heat to simmer. Put the lid on and cook for about 10 minutes or until the veggies are just tender.

Step 4: To the pan, add the butter and flour mix. Bring everything to a gentle boil while stirring constantly.

Step 5: Add in the milk and the cornstarch mixture. Bring to a boil and season with salt & pepper. Add the chicken and peas. Stir and cover. Allow the mixture to cool.

Step 6: For the pie dough, combine the flour and salt in a food processor. Then, add the butter and process it a couple of times until the butter is the size of peas. Pour in the water and vinegar. Pulse a couple more times until the dough forms into a ball.

Step 7: On a large piece of Saran wrap, transfer the dough. Twist to tighten the plastic and shape the dough into a ball. Cut the dough ball into two pieces and flatten each into a disk. Cover the disk with a plastic wrap and keep it in the fridge for an hour. Or you can twist both ends of the plastic wrap like wrapping a candy. Then, cut the dough into 8 discs to make 2 smaller chicken pot pies.

Step 8: Prepare the oven. Preheat it to 400 degrees F.

Step 9: Roll the two dough discs into circles (the first one around 13 inches in diameter and the second one to about 10 inches) on a lightly floured work surface. Make a couple of slits in the second (10 inches) dough circle using a sharp knife. With the larger dough circle, line a 9-inch pie dish, overhanging the dish by about half inches. You can make smaller pot pies in ramekins, and roll out 4 disks into 8 to 9-inch circles and 4 disks into 5 to 6-inches circles.

Step 10: Into the baking dish of or ramekins, spoon the chicken filling. Tent using the second sheet of dough, then crimp the edges and tuck them in. With the egg yolk wash, brush the top.

Step 11: Place in the middle rack of the preheated oven and bake for approximately 50 minutes or until the pastry is golden brown. Remove from the oven when done and allow the chicken pot pie to rest for about 15 minutes before serving.

May 20, 2022 0 comment
0 FacebookTwitterPinterestEmail
General Recipes

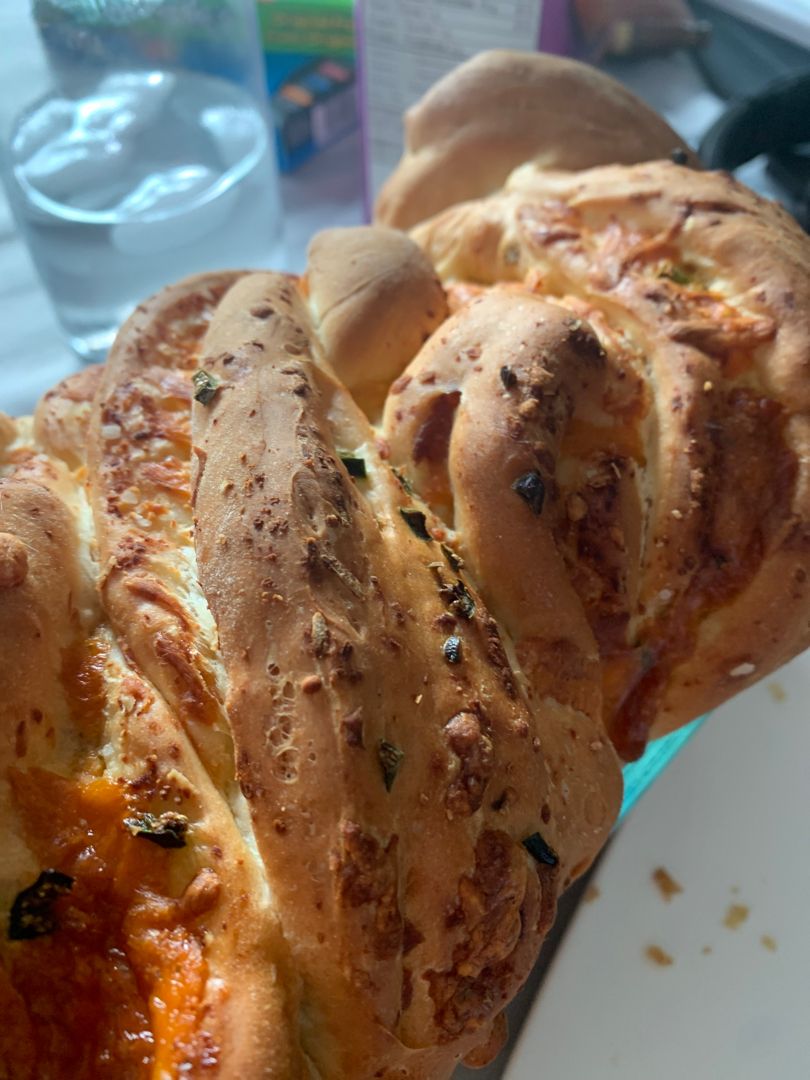
JALAPENO CHEESE BREAD

by Rebecca May 20, 2022
written by Rebecca

Prep time: 20 mins | Cook time: 40 mins | Additional time: 1 hr | Total time: 2 hrs | Yield: 1 LOAF

This is an impressive loaf of jalapeno cheese that is great to serve on its own or as a side dish to just about any meal. An amazing homemade bread that is loaded with fresh jalapeno and cheddar cheese. It is a must-try and highly praised!

INGREDIENTS

BREAD:

1 egg

2 and 1/2 c. flour

1/4 c. milk

3 tbsp sugar

3 tbsp butter

1/2 c. water

1 packet (2 and 1/4 tsp) active dry yeast

1 teaspoon salt

FILLING:

1 jalapeno, minced

1/2 c. grated Parmesan cheese

2 c. shredded cheddar cheese

1 tsp garlic salt

HOW TO MAKE JALAPENO CHEESE BREAD

Step 1: To the bowl of a stand mixer, add 2 c of flour and salt.

Step 2: Heat the water, milk, and butter in a medium saucepan over medium heat until the butter has melted. Make sure that the temperature of the mixture is between 110 to 115 degrees. Then, stir in the sugar and yeast. Allow the mixture to stand for around 10 minutes or until the yeast is frothy.

Step 3: To the flour in the mixer, add the yeast mixture and stir in the egg. Mix well using the dough hook. Next, slowly add the rest of the half cup of flour until you have a soft dough that gathers in the middle of the bowl.

Step 4: Onto a lightly floured surface, turn the dough out, and knead for a couple of minutes. Allow the dough to rest for about 5 to 10 minutes. Then, roll the dough using a rolling pin into a 10 x 14-inch triangle.

Step 5: Next, sprinkle the dough with the garlic salt, minced jalapenos, and grated cheddar and Parmesan cheese. Roll the dough starting from the long end into a tight log. Slice the log in half vertically with a sharp knife, beginning a couple of inches below the upper edge. At this point, you should have two ropes of dough that are connected at the top.

Step 6: Start rotating the two ropes gently outward. This way the cut side is facing up and the filling is exposed. Put one rope of dough on top of the other and repeat until you reached the end of the log. Into a greased 9 x 5-inch loaf pan, carefully place the loaf.

Step 7: Tent and allow the dough to rise for about an hour in a warm place until doubled in size.

Step 8: In the meantime, prepare the oven. Preheat it to 350 degrees.

Step 9: After an hour, place the loaf in the preheated oven and bake for about 40 to 15 minutes or until the top is golden brown. To prevent over-browning, tent the loaf with foil in the last 20 minutes of baking.

NUTRITION FACTS:

YIELD: 12 SERVING SIZE: 1
Amount Per Serving: CALORIES: 179 | TOTAL FAT: 11g | SATURATED FAT: 6g | TRANS FAT: 0g | UNSATURATED FAT: 4g | CHOLESTEROL: 46mg | SODIUM: 556mg | CARBOHYDRATES: 13g | FIBER: 0g | SUGAR: 3g | PROTEIN: 7g

JALAPENO CHEESE BREAD

Rebecca Prep time: 20 mins | Cook time: 40 mins | Additional time: 1 hr | Total time: 2 hrs | Yield: 1 LOAF This is an impressive loaf of jalapeno… General Recipes JALAPENO CHEESE BREAD European Print This
Prep Time: 20 mins Cooking Time: 1 hr 40 mins 1 hr 40 mins
Nutrition facts: 179 calories 11 fat
Rating: 5.0/5
( 1 voted )

Ingredients

  • BREAD:
  • 1 egg
  • 2 and 1/2 c. flour
  • 1/4 c. milk
  • 3 tbsp sugar
  • 3 tbsp butter
  • 1/2 c. water
  • 1 packet (2 and 1/4 tsp) active dry yeast
  • 1 teaspoon salt
  • FILLING:
  • 1 jalapeno, minced
  • 1/2 c. grated Parmesan cheese
  • 2 c. shredded cheddar cheese
  • 1 tsp garlic salt

Instructions

Step 1: To the bowl of a stand mixer, add 2 c of flour and salt.

Step 2: Heat the water, milk, and butter in a medium saucepan over medium heat until the butter has melted. Make sure that the temperature of the mixture is between 110 to 115 degrees. Then, stir in the sugar and yeast. Allow the mixture to stand for around 10 minutes or until the yeast is frothy.

Step 3: To the flour in the mixer, add the yeast mixture and stir in the egg. Mix well using the dough hook. Next, slowly add the rest of the half cup of flour until you have a soft dough that gathers in the middle of the bowl.

Step 4: Onto a lightly floured surface, turn the dough out, and knead for a couple of minutes. Allow the dough to rest for about 5 to 10 minutes. Then, roll the dough using a rolling pin into a 10 x 14-inch triangle.

Step 5: Next, sprinkle the dough with the garlic salt, minced jalapenos, and grated cheddar and Parmesan cheese. Roll the dough starting from the long end into a tight log. Slice the log in half vertically with a sharp knife, beginning a couple of inches below the upper edge. At this point, you should have two ropes of dough that are connected at the top.

Step 6: Start rotating the two ropes gently outward. This way the cut side is facing up and the filling is exposed. Put one rope of dough on top of the other and repeat until you reached the end of the log. Into a greased 9 x 5-inch loaf pan, carefully place the loaf.

Step 7: Tent and allow the dough to rise for about an hour in a warm place until doubled in size.

Step 8: In the meantime, prepare the oven. Preheat it to 350 degrees.

Step 9: After an hour, place the loaf in the preheated oven and bake for about 40 to 15 minutes or until the top is golden brown. To prevent over-browning, tent the loaf with foil in the last 20 minutes of baking.

May 20, 2022 0 comment
0 FacebookTwitterPinterestEmail
General Recipes

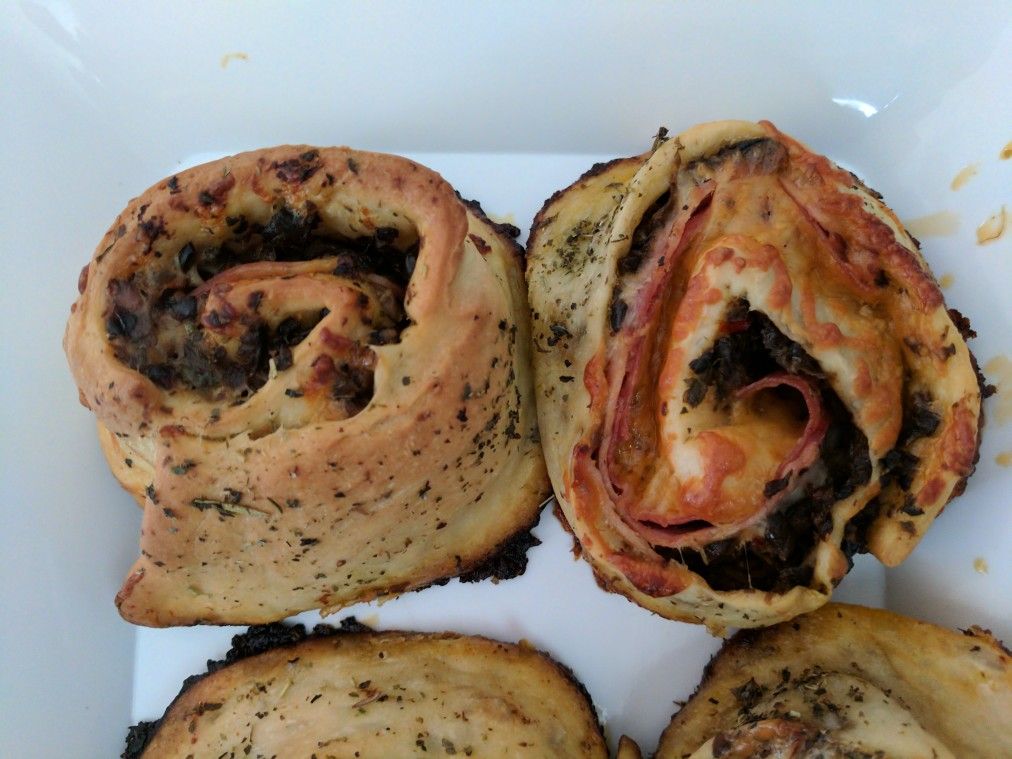
Muffuletta Pizza Rolls

by Rebecca May 20, 2022
written by Rebecca

Put a fun twist on your pizza night with this easy Muffuletta Pizza Rolls. I always love Muffulettas. I think my mom is a great influence. We never run out of Muffulettas or any bread. You can create great food with just bread, cheese, and olives. For some extras, simply throw in meats such as Genoa Salami and Ham. Thus, these Muffuletta Pizza Rolls! With this easy recipe, you’ll feel like hitting the jackpot!

I never meet anyone who doesn’t love pizza. Especially the ones with very good cheese and loads of meat. To make life easier, I use ready-made pizza dough. I baked these pizza rolls until golden brown. If you love pizza, I am pretty sure that you’ll dig this Muffuletta Pizza Rolls!

INGREDIENTS

18 slices of Genoa salami

2 packs of Pillsbury pizza dough

2 c. olive spread

1 c. jack cheese, grated

1 c. sharp cheddar cheese, grated

18 slices ham

2 tsp Italian seasonings, dried

1 tsp dried parsley

1 pack of Sargento provolone cheese, sliced

1/2 c. extra virgin olive oil

How to make Muffuletta Pizza Rolls

Step 1: Prepare the oven. Preheat it to 375 degrees.

Step 2: Combine the olive oil and Italian seasoning. Set aside.

Step 3: After rolling out the dough, slightly stretch it using your hands.

Step 4: On top of the dough, place the olive spread followed by the provolone cheese, salami, and ham, and sprinkle with grated cheese. Start rolling the dough up, then cut it into around 2 to 3-inch rolls (you’ll make 6 rolls out of each log)

Step 5: On a greased cookie sheet, place the logs and baste them with the olive oil mixture. Pop in the preheated oven and bake for about 30 to 35 minutes or until the dough is golden brown and cooked.

Step 6: When done, take the pizza rolls out of the oven and serve right away garnished with some dried parsley. Enjoy!

Muffuletta Pizza Rolls

Rebecca Put a fun twist on your pizza night with this easy Muffuletta Pizza Rolls. I always love Muffulettas. I think my mom is a great influence. We never run out… General Recipes Muffuletta Pizza Rolls European Print This
Nutrition facts: 200 calories 20 grams fat
Rating: 5.0/5
( 1 voted )

Ingredients

  • 18 slices of Genoa salami
  • 2 packs of Pillsbury pizza dough
  • 2 c. olive spread
  • 1 c. jack cheese, grated
  • 1 c. sharp cheddar cheese, grated
  • 18 slices ham
  • 2 tsp Italian seasonings, dried
  • 1 tsp dried parsley
  • 1 pack of Sargento provolone cheese, sliced
  • 1/2 c. extra virgin olive oil

Instructions

Step 1: Prepare the oven. Preheat it to 375 degrees.

Step 2: Combine the olive oil and Italian seasoning. Set aside.

Step 3: After rolling out the dough, slightly stretch it using your hands.

Step 4: On top of the dough, place the olive spread followed by the provolone cheese, salami, and ham, and sprinkle with grated cheese. Start rolling the dough up, then cut it into around 2 to 3-inch rolls (you’ll make 6 rolls out of each log)

Step 5: On a greased cookie sheet, place the logs and baste them with the olive oil mixture. Pop in the preheated oven and bake for about 30 to 35 minutes or until the dough is golden brown and cooked.

Step 6: When done, take the pizza rolls out of the oven and serve right away garnished with some dried parsley. Enjoy!

May 20, 2022 0 comment
0 FacebookTwitterPinterestEmail
General Recipes

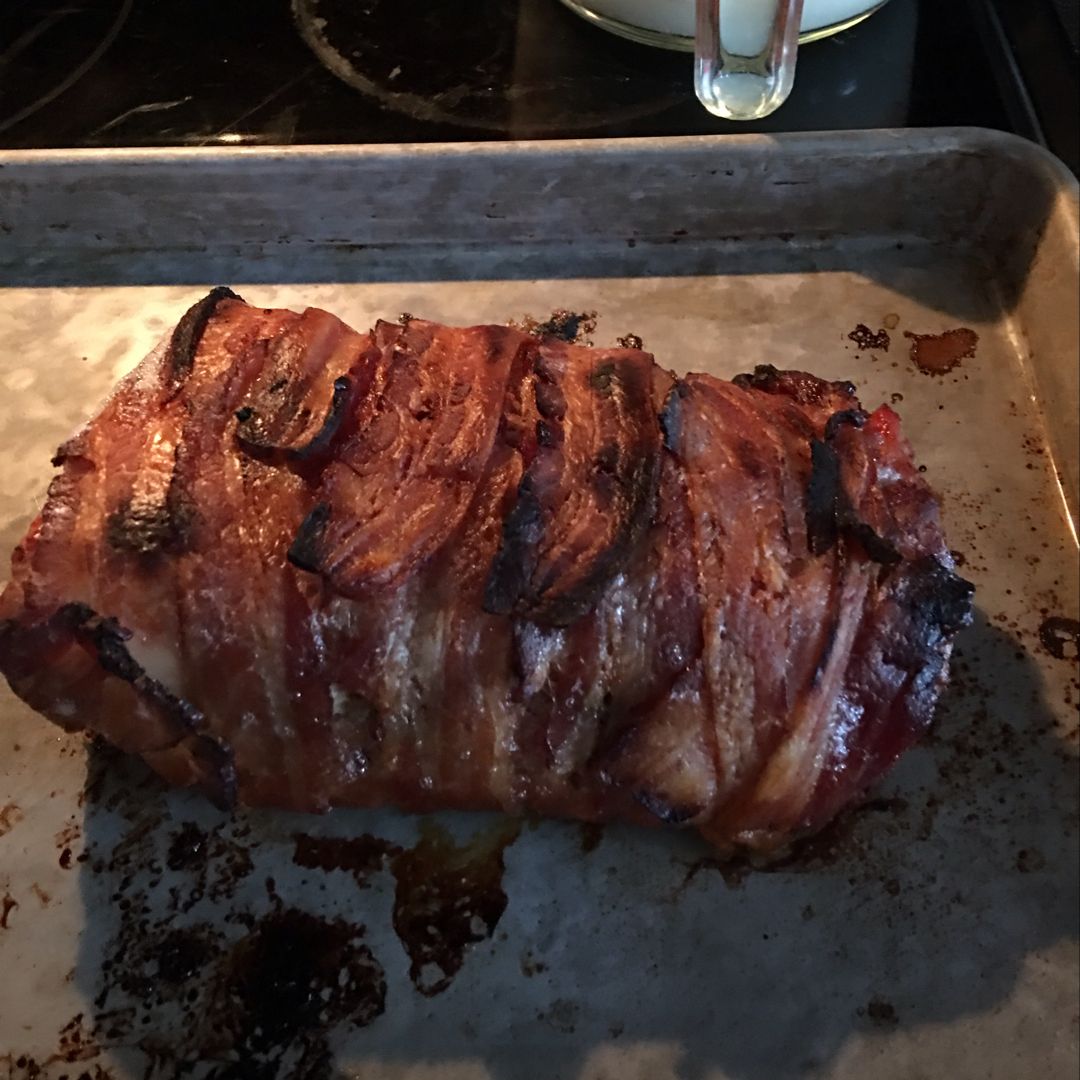
Slow Cooker Bacon Garlic Pork Loin

by Rebecca May 18, 2022
written by Rebecca

Prep Time: 10 mins | Cook Time: 4 hrs | Total Time: 4 hrs 10 mins | Yield: 8

If you love brown sugar, garlic, pork, I am pretty sure that you’ll fall head over heels for this slow cooker bacon garlic pork loin. It is made with only five simple ingredients; bacon, pork loin, garlic cloves, light brown sugar, and canola oil. After rubbing the pork loin with oil, sprinkle it with kosher salt and pepper. Then, wrap in bacon and carefully throw in the slow cooker. Set this to cook for a couple of hours until done. Lastly, broil in the oven for a few minutes. This extra step will guarantee crispy bacon.

When ready to serve, let this bacon, garlic, and pork loin rest first for approximately 5 to 15 minutes before slicing. Pair it with mashed potatoes, roasted carrots, or any of your favorite green vegetables. You can also serve this with a bottle of wine for a simple date night at home.

Ingredients

8 slices of thick-cut bacon

3 lbs. pork loin, trimmed of excess fat

4 garlic cloves, minced

1 tbsp canola oil

1/3 c. light brown sugar

salt and pepper, to taste

How to make Slow Cooker Bacon, Garlic, Pork Loin

Step 1: Rub the pork loin with a tbsp canola oil and season with kosher salt and fresh cracked black pepper. Over the pork, add the garlic and brown sugar.

Step 2: With bacon wrap the pork all the way around.

Step 3: Into the slow cooker, carefully place the bacon-wrapped pork loin. Cover and set to cook for 4 to 5 hours on low.

Step 4: If the bacon is not as crispy after the cooking time is finished, take the pork out of the slow cooker and transfer it to a baking sheet. Pop in the oven and broil for about 2 to 3 minutes. Make sure to keep the pork in the center of the oven, but not too close to the top.

Nutrition Facts:

Calories: 388 kcal | Carbohydrates: 9g | Protein: 40g | Fat: 19g | Saturated Fat: 6g | Cholesterol: 134mg | Sodium: 331mg | Potassium: 768mg | Sugar: 8g | Vitamin A: 15IU | Vitamin C: 0.5mg | Calcium: 21mg | Iron: 1.9mg

Slow Cooker Bacon Garlic Pork Loin

Rebecca Prep Time: 10 mins | Cook Time: 4 hrs | Total Time: 4 hrs 10 mins | Yield: 8 If you love brown sugar, garlic, pork, I am pretty sure… General Recipes Slow Cooker Bacon Garlic Pork Loin European Print This
Serves: 8 Prep Time: 10 mins Cooking Time: 4 hrs 4 hrs
Nutrition facts: 388 calories 19 fat
Rating: 5.0/5
( 1 voted )

Ingredients

  • 8 slices of thick-cut bacon
  • 3 lbs. pork loin, trimmed of excess fat
  • 4 garlic cloves, minced
  • 1 tbsp canola oil
  • 1/3 c. light brown sugar
  • salt and pepper, to taste

Instructions

Step 1: Rub the pork loin with a tbsp canola oil and season with kosher salt and fresh cracked black pepper. Over the pork, add the garlic and brown sugar.

Step 2: With bacon wrap the pork all the way around.

Step 3: Into the slow cooker, carefully place the bacon-wrapped pork loin. Cover and set to cook for 4 to 5 hours on low.

Step 4: If the bacon is not as crispy after the cooking time is finished, take the pork out of the slow cooker and transfer it to a baking sheet. Pop in the oven and broil for about 2 to 3 minutes. Make sure to keep the pork in the center of the oven, but not too close to the top.

May 18, 2022 0 comment
0 FacebookTwitterPinterestEmail
General Recipes

Slow Cooker Low Country Boil

by Rebecca May 18, 2022
written by Rebecca

PREP TIME: 10 MINS | COOK TIME: 6 HRS 30 MINS | SERVINGS: 8

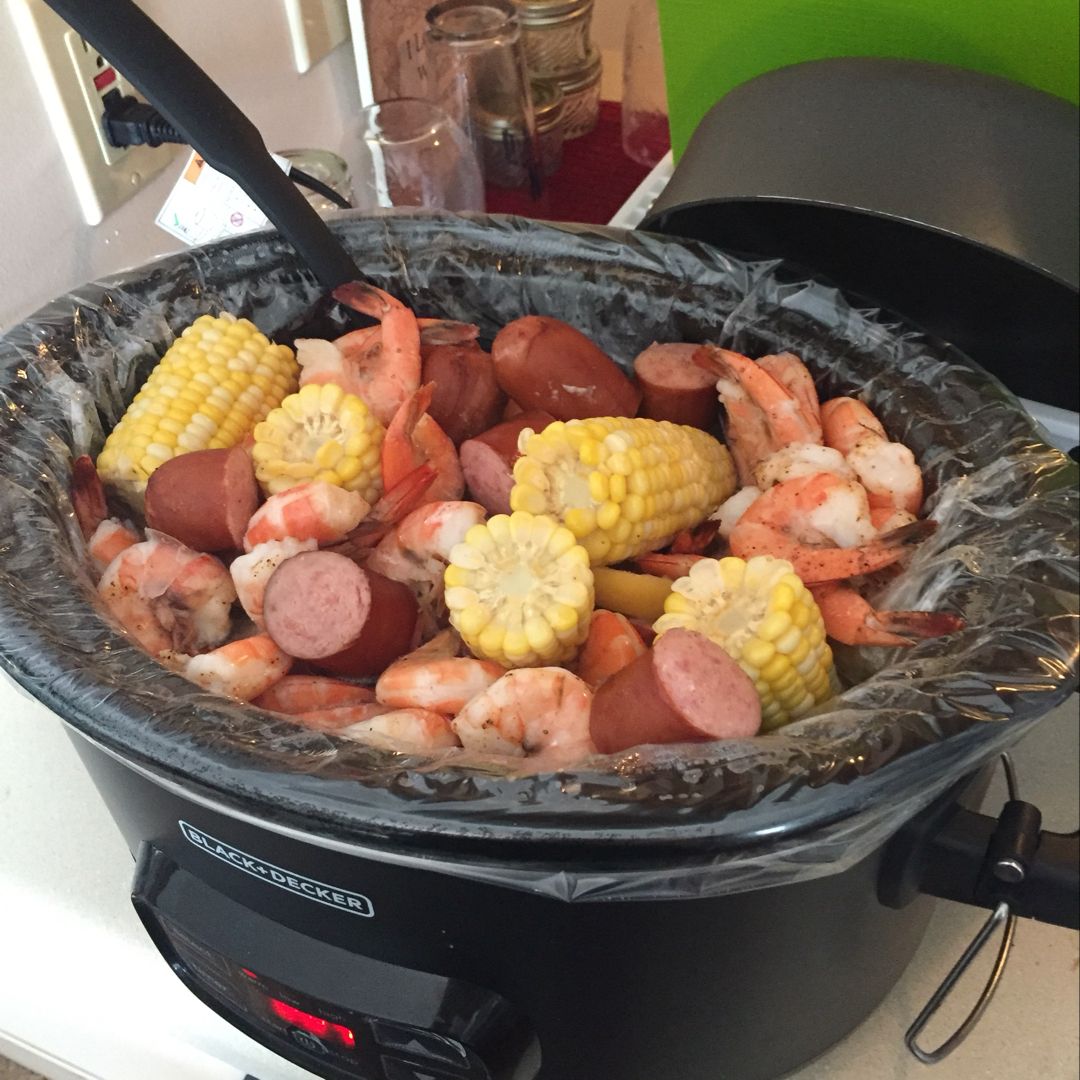
This slow cooker low country boil is the perfect dish to bring to potlucks or picnics. A flavorful dish with shrimp, kielbasa sausage, potatoes, and corn flavored with loads of spice. Conveniently make this in your trusty slow-cooked low and slow. Sprinkle some Cajun seasoning if you love it a little spicy. Serve this slow cooker low country boil with melted butter and/or cocktail sauce for an impressive meal that everyone will surely enjoy!

Ingredients

2 lbs. fresh shrimp with shells on

1 lb kielbasa sausage, cut into 1 1/2-inch piece

1 1/2 lbs small red potatoes

1/4 c. Zatarain’s Crawfish, Shrimp, and Crab Boil or Old Bay Seasoning

1 lemon, sliced

4 ears of fresh or frozen corn, cut into thirds

cocktail sauce for serving

6 c. water

How to make Slow Cooker Low Country Boil

Step 1: In a slow cooker, place the potatoes followed by slices of lemon, seasoning, and water. Cover and set to cook for 4 to 5 hours on low.

Step 2: Remove the cover, then add the sausage and corn. Replace the lid and continue to cook on low for 2 hours.

Step 3: Next, add the shrimp and toss well. You can remove some of the sausage and corn if needed as the slow cooker will be very full. Pour in some water if needed. Note that the liquid should be close to the top, but it doesn’t need to fully submerge everything.

Step 4: Cover the slow cooker again and set to cook for another 20 to 30 minutes on high until the shrimps are done.

Step 5: Ladle into servings bowls when done and serve with cocktail sauce or melted butter. Enjoy!

Note:

If you want more flavor, add 3 minced garlic cloves when adding the potatoes. You can also add 4 tbsp of butter and 2 sliced green onions along with the shrimp.

Nutrition Info.

Calories: 340 kcal

Slow Cooker Low Country Boil

Rebecca PREP TIME: 10 MINS | COOK TIME: 6 HRS 30 MINS | SERVINGS: 8 This slow cooker low country boil is the perfect dish to bring to potlucks or picnics.… General Recipes Slow Cooker Low Country Boil European Print This
Serves: 8 Prep Time: 10 mins Cooking Time: 6 hrs 30 mins 6 hrs 30 mins
Nutrition facts: 340 calories 20 grams fat
Rating: 4.5/5
( 2 voted )

Ingredients

  • 2 lbs. fresh shrimp with shells on
  • 1 lb kielbasa sausage, cut into 1 1/2-inch piece
  • 1 1/2 lbs small red potatoes
  • 1/4 c. Zatarain's Crawfish, Shrimp, and Crab Boil or Old Bay Seasoning
  • 1 lemon, sliced
  • 4 ears of fresh or frozen corn, cut into thirds
  • cocktail sauce for serving
  • 6 c. water

Instructions

Step 1: In a slow cooker, place the potatoes followed by slices of lemon, seasoning, and water. Cover and set to cook for 4 to 5 hours on low.

Step 2: Remove the cover, then add the sausage and corn. Replace the lid and continue to cook on low for 2 hours.

Step 3: Next, add the shrimp and toss well. You can remove some of the sausage and corn if needed as the slow cooker will be very full. Pour in some water if needed. Note that the liquid should be close to the top, but it doesn’t need to fully submerge everything.

Step 4: Cover the slow cooker again and set to cook for another 20 to 30 minutes on high until the shrimps are done.

Step 5: Ladle into servings bowls when done and serve with cocktail sauce or melted butter. Enjoy!

Notes

If you want more flavor, add 3 minced garlic cloves when adding the potatoes. You can also add 4 tbsp of butter and 2 sliced green onions along with the shrimp.

May 18, 2022 0 comment
0 FacebookTwitterPinterestEmail
General Recipes

Crockpot Italian Chicken Pasta

by Rebecca May 18, 2022
written by Rebecca

PREP TIME: 10 MINS | COOK TIME: 4 HRS | TOTAL TIME: 4 HRS 10 MINS | SERVINGS: 8

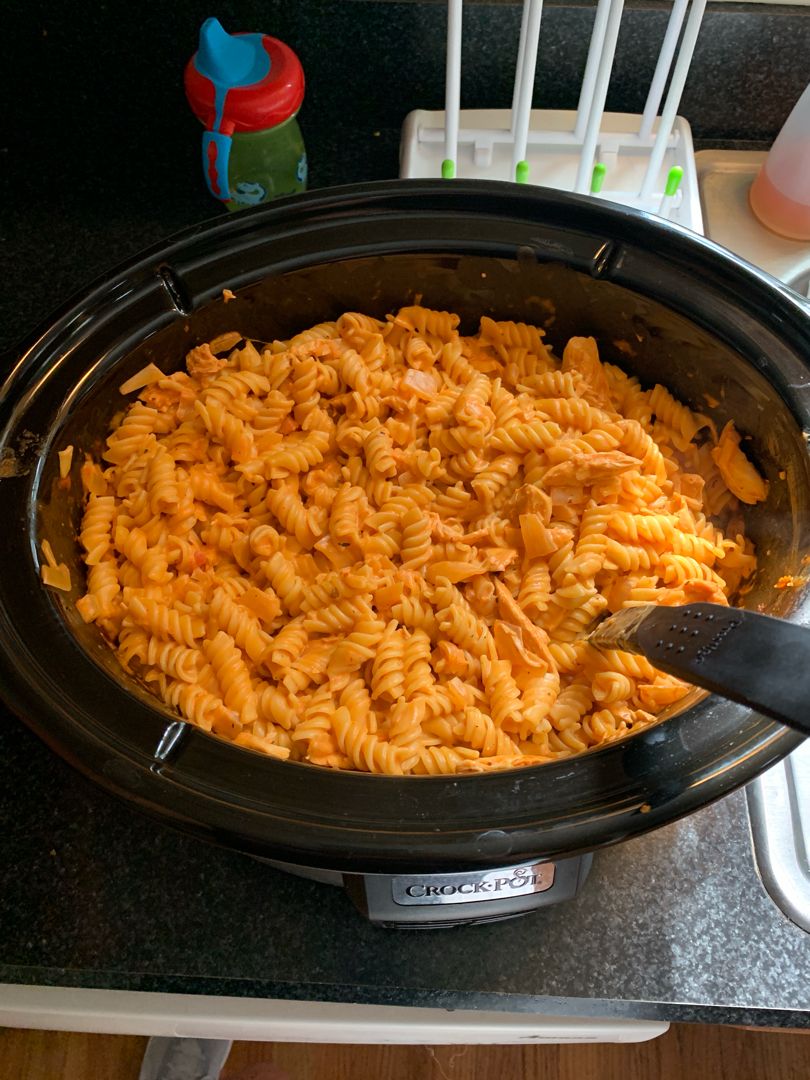
This crockpot Italian chicken pasta is another great addition to your regular dinner rotation. It’s an easy crockpot recipe made with only a few simple ingredients. The tender, melt-in-your-mouth chicken is tossed in a deliciously creamy tomato sauce.

If you want another chicken and pasta dish, this easy and quick crockpot Italian chicken pasta is a must-try and for keeps. Family and fussy eaters approved and one of the best meals you can make for your entire family.

I have been making this Italian chicken pasta for years. This quickly became a staple at my house. My little ones loved it so much, and this fits the bill. Not only that, this guarantees a delicious meal, but this is so easy to throw together. With my busy schedule, I can effortlessly prep this and leave it to cook. When done cooking, I have this scrumptious Italian chicken pasta ready to feed everyone’s hungry tummies.

Ingredients

1.25 lbs chicken tenders

1 onion, chopped

12 ounces cream cheese

2 cloves garlic, minced

25 ounces (1 jar) marinara sauce (pick one that you like or use a combination of basil, oregano, and thyme)

2 bay leaves

1 teaspoon Italian Seasoning

1 pound pasta

salt and pepper to taste

How to make Crockpot Italian Chicken Pasta

Step 1: Into a cold crockpot, add the diced onion, garlic, chicken breasts, cream cheese, marinara sauce, and some seasonings. Put the lid on and set it to cook for 3 to 4 hours on high. I suggest starting checking the chicken for doneness at 2 1/2 hours.

Step 2: Take the chicken out of the pot when done and shred using two forks. Return the shredded chicken to the pot. Remove and discard the bay leaves. Add the cream cheese and stir well to melt it into the sauce.

Step 3: Before serving, toss with freshly cooked pasta. Enjoy!

Nutrition Facts:

Calories: 465 kcal | Carbohydrates: 50g | Protein: 26g | Fat: 17g | Saturated Fat: 8g | Cholesterol: 92mg | Sodium: 687mg | Potassium: 760mg | Fiber: 3g | Sugar: 7g | Vitamin A: 975IU | Vitamin C: 8.3mg | Calcium: 77mg | Iron: 2.2mg

Crockpot Italian Chicken Pasta

Rebecca PREP TIME: 10 MINS | COOK TIME: 4 HRS | TOTAL TIME: 4 HRS 10 MINS | SERVINGS: 8 This crockpot Italian chicken pasta is another great addition to your… General Recipes Crockpot Italian Chicken Pasta European Print This
Serves: 8 Prep Time: 10 mins Cooking Time: 4 hrs 4 hrs
Nutrition facts: 465 calories 17 fat
Rating: 5.0/5
( 1 voted )

Ingredients

  • 1.25 lbs chicken tenders
  • 1 onion, chopped
  • 12 ounces cream cheese
  • 2 cloves garlic, minced
  • 25 ounces (1 jar) marinara sauce (pick one that you like or use a combination of basil, oregano, and thyme)
  • 2 bay leaves
  • 1 teaspoon Italian Seasoning
  • 1 pound pasta
  • salt and pepper to taste

Instructions

Step 1: Into a cold crockpot, add the diced onion, garlic, chicken breasts, cream cheese, marinara sauce, and some seasonings. Put the lid on and set it to cook for 3 to 4 hours on high. I suggest starting checking the chicken for doneness at 2 1/2 hours.

Step 2: Take the chicken out of the pot when done and shred using two forks. Return the shredded chicken to the pot. Remove and discard the bay leaves. Add the cream cheese and stir well to melt it into the sauce.

Step 3: Before serving, toss with freshly cooked pasta. Enjoy!

May 18, 2022 0 comment
0 FacebookTwitterPinterestEmail
Newer Posts
Older Posts

Popular Posts

  • 1

    Crispy Crunchy Parmesan Potatoes

    March 21, 2020
  • 2

    CROCK POT SMOTHERED PORK CHOPS

    March 21, 2020
  • Facebook
  • Twitter

@2019 - All Right Reserved.


Back To Top