Cook it once
  • Home
  • Privacy Policy
  • Recipes
    • KETO
    • LC
    • WW
  • Tips
  • Contact
Cook it once
  • Home
  • Privacy Policy
  • Recipes
    • KETO
    • LC
    • WW
  • Tips
  • Contact
Category:

General Recipes

General Recipes

Japanese Mushroom Soup

by Rebecca May 27, 2022
written by Rebecca

Total cooking time: 20 mins | Servings: 4

This Japanese Mushroom Soup is a must-try and for keeps! It is a very comforting soup, aromatic, and incredibly flavorful. Easily make this soup with ginger, carrots, and onions. Then, ladle into serving bowls with mushrooms and noodles and serve. If you are a fan of light and delicious soup, then you must try this pleasing Japanese Mushroom Soup.

This is a pretty easy and quick recipe. The ingredients you need are simple and are mostly available in your pantry, maybe except for the glass noodles. Glass noodles are transparent noodles made from starch and water. They are long, gelatinous noodles. And you can find these glass noodles at Supermarkets in the Korean section or online. If you love Japanese cuisine, you have to try this simple recipe.

Ingredients

1 carrot, peeled and diced

1 celery, diced

½ sweet onion, diced

1 teaspoon soy sauce

6 mushrooms, sliced thinly

1 small piece of peeled ginger

1 teaspoon sesame oil

1 portion of glass noodles

900ml vegetarian or chicken broth

2 green onions for garnish

pinch of salt and pepper

How to make Japanese Mushroom Soup

Step 1: In cold water, soak 1 portion of glass noodles for about 7 to 10 minutes. Then, cut the noodles into 3 parts using scissors to make smaller pieces.

Step 2: Over medium heat, preheat a small pot. Then, add the sesame oil along with the diced celery, carrots, ginger, and onions. Saute for a few minutes until golden. Next, pour in the vegetarian or chicken broth. Bring everything to a boil.

Step 3: Take the pot off the heat and strain the contents into another pot. Then, bring to a boil.

Step 4: Add the clear noodles and mushrooms to a bowl and carefully pour over the boiling broth. Allow it to sit for about 5 minutes.

Step 5: Serve and enjoy!

Japanese Mushroom Soup

Rebecca Total cooking time: 20 mins | Servings: 4 This Japanese Mushroom Soup is a must-try and for keeps! It is a very comforting soup, aromatic, and incredibly flavorful. Easily make… General Recipes Japanese Mushroom Soup European Print This
Serves: 4 Cooking Time: 20 mins 20 mins
Nutrition facts: 200 calories 20 grams fat
Rating: 5.0/5
( 1 voted )

Ingredients

  • 1 carrot, peeled and diced
  • 1 celery, diced
  • ½ sweet onion, diced
  • 1 teaspoon soy sauce
  • 6 mushrooms, sliced thinly
  • 1 small piece of peeled ginger
  • 1 teaspoon sesame oil
  • 1 portion of glass noodles
  • 900ml vegetarian or chicken broth
  • 2 green onions for garnish
  • pinch of salt and pepper

Instructions

Step 1: In cold water, soak 1 portion of glass noodles for about 7 to 10 minutes. Then, cut the noodles into 3 parts using scissors to make smaller pieces.

Step 2: Over medium heat, preheat a small pot. Then, add the sesame oil along with the diced celery, carrots, ginger, and onions. Saute for a few minutes until golden. Next, pour in the vegetarian or chicken broth. Bring everything to a boil.

Step 3: Take the pot off the heat and strain the contents into another pot. Then, bring to a boil.

Step 4: Add the clear noodles and mushrooms to a bowl and carefully pour over the boiling broth. Allow it to sit for about 5 minutes.

Step 5: Serve and enjoy!

May 27, 2022 0 comment
0 FacebookTwitterPinterestEmail
General Recipes

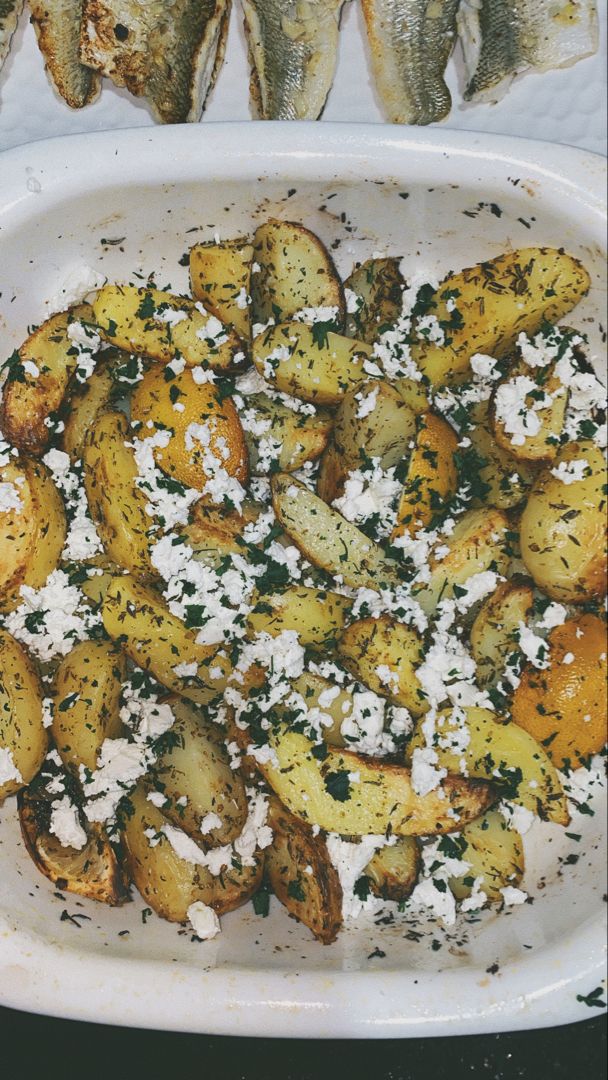
Greek Potatoes

by Rebecca May 27, 2022
written by Rebecca

Prep Time: 3 mins | Cook Time: 40 mins | Par-boiling time: 7 mins | Total Time: 50 mins | Servings: 4 people

This is another potato recipe that you should not miss! A delicious variation of roasted potatoes. Potato wedges coated in olive oil, lemon juice, and Greek herbs. For best results, use Cornish, New Potatoes. Bake them to golden perfection, then sprinkle with feta and some fresh thyme. It’s an amazing side dish that you can easily turn into a meal. You can also omit the feta cheese to keep these Greek Potatoes vegan.

Ingredients

2 tbsp olive oil

700 grams of new potatoes

0.5 lemon, juice only

1 tbsp dried thyme

1 tbsp dried oregano

1 tbsp fresh thyme

30 grams feta

4 garlic cloves, crushed

1 lemon quartered

1 pinch of sea salt and black pepper

How to make Greek Potatoes

Step 1: Into wedges, chop the potatoes. In boiling water, place the chopped potatoes. Bring the water to a boil and par-boil the potatoes for about 6 to 7 minutes.

Step 2: When done, drain the potatoes and transfer them to a bowl along with the remaining ingredients except for the Feta. Stir well until combined.

Step 3: To a baking dish, transfer the mixture. Cut a whole lemon into quarters and add them to the baking dish.

Step 4: Bake in a preheated oven (220 degrees C or 420 degrees F or Gas 7) for about 40 minutes.

Step 5: Remove from the oven when done and transfer the baked potatoes to a plate. Before serving, sprinkle with feta and some fresh thyme leaves. Enjoy!

Notes:

Reheat any leftovers in the oven for about 15 to 20 minutes or enjoy cold. Before serving (after reheating the potatoes), add a squeeze of lemon.

I recommend using Cornish, New Potatoes for best results.

You can omit the feta cheese to keep this dish vegan.

Feel free to add some chopped vegetables and pieces of chicken breasts (or thighs/legs) to turn this into a main dish. You can also add halloumi instead of chicken. Roast them at the same time, but keep an eye.

Nutritional Facts:

Serving: 1portion | Calories: 212 kcal | Carbohydrates: 35g | Protein: 5g | Fat: 9g | Saturated Fat: 2g | Cholesterol: 7mg | Sodium: 106mg | Potassium: 794mg | Fiber: 5g | Sugar: 2g | Vitamin A: 160IU | Vitamin C: 45.7mg | Calcium: 107mg | Iron: 3.2mg

Greek Potatoes

Rebecca Prep Time: 3 mins | Cook Time: 40 mins | Par-boiling time: 7 mins | Total Time: 50 mins | Servings: 4 people This is another potato recipe that you… General Recipes Greek Potatoes European Print This
Serves: 4 Prep Time: 3 mins Cooking Time: 40 mins 40 mins
Nutrition facts: 212 calories 9 fat
Rating: 5.0/5
( 1 voted )

Ingredients

  • 2 tbsp olive oil
  • 700 grams of new potatoes
  • 0.5 lemon, juice only
  • 1 tbsp dried thyme
  • 1 tbsp dried oregano
  • 1 tbsp fresh thyme
  • 30 grams feta
  • 4 garlic cloves, crushed
  • 1 lemon quartered
  • 1 pinch of sea salt and black pepper

Instructions

Step 1: Into wedges, chop the potatoes. In boiling water, place the chopped potatoes. Bring the water to a boil and par-boil the potatoes for about 6 to 7 minutes.

Step 2: When done, drain the potatoes and transfer them to a bowl along with the remaining ingredients except for the Feta. Stir well until combined.

Step 3: To a baking dish, transfer the mixture. Cut a whole lemon into quarters and add them to the baking dish.

Step 4: Bake in a preheated oven (220 degrees C or 420 degrees F or Gas 7) for about 40 minutes.

Step 5: Remove from the oven when done and transfer the baked potatoes to a plate. Before serving, sprinkle with feta and some fresh thyme leaves. Enjoy!

Notes

Reheat any leftovers in the oven for about 15 to 20 minutes or enjoy cold. Before serving (after reheating the potatoes), add a squeeze of lemon. I recommend using Cornish, New Potatoes for best results. You can omit the feta cheese to keep this dish vegan. Feel free to add some chopped vegetables and pieces of chicken breasts (or thighs/legs) to turn this into a main dish. You can also add halloumi instead of chicken. Roast them at the same time, but keep an eye.

May 27, 2022 0 comment
0 FacebookTwitterPinterestEmail
General Recipes

One Pan Cheesy Jalapeño Chicken

by Rebecca May 27, 2022
written by Rebecca

Prep Time: 10 mins | Cook Time: 15 mins | Total Time: 25 mins | Servings: 4

This is an amazing one-pan meal that’s bursting with exciting flavors. Pan-seared tender and juicy chicken smothered in melty cheese with jalapenos and corn kernels. It’s the perfect weeknight meal that you can easily whip up in under twenty minutes!

Ingredients

3 boneless, skinless chicken breasts, cut in half and pounded to be 1/2” thick

2 jalapeños seeds were removed and sliced lengthwise into strips

3 1/2 tablespoons vegetable oil divided

1 lime, sliced

1 teaspoon chili powder

3/4 teaspoon kosher salt

1 teaspoon dried oregano

1/2 teaspoon ground cumin

1/2 teaspoon dried minced onion

1/2 c. all-purpose flour

1/4 teaspoon ancho chile powder

1 1/2-2 c. frozen corn kernels, thawed (fresh corn works as well)

2 cloves garlic, minced

1/2 c. water

minced fresh cilantro, for garnish

3 tablespoons lime juice (juice of 2-3 limes)

extra lime wedges, for garnish

1-1 1/2 c. shredded Mexican blend cheese (or any cheese you love)

1/2 teaspoon black pepper

How to make One Pan Cheesy Jalapeño Chicken

Step 1: Add the chicken, chili powder, oregano, kosher salt, ground cumin, black pepper, dried minced onion, and ancho chile powder in a mixing bowl. On all sides of the chicken, massage the spice mixture.

Step 2: To a shallow bowl or plate, add the flour. In the flour, lightly dredge the chicken.

Step 3: Add the lime slices into a hot large oven-safe skillet. Cook the lime slices over medium-high heat for about 1 to 2 minutes on each side until brown and charred. To a plate, transfer the slices of lime.

Step 4: To the same pan, add 2 1/2 tablespoons vegetable oil and heat until shimmering. Then, add the pieces of chicken and cook on each side for about 3 minutes until golden brown. You can do this in 2 batches to avoid overcrowding the pan. To a plate, transfer the chicken.

Step 5: To the upper third part of the oven, move the oven rack, then preheat the broiler to High.

Step 6: To the hot skillet, add the rest of the 1 tbsp oil. Next, add the corn kernels, jalapeno slices, and garlic. Cook for about 2 to 3 minutes, stirring occasionally, until the corn starts to turn lightly brown.

Step 7: Return the chicken to the pan and pour in the lime juice and water. Continue to cook for a few minutes more until the liquid is mostly absorbed.

Step 8: Over everything, sprinkle the shredded cheese. Place in the broiler for about 2 to 3 minutes or until the cheese has melted.

Step 9: Serve the cheesy jalapeno chicken right away garnished with some minced fresh cilantro and lime wedges or charred lime slices. Enjoy!

One Pan Cheesy Jalapeño Chicken

Rebecca Prep Time: 10 mins | Cook Time: 15 mins | Total Time: 25 mins | Servings: 4 This is an amazing one-pan meal that’s bursting with exciting flavors. Pan-seared tender… General Recipes One Pan Cheesy Jalapeño Chicken European Print This
Serves: 4 Prep Time: 10 mins Cooking Time: 15 mins 15 mins
Nutrition facts: 200 calories 20 grams fat
Rating: 5.0/5
( 1 voted )

Ingredients

  • 3 boneless, skinless chicken breasts, cut in half and pounded to be 1/2” thick
  • 2 jalapeños seeds were removed and sliced lengthwise into strips
  • 3 1/2 tablespoons vegetable oil divided
  • 1 lime, sliced
  • 1 teaspoon chili powder
  • 3/4 teaspoon kosher salt
  • 1 teaspoon dried oregano
  • 1/2 teaspoon ground cumin
  • 1/2 teaspoon dried minced onion
  • 1/2 c. all-purpose flour
  • 1/4 teaspoon ancho chile powder
  • 1 1/2-2 c. frozen corn kernels, thawed (fresh corn works as well)
  • 2 cloves garlic, minced
  • 1/2 c. water
  • minced fresh cilantro, for garnish
  • 3 tablespoons lime juice (juice of 2-3 limes)
  • extra lime wedges, for garnish
  • 1-1 1/2 c. shredded Mexican blend cheese (or any cheese you love)
  • 1/2 teaspoon black pepper

Instructions

Step 1: Add the chicken, chili powder, oregano, kosher salt, ground cumin, black pepper, dried minced onion, and ancho chile powder in a mixing bowl. On all sides of the chicken, massage the spice mixture.

Step 2: To a shallow bowl or plate, add the flour. In the flour, lightly dredge the chicken.

Step 3: Add the lime slices into a hot large oven-safe skillet. Cook the lime slices over medium-high heat for about 1 to 2 minutes on each side until brown and charred. To a plate, transfer the slices of lime.

Step 4: To the same pan, add 2 1/2 tablespoons vegetable oil and heat until shimmering. Then, add the pieces of chicken and cook on each side for about 3 minutes until golden brown. You can do this in 2 batches to avoid overcrowding the pan. To a plate, transfer the chicken.

Step 5: To the upper third part of the oven, move the oven rack, then preheat the broiler to High.

Step 6: To the hot skillet, add the rest of the 1 tbsp oil. Next, add the corn kernels, jalapeno slices, and garlic. Cook for about 2 to 3 minutes, stirring occasionally, until the corn starts to turn lightly brown.

Step 7: Return the chicken to the pan and pour in the lime juice and water. Continue to cook for a few minutes more until the liquid is mostly absorbed.

Step 8: Over everything, sprinkle the shredded cheese. Place in the broiler for about 2 to 3 minutes or until the cheese has melted.

Step 9: Serve the cheesy jalapeno chicken right away garnished with some minced fresh cilantro and lime wedges or charred lime slices. Enjoy!

May 27, 2022 0 comment
0 FacebookTwitterPinterestEmail
General Recipes

Chocolate Pecan Pie

by Rebecca May 27, 2022
written by Rebecca

This is your classic pecan pie, but with the addition of chocolate. All my favorites in one dessert – crunchy pecans, sweet sticky filling, rich flavor, and flaky crust. This is seriously the best chocolate pecan pie! Easy and quick to whip up and toothsome! It’ll always be pie season with this decadent chocolate pecan pie!

Ingredients

3 eggs

1 (9” deep dish) pie crust (I used Marie Calendar frozen crust)

1/3 cup butter, melted

1 cup sugar

1/4 teaspoon salt

1 cup corn syrup

2 tablespoons brown sugar

1 teaspoon vanilla

1 cup semi-sweet chocolate chips

1 cup pecans

How to make Chocolate Pecan Pie

Step 1: Prepare the oven. Preheat it to 350 degrees.

Step 2: Line a large baking sheet with foil. In the middle of the baking sheet, place the pie crust. Using a fork, prick the crust about 4 to 5 times.

Step 3: Place the sugar, brown sugar, salt, corn syrup, and melted butter into a medium-sized bowl. Mix well until blended.

Step 4: Whisk the eggs in a small bowl until frothy. Add this to the sugar mixture and mix well until incorporated. Then, add the vanilla and stir until combined.

Step 5: In the bottom of the pie crust, place the roughly chopped pecans. On top, sprinkle the chocolate chips.

Step 6: On top of the pecans and chocolate chips, carefully pour the filling mixture, making sure not to overfill the pie. With foil, carefully wrap the cake in a loose tent shape on the edges of the pie. Place in the preheated oven and bake for about 30 minutes. After thirty minutes, remove the foil from the edges of the pie and continue to bake for another 20 minutes.

Step 7: Take the pie out of the oven and let it cool for at least 5 to 6 hours until set or overnight.

Chocolate Pecan Pie

Rebecca This is your classic pecan pie, but with the addition of chocolate. All my favorites in one dessert – crunchy pecans, sweet sticky filling, rich flavor, and flaky crust. This… General Recipes Chocolate Pecan Pie European Print This
Nutrition facts: 200 calories 20 grams fat
Rating: 5.0/5
( 1 voted )

Ingredients

  • 3 eggs
  • 1 (9” deep dish) pie crust (I used Marie Calendar frozen crust)
  • 1/3 cup butter, melted
  • 1 cup sugar
  • 1/4 teaspoon salt
  • 1 cup corn syrup
  • 2 tablespoons brown sugar
  • 1 teaspoon vanilla
  • 1 cup semi-sweet chocolate chips
  • 1 cup pecans

Instructions

Step 1: Prepare the oven. Preheat it to 350 degrees.

Step 2: Line a large baking sheet with foil. In the middle of the baking sheet, place the pie crust. Using a fork, prick the crust about 4 to 5 times.

Step 3: Place the sugar, brown sugar, salt, corn syrup, and melted butter into a medium-sized bowl. Mix well until blended.

Step 4: Whisk the eggs in a small bowl until frothy. Add this to the sugar mixture and mix well until incorporated. Then, add the vanilla and stir until combined.

Step 5: In the bottom of the pie crust, place the roughly chopped pecans. On top, sprinkle the chocolate chips.

Step 6: On top of the pecans and chocolate chips, carefully pour the filling mixture, making sure not to overfill the pie. With foil, carefully wrap the cake in a loose tent shape on the edges of the pie. Place in the preheated oven and bake for about 30 minutes. After thirty minutes, remove the foil from the edges of the pie and continue to bake for another 20 minutes.

Step 7: Take the pie out of the oven and let it cool for at least 5 to 6 hours until set or overnight.

May 27, 2022 0 comment
0 FacebookTwitterPinterestEmail
General Recipes

CLASSIC SMASHED BURGER

by Rebecca May 27, 2022
written by Rebecca

PREP TIME: 20 MINS | OTHER TIME: 5 MINS | COOK TIME: 5 MINS | TOTAL TIME: 30 MINS | SERVES: 4

This is the best-smashed burger! The secret to success is the special homemade burger sauce. Follow the easy steps below and make this classic and mouthwatering smashed burger at home!

INGREDIENTS

2 tbsp butter, room temperature

1 1/2 lbs Certified Angus Beef ® ground beef, 80/20 lean

1 tbsp yellow mustard

1/2 c. mayonnaise

1 tbsp grated yellow onion

1 tsp Worcestershire sauce

2 tbsp hot sauce

2 c. shredded iceberg lettuce

4 slices of American cheese

8 slices of vine-ripe tomatoes

4 white hamburger buns

1 1/2 tbsp kosher salt

1/2 tbsp pepper

HOW TO MAKE A CLASSIC SMASHED BURGER

Step 1: Into 8 equal balls (about the size of a ping-pong ball & 3 ounces each) divide the ground beef. Place the balls in the fridge.

Step 2: Place the mayonnaise, mustard, grated onion, hot sauce, and Worcestershire in a small mixing bowl. Stir well to make a special sauce and place in the fridge.

Step 3: Heat a large cast-iron griddle or 2 large cast-iron pans over high heat. Then, toast the buns with butter. To plates, transfer the toasted buns.

Step 4: On a hot cooking surface, space the beef balls. Smash each ball using a large metal spatula to around 1/4-inch thick patties. Drizzle the patties with 1 tbsp each of the reserved special sauces, and season with salt & pepper. Sear the meatballs for about 2 to 3 minutes or until some fat starts to bubble up in the middle of the patty. Then, flip the patty quickly. With a slice of cheese, top 4 patties. Continue to cook for a minute more and put a plain patty on top of a cheese patty.

Step 5: To build the burgers, smear some of the special sauce on the bottom bun and top with shredded lettuce followed by the tomato, double burgers, and the top bun.

Step 6: Serve and enjoy!

NUTRITION INFO:

Calories: 925cal total

CLASSIC SMASHED BURGER

Rebecca PREP TIME: 20 MINS | OTHER TIME: 5 MINS | COOK TIME: 5 MINS | TOTAL TIME: 30 MINS | SERVES: 4 This is the best-smashed burger! The secret to… General Recipes CLASSIC SMASHED BURGER European Print This
Serves: 4 Prep Time: 20 mins Cooking Time: 5 mins 5 mins
Nutrition facts: 925 calories 20 grams fat
Rating: 5.0/5
( 1 voted )

Ingredients

  • 2 tbsp butter, room temperature
  • 1 1/2 lbs Certified Angus Beef ® ground beef, 80/20 lean
  • 1 tbsp yellow mustard
  • 1/2 c. mayonnaise
  • 1 tbsp grated yellow onion
  • 1 tsp Worcestershire sauce
  • 2 tbsp hot sauce
  • 2 c. shredded iceberg lettuce
  • 4 slices of American cheese
  • 8 slices of vine-ripe tomatoes
  • 4 white hamburger buns
  • 1 1/2 tbsp kosher salt
  • 1/2 tbsp pepper

Instructions

Step 1: Into 8 equal balls (about the size of a ping-pong ball & 3 ounces each) divide the ground beef. Place the balls in the fridge.

Step 2: Place the mayonnaise, mustard, grated onion, hot sauce, and Worcestershire in a small mixing bowl. Stir well to make a special sauce and place in the fridge.

Step 3: Heat a large cast-iron griddle or 2 large cast-iron pans over high heat. Then, toast the buns with butter. To plates, transfer the toasted buns.

Step 4: On a hot cooking surface, space the beef balls. Smash each ball using a large metal spatula to around 1/4-inch thick patties. Drizzle the patties with 1 tbsp each of the reserved special sauces, and season with salt & pepper. Sear the meatballs for about 2 to 3 minutes or until some fat starts to bubble up in the middle of the patty. Then, flip the patty quickly. With a slice of cheese, top 4 patties. Continue to cook for a minute more and put a plain patty on top of a cheese patty.

Step 5: To build the burgers, smear some of the special sauce on the bottom bun and top with shredded lettuce followed by the tomato, double burgers, and the top bun.

Step 6: Serve and enjoy!

May 27, 2022 0 comment
0 FacebookTwitterPinterestEmail
General Recipes

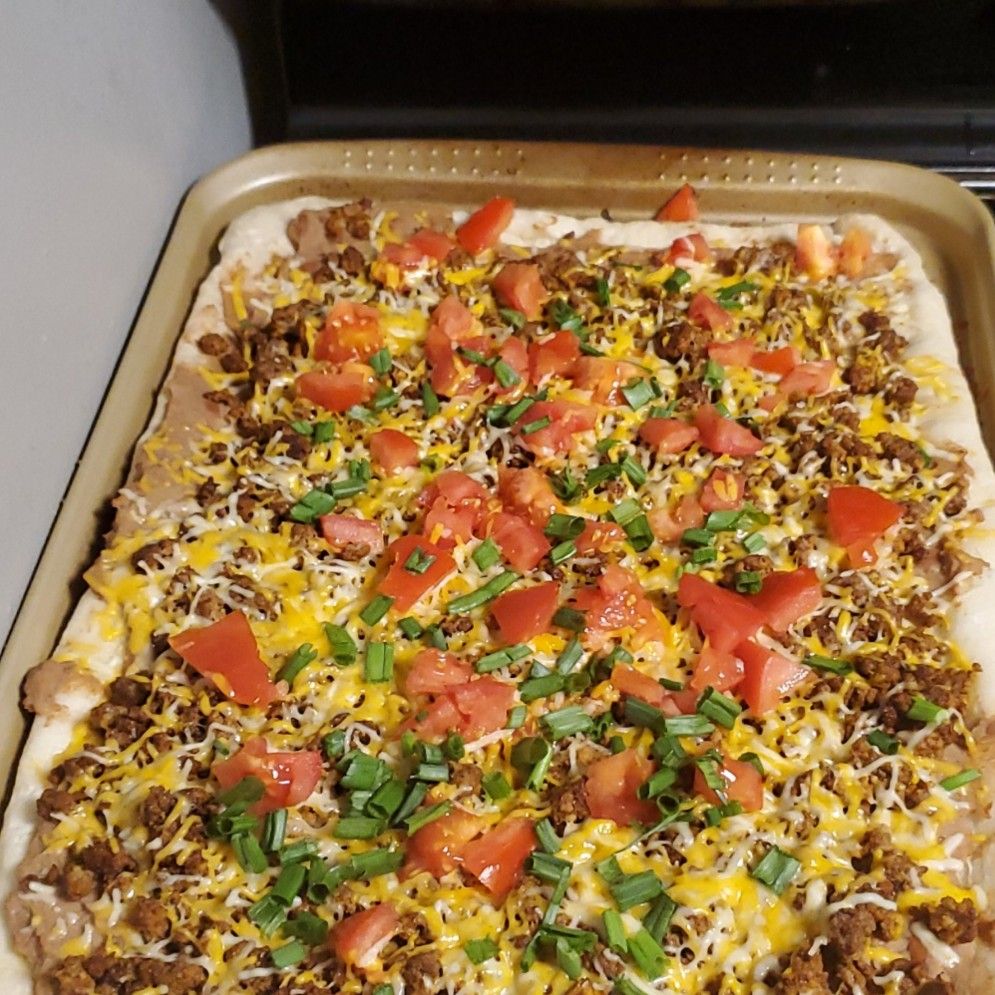
Taco Pizza

by Rebecca May 27, 2022
written by Rebecca

This is an amazing pizza loaded with seasoned ground beef and refried beans along with your favorite taco toppings! I love everything pizza, and this taco pizza instantly made it to my top five favorites. It is an awesome pizza with the delicious flavor of tacos and colorful veggies that is hard to resist!

Ingredients

4 green onions, chopped

1 envelope taco seasoning mix

1 16-oz. can of refried beans

1 lb. lean ground beef

1/2 c. chopped tomatoes

1/4 c. sliced black olives

1 10-oz. can refrigerated Pillsbury pizza dough

2-3 c. shredded cheddar cheese – I used Colby and Monterey Jack cheese

How to make Taco Pizza

Step 1: Prepare the oven. Preheat it to 375 degrees.

Step 2: In the meantime, cook the ground beef in a large skillet over medium-high heat until browned. Drain the excess grease when done. To the skillet with the ground beef, add the taco seasoning following the package instructions.

Step 3: Onto an ungreased cookie sheet, unroll the pizza dough (for this recipe, I used a 10 x 5-inch cookie sheet). Allow the dough to sit for 5 minutes at room temperature. Then, over the bottom and up along all four sides of the cookie sheet, press the dough. Place in the preheated oven and for about 8 to 10 minutes or until the pizza dough is lightly golden. When done, remove the pizza dough from the oven.

Step 4: Into a microwavable-safe bowl, place the refried beans. Heat in the microwave for about a minute. Then, stir well and evenly spread the beans over the warm pizza crust. Next, top the beans with the cooked ground beef mixture and sprinkle with cheese. Lastly, top everything with tomatoes, black olives, and green onions.

Step 5: Continue to bake for an additional 5 to 7 minutes or until the cheese has melted.

Step 6: Remove from the oven when done and serve the Taco Pizza right away.

Note: You can keep any leftovers in an airtight container and store them in the fridge for up to 2 days.

Taco Pizza

Rebecca This is an amazing pizza loaded with seasoned ground beef and refried beans along with your favorite taco toppings! I love everything pizza, and this taco pizza instantly made it… General Recipes Taco Pizza European Print This
Nutrition facts: 200 calories 20 grams fat
Rating: 5.0/5
( 1 voted )

Ingredients

  • 4 green onions, chopped
  • 1 envelope taco seasoning mix
  • 1 16-oz. can of refried beans
  • 1 lb. lean ground beef
  • 1/2 c. chopped tomatoes
  • 1/4 c. sliced black olives
  • 1 10-oz. can refrigerated Pillsbury pizza dough
  • 2-3 c. shredded cheddar cheese - I used Colby and Monterey Jack cheese

Instructions

Step 1: Prepare the oven. Preheat it to 375 degrees.

Step 2: In the meantime, cook the ground beef in a large skillet over medium-high heat until browned. Drain the excess grease when done. To the skillet with the ground beef, add the taco seasoning following the package instructions.

Step 3: Onto an ungreased cookie sheet, unroll the pizza dough (for this recipe, I used a 10 x 5-inch cookie sheet). Allow the dough to sit for 5 minutes at room temperature. Then, over the bottom and up along all four sides of the cookie sheet, press the dough. Place in the preheated oven and for about 8 to 10 minutes or until the pizza dough is lightly golden. When done, remove the pizza dough from the oven.

Step 4: Into a microwavable-safe bowl, place the refried beans. Heat in the microwave for about a minute. Then, stir well and evenly spread the beans over the warm pizza crust. Next, top the beans with the cooked ground beef mixture and sprinkle with cheese. Lastly, top everything with tomatoes, black olives, and green onions.

Step 5: Continue to bake for an additional 5 to 7 minutes or until the cheese has melted.

Step 6: Remove from the oven when done and serve the Taco Pizza right away.

Notes

You can keep any leftovers in an airtight container and store them in the fridge for up to 2 days.

May 27, 2022 0 comment
0 FacebookTwitterPinterestEmail
General Recipes

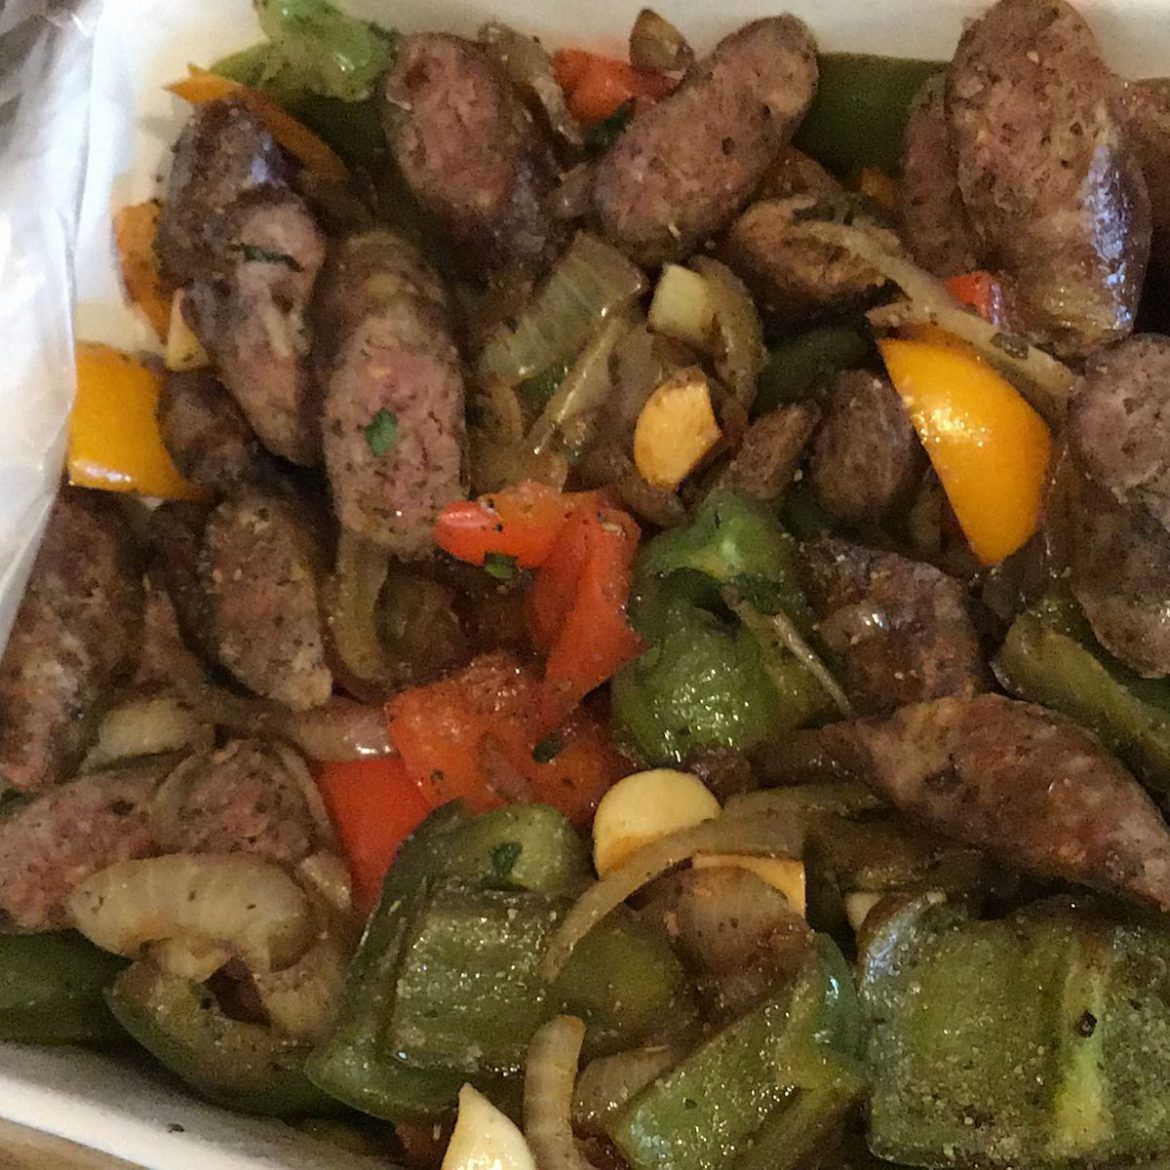
Italian Sausage, Peppers and Onions and Recipe

by Rebecca May 27, 2022
written by Rebecca

Prep Time: 10 mins | Cook Time: 30 mins | Servings: 4 people

This Italian sausage, peppers, and onions recipe have been one of my favorites for years! It is an amazing Italian cuisine that anyone can throw together using three ingredients not counting the olive oil. A chock-full of flavors dishes that are excellent for parties, side dishes, and holidays. This Italian sausage, peppers, and onions pair perfectly with pasta.

If you are looking for another handy recipe that your entire family will love, then you just hit the jackpot! This Italian sausage, peppers, and onions are not only delicious, but super easy and quick to make. Everything is cooked together, including the meat so the flavors mixed perfectly, making this incredibly flavorful and smelling fantastic!

This recipe is also very versatile. The ingredient calls for only green peppers, but you can use green and red if desired, especially if you enjoy the sweetness of the red peppers. You can even swap the sausage with chicken sausage or turkey sausage. Either way, this will be an awesome meal that you can make easily and quickly at any time!

Make sure to give this mouthwatering Italian sausage, peppers, and onions a try very soon, and expect no leftovers!

Ingredients

olive oil

1 package sausage – depends on how much you want to make

1 onion chopped in large chunks

2-3 green peppers, chopped

How to make Italian Sausage, Peppers, and Onions

Step 1: Thoroughly wash the peppers, then cut them into strips.

Step 2: Fry the pepper strips in olive oil for about 5 to 10 minutes. Then, add the onion and take the peppers out of the pan.

Step 3: Next, add the sausage and fry until cooked through and no longer pink.

Step 4: In a baking pan, mix everything. Place in the oven and bake for about 10 minutes at 375 degrees.

Step 5: Remove from the oven when done and serve right away. Enjoy!

Italian Sausage, Peppers and Onions and Recipe

Rebecca Prep Time: 10 mins | Cook Time: 30 mins | Servings: 4 people This Italian sausage, peppers, and onions recipe have been one of my favorites for years! It is… General Recipes Italian Sausage, Peppers and Onions and Recipe European Print This
Serves: 4 Prep Time: 10 mins Cooking Time: 30 mins 30 mins
Nutrition facts: 200 calories 20 grams fat
Rating: 5.0/5
( 1 voted )

Ingredients

  • olive oil
  • 1 package sausage - depends on how much you want to make
  • 1 onion chopped in large chunks
  • 2-3 green peppers, chopped

Instructions

Step 1: Thoroughly wash the peppers, then cut them into strips.

Step 2: Fry the pepper strips in olive oil for about 5 to 10 minutes. Then, add the onion and take the peppers out of the pan.

Step 3: Next, add the sausage and fry until cooked through and no longer pink.

Step 4: In a baking pan, mix everything. Place in the oven and bake for about 10 minutes at 375 degrees.

Step 5: Remove from the oven when done and serve right away. Enjoy!

May 27, 2022 0 comment
0 FacebookTwitterPinterestEmail
General Recipes

White Chocolate Almond Raspberry Cake

by Rebecca May 27, 2022
written by Rebecca

PREP TIME: 30 MINS | COOK TIME: 30 MINS | INACTIVE TIME: 20 MINS | TOTAL TIME: 1 HR 20 MINS | SERVINGS: 1 Cake (9-inch Layer Cake)

This decadent white chocolate almond raspberry cake is a dream cake with four layers of light and fluffy almond cake, raspberry filling, and tasty, creamy white chocolate amaretto cream. This is a perfectly sweet, heavenly cake that is perfect for raspberry almond dessert lovers!

Ingredients

Almond Cake:

3 tsp baking powder

2 and 1/2 c. cake flour, sifted (315 g.)

1/2 tsp baking soda

1 c. (227 g.) unsalted butter, at room temperature

1 and 1/2 c. (298 g.) granulated sugar

1 tsp vanilla extract

2/3 c. (152 g.) sour cream, at room temperature

2 tsp almond extract

3/4 c. (170 g.) whole milk, at room temperature

3/4 tsp salt

6 large egg whites, at room temperature, lightly beaten until foamy

White Chocolate Amaretto Buttercream Frosting:

1 tbsp heavy cream

1 c. (227 grams) unsalted butter, at room temperature

1/4 tsp salt

1 and 1/2 tbsp amaretto liqueur

2 and 1/2 c. (283 grams/10 oz.) confectioners’ sugar, sifted

6 oz. (170 grams) quality white chocolate, melted and cooled for 10 minutes

1 tsp almond extract

Assembly and Garnish:

1 c. fresh raspberries

1 c. thinly sliced almonds

1 c. raspberry preserves

How to make White Chocolate Almond Raspberry Cake

Almond Cake:

Step 1: Prepare the oven. Preheat it to 350 degrees F. In the meantime, generously oil the bottom and sides of two 9-inch round cake pans, then line them with parchment paper rounds. Set aside.

Step 2: Sift the cake flour, baking powder, baking soda, and salt in a large mixing bowl and set aside.

Step 3: Place the butter in a bowl of a stand mixer and beat for about 1 minute on medium-high speed until smooth and creamy. You can also do this using a handheld electric mixer. Then, slowly add in the sugar. Beat for about 2 minutes on high once all the sugar has been added. Adjust the speed to low and add gradually add in the egg whites, beating well every after each addition. As needed, scrape the sides and bottom of the bowl.

Step 4: Combine the vanilla extract, almond extract, milk, and sour cream in a spouted measuring cup. Mix well until evenly blended.

Step 5: In three additions, add the flour mixture alternately with the liquid milk/sour cream mixture while beating on low speed, starting and ending with the flour, beating until just mixed.

Step 6: Into the prepared pans, evenly divide the batter. Smooth the tops. Place in the preheated oven and bake for about 25 to 30 minutes or until the cakes are lightly browned around the edges and a toothpick inserted in the middle of the cakes comes out clean.

Step 7: Take the cakes out of the oven and let them cool in the pans for about 15 minutes before inverting the cake layers onto the cooling racks to cool fully.

White Chocolate Amaretto Buttercream Frosting:

Step 8: Place the butter in the bowl of a stand mixer fitted with the paddle attachment and beat on medium speed until fully smooth. You can also do this using a handheld electric mixer. Adjust the speed to low, then slowly add in the confectioners’ sugar, beating well until the sugar is fully incorporated. Next, add the salt along with the cream, amaretto, and almond extract. Beat well until smooth.

Step 9: To the bowl, add the white chocolate and continue beating until smooth. Adjust the speed to medium-high once all the ingredients have been incorporated and beat for another minute.

Assembly and Garnish:

Step 10: Slice each cake in half horizontally using a long, serrated knife to make 4 even layers.

Step 11: On a large plate or cake stand, place one cake layer. On top of the cake, spread a half cup of the frosting, completely covering it. Next, spread 1/4 cup of raspberry preserves on top. Place the other cake layer on top and repeat the layering process. Top with the last cake layer and spread the rest of the frosting on the top and sides of the cake. Gently press the sliced almonds using your hands all around the sides of the cake. Lastly, top the cake with fresh raspberries.

Step 12: Set aside the cake for about 20 minutes to set. Then, slice and serve. You can also keep the cake in the fridge for up to 2 days. Before serving, bring the cake to room temperature.

White Chocolate Almond Raspberry Cake

Rebecca PREP TIME: 30 MINS | COOK TIME: 30 MINS | INACTIVE TIME: 20 MINS | TOTAL TIME: 1 HR 20 MINS | SERVINGS: 1 Cake (9-inch Layer Cake) This decadent… General Recipes White Chocolate Almond Raspberry Cake European Print This
Serves: 1 Prep Time: 30 mins Cooking Time: 30 mins 30 mins
Nutrition facts: 200 calories 20 grams fat
Rating: 5.0/5
( 1 voted )

Ingredients

  • Almond Cake:
  • 3 tsp baking powder
  • 2 and 1/2 c. cake flour, sifted (315 g.)
  • 1/2 tsp baking soda
  • 1 c. (227 g.) unsalted butter, at room temperature
  • 1 and 1/2 c. (298 g.) granulated sugar
  • 1 tsp vanilla extract
  • 2/3 c. (152 g.) sour cream, at room temperature
  • 2 tsp almond extract
  • 3/4 c. (170 g.) whole milk, at room temperature
  • 3/4 tsp salt
  • 6 large egg whites, at room temperature, lightly beaten until foamy
  • White Chocolate Amaretto Buttercream Frosting:
  • 1 tbsp heavy cream
  • 1 c. (227 grams) unsalted butter, at room temperature
  • 1/4 tsp salt
  • 1 and 1/2 tbsp amaretto liqueur
  • 2 and 1/2 c. (283 grams/10 oz.) confectioners’ sugar, sifted
  • 6 oz. (170 grams) quality white chocolate, melted and cooled for 10 minutes
  • 1 tsp almond extract
  • Assembly and Garnish:
  • 1 c. fresh raspberries
  • 1 c. thinly sliced almonds
  • 1 c. raspberry preserves

Instructions

Almond Cake:

Step 1: Prepare the oven. Preheat it to 350 degrees F. In the meantime, generously oil the bottom and sides of two 9-inch round cake pans, then line them with parchment paper rounds. Set aside.

Step 2: Sift the cake flour, baking powder, baking soda, and salt in a large mixing bowl and set aside.

Step 3: Place the butter in a bowl of a stand mixer and beat for about 1 minute on medium-high speed until smooth and creamy. You can also do this using a handheld electric mixer. Then, slowly add in the sugar. Beat for about 2 minutes on high once all the sugar has been added. Adjust the speed to low and add gradually add in the egg whites, beating well every after each addition. As needed, scrape the sides and bottom of the bowl.

Step 4: Combine the vanilla extract, almond extract, milk, and sour cream in a spouted measuring cup. Mix well until evenly blended.

Step 5: In three additions, add the flour mixture alternately with the liquid milk/sour cream mixture while beating on low speed, starting and ending with the flour, beating until just mixed.

Step 6: Into the prepared pans, evenly divide the batter. Smooth the tops. Place in the preheated oven and bake for about 25 to 30 minutes or until the cakes are lightly browned around the edges and a toothpick inserted in the middle of the cakes comes out clean.

Step 7: Take the cakes out of the oven and let them cool in the pans for about 15 minutes before inverting the cake layers onto the cooling racks to cool fully.

White Chocolate Amaretto Buttercream Frosting:

Step 8: Place the butter in the bowl of a stand mixer fitted with the paddle attachment and beat on medium speed until fully smooth. You can also do this using a handheld electric mixer. Adjust the speed to low, then slowly add in the confectioners' sugar, beating well until the sugar is fully incorporated. Next, add the salt along with the cream, amaretto, and almond extract. Beat well until smooth.

Step 9: To the bowl, add the white chocolate and continue beating until smooth. Adjust the speed to medium-high once all the ingredients have been incorporated and beat for another minute.

Assembly and Garnish:

Step 10: Slice each cake in half horizontally using a long, serrated knife to make 4 even layers.

Step 11: On a large plate or cake stand, place one cake layer. On top of the cake, spread a half cup of the frosting, completely covering it. Next, spread 1/4 cup of raspberry preserves on top. Place the other cake layer on top and repeat the layering process. Top with the last cake layer and spread the rest of the frosting on the top and sides of the cake. Gently press the sliced almonds using your hands all around the sides of the cake. Lastly, top the cake with fresh raspberries.

Step 12: Set aside the cake for about 20 minutes to set. Then, slice and serve. You can also keep the cake in the fridge for up to 2 days. Before serving, bring the cake to room temperature.

May 27, 2022 0 comment
0 FacebookTwitterPinterestEmail
General Recipes

Aloo Gobi (Indian Spiced Potatoes and Cauliflower)

by Rebecca May 26, 2022
written by Rebecca

Yield: SERVES 4

This Aloo Gobi is an amazing Indian meal. An impressive vegetarian dish with potatoes and cauliflower tossed in flavor-packed Indian spices. It is a pretty simple dish with big flavors. Serve this with some plain basmati rice or Pilau Rice. Also, try drizzling over a mint yoghurt. It makes a whole lot of difference!

Ingredients

1 medium head of cauliflower, broken into small florets

400 grams (14 ounces) of potatoes (I like to use a waxy variety like Yukon Golds), peeled and cubed

1 onion, halved and sliced

½ tsp of amchoor (use a little lemon juice if you can’t get this)

2 cloves of garlic, crushed

2 tsp of ground cumin

2 tbsp of finely grated ginger

2 tsp of ground coriander

1 tsp of turmeric

½ tsp of garam masala

¼ c (60ml) or passata (or crushed tomatoes)

¼ c (60ml of water)

1 tbsp of tomato paste

1 tbsp of ghee (or another oil of choice)

½ tsp of red chili flakes

fresh coriander (cilantro), chopped (to serve)

salt and black pepper to season

How to make Aloo Gobi (Indian Spiced Potatoes and Cauliflower)

Step 1: In a large saucepan with water, place the potatoes. Bring the water to a boil, then turn the heat off. Now, add the cauliflower and cover the pan. Leave the pan with the lid on for about 10 minutes.

Step 2: Heat the ghee in a deep frying pan over medium-high heat. Then, add the onion and cook for a couple of minutes until the onion is lightly golden and softened. Next, add the ginger along with the garlic and spices. Cook for a few minutes more before adding in the potatoes and cauliflower. Toss to coat.

Step 3: Pour in the water and add the passata and tomato paste. Put the lid on and simmer for about 5 minutes pr until the potatoes are tender but not mushy. To taste, season with salt and pepper.

Step 4: Serve the Aloo Gobi garnished with some freshly chopped coriander. Enjoy!

Notes:

This is a great recipe that is dairy-free, vegetarian (vegan), gluten-free, Whole30, Slimming World, and Weight Watchers friendly:

Slimming World – 1.5 syns per serving
WW Green Smart Points – 4 per serving
WW Blue Smart Points – 4 per serving
WW Purple Smart Points – 2 per serving

Swap ghee with a vegan-friendly oil to make this vegan/dairy-free.

Nutrition Facts:

Yield: 4, Serving Size: 1 SERVING
Amount Per Serving: Calories 188, Total Fat 5g, Saturated Fat 2g, Trans Fat 0g, Unsaturated Fat 2g, Cholesterol 8mg, Sodium 189mg, Carbohydrates 34g, Fiber 7g, Sugar 6g, Protein 6g

Aloo Gobi (Indian Spiced Potatoes and Cauliflower)

Rebecca Yield: SERVES 4 This Aloo Gobi is an amazing Indian meal. An impressive vegetarian dish with potatoes and cauliflower tossed in flavor-packed Indian spices. It is a pretty simple dish… General Recipes Aloo Gobi (Indian Spiced Potatoes and Cauliflower) European Print This
Serves: 4
Nutrition facts: 188 calories 5 fat
Rating: 5.0/5
( 1 voted )

Ingredients

  • 1 medium head of cauliflower, broken into small florets
  • 400 grams (14 ounces) of potatoes (I like to use a waxy variety like Yukon Golds), peeled and cubed
  • 1 onion, halved and sliced
  • ½ tsp of amchoor (use a little lemon juice if you can't get this)
  • 2 cloves of garlic, crushed
  • 2 tsp of ground cumin
  • 2 tbsp of finely grated ginger
  • 2 tsp of ground coriander
  • 1 tsp of turmeric
  • ½ tsp of garam masala
  • ¼ c (60ml) or passata (or crushed tomatoes)
  • ¼ c (60ml of water)
  • 1 tbsp of tomato paste
  • 1 tbsp of ghee (or another oil of choice)
  • ½ tsp of red chili flakes
  • fresh coriander (cilantro), chopped (to serve)
  • salt and black pepper to season

Instructions

Step 1: In a large saucepan with water, place the potatoes. Bring the water to a boil, then turn the heat off. Now, add the cauliflower and cover the pan. Leave the pan with the lid on for about 10 minutes.

Step 2: Heat the ghee in a deep frying pan over medium-high heat. Then, add the onion and cook for a couple of minutes until the onion is lightly golden and softened. Next, add the ginger along with the garlic and spices. Cook for a few minutes more before adding in the potatoes and cauliflower. Toss to coat.

Step 3: Pour in the water and add the passata and tomato paste. Put the lid on and simmer for about 5 minutes pr until the potatoes are tender but not mushy. To taste, season with salt and pepper.

Step 4: Serve the Aloo Gobi garnished with some freshly chopped coriander. Enjoy!

Notes

This is a great recipe that is dairy-free, vegetarian (vegan), gluten-free, Whole30, Slimming World, and Weight Watchers friendly: Slimming World - 1.5 syns per serving WW Green Smart Points - 4 per serving WW Blue Smart Points - 4 per serving WW Purple Smart Points - 2 per serving Swap ghee with a vegan-friendly oil to make this vegan/dairy-free.

May 26, 2022 0 comment
0 FacebookTwitterPinterestEmail
General Recipes

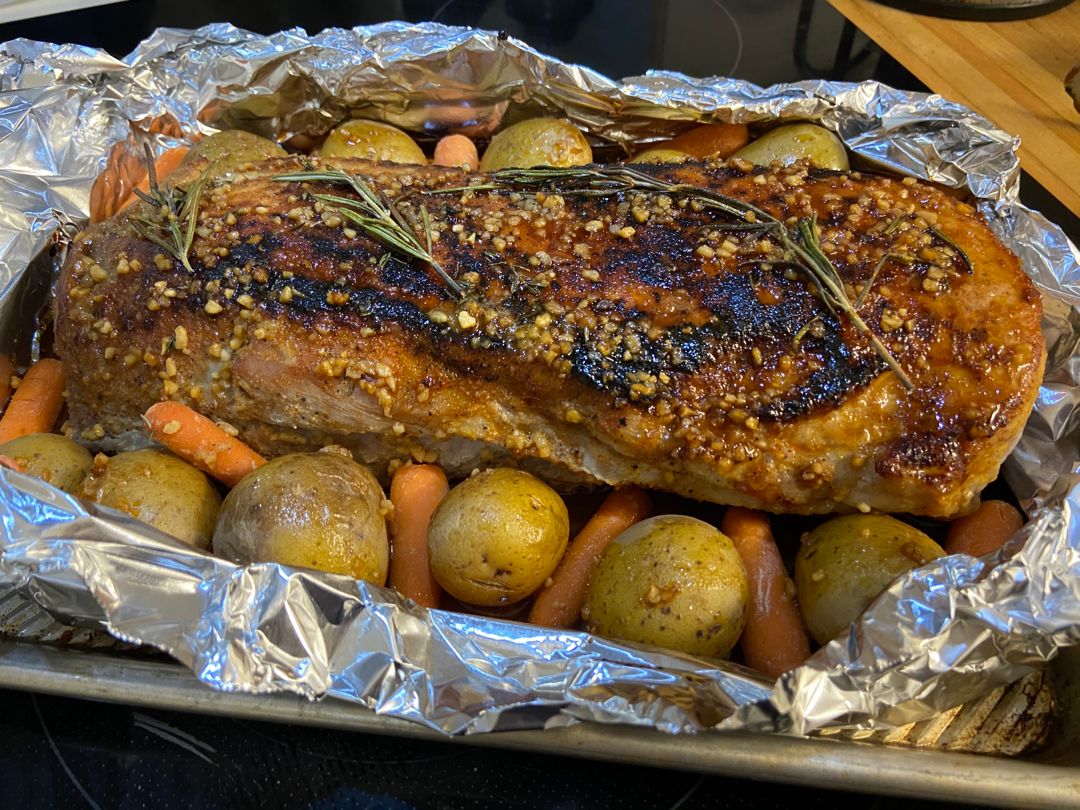
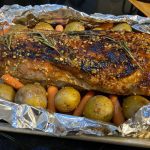
Tender and Juicy Pork Loin Roast Recipe

by Rebecca May 26, 2022
written by Rebecca

Prep Time: 15 mins | Cook Time: 1 hr | Resting Time: 10 mins | Servings: 8

This is the best pork loin roast! Juicy and tender with superb flavors! This recipe is a fool-proof recipe, incredibly easy, and guarantees an impressive pork loin roast perfect for entertaining or a fancy dinner.

Ingredients

PORK LOIN:

1 tbsp olive oil

3 lbs. pork loin

SPICE RUB:

1/2 tsp onion powder

1 tsp sweet paprika

1/2 tsp dried rosemary

1 tsp garlic powder

salt and fresh ground pepper, to taste

1/2 tsp dried thyme

HONEY GARLIC GLAZE:

1 tbsp olive oil

1/4 c. honey

4 cloves garlic, minced

1 tbsp Dijon mustard

3 tbsp low-sodium, gluten-free soy sauce

VEGETABLES:

1 lb. Brussels sprouts, cut in half

1 lb. butternut squash, peeled, seeds cleaned out, and cut into 1” cubes (or use pre-cut butternut squash)

1 tbsp olive oil

How to make Tender and Juicy Pork Loin Roast

Step 1: Prepare the oven. Preheat it to 375 degrees F. Using aluminium foil or parchment paper, line a rimmed baking sheet, and set aside. Using paper towels, pat dry the pork loin.

Step 2: Place the paprika, garlic powder, onion powder, thyme, rosemary, salt, and pepper in a small mixing bowl. Mix well until combined.

Step 3: Using cooking spray, lightly spray the pork loin. Then, rub the spice mix on the entire pork loin.

Step 4: Sear the pork loin in olive oil for about 3 to 5 minutes per side until all sides are browned. On the prepared baking sheet, transfer the pork loin, fast-layer side up. Set aside.

Step 5: Mix the garlic, honey, soy sauce, mustard, and oil in a bowl until well blended. Add a little more oil or soy sauce if the mixture is too thick. Set aside 2 tbsp of the sauce for later and brush the rest on the pork loin.

Step 6: Place the baking sheet in the preheated oven and roast the pork loin for about 25 minutes.

Step 7: While the pork loin is in the oven, toss the vegetables with 1 tbsp olive oil and the reserved homey mixture. After roasting the pork loin for 25 minutes, remove it from the oven and add the vegetables around in a single layer.

Step 8: Cover the pork with a piece of foil. Return to the oven and continue to roast for an additional 25 to 30 minutes or until the internal temperature of the pork loin reads 145 degrees F. Halfway through cooking, stir the vegetables.

Step 9: Take the baking sheet out of the oven. With foil, loosely tent the meat and veggies and allow them to rest for about 10 minutes. Before serving, cut the pork into slices. Enjoy with the veggies.

Notes:

WW FREESTYLE POINTS: 10

SLOW-COOKER PORK LOIN:

After seasoning the pork, sear it and transfer it to the slow cooker. Pour in the prepared sauce. Put the lid on and set to cook on low for 4 to 6 hours.

HOW TO MAKE AHEAD:

Sear the seasoned pork and transfer it to the baking pan. Over the pork, pour the sauce. Cover and store in the fridge for up to 24 hours. When ready to serve, remove from the fridge and roast as directed.

Nutrition Facts:

Amount Per Serving: Calories 347, Calories from Fat 99, Fat 11g17%, Saturated Fat 3g15%, Cholesterol 107mg36%, Sodium 322mg13%, Potassium 1089mg31%, Carbohydrates 22g7%, Fiber 4g16%, Sugar 11g12%, Protein 41g82%, Vitamin A 6578IU132%, Vitamin C 61mg74%, Calcium 62mg6%, Iron 2mg11%

Tender and Juicy Pork Loin Roast Recipe

Rebecca Prep Time: 15 mins | Cook Time: 1 hr | Resting Time: 10 mins | Servings: 8 This is the best pork loin roast! Juicy and tender with superb flavors!… General Recipes Tender and Juicy Pork Loin Roast Recipe European Print This
Serves: 8 Prep Time: 15 mins Cooking Time: 1 hr 1 hr
Nutrition facts: 347 calories 11 fat
Rating: 5.0/5
( 1 voted )

Ingredients

  • PORK LOIN:
  • 1 tbsp olive oil
  • 3 lbs. pork loin
  • SPICE RUB:
  • 1/2 tsp onion powder
  • 1 tsp sweet paprika
  • 1/2 tsp dried rosemary
  • 1 tsp garlic powder
  • salt and fresh ground pepper, to taste
  • 1/2 tsp dried thyme
  • HONEY GARLIC GLAZE:
  • 1 tbsp olive oil
  • 1/4 c. honey
  • 4 cloves garlic, minced
  • 1 tbsp Dijon mustard
  • 3 tbsp low-sodium, gluten-free soy sauce
  • VEGETABLES:
  • 1 lb. Brussels sprouts, cut in half
  • 1 lb. butternut squash, peeled, seeds cleaned out, and cut into 1” cubes (or use pre-cut butternut squash)
  • 1 tbsp olive oil

Instructions

Step 1: Prepare the oven. Preheat it to 375 degrees F. Using aluminium foil or parchment paper, line a rimmed baking sheet, and set aside. Using paper towels, pat dry the pork loin.

Step 2: Place the paprika, garlic powder, onion powder, thyme, rosemary, salt, and pepper in a small mixing bowl. Mix well until combined.

Step 3: Using cooking spray, lightly spray the pork loin. Then, rub the spice mix on the entire pork loin.

Step 4: Sear the pork loin in olive oil for about 3 to 5 minutes per side until all sides are browned. On the prepared baking sheet, transfer the pork loin, fast-layer side up. Set aside.

Step 5: Mix the garlic, honey, soy sauce, mustard, and oil in a bowl until well blended. Add a little more oil or soy sauce if the mixture is too thick. Set aside 2 tbsp of the sauce for later and brush the rest on the pork loin.

Step 6: Place the baking sheet in the preheated oven and roast the pork loin for about 25 minutes.

Step 7: While the pork loin is in the oven, toss the vegetables with 1 tbsp olive oil and the reserved homey mixture. After roasting the pork loin for 25 minutes, remove it from the oven and add the vegetables around in a single layer.

Step 8: Cover the pork with a piece of foil. Return to the oven and continue to roast for an additional 25 to 30 minutes or until the internal temperature of the pork loin reads 145 degrees F. Halfway through cooking, stir the vegetables.

Step 9: Take the baking sheet out of the oven. With foil, loosely tent the meat and veggies and allow them to rest for about 10 minutes. Before serving, cut the pork into slices. Enjoy with the veggies.

Notes

WW FREESTYLE POINTS: 10 SLOW-COOKER PORK LOIN: After seasoning the pork, sear it and transfer it to the slow cooker. Pour in the prepared sauce. Put the lid on and set to cook on low for 4 to 6 hours. HOW TO MAKE AHEAD: Sear the seasoned pork and transfer it to the baking pan. Over the pork, pour the sauce. Cover and store in the fridge for up to 24 hours. When ready to serve, remove from the fridge and roast as directed.

May 26, 2022 0 comment
0 FacebookTwitterPinterestEmail
Newer Posts
Older Posts

Popular Posts

  • 1

    Crispy Crunchy Parmesan Potatoes

    March 21, 2020
  • 2

    CROCK POT SMOTHERED PORK CHOPS

    March 21, 2020
  • Facebook
  • Twitter

@2019 - All Right Reserved.


Back To Top