Cook it once
  • Home
  • Privacy Policy
  • Recipes
    • KETO
    • LC
    • WW
  • Tips
  • Contact
Cook it once
  • Home
  • Privacy Policy
  • Recipes
    • KETO
    • LC
    • WW
  • Tips
  • Contact
Category:

General Recipes

General Recipes

Baked Cod Recipe with Lemon and Garlic

by Rebecca May 30, 2022
written by Rebecca

PREP TIME: 10 MINS | COOK TIME: 12 MINS | TOTAL TIME: 22 MINS | SERVINGS: up to 5 people

This is one of the easiest and quickest fish recipes. Baked Cod with lemon and garlic for dinner served with Lebanese rice is a filling and delicious meal that everyone can’t say no to! Enjoy a Mediterranean-style dish at home with this simple cod recipe any time.

INGREDIENTS

¼ c. chopped fresh parsley leaves

1.5 pounds Cod fillet pieces, 4-6 pieces

Lemon Sauce:

2 tbsp melted butter

5 tablespoons extra virgin olive oil

5 garlic cloves, minced

5 tbsp fresh lemon juice

Coating:

¾ tsp ground cumin

¾ tsp sweet Spanish paprika

¾ tsp salt

1 tsp ground coriander

½ tsp black pepper

⅓ c. all-purpose flour

How to make Baked Cod Recipe with Lemon and Garlic

Step 1: Prepare the oven. Preheat it to 400 degrees F.

Step 2: In a shallow bowl, place the lemon juice, olive oil, and melted butter. Mix well and set aside.

Step 3: Whisk the all-purpose flour, spices, salt, and pepper in a different shallow bowl. Set this aside next to the lemon sauce.

Step 4: Next, pat dries the fish. In the lemon sauce, dip the sauce and dredge in the flour mixture, shaking the excess off. Set the lemon sauce aside for later.

Step 5: In a cast-iron skillet or oven-safe pan, heat 2 tbsp olive oil over medium-high heat. Once the oil is shimmering but not smoking, add the fish to the skillet. Sear the fish on each side for around 2 minutes to give them some color, but do not cook them completely. Set the seared fish aside for now.

Step 6: Add the minced garlic to the remaining lemon sauce and mix well. Drizzle this over the fish fillets. Place in the preheated oven and bake for about 10 minutes until the fish flakes easily using a fork.

Step 7: Serve the baked Cod with lemon and garlic immediately, garnished with some chopped parsley. Enjoy!

NOTES:

Pair this baked cod with Lebanese rice alongside Mediterranean chickpea salad or traditional Greek salad.

In a shallow glass container with a tight lid, arrange the completely cooked fish and keep it in the fridge for up to 2 to 3 days or freeze for up to 1 month.

NUTRITION FACTS:

Calories: 319.3 kcal, Carbohydrates: 9.6g, Protein: 25.8g, Fat: 19.8g, Saturated Fat: 5g, Trans Fat: 0.2g, Cholesterol: 70.6mg, Sodium: 466.1mg, Potassium: 641.5mg, Fiber: 1.2g, Sugar: 0.5g, Vitamin A: 603.3IU, Vitamin C: 14.2mg, Calcium: 45.3mg, Iron: 1.7mg

Baked Cod Recipe with Lemon and Garlic

Rebecca PREP TIME: 10 MINS | COOK TIME: 12 MINS | TOTAL TIME: 22 MINS | SERVINGS: up to 5 people This is one of the easiest and quickest fish recipes.… General Recipes Baked Cod Recipe with Lemon and Garlic European Print This
Serves: 5 Prep Time: 10 mins Cooking Time: 12 mins 12 mins
Nutrition facts: 319.3 calories 19.8 fat
Rating: 5.0/5
( 1 voted )

Ingredients

  • ¼ c. chopped fresh parsley leaves
  • 1.5 pounds Cod fillet pieces, 4-6 pieces
  • Lemon Sauce:
  • 2 tbsp melted butter
  • 5 tablespoons extra virgin olive oil
  • 5 garlic cloves, minced
  • 5 tbsp fresh lemon juice
  • Coating:
  • ¾ tsp ground cumin
  • ¾ tsp sweet Spanish paprika
  • ¾ tsp salt
  • 1 tsp ground coriander
  • ½ tsp black pepper
  • ⅓ c. all-purpose flour

Instructions

Step 1: Prepare the oven. Preheat it to 400 degrees F.

Step 2: In a shallow bowl, place the lemon juice, olive oil, and melted butter. Mix well and set aside.

Step 3: Whisk the all-purpose flour, spices, salt, and pepper in a different shallow bowl. Set this aside next to the lemon sauce.

Step 4: Next, pat dries the fish. In the lemon sauce, dip the sauce and dredge in the flour mixture, shaking the excess off. Set the lemon sauce aside for later.

Step 5: In a cast-iron skillet or oven-safe pan, heat 2 tbsp olive oil over medium-high heat. Once the oil is shimmering but not smoking, add the fish to the skillet. Sear the fish on each side for around 2 minutes to give them some color, but do not cook them completely. Set the seared fish aside for now.

Step 6: Add the minced garlic to the remaining lemon sauce and mix well. Drizzle this over the fish fillets. Place in the preheated oven and bake for about 10 minutes until the fish flakes easily using a fork.

Step 7: Serve the baked Cod with lemon and garlic immediately, garnished with some chopped parsley. Enjoy!

Notes

Pair this baked cod with Lebanese rice alongside Mediterranean chickpea salad or traditional Greek salad. In a shallow glass container with a tight lid, arrange the completely cooked fish and keep it in the fridge for up to 2 to 3 days or freeze for up to 1 month.

May 30, 2022 0 comment
0 FacebookTwitterPinterestEmail
General Recipes

SMOTHERED PORK CHOPS

by Rebecca May 30, 2022
written by Rebecca

Prep Time: 10 mins | Cook Time: 30 mins | Total Time: 40 mins | Yield: 4 people

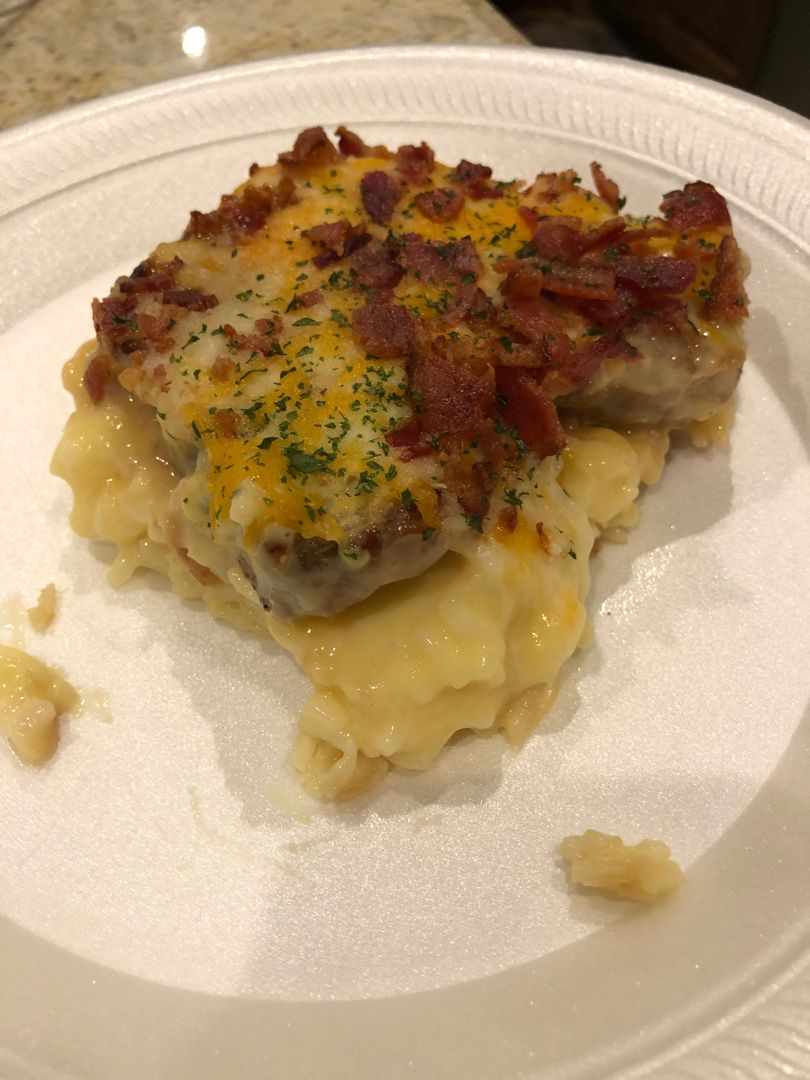
These smothered pork chops are seriously delicious! Always a hit and guarantee to impress everyone around the dinner table. Cooked rice topped with pan-seared pork chops and bake in cream of chicken soup. Sprinkle everything with cheddar and mozzarella cheese, then bacon, and baked to perfection! These scrumptious smothered pork chops are super easy to whip up using a few simple ingredients and ready in a cinch.

Ingredients

1 tablespoon vegetable oil

4 boneless pork chops (about 2 lbs.)

2 c. cooked rice

1 (10.75 ounces) can Cream of Chicken soup

½ c. shredded cheddar cheese

¾ c. shredded mozzarella

8 slices of bacon, cooked and chopped

1¼ c. milk

½ teaspoon seasoned salt

HOW TO MAKE SMOTHERED PORK CHOPS

Step 1: Prepare the oven. Preheat it to 375 degrees F. Using cooking spray, lightly grease a 9 x 13-inch pan.

Step 2: In the bottom of the prepared pan, spread the cooked rice.

Step 3: In a skillet, heat the oil over medium-high heat. In the meantime, sprinkle the pork chops with seasoned salt. Once the oil is hot, add the pork chops to the skillet and sear for about 2 to 3 minutes on each side until the pork chops are beginning to brown. When done, transfer the pork chops over the cooked rice.

Step 4: Whisk the cream of chicken soup and milk until well blended. Pour this over the pork chops.

Step 5: Place in the preheated oven and bake for about 25 minutes, uncovered. When done, take the pork chops out of the oven and sprinkle on top the shredded cheeses followed by cooked bacon. Place in the oven again and resume baking for another 5 to 10 minutes.

Notes:

For a gluten-free dish, use gluten-free Cream of Chicken Soup.

For this recipe, you can use whatever cream of soup, you prefer, such as cream of chicken, mushroom, celery, or broccoli.

SMOTHERED PORK CHOPS

Rebecca Prep Time: 10 mins | Cook Time: 30 mins | Total Time: 40 mins | Yield: 4 people These smothered pork chops are seriously delicious! Always a hit and guarantee… General Recipes SMOTHERED PORK CHOPS European Print This
Serves: 4 Prep Time: 10 mins Cooking Time: 30 mins 30 mins
Nutrition facts: 200 calories 20 grams fat
Rating: 5.0/5
( 1 voted )

Ingredients

  • 1 tablespoon vegetable oil
  • 4 boneless pork chops (about 2 lbs.)
  • 2 c. cooked rice
  • 1 (10.75 ounces) can Cream of Chicken soup
  • ½ c. shredded cheddar cheese
  • ¾ c. shredded mozzarella
  • 8 slices of bacon, cooked and chopped
  • 1¼ c. milk
  • ½ teaspoon seasoned salt

Instructions

Step 1: Prepare the oven. Preheat it to 375 degrees F. Using cooking spray, lightly grease a 9 x 13-inch pan.

Step 2: In the bottom of the prepared pan, spread the cooked rice.

Step 3: In a skillet, heat the oil over medium-high heat. In the meantime, sprinkle the pork chops with seasoned salt. Once the oil is hot, add the pork chops to the skillet and sear for about 2 to 3 minutes on each side until the pork chops are beginning to brown. When done, transfer the pork chops over the cooked rice.

Step 4: Whisk the cream of chicken soup and milk until well blended. Pour this over the pork chops.

Step 5: Place in the preheated oven and bake for about 25 minutes, uncovered. When done, take the pork chops out of the oven and sprinkle on top the shredded cheeses followed by cooked bacon. Place in the oven again and resume baking for another 5 to 10 minutes.

Notes

For a gluten-free dish, use gluten-free Cream of Chicken Soup. For this recipe, you can use whatever cream of soup, you prefer, such as cream of chicken, mushroom, celery, or broccoli.

May 30, 2022 0 comment
0 FacebookTwitterPinterestEmail
General Recipes

CRISPY HONEY ORANGE GLAZED SALMON

by Rebecca May 30, 2022
written by Rebecca

PREP TIME: 10 MINS | COOK TIME: 10 MINS | TOTAL TIME: 20 MINS | SERVES: 4 people

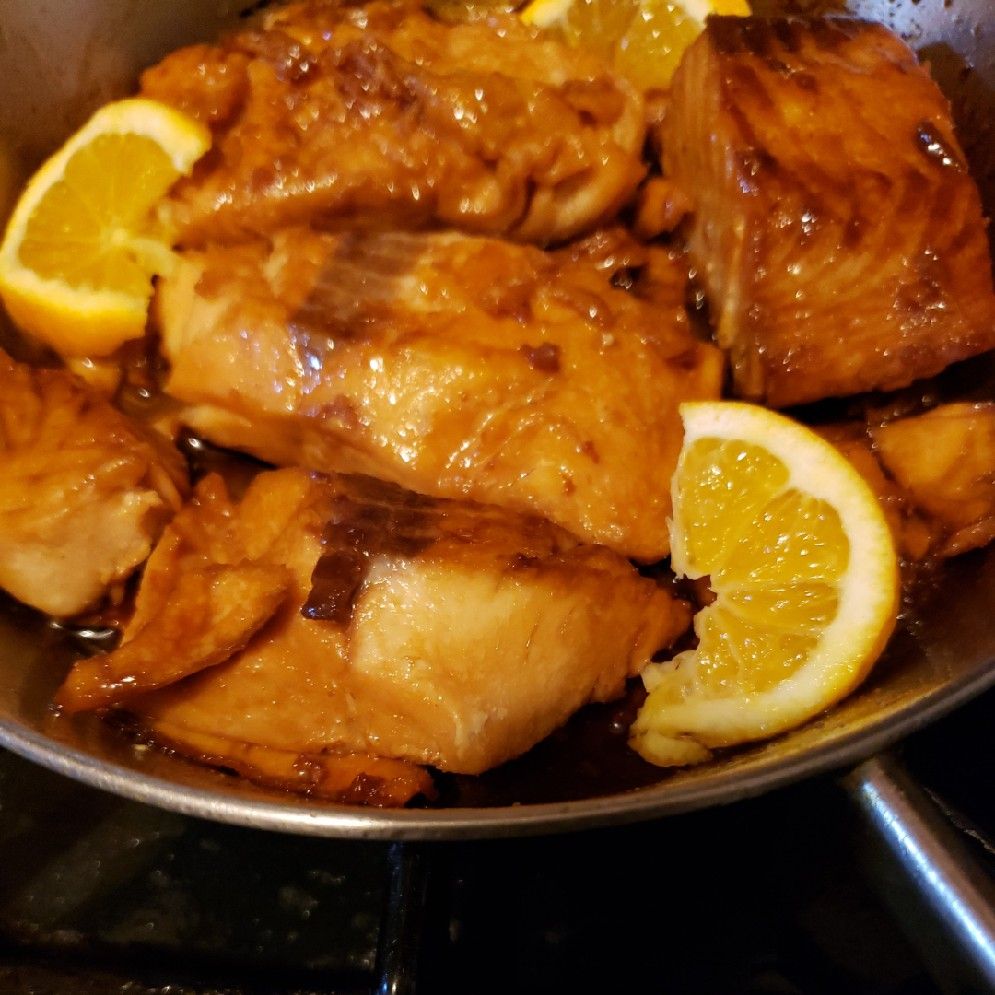
Pan-fried salmon tossed in a delicious honey-orange-garlic sauce with a speck of soy and broil to get that beautiful charred crispy edges. For an easy and quick filling meal, serve this crispy honey, orange-glazed salmon over rice, noodles, steamed vegetables, or with a salad, and do not forget to drizzle the tasty sauce on top.

INGREDIENTS

4 (6 oz.) skinless salmon fillets, (170 g. each)

2 tsp butter

1 tbsp olive oil

3 tbsp honey

4 cloves garlic, crushed or minced

2 tbsp low-sodium soy sauce

1/4 c. fresh orange juice, (about 1/2 an orange)

1/2 an orange, sliced to serve

salt and cracked black pepper, to taste

HOW TO MAKE CRISPY HONEY ORANGE GLAZED SALMON

Step 1: In a skillet or pan, melt the butter over medium-high heat. Once the butter has melted, add the salmon to the skillet/pan, skin-side up and sear for about 3 to 4 minutes. Flip the salmon and sear the other side for another 2 minutes.

Step 2: Into the skillet/pan, pour in the orange juice, and cook for about 1 minute until reduced in half. Next, add the garlic and continue to cook for another 30 seconds until aromatic. To the sides of the pan, move the salmon and add the honey and soy sauce, whisking to mix the flavors.

Step 3: Bring everything to a simmer until the mixture has reduced to a nice syrup. This takes about 30 seconds to a minute. Then, move the salmon around to evenly coat them in the sauce. Take the skillet/pan off the heat once the salmon is cooked to your desired doneness.

Step 4: To taste, season the salmon with salt and pepper. Serve the salmon over rice, noodles, steamed vegetables, or with a salad. And do not forget to drizzle the sauce over. Enjoy!

NOTE:

This step is optional but recommended if you want to get those charred and crispy edges. During the last 2 minutes of cooking, broil or grill the salmon (if using an oven-safe pan/skillet). While the salmon is cooking on the stove, preheat the broiler.

NUTRITION FACTS:

Calories: 349 kcal | Carbohydrates: 14g | Protein: 34g | Fat: 16g | Saturated Fat: 5g | Cholesterol: 108mg | Sodium: 579mg | Potassium: 864mg | Sugar: 13g | Vitamin A: 245IU | Vitamin C: 0.9mg | Calcium: 26mg | Iron: 1.7mg

CRISPY HONEY ORANGE GLAZED SALMON

Rebecca PREP TIME: 10 MINS | COOK TIME: 10 MINS | TOTAL TIME: 20 MINS | SERVES: 4 people Pan-fried salmon tossed in a delicious honey-orange-garlic sauce with a speck of… General Recipes CRISPY HONEY ORANGE GLAZED SALMON European Print This
Serves: 4 Prep Time: 10 mins Cooking Time: 10 mins 10 mins
Nutrition facts: 349 calories 16 fat
Rating: 5.0/5
( 1 voted )

Ingredients

  • 4 (6 oz.) skinless salmon fillets, (170 g. each)
  • 2 tsp butter
  • 1 tbsp olive oil
  • 3 tbsp honey
  • 4 cloves garlic, crushed or minced
  • 2 tbsp low-sodium soy sauce
  • 1/4 c. fresh orange juice, (about 1/2 an orange)
  • 1/2 an orange, sliced to serve
  • salt and cracked black pepper, to taste

Instructions

Step 1: In a skillet or pan, melt the butter over medium-high heat. Once the butter has melted, add the salmon to the skillet/pan, skin-side up and sear for about 3 to 4 minutes. Flip the salmon and sear the other side for another 2 minutes.

Step 2: Into the skillet/pan, pour in the orange juice, and cook for about 1 minute until reduced in half. Next, add the garlic and continue to cook for another 30 seconds until aromatic. To the sides of the pan, move the salmon and add the honey and soy sauce, whisking to mix the flavors.

Step 3: Bring everything to a simmer until the mixture has reduced to a nice syrup. This takes about 30 seconds to a minute. Then, move the salmon around to evenly coat them in the sauce. Take the skillet/pan off the heat once the salmon is cooked to your desired doneness.

Step 4: To taste, season the salmon with salt and pepper. Serve the salmon over rice, noodles, steamed vegetables, or with a salad. And do not forget to drizzle the sauce over. Enjoy!

Notes

This step is optional but recommended if you want to get those charred and crispy edges. During the last 2 minutes of cooking, broil or grill the salmon (if using an oven-safe pan/skillet). While the salmon is cooking on the stove, preheat the broiler.

May 30, 2022 0 comment
0 FacebookTwitterPinterestEmail
General Recipes

Ridiculously Amazing Asian Ramen Salad

by Rebecca May 30, 2022
written by Rebecca

Prep Time: 2 hrs 10 mins | Total Time: 2 hrs 10 mins | Servings: 8

This Asian Ramen Salad is a favorite at potlucks and parties. It is incredibly easy to whip up and guarantees the best tasting, unconventional salad. The crunchy ramen added a fabulous texture and bite to this amazing salad. To make sure the ramen salad does not get soggy, you want to add it right before serving the salad. If you do not want the extra crunch, you can add it before placing the salad in the fridge to chill. If you want to add sesame oil, you can but keep it to just half a tablespoon so as not to overpower the salad. I also get so many questions about the seasoning packet. You can add it if desired, but I would not suggest it, as it is packed with not-so-good ingredients, and it contains too much sodium.

INGREDIENTS

¾ c. vegetable oil

16 oz. bag coleslaw mix

1 c. sliced almonds

½ c. granulated sugar

5 stalks of scallions, sliced

⅓ c. white vinegar

1 c. sunflower seeds, de-shelled/shelled/no shells

6 oz. dried ramen, (any flavor is okay, you won’t be using the seasoning packets so it doesn’t matter)

How to make Ridiculously Amazing Asian Ramen Salad

Step 1: Place the coleslaw mix, sunflower seeds, sliced almonds, crushed ramen, and scallions in a large bowl.

Step 2: Put the vegetable oil in a large measuring cup along with the vinegar, and sugar. Mix well. It is okay if the sugar is not fully dissolved.

Step 3: Over the coleslaw mix, pour the mixture, and toss well using a large spatula until all are coated well.

Step 4: Using plastic wrap, cover the bowl and chill for at least 2 hours in the fridge. Serve the salad either cold or at room temperature. Enjoy!

NOTES:

Into a Ziplock bag, place the ramen block and gently crush with a rolling pin into smaller pieces.

You can add the seasoning packets if desired.

NUTRITION FACTS:

Serving: 1 SERVING | Calories: 456 KCAL | Carbohydrates: 32 G | Protein: 7 G | Fat: 35 G | Saturated Fat: 5 G | Fiber: 3 G | Sugar: 15 G

Ridiculously Amazing Asian Ramen Salad

Rebecca Prep Time: 2 hrs 10 mins | Total Time: 2 hrs 10 mins | Servings: 8 This Asian Ramen Salad is a favorite at potlucks and parties. It is incredibly… General Recipes Ridiculously Amazing Asian Ramen Salad European Print This
Serves: 8 Prep Time: 2 hrs 10 mins
Nutrition facts: 456 calories 35 fat
Rating: 5.0/5
( 1 voted )

Ingredients

  • ¾ c. vegetable oil
  • 16 oz. bag coleslaw mix
  • 1 c. sliced almonds
  • ½ c. granulated sugar
  • 5 stalks of scallions, sliced
  • ⅓ c. white vinegar
  • 1 c. sunflower seeds, de-shelled/shelled/no shells
  • 6 oz. dried ramen, (any flavor is okay, you won’t be using the seasoning packets so it doesn’t matter)

Instructions

Step 1: Place the coleslaw mix, sunflower seeds, sliced almonds, crushed ramen, and scallions in a large bowl.

Step 2: Put the vegetable oil in a large measuring cup along with the vinegar, and sugar. Mix well. It is okay if the sugar is not fully dissolved.

Step 3: Over the coleslaw mix, pour the mixture, and toss well using a large spatula until all are coated well.

Step 4: Using plastic wrap, cover the bowl and chill for at least 2 hours in the fridge. Serve the salad either cold or at room temperature. Enjoy!

Notes

Into a Ziplock bag, place the ramen block and gently crush with a rolling pin into smaller pieces. You can add the seasoning packets if desired.

May 30, 2022 0 comment
0 FacebookTwitterPinterestEmail
General Recipes

Mom’s Apple Crisp with Crunchy Oat Topping

by Rebecca May 30, 2022
written by Rebecca

Servings: 4-6

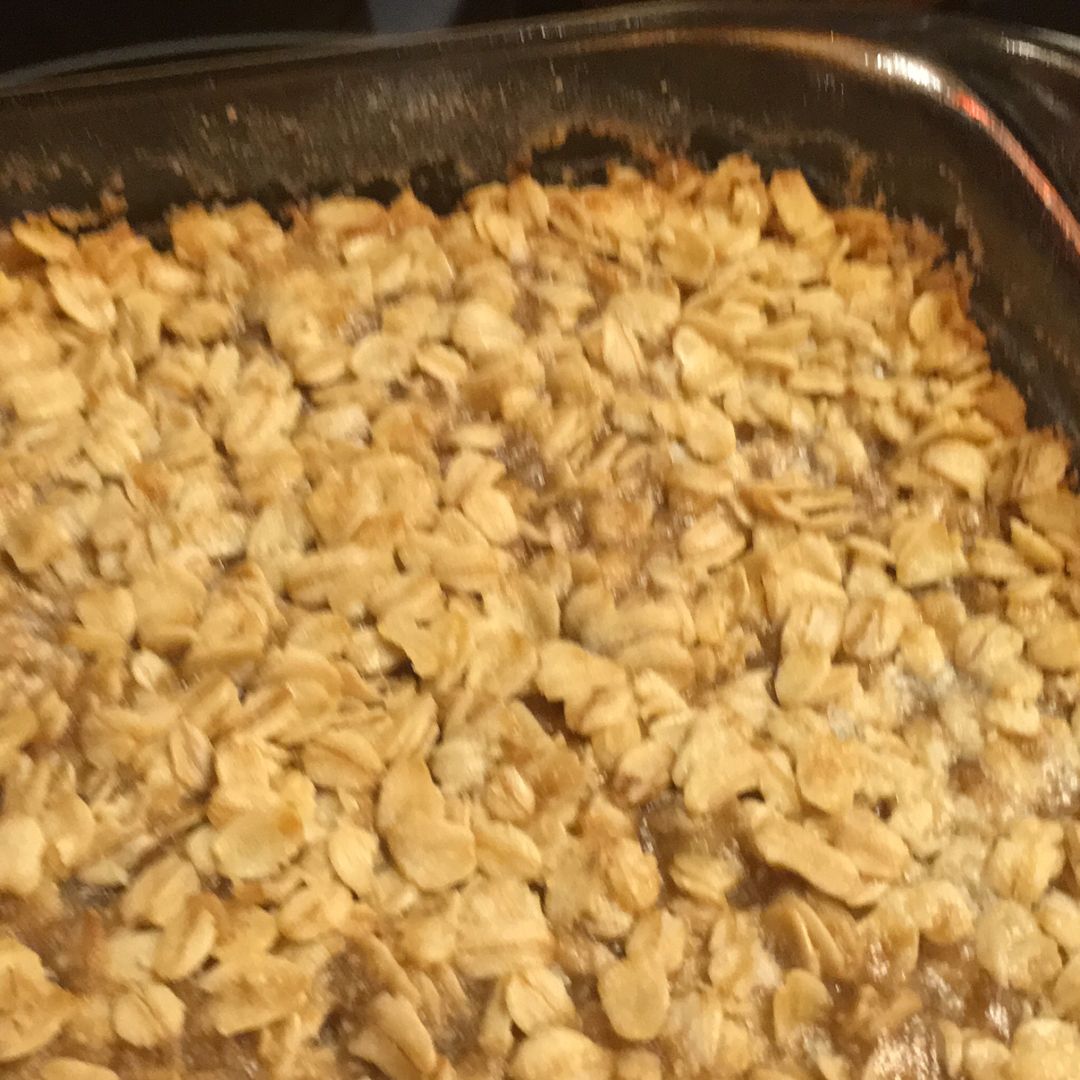
This Apple Crisp with crunchy oat topping is one of my favorites! It’s made with only a few simple ingredients that you probably have on hand, such as fresh apples. My mom has been making this amazing dessert since I can remember. Then, I adapted her recipe to make a very gratifying and extra special treat that my kids love so much!

This recipe is pretty simple. It’s a no-fuss and guarantees to deliver one of the best treats you’ll ever make! The buttery and crunchy topping of this apple crisp is the star of the show. I also love how this freezes so well.

If you enjoy the classics, I bet you’ll love this apple crisp with an impressive crunchy oat topping. It’s an easy and tasty treat that’s perfect for everybody.

Ingredients

2 tablespoons ground cinnamon

4 golden delicious or Granny Smith apples

Topping:

2 c. Quaker Oats

1 c. brown sugar

2/3 c. melted butter

2/3 c. all-purpose flour

How to make Mom’s Apple Crisp with Crunchy Oat Topping

Step 1: Slice the peeled and cored apples into eighths or sixteenths. In a bowl with the ground cinnamon, place the apple pieces. Then, toss to coat.

Step 2: Into an 8-inch square Pyrex dish (or similar), empty the contents of the bowl.

Step 3: To make the topping, whisk the flour and brown sugar in a large bowl until combined. Add the Quaker Oats and mix well until blended. Over the mixture, pour the melted butter and mix well. On top of the apples, evenly sprinkle the topping.

Step 4: Place inside the oven and bake for about 30 minutes at 375 degrees F.

Step 5: Remove from the oven when done and serve the Apple Crisp with a crunchy oat topping warm or at room temperature with a big scoop of vanilla ice cream. Enjoy!

Mom's Apple Crisp with Crunchy Oat Topping

Rebecca Servings: 4-6 This Apple Crisp with crunchy oat topping is one of my favorites! It’s made with only a few simple ingredients that you probably have on hand, such as… General Recipes Mom’s Apple Crisp with Crunchy Oat Topping European Print This
Serves: 4-6
Nutrition facts: 200 calories 20 grams fat
Rating: 5.0/5
( 1 voted )

Ingredients

  • 2 tablespoons ground cinnamon
  • 4 golden delicious or Granny Smith apples
  • Topping:
  • 2 c. Quaker Oats
  • 1 c. brown sugar
  • 2/3 c. melted butter
  • 2/3 c. all-purpose flour

Instructions

Step 1: Slice the peeled and cored apples into eighths or sixteenths. In a bowl with the ground cinnamon, place the apple pieces. Then, toss to coat.

Step 2: Into an 8-inch square Pyrex dish (or similar), empty the contents of the bowl.

Step 3: To make the topping, whisk the flour and brown sugar in a large bowl until combined. Add the Quaker Oats and mix well until blended. Over the mixture, pour the melted butter and mix well. On top of the apples, evenly sprinkle the topping.

Step 4: Place inside the oven and bake for about 30 minutes at 375 degrees F.

Step 5: Remove from the oven when done and serve the Apple Crisp with a crunchy oat topping warm or at room temperature with a big scoop of vanilla ice cream. Enjoy!

May 30, 2022 0 comment
0 FacebookTwitterPinterestEmail
General Recipes

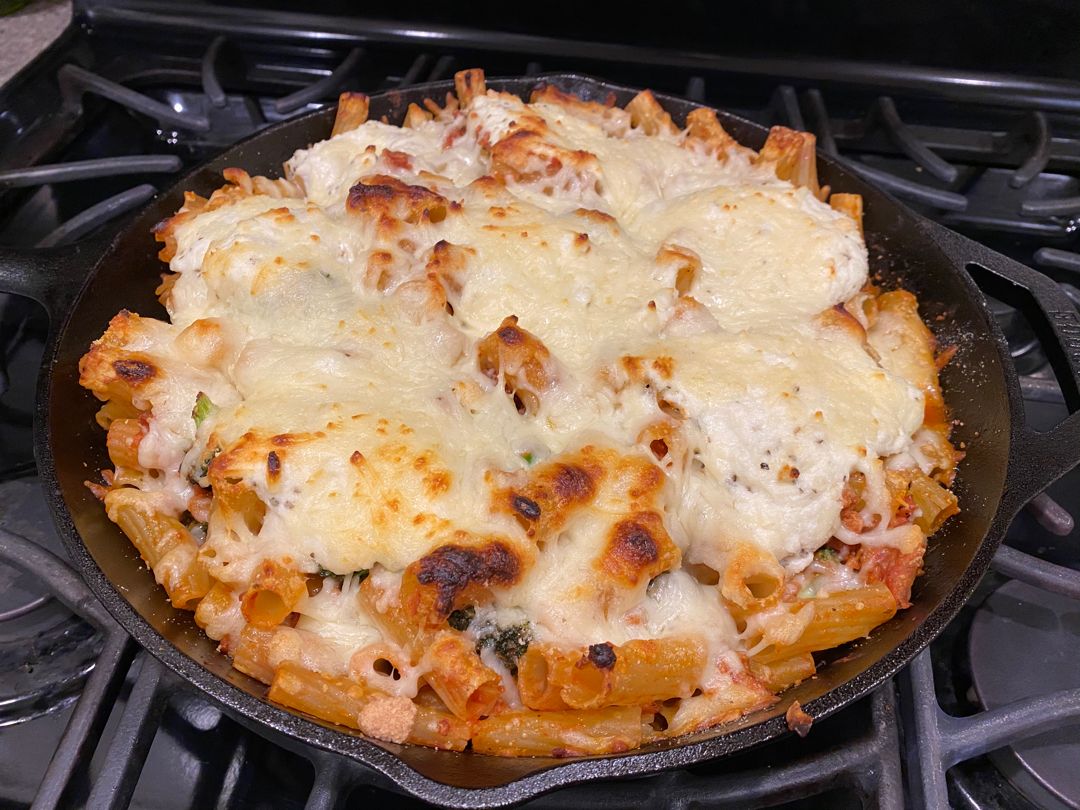
Baked Rigatoni with Sausage

by Rebecca May 30, 2022
written by Rebecca

Prep Time: 10 mins | Cook Time: 40 mins | Total Time: 50 mins | Serves: 8 people

This is my family’s favorite for years! This baked rigatoni with sausage is incredibly easy to whip up. It is a scrumptious dish with sweet Italian sausage, roasted bell peppers, broccoli, and rigatoni pasta with thick layers of melty, crisped, and crusted cheese. It’s the ultimate dinner perfect for everyone!

INGREDIENTS:

Topping:

1/2 tsp kosher salt

1 c. whole milk ricotta cheese

1/2 c. fresh basil leaves, chopped

Pasta:

1 tbsp olive oil

1 lb. rigatoni pasta

1 lb. sweet Italian sausage, casings removed

1 clove of garlic, peeled and chopped

1 1/2 c. shredded mozzarella cheese

1 c. freshly grated Parmesan cheese

One 25-oz. jar of marinara sauce

1 large or 2 small heads of broccoli, chopped into small florets

1/4 tsp kosher salt, plus more for the pasta

How to make Baked Rigatoni with Sausage

Step 1: Prepare the oven. Preheat it to 400 degrees F.

Topping:

Step 2: To a small bowl, add the ricotta, basil, and salt. Using a rubber spatula, mix the ingredients well and set them aside.

Pasta:

Step 3: In a large pot with salted boiling water, cook the rigatoni until al dente. Drain well when done and set aside about half a cup of pasta water.

Step 4: While the rigatoni is cooking, heat a large braiser or ovenproof skillet over medium-high heat. Drizzle the olive oil into the hot skillet along with the sausage. Cook for about 7 minutes, breaking the meat into small pieces using the back of a spoon until the meat is starting to brown.

Step 5: To the skillet with the heat, add the broccoli and garlic. Cook for about 3 minutes, stirring to marry the flavors. Add the marinara and season with 1/4 tsp salt. Stir well.

Step 6: Then, add the pasta and sprinkle with a half cup of Parmesan cheese. Mix well. To slightly thin out the sauce, add the reserved pasta water.

Step 7: Evenly over the top, dollop the ricotta mixture. Into the pasta, nestle the ricotta mixture and tent with some of the pasta. Next, sprinkle the mozzarella on top, followed by half cup of Parmesan cheese. Place in the preheated oven and bake for about 20 minutes or until golden brown and bubbly. Remove from the oven when done and allow the baked rigatoni to sit for about 5 minutes.

Step 8: Serve and enjoy!

Baked Rigatoni with Sausage

Rebecca Prep Time: 10 mins | Cook Time: 40 mins | Total Time: 50 mins | Serves: 8 people This is my family’s favorite for years! This baked rigatoni with sausage… General Recipes Baked Rigatoni with Sausage European Print This
Serves: 8 Prep Time: 10 mins Cooking Time: 40 mins 40 mins
Nutrition facts: 200 calories 20 grams fat
Rating: 5.0/5
( 1 voted )

Ingredients

  • Topping:
  • 1/2 tsp kosher salt
  • 1 c. whole milk ricotta cheese
  • 1/2 c. fresh basil leaves, chopped
  • Pasta:
  • 1 tbsp olive oil
  • 1 lb. rigatoni pasta
  • 1 lb. sweet Italian sausage, casings removed
  • 1 clove of garlic, peeled and chopped
  • 1 1/2 c. shredded mozzarella cheese
  • 1 c. freshly grated Parmesan cheese
  • One 25-oz. jar of marinara sauce
  • 1 large or 2 small heads of broccoli, chopped into small florets
  • 1/4 tsp kosher salt, plus more for the pasta

Instructions

Step 1: Prepare the oven. Preheat it to 400 degrees F.

Topping:

Step 2: To a small bowl, add the ricotta, basil, and salt. Using a rubber spatula, mix the ingredients well and set them aside.

Pasta:

Step 3: In a large pot with salted boiling water, cook the rigatoni until al dente. Drain well when done and set aside about half a cup of pasta water.

Step 4: While the rigatoni is cooking, heat a large braiser or ovenproof skillet over medium-high heat. Drizzle the olive oil into the hot skillet along with the sausage. Cook for about 7 minutes, breaking the meat into small pieces using the back of a spoon until the meat is starting to brown.

Step 5: To the skillet with the heat, add the broccoli and garlic. Cook for about 3 minutes, stirring to marry the flavors. Add the marinara and season with 1/4 tsp salt. Stir well.

Step 6: Then, add the pasta and sprinkle with a half cup of Parmesan cheese. Mix well. To slightly thin out the sauce, add the reserved pasta water.

Step 7: Evenly over the top, dollop the ricotta mixture. Into the pasta, nestle the ricotta mixture and tent with some of the pasta. Next, sprinkle the mozzarella on top, followed by half cup of Parmesan cheese. Place in the preheated oven and bake for about 20 minutes or until golden brown and bubbly. Remove from the oven when done and allow the baked rigatoni to sit for about 5 minutes.

Step 8: Serve and enjoy!

May 30, 2022 0 comment
0 FacebookTwitterPinterestEmail
General Recipes

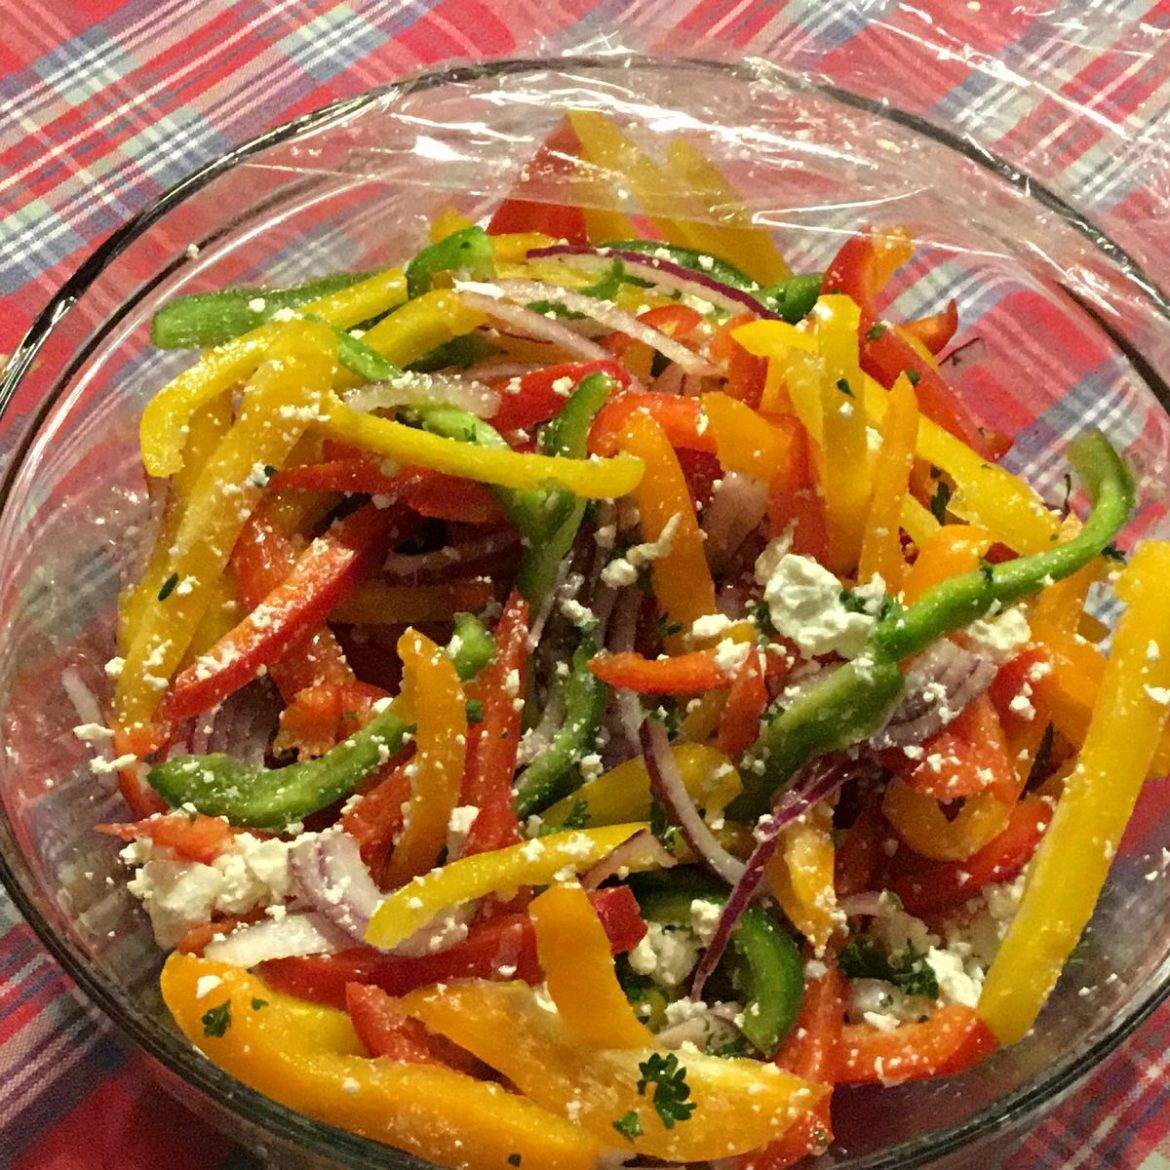
Three Pepper Salad

by Rebecca May 30, 2022
written by Rebecca

Prep Time: 1 hr | Total Time: 1 hr | Servings: 4

I love salads because they are so easy & quick to throw together and very versatile. I have my list of salad favorites and this Three Pepper Salad is one of them. The ingredient list is not very long. All this require is some red onion, yellow, red, & orange pepper, parsley, rice vinegar, sesame oil, and crumbled feta. Sea salt and pepper are a given to taste. This is a pretty simple salad that you can whip up quickly. It’s a no-fuss BBQ side dish that is a favorite of many. If you love salads as I do, then you have to give this Three Pepper Salad a try very soon! This recipe is just in time for summer!

For presentation, slice the peppers into long, thin strips, as well as the onions. This salad should be made in advance, so there is time to marinate the peppers. This will guarantee the best zesty salad perfect for BBQ. This is also excellent, even if you are very picky about your veggies or simply want to use whatever you have on hand. As I said, this salad recipe is very simple. It’s amazing, especially if you are craving some zesty action. This three pepper salad is nice, refreshing, and not your typical side salad!

Ingredients

1/2 red onion

1 yellow pepper

1/2 c. parsley

1 orange pepper

2 tbsp rice vinegar

1/3 c. crumbled feta cheese

1 tbsp sesame oil

Sea salt and pepper

1 red pepper

How to make Three Pepper Salad

Step 1: Place the cored, seeded, and sliced peppers into a large bowl.

Step 2: In the same bowl, add the sliced onion and parsley.

Step 3: Next, add the vinegar and season with salt & pepper.

Step 4: Cover the bowl and place it in the fridge for at least 1 hour. Before serving, toss the salad with feta cheese. Enjoy!

Nutrition Facts:

Serving: 1g | Calories: 113 kcal | Carbohydrates: 11.7g | Protein: 3.6g | Fat: 6.4g | Saturated Fat: 2.4g | Cholesterol: 11mg | Sodium: 121.9mg | Fiber: 1.8g | Sugar: 1.4g

Three Pepper Salad

Rebecca Prep Time: 1 hr | Total Time: 1 hr | Servings: 4 I love salads because they are so easy & quick to throw together and very versatile. I have… General Recipes Three Pepper Salad European Print This
Serves: 4 Prep Time: 1 hr
Nutrition facts: 113 calories 6.4 fat
Rating: 5.0/5
( 1 voted )

Ingredients

  • 1/2 red onion
  • 1 yellow pepper
  • 1/2 c. parsley
  • 1 orange pepper
  • 2 tbsp rice vinegar
  • 1/3 c. crumbled feta cheese
  • 1 tbsp sesame oil
  • Sea salt and pepper
  • 1 red pepper

Instructions

Step 1: Place the cored, seeded, and sliced peppers into a large bowl.

Step 2: In the same bowl, add the sliced onion and parsley.

Step 3: Next, add the vinegar and season with salt & pepper.

Step 4: Cover the bowl and place it in the fridge for at least 1 hour. Before serving, toss the salad with feta cheese. Enjoy!

May 30, 2022 0 comment
0 FacebookTwitterPinterestEmail
General Recipes

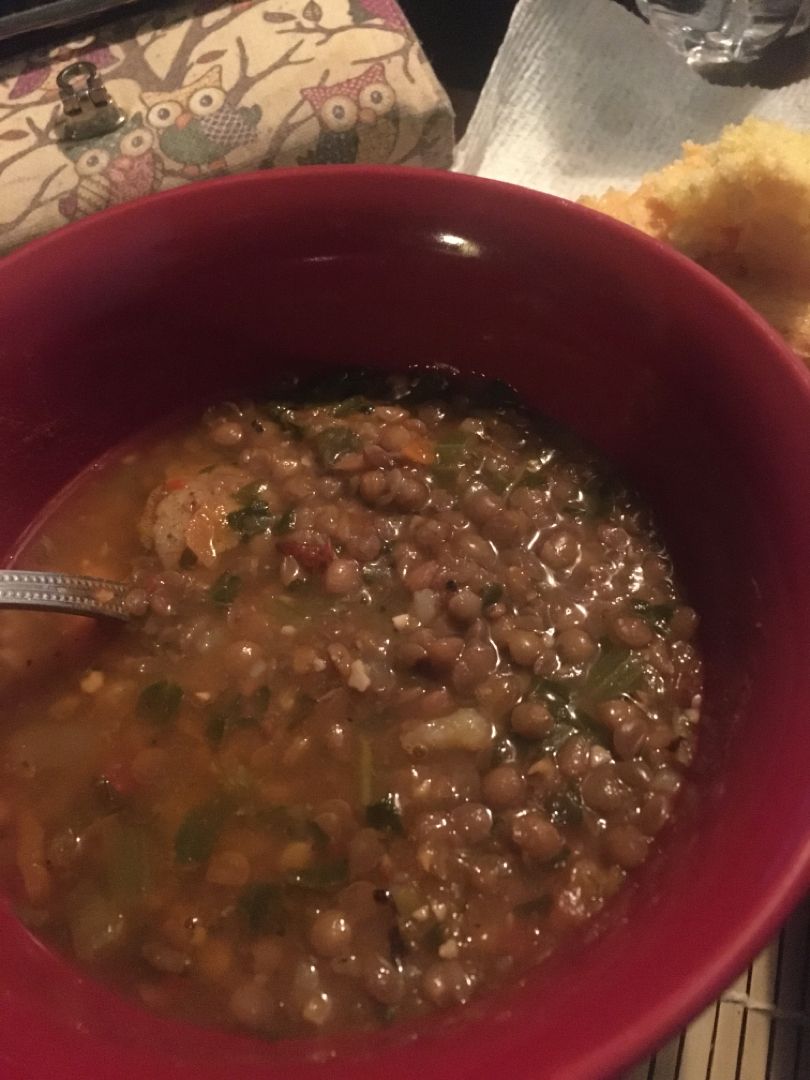
Best Lentil Soup Recipe

by Rebecca May 30, 2022
written by Rebecca

Warm your soul with this hearty and filling lentil soup. A classic, thick soup packed with veggies. This lentil soup is incredibly easy to whip up and guarantees the best lentil soup recipe you’ll ever make!

Ingredients

2 c. (13-14 oz. or 375-400 g.) dried green or brown lentils

1 tbsp olive oil

4 cloves garlic, (minced)

1 yellow onion, (chopped)

1 large carrot, (chopped)

1 stalk celery, (chopped (just over 1/2 c.)

3 large tomatoes (or 4 small tomatoes), (diced)

2 quarts (liters) or 8 c. low sodium chicken stock (or broth), (divided)

2 tsp vegetable stock powder (such as Vegeta) (or beef/chicken bullion powder)

1 tsp ground cumin

2 tsp paprika (sweet or mild (or 1 tsp smoky)

1 tbsp fresh chopped thyme (optional)

2 medium-sized potatoes, diced into 1” pieces, (preferably Yukon gold)

Salt and pepper, (to taste)

1/4 c. fresh parsley, (plus extra to garnish)

How to make the Best Lentil Soup

Step 1: In a large saucepan, heat the oil over low-medium heat. Once the oil is hot, add the onion and cook until transparent. Next, add the garlic and continue to cook for a minute more until aromatic. Then, add the carrot and celery. Cook for another 8 minutes until the veggies have softened. At this point, you can add any meats and cook until browned.

Step 2: In the pot, add the lentils and mix. Cook for a few minutes, stirring often. If needed, add extra 1 tbsp oil. Next, add the tomatoes and continue to cook until tender. Then, add the potatoes and cook for 4 to 5 minutes more.

Step 3: To the pot, whisk the rest of the ingredients except for the salt and pepper. Then, increase the heat and bring everything to a simmer, stirring often to keep the ingredients from sticking to the bottom.

Step 4: Adjust the heat to low once the soup has been simmering for about 2 to 3 minutes. Put the lid on and let everything simmer for an additional 40 to 50 minutes until the lentils and potatoes have softened, stirring often.

Step 5: Press down the soup for 3 to 4 minutes using a potato masher until you reached your desired thickness or consistency. Or use a blender and blend 2 to 3 quick pulses. To taste, season with salt and pepper. Before serving, garnish with a bit more parsley. Enjoy the lentil soup with garlic bread.

Best Lentil Soup Recipe

Rebecca Warm your soul with this hearty and filling lentil soup. A classic, thick soup packed with veggies. This lentil soup is incredibly easy to whip up and guarantees the best… General Recipes Best Lentil Soup Recipe European Print This
Nutrition facts: 200 calories 20 grams fat
Rating: 5.0/5
( 1 voted )

Ingredients

  • 2 c. (13-14 oz. or 375-400 g.) dried green or brown lentils
  • 1 tbsp olive oil
  • 4 cloves garlic, (minced)
  • 1 yellow onion, (chopped)
  • 1 large carrot, (chopped)
  • 1 stalk celery, (chopped (just over 1/2 c.)
  • 3 large tomatoes (or 4 small tomatoes), (diced)
  • 2 quarts (liters) or 8 c. low sodium chicken stock (or broth), (divided)
  • 2 tsp vegetable stock powder (such as Vegeta) (or beef/chicken bullion powder)
  • 1 tsp ground cumin
  • 2 tsp paprika (sweet or mild (or 1 tsp smoky)
  • 1 tbsp fresh chopped thyme (optional)
  • 2 medium-sized potatoes, diced into 1” pieces, (preferably Yukon gold)
  • Salt and pepper, (to taste)
  • 1/4 c. fresh parsley, (plus extra to garnish)

Instructions

Step 1: In a large saucepan, heat the oil over low-medium heat. Once the oil is hot, add the onion and cook until transparent. Next, add the garlic and continue to cook for a minute more until aromatic. Then, add the carrot and celery. Cook for another 8 minutes until the veggies have softened. At this point, you can add any meats and cook until browned.

Step 2: In the pot, add the lentils and mix. Cook for a few minutes, stirring often. If needed, add extra 1 tbsp oil. Next, add the tomatoes and continue to cook until tender. Then, add the potatoes and cook for 4 to 5 minutes more.

Step 3: To the pot, whisk the rest of the ingredients except for the salt and pepper. Then, increase the heat and bring everything to a simmer, stirring often to keep the ingredients from sticking to the bottom.

Step 4: Adjust the heat to low once the soup has been simmering for about 2 to 3 minutes. Put the lid on and let everything simmer for an additional 40 to 50 minutes until the lentils and potatoes have softened, stirring often.

Step 5: Press down the soup for 3 to 4 minutes using a potato masher until you reached your desired thickness or consistency. Or use a blender and blend 2 to 3 quick pulses. To taste, season with salt and pepper. Before serving, garnish with a bit more parsley. Enjoy the lentil soup with garlic bread.

May 30, 2022 0 comment
0 FacebookTwitterPinterestEmail
General Recipes

General Tso’s Chicken

by Rebecca May 28, 2022
written by Rebecca

PREP TIME: 25 MINS | COOK TIME: 25 MINS | TOTAL TIME: 50 MINS | SERVINGS: 4

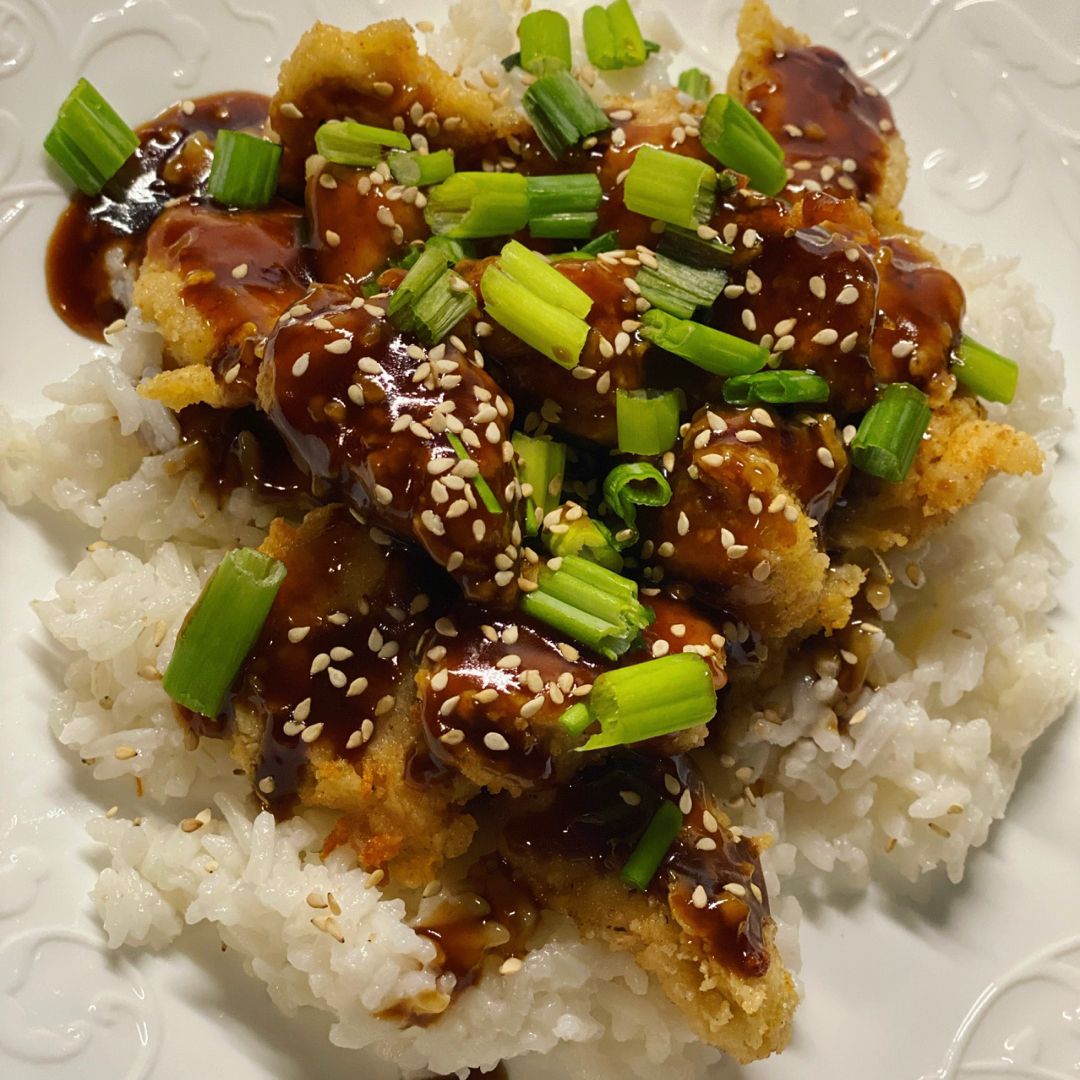
Now I can easily make my favorite Chinese takeout at home with this simple recipe. General Tso’s Chicken features pan-fried chicken pieces tossed in a sweet, sticky sauce made with ginger, garlic, soy sauce, dried red chilies, and rice wine vinegar. Enjoy this kid-friendly and healthier takeout alternative any time with this easy recipe.

Ingredients

2 large egg whites

1 1/2 lbs. boneless, skinless chicken breasts, cut into small pieces

1/2 c. all-purpose flour

1/2 c. oil (vegetable or canola oil)

1/2 c. cornstarch

salt and freshly ground black pepper

Sauce:

3 cloves garlic, minced

2/3 c. hoisin sauce

1/3 c. low-sodium soy sauce

1/3 c. rice vinegar

1/4 c. light brown sugar, packed

1 tsp ground ginger, or 1 tbsp fresh minced ginger

1 1/2 tsp cornstarch

1/2 tsp crushed red pepper flakes or more, to taste

How to make General Tso’s Chicken

Step 1: To a bowl, add the sauce ingredients and mix well until combined. Set aside.

Step 2: To a large ziplock bag, add the cornstarch, flour, salt, and pepper. Seal the bag and shake until blended. In another bowl, beat the egg whites.

Step 3: To the egg whites, add the pieces of chicken and toss to coat. Into the ziplock bag, spoon the coated pieces of chicken. Seal the bag again and shake to evenly coat the chicken pieces in the cornstarch mixture.

Step 4: Into a hot large skillet over medium-high heat, add the oil. Once the oil is shimmering, add some of the chicken pieces and sear for about 2 to 3 minutes per side until the coating turned golden brown and the chicken is completely cooked. Sear the chicken pieces in 2 to 3 batches to avoid overcrowding the pan. To a plate, transfer the cooked chicken and set it aside.

Step 5: To the same pan, add the sauce and let it simmer until warm and thickened. Just before serving, toss the chicken in the sauce. Serve immediately with hot cooked white/brown rice and garnish with some chopped green onions. Enjoy!

Notes:

To make this vegetarian, swap chicken with extra-firm tofu. Place the tofu in between paper towels and press out the excess moisture by putting something heavy on top, such as a cast-iron skillet. Leave this for a couple of minutes. Then, proceed as with the chicken.

To make this in an Air fryer: Evenly spread the chicken after coating in a preheated air fryer. Spray with olive oil and set to cook for 15 minutes at 400 degrees.

To make this in a slow cooker. Start by whisking the sauce ingredients until well combined. Prep the chicken as instructed and cook for about 1 minute per side over very high heat until the coating is browned but not cooked through. Using a nonstick spray, spray your slow cooker. Place the chicken on the bottom and pour half of the sauce over it. Set to cook for 2 to 3 hours on low. Then, stir in the rest of the sauce. Before serving, garnish with some chopped onions.

Nutrition Facts:

Calories: 556 kcal, Carbohydrates: 61g, Protein: 44g, Fat: 13g, Saturated Fat: 1g, Cholesterol: 110mg, Sodium: 2480mg, Potassium: 809mg, Fiber: 2g, Sugar: 24g, Vitamin A: 125IU, Vitamin C: 2.9mg, Calcium: 44mg, Iron: 2.8mg

General Tso’s Chicken

Rebecca PREP TIME: 25 MINS | COOK TIME: 25 MINS | TOTAL TIME: 50 MINS | SERVINGS: 4 Now I can easily make my favorite Chinese takeout at home with this… General Recipes General Tso’s Chicken European Print This
Serves: 4 Prep Time: 25 mins Cooking Time: 25 mins 25 mins
Nutrition facts: 556 calories 13 fat
Rating: 5.0/5
( 1 voted )

Ingredients

  • 2 large egg whites
  • 1 1/2 lbs. boneless, skinless chicken breasts, cut into small pieces
  • 1/2 c. all-purpose flour
  • 1/2 c. oil (vegetable or canola oil)
  • 1/2 c. cornstarch
  • salt and freshly ground black pepper
  • Sauce:
  • 3 cloves garlic, minced
  • 2/3 c. hoisin sauce
  • 1/3 c. low-sodium soy sauce
  • 1/3 c. rice vinegar
  • 1/4 c. light brown sugar, packed
  • 1 tsp ground ginger, or 1 tbsp fresh minced ginger
  • 1 1/2 tsp cornstarch
  • 1/2 tsp crushed red pepper flakes or more, to taste

Instructions

Step 1: To a bowl, add the sauce ingredients and mix well until combined. Set aside.

Step 2: To a large ziplock bag, add the cornstarch, flour, salt, and pepper. Seal the bag and shake until blended. In another bowl, beat the egg whites.

Step 3: To the egg whites, add the pieces of chicken and toss to coat. Into the ziplock bag, spoon the coated pieces of chicken. Seal the bag again and shake to evenly coat the chicken pieces in the cornstarch mixture.

Step 4: Into a hot large skillet over medium-high heat, add the oil. Once the oil is shimmering, add some of the chicken pieces and sear for about 2 to 3 minutes per side until the coating turned golden brown and the chicken is completely cooked. Sear the chicken pieces in 2 to 3 batches to avoid overcrowding the pan. To a plate, transfer the cooked chicken and set it aside.

Step 5: To the same pan, add the sauce and let it simmer until warm and thickened. Just before serving, toss the chicken in the sauce. Serve immediately with hot cooked white/brown rice and garnish with some chopped green onions. Enjoy!

Notes

To make this vegetarian, swap chicken with extra-firm tofu. Place the tofu in between paper towels and press out the excess moisture by putting something heavy on top, such as a cast-iron skillet. Leave this for a couple of minutes. Then, proceed as with the chicken. To make this in an Air fryer: Evenly spread the chicken after coating in a preheated air fryer. Spray with olive oil and set to cook for 15 minutes at 400 degrees. To make this in a slow cooker. Start by whisking the sauce ingredients until well combined. Prep the chicken as instructed and cook for about 1 minute per side over very high heat until the coating is browned but not cooked through. Using a nonstick spray, spray your slow cooker. Place the chicken on the bottom and pour half of the sauce over it. Set to cook for 2 to 3 hours on low. Then, stir in the rest of the sauce. Before serving, garnish with some chopped onions.

May 28, 2022 0 comment
0 FacebookTwitterPinterestEmail
General Recipes

Crockpot Carnitas

by Rebecca May 28, 2022
written by Rebecca

PREP TIME: 5 MINS | COOK TIME: 7 HRS 5 MINS | ADDITIONAL TIME: 5 MINS | TOTAL TIME: 7 HRS 15 MINS | YIELD: 8 servings

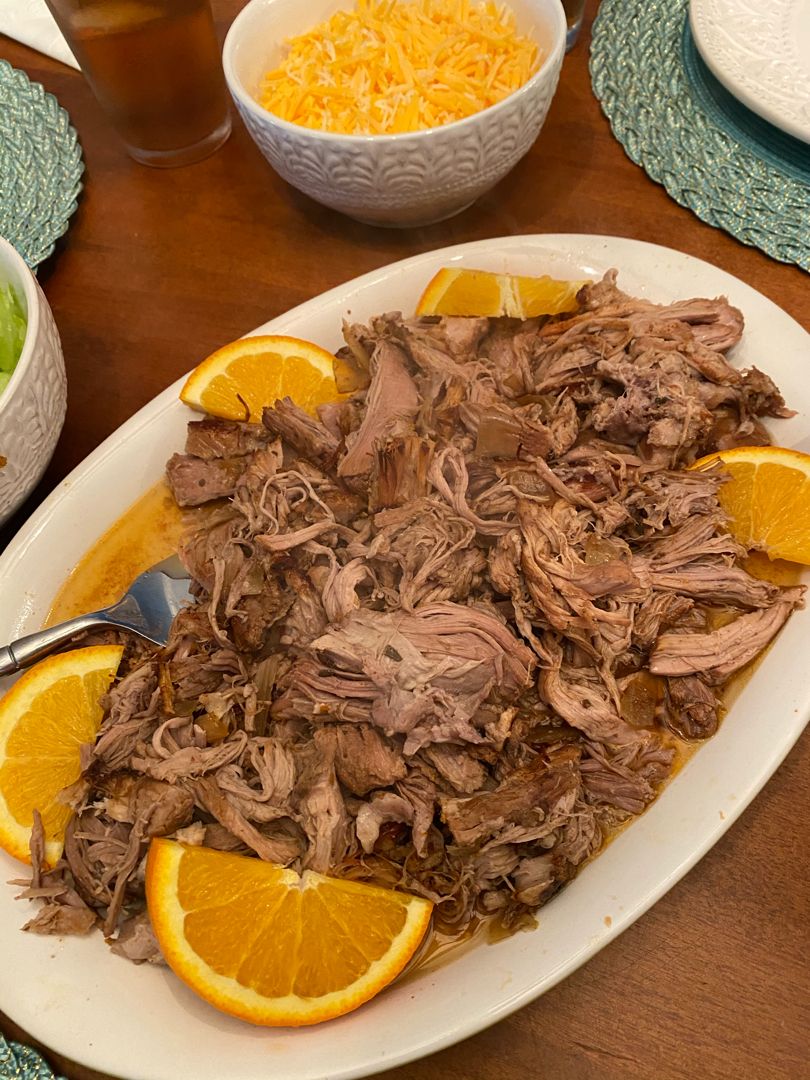
Carnitas is one of my ultimate favorites. To be able to make this at home in my crockpot is a real treat! Pork butt cooked with spices, onion, oranges, and blue moon beer until fork-tender. This crockpot carnitas is a million better than what we get in the restaurant. Serve this for mouthwatering and filling tacos, burritos, or quesadillas.

Ingredients

1 onion, diced

4 lbs pork butt

1 tbsp chipotle chili powder

2 tsp cumin

1 large orange

2 tsp oregano

1 (12 ounces) Blue Moon or similar wheat beer

1 tsp salt

How to make Crockpot Carnitas

Step 1: Into 4 even pieces, carefully cut the pork. To the crockpot, transfer the pieces of pork. Then, add the onion, chipotle chili powder, oregano, cumin, and salt. On top, zest the whole orange and juice the whole orange. Gradually pour the beer on top. Put the lid on and cook on low for 7 to 8 hours or 4 hours on high.

Step 2: Once the pork is easily pulled apart, transfer the pork to a sheet pan. Then, pull the pork apart and spread the meat on the entire sheet pan. Scoop around 1/4 c of liquid from the pot and sprinkle this evenly on top of the pulled pork. To the middle of the rack of the oven, transfer the sheet pan and broil for about 5 to 6 minutes or until the edges of the pork are crispy.

Step 3: Serve the Carnitas right away with warm tortillas, queso fresco cheese, cilantro, and red onions. Enjoy!

Notes:

For this recipe, make sure to use only Chipotle Chili Powder and NOT plain Chili Powder.

DO NOT SKIP the broiling step, or the Carnitas will be very wet and mushy.

You can use broth instead of beer if desired.

I suggest using a boneless cut (Pork Butt cut also referred to as Boston Butt).

Nutrition Facts:

YIELD: 8 SERVING SIZE: 1
AMOUNT PER SERVING: CALORIES: 632 | TOTAL FAT: 43G | SATURATED FAT: 16G | TRANS FAT: 0G | UNSATURATED FAT: 23G | CHOLESTEROL: 195MG | SODIUM: 447MG | CARBOHYDRATES: 5G | FIBER: 1G | SUGAR: 3G | PROTEIN: 53G

Crockpot Carnitas

Rebecca PREP TIME: 5 MINS | COOK TIME: 7 HRS 5 MINS | ADDITIONAL TIME: 5 MINS | TOTAL TIME: 7 HRS 15 MINS | YIELD: 8 servings Carnitas is one… General Recipes Crockpot Carnitas European Print This
Serves: 8 Prep Time: 5 mins Cooking Time: 7 hrs 10 mins 7 hrs 10 mins
Nutrition facts: 632 calories 43 fat
Rating: 5.0/5
( 1 voted )

Ingredients

  • 1 onion, diced
  • 4 lbs pork butt
  • 1 tbsp chipotle chili powder
  • 2 tsp cumin
  • 1 large orange
  • 2 tsp oregano
  • 1 (12 ounces) Blue Moon or similar wheat beer
  • 1 tsp salt

Instructions

Step 1: Into 4 even pieces, carefully cut the pork. To the crockpot, transfer the pieces of pork. Then, add the onion, chipotle chili powder, oregano, cumin, and salt. On top, zest the whole orange and juice the whole orange. Gradually pour the beer on top. Put the lid on and cook on low for 7 to 8 hours or 4 hours on high.

Step 2: Once the pork is easily pulled apart, transfer the pork to a sheet pan. Then, pull the pork apart and spread the meat on the entire sheet pan. Scoop around 1/4 c of liquid from the pot and sprinkle this evenly on top of the pulled pork. To the middle of the rack of the oven, transfer the sheet pan and broil for about 5 to 6 minutes or until the edges of the pork are crispy.

Step 3: Serve the Carnitas right away with warm tortillas, queso fresco cheese, cilantro, and red onions. Enjoy!

Notes

For this recipe, make sure to use only Chipotle Chili Powder and NOT plain Chili Powder. DO NOT SKIP the broiling step, or the Carnitas will be very wet and mushy. You can use broth instead of beer if desired. I suggest using a boneless cut (Pork Butt cut also referred to as Boston Butt).

May 28, 2022 0 comment
0 FacebookTwitterPinterestEmail
Newer Posts
Older Posts

Popular Posts

  • 1

    Crispy Crunchy Parmesan Potatoes

    March 21, 2020
  • 2

    CROCK POT SMOTHERED PORK CHOPS

    March 21, 2020
  • Facebook
  • Twitter

@2019 - All Right Reserved.


Back To Top