Cook it once
  • Home
  • Privacy Policy
  • Recipes
    • KETO
    • LC
    • WW
  • Tips
  • Contact
Cook it once
  • Home
  • Privacy Policy
  • Recipes
    • KETO
    • LC
    • WW
  • Tips
  • Contact
Category:

General Recipes

General Recipes

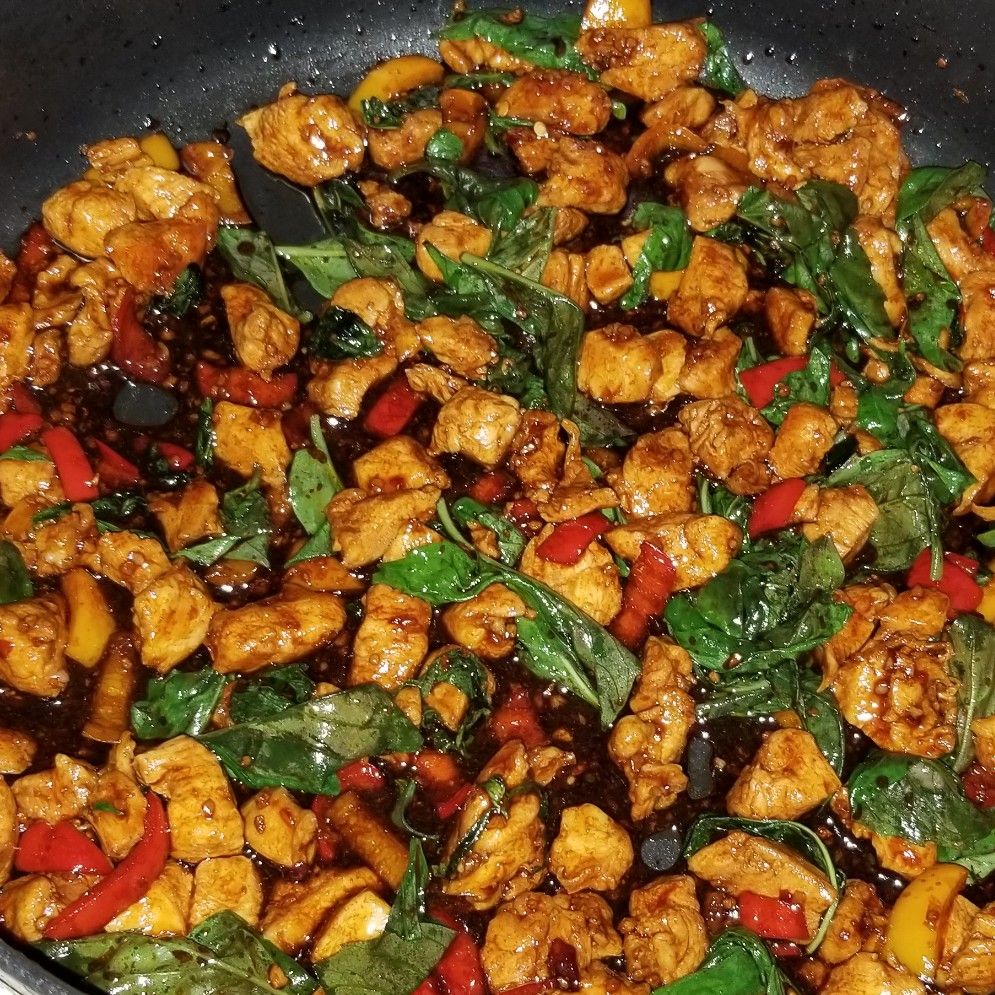
Thai Basil Chicken

by Rebecca May 31, 2022
written by Rebecca

Prep time: 15 mins | Cook time: 10 mins | Total time: 25 mins | Yield: 3 cups | Serves: 2

This Thai basil chicken is a very savory dish with incredible flavors. It’s an impressive dish that you can easily throw together in under thirty minutes! A filling Thai dinner that is way better (and faster) than takeout!

Ingredients

2 tablespoons cooking oil

1 tablespoon garlic (around 4-5 cloves, minced)

1 pound chicken (boneless, skinless chicken breasts, small diced)

1 bunch basil (sweet Thai basil)

1 bell pepper (red or yellow)

2 -3 green onions (thinly sliced, for serving)

1/4 teaspoon salt (or 1 teaspoon fish sauce)

1 tablespoon soy sauce (dark sauce)

2 tablespoons soy sauce (low sodium, light soy sauce)

2-4 Thai red chili (or 1 serrano, minced)

2 tablespoons oyster sauce

2 teaspoons sugar

How to make Thai Basil Chicken

Step 1: In a small bowl, whisk the stir-fry sauce ingredients until the sugar has dissolved fully and set aside.

Step 2: Into 1 to 2-inch bite-sized pieces, dice the chicken and set aside.

Step 3: After washing the Thai basil, pat it dries using a kitchen towel, then tears the leaves off the stem and discard. Next, mince the garlic and chili.

Step 4: Drizzle the cooking oil in a hot wok or medium skillet. Once the oil is hot, add half of the basil leaves and deep fry over medium-high heat. On a plate lined with paper towels, transfer the fried basil leaves and set them aside. The leaves must be dry before frying.

Step 5: Add the minced garlic and chili to the now-empty skillet. Fry over medium-high heat for just 20 to 30 seconds until the garlic is aromatic, making sure not to burn the garlic.

Step 6: To the skillet with the garlic and chili, add the diced chicken and season with salt. Cook for about 2 minutes or until the chicken is no longer pink. Then, pour in the sauce and continue to cook for another 4 to 5 minutes, stirring often, until the sauce has thickened and the chicken is completely cooked. Add the sliced bell pepper after the first three minutes and stir.

Step 7: Add the basil leaves once the sauce has thickened and the chicken is completely cooked. Stir well and turn the heat off. In a serving bowl, transfer the Thai Basil Chicken and top it with the deep-fried basil leaves. Serve garnished with some sliced scallions. Serve it immediately with Jasmine rice. Enjoy!

Thai Basil Chicken

Rebecca Prep time: 15 mins | Cook time: 10 mins | Total time: 25 mins | Yield: 3 cups | Serves: 2 This Thai basil chicken is a very savory dish… General Recipes Thai Basil Chicken European Print This
Serves: 2 Prep Time: 15 mins Cooking Time: 10 mins 10 mins
Nutrition facts: 200 calories 20 grams fat
Rating: 5.0/5
( 1 voted )

Ingredients

  • 2 tablespoons cooking oil
  • 1 tablespoon garlic (around 4-5 cloves, minced)
  • 1 pound chicken (boneless, skinless chicken breasts, small diced)
  • 1 bunch basil (sweet Thai basil)
  • 1 bell pepper (red or yellow)
  • 2 -3 green onions (thinly sliced, for serving)
  • 1/4 teaspoon salt (or 1 teaspoon fish sauce)
  • 1 tablespoon soy sauce (dark sauce)
  • 2 tablespoons soy sauce (low sodium, light soy sauce)
  • 2-4 Thai red chili (or 1 serrano, minced)
  • 2 tablespoons oyster sauce
  • 2 teaspoons sugar

Instructions

Step 1: In a small bowl, whisk the stir-fry sauce ingredients until the sugar has dissolved fully and set aside.

Step 2: Into 1 to 2-inch bite-sized pieces, dice the chicken and set aside.

Step 3: After washing the Thai basil, pat it dries using a kitchen towel, then tears the leaves off the stem and discard. Next, mince the garlic and chili.

Step 4: Drizzle the cooking oil in a hot wok or medium skillet. Once the oil is hot, add half of the basil leaves and deep fry over medium-high heat. On a plate lined with paper towels, transfer the fried basil leaves and set them aside. The leaves must be dry before frying.

Step 5: Add the minced garlic and chili to the now-empty skillet. Fry over medium-high heat for just 20 to 30 seconds until the garlic is aromatic, making sure not to burn the garlic.

Step 6: To the skillet with the garlic and chili, add the diced chicken and season with salt. Cook for about 2 minutes or until the chicken is no longer pink. Then, pour in the sauce and continue to cook for another 4 to 5 minutes, stirring often, until the sauce has thickened and the chicken is completely cooked. Add the sliced bell pepper after the first three minutes and stir.

Step 7: Add the basil leaves once the sauce has thickened and the chicken is completely cooked. Stir well and turn the heat off. In a serving bowl, transfer the Thai Basil Chicken and top it with the deep-fried basil leaves. Serve garnished with some sliced scallions. Serve it immediately with Jasmine rice. Enjoy!
May 31, 2022 0 comment
0 FacebookTwitterPinterestEmail
General Recipes

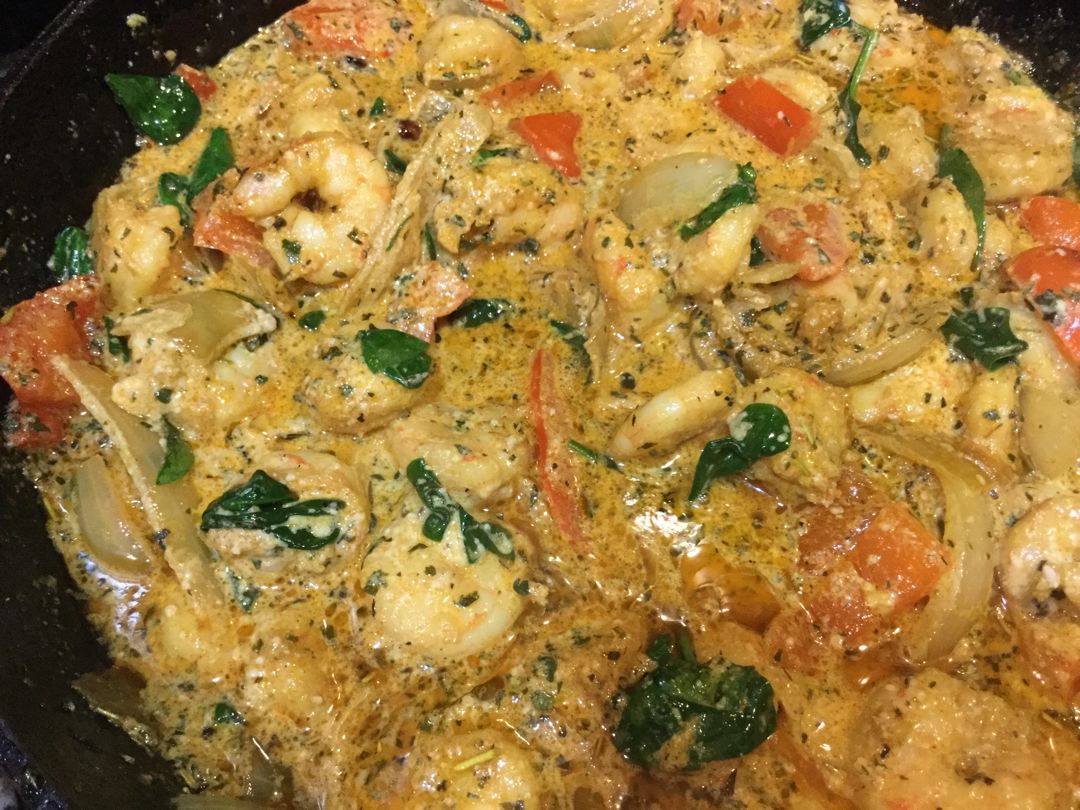
CREAMY GARLIC BUTTER TUSCAN SHRIMP

by Rebecca May 31, 2022
written by Rebecca

PREP TIME: 5 mins | COOK TIME: 15 mins | TOTAL TIME: 20 mins | SERVES: 4 people

This creamy garlic butter Tuscan shrimp is loaded with incredible flavors! It is the perfect weeknight meal that you can whip up easily and quickly. You can serve this over rice or steamed veggies. If you want to enjoy this with pasta, throw in the cooked pasta along with 1/4 c of the pasta water into the pan with the shrimp and toss gently as it cooks.

INGREDIENTS

1 lb (500 grams) shrimp (or prawns), tails on or off

6 cloves garlic, finely diced

2 tbsp salted butter

1 small yellow onion, diced

5 ounces (150 g) jarred sun-dried tomato strips in oil, drained (reserve 1 tsp of the jarred oil for cooking)

1/2 c. white wine (OPTIONAL)

1 3/4 c. half and half

3 c. baby spinach leaves, washed

2/3 c. fresh grated Parmesan cheese

1 tbsp fresh parsley, chopped

2 tsp dried Italian herbs

Salt and pepper, to taste

1 tsp cornstarch (cornflour) mixed with 1 tablespoon of water (optional)

HOW TO MAKE CREAMY GARLIC BUTTER TUSCAN SHRIMP

Step 1: Melt the butter in a large skillet over medium-high heat. Then, add the garlic and cook for about a minute until aromatic. Next, add the shrimp and continue to cook for another 2 minutes per side or until just cooked through and pink. To a bowl, transfer the cooked shrimp and garlic. Set aside.

Step 2: In the same skillet, cook the onion in the remaining butter. Add the white wine (optional) and cook until reduced by half, scraping the bits off the bottom of the pan. Then, add the sun-dried tomatoes and continue to cook for 1 to 2 minutes more.

Step 3: Adjust the heat to low-medium before adding the half-and-half. Bring everything to a gentle simmer, stirring often. To taste, season with salt and pepper.

Step 4: To the skillet, add the spinach leaves and let them wilt in the sauce. Next, add the Parmesan cheese. Let the sauce simmer for a minute more or until the cheese has melted. If you want a thicker sauce, add the milk/cornstarch mixture to the middle of the pan and simmer while stirring quickly until the sauce has thickened.

Step 5: Return the shrimp to the pan and stir in the herbs and parsley.

Step 6: Serve the creamy garlic butter Tuscan shrimp right away over rice, pasta, or steamed veggies. Enjoy!

NOTES:

In place of half-and-half, you can use half, light cream and half, 2% milk (if you are worried about fat counts & calories, you can use full fat). Or light cream or heavy cream. You can even sub half-and-half with almond milk.

If you want to serve this with pasta, add the cooked pasta along with 1/4 c of the reserved pasta water into the pan with the shrimp. Mix gently as it cooks. Serve right away.

NUTRITION FACTS:

Calories: 403 kcal | Carbohydrates: 16g | Protein: 39g | Fat: 15g | Saturated Fat: 9g | Cholesterol: 332mg | Sodium: 1346mg | Potassium: 1531mg | Fiber: 5g | Sugar: 18g | Vitamin A: 3055IU | Vitamin C: 32.6mg | Calcium: 432mg | Iron: 6.8mg

CREAMY GARLIC BUTTER TUSCAN SHRIMP

Rebecca PREP TIME: 5 mins | COOK TIME: 15 mins | TOTAL TIME: 20 mins | SERVES: 4 people This creamy garlic butter Tuscan shrimp is loaded with incredible flavors! It… General Recipes CREAMY GARLIC BUTTER TUSCAN SHRIMP European Print This
Serves: 4 Prep Time: 5 mins Cooking Time: 15 mins 15 mins
Nutrition facts: 403 calories 15 fat
Rating: 5.0/5
( 1 voted )

Ingredients

  • 1 lb (500 grams) shrimp (or prawns), tails on or off
  • 6 cloves garlic, finely diced
  • 2 tbsp salted butter
  • 1 small yellow onion, diced
  • 5 ounces (150 g) jarred sun-dried tomato strips in oil, drained (reserve 1 tsp of the jarred oil for cooking)
  • 1/2 c. white wine (OPTIONAL)
  • 1 3/4 c. half and half
  • 3 c. baby spinach leaves, washed
  • 2/3 c. fresh grated Parmesan cheese
  • 1 tbsp fresh parsley, chopped
  • 2 tsp dried Italian herbs
  • Salt and pepper, to taste
  • 1 tsp cornstarch (cornflour) mixed with 1 tablespoon of water (optional)

Instructions

Step 1: Melt the butter in a large skillet over medium-high heat. Then, add the garlic and cook for about a minute until aromatic. Next, add the shrimp and continue to cook for another 2 minutes per side or until just cooked through and pink. To a bowl, transfer the cooked shrimp and garlic. Set aside.

Step 2: In the same skillet, cook the onion in the remaining butter. Add the white wine (optional) and cook until reduced by half, scraping the bits off the bottom of the pan. Then, add the sun-dried tomatoes and continue to cook for 1 to 2 minutes more.

Step 3: Adjust the heat to low-medium before adding the half-and-half. Bring everything to a gentle simmer, stirring often. To taste, season with salt and pepper.

Step 4: To the skillet, add the spinach leaves and let them wilt in the sauce. Next, add the Parmesan cheese. Let the sauce simmer for a minute more or until the cheese has melted. If you want a thicker sauce, add the milk/cornstarch mixture to the middle of the pan and simmer while stirring quickly until the sauce has thickened.

Step 5: Return the shrimp to the pan and stir in the herbs and parsley.

Step 6: Serve the creamy garlic butter Tuscan shrimp right away over rice, pasta, or steamed veggies. Enjoy!

Notes

In place of half-and-half, you can use half, light cream and half, 2% milk (if you are worried about fat counts & calories, you can use full fat). Or light cream or heavy cream. You can even sub half-and-half with almond milk. If you want to serve this with pasta, add the cooked pasta along with 1/4 c of the reserved pasta water into the pan with the shrimp. Mix gently as it cooks. Serve right away.

May 31, 2022 0 comment
0 FacebookTwitterPinterestEmail
General Recipes

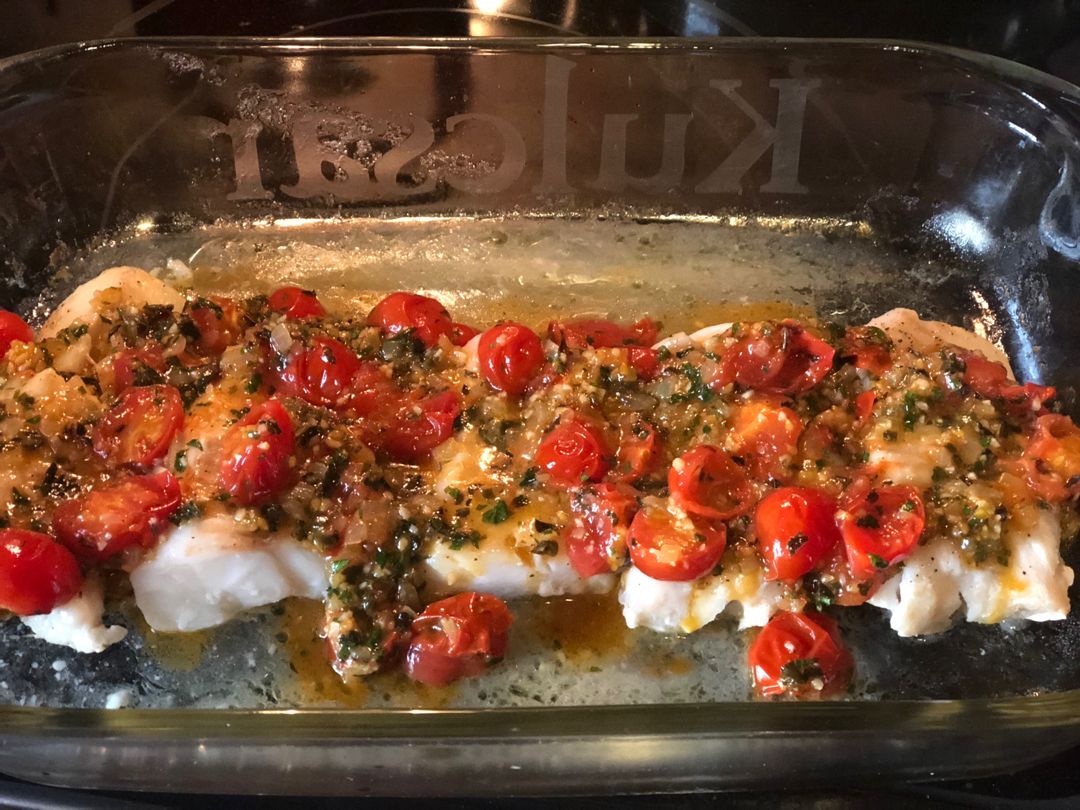
COD WITH TOMATO AND HERB BUTTER

by Rebecca May 31, 2022
written by Rebecca

Prep Time: 20 mins | Cook Time: 25 mins | Total Time: 45 mins | Yield: 4-6

This is the best cod recipe! Oozing with flavor, the flakiest and most tender cod in an amazing tomato and herb butter that compliments well the mild-tasting fish. Serve this cooked rice, quinoa, or crusty bread for a filling weeknight meal any time!

INGREDIENTS

TOMATO AND HERB BUTTER:

4 tablespoons unsalted butter, sliced

2 garlic cloves, minced

1 medium shallot, finely chopped

1-pint grape or cherry tomatoes

1/2 c. chicken stock

1/4 teaspoon red pepper flakes

1/2 teaspoon kosher salt

1/4 teaspoon granulated sugar

3 tablespoons fresh chopped herbs (basil, parsley, chives, cilantro), plus extra for garnish

1 tablespoon olive oil, plus extra for drizzling

COD:

1 lemon

2–2 1/4 lbs. fresh cod fillets, cut into 6-8-ounce portions

Kosher salt and fresh ground black pepper

HOW TO MAKE COD WITH TOMATO AND HERB BUTTER

TOMATO AND HERB BUTTER:

Step 1: Heat the olive oil in a small saucepan over medium heat. Then, add the shallot and garlic and saute for about 4 to 5 minutes, stirring often until soft.

Step 2: To the pan, add the tomatoes along with the chicken stock, sea salt, red pepper flakes, and sugar. Allow everything to simmer for about 15 to 17 minutes or until the tomatoes break down and release their juices and the liquid has mostly evaporated, uncovered.

Step 3: Take the pan off the heat and whisk in the butter and fresh herbs until velvety and thick. Put the lid on and keep the tomato and herb butter warm as you prep your cod.

COD:

Step 4: Prepare the oven. Preheat it to 400 degrees F.

Step 5: Lightly drizzle the bottom of your casserole dish with olive oil. Make sure to use a big enough dish to fit the cod in one layer with some room or else you’ll get too much juice while baking.

Step 6: Pat the cod dry very well and lay them in a single layer in the prepared casserole dish. To taste, generously season the cod with salt and pepper. Lightly drizzle the cod with olive oil and a squeeze of fresh lemon (about half). Tightly tent the casserole dish using aluminium foil and place it in the preheated oven, bake the cod for about 12 to 18 minutes or until easily flaked. Note that the baking time varies depending on the thickness of the cod.

Step 7: After about 12 to 18 minutes, take the cod out of the oven and spread the tomato butter evenly on the cod. Replace the cover and allow the dish to stand for about a minute or two at room temperature.

Step 8: Serve the cod with tomato and butter herb immediately, garnished with some fresh chopped herbs. Enjoy!

NOTES:

For this recipe, I use around 2 1/4 lbs of cod sliced into about six individual portions (around 6 to 8 ounces).

This cod with tomato and butter herb pairs perfectly with cooked rice, quinoa, or crusty bread to soak up all the juices.

NUTRITION FACTS:

Serving Size: 1 (6-8 oz.) fillet plus sauce, Calories: 350 | Sugar: 3.1 g | Sodium: 383.3 mg | Fat: 11.1 g | Carbohydrates: 6.8 g | Protein: 57.7 g | Cholesterol: 168.7 mg

COD WITH TOMATO AND HERB BUTTER

Rebecca Prep Time: 20 mins | Cook Time: 25 mins | Total Time: 45 mins | Yield: 4-6 This is the best cod recipe! Oozing with flavor, the flakiest and most… General Recipes COD WITH TOMATO AND HERB BUTTER European Print This
Serves: 4-6 Prep Time: 20 mins Cooking Time: 25 mins 25 mins
Nutrition facts: 350 calories 11.1 fat
Rating: 5.0/5
( 1 voted )

Ingredients

  • TOMATO AND HERB BUTTER:
  • 4 tablespoons unsalted butter, sliced
  • 2 garlic cloves, minced
  • 1 medium shallot, finely chopped
  • 1-pint grape or cherry tomatoes
  • 1/2 c. chicken stock
  • 1/4 teaspoon red pepper flakes
  • 1/2 teaspoon kosher salt
  • 1/4 teaspoon granulated sugar
  • 3 tablespoons fresh chopped herbs (basil, parsley, chives, cilantro), plus extra for garnish
  • 1 tablespoon olive oil, plus extra for drizzling
  • COD:
  • 1 lemon
  • 2–2 1/4 lbs. fresh cod fillets, cut into 6-8-ounce portions
  • Kosher salt and fresh ground black pepper

Instructions

TOMATO AND HERB BUTTER:

Step 1: Heat the olive oil in a small saucepan over medium heat. Then, add the shallot and garlic and saute for about 4 to 5 minutes, stirring often until soft.

Step 2: To the pan, add the tomatoes along with the chicken stock, sea salt, red pepper flakes, and sugar. Allow everything to simmer for about 15 to 17 minutes or until the tomatoes break down and release their juices and the liquid has mostly evaporated, uncovered.

Step 3: Take the pan off the heat and whisk in the butter and fresh herbs until velvety and thick. Put the lid on and keep the tomato and herb butter warm as you prep your cod.

COD:

Step 4: Prepare the oven. Preheat it to 400 degrees F.

Step 5: Lightly drizzle the bottom of your casserole dish with olive oil. Make sure to use a big enough dish to fit the cod in one layer with some room or else you’ll get too much juice while baking.

Step 6: Pat the cod dry very well and lay them in a single layer in the prepared casserole dish. To taste, generously season the cod with salt and pepper. Lightly drizzle the cod with olive oil and a squeeze of fresh lemon (about half). Tightly tent the casserole dish using aluminium foil and place it in the preheated oven, bake the cod for about 12 to 18 minutes or until easily flaked. Note that the baking time varies depending on the thickness of the cod.

Step 7: After about 12 to 18 minutes, take the cod out of the oven and spread the tomato butter evenly on the cod. Replace the cover and allow the dish to stand for about a minute or two at room temperature.

Step 8: Serve the cod with tomato and butter herb immediately, garnished with some fresh chopped herbs. Enjoy!

Notes

For this recipe, I use around 2 1/4 lbs of cod sliced into about six individual portions (around 6 to 8 ounces). This cod with tomato and butter herb pairs perfectly with cooked rice, quinoa, or crusty bread to soak up all the juices.

May 31, 2022 0 comment
0 FacebookTwitterPinterestEmail
General Recipes

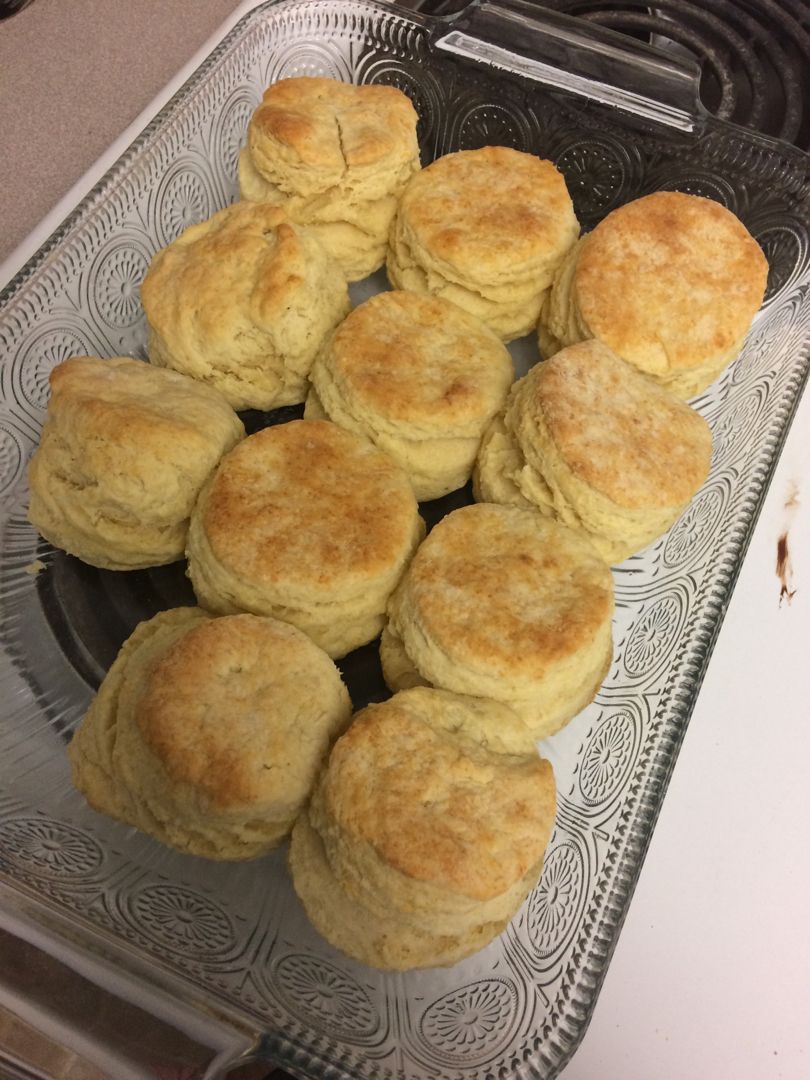
Fluffy Southern Buttermilk Biscuits

by Rebecca May 31, 2022
written by Rebecca

Prep Time: 15 mins | Cook Time: 15 mins | Total Time: 30 mins | Servings: 10

These heavenly Fluffy Southern Buttermilk Biscuits not only taste great, but smell amazing, too! It’s a simple recipe that you can whip up using only a few ingredients. In under thirty minutes, these lightly golden and fluffy biscuits are ready to serve at any meal!

Ingredients

1-1 ¼ c. cold buttermilk

5 tsp baking powder

½ c. cold butter or vegetable shortening

½ tsp baking soda

3 c. all-purpose flour

melted butter or heavy cream to brush the tops

1 ½ tsp salt

How to make Fluffy Southern Buttermilk Biscuits

Step 1: Prepare the oven. Preheat it to 450 degrees F. Using the parchment paper, line a baking sheet.

Step 2: In a large mixing bowl, sift the dry ingredients.

Step 3: Cut the cubed butter or shortening into the dry ingredients with a pastry blender. You can also do this in a food processor until you have a crumbly mixture that resembles peas.

Step 4: Into the mixture, whisk in a cup of cold buttermilk until the crumbs are just completely moistened. If needed, add up to 1/4 c extra buttermilk. At this point, the dough should be a little sticky, but not overly wet.

Step 5: On a lightly floured surface, roll or pat the dough to around 3/4-inch thickness. Using a floured 2-inch cookie cutter, cut the dough into rounds, making sure not to twist the dough with the cutter. Lift the cookie cutter after cutting the dough. You can re-roll any dough scraps and repeat the process.

Step 6: On the prepared baking sheet, lay the biscuits at least 2-inches apart. Brush each cookie top with melted butter or heavy cream. Place in the preheated oven and bake for about 13 to 15 minutes or until the biscuits are lightly golden and puffed.

Step 7: Remove from the oven when done and brush the biscuits again with melted butter. Serve the buttermilk biscuits right away. Enjoy!

Note:

For this recipe, I prefer low-fat or whole-fat buttermilk and not fat-free.

Nutrition Facts:
Serving: 1serving | Calories: 254 kcal | Carbohydrates: 32g | Protein: 6g | Fat: 11g | Saturated Fat: 3g | Cholesterol: 6mg | Sodium: 570mg | Potassium: 320mg | Fiber: 1g | Sugar: 3g | Vitamin A: 495IU | Vitamin C: 1mg | Calcium: 158mg | Iron: 2mg

Fluffy Southern Buttermilk Biscuits

Rebecca Prep Time: 15 mins | Cook Time: 15 mins | Total Time: 30 mins | Servings: 10 These heavenly Fluffy Southern Buttermilk Biscuits not only taste great, but smell amazing,… General Recipes Fluffy Southern Buttermilk Biscuits European Print This
Serves: 10 Prep Time: 15 mins Cooking Time: 15 mins 15 mins
Nutrition facts: 254 calories 11 fat
Rating: 5.0/5
( 1 voted )

Ingredients

  • 1-1 ¼ c. cold buttermilk
  • 5 tsp baking powder
  • ½ c. cold butter or vegetable shortening
  • ½ tsp baking soda
  • 3 c. all-purpose flour
  • melted butter or heavy cream to brush the tops
  • 1 ½ tsp salt

Instructions

Step 1: Prepare the oven. Preheat it to 450 degrees F. Using the parchment paper, line a baking sheet.

Step 2: In a large mixing bowl, sift the dry ingredients.

Step 3: Cut the cubed butter or shortening into the dry ingredients with a pastry blender. You can also do this in a food processor until you have a crumbly mixture that resembles peas.

Step 4: Into the mixture, whisk in a cup of cold buttermilk until the crumbs are just completely moistened. If needed, add up to 1/4 c extra buttermilk. At this point, the dough should be a little sticky, but not overly wet.

Step 5: On a lightly floured surface, roll or pat the dough to around 3/4-inch thickness. Using a floured 2-inch cookie cutter, cut the dough into rounds, making sure not to twist the dough with the cutter. Lift the cookie cutter after cutting the dough. You can re-roll any dough scraps and repeat the process.

Step 6: On the prepared baking sheet, lay the biscuits at least 2-inches apart. Brush each cookie top with melted butter or heavy cream. Place in the preheated oven and bake for about 13 to 15 minutes or until the biscuits are lightly golden and puffed.

Step 7: Remove from the oven when done and brush the biscuits again with melted butter. Serve the buttermilk biscuits right away. Enjoy!

Notes

For this recipe, I prefer low-fat or whole-fat buttermilk and not fat-free.

May 31, 2022 0 comment
0 FacebookTwitterPinterestEmail
General Recipes

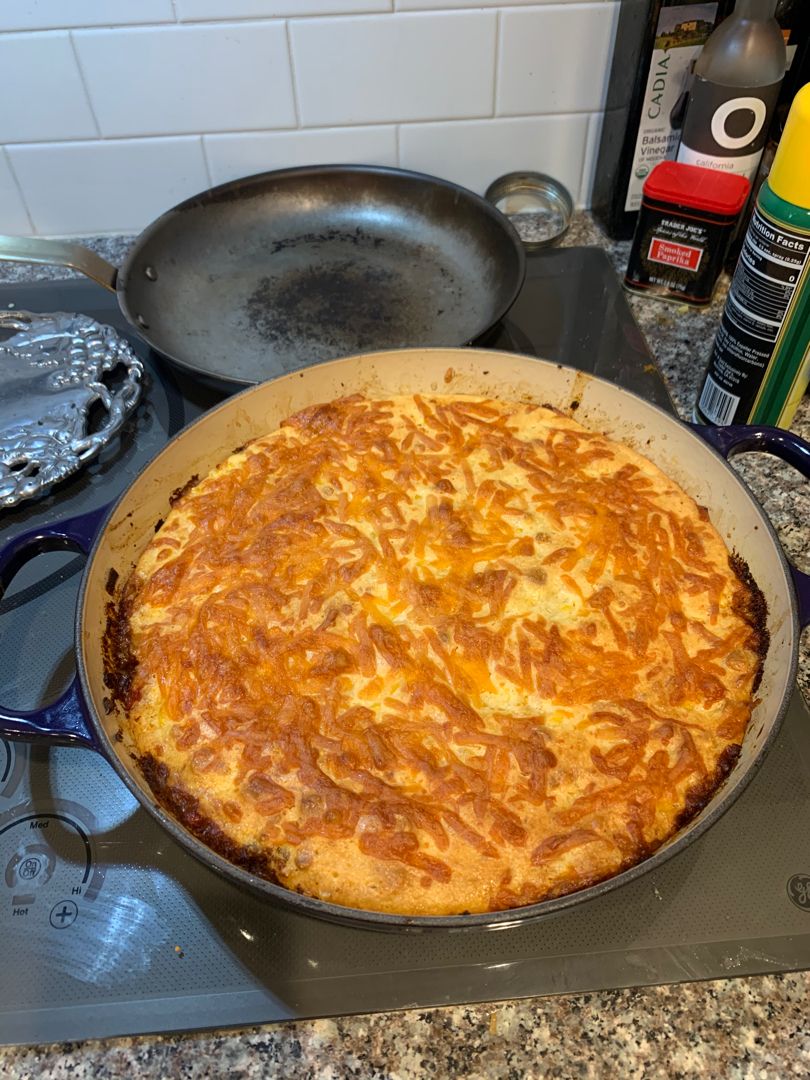
Tamale Pie

by Rebecca May 31, 2022
written by Rebecca

PREP TIME: 15 mins | COOK TIME: 55 mins | TOTAL TIME: 1 hr 10 mins | SERVINGS: 6

This Tamale Pie is filling, hearty, and flavorful. It is loaded with goodness from simple ingredients. This is also a very versatile recipe. You can swap the beef with ground turkey or chicken. As for the cheese, you can use your favorite. If you have any leftover veggies such as shredded zucchini, frozen diced veggies, a can of diced tomatoes, jalapenos, or sliced black olives, feel free to add them, too. I like to top this tamale pie with salsa, sour cream, or guacamole before serving.

Ingredients

1 onion, chopped

1 lb. lean ground beef

2 cloves garlic, minced

1 bell pepper, diced, green or red

2 tbsp taco seasoning

2 c. cheddar cheese, shredded, divided

¾ c. enchilada sauce

¼ c. water

Topping:

1 egg

½ c. sour cream

1 box corn muffin mix 8.5 ounces

⅓ c. milk

fresh cilantro, chopped, for garnish

½ c. corn kernels canned, fresh, or frozen

How to make Tamale Pie

Step 1: Prepare the oven. Preheat it to 350 degrees F.

Step 2: In a 10-inch ovenproof skillet, place the beef, onion, bell pepper, and garlic. Mix well and cook until the beef is browned. Drain the excess grease. Then, add the taco seasoning along with 1/4 c water. Let everything simmer until the water evaporated. Next, stir in the enchilada sauce and top with 1 1/2 c cheese.

Step 3: Whisk the corn muffin mix, sour cream, corn, milk, and egg until well blended. Spread this mixture on top of the beef mixture. Then, sprinkle the rest of the cheese on top.

Step 4: Place in the preheated oven and bake for about 35 to 40 minutes.

Step 5: Remove from the oven when done and serve the Tamale Pie garnished with some cilantro. Enjoy!

Notes:

Place the Tamale Pie in an airtight container and store in the fridge for up to 5 days.

To reheat, pop in the microwave in a single portion. Adjust the seasoning according to taste and serve.

NUTRITION FACTS:

Calories: 575, Carbohydrates: 38g, Protein: 29g, Fat: 34g, Saturated Fat: 16g, Cholesterol: 130mg, Sodium: 998mg, Potassium: 450mg, Fiber: 4g, Sugar: 14g, Vitamin A: 1508IU, Vitamin C: 28mg, Calcium: 353mg, Iron: 3mg

Tamale Pie

Rebecca PREP TIME: 15 mins | COOK TIME: 55 mins | TOTAL TIME: 1 hr 10 mins | SERVINGS: 6 This Tamale Pie is filling, hearty, and flavorful. It is loaded… General Recipes Tamale Pie European Print This
Serves: 6 Prep Time: 15 mins Cooking Time: 55 mins 55 mins
Nutrition facts: 575 calories 34 fat
Rating: 5.0/5
( 1 voted )

Ingredients

  • 1 onion, chopped
  • 1 lb. lean ground beef
  • 2 cloves garlic, minced
  • 1 bell pepper, diced, green or red
  • 2 tbsp taco seasoning
  • 2 c. cheddar cheese, shredded, divided
  • ¾ c. enchilada sauce
  • ¼ c. water
  • Topping:
  • 1 egg
  • ½ c. sour cream
  • 1 box corn muffin mix 8.5 ounces
  • ⅓ c. milk
  • fresh cilantro, chopped, for garnish
  • ½ c. corn kernels canned, fresh, or frozen

Instructions

Step 1: Prepare the oven. Preheat it to 350 degrees F.

Step 2: In a 10-inch ovenproof skillet, place the beef, onion, bell pepper, and garlic. Mix well and cook until the beef is browned. Drain the excess grease. Then, add the taco seasoning along with 1/4 c water. Let everything simmer until the water evaporated. Next, stir in the enchilada sauce and top with 1 1/2 c cheese.

Step 3: Whisk the corn muffin mix, sour cream, corn, milk, and egg until well blended. Spread this mixture on top of the beef mixture. Then, sprinkle the rest of the cheese on top.

Step 4: Place in the preheated oven and bake for about 35 to 40 minutes.

Step 5: Remove from the oven when done and serve the Tamale Pie garnished with some cilantro. Enjoy!

Notes

Place the Tamale Pie in an airtight container and store in the fridge for up to 5 days. To reheat, pop in the microwave in a single portion. Adjust the seasoning according to taste and serve.

May 31, 2022 0 comment
0 FacebookTwitterPinterestEmail
General Recipes

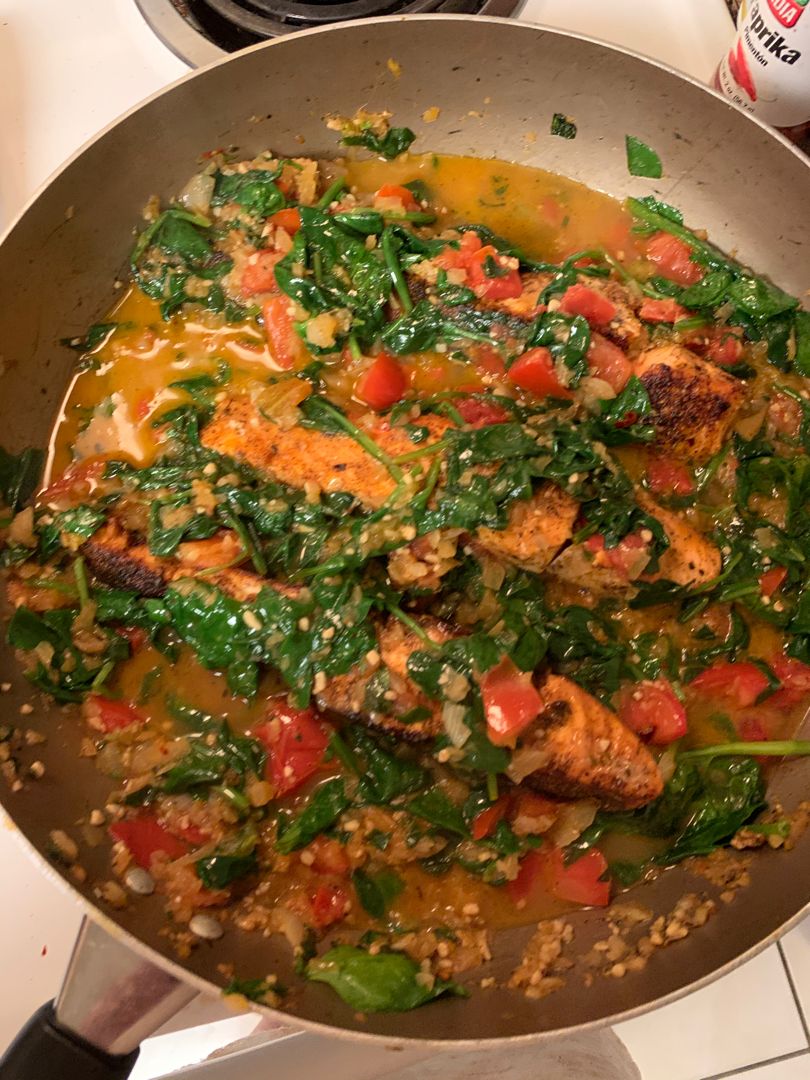
TUSCAN GARLIC SALMON SKILLET WITH SPINACH AND TOMATO

by Rebecca May 31, 2022
written by Rebecca

PREP TIME: 5 MINS | COOK TIME: 15 MINS | YIELD: 4 servings

Healthy and delicious – this Tuscan Garlic Salmon Fillets with Spinach and Tomatoes is the perfect weeknight meal that you can easily whip up in no time. It’s a simple and basic recipe with excellent and impressive flavors. This mouthwatering salmon dish pairs perfectly with steamed/roasted veggies, white or brown rice, or even pasta. For any leftovers, keep them in an airtight container for up to 3 days in the fridge.

INGREDIENTS

2 tbsp olive oil

1 pound (450 grams) of salmon fillets

1 tbsp olive oil or unsalted butter

1/4 tsp red pepper flakes

1 tsp Italian seasoning

4 cloves garlic, minced

1 medium onion, chopped

4 Roma tomatoes, chopped

1/2 c. (60ml) vegetable or chicken stock (or dry white wine)

6 ounces of fresh spinach

2 tbsp high-quality olive oil, optional

1/4 c. fresh basil leaves, chopped

1 tsp smoked paprika or more, to taste

Kosher salt and freshly ground black pepper, to taste

HOW TO MAKE TUSCAN GARLIC SALMON SKILLET WITH SPINACH AND TOMATO

Step 1: In a large skillet, heat 2 tbsp olive oil over medium-low heat. Once the oil is hot, add the salmon fillets to the skillet and sprinkle with red pepper flakes, paprika, Italian seasoning, and salt. Sear the salmon for about 5 minutes over medium heat until all sides are cooked through. On a plate, transfer the cooked salmon and set it aside.

Step 2: Add another 1 tbsp of olive oil to the same skillet over medium heat (or melt 1 tbsp butter). Then, add the garlic and chopped onion. Gently cook until aromatic and translucent. Next, add the chopped tomatoes, along with the chopped fresh basil leaves, fresh spinach, and vegetable or chicken stock (or white wine). Continue to cook for another 3 to 5 minutes over medium heat until the spinach is slightly wilted and the tomatoes release some of their juices. If needed, adjust the seasoning.

Step 3: To the skillet, return the salmon and quickly reheat. Just before serving, drizzle the salmon with good quality olive oil for more taste. Enjoy the salmon right away. Enjoy!

Nutrition Facts:

Energy 370.54 kcal, Fat 26.5 g, Protein 25.39 g, Carbs 8.95 g, Saturated Fat 3.79 g, Polyunsat Fat 5.12 g, Monounsat Fat 16.11 g, Sugar 4.22 g, Cholesterol 61.88 mg, Sodium 187.51 mg, Potassium 1041.68 mg, Fiber 2.61 g

TUSCAN GARLIC SALMON SKILLET WITH SPINACH AND TOMATO

Rebecca PREP TIME: 5 MINS | COOK TIME: 15 MINS | YIELD: 4 servings Healthy and delicious – this Tuscan Garlic Salmon Fillets with Spinach and Tomatoes is the perfect weeknight… General Recipes TUSCAN GARLIC SALMON SKILLET WITH SPINACH AND TOMATO European Print This
Serves: 4 Prep Time: 5 mins Cooking Time: 15 mins 15 mins
Nutrition facts: 370.54 calories 26.5 fat
Rating: 5.0/5
( 1 voted )

Ingredients

  • 2 tbsp olive oil
  • 1 pound (450 grams) of salmon fillets
  • 1 tbsp olive oil or unsalted butter
  • 1/4 tsp red pepper flakes
  • 1 tsp Italian seasoning
  • 4 cloves garlic, minced
  • 1 medium onion, chopped
  • 4 Roma tomatoes, chopped
  • 1/2 c. (60ml) vegetable or chicken stock (or dry white wine)
  • 6 ounces of fresh spinach
  • 2 tbsp high-quality olive oil, optional
  • 1/4 c. fresh basil leaves, chopped
  • 1 tsp smoked paprika or more, to taste
  • Kosher salt and freshly ground black pepper, to taste

Instructions

Step 1: In a large skillet, heat 2 tbsp olive oil over medium-low heat. Once the oil is hot, add the salmon fillets to the skillet and sprinkle with red pepper flakes, paprika, Italian seasoning, and salt. Sear the salmon for about 5 minutes over medium heat until all sides are cooked through. On a plate, transfer the cooked salmon and set it aside.

Step 2: Add another 1 tbsp of olive oil to the same skillet over medium heat (or melt 1 tbsp butter). Then, add the garlic and chopped onion. Gently cook until aromatic and translucent. Next, add the chopped tomatoes, along with the chopped fresh basil leaves, fresh spinach, and vegetable or chicken stock (or white wine). Continue to cook for another 3 to 5 minutes over medium heat until the spinach is slightly wilted and the tomatoes release some of their juices. If needed, adjust the seasoning.

Step 3: To the skillet, return the salmon and quickly reheat. Just before serving, drizzle the salmon with good quality olive oil for more taste. Enjoy the salmon right away. Enjoy!

May 31, 2022 0 comment
0 FacebookTwitterPinterestEmail
General Recipes

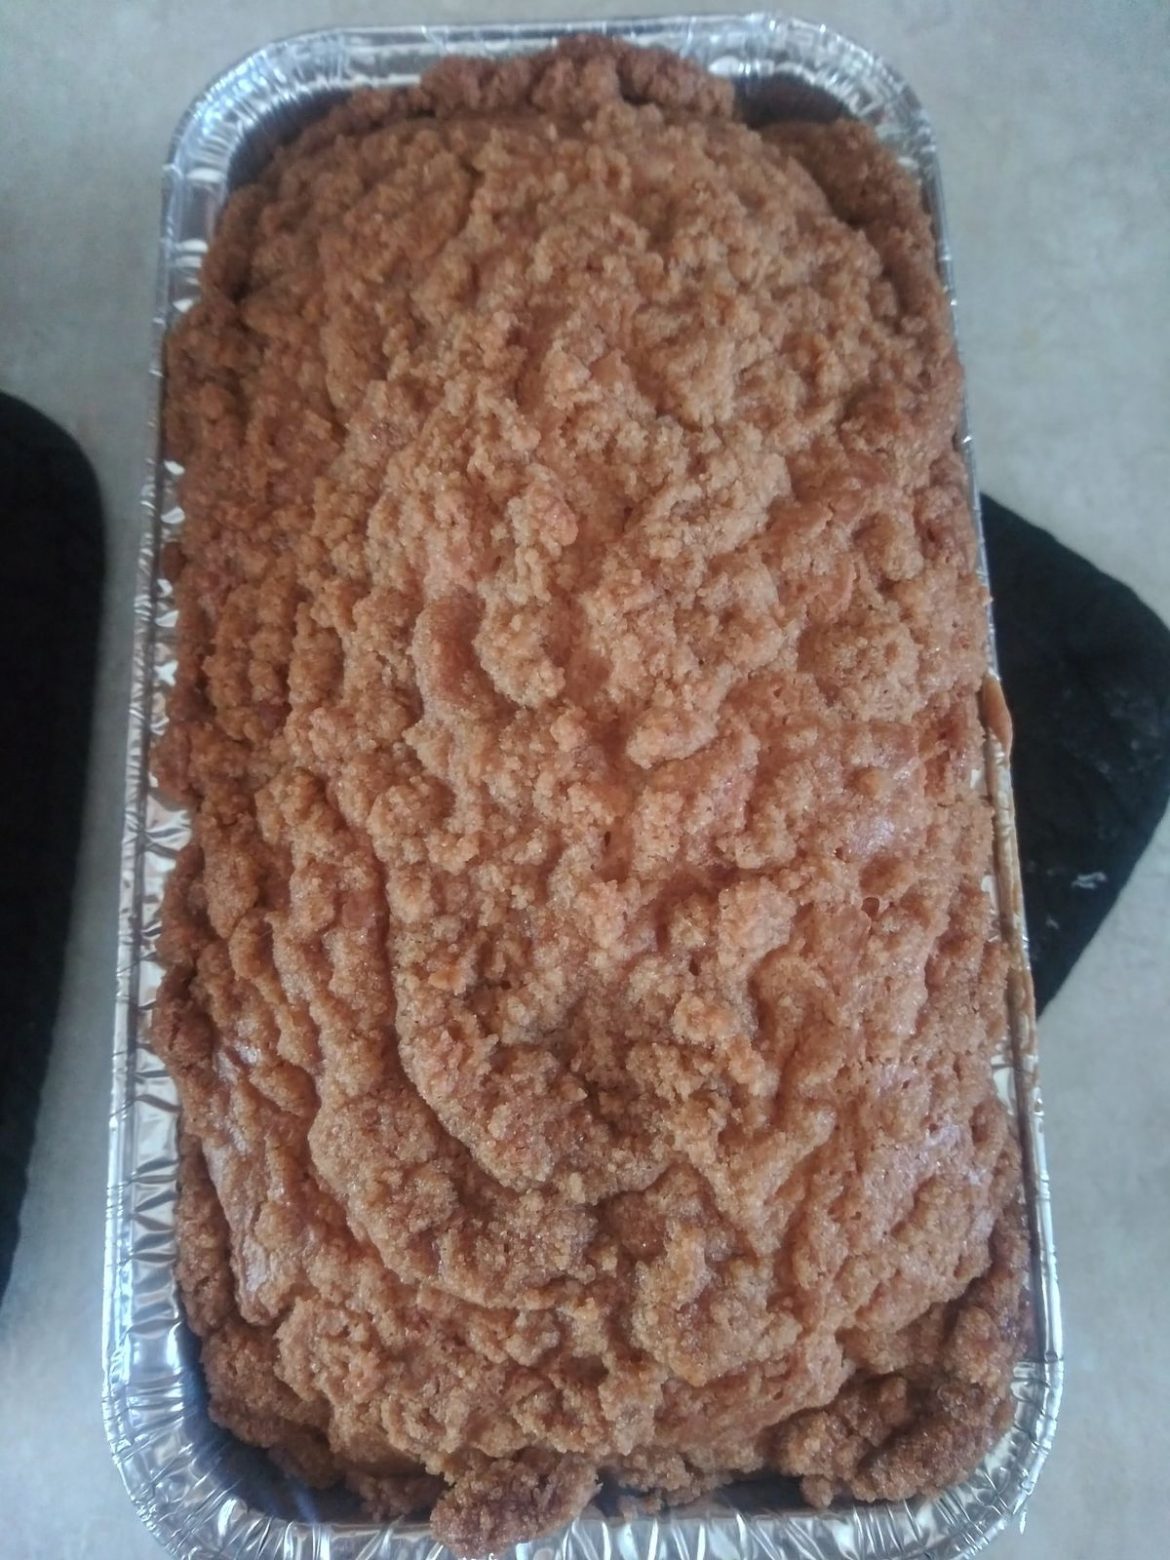
Sour Cream Coffee Cake

by Rebecca May 31, 2022
written by Rebecca

Prep Time: 15 mins | Cook Time: 1 hr 5 mins | Total Time: 1 hr 20 mins | Servings: 3 loaves

Incredibly moist with an impressive cinnamon streusel topping. This sour cream coffee cake is super simple to make, and the best part is you can fold in any fruits you love. Enjoy this for breakfast or brunch with your favorite cup of coffee to start your day right!

Ingredients

Sour Cream Coffee Cake:

½ c. (1 stick) unsalted butter softened

2 c. granulated sugar

4 large eggs, room temperature

1 c. fresh blueberries

4 c. all-purpose or cake flour, sifted

1 ¼ c. full-fat sour cream

1 tbsp baking powder

1 tsp pure vanilla extract

1 tsp salt

Streusel topping:

¾ c. all-purpose flour

½ c. (1 stick) unsalted butter softened

½ tsp ground cinnamon

1 c. granulated sugar

How to make Sour Cream Coffee Cake

Streusel Topping:

Step 1: Place the Streusel Topping ingredients in a bowl. Mix well using your fingers. Feel free to adjust the amount of cinnamon to your liking.

Sour Cream Coffee Cake:

Step 2: Prepare the oven. Preheat it to 350 degrees F. Using baking papers, line three loaf pans and set aside.

Step 3: Cream the butter and sugar in a large mixing bowl of a stand mixer or electric hand mixer. Then, add the salt along with the eggs, vanilla, and sour cream. Mix well while scraping the sides and bottom of the bowl often using a rubber spatula. Next, add half of the flour. Mix and scrape the bowl again. Add the rest of the flour and baking powder, then mix until well blended. Lastly, fold in the blueberries.

Step 4: Between the three loaf pans, evenly divide the batter. On top of each unbaked coffee cake, evenly sprinkle the streusel topping. You can store any remaining streusel topping in a freezer-safe Ziploc bag.

Step 5: On a half-pan lined with parchment paper, place the loaf pans. Then, place in the preheated oven and bake for about 60 to 65 minutes or until a toothpick inserted in the middle of the cake comes out clean.

Step 6: Remove the cakes from the oven when done and allow them to cool for about 20 minutes.

Step 7: Slice and serve. Enjoy!

Notes:

For this recipe, you can leave the fruit behind or fold in any of your preferred fruits.

To make a darker streusel topping, you need to add a little more cinnamon.

Nutrition Facts:

Calories: 2406 kcal | Carbohydrates: 373g | Protein: 34g | Fat: 90g | Saturated Fat: 53g | Cholesterol: 494mg | Sodium: 1510mg | Potassium: 1083mg | Fiber: 8g | Sugar: 217g | Vitamin A: 3249IU | Vitamin C: 12mg | Calcium: 375mg | Iron: 11mg

Sour Cream Coffee Cake

Rebecca Prep Time: 15 mins | Cook Time: 1 hr 5 mins | Total Time: 1 hr 20 mins | Servings: 3 loaves Incredibly moist with an impressive cinnamon streusel topping.… General Recipes Sour Cream Coffee Cake European Print This
Serves: 3 Prep Time: 15 mins Cooking Time: 1 hr 5 mins 1 hr 5 mins
Nutrition facts: 2406 calories 90 fat
Rating: 5.0/5
( 1 voted )

Ingredients

  • Sour Cream Coffee Cake:
  • ½ c. (1 stick) unsalted butter softened
  • 2 c. granulated sugar
  • 4 large eggs, room temperature
  • 1 c. fresh blueberries
  • 4 c. all-purpose or cake flour, sifted
  • 1 ¼ c. full-fat sour cream
  • 1 tbsp baking powder
  • 1 tsp pure vanilla extract
  • 1 tsp salt
  • Streusel topping:
  • ¾ c. all-purpose flour
  • ½ c. (1 stick) unsalted butter softened
  • ½ tsp ground cinnamon
  • 1 c. granulated sugar

Instructions

Streusel Topping:

Step 1: Place the Streusel Topping ingredients in a bowl. Mix well using your fingers. Feel free to adjust the amount of cinnamon to your liking.

Sour Cream Coffee Cake:

Step 2: Prepare the oven. Preheat it to 350 degrees F. Using baking papers, line three loaf pans and set aside.

Step 3: Cream the butter and sugar in a large mixing bowl of a stand mixer or electric hand mixer. Then, add the salt along with the eggs, vanilla, and sour cream. Mix well while scraping the sides and bottom of the bowl often using a rubber spatula. Next, add half of the flour. Mix and scrape the bowl again. Add the rest of the flour and baking powder, then mix until well blended. Lastly, fold in the blueberries.

Step 4: Between the three loaf pans, evenly divide the batter. On top of each unbaked coffee cake, evenly sprinkle the streusel topping. You can store any remaining streusel topping in a freezer-safe Ziploc bag.

Step 5: On a half-pan lined with parchment paper, place the loaf pans. Then, place in the preheated oven and bake for about 60 to 65 minutes or until a toothpick inserted in the middle of the cake comes out clean.

Step 6: Remove the cakes from the oven when done and allow them to cool for about 20 minutes.

Step 7: Slice and serve. Enjoy!

Notes

For this recipe, you can leave the fruit behind or fold in any of your preferred fruits. To make a darker streusel topping, you need to add a little more cinnamon.

May 31, 2022 0 comment
0 FacebookTwitterPinterestEmail
General Recipes

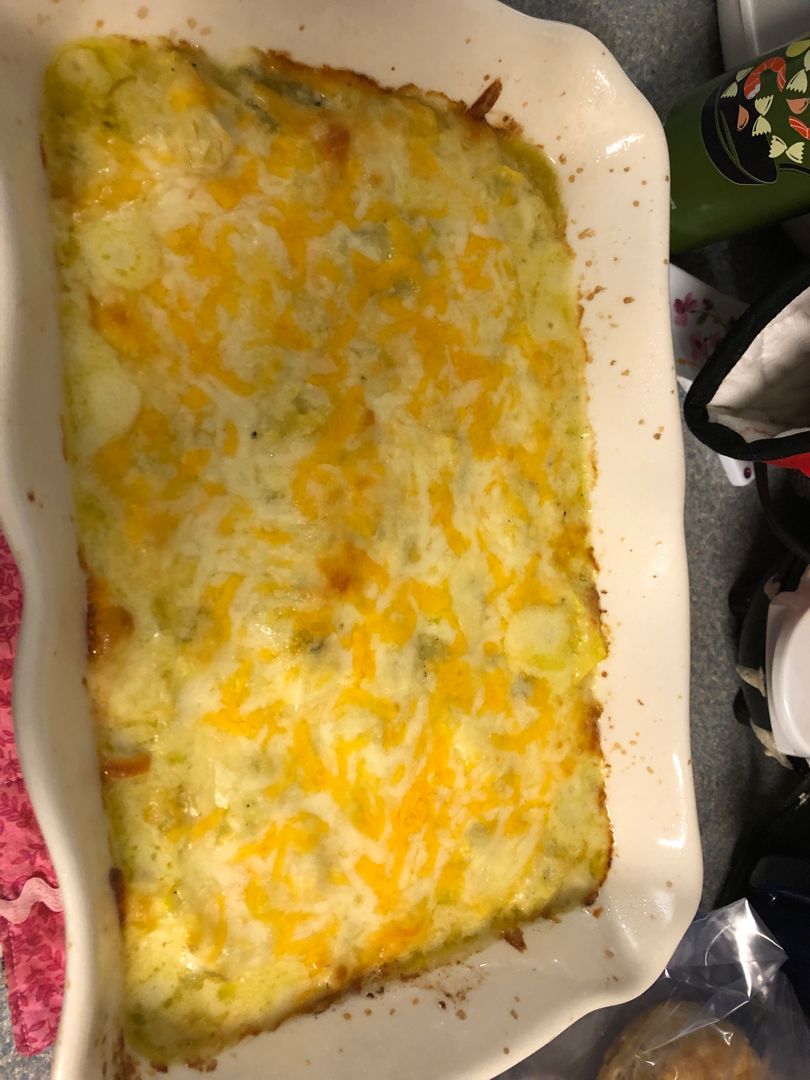
Best Squash Casserole with Green Chile-Summer Squash Recipes

by Rebecca May 31, 2022
written by Rebecca

Prep Time: 10 mins | Cook Time: 35 mins | Total Time: 45 mins | Servings: 8

If you are looking for another amazing and freezer-friendly meal, then this squash casserole is what you need. Onions and yellow squash baked in a delicious cheesy sauce and topped with a simple Parmesan bread topping. This casserole will surely be loved even by your picky eaters! You’ll be impressed with the balance of flavor of this all-time favorite summer squash casserole. This is especially perfect to use up your garden produce.

Ingredients

1/4 c. butter

1 large onion, thinly sliced

1/2 c. Parmesan cheese, grated

1/2 c. sour cream

1 c. sharp cheddar cheese, shredded

3 whole roasted green chile peeled and chopped

6 medium squash, thinly sliced

Fresh chopped parsley, optional

1/4 teaspoon salt

1/4 teaspoon black pepper

Topping:

1 tablespoon butter, melted

1/4 c. Parmesan cheese

1/4 c. breadcrumbs

How to make the Best Squash Casserole with Green Chile-Summer Squash

Step 1: Prepare the oven. Preheat it to 350 degrees F.

Step 2: In the meantime, melt the butter in a wok or large skillet on medium heat. Once the butter has melted, add the squash and onions to the skillet/wok and saute until the onions are translucent.

Step 3: In a large mixing bowl, transfer the cooked squash and onions. Then, add the cheddar cheese along with the Parmesan cheese, sour cream, green chiles, salt, and pepper. Mix gently until well blended.

Step 4: Into a lightly greased 2-quart baking dish, empty the contents of the bowl.

Step 5: In a small dish, combine the breadcrumbs, Parmesan cheese, and 1 tablespoon of melted butter. Sprinkle this over the casserole. Place in the preheated oven and bake for about 20 minutes until golden, and uncovered.

Step 6: When done, take the casserole out of the oven and allow it to cool for about 5 to 10 minutes.

Step 7: Serve the casserole garnished with some chopped fresh parsley. Enjoy!

Nutrition Facts:

Calories: 229 kcal | Carbohydrates: 10g | Protein: 10g | Fat: 18g | Saturated Fat: 11g | Polyunsaturated Fat: 1g | Monounsaturated Fat: 5g | Trans Fat: 1g | Cholesterol: 48mg | Sodium: 427mg | Potassium: 80mg | Fiber: 12g | Sugar: 4g | Vitamin A: 526IU | Vitamin C: 2mg | Calcium: 242mg | Iron: 4mg

Best Squash Casserole with Green Chile-Summer Squash Recipes

Rebecca Prep Time: 10 mins | Cook Time: 35 mins | Total Time: 45 mins | Servings: 8 If you are looking for another amazing and freezer-friendly meal, then this squash… General Recipes Best Squash Casserole with Green Chile-Summer Squash Recipes European Print This
Serves: 8 Prep Time: 10 mins Cooking Time: 35 mins 35 mins
Nutrition facts: 229 calories 18 fat
Rating: 5.0/5
( 1 voted )

Ingredients

  • 1/4 c. butter
  • 1 large onion, thinly sliced
  • 1/2 c. Parmesan cheese, grated
  • 1/2 c. sour cream
  • 1 c. sharp cheddar cheese, shredded
  • 3 whole roasted green chile peeled and chopped
  • 6 medium squash, thinly sliced
  • Fresh chopped parsley, optional
  • 1/4 teaspoon salt
  • 1/4 teaspoon black pepper
  • Topping:
  • 1 tablespoon butter, melted
  • 1/4 c. Parmesan cheese
  • 1/4 c. breadcrumbs

Instructions

Step 1: Prepare the oven. Preheat it to 350 degrees F.

Step 2: In the meantime, melt the butter in a wok or large skillet on medium heat. Once the butter has melted, add the squash and onions to the skillet/wok and saute until the onions are translucent.

Step 3: In a large mixing bowl, transfer the cooked squash and onions. Then, add the cheddar cheese along with the Parmesan cheese, sour cream, green chiles, salt, and pepper. Mix gently until well blended.

Step 4: Into a lightly greased 2-quart baking dish, empty the contents of the bowl.

Step 5: In a small dish, combine the breadcrumbs, Parmesan cheese, and 1 tablespoon of melted butter. Sprinkle this over the casserole. Place in the preheated oven and bake for about 20 minutes until golden, and uncovered.

Step 6: When done, take the casserole out of the oven and allow it to cool for about 5 to 10 minutes.

Step 7: Serve the casserole garnished with some chopped fresh parsley. Enjoy!

May 31, 2022 0 comment
0 FacebookTwitterPinterestEmail
General Recipes

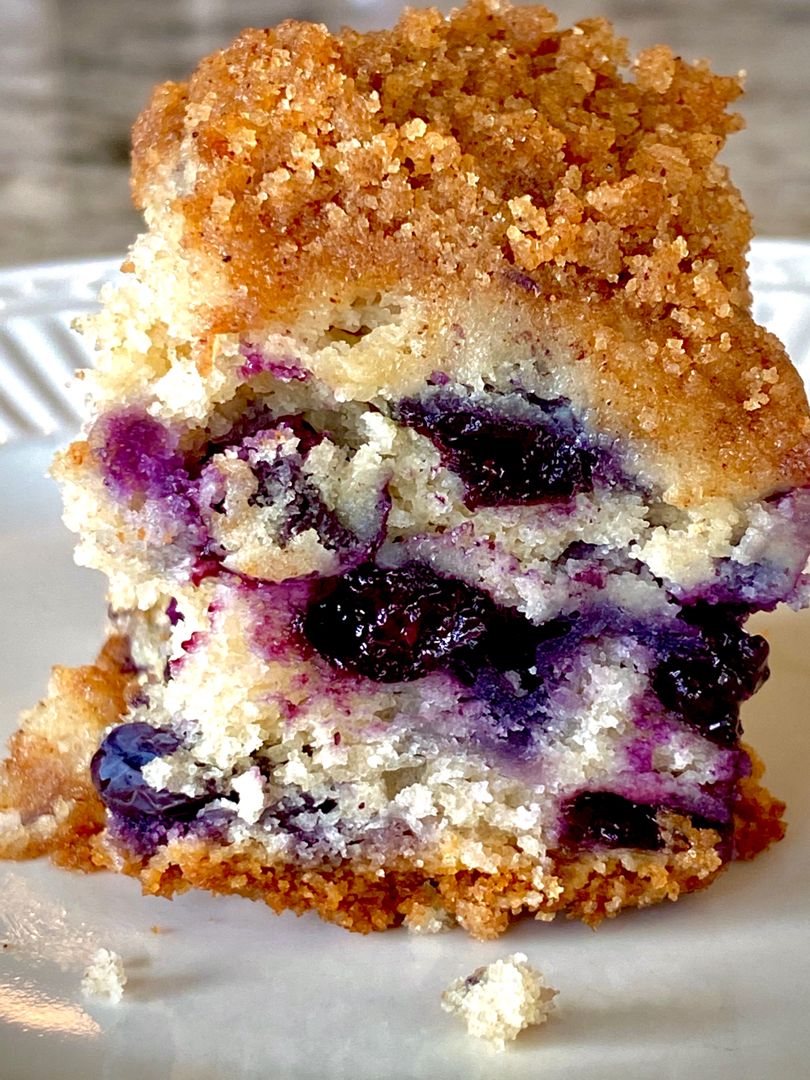
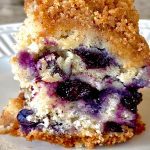
Blueberry Buckle Coffee Cake

by Rebecca May 30, 2022
written by Rebecca

PREP TIME: 10 MINS | COOK TIME: 50 MINS | TOTAL TIME: 1 HR | SERVINGS: 9 people

I love blueberries, thus this amazing blueberry buckle coffee cake! This is my ultimate favorite cake. I enjoy making treats using blueberries, such as this cake, muffins, and more! The crumb topping is the highlight here. You can use it to top any desserts, however, make sure not to overwork it, or it will break and cause inconsistency. For this recipe, you are welcome to use frozen or fresh blueberries. If using frozen blueberries, make sure to first dust them with flour before adding to the batter as it assists the frozen blueberries from settling into the bottom. You can also use them without thawing.

INGREDIENTS

Cake:

1 large egg

2 1/2 teaspoons baking powder

1/4 c. butter, softened

3/4 teaspoon salt

3/4 c. milk

3/4 c. sugar

2 c. fresh blueberries, washed with any stems removed

2 c. all-purpose flour

Crumb Topping:

1/2 teaspoon cinnamon

1/2 c. sugar

1/4 c. butter, cold

1/3 c. all-purpose flour

How to make Blueberry Buckle Coffee Cake

Step 1: Prepare the oven. Preheat it to 375 degrees. Ready your baking pan. Grease and set aside.

Step 2: Using a stand mixer, beat the flour, sugar, baking powder, salt, butter, milk, and egg for about 1 minute until blended. Alternately, you can use a hand mixer. Fold in the blueberries using a wooden spoon.

Step 3: Into the prepared pan, spread the batter and top with the crumb topping. Place in the preheated oven and bake for about 45 to 50 minutes or until a toothpick inserted in the middle of the cake comes out clean.

Crumb Topping:

Step 4: Place the sugar, flour, cinnamon, and butter in a medium mixing bowl. Mix well until blended, and you have a “crumb-like” mixture. For this, you can either use your hands or a pastry dough blender. Before baking, sprinkle this on top of the cake.

Blueberry Buckle Coffee Cake

Rebecca PREP TIME: 10 MINS | COOK TIME: 50 MINS | TOTAL TIME: 1 HR | SERVINGS: 9 people I love blueberries, thus this amazing blueberry buckle coffee cake! This is… General Recipes Blueberry Buckle Coffee Cake European Print This
Serves: 9 Prep Time: 10 mins Cooking Time: 50 mins 50 mins
Nutrition facts: 200 calories 20 grams fat
Rating: 3.7/5
( 7 voted )

Ingredients

  • Cake:
  • 1 large egg
  • 2 1/2 teaspoons baking powder
  • 1/4 c. butter, softened
  • 3/4 teaspoon salt
  • 3/4 c. milk
  • 3/4 c. sugar
  • 2 c. fresh blueberries, washed with any stems removed
  • 2 c. all-purpose flour
  • Crumb Topping:
  • 1/2 teaspoon cinnamon
  • 1/2 c. sugar
  • 1/4 c. butter, cold
  • 1/3 c. all-purpose flour

Instructions

Step 1: Prepare the oven. Preheat it to 375 degrees. Ready your baking pan. Grease and set aside.

Step 2: Using a stand mixer, beat the flour, sugar, baking powder, salt, butter, milk, and egg for about 1 minute until blended. Alternately, you can use a hand mixer. Fold in the blueberries using a wooden spoon.

Step 3: Into the prepared pan, spread the batter and top with the crumb topping. Place in the preheated oven and bake for about 45 to 50 minutes or until a toothpick inserted in the middle of the cake comes out clean.

Crumb Topping:

Step 4: Place the sugar, flour, cinnamon, and butter in a medium mixing bowl. Mix well until blended, and you have a “crumb-like” mixture. For this, you can either use your hands or a pastry dough blender. Before baking, sprinkle this on top of the cake.

May 30, 2022 0 comment
0 FacebookTwitterPinterestEmail
General Recipes

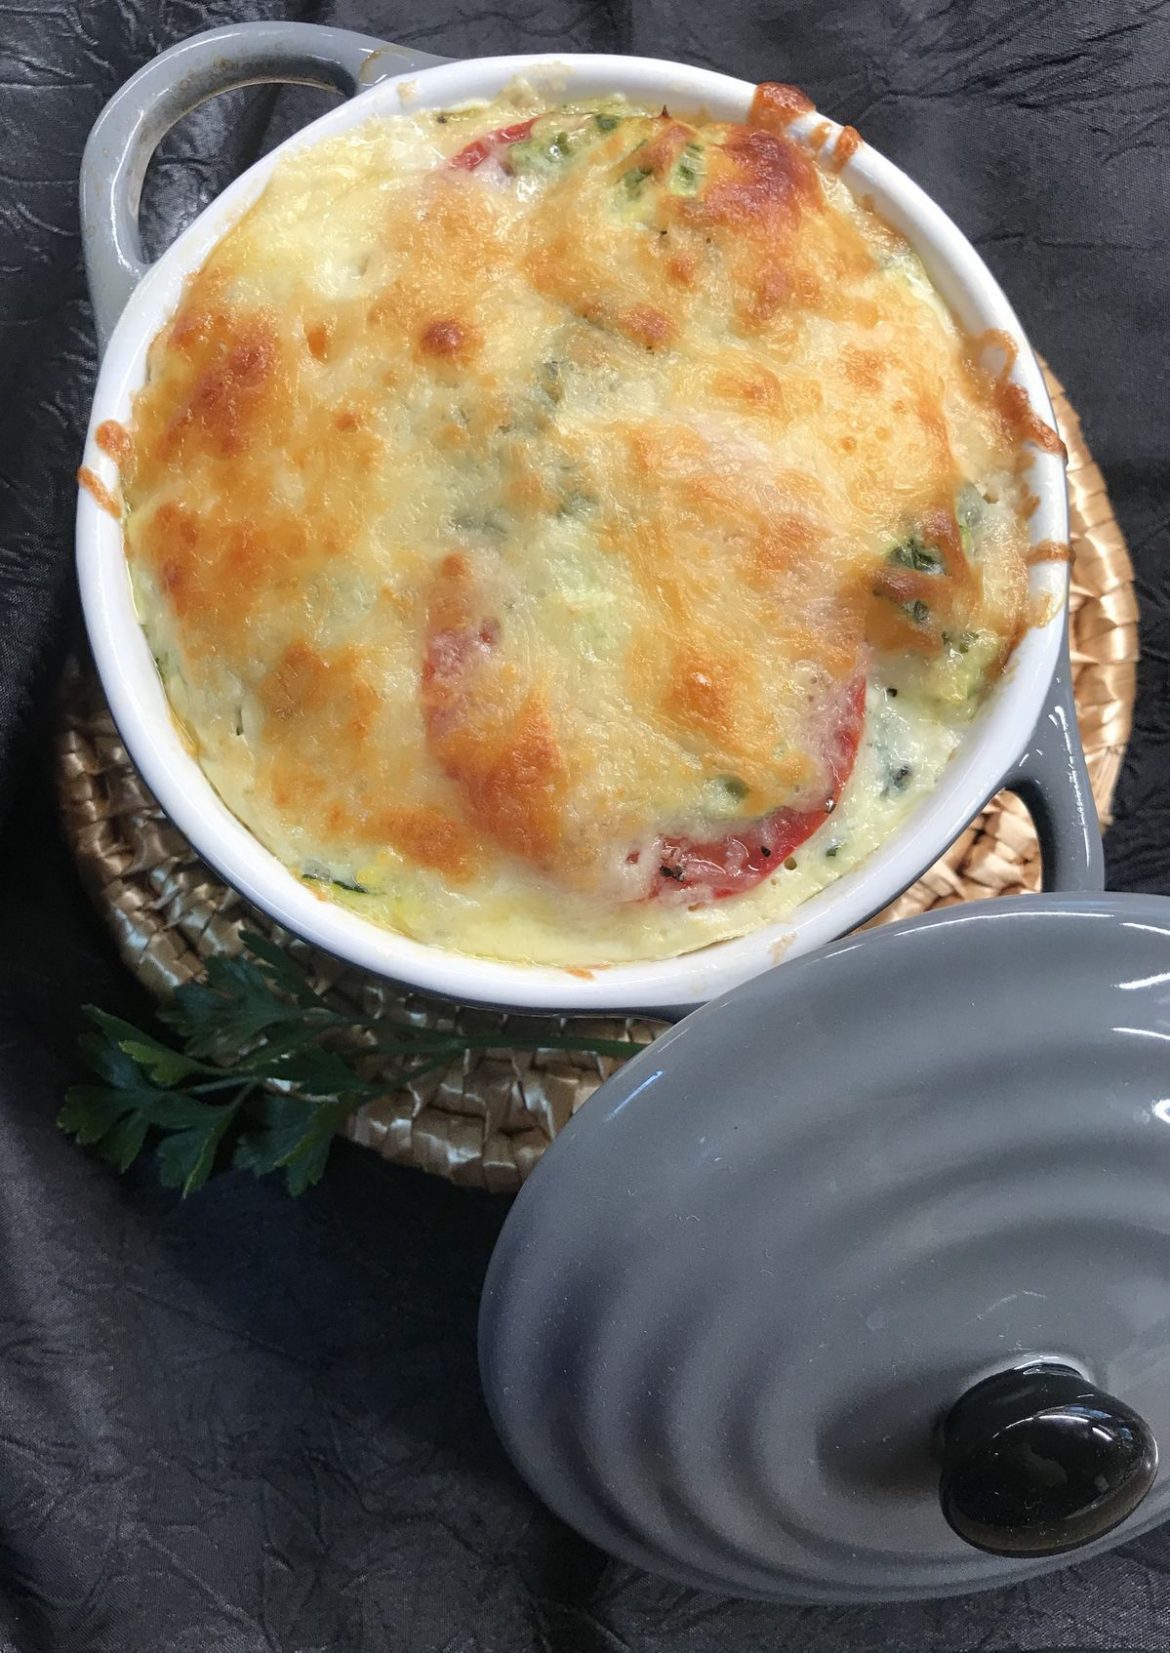
Zucchini Tomato Gratin Recipe

by Rebecca May 30, 2022
written by Rebecca

Yield: 6 To 8 Servings

This zucchini, tomato gratin is incredibly easy to whip up using simple ingredients you might already have on hand. A staple dish at home and my family’s ultimate favorite summer dishes. It’s an excellent side dish for meat, vegetables, fish, and even poultry. The best part is you can assemble this ahead, and this recipe is pretty modifiable!

INGREDIENTS

1 egg, beaten

3 medium-sized zucchini squash, cut into 2” pieces

1 tablespoon chopped fresh Italian parsley

3 yellow summer squash, cut into 2” pieces

1/4 teaspoon crushed red pepper, rubbed together between your hands to bring out the flavor, plus salt and pepper to taste

1 to 2 ounces cheddar, Gruyere, or Swiss cheese, grated, plus 1/2 ounce Parmesan cheese, grated

1 to 2 Roma or other smallish tomatoes, thinly sliced. You can also use grape tomatoes

How to make Zucchini Tomato Gratin

Step 1: Prepare the oven. Preheat it to 350 degrees F.

Step 2: Add the zucchini and pieces of summer squash to a large saucepan of boiling water and simmer for about 10 minutes. Into a colander, strain the zucchini and summer squash pieces. Into a heat-proof bowl, dumped the cooked squash. Using a potato masher, roughly mash the pieces, making sure not to over-mash them as we want to retain large pieces. Into the colander, dump the mixture, and drain the excess liquid off.

Step 3: Into a baking dish, combine the squash, herbs, red pepper, salt & pepper, and egg. Mix well until evenly distributed. For this recipe, I use 11 x 8-inch or 8 x 8-inch Pyrex.

Step 4: To the baking dish, add the slices of tomato, tucking some of the slices under the mixture, and place the remaining slices on top.

Step 5: Into the preheated oven, place the dish, and bake for about 10 minutes, uncovered. Take the dish out of the oven after 10 minutes and top with the cheeses. Place the dish back into the oven and resume baking for additional 20 minutes, uncovered. Turn the broiler and raise the rack. Place the dish under the broiler until the cheese has browned, keeping a close eye.

Zucchini Tomato Gratin Recipe

Rebecca Yield: 6 To 8 Servings This zucchini, tomato gratin is incredibly easy to whip up using simple ingredients you might already have on hand. A staple dish at home and… General Recipes Zucchini Tomato Gratin Recipe European Print This
Serves: 6-8
Nutrition facts: 200 calories 20 grams fat
Rating: 5.0/5
( 1 voted )

Ingredients

  • 1 egg, beaten
  • 3 medium-sized zucchini squash, cut into 2” pieces
  • 1 tablespoon chopped fresh Italian parsley
  • 3 yellow summer squash, cut into 2” pieces
  • 1/4 teaspoon crushed red pepper, rubbed together between your hands to bring out the flavor, plus salt and pepper to taste
  • 1 to 2 ounces cheddar, Gruyere, or Swiss cheese, grated, plus 1/2 ounce Parmesan cheese, grated
  • 1 to 2 Roma or other smallish tomatoes, thinly sliced. You can also use grape tomatoes

Instructions

Step 1: Prepare the oven. Preheat it to 350 degrees F.

Step 2: Add the zucchini and pieces of summer squash to a large saucepan of boiling water and simmer for about 10 minutes. Into a colander, strain the zucchini and summer squash pieces. Into a heat-proof bowl, dumped the cooked squash. Using a potato masher, roughly mash the pieces, making sure not to over-mash them as we want to retain large pieces. Into the colander, dump the mixture, and drain the excess liquid off.

Step 3: Into a baking dish, combine the squash, herbs, red pepper, salt & pepper, and egg. Mix well until evenly distributed. For this recipe, I use 11 x 8-inch or 8 x 8-inch Pyrex.

Step 4: To the baking dish, add the slices of tomato, tucking some of the slices under the mixture, and place the remaining slices on top.

Step 5: Into the preheated oven, place the dish, and bake for about 10 minutes, uncovered. Take the dish out of the oven after 10 minutes and top with the cheeses. Place the dish back into the oven and resume baking for additional 20 minutes, uncovered. Turn the broiler and raise the rack. Place the dish under the broiler until the cheese has browned, keeping a close eye.

May 30, 2022 0 comment
0 FacebookTwitterPinterestEmail
Newer Posts
Older Posts

Popular Posts

  • 1

    Crispy Crunchy Parmesan Potatoes

    March 21, 2020
  • 2

    CROCK POT SMOTHERED PORK CHOPS

    March 21, 2020
  • Facebook
  • Twitter

@2019 - All Right Reserved.


Back To Top