Cook it once
  • Home
  • Privacy Policy
  • Recipes
    • KETO
    • LC
    • WW
  • Tips
  • Contact
Cook it once
  • Home
  • Privacy Policy
  • Recipes
    • KETO
    • LC
    • WW
  • Tips
  • Contact
Category:

General Recipes

General Recipes

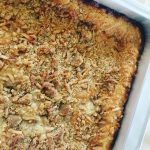
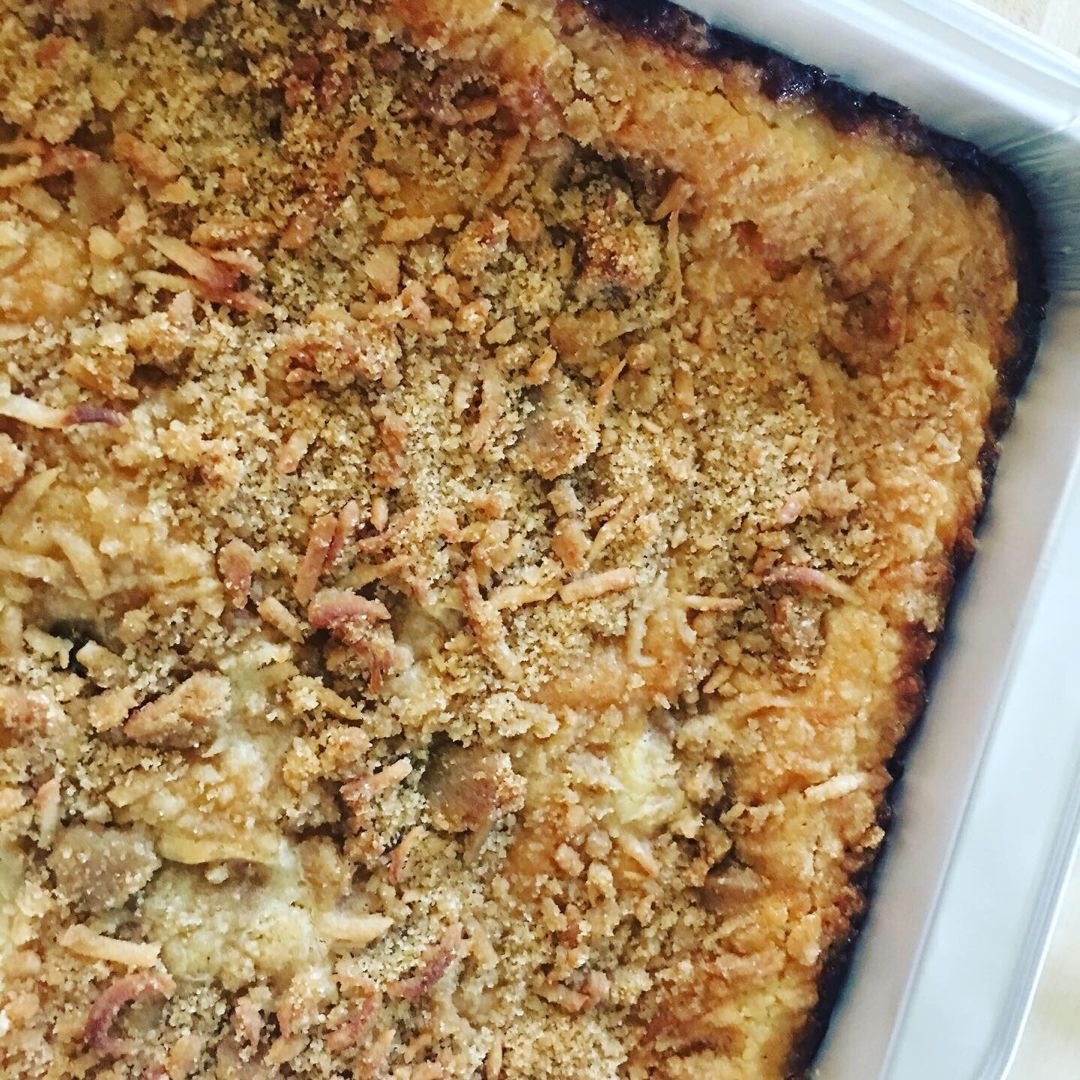
Lemon coconut oeey gooey bars

by Rebecca June 2, 2022
written by Rebecca

Total Time: 1 hr | Yield: 16

These are the best lemon coconut bars! You’ll love the hint of lemon and coconut in these tasty oeey gooey bars. They are very addictive, you’ll never settle for just one bar!

INGREDIENTS

CRUST:

1 egg

1 stick unsalted butter, melted

1 1-pound Yellow Cake Mix

FILLING:

2 eggs, room temperature

8 ounces cream cheese, softened

1/4 teaspoon coconut extract

1 teaspoon vanilla extract

1/2 cup lemon juice (fresh)

1 stick unsalted butter, melted

2 cups powdered sugar

TOPPING:

4 tablespoons butter, melted

1/2 cup sweetened coconut

1/2 cup sugar

3/4 cup flour

1/2 cup brown sugar

How to make Lemon coconut oeey gooey bars

Step 1: Prepare the oven. Preheat it to 350 degrees. Using a baking spray, grease a 9 x 13-inch rectangular pan and set it aside.

Step 2: Place the cake mix, and add the egg and the melted butter in a large bowl. Mix well using a wooden spoon. Empty the contents of the bowl into the prepared pan and set it aside.

Step 3: Cream the cream cheese in a large bowl until smooth. Add the eggs a piece at a time. Next, add the vanilla along with the coconut extract, lemon juice, powdered sugar, and melted butter. Pour this over the cake mix.

Step 4: To make the topping, whisk the brown & white sugar and sweetened coconut. Mix in the butter. Add the flour and stir well until you have a very crumbly topping. Transfer the topping to a wax or parchment paper and allow it to sit for approximately 10 to 15 minutes to dry the crumbs a little. On top of the filling, sprinkle the crumbs.

Step 5: Place in the preheated oven and bake for about 35 to 40 minutes, making sure not to over-bake the bar. Remove from the oven when done and let it cool before cutting into squares.
Lemon coconut oeey gooey bars

Rebecca Total Time: 1 hr | Yield: 16 These are the best lemon coconut bars! You’ll love the hint of lemon and coconut in these tasty oeey gooey bars. They are… General Recipes Lemon coconut oeey gooey bars European Print This
Serves: 16
Nutrition facts: 200 calories 20 grams fat
Rating: 5.0/5
( 1 voted )

Ingredients

  • CRUST:
  • 1 egg
  • 1 stick unsalted butter, melted
  • 1 1-pound Yellow Cake Mix
  • FILLING:
  • 2 eggs, room temperature
  • 8 ounces cream cheese, softened
  • 1/4 teaspoon coconut extract
  • 1 teaspoon vanilla extract
  • 1/2 cup lemon juice (fresh)
  • 1 stick unsalted butter, melted
  • 2 cups powdered sugar
  • TOPPING:
  • 4 tablespoons butter, melted
  • 1/2 cup sweetened coconut
  • 1/2 cup sugar
  • 3/4 cup flour
  • 1/2 cup brown sugar

Instructions

Step 1: Prepare the oven. Preheat it to 350 degrees. Using a baking spray, grease a 9 x 13-inch rectangular pan and set it aside.

Step 2: Place the cake mix, and add the egg and the melted butter in a large bowl. Mix well using a wooden spoon. Empty the contents of the bowl into the prepared pan and set it aside.

Step 3: Cream the cream cheese in a large bowl until smooth. Add the eggs a piece at a time. Next, add the vanilla along with the coconut extract, lemon juice, powdered sugar, and melted butter. Pour this over the cake mix.

Step 4: To make the topping, whisk the brown & white sugar and sweetened coconut. Mix in the butter. Add the flour and stir well until you have a very crumbly topping. Transfer the topping to a wax or parchment paper and allow it to sit for approximately 10 to 15 minutes to dry the crumbs a little. On top of the filling, sprinkle the crumbs.

Step 5: Place in the preheated oven and bake for about 35 to 40 minutes, making sure not to over-bake the bar. Remove from the oven when done and let it cool before cutting into squares.
June 2, 2022 0 comment
0 FacebookTwitterPinterestEmail
General Recipes

Baked Pork Chops & Rice

by Rebecca June 2, 2022
written by Rebecca

Prep Time: 10 mins | Cook Time: 2 hrs | Total Time: 2 hrs 10 mins | Servings: 4 people

Fork-tender, moist pan-fried pork chops in a bed of a mouthwatering rice mixture. These baked pork chops and rice make an amazing weeknight dinner. It’s filling, herby, and very flavorful. A complete meal in one that you can throw together easily at any time. This scrumptious baked pork chops and rice is a serious staple that everyone needs. If you are looking for another simple recipe, then this baked pork chops and rice is perfect! It’s a foolproof recipe, my favorite, and go-to. A must-try!

Ingredients

4-5 boneless pork chops

1/2 c. butter

2 tablespoons vegetable oil

1 teaspoon onion powder

1 teaspoon thyme

1 10-ounces can of cream of chicken soup

1 10-ounces can cream of mushroom soup

1 1/2 c. milk

1 c. long-grain white rice

2 teaspoons dried rosemary divided

Parsley garnish

1 teaspoon salt

1 teaspoon pepper

How to make Baked Pork Chops & Rice

Step 1: Prepare the oven. Preheat it to 275 degrees.

Step 2: On both sides, season the pork chops with salt, pepper, onion powder, and 1 teaspoon rosemary.

Step 3: Heat 2 tablespoons of vegetable oil in a large saute pan. Once hot, add the pork chops and cook for about 3 to 5 minutes on both sides until browned.

Step 4: Take the pan off the heat and transfer the pork chops to a 9 x 13-inch pan. Set aside.

Step 5: In the meantime, add the cream of mushroom soup, cream of chicken soup, milk, remaining rosemary, and thyme in a medium saucepan. Stir well. Then, mix in the rice and add the butter. Gently boil while stirring until the butter has melted. Pour this over the chops. Tent with tin foil and place in the preheated oven. Bake for about 2 hours until done.

Step 6: Before serving, garnish the baked pork chops and rice with parsley. Enjoy!

Nutrition Facts:

Serving: 0g | Calories: 700 kcal | Carbohydrates: 43g | Protein: 35g | Fat: 42g | Saturated Fat: 25g | Cholesterol: 160mg | Sodium: 894mg | Potassium: 674mg | Fiber: 1g | Sugar: 5g | Vitamin A: 875IU | Vitamin C: 0.7mg | Calcium: 140mg | Iron: 1.3mg

Baked Pork Chops & Rice

Rebecca Prep Time: 10 mins | Cook Time: 2 hrs | Total Time: 2 hrs 10 mins | Servings: 4 people Fork-tender, moist pan-fried pork chops in a bed of a… General Recipes Baked Pork Chops & Rice European Print This
Serves: 4 Prep Time: 10 mins Cooking Time: 2 hrs 2 hrs
Nutrition facts: 700 calories 42 fat
Rating: 5.0/5
( 1 voted )

Ingredients

  • 4-5 boneless pork chops
  • 1/2 c. butter
  • 2 tablespoons vegetable oil
  • 1 teaspoon onion powder
  • 1 teaspoon thyme
  • 1 10-ounces can of cream of chicken soup
  • 1 10-ounces can cream of mushroom soup
  • 1 1/2 c. milk
  • 1 c. long-grain white rice
  • 2 teaspoons dried rosemary divided
  • Parsley garnish
  • 1 teaspoon salt
  • 1 teaspoon pepper

Instructions

Step 1: Prepare the oven. Preheat it to 275 degrees.

Step 2: On both sides, season the pork chops with salt, pepper, onion powder, and 1 teaspoon rosemary.

Step 3: Heat 2 tablespoons of vegetable oil in a large saute pan. Once hot, add the pork chops and cook for about 3 to 5 minutes on both sides until browned.

Step 4: Take the pan off the heat and transfer the pork chops to a 9 x 13-inch pan. Set aside.

Step 5: In the meantime, add the cream of mushroom soup, cream of chicken soup, milk, remaining rosemary, and thyme in a medium saucepan. Stir well. Then, mix in the rice and add the butter. Gently boil while stirring until the butter has melted. Pour this over the chops. Tent with tin foil and place in the preheated oven. Bake for about 2 hours until done.

Step 6: Before serving, garnish the baked pork chops and rice with parsley. Enjoy!

June 2, 2022 0 comment
0 FacebookTwitterPinterestEmail
General Recipes

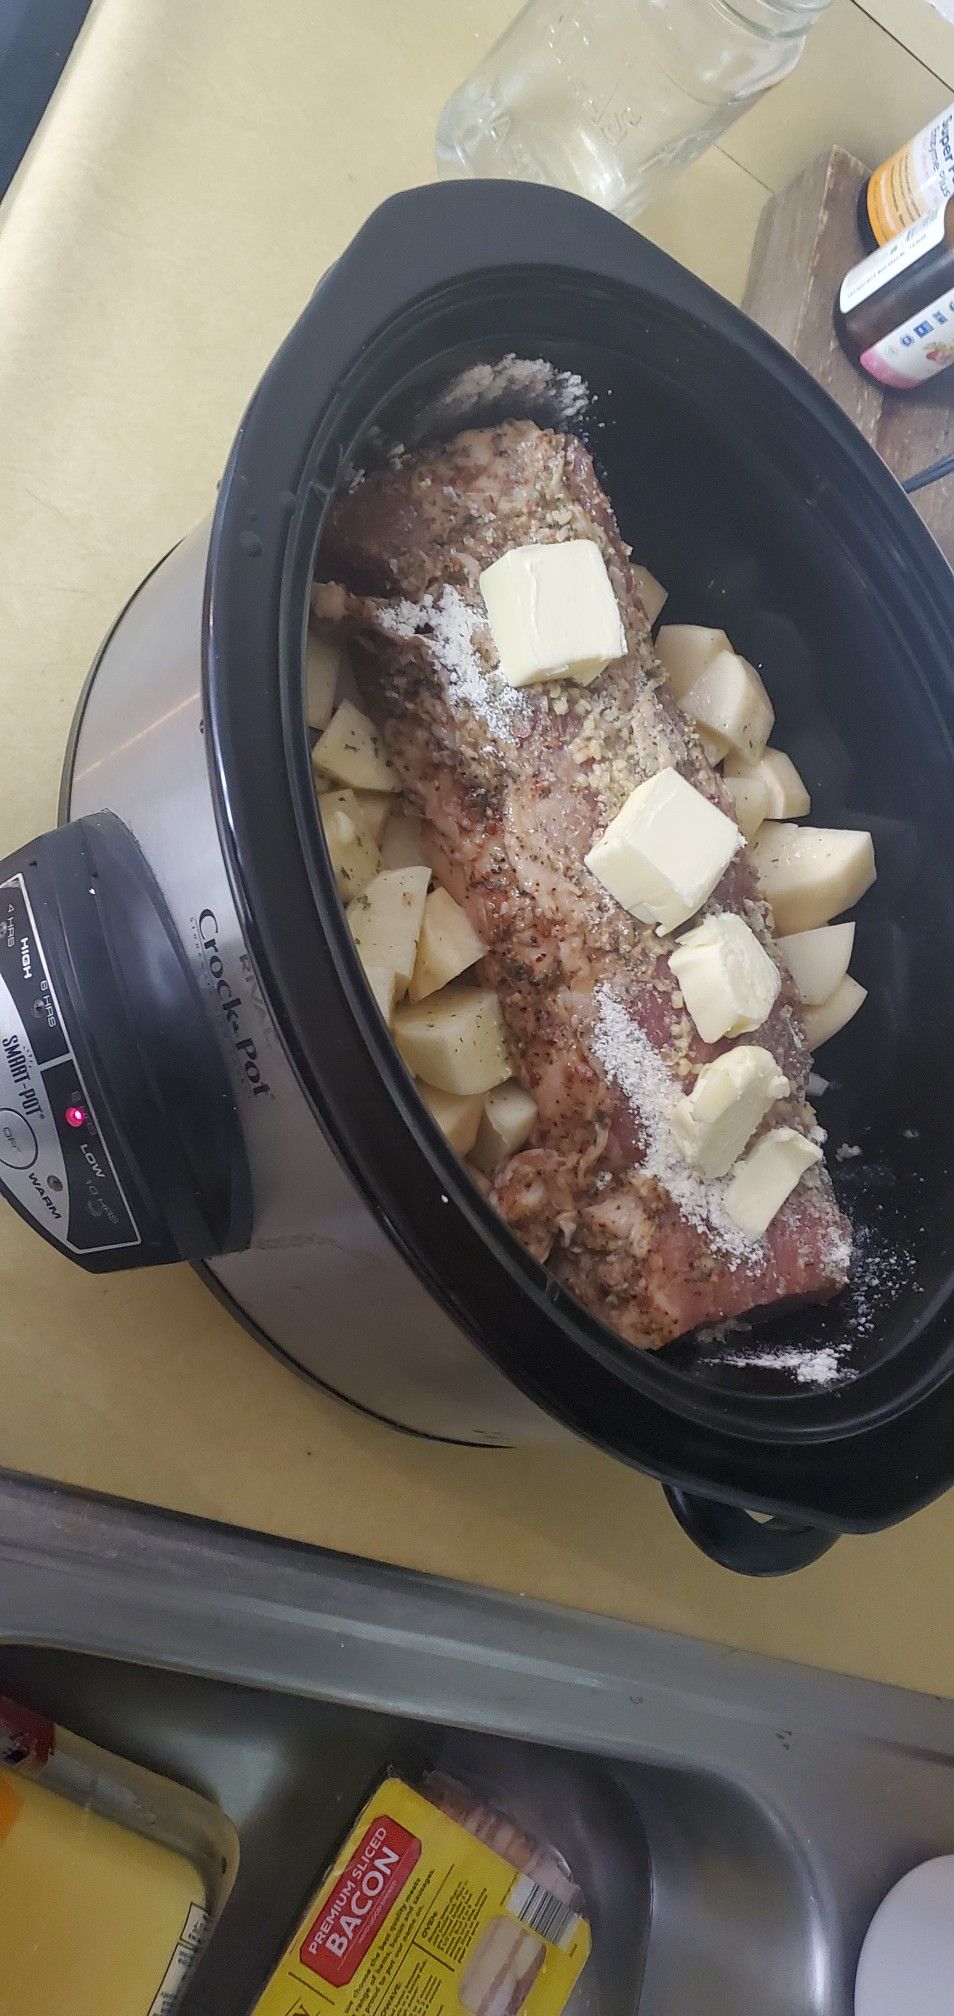
Crock Pot Ranch Pork Loin Roast and Potatoes

by Rebecca June 2, 2022
written by Rebecca

Prep Time: 10 mins | Cook Time: 8 hrs | Total Time: 8 hrs 10 mins | Servings: 6

Are you looking for a fancy dinner that you can make easily and without a fuss? Well, you are in luck because this ranch pork loin roast and potatoes are a great choice. It’s a dump-and-go recipe that you can whip up any time using your crockpot. For best results, make sure not to cut the potatoes into small pieces (you can also use small potatoes and not cut them), or else they will cook faster and become mushier. I use pork loin but feel free to use pork chops instead. If you want a creamier version, pour a can of cream of chicken soup over the butter before cooking. I like ranch, but if you don’t, you can always swap it with an Italian dressing mix.

This crockpot ranch pork loin roast and potatoes are the perfect weeknight dinner that you can also eat on the go if used in a sandwich. If you want to change up your meal routine this is excellent, too!

Ingredients

8 tbsp butter

3 lbs pork loin roast

4 cloves garlic

1 onion

3 tbsp ranch seasoning

3 lbs red potatoes

How to make Crock Pot Ranch Pork Loin Roast and Potatoes

Step 1: In a bowl, dump the quartered potatoes, sliced onions, and two minced garlic.

Step 2: After melting four tbsp of butter, stir in 1 tsp ranch seasoning. Pour this over the bowl with the potatoes, onions, and garlic. Then, transfer it into your crockpot.

Step 3: In 2 tbsp ranch seasoning, coat the pork loin. In the crockpot, place the pork loin roast, fat-side down, and top with the rest of the 2 tbsp minced garlic cloves and 4 tbsp butter.

Step 4: Cover the crockpot and set to cook for 6 to 8 hours on low until the internal temperature of the pork reaches 145 degrees and the potatoes are fork-tender.

Nutrition Facts:

Calories: 623 kcal | Carbohydrates: 43g | Protein: 56g | Fat: 25g | Saturated Fat: 13g | Cholesterol: 183mg | Sodium: 849mg | Potassium: 1915mg | Fiber: 4g | Sugar: 4g | Vitamin A: 482IU | Vitamin C: 21mg | Calcium: 46mg | Iron: 3mg

Crock Pot Ranch Pork Loin Roast and Potatoes

Rebecca Prep Time: 10 mins | Cook Time: 8 hrs | Total Time: 8 hrs 10 mins | Servings: 6 Are you looking for a fancy dinner that you can make… General Recipes Crock Pot Ranch Pork Loin Roast and Potatoes European Print This
Serves: 6 Prep Time: 10 mins Cooking Time: 8 hrs 8 hrs
Nutrition facts: 623 calories 25 fat
Rating: 5.0/5
( 1 voted )

Ingredients

  • 8 tbsp butter
  • 3 lbs pork loin roast
  • 4 cloves garlic
  • 1 onion
  • 3 tbsp ranch seasoning
  • 3 lbs red potatoes

Instructions

Step 1: In a bowl, dump the quartered potatoes, sliced onions, and two minced garlic.

Step 2: After melting four tbsp of butter, stir in 1 tsp ranch seasoning. Pour this over the bowl with the potatoes, onions, and garlic. Then, transfer it into your crockpot.

Step 3: In 2 tbsp ranch seasoning, coat the pork loin. In the crockpot, place the pork loin roast, fat-side down, and top with the rest of the 2 tbsp minced garlic cloves and 4 tbsp butter.

Step 4: Cover the crockpot and set to cook for 6 to 8 hours on low until the internal temperature of the pork reaches 145 degrees and the potatoes are fork-tender.

June 2, 2022 0 comment
0 FacebookTwitterPinterestEmail
General Recipes

Creamy Garlic Pesto Chicken

by Rebecca June 2, 2022
written by Rebecca

PREP TIME: 15 MINS | COOK TIME: 20 MINS | YIELD: 4 servings

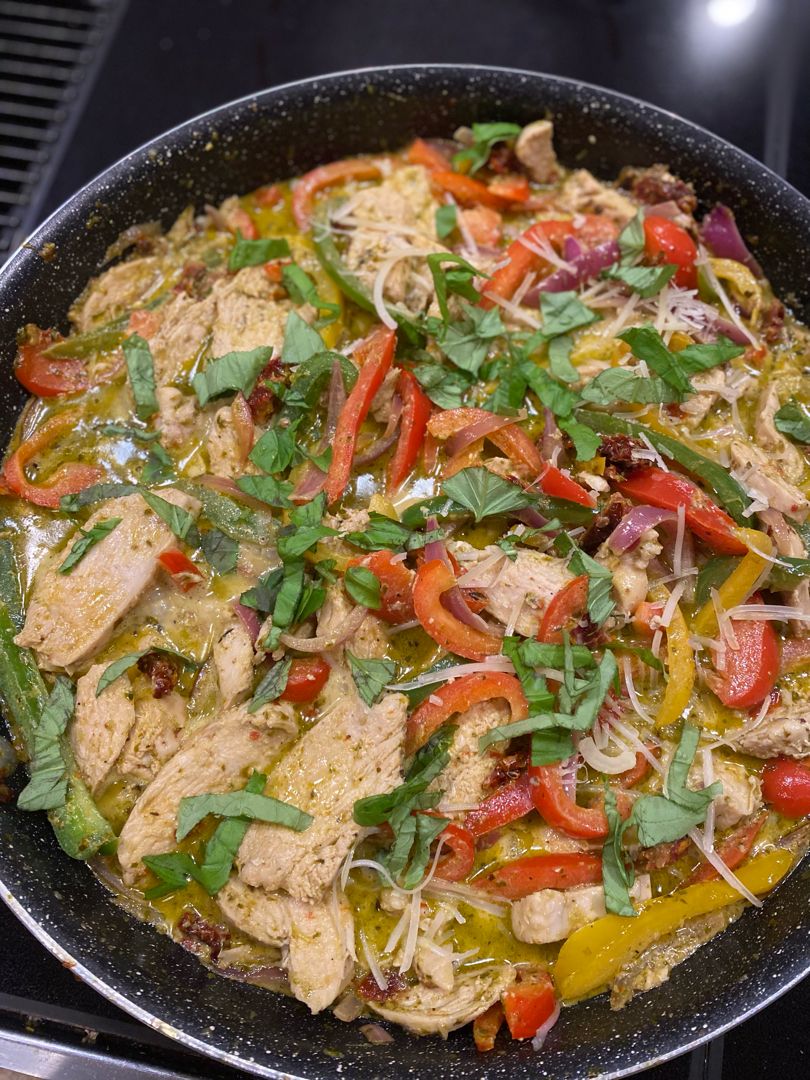
Creamy, scrumptious, and very easy to throw together. This creamy garlic pesto chicken is an amazing weeknight meal perfect for busy days. Serve this over pasta, rice, zucchini noodles, or bulgur for a filling dinner any time!

INGREDIENTS

3 garlic cloves, minced

3-4 chicken breasts, boneless, skinless

1/2 tsp Italian seasoning

1/2 red onion

1/2 c. sun-dried tomatoes, drained of most oil, chopped (keep the drained oil for cooking)

1/4 tsp red pepper flakes

3 bell peppers (1 red, 1/2 yellow, and 1/2 green)

1/2 c. heavy whipping cream

1/2 c. basil pesto

1/2 c. chicken stock

Parmesan, for garnish

Salt and fresh cracked pepper

Chopped fresh basil, for garnish

How to make Creamy Garlic Pesto Chicken

Step 1: For the pesto chicken, drizzle 1 tbsp of the drained tomato oil in a large nonstick skillet and add the Italian seasoning and crushed chili pepper. Once the oil is hot, add the chicken breasts and sear for about 4 to 5 minutes per side over medium heat until cooked through. Decrease the heat if the chicken begins to brown too much. Set the cooked chicken aside when done.

Step 2: In a mixing cup or bowl, whisk the sauce ingredients (basil pesto, cream, and chicken stock) until well blended and set aside.

Step 3: Add the onion to the same skillet along with the garlic and sun-dried tomato. Add a little more oil from the sun-dried tomato jar if the skillet is dry. Cook for about a minute over medium-high heat until aromatic. Next, add the bell peppers and cook further until slightly cooked but still crisp.

Step 4: To the skillet, add the prepared pesto sauce. Bring everything to a simmer. In the meantime, slice the chicken breasts into strips. Add the chicken strips back to the skillet and continue to cook for another 2 to 3 minutes or until heated through.

Step 5: Serve the creamy garlic pesto chicken immediately, garnished with Parmesan and basil. Enjoy over pasta, rice, zucchini noodles, or bulgur.

Nutrition Facts:

Energy 610.51 cal, Fat 32.43 g, Protein 67.98 g, Carbs 11.48 g, Saturated Fat 10.68 g, Polyunsat Fat 6.02 g, Monounsat Fat 12.59 g, Sugar 2.17 g, Cholesterol 199.73 mg, Sodium 360 mg, Potassium 1190.69 mg, Fiber 6.38 g

Creamy Garlic Pesto Chicken

Rebecca PREP TIME: 15 MINS | COOK TIME: 20 MINS | YIELD: 4 servings Creamy, scrumptious, and very easy to throw together. This creamy garlic pesto chicken is an amazing weeknight… General Recipes Creamy Garlic Pesto Chicken European Print This
Serves: 4 Prep Time: 15 mins Cooking Time: 20 mins 20 mins
Nutrition facts: 610.51 calories 32.43 fat
Rating: 5.0/5
( 1 voted )

Ingredients

  • 3 garlic cloves, minced
  • 3-4 chicken breasts, boneless, skinless
  • 1/2 tsp Italian seasoning
  • 1/2 red onion
  • 1/2 c. sun-dried tomatoes, drained of most oil, chopped (keep the drained oil for cooking)
  • 1/4 tsp red pepper flakes
  • 3 bell peppers (1 red, 1/2 yellow, and 1/2 green)
  • 1/2 c. heavy whipping cream
  • 1/2 c. basil pesto
  • 1/2 c. chicken stock
  • Parmesan, for garnish
  • Salt and fresh cracked pepper
  • Chopped fresh basil, for garnish

Instructions

Step 1: For the pesto chicken, drizzle 1 tbsp of the drained tomato oil in a large nonstick skillet and add the Italian seasoning and crushed chili pepper. Once the oil is hot, add the chicken breasts and sear for about 4 to 5 minutes per side over medium heat until cooked through. Decrease the heat if the chicken begins to brown too much. Set the cooked chicken aside when done.

Step 2: In a mixing cup or bowl, whisk the sauce ingredients (basil pesto, cream, and chicken stock) until well blended and set aside.

Step 3: Add the onion to the same skillet along with the garlic and sun-dried tomato. Add a little more oil from the sun-dried tomato jar if the skillet is dry. Cook for about a minute over medium-high heat until aromatic. Next, add the bell peppers and cook further until slightly cooked but still crisp.

Step 4: To the skillet, add the prepared pesto sauce. Bring everything to a simmer. In the meantime, slice the chicken breasts into strips. Add the chicken strips back to the skillet and continue to cook for another 2 to 3 minutes or until heated through.

Step 5: Serve the creamy garlic pesto chicken immediately, garnished with Parmesan and basil. Enjoy over pasta, rice, zucchini noodles, or bulgur.

June 2, 2022 0 comment
0 FacebookTwitterPinterestEmail
General Recipes

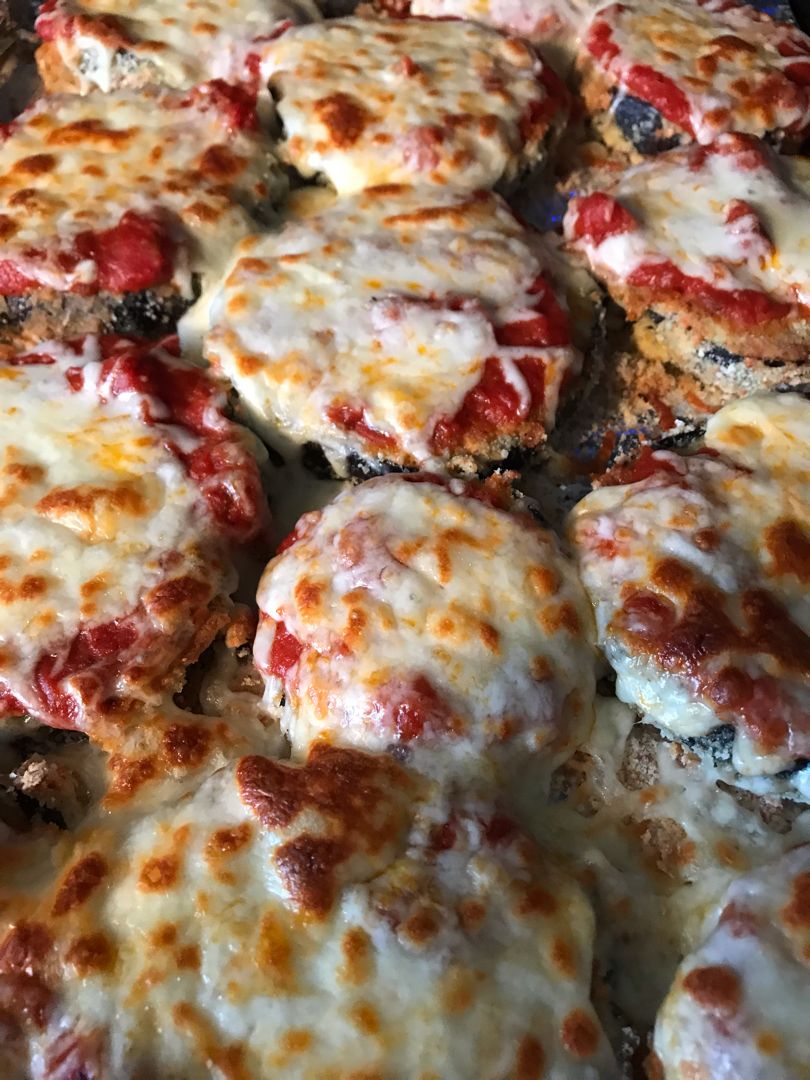
Sheet Pan Eggplant Parmesan

by Rebecca June 2, 2022
written by Rebecca

PREP TIME: 35 MINS | COOK TIME: 35 MINS | TOTAL TIME: 1 HR 10 MINS | YIELD: 6 servings

This sheet pan eggplant Parmesan has been my favorite eggplant recipe for years! It’s so easy to make using only a few simple pantry essentials. The breaded eggplant slices are baked until golden, topped with tomato sauce and loads of melty cheese. And I am super obsessed with the crisp and delicious cheese bits that fell onto the hot pan.

INGREDIENTS

2 eggs

1 medium eggplant, cut into 1/4” slices

8 oz. mozzarella cheese, shredded

1 c. panko breadcrumbs

1 tsp dried oregano

1/4 c. grated Parmesan cheese

1 tsp dried basil

1/2 tsp garlic powder

1 (25 oz.) jar of marinara sauce

1 tbsp water

julienned fresh basil, optional

2 tbsp olive oil

How to make Sheet Pan Eggplant Parmesan

Step 1: On paper towels, spread the sliced eggplant in one layer. Generously season with salt. Allow the eggplants to sit for about 15 minutes. After 15 minutes, flip the sliced eggplant and sprinkle the other side with salt. Let them sit for additional 15 minutes. Then, rinse the eggplant with water and pat them dry using clean paper towels.

Step 2: Prepare the oven. Preheat it to 375 degrees.

Step 3: In a shallow dish, place the panko breadcrumbs, Parmesan cheese, dried basil, dried oregano, and garlic. Mix well.

Step 4: Lightly beat the eggs and water in another dish.

Step 5: In the egg, dip the eggplant slices and dredge in the breadcrumb mixture, pressing the eggplant to evenly coat all sides.

Step 6: With olive oil, drizzle a foil-lined sheet pan. Spread the oil to cover the entire pan. In a single layer, place the breadcrumb eggplant. Place in the preheated oven and bake for about 15 minutes. Then, flip the eggplant slices and continue to bake for 10 minutes more.

Step 7: Onto each slice, spoon the sauce, and sprinkle with the shredded cheese. Resume baking for another 10 minutes or until the cheese has melted.

Step 8: Before serving, top the eggplant slices with some fresh basil. Enjoy!

Sheet Pan Eggplant Parmesan

Rebecca PREP TIME: 35 MINS | COOK TIME: 35 MINS | TOTAL TIME: 1 HR 10 MINS | YIELD: 6 servings This sheet pan eggplant Parmesan has been my favorite eggplant… General Recipes Sheet Pan Eggplant Parmesan European Print This
Serves: 6 Prep Time: 35 mins Cooking Time: 35 mins 35 mins
Nutrition facts: 200 calories 20 grams fat
Rating: 5.0/5
( 1 voted )

Ingredients

  • 2 eggs
  • 1 medium eggplant, cut into 1/4” slices
  • 8 oz. mozzarella cheese, shredded
  • 1 c. panko breadcrumbs
  • 1 tsp dried oregano
  • 1/4 c. grated Parmesan cheese
  • 1 tsp dried basil
  • 1/2 tsp garlic powder
  • 1 (25 oz.) jar of marinara sauce
  • 1 tbsp water
  • julienned fresh basil, optional
  • 2 tbsp olive oil

Instructions

Step 1: On paper towels, spread the sliced eggplant in one layer. Generously season with salt. Allow the eggplants to sit for about 15 minutes. After 15 minutes, flip the sliced eggplant and sprinkle the other side with salt. Let them sit for additional 15 minutes. Then, rinse the eggplant with water and pat them dry using clean paper towels.

Step 2: Prepare the oven. Preheat it to 375 degrees.

Step 3: In a shallow dish, place the panko breadcrumbs, Parmesan cheese, dried basil, dried oregano, and garlic. Mix well.

Step 4: Lightly beat the eggs and water in another dish.

Step 5: In the egg, dip the eggplant slices and dredge in the breadcrumb mixture, pressing the eggplant to evenly coat all sides.

Step 6: With olive oil, drizzle a foil-lined sheet pan. Spread the oil to cover the entire pan. In a single layer, place the breadcrumb eggplant. Place in the preheated oven and bake for about 15 minutes. Then, flip the eggplant slices and continue to bake for 10 minutes more.

Step 7: Onto each slice, spoon the sauce, and sprinkle with the shredded cheese. Resume baking for another 10 minutes or until the cheese has melted.

Step 8: Before serving, top the eggplant slices with some fresh basil. Enjoy!

June 2, 2022 0 comment
0 FacebookTwitterPinterestEmail
General Recipes

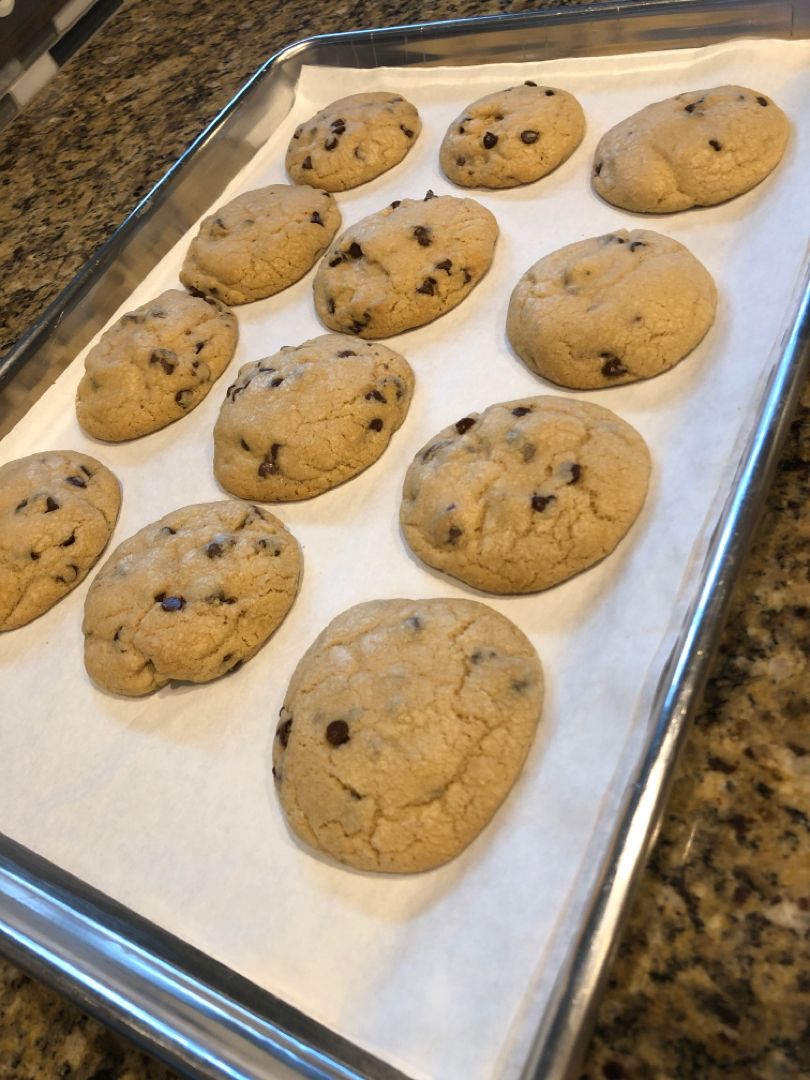
30 Minute Chewy Chocolate Chip Cookies

by Rebecca June 2, 2022
written by Rebecca

Prep time: 10 mins | Cook time: 9 mins | Total time: 19 mins | Servings: 38

These are very impressive cookies – perfectly soft in the middle and crisp on the edge. Not to mention the insanely chewy center! Easily throw these chewy chocolate chip cookies using only a few simple ingredients in less than thirty minutes.

Ingredients

2 large eggs

1 c. salted butter, 2 sticks

1/2 c. white sugar

3 c. flour, spooned and leveled

1 c. light brown sugar, packed

1 & 1/2 tsp baking soda

1 tsp vanilla extract

2 c. semi-sweet chocolate chips

3/4 tsp salt

How to make 30 Minute Chewy Chocolate Chip Cookies

Step 1: Prepare the oven. Preheat it to 350 degrees F. Using the parchment paper, line 2 large baking sheets. You can also use a silicone baking mat in place of the parchment paper.

Step 2: Place the butter in a large bowl or stand mixer. Beat until fluffy, scraping the sides of the bowl as needed. Cold butter if using a stand mixer and beat until creamy. However, if using an electric mixer, make sure to use softened butter. Add the brown and white sugar to the creamy butter and beat for at least a minute until fluffy. Halfway through, scrape the sides. Next, add the vanilla along with 1 egg. Beat again, scraping the sides of the bowl. Lastly, add the flour, but DO NOT mix yet. Into the flour, stir the baking soda and salt using a small spoon. Set the mixer on low speed and beat until there are only a few streaks of white flour left. Keep in mind to stop mixing once the flour is mostly blended. Mix in the chocolate chips and make sure not to over-mix the batter.

Step 3: To shape the cookie dough, you can use your hands, an ice cream scoop, or a medium cookie scoop. Form the cookie dough into a size of a golf ball. On the prepared baking sheet, place 12 cookie dough balls around 2 inches apart. Place in the preheated oven and bake for about 9 minutes. Note that the baking time varies depending on your oven and the size of your cookies. You want to make sure to remove the cookies from the oven once the top is very pale and the edges just barely started browning.

Step 4: Gently push each cookie together using two spoons immediately after taking them out of the oven. To get a nice circle shape, quickly work to shape all the cookies before the edges crisp up. You can also press extra chocolate chips on top of each cookie if desired.

Step 5: Allow the cookies to cool for a few minutes on the pan. After the cookies are set, transfer them to a cooling rack.

Step 6: Serve the cookies and dip them in milk if desired. Enjoy!

Note:

Feel free to make the dough in advance and simply freeze it. Into balls, form the dough and place in a Ziploc, then freeze for up to 3 months. When ready to bake, place the frozen cookie dough into a preheated oven and bake as instructed adding about 2 to 3 minutes to the bake time.

Nutrition Facts:

Serving: 1 cookie, calories: 170 kcal, carbohydrates: 21 g, protein: 2 g, fat: 9 g, saturated fat: 5 g, polyunsaturated fat: 1 g, monounsaturated fat: 2 g, trans fat: 1 g, cholesterol: 23 mg, sodium: 138 mg, potassium: 77 mg, fiber: 1 g, sugar: 12 g, vitamin a: 168 iu, calcium: 15 mg, iron: 1 mg

30 Minute Chewy Chocolate Chip Cookies

Rebecca Prep time: 10 mins | Cook time: 9 mins | Total time: 19 mins | Servings: 38 These are very impressive cookies – perfectly soft in the middle and crisp… General Recipes 30 Minute Chewy Chocolate Chip Cookies European Print This
Serves: 38 Prep Time: 10 mins Cooking Time: 9 mins 9 mins
Nutrition facts: 170 calories 9 fat
Rating: 5.0/5
( 1 voted )

Ingredients

  • 2 large eggs
  • 1 c. salted butter, 2 sticks
  • 1/2 c. white sugar
  • 3 c. flour, spooned and leveled
  • 1 c. light brown sugar, packed
  • 1 & 1/2 tsp baking soda
  • 1 tsp vanilla extract
  • 2 c. semi-sweet chocolate chips
  • 3/4 tsp salt

Instructions

Step 1: Prepare the oven. Preheat it to 350 degrees F. Using the parchment paper, line 2 large baking sheets. You can also use a silicone baking mat in place of the parchment paper.

Step 2: Place the butter in a large bowl or stand mixer. Beat until fluffy, scraping the sides of the bowl as needed. Cold butter if using a stand mixer and beat until creamy. However, if using an electric mixer, make sure to use softened butter. Add the brown and white sugar to the creamy butter and beat for at least a minute until fluffy. Halfway through, scrape the sides. Next, add the vanilla along with 1 egg. Beat again, scraping the sides of the bowl. Lastly, add the flour, but DO NOT mix yet. Into the flour, stir the baking soda and salt using a small spoon. Set the mixer on low speed and beat until there are only a few streaks of white flour left. Keep in mind to stop mixing once the flour is mostly blended. Mix in the chocolate chips and make sure not to over-mix the batter.

Step 3: To shape the cookie dough, you can use your hands, an ice cream scoop, or a medium cookie scoop. Form the cookie dough into a size of a golf ball. On the prepared baking sheet, place 12 cookie dough balls around 2 inches apart. Place in the preheated oven and bake for about 9 minutes. Note that the baking time varies depending on your oven and the size of your cookies. You want to make sure to remove the cookies from the oven once the top is very pale and the edges just barely started browning.

Step 4: Gently push each cookie together using two spoons immediately after taking them out of the oven. To get a nice circle shape, quickly work to shape all the cookies before the edges crisp up. You can also press extra chocolate chips on top of each cookie if desired.

Step 5: Allow the cookies to cool for a few minutes on the pan. After the cookies are set, transfer them to a cooling rack.

Step 6: Serve the cookies and dip them in milk if desired. Enjoy!

Notes

Feel free to make the dough in advance and simply freeze it. Into balls, form the dough and place in a Ziploc, then freeze for up to 3 months. When ready to bake, place the frozen cookie dough into a preheated oven and bake as instructed adding about 2 to 3 minutes to the bake time.

June 2, 2022 0 comment
0 FacebookTwitterPinterestEmail
General Recipes

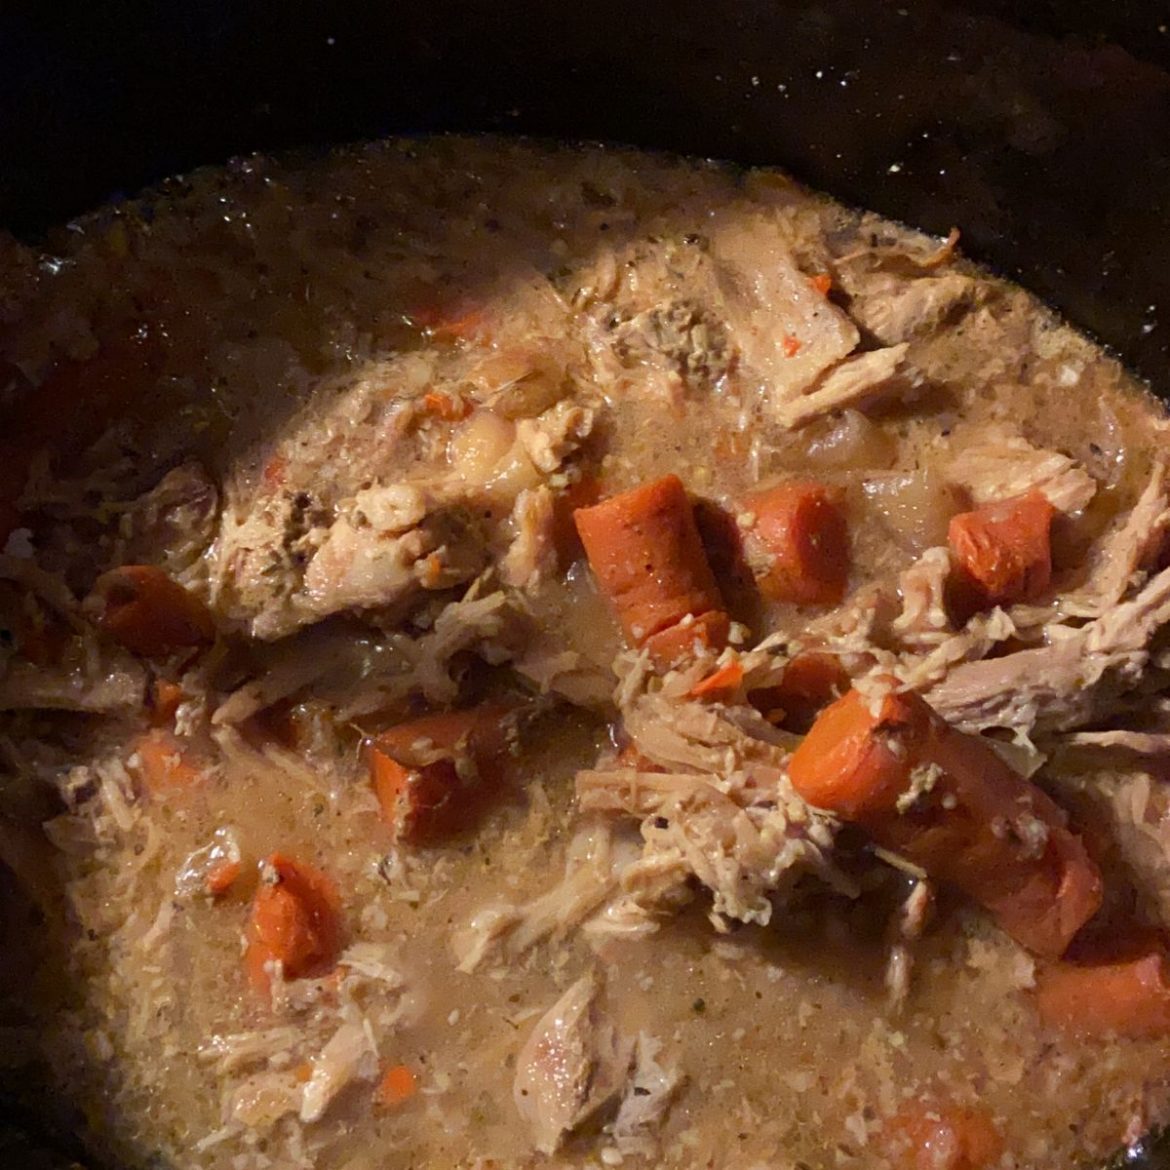
Crock Pot Pork Roast Recipe

by Rebecca June 2, 2022
written by Rebecca

PREP TIME: 10 mins | COOK TIME: 8 hrs | TOTAL TIME: 8 hrs 10 mins | SERVINGS: 6

Packed with flavor, tender pork roast. The perfect weeknight meal that you can easily make in your crockpot. Fall-apart tender pork roast served with masked potatoes and steamed/roasted veggies for a filling and scrumptious meal that your entire family will love!

My mom makes the best pork roast. The pork roast is a huge part of my childhood. Whenever we have big lunches, pork roast is always part of the menu. It is a staple and a favorite. I grew up with my mom’s pork roast. Throw in your favorite sides, and you have a no-frills meal that everyone will surely ask for again and again!

I love this recipe as I can easily prep this, leave everything to my crockpot, and come back to the most amazing dish. And do not forget the gravy! It makes a whole lot of difference!

INGREDIENTS

1/2 onion, cut into chunks

2 to 3 pounds of pork roast

1/2 tsp Italian Seasoning

4 c. chicken stock

1 tsp minced Garlic

2 tbsp cornstarch

1/4 c. water for the gravy (or chicken broth if preferred)

1 16-ounces package of baby carrots

1/2 tsp salt

1/2 tsp pepper

How to make Crock Pot Pork Roast

Step 1: Into your crockpot, add all the ingredients except for the cornstarch and 1/4 c. of water. Cover the pot and set to cook on low for 8 to 10 hours.

Step 2: After 8 to 10 hours, shred the pork roast.

Step 3: To make the gravy, whisk 1/4 c water and cornstarch in a small bowl. Scoop 2 cups of the liquid from the pot and pour into a saucepan. Then, stir in the water and cornstarch mixture. Bring the sauce to a boil for about 3 to 5 minutes, stirring occasionally, until the sauce starts to thicken.

Step 4: Over the roast and carrots, drizzle the gravy. Enjoy!

Note:

For this recipe, you can add potatoes or simply serve the pork roast with mashed potatoes. Adjust the salt and pepper according to taste.

NUTRITION FACTS:

Calories 405 kcal, Carbohydrates 16g, Protein 55g, Fat 11g, Saturated Fat 3g, Cholesterol 147mg, Sodium 590mg, Potassium 1286mg, Fiber 2g, Sugar 6g, Vitamin A 13420IU, Vitamin C 5.8mg, Calcium 47mg, Iron 1.9mg

Crock Pot Pork Roast Recipe

Rebecca PREP TIME: 10 mins | COOK TIME: 8 hrs | TOTAL TIME: 8 hrs 10 mins | SERVINGS: 6 Packed with flavor, tender pork roast. The perfect weeknight meal that… General Recipes Crock Pot Pork Roast Recipe European Print This
Serves: 6 Prep Time: 10 mins Cooking Time: 8 hrs 8 hrs
Nutrition facts: 405 calories 11 fat
Rating: 5.0/5
( 1 voted )

Ingredients

  • 1/2 onion, cut into chunks
  • 2 to 3 pounds of pork roast
  • 1/2 tsp Italian Seasoning
  • 4 c. chicken stock
  • 1 tsp minced Garlic
  • 2 tbsp cornstarch
  • 1/4 c. water for the gravy (or chicken broth if preferred)
  • 1 16-ounces package of baby carrots
  • 1/2 tsp salt
  • 1/2 tsp pepper

Instructions

Step 1: Into your crockpot, add all the ingredients except for the cornstarch and 1/4 c. of water. Cover the pot and set to cook on low for 8 to 10 hours.

Step 2: After 8 to 10 hours, shred the pork roast.

Step 3: To make the gravy, whisk 1/4 c water and cornstarch in a small bowl. Scoop 2 cups of the liquid from the pot and pour into a saucepan. Then, stir in the water and cornstarch mixture. Bring the sauce to a boil for about 3 to 5 minutes, stirring occasionally, until the sauce starts to thicken.

Step 4: Over the roast and carrots, drizzle the gravy. Enjoy!

Notes

For this recipe, you can add potatoes or simply serve the pork roast with mashed potatoes. Adjust the salt and pepper according to taste.

June 2, 2022 0 comment
0 FacebookTwitterPinterestEmail
General Recipes

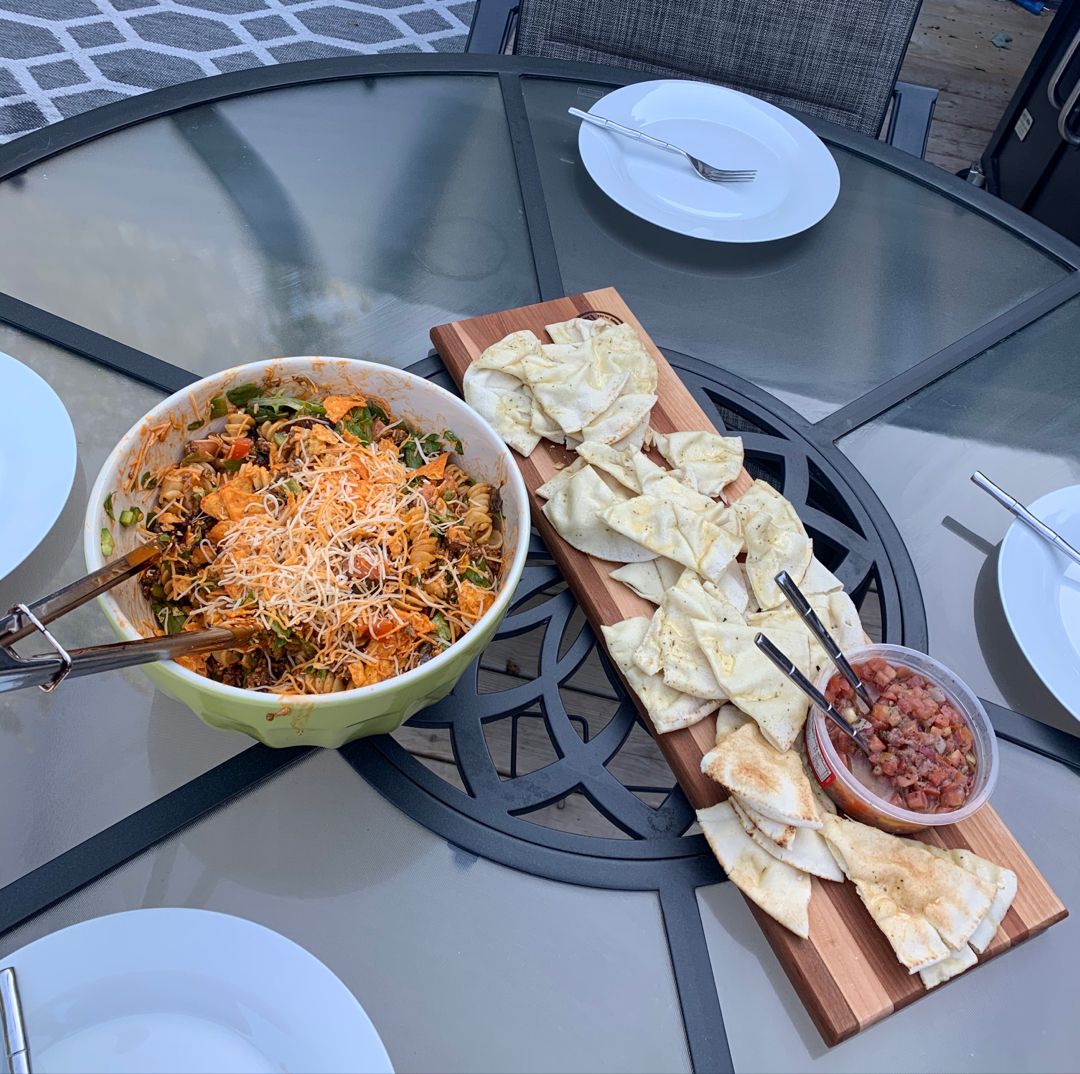
Taco Pasta Salad

by Rebecca June 2, 2022
written by Rebecca

PREP TIME: 10 MINS | COOK TIME: 30 MINS | TOTAL TIME: 40 MINS | SERVINGS: 16

Summer will never be over with this Taco Pasta Salad. It’s a delicious salad made with Mexican flavors, seasoned ground beef, crunchy nacho cheese chips, and a delightful creamy dressing! It’s my favorite for potlucks, BBQs, and picnics.

For this recipe, I bought a bag of already shredded lettuce to make life easier. You can also make this salad in advance. Prep everything except for the dressing and chips. So the pasta salad stays extra crunchy, mix the dressing into the salad right before serving and top with the crushed chips.

This taco pasta salad is packed with impressive flavors. A fun twist is using pasta noodles instead of taco shells. The dressing is super amazing as it binds everything. It adds sweetness and creaminess to the salad. If you want to make a vegetarian salad, simply swap the ground beef with some black beans or kidney beans for more protein!

Ingredients

1 pound of ground beef

16 ounces rotini pasta (or other medium-sized noodles)

3 tablespoons taco seasoning

1 c. diced green bell pepper

4 c. shredded lettuce

2-3 c. Mexican Style Shredded Cheese

15 ounces French Dressing

1.5 c. chopped tomatoes

chopped cilantro (optional)

3 c. slightly crushed nacho cheese or tortilla chips

How to make Taco Pasta Salad

Step 1: Following the package directions, cook the rotini noodles in a large pot of boiling water. Drain when done and rinse in cold water.

Step 2: Cook the ground beef in a large skillet until no longer pink. Drain the excess grease. Then, add the taco seasoning and mix well.

Step 3: Place the pasta, ground beef, tomatoes, bell pepper, cheese, and lettuce in a large bowl. Next, pour over the French Dressing. Toss well, then cover the bowl and place in the fridge until ready to serve.

Step 4: When serving, top the salad with some crushed chips. If desired, garnish with some chopped cilantro. Enjoy!

Nutrition Facts:

Calories: 470 kcal, Carbohydrates: 41g, Protein: 14g, Fat: 28g, Saturated Fat: 8g, Polyunsaturated Fat: 12g, Monounsaturated Fat: 9g, Trans Fat: 1g, Cholesterol: 33mg, Sodium: 649mg, Potassium: 359mg, Fiber: 4g, Sugar: 7g, Vitamin A: 411IU, Vitamin C: 11mg, Calcium: 186mg, Iron: 2mg

Taco Pasta Salad

Rebecca PREP TIME: 10 MINS | COOK TIME: 30 MINS | TOTAL TIME: 40 MINS | SERVINGS: 16 Summer will never be over with this Taco Pasta Salad. It’s a delicious… General Recipes Taco Pasta Salad European Print This
Serves: 16 Prep Time: 10 mins Cooking Time: 30 mins 30 mins
Nutrition facts: 470 calories 28 fat
Rating: 5.0/5
( 1 voted )

Ingredients

  • 1 pound of ground beef
  • 16 ounces rotini pasta (or other medium-sized noodles)
  • 3 tablespoons taco seasoning
  • 1 c. diced green bell pepper
  • 4 c. shredded lettuce
  • 2-3 c. Mexican Style Shredded Cheese
  • 15 ounces French Dressing
  • 1.5 c. chopped tomatoes
  • chopped cilantro (optional)
  • 3 c. slightly crushed nacho cheese or tortilla chips

Instructions

Step 1: Following the package directions, cook the rotini noodles in a large pot of boiling water. Drain when done and rinse in cold water.

Step 2: Cook the ground beef in a large skillet until no longer pink. Drain the excess grease. Then, add the taco seasoning and mix well.

Step 3: Place the pasta, ground beef, tomatoes, bell pepper, cheese, and lettuce in a large bowl. Next, pour over the French Dressing. Toss well, then cover the bowl and place in the fridge until ready to serve.

Step 4: When serving, top the salad with some crushed chips. If desired, garnish with some chopped cilantro. Enjoy!

June 2, 2022 0 comment
0 FacebookTwitterPinterestEmail
General Recipes

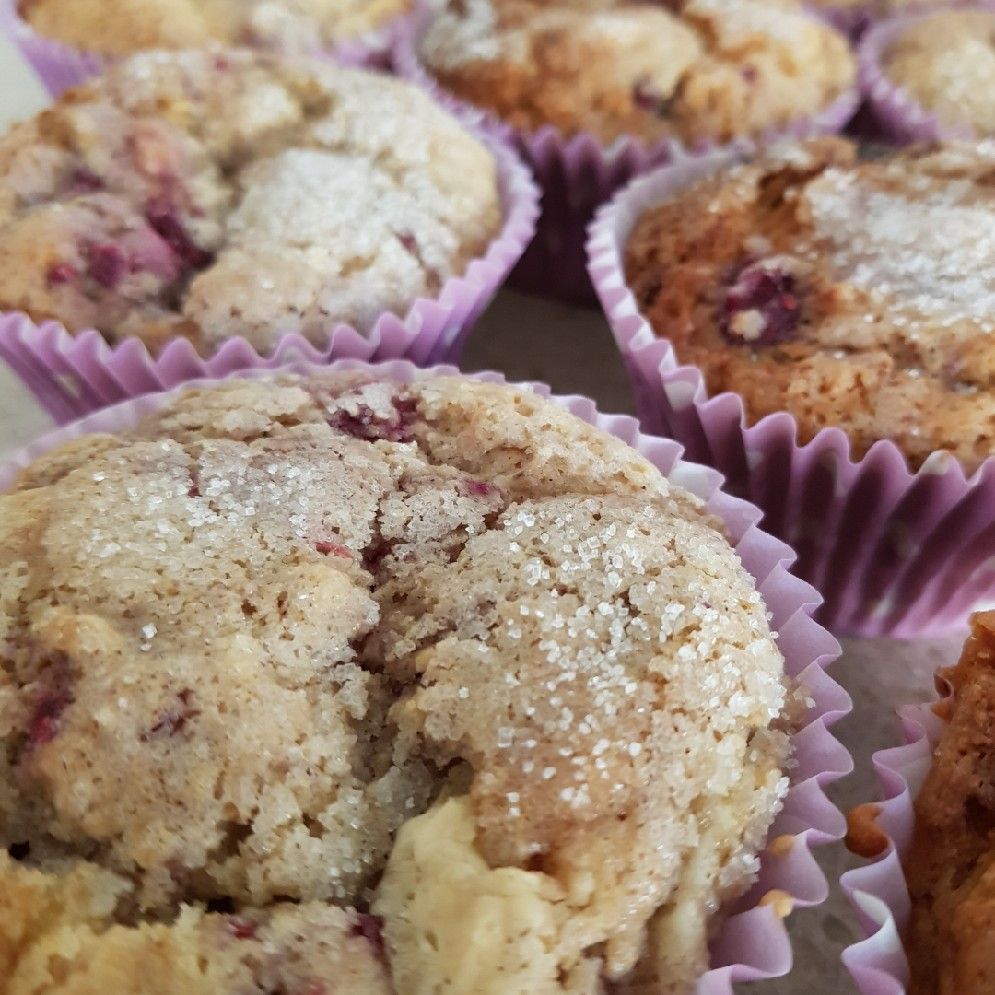
Jumbo Raspberry Chocolate Chip Muffins

by Rebecca June 2, 2022
written by Rebecca

Prep Time: 15 mins | Cook Time: 30 mins | Total Time: 45 mins | Yield: 6 jumbo muffins or 15 standard muffins

These moist and dense bakery-style muffins are very impressive. They are so good and bursting with juicy raspberries and loaded with chocolate chips. You’ll also love the slightly crunchy muffin tops!

Ingredients

3 tsp baking powder

1/4 tsp baking soda

1 tsp pure vanilla extract

3 c. (375 grams) all-purpose flour (spoon & leveled)

1/3 c. (80 grams) sour cream or yoghurt, at room temperature

1/3 c. (80ml) vegetable oil

1 c. (200 grams) granulated sugar

2 large eggs, at room temperature

1 c. (240ml) milk, at room temperature

3/4 c. (135 grams) semi-sweet chocolate chips

1/3 c. (5 tbsp; 80 grams) unsalted butter, melted and slightly cooled

optional: coarse sugar for sprinkling

1 and 1/4 c. (170 grams) fresh or frozen raspberries (do not thaw)

1/2 tsp salt

How to make Jumbo Raspberry Chocolate Chip Muffins

Step 1: Prepare the oven. Preheat it to 425 degrees F or 218 degrees C. Using butter or nonstick spray, generously grease a jumbo 6-count muffin pan. Alternately, you can line them with muffin liners. Set aside.

Step 2: In a large bowl, place the flour, baking powder, baking soda, and salt. Mix well and set aside.

Step 3: Combine the melted butter with oil, sugar, and eggs until well blended. Stir in the sour cream followed by the milk and vanilla extract. At this point, the mixture should be pale yellow.

Step 4: Into the dry ingredients, pour the wet ingredients and mix using a rubber spatula or wooden spoon until blended. If needed, use a whisk to remove any large lumps of flour. Make sure not to overmix the batter. Then, gently fold in the chocolate chips followed by the raspberries.

Step 5: Between each muffin cup, divide the batter, filling to the top. On top of each batter, sprinkle the coarse sugar (optional, but recommended for extra crunch). Place in the preheated oven and bake for about 5 minutes. While the muffins are still in the oven, adjust the temperature to 350 degrees F or 177 degrees C and continue baking for another 25 to 30 minutes or until the tops turned lightly golden brown and the center of the muffins are set. To check for doneness, insert a toothpick in the center of the muffin. Once it comes out clean, the muffins are done.

Step 6: Remove from the oven when done and allow the muffins to cool in the pan for about 10 minutes. Store any leftover at room temperature, covered, for up to 5 days, or keep in the fridge for up to 1 week. You can also freeze the muffins for up to 3 months. To serve after freezing, thaw the muffins in the fridge or on the counter first.

Jumbo Raspberry Chocolate Chip Muffins

Rebecca Prep Time: 15 mins | Cook Time: 30 mins | Total Time: 45 mins | Yield: 6 jumbo muffins or 15 standard muffins These moist and dense bakery-style muffins are… General Recipes Jumbo Raspberry Chocolate Chip Muffins European Print This
Serves: 6 Prep Time: 15 mins Cooking Time: 30 mins 30 mins
Nutrition facts: 200 calories 20 grams fat
Rating: 5.0/5
( 1 voted )

Ingredients

  • 3 tsp baking powder
  • 1/4 tsp baking soda
  • 1 tsp pure vanilla extract
  • 3 c. (375 grams) all-purpose flour (spoon & leveled)
  • 1/3 c. (80 grams) sour cream or yoghurt, at room temperature
  • 1/3 c. (80ml) vegetable oil
  • 1 c. (200 grams) granulated sugar
  • 2 large eggs, at room temperature
  • 1 c. (240ml) milk, at room temperature
  • 3/4 c. (135 grams) semi-sweet chocolate chips
  • 1/3 c. (5 tbsp; 80 grams) unsalted butter, melted and slightly cooled
  • optional: coarse sugar for sprinkling
  • 1 and 1/4 c. (170 grams) fresh or frozen raspberries (do not thaw)
  • 1/2 tsp salt

Instructions

Step 1: Prepare the oven. Preheat it to 425 degrees F or 218 degrees C. Using butter or nonstick spray, generously grease a jumbo 6-count muffin pan. Alternately, you can line them with muffin liners. Set aside.

Step 2: In a large bowl, place the flour, baking powder, baking soda, and salt. Mix well and set aside.

Step 3: Combine the melted butter with oil, sugar, and eggs until well blended. Stir in the sour cream followed by the milk and vanilla extract. At this point, the mixture should be pale yellow.

Step 4: Into the dry ingredients, pour the wet ingredients and mix using a rubber spatula or wooden spoon until blended. If needed, use a whisk to remove any large lumps of flour. Make sure not to overmix the batter. Then, gently fold in the chocolate chips followed by the raspberries.

Step 5: Between each muffin cup, divide the batter, filling to the top. On top of each batter, sprinkle the coarse sugar (optional, but recommended for extra crunch). Place in the preheated oven and bake for about 5 minutes. While the muffins are still in the oven, adjust the temperature to 350 degrees F or 177 degrees C and continue baking for another 25 to 30 minutes or until the tops turned lightly golden brown and the center of the muffins are set. To check for doneness, insert a toothpick in the center of the muffin. Once it comes out clean, the muffins are done.

Step 6: Remove from the oven when done and allow the muffins to cool in the pan for about 10 minutes. Store any leftover at room temperature, covered, for up to 5 days, or keep in the fridge for up to 1 week. You can also freeze the muffins for up to 3 months. To serve after freezing, thaw the muffins in the fridge or on the counter first.

June 2, 2022 0 comment
0 FacebookTwitterPinterestEmail
General Recipes

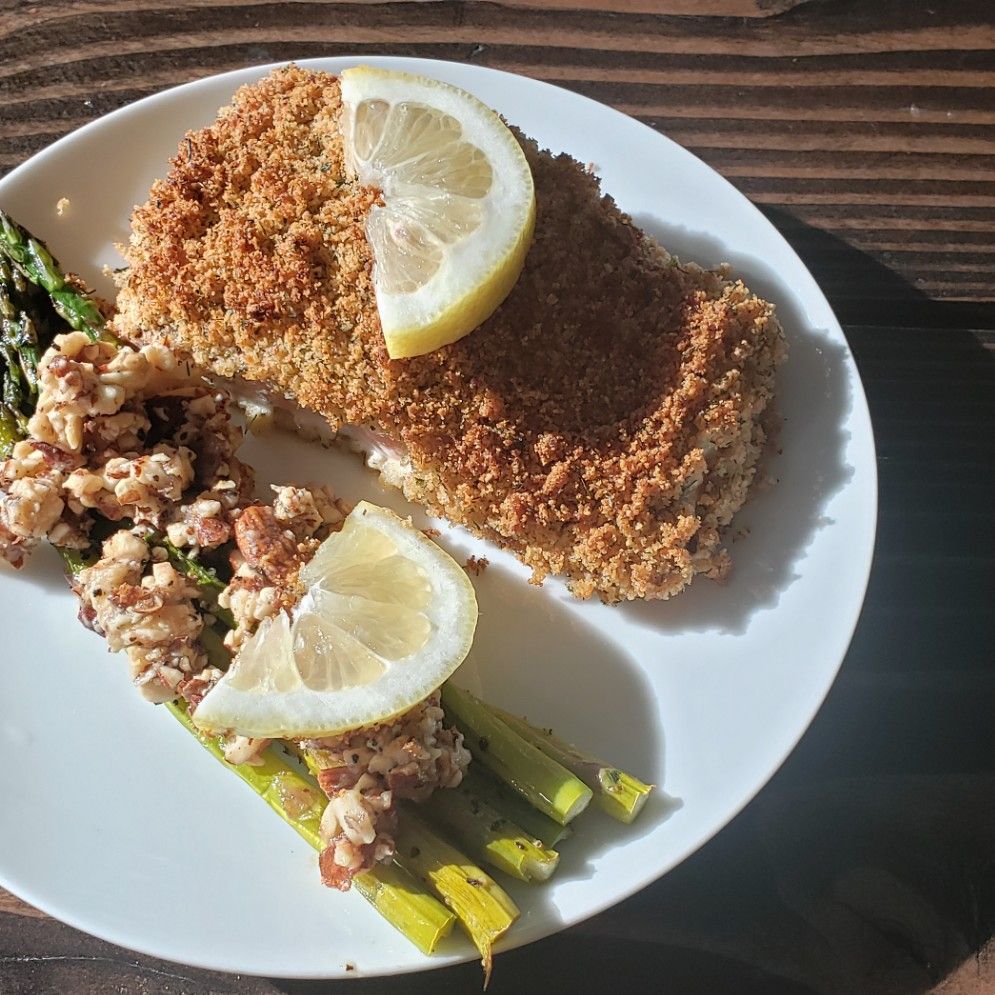
Panko Crusted Salmon

by Rebecca June 1, 2022
written by Rebecca

Prep Time: 10 mins | Cook Time: 20 mins | Total Time: 30 mins | Servings: 4

Whenever I have unexpected guests coming over, this panko-crusted salmon has been one of my favorite go-to to serve. It’s easy, quick, and guarantees a delicious meal that everyone loves. I pair this up with some veggies, grains/potatoes, pasta, or even salad. It’s a great dish that you can serve almost any meal.

Ingredients

3 tablespoons butter, melted

2 pounds of salmon fillets

3 tablespoons sour cream

1/2 c. grated Parmesan cheese

1 garlic clove, grated or pressed

1 c. panko bread crumbs

1 tablespoon dried dill

3 tablespoons mayonnaise

1 tablespoon lemon juice

salt & pepper to taste

How to make Panko Crusted Salmon

Step 1: In a small bowl, place 3 tablespoons mayonnaise, 3 tablespoons sour cream, 1 tablespoon sour cream, 1 tablespoon lemon juice, and 1 pressed garlic clove. Mix well until combined and set aside.

Step 2: Sprinkle with salt and pepper on all sides of the salmon fillets. On a rimmed baking sheet lined with foil, lay the salmon fillets. On top of each fillet, spread the mayonnaise mixture.

Step 3: Place 1 c. panko bread crumbs, half c. Parmesan cheese, 1 tablespoon dried dill, and 3 tablespoons melted butter in another bowl. Mix well using a fork until blended.

Step 4: Over the mayonnaise on each salmon fillet, evenly spread the bread crumb mixture. Place in the oven and bake for about 15 to 20 minutes at 400 degrees F. Note that the cooking time varies depending on the thickness of the fillet. The salmon is done once its internal temperature reached at least 145 degrees F.

Notes:

If needed, make this with a whole salon fillet instead of small fillet cuts and adjust the baking time accordingly.

To make this salmon dish in advance, slather the mayonnaise mixture hours before topping with the crust and baking.

If using cold-out salmon, keep in mind that the baking time is longer.

Nutrition Facts:

Calories: 603 kcal | Carbohydrates: 12g | Protein: 52g | Fat: 36g | Saturated Fat: 12g | Cholesterol: 167mg | Sodium: 551mg | Potassium: 1194mg | Sugar: 1g | Vitamin A: 565IU | Vitamin C: 2.1mg | Calcium: 220mg | Iron: 3mg

Panko Crusted Salmon

Rebecca Prep Time: 10 mins | Cook Time: 20 mins | Total Time: 30 mins | Servings: 4 Whenever I have unexpected guests coming over, this panko-crusted salmon has been one… General Recipes Panko Crusted Salmon European Print This
Serves: 4 Prep Time: 10 mins Cooking Time: 20 mins 20 mins
Nutrition facts: 603 calories 36 fat
Rating: 5.0/5
( 1 voted )

Ingredients

  • 3 tablespoons butter, melted
  • 2 pounds of salmon fillets
  • 3 tablespoons sour cream
  • 1/2 c. grated Parmesan cheese
  • 1 garlic clove, grated or pressed
  • 1 c. panko bread crumbs
  • 1 tablespoon dried dill
  • 3 tablespoons mayonnaise
  • 1 tablespoon lemon juice
  • salt & pepper to taste

Instructions

Step 1: In a small bowl, place 3 tablespoons mayonnaise, 3 tablespoons sour cream, 1 tablespoon sour cream, 1 tablespoon lemon juice, and 1 pressed garlic clove. Mix well until combined and set aside.

Step 2: Sprinkle with salt and pepper on all sides of the salmon fillets. On a rimmed baking sheet lined with foil, lay the salmon fillets. On top of each fillet, spread the mayonnaise mixture.

Step 3: Place 1 c. panko bread crumbs, half c. Parmesan cheese, 1 tablespoon dried dill, and 3 tablespoons melted butter in another bowl. Mix well using a fork until blended.

Step 4: Over the mayonnaise on each salmon fillet, evenly spread the bread crumb mixture. Place in the oven and bake for about 15 to 20 minutes at 400 degrees F. Note that the cooking time varies depending on the thickness of the fillet. The salmon is done once its internal temperature reached at least 145 degrees F.

Notes

If needed, make this with a whole salon fillet instead of small fillet cuts and adjust the baking time accordingly. To make this salmon dish in advance, slather the mayonnaise mixture hours before topping with the crust and baking. If using cold-out salmon, keep in mind that the baking time is longer.

June 1, 2022 0 comment
0 FacebookTwitterPinterestEmail
Newer Posts
Older Posts

Popular Posts

  • 1

    Crispy Crunchy Parmesan Potatoes

    March 21, 2020
  • 2

    CROCK POT SMOTHERED PORK CHOPS

    March 21, 2020
  • Facebook
  • Twitter

@2019 - All Right Reserved.


Back To Top