Cook it once
  • Home
  • Privacy Policy
  • Recipes
    • KETO
    • LC
    • WW
  • Tips
  • Contact
Cook it once
  • Home
  • Privacy Policy
  • Recipes
    • KETO
    • LC
    • WW
  • Tips
  • Contact
Category:

General Recipes

General Recipes

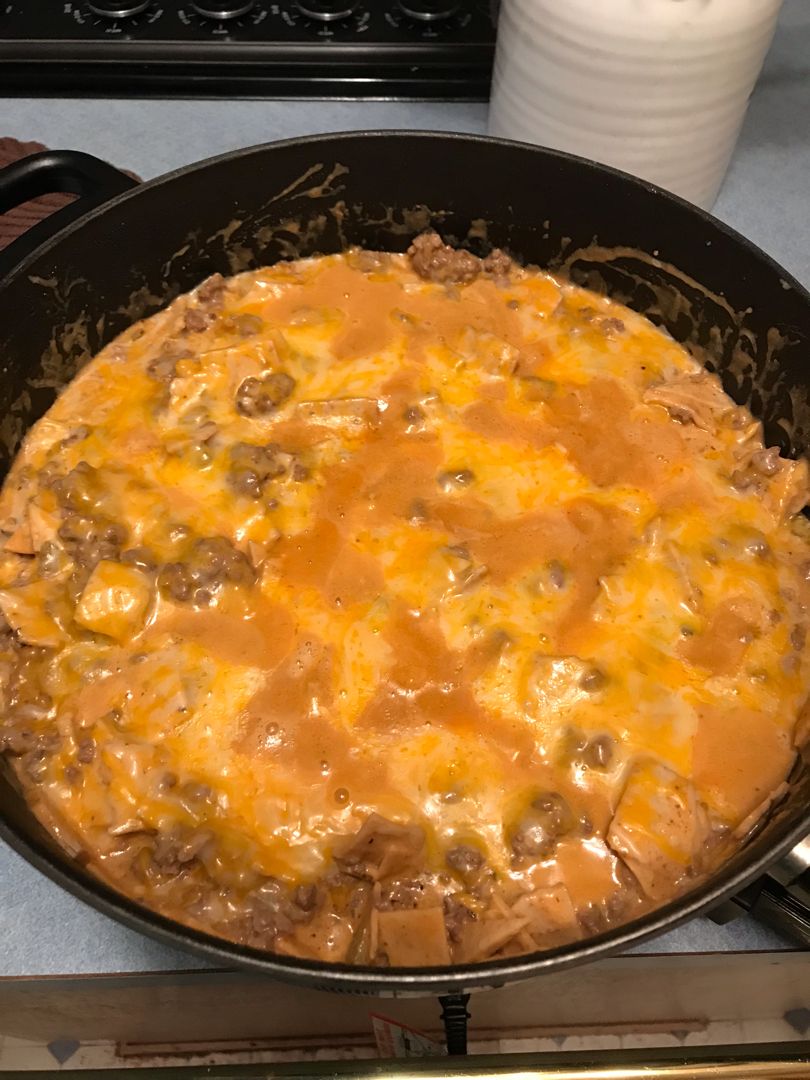
One Pan Sour Cream Chicken Enchilada Skillet

by Rebecca June 4, 2022
written by Rebecca

Prep Time: 5 mins | Cook Time: 30 mins | Total Time: 35 mins | Servings: 6

I love the chicken enchilada, but let’s face it, we do not always have time to roll up enchiladas. This sour cream chicken enchilada made in one pan is a great alternative. Incredibly easy and quick to whip up with less fuss. This enchilada skillet guarantees the best weeknight meal, excellent for your entire family. Enjoy the zesty, creamy, and cheesy goodness of this one-pan sour cream chicken enchilada skillet anytime with this easy recipe!

Ingredients

3 whole boneless, skinless chicken breast halves

3 tbsp butter

2 c. chicken broth

¼ tsp oregano

4 oz. chopped green chiles

3 tbsp all-purpose flour

4 oz. chopped black olives

1 c. sour cream

2 c. Colby-jack cheese, grated

12 whole corn tortillas, cut into bite-sized pieces

½ tsp kosher salt

⅛ tsp chipotle chili powder, optional

How to make One Pan Sour Cream Chicken Enchilada Skillet

Step 1: Melt the butter in a large skillet over medium heat. Once the butter has melted, whisk in the flour and cook for about a minute. Then, stir in the chicken broth. Continue to cook while stirring for another 2 to 3 minutes until smooth and thickened.

Step 2: Into the sauce, whisk in the chipotle chili powder, salt, oregano, green chiles, and black olives. Add the chicken breasts and bring everything to a simmer. Adjust the heat to low. Put the lid on and cook for 15 minutes more or until the chicken is completely cooked.

Step 3: Take the chicken out of the pan. Leave the heat on low. On a plate, transfer the chicken and shred it into bite-sized pieces.

Step 4: Into the sauce, stir in the sour cream. Add the chicken back to the pan along with the tortillas. Mix well until blended, then sprinkle with cheese. Replace the lid and cook for an additional 5 to 8 minutes or until bubbly and the cheese has melted.

Nutrition Facts:

Serving: 1 serving | Calories: 460 kcal | Carbohydrates: 30 g | Protein: 15 g | Fat: 32 g | Saturated Fat: 17 g | Cholesterol: 77 mg | Sodium: 1220 mg | Potassium: 298 mg | Fiber: 4 g | Sugar: 1 g | Vitamin A: 960 IU | Vitamin C: 12.3 mg | Calcium: 409 mg | Iron: 1.7 mg

One Pan Sour Cream Chicken Enchilada Skillet

Rebecca Prep Time: 5 mins | Cook Time: 30 mins | Total Time: 35 mins | Servings: 6 I love the chicken enchilada, but let’s face it, we do not always… General Recipes One Pan Sour Cream Chicken Enchilada Skillet European Print This
Serves: 6 Prep Time: 5 mins Cooking Time: 30 mins 30 mins
Nutrition facts: 460 calories 32 fat
Rating: 5.0/5
( 1 voted )

Ingredients

  • 3 whole boneless, skinless chicken breast halves
  • 3 tbsp butter
  • 2 c. chicken broth
  • ¼ tsp oregano
  • 4 oz. chopped green chiles
  • 3 tbsp all-purpose flour
  • 4 oz. chopped black olives
  • 1 c. sour cream
  • 2 c. Colby-jack cheese, grated
  • 12 whole corn tortillas, cut into bite-sized pieces
  • ½ tsp kosher salt
  • ⅛ tsp chipotle chili powder, optional

Instructions

Step 1: Melt the butter in a large skillet over medium heat. Once the butter has melted, whisk in the flour and cook for about a minute. Then, stir in the chicken broth. Continue to cook while stirring for another 2 to 3 minutes until smooth and thickened.

Step 2: Into the sauce, whisk in the chipotle chili powder, salt, oregano, green chiles, and black olives. Add the chicken breasts and bring everything to a simmer. Adjust the heat to low. Put the lid on and cook for 15 minutes more or until the chicken is completely cooked.

Step 3: Take the chicken out of the pan. Leave the heat on low. On a plate, transfer the chicken and shred it into bite-sized pieces.

Step 4: Into the sauce, stir in the sour cream. Add the chicken back to the pan along with the tortillas. Mix well until blended, then sprinkle with cheese. Replace the lid and cook for an additional 5 to 8 minutes or until bubbly and the cheese has melted.
June 4, 2022 0 comment
0 FacebookTwitterPinterestEmail
General Recipes

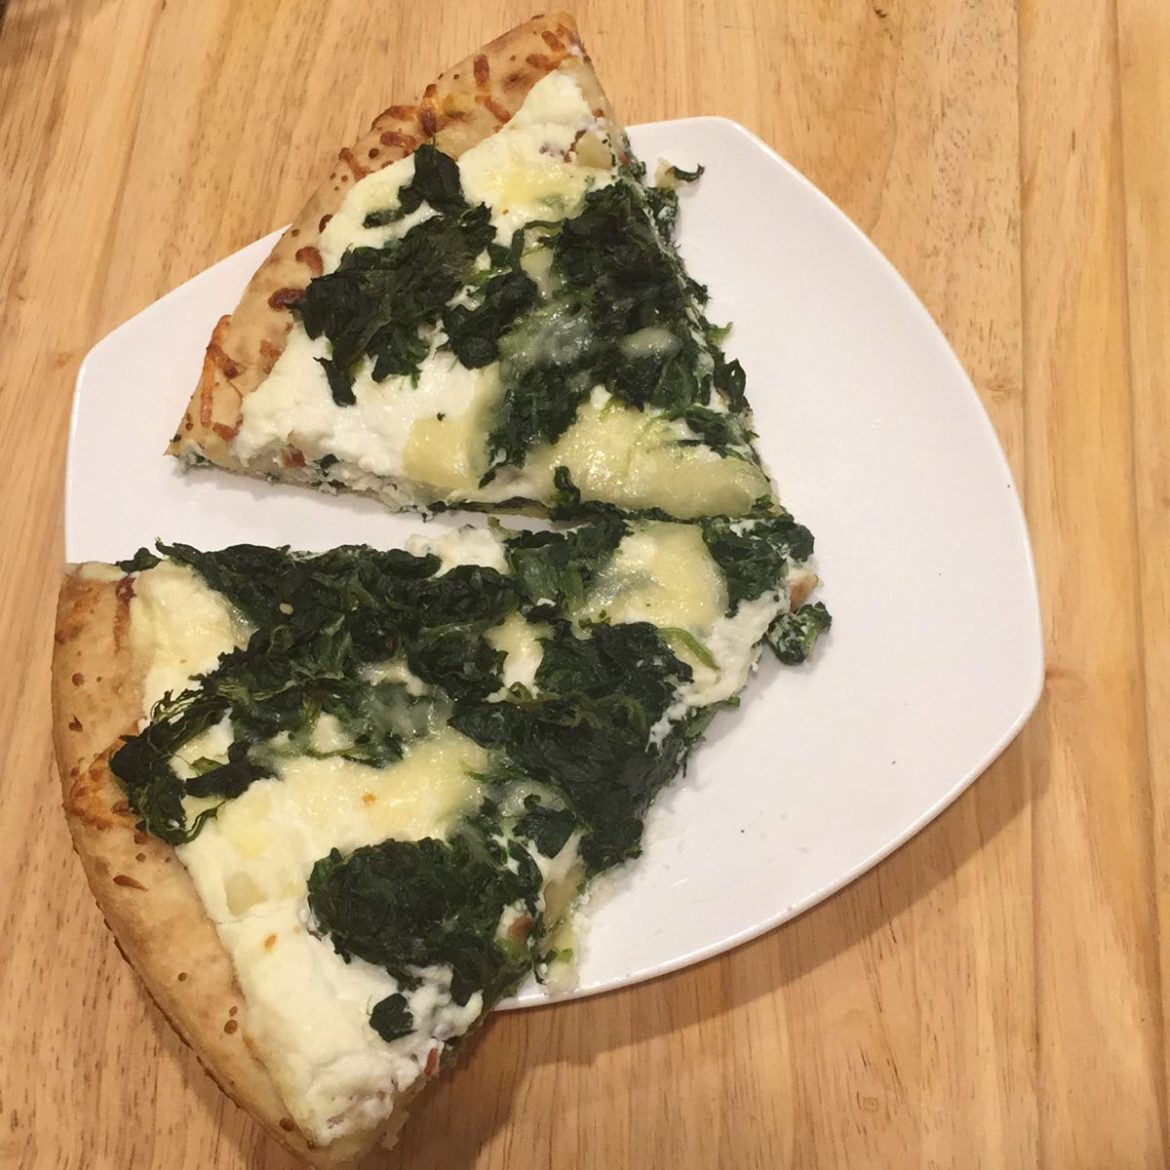
ROASTED GARLIC SPINACH WHITE PIZZA

by Rebecca June 4, 2022
written by Rebecca

Total time: 1-hr | Servings: 2 pizzas, 16 slices

It was love at first bite! I was hesitant to try this roasted garlic spinach, white pizza at first because of my picky eaters. Little do I know that this pizza would be the next big thing! If you want a fun, delicious twist on your pizza, this is a must! I guarantee you that even your fussiest eaters will love every bite!

INGREDIENTS

4 teaspoons olive oil

4-5 heads of garlic

2 whole-wheat pizza dough

16-22 ounces ricotta cheese

32 ounces part-skim mozzarella cheese

Pepper flakes, optional

20 ounces Cascadian Farm frozen spinach, thawed and liquid squeezed

HOW TO MAKE ROASTED GARLIC SPINACH WHITE PIZZA

Step 1: Prepare the oven. Preheat it to 400 degrees F. Peel away all the loose layers around the head of the garlic using your fingers. From the top of the head, cut off around 1/4-inch to expose the cloves.

Step 2: Over the exposed surface of each garlic head, drizzle 1 tsp of olive oil. In aluminium foil, wrap the garlic and roast for about 30 to 40 minutes until the center of the clove is entirely soft.

Step 3: Allow the garlic to cool a little before pushing the entire clove out of its paper. In a bowl, place the garlic and mash using the back of a fork. Add the ricotta cheese and mix well. Set aside.

Step 4: Sprinkle some whole wheat flour on a flat surface. Using a rolling pin, roll out the pizza dough. Onto a pizza stone, place the pizza dough, ensuring the edges are reached. For this, you can also use a cookie sheet or a pizza baking sheet. Do the same with the second pizza dough.

Step 5: Over each pizza dough, spread half of the ricotta cheese and sprinkle with mozzarella cheese and spinach. Place in the oven and bake for about 18 to 20 minutes at 425 degrees.

Step 6: Remove from the oven when done and sprinkle with pepper flakes (optional). Serve right away. Enjoy!

ROASTED GARLIC SPINACH WHITE PIZZA

Rebecca Total time: 1-hr | Servings: 2 pizzas, 16 slices It was love at first bite! I was hesitant to try this roasted garlic spinach, white pizza at first because of… General Recipes ROASTED GARLIC SPINACH WHITE PIZZA European Print This
Serves: 16
Nutrition facts: 200 calories 20 grams fat
Rating: 5.0/5
( 1 voted )

Ingredients

  • 4 teaspoons olive oil
  • 4-5 heads of garlic
  • 2 whole-wheat pizza dough
  • 16-22 ounces ricotta cheese
  • 32 ounces part-skim mozzarella cheese
  • Pepper flakes, optional
  • 20 ounces Cascadian Farm frozen spinach, thawed and liquid squeezed

Instructions

Step 1: Prepare the oven. Preheat it to 400 degrees F. Peel away all the loose layers around the head of the garlic using your fingers. From the top of the head, cut off around 1/4-inch to expose the cloves.

Step 2: Over the exposed surface of each garlic head, drizzle 1 tsp of olive oil. In aluminium foil, wrap the garlic and roast for about 30 to 40 minutes until the center of the clove is entirely soft.

Step 3: Allow the garlic to cool a little before pushing the entire clove out of its paper. In a bowl, place the garlic and mash using the back of a fork. Add the ricotta cheese and mix well. Set aside.

Step 4: Sprinkle some whole wheat flour on a flat surface. Using a rolling pin, roll out the pizza dough. Onto a pizza stone, place the pizza dough, ensuring the edges are reached. For this, you can also use a cookie sheet or a pizza baking sheet. Do the same with the second pizza dough.

Step 5: Over each pizza dough, spread half of the ricotta cheese and sprinkle with mozzarella cheese and spinach. Place in the oven and bake for about 18 to 20 minutes at 425 degrees.

Step 6: Remove from the oven when done and sprinkle with pepper flakes (optional). Serve right away. Enjoy!

June 4, 2022 0 comment
0 FacebookTwitterPinterestEmail
General Recipes

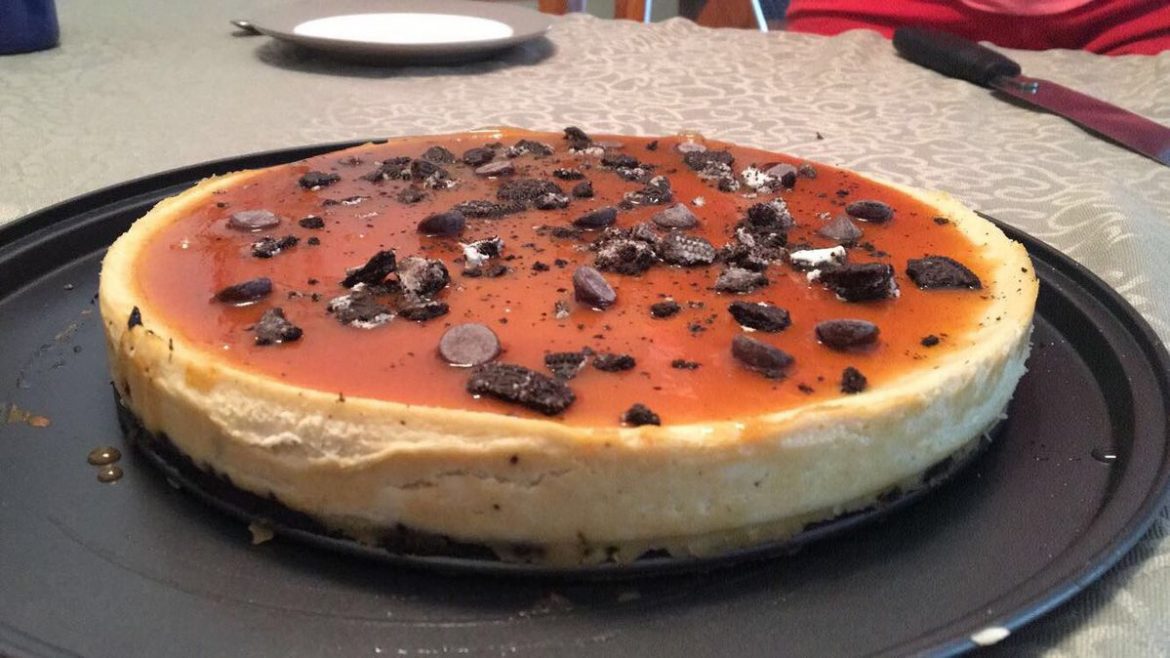
Salted Caramel Chocolate Chip Cheesecake

by Rebecca June 4, 2022
written by Rebecca

This is a dreamy cake perfect for every occasion! A decadent dessert with layers of cheesecake covered in caramel sauce and topped with more chocolate chips and sea salt.

Ingredients

Sauce:

1/2 c. heavy cream

1 c. granulated sugar

1 teaspoon salt

6 tablespoons salted butter, cut into 6 pieces

Cake:

3 tablespoons unsalted butter, melted

1 c. Oreo cookies, finely crushed

3 (8 ounces) packages of cream cheese, softened

3 large eggs, room temp

1 (14 ounces) can sweetened, condensed milk

2 teaspoon vanilla extract

sea salt (optional for topping)

1 c. mini chocolate chips (plus more for topping)

How to make Salted Caramel Chocolate Chip Cheesecake

Step 1: In a small saucepan, melt the sugar over medium heat. To stir, use a heat-resistant spatula. Stir the sugar constantly until completely melted. Then, add the butter while stirring for about 2 to 3 minutes until fully melted. While stirring, gradually drizzle the cream. Let the sauce boil for just a minute, then take the pan off the heat. Quickly stir in the salt. Allow the sauce to cool before serving. For ease of use, store the sauce in a glass jar and place it in the fridge.

Step 2: Prepare the oven. Preheat it to 300 degrees. Ready a 9-inch springform pan. Generously grease and set aside.

Step 3: Whisk the Oreos and butter in a mixing bowl. Into the prepared pan, evenly press the mixture.

Step 4: In a stand mixer or mixing bowl, beat the cream cheese for about 2 to 3 minutes until fluffy. Add the condensed milk and mix. Then, add in the eggs, one at a time, beating well every after each addition until blended. Next, stir in the vanilla. To the bowl, add the chocolate chips and gently fold using a spatula. Into the pan, pour the filling, and top with a handful of mini chocolate chips.

Step 5: Place in the preheated oven and bake for about 40 to 15 minutes or until the cheesecake is set and slightly jiggles in the center. Around the edge of the cheesecake, run a thin knife. Place the pan on the cooling rack to let the cheesecake cool before placing it in the fridge to chill.

Step 6: In the microwave, heat the caramel sauce for 10 to 15 seconds. Then, remove the cheesecake from the springform pan. On top of the cheesecake, pour enough caramel sauce to cover it. Sprinkle with extra chocolate chips and sea salt (optional). Slice and serve. Enjoy!

Salted Caramel Chocolate Chip Cheesecake

Rebecca This is a dreamy cake perfect for every occasion! A decadent dessert with layers of cheesecake covered in caramel sauce and topped with more chocolate chips and sea salt. Ingredients… General Recipes Salted Caramel Chocolate Chip Cheesecake European Print This
Nutrition facts: 200 calories 20 grams fat
Rating: 5.0/5
( 1 voted )

Ingredients

  • Sauce:
  • 1/2 c. heavy cream
  • 1 c. granulated sugar
  • 1 teaspoon salt
  • 6 tablespoons salted butter, cut into 6 pieces
  • Cake:
  • 3 tablespoons unsalted butter, melted
  • 1 c. Oreo cookies, finely crushed
  • 3 (8 ounces) packages of cream cheese, softened
  • 3 large eggs, room temp
  • 1 (14 ounces) can sweetened, condensed milk
  • 2 teaspoon vanilla extract
  • sea salt (optional for topping)
  • 1 c. mini chocolate chips (plus more for topping)

Instructions

Step 1: In a small saucepan, melt the sugar over medium heat. To stir, use a heat-resistant spatula. Stir the sugar constantly until completely melted. Then, add the butter while stirring for about 2 to 3 minutes until fully melted. While stirring, gradually drizzle the cream. Let the sauce boil for just a minute, then take the pan off the heat. Quickly stir in the salt. Allow the sauce to cool before serving. For ease of use, store the sauce in a glass jar and place it in the fridge.

Step 2: Prepare the oven. Preheat it to 300 degrees. Ready a 9-inch springform pan. Generously grease and set aside.

Step 3: Whisk the Oreos and butter in a mixing bowl. Into the prepared pan, evenly press the mixture.

Step 4: In a stand mixer or mixing bowl, beat the cream cheese for about 2 to 3 minutes until fluffy. Add the condensed milk and mix. Then, add in the eggs, one at a time, beating well every after each addition until blended. Next, stir in the vanilla. To the bowl, add the chocolate chips and gently fold using a spatula. Into the pan, pour the filling, and top with a handful of mini chocolate chips.

Step 5: Place in the preheated oven and bake for about 40 to 15 minutes or until the cheesecake is set and slightly jiggles in the center. Around the edge of the cheesecake, run a thin knife. Place the pan on the cooling rack to let the cheesecake cool before placing it in the fridge to chill.

Step 6: In the microwave, heat the caramel sauce for 10 to 15 seconds. Then, remove the cheesecake from the springform pan. On top of the cheesecake, pour enough caramel sauce to cover it. Sprinkle with extra chocolate chips and sea salt (optional). Slice and serve. Enjoy!

June 4, 2022 0 comment
0 FacebookTwitterPinterestEmail
General Recipes

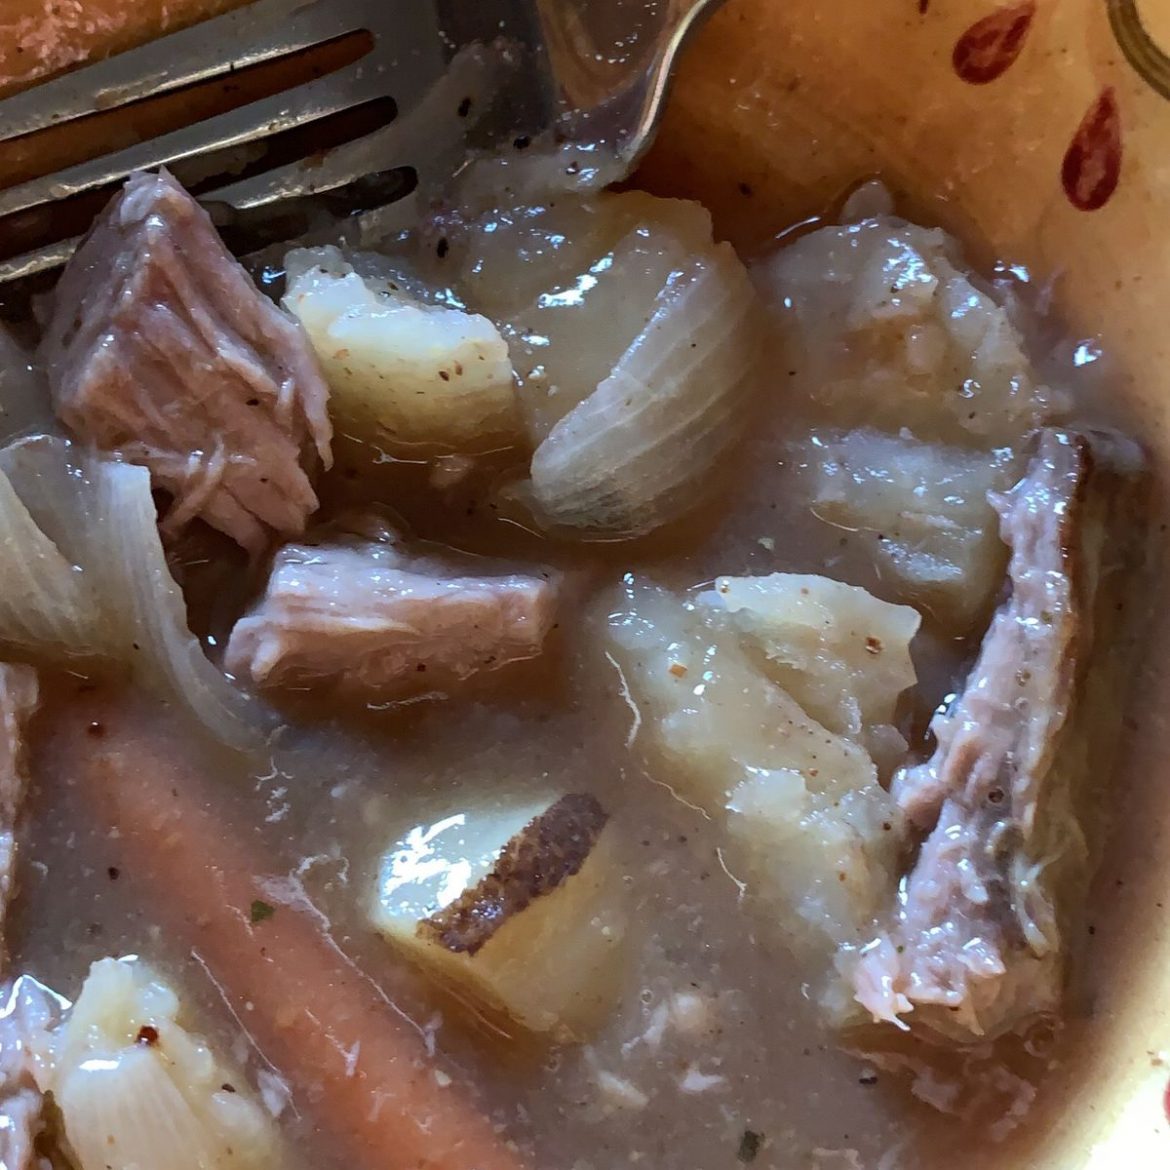
Slow Cooker “Melt in Your Mouth” Pot Roast

by Rebecca June 4, 2022
written by Rebecca

Yield: 4 – 6 servings

This slow cooker Pot Roast is another amazing dish with flavorful, melt-in-your-mouth chuck roast with veggies in a delightful gravy-like sauce. You can also any leftovers in a hot beef sandwich for a grab-and-go lunch.

Ingredients

olive oil

1 chuck roast (I used 3 lbs)

1 lb. carrots, peeled and cut into large chunks

1 onion, peeled and cut into large chunks

1 c. beef broth

2 lbs. potatoes, peeled and cut into large chunks

1 tbsp corn starch

2 stalks of celery, cut into large chunks (optional)

SEASONING MIX:

1 tbsp dried rosemary

2 tbsp steak seasoning (I used store-bought with a blend of peppercorns, garlic, paprika, parsley, and salt)

1 tbsp dried thyme

1 tbsp kosher salt

How to make Slow Cooker “Melt in Your Mouth” Pot Roast

Step 1: In a small bowl, whisk the seasoning mix ingredients and set aside.

Step 2: Sprinkle both sides of the meat with olive oil and coat well. On each side of the meat, sprinkle a third of the seasoning mix.

Step 3: In a large skillet, sear both sides of the meat over medium-high heat. To a slow cooker, transfer the roasted meat.

Step 4: In a large bowl, place the vegetables. Drizzle a bit of olive oil and coat the vegetables. Then, sprinkle the rest of the seasoning mix. To the same skillet where you used to sear the meat, add the vegetables. Saute for approximately 5 minutes, stirring often.

Step 5: On top of the roast in the slow cooker, transfer the vegetables. Then, add the beef broth. Put the lid on. Set to cook for 9 hours on low or 6 hours on high.

Step 6: Recover most of the cooking juices from the slow cooker using a turkey baster. To a small saucepan, transfer the juices. Bring everything to a simmer on medium heat. In the meantime, stir the cornstarch with a bit of water. Add this into the pan juices while stirring. Let it simmer until thickened. As needed, adjust the seasoning.

Step 7: To a larger platter, transfer the roast and vegetables. Serve the Pot Roast right away. Enjoy!

Slow Cooker "Melt in Your Mouth" Pot Roast

Rebecca Yield: 4 – 6 servings This slow cooker Pot Roast is another amazing dish with flavorful, melt-in-your-mouth chuck roast with veggies in a delightful gravy-like sauce. You can also any… General Recipes Slow Cooker “Melt in Your Mouth” Pot Roast European Print This
Serves: 4-6
Nutrition facts: 200 calories 20 grams fat
Rating: 5.0/5
( 1 voted )

Ingredients

  • olive oil
  • 1 chuck roast (I used 3 lbs)
  • 1 lb. carrots, peeled and cut into large chunks
  • 1 onion, peeled and cut into large chunks
  • 1 c. beef broth
  • 2 lbs. potatoes, peeled and cut into large chunks
  • 1 tbsp corn starch
  • 2 stalks of celery, cut into large chunks (optional)
  • SEASONING MIX:
  • 1 tbsp dried rosemary
  • 2 tbsp steak seasoning (I used store-bought with a blend of peppercorns, garlic, paprika, parsley, and salt)
  • 1 tbsp dried thyme
  • 1 tbsp kosher salt

Instructions

Step 1: In a small bowl, whisk the seasoning mix ingredients and set aside.

Step 2: Sprinkle both sides of the meat with olive oil and coat well. On each side of the meat, sprinkle a third of the seasoning mix.

Step 3: In a large skillet, sear both sides of the meat over medium-high heat. To a slow cooker, transfer the roasted meat.

Step 4: In a large bowl, place the vegetables. Drizzle a bit of olive oil and coat the vegetables. Then, sprinkle the rest of the seasoning mix. To the same skillet where you used to sear the meat, add the vegetables. Saute for approximately 5 minutes, stirring often.

Step 5: On top of the roast in the slow cooker, transfer the vegetables. Then, add the beef broth. Put the lid on. Set to cook for 9 hours on low or 6 hours on high.

Step 6: Recover most of the cooking juices from the slow cooker using a turkey baster. To a small saucepan, transfer the juices. Bring everything to a simmer on medium heat. In the meantime, stir the cornstarch with a bit of water. Add this into the pan juices while stirring. Let it simmer until thickened. As needed, adjust the seasoning.

Step 7: To a larger platter, transfer the roast and vegetables. Serve the Pot Roast right away. Enjoy!

June 4, 2022 0 comment
0 FacebookTwitterPinterestEmail
General Recipes

Mexican Fried Rice

by Rebecca June 4, 2022
written by Rebecca

Prep time: 5 mins | Cook time: 15 mins | Total time: 20 mins | Servings: 6

Whip up a unique Mexican Fried Rice with this simple recipe. Perfect for Taco Tuesday and or any day of the year! If you are looking for a fun, delicious twist on your traditional Mexican Rice, then you have to give this recipe a try soon! Like my other favorite fried rice, this too is insanely easy and quick to throw together. And the secret to making the best-fried rice is using cooked, cold rice. To prevent it from sticking to the bottom of the pan, make sure to stir the rice almost constantly. For a few crunchy bits of rice, allow the rice to sit a while longer without stirring once all the spices and seasonings are well blended into the rice.

Ingredients

4 tbsp olive oil, divided

2 garlic cloves, minced

3 c. cooked white rice

1 small onion, finely diced

1 c. frozen corn, thawed

½ c. chopped tomatoes

2 tsp chili powder

1 tsp cumin

1 tsp paprika

1 4-oz. can of green chiles, drained

2 green onions, sliced

½ tsp salt

¼ tsp black pepper

How to make Mexican Fried Rice

Step 1: To a large skillet, drizzle 2 tbsp olive oil over medium-high heat. Add the onion to the skillet once the oil is hot and saute for about 3 to 4 minutes or until tender.

Step 2: Then, add the tomatoes to the skillet along with the corn and green chiles. Continue to cook for another 2 to 3 minutes or until the liquid is cooked out.

Step 3: Next, add the seasoning and garlic. Cook further or until the garlic starts to brown. This takes an additional 1 to 2 minutes.

Step 4: Adjust the heat to medium before adding the rest of the oil and cooked rice to the skillet. Cook for 4 to 5 minutes more, stirring often, until the rice and seasoning have blended.

Step 5: Add the green onions and stir well. Take the pan off the heat. Serve the Mexican Fried Rice garnished with the rest of the green onions. Enjoy!

Mexican Fried Rice

Rebecca Prep time: 5 mins | Cook time: 15 mins | Total time: 20 mins | Servings: 6 Whip up a unique Mexican Fried Rice with this simple recipe. Perfect for… General Recipes Mexican Fried Rice European Print This
Serves: 6 Prep Time: 5 mins Cooking Time: 15 mins 15 mins
Nutrition facts: 200 calories 20 grams fat
Rating: 5.0/5
( 1 voted )

Ingredients

  • 4 tbsp olive oil, divided
  • 2 garlic cloves, minced
  • 3 c. cooked white rice
  • 1 small onion, finely diced
  • 1 c. frozen corn, thawed
  • ½ c. chopped tomatoes
  • 2 tsp chili powder
  • 1 tsp cumin
  • 1 tsp paprika
  • 1 4-oz. can of green chiles, drained
  • 2 green onions, sliced
  • ½ tsp salt
  • ¼ tsp black pepper

Instructions

Step 1: To a large skillet, drizzle 2 tbsp olive oil over medium-high heat. Add the onion to the skillet once the oil is hot and saute for about 3 to 4 minutes or until tender.

Step 2: Then, add the tomatoes to the skillet along with the corn and green chiles. Continue to cook for another 2 to 3 minutes or until the liquid is cooked out.

Step 3: Next, add the seasoning and garlic. Cook further or until the garlic starts to brown. This takes an additional 1 to 2 minutes.

Step 4: Adjust the heat to medium before adding the rest of the oil and cooked rice to the skillet. Cook for 4 to 5 minutes more, stirring often, until the rice and seasoning have blended.

Step 5: Add the green onions and stir well. Take the pan off the heat. Serve the Mexican Fried Rice garnished with the rest of the green onions. Enjoy!

June 4, 2022 0 comment
0 FacebookTwitterPinterestEmail
General Recipes

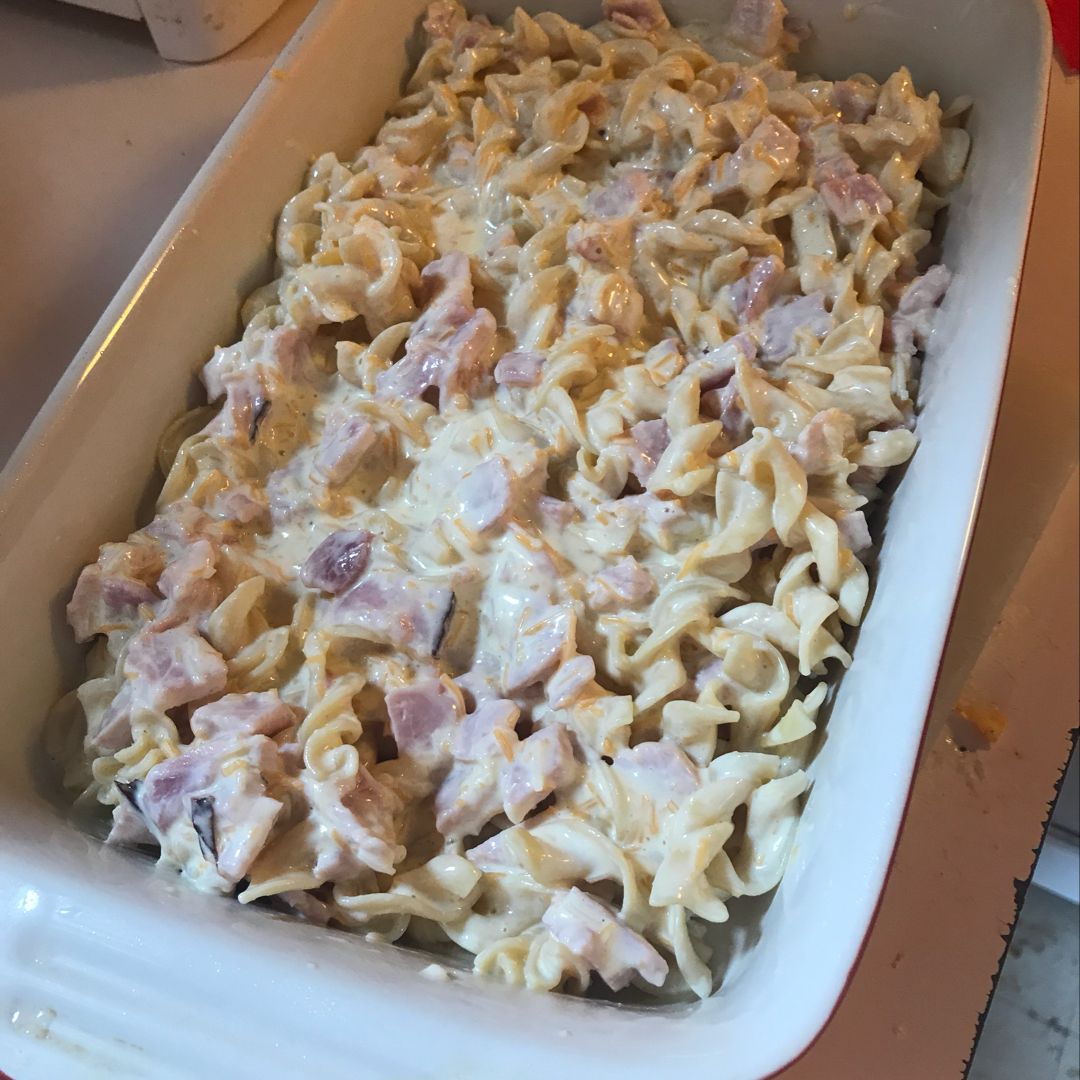
Ham and Noodle Casserole

by Rebecca June 4, 2022
written by Rebecca

Prep Time: 15 mins | Cook Time: 30 mins | Servings: 8

This is one of the easiest and quickest meals that you can whip up at any time. All you need are a few simple ingredients, and this ham and noodle casserole is ready in less than thirty minutes. My family loves this so much that this instantly became one of our favorites. A part of our regular menu rotation. This casserole is a must-try if you are looking for another easy, quick, and delicious meal that your entire family will surely love.

Lately, I have been enjoying cooking and baking. I stay at home almost every day, working from the comfort of my abode. This gives me more than enough time to experiment and try new recipes. Although, this casserole is not new as this has been part of my favorite easy recipe for years. But this never stops to be my favorite. It is impressively simple yet guaranteed to be one of the best casseroles. Don’t you just love simple recipes that you can whip up any time using only readily available ingredients?

Ingredients

1 c. sour cream

2 eggs, beaten

2 c. cooked ham, chopped

1 c. shredded Swiss cheese

1 1/2 tablespoons dried minced onion

12 ounces egg noodles, cooked and drained

1 teaspoon kosher salt

How to make Ham and Noodle Casserole

Step 1: Place the egg and sour cream in a large mixing bowl. Mix well until smooth. Then, add the ham along with the minced onion, salt, and cheese. Next, fold in the egg noodles gently to coat well.

Step 2: To a 2-quart casserole dish, pour the mixture. Place in the oven and bake for about 30 minutes at 350 degrees. Make sure to check the casserole during the last 10 minutes of baking as you might need to cover it with foil to prevent the edges from browning too much.

Nutrition Facts:

Calories: 303 kcal | Carbohydrates: 34g | Protein: 17g | Fat: 11g | Saturated Fat: 5g | Polyunsaturated Fat: 1g | Monounsaturated Fat: 3g | Trans Fat: 1g | Cholesterol: 112mg | Sodium: 743mg | Potassium: 285mg | Fiber: 1g | Sugar: 2g | Vitamin A: 292IU | Vitamin C: 1mg | Calcium: 174mg | Iron: 1mg

Ham and Noodle Casserole

Rebecca Prep Time: 15 mins | Cook Time: 30 mins | Servings: 8 This is one of the easiest and quickest meals that you can whip up at any time. All… General Recipes Ham and Noodle Casserole European Print This
Serves: 8 Prep Time: 15 mins Cooking Time: 30 mins 30 mins
Nutrition facts: 303 calories 11 fat
Rating: 5.0/5
( 1 voted )

Ingredients

  • 1 c. sour cream
  • 2 eggs, beaten
  • 2 c. cooked ham, chopped
  • 1 c. shredded Swiss cheese
  • 1 1/2 tablespoons dried minced onion
  • 12 ounces egg noodles, cooked and drained
  • 1 teaspoon kosher salt

Instructions

Step 1: Place the egg and sour cream in a large mixing bowl. Mix well until smooth. Then, add the ham along with the minced onion, salt, and cheese. Next, fold in the egg noodles gently to coat well.

Step 2: To a 2-quart casserole dish, pour the mixture. Place in the oven and bake for about 30 minutes at 350 degrees. Make sure to check the casserole during the last 10 minutes of baking as you might need to cover it with foil to prevent the edges from browning too much.

June 4, 2022 0 comment
0 FacebookTwitterPinterestEmail
General Recipes

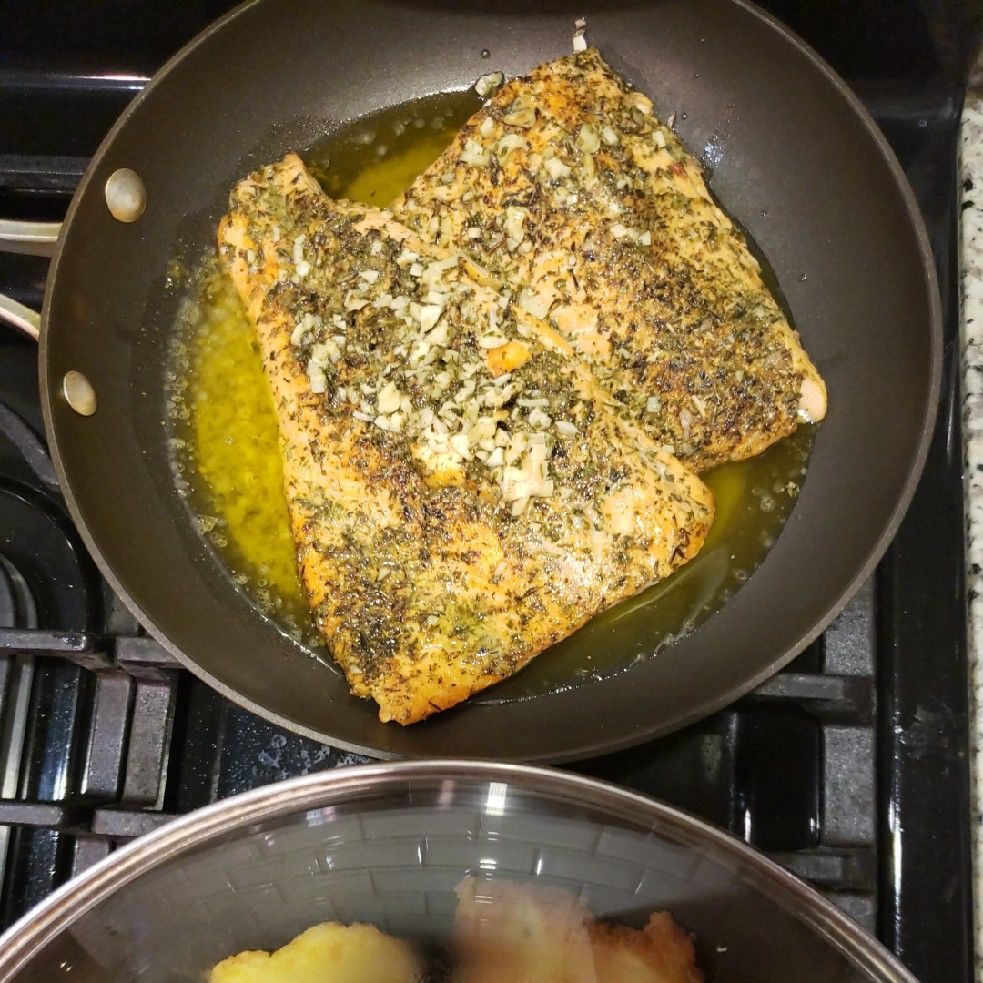
Trout with Garlic Lemon Butter Herb Sauce

by Rebecca June 4, 2022
written by Rebecca

PREP TIME: 10 MINS | COOK TIME: 20 MINS | TOTAL TIME: 30 MINS | SERVINGS: 4

This trout recipe is incredibly easy to whip up. A delicious, healthy, and gluten-free dish with flaky fish in a delightful garlic lemon butter herb sauce that is rich in omega-3 fatty acids and lean protein. Enjoy a low-carb dinner with this trout recipe any time.

Ingredients

2 tbsp olive oil more, if needed

1.5 lbs trout or salmon, or arctic char – 2 large fish fillets with skin on the bottom

3 tbsp lemon juice, freshly squeezed

1 tbsp Italian seasoning (dried thyme, oregano, parsley, combined)

4 garlic cloves, diced

2 tbsp white wine

2 tbsp parsley, chopped

2 tbsp butter, softened

¼ tsp salt to taste

How to make Trout with Garlic Lemon Butter Herb Sauce

Step 1: Sprinkle the Italian herb seasoning and salt on top of the fish fillets. There is no need to season the skins on the bottom.

Step 2: Heat 2 tbsp olive oil in a large skillet over medium heat. Once the oil is hot, add the fish fillets to the skillet, flesh-side down. Sear for approximately 3 to 5 minutes until lightly browned, ensuring the oil does not smoke. Flip the fillets and continue to cook the other side for an additional 2 to 4 minutes. If needed, add more oil to the skillet.

Step 3: Take the skillet off the heat and put the lid on. Allow the fillets to sit for about 5 to 10 minutes until completely cooked and flaky.

Step 4: To a plate, carefully transfer the fish using a spatula, detaching the fish from the skin. Scrape the fish skin off the bottom of the pan, ensuring to leave the cooking oil in the pan.

Step 5: To the same pan, add the diced garlic, lemon juice, and white wine. Cook for about 1 minute over medium-low heat until the garlic has slightly softened. Then, take the pan off the heat and add 1 tbsp chopped parsley and 2 tbsp butter. While the heat is off, stir until the butter has melted and you have a creamy mixture.

Step 6: Return the fish to the pan and spoon the sauce on top. Garnish with 1 tbsp parsley. Enjoy!

Nutrition Facts:

Amount per Serving: Calories 380, Fat 24g 37%, Saturated Fat 6g 38%, Cholesterol 113mg 38%, Sodium 286mg 12%, Potassium 664mg 19%, Carbohydrates 2g 1%, Protein 35g 70%, Vitamin A 460IU 9%, Vitamin C 8.8mg 11%, Calcium 101mg 10%, Iron 3.2mg 18%

Trout with Garlic Lemon Butter Herb Sauce

Rebecca PREP TIME: 10 MINS | COOK TIME: 20 MINS | TOTAL TIME: 30 MINS | SERVINGS: 4 This trout recipe is incredibly easy to whip up. A delicious, healthy, and… General Recipes Trout with Garlic Lemon Butter Herb Sauce European Print This
Serves: 4 Prep Time: 10 mins Cooking Time: 20 mins 20 mins
Nutrition facts: 380 calories 24 fat
Rating: 5.0/5
( 1 voted )

Ingredients

  • 2 tbsp olive oil more, if needed
  • 1.5 lbs trout or salmon, or arctic char - 2 large fish fillets with skin on the bottom
  • 3 tbsp lemon juice, freshly squeezed
  • 1 tbsp Italian seasoning (dried thyme, oregano, parsley, combined)
  • 4 garlic cloves, diced
  • 2 tbsp white wine
  • 2 tbsp parsley, chopped
  • 2 tbsp butter, softened
  • ¼ tsp salt to taste

Instructions

Step 1: Sprinkle the Italian herb seasoning and salt on top of the fish fillets. There is no need to season the skins on the bottom.

Step 2: Heat 2 tbsp olive oil in a large skillet over medium heat. Once the oil is hot, add the fish fillets to the skillet, flesh-side down. Sear for approximately 3 to 5 minutes until lightly browned, ensuring the oil does not smoke. Flip the fillets and continue to cook the other side for an additional 2 to 4 minutes. If needed, add more oil to the skillet.

Step 3: Take the skillet off the heat and put the lid on. Allow the fillets to sit for about 5 to 10 minutes until completely cooked and flaky.

Step 4: To a plate, carefully transfer the fish using a spatula, detaching the fish from the skin. Scrape the fish skin off the bottom of the pan, ensuring to leave the cooking oil in the pan.

Step 5: To the same pan, add the diced garlic, lemon juice, and white wine. Cook for about 1 minute over medium-low heat until the garlic has slightly softened. Then, take the pan off the heat and add 1 tbsp chopped parsley and 2 tbsp butter. While the heat is off, stir until the butter has melted and you have a creamy mixture.

Step 6: Return the fish to the pan and spoon the sauce on top. Garnish with 1 tbsp parsley. Enjoy!

June 4, 2022 0 comment
0 FacebookTwitterPinterestEmail
General Recipes

Honey Dijon Garlic Roasted Pork Tenderloin

by Rebecca June 4, 2022
written by Rebecca

Prep Time: 5 mins | Cook Time: 15 mins | Total Time: 20 mins | Servings: 6

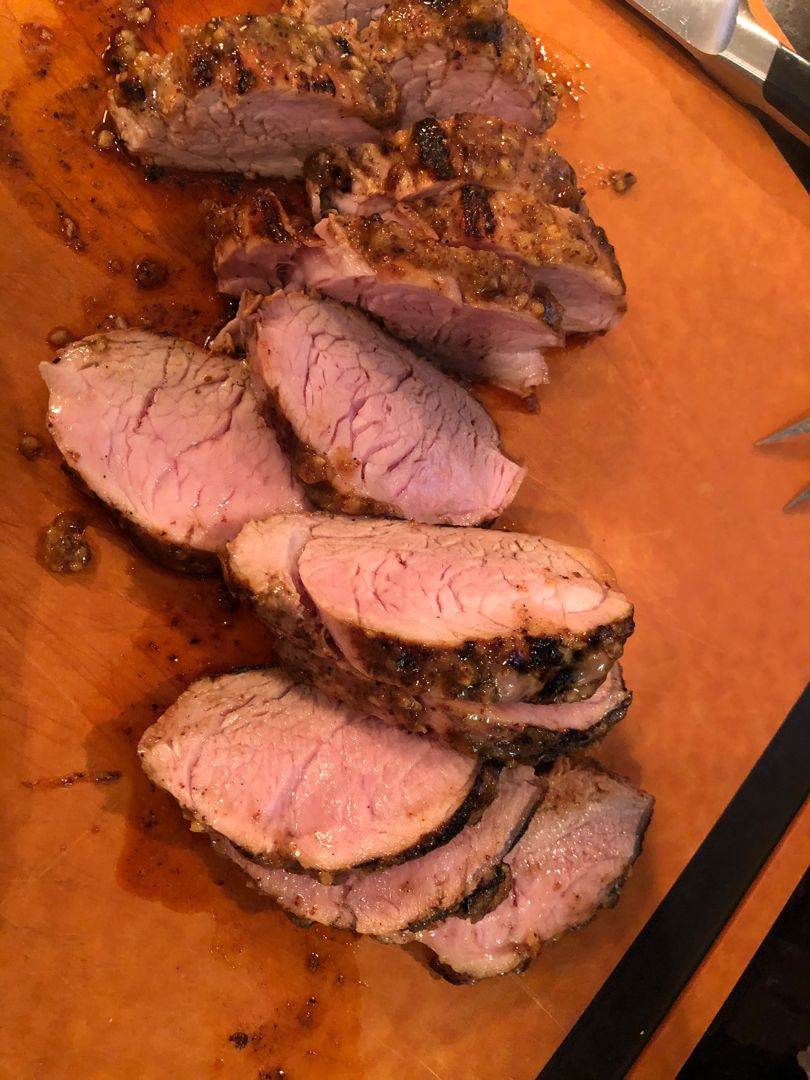
This honey Dijon, garlic roasted pork tenderloin is a staple at my house. My family loves this so much that this became one of our top requested dishes. This is incredibly easy to whip using only a few simple ingredients and ready in a breeze. It is a must-try with flavor-packed, juicy pork tenderloin that everyone will surely love!

I love this recipe. It’s very simple, straightforward, and guarantees the best pork tenderloin. The ingredients are readily available, and very simple yet provide a combination of wonderful flavors. If you want another convenient weeknight meal for your family or entertaining, you should not skip this Honey Dijon Roasted Pork Tenderloin!

You can keep any leftovers in an airtight container and store them in the fridge for up to 5 days. Before serving, reheat with a little oil in a skillet, covered over medium-low heat until warmed through. Serve this alongside roasted veggies for a quick meal.

INGREDIENTS

1 tbsp olive oil

2 lbs pork tenderloin

4 cloves garlic, crushed

2 tbsp honey

1/4 c. whole grain Dijon mustard

1/2 tsp salt

1/4 tsp black pepper

How to make Honey Dijon Garlic Roasted Pork Tenderloin

Step 1: Place a cast-iron skillet or oven-safe skillet on high heat. Prepare the oven and preheat it to 400 degrees.

Step 2: Place the Dijon mustard, honey, garlic, salt, and pepper in a small bowl. Mix well and rub this on each pork tenderloin until completely coated.

Step 3: Into the hot skillet, drizzle the olive oil. Add the tenderloins and sear on each side. To flip, use tongs. Coat the pork again with the rest of the sauce. Transfer the skillet into the preheated oven once the outside of the pork is seared and bake for about 10 to 15 minutes or until the internal temperature of the meat reaches 145 degrees.

Step 4: Remove from the oven when done and allow the pork tenderloin to rest for about 5 minutes before slicing. Enjoy!

Nutrition Facts:

Serving: 0.33 pounds | Calories: 233 kcal | Carbohydrates: 7g | Protein: 32g | Fat: 8g | Saturated Fat: 2g | Cholesterol: 98mg | Sodium: 391mg | Potassium: 617mg | Fiber: 1g | Sugar: 6g | Vitamin C: 1mg | Calcium: 19mg | Iron: 2mg

Honey Dijon Garlic Roasted Pork Tenderloin

Rebecca Prep Time: 5 mins | Cook Time: 15 mins | Total Time: 20 mins | Servings: 6 This honey Dijon, garlic roasted pork tenderloin is a staple at my house.… General Recipes Honey Dijon Garlic Roasted Pork Tenderloin European Print This
Serves: 6 Prep Time: 5 mins Cooking Time: 15 mins 15 mins
Nutrition facts: 233 calories 8 fat
Rating: 5.0/5
( 1 voted )

Ingredients

  • 1 tbsp olive oil
  • 2 lbs pork tenderloin
  • 4 cloves garlic, crushed
  • 2 tbsp honey
  • 1/4 c. whole grain Dijon mustard
  • 1/2 tsp salt
  • 1/4 tsp black pepper

Instructions

Step 1: Place a cast-iron skillet or oven-safe skillet on high heat. Prepare the oven and preheat it to 400 degrees.

Step 2: Place the Dijon mustard, honey, garlic, salt, and pepper in a small bowl. Mix well and rub this on each pork tenderloin until completely coated.

Step 3: Into the hot skillet, drizzle the olive oil. Add the tenderloins and sear on each side. To flip, use tongs. Coat the pork again with the rest of the sauce. Transfer the skillet into the preheated oven once the outside of the pork is seared and bake for about 10 to 15 minutes or until the internal temperature of the meat reaches 145 degrees.

Step 4: Remove from the oven when done and allow the pork tenderloin to rest for about 5 minutes before slicing. Enjoy!

June 4, 2022 0 comment
0 FacebookTwitterPinterestEmail
General Recipes

Simple Potato Cake with Onions

by Rebecca June 4, 2022
written by Rebecca

PREP TIME: 10 MINS | COOK TIME: 50 MINS | TOTAL TIME: 1 HR | SERVINGS: 4

Are you looking for another filling lunch or dinner? Then, this simple potato cake with onions is a must! It is made with only four ingredients and ready in no time. Before serving, garnish this with some chopped parsley and sea salt.

I love simple recipes like this potato cake with onions. This is perfect for working moms like me. This might be a very simple dish, but this never disappoints. Serve this with a simple side salad for an easy, quick, and filling meal perfect for your entire family.

I love the flavor and texture of this potato cake with onions. It is perfectly crunchy on the outside and soft on the inside. These buttery potato slices are excellently baked. Do not forget the sweet addition of the onion is irresistible! I have been making this recipe for years and shared this with one of my friends. It is a customizable recipe. If desired, you can some mushrooms and feta to this already amazing dish. For best results, I suggest using Yukon potatoes. You can also swap the dried Italian herbs with fresh thyme, rosemary, and oregano. I do not recommend skipping the herbs, but you can if desired.

INGREDIENTS

3 tablespoons melted butter

1 small onion

4 large russet potatoes, peeled and sliced thinly

salt and pepper

1 teaspoon dried Italian herbs

How to make Simple Potato Cake with Onions

Step 1: Prepare the oven. Preheat it to 375 degrees.

Step 2: Into a medium mixing bowl, place the potatoes. Then, add the onions along with the butter, dried herbs, salt, and pepper. Mix well until blended.

Step 3: Inside a 9-inch springform pan, lay the parchment paper. Add and nicely spread the potato mixture. Place in the preheated oven and bake for about 50 to 55 minutes or until the potatoes are completely cooked and golden brown.

NUTRITION FACTS:

Calories: 291 kcal, Carbohydrates: 1g, Fat: 10g, Saturated Fat: 6g, Sodium: 8mg

Simple Potato Cake with Onions

Rebecca PREP TIME: 10 MINS | COOK TIME: 50 MINS | TOTAL TIME: 1 HR | SERVINGS: 4 Are you looking for another filling lunch or dinner? Then, this simple potato… General Recipes Simple Potato Cake with Onions European Print This
Serves: 4 Prep Time: 10 mins Cooking Time: 50 mins 50 mins
Nutrition facts: 291 calories 10 fat
Rating: 5.0/5
( 1 voted )

Ingredients

  • 3 tablespoons melted butter
  • 1 small onion
  • 4 large russet potatoes, peeled and sliced thinly
  • salt and pepper
  • 1 teaspoon dried Italian herbs

Instructions

Step 1: Prepare the oven. Preheat it to 375 degrees.

Step 2: Into a medium mixing bowl, place the potatoes. Then, add the onions along with the butter, dried herbs, salt, and pepper. Mix well until blended.

Step 3: Inside a 9-inch springform pan, lay the parchment paper. Add and nicely spread the potato mixture. Place in the preheated oven and bake for about 50 to 55 minutes or until the potatoes are completely cooked and golden brown.

June 4, 2022 0 comment
0 FacebookTwitterPinterestEmail
General Recipes

Parmigiana di Melanazane

by Rebecca June 3, 2022
written by Rebecca

Prep Time: 1 hr | Cook Time: 55 mins | Total Time: 1 hr 55 mins | Servings: 6 people

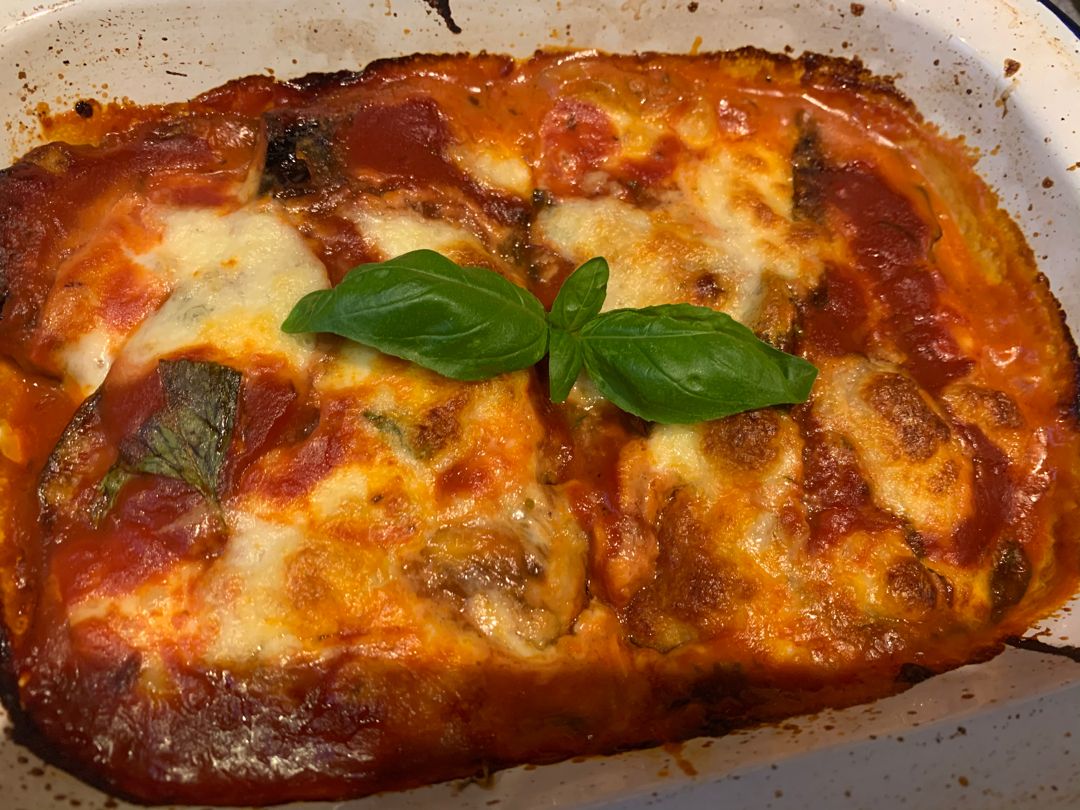
This Parmigiana di Melanazane is always the star of the show. It’s very delightful and never fails to impress everyone. Fried aubergines/eggplant baked with tomato sauce, basil, Parmesan, and mozzarella cheese. It’s comfort food at its finest!

Ingredients

½ tbsp olive oil

1 white onion

1.5 pounds of pureed tomatoes (passata) with chunky texture (700 grams)

2 large aubergines/eggplant around (700 grams/ 1.5 pounds)

Small bunch of basil

¾ c. Parmesan cheese, freshly grated (70 grams)

8.8 ounces mozzarella cheese, cut into cubes (250 grams)

sunflower oil for frying (around ½ c./125ml)

salt and pepper to season

flour for dusting

How to make Parmigiana di Melanazane

Step 1: Place the thinly sliced eggplant/aubergines in a colander and sprinkle with salt. Keep them aside for about an hour.

Step 2: For the tomato sauce, start by finely chopping 1 onion. In a pan with olive oil, saute the onion until translucent and tender but not browned. Next, add the pureed tomatoes (tomato passata), basil, salt, and pepper. Stir well and gently simmer for about 10 to 15 minutes. Set aside.

Step 3: Under cold water, rinse the slices of eggplant. Using kitchen towels, pat the eggplant slices dry. Then, dust them with flour. Shake any excess off and fry in sunflower oil for a couple of seconds on each side. To remove any excess oil, transfer the eggplant slices to kitchen paper.

Step 4: Prepare the oven. Preheat it to 180 degrees C or 350 degrees F or gas mark 4. For this recipe, I used an 11 x 18-inch oval dish. Although, you can use a rectangle or square dish around the same size.

Step 5: Into the bottom of the prepared baking dish, spoon and spread a small amount of tomato sauce. On top, layer the eggplant and sprinkle with Parmesan cheese, and mozzarella cubes, and season with pepper. Over the layers, add a few spoons of tomato sauce (reserve about 1/3 of the sauce for the final layer). Repeat until there is one top layer left. Finally, spoon the rest of the tomato sauce and top with Parmesan and mozzarella. Loosely tent with foil and place in the preheated oven. Bake for about 20 minutes. Uncover and continue to bake for 20 minutes more or until golden, and the top is bubbling.

Step 6: Remove from the oven when done and allow the Parmigiana di Melanazane to rest for about 5 minutes before serving. Enjoy!

Nutrition Facts:

Calories: 442 kcal | Carbohydrates: 24g | Protein: 18g | Fat: 32g | Saturated Fat: 10g | Cholesterol: 41mg | Sodium: 497mg | Potassium: 917mg | Fiber: 7g | Sugar: 12g | Vitamin A: 992IU | Vitamin C: 17mg | Calcium: 396mg | Iron: 3mg

Parmigiana di Melanazane

Rebecca Prep Time: 1 hr | Cook Time: 55 mins | Total Time: 1 hr 55 mins | Servings: 6 people This Parmigiana di Melanazane is always the star of the… General Recipes Parmigiana di Melanazane European Print This
Serves: 6 Prep Time: 1 hr Cooking Time: 55 mins 55 mins
Nutrition facts: 442 calories 32 fat
Rating: 5.0/5
( 1 voted )

Ingredients

  • ½ tbsp olive oil
  • 1 white onion
  • 1.5 pounds of pureed tomatoes (passata) with chunky texture (700 grams)
  • 2 large aubergines/eggplant around (700 grams/ 1.5 pounds)
  • Small bunch of basil
  • ¾ c. Parmesan cheese, freshly grated (70 grams)
  • 8.8 ounces mozzarella cheese, cut into cubes (250 grams)
  • sunflower oil for frying (around ½ c./125ml)
  • salt and pepper to season
  • flour for dusting

Instructions

Step 1: Place the thinly sliced eggplant/aubergines in a colander and sprinkle with salt. Keep them aside for about an hour.

Step 2: For the tomato sauce, start by finely chopping 1 onion. In a pan with olive oil, saute the onion until translucent and tender but not browned. Next, add the pureed tomatoes (tomato passata), basil, salt, and pepper. Stir well and gently simmer for about 10 to 15 minutes. Set aside.

Step 3: Under cold water, rinse the slices of eggplant. Using kitchen towels, pat the eggplant slices dry. Then, dust them with flour. Shake any excess off and fry in sunflower oil for a couple of seconds on each side. To remove any excess oil, transfer the eggplant slices to kitchen paper.

Step 4: Prepare the oven. Preheat it to 180 degrees C or 350 degrees F or gas mark 4. For this recipe, I used an 11 x 18-inch oval dish. Although, you can use a rectangle or square dish around the same size.

Step 5: Into the bottom of the prepared baking dish, spoon and spread a small amount of tomato sauce. On top, layer the eggplant and sprinkle with Parmesan cheese, and mozzarella cubes, and season with pepper. Over the layers, add a few spoons of tomato sauce (reserve about 1/3 of the sauce for the final layer). Repeat until there is one top layer left. Finally, spoon the rest of the tomato sauce and top with Parmesan and mozzarella. Loosely tent with foil and place in the preheated oven. Bake for about 20 minutes. Uncover and continue to bake for 20 minutes more or until golden, and the top is bubbling.

Step 6: Remove from the oven when done and allow the Parmigiana di Melanazane to rest for about 5 minutes before serving. Enjoy!

June 3, 2022 0 comment
0 FacebookTwitterPinterestEmail
Newer Posts
Older Posts

Popular Posts

  • 1

    Crispy Crunchy Parmesan Potatoes

    March 21, 2020
  • 2

    CROCK POT SMOTHERED PORK CHOPS

    March 21, 2020
  • Facebook
  • Twitter

@2019 - All Right Reserved.


Back To Top