Cook it once
  • Home
  • Privacy Policy
  • Recipes
    • KETO
    • LC
    • WW
  • Tips
  • Contact
Cook it once
  • Home
  • Privacy Policy
  • Recipes
    • KETO
    • LC
    • WW
  • Tips
  • Contact
Category:

General Recipes

General Recipes

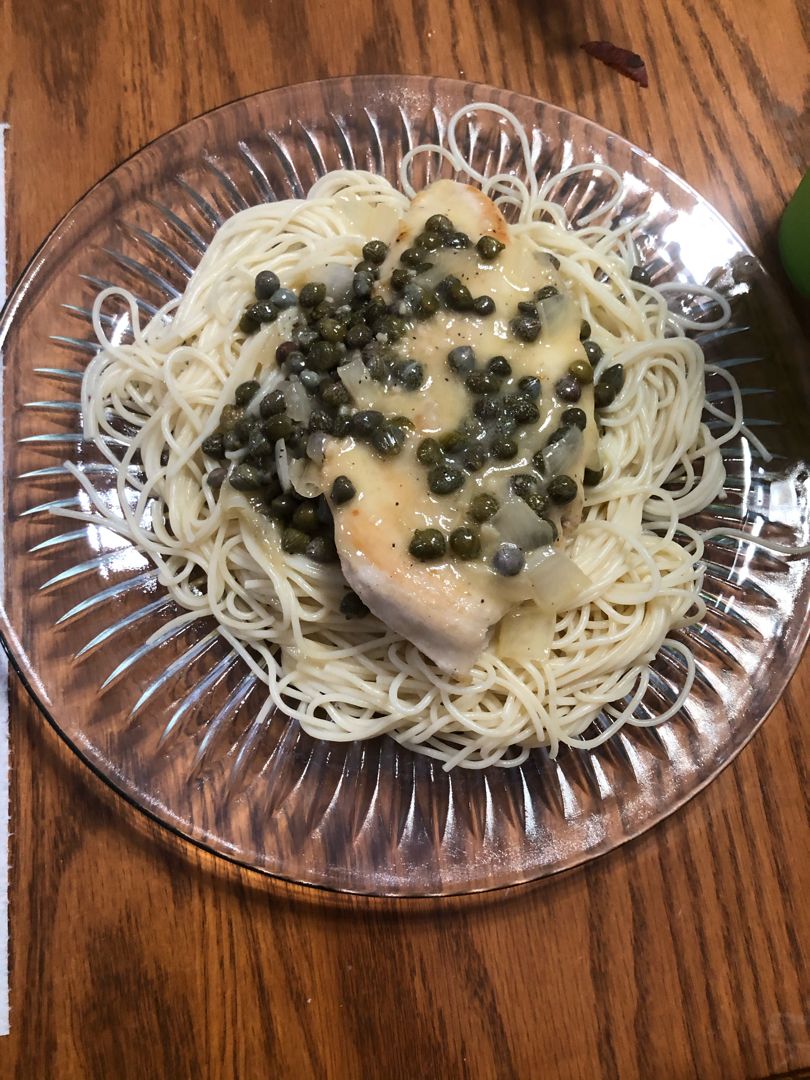
CHICKEN IN LEMON BUTTER CAPER SAUCE

by Rebecca June 6, 2022
written by Rebecca

Prep Time: 5 mins | Cook Time: 25 mins | Total Time: 30 mins | Yield: 4 people

Whip this restaurant-quality meal in under thirty minutes and enjoy lush chicken in a delicious lemon butter caper sauce over pasta, polenta, cooked pasta, or mashed potatoes. It is a very impressive meal that you can easily and quickly make at any time!

Ingredients

Chicken:

olive oil

4 boneless, skinless chicken breast halves (or use cutlets)

⅓ c. flour

2 tablespoons grated Parmesan cheese

8 ounces angel hair pasta, cooked and drained

salt and pepper

Sauce:

2 garlic cloves, minced

12 tablespoons cold unsalted butter, cut into 1⁄2” pieces, divided

⅓ c. Pinot Grigio wine I used Cavit

2 tablespoons finely chopped yellow onion

3 tablespoons fresh lemon juice

1/4 c. capers, rinsed

kosher salt

Pepper

HOW TO MAKE CHICKEN IN LEMON BUTTER CAPER SAUCE

Chicken:

Step 1: In halves horizontally, cut the chicken, butterflying them open. Using a meat hammer, pound the pieces of chicken to about 1/4-inch thickness.

Step 2: Combine the flour, salt, pepper, and grated Parmesan until well mixed. In the flour mixture, dredge the chicken cutlets, coating them well.

Step 3: In a large skillet, heat the olive oil over medium-high heat. Once the oil is hot, add the chicken to the skillet and sear for about 3 minutes on each side until well browned. To a plate, transfer the chicken when done and tent using aluminum foil to keep them warm.

Sauce:

Step 4: In a medium pan, melt 1 tbsp butter over medium heat. To the melted butter, add the onion and cook for about 3 minutes, stirring occasionally, until the onion is translucent. Next, add the garlic and continue to cook for another 30 seconds.

Step 5: Pour in the wine and lemon juice. Bring everything to a boil over high heat. Continue to cook for another 5 minutes until the liquid is reduced to around 2 tbsp.

Step 6: Adjust the heat to very low, then gradually stir in the butter, one piece at a time, allowing the first addition to melting before adding more butter. To taste, season with salt and pepper. Lastly, stir in the capers.

To Serve:

Step 7: On a plate or pasta bowl, place the cooked pasta and top with chicken. Over the chicken and pasta, spoon the sauce. Enjoy!

Notes:

The chicken pairs great with polenta, cooked pasta, or mashed potatoes, too.

You can keep the sauce at room temperature for up to 2 hours. To prevent the sauce from separating, make sure to reheat it over very low heat.

If desired, prep the sauce first before pan-searing the chicken.
CHICKEN IN LEMON BUTTER CAPER SAUCE

Rebecca Prep Time: 5 mins | Cook Time: 25 mins | Total Time: 30 mins | Yield: 4 people Whip this restaurant-quality meal in under thirty minutes and enjoy lush chicken… General Recipes CHICKEN IN LEMON BUTTER CAPER SAUCE European Print This
Serves: 4 Prep Time: 5 mins Cooking Time: 25 mins 25 mins
Nutrition facts: 200 calories 20 grams fat
Rating: 5.0/5
( 1 voted )

Ingredients

  • Chicken:
  • olive oil
  • 4 boneless, skinless chicken breast halves (or use cutlets)
  • ⅓ c. flour
  • 2 tablespoons grated Parmesan cheese
  • 8 ounces angel hair pasta, cooked and drained
  • salt and pepper
  • Sauce:
  • 2 garlic cloves, minced
  • 12 tablespoons cold unsalted butter, cut into 1⁄2” pieces, divided
  • ⅓ c. Pinot Grigio wine I used Cavit
  • 2 tablespoons finely chopped yellow onion
  • 3 tablespoons fresh lemon juice
  • 1/4 c. capers, rinsed
  • kosher salt
  • Pepper

Instructions

Chicken:

Step 1: In halves horizontally, cut the chicken, butterflying them open. Using a meat hammer, pound the pieces of chicken to about 1/4-inch thickness.

Step 2: Combine the flour, salt, pepper, and grated Parmesan until well mixed. In the flour mixture, dredge the chicken cutlets, coating them well.

Step 3: In a large skillet, heat the olive oil over medium-high heat. Once the oil is hot, add the chicken to the skillet and sear for about 3 minutes on each side until well browned. To a plate, transfer the chicken when done and tent using aluminum foil to keep them warm.

Sauce:

Step 4: In a medium pan, melt 1 tbsp butter over medium heat. To the melted butter, add the onion and cook for about 3 minutes, stirring occasionally, until the onion is translucent. Next, add the garlic and continue to cook for another 30 seconds.

Step 5: Pour in the wine and lemon juice. Bring everything to a boil over high heat. Continue to cook for another 5 minutes until the liquid is reduced to around 2 tbsp.

Step 6: Adjust the heat to very low, then gradually stir in the butter, one piece at a time, allowing the first addition to melting before adding more butter. To taste, season with salt and pepper. Lastly, stir in the capers.

To Serve:

Step 7: On a plate or pasta bowl, place the cooked pasta and top with chicken. Over the chicken and pasta, spoon the sauce. Enjoy!

Notes

The chicken pairs great with polenta, cooked pasta, or mashed potatoes, too. You can keep the sauce at room temperature for up to 2 hours. To prevent the sauce from separating, make sure to reheat it over very low heat. If desired, prep the sauce first before pan-searing the chicken.
June 6, 2022 0 comment
0 FacebookTwitterPinterestEmail
General Recipes

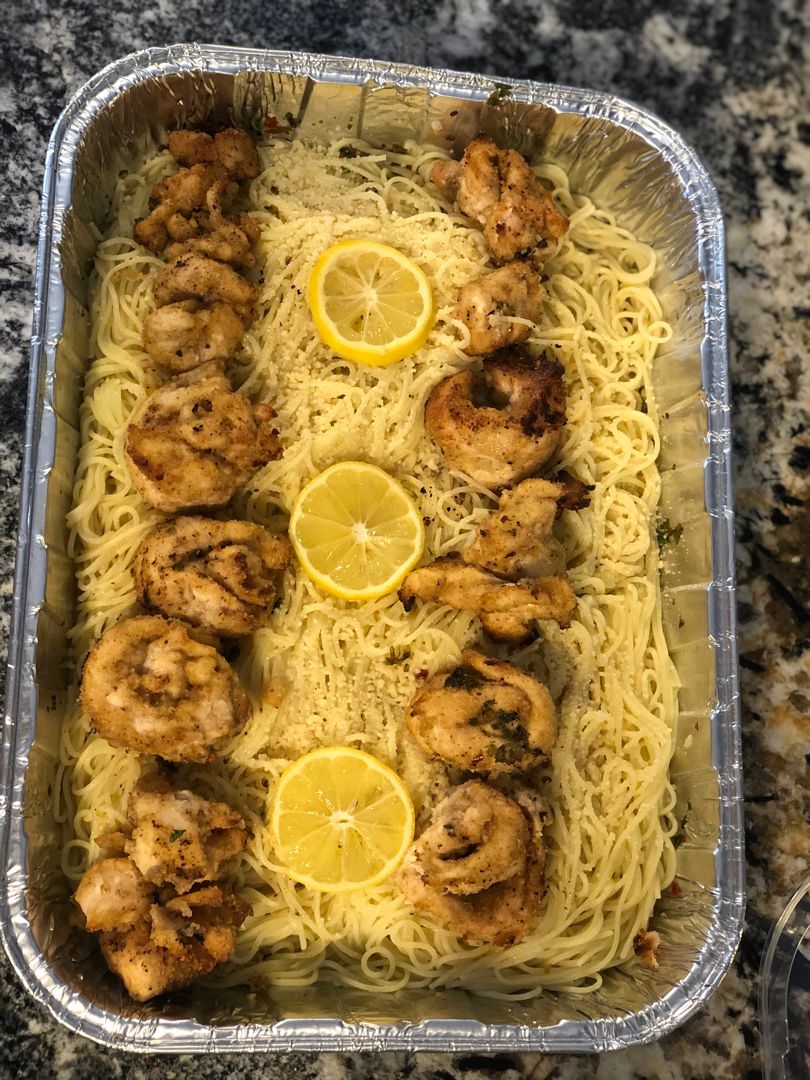
Chicken Spiedini with Amogio Sauce

by Rebecca June 6, 2022
written by Rebecca

Prep Time: 45 mins | Cook Time: 1 hr | Total Time: 1 hr 45 mins | Servings: 4 people

This is a very popular dish served in Italian restaurants. Tender and juicy chicken Spiendini with Amogio sauce served over pasta. Whip this up any time for a filling meal that your entire family will surely love!

Ingredients

Chicken Spiedini:

2 tbsp olive oil

2 tbsp butter

2 lbs. chicken breasts, skinless and boneless

1/3 c Parmesan cheese, grated

2 tsp lemon zest

2 cloves garlic, minced

1 c. bread crumbs

1 tbsp fresh Italian parsley

Amogio Sauce:

1/2 c. butter

1 c. olive oil

1 tbsp garlic

1 tbsp parsley

1/2 c. lemon juice

1 tbsp basil, chopped

1/2 tsp red chili pepper flakes

1/2 tsp each salt & pepper

How to make Chicken Spiedini with Amogio Sauce

Chicken Spiedini:

Step 1: Grate the Parmesan cheese and zest of lemon in a Microplane. Then, chop the parsley and chop or press the garlic.

Step 2: In a shallow bowl, place the cheese, lemon zest, bread crumbs, parsley, and garlic. Mix well until combined and set aside.

Step 3: In a gallon plastic bag, place the chicken and gently pound using a meat mallet to about 1/4-1/2-inch thickness. Then, slice the chicken into 1 1/2 width strips to make 12 pieces.

Step 4: Add the olive oil to a shallow bowl. Melt the butter and add to the bowl with olive oil.

Step 5: Dip each chicken strip in the butter/oil mixture, then dredge in breadcrumbs, evenly coating the chicken. Individually roll 3 chicken strips into a ball, then prick with a skewer. Set aside. For the chicken to fit in the baking pan, just cut the excess kabob. For this recipe, I use a rectangular baker.

Amogio Sauce:

Step 6: Whisk the extra-virgin olive oil, butter, lemon juice, salt, pepper, garlic, fresh chopped parsley and basil, and red pepper, chili flakes in a medium saucier pan over medium heat until the mixture starts to boil. Then, quickly take the pan off the heat.

Step 7: Over the chicken skewers, spoon just enough Amogio sauce to cover the bottom of the baking pan.

Step 8: Bake in a preheated 400 degrees F for about 15 minutes. Flip the chicken and resume baking for additional 15 minutes. Remove from the oven and tip the pan upward very carefully. Spoon some of the Amogio sauce and drizzle it over the chicken. Place in the oven and bake for 15 minutes more.

Step 9: Following the package directions, cook the Angel Hair Pasta. Drain when done and return to the pan. Over the pasta, pour the Amogio sauce and toss well. Transfer the pasta to a serving dish. Serve with the chicken. Enjoy!

Chicken Spiedini with Amogio Sauce

Rebecca Prep Time: 45 mins | Cook Time: 1 hr | Total Time: 1 hr 45 mins | Servings: 4 people This is a very popular dish served in Italian restaurants.… General Recipes Chicken Spiedini with Amogio Sauce European Print This
Serves: 4 Prep Time: 45 mins Cooking Time: 1 hr 1 hr
Nutrition facts: 200 calories 20 grams fat
Rating: 5.0/5
( 1 voted )

Ingredients

  • Chicken Spiedini:
  • 2 tbsp olive oil
  • 2 tbsp butter
  • 2 lbs. chicken breasts, skinless and boneless
  • 1/3 c Parmesan cheese, grated
  • 2 tsp lemon zest
  • 2 cloves garlic, minced
  • 1 c. bread crumbs
  • 1 tbsp fresh Italian parsley
  • Amogio Sauce:
  • 1/2 c. butter
  • 1 c. olive oil
  • 1 tbsp garlic
  • 1 tbsp parsley
  • 1/2 c. lemon juice
  • 1 tbsp basil, chopped
  • 1/2 tsp red chili pepper flakes
  • 1/2 tsp each salt & pepper

Instructions

Chicken Spiedini:

Step 1: Grate the Parmesan cheese and zest of lemon in a Microplane. Then, chop the parsley and chop or press the garlic.

Step 2: In a shallow bowl, place the cheese, lemon zest, bread crumbs, parsley, and garlic. Mix well until combined and set aside.

Step 3: In a gallon plastic bag, place the chicken and gently pound using a meat mallet to about 1/4-1/2-inch thickness. Then, slice the chicken into 1 1/2 width strips to make 12 pieces.

Step 4: Add the olive oil to a shallow bowl. Melt the butter and add to the bowl with olive oil.

Step 5: Dip each chicken strip in the butter/oil mixture, then dredge in breadcrumbs, evenly coating the chicken. Individually roll 3 chicken strips into a ball, then prick with a skewer. Set aside. For the chicken to fit in the baking pan, just cut the excess kabob. For this recipe, I use a rectangular baker.

Amogio Sauce:

Step 6: Whisk the extra-virgin olive oil, butter, lemon juice, salt, pepper, garlic, fresh chopped parsley and basil, and red pepper, chili flakes in a medium saucier pan over medium heat until the mixture starts to boil. Then, quickly take the pan off the heat.

Step 7: Over the chicken skewers, spoon just enough Amogio sauce to cover the bottom of the baking pan.

Step 8: Bake in a preheated 400 degrees F for about 15 minutes. Flip the chicken and resume baking for additional 15 minutes. Remove from the oven and tip the pan upward very carefully. Spoon some of the Amogio sauce and drizzle it over the chicken. Place in the oven and bake for 15 minutes more.

Step 9: Following the package directions, cook the Angel Hair Pasta. Drain when done and return to the pan. Over the pasta, pour the Amogio sauce and toss well. Transfer the pasta to a serving dish. Serve with the chicken. Enjoy!

June 6, 2022 0 comment
0 FacebookTwitterPinterestEmail
General Recipes

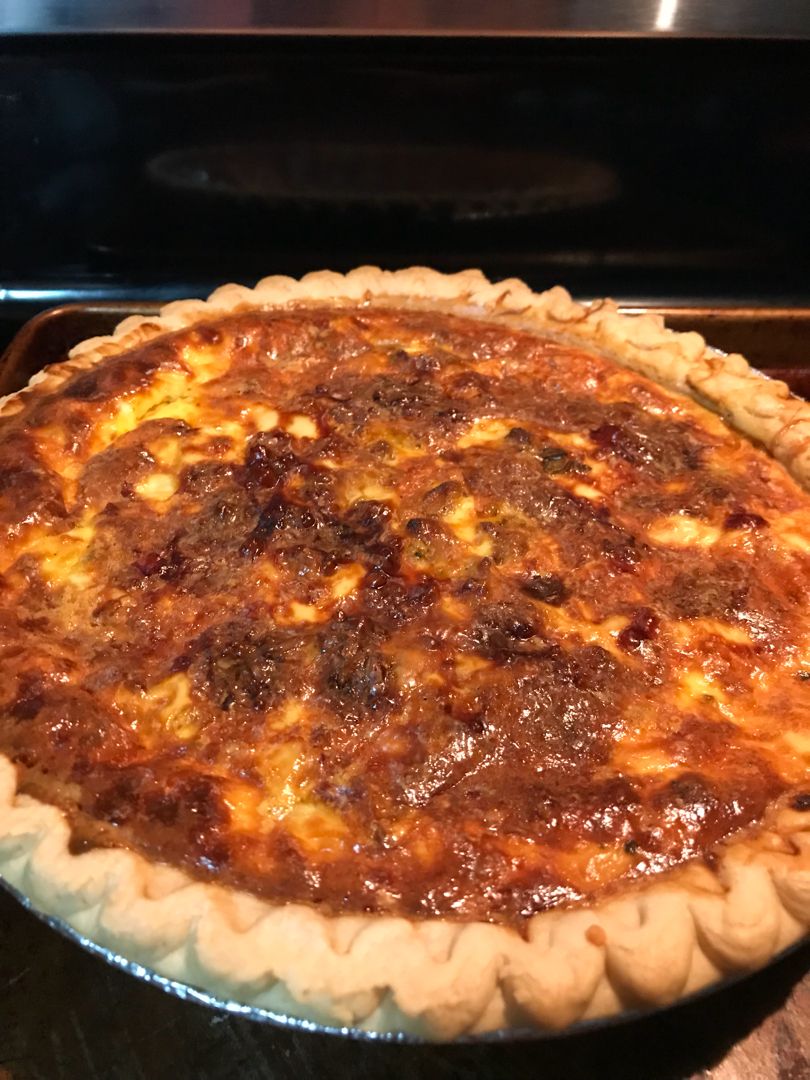
TACO QUICHE

by Rebecca June 6, 2022
written by Rebecca

Yield: 4 people

This taco quiche is a very simple dish. It is packed with flavor. A freezer-friendly dish that is loaded with taco meat, salsa, and cheese. For a fun twist, top the quiche with your preferred taco toppings.

Ingredients

3 large eggs

½ pound ground beef

½ c. salsa

2 tablespoons taco seasoning

½ c. shredded cheddar cheese

1 c. milk

1 (9”) deep-dish frozen pie crust

2 tablespoons sour cream

HOW TO MAKE TACO QUICHE

Step 1: Prepare the oven. Preheat it to 350 degrees F.

Step 2: Cook the ground beef in a skillet until browned. Drain any excess grease. Then, add the taco seasoning and salsa. Continue to cook for another 2 to 3 minutes or until most of the liquid has been absorbed.

Step 3: Into the bottom of a pie crust, spoon the ground beef mixture, and top with shredded cheddar cheese.

Step 4: Mix the eggs, milk, and sour cream until well combined, then pour this over the taco mixture.

Step 5: Place in the preheated oven and bake for about an hour. Remove from the oven when done and let the quiche rest for about 5 to 10 minutes.

Step 6: Serve and enjoy!

Notes:

You can swap ground beef with ground turkey.

I make this recipe even without thawing the pie crust.

If desired, use refrigerated or homemade pie crust.

I use a 9-inch deep-dish pie plate.

You are welcome to add onions, green pepper, black beans, or corn to the quiche.

Tent the edges of the pie crust using foil if they begin to get brown quickly.

Feel free to assemble the quiche in advance and keep it in the fridge overnight.

Make this quiche in advance and freeze either unbaked or baked.

To freeze unbaked, assemble the quiche and flash freeze. Then, place in a freezer bag and freeze. Thaw in the fridge and bake as directed.

Let the baked quiche cool fully before wrapping the pie plate in plastic wrap and aluminium foil, then freeze. Thaw in the fridge and reheat in the microwave or oven.

You can omit the pie crust and make a crustless quiche for a low-carb and keto-friendly meal. And simply bake on a baking dish or deep-dish pie plate.

Store the quiche in the fridge, covered, for up to 3 to 4 days.

In an airtight plastic container or Ziplocks, store leftovers and keep them in the fridge.

TACO QUICHE

Rebecca Yield: 4 people This taco quiche is a very simple dish. It is packed with flavor. A freezer-friendly dish that is loaded with taco meat, salsa, and cheese. For a… General Recipes TACO QUICHE European Print This
Serves: 4
Nutrition facts: 200 calories 20 grams fat
Rating: 5.0/5
( 1 voted )

Ingredients

  • 3 large eggs
  • ½ pound ground beef
  • ½ c. salsa
  • 2 tablespoons taco seasoning
  • ½ c. shredded cheddar cheese
  • 1 c. milk
  • 1 (9”) deep-dish frozen pie crust
  • 2 tablespoons sour cream

Instructions

Step 1: Prepare the oven. Preheat it to 350 degrees F.

Step 2: Cook the ground beef in a skillet until browned. Drain any excess grease. Then, add the taco seasoning and salsa. Continue to cook for another 2 to 3 minutes or until most of the liquid has been absorbed.

Step 3: Into the bottom of a pie crust, spoon the ground beef mixture, and top with shredded cheddar cheese.

Step 4: Mix the eggs, milk, and sour cream until well combined, then pour this over the taco mixture.

Step 5: Place in the preheated oven and bake for about an hour. Remove from the oven when done and let the quiche rest for about 5 to 10 minutes.

Step 6: Serve and enjoy!

Notes

You can swap ground beef with ground turkey. I make this recipe even without thawing the pie crust. If desired, use refrigerated or homemade pie crust. I use a 9-inch deep-dish pie plate. You are welcome to add onions, green pepper, black beans, or corn to the quiche. Tent the edges of the pie crust using foil if they begin to get brown quickly. Feel free to assemble the quiche in advance and keep it in the fridge overnight. Make this quiche in advance and freeze either unbaked or baked. To freeze unbaked, assemble the quiche and flash freeze. Then, place in a freezer bag and freeze. Thaw in the fridge and bake as directed. Let the baked quiche cool fully before wrapping the pie plate in plastic wrap and aluminium foil, then freeze. Thaw in the fridge and reheat in the microwave or oven. You can omit the pie crust and make a crustless quiche for a low-carb and keto-friendly meal. And simply bake on a baking dish or deep-dish pie plate. Store the quiche in the fridge, covered, for up to 3 to 4 days. In an airtight plastic container or Ziplocks, store leftovers and keep them in the fridge.

June 6, 2022 0 comment
0 FacebookTwitterPinterestEmail
General Recipes

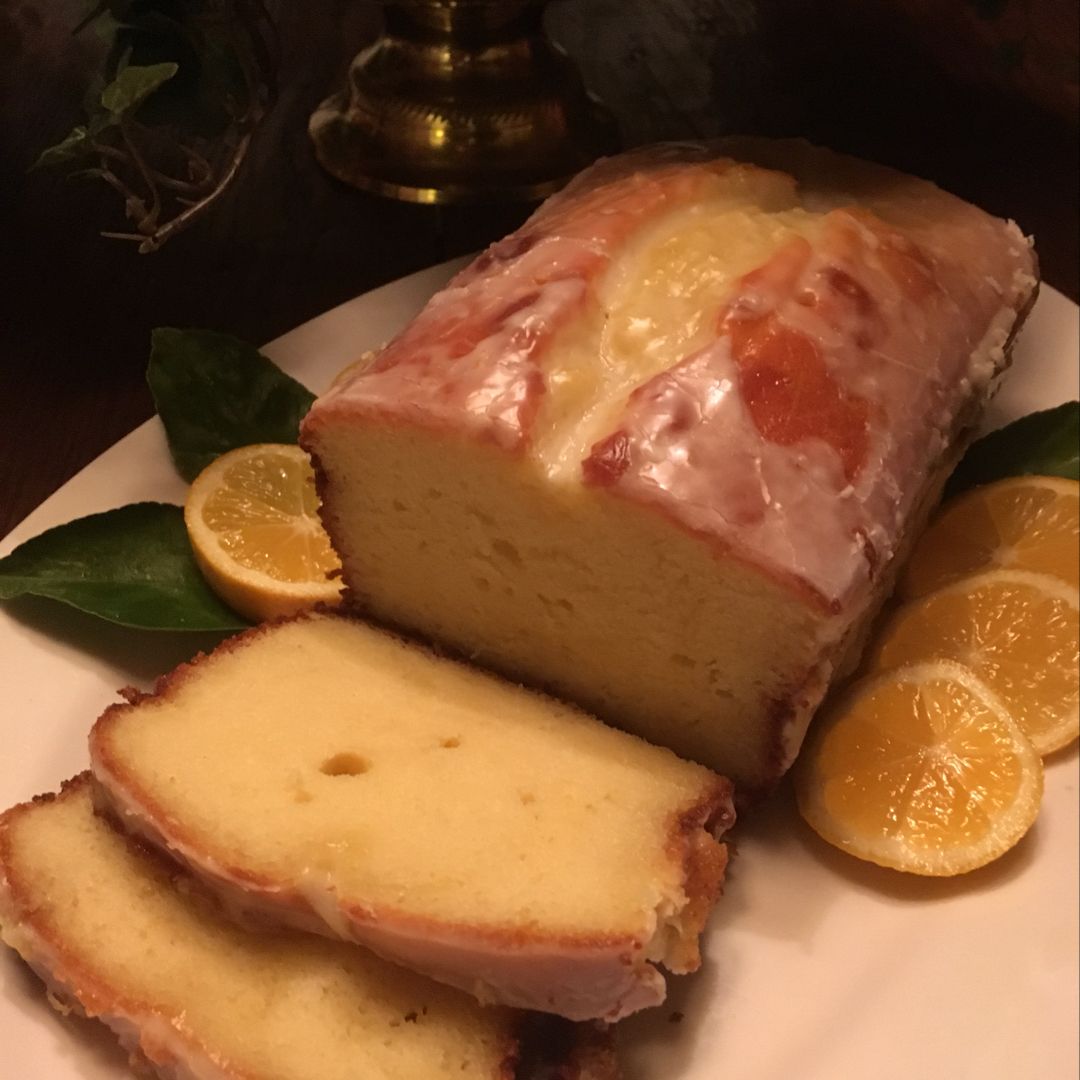
Ina Garten’s Lemon Loaf Cake

by Rebecca June 6, 2022
written by Rebecca

Prep time: 25 mins | Cook time: 50 mins | Total time: 1 hr 15 mins | Serves: 6

This lemon Loaf Cake is a very impressive, tangy, and delicious cake. A refreshing cake that screams summer! Super fun and easy to whip up. Enjoy a slice with some fresh berries, ice cream, or whipped cream.

Ingredients

Cake:

3 eggs

2 tsp baking powder

1 c. plain whole-milk yoghurt or sour cream

1 1/2 c. all-purpose flour

1 1/3 c. sugar, divided

2 tsp grated lemon zest or 2 tsp lemon extract

1/2 c. vegetable oil

1/2 tsp pure vanilla extract

1/3 c. freshly squeezed lemon juice

1/2 tsp kosher salt

Glaze:

2 tbsp freshly squeezed lemon juice

1 c. powdered sugar

How to make Ina Garten’s Lemon Loaf Cake

Step 1: Prepare the oven. Preheat it to 350 degrees F. Ready an 8 1/2 x 4 1/4 x 2 1/2-inch loaf pan. Grease and line with parchment paper. Then, butter and flour the whole pan.

Step 2: In a medium bowl, sift the flour, baking powder, and salt.

Step 3: Place the yoghurt, 1 c sugar, eggs, lemon zest or extract, and vanilla in a large bowl. Mix well until blended.

Step 4: Into the wet ingredients, gradually add the dry ingredients. Fold in the vegetable oil using a rubber spatula until it is completely incorporated into the batter. Pour the batter into the prepared pan. Place in the preheated oven and bake for about 50 minutes or until a toothpick inserted into the middle of the loaf comes out clean.

Step 5: In the meantime, whisk 1/3 c lemon juice and the rest of the 1/3 c sugar in a small saucepan over medium heat until the sugar is completely dissolved and you have a clear mixture. Set aside when done.

Step 6: Remove the cake from the oven when done and let it cool for about 10 minutes in the pan. Then, invert on a baking rack over a sheet pan. Carefully pierce holes on the entire cake using a cake tester, wooden skewer, or toothpick. Pour the lemon-sugar mixture on the still-warm cake, letting it soak in. Let the cake cool completely.

Step 7: Place the powdered sugar and lemon juice in a small bowl. Mix well until smooth. Then, pour this over the cake.

Step 8: Slice the loaf cake and serve with ice cream, fresh berries, or whipped cream. Enjoy!

Ina Garten's Lemon Loaf Cake

Rebecca Prep time: 25 mins | Cook time: 50 mins | Total time: 1 hr 15 mins | Serves: 6 This lemon Loaf Cake is a very impressive, tangy, and delicious… General Recipes Ina Garten’s Lemon Loaf Cake European Print This
Serves: 6 Prep Time: 25 mins Cooking Time: 50 mins 50 mins
Nutrition facts: 200 calories 20 grams fat
Rating: 5.0/5
( 1 voted )

Ingredients

  • Cake:
  • 3 eggs
  • 2 tsp baking powder
  • 1 c. plain whole-milk yoghurt or sour cream
  • 1 1/2 c. all-purpose flour
  • 1 1/3 c. sugar, divided
  • 2 tsp grated lemon zest or 2 tsp lemon extract
  • 1/2 c. vegetable oil
  • 1/2 tsp pure vanilla extract
  • 1/3 c. freshly squeezed lemon juice
  • 1/2 tsp kosher salt
  • Glaze:
  • 2 tbsp freshly squeezed lemon juice
  • 1 c. powdered sugar

Instructions

Step 1: Prepare the oven. Preheat it to 350 degrees F. Ready an 8 1/2 x 4 1/4 x 2 1/2-inch loaf pan. Grease and line with parchment paper. Then, butter and flour the whole pan.

Step 2: In a medium bowl, sift the flour, baking powder, and salt.

Step 3: Place the yoghurt, 1 c sugar, eggs, lemon zest or extract, and vanilla in a large bowl. Mix well until blended.

Step 4: Into the wet ingredients, gradually add the dry ingredients. Fold in the vegetable oil using a rubber spatula until it is completely incorporated into the batter. Pour the batter into the prepared pan. Place in the preheated oven and bake for about 50 minutes or until a toothpick inserted into the middle of the loaf comes out clean.

Step 5: In the meantime, whisk 1/3 c lemon juice and the rest of the 1/3 c sugar in a small saucepan over medium heat until the sugar is completely dissolved and you have a clear mixture. Set aside when done.

Step 6: Remove the cake from the oven when done and let it cool for about 10 minutes in the pan. Then, invert on a baking rack over a sheet pan. Carefully pierce holes on the entire cake using a cake tester, wooden skewer, or toothpick. Pour the lemon-sugar mixture on the still-warm cake, letting it soak in. Let the cake cool completely.

Step 7: Place the powdered sugar and lemon juice in a small bowl. Mix well until smooth. Then, pour this over the cake.

Step 8: Slice the loaf cake and serve with ice cream, fresh berries, or whipped cream. Enjoy!

June 6, 2022 0 comment
0 FacebookTwitterPinterestEmail
General Recipes

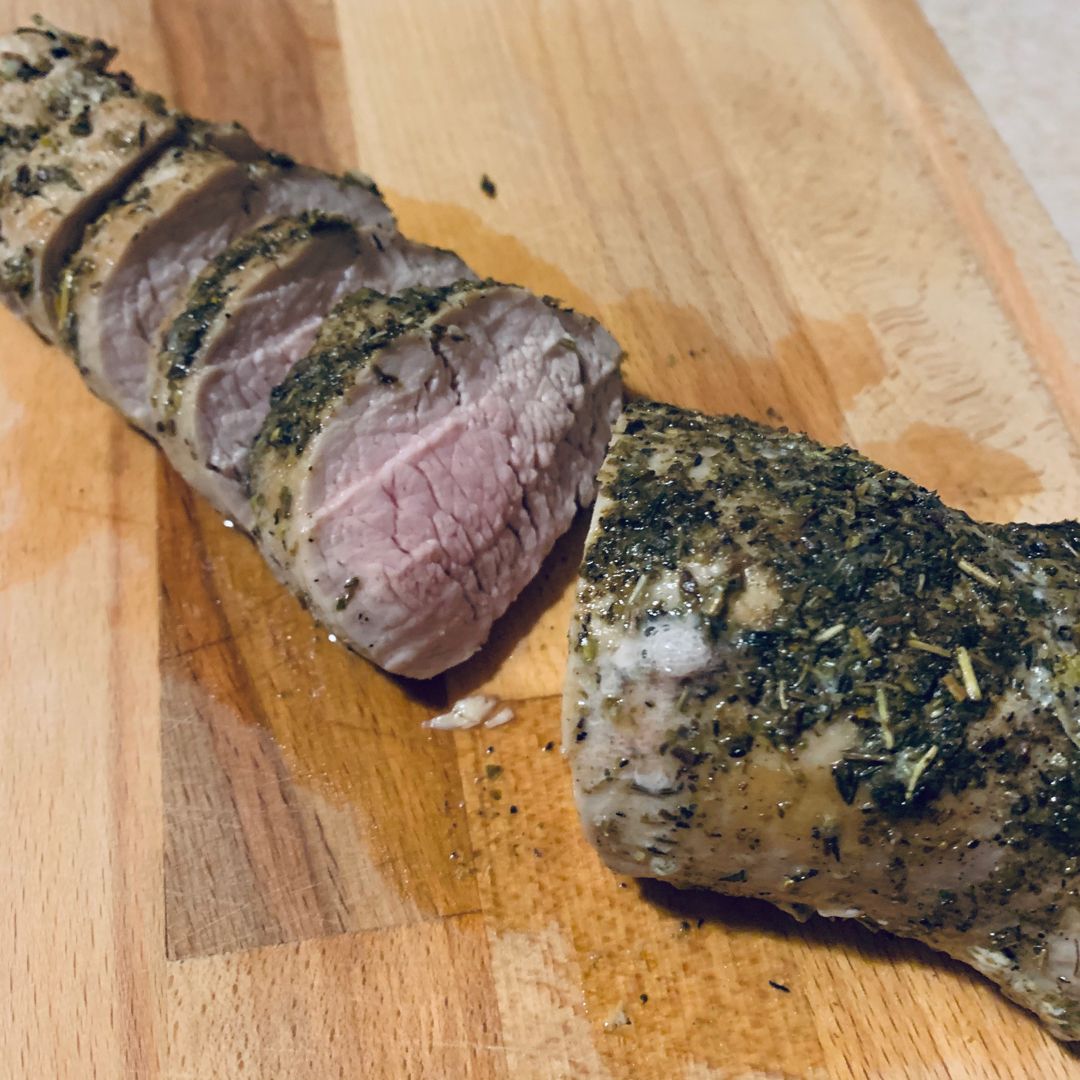
THE BEST GARLIC BAKED PORK TENDERLOIN RECIPE EVER

by Rebecca June 6, 2022
written by Rebecca

Prep time: 5 mins | Cooking time: 30 mins | Total time: 35 mins | Servings: 6

This is indeed the best garlic-baked pork tenderloin! Melt-in-your-mouth and seriously delicious! Tender pork tenderloin baked in a simple yet amazing buttery garlic sauce. It’s the perfect meal to serve when you are expecting guests or for a fancy dinner at home with your loved ones.

INGREDIENTS

2 pounds pork tenderloin, optional: pre-marinated pork before cooking

4 tablespoons butter, sliced into 4-6 pats

2 tablespoons extra virgin olive oil

2 tablespoons diced garlic

½ teaspoon dried sage

1 teaspoon dried basil

1 teaspoon dried oregano

1 teaspoon dried parsley

1 teaspoon dried thyme

OR 2 tablespoons Italian Herb Seasoning Blend

1 tablespoon Celtic sea salt and fresh cracked pepper

HOW TO MAKE THE BEST GARLIC BAKED PORK TENDERLOIN

Step 1: Prepare the oven. Preheat it to 350 degrees. Using aluminium foil, line a baking sheet.

Step 2: Place the garlic, basil, oregano, thyme, parsley, and sage in a small bowl. Mix well and set aside.

Step 3: Generously sprinkle the meat with salt and pepper.

Step 4: Heat the oil in a large pan. Once the oil is shimmering, add the meat to the pan and cook until all sides are dark golden brown. Then, shift the meat to the prepared baking sheet and generously coat with the herb mix. On top, place pats of butter. Tent the dish with foil and place it in the preheated oven. Bake for about 25 minutes or until the internal temperature of the widest, thickest part of the tenderloin reaches 145 degrees.

Step 5: Remove from the oven when done and allow to rest while still covered with foil for about 5 minutes. This will ensure to lock in all the juices.

Step 6: Remove the foil and slice the tenderloin against the grain. Serve and enjoy!

Note:

In an airtight container, store any leftovers in the fridge for up to 3 days.

Keep the tenderloin in a plastic bag or wrap it in plastic wrap and freeze for up to 3 months.

Thaw the frozen tenderloin in the fridge overnight and reheat, tent with foil at 350 degrees until piping hot.

The tenderloin is completely cooked once the internal temperature reaches 145 degrees.

NUTRITION FACTS:

Yield: 6, Serving Size: 3 ounces
Amount Per Serving: Calories 279, Total Fat 15g, Saturated Fat 6g, Trans Fat 0g, Unsaturated Fat 8g, Cholesterol 107mg, Sodium 438mg, Carbohydrates 1g, Fiber 0g, Sugar 0g, Protein 33g

THE BEST GARLIC BAKED PORK TENDERLOIN RECIPE EVER

Rebecca Prep time: 5 mins | Cooking time: 30 mins | Total time: 35 mins | Servings: 6 This is indeed the best garlic-baked pork tenderloin! Melt-in-your-mouth and seriously delicious! Tender… General Recipes THE BEST GARLIC BAKED PORK TENDERLOIN RECIPE EVER European Print This
Serves: 6 Prep Time: 5 mins Cooking Time: 30 mins 30 mins
Nutrition facts: 279 calories 15 fat
Rating: 4.5/5
( 2 voted )

Ingredients

  • 2 pounds pork tenderloin, optional: pre-marinated pork before cooking
  • 4 tablespoons butter, sliced into 4-6 pats
  • 2 tablespoons extra virgin olive oil
  • 2 tablespoons diced garlic
  • ½ teaspoon dried sage
  • 1 teaspoon dried basil
  • 1 teaspoon dried oregano
  • 1 teaspoon dried parsley
  • 1 teaspoon dried thyme
  • OR 2 tablespoons Italian Herb Seasoning Blend
  • 1 tablespoon Celtic sea salt and fresh cracked pepper

Instructions

Step 1: Prepare the oven. Preheat it to 350 degrees. Using aluminium foil, line a baking sheet.

Step 2: Place the garlic, basil, oregano, thyme, parsley, and sage in a small bowl. Mix well and set aside.

Step 3: Generously sprinkle the meat with salt and pepper.

Step 4: Heat the oil in a large pan. Once the oil is shimmering, add the meat to the pan and cook until all sides are dark golden brown. Then, shift the meat to the prepared baking sheet and generously coat with the herb mix. On top, place pats of butter. Tent the dish with foil and place it in the preheated oven. Bake for about 25 minutes or until the internal temperature of the widest, thickest part of the tenderloin reaches 145 degrees.

Step 5: Remove from the oven when done and allow to rest while still covered with foil for about 5 minutes. This will ensure to lock in all the juices.

Step 6: Remove the foil and slice the tenderloin against the grain. Serve and enjoy!

June 6, 2022 0 comment
0 FacebookTwitterPinterestEmail
General Recipes

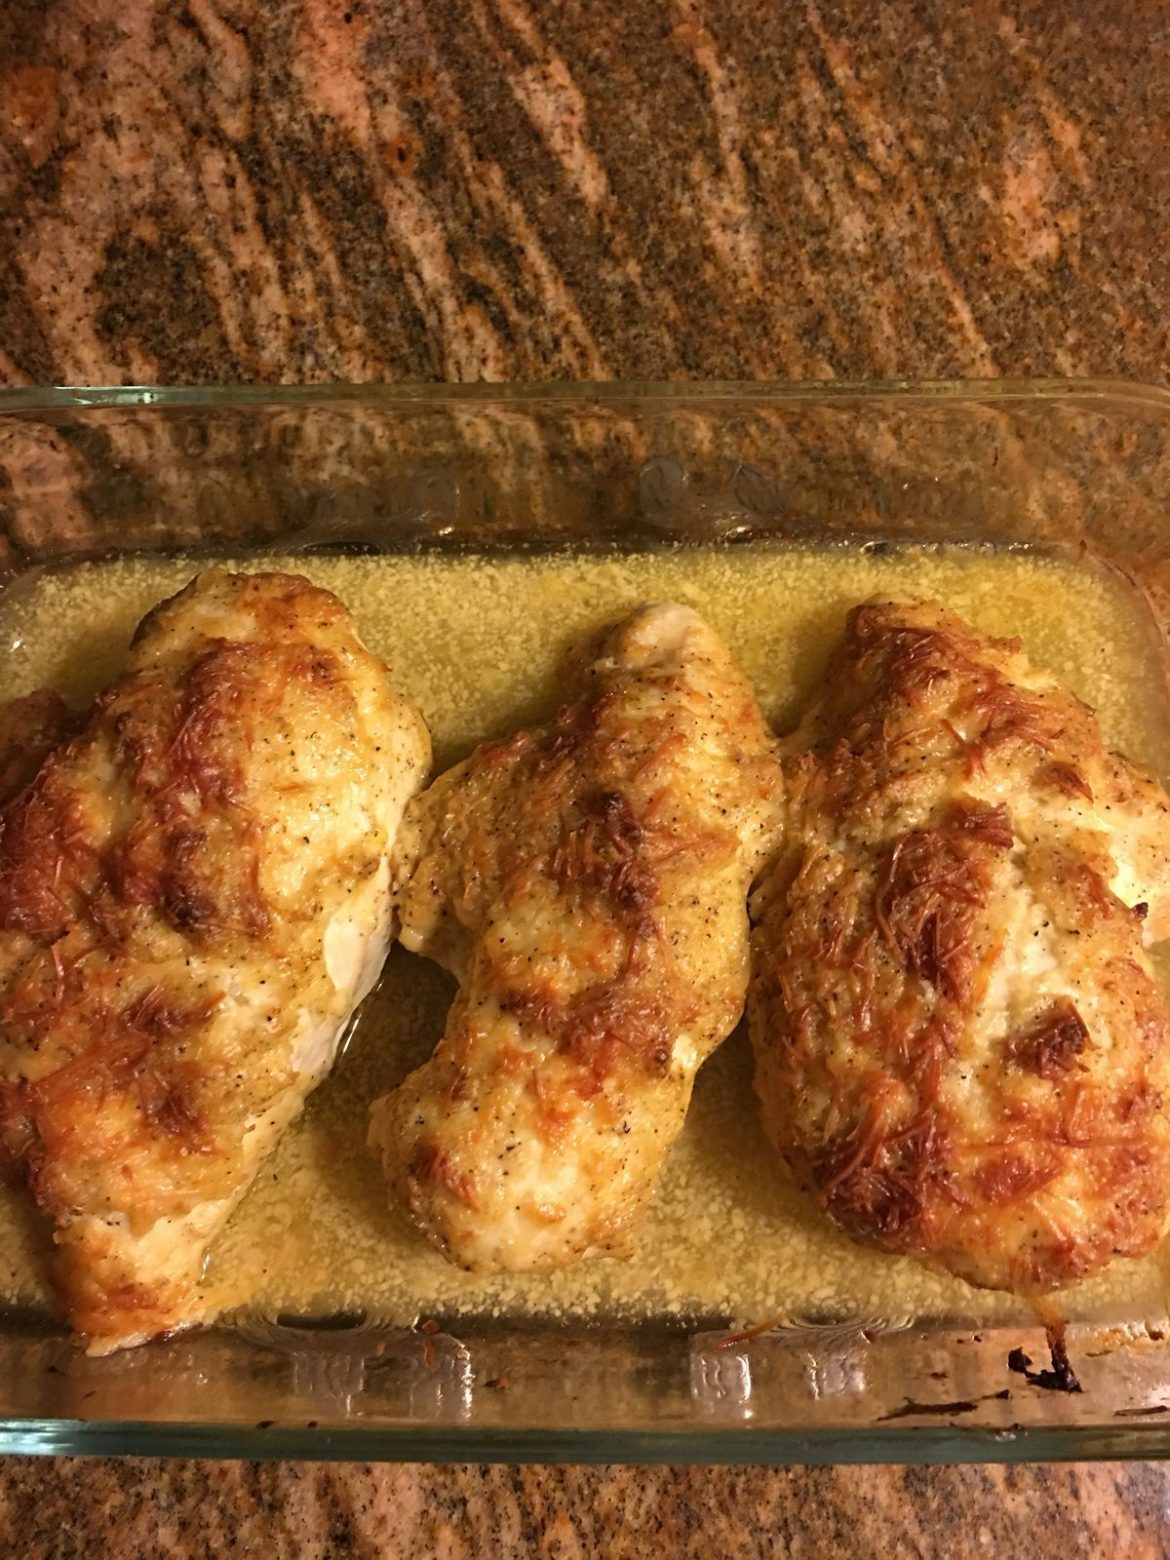
Parmesan Chicken Bake Recipe

by Rebecca June 6, 2022
written by Rebecca

Prep Time: 10 mins | Cook Time: 45 mins | Total Time: 55 mins | Yield: 6 servings

Super tender chicken with mayo and a ton of Parmesan cheese baked until golden and crispy. This chicken dinner is loaded with amazing flavor. It’s a simple weeknight meal that you can easily and quickly make in the oven at any time. All you need are a few readily available ingredients. Serve this mouthwatering Parmesan chicken, bake with steamed/roasted veggies on the side or a simple side salad for an easy and filling meal.

Chicken is a staple at home. I make sure to whip up wonderful chicken meals for my family. I have my favorites, and this Parmesan Chicken Bake is my newest obsession. Not only that this is incredibly easy to make, but this guarantee one of the best chicken dish. And this is perfect all year round. Leftovers are amazing, too!

Make sure to give this Parmesan Chicken Bake a try very soon. I am pretty sure that you’ll not be disappointed!

Ingredients

1/2 cup fresh Parmesan cheese, plus more for the top

6 boneless, skinless chicken breasts

1/2 teaspoon pepper

1 cup light mayonnaise or Greek yoghurt (or 1/2 of each as well)

1 teaspoon garlic powder

1 1/2 teaspoons seasoning salt (not regular table salt)

How to make Parmesan Chicken Bake

Step 1: Prepare the oven. Preheat it to 375 degrees. Grease a 9 x 13-inch glass pan. Inside the prepared pan, lay the chicken.

Step 2: Combine the remaining ingredients until well blended and evenly spread on top of each chicken, ensuring to completely cover all exposed raw meat. Over the entire chicken, slightly sprinkle extra fresh Parmesan.

Step 3: Place in the preheated oven and bake for about 45 minutes. Serve right away or the next day. If serving the next day, simply reheat in the microwave.

Note:

Make sure to use fresh Parmesan and not the ones in the can. Do not use table salt instead use seasoning salt. Feel free to adjust the sodium, according to taste.

Nutrition Facts:

Serving Size: 1 chicken breast, Calories: 500 | Sugar: 0 g | Sodium: 953 mg | Fat: 22 g | Saturated Fat: 4 g | Unsaturated Fat: 10 g | Trans Fat: 0 g | Carbohydrates: 3 g | Fiber: 0 g | Protein: 70 g | Cholesterol: 193 mg

Parmesan Chicken Bake Recipe

Rebecca Prep Time: 10 mins | Cook Time: 45 mins | Total Time: 55 mins | Yield: 6 servings Super tender chicken with mayo and a ton of Parmesan cheese baked… General Recipes Parmesan Chicken Bake Recipe European Print This
Serves: 6 Prep Time: 10 mins Cooking Time: 45 mins 45 mins
Nutrition facts: 500 calories 22 fat
Rating: 5.0/5
( 1 voted )

Ingredients

  • 1/2 cup fresh Parmesan cheese, plus more for the top
  • 6 boneless, skinless chicken breasts
  • 1/2 teaspoon pepper
  • 1 cup light mayonnaise or Greek yoghurt (or 1/2 of each as well)
  • 1 teaspoon garlic powder
  • 1 1/2 teaspoons seasoning salt (not regular table salt)

Instructions

Step 1: Prepare the oven. Preheat it to 375 degrees. Grease a 9 x 13-inch glass pan. Inside the prepared pan, lay the chicken.

Step 2: Combine the remaining ingredients until well blended and evenly spread on top of each chicken, ensuring to completely cover all exposed raw meat. Over the entire chicken, slightly sprinkle extra fresh Parmesan.

Step 3: Place in the preheated oven and bake for about 45 minutes. Serve right away or the next day. If serving the next day, simply reheat in the microwave.

Notes

Make sure to use fresh Parmesan and not the ones in the can. Do not use table salt instead use seasoning salt. Feel free to adjust the sodium, according to taste.

June 6, 2022 0 comment
0 FacebookTwitterPinterestEmail
General Recipes

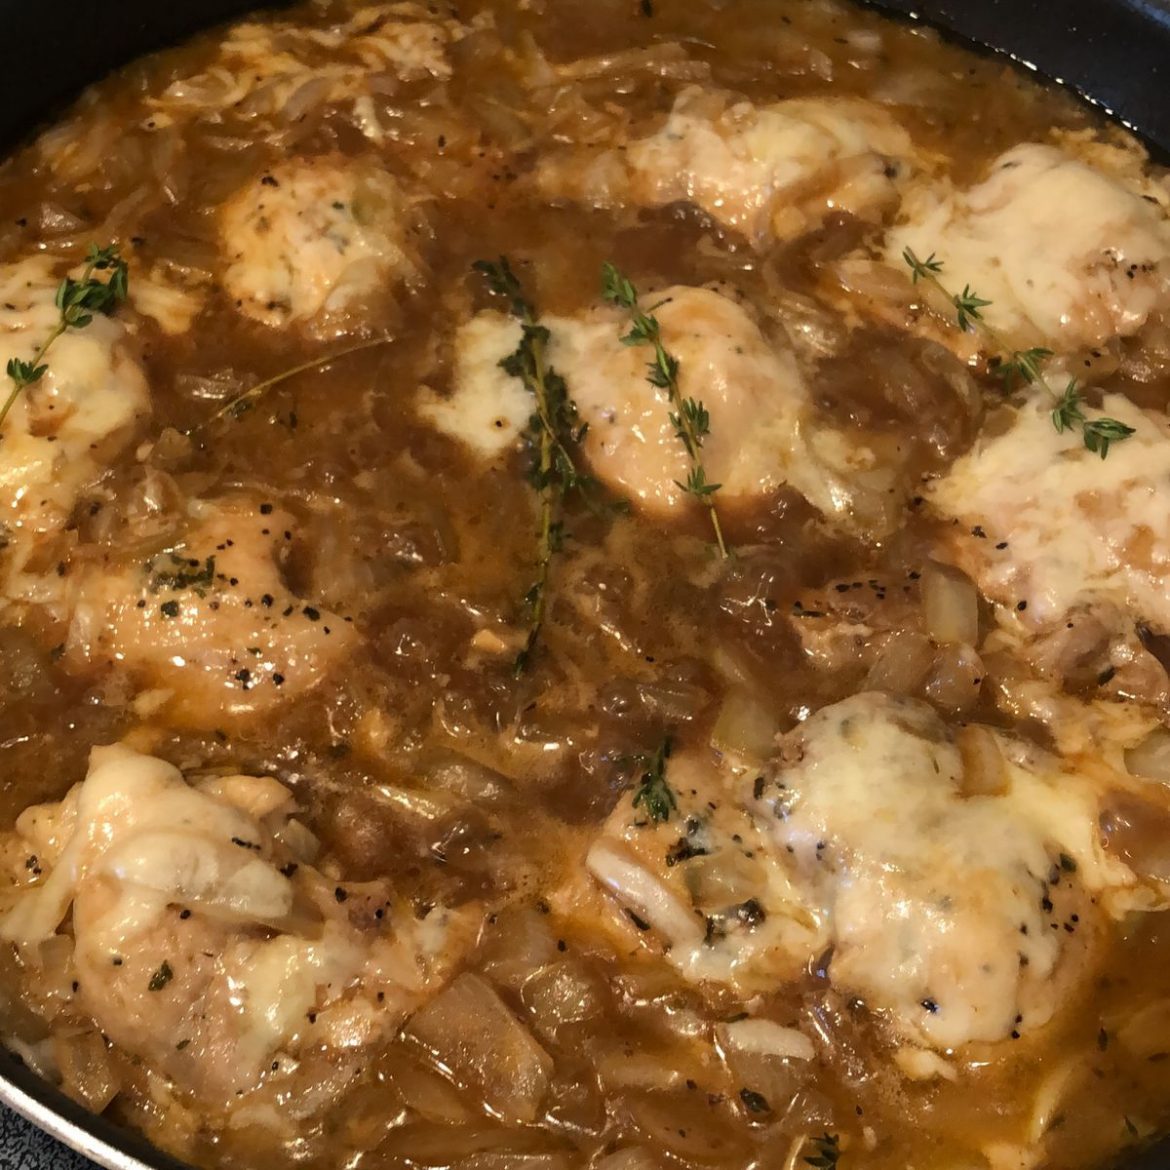
French Onion Chicken

by Rebecca June 6, 2022
written by Rebecca

Prep Time: 15 mins | Cook Time: 1 hr 35 mins | Total Time: 1 hr 50 mins | Servings: 4

I instantly fell in love with this French Onion Chicken. Melt-in-your-mouth chicken in a French onion soup-like sauce and topped with loads of melty cheese. A flavor-packed dinner that will surely impress everyone!

Ingredients

1 lb. chicken breasts or thighs (optionally boneless and skinless)

2 lbs. onions, sliced

3 tbsp butter

2 cloves garlic, chopped

2 c. beef broth or chicken broth

2 tbsp flour

1 tbsp olive oil

2 tbsp Dijon mustard

1 tbsp balsamic vinegar

1 tsp thyme, chopped

1 c. Gruyere, grated

salt and pepper to taste

How to make French Onion Chicken

Step 1: In a pan, melt the butter over medium heat. Once the butter has melted, add the onions and cook for about 1 hour or until deep golden, stirring often. As needed, slightly, add water or broth to deglaze the pan.

Step 2: Add the garlic along with the thyme and flour. Continue to cook for a minute more while stirring.

Step 3: Pour in half of the broth. Deglaze the pan and bring everything to a boil. Then, decrease the heat and let the mixture simmer for about 5 minutes.

Step 4: In the meantime, heat the oil in a different pan over medium-high heat. Sprinkle the chicken with salt and pepper. Once the oil is hot, add the chicken to the pan and cook for about 4 to 5 minutes on each side until browned. Set aside when done,

Step 5: To the pan after removing the chicken, pour in the rest of the broth. Deglaze the pan and stir in the balsamic vinegar and mustard. Bring everything to a boil, then decrease the heat. Simmer for about 5 minutes until the mixture has reduced by half.

Step 6: In an oven-safe pan, place the onions and top with the chicken and broth from the pan. Put the lid on or tent with foil and place in a 350 degrees F or 1802 degrees C preheated oven. Bake for about 20 minutes. Remove from the oven after 20 minutes and sprinkle with cheese. Broil for approximately 2 to 4 minutes until the cheese has melted.

Option:

To easily make this a one-pan meal, add 8 ounces of pasta and 2 1/4 c broth or water to the sauce in step 6. Or add 1 c. rice and 2 c broth/water instead.

Nutrition Facts: Calories 473, Fat 23.7g (Saturated 11.3g, Trans 0g), Cholesterol 118mg, Sodium 708mg, Carbs 29.5g (Fiber 5.4g, Sugars 10g), Protein 40.6g

French Onion Chicken

Rebecca Prep Time: 15 mins | Cook Time: 1 hr 35 mins | Total Time: 1 hr 50 mins | Servings: 4 I instantly fell in love with this French Onion… General Recipes French Onion Chicken European Print This
Serves: 4 Prep Time: 15 mins Cooking Time: 1 hr 35 mins 1 hr 35 mins
Nutrition facts: 473 calories 23.7 fat
Rating: 5.0/5
( 1 voted )

Ingredients

  • 1 lb. chicken breasts or thighs (optionally boneless and skinless)
  • 2 lbs. onions, sliced
  • 3 tbsp butter
  • 2 cloves garlic, chopped
  • 2 c. beef broth or chicken broth
  • 2 tbsp flour
  • 1 tbsp olive oil
  • 2 tbsp Dijon mustard
  • 1 tbsp balsamic vinegar
  • 1 tsp thyme, chopped
  • 1 c. Gruyere, grated
  • salt and pepper to taste

Instructions

Step 1: In a pan, melt the butter over medium heat. Once the butter has melted, add the onions and cook for about 1 hour or until deep golden, stirring often. As needed, slightly, add water or broth to deglaze the pan.

Step 2: Add the garlic along with the thyme and flour. Continue to cook for a minute more while stirring.

Step 3: Pour in half of the broth. Deglaze the pan and bring everything to a boil. Then, decrease the heat and let the mixture simmer for about 5 minutes.

Step 4: In the meantime, heat the oil in a different pan over medium-high heat. Sprinkle the chicken with salt and pepper. Once the oil is hot, add the chicken to the pan and cook for about 4 to 5 minutes on each side until browned. Set aside when done,

Step 5: To the pan after removing the chicken, pour in the rest of the broth. Deglaze the pan and stir in the balsamic vinegar and mustard. Bring everything to a boil, then decrease the heat. Simmer for about 5 minutes until the mixture has reduced by half.

Step 6: In an oven-safe pan, place the onions and top with the chicken and broth from the pan. Put the lid on or tent with foil and place in a 350 degrees F or 1802 degrees C preheated oven. Bake for about 20 minutes. Remove from the oven after 20 minutes and sprinkle with cheese. Broil for approximately 2 to 4 minutes until the cheese has melted.

June 6, 2022 0 comment
0 FacebookTwitterPinterestEmail
General Recipes

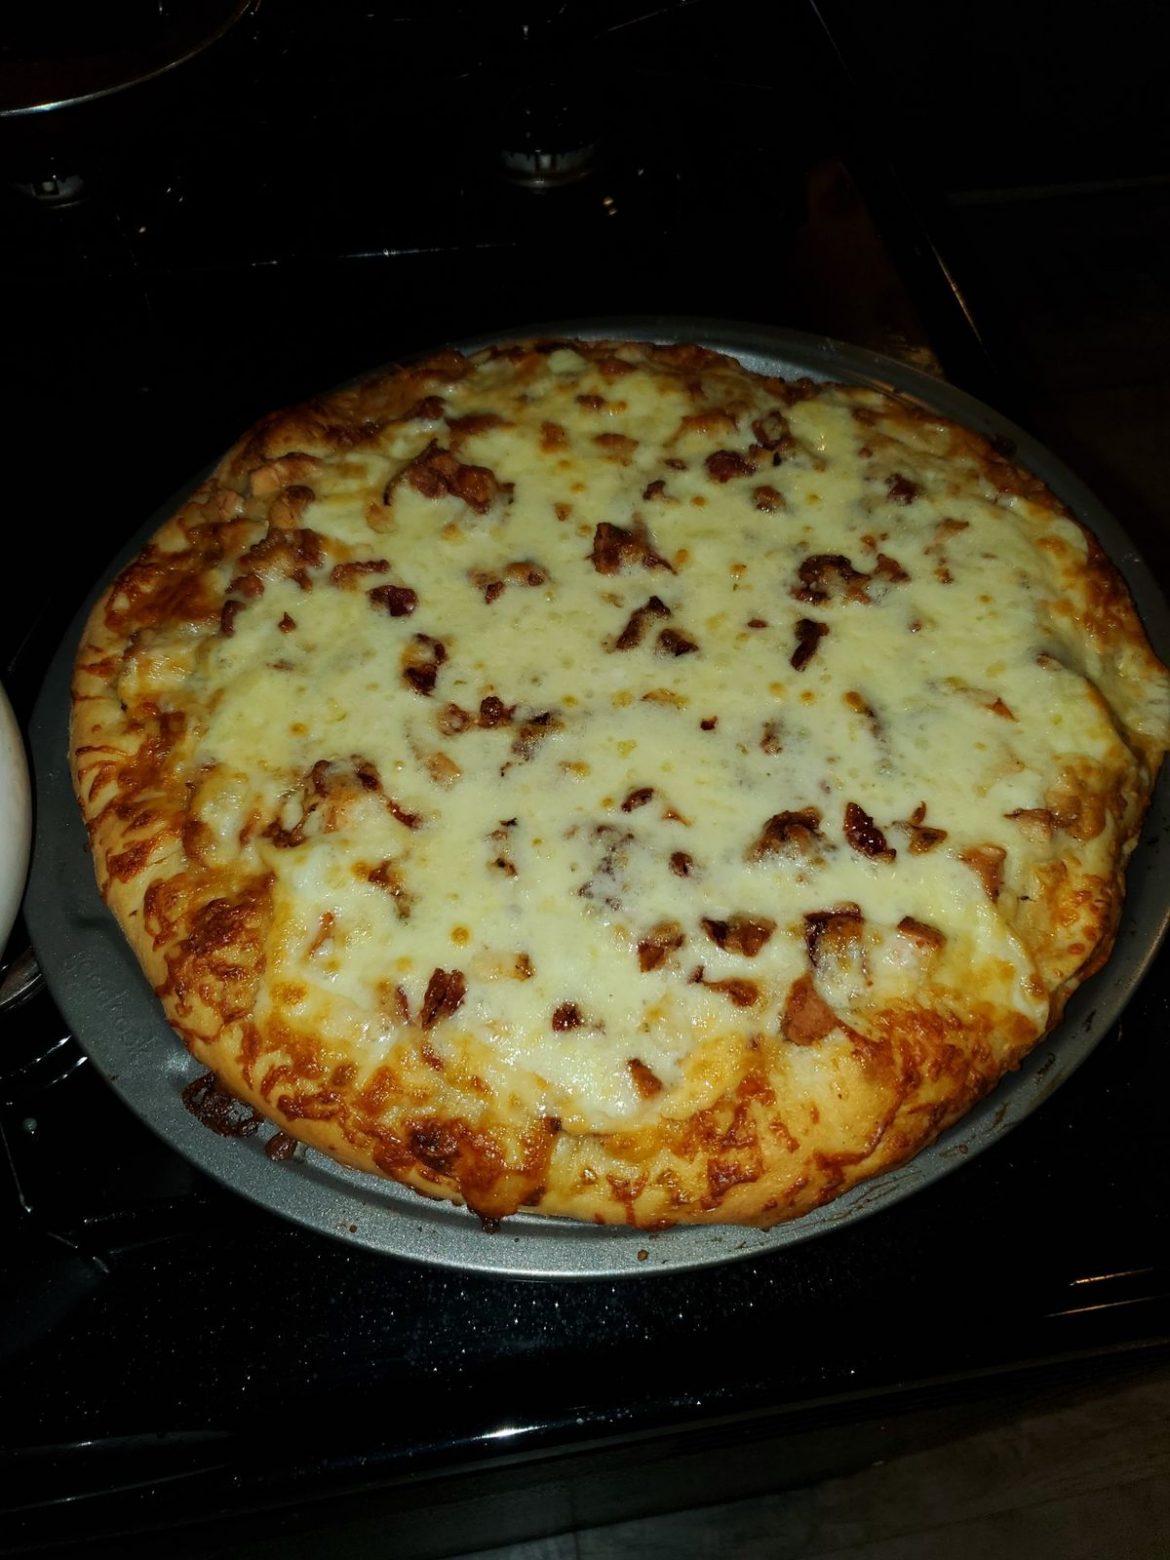
Chicken Bacon Ranch Pizza

by Rebecca June 6, 2022
written by Rebecca

PREP TIME: 15 MINS | COOK TIME: 15 MINS | TOTAL TIME: 30 MINS | SERVINGS: 8 slices

This is one of my family’s ultimate favorite pizzas! This chicken, bacon, ranch pizza is loaded with smokey bacon, pieces of chicken, melty cheese, and creamy ranch. Incredibly easy to whip up using only a few simple ingredients. Make this any time in less than thirty minutes. Serve this delicious pizza with fresh fruit salad, simple Caesar salad, cheesy breadsticks, or salad for a simple, quick, and filling lunch or dinner.

This pizza recipe is perfect for beginners. You only need minimal ingredients to pull this off. A quality pizza that crisps on the outside and are soft on the inside. You can make the crust thick or thin depending on your preference.

INGREDIENTS

1½ c. (200 grams) chopped cooked chicken

3 c. (340 grams) shredded mozzarella cheese

4 strips bacon, cooked and crumbled

⅔ c. (155 ml) ranch dressing

1 lb. (550 grams) of homemade pizza dough or store-bought

How to make Chicken Bacon Ranch Pizza

Step 1: Prepare the oven. Preheat it to 425 degrees F.

Step 2: Into about a 13-15-inch circle, roll the dough out and lay it on a pizza pan.

Step 3: Evenly spread the ranch over the dough and sprinkle with cheese. Next, top with chicken followed by the bacon. Place in the preheated oven and bake for about 15 minutes or until the crust is golden.

NOTES:

For this recipe, you are welcome to use any cooked chicken, such as leftover or Rotisserie chicken. You can also just cut up a few chicken breasts and cook them in advance.

You can use your favorite brand of ranch or Homemade Buttermilk Ranch.

A great choice to use is shredded mozzarella. To change things up a little, you can also use Monterey Jack or pepper jack. It is important to grate the cheese yourself.

Serving Suggestions:

Fresh fruit slices

Simple Caesar Salad

Cheesy Breadsticks

Salad with Homemade Buttermilk Ranch

Nutrition Facts:

Amount Per Serving (1 slice): Calories 364, Calories from Fat 175, Fat 19.4g30%, Saturated Fat 4.7g29%, Cholesterol 62mg21%, Sodium 881mg38%, Potassium 143mg4%, Carbohydrates 28g9%, Fiber 1g4%, Sugar 1.3g1%, Protein 17.5g35%, Vitamin C 1mg1%, Calcium 119mg12%, Iron 3mg17%

Chicken Bacon Ranch Pizza

Rebecca PREP TIME: 15 MINS | COOK TIME: 15 MINS | TOTAL TIME: 30 MINS | SERVINGS: 8 slices This is one of my family’s ultimate favorite pizzas! This chicken, bacon,… General Recipes Chicken Bacon Ranch Pizza European Print This
Serves: 8 Prep Time: 15 mins Cooking Time: 15 mins 15 mins
Nutrition facts: 200 calories 20 grams fat
Rating: 5.0/5
( 1 voted )

Ingredients

  • 1½ c. (200 grams) chopped cooked chicken
  • 3 c. (340 grams) shredded mozzarella cheese
  • 4 strips bacon, cooked and crumbled
  • ⅔ c. (155 ml) ranch dressing
  • 1 lb. (550 grams) of homemade pizza dough or store-bought

Instructions

Step 1: Prepare the oven. Preheat it to 425 degrees F.

Step 2: Into about a 13-15-inch circle, roll the dough out and lay it on a pizza pan.

Step 3: Evenly spread the ranch over the dough and sprinkle with cheese. Next, top with chicken followed by the bacon. Place in the preheated oven and bake for about 15 minutes or until the crust is golden.

Notes

For this recipe, you are welcome to use any cooked chicken, such as leftover or Rotisserie chicken. You can also just cut up a few chicken breasts and cook them in advance. You can use your favorite brand of ranch or Homemade Buttermilk Ranch. A great choice to use is shredded mozzarella. To change things up a little, you can also use Monterey Jack or pepper jack. It is important to grate the cheese yourself. Serving Suggestions: Fresh fruit slices Simple Caesar Salad Cheesy Breadsticks Salad with Homemade Buttermilk Ranch

June 6, 2022 0 comment
0 FacebookTwitterPinterestEmail
General Recipes

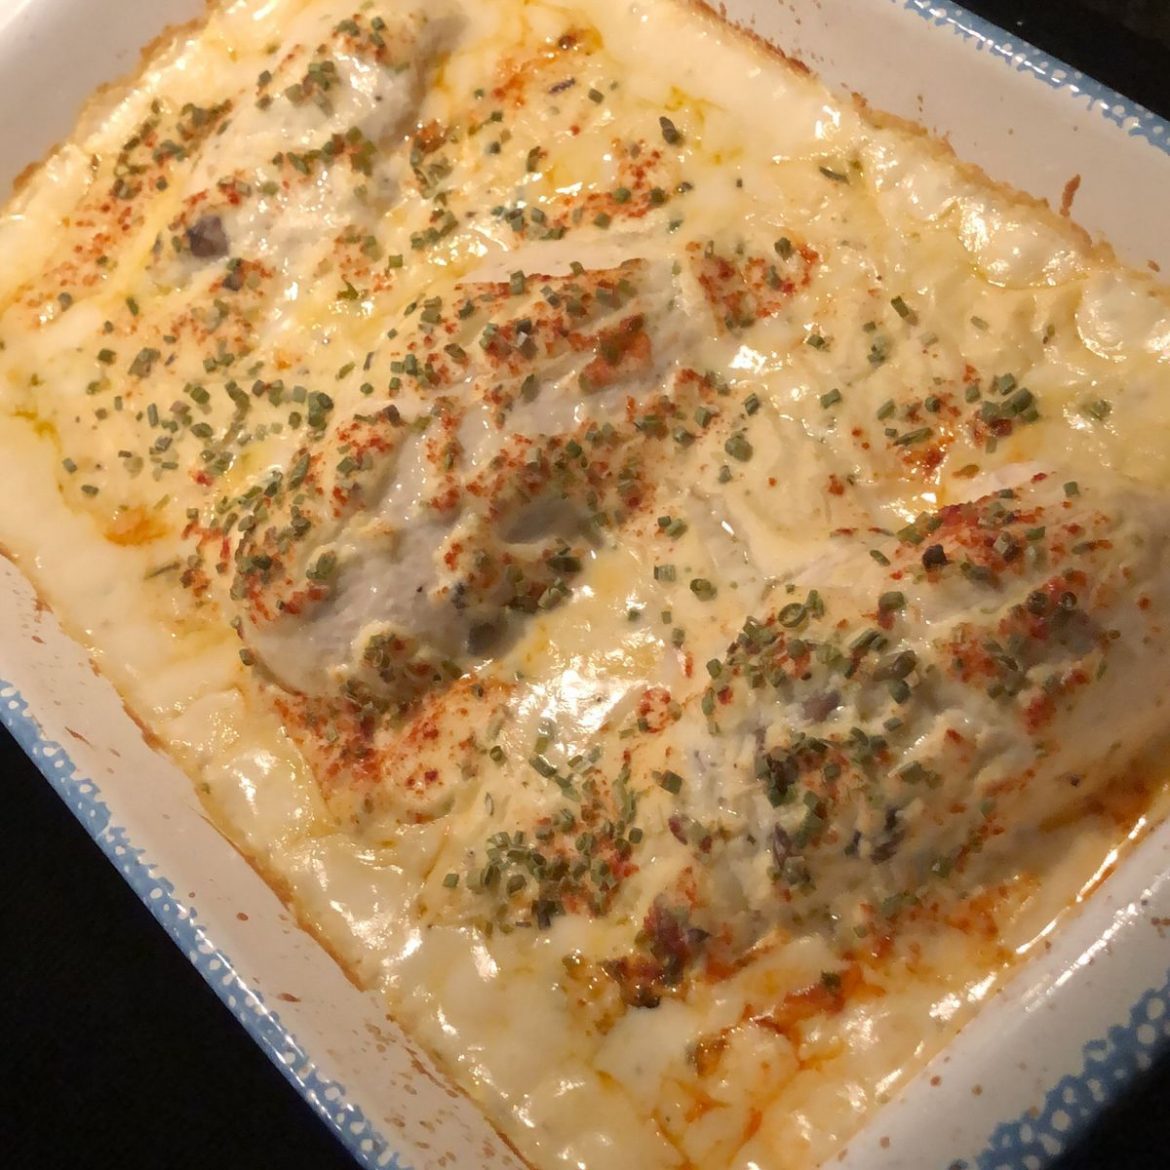
CREAMY CHICKEN BAKE

by Rebecca June 6, 2022
written by Rebecca

This creamy chicken bake is a wonderful dinner perfect for the entire family! An incredibly easy and quick dish that you can throw together using a few simple ingredients. A delicious chicken dinner that is excellent any day or even on busy days.

Ingredients

Homemade Condensed Cream of Chicken Soup, an equivalent amount

1 c. Sour Cream

2 1/2 to 3 pounds Boneless Skinless Chicken Breasts (I use 4 large breasts)

1 can Cream of Chicken Soup (10 3/4 oz., condensed) – or make

8 ounces can Mushroom drained (stems and pieces – or use fresh) – optional

1 can Cream of Mushroom Soup (10 3/4 oz., condensed ) – or make Homemade Condensed Cream Of Mushroom Soup, using an equivalent amount

1/2 tsp Onion Powder

1/2 c. Water

1 tsp chives (chopped)

Salt and Pepper to taste

Few dashes of Paprika

HOW TO MAKE CREAMY CHICKEN BAKE

Step 1: Prepare the oven. Preheat it to 350 degrees F. Using non-stick cooking spray, grease a 9 x 13-inch dish (or similar size dish).

Step 2: In the prepared baking dish, place the chicken breasts in a single layer and lightly season with salt and pepper.

Step 3: Place the soups, sour cream, onion powder, mushrooms, chives, and water in a medium-sized bowl. Mix well until combined. Over the chicken, evenly pour the mixture and lightly sprinkle with paprika. Bake on the middle rack of the preheated oven for about 1 hour, uncovered, until the chicken breast is completely cooked and the internal temperature reaches 165 to 170 degrees F. Note that the cooking time of the chicken varies depending on the size.

Step 4: Remove from the oven when done and serve the creamy chicken bake immediately alongside your preferred veggies (such as broccoli or green beans) and rice or noodles. Do not forget to spoon the creamy sauce over the rice/noodles. Enjoy!

TIPS:

If desired, sprinkle with extra chives before serving.

For this recipe, you can also use leftover cooked turkey/chicken and rotisserie chicken. Simply reduce the cooking time.

CREAMY CHICKEN BAKE

Rebecca This creamy chicken bake is a wonderful dinner perfect for the entire family! An incredibly easy and quick dish that you can throw together using a few simple ingredients. A… General Recipes CREAMY CHICKEN BAKE European Print This
Nutrition facts: 200 calories 20 grams fat
Rating: 4.0/5
( 2 voted )

Ingredients

  • Homemade Condensed Cream of Chicken Soup, an equivalent amount
  • 1 c. Sour Cream
  • 2 1/2 to 3 pounds Boneless Skinless Chicken Breasts (I use 4 large breasts)
  • 1 can Cream of Chicken Soup (10 3/4 oz., condensed) - or make
  • 8 ounces can Mushroom drained (stems and pieces – or use fresh) - optional
  • 1 can Cream of Mushroom Soup (10 3/4 oz., condensed ) - or make Homemade Condensed Cream Of Mushroom Soup, using an equivalent amount
  • 1/2 tsp Onion Powder
  • 1/2 c. Water
  • 1 tsp chives (chopped)
  • Salt and Pepper to taste
  • Few dashes of Paprika

Instructions

Step 1: Prepare the oven. Preheat it to 350 degrees F. Using non-stick cooking spray, grease a 9 x 13-inch dish (or similar size dish).

Step 2: In the prepared baking dish, place the chicken breasts in a single layer and lightly season with salt and pepper.

Step 3: Place the soups, sour cream, onion powder, mushrooms, chives, and water in a medium-sized bowl. Mix well until combined. Over the chicken, evenly pour the mixture and lightly sprinkle with paprika. Bake on the middle rack of the preheated oven for about 1 hour, uncovered, until the chicken breast is completely cooked and the internal temperature reaches 165 to 170 degrees F. Note that the cooking time of the chicken varies depending on the size.

Step 4: Remove from the oven when done and serve the creamy chicken bake immediately alongside your preferred veggies (such as broccoli or green beans) and rice or noodles. Do not forget to spoon the creamy sauce over the rice/noodles. Enjoy!

June 6, 2022 0 comment
0 FacebookTwitterPinterestEmail
General Recipes

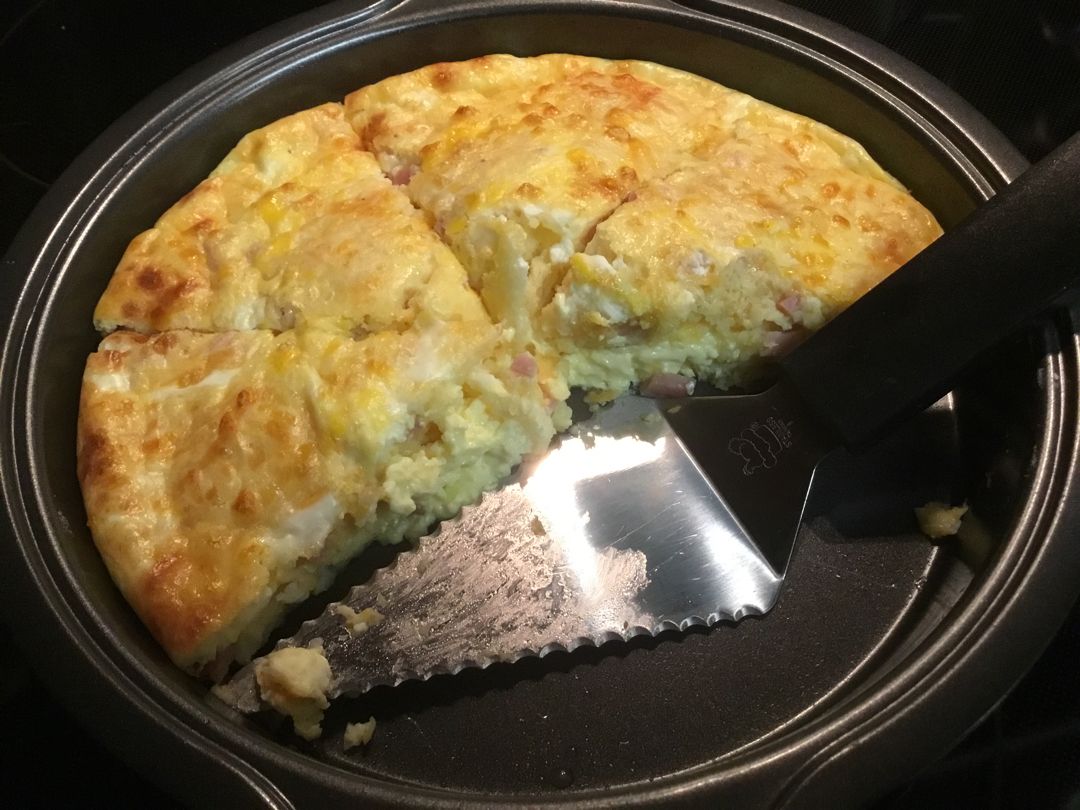
IMPOSSIBLE QUICHE (CRUSTLESS HAM AND CHEESE QUICHE)

by Rebecca June 4, 2022
written by Rebecca

Prep time: 10 mins | Cook time: 40 mins | Total time: 50 mins | Yield: 8

This quiche is a delicious dish that you can serve for breakfast, lunch, or even dinner. Very light, delightful, and loved by everyone. If you have leftover ham, this recipe is perfect to use them up.

INGREDIENTS

4 eggs

100 grams / 3.5 ounces Ham, diced

½ c. Parmesan Cheese, grated

1 ¼ c. Cheddar Cheese, grated

1 Brown Onion, diced

1 ½ c. Milk

⅓ c Self-Raising Flour

Salt & Pepper, to taste

HOW TO MAKE IMPOSSIBLE QUICHE (CRUSTLESS HAM AND CHEESE QUICHE)

Step 1: Prepare the oven. Preheat it to 200 degrees C or 390 degrees F. Ready a 9 x 12-inches or 22.5 x 3.1 cm pie tray. Grease and set aside.

Step 2: In a small frying pan, heat the oil. Then, add the onion and cook until translucent.

Step 3: In a bowl, place 1 c shredded cheddar cheese, Parmesan cheese, ham, onion, flour, salt, and pepper. Mix well until blended, then pour this into the prepared pie dish.

Step 4: In another bowl, whisk the eggs and milk. Pour this over the pie dish and sprinkle it with the rest of the shredded cheddar cheese. Place inside the preheated oven and bake for about 40 minutes or until golden and completely cooked.

Step 5: Remove from the oven when done and serve the quiche warm or cold. Enjoy!

NOTES:

FLOUR:

You can sub the self-raising flour with a mixture of plain/all-purpose flour and baking powder. 1 c flour is equivalent to 2 tsp baking powder. I use only 1/3 c plain/all-purpose and 1 tsp baking powder for this recipe.

TIPS:

Frying the onion brings out more flavor. But you can add the onion into the mixture without frying it.

You can add veggies to the quiche, such as finely diced capsicum/bell peppers or grated zucchini.

Use bacon in place of ham. Before adding to the rest of the ingredients, fry the onion and bacon first.

NUTRITION FACTS:

YIELD: 8 SERVING SIZE: 1
Amount Per Serving: CALORIES: 198 | TOTAL FAT: 12g | SATURATED FAT: 6g | TRANS FAT: 0g | UNSATURATED FAT: 4g | CHOLESTEROL: 127mg | SODIUM: 507mg | CARBOHYDRATES: 9g | FIBER: 0g | SUGAR: 1g | PROTEIN: 14g

IMPOSSIBLE QUICHE (CRUSTLESS HAM AND CHEESE QUICHE)

Rebecca Prep time: 10 mins | Cook time: 40 mins | Total time: 50 mins | Yield: 8 This quiche is a delicious dish that you can serve for breakfast, lunch,… General Recipes IMPOSSIBLE QUICHE (CRUSTLESS HAM AND CHEESE QUICHE) European Print This
Serves: 8 Prep Time: 10 mins Cooking Time: 40 mins 40 mins
Nutrition facts: 198 calories 12 fat
Rating: 5.0/5
( 1 voted )

Ingredients

  • 4 eggs
  • 100 grams / 3.5 ounces Ham, diced
  • ½ c. Parmesan Cheese, grated
  • 1 ¼ c. Cheddar Cheese, grated
  • 1 Brown Onion, diced
  • 1 ½ c. Milk
  • ⅓ c Self-Raising Flour
  • Salt & Pepper, to taste

Instructions

Step 1: Prepare the oven. Preheat it to 200 degrees C or 390 degrees F. Ready a 9 x 12-inches or 22.5 x 3.1 cm pie tray. Grease and set aside.

Step 2: In a small frying pan, heat the oil. Then, add the onion and cook until translucent.

Step 3: In a bowl, place 1 c shredded cheddar cheese, Parmesan cheese, ham, onion, flour, salt, and pepper. Mix well until blended, then pour this into the prepared pie dish.

Step 4: In another bowl, whisk the eggs and milk. Pour this over the pie dish and sprinkle it with the rest of the shredded cheddar cheese. Place inside the preheated oven and bake for about 40 minutes or until golden and completely cooked.

Step 5: Remove from the oven when done and serve the quiche warm or cold. Enjoy!

Notes

FLOUR: You can sub the self-raising flour with a mixture of plain/all-purpose flour and baking powder. 1 c flour is equivalent to 2 tsp baking powder. I use only 1/3 c plain/all-purpose and 1 tsp baking powder for this recipe. TIPS: Frying the onion brings out more flavor. But you can add the onion into the mixture without frying it. You can add veggies to the quiche, such as finely diced capsicum/bell peppers or grated zucchini. Use bacon in place of ham. Before adding to the rest of the ingredients, fry the onion and bacon first.

June 4, 2022 0 comment
0 FacebookTwitterPinterestEmail
Newer Posts
Older Posts

Popular Posts

  • 1

    Crispy Crunchy Parmesan Potatoes

    March 21, 2020
  • 2

    CROCK POT SMOTHERED PORK CHOPS

    March 21, 2020
  • Facebook
  • Twitter

@2019 - All Right Reserved.


Back To Top