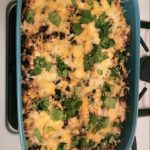
Cook it once
  • Home
  • Privacy Policy
  • Recipes
    • KETO
    • LC
    • WW
  • Tips
  • Contact
Cook it once
  • Home
  • Privacy Policy
  • Recipes
    • KETO
    • LC
    • WW
  • Tips
  • Contact
Category:

General Recipes

General Recipes

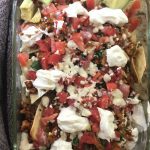
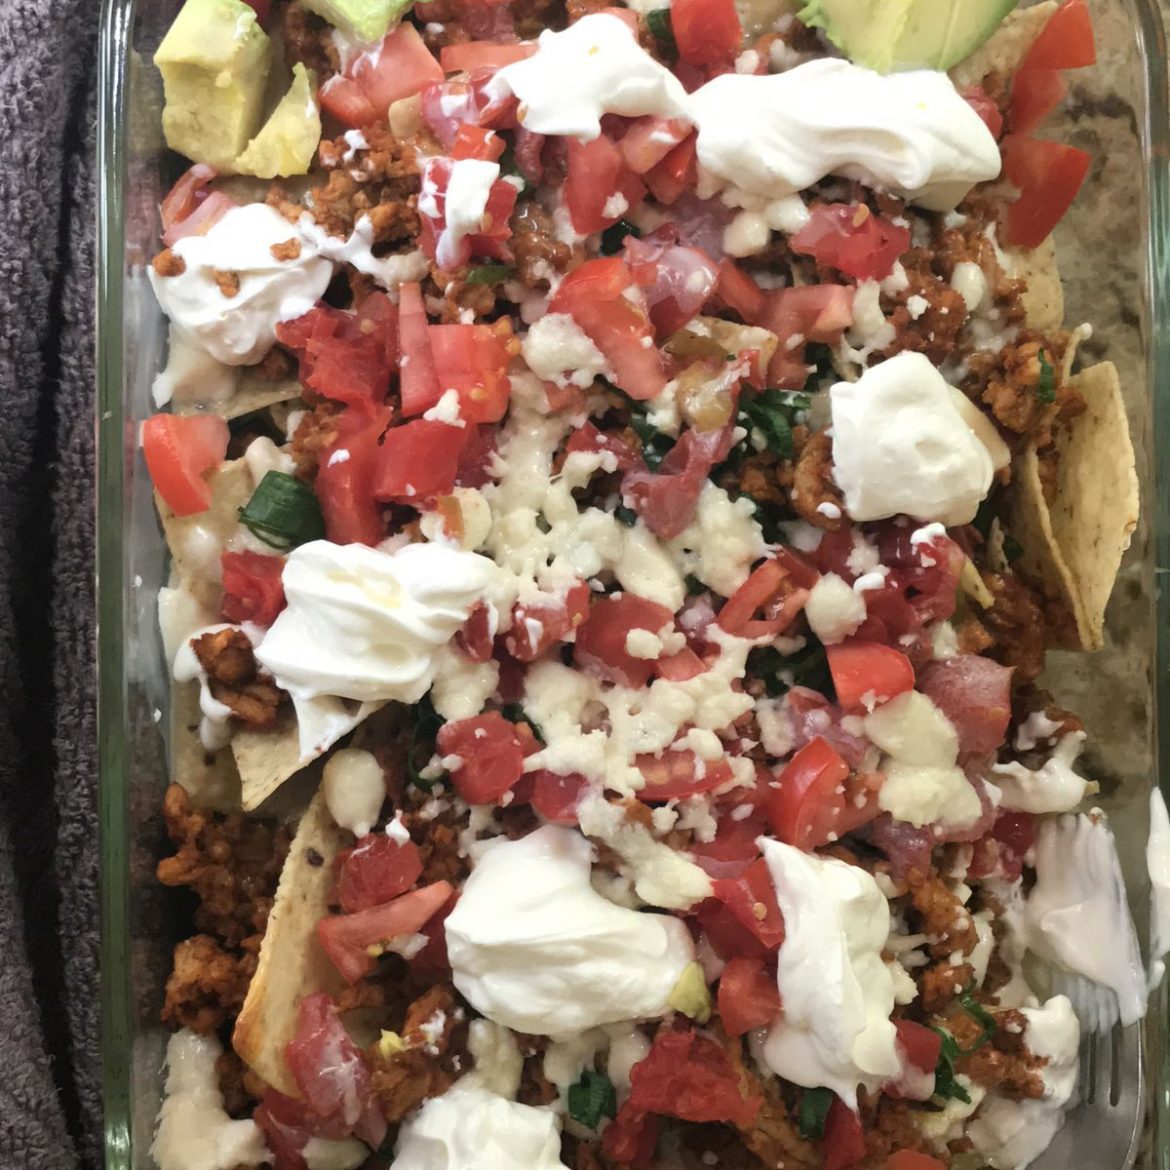
8 Ingredient Nachos Madness Recipe

by Rebecca June 7, 2022
written by Rebecca

PREP TIME: 15 MINS | COOK TIME: 10 MINS | TOTAL TIME: 25 MINS | SERVINGS: 4-6

This is the best nachos recipe! A true tried and tested recipe that I have been loving for years now. An 8-ingredient nachos made with tortilla chips, ground beef, melted cheese, tomatoes, avocados, green onion, and refried beans. Incredibly easy to whip up and excellent for gatherings and game days.

Nachos are a favorite at home. We have Saturday nachos nights and this 8-ingredient nachos madness is the most requested. Meaty, cheesy, and mouthwatering nachos. This is the ultimate nachos that’s to die for! If you love nachos like me, make sure not to miss this out!

INGREDIENTS

13 ounces of tortilla chips

1/2 pound ground beef

3 tomatoes, cubed

2 Large avocados, cubed

8 ounces of refried beans

green onion, chopped

1-2 tsp toca seasoning

16 ounces salsa con queso Mission brand

black olives

salt to taste

How to make 8 Ingredient Nachos Madness Recipe

Step 1: Prepare the oven. Preheat it to 400 degrees F.

Step 2: In a bowl, place the avocados, tomatoes, and onion. Set aside.

Step 3: In a skillet, place the ground beef and season with taco seasoning. Cook for about 5 minutes over medium heat until the meat is completely cooked. To taste, season with salt.

Step 4: Into a small cooking pan, place the salsa con queso and cook for about 3 to 5 minutes over low heat until the cheese is hot. In another pan, cook the refried beans over medium heat. Add a couple of tablespoons of water and continue to cook until the liquid begins to bubble. Set aside.

Step 5: On a baking sheet, place the tortilla chips. To warm the chips, place them in the oven for a couple of minutes.

Step 6: Over the warm tortilla chips sprinkle the ground beef and top with refried beans. Drizzle the melted salsa con queso cheese on top, followed by the tomato salsa. Serve immediately. Enjoy!
8 Ingredient Nachos Madness Recipe

Rebecca PREP TIME: 15 MINS | COOK TIME: 10 MINS | TOTAL TIME: 25 MINS | SERVINGS: 4-6 This is the best nachos recipe! A true tried and tested recipe that… General Recipes 8 Ingredient Nachos Madness Recipe European Print This
Serves: 4-6 Prep Time: 15 mins Cooking Time: 10 mins 10 mins
Nutrition facts: 200 calories 20 grams fat
Rating: 5.0/5
( 1 voted )

Ingredients

  • 13 ounces of tortilla chips
  • 1/2 pound ground beef
  • 3 tomatoes, cubed
  • 2 Large avocados, cubed
  • 8 ounces of refried beans
  • green onion, chopped
  • 1-2 tsp toca seasoning
  • 16 ounces salsa con queso Mission brand
  • black olives
  • salt to taste

Instructions

Step 1: Prepare the oven. Preheat it to 400 degrees F.

Step 2: In a bowl, place the avocados, tomatoes, and onion. Set aside.

Step 3: In a skillet, place the ground beef and season with taco seasoning. Cook for about 5 minutes over medium heat until the meat is completely cooked. To taste, season with salt.

Step 4: Into a small cooking pan, place the salsa con queso and cook for about 3 to 5 minutes over low heat until the cheese is hot. In another pan, cook the refried beans over medium heat. Add a couple of tablespoons of water and continue to cook until the liquid begins to bubble. Set aside.

Step 5: On a baking sheet, place the tortilla chips. To warm the chips, place them in the oven for a couple of minutes.

Step 6: Over the warm tortilla chips sprinkle the ground beef and top with refried beans. Drizzle the melted salsa con queso cheese on top, followed by the tomato salsa. Serve immediately. Enjoy!
June 7, 2022 0 comment
0 FacebookTwitterPinterestEmail
General Recipes

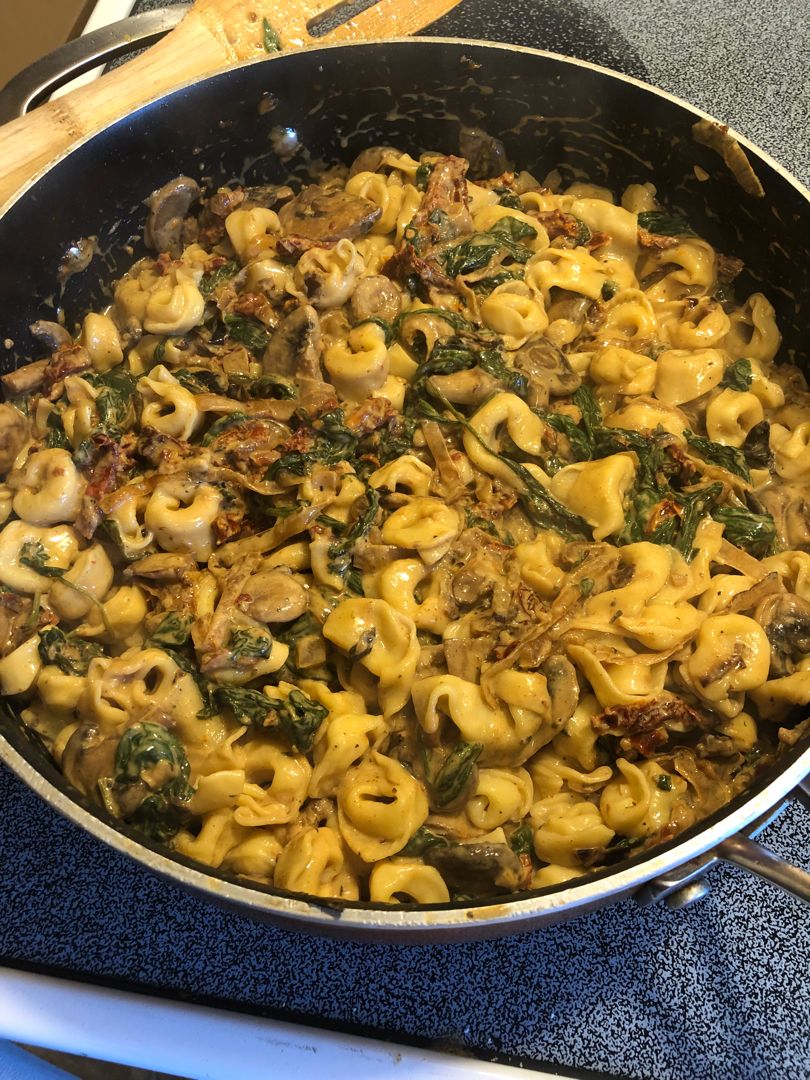
Creamy Spinach and Mushroom Tortellini with Caramelized Onions

by Rebecca June 7, 2022
written by Rebecca

PREP TIME: 20 mins | COOK TIME: 30 mins | TOTAL TIME: 50 mins | SERVINGS: 4 people

If you are craving a delicious, meatless weeknight meal, then this creamy spinach and mushroom tortellini with caramelized onions is a perfect option. Serve this scrumptious dish with your favorite protein, such as grilled steak, chicken, pork, or even seafood.

Ingredients

Caramelized Onions:

2 yellow onions, large

2 tbsp olive oil

¼ tsp salt

Creamy pasta sauce:

8 ounces spinach

1 tbsp olive oil

1 c. heavy cream

9 ounces tortellini (I used 3-cheese tortellini, refrigerated)

¼ tsp black pepper when serving

08 ounces mushrooms (I used crimini mushrooms)

¼ tsp salt

How to make Creamy Spinach and Mushroom Tortellini with Caramelized Onions

To caramelize the onions (make this a day or 2 in advance):

Step 1: After peeling the onions, wash them, then slice thinly.

Step 2: In a large skillet, heat 2 tbsp olive oil over medium-high heat. Once the oil is hot, add the sliced onions to the skillet and cook for about 10 minutes on high heat, stirring using a spatula. Adjust the heat to medium and cook further while stirring to brown the onions even more without burning. This takes another 10 minutes. Season the onions with a pinch of salt.

Step 3: Continue to cook the onions for 10 minutes more over medium or low heat to prevent them from sticking to the bottom of the pan or burning, stirring often. After 30 minutes of cooking the onions, transfer them to a plate.

To make the creamy sauce:

Step 4: In the now-empty skillet, heat 1 tbsp olive oil over medium heat. Then, add the sliced mushrooms and season with a pinch of salt. Cook the mushrooms while stirring often, for about 5 minutes until tender. Next, add the fresh spinach. Stir and cook over low heat until the spinach just begins to wilt.

Step 5: Return the caramelized onions to the skillet.

Step 6: Pour in 1 c heavy cream and season with 1/4 tsp salt. Bring everything to a quick boil and quickly reduce the heat to a simmer, stirring constantly while the sauce simmers for a few minutes.

Add the tortellini:

Step 7: Following the package directions cook the tortellini. Drain when done and add the cooked tortellini to the creamy sauce. Stir well and reheat for a few minutes over low heat.

Step 8: Before serving, sprinkle with some cracked black pepper. Enjoy!

Nutrition Facts:

Amount per Serving: Calories 544, Fat 38g 58%, Saturated Fat 17g 106%, Cholesterol 105mg 35%, Sodium 640mg 28%, Potassium 621mg 18%, Carbohydrates 38g 13%, Fiber 5g 21%, Sugar 5g 6%, Protein 14g 28%, Vitamin A 6190IU 124%, Vitamin C 21.5mg 26%, Calcium 198mg 20%, Iron 3.6mg 20%

Creamy Spinach and Mushroom Tortellini with Caramelized Onions

Rebecca PREP TIME: 20 mins | COOK TIME: 30 mins | TOTAL TIME: 50 mins | SERVINGS: 4 people If you are craving a delicious, meatless weeknight meal, then this creamy… General Recipes Creamy Spinach and Mushroom Tortellini with Caramelized Onions European Print This
Serves: 4 Prep Time: 20 mins Cooking Time: 30 mins 30 mins
Nutrition facts: 544 calories 38 fat
Rating: 5.0/5
( 1 voted )

Ingredients

  • Caramelized Onions:
  • 2 yellow onions, large
  • 2 tbsp olive oil
  • ¼ tsp salt
  • Creamy pasta sauce:
  • 8 ounces spinach
  • 1 tbsp olive oil
  • 1 c. heavy cream
  • 9 ounces tortellini (I used 3-cheese tortellini, refrigerated)
  • ¼ tsp black pepper when serving
  • 08 ounces mushrooms (I used crimini mushrooms)
  • ¼ tsp salt

Instructions

To caramelize the onions (make this a day or 2 in advance):

Step 1: After peeling the onions, wash them, then slice thinly.

Step 2: In a large skillet, heat 2 tbsp olive oil over medium-high heat. Once the oil is hot, add the sliced onions to the skillet and cook for about 10 minutes on high heat, stirring using a spatula. Adjust the heat to medium and cook further while stirring to brown the onions even more without burning. This takes another 10 minutes. Season the onions with a pinch of salt.

Step 3: Continue to cook the onions for 10 minutes more over medium or low heat to prevent them from sticking to the bottom of the pan or burning, stirring often. After 30 minutes of cooking the onions, transfer them to a plate.

To make the creamy sauce:

Step 4: In the now-empty skillet, heat 1 tbsp olive oil over medium heat. Then, add the sliced mushrooms and season with a pinch of salt. Cook the mushrooms while stirring often, for about 5 minutes until tender. Next, add the fresh spinach. Stir and cook over low heat until the spinach just begins to wilt.

Step 5: Return the caramelized onions to the skillet.

Step 6: Pour in 1 c heavy cream and season with 1/4 tsp salt. Bring everything to a quick boil and quickly reduce the heat to a simmer, stirring constantly while the sauce simmers for a few minutes.

Add the tortellini:

Step 7: Following the package directions cook the tortellini. Drain when done and add the cooked tortellini to the creamy sauce. Stir well and reheat for a few minutes over low heat.

Step 8: Before serving, sprinkle with some cracked black pepper. Enjoy!

June 7, 2022 0 comment
0 FacebookTwitterPinterestEmail
General Recipes

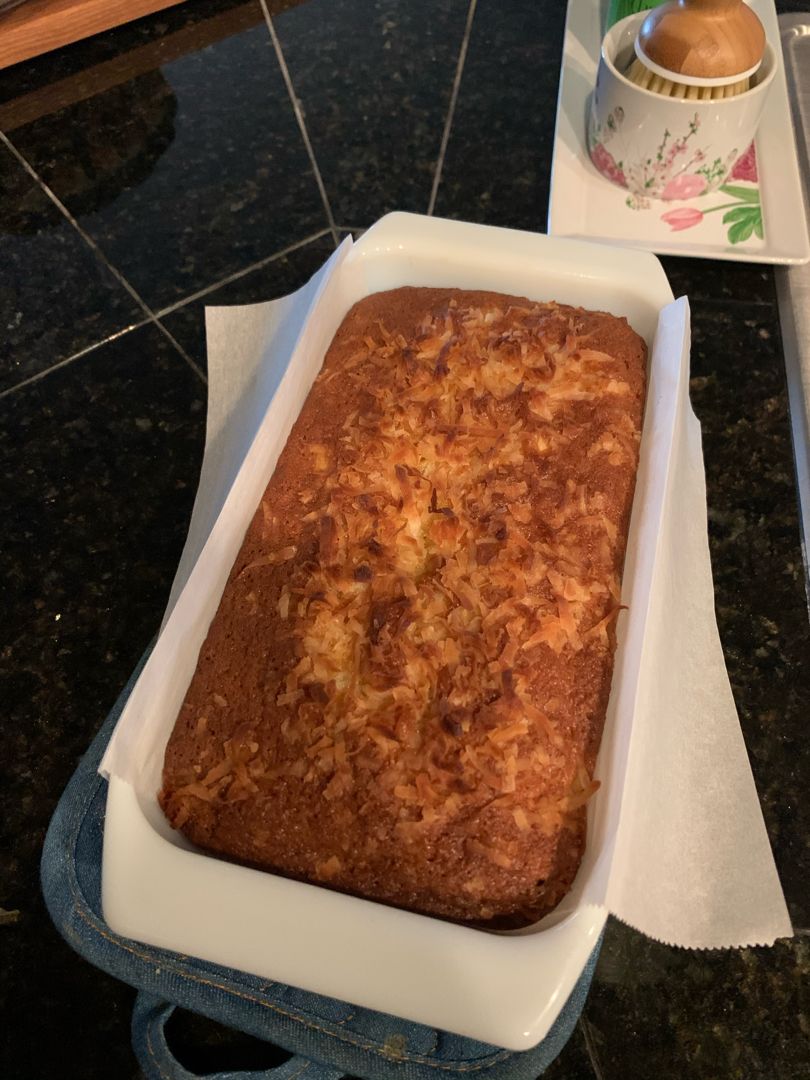
Pineapple Coconut Bread

by Rebecca June 7, 2022
written by Rebecca

Prep Time: 10 mins | Cook Time: 1 hr 5 mins | Total Time: 1 hr 15 mins | Yield: 12 Servings

Rich and sweet – this is the best pineapple-coconut bread! It’s easily made with coconut, pineapple, eggs, and butter. This pineapple coconut bread is a staple at my house for great reasons. It’s excellent to serve for breakfast with a cup of coffee or snack. Store this, covered, at room temperature for up to 2 days or freeze for up to 2 months. Keep this bread in the fridge for up to a week and enjoy it chilled.

I am pretty sure that you’ll love the tropical and fruity twist to your favorite classic bread with this simple recipe. If desired, add in some crushed nuts for that extra crunchy texture. Fruits such as blueberries, strawberries, and cut fresh pineapple chunks are also a perfect addition.

Ingredients

3 large eggs

2 c. sweetened shredded coconut

1 1/2 c. flour

1/2 c. butter

1/2 tsp baking soda

1 c. sugar

1 c. sour cream

20 oz. crushed pineapple, drained well

1/2 tsp salt

How to make Pineapple Coconut Bread

Step 1: Prepare the oven. Preheat it to 325 degrees. Using a baking spray, grease a loaf pan.

Step 2: On the prepared baking sheet, spread the coconut. Place in the preheated oven and bake for about 6 to 10 minutes, shaking the tray often.

Step 3: Place the butter and sugar in a stand mixer and cream for about 1 to 2 minutes on high speed until light and fluffy.

Step 4: In a bowl, place the flour, baking soda, and salt and mix well until combined. Add the eggs, one at a time, beating well after each addition until completely blended. Alternately add the flour mixture and sour cream about 1/3 at a time. Fold in the pineapple and 1 c coconut flakes using a spatula.

Step 5: Into the prepared loaf pan, pour in the batter, and top with the rest of the coconut. Place in the oven and bake for about 65 to 70 minutes or until a toothpick inserted in the center of the bread comes out clean.

Nutrition Facts:

Calories: 360 kcal | Carbohydrates: 44g | Protein: 4g | Fat: 20g | Saturated Fat: 15g | Cholesterol: 63mg | Sodium: 173mg | Potassium: 172mg | Fiber: 2g | Sugar: 30g | Vitamin A: 220IU | Vitamin C: 5mg | Calcium: 41mg | Iron: 1mg

Pineapple Coconut Bread

Rebecca Prep Time: 10 mins | Cook Time: 1 hr 5 mins | Total Time: 1 hr 15 mins | Yield: 12 Servings Rich and sweet – this is the best… General Recipes Pineapple Coconut Bread European Print This
Serves: 12 Prep Time: 10 mins Cooking Time: 1 hr 5 mins 1 hr 5 mins
Nutrition facts: 360 calories 20 fat
Rating: 5.0/5
( 1 voted )

Ingredients

  • 3 large eggs
  • 2 c. sweetened shredded coconut
  • 1 1/2 c. flour
  • 1/2 c. butter
  • 1/2 tsp baking soda
  • 1 c. sugar
  • 1 c. sour cream
  • 20 oz. crushed pineapple, drained well
  • 1/2 tsp salt

Instructions

Step 1: Prepare the oven. Preheat it to 325 degrees. Using a baking spray, grease a loaf pan.

Step 2: On the prepared baking sheet, spread the coconut. Place in the preheated oven and bake for about 6 to 10 minutes, shaking the tray often.

Step 3: Place the butter and sugar in a stand mixer and cream for about 1 to 2 minutes on high speed until light and fluffy.

Step 4: In a bowl, place the flour, baking soda, and salt and mix well until combined. Add the eggs, one at a time, beating well after each addition until completely blended. Alternately add the flour mixture and sour cream about 1/3 at a time. Fold in the pineapple and 1 c coconut flakes using a spatula.

Step 5: Into the prepared loaf pan, pour in the batter, and top with the rest of the coconut. Place in the oven and bake for about 65 to 70 minutes or until a toothpick inserted in the center of the bread comes out clean.

June 7, 2022 0 comment
0 FacebookTwitterPinterestEmail
General Recipes

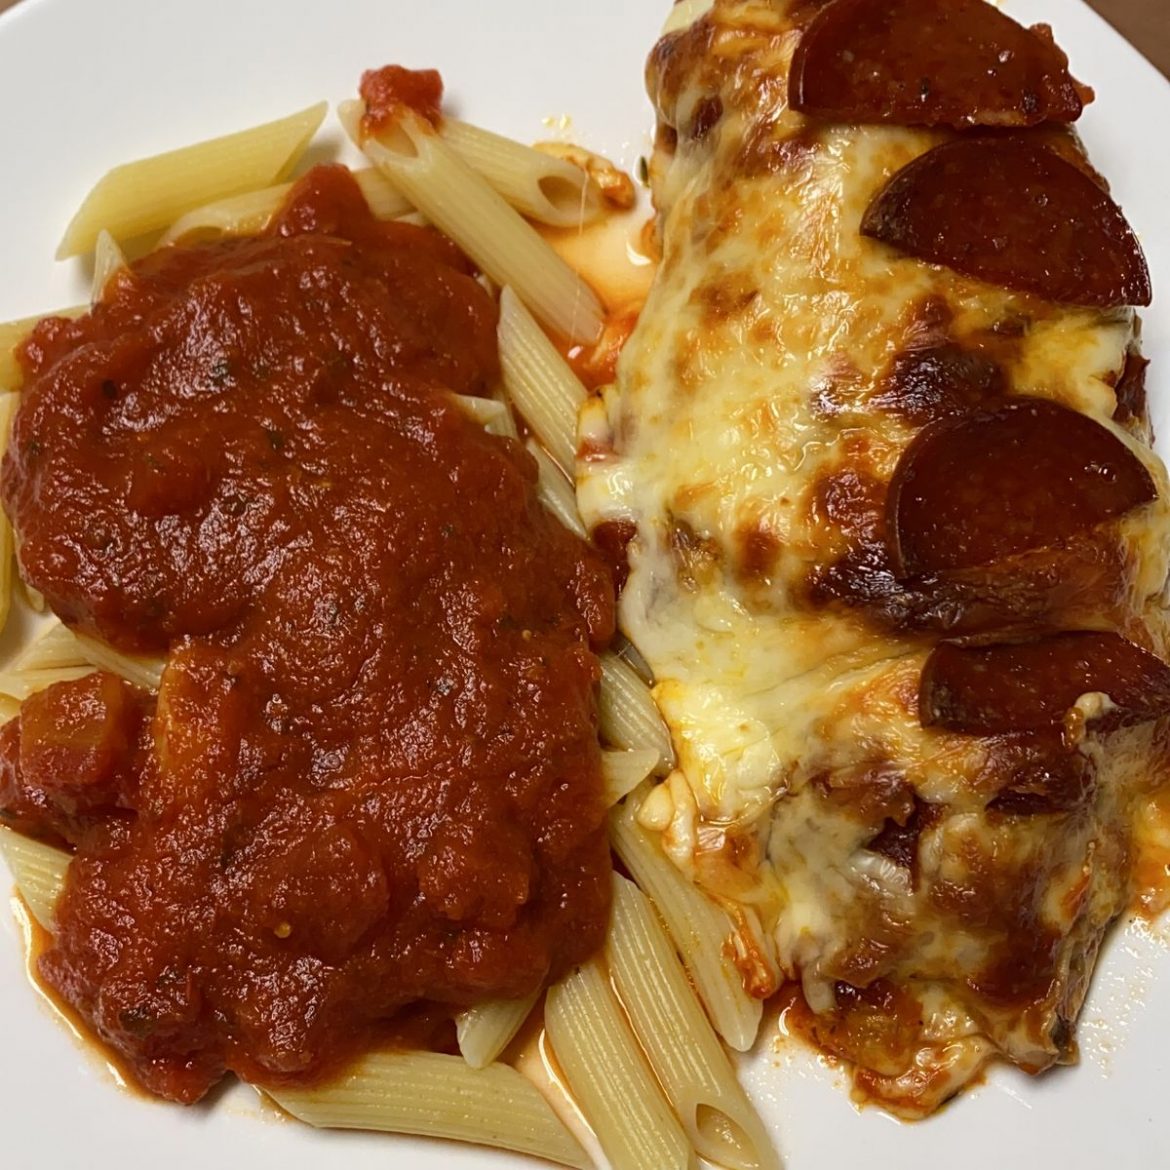
Easy Mozzarella Chicken with Marinara Sauce and Mushrooms

by Rebecca June 7, 2022
written by Rebecca

PREP TIME: 10 mins | COOK TIME: 30 mins | TOTAL TIME: 40 mins | SERVINGS: 4 people

This is a simple weeknight dinner with lush chicken smothered in a mouthwatering marinara sauce and mushrooms with melty mozzarella on top. This recipe is incredibly easy to whip up using only four readily available ingredients plus seasonings. A quick meal that I am pretty sure your entire family will love and enjoy! Serve this with roasted broccoli or asparagus, or spaghetti, linguine, and even fettuccine for a filling meal any time.

I enjoy simple recipes like this easy mozzarella chicken with marinara sauce and mushrooms. As a full-time working mom, I always opt for recipes that are easy, quick, and no-fuss. This recipe is also very versatile. I use skinless, boneless chicken breasts, but you can swap them with chicken thighs. For the sauce, you can use either homemade tomato sauce or store-bought marinara sauce to make things much easier. As for the cheese, you are welcome to use any cheese such as shredded Mozzarella, Parmesan, Asiago, or Pecorino Romano cheese. And lastly, you can sub regular button mushrooms with shiitake mushrooms or oyster mushrooms. Feel free to stick to the original recipe or sub the ingredients accordingly. Either way, this easy recipe guarantees one of the best chicken dishes you’ll ever make!

Ingredients

½ c. mushrooms, sliced

4 chicken breasts, skinless, boneless

1 c. marinara sauce

½ tbsp Italian seasoning

1 c. Mozzarella cheese, shredded

¼ tsp salt

How to make Easy Mozzarella Chicken with Marinara Sauce and Mushrooms

Step 1: Prepare the oven. Preheat it to 375 degrees F.

Step 2: To a casserole dish, add the chicken breasts and top each with the sliced mushrooms. Over the chicken, evenly pour the marinara sauce. Then, sprinkle with shredded mozzarella cheese.

Step 3: Place in the preheated oven and bake for about 25 to 30 minutes, uncovered, until the chicken is completely cooked. If desired, broil for about 4 minutes.

Nutrition Facts:

Amount per Serving: Calories 360, Fat 12g 18%, Saturated Fat 4g 25%, Cholesterol 166mg 55%, Sodium 904mg 39%, Potassium 1098mg 31%, Carbohydrates 4g 1%, Fiber 1g 4%, Sugar 3g 3%, Protein 55g 110%, Vitamin A 520IU 10%, Vitamin C 7.3mg 9%, Calcium 171mg 17%, Iron 1.9mg 11%

Easy Mozzarella Chicken with Marinara Sauce and Mushrooms

Rebecca PREP TIME: 10 mins | COOK TIME: 30 mins | TOTAL TIME: 40 mins | SERVINGS: 4 people This is a simple weeknight dinner with lush chicken smothered in a… General Recipes Easy Mozzarella Chicken with Marinara Sauce and Mushrooms European Print This
Serves: 4 Prep Time: 10 mins Cooking Time: 30 mins 30 mins
Nutrition facts: 360 calories 12 fat
Rating: 5.0/5
( 1 voted )

Ingredients

  • ½ c. mushrooms, sliced
  • 4 chicken breasts, skinless, boneless
  • 1 c. marinara sauce
  • ½ tbsp Italian seasoning
  • 1 c. Mozzarella cheese, shredded
  • ¼ tsp salt

Instructions

Step 1: Prepare the oven. Preheat it to 375 degrees F.

Step 2: To a casserole dish, add the chicken breasts and top each with the sliced mushrooms. Over the chicken, evenly pour the marinara sauce. Then, sprinkle with shredded mozzarella cheese.

Step 3: Place in the preheated oven and bake for about 25 to 30 minutes, uncovered, until the chicken is completely cooked. If desired, broil for about 4 minutes.

June 7, 2022 0 comment
0 FacebookTwitterPinterestEmail
General Recipes

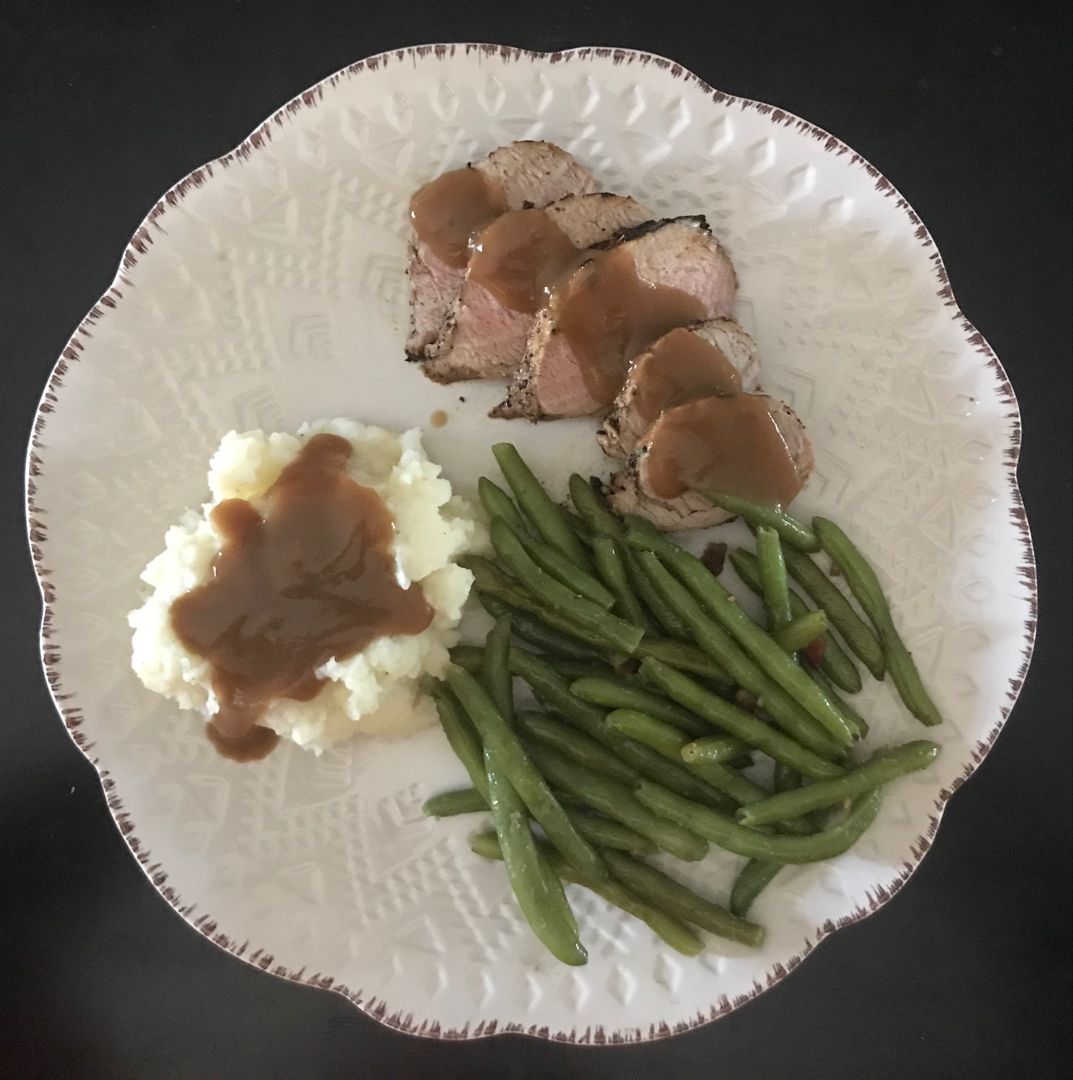
Best Ever Healthy Grilled Pork Tenderloin

by Rebecca June 7, 2022
written by Rebecca

Prep Time: 10 mins | Cook Time: 15 mins | Marinating time: 30 mins | Total Time: 55 mins | Servings: 4

If you are looking for the best, healthiest, and easiest pork tenderloin, then you have to give this grilled pork tenderloin a try very soon! Throw this together using just pantry ingredients and in less than thirty minutes. And enjoy an impressively moist, hearty, and mouthwatering pork tenderloin any time!

Ingredients

¼ c. oil

1 ½-2 lbs. pork tenderloin

juice of ½ lemon

1 tsp Italian herb seasoning blend – or ¼ tsp each dried basil, thyme, oregano, and parsley or rosemary

2 tsp Dijon mustard

2 tsp minced garlic

2 tsp honey

½ tsp salt

⅛ tsp cracked black pepper – or a pinch of finely ground black pepper

How to make Best Ever Healthy Grilled Pork Tenderloin

Step 1: Using paper towels, pat the pork tenderloin dry.

Step 2: Whisk the lemon juice, garlic, dried herbs, oil, salt, pepper, Dijon mustard, and honey until well blended.

Step 3: Into a large Ziplock bag with the tenderloin, pour half of the mixture. Make sure to press the excess air out before sealing the bag. Then, place in the fridge to chill for about 30 minutes.

Step 4: To medium, preheat the grill and grease the grates.

Step 5: Transfer the pork to the preheated grill using tongs. Close the grill and cook the pork for about 15 to 20 minutes, turning the pork every couple of minutes for even cooking and brushing the pork on all sides with the reserved marinade halfway through grilling. The pork tenderloin is done once the internal temperature reaches 145 degrees.

Step 6: To a cutting board, transfer the pork when done and let it rest for about 5 minutes before slicing. Enjoy!

Note:

If using more than 2 1/2 inches thick pork tenderloin, cut it in half lengthwise to make 2 pieces of thinner tenderloin. This way the pork tenderloin once cooked will not be pink in the middle.

Nutrition Facts:

Calories: 342 kcal, Carbohydrates: 4 g, Protein: 35 g, Fat: 20 g, Saturated Fat: 3 g, Trans Fat: 1 g, Cholesterol: 111 mg, Sodium: 408 mg, Potassium: 680 mg, Fiber: 1 g, Sugar: 3 g, Vitamin A: 5 IU, Vitamin C: 1 mg, Calcium: 15 mg, Iron: 2 mg

Best Ever Healthy Grilled Pork Tenderloin

Rebecca Prep Time: 10 mins | Cook Time: 15 mins | Marinating time: 30 mins | Total Time: 55 mins | Servings: 4 If you are looking for the best, healthiest,… General Recipes Best Ever Healthy Grilled Pork Tenderloin European Print This
Serves: 4 Prep Time: 10 mins Cooking Time: 15 mins 15 mins
Nutrition facts: 342 calories 20 fat
Rating: 5.0/5
( 1 voted )

Ingredients

  • ¼ c. oil
  • 1 ½-2 lbs. pork tenderloin
  • juice of ½ lemon
  • 1 tsp Italian herb seasoning blend - or ¼ tsp each dried basil, thyme, oregano, and parsley or rosemary
  • 2 tsp Dijon mustard
  • 2 tsp minced garlic
  • 2 tsp honey
  • ½ tsp salt
  • ⅛ tsp cracked black pepper - or a pinch of finely ground black pepper

Instructions

Step 1: Using paper towels, pat the pork tenderloin dry.

Step 2: Whisk the lemon juice, garlic, dried herbs, oil, salt, pepper, Dijon mustard, and honey until well blended.

Step 3: Into a large Ziplock bag with the tenderloin, pour half of the mixture. Make sure to press the excess air out before sealing the bag. Then, place in the fridge to chill for about 30 minutes.

Step 4: To medium, preheat the grill and grease the grates.

Step 5: Transfer the pork to the preheated grill using tongs. Close the grill and cook the pork for about 15 to 20 minutes, turning the pork every couple of minutes for even cooking and brushing the pork on all sides with the reserved marinade halfway through grilling. The pork tenderloin is done once the internal temperature reaches 145 degrees.

Step 6: To a cutting board, transfer the pork when done and let it rest for about 5 minutes before slicing. Enjoy!

Notes

If using more than 2 1/2 inches thick pork tenderloin, cut it in half lengthwise to make 2 pieces of thinner tenderloin. This way the pork tenderloin once cooked will not be pink in the middle.

June 7, 2022 0 comment
0 FacebookTwitterPinterestEmail
General Recipes

Yellow Squash Tots

by Rebecca June 7, 2022
written by Rebecca

Prep Time: 20 mins | Cook Time: 25 mins | Total Time: 45 mins | Yield: 24 tots / 4 servings

These yellow squash tots are my picky eaters’ favorite. These are perfect for your fussy eaters to eat their veggies. And do not forget to serve these tasty tots with the yoghurt dip!

Ingredients

Tots:

1 egg

3 small yellow squashes or zucchini – about 1-1.5 pounds of yellow squash

4 ounces grated cheddar cheese or other meltable cheese (about 1/2 c. grated)

1/2 medium onion, finely chopped

3/4 c. breadcrumbs

1/2 tsp garlic powder

Optional: 2 tbsp – 1/4 c. finely minced parsley leaves

1/2 tsp salt

Ground black pepper, to taste

Yoghurt dip:

2 tsp lemon juice (from about 1/2 lemon, or to taste)

1/4 tsp garlic powder (or use 1 small clove of garlic, minced)

⅓ c. unsweetened Greek yoghurt

¼ tsp salt, or to taste

¼ tsp pepper, or to taste

1 tsp finely minced parsley (or dill, or 1/2 tsp dried parsley or dill)

How to make Yellow Squash Tots

To make the tots:

Step 1: Prepare the oven. Preheat it to 400 degrees F. Using the parchment paper, line a large baking sheet. You can also grease the baking sheet using olive oil.

Step 2: On a fine grater or food processor, grate the squash. Then, add half tsp salt and mix well. In a colander, place the grated squash and allow it to sit while preparing the remaining ingredients. You can also use a cheesecloth.

Step 3: In a colander, squeeze all the extra liquid from the grated squash using your hands. For every pound of squash, you should have about 1 c liquid. Then, discard the liquid.

Step 4: In a large bowl, whisk all the Tot ingredients until well blended and you have a sticky and wet mixture (like a thick paste). You can add more breadcrumbs if the mixture ends up too wet. With your hands, shape small tots (around 1.5-2 tbsp squash mixture/tot). To prevent the mixture from sticking to your hands, dip your hands into a bowl with cold water in between every couple of tots.

Step 5: On the prepared baking sheet, arrange the tots. Place in the preheated oven and bake for about 25 minutes or until the top is golden and the bottom is lightly browned. Remove from the oven when done and let the tots rest for about 5 minutes before taking them out of the baking sheet.

To make the dip:

Step 6: Place the yoghurt sauce ingredients in a small bowl and mix well until combined. Serve this as a dip for the warm tots. Enjoy!

Nutrition Facts:

Yield: 4 Serving Size: 1
Amount Per Serving: Calories: 290 | Total Fat: 15g | Saturated Fat: 7g | Trans Fat: 0g | Unsaturated Fat: 5g | Cholesterol: 82mg | Sodium: 669mg | Carbohydrates: 25g | Fiber: 4g | Sugar: 6g | Protein: 15g

Yellow Squash Tots

Rebecca Prep Time: 20 mins | Cook Time: 25 mins | Total Time: 45 mins | Yield: 24 tots / 4 servings These yellow squash tots are my picky eaters’ favorite.… General Recipes Yellow Squash Tots European Print This
Serves: 4 Prep Time: 20 mins Cooking Time: 25 mins 25 mins
Nutrition facts: 290 calories 15 fat
Rating: 5.0/5
( 1 voted )

Ingredients

  • Tots:
  • 1 egg
  • 3 small yellow squashes or zucchini - about 1-1.5 pounds of yellow squash
  • 4 ounces grated cheddar cheese or other meltable cheese (about 1/2 c. grated)
  • 1/2 medium onion, finely chopped
  • 3/4 c. breadcrumbs
  • 1/2 tsp garlic powder
  • Optional: 2 tbsp - 1/4 c. finely minced parsley leaves
  • 1/2 tsp salt
  • Ground black pepper, to taste
  • Yoghurt dip:
  • 2 tsp lemon juice (from about 1/2 lemon, or to taste)
  • 1/4 tsp garlic powder (or use 1 small clove of garlic, minced)
  • ⅓ c. unsweetened Greek yoghurt
  • ¼ tsp salt, or to taste
  • ¼ tsp pepper, or to taste
  • 1 tsp finely minced parsley (or dill, or 1/2 tsp dried parsley or dill)

Instructions

To make the tots:

Step 1: Prepare the oven. Preheat it to 400 degrees F. Using the parchment paper, line a large baking sheet. You can also grease the baking sheet using olive oil.

Step 2: On a fine grater or food processor, grate the squash. Then, add half tsp salt and mix well. In a colander, place the grated squash and allow it to sit while preparing the remaining ingredients. You can also use a cheesecloth.

Step 3: In a colander, squeeze all the extra liquid from the grated squash using your hands. For every pound of squash, you should have about 1 c liquid. Then, discard the liquid.

Step 4: In a large bowl, whisk all the Tot ingredients until well blended and you have a sticky and wet mixture (like a thick paste). You can add more breadcrumbs if the mixture ends up too wet. With your hands, shape small tots (around 1.5-2 tbsp squash mixture/tot). To prevent the mixture from sticking to your hands, dip your hands into a bowl with cold water in between every couple of tots.

Step 5: On the prepared baking sheet, arrange the tots. Place in the preheated oven and bake for about 25 minutes or until the top is golden and the bottom is lightly browned. Remove from the oven when done and let the tots rest for about 5 minutes before taking them out of the baking sheet.

To make the dip:

Step 6: Place the yoghurt sauce ingredients in a small bowl and mix well until combined. Serve this as a dip for the warm tots. Enjoy!

June 7, 2022 0 comment
0 FacebookTwitterPinterestEmail
General Recipes

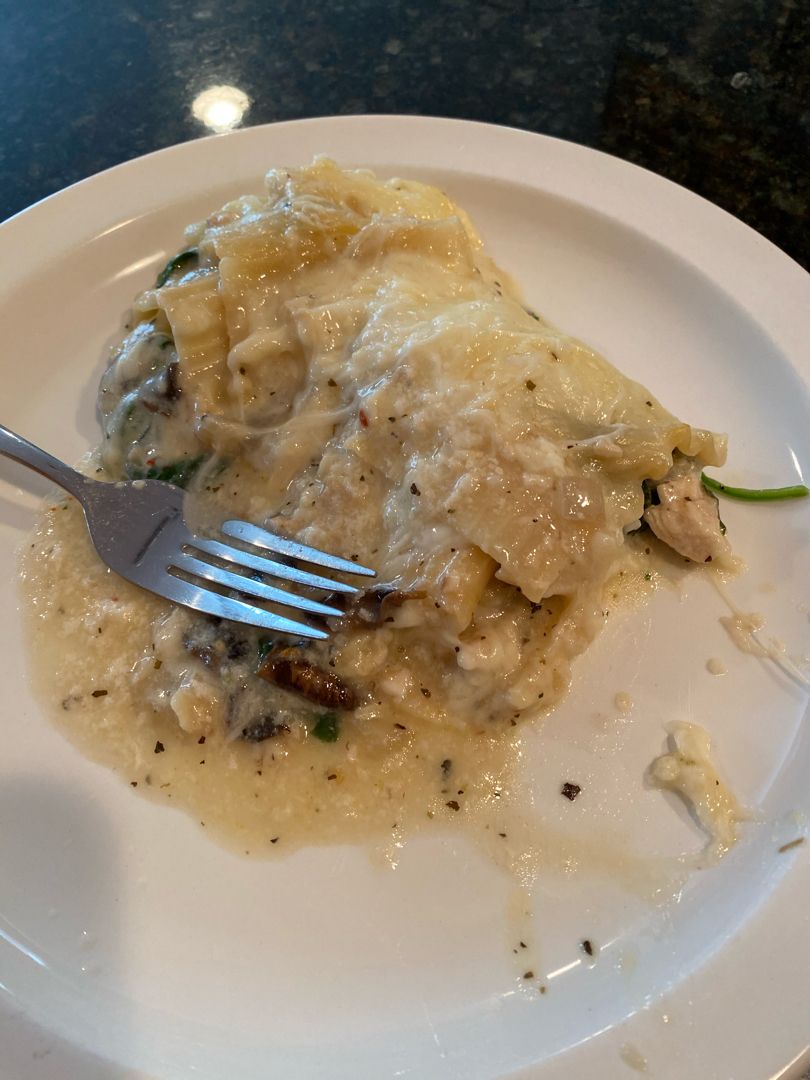
CHICKEN MUSHROOM AND SPINACH LASAGNA

by Rebecca June 7, 2022
written by Rebecca

Prep Time: 25 mins | Cook Time: 1 hr | Total Time: 1 hr 25 mins | Yield: 8

Enjoy this creamy yet light lasagna anytime with this easy recipe. It’s a scrumptious weeknight meal with shredded chicken, mushrooms, spinach, no-boil lasagna noodles, and a delightful milk-based sauce. Serve this with a fresh salad for an easy and filling meal that everyone will surely love!

INGREDIENTS

2 tablespoons minced garlic

1 c. chopped onion

2 1/2 tablespoons olive oil

1 teaspoon dried basil

8 ounces white mushrooms, thinly sliced

1 teaspoon dried oregano

1 1/4 teaspoon kosher salt, divided

2 c. shredded cooked chicken

1/4 c. all-purpose flour

2 c. low-sodium chicken stock

2 c. whole milk

1/4 teaspoon Nutmeg

1 (6 ounces) bag of fresh baby spinach

1/2 c. shredded Parmesan cheese

1 1/4 c. shredded mozzarella cheese

1/2 teaspoon red pepper flakes

8 no-boil (oven-ready) lasagna noodles

HOW TO MAKE CHICKEN MUSHROOM AND SPINACH LASAGNA

Step 1: Prepare the oven. Preheat it to 375 degrees F.

Step 2: On medium-high, heat a large saute pan. Drizzle the oil once the pan is hot and add the onions, garlic, mushrooms, basil, oregano, red pepper flakes, and 1/4 tsp salt. Cook for about 5 minutes, stirring often until the mushrooms have softened and the liquid from the mushrooms has evaporated. Then, add the spinach. Stir and continue to cook until wilted and the moisture has evaporated. Take the pan off the heat when done and stir in the cooked chicken. Set aside.

Step 3: To make the slurry, whisk in half c chicken stock with flour in a small bowl until thick milky consistency. Set aside.

Step 4: Whisk the rest of the 1 1/2 c chicken broth, milk, nutmeg, and 1 tsp of salt in a small saucepan. Bring everything to a slow simmer over medium heat, stirring often. Stir in the slurry once the mixture begins to bubble around the edges. Simmer for about 5 to 8 minutes until thickened, stirring often. Then, whisk in the Parmesan cheese. Take the pan off the heat when done.

Step 5: Into the bottom of a 10 x 10-inch square baking dish, pour half a cup of the sauce and top with 2 noodles, 1 c. chicken mixture, 1 c. sauce, and 1/4 c mozzarella. Make sure the noodles are completely covered with sauce. If needed, lightly press the noodles down. Do the same layers three times. For the final layer, top with a little more sauce and sprinkle the cheese on top.

Step 6: Using aluminium foil, tent the baking dish. Place in the preheated oven and bake for about 25 minutes. Remove the foil and continue baking for 15 minutes more. For a golden brown top, broil the lasagna for about 2 to 3 minutes. Remove from the oven when done and allow the lasagna to stand for about 15 to 20 minutes before slicing. Enjoy!

NUTRITION FACTS:

Serving Size: Calories: 328 | Sugar: 5.6 g | Sodium: 812.7 mg | Fat: 10.1 g | Carbohydrates: 33.5 g | Protein: 24.4 g | Cholesterol: 39 mg

CHICKEN MUSHROOM AND SPINACH LASAGNA

Rebecca Prep Time: 25 mins | Cook Time: 1 hr | Total Time: 1 hr 25 mins | Yield: 8 Enjoy this creamy yet light lasagna anytime with this easy recipe.… General Recipes CHICKEN MUSHROOM AND SPINACH LASAGNA European Print This
Serves: 8 Prep Time: 25 mins Cooking Time: 1 hr 1 hr
Nutrition facts: 328 calories 10.1 fat
Rating: 5.0/5
( 1 voted )

Ingredients

  • 2 tablespoons minced garlic
  • 1 c. chopped onion
  • 2 1/2 tablespoons olive oil
  • 1 teaspoon dried basil
  • 8 ounces white mushrooms, thinly sliced
  • 1 teaspoon dried oregano
  • 1 1/4 teaspoon kosher salt, divided
  • 2 c. shredded cooked chicken
  • 1/4 c. all-purpose flour
  • 2 c. low-sodium chicken stock
  • 2 c. whole milk
  • 1/4 teaspoon Nutmeg
  • 1 (6 ounces) bag of fresh baby spinach
  • 1/2 c. shredded Parmesan cheese
  • 1 1/4 c. shredded mozzarella cheese
  • 1/2 teaspoon red pepper flakes
  • 8 no-boil (oven-ready) lasagna noodles

Instructions

Step 1: Prepare the oven. Preheat it to 375 degrees F.

Step 2: On medium-high, heat a large saute pan. Drizzle the oil once the pan is hot and add the onions, garlic, mushrooms, basil, oregano, red pepper flakes, and 1/4 tsp salt. Cook for about 5 minutes, stirring often until the mushrooms have softened and the liquid from the mushrooms has evaporated. Then, add the spinach. Stir and continue to cook until wilted and the moisture has evaporated. Take the pan off the heat when done and stir in the cooked chicken. Set aside.

Step 3: To make the slurry, whisk in half c chicken stock with flour in a small bowl until thick milky consistency. Set aside.

Step 4: Whisk the rest of the 1 1/2 c chicken broth, milk, nutmeg, and 1 tsp of salt in a small saucepan. Bring everything to a slow simmer over medium heat, stirring often. Stir in the slurry once the mixture begins to bubble around the edges. Simmer for about 5 to 8 minutes until thickened, stirring often. Then, whisk in the Parmesan cheese. Take the pan off the heat when done.

Step 5: Into the bottom of a 10 x 10-inch square baking dish, pour half a cup of the sauce and top with 2 noodles, 1 c. chicken mixture, 1 c. sauce, and 1/4 c mozzarella. Make sure the noodles are completely covered with sauce. If needed, lightly press the noodles down. Do the same layers three times. For the final layer, top with a little more sauce and sprinkle the cheese on top.

Step 6: Using aluminium foil, tent the baking dish. Place in the preheated oven and bake for about 25 minutes. Remove the foil and continue baking for 15 minutes more. For a golden brown top, broil the lasagna for about 2 to 3 minutes. Remove from the oven when done and allow the lasagna to stand for about 15 to 20 minutes before slicing. Enjoy!

June 7, 2022 0 comment
0 FacebookTwitterPinterestEmail
General Recipes

Oreo Brookie Cheesecake

by Rebecca June 7, 2022
written by Rebecca

Prep Time: 1 hr 20 mins | Cook Time: 2 hrs 30 mins | Total Time: 3 hrs 50 mins | Yield: 12-14 Slices

My daughter is obsessed with this heavenly Oreo Brookie Cheesecake! It’s a decadent cake perfect for all occasions. The chewy brownie bottom with chocolate chip cookie cheesecake filling & Oreo whipped cream is everyone’s dream! It’s the ultimate dessert for all chocolate lovers out there!

Ingredients

BROWNIE BOTTOM:

2 eggs

1/4 teaspoon baking powder

1 c (207 grams) sugar

3/4 c (98 grams) all-purpose flour

1 teaspoon vanilla extract

6 tablespoons (43 grams) natural unsweetened cocoa

1/4 teaspoon salt

10 tablespoons (140 grams) unsalted butter, melted

COOKIE CHEESECAKE FILLING:

1 c (225 grams) brown sugar

24 oz (678 grams) cream cheese, room temperature

3 tablespoons (24 grams) of all-purpose flour

1 1/2 c (128 grams) chopped chocolate chip cookies

1 c (230 grams) sour cream, room temperature

3 large eggs, room temperature

3/4 c (128 grams) chocolate chips

1 tablespoon vanilla extract

OREO WHIPPED CREAM:

1/2 c. (57 grams) natural unsweetened cocoa

1/2 c. (58 grams) powdered sugar

1 1/2 teaspoon vanilla extract

2 c. (480ml) heavy whipping cream, cold

5–6 chopped Oreos

1/2 c. Oreo crumbs

How to make Oreo Brookie Cheesecake

BROWNIE:

Step 1: Prepare the oven. Preheat it to 350 degrees F or 176 degrees C. Using the parchment paper, line a 9-inch (23 cm) springform pan and grease the sides.

Step 2: Place the flour, cocoa, baking powder, and salt in a medium-sized bowl. Mix well and set aside.

Step 3: Whisk the butter, sugar, and vanilla extract in a large bowl. Then, add the eggs and beat well until incorporated.

Step 4: To the egg mixture, add the dry ingredients and mix well until blended. Into the prepared pan, pour the batter, and evenly spread. Place in the preheated oven and bake for about 20 to 25 minutes or until a toothpick inserted in the center of the cake comes out with a few moist crumbs.

Step 5: Adjust the oven temperature to 300 degrees F or 148 degrees C once the brownie is done baking. Take the brownie out of the oven and let it cool for about 10 minutes.

Step 6: After removing the sides of the pan, wash it, and grease again with non-stick spray. Re-attach it to the bottom of the pan while the brownie is still on the pan.

CHEESECAKE FILLING:

Step 7: Place the cream cheese, sugar, and flour in a large bowl. Beat on low speed until well combined and smooth. Make sure to scrape down the sides of the bowl. Then, add the sour cream and vanilla. Beat in low speed until blended. Next, add the eggs, one at a time, slowly beating every after each addition. As needed, scrape down the sides of the bowl, making sure everything is well mixed.

Step 8: Fold in the chocolate chip cookies and chocolate chips. Over the brownie, evenly pour the cheesecake batter.

Step 9: Using aluminium foil, wrap the outside of the pan. Inside another larger pan, place the springform pan. Fill the outside of the pan with enough water until halfway up the sides of the springform pan. Make sure that the water will not go above the top edge of the aluminium foil.

Step 10: Place in the oven and bake for about 1 hour or until the center is set but still slightly jiggly. Turn the oven off but leave the oven door shut for 30 minutes. After 30 minutes, partially open the oven door for another 30 minutes.

Step 11: Take the cheesecake out of the oven and from the water bath. Wrap and place the cheesecake in the fridge for at least 5 to 6 hours or overnight. To loosen the cheesecake from the edges of the pan, gently jiggle it around. I do this before placing the cheesecake in the fridge.

Step 12: Remove the cheesecake from the springform pan once completely cool and firm and transfer to a serving plate.

CHEESECAKE:

Step 13: For the whipped cream, whip the heavy whipping cream, powdered sugar, cocoa, and vanilla extract on high speed until stiff peaks form. Then, stir in the Oreo crumbs and chopped Oreos.

Step 14: Around the outside edge of the cheesecake, pipe swirls of the whipped cream. For this, I use Ateco 808.

Step 15: With the rest of the whipped cream, fill the center of the cheesecake and top with extra chopped Oreos and chocolate chip cookies. Place in the fridge until ready to serve. Note that the cheesecake is best served within 3 to 4 days. Simply cover it well and store it in the fridge.

Nutrition Facts:

Serving Size: 1 slice
Calories: 556, Sugar: 38.1 g, Sodium: 242.3 mg, Fat: 36.1 g, Carbohydrates: 50.7 g, Protein: 10.8 g, Cholesterol: 160.6 mg

Oreo Brookie Cheesecake

Rebecca Prep Time: 1 hr 20 mins | Cook Time: 2 hrs 30 mins | Total Time: 3 hrs 50 mins | Yield: 12-14 Slices My daughter is obsessed with this… General Recipes Oreo Brookie Cheesecake European Print This
Serves: 12-14 Prep Time: 1 hr 20 mins Cooking Time: 2 hrs 30 mins 2 hrs 30 mins
Nutrition facts: 556 calories 36.1 fat
Rating: 5.0/5
( 1 voted )

Ingredients

  • BROWNIE BOTTOM:
  • 2 eggs
  • 1/4 teaspoon baking powder
  • 1 c (207 grams) sugar
  • 3/4 c (98 grams) all-purpose flour
  • 1 teaspoon vanilla extract
  • 6 tablespoons (43 grams) natural unsweetened cocoa
  • 1/4 teaspoon salt
  • 10 tablespoons (140 grams) unsalted butter, melted
  • COOKIE CHEESECAKE FILLING:
  • 1 c (225 grams) brown sugar
  • 24 oz (678 grams) cream cheese, room temperature
  • 3 tablespoons (24 grams) of all-purpose flour
  • 1 1/2 c (128 grams) chopped chocolate chip cookies
  • 1 c (230 grams) sour cream, room temperature
  • 3 large eggs, room temperature
  • 3/4 c (128 grams) chocolate chips
  • 1 tablespoon vanilla extract
  • OREO WHIPPED CREAM:
  • 1/2 c. (57 grams) natural unsweetened cocoa
  • 1/2 c. (58 grams) powdered sugar
  • 1 1/2 teaspoon vanilla extract
  • 2 c. (480ml) heavy whipping cream, cold
  • 5–6 chopped Oreos
  • 1/2 c. Oreo crumbs

Instructions

BROWNIE:

Step 1: Prepare the oven. Preheat it to 350 degrees F or 176 degrees C. Using the parchment paper, line a 9-inch (23 cm) springform pan and grease the sides.

Step 2: Place the flour, cocoa, baking powder, and salt in a medium-sized bowl. Mix well and set aside.

Step 3: Whisk the butter, sugar, and vanilla extract in a large bowl. Then, add the eggs and beat well until incorporated.

Step 4: To the egg mixture, add the dry ingredients and mix well until blended. Into the prepared pan, pour the batter, and evenly spread. Place in the preheated oven and bake for about 20 to 25 minutes or until a toothpick inserted in the center of the cake comes out with a few moist crumbs.

Step 5: Adjust the oven temperature to 300 degrees F or 148 degrees C once the brownie is done baking. Take the brownie out of the oven and let it cool for about 10 minutes.

Step 6: After removing the sides of the pan, wash it, and grease again with non-stick spray. Re-attach it to the bottom of the pan while the brownie is still on the pan.

CHEESECAKE FILLING:

Step 7: Place the cream cheese, sugar, and flour in a large bowl. Beat on low speed until well combined and smooth. Make sure to scrape down the sides of the bowl. Then, add the sour cream and vanilla. Beat in low speed until blended. Next, add the eggs, one at a time, slowly beating every after each addition. As needed, scrape down the sides of the bowl, making sure everything is well mixed.

Step 8: Fold in the chocolate chip cookies and chocolate chips. Over the brownie, evenly pour the cheesecake batter.

Step 9: Using aluminium foil, wrap the outside of the pan. Inside another larger pan, place the springform pan. Fill the outside of the pan with enough water until halfway up the sides of the springform pan. Make sure that the water will not go above the top edge of the aluminium foil.

Step 10: Place in the oven and bake for about 1 hour or until the center is set but still slightly jiggly. Turn the oven off but leave the oven door shut for 30 minutes. After 30 minutes, partially open the oven door for another 30 minutes.

Step 11: Take the cheesecake out of the oven and from the water bath. Wrap and place the cheesecake in the fridge for at least 5 to 6 hours or overnight. To loosen the cheesecake from the edges of the pan, gently jiggle it around. I do this before placing the cheesecake in the fridge.

Step 12: Remove the cheesecake from the springform pan once completely cool and firm and transfer to a serving plate.

CHEESECAKE:

Step 13: For the whipped cream, whip the heavy whipping cream, powdered sugar, cocoa, and vanilla extract on high speed until stiff peaks form. Then, stir in the Oreo crumbs and chopped Oreos.

Step 14: Around the outside edge of the cheesecake, pipe swirls of the whipped cream. For this, I use Ateco 808.

Step 15: With the rest of the whipped cream, fill the center of the cheesecake and top with extra chopped Oreos and chocolate chip cookies. Place in the fridge until ready to serve. Note that the cheesecake is best served within 3 to 4 days. Simply cover it well and store it in the fridge.

June 7, 2022 0 comment
0 FacebookTwitterPinterestEmail
General Recipes

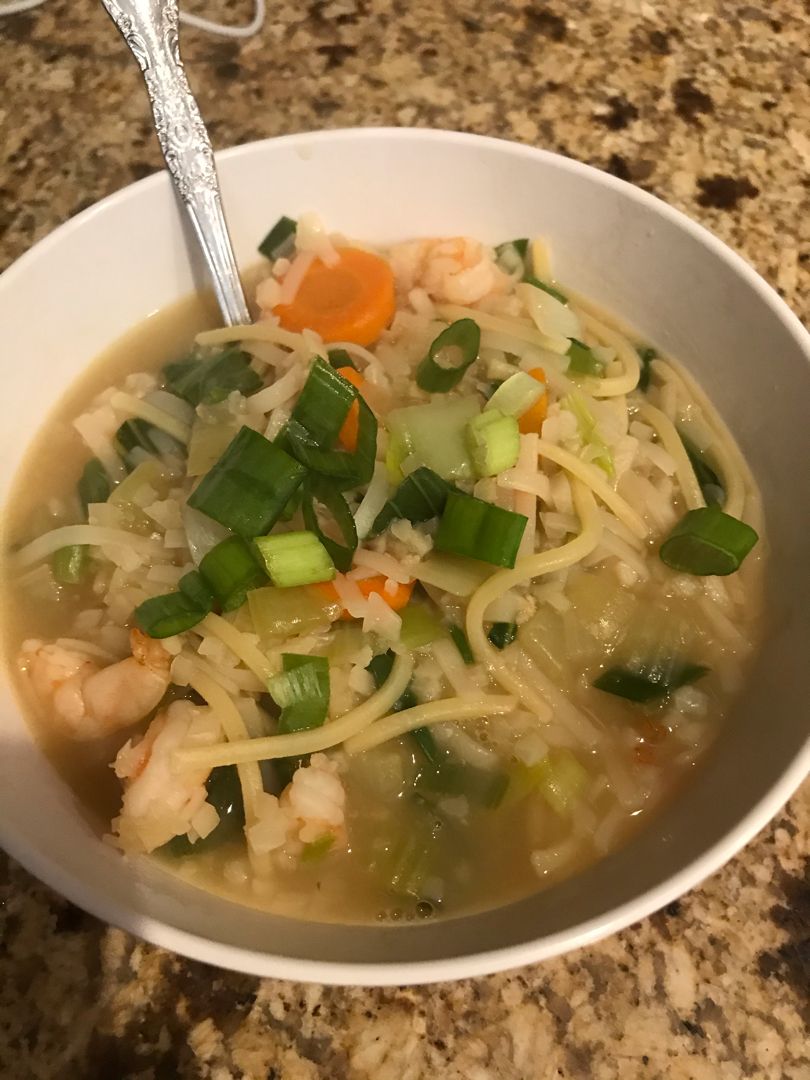
Asian Rice Noodle Soup with Shrimp

by Rebecca June 7, 2022
written by Rebecca

Prep Time: 10 mins | Cook Time: 25 mins | Servings: 2-3

This Asian Rice Noodle Soup with shrimp is so easy to whip up in less than thirty minutes. It’s an amazing soup excellent for cold nights and sore throats. The savory broth with ginger is an excellent way to soothe and get you warm up during cold days/nights. You are also welcome to replace the shrimp with boneless, skinless chicken breasts if desired.

INGREDIENTS

1 lb small raw shrimp, peeled (51-60/lb)

1 tbsp sesame oil

2 cloves garlic, minced or crushed

1 large carrot, peeled and sliced very thin

1 tbsp fresh ginger, minced

2 tbsp gluten-free soy sauce or substitute regular soy sauce

2 tbsp rice vinegar

2 tbsp fish sauce

4 oz. pad Thai rice noodles (1/2 package)

4 baby bok choy chopped (separate white and green pieces)

1 bunch of green onions, sliced

4 c. vegetable or chicken broth

2 c. water

How to make Asian Rice Noodle Soup with Shrimp

Step 1: In a Dutch oven, heat the sesame oil over medium-high heat. Once the oil is hot, add the white pieces of bok chop and carrots. Cook for about 5 minutes, stirring often. Then, add the garlic along with the ginger. Cook for a minute more.

Step 2: Pour in the broth, water, soy sauce, and fish sauce. Bring everything to a boil. Next, add the uncooked noodles and continue to cook for another 2 minutes, separating the noodles as it cooks.

Step 3: Then, add the shrimp, green onions, and green pieces of bok choy. Stir and cook for an additional 2 to 3 minutes.

Step 4: When done, turn the heat off and quickly stir in the rice vinegar. Serve the soup right away. Enjoy!

NOTES:

You can replace the shrimp with chicken if desired. With the broth, add boneless, skinless breasts and simmer until heated through. Take the meat out and shred, then add back to the pot with noodles.

Asian Rice Noodle Soup with Shrimp

Rebecca Prep Time: 10 mins | Cook Time: 25 mins | Servings: 2-3 This Asian Rice Noodle Soup with shrimp is so easy to whip up in less than thirty minutes.… General Recipes Asian Rice Noodle Soup with Shrimp European Print This
Serves: 2-3 Prep Time: 10 mins Cooking Time: 25 mins 25 mins
Nutrition facts: 200 calories 20 grams fat
Rating: 5.0/5
( 1 voted )

Ingredients

  • 1 lb small raw shrimp, peeled (51-60/lb)
  • 1 tbsp sesame oil
  • 2 cloves garlic, minced or crushed
  • 1 large carrot, peeled and sliced very thin
  • 1 tbsp fresh ginger, minced
  • 2 tbsp gluten-free soy sauce or substitute regular soy sauce
  • 2 tbsp rice vinegar
  • 2 tbsp fish sauce
  • 4 oz. pad Thai rice noodles (1/2 package)
  • 4 baby bok choy chopped (separate white and green pieces)
  • 1 bunch of green onions, sliced
  • 4 c. vegetable or chicken broth
  • 2 c. water

Instructions

Step 1: In a Dutch oven, heat the sesame oil over medium-high heat. Once the oil is hot, add the white pieces of bok chop and carrots. Cook for about 5 minutes, stirring often. Then, add the garlic along with the ginger. Cook for a minute more.

Step 2: Pour in the broth, water, soy sauce, and fish sauce. Bring everything to a boil. Next, add the uncooked noodles and continue to cook for another 2 minutes, separating the noodles as it cooks.

Step 3: Then, add the shrimp, green onions, and green pieces of bok choy. Stir and cook for an additional 2 to 3 minutes.

Step 4: When done, turn the heat off and quickly stir in the rice vinegar. Serve the soup right away. Enjoy!

Notes

You can replace the shrimp with chicken if desired. With the broth, add boneless, skinless breasts and simmer until heated through. Take the meat out and shred, then add back to the pot with noodles.

June 7, 2022 0 comment
0 FacebookTwitterPinterestEmail
General Recipes

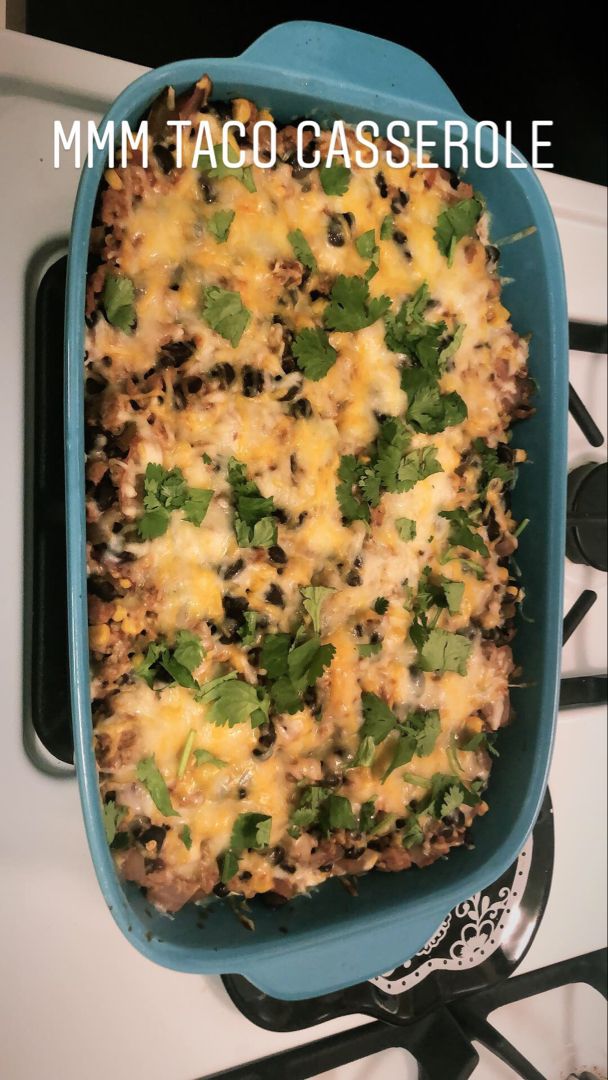
Weight Watcher’s Mexican Casserole

by Rebecca June 6, 2022
written by Rebecca

Prep Time: 10 mins | Cook Time: 25 mins | Total Time: 35 mins | Yield: 6

This Mexican Casserole has been one of my favorites for years! It is loaded with ground beef, tomatoes, corn, and black beans. Enjoy this amazing casserole with your favorite taco toppings such as avocado, sour cream, etc.

INGREDIENTS

1/4 c. canned jalapeno slices, chopped

1 (15 ounces) can kernel corn (drained)

1 pound extra-lean ground beef (drained or rinsed)

1/2 c. onion (chopped)

2 c. fresh tomatoes, chopped or 1 (15 ounces) can dice canned tomatoes

1 (1 1/4 ounces) package of taco seasoning mix

1/3 c. reduced-fat Mexican cheese blend, shredded

3/4 c. nonfat sour cream

1 (15 ounces) can of black beans (rinsed and drained)

1/3 bunch fresh cilantro, chopped, to taste (or less (or more)

8 corn tortillas

How to make Weight Watcher’s Mexican Casserole

Step 1: In a large skillet, cook the ground beef and onions for about 10 to 12 minutes or until the meat is browned and completely cooked, stirring often. Drain all the grease from the skillet and place the beef/onions back in the pan.

Step 2: To the beef/onions in the pan, add the corn, black beans, tomatoes, chilies/jalapenos, and taco seasoning mix. Stir well and decrease the heat. Let everything simmer for about 5 minutes.

Step 3: In the meantime, grease a (2 quart) 12 x 8-inches baking dish using a nonstick cooking spray. In half, cut each tortilla. In the bottom of the prepared dish, lay 8 halves of the tortilla, slightly overlapping.

Step 4: Evenly, cover the tortillas, spoon half of the mixture, and top with sour cream, evenly spreading. On top, lay the other 8 tortilla halves and spread the rest of the beef mixture over. Using foil, tightly cover the dish and freeze for later.

Step 5: If baking right away, place in a preheated 350 degrees F oven and bake for about 25 minutes. Take the casserole out of the oven and sprinkle with cheese. Cover and allow it to stand for about 5 minutes or until the cheese has melted. For the frozen casserole, make sure to thaw first in the fridge overnight before baking as directed.

Step 6: Before serving, garnish with some chopped cilantro. Slice into 6 equal portions and serve with fresh chopped lettuce, tomatoes, salsa, and black olives. Enjoy!

Notes:

My WW Personal Points: 7
Points Plus: 9

NUTRITION FACTS:

Serving Size: 1/6th of the pan, Calories: 355 | Sugar: 8.2 | Fat: 5.9 | Saturated Fat: 2.2 | Carbohydrates: 52.3 | Fiber: 10.4 | Protein: 26.7

Weight Watcher’s Mexican Casserole

Rebecca Prep Time: 10 mins | Cook Time: 25 mins | Total Time: 35 mins | Yield: 6 This Mexican Casserole has been one of my favorites for years! It is… General Recipes Weight Watcher’s Mexican Casserole European Print This
Serves: 6 Prep Time: 10 mins Cooking Time: 25 mins 25 mins
Nutrition facts: 355 calories 5.9 fat
Rating: 5.0/5
( 1 voted )

Ingredients

  • 1/4 c. canned jalapeno slices, chopped
  • 1 (15 ounces) can kernel corn (drained)
  • 1 pound extra-lean ground beef (drained or rinsed)
  • 1/2 c. onion (chopped)
  • 2 c. fresh tomatoes, chopped or 1 (15 ounces) can dice canned tomatoes
  • 1 (1 1/4 ounces) package of taco seasoning mix
  • 1/3 c. reduced-fat Mexican cheese blend, shredded
  • 3/4 c. nonfat sour cream
  • 1 (15 ounces) can of black beans (rinsed and drained)
  • 1/3 bunch fresh cilantro, chopped, to taste (or less (or more)
  • 8 corn tortillas

Instructions

Step 1: In a large skillet, cook the ground beef and onions for about 10 to 12 minutes or until the meat is browned and completely cooked, stirring often. Drain all the grease from the skillet and place the beef/onions back in the pan.

Step 2: To the beef/onions in the pan, add the corn, black beans, tomatoes, chilies/jalapenos, and taco seasoning mix. Stir well and decrease the heat. Let everything simmer for about 5 minutes.

Step 3: In the meantime, grease a (2 quart) 12 x 8-inches baking dish using a nonstick cooking spray. In half, cut each tortilla. In the bottom of the prepared dish, lay 8 halves of the tortilla, slightly overlapping.

Step 4: Evenly, cover the tortillas, spoon half of the mixture, and top with sour cream, evenly spreading. On top, lay the other 8 tortilla halves and spread the rest of the beef mixture over. Using foil, tightly cover the dish and freeze for later.

Step 5: If baking right away, place in a preheated 350 degrees F oven and bake for about 25 minutes. Take the casserole out of the oven and sprinkle with cheese. Cover and allow it to stand for about 5 minutes or until the cheese has melted. For the frozen casserole, make sure to thaw first in the fridge overnight before baking as directed.

Step 6: Before serving, garnish with some chopped cilantro. Slice into 6 equal portions and serve with fresh chopped lettuce, tomatoes, salsa, and black olives. Enjoy!

June 6, 2022 0 comment
0 FacebookTwitterPinterestEmail
Newer Posts
Older Posts

Popular Posts

  • 1

    Crispy Crunchy Parmesan Potatoes

    March 21, 2020
  • 2

    CROCK POT SMOTHERED PORK CHOPS

    March 21, 2020
  • Facebook
  • Twitter

@2019 - All Right Reserved.


Back To Top