Cook it once
  • Home
  • Privacy Policy
  • Recipes
    • KETO
    • LC
    • WW
  • Tips
  • Contact
Cook it once
  • Home
  • Privacy Policy
  • Recipes
    • KETO
    • LC
    • WW
  • Tips
  • Contact
Category:

General Recipes

General Recipes

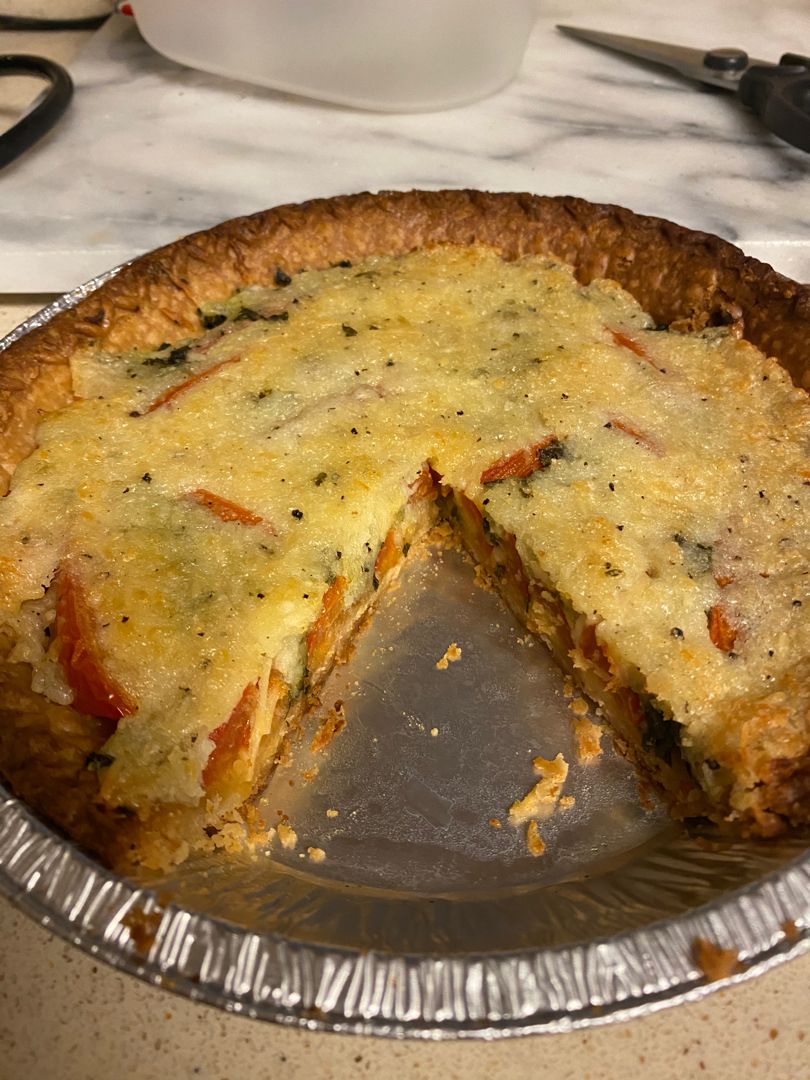
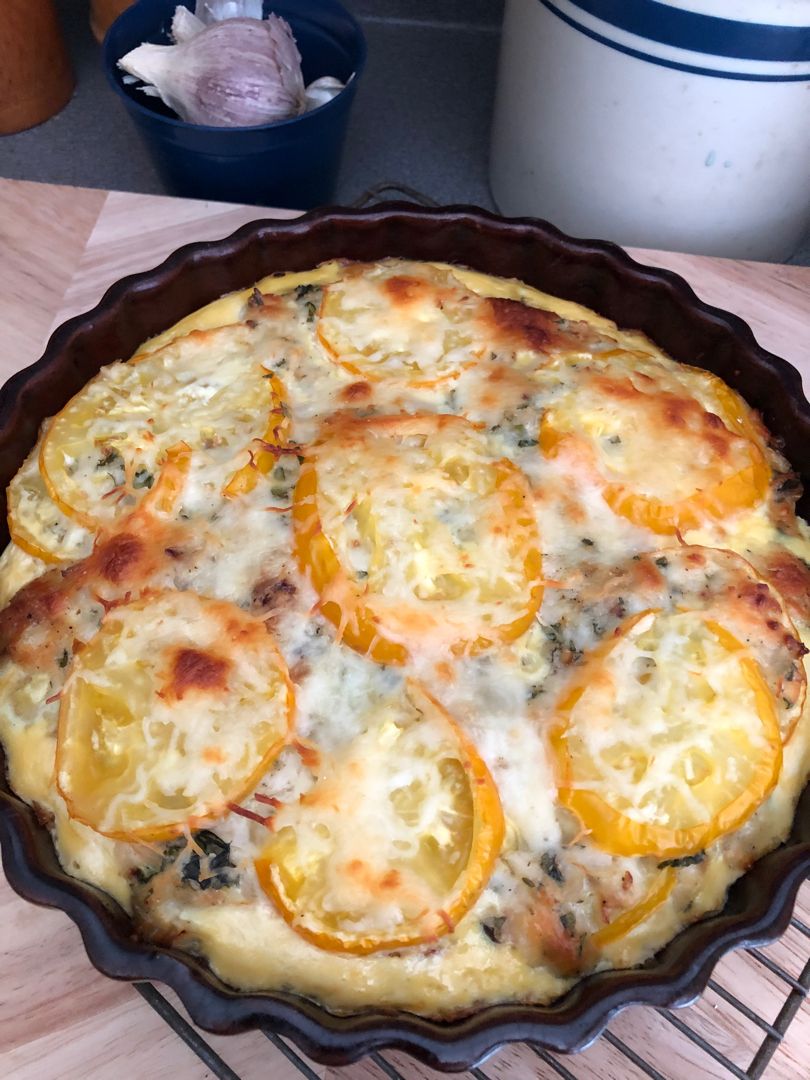
CRUSTLESS TOMATO PIE RECIPE

by Rebecca June 13, 2022
written by Rebecca

This crustless tomato pie has been one of my family’s favorites for years. It is very delightful and pretty easy to whip up fast. The perfect pizza to serve for brunch, lunch, or dinner. With an Italian flair from the fresh herbs and mozzarella cheese that brings everything together! This easy crustless tomato pie recipe is a must-try!

INGREDIENTS

2 eggs, beaten

1 tbsp butter

4 tomatoes, sliced

1 clove garlic, minced

1/2 c. onion, chopped

2 tbsp fresh oregano, chopped

2 c. mozzarella cheese, shredded, plus extra for sprinkling over top

6-7 leaves of basil, chopped

1/2 tsp black pepper

1-2 tsp salt

HOW TO MAKE CRUSTLESS TOMATO PIE

Step 1: On plates, lay the sliced tomatoes and lightly sprinkle with salt. Allow them to sit for at least 10 to 20 minutes up to 30 minutes.

Step 2: In a small skillet, melt the butter over medium-high heat. Once the butter has melted, add the onion and garlic to the skillet and cook for about 8 minutes, stirring often, until the onions have softened. To a medium-sized bowl, transfer the onion/garlic mixture. Then, add the cheese, eggs, herbs, and pepper. Mix well.

Step 3: Drain the water from the plates with the tomatoes. Gently blot the tomatoes using a paper towel to soak up any excess moisture.

Step 4: On a greased pie pan, arrange the tomatoes in a single layer and top with around 1/4 cup of the cheese mixture. Repeat the layers with the rest of the tomato slices and cheese mixture, ending with a layer of tomatoes. Sprinkle the final layer with mozzarella cheese.

Step 5: Place in the oven and bake for about 30 to 40 minutes at 375 degrees or until the edges are lightly browned. Remove from the oven when done and let the pie sit for about 5 to 7 minutes.

Step 6: Serve and enjoy!

CRUSTLESS TOMATO PIE RECIPE

Rebecca This crustless tomato pie has been one of my family’s favorites for years. It is very delightful and pretty easy to whip up fast. The perfect pizza to serve for… General Recipes CRUSTLESS TOMATO PIE RECIPE European Print This
Nutrition facts: 200 calories 20 grams fat
Rating: 5.0/5
( 1 voted )

Ingredients

  • 2 eggs, beaten
  • 1 tbsp butter
  • 4 tomatoes, sliced
  • 1 clove garlic, minced
  • 1/2 c. onion, chopped
  • 2 tbsp fresh oregano, chopped
  • 2 c. mozzarella cheese, shredded, plus extra for sprinkling over top
  • 6-7 leaves of basil, chopped
  • 1/2 tsp black pepper
  • 1-2 tsp salt

Instructions

Step 1: On plates, lay the sliced tomatoes and lightly sprinkle with salt. Allow them to sit for at least 10 to 20 minutes up to 30 minutes.

Step 2: In a small skillet, melt the butter over medium-high heat. Once the butter has melted, add the onion and garlic to the skillet and cook for about 8 minutes, stirring often, until the onions have softened. To a medium-sized bowl, transfer the onion/garlic mixture. Then, add the cheese, eggs, herbs, and pepper. Mix well.

Step 3: Drain the water from the plates with the tomatoes. Gently blot the tomatoes using a paper towel to soak up any excess moisture.

Step 4: On a greased pie pan, arrange the tomatoes in a single layer and top with around 1/4 cup of the cheese mixture. Repeat the layers with the rest of the tomato slices and cheese mixture, ending with a layer of tomatoes. Sprinkle the final layer with mozzarella cheese.

Step 5: Place in the oven and bake for about 30 to 40 minutes at 375 degrees or until the edges are lightly browned. Remove from the oven when done and let the pie sit for about 5 to 7 minutes.

Step 6: Serve and enjoy!
June 13, 2022 0 comment
0 FacebookTwitterPinterestEmail
General Recipes

Chicken with Creamy Garlic Sauce

by Rebecca June 13, 2022
written by Rebecca

Prep Time: 15 mins | Cook Time: 35 mins | Total Time: 50 mins | Servings: 4-8

This is an easy and quick one-skillet meal. Juicy, perfectly golden chicken with the most amazing creamy garlic sauce. This is a real treat for all garlic lovers out there!

Ingredients

2 tablespoons olive oil, divided

4 boneless, skinless chicken breasts

1-1 1/2 c. Italian flavor bread crumbs

1/2 c. half-and-half -OR- light cream

SAUCE:

2 tablespoons finely minced garlic

2 tablespoons butter

1/2 c. chicken stock

1/4 c. grated Parmesan cheese

1 c heavy cream preferred

2 ounces softened cream cheese

2 tablespoons flour

1/4 teaspoon white pepper

1 teaspoon salt

How to make Chicken with Creamy Garlic Sauce

Step 1: Place the chicken breasts between sheets of plastic wrap or wax paper and pound using the smooth side of a meat mallet to about 1/4 inch thickness.

Step 2: Drizzle 1 tablespoon of olive oil in a hot large skillet over medium heat.

Step 3: Dredge each chicken in the cream, allowing the excess cream to drip off before coating it in the Italian bread crumbs.

Step 4: Into the hot oil, place the chicken, and cook (in batches) for about 5 minutes per side or until the internal temperature of the chicken reaches 175 degrees F and the juices run clear. Set the cooked chicken aside. Repeat with the rest of the chicken.

Step 5: Tent the chicken and keep them warm in a 200 degrees F oven.

Step 6: If desired, wipe the skillet. Add the butter and melt over medium heat. Once the butter has melted, add the garlic and cook for about 3 to 5 minutes until aromatic. Stir in the flour and continue to cook for a minute more. Gradually add the chicken stock, stirring until the lumps are gone. Then, stir in the cream. To taste, season with salt and pepper. Continue to cook for additional 5 minutes.

Step 7: To the skillet, add the Parmesan, followed by the cream cheese. Whisk until blended. Over the chicken, pour the sauce.

Step 8: Serve the chicken with creamy garlic sauce right away. Enjoy!

Nutrition Facts:

Serving: 1serving | Calories: 859 kcal | Carbohydrates: 58g | Protein: 40g | Fat: 52g | Saturated Fat: 26g | Cholesterol: 202mg | Sodium: 1477mg | Potassium: 701mg | Fiber: 3g | Sugar: 5g | Vitamin A: 1437IU | Vitamin C: 3mg | Calcium: 290mg | Iron: 4mg

Chicken with Creamy Garlic Sauce

Rebecca Prep Time: 15 mins | Cook Time: 35 mins | Total Time: 50 mins | Servings: 4-8 This is an easy and quick one-skillet meal. Juicy, perfectly golden chicken with… General Recipes Chicken with Creamy Garlic Sauce European Print This
Serves: 4-8 Prep Time: 15 mins Cooking Time: 35 mins 35 mins
Nutrition facts: 859 calories 52 fat
Rating: 5.0/5
( 1 voted )

Ingredients

  • 2 tablespoons olive oil, divided
  • 4 boneless, skinless chicken breasts
  • 1-1 1/2 c. Italian flavor bread crumbs
  • 1/2 c. half-and-half -OR- light cream
  • SAUCE:
  • 2 tablespoons finely minced garlic
  • 2 tablespoons butter
  • 1/2 c. chicken stock
  • 1/4 c. grated Parmesan cheese
  • 1 c heavy cream preferred
  • 2 ounces softened cream cheese
  • 2 tablespoons flour
  • 1/4 teaspoon white pepper
  • 1 teaspoon salt

Instructions

Step 1: Place the chicken breasts between sheets of plastic wrap or wax paper and pound using the smooth side of a meat mallet to about 1/4 inch thickness.

Step 2: Drizzle 1 tablespoon of olive oil in a hot large skillet over medium heat.

Step 3: Dredge each chicken in the cream, allowing the excess cream to drip off before coating it in the Italian bread crumbs.

Step 4: Into the hot oil, place the chicken, and cook (in batches) for about 5 minutes per side or until the internal temperature of the chicken reaches 175 degrees F and the juices run clear. Set the cooked chicken aside. Repeat with the rest of the chicken.

Step 5: Tent the chicken and keep them warm in a 200 degrees F oven.

Step 6: If desired, wipe the skillet. Add the butter and melt over medium heat. Once the butter has melted, add the garlic and cook for about 3 to 5 minutes until aromatic. Stir in the flour and continue to cook for a minute more. Gradually add the chicken stock, stirring until the lumps are gone. Then, stir in the cream. To taste, season with salt and pepper. Continue to cook for additional 5 minutes.

Step 7: To the skillet, add the Parmesan, followed by the cream cheese. Whisk until blended. Over the chicken, pour the sauce.

Step 8: Serve the chicken with creamy garlic sauce right away. Enjoy!

June 13, 2022 0 comment
0 FacebookTwitterPinterestEmail
General Recipes

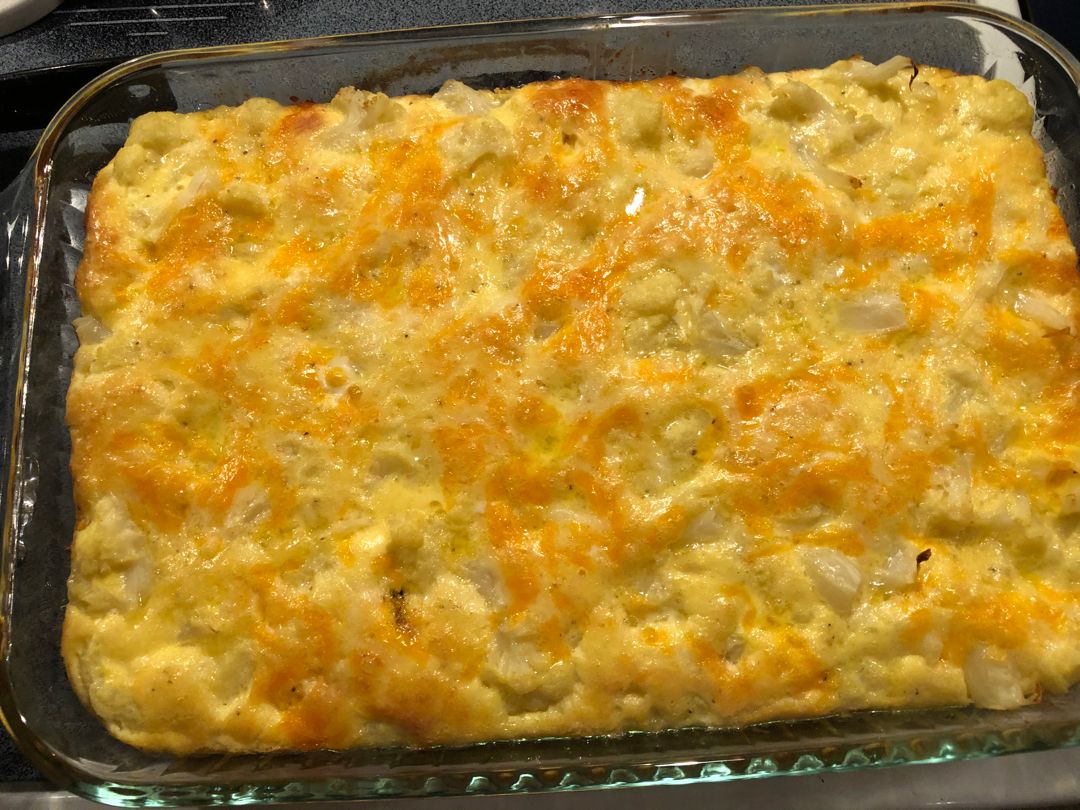
Cauliflower Casserole

by Rebecca June 13, 2022
written by Rebecca

Dress up your cauliflower into something amazing! This cauliflower casserole will surely have everyone begging. It’s a very easy and quick dish to make using only a few simple ingredients. Serve this as a satisfying side dish. Or if you are vegetarian, you’ll enjoy this as the main course. A high in protein and healthy casserole that deserves a spot on your weekly menu rotation.

I always want to try new recipes. Those that are unexpected, unconventional, and result in surprisingly wonderful dishes. I never thought that cauliflowers are boring. They are my favorite. But this superb recipe simply brought cauliflower to the next level! With cheesy goodness and delicious flavors, this cauliflower casserole will surely be your new favorite!

Ingredients

8 eggs

1 cauliflower

4 tbsp butter (melted and cooled)

1/4 tsp Celery Salt

1/2 tsp Onion Powder

1/2 c. Shredded or Ground Parmesan Cheese

2 c. Shredded White Cheddar Cheese

1-1/4 c. heavy cream

1/2 c. Shredded Mozzarella Cheese

1/2 tsp salt

1/8 tsp White Pepper

How to make Cauliflower Casserole

Step 1: Prepare the oven. Preheat it to 350 degrees F.

Step 2: Into smaller florets, cut the cauliflower, discarding the stack and other leaves.

Step 3: Add the cauliflower into a pot of boiling water and cook until tender but still somewhat crunchy. When done, drain the cauliflower, getting rid of as much moisture as possible. Then, into a small casserole dish, spread the cauliflower.

Step 4: Place the eggs in a bowl and beat until fluffy. Then, whisk in the cream followed by the melted butter. Season with salt, pepper, celery salt, and onion powder.

Step 5: Into the egg mixture, mix in the white cheddar, Parmesan, and mozzarella cheeses. Over the cauliflower, pour the mixture. Place in the preheated oven and bake for approximately 45 minutes.

Step 6: Serve as a side or main dish. Enjoy!

Cauliflower Casserole

Rebecca Dress up your cauliflower into something amazing! This cauliflower casserole will surely have everyone begging. It’s a very easy and quick dish to make using only a few simple ingredients.… General Recipes Cauliflower Casserole European Print This
Nutrition facts: 200 calories 20 grams fat
Rating: 5.0/5
( 1 voted )

Ingredients

  • 8 eggs
  • 1 cauliflower
  • 4 tbsp butter (melted and cooled)
  • 1/4 tsp Celery Salt
  • 1/2 tsp Onion Powder
  • 1/2 c. Shredded or Ground Parmesan Cheese
  • 2 c. Shredded White Cheddar Cheese
  • 1-1/4 c. heavy cream
  • 1/2 c. Shredded Mozzarella Cheese
  • 1/2 tsp salt
  • 1/8 tsp White Pepper

Instructions

Step 1: Prepare the oven. Preheat it to 350 degrees F.

Step 2: Into smaller florets, cut the cauliflower, discarding the stack and other leaves.

Step 3: Add the cauliflower into a pot of boiling water and cook until tender but still somewhat crunchy. When done, drain the cauliflower, getting rid of as much moisture as possible. Then, into a small casserole dish, spread the cauliflower.

Step 4: Place the eggs in a bowl and beat until fluffy. Then, whisk in the cream followed by the melted butter. Season with salt, pepper, celery salt, and onion powder.

Step 5: Into the egg mixture, mix in the white cheddar, Parmesan, and mozzarella cheeses. Over the cauliflower, pour the mixture. Place in the preheated oven and bake for approximately 45 minutes.

Step 6: Serve as a side or main dish. Enjoy!

June 13, 2022 0 comment
0 FacebookTwitterPinterestEmail
General Recipes

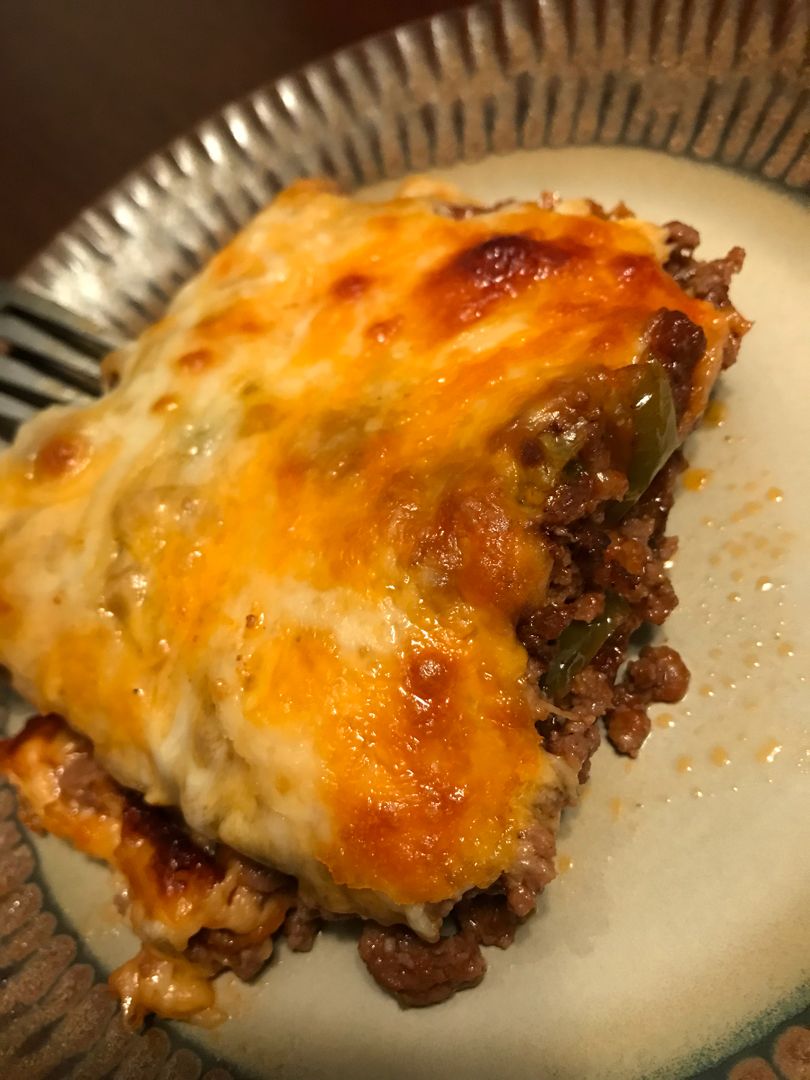
Meaty Zucchini Casserole

by Rebecca June 13, 2022
written by Rebecca

Scrumptious and filling – this easy, meaty zucchini casserole is a great meal with shredded zucchini base or pizza crust topped with cheese, ground beef or hamburger, chicken, and a lot more. It’s a packed weeknight dinner, especially perfect for zucchini lovers!

INGREDIENTS

cooking spray

Zucchini Base:

2 large eggs

1 large zucchini or 2 c., shredded or grated Aim for approximately 2 c. A little less will not matter. Begin to grate another

zucchini if you are just under the 2-cup mark. Your base will still turn out amazing!

1 ½ c. cheese, shredded

⅔ c. Parmesan cheese, grated or shredded

1 tsp salt

Meaty Middle Layer:

¾ c. onion, chopped

1 ½ lb. ground beef, pork, sausage (no casings), chicken, turkey, soy-based crumble

½ c. peppers, green, orange, yellow, or red, chopped

2 c. mushrooms, fresh, sliced

1-2 tbsp Italian seasoning, if desired

1 jar (26 ounces) tomato, pasta, or spaghetti sauce, your favorite brand or flavor, Alfredo sauce works too!

Topping:

1 ½ c. cheese, shredded, more or less to taste

How to make Meaty Zucchini Casserole

Step 1: Prepare the oven. Preheat it to 400 degrees. Using cooking spray, lightly grease a 13 x 9-inch and set aside.

Zucchini Base:

Step 2: In a strainer, place the grated zucchini and sprinkle with salt. Toss and allow it to stand for about 15 minutes.

Step 3: In a medium-sized mixing bowl, place the eggs, Parmesan cheese, and half of the shredded cheeses. Mix well until combined.

Step 4: Using paper towels, squeeze out the moisture from the zucchini. Place the zucchini in the bowl with the eggs and cheeses. Mix again using your hands.

Step 5: Into the prepared pan, evenly press the mixture. Place in the preheated oven and bake for about 25 minutes, uncovered. Set aside when done.

Meaty Middle Layer:

Step 6: Saute the mushrooms and onions in a large skillet or saucepan over medium heat until they begin to soften. Then, add the ground meat and cook while breaking it into small pieces until browned. Next, add the peppers and stir well until combined. If needed, drain. Toss in the tomato, pasta, and spaghetti sauce.

Step 7: On top of the zucchini layer, empty the contents of the bowl and spread evenly.

Topping:

Step 8: On top, sprinkle the cheese. Return to the oven and resume baking for another 20 minutes until completely heated.

Step 9: Remove from the oven when done and let the casserole rest for about 10 minutes before slicing. Enjoy!

Meaty Zucchini Casserole

Rebecca Scrumptious and filling – this easy, meaty zucchini casserole is a great meal with shredded zucchini base or pizza crust topped with cheese, ground beef or hamburger, chicken, and a… General Recipes Meaty Zucchini Casserole European Print This
Nutrition facts: 200 calories 20 grams fat
Rating: 5.0/5
( 1 voted )

Ingredients

  • cooking spray
  • Zucchini Base:
  • 2 large eggs
  • 1 large zucchini or 2 c., shredded or grated Aim for approximately 2 c. A little less will not matter. Begin to grate another
  • zucchini if you are just under the 2-cup mark. Your base will still turn out amazing!
  • 1 ½ c. cheese, shredded
  • ⅔ c. Parmesan cheese, grated or shredded
  • 1 tsp salt
  • Meaty Middle Layer:
  • ¾ c. onion, chopped
  • 1 ½ lb. ground beef, pork, sausage (no casings), chicken, turkey, soy-based crumble
  • ½ c. peppers, green, orange, yellow, or red, chopped
  • 2 c. mushrooms, fresh, sliced
  • 1-2 tbsp Italian seasoning, if desired
  • 1 jar (26 ounces) tomato, pasta, or spaghetti sauce, your favorite brand or flavor, Alfredo sauce works too!
  • Topping:
  • 1 ½ c. cheese, shredded, more or less to taste

Instructions

Step 1: Prepare the oven. Preheat it to 400 degrees. Using cooking spray, lightly grease a 13 x 9-inch and set aside.

Zucchini Base:

Step 2: In a strainer, place the grated zucchini and sprinkle with salt. Toss and allow it to stand for about 15 minutes.

Step 3: In a medium-sized mixing bowl, place the eggs, Parmesan cheese, and half of the shredded cheeses. Mix well until combined.

Step 4: Using paper towels, squeeze out the moisture from the zucchini. Place the zucchini in the bowl with the eggs and cheeses. Mix again using your hands.

Step 5: Into the prepared pan, evenly press the mixture. Place in the preheated oven and bake for about 25 minutes, uncovered. Set aside when done.

Meaty Middle Layer:

Step 6: Saute the mushrooms and onions in a large skillet or saucepan over medium heat until they begin to soften. Then, add the ground meat and cook while breaking it into small pieces until browned. Next, add the peppers and stir well until combined. If needed, drain. Toss in the tomato, pasta, and spaghetti sauce.

Step 7: On top of the zucchini layer, empty the contents of the bowl and spread evenly.

Topping:

Step 8: On top, sprinkle the cheese. Return to the oven and resume baking for another 20 minutes until completely heated.

Step 9: Remove from the oven when done and let the casserole rest for about 10 minutes before slicing. Enjoy!

June 13, 2022 0 comment
0 FacebookTwitterPinterestEmail
General Recipes

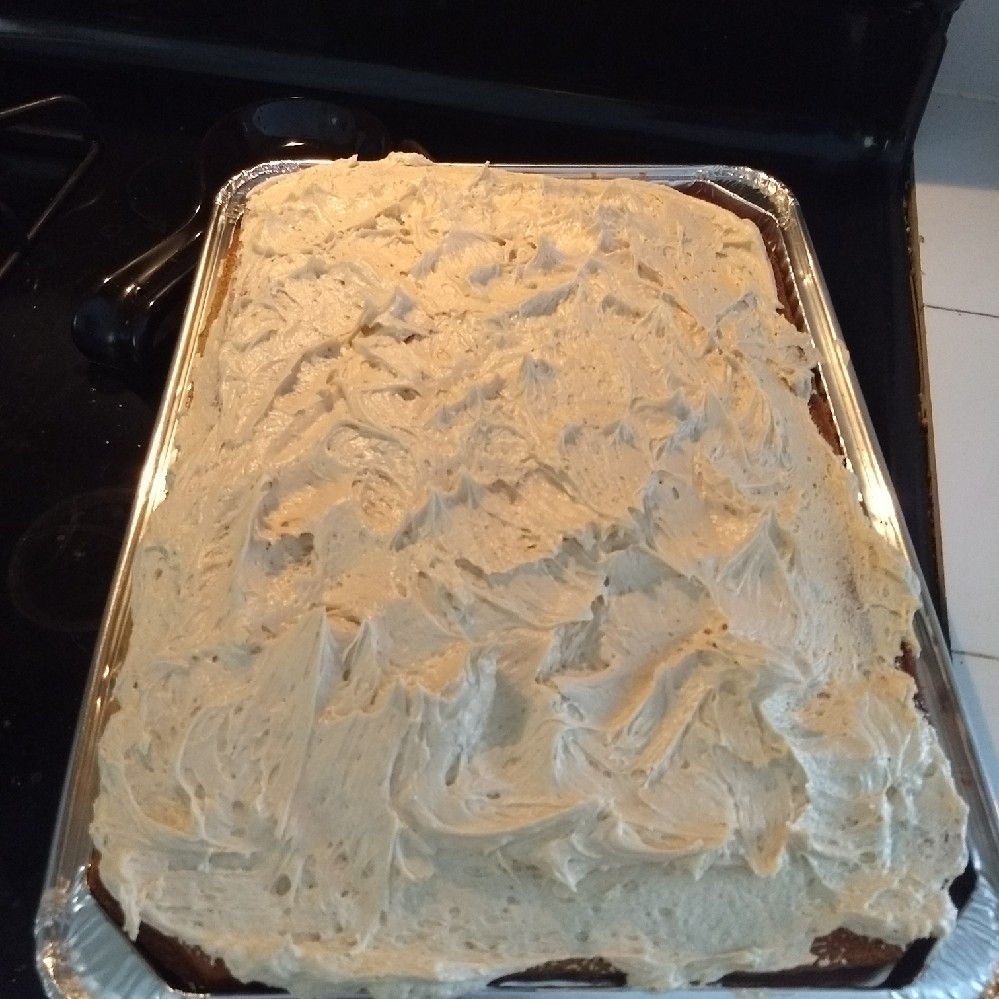
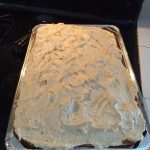
Peanut Butter Sheet Cake

by Rebecca June 13, 2022
written by Rebecca

PREP TIME: 20 MINS | COOK TIME: 22 MINS | TOTAL TIME: 42 MINS | SERVINGS: 20

This is a very delightful, moist sheet cake topped with an impressive creamy, and sweet peanut butter icing. My favorite for potlucks, picnics, or whenever I am craving some peanut butter action!

Ingredients

Cake:

2 eggs

2 c. all-purpose flour

1/2 tsp baking soda

1 1/2 (12 tbsp) sticks of butter

2 c. sugar

1 c. water

1/4 c. vegetable oil

1/2 c. buttermilk

1/2 c. peanut butter

1 tsp vanilla extract

1/4 tsp salt

Frosting:

3/4 c. peanut butter

2 sticks (1 c.) butter, softened

2 tbsp instant vanilla pudding mix

3 to 4 tbsp milk

3 c. confectioners’ sugar

How to make Peanut Butter Sheet Cake

Step 1: Prepare the oven. Preheat it to 350 degrees. Ready a 10 x 15 x 1-inch jellyroll pan. Grease and set aside.

Step 2: Place the flour, sugar, baking soda, and salt in a large bowl. Mix well until blended.

Step 3: In a medium saucepan, whisk 1 1/2 sticks of butter with 1 cup of water. Bring the mixture to a simmer and stir until the butter has melted. Stir in half a c of peanut butter and vegetables. Then, stir this into the flour mixture.

Step 4: Combine the eggs with buttermilk and vanilla extract. Then, mix this into the flour mixture until well blended.

Step 5: Into the prepared pan, pour the batter. Place in the preheated oven and bake for about 22 to 26 minutes or until a toothpick inserted in the center of the cake comes out clean. Remove from the oven when done and allow the cake to cool.

Step 6: For the frosting, beat the butter and peanut butter in an electric mixer until smooth. Add half each of the confectioners’ sugar and milk. Beat well until smooth. Then, add the rest of the confectioners’ sugar, milk, and vanilla pudding mix. Stir again until the frosting is smooth. If needed, add a bit more milk.

Step 7: On the cooled cake, spread the frosting.

Nutrition Info.

Calories: 432 kcal

Peanut Butter Sheet Cake

Rebecca PREP TIME: 20 MINS | COOK TIME: 22 MINS | TOTAL TIME: 42 MINS | SERVINGS: 20 This is a very delightful, moist sheet cake topped with an impressive creamy,… General Recipes Peanut Butter Sheet Cake European Print This
Serves: 20 Prep Time: 20 mins Cooking Time: 22 mins 22 mins
Nutrition facts: 432 calories 20 grams fat
Rating: 5.0/5
( 1 voted )

Ingredients

  • Cake:
  • 2 eggs
  • 2 c. all-purpose flour
  • 1/2 tsp baking soda
  • 1 1/2 (12 tbsp) sticks of butter
  • 2 c. sugar
  • 1 c. water
  • 1/4 c. vegetable oil
  • 1/2 c. buttermilk
  • 1/2 c. peanut butter
  • 1 tsp vanilla extract
  • 1/4 tsp salt
  • Frosting:
  • 3/4 c. peanut butter
  • 2 sticks (1 c.) butter, softened
  • 2 tbsp instant vanilla pudding mix
  • 3 to 4 tbsp milk
  • 3 c. confectioners' sugar

Instructions

Step 1: Prepare the oven. Preheat it to 350 degrees. Ready a 10 x 15 x 1-inch jellyroll pan. Grease and set aside.

Step 2: Place the flour, sugar, baking soda, and salt in a large bowl. Mix well until blended.

Step 3: In a medium saucepan, whisk 1 1/2 sticks of butter with 1 cup of water. Bring the mixture to a simmer and stir until the butter has melted. Stir in half a c of peanut butter and vegetables. Then, stir this into the flour mixture.

Step 4: Combine the eggs with buttermilk and vanilla extract. Then, mix this into the flour mixture until well blended.

Step 5: Into the prepared pan, pour the batter. Place in the preheated oven and bake for about 22 to 26 minutes or until a toothpick inserted in the center of the cake comes out clean. Remove from the oven when done and allow the cake to cool.

Step 6: For the frosting, beat the butter and peanut butter in an electric mixer until smooth. Add half each of the confectioners' sugar and milk. Beat well until smooth. Then, add the rest of the confectioners' sugar, milk, and vanilla pudding mix. Stir again until the frosting is smooth. If needed, add a bit more milk.

Step 7: On the cooled cake, spread the frosting.

June 13, 2022 0 comment
0 FacebookTwitterPinterestEmail
General Recipes

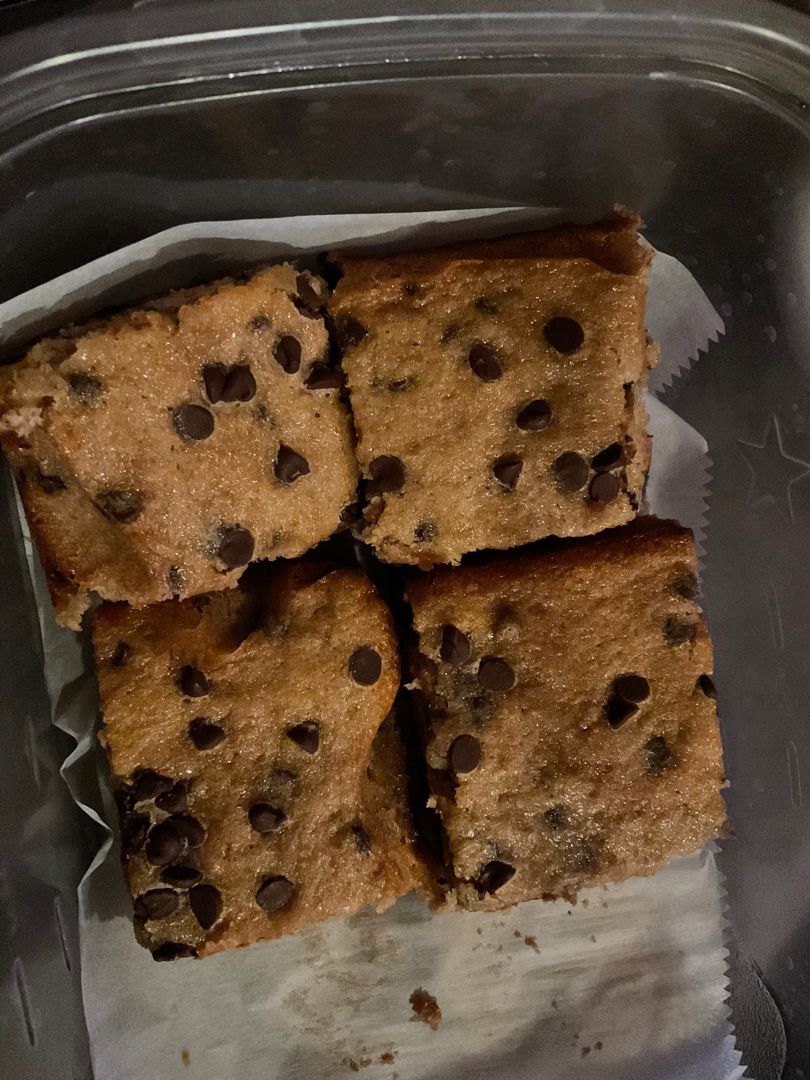
Chocolate Chip Banana Bars

by Rebecca June 13, 2022
written by Rebecca

PREP TIME: 10 MINS | COOK TIME: 32 MINS | TOTAL TIME: 42 MINS | YIELD: 16 bars

Whenever I find myself craving some chocolate chips and bananas, these delightful chocolate chip banana bars are my favorite go-to! Delicious and healthy – these are the best treat for chocolate and banana lovers! So easy to whip up and ready in no time. The best part is you can also make this ahead or easily double the recipe.

Ingredients

1 c. light or dark brown sugar (200 grams)

1/2 c. unsalted butter, room temperature (113 grams)

1 1/2 teaspoons vanilla extract (6ml)

1 large egg, room temperature (56 grams)

1 c. mashed overripe banana – about 2 medium bananas (230 grams)

1 c. all-purpose flour (125 grams)

3/4 c. chocolate chips, chopped (160 grams)

1/2 teaspoon fine salt (3 grams)

How to make Chocolate Chip Banana Bars

Step 1: Prepare the oven. Preheat it to 350 degrees F or 175 degrees C. Using parchment paper or foil, line an 8 x 8-inch baking dish and grease with cooking spray. Set aside.

Step 2: Cream half a cup of unsalted butter with 1 cup of brown sugar in a large bowl or the bowl of a stand mixer. Mix for about 2 minutes on medium-high speed or until the color of the mixture is lighter. Then, add in 1 1/2 teaspoons vanilla extract, 1/2 teaspoon salt, and 1 large egg. Whisk on medium-low speed until completely blended. Using a rubber spatula, scrape the sides and bottom of the bowl as needed. Next, add 1 cup all-purpose flour and whisk on low until just blended and the streaks of flour are not visible anymore. Mix 1 cup mashed bananas on low speed, then fold in 3/4 c. mini chocolate chips or chopped chocolate chips. Make sure to keep a couple of chocolate chips for later.

Step 3: Into the prepared pan, pour the batter and sprinkle with a couple of bits of chocolate. Place in the preheated oven and bake for about 32 to 36 minutes or until the edges are golden brown and the center of the bar is cooked through. For even baking, rotate the pan halfway through.

Step 4: Remove from the oven when done and allow the bar to cool completely before slicing into 16 small squares. Keep any leftovers in an airtight container or cover with plastic wrap and store in the fridge for up to 1 week.

Notes:

To make these Chocolate Chip Banana Bars ahead:

Separate the bars a little and place them between parchment to prevent them from sticking if they are stacked and stored in an airtight container. Keep in the fridge for up to 1 week and freeze for up to 1 month.

Baking in a Different Type of Pan:

If making in a glass baking pan, decrease the baking temperature by 25 degrees (325 degrees F) and bake for around 5 minutes less.

Nutrition Facts:

Yield: 16, Serving Size: 1
Amount Per Serving: Calories 191, Total Fat 9g, Saturated Fat 5g, Trans Fat 0g, Unsaturated Fat 3g, Cholesterol 27mg, Sodium 82mg, Carbohydrates 28g, Fiber 1g, Sugar 19g, Protein 2g

Chocolate Chip Banana Bars

Rebecca PREP TIME: 10 MINS | COOK TIME: 32 MINS | TOTAL TIME: 42 MINS | YIELD: 16 bars Whenever I find myself craving some chocolate chips and bananas, these delightful… General Recipes Chocolate Chip Banana Bars European Print This
Serves: 16 Prep Time: 10 mins Cooking Time: 32 mins 32 mins
Nutrition facts: 191 calories 9 fat
Rating: 5.0/5
( 1 voted )

Ingredients

  • 1 c. light or dark brown sugar (200 grams)
  • 1/2 c. unsalted butter, room temperature (113 grams)
  • 1 1/2 teaspoons vanilla extract (6ml)
  • 1 large egg, room temperature (56 grams)
  • 1 c. mashed overripe banana - about 2 medium bananas (230 grams)
  • 1 c. all-purpose flour (125 grams)
  • 3/4 c. chocolate chips, chopped (160 grams)
  • 1/2 teaspoon fine salt (3 grams)

Instructions

Step 1: Prepare the oven. Preheat it to 350 degrees F or 175 degrees C. Using parchment paper or foil, line an 8 x 8-inch baking dish and grease with cooking spray. Set aside.

Step 2: Cream half a cup of unsalted butter with 1 cup of brown sugar in a large bowl or the bowl of a stand mixer. Mix for about 2 minutes on medium-high speed or until the color of the mixture is lighter. Then, add in 1 1/2 teaspoons vanilla extract, 1/2 teaspoon salt, and 1 large egg. Whisk on medium-low speed until completely blended. Using a rubber spatula, scrape the sides and bottom of the bowl as needed. Next, add 1 cup all-purpose flour and whisk on low until just blended and the streaks of flour are not visible anymore. Mix 1 cup mashed bananas on low speed, then fold in 3/4 c. mini chocolate chips or chopped chocolate chips. Make sure to keep a couple of chocolate chips for later.

Step 3: Into the prepared pan, pour the batter and sprinkle with a couple of bits of chocolate. Place in the preheated oven and bake for about 32 to 36 minutes or until the edges are golden brown and the center of the bar is cooked through. For even baking, rotate the pan halfway through.

Step 4: Remove from the oven when done and allow the bar to cool completely before slicing into 16 small squares. Keep any leftovers in an airtight container or cover with plastic wrap and store in the fridge for up to 1 week.

Notes

To make these Chocolate Chip Banana Bars ahead: Separate the bars a little and place them between parchment to prevent them from sticking if they are stacked and stored in an airtight container. Keep in the fridge for up to 1 week and freeze for up to 1 month. Baking in a Different Type of Pan: If making in a glass baking pan, decrease the baking temperature by 25 degrees (325 degrees F) and bake for around 5 minutes less.

June 13, 2022 0 comment
0 FacebookTwitterPinterestEmail
General Recipes

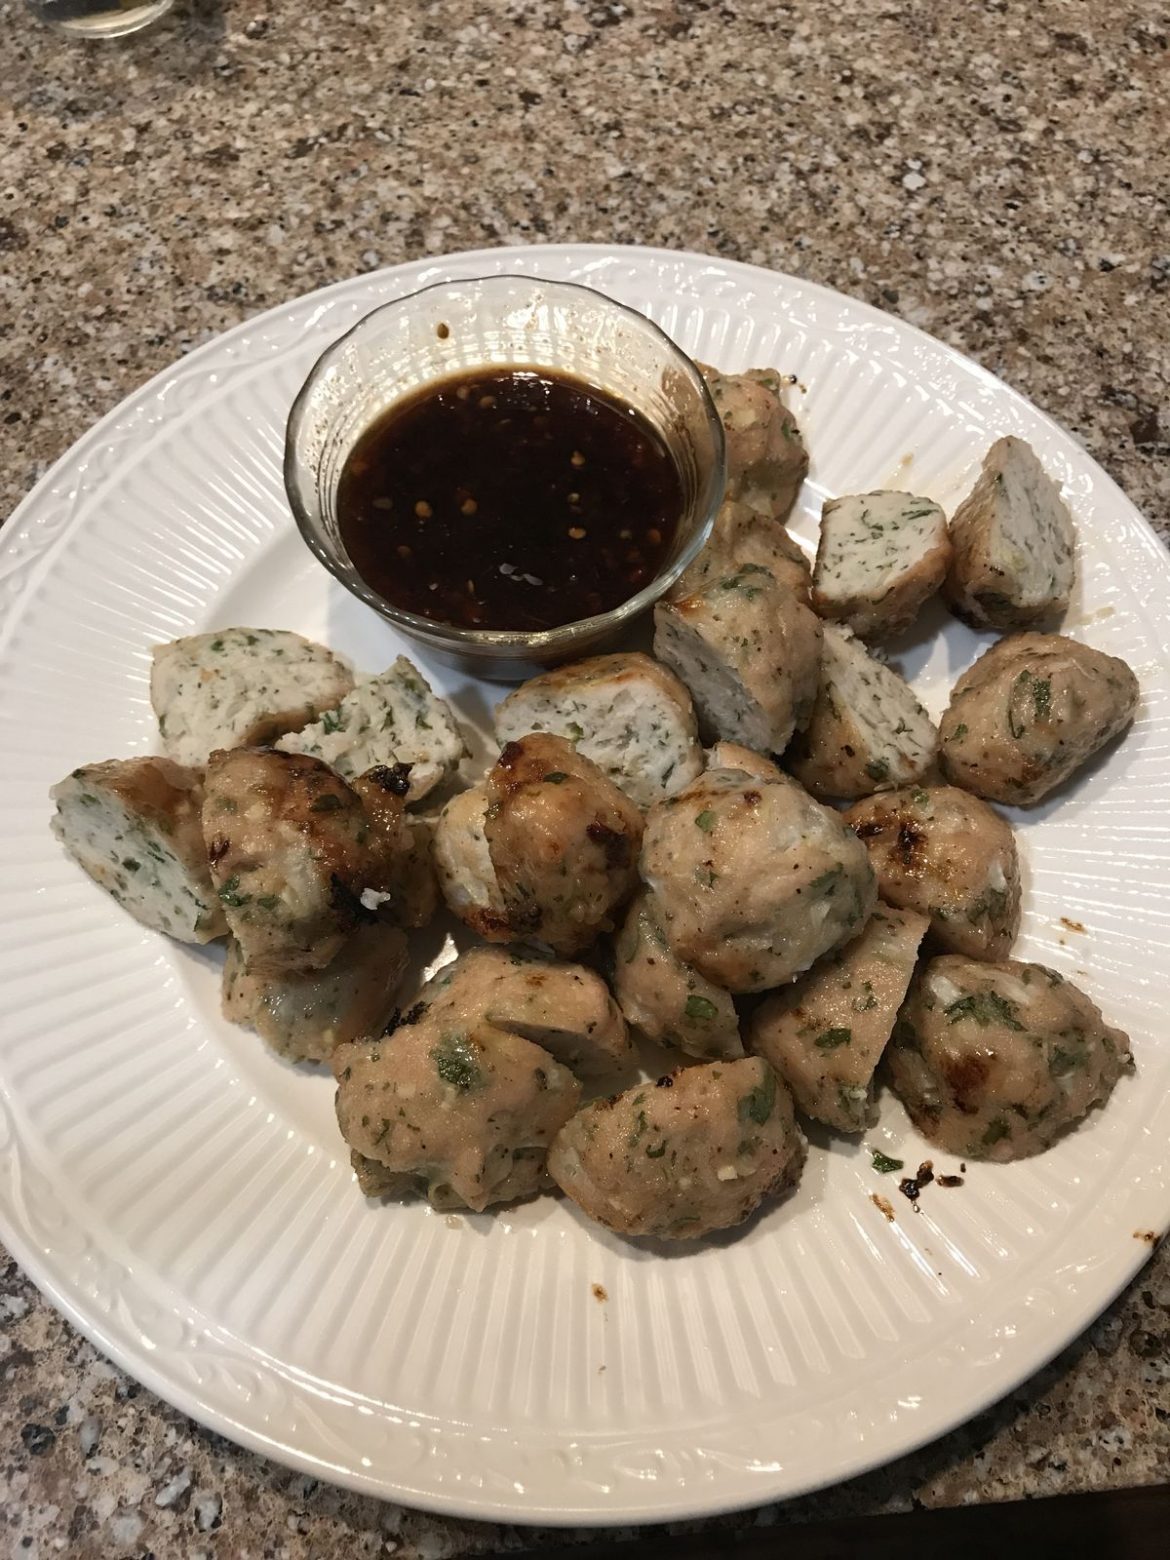
Joyce’s Vietnamese Chicken Meatballs

by Rebecca June 13, 2022
written by Rebecca

Today, I found myself craving some Vietnamese action. I remembered the Bun that I had a few weeks ago. It is a bowl of crisp, shredded romaine lettuce, cold rice noodles, loads of chopped dry roasted peanuts, fresh mint and cilantro, shredded carrots, cucumbers, and some kind of sticky, and sweet bbq meat. I love this dish so much, but I wanted to keep everything simpler and easier. These Vietnamese Chicken Meatballs are the first that came to my mind. I am obsessed with the sticky, caramelized glaze of these delicious meatballs that reminds me of Vietnamese bbq meat. I served these tasty meatballs by themselves with a sweet chili sauce for dipping. But you can also enjoy these meatballs on rice, in a Thai-inspired sub, lettuce wraps, and even soups!

Ingredients

2 cloves garlic, finely chopped

1 pound ground chicken

1/2 small onion, minced

3-4 tablespoons chopped cilantro

3 tablespoons fish sauce

1 tablespoon chopped mint

1 stalk lemongrass, tender white inside part only, minced

granulated sugar for rolling the meatballs, about 1/4 c.

1 1/2 teaspoons cornstarch

1/2 teaspoon kosher salt

A couple of grinds of fresh black pepper

How to make Joyce’s Vietnamese Chicken Meatballs

Step 1: In a large bowl, place the chicken with all the other ingredients except for the sugar. Mix well but gently to prevent overworking the heart. Roll the mixture into golf-sized meatballs using your slightly damp hands. On a plate, place the meatballs and keep them in the fridge for about half an hour or so.

Step 2: In the meantime, prepare the oven. Preheat it to 400 degrees F.

Step 3: Remove the meatballs from the fridge and transfer them to a baking sheet lined with parchment paper. Lightly roll each meatball in the sugar. Place the baking sheet in the middle of the preheated oven and bake for about 15 minutes, shaking the pan a couple of times to ensure even browning.

Step 4: Remove from the oven when done and serve the meatballs on rice, in a Thai-inspired sub, in lettuce wraps, or by themselves with a sweet and chili sauce for dipping. These Vietnamese Chicken meatballs are also excellent in soup. Enjoy!

Joyce's Vietnamese Chicken Meatballs

Rebecca Today, I found myself craving some Vietnamese action. I remembered the Bun that I had a few weeks ago. It is a bowl of crisp, shredded romaine lettuce, cold rice… General Recipes Joyce’s Vietnamese Chicken Meatballs European Print This
Nutrition facts: 200 calories 20 grams fat
Rating: 5.0/5
( 1 voted )

Ingredients

  • 2 cloves garlic, finely chopped
  • 1 pound ground chicken
  • 1/2 small onion, minced
  • 3-4 tablespoons chopped cilantro
  • 3 tablespoons fish sauce
  • 1 tablespoon chopped mint
  • 1 stalk lemongrass, tender white inside part only, minced
  • granulated sugar for rolling the meatballs, about 1/4 c.
  • 1 1/2 teaspoons cornstarch
  • 1/2 teaspoon kosher salt
  • A couple of grinds of fresh black pepper

Instructions

Step 1: In a large bowl, place the chicken with all the other ingredients except for the sugar. Mix well but gently to prevent overworking the heart. Roll the mixture into golf-sized meatballs using your slightly damp hands. On a plate, place the meatballs and keep them in the fridge for about half an hour or so.

Step 2: In the meantime, prepare the oven. Preheat it to 400 degrees F.

Step 3: Remove the meatballs from the fridge and transfer them to a baking sheet lined with parchment paper. Lightly roll each meatball in the sugar. Place the baking sheet in the middle of the preheated oven and bake for about 15 minutes, shaking the pan a couple of times to ensure even browning.

Step 4: Remove from the oven when done and serve the meatballs on rice, in a Thai-inspired sub, in lettuce wraps, or by themselves with a sweet and chili sauce for dipping. These Vietnamese Chicken meatballs are also excellent in soup. Enjoy!

June 13, 2022 0 comment
0 FacebookTwitterPinterestEmail
General Recipes

Basil Tomato Pie

by Rebecca June 13, 2022
written by Rebecca

Yield: 8 appetizer servings or 4 main-dish servings

This is a very savory, delicious pie with a superb combination of tomatoes and basil mixed with cream cheese in a flaky crust. This basil, tomato pie is a perfect appetizer. It is also an impressive dinner entree. It’s a delightful pie with bright summer flavors that everyone will love!

INGREDIENTS

4 cloves garlic (I use less)

1 folded refrigerated unbaked pie crust or homemade 9” crust

5 Roma tomatoes or 4 medium tomatoes

1 c. loosely packed fresh basil leaves

1/4 c. grated Parmesan cheese

1/2 c. mayonnaise or salad dressing

1-1/2 c. shredded mozzarella cheese (6 oz.)

Fresh basil leaves (for garnish)

1/8 tsp ground white pepper

How to make Basil Tomato Pie

Step 1: Following the package directions, unroll the pie crust and lay it in a 9-inch quiche dish or glass pie plate. Using your fingers or a fork, flute the pie crust all around the edges.

Step 2: Using a double-thick foil, line the shell. To prevent the crust from sinking into the pie plate, use pie weights (or dried beans or peas). Place in the oven and bake for about 8 minutes at 450 degrees. Uncover and resume baking for another 4 to 5 minutes or until set and dry. Then, take the pie crust out of the oven and adjust the oven temperature to 375 degrees F.

Step 3: On top of the pie crust, sprinkle half a cup of mozzarella cheese. Place the pie crust on a wire rack to cool a little.

Step 4: Meanwhile, slice the tomatoes into wedges and let them drain on paper towels. On top of the pie shell, arrange the tomato wedges.

Step 5: Place the basil and garlic in a food processor bowl. Pulse until coarsely chopped and sprinkle this over the tomatoes.

Step 6: Mix the rest of the mozzarella cheese, mayonnaise, Parmesan cheese, and pepper in a medium mixing bowl until well blended. Spoon this over the basil mixture, evenly spreading to cover the top. Place in the oven and bake for about 35 to 40 minutes or until the top is golden and bubbly. Remove from the oven when done and serve the pie warm, garnished with extra basil leaves if desired. Enjoy!

Notes:

You can substitute mozzarella cheese with Cheddar, Monterey Jack, or Gruyere.

To make this in advance, start by pre-baking the pastry crust. Then, tent and allow it to stand for up to 2 hours at room temperature. In the meantime, slice and drain the tomatoes. Allow the tomatoes to stand for up to 2 hours at room temperature. Prep the cheese-mayo mixture. Cover the pie and chill for up to 2 hours.

Basil Tomato Pie

Rebecca Yield: 8 appetizer servings or 4 main-dish servings This is a very savory, delicious pie with a superb combination of tomatoes and basil mixed with cream cheese in a flaky… General Recipes Basil Tomato Pie European Print This
Serves: 8
Nutrition facts: 200 calories 20 grams fat
Rating: 5.0/5
( 1 voted )

Ingredients

  • 4 cloves garlic (I use less)
  • 1 folded refrigerated unbaked pie crust or homemade 9” crust
  • 5 Roma tomatoes or 4 medium tomatoes
  • 1 c. loosely packed fresh basil leaves
  • 1/4 c. grated Parmesan cheese
  • 1/2 c. mayonnaise or salad dressing
  • 1-1/2 c. shredded mozzarella cheese (6 oz.)
  • Fresh basil leaves (for garnish)
  • 1/8 tsp ground white pepper

Instructions

Step 1: Following the package directions, unroll the pie crust and lay it in a 9-inch quiche dish or glass pie plate. Using your fingers or a fork, flute the pie crust all around the edges.

Step 2: Using a double-thick foil, line the shell. To prevent the crust from sinking into the pie plate, use pie weights (or dried beans or peas). Place in the oven and bake for about 8 minutes at 450 degrees. Uncover and resume baking for another 4 to 5 minutes or until set and dry. Then, take the pie crust out of the oven and adjust the oven temperature to 375 degrees F.

Step 3: On top of the pie crust, sprinkle half a cup of mozzarella cheese. Place the pie crust on a wire rack to cool a little.

Step 4: Meanwhile, slice the tomatoes into wedges and let them drain on paper towels. On top of the pie shell, arrange the tomato wedges.

Step 5: Place the basil and garlic in a food processor bowl. Pulse until coarsely chopped and sprinkle this over the tomatoes.

Step 6: Mix the rest of the mozzarella cheese, mayonnaise, Parmesan cheese, and pepper in a medium mixing bowl until well blended. Spoon this over the basil mixture, evenly spreading to cover the top. Place in the oven and bake for about 35 to 40 minutes or until the top is golden and bubbly. Remove from the oven when done and serve the pie warm garnished with extra basil leaves if desired. Enjoy!

Notes

You can substitute mozzarella cheese with Cheddar, Monterey Jack, or Gruyere. To make this in advance, start by pre-baking the pastry crust. Then, tent and allow it to stand for up to 2 hours at room temperature. In the meantime, slice and drain the tomatoes. Allow the tomatoes to stand for up to 2 hours at room temperature. Prep the cheese-mayo mixture. Cover the pie and chill for up to 2 hours.

June 13, 2022 0 comment
0 FacebookTwitterPinterestEmail
General Recipes

FRENCH ONION TART

by Rebecca June 13, 2022
written by Rebecca

This French Onion Tart is one of the best memories I have of France. I first tasted this tart when I traveled to France a couple of years ago. You can say that it was love at first bite. Une tarte à l’oignon, or onion tart instantly captured my heart. I love this tart with a simple green salad on the side for an easy and quick light meal during the day. Or a grab-and-go breakfast. Whenever I have guests coming over, I make sure to make this delicious French Onion Tart. This French Onion Tart is pretty easy to whip up in no time. I serve this hot with a light salad on the side. This pie also pairs perfectly with white wine. A tasty reminder of the great times I had in the city of love!

Ingredients

3 eggs

2 onions, thinly sliced

1/2 c. milk

1 1/2 ounces (40 grams) gruyère cheese, grated

6 ounces (180 grams) of smoked bacon, cut into strips

salt and pepper

1 pâte brisée (pie crust)

HOW TO MAKE FRENCH ONION TART

Step 1: In a medium saucepan, saute the bacon for about 7 minutes over medium-high heat until the bacon is completely cooked and crisped. Set the bacon aside when done.

Step 2: Add the onions to the now-empty skillet and cook for about 10 minutes until translucent.

Step 3: Place the eggs and milk in a bowl. Whisk well until combined. Season with just the right amount of salt and pepper.

Step 4: Prepare the oven. Preheat it to 400 degrees F or 200 degrees C.

Step 5: Into a greased tart pan, fit the pie dough and lightly prick. Spread the onions and bacon on top and sprinkle with cheese. On top, pour the egg-milk mixture. Place in the preheated oven and bake for about 25 to 30 minutes or until the tart is golden.

FRENCH ONION TART

Rebecca This French Onion Tart is one of the best memories I have of France. I first tasted this tart when I traveled to France a couple of years ago. You… General Recipes FRENCH ONION TART European Print This
Nutrition facts: 200 calories 20 grams fat
Rating: 5.0/5
( 1 voted )

Ingredients

  • 3 eggs
  • 2 onions, thinly sliced
  • 1/2 c. milk
  • 1 1/2 ounces (40 grams) gruyère cheese, grated
  • 6 ounces (180 grams) of smoked bacon, cut into strips
  • salt and pepper
  • 1 pâte brisée (pie crust)

Instructions

Step 1: In a medium saucepan, saute the bacon for about 7 minutes over medium-high heat until the bacon is completely cooked and crisped. Set the bacon aside when done.

Step 2: Add the onions to the now-empty skillet and cook for about 10 minutes until translucent.

Step 3: Place the eggs and milk in a bowl. Whisk well until combined. Season with just the right amount of salt and pepper.

Step 4: Prepare the oven. Preheat it to 400 degrees F or 200 degrees C.

Step 5: Into a greased tart pan, fit the pie dough and lightly prick. Spread the onions and bacon on top and sprinkle with cheese. On top, pour the egg-milk mixture. Place in the preheated oven and bake for about 25 to 30 minutes or until the tart is golden.

June 13, 2022 0 comment
0 FacebookTwitterPinterestEmail
General Recipes

Cheesy Cauliflower Soup Recipe

by Rebecca June 11, 2022
written by Rebecca

Prep Time: 15 mins | Cook Time: 30 mins | Total Time: 45 mins | Servings: 4-6

This is an amazing soup that is loaded with veggies. A scrumptious cheesy cauliflower soup that you can easily and quickly whip up. This delightful soup will surely warm you up all winter long!

INGREDIENTS

4 cloves garlic – minced

2 shallots – minced

3 tablespoons unsalted butter

2 carrots – julienned and cut into 1” strips (matchsticks)

1 stalk celery – thinly sliced

3 tablespoons all-purpose flour

1/4 teaspoon paprika

4 cups low-sodium chicken broth

1/2 teaspoon garlic powder

1/4 teaspoon coriander

1/8 teaspoon cayenne pepper

1 cup grated cheddar or Colby jack cheese

1/2 cup heavy cream

Freshly chopped parsley – optional garnish

1 large head cauliflower – or 2 small/medium heads, cut into florets

1 teaspoon salt

1/2 teaspoon ground black pepper

How to make Cheesy Cauliflower Soup

Step 1: Melt the butter in a large stockpot or dutch oven set over medium-low heat. Once the butter has melted, add the celery to the pot and cook for about 3 minutes. Next, add the carrot, shallot, and garlic. Continue to cook for additional 2 minutes.

Step 2: To the pot, whisk in the flour until golden brown. Then, slowly pour in the chicken broth, stirring until blended. Adjust the heat to medium and bring everything to a simmer.

Step 3: Season with salt, garlic powder, pepper, coriander, paprika, and cayenne pepper. Then, add the cauliflower. Let the soup come to a gentle boil. Cook for 15 minutes more. In a food processor or blender, add 2 c. of the mixture and puree until smooth. Then, pour the pureed mixture back into the soup.

Step 4: Add the cream and continue to cook for 10 minutes more. Lastly, stir in the cheese until well incorporated.

Step 5: Take the pot off the heat when done and ladle the soup into serving bowls. If desired, garnish the individual serving with parsley. Enjoy!

NOTE:

If you prefer a silky smooth soup, you can puree everything using a high-speed blender or an immersion blender. But if you are like me and prefer some small chunks, then simply proceed with the recipe.

Nutrition Facts:

Amount per Serving: Calories 566, Fat 42g 65%, Saturated Fat 26g 163%, Cholesterol 126mg 42%, Sodium 997mg 43%, Potassium 890mg 25%, Carbohydrates 27g 9%, Fiber 5g 21%, Sugar 6g 7%, Protein 25g 50%, Vitamin A 6634IU 133%, Vitamin C 75mg 91%, Calcium 516mg 52%, Iron 3mg 17%

Cheesy Cauliflower Soup Recipe

Rebecca Prep Time: 15 mins | Cook Time: 30 mins | Total Time: 45 mins | Servings: 4-6 This is an amazing soup that is loaded with veggies. A scrumptious cheesy… General Recipes Cheesy Cauliflower Soup Recipe European Print This
Serves: 4-6 Prep Time: 15 mins Cooking Time: 30 mins 30 mins
Nutrition facts: 566 calories 42 fat
Rating: 5.0/5
( 1 voted )

Ingredients

  • 4 cloves garlic - minced
  • 2 shallots - minced
  • 3 tablespoons unsalted butter
  • 2 carrots - julienned and cut into 1” strips (matchsticks)
  • 1 stalk celery - thinly sliced
  • 3 tablespoons all-purpose flour
  • 1/4 teaspoon paprika
  • 4 cups low-sodium chicken broth
  • 1/2 teaspoon garlic powder
  • 1/4 teaspoon coriander
  • 1/8 teaspoon cayenne pepper
  • 1 cup grated cheddar or Colby jack cheese
  • 1/2 cup heavy cream
  • Freshly chopped parsley - optional garnish
  • 1 large head cauliflower - or 2 small/medium heads, cut into florets
  • 1 teaspoon salt
  • 1/2 teaspoon ground black pepper

Instructions

Step 1: Melt the butter in a large stockpot or dutch oven set over medium-low heat. Once the butter has melted, add the celery to the pot and cook for about 3 minutes. Next, add the carrot, shallot, and garlic. Continue to cook for additional 2 minutes.

Step 2: To the pot, whisk in the flour until golden brown. Then, slowly pour in the chicken broth, stirring until blended. Adjust the heat to medium and bring everything to a simmer.

Step 3: Season with salt, garlic powder, pepper, coriander, paprika, and cayenne pepper. Then, add the cauliflower. Let the soup come to a gentle boil. Cook for 15 minutes more. In a food processor or blender, add 2 c. of the mixture and puree until smooth. Then, pour the pureed mixture back into the soup.

Step 4: Add the cream and continue to cook for 10 minutes more. Lastly, stir in the cheese until well incorporated.

Step 5: Take the pot off the heat when done and ladle the soup into serving bowls. If desired, garnish the individual serving with parsley. Enjoy!

Notes

If you prefer a silky smooth soup, you can puree everything using a high-speed blender or an immersion blender. But if you are like me and prefer some small chunks, then simply proceed with the recipe.

June 11, 2022 0 comment
0 FacebookTwitterPinterestEmail
Newer Posts
Older Posts

Popular Posts

  • 1

    Crispy Crunchy Parmesan Potatoes

    March 21, 2020
  • 2

    CROCK POT SMOTHERED PORK CHOPS

    March 21, 2020
  • Facebook
  • Twitter

@2019 - All Right Reserved.


Back To Top