Cook it once
  • Home
  • Privacy Policy
  • Recipes
    • KETO
    • LC
    • WW
  • Tips
  • Contact
Cook it once
  • Home
  • Privacy Policy
  • Recipes
    • KETO
    • LC
    • WW
  • Tips
  • Contact
Category:

General Recipes

General Recipes

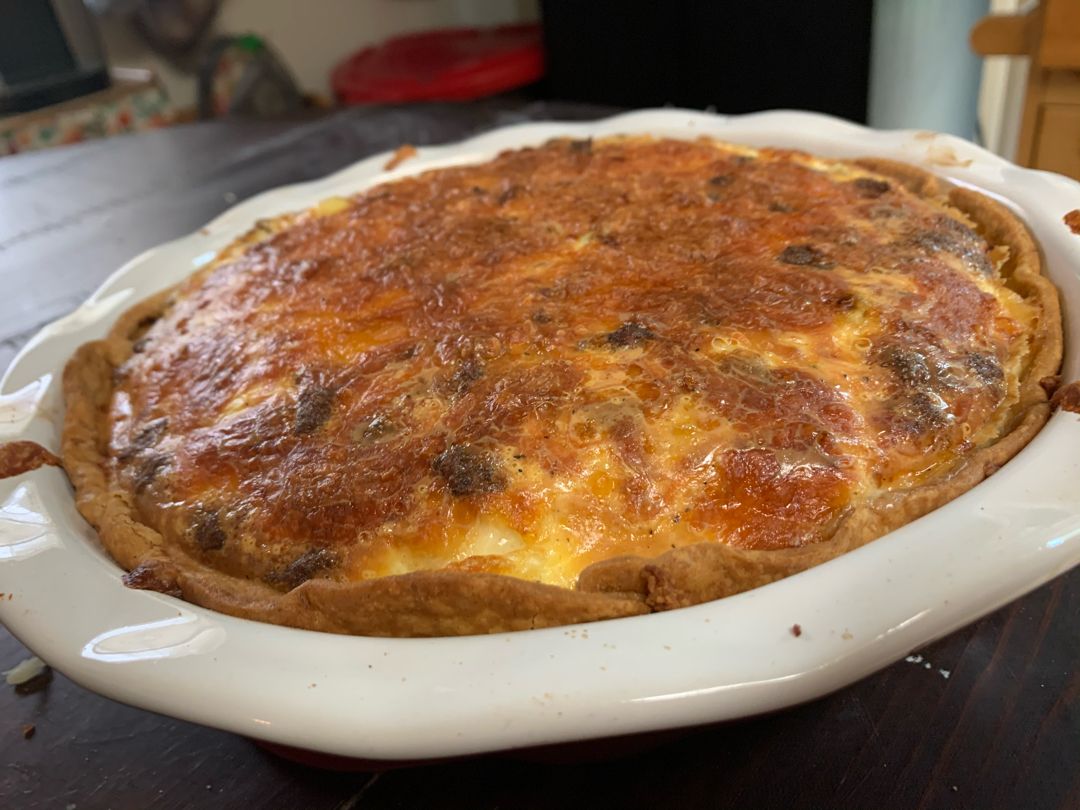
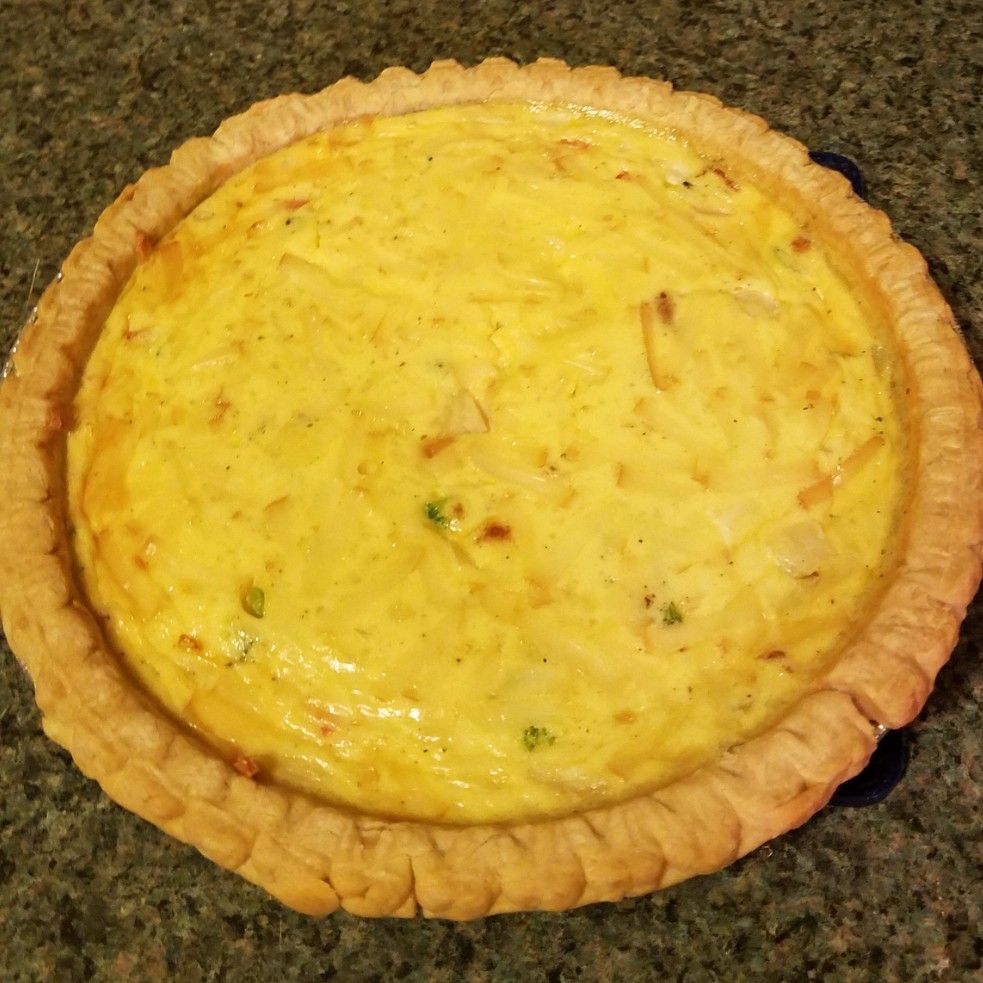
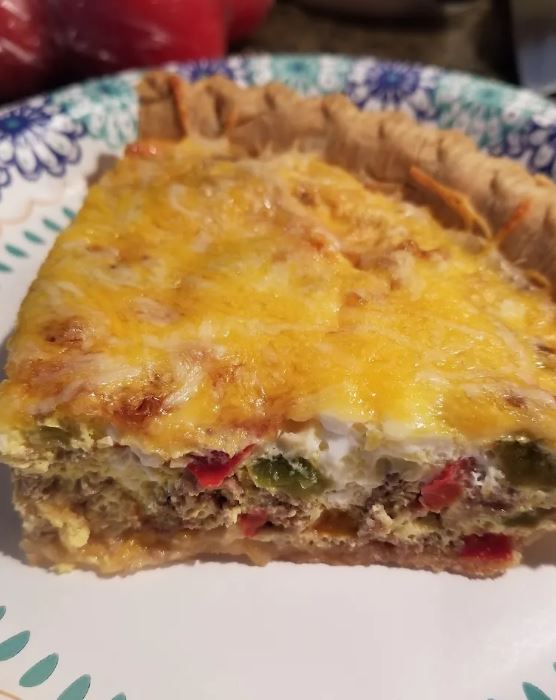
Cream Cheese Sausage Rotel Dip Quiche

by Rebecca July 2, 2022
written by Rebecca

Prep Time: 15 mins | Cook Time: 25 mins | Servings: 8 slices

Enjoy the flavors of your favorite dip in this seriously delicious quiche. Throw in some side salad for an easy and quick weeknight dinner any time.

This cream cheese, sausage Rotel dip quiche is a real treat for everyone who loves dip and quiche. It’s like hitting two birds with a single stone. Plus, this quiche is incredibly easy to throw together. It is creamy and spicy at the same time. Super good you’ll not be able to resist this amazing quiche!

Ingredients

9” pie crust, deep dish

1 lb. pork sausage

5 large eggs

8 oz. cream cheese

¾ c. cheddar, Colby cheese, shredded

salt and pepper to taste

10 oz. can of diced tomatoes with green chiles with a mild flavor

How to make Cream Cheese Sausage Rotel Dip Quiche

Step 1: Prepare the oven. Preheat it to 350 degrees F.

Step 2: Place the pie crust in the oven and blind bake. Remove from the oven and let the pie crust cool for about 5 minutes before adding the filling.

Step 3: Cook the sausage in a skillet, breaking the meat up into small pieces as it cooks until no longer pink. When done, drain the excess grease.

Step 4: Into cubes, cut the cream cheese and add them to the pan with the sausage. Add 10 ounces of drained diced tomatoes and green chilis. Stir well until the cream cheese has melted.

Step 5: Allow the mixture to cool for about 5 minutes before whisking in the beaten eggs. If desired, season with a pinch of salt and pepper.

Step 6: Into the pie crust, pour the sausage mixture and evenly spread the cheddar Colby cheese on top. Place in the preheated oven and bake for about 30 to 35 minutes or until the crust is brown and the middle of the quiche is a little jiggly.

Step 7: Take the quiche out of the oven when done and let it cool for about 5 minutes.

Step 8: Slice and serve. Enjoy!

Nutrition Facts:

Calories: 654 kcal | Carbohydrates: 52g | Protein: 29g | Fat: 23g | Saturated Fat: 20g | Cholesterol: 104mg | Sodium: 1426mg | Potassium: 514mg | Fiber: 6g | Sugar: 2g | Vitamin A: 655IU | Vitamin C: 3.7mg | Calcium: 106mg | Iron: 7.6mg

Cream Cheese Sausage Rotel Dip Quiche

Rebecca Prep Time: 15 mins | Cook Time: 25 mins | Servings: 8 slices Enjoy the flavors of your favorite dip in this seriously delicious quiche. Throw in some side salad… General Recipes Cream Cheese Sausage Rotel Dip Quiche European Print This
Serves: 8 Prep Time: 15 mins Cooking Time: 25 mins 25 mins
Nutrition facts: 654 calories 23 fat
Rating: 5.0/5
( 1 voted )

Ingredients

  • 9” pie crust, deep dish
  • 1 lb. pork sausage
  • 5 large eggs
  • 8 oz. cream cheese
  • ¾ c. cheddar, Colby cheese, shredded
  • salt and pepper to taste
  • 10 oz. can of diced tomatoes with green chiles with a mild flavor

Instructions

Step 1: Prepare the oven. Preheat it to 350 degrees F.

Step 2: Place the pie crust in the oven and blind bake. Remove from the oven and let the pie crust cool for about 5 minutes before adding the filling.

Step 3: Cook the sausage in a skillet, breaking the meat up into small pieces as it cooks until no longer pink. When done, drain the excess grease.

Step 4: Into cubes, cut the cream cheese and add them to the pan with the sausage. Add 10 ounces of drained diced tomatoes and green chilis. Stir well until the cream cheese has melted.

Step 5: Allow the mixture to cool for about 5 minutes before whisking in the beaten eggs. If desired, season with a pinch of salt and pepper.

Step 6: Into the pie crust, pour the sausage mixture and evenly spread the cheddar Colby cheese on top. Place in the preheated oven and bake for about 30 to 35 minutes or until the crust is brown and the middle of the quiche is a little jiggly.

Step 7: Take the quiche out of the oven when done and let it cool for about 5 minutes.

Step 8: Slice and serve. Enjoy!
July 2, 2022 0 comment
0 FacebookTwitterPinterestEmail
General Recipes

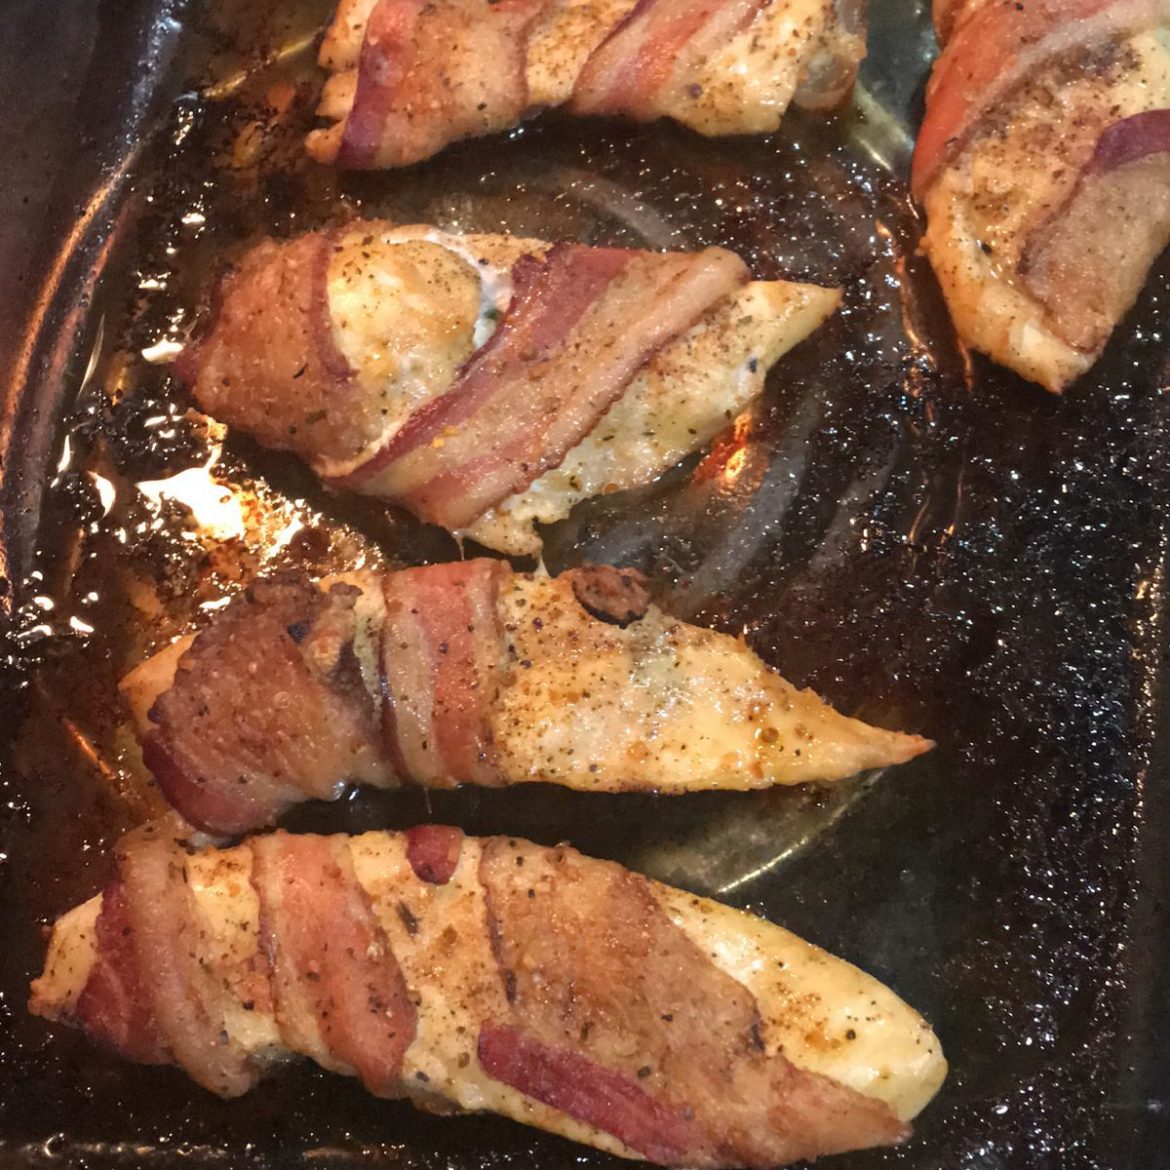
Sweet & Spicy Bacon Chicken

by Rebecca July 2, 2022
written by Rebecca

This sweet and spicy bacon, chicken is indeed very mouthwatering! Pieces of chicken breasts wrapped around bacon and coated in brown sugar mixture, then baked until the chicken is done and the bacon is nicely browned and crispy. No wonder why my kids are so obsessed with this scrumptious sweet and spicy bacon chicken!

I love the combination of sweet and spicy. It excites my taste buds. When I first made this sweet and spicy bacon, chicken I knew this will turn out great. And I was not wrong. Chicken and bacon are a staple at my house. And to enjoy one dish with everything we love is a must and a keeper! This sweet and spicy bacon, chicken is no doubt a winner! The best part is you can easily throw this together using only five main ingredients that are available in your pantry. Enjoy this amazing dish with mashed potatoes, and do not forget to drizzle some of the gravy from the chicken on top!

Ingredients

Bacon slices

4 chicken breasts, cut in thirds (12 pieces)

garlic powder

brown sugar

chili powder

salt and pepper to taste

How to make Sweet & Spicy Bacon Chicken

Step 1: Into three pieces, slice each chicken breast and season with the spices. Around each piece of chicken, wrap one bacon. Then, roll in brown sugar. Repeat with the remaining chicken pieces.

Step 2: Into an oven-proof dish greased with about 2 to 3 tablespoons of olive oil, place the bacon-wrapped chicken. Place in a preheated 400 degrees oven and bake for about 30 to 40 minutes or until the chicken is completely cooked and the bacon is brown and crispy.

Step 3: Remove from the oven when done and serve the sweet and spicy bacon chicken with mashed potatoes. Drizzle some of the gravy from the chicken on top. Enjoy!

Note:

You can also grill this sweet and spicy bacon, chicken if desired.

Sweet & Spicy Bacon Chicken

Rebecca This sweet and spicy bacon, chicken is indeed very mouthwatering! Pieces of chicken breasts wrapped around bacon and coated in brown sugar mixture, then baked until the chicken is done… General Recipes Sweet & Spicy Bacon Chicken European Print This
Nutrition facts: 200 calories 20 grams fat
Rating: 5.0/5
( 1 voted )

Ingredients

  • Bacon slices
  • 4 chicken breasts, cut in thirds (12 pieces)
  • garlic powder
  • brown sugar
  • chili powder
  • salt and pepper to taste

Instructions

Step 1: Into three pieces, slice each chicken breast and season with the spices. Around each piece of chicken, wrap one bacon. Then, roll in brown sugar. Repeat with the remaining chicken pieces.

Step 2: Into an oven-proof dish greased with about 2 to 3 tablespoons of olive oil, place the bacon-wrapped chicken. Place in a preheated 400 degrees oven and bake for about 30 to 40 minutes or until the chicken is completely cooked and the bacon is brown and crispy.

Step 3: Remove from the oven when done and serve the sweet and spicy bacon chicken with mashed potatoes. Drizzle some of the gravy from the chicken on top. Enjoy!

Notes

You can also grill this sweet and spicy bacon, chicken if desired.

July 2, 2022 0 comment
0 FacebookTwitterPinterestEmail
General Recipes

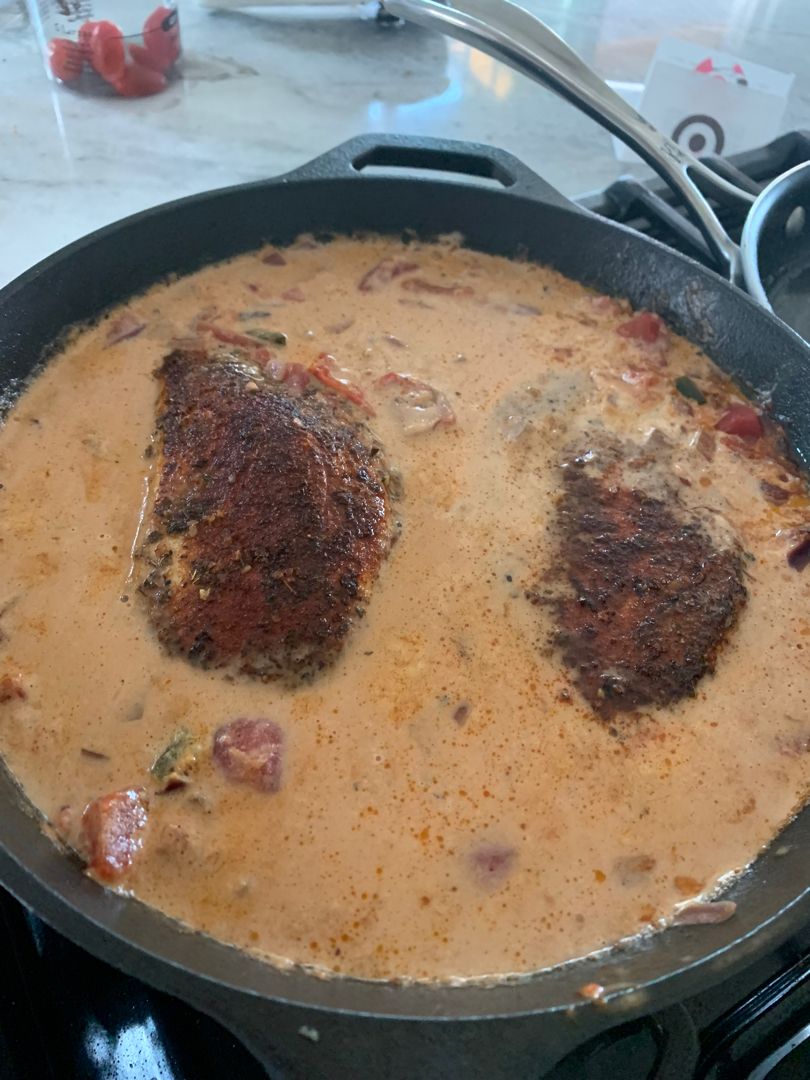
Stovetop Coconut Milk Chicken Breasts

by Rebecca July 2, 2022
written by Rebecca

Prep Time: 10 mins | Cook Time: 25 mins | Total Time: 40 mins | Servings: 4 people

This mouthwatering dish with tender and juicy chicken smothered in a creamy, fragrant coconut milk sauce is to die for! A great addition to your menu rotation that you can easily and quickly whip up any time.

Ingredients

1 yellow onion, finely diced

3 cloves garlic, minced

1 lb. boneless, skinless chicken breasts, (1 to 1-1/2” thick)

1 tsp smoked or sweet paprika

1 tsp cumin

1/2 tsp cayenne pepper, (Use 1 tsp cayenne pepper if you want some extra kick. Or simply skip it if desired.)

3 tbsp olive oil, divided

1 tsp dried oregano

1 can (14 oz.) unsweetened, lite coconut milk

chopped fresh cilantro, for garnish

2 c seeded and diced tomatoes, (or use 1 can 14 oz. diced tomatoes, well-drained)

1 tsp salt, or to taste

1/4 tsp freshly ground black pepper, or to taste

How to make Stovetop Coconut Milk Chicken Breasts

Step 1: Using paper towels, pat dries the chicken breasts and set them aside.

Step 2: Place the cumin, paprika, oregano, cayenne pepper, salt, and black pepper in a small mixing bowl. Mix well until combined.

Step 3: Over the chicken breasts, rub the seasoning.

Step 4: In a large skillet, heat 2 tbsp olive oil over medium heat. Once the oil is hot, add the chicken breasts to the skillet and sear for about 6 to 7 minutes per side or until browned and almost done. Note that the cooking time of the chicken breasts varies depending on the size of the chicken. On a plate, transfer the chicken and cover to keep warm.

Step 5: To the same skillet, add the rest of the olive oil. Then, add the onions and cook for about 2 to 3 minutes or until soft and translucent. Add the garlic, stir, and continue to cook for another 30 seconds. Next, add the tomatoes and cook for additional 5 minutes or until the tomatoes have softened. Pour in the coconut milk, stir, and let everything simmer for about 5 minutes or until the sauce has thickened.

Step 6: Place the chicken breasts back into the skillet. Adjust the heat to medium-low and cook further until the chicken is cooked through. This takes another 4 to 5 minutes. The chicken is completely cooked once its internal temperature reaches 165 degrees F. Adjust the salt and pepper according to taste.

Step 7: Serve the coconut milk, and chicken breasts garnished with cilantro and parsley. Enjoy!

Note:

NET CARBS: 10 grams

Nutrition Facts:

Amount Per Serving: Calories 341, Calories from Fat 180, Fat 20g31%, Saturated Fat 9g45%, Cholesterol 73mg24%, Sodium 941mg39%, Potassium 676mg19%, Carbohydrates 12g4%, Fiber 2g8%, Sugar 4g4%, Protein 26g52%, Vitamin A 500IU10%, Vitamin C 13mg16%, Calcium 59mg6%, Iron 2mg11%

Stovetop Coconut Milk Chicken Breasts

Rebecca Prep Time: 10 mins | Cook Time: 25 mins | Total Time: 40 mins | Servings: 4 people This mouthwatering dish with tender and juicy chicken smothered in a creamy,… General Recipes Stovetop Coconut Milk Chicken Breasts European Print This
Serves: 4 Prep Time: 10 mins Cooking Time: 25 mins 25 mins
Nutrition facts: 341 calories 20 fat
Rating: 5.0/5
( 1 voted )

Ingredients

  • 1 yellow onion, finely diced
  • 3 cloves garlic, minced
  • 1 lb. boneless, skinless chicken breasts, (1 to 1-1/2” thick)
  • 1 tsp smoked or sweet paprika
  • 1 tsp cumin
  • 1/2 tsp cayenne pepper, (Use 1 tsp cayenne pepper if you want some extra kick. Or simply skip it if desired.)
  • 3 tbsp olive oil, divided
  • 1 tsp dried oregano
  • 1 can (14 oz.) unsweetened, lite coconut milk
  • chopped fresh cilantro, for garnish
  • 2 c seeded and diced tomatoes, (or use 1 can 14 oz. diced tomatoes, well-drained)
  • 1 tsp salt, or to taste
  • 1/4 tsp freshly ground black pepper, or to taste

Instructions

Step 1: Using paper towels, pat dries the chicken breasts and set them aside.

Step 2: Place the cumin, paprika, oregano, cayenne pepper, salt, and black pepper in a small mixing bowl. Mix well until combined.

Step 3: Over the chicken breasts, rub the seasoning.

Step 4: In a large skillet, heat 2 tbsp olive oil over medium heat. Once the oil is hot, add the chicken breasts to the skillet and sear for about 6 to 7 minutes per side or until browned and almost done. Note that the cooking time of the chicken breasts varies depending on the size of the chicken. On a plate, transfer the chicken and cover to keep warm.

Step 5: To the same skillet, add the rest of the olive oil. Then, add the onions and cook for about 2 to 3 minutes or until soft and translucent. Add the garlic, stir, and continue to cook for another 30 seconds. Next, add the tomatoes and cook for additional 5 minutes or until the tomatoes have softened. Pour in the coconut milk, stir, and let everything simmer for about 5 minutes or until the sauce has thickened.

Step 6: Place the chicken breasts back into the skillet. Adjust the heat to medium-low and cook further until the chicken is cooked through. This takes another 4 to 5 minutes. The chicken is completely cooked once its internal temperature reaches 165 degrees F. Adjust the salt and pepper according to taste.

Step 7: Serve the coconut milk, and chicken breasts garnished with cilantro and parsley. Enjoy!

July 2, 2022 0 comment
0 FacebookTwitterPinterestEmail
General Recipes

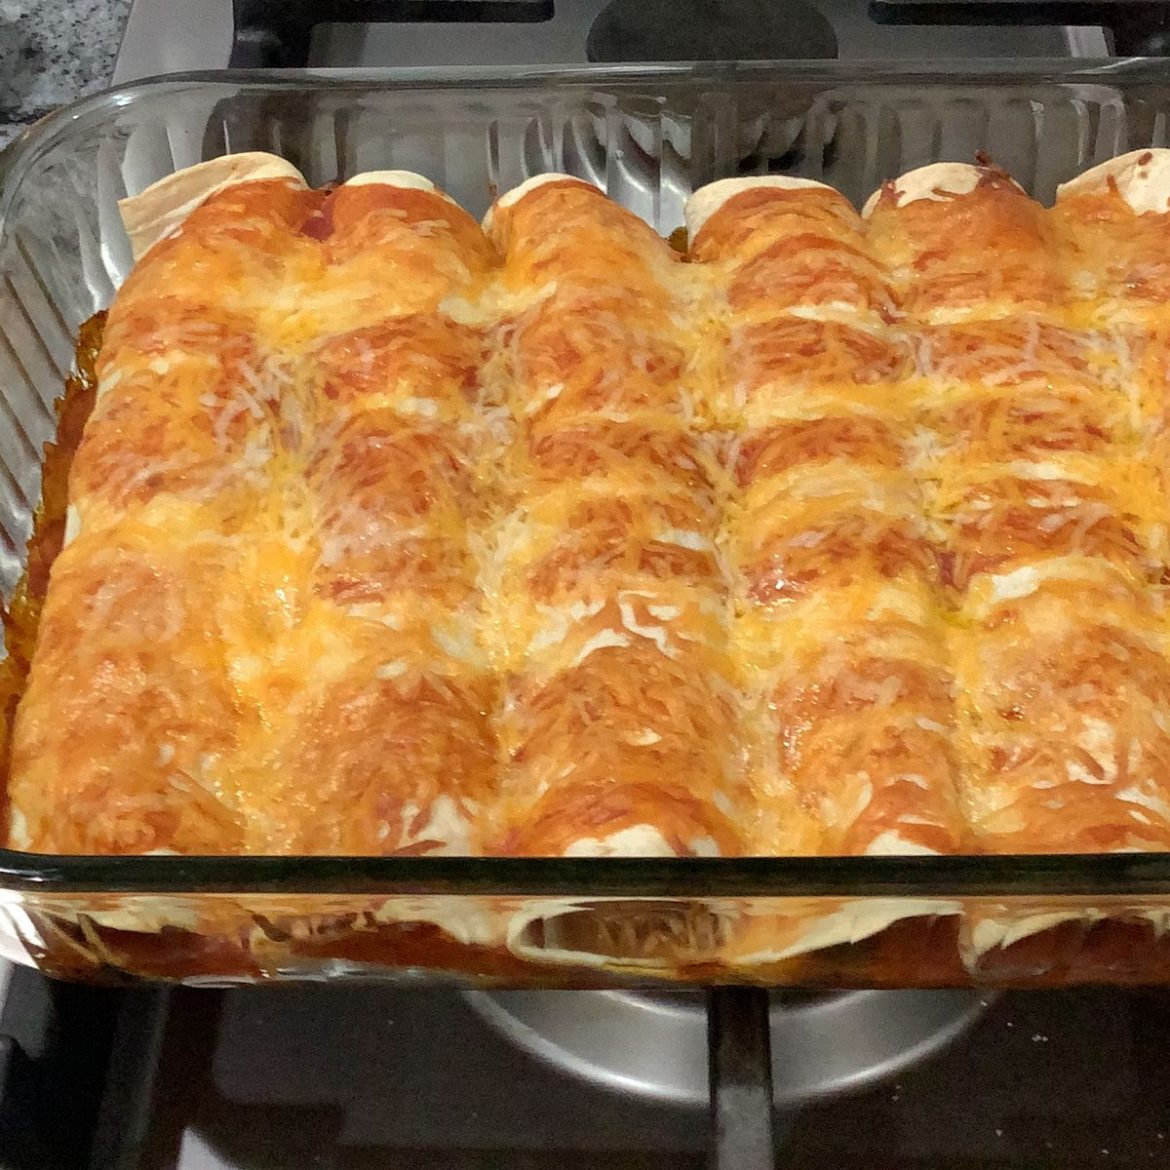
Chicken Enchiladas

by Rebecca July 2, 2022
written by Rebecca

Prep Time: 25 mins | Cook Time: 20 mins | Total Time: 45 mins | Servings: 8

These chicken enchiladas are loaded with flavors. Filled with mouthwatering chicken, black bean, and cheese filling. These chicken enchiladas are the perfect weeknight dinner that I’m pretty sure your entire family will love!

INGREDIENTS

2 cloves garlic (minced)

1 tbsp olive oil

1 c. finely chopped onion

2 c. chopped or shredded cooked chicken

4 oz. can dice green chiles

15 oz. can of black beans (rinsed and drained)

1 tsp ground cumin

1 tsp chili powder

½ tsp dried oregano

1 ½ c. enchilada sauce ((about 12 oz) homemade or store-bought)

8 large flour tortillas

12 oz. shredded cheese ((about 3 c.) cheddar, Monterey jack, Mexican cheese blend, or a combination)

Optional, for serving: fresh cilantro, chopped green or red onion, sour cream, etc.

½ tsp salt

How to Make Chicken Enchiladas

Step 1: Prepare the oven. Preheat it to 350 degrees F.

Enchilada Filling:

Step 2: In a large skillet, heat the olive oil over medium heat. Once the oil is hot, add the onion to the skillet and cook for about 3 minutes until it begins to soften. Then, add the garlic and continue to cook for another 30 seconds. Turn the heat off.

Step 2: To the skillet, add the cooked chicken, black beans, diced green chiles, chili powder, cumin, dried oregano, salt, and half a cup of enchilada sauce. Mix well until blended.

To Assemble the Enchiladas:

Step 3: Over the bottom of a greased 13 x 9-inch baking dish, spread a half cup of enchilada sauce. Down the center of the tortilla and slightly to the side of the center, place a half cup of the chicken and bean mixture, then top with 1/3 cup of cheese.

Step 4: Tightly roll the tortilla up and place it, seam-side down in the prepared baking dish. Do the same with the rest of the tortillas.

Step 5: On top of the enchilada, spread the rest of the sauce and sprinkle with the rest of the cheese.

Bake the Enchiladas:

Step 6: Place in the preheated oven and bake for about 20 to 25 minutes until hot and bubbly. Remove from the oven when done and allow the enchiladas to rest for about 5 minutes before serving. Enjoy with your favorite toppings if desired.

NOTES:

For this recipe, you can use a store-bought rotisserie chicken. Alternately, you can cook the chicken yourself.

Keep any leftovers in the fridge for up to 3 days or freeze for up to 3 months. Before reheating, thaw the frozen baked enchiladas and reheat until steaming hot. You can do this in the microwave.

Assemble the enchilada in advance and keep it in the fridge until ready to bake. Or freeze the entire pan (unbaked) for up to 3 months. Before baking, thaw in the fridge overnight and bake as instructed.

NUTRITION FACTS:

Serving: 1enchilada | Calories: 372 kcal | Carbohydrates: 32g | Protein: 25g | Fat: 16g | Saturated Fat: 7g | Cholesterol: 60mg | Sodium: 1300mg | Potassium: 377mg | Fiber: 6g | Sugar: 6g | Vitamin A: 694IU | Vitamin C: 9mg | Calcium: 285mg | Iron: 3mg

Chicken Enchiladas

Rebecca Prep Time: 25 mins | Cook Time: 20 mins | Total Time: 45 mins | Servings: 8 These chicken enchiladas are loaded with flavors. Filled with mouthwatering chicken, black bean,… General Recipes Chicken Enchiladas European Print This
Serves: 8 Prep Time: 25 mins Cooking Time: 20 mins 20 mins
Nutrition facts: 372 calories 16 fat
Rating: 5.0/5
( 1 voted )

Ingredients

  • 2 cloves garlic (minced)
  • 1 tbsp olive oil
  • 1 c. finely chopped onion
  • 2 c. chopped or shredded cooked chicken
  • 4 oz. can dice green chiles
  • 15 oz. can of black beans (rinsed and drained)
  • 1 tsp ground cumin
  • 1 tsp chili powder
  • ½ tsp dried oregano
  • 1 ½ c. enchilada sauce ((about 12 oz) homemade or store-bought)
  • 8 large flour tortillas
  • 12 oz. shredded cheese ((about 3 c.) cheddar, Monterey jack, Mexican cheese blend, or a combination)
  • Optional, for serving: fresh cilantro, chopped green or red onion, sour cream, etc.
  • ½ tsp salt

Instructions

Step 1: Prepare the oven. Preheat it to 350 degrees F.

Enchilada Filling:

Step 2: In a large skillet, heat the olive oil over medium heat. Once the oil is hot, add the onion to the skillet and cook for about 3 minutes until it begins to soften. Then, add the garlic and continue to cook for another 30 seconds. Turn the heat off.

Step 2: To the skillet, add the cooked chicken, black beans, diced green chiles, chili powder, cumin, dried oregano, salt, and half a cup of enchilada sauce. Mix well until blended.

To Assemble the Enchiladas:

Step 3: Over the bottom of a greased 13 x 9-inch baking dish, spread a half cup of enchilada sauce. Down the center of the tortilla and slightly to the side of the center, place a half cup of the chicken and bean mixture, then top with 1/3 cup of cheese.

Step 4: Tightly roll the tortilla up and place it, seam-side down in the prepared baking dish. Do the same with the rest of the tortillas.

Step 5: On top of the enchilada, spread the rest of the sauce and sprinkle with the rest of the cheese.

Bake the Enchiladas:

Step 6: Place in the preheated oven and bake for about 20 to 25 minutes until hot and bubbly. Remove from the oven when done and allow the enchiladas to rest for about 5 minutes before serving. Enjoy with your favorite toppings if desired.

Notes

For this recipe, you can use a store-bought rotisserie chicken. Alternately, you can cook the chicken yourself. Keep any leftovers in the fridge for up to 3 days or freeze for up to 3 months. Before reheating, thaw the frozen baked enchiladas and reheat until steaming hot. You can do this in the microwave. Assemble the enchilada in advance and keep it in the fridge until ready to bake. Or freeze the entire pan (unbaked) for up to 3 months. Before baking, thaw in the fridge overnight and bake as instructed.

July 2, 2022 0 comment
0 FacebookTwitterPinterestEmail
General Recipes

Melt In Your Mouth Chicken Bake

by Rebecca July 2, 2022
written by Rebecca

Prep Time: 10 mins | Cook Time: 35 mins | Total Time: 45 mins | Servings: 6

This chicken bake is my family’s new favorite chicken dinner. It is incredibly delicious and made with just only a few simple ingredients. A quick melt-in-your-mouth dinner option is excellent for busy days or any day. For a complete meal, serve this chicken bake over pasta or rice. This is also great to enjoy by itself.

If chicken is a staple at your home, then you should not miss this easy chicken bake recipe. The first time I made this chicken bake my family loved it immediately!

This instantly became one of our favorite menu rotations. Most of the time I serve this over pasta with a simple side salad. But this dish is also amazing by itself. You are welcome to spread the yoghurt/mayonnaise on top to cover the entire chicken or spread it over the top and bottom. Either way, this chicken bake will turn out amazing!

Make sure to give this melt-in-your-mouth chicken bake a try very soon. It’s a must and surely a keeper!

Ingredients

3/4 c. mayonnaise or Greek yoghurt

1 c. Parmesan cheese, shredded

1/2 tsp red pepper flakes

4 garlic cloves, minced

1 pound chicken breasts, boneless/diced

1/4 c. Italian bread crumbs

1/2 tsp seasoned salt

1/2 tsp ground black pepper

How to make Melt In Your Mouth Chicken Bake

Step 1: On the bottom of a greased 9 x 13-inch baking pan, place the diced chicken.

Step 2: Place the mayonnaise (or yoghurt), Parmesan cheese, seasoned salt, pepper, garlic, and red pepper flakes in a small bowl. Mix well until combined. Then, evenly spread this over the chicken. On top, sprinkle the bread crumbs.

Step 3: Place in a preheated 375 degrees oven and bake for approximately 30 to 35 minutes or until the chicken is completely cooked. Remove from the oven when done and serve the chicken over rice, or pasta, or enjoy it by itself.

Melt In Your Mouth Chicken Bake

Rebecca Prep Time: 10 mins | Cook Time: 35 mins | Total Time: 45 mins | Servings: 6 This chicken bake is my family’s new favorite chicken dinner. It is incredibly delicious… General Recipes Melt In Your Mouth Chicken Bake European Print This
Serves: 6 Prep Time: 10 mins Cooking Time: 35 mins 35 mins
Nutrition facts: 200 calories 20 grams fat
Rating: 5.0/5
( 1 voted )

Ingredients

  • 3/4 c. mayonnaise or Greek yoghurt
  • 1 c. Parmesan cheese, shredded
  • 1/2 tsp red pepper flakes
  • 4 garlic cloves, minced
  • 1 pound chicken breasts, boneless/diced
  • 1/4 c. Italian bread crumbs
  • 1/2 tsp seasoned salt
  • 1/2 tsp ground black pepper

Instructions

Step 1: On the bottom of a greased 9 x 13-inch baking pan, place the diced chicken.

Step 2: Place the mayonnaise (or yoghurt), Parmesan cheese, seasoned salt, pepper, garlic, and red pepper flakes in a small bowl. Mix well until combined. Then, evenly spread this over the chicken. On top, sprinkle the bread crumbs.

Step 3: Place in a preheated 375 degrees oven and bake for approximately 30 to 35 minutes or until the chicken is completely cooked. Remove from the oven when done and serve the chicken over rice, or pasta, or enjoy it by itself.


July 2, 2022 0 comment
0 FacebookTwitterPinterestEmail
General Recipes

Easy Breakfast Egg Quiche

by Rebecca July 2, 2022
written by Rebecca

Prep Time: 20 mins | Cook Time: 1 hr | Total Time: 1 hr 20 mins | Servings: 6 people

This breakfast egg quiche is a very simple quiche recipe that requires only a few readily available ingredients. This is perfect for your love quiche. It’s delicious and a great make-ahead breakfast option. An incredible, creamy, and filling quiche that you can easily whip up at any time!

I particularly enjoy quiche for breakfast. I can easily put this together in advance. And just pop this in the oven the next day. This breakfast egg quiche has always been a popular addition to our weekend brunch. This quiche recipe is excellent if you are searching for another awesome breakfast option that everyone will love!

Ingredients

4 eggs

Pie Crust

1 tablespoon butter

1/2 small onion, chopped and diced

6 slices of bacon, cooked and crumbled

2 c. shredded mozzarella freshly shredded or prepackaged

1 c. diced ham

1 1/2 c. half and half

1/2 teaspoon salt

1/4 teaspoon mustard

How to make Easy Breakfast Egg Quiche

Step 1: Prepare the oven. Preheat it to 425 degrees.

Step 2: Place the onion and butter in a bowl and microwave for 60 seconds.

Step 3: Unroll the pie crust and place it in a pie dish. Pour the melted butter and onion mixture into the pie dish. Add half each of the ham, bacon, and cheese. Next, add the rest of the ham, bacon, and cheese.

Step 4: In a bowl, whisk the eggs, half and half, and seasonings until combined. Then, pour this over the meat and cheese mixture.

Step 5: Place in the preheated oven and bake for about 15 minutes. Adjust the oven temperature to 350 degrees and continue baking for about 35 to 40 minutes or until a knife inserted in the middle of the quiche comes out clean.

Step 6: Remove from the oven when done and allow the quiche to sit for about 10 minutes before slicing. Enjoy!

Easy Breakfast Egg Quiche

Rebecca Prep Time: 20 mins | Cook Time: 1 hr | Total Time: 1 hr 20 mins | Servings: 6 people This breakfast egg quiche is a very simple quiche recipe… General Recipes Easy Breakfast Egg Quiche European Print This
Serves: 6 Prep Time: 25 mins Cooking Time: 1 hr 1 hr
Nutrition facts: 200 calories 20 grams fat
Rating: 5.0/5
( 1 voted )

Ingredients

  • 4 eggs
  • Pie Crust
  • 1 tablespoon butter
  • 1/2 small onion, chopped and diced
  • 6 slices of bacon, cooked and crumbled
  • 2 c. shredded mozzarella freshly shredded or prepackaged
  • 1 c. diced ham
  • 1 1/2 c. half and half
  • 1/2 teaspoon salt
  • 1/4 teaspoon mustard

Instructions

Step 1: Prepare the oven. Preheat it to 425 degrees.

Step 2: Place the onion and butter in a bowl and microwave for 60 seconds.

Step 3: Unroll the pie crust and place it in a pie dish. Pour the melted butter and onion mixture into the pie dish. Add half each of the ham, bacon, and cheese. Next, add the rest of the ham, bacon, and cheese.

Step 4: In a bowl, whisk the eggs, half and half, and seasonings until combined. Then, pour this over the meat and cheese mixture.

Step 5: Place in the preheated oven and bake for about 15 minutes. Adjust the oven temperature to 350 degrees and continue baking for about 35 to 40 minutes or until a knife inserted in the middle of the quiche comes out clean.

Step 6: Remove from the oven when done and allow the quiche to sit for about 10 minutes before slicing. Enjoy!

July 2, 2022 0 comment
0 FacebookTwitterPinterestEmail
General Recipes

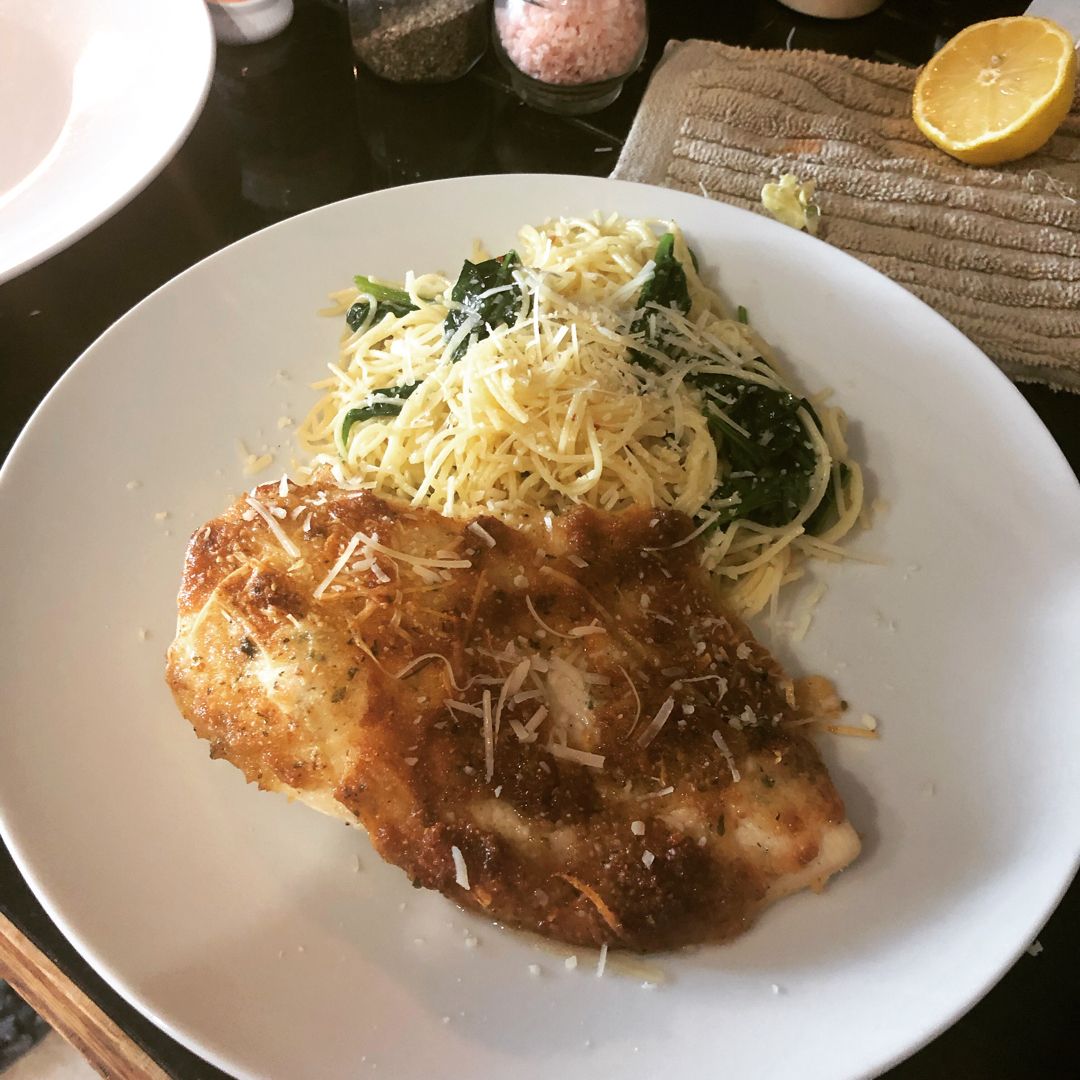
Italian Chicken Pasta in Creamy White Wine Parmesan Cheese Sauce

by Rebecca July 2, 2022
written by Rebecca

Prep Time: 10 mins | Cook Time: 20 mins | Total Time: 30 mins | Servings: 4

Experience the Italian dining experience right in the comfort of your home with this easy, delicious Italian Chicken Pasta in Creamy White Wine Parmesan Cheese Sauce!

Ingredients

Cooking chicken:

2 tbsp olive oil

4 thin boneless, skinless chicken breasts (or 2 thick ones, halved horizontally and paper towel dried)

½ c. flour

2 tsp Italian seasoning

1 tsp garlic powder

1 tsp salt

¼ tsp black pepper

Pasta:

12 ounces of spaghetti

White Wine, Parmesan Sauce:

4 garlic cloves, minced

1 small yellow onion (or use ½ onion) chopped

4 tbsp butter

2 scallions, chopped

1 tbsp flour

1 c. heavy cream

½ c. Parmesan cheese, shredded

1 c. white wine

1 tsp Italian Seasoning

2 small tomatoes, diced

¼ tsp crushed red pepper flakes

½ tsp salt more to taste

How to make Italian Chicken Pasta in Creamy White Wine, Parmesan, Cheese Sauce

Step 1: Start by slicing the chicken breasts horizontally. Alternately, you simply use thin chicken breasts. Then, pat them dry using a paper towel.

Step 2: Place the flour, salt, black pepper, garlic powder, and Italian seasoning in a large bowl. Mix well. Coat the chicken breasts in the flour mixture using a fork or tongs. Press the chicken breasts into the flour mixture before flipping and coating the other side. Set aside.

Step 3: In a large skillet, heat 2 tbsp olive oil over medium-high heat. Place the coated chicken breasts in the skillet once the oil is hot and sear for about 4 to 5 minutes per side or until both sides are golden brown and the chicken is completely cooked, flipping once. Set the chicken aside when done.

Step 4: To make the sauce, place the butter, diced yellow onion, and minced garlic cloves in a pan. Cook for about 2 minutes over medium heat or until the onions and garlic are translucent. Then, add the chopped scallions and tomatoes. Add 1 tbsp flour and stir well until blended. Next, pour in the heavy cream and wine. Season with Italian Seasoning, salt, and red pepper flakes. Bring everything to a simmering point before adding a half cup of the shredded Parmesan cheese. Stir well using a whisk or wooden spoon until smooth.

Step 5: Following the package directions, cook the pasta until al dente. Drain when done, but do not rinse.

Step 6: To assemble: With the sauce in the skillet, add to the cooked pasta. Toss and cook for about 2 to 4 minutes over low heat. If needed, season with extra salt. Place the chicken back into the skillet over the pasta and heat for about 5 minutes.

Step 7: Enjoy the chicken over or next to the pasta. If desired, sprinkle with more Parmesan cheese.

Nutrition Facts:

Amount Per Serving: Calories 998, Calories from Fat 432, Fat 48g74%, Saturated Fat 25g156%, Trans Fat 1g, Cholesterol 192mg64%, Sodium 986mg43%, Potassium 935mg27%, Carbohydrates 86g29%, Fiber 5g21%, Sugar 5g6%, Protein 44g88%, Vitamin A 1992IU40%, Vitamin C 12mg15%, Calcium 264mg26%, Iron 4mg

Italian Chicken Pasta in Creamy White Wine Parmesan Cheese Sauce

Rebecca Prep Time: 10 mins | Cook Time: 20 mins | Total Time: 30 mins | Servings: 4 Experience the Italian dining experience right in the comfort of your home with… General Recipes Italian Chicken Pasta in Creamy White Wine Parmesan Cheese Sauce European Print This
Serves: 4 Prep Time: 10 mins Cooking Time: 20 mins 20 mins
Nutrition facts: 998 calories 48 fat
Rating: 5.0/5
( 1 voted )

Ingredients

  • Cooking chicken:
  • 2 tbsp olive oil
  • 4 thin boneless, skinless chicken breasts (or 2 thick ones, halved horizontally and paper towel dried)
  • ½ c. flour
  • 2 tsp Italian seasoning
  • 1 tsp garlic powder
  • 1 tsp salt
  • ¼ tsp black pepper
  • Pasta:
  • 12 ounces of spaghetti
  • White Wine, Parmesan Sauce:
  • 4 garlic cloves, minced
  • 1 small yellow onion (or use ½ onion) chopped
  • 4 tbsp butter
  • 2 scallions, chopped
  • 1 tbsp flour
  • 1 c. heavy cream
  • ½ c. Parmesan cheese, shredded
  • 1 c. white wine
  • 1 tsp Italian Seasoning
  • 2 small tomatoes, diced
  • ¼ tsp crushed red pepper flakes
  • ½ tsp salt more to taste

Instructions

Step 1: Start by slicing the chicken breasts horizontally. Alternately, you simply use thin chicken breasts. Then, pat them dry using a paper towel.

Step 2: Place the flour, salt, black pepper, garlic powder, and Italian seasoning in a large bowl. Mix well. Coat the chicken breasts in the flour mixture using a fork or tongs. Press the chicken breasts into the flour mixture before flipping and coating the other side. Set aside.

Step 3: In a large skillet, heat 2 tbsp olive oil over medium-high heat. Place the coated chicken breasts in the skillet once the oil is hot and sear for about 4 to 5 minutes per side or until both sides are golden brown and the chicken is completely cooked, flipping once. Set the chicken aside when done.

Step 4: To make the sauce, place the butter, diced yellow onion, and minced garlic cloves in a pan. Cook for about 2 minutes over medium heat or until the onions and garlic are translucent. Then, add the chopped scallions and tomatoes. Add 1 tbsp flour and stir well until blended. Next, pour in the heavy cream and wine. Season with Italian Seasoning, salt, and red pepper flakes. Bring everything to a simmering point before adding a half cup of the shredded Parmesan cheese. Stir well using a whisk or wooden spoon until smooth.

Step 5: Following the package directions, cook the pasta until al dente. Drain when done, but do not rinse.

Step 6: To assemble: With the sauce in the skillet, add to the cooked pasta. Toss and cook for about 2 to 4 minutes over low heat. If needed, season with extra salt. Place the chicken back into the skillet over the pasta and heat for about 5 minutes.

Step 7: Enjoy the chicken over or next to the pasta. If desired, sprinkle with more Parmesan cheese.

July 2, 2022 0 comment
0 FacebookTwitterPinterestEmail
General Recipes

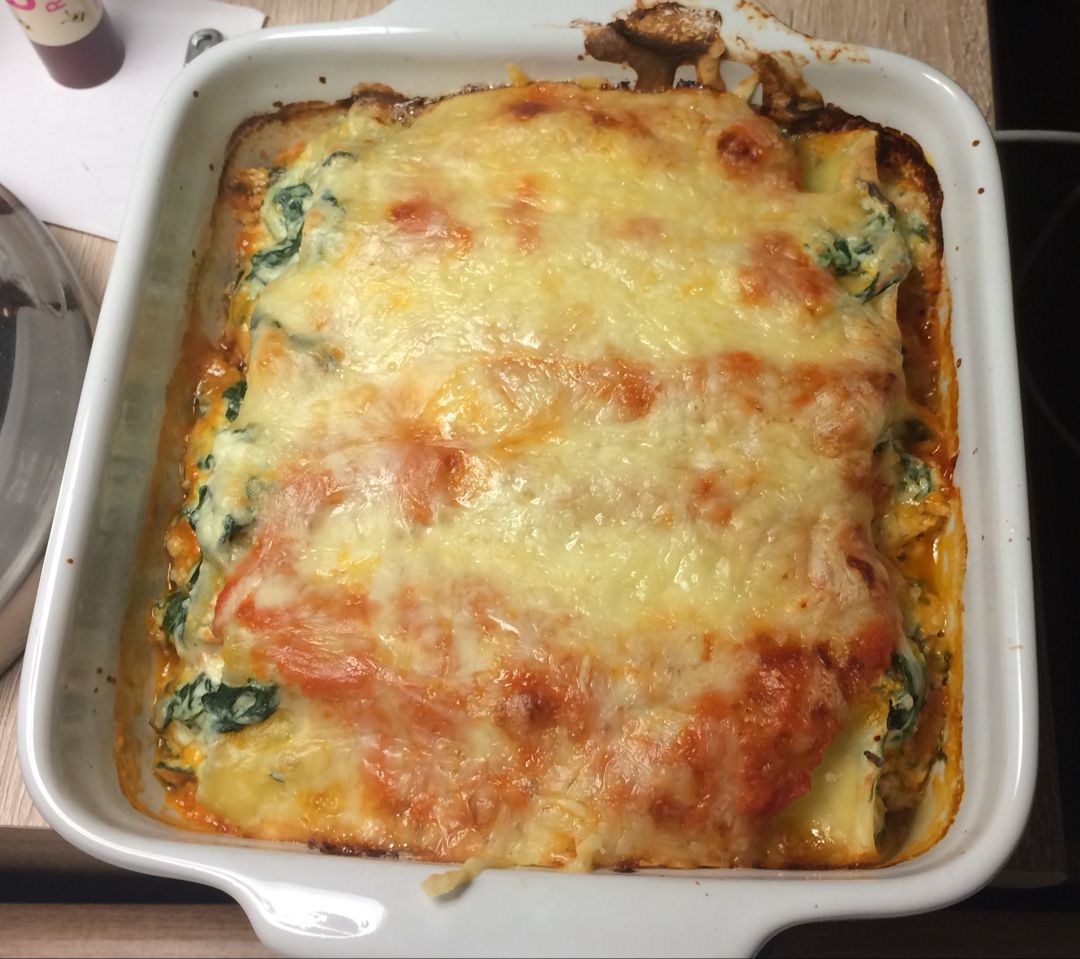
Spinach Ricotta Cannelloni

by Rebecca July 2, 2022
written by Rebecca

Prep time: 25 mins | Cook time: 35 mins | Total time: 1 hr | Servings: 5–6 people

This Spinach Ricotta Cannelloni is crazy good you have to try this very soon! Cannelloni pasta tubes filled with perfectly seasoned and juicy spinach with ricotta filling topped with a simple yet delectable tomato sauce with loads of melty cheese. The best part is this Cannelloni is great for freezing!

Ingredients

SAUCE:

1 garlic clove, finely chopped

1 small onion, finely chopped

1 tablespoon olive oil

1 cup water (swirl in tomato can clean out)

800 grams/28 ounces crushed tomato

Handful basil leaves, torn, or 1 tsp dried herbs (such as Italian mix, oregano, thyme, basil)

3/4 teaspoon salt + pepper to taste

FILLING:

1 egg

1 large garlic clove, minced

250 grams/8 ounces frozen chopped spinach, thawed

1 c. shredded cheese (Mozzarella, Colby, Cheddar, Tasty, Gruyere, Swiss)

1/3 c. grated Parmesan

500 grams/ 1 pound ricotta, full fat

1/2 teaspoon salt and pepper, each

Grated fresh nutmeg (just a sprinkling) or 1/8 teaspoon nutmeg powder (optional)

CANNELLONI:

1–1 1/2 c. shredded Mozzarella

More basil, for garnish (optional)

18–22 dried cannelloni tubes

How to make Spinach Ricotta Cannelloni

SAUCE:

Step 1: In a large skillet, heat the oil over medium-high heat. Once the oil is hot, add the garlic and onion to the skillet and cook for about 2 to 3 minutes or until translucent. Next, add the tomato, water, salt, and pepper. Stir well.

Step 2: Adjust the heat to medium and simmer everything for about 5 minutes. If desired, you can pour in a half cup of water and mix it into the sauce until smooth.

Step 3: Add the basil and dried herbs. Stir well and set the sauce aside.

FILLING:

Step 4: In a colander, place the spinach and press out as much liquid as you can. In a bowl, place the spinach along with the remaining filling ingredients. Mix well and adjust the salt and pepper according to taste.

TO ASSEMBLE & BAKE:

Step 5: Prepare the oven. Preheat it to 180 degrees C or 350 degrees F. For this recipe, I used a 21 x 26 cm or 8.5 x 10.5-inches baking pan.

Step 6: On the base of the prepared baking pan, spread a little amount of the sauce.

Step 7: To a piping bag with a large nozzle, transfer the filling. Alternately, you can use a strong ziplock bag. You can also use a knife. Into the tubes, pipe the filling and place it in the baking dish. On top, pour the rest of the sauce, making sure to cover all the tubes. Tent with foil and place in the preheated oven. Bake for about 25 minutes. Uncover and scatter the cheese on top. Continue to bake for another 10 minutes until the cheese has melted.

Step 8: Serve the Spinach Ricotta Cannelloni garnished with more basil. Enjoy!

NUTRITION FACTS:

Serving: 407g, Calories: 531cal (27%)

Spinach Ricotta Cannelloni

Rebecca Prep time: 25 mins | Cook time: 35 mins | Total time: 1 hr | Servings: 5–6 people This Spinach Ricotta Cannelloni is crazy good you have to try this… General Recipes Spinach Ricotta Cannelloni European Print This
Serves: 5-6 Prep Time: 25 mins Cooking Time: 35 mins 35 mins
Nutrition facts: 531 calories 20 grams fat
Rating: 5.0/5
( 1 voted )

Ingredients

  • SAUCE:
  • 1 garlic clove, finely chopped
  • 1 small onion, finely chopped
  • 1 tablespoon olive oil
  • 1 cup water (swirl in tomato can clean out)
  • 800 grams/28 ounces crushed tomato
  • Handful basil leaves, torn, or 1 tsp dried herbs (such as Italian mix, oregano, thyme, basil)
  • 3/4 teaspoon salt + pepper to taste
  • FILLING:
  • 1 egg
  • 1 large garlic clove, minced
  • 250 grams/8 ounces frozen chopped spinach, thawed
  • 1 c. shredded cheese (Mozzarella, Colby, Cheddar, Tasty, Gruyere, Swiss)
  • 1/3 c. grated Parmesan
  • 500 grams/ 1 pound ricotta, full fat
  • 1/2 teaspoon salt and pepper, each
  • Grated fresh nutmeg (just a sprinkling) or 1/8 teaspoon nutmeg powder (optional)
  • CANNELLONI:
  • 1–1 1/2 c. shredded Mozzarella
  • More basil, for garnish (optional)
  • 18–22 dried cannelloni tubes

Instructions

SAUCE:

Step 1: In a large skillet, heat the oil over medium-high heat. Once the oil is hot, add the garlic and onion to the skillet and cook for about 2 to 3 minutes or until translucent. Next, add the tomato, water, salt, and pepper. Stir well.

Step 2: Adjust the heat to medium and simmer everything for about 5 minutes. If desired, you can pour in a half cup of water and mix it into the sauce until smooth.

Step 3: Add the basil and dried herbs. Stir well and set the sauce aside.

FILLING:

Step 4: In a colander, place the spinach and press out as much liquid as you can. In a bowl, place the spinach along with the remaining filling ingredients. Mix well and adjust the salt and pepper according to taste.

TO ASSEMBLE & BAKE:

Step 5: Prepare the oven. Preheat it to 180 degrees C or 350 degrees F. For this recipe, I used a 21 x 26 cm or 8.5 x 10.5-inches baking pan.

Step 6: On the base of the prepared baking pan, spread a little amount of the sauce.

Step 7: To a piping bag with a large nozzle, transfer the filling. Alternately, you can use a strong ziplock bag. You can also use a knife. Into the tubes, pipe the filling and place it in the baking dish. On top, pour the rest of the sauce, making sure to cover all the tubes. Tent with foil and place in the preheated oven. Bake for about 25 minutes. Uncover and scatter the cheese on top. Continue to bake for another 10 minutes until the cheese has melted.

Step 8: Serve the Spinach Ricotta Cannelloni garnished with more basil. Enjoy!

July 2, 2022 0 comment
0 FacebookTwitterPinterestEmail
General Recipes

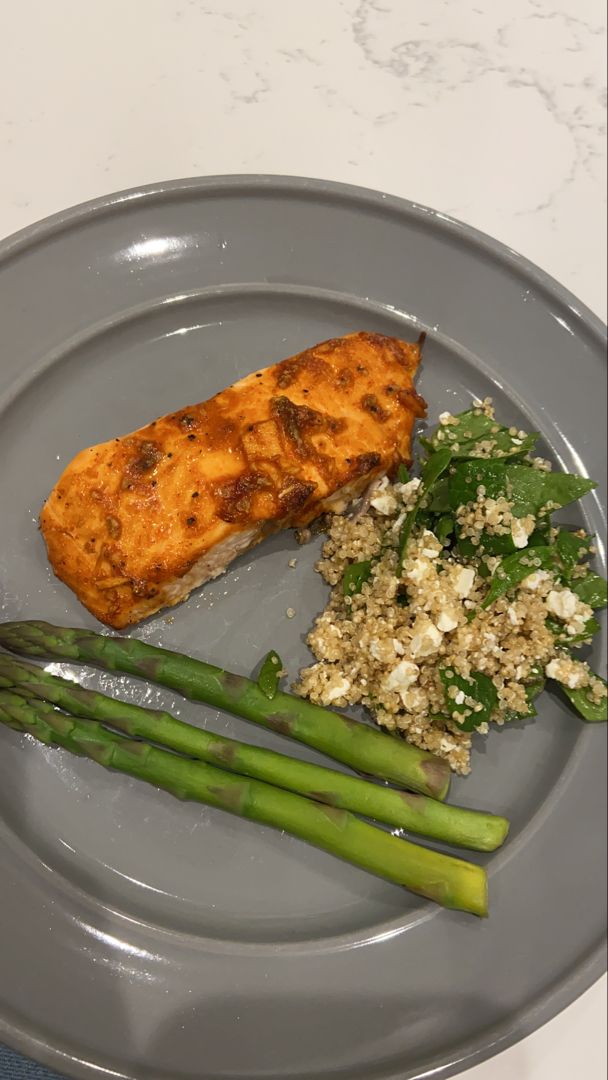
SWEET & SPICY ASIAN SALMON

by Rebecca July 2, 2022
written by Rebecca

Total time: 14 mins | Servings: 2

Are you searching for another salmon recipe that you can easily make it less than twenty minutes? Then, look no more because you’ve found one of the best salmon recipes there is! The combination of sweet and spicy flavors in this scrumptious salmon will make you love this simple dish more and more!

Oven-roasted flaky salmon fillets topped with delicious garlic, ginger, soy, and brown sugar glaze. Serve this with a simple side salad and a slice of lemon for an easy and quick weeknight meal perfect any time.

The best part about this recipe is it does not need a plethora of ingredients, yet this dish comes out great always. Just make sure to pick the freshest salmon. For the marinade, all you need are simple pantry ingredients. Whisk them together, and you have a simple yet impressive Asian sauce. If you do not have Sriracha sauce, you can always swap it with garlic chili sauce.

INGREDIENTS

1 garlic clove, grated

2 8-ounces pieces of organic salmon, room temperature

1 knob of ginger, peeled and grated (about 1 tbsp)

1 tbsp soy sauce

1 tbsp dark brown sugar

1 tbsp Sriracha sauce

lemon garnish

sprinkle black pepper

HOW TO MAKE SWEET & SPICY ASIAN SALMON

Step 1: Prepare the oven. Preheat it to 450 degrees F. Onto a baking sheet lined with parchment, place the salmon.

Step 2: In a small bowl, place the ginger, garlic, Sriracha, and soy. Mix well until combined, then drizzle this over the salmon. Then, sprinkle the top of the salmon with fresh black pepper followed by the brown sugar.

Step 3: Place in the preheated oven and bake the salmon for about 10 minutes. Remove from the oven when done and serve the sweet and spicy Asian salmon right away with your preferred side salad and a slice of lemon. Enjoy!

SWEET & SPICY ASIAN SALMON

Rebecca Total time: 14 mins | Servings: 2 Are you searching for another salmon recipe that you can easily make it less than twenty minutes? Then, look no more because you’ve… General Recipes SWEET & SPICY ASIAN SALMON European Print This
Serves: 2
Nutrition facts: 200 calories 20 grams fat
Rating: 5.0/5
( 1 voted )

Ingredients

  • 1 garlic clove, grated
  • 2 8-ounces pieces of organic salmon, room temperature
  • 1 knob of ginger, peeled and grated (about 1 tbsp)
  • 1 tbsp soy sauce
  • 1 tbsp dark brown sugar
  • 1 tbsp Sriracha sauce
  • lemon garnish
  • sprinkle black pepper

Instructions

Step 1: Prepare the oven. Preheat it to 450 degrees F. Onto a baking sheet lined with parchment, place the salmon.

Step 2: In a small bowl, place the ginger, garlic, Sriracha, and soy. Mix well until combined, then drizzle this over the salmon. Then, sprinkle the top of the salmon with fresh black pepper followed by the brown sugar.

Step 3: Place in the preheated oven and bake the salmon for about 10 minutes. Remove from the oven when done and serve the sweet and spicy Asian salmon right away with your preferred side salad and a slice of lemon. Enjoy!

July 2, 2022 0 comment
0 FacebookTwitterPinterestEmail
General Recipes

CRACKED OUT QUICHE

by Rebecca July 2, 2022
written by Rebecca

Prep Time: 10 mins | Cook Time: 45 mins | Total Time: 55 mins | Yield: 6 people

This cracked-out quiche is super good and loaded with cheddar, bacon, and ranch. It is incredibly easy to make using only seven ingredients. You can even assemble this quiche in advance and freeze it unbaked for later. If you are looking for another great quick breakfast or dinner option, you have to give this cracked-out quiche a try.

This homemade cracked-out quiche is a staple at my house. We love to serve this with some grits and biscuits for breakfast or with a simple salad for dinner. We love this cheesy and packed with bacon quiche to the bone that this has become one of our go-to for an easy and fast meal option.

Ingredients

3 eggs

¾ c. cooked chopped bacon

1 (9”) deep-dish pie crust

1 c. shredded cheddar cheese

¼ c. milk

½ c. prepared light Ranch dressing

¼ c. heavy cream

HOW TO MAKE CRACKED-OUT QUICHE

Step 1: Prepare the oven. Preheat it to 375 degrees F.

Step 2: In the bottom of the pie crust, place the bacon and sprinkle with cheese.

Step 3: Beat the eggs, milk, cream, and Ranch dressing until combined. Pour this on top of the bacon and cheese. Place in the preheated oven and bake for about 40 to 50 minutes or until the middle of the quiche is set and turned lightly browned.

Step 4: Remove from the oven when done and let the quiche cool for at least 5 minutes.

Step 5: Slice and serve and enjoy!

Notes:

This quiche can be assembled and frozen unbaked. When ready to bake, thaw the quiche completely and bake as instructed.

For this recipe, I love to use Hidden Valley Ranch or Ken’s Ranch Dressing.

You can use turkey bacon. Note that 3/4 c cooked bacon is around 3/4 lb. Raw bacon.

Feel free to use low-fat milk.

CRACKED OUT QUICHE

Rebecca Prep Time: 10 mins | Cook Time: 45 mins | Total Time: 55 mins | Yield: 6 people This cracked-out quiche is super good and loaded with cheddar, bacon, and… General Recipes CRACKED OUT QUICHE European Print This
Serves: 6 Prep Time: 10 mins Cooking Time: 45 mins 45 mins
Nutrition facts: 200 calories 20 grams fat
Rating: 5.0/5
( 1 voted )

Ingredients

  • 3 eggs
  • ¾ c. cooked chopped bacon
  • 1 (9”) deep-dish pie crust
  • 1 c. shredded cheddar cheese
  • ¼ c. milk
  • ½ c. prepared light Ranch dressing
  • ¼ c. heavy cream

Instructions

Step 1: Prepare the oven. Preheat it to 375 degrees F.

Step 2: In the bottom of the pie crust, place the bacon and sprinkle with cheese.

Step 3: Beat the eggs, milk, cream, and Ranch dressing until combined. Pour this on top of the bacon and cheese. Place in the preheated oven and bake for about 40 to 50 minutes or until the middle of the quiche is set and turned lightly browned.

Step 4: Remove from the oven when done and let the quiche cool for at least 5 minutes.

Step 5: Slice and serve and enjoy!

Notes

This quiche can be assembled and frozen unbaked. When ready to bake, thaw the quiche completely and bake as instructed. For this recipe, I love to use Hidden Valley Ranch or Ken’s Ranch Dressing. You can use turkey bacon. Note that 3/4 c cooked bacon is around 3/4 lb. Raw bacon. Feel free to use low-fat milk.

July 2, 2022 0 comment
0 FacebookTwitterPinterestEmail
Newer Posts
Older Posts

Popular Posts

  • 1

    Crispy Crunchy Parmesan Potatoes

    March 21, 2020
  • 2

    CROCK POT SMOTHERED PORK CHOPS

    March 21, 2020
  • Facebook
  • Twitter

@2019 - All Right Reserved.


Back To Top