Cook it once
  • Home
  • Privacy Policy
  • Recipes
    • KETO
    • LC
    • WW
  • Tips
  • Contact
Cook it once
  • Home
  • Privacy Policy
  • Recipes
    • KETO
    • LC
    • WW
  • Tips
  • Contact
Category:

General Recipes

General Recipes

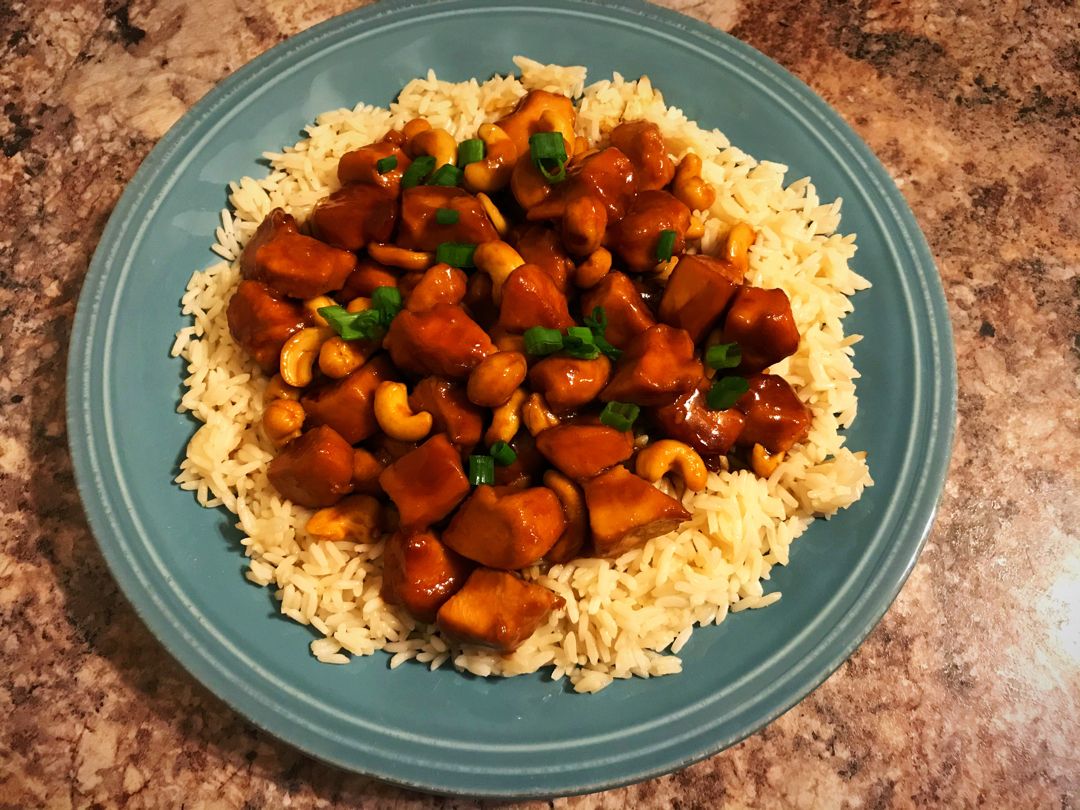
CROCKPOT CASHEW CHICKEN

by Rebecca July 29, 2022
written by Rebecca

This cashew chicken has been one of my favorite Chinese take-out. To be able to make this at home in my crockpot makes me always super excited. It has the perfect flavor and texture combination. For a full meal, serve this cashew chicken over white rice, brown rice, cauliflower rice, zoodles, or quinoa.

INGREDIENTS

Chicken:

1 pound boneless, skinless chicken breasts or thighs, cut into 1” chunks

1 tablespoon olive oil

Kosher salt and freshly ground black pepper, to taste

Sauce:

3 cloves garlic, minced

1/4 c. reduced-sodium soy sauce

2 tablespoons unseasoned rice vinegar

2 tablespoons ketchup

1 tablespoon brown sugar

1/4 teaspoon crushed red pepper flakes – optional

1 tablespoon freshly grated ginger

Garnish:

2 green onions, sliced

1 c. raw cashews

HOW TO MAKE CROCKPOT CASHEW CHICKEN

Step 1: For the sauce: In a small bowl, place the soy sauce, ketchup, rice vinegar, brown sugar, garlic, ginger, and red pepper flakes. Mix well until combined.

Step 2: Heat the olive oil in a large skillet over medium-high heat.

Step 3: To taste, season the chicken with salt and pepper. Once the oil is hot, add the chicken to the skillet and cook for about 2 minutes, stirring often until browned.

Step 4: To a slow cooker, transfer the chicken and pour in the soy sauce mixture. Gently toss.

Step 5: Put the lid on and set it to cook for 2 to 3 hours on low. Uncover and stir in the cashews. Continue to cook for another 15 minutes on low heat.

Step 6: Serve the cashew chicken right away. If desired, garnish with some green onions. Enjoy!

NOTES:

Feel free to add vegetables to this dish, such as broccoli, zucchini, Bok choy, snap peas, celery, mushrooms, edamame, and green pepper. Add them in the last 30 minutes of cooking.

For this recipe, make sure to use unsalted cashews. If using salted cashew, rinse them off first before using them.

Serve this cashew chicken over white rice, brown rice, cauliflower rice, zoodles, or quinoa.

Keep any leftovers in a tightly sealed container and store them in the fridge for up to 5 days.

To freeze, make sure to completely cool the cashew chicken first. Then, store it in a freezer-safe bag or container and freeze for up to 3 months. Thaw in the fridge overnight, then heat on the stovetop or crockpot for 1 to 2 hours.

You can also make a double batch and freeze the other for later. Into a freezer-safe bag, place everything except for the cashews. Press all the air out of the bag and freeze for up to 3 months.

CROCKPOT CASHEW CHICKEN

Rebecca This cashew chicken has been one of my favorite Chinese take-out. To be able to make this at home in my crockpot makes me always super excited. It has the… General Recipes CROCKPOT CASHEW CHICKEN European Print This
Nutrition facts: 200 calories 20 grams fat
Rating: 5.0/5
( 1 voted )

Ingredients

  • Chicken:
  • 1 pound boneless, skinless chicken breasts or thighs, cut into 1” chunks
  • 1 tablespoon olive oil
  • Kosher salt and freshly ground black pepper, to taste
  • Sauce:
  • 3 cloves garlic, minced
  • 1/4 c. reduced-sodium soy sauce
  • 2 tablespoons unseasoned rice vinegar
  • 2 tablespoons ketchup
  • 1 tablespoon brown sugar
  • 1/4 teaspoon crushed red pepper flakes – optional
  • 1 tablespoon freshly grated ginger
  • Garnish:
  • 2 green onions, sliced
  • 1 c. raw cashews

Instructions

Step 1: For the sauce: In a small bowl, place the soy sauce, ketchup, rice vinegar, brown sugar, garlic, ginger, and red pepper flakes. Mix well until combined.

Step 2: Heat the olive oil in a large skillet over medium-high heat.

Step 3: To taste, season the chicken with salt and pepper. Once the oil is hot, add the chicken to the skillet and cook for about 2 minutes, stirring often until browned.

Step 4: To a slow cooker, transfer the chicken and pour in the soy sauce mixture. Gently toss.

Step 5: Put the lid on and set it to cook for 2 to 3 hours on low. Uncover and stir in the cashews. Continue to cook for another 15 minutes on low heat.

Step 6: Serve the cashew chicken right away. If desired, garnish with some green onions. Enjoy!

Notes

Feel free to add vegetables to this dish, such as broccoli, zucchini, Bok choy, snap peas, celery, mushrooms, edamame, and green pepper. Add them in the last 30 minutes of cooking. For this recipe, make sure to use unsalted cashews. If using salted cashew, rinse them off first before using them. Serve this cashew chicken over white rice, brown rice, cauliflower rice, zoodles, or quinoa. Keep any leftovers in a tightly sealed container and store them in the fridge for up to 5 days. To freeze, make sure to completely cool the cashew chicken first. Then, store it in a freezer-safe bag or container and freeze for up to 3 months. Thaw in the fridge overnight, then heat on the stovetop or crockpot for 1 to 2 hours. You can also make a double batch and freeze the other for later. Into a freezer-safe bag, place everything except for the cashews. Press all the air out of the bag and freeze for up to 3 months.
July 29, 2022 0 comment
0 FacebookTwitterPinterestEmail
General Recipes

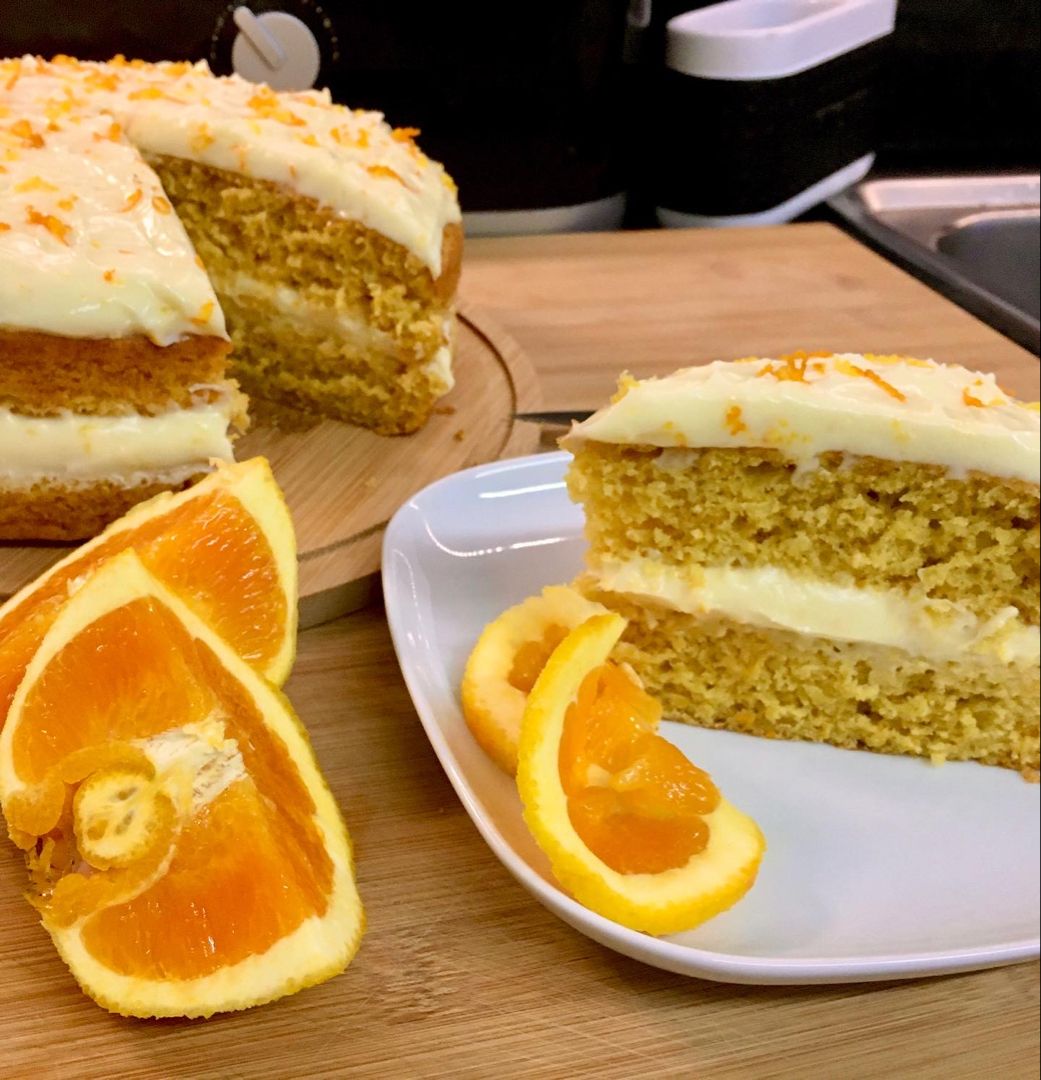
Practically Perfect Pineapple Cake

by Rebecca July 29, 2022
written by Rebecca

Prep Time: 5 mins | Cook Time: 25 mins | Total Time: 30 mins | Servings: 24

This Pineapple Cake is very moist and delicious. Every bite is packed with pineapple flavor. I especially enjoy the pineapple fluff frosting. It’s super simple yet incredibly decadent. If you are searching for a cake that you can serve on any occasion, then this Practically Perfect Pineapple Cake is a must!

Ingredients

Cake:

2 eggs

2 ¼ c. all-purpose flour

2 tsp baking soda

1 ¼ c. granulated sugar

20 oz. crushed pineapple in 100% juice, do not drain

1 tsp vanilla extract

Frosting:

20 oz. crushed pineapple in 100% juice

12 oz. Cool Whip or 1 cup heavy whipped cream, whipped

3.5 oz. vanilla instant pudding mix 1 package

How to make Pineapple Cake

Cake:

Step 1: Prepare the oven. Preheat it to 350 degrees. Ready a 9 x 13-inch baking dish. Grease, flour, and set aside.

Step 2: Place the flour, sugar, and baking soda in a large bowl. Mix well until combined. Then, stir in the vanilla extract, along with the crushed pineapple and eggs.

Step 3: Pour the batter into the prepared baking dish. Place in the preheated oven and bake for about 25 to 30 minutes or until a toothpick inserted in the center of the cake comes out clean.

Step 4: Remove from the oven when done and allow the cake to cool completely.

Fluff Frosting:

Step 5: Combine the pineapple and pudding mix until well mixed. Then, gently fold in the Cool Whip or whipped cream.

Step 6: On the cooled cake, spread the frosting and keep it in the fridge for at least 30 minutes to chill.

Step 7: Slice and serve. Enjoy!

Notes:

To store:

You can store frosted cake for up to 3 days in the fridge.

Wrap unfrosted cake in a plastic wrap and keep it for up to 3 days at room temperature or freeze for up to 3 months.

Nutrition Facts:

Calories: 154 kcal | Carbohydrates: 34g | Protein: 2g | Fat: 1g | Saturated Fat: 1g | Polyunsaturated Fat: 1g | Monounsaturated Fat: 1g | Trans Fat: 1g | Cholesterol: 16mg | Sodium:

Practically Perfect Pineapple Cake

Rebecca Prep Time: 5 mins | Cook Time: 25 mins | Total Time: 30 mins | Servings: 24 This Pineapple Cake is very moist and delicious. Every bite is packed with… General Recipes Practically Perfect Pineapple Cake European Print This
Serves: 24 Prep Time: 5 mins Cooking Time: 25 mins 25 mins
Nutrition facts: 154 calories 1 fat
Rating: 5.0/5
( 1 voted )

Ingredients

  • Cake:
  • 2 eggs
  • 2 ¼ c. all-purpose flour
  • 2 tsp baking soda
  • 1 ¼ c. granulated sugar
  • 20 oz. crushed pineapple in 100% juice, do not drain
  • 1 tsp vanilla extract
  • Frosting:
  • 20 oz. crushed pineapple in 100% juice
  • 12 oz. Cool Whip or 1 cup heavy whipped cream, whipped
  • 3.5 oz. vanilla instant pudding mix 1 package

Instructions

Cake:

Step 1: Prepare the oven. Preheat it to 350 degrees. Ready a 9 x 13-inch baking dish. Grease, flour, and set aside.

Step 2: Place the flour, sugar, and baking soda in a large bowl. Mix well until combined. Then, stir in the vanilla extract, along with the crushed pineapple and eggs.

Step 3: Pour the batter into the prepared baking dish. Place in the preheated oven and bake for about 25 to 30 minutes or until a toothpick inserted in the center of the cake comes out clean.

Step 4: Remove from the oven when done and allow the cake to cool completely.

Fluff Frosting:

Step 5: Combine the pineapple and pudding mix until well mixed. Then, gently fold in the Cool Whip or whipped cream.

Step 6: On the cooled cake, spread the frosting and keep it in the fridge for at least 30 minutes to chill.

Step 7: Slice and serve. Enjoy!

Notes

To store: You can store frosted cake for up to 3 days in the fridge. Wrap unfrosted cake in a plastic wrap and keep it for up to 3 days at room temperature or freeze for up to 3 months.
July 29, 2022 0 comment
0 FacebookTwitterPinterestEmail
General Recipes

Black Forest Texas Sheet Cake – This Delicious Dessert Is Perfect For Any Occasion

by Rebecca July 28, 2022
written by Rebecca

Prep time: 15 mins | Cook time: 25 mins | Serves: 12

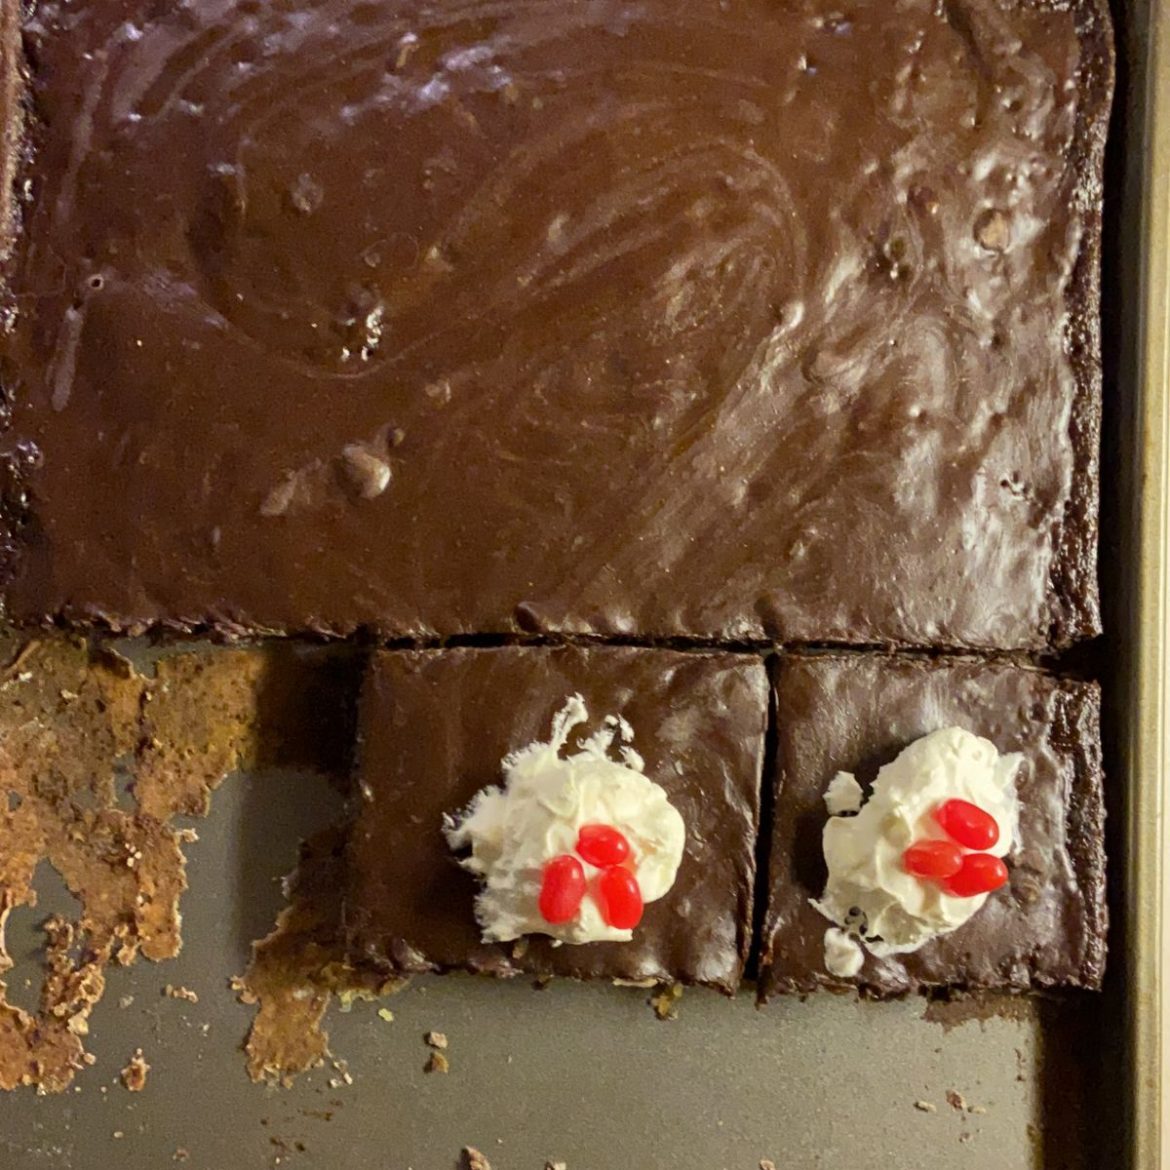
This Black Forest, Texas Sheet Cake is a decadent, very pleasing cake. This has a classic black forest trio flavor that everyone will be begging for! If you are looking for the perfect dessert, excellent for any occasion, this delicious cake is a must! Every bite is packed with rich chocolate, cherries, and whipped cream!

Ingredients

CAKE:

2 eggs

1 tsp vanilla extract

2 (21 ounces) cans of cherry pie filling

1 box Devil’s Food cake mix

FROSTING:

5 tbsp butter

1/4 c. milk

1 c. semi-sweet chocolate chips

1 c. granulated sugar

TOPPING:

Chocolate bar

Whipped cream, as needed

How to make the Black Forest, Texas Sheet Cake

Step 1: Prepare the oven. Preheat it to 350 degrees F. Using a nonstick spray, grease a 10 x 15-inch baking sheet, and set aside.

Step 2: Place the eggs and vanilla extract in a large bowl. Beat well until combined. Then, add the cake mix, along with one can of the cherry pie filling. Mix again until blended. Then, evenly spread this into the prepared baking sheet.

Step 3: Place in the preheated oven and bake for about 25 minutes or until a toothpick inserted in the middle of the cake comes out clean.

Step 4: In the meantime, make the frosting. Place the milk, sugar, and butter in a small saucepan over medium-high heat. Cook while stirring occasionally until melted. Allow the mixture to boil for about a minute, then take the pan off the heat.

Step 5: To the frosting, stir in the chocolate chips until smooth.

Step 6: While the cake is still warm, pour the frosting over and spread it using a spatula. Allow the cake and frosting to cool.

Step 7: Slice the cake and top each serving with whipped cream and a spoonful of cherry pie filling. On top, shave the chocolate bar. Enjoy!

Black Forest Texas Sheet Cake – This Delicious Dessert Is Perfect For Any Occasion

Rebecca Prep time: 15 mins | Cook time: 25 mins | Serves: 12 This Black Forest, Texas Sheet Cake is a decadent, very pleasing cake. This has a classic black forest… General Recipes Black Forest Texas Sheet Cake – This Delicious Dessert Is Perfect For Any Occasion European Print This
Serves: 12 Prep Time: 15 mins Cooking Time: 25 mins 25 mins
Nutrition facts: 200 calories 20 grams fat
Rating: 5.0/5
( 1 voted )

Ingredients

  • CAKE:
  • 2 eggs
  • 1 tsp vanilla extract
  • 2 (21 ounces) cans of cherry pie filling
  • 1 box Devil’s Food cake mix
  • FROSTING:
  • 5 tbsp butter
  • 1/4 c. milk
  • 1 c. semi-sweet chocolate chips
  • 1 c. granulated sugar
  • TOPPING:
  • Chocolate bar
  • Whipped cream, as needed

Instructions

Step 1: Prepare the oven. Preheat it to 350 degrees F. Using a nonstick spray, grease a 10 x 15-inch baking sheet, and set aside.

Step 2: Place the eggs and vanilla extract in a large bowl. Beat well until combined. Then, add the cake mix, along with one can of the cherry pie filling. Mix again until blended. Then, evenly spread this into the prepared baking sheet.

Step 3: Place in the preheated oven and bake for about 25 minutes or until a toothpick inserted in the middle of the cake comes out clean.

Step 4: In the meantime, make the frosting. Place the milk, sugar, and butter in a small saucepan over medium-high heat. Cook while stirring occasionally until melted. Allow the mixture to boil for about a minute, then take the pan off the heat.

Step 5: To the frosting, stir in the chocolate chips until smooth.

Step 6: While the cake is still warm, pour the frosting over and spread it using a spatula. Allow the cake and frosting to cool.

Step 7: Slice the cake and top each serving with whipped cream and a spoonful of cherry pie filling. On top, shave the chocolate bar. Enjoy!

July 28, 2022 0 comment
0 FacebookTwitterPinterestEmail
General Recipes

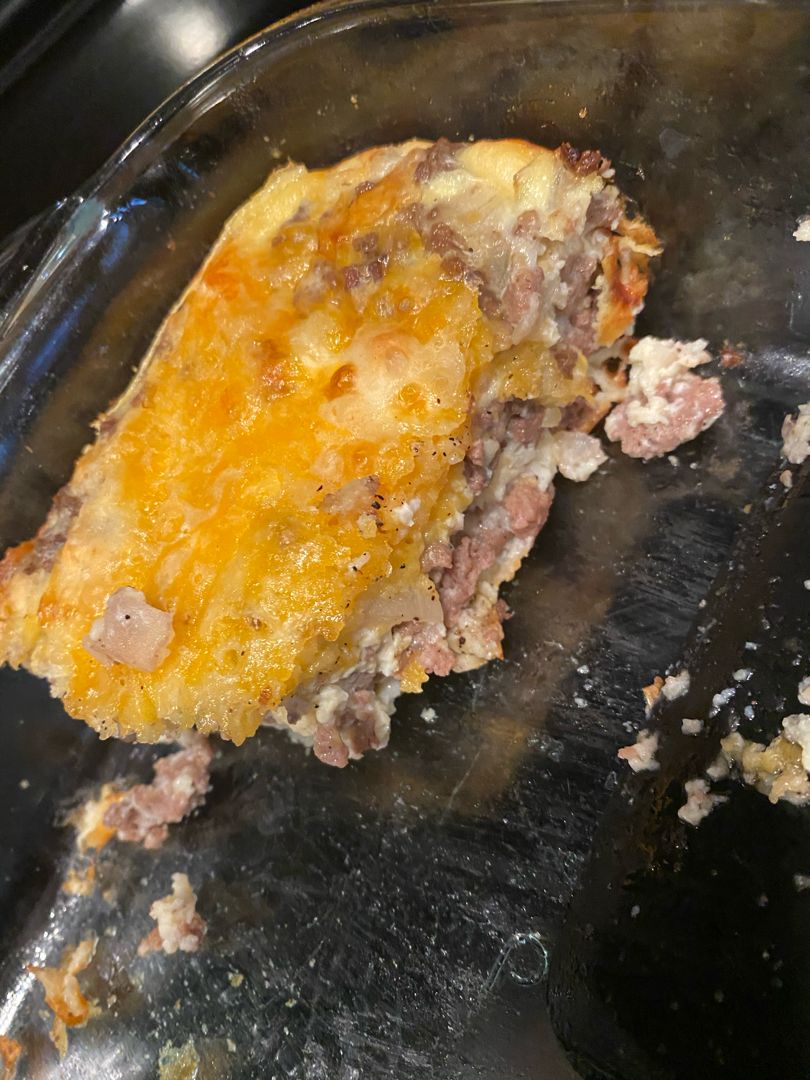
LOW CARB PHILLY CHEESE STEAK CASSEROLE

by Rebecca July 28, 2022
written by Rebecca

Prep Time: 15 mins | Cook Time: 33 mins | Total Time: 48 mins | Yield: 6 Servings

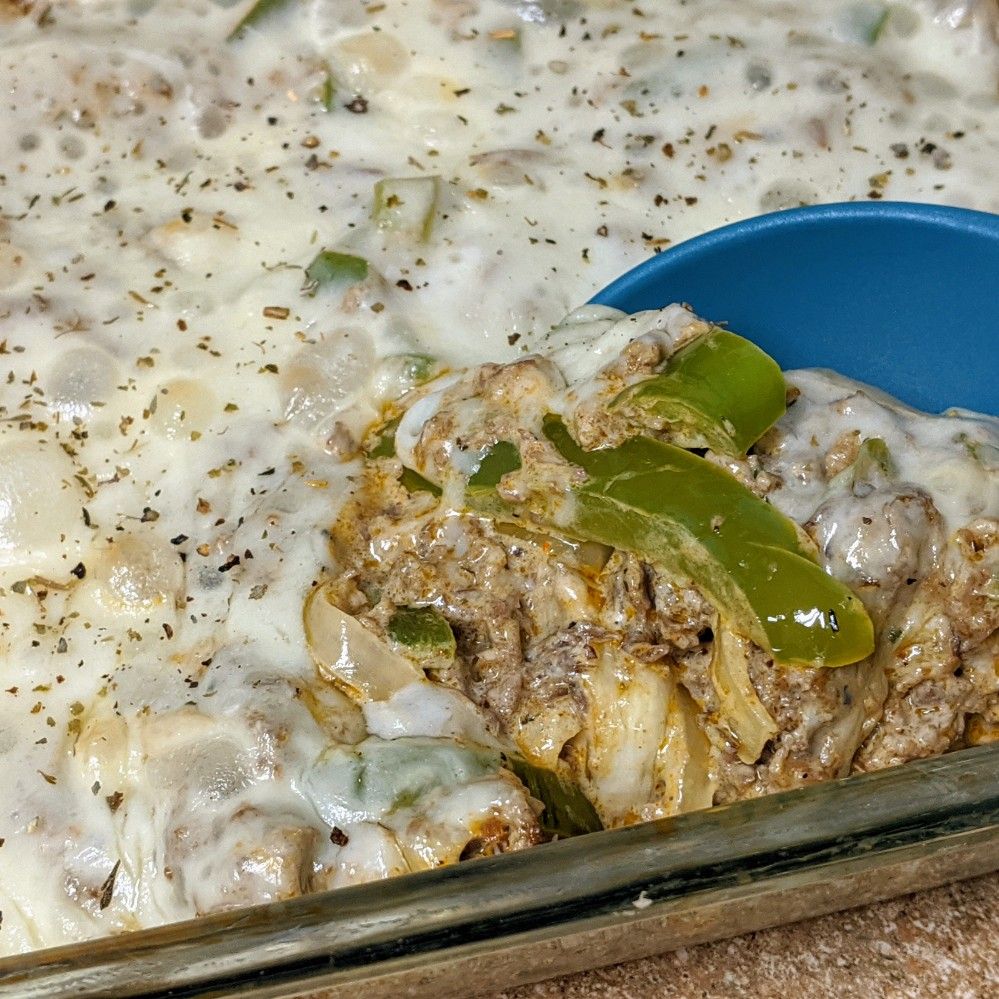
This Philly cheese steak casserole is a great meal option perfect for everyone! A low-carb dish that you can easily make in under an hour. One bite, and it was like love at first bite!

Ingredients

1 1/2 pounds lean ground beef

1 1/2 teaspoons garlic powder

1 medium sweet or yellow onion, chopped

1 (8 ounces) package of mushrooms, sliced

5 large eggs

1/3 cup heavy cream

2 bell peppers, seeded and chopped

1 1/2 teaspoons Worcestershire sauce

6 slices of Provolone cheese were torn into pieces

1 1/4 teaspoons seasoned salt

1/4 to 1/2 teaspoon crushed red pepper flakes

HOW TO MAKE LOW-CARB PHILLY CHEESE STEAK CASSEROLE

Step 1: Ready the oven. Preheat it to 350 degrees F or 175 degrees C. Grease a 9 x 9-inch baking dish using cooking spray.

Step 2: Heat a large nonstick skillet on medium-high. Then, add the ground beef and cook until brown, breaking the meat apart into pieces as it cooks. Next, add the peppers and onions. Continue to cook until tender. Add the garlic powder and seasoned salt. Stir well.

Step 3: Into the prepared baking dish, transfer the mixture, evenly spreading it.

Step 4: Melt the butter in the now-empty skillet. Once the butter has melted, add the mushrooms to the skillet and saute for a couple of minutes until tender. When done, transfer the sauteed mushrooms into the baking dish.

Step 5: On top of the mushrooms, lay the provolone cheese.

Step 6: In a large bowl, place the heavy cream, red pepper flakes, Worcestershire sauce, and eggs. Mix well until combined. Then, evenly pour this over the cheese.

Step 7: Bake in the preheated oven for about 33 to 35 minutes. When done, take the casserole out of the oven and let it rest for a couple of minutes at room temperature.

Step 8: Serve the casserole warm. Enjoy!

Nutrition Facts:

Calories 390 | Calories from Fat 198 | Fat 22g34% | Saturated Fat 11g69% | Cholesterol 283mg94% | Sodium 894mg39% | Potassium 637mg18% | Carbohydrates 6g2% | Fiber 1g4% | Sugar 2g2% | Protein 38g76% | Vitamin A 1940IU39% | Vitamin C 52.2 mg63% | Calcium 264mg26% | Iron 4mg22%

LOW CARB PHILLY CHEESE STEAK CASSEROLE

Rebecca Prep Time: 15 mins | Cook Time: 33 mins | Total Time: 48 mins | Yield: 6 Servings This Philly cheese steak casserole is a great meal option perfect for… General Recipes LOW CARB PHILLY CHEESE STEAK CASSEROLE European Print This
Serves: 6 Prep Time: 15 mins Cooking Time: 33 mins 33 mins
Nutrition facts: 390 calories 22 fat
Rating: 5.0/5
( 1 voted )

Ingredients

  • 1 1/2 pounds lean ground beef
  • 1 1/2 teaspoons garlic powder
  • 1 medium sweet or yellow onion, chopped
  • 1 (8 ounces) package of mushrooms, sliced
  • 5 large eggs
  • 1/3 cup heavy cream
  • 2 bell peppers, seeded and chopped
  • 1 1/2 teaspoons Worcestershire sauce
  • 6 slices of Provolone cheese were torn into pieces
  • 1 1/4 teaspoons seasoned salt
  • 1/4 to 1/2 teaspoon crushed red pepper flakes

Instructions

Step 1: Ready the oven. Preheat it to 350 degrees F or 175 degrees C. Grease a 9 x 9-inch baking dish using cooking spray.

Step 2: Heat a large nonstick skillet on medium-high. Then, add the ground beef and cook until brown, breaking the meat apart into pieces as it cooks. Next, add the peppers and onions. Continue to cook until tender. Add the garlic powder and seasoned salt. Stir well.

Step 3: Into the prepared baking dish, transfer the mixture, evenly spreading it.

Step 4: Melt the butter in the now-empty skillet. Once the butter has melted, add the mushrooms to the skillet and saute for a couple of minutes until tender. When done, transfer the sauteed mushrooms into the baking dish.

Step 5: On top of the mushrooms, lay the provolone cheese.

Step 6: In a large bowl, place the heavy cream, red pepper flakes, Worcestershire sauce, and eggs. Mix well until combined. Then, evenly pour this over the cheese.

Step 7: Bake in the preheated oven for about 33 to 35 minutes. When done, take the casserole out of the oven and let it rest for a couple of minutes at room temperature.

Step 8: Serve the casserole warm. Enjoy!

July 28, 2022 0 comment
0 FacebookTwitterPinterestEmail
General Recipes

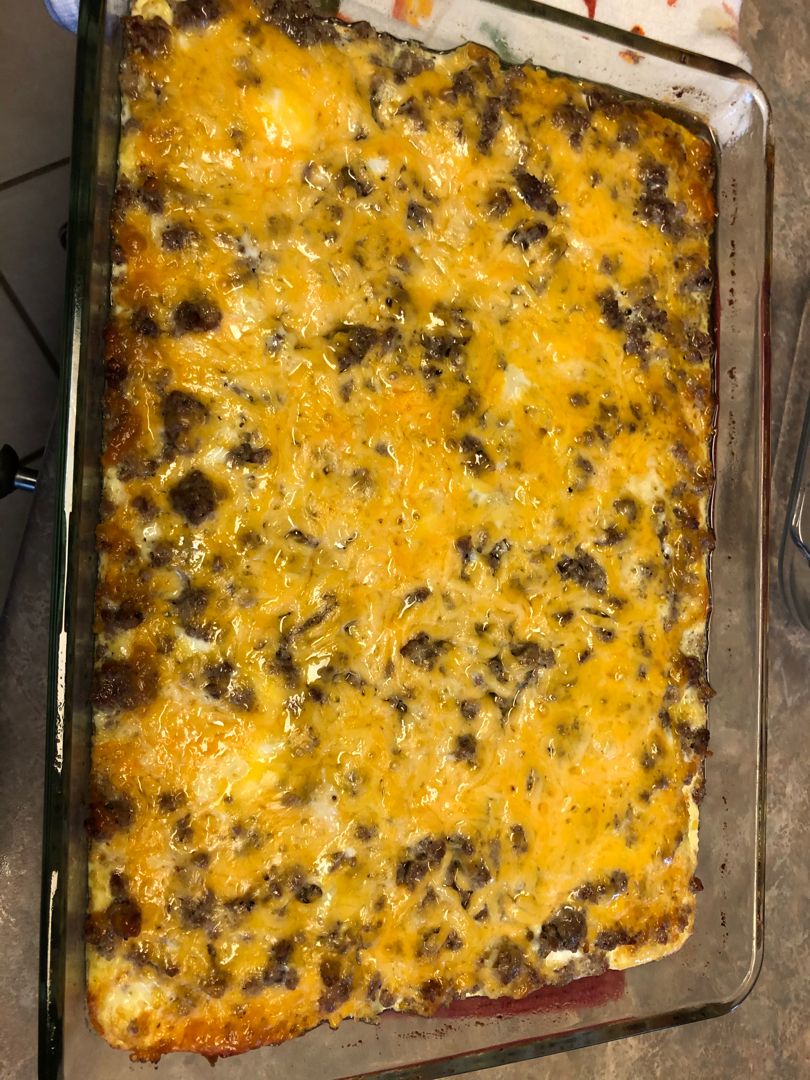
Make Ahead Sausage Breakfast Bake

by Rebecca July 28, 2022
written by Rebecca

Prep time: 15 mins | Cook time: 35 mins | Serves: 8

If you are looking for a big and heavy breakfast to serve to your family, then this sausage breakfast bake is a must! It’s super easy to throw together using pantry staple, and you can even prep this a day ahead. And simply pop this in the oven the next day for an easy and quick hearty breakfast.

INGREDIENTS

2 pounds of crumbled breakfast sausage of your choice

8 eggs

1 small white or yellow onion

1/4 teaspoon onion powder

1 tablespoon butter

1 30-ounces bag of frozen shredded hash browns

1/4 teaspoon garlic powder

2 c. shredded cheddar cheese

2 c. milk

salt and pepper to taste

How to make Make Ahead Sausage Breakfast Bake

Step 1: In a large skillet, melt the butter. Once the butter has melted, add the onions to the skillet and cook for about 3 to 5 minutes over medium heat. To taste, season with salt and pepper. Set the onions aside when done and wipe clean the skillet.

Step 2: To the now-empty skillet, add the sausage and cook for about 8 minutes over medium-high heat until no longer pink. Remove the sausage from the skillet.

Step 3: In the same skillet, add the potatoes. Adjust the heat to medium and cook the potatoes for about 5 minutes or so, flipping them halfway. To taste, season with salt and pepper.

Step 4: Place the eggs and milk in a large bowl. Beat well and season with salt, pepper, garlic powder, and onion powder. Mix again.

Step 5: On the bottom of a greased 9 x 13-inch pan, place the hash browns, then the onions, eggs, and sausage. Sprinkle the cheese on top. At this point, you can place the pan in the fridge or bake it right away. If baking right away, place the pan in the oven and bake for about 30 to 35 minutes at 350 degrees F or until the cheese has melted.

Make Ahead Sausage Breakfast Bake

Rebecca Prep time: 15 mins | Cook time: 35 mins | Serves: 8 If you are looking for a big and heavy breakfast to serve to your family, then this sausage… General Recipes Make Ahead Sausage Breakfast Bake European Print This
Serves: 8 Prep Time: 15 mins Cooking Time: 35 mins 35 mins
Nutrition facts: 200 calories 20 grams fat
Rating: 5.0/5
( 1 voted )

Ingredients

  • 2 pounds of crumbled breakfast sausage of your choice
  • 8 eggs
  • 1 small white or yellow onion
  • 1/4 teaspoon onion powder
  • 1 tablespoon butter
  • 1 30-ounces bag of frozen shredded hash browns
  • 1/4 teaspoon garlic powder
  • 2 c. shredded cheddar cheese
  • 2 c. milk
  • salt and pepper to taste

Instructions

Step 1: In a large skillet, melt the butter. Once the butter has melted, add the onions to the skillet and cook for about 3 to 5 minutes over medium heat. To taste, season with salt and pepper. Set the onions aside when done and wipe clean the skillet.

Step 2: To the now-empty skillet, add the sausage and cook for about 8 minutes over medium-high heat until no longer pink. Remove the sausage from the skillet.

Step 3: In the same skillet, add the potatoes. Adjust the heat to medium and cook the potatoes for about 5 minutes or so, flipping them halfway. To taste, season with salt and pepper.

Step 4: Place the eggs and milk in a large bowl. Beat well and season with salt, pepper, garlic powder, and onion powder. Mix again.

Step 5: On the bottom of a greased 9 x 13-inch pan, place the hash browns, then the onions, eggs, and sausage. Sprinkle the cheese on top. At this point, you can place the pan in the fridge or bake it right away. If baking right away, place the pan in the oven and bake for about 30 to 35 minutes at 350 degrees F or until the cheese has melted.

July 28, 2022 0 comment
0 FacebookTwitterPinterestEmail
General Recipes

Honey Butter Skillet Corn

by Rebecca July 28, 2022
written by Rebecca

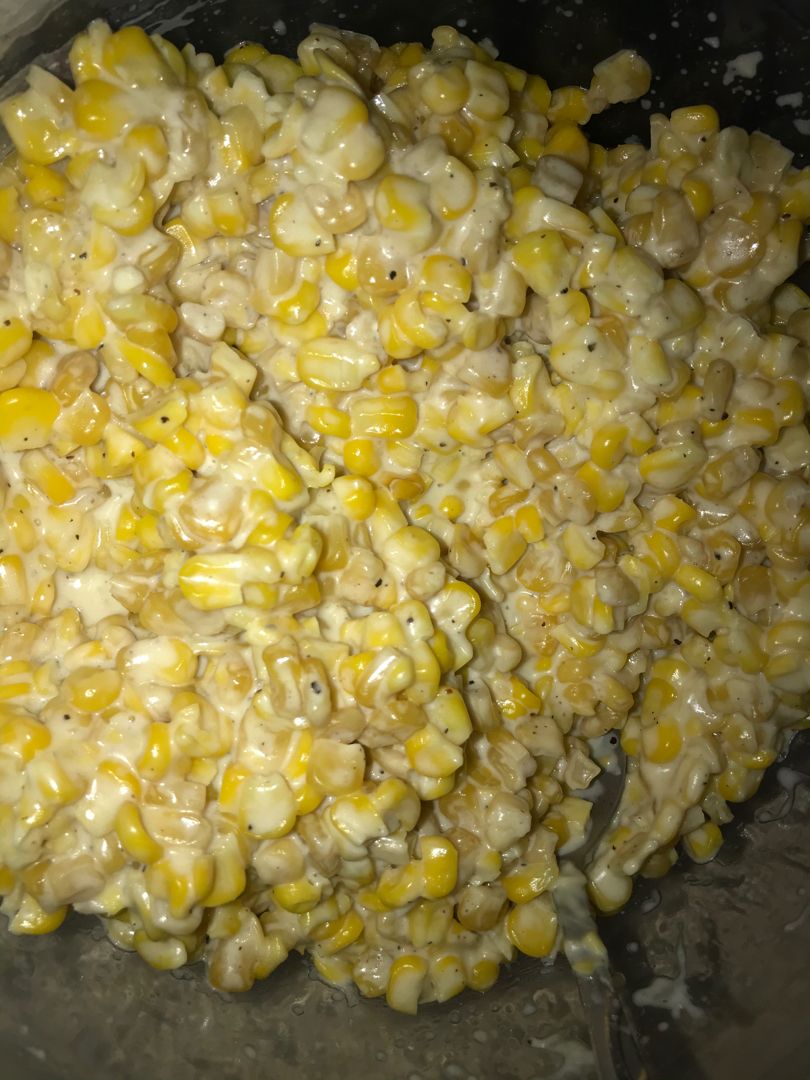
I love corn, and this honey butter skillet corn is my favorite corn side dish. It’s super easy to make, and everyone just cannot get enough of this. To make life easier, you can also make this in your trusty slow cooker.

Ingredients

1 tablespoon onion – finely minced

2 tablespoons salted butter

2 tablespoons honey

2 oz. regular cream cheese (not low or fat-free) – cut into small chunks

16 oz. frozen sweet corn

½ c. fresh shaved Parmesan cheese (optional, but delicious!)

¼ teaspoon salt

¼ teaspoon pepper

How to make Honey Butter Skillet Corn

Step 1: Melt the butter and honey in a large skillet over medium-high heat. Add the onion once the butter and honey have melted and cook for about 3 minutes. Next, add the frozen corn and continue to cook for an additional 5 to 8 minutes, stirring often until completely cooked.

Step 2: To the skillet, add the cream cheese and season with salt & pepper. Stir well and cook for an additional 3 to 5 minutes, stirring often.

Step 3: Remove from the heat when done and serve the honey butter skillet corn with a bit of fresh shaved Parmesan cheese and fresh ground pepper. Serve right away. Enjoy!

To make in a Slow Cooker:

Put all the ingredients in your slow cooker. Set to cook for 1 to 2 hours on low. Serve right away or set the slow cooker on warm until ready to serve. Enjoy!

Notes:

For this recipe, use only regular cream cheese as low or fat-free cream cheese does not melt properly.

Keep any leftovers in an airtight container and store them in the fridge.

I do not suggest freezing this honey butter skillet corn as dairy does not freeze well.

For a bit of kick, chop up a small jalapeno and cook it with the onion.

For this recipe, you need around 8 large ears of corn if using fresh corn on the cob. Before starting the recipe, cut the kernels off the cob.

For canned corn, drain it well and rinse with cold water. Allow the water to drain well.

Honey Butter Skillet Corn

Rebecca I love corn, and this honey butter skillet corn is my favorite corn side dish. It’s super easy to make, and everyone just cannot get enough of this. To make… General Recipes Honey Butter Skillet Corn European Print This
Nutrition facts: 200 calories 20 grams fat
Rating: 5.0/5
( 1 voted )

Ingredients

  • 1 tablespoon onion – finely minced
  • 2 tablespoons salted butter
  • 2 tablespoons honey
  • 2 oz. regular cream cheese (not low or fat-free) – cut into small chunks
  • 16 oz. frozen sweet corn
  • ½ c. fresh shaved Parmesan cheese (optional, but delicious!)
  • ¼ teaspoon salt
  • ¼ teaspoon pepper

Instructions

Step 1: Melt the butter and honey in a large skillet over medium-high heat. Add the onion once the butter and honey have melted and cook for about 3 minutes. Next, add the frozen corn and continue to cook for an additional 5 to 8 minutes, stirring often until completely cooked.

Step 2: To the skillet, add the cream cheese and season with salt & pepper. Stir well and cook for an additional 3 to 5 minutes, stirring often.

Step 3: Remove from the heat when done and serve the honey butter skillet corn with a bit of fresh shaved Parmesan cheese and fresh ground pepper. Serve right away. Enjoy!

To make in a Slow Cooker:

Put all the ingredients in your slow cooker. Set to cook for 1 to 2 hours on low. Serve right away or set the slow cooker on warm until ready to serve. Enjoy!

Notes

For this recipe, use only regular cream cheese as low or fat-free cream cheese does not melt properly. Keep any leftovers in an airtight container and store them in the fridge. I do not suggest freezing this honey butter skillet corn as dairy does not freeze well. For a bit of kick, chop up a small jalapeno and cook it with the onion. For this recipe, you need around 8 large ears of corn if using fresh corn on the cob. Before starting the recipe, cut the kernels off the cob. For canned corn, drain it well and rinse with cold water. Allow the water to drain well.

July 28, 2022 0 comment
0 FacebookTwitterPinterestEmail
General Recipes

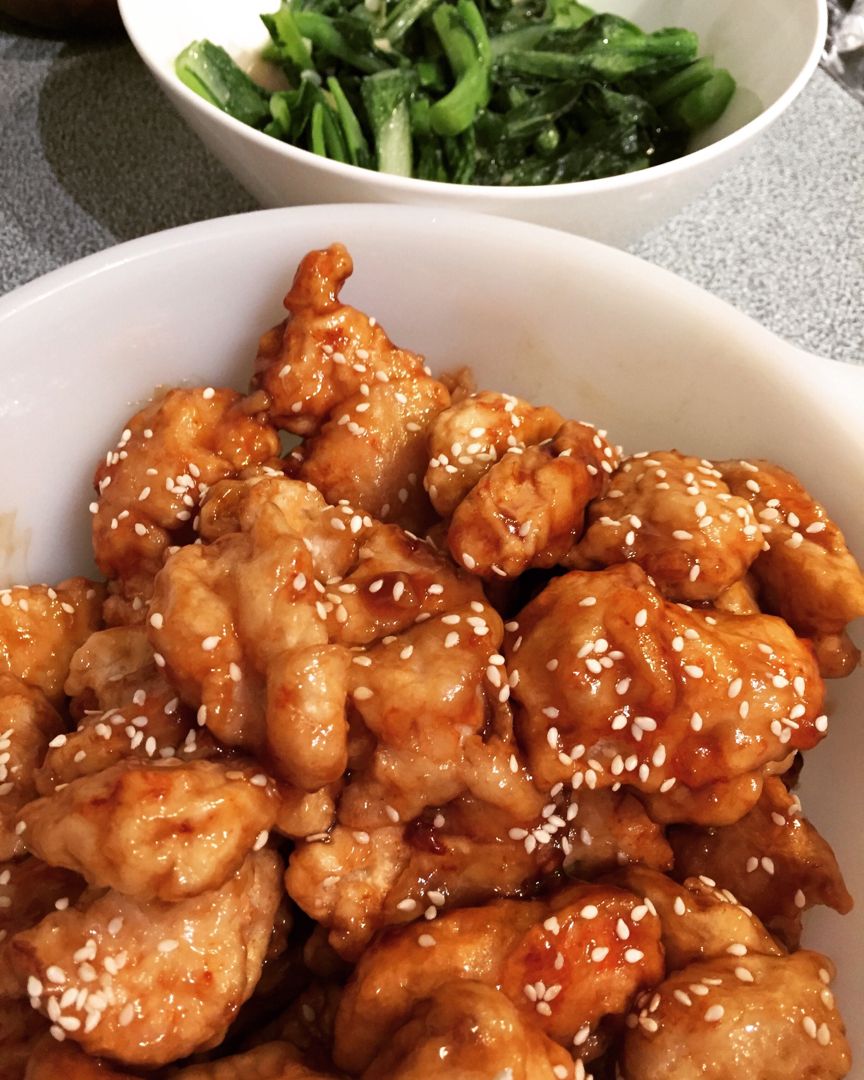
The Perfect Sesame Chicken Recipe

by Rebecca July 28, 2022
written by Rebecca

Prep Time: 15 mins | Cook Time: 25 mins | Total Time: 40 mins | Yield: 4

This Sesame chicken is another one of my favorite chicken dishes. Very flavorful with a slight hint of spice. For a filling meal, serve this sesame chicken over rice or Chinese noodles. If you have any leftovers, simply keep them in an airtight container and store them in the fridge for up to 3 days.

INGREDIENTS

CHICKEN:

2 eggs

1 1/2 pounds boneless, skinless chicken breasts or thighs, cut into bite-size pieces

1/2 c. cornstarch

vegetable oil for frying

1/4 tsp salt

1/2 tsp fresh ground black pepper

SAUCE:

1/2 tbsp olive oil

2 tbsp sesame seeds

2 cloves garlic, finely minced

1 tbsp rice vinegar

1/4 c. honey

1 tbsp chili sauce (sambal oelek)

2 tbsp brown sugar

1/4 c. ketchup

2 tsp sesame oil

2 tbsp cornstarch

1/3 c. low sodium soy sauce

2 green onions, sliced thin

1/4 c. cold water

How to make The Perfect Sesame Chicken

Step 1: Whisk the eggs, cornstarch, salt, and pepper. Then, add the chicken and mix well.

Step 2: In a heavy pot or Dutch oven, heat 2 inches of vegetable oil over medium-high heat. Add the chicken pieces to the pot once the oil reaches 350 degrees. Fry the pieces of chicken until crispy and golden brown. Transfer the fried chicken to paper towels to drain.

Step 3: Add the sesame seeds to a large dry skillet over medium-high heat and cook until lightly toasted while shaking the pan a few times. To a small bowl, transfer the sesame seeds.

Step 4: Heat a little olive oil in the same skillet over low heat. Then, add the garlic and cook for about a minute, stirring continuously. Next, add the soy sauce, along with the rice vinegar, sesame oil, honey, brown sugar, ketchup, and chili sauce. Whisk the cornstarch with water until well blended, then stir this into the sauce. Continue to cook until thickened.

Step 5: To the skillet with the sauce, add the chicken, and toss well. Serve over rice or Chinese noodles garnished with scallions and toasted sesame seeds. Enjoy!

The Perfect Sesame Chicken Recipe

Rebecca Prep Time: 15 mins | Cook Time: 25 mins | Total Time: 40 mins | Yield: 4 This Sesame chicken is another one of my favorite chicken dishes. Very flavorful… General Recipes The Perfect Sesame Chicken Recipe European Print This
Serves: 4 Prep Time: 15 mins Cooking Time: 25 mins 25 mins
Nutrition facts: 200 calories 20 grams fat
Rating: 5.0/5
( 1 voted )

Ingredients

  • CHICKEN:
  • 2 eggs
  • 1 1/2 pounds boneless, skinless chicken breasts or thighs, cut into bite-size pieces
  • 1/2 c. cornstarch
  • vegetable oil for frying
  • 1/4 tsp salt
  • 1/2 tsp fresh ground black pepper
  • SAUCE:
  • 1/2 tbsp olive oil
  • 2 tbsp sesame seeds
  • 2 cloves garlic, finely minced
  • 1 tbsp rice vinegar
  • 1/4 c. honey
  • 1 tbsp chili sauce (sambal oelek)
  • 2 tbsp brown sugar
  • 1/4 c. ketchup
  • 2 tsp sesame oil
  • 2 tbsp cornstarch
  • 1/3 c. low sodium soy sauce
  • 2 green onions, sliced thin
  • 1/4 c. cold water

Instructions

Step 1: Whisk the eggs, cornstarch, salt, and pepper. Then, add the chicken and mix well.

Step 2: In a heavy pot or Dutch oven, heat 2 inches of vegetable oil over medium-high heat. Add the chicken pieces to the pot once the oil reaches 350 degrees. Fry the pieces of chicken until crispy and golden brown. Transfer the fried chicken to paper towels to drain.

Step 3: Add the sesame seeds to a large dry skillet over medium-high heat and cook until lightly toasted while shaking the pan a few times. To a small bowl, transfer the sesame seeds.

Step 4: Heat a little olive oil in the same skillet over low heat. Then, add the garlic and cook for about a minute, stirring continuously. Next, add the soy sauce, along with the rice vinegar, sesame oil, honey, brown sugar, ketchup, and chili sauce. Whisk the cornstarch with water until well blended, then stir this into the sauce. Continue to cook until thickened.

Step 5: To the skillet with the sauce, add the chicken, and toss well. Serve over rice or Chinese noodles garnished with scallions and toasted sesame seeds. Enjoy!

July 28, 2022 0 comment
0 FacebookTwitterPinterestEmail
General Recipes

Glazed Cream Cheese Orange Loaf

by Rebecca July 28, 2022
written by Rebecca

Total time: 1 hr 30 mins | Serves: 8

I love a little sweet treat to jump-start my day. That is why I enjoy this glazed cream cheese, orange loaf so much! It is a very moist bread with the perfect glaze. Incredibly simple to whip up and easy to customize.

INGREDIENTS

1 c (2 sticks) unsalted butter, room temperature

2 c. all-purpose flour

1 c. sugar

1/4 c. orange juice

3 large eggs

1 1/2 tsp vanilla extract

1 tbsp orange zest

1 1/2 tsp baking soda

1 (8 ounces) package of cream cheese, room temperature

1/2 tsp salt

1 tsp orange extract, optional

Glaze:

3-5 tbsp orange juice

1 tsp orange zest

1 1/2 c. powdered sugar

How to make Glazed Cream Cheese Orange Loaf

Step 1: Prepare the oven. Preheat it to 350 degrees F. Using butter or non-stick spray, generously grease a 9 x 5-inch baking dish. If desired, you can also use two loaf dishes.

Step 2: Place the flour, orange zest, baking soda, and salt in a medium bowl. Mix well and set aside.

Step 3: Cream the butter, cream cheese, and sugar in a large bowl or mixer for about 3 to 4 minutes until smooth. Add the eggs along with the orange juice, vanilla, and orange extract.

Step 4: To the wet ingredients, slowly stir in the dry ingredients, beating until just combined. Pour the batter into the prepared baking dish.

Step 5: Bake in the preheated oven for about 45 to 50 minutes or until a toothpick inserted in the middle of the bread comes out clean.

Step 6: In the meantime, make the glaze. Mix the powdered sugar, orange juice, and orange zest until well blended. For a thinner glaze, add more orange juice. Or add less if you prefer a thicker glaze.

Step 7: Take the loaf out of the oven when done and allow it to cool for about 15 minutes. To loosen the loaf, run a knife around the edge of the pan. Onto a serving plate, invert the loaf, and pour the glaze over. Allow the glaze to set.

Step 8: Slice and serve the glazed cream cheese, orange loaf at room temperature. Enjoy!

Rebecca Total time: 1 hr 30 mins | Serves: 8 I love a little sweet treat to jump-start my day. That is why I enjoy this glazed cream cheese, orange loaf… General Recipes Glazed Cream Cheese Orange Loaf European Print This
Nutrition facts: 200 calories 20 grams fat
Rating: 5.0/5
( 1 voted )

Ingredients

  • 1 c (2 sticks) unsalted butter, room temperature
  • 2 c. all-purpose flour
  • 1 c. sugar
  • 1/4 c. orange juice
  • 3 large eggs
  • 1 1/2 tsp vanilla extract
  • 1 tbsp orange zest
  • 1 1/2 tsp baking soda
  • 1 (8 ounces) package of cream cheese, room temperature
  • 1/2 tsp salt
  • 1 tsp orange extract, optional
  • Glaze:
  • 3-5 tbsp orange juice
  • 1 tsp orange zest
  • 1 1/2 c. powdered sugar

Instructions

Step 1: Prepare the oven. Preheat it to 350 degrees F. Using butter or non-stick spray, generously grease a 9 x 5-inch baking dish. If desired, you can also use two loaf dishes.

Step 2: Place the flour, orange zest, baking soda, and salt in a medium bowl. Mix well and set aside.

Step 3: Cream the butter, cream cheese, and sugar in a large bowl or mixer for about 3 to 4 minutes until smooth. Add the eggs along with the orange juice, vanilla, and orange extract.

Step 4: To the wet ingredients, slowly stir in the dry ingredients, beating until just combined. Pour the batter into the prepared baking dish.

Step 5: Bake in the preheated oven for about 45 to 50 minutes or until a toothpick inserted in the middle of the bread comes out clean.

Step 6: In the meantime, make the glaze. Mix the powdered sugar, orange juice, and orange zest until well blended. For a thinner glaze, add more orange juice. Or add less if you prefer a thicker glaze.

Step 7: Take the loaf out of the oven when done and allow it to cool for about 15 minutes. To loosen the loaf, run a knife around the edge of the pan. Onto a serving plate, invert the loaf, and pour the glaze over. Allow the glaze to set.

Step 8: Slice and serve the glazed cream cheese, orange loaf at room temperature. Enjoy!

July 28, 2022 0 comment
0 FacebookTwitterPinterestEmail
General Recipes

IMPOSSIBLE CHEESEBURGER PIE RECIPE

by Rebecca July 28, 2022
written by Rebecca

This is a wonderful cheeseburger pie recipe perfect for all cheeseburger lovers out there! A must-try and surely for keeps!

Ingredients

3 large eggs

2 pounds of ground beef

1 c. finely chopped onion

3/4 c. water

3/4 c. baking mix (Bisquick or similar baking mix)

1 1/2 c. finely shredded cheese of your choice

1 1/2 c. milk

1 package dry onion soup mix

Sliced American Cheese – optional

1/2 teaspoon salt

1/4 teaspoon pepper

HOW TO MAKE IMPOSSIBLE CHEESEBURGER PIE

Step 1: Ready two pie plates. Lightly grease and set aside. Prepare the oven. Preheat it to degrees F.

Step 2: Cook the ground beef and onions in a skillet until the meat is browned. Drain the grease from the pan if needed.

Step 3: To the skillet, add the onion soup and 3/4 c. water. Allow everything to simmer until the liquid is gone.

Step 4: Place the eggs in a mixing bowl. Gently whisk, then add the salt, pepper, milk, and Bisquick mix. Mix well until well combined.

Step 5: At the bottom of each pie plate, layer 1/4 of the meat mixture. Top with 1/4 shredded cheese. Repeat with another layer of the meat mixture and shredded cheese.

Step 6: On top, evenly pour half of the Bisquick mixture and lay a few slices of American cheese.

Step 7: Place in the preheated oven and bake for about 25 to 30 minutes or until the top is golden.

Notes:

Instead of a pie pan, you can also use a 9 x 9-inch baking pan for thicker pieces. For thinner pieces, you can use a 9 x 13-inch baking pan.

This is a gluten-free version, thanks to Bisquick. You can also check out other gluten-free baking mixes.

You can use ground turkey or ground chicken instead of ground beef.

There are a couple of add-ins that work perfectly for this recipe, such as (or Mexican corn), diced mixed vegetables, green peppers, garlic, ¼ c. ketchup (and 2 tablespoons yellow mustard if desired). Add this after browning the meat and mushrooms.

For a dash of cheeseburger taste, add slices of American cheese on top.

Amazing garnishes are sliced dill pickles, sliced tomato, chopped lettuce, and sauteed mushrooms.

IMPOSSIBLE CHEESEBURGER PIE RECIPE

Rebecca This is a wonderful cheeseburger pie recipe perfect for all cheeseburger lovers out there! A must-try and surely for keeps! Ingredients 3 large eggs 2 pounds of ground beef 1… General Recipes IMPOSSIBLE CHEESEBURGER PIE RECIPE European Print This
Nutrition facts: 200 calories 20 grams fat
Rating: 5.0/5
( 1 voted )

Ingredients

  • 3 large eggs
  • 2 pounds of ground beef
  • 1 c. finely chopped onion
  • 3/4 c. water
  • 3/4 c. baking mix (Bisquick or similar baking mix)
  • 1 1/2 c. finely shredded cheese of your choice
  • 1 1/2 c. milk
  • 1 package dry onion soup mix
  • Sliced American Cheese – optional
  • 1/2 teaspoon salt
  • 1/4 teaspoon pepper

Instructions

Step 1: Ready two pie plates. Lightly grease and set aside. Prepare the oven. Preheat it to degrees F.

Step 2: Cook the ground beef and onions in a skillet until the meat is browned. Drain the grease from the pan if needed.

Step 3: To the skillet, add the onion soup and 3/4 c. water. Allow everything to simmer until the liquid is gone.

Step 4: Place the eggs in a mixing bowl. Gently whisk, then add the salt, pepper, milk, and Bisquick mix. Mix well until well combined.

Step 5: At the bottom of each pie plate, layer 1/4 of the meat mixture. Top with 1/4 shredded cheese. Repeat with another layer of the meat mixture and shredded cheese.

Step 6: On top, evenly pour half of the Bisquick mixture and lay a few slices of American cheese.

Step 7: Place in the preheated oven and bake for about 25 to 30 minutes or until the top is golden.

Notes

Instead of a pie pan, you can also use a 9 x 9-inch baking pan for thicker pieces. For thinner pieces, you can use a 9 x 13-inch baking pan. This is a gluten-free version, thanks to Bisquick. You can also check out other gluten-free baking mixes. You can use ground turkey or ground chicken instead of ground beef. There are a couple of add-ins that work perfectly for this recipe, such as (or Mexican corn), diced mixed vegetables, green peppers, garlic, ¼ c. ketchup (and 2 tablespoons yellow mustard if desired). Add this after browning the meat and mushrooms. For a dash of cheeseburger taste, add slices of American cheese on top. Amazing garnishes are sliced dill pickles, sliced tomato, chopped lettuce, and sauteed mushrooms.

July 28, 2022 0 comment
0 FacebookTwitterPinterestEmail
General Recipes

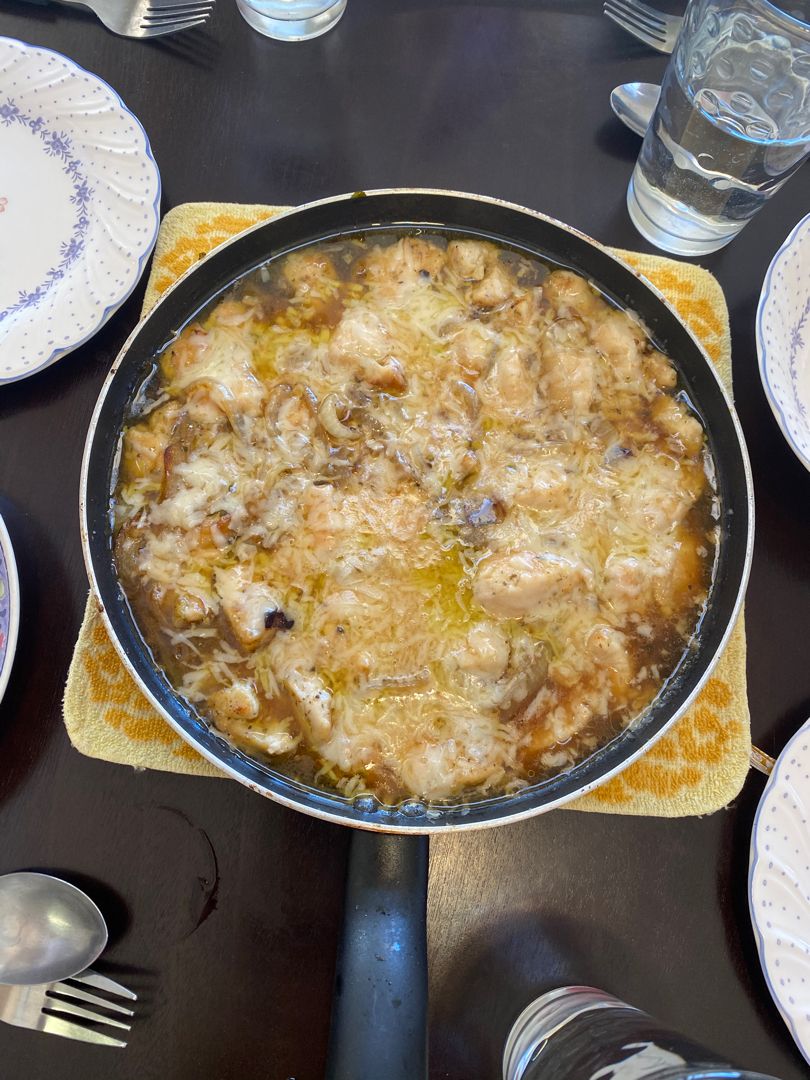
French Onion Chicken Skillet

by Rebecca July 28, 2022
written by Rebecca

Total time: 1 hr | Serves: 4-6

This French Onion Chicken Skillet is an amazing one-skillet meal. It is one of the best dinners I’ve made for your family. Insanely flavorful, so easy to make, and will surely blow everyone away!

INGREDIENTS

1/3 c. extra-virgin olive oil, divided

2 lbs boneless, skinless chicken breasts or thighs

2 lbs Vidalia onions, sliced

1 c. Swiss cheese, grated

2 tbsp all-purpose flour

2 tsp balsamic vinegar

1/2 tsp dried sage

1/2 tsp dried thyme

kosher salt and freshly ground pepper, to taste

2 c. beef broth

How to make French Onion Chicken Skillet

Step 1: Prepare the oven. Preheat it to 350 degrees F.

Step 2: In a large, oven-proof pan or skillet, heat 2 tbsp olive oil over medium heat. To the hot oil, add the onions and season with salt. Cook the onions for about 15 to 20 minutes, stirring often, until softened and caramelized. Next, add the balsamic vinegar and continue to cook for an additional 3 to 5 minutes or until darkened.

Step 3: To a medium bowl, transfer the onions.

Step 4: In the same skillet, heat the rest of the olive oil to medium-high heat. In the meantime, season the chicken breasts with salt, pepper, thyme, and sage. Once the oil is hot, add the chicken to the skillet and sear on all sides until golden brown. Set the chicken aside when done.

Step 5: Into the skillet, pour in the beef broth. Bring to a boil, scraping the browned bits from the bottom of the pan. Adjust the heat to medium-low and stir in the flour until smooth. Continue to cook for 5 to 7 minutes more or until the mixture has thickened. Adjust the seasoning according to taste.

Step 6: Place the chicken and onions in the pan. Stir and top with the grated Swiss cheese.

Step 7: Place the skillet in the preheated oven and bake until the cheese has melted and bubbly, and the chicken is completely cooked.

Step 8: Serve the French Onion Chicken Skillet immediately. Enjoy!

French Onion Chicken Skillet

Rebecca Total time: 1 hr | Serves: 4-6 This French Onion Chicken Skillet is an amazing one-skillet meal. It is one of the best dinners I’ve made for your family. Insanely… General Recipes French Onion Chicken Skillet European Print This
Serves: 4-6
Nutrition facts: 200 calories 20 grams fat
Rating: 5.0/5
( 1 voted )

Ingredients

  • 1/3 c. extra-virgin olive oil, divided
  • 2 lbs boneless, skinless chicken breasts or thighs
  • 2 lbs Vidalia onions, sliced
  • 1 c. Swiss cheese, grated
  • 2 tbsp all-purpose flour
  • 2 tsp balsamic vinegar
  • 1/2 tsp dried sage
  • 1/2 tsp dried thyme
  • kosher salt and freshly ground pepper, to taste
  • 2 c. beef broth

Instructions

Step 1: Prepare the oven. Preheat it to 350 degrees F.

Step 2: In a large, oven-proof pan or skillet, heat 2 tbsp olive oil over medium heat. To the hot oil, add the onions and season with salt. Cook the onions for about 15 to 20 minutes, stirring often, until softened and caramelized. Next, add the balsamic vinegar and continue to cook for an additional 3 to 5 minutes or until darkened.

Step 3: To a medium bowl, transfer the onions.

Step 4: In the same skillet, heat the rest of the olive oil to medium-high heat. In the meantime, season the chicken breasts with salt, pepper, thyme, and sage. Once the oil is hot, add the chicken to the skillet and sear on all sides until golden brown. Set the chicken aside when done.

Step 5: Into the skillet, pour in the beef broth. Bring to a boil, scraping the browned bits from the bottom of the pan. Adjust the heat to medium-low and stir in the flour until smooth. Continue to cook for 5 to 7 minutes more or until the mixture has thickened. Adjust the seasoning according to taste.

Step 6: Place the chicken and onions in the pan. Stir and top with the grated Swiss cheese.

Step 7: Place the skillet in the preheated oven and bake until the cheese has melted and bubbly, and the chicken is completely cooked.

Step 8: Serve the French Onion Chicken Skillet immediately. Enjoy!

July 28, 2022 0 comment
0 FacebookTwitterPinterestEmail
Newer Posts
Older Posts

Popular Posts

  • 1

    Crispy Crunchy Parmesan Potatoes

    March 21, 2020
  • 2

    CROCK POT SMOTHERED PORK CHOPS

    March 21, 2020
  • Facebook
  • Twitter

@2019 - All Right Reserved.


Back To Top