Cook it once
  • Home
  • Privacy Policy
  • Recipes
    • KETO
    • LC
    • WW
  • Tips
  • Contact
Cook it once
  • Home
  • Privacy Policy
  • Recipes
    • KETO
    • LC
    • WW
  • Tips
  • Contact
Category:

General Recipes

General Recipes

Stick Of Butter Baked Rice: A New Twist On Baked Rice

by Rebecca August 3, 2022
written by Rebecca

Prep time: 5 mins | Cook time: 1 hr | Serves: 4-6

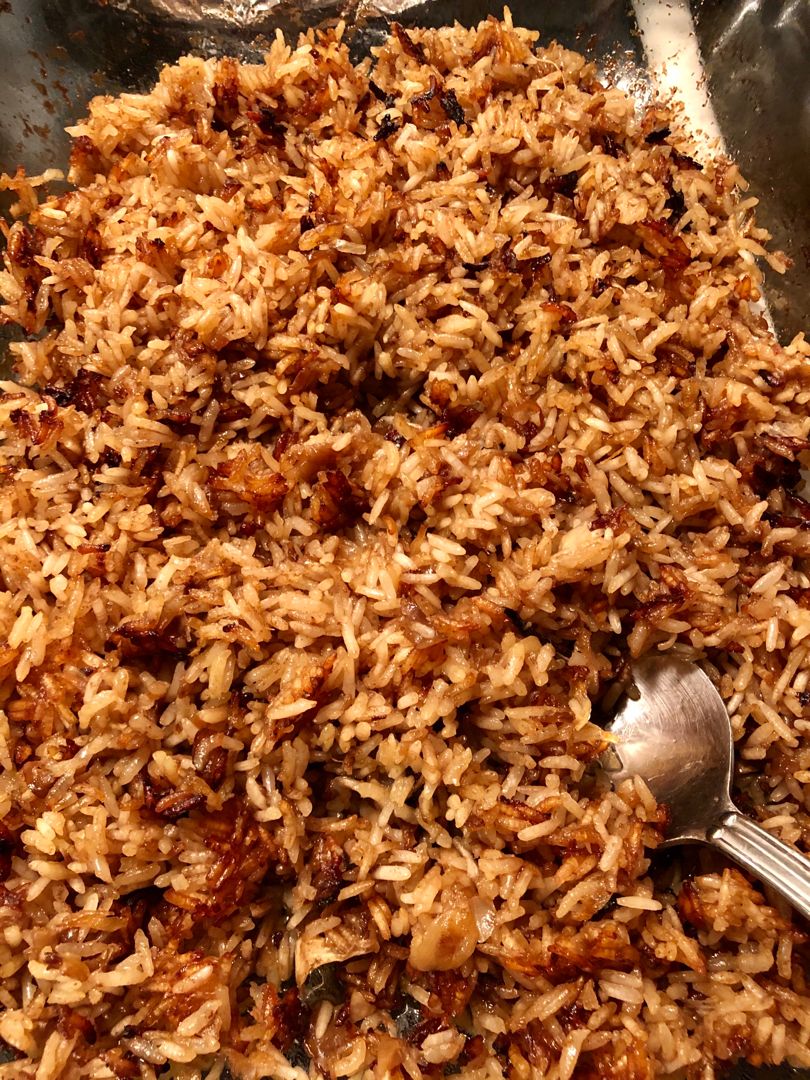
I will never be tired of baked rice. Rice is a staple at home. I love recipes with rice, and my forever obsession is this Stick of Butter Baked Rice. This put fun and delicious twist on baked rice. Rice is an amazing side to any meal. You can serve it plain, or you can easily fancy it up.

This simple recipe requires only three ingredients (long-grain white rice, cans of condensed beef broth & condensed French Onion soup, and a whole stick of butter). Combine the ingredients in a baking dish and top with butter slices. Bake this in the oven until done. In under an hour, you have the fluffiest and extremely delicious baked rice!

Enjoy soft and fluffy rice that is filled with sweet and rich flavors from the onion soup and butter. Not only that, this tastes super amazing, but this smells wonderful, too! And the French Onion Soup adds a sweet depth of flavor. This Stick of Butter Baked Rice is one of the most comforting dishes I’ve ever made, even my fussiest eaters love this!

For best results, use only long grain rice. Instant rice is not recommended. This recipe is also very versatile. You are welcome to keep it plain and simple or add some add-ins like sliced mushrooms, bacon crumbles or even diced onions. You can also top this baked rice with chicken tenders or pork chops. For a nutty flavor, you can sprinkle some Parmesan cheese on top. And to boost the flavor, you can add Worcestershire sauce, soy sauce, or beef consomme.

INGREDIENTS

1 (10 ounces) can of condensed beef broth

1 c. long-grain white rice, uncooked

1/2 c. (1 stick) unsalted butter, sliced

1 (10 ounces) can of condensed French Onion soup

How to make Stick Of Butter Baked Rice

Step 1: Prepare the oven. Preheat it to 425 degrees F.

Step 2: Place the rice, soup, and broth in a 9 x 9-inch baking dish. Mix well. On top, arrange the slices of butter. Using foil, tightly tent the dish.

Step 3: Place the dish in the preheated oven and bake for about 30 minutes. Uncover and continue to bake for additional 30 minutes.

Step 4: Serve and enjoy!

Stick Of Butter Baked Rice: A New Twist On Baked Rice

Rebecca Prep time: 5 mins | Cook time: 1 hr | Serves: 4-6 I will never be tired of baked rice. Rice is a staple at home. I love recipes with… General Recipes Stick Of Butter Baked Rice: A New Twist On Baked Rice European Print This
Serves: 4-6 Prep Time: 5 mins Cooking Time: 1 hr 1 hr
Nutrition facts: 200 calories 20 grams fat
Rating: 5.0/5
( 1 voted )

Ingredients

  • 1 (10 ounces) can of condensed beef broth
  • 1 c. long-grain white rice, uncooked
  • 1/2 c. (1 stick) unsalted butter, sliced
  • 1 (10 ounces) can of condensed French Onion soup

Instructions

Step 1: Prepare the oven. Preheat it to 425 degrees F.

Step 2: Place the rice, soup, and broth in a 9 x 9-inch baking dish. Mix well. On top, arrange the slices of butter. Using foil, tightly tent the dish.

Step 3: Place the dish in the preheated oven and bake for about 30 minutes. Uncover and continue to bake for additional 30 minutes.

Step 4: Serve and enjoy!
August 3, 2022 0 comment
0 FacebookTwitterPinterestEmail
General Recipes

The Delicious Vanilla Custard Magic Cake Recipe

by Rebecca August 3, 2022
written by Rebecca

Prep time: 15 mins | Cook time: 45 mins | Serves: 9

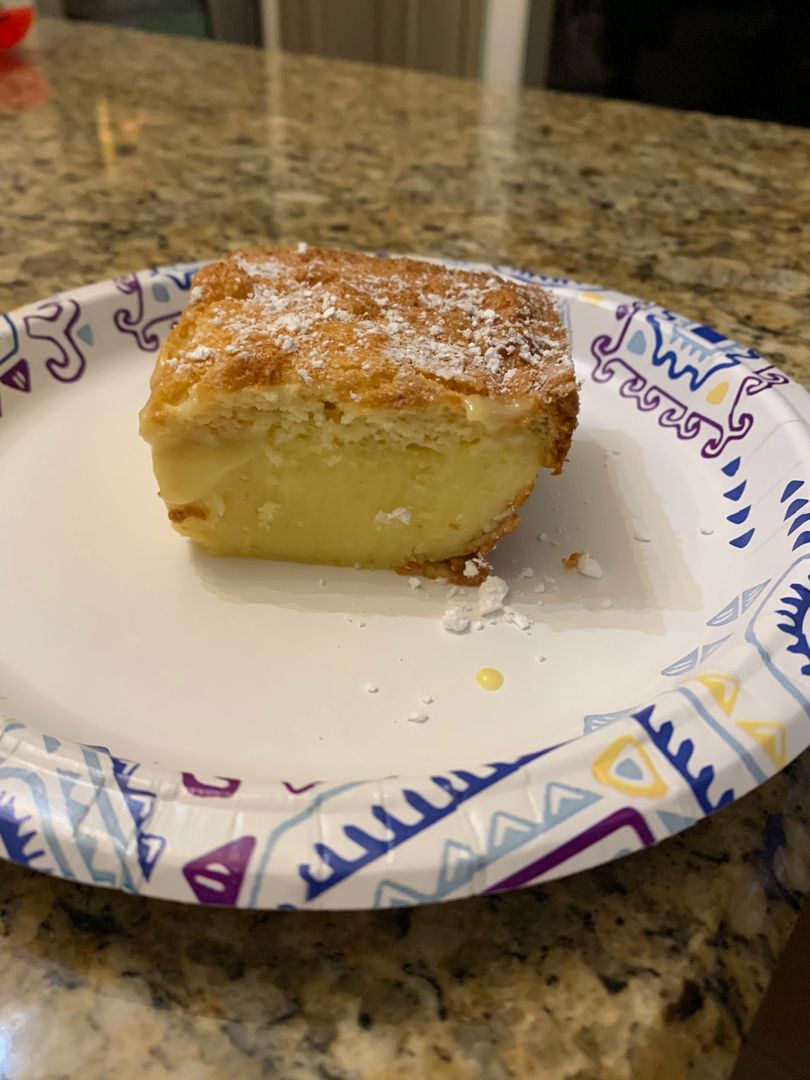
This Vanilla Custard Magic Cake is a very delicious and amazing cake perfect for everyone. This cake is super easy to whip up using ingredients that you might already have on hand. My favorite part of this cake is the vanilla custard filling. It is mesmerizing! The layers are separated like magic!

This three-layer cake is the ultimate dessert. It is light with a fluffy layer on the top and dense on the bottom. A melt-in-your-mouth cake that is super hard to resist!

If you have not tried magic cakes, this is the perfect time to try them. Start with this over-the-top vanilla custard magic cake. This cake will surprise you!

INGREDIENTS

4 eggs, separated into yolk & egg whites

1/2 c. unsalted butter, melted & slightly cooled

1 1/4 c. powdered sugar

1 tbsp water

1 tsp cinnamon

1 c. flour

2 c. milk, lukewarm

Powdered sugar for dusting

3 tsp vanilla extract

How to make Vanilla Custard Magic Cake

Step 1: Prepare the oven. Preheat it to 325 degrees. Then, ready an 8 x 8-inch baking dish. Lightly grease both the bottom and sides.

Step 2: In a bowl, whisk the egg whites until stiff peaks form and set aside.

Step 3: In another bowl, beat the egg yolks and powdered sugar until pale yellow. Then, add the butter and water, whisking until mixed. Stir in the flour and cinnamon until evenly blended. Next, gradually beat in the milk and vanilla extract until incorporated. Lastly, fold in the egg whites about 1/3 at a time until all the egg whites are blended.

Step 4: Into the prepared pan, transfer the batter. Place in the preheated oven and bake for about 40 to 60 minutes or until the cake is barely jiggly in the middle. Tent the cake with aluminium foil if the top browns too quickly.

Step 5: Serve and enjoy!

The Delicious Vanilla Custard Magic Cake Recipe

Rebecca Prep time: 15 mins | Cook time: 45 mins | Serves: 9 This Vanilla Custard Magic Cake is a very delicious and amazing cake perfect for everyone. This cake is… General Recipes The Delicious Vanilla Custard Magic Cake Recipe European Print This
Serves: 9 Prep Time: 15 mins Cooking Time: 45 mins 45 mins
Nutrition facts: 200 calories 20 grams fat
Rating: 5.0/5
( 1 voted )

Ingredients

  • 4 eggs, separated into yolk & egg whites
  • 1/2 c. unsalted butter, melted & slightly cooled
  • 1 1/4 c. powdered sugar
  • 1 tbsp water
  • 1 tsp cinnamon
  • 1 c. flour
  • 2 c. milk, lukewarm
  • Powdered sugar for dusting
  • 3 tsp vanilla extract

Instructions

Step 1: Prepare the oven. Preheat it to 325 degrees. Then, ready an 8 x 8-inch baking dish. Lightly grease both the bottom and sides.

Step 2: In a bowl, whisk the egg whites until stiff peaks form and set aside.

Step 3: In another bowl, beat the egg yolks and powdered sugar until pale yellow. Then, add the butter and water, whisking until mixed. Stir in the flour and cinnamon until evenly blended. Next, gradually beat in the milk and vanilla extract until incorporated. Lastly, fold in the egg whites about 1/3 at a time until all the egg whites are blended.

Step 4: Into the prepared pan, transfer the batter. Place in the preheated oven and bake for about 40 to 60 minutes or until the cake is barely jiggly in the middle. Tent the cake with aluminium foil if the top browns too quickly.

Step 5: Serve and enjoy!

August 3, 2022 0 comment
0 FacebookTwitterPinterestEmail
General Recipes

No Bake Cream Cheese Peanut Butter Pie

by Rebecca August 2, 2022
written by Rebecca

This cream cheese, peanut butter pie is another no-bake dessert that will satisfy your sweet tooth. It is the perfect treat filled with creamy goodness. This is also excellent if you love peanut butter. Because this is a no-bake pie, you save the hassle of turning the oven on!

INGREDIENTS

CRUST:

6 tbsp unsalted butter, melted

1/4 c. brown sugar

1 1/4 c. salted pretzels

FILLING:

1/4 c. brown sugar

1/3 c. smooth peanut butter

1/2 c. 35-percent whipping cream, whipped

1/2 c. cream cheese, softened

CHOCOLATE WHIPPED CREAM:

2 c. 35-percent whipping cream

Chocolate shavings, optional

3/4 c. roughly chopped dark chocolate

How to make No Bake Cream Cheese Peanut Butter Pie

Step 1: In a food processor, place the pretzels and blend until firm.

Step 2: Transfer the crumbs of pretzels to a big bowl. Add the brown sugar and butter. Mix well using your hands or a small spoon until combined.

Step 3: In the bottom of a pie plate, spread the mixture, covering the sides. Cover the pie plate and place it in the fridge.

Step 4: To make the filling, whisk the peanut butter, cream cheese, and brown sugar in a bowl until well blended and smooth. Fold in the whipped cream. Pour the filling into the chilled pie crust, evenly spreading it. Cover the pie again and return it to the fridge.

Step 5: To make the whipped topping, place the chocolate and whipped cream in a double boiler over medium heat. Stir well until completely melted. Then, place this in the fridge to chill, covered.

Step 6: Once the chocolate mixture has cooled down, beat the mixture using a mixer until thick and spreadable. Make sure not to overmix.

Step 7: Remove the pie from the fridge and spread the whipped chocolate topping over the filling. Garnish with chocolate shavings if desired.

Step 8: Serve this cream cheese, peanut butter pie right away or chill in the fridge first for a few hours. Slice and enjoy!

No Bake Cream Cheese Peanut Butter Pie

Rebecca This cream cheese, peanut butter pie is another no-bake dessert that will satisfy your sweet tooth. It is the perfect treat filled with creamy goodness. This is also excellent if… General Recipes No Bake Cream Cheese Peanut Butter Pie European Print This
Nutrition facts: 200 calories 20 grams fat
Rating: 5.0/5
( 1 voted )

Ingredients

  • CRUST:
  • 6 tbsp unsalted butter, melted
  • 1/4 c. brown sugar
  • 1 1/4 c. salted pretzels
  • FILLING:
  • 1/4 c. brown sugar
  • 1/3 c. smooth peanut butter
  • 1/2 c. 35-percent whipping cream, whipped
  • 1/2 c. cream cheese, softened
  • CHOCOLATE WHIPPED CREAM:
  • 2 c. 35-percent whipping cream
  • Chocolate shavings, optional
  • 3/4 c. roughly chopped dark chocolate

Instructions

Step 1: In a food processor, place the pretzels and blend until firm.

Step 2: Transfer the crumbs of pretzels to a big bowl. Add the brown sugar and butter. Mix well using your hands or a small spoon until combined.

Step 3: In the bottom of a pie plate, spread the mixture, covering the sides. Cover the pie plate and place it in the fridge.

Step 4: To make the filling, whisk the peanut butter, cream cheese, and brown sugar in a bowl until well blended and smooth. Fold in the whipped cream. Pour the filling into the chilled pie crust, evenly spreading it. Cover the pie again and return it to the fridge.

Step 5: To make the whipped topping, place the chocolate and whipped cream in a double boiler over medium heat. Stir well until completely melted. Then, place this in the fridge to chill, covered.

Step 6: Once the chocolate mixture has cooled down, beat the mixture using a mixer until thick and spreadable. Make sure not to overmix.

Step 7: Remove the pie from the fridge and spread the whipped chocolate topping over the filling. Garnish with chocolate shavings if desired.

Step 8: Serve this cream cheese, peanut butter pie right away or chill in the fridge first for a few hours. Slice and enjoy!

August 2, 2022 0 comment
0 FacebookTwitterPinterestEmail
General Recipes

No-Bake Chocolate Oatmeal Cookies

by Rebecca August 2, 2022
written by Rebecca

YIELD: 24 cookies

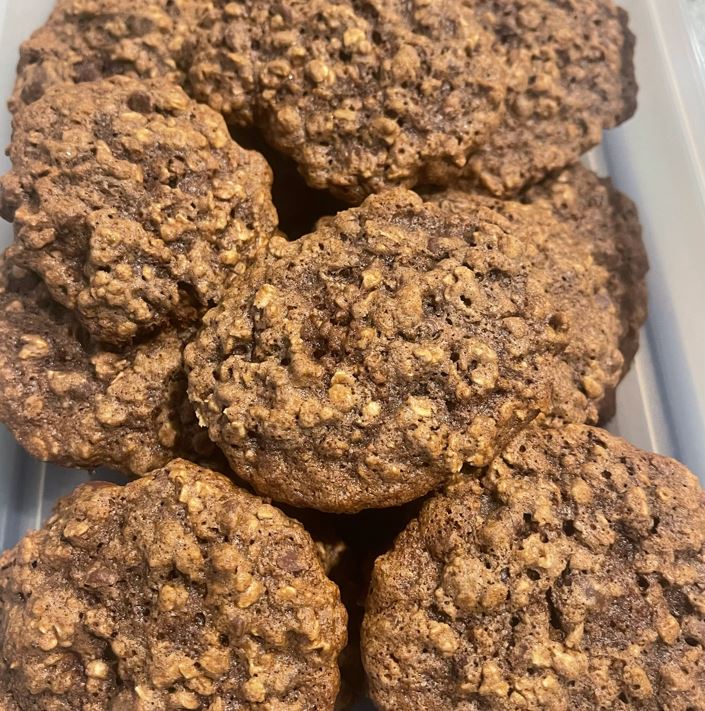
I don’t know anyone who does not love cookies. I love cookies, and I have my favorite. I especially enjoy these no-bake chocolate oatmeal cookies. These cookies are the bomb! Plus, I can grab more without any guilt!

These chocolate oatmeal cookies are incredibly easy to whip up. All you need are a few simple, readily available ingredients like butter, sugar, milk, peanut butter, and quick-cooking oats. This cookie recipe is also pretty versatile. You are welcome to add other ingredients like nuts. Or if desired fold in some fruits such as raisins or cranberries.

These delicious no-bake chocolate oatmeal cookies are not overly sweet, they are guilt-free, and perfect for people who are watching their sugar. These tasty cookies come out great as always. For this recipe, I use creamy peanut butter, but if you want more crumbly cookies, you are welcome to replace it with chunky peanut butter. Either way, these cookies are going to be amazing!

Ingredients

4 tbsp cocoa

1⁄2 c. butter or 1⁄2 c. margarine

1⁄2 c. milk

2 tsp vanilla

2 c. sugar

3 -3 1⁄2 c. dry quick-cooking oats (NOT old-fashioned oats)

1⁄2 c. creamy peanut butter (you can use chunky but it seems to make a more crumbly dry cookie)

How to make No-Bake Chocolate Oatmeal Cookies

Step 1: In a 4-quart saucepan, place the butter/margarine, sugar, milk, and cocoa. Let the mixture come to a rolling boil and cook for not more than 30 to 40 minutes. Then, take the pan off the heat.

Step 2: Add peanut butter into the mixture and stir well until completely melted. Add the vanilla along with the oats. Mix well until blended.

Step 3: Drop about a few tablespoons of the mixture onto the wax paper. Keep them in the fridge or allow them to cool at room temperature.

Tips:

Feel free to add other ingredients to this recipe like your favorite fruits, dried raisins, or cranberries

No-Bake Chocolate Oatmeal Cookies

Rebecca YIELD: 24 cookies I don’t know anyone who does not love cookies. I love cookies, and I have my favorite. I especially enjoy these no-bake chocolate oatmeal cookies. These cookies… General Recipes No-Bake Chocolate Oatmeal Cookies European Print This
Serves: 24
Nutrition facts: 200 calories 20 grams fat
Rating: 5.0/5
( 1 voted )

Ingredients

  • 4 tbsp cocoa
  • 1⁄2 c. butter or 1⁄2 c. margarine
  • 1⁄2 c. milk
  • 2 tsp vanilla
  • 2 c. sugar
  • 3 -3 1⁄2 c. dry quick-cooking oats (NOT old-fashioned oats)
  • 1⁄2 c. creamy peanut butter (you can use chunky but it seems to make a more crumbly dry cookie)

Instructions

Step 1: In a 4-quart saucepan, place the butter/margarine, sugar, milk, and cocoa. Let the mixture come to a rolling boil and cook for not more than 30 to 40 minutes. Then, take the pan off the heat.

Step 2: Add peanut butter into the mixture and stir well until completely melted. Add the vanilla along with the oats. Mix well until blended.

Step 3: Drop about a few tablespoons of the mixture onto the wax paper. Keep them in the fridge or allow them to cool at room temperature.

Notes

Feel free to add other ingredients to this recipe like your favorite fruits, dried raisins, or cranberries

August 2, 2022 0 comment
0 FacebookTwitterPinterestEmail
General Recipes

A Recipe For The Greatest Canadian Cookie—Nanaimo Bars

by Rebecca August 2, 2022
written by Rebecca

Active: 25 mins | Inactive: 1 hr 30 mins | Serves: 16

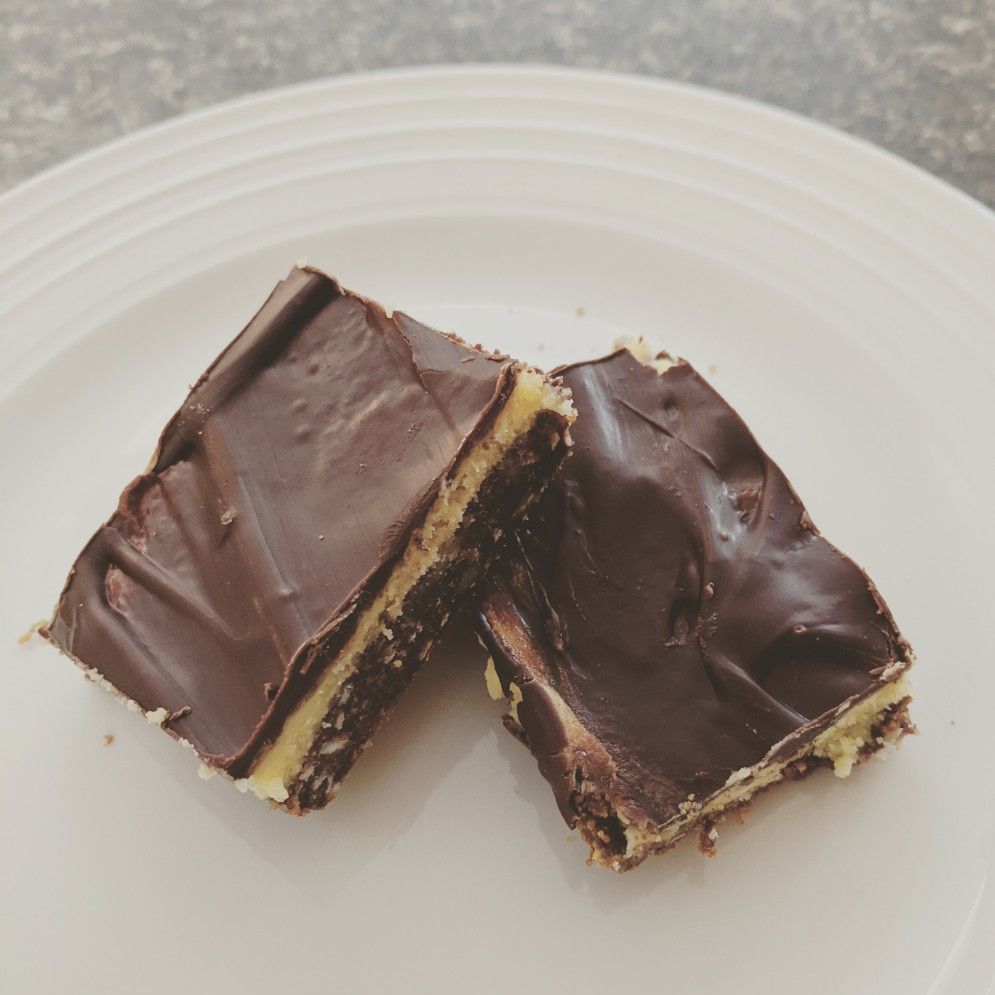
These delicious bars are a Canadian classic dessert that is most popular during the holiday. These Nanaimo Bars are incredibly easy to whip up. This treat has three amazing sweet layers, and my favorite is the cream filling in the middle.

INGREDIENTS

Bottom Layer:

⅓ c. brown sugar

1 stick unsalted butter, cubed

1 large egg, lightly beaten

3 tbsp unsweetened cocoa powder

1 tsp vanilla extract

8 ounces sweetened coconut, shredded

2 c Graham crackers, finely crushed

½ c. chopped nuts (walnuts, pecans, or almonds)

1 tsp kosher salt

Cream Filling:

¼ c. heavy cream

5 tbsp unsalted butter, room temperature

2 c. powdered sugar

2 tbsp white chocolate instant pudding mix

Chocolate Topping:

4 tbsp salted butter

Optional: ½ tsp kosher salt

1 c. semi-sweet chocolate chips

How to make Canadian Cookie – Nanaimo Bars

Step 1: Using the parchment paper, line an 8 x 8-inch baking dish and set it aside.

Step 2: In a saucepan, melt 1 stick of butter over medium heat. Once the butter has melted, add the cocoa powder, salt, and brown sugar to the pan. Take the pan off the heat and mix well until everything is combined.

Step 3: Gradually stir in the beaten egg until well blended. Place the pot back on the stovetop over medium heat and cook for about 2 minutes or until the chocolate mixture has thickened, stirring often. Then, whisk in the vanilla extract along with the shredded coconut, chopped nuts, and Graham cracker crumbs. Into the prepared baking dish, transfer the mixture. Tent with plastic and keep in the fridge for about 40 minutes.

Step 4: Mix 5 tbsp unsalted butter, heavy cream, and instant pudding powder until smooth. Whisk in the powdered sugar until you have a creamy mixture. On top of the chocolate base layer, spread the cream filling and tent with plastic wrap. Place the pan in the fridge for about 20 minutes.

Step 5: In a microwave-safe bowl, melt the chocolate chips with butter. Cook in short increments, stirring until completely melted and smooth. If using, add salt and stir well until incorporated. On top of the cream filling, spread the chocolate topping. Tent with plastic and place in the fridge to chill for about 30 minutes or until the chocolate is fully set.

Step 6: When ready to serve, cut into squares. Keep the bars in an airtight container. You can also stack the bars, simply put a layer of parchment paper in between the layers.

A Recipe For The Greatest Canadian Cookie—Nanaimo Bars

Rebecca Active: 25 mins | Inactive: 1 hr 30 mins | Serves: 16 These delicious bars are a Canadian classic dessert that is most popular during the holiday. These Nanaimo Bars… General Recipes A Recipe For The Greatest Canadian Cookie—Nanaimo Bars European Print This
Serves: 16
Nutrition facts: 200 calories 20 grams fat
Rating: 5.0/5
( 1 voted )

Ingredients

  • Bottom Layer:
  • ⅓ c. brown sugar
  • 1 stick unsalted butter, cubed
  • 1 large egg, lightly beaten
  • 3 tbsp unsweetened cocoa powder
  • 1 tsp vanilla extract
  • 8 ounces sweetened coconut, shredded
  • 2 c Graham crackers, finely crushed
  • ½ c. chopped nuts (walnuts, pecans, or almonds)
  • 1 tsp kosher salt
  • Cream Filling:
  • ¼ c. heavy cream
  • 5 tbsp unsalted butter, room temperature
  • 2 c. powdered sugar
  • 2 tbsp white chocolate instant pudding mix
  • Chocolate Topping:
  • 4 tbsp salted butter
  • Optional: ½ tsp kosher salt
  • 1 c. semi-sweet chocolate chips

Instructions

Step 1: Using the parchment paper, line an 8 x 8-inch baking dish and set it aside.

Step 2: In a saucepan, melt 1 stick of butter over medium heat. Once the butter has melted, add the cocoa powder, salt, and brown sugar to the pan. Take the pan off the heat and mix well until everything is combined.

Step 3: Gradually stir in the beaten egg until well blended. Place the pot back on the stovetop over medium heat and cook for about 2 minutes or until the chocolate mixture has thickened, stirring often. Then, whisk in the vanilla extract along with the shredded coconut, chopped nuts, and Graham cracker crumbs. Into the prepared baking dish, transfer the mixture. Tent with plastic and keep in the fridge for about 40 minutes.

Step 4: Mix 5 tbsp unsalted butter, heavy cream, and instant pudding powder until smooth. Whisk in the powdered sugar until you have a creamy mixture. On top of the chocolate base layer, spread the cream filling and tent with plastic wrap. Place the pan in the fridge for about 20 minutes.

Step 5: In a microwave-safe bowl, melt the chocolate chips with butter. Cook in short increments, stirring until completely melted and smooth. If using, add salt and stir well until incorporated. On top of the cream filling, spread the chocolate topping. Tent with plastic and place in the fridge to chill for about 30 minutes or until the chocolate is fully set.

Step 6: When ready to serve, cut into squares. Keep the bars in an airtight container. You can also stack the bars, simply put a layer of parchment paper in between the layers.

August 2, 2022 0 comment
0 FacebookTwitterPinterestEmail
General Recipes

Cranberry Brie Pull-Apart Bread: The Perfect Holiday Dish For Your Kitchen!

by Rebecca August 2, 2022
written by Rebecca

Prep time: 10 mins | Cook time: 30 mins | Serves: 9

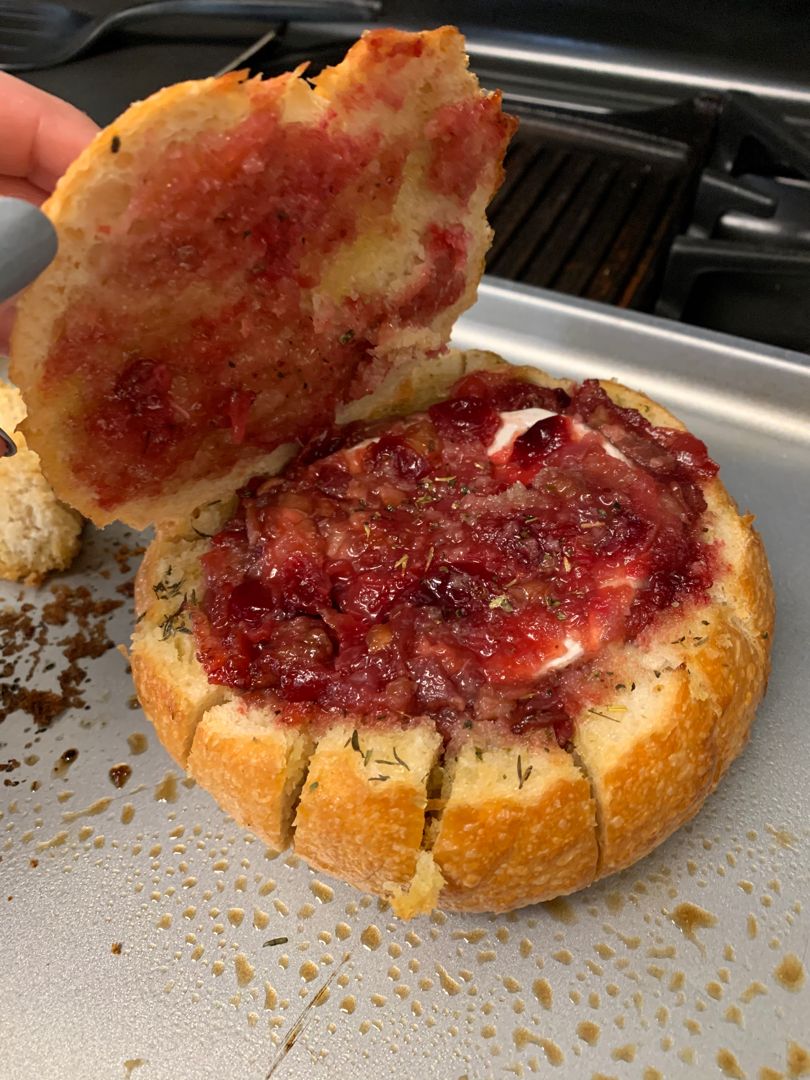
This pull-apart bread is an amazing Holiday dish that is perfect all year round! Super easy to make using a few simple ingredients. Whip this up any time and have this Cranberry Brie Pull-Apart Bread ready in under an hour.

If you are searching for an easy and quick appetizer, then this Cranberry Brie Pull-Apart Bread is an excellent option. The combination of cranberry sauce and fragrant herbs is to die for. This delicious bread with warm, gooey brie and sweet & tart cranberry sauce is like a dream!


This Cranberry Brie Pull-Apart Bread not only tastes super great but also looks very appetizing. This is my mom’s most requested appetizer during the Holiday. This pull-apart bread is the simplest, but is simply the best!

I am ecstatic for you to try this Cranberry Brie Pull-Apart Bread. Make sure to give this a go very soon!

INGREDIENTS

1/2 c. (1 stick) butter

1 large round sourdough bread

1 tsp dried rosemary

1 1/2 c. whole berry cranberry sauce

Kosher salt, to taste

1 tsp dried thyme

1 (16 ounces) wheel of brie, chopped or cubed

How to make Cranberry Brie Pull-Apart Bread

Step 1: Prepare the oven. Preheat it to 350 degrees F.

Step 2: To make 1-inch cubes, slice the bread horizontally and vertically. Make sure not to cut all the way.

Step 3: Place the butter, thyme, and rosemary in a small bowl. Mix well and season with salt. Mix again until blended.

Step 4: On a baking sheet, place the bread and brush with the butter mixture. Stuff each space with brie and cranberry sauce. In foil, wrap the bread. Place in the preheated oven and bake for about 20 minutes or until the cheese has melted.

Step 5: Remove from the oven when done and unwrap the foil. Serve the cranberry brie pull-apart bread hot. Enjoy!

Cranberry Brie Pull-Apart Bread: The Perfect Holiday Dish For Your Kitchen!

Rebecca Prep time: 10 mins | Cook time: 30 mins | Serves: 9 This pull-apart bread is an amazing Holiday dish that is perfect all year round! Super easy to make… General Recipes Cranberry Brie Pull-Apart Bread: The Perfect Holiday Dish For Your Kitchen! European Print This
Serves: 9 Prep Time: 10 mins Cooking Time: 30 mins 30 mins
Nutrition facts: 200 calories 20 grams fat
Rating: 5.0/5
( 1 voted )

Ingredients

  • 1/2 c. (1 stick) butter
  • 1 large round sourdough bread
  • 1 tsp dried rosemary
  • 1 1/2 c. whole berry cranberry sauce
  • Kosher salt, to taste
  • 1 tsp dried thyme
  • 1 (16 ounces) wheel of brie, chopped or cubed

Instructions

Step 1: Prepare the oven. Preheat it to 350 degrees F.

Step 2: To make 1-inch cubes, slice the bread horizontally and vertically. Make sure not to cut all the way.

Step 3: Place the butter, thyme, and rosemary in a small bowl. Mix well and season with salt. Mix again until blended.

Step 4: On a baking sheet, place the bread and brush with the butter mixture. Stuff each space with brie and cranberry sauce. In foil, wrap the bread. Place in the preheated oven and bake for about 20 minutes or until the cheese has melted.

Step 5: Remove from the oven when done and unwrap the foil. Serve the cranberry brie pull-apart bread hot. Enjoy!


August 2, 2022 0 comment
0 FacebookTwitterPinterestEmail
General Recipes

Jiffy Corn Casserole with Cream Cheese and Bacon

by Rebecca August 2, 2022
written by Rebecca

Prep Time: 30 mins | Cook Time: 1 hr | Total Time: 1 hr 30 mins | Servings: 12

This casserole is incredibly easy to make. It is the perfect side dish for a big crowd. This Jiffy corn casserole with cream cheese and bacon is the ultimate side dish to pair with roasted turkey, mashed potato, green beans, and more! You can even freeze for this an easy and quick side any time.

Ingredients

3 green onions, minced

6 slices bacon

8 oz. cream cheese

4 tbsp salted butter

1 c. heavy whipping cream

1 tsp pure cane sugar

32 oz. frozen corn

1 tbsp sour cream

1/2 box JIFFY Corn Muffin Mix

1/2 c. Colby Jack cheese

1/2 c. cheddar cheese

1 tsp salt

1/2 tsp black pepper

How to make Jiffy Corn Casserole with Cream Cheese and Bacon

Step 1: Prepare the oven. Preheat it to 325 degrees.

Step 2: Cook the bacon. When done, set the bacon aside. In the meantime, mince the green onions.

Step 3: Place the cream cheese, heavy whipping cream, salted butter, sugar, and sour cream in a medium saucepan. Cook over low heat until the cream cheese is completely melted, stirring constantly to prevent the mixture from scorching.

Step 4: Place the cream cheese mixture, crumbled bacon, minced green onions, frozen corn, JIFFY Corn Muffin Mix (1/2 a box), salt, and pepper in a large mixing bowl. Mix well until blended.

Step 5: Using cooking spray, grease a 13 x 9-inch baking dish.

Step 6: Into the prepared baking dish, pour the casserole mixture, spreading it evenly. Place in the preheated oven and bake for about 55 minutes until the mixture is set.

Step 7: On top of the casserole, sprinkle the shredded cheese. Return to the oven and resume baking for another 10 minutes.

Step 8: Remove from the oven when done and serve the casserole warm. Enjoy!

Notes:

You can cut the recipe in half if feeding a smaller crowd and bake in an 8 x 8-inch baking dish.

For a gluten-free version, use a gluten-free cornbread mix. You can even make gluten-free Jiffy-style corn muffin mix if desired.

Nutrition Facts:

Serving: 10 servings | Calories: 321 kcal | Carbohydrates: 22g | Protein: 9g | Fat: 24g | Saturated Fat: 14g | Polyunsaturated Fat: 8g | Cholesterol: 69mg | Sodium: 450mg | Fiber: 2g | Sugar: 5g

Jiffy Corn Casserole with Cream Cheese and Bacon

Rebecca Prep Time: 30 mins | Cook Time: 1 hr | Total Time: 1 hr 30 mins | Servings: 12 This casserole is incredibly easy to make. It is the perfect… General Recipes Jiffy Corn Casserole with Cream Cheese and Bacon European Print This
Serves: 12 Prep Time: 30 mins Cooking Time: 1 hr 1 hr
Nutrition facts: 321 calories 24 fat
Rating: 5.0/5
( 1 voted )

Ingredients

  • 3 green onions, minced
  • 6 slices bacon
  • 8 oz. cream cheese
  • 4 tbsp salted butter
  • 1 c. heavy whipping cream
  • 1 tsp pure cane sugar
  • 32 oz. frozen corn
  • 1 tbsp sour cream
  • 1/2 box JIFFY Corn Muffin Mix
  • 1/2 c. Colby Jack cheese
  • 1/2 c. cheddar cheese
  • 1 tsp salt
  • 1/2 tsp black pepper

Instructions

Step 1: Prepare the oven. Preheat it to 325 degrees.

Step 2: Cook the bacon. When done, set the bacon aside. In the meantime, mince the green onions.

Step 3: Place the cream cheese, heavy whipping cream, salted butter, sugar, and sour cream in a medium saucepan. Cook over low heat until the cream cheese is completely melted, stirring constantly to prevent the mixture from scorching.

Step 4: Place the cream cheese mixture, crumbled bacon, minced green onions, frozen corn, JIFFY Corn Muffin Mix (1/2 a box), salt, and pepper in a large mixing bowl. Mix well until blended.

Step 5: Using cooking spray, grease a 13 x 9-inch baking dish.

Step 6: Into the prepared baking dish, pour the casserole mixture, spreading it evenly. Place in the preheated oven and bake for about 55 minutes until the mixture is set.

Step 7: On top of the casserole, sprinkle the shredded cheese. Return to the oven and resume baking for another 10 minutes.

Step 8: Remove from the oven when done and serve the casserole warm. Enjoy!

Notes

You can cut the recipe in half if feeding a smaller crowd and bake in an 8 x 8-inch baking dish. For a gluten-free version, use a gluten-free cornbread mix. You can even make gluten-free Jiffy-style corn muffin mix if desired.

August 2, 2022 0 comment
0 FacebookTwitterPinterestEmail
General Recipes

No Bake Sugar Free Strawberry Cheesecake

by Rebecca August 2, 2022
written by Rebecca

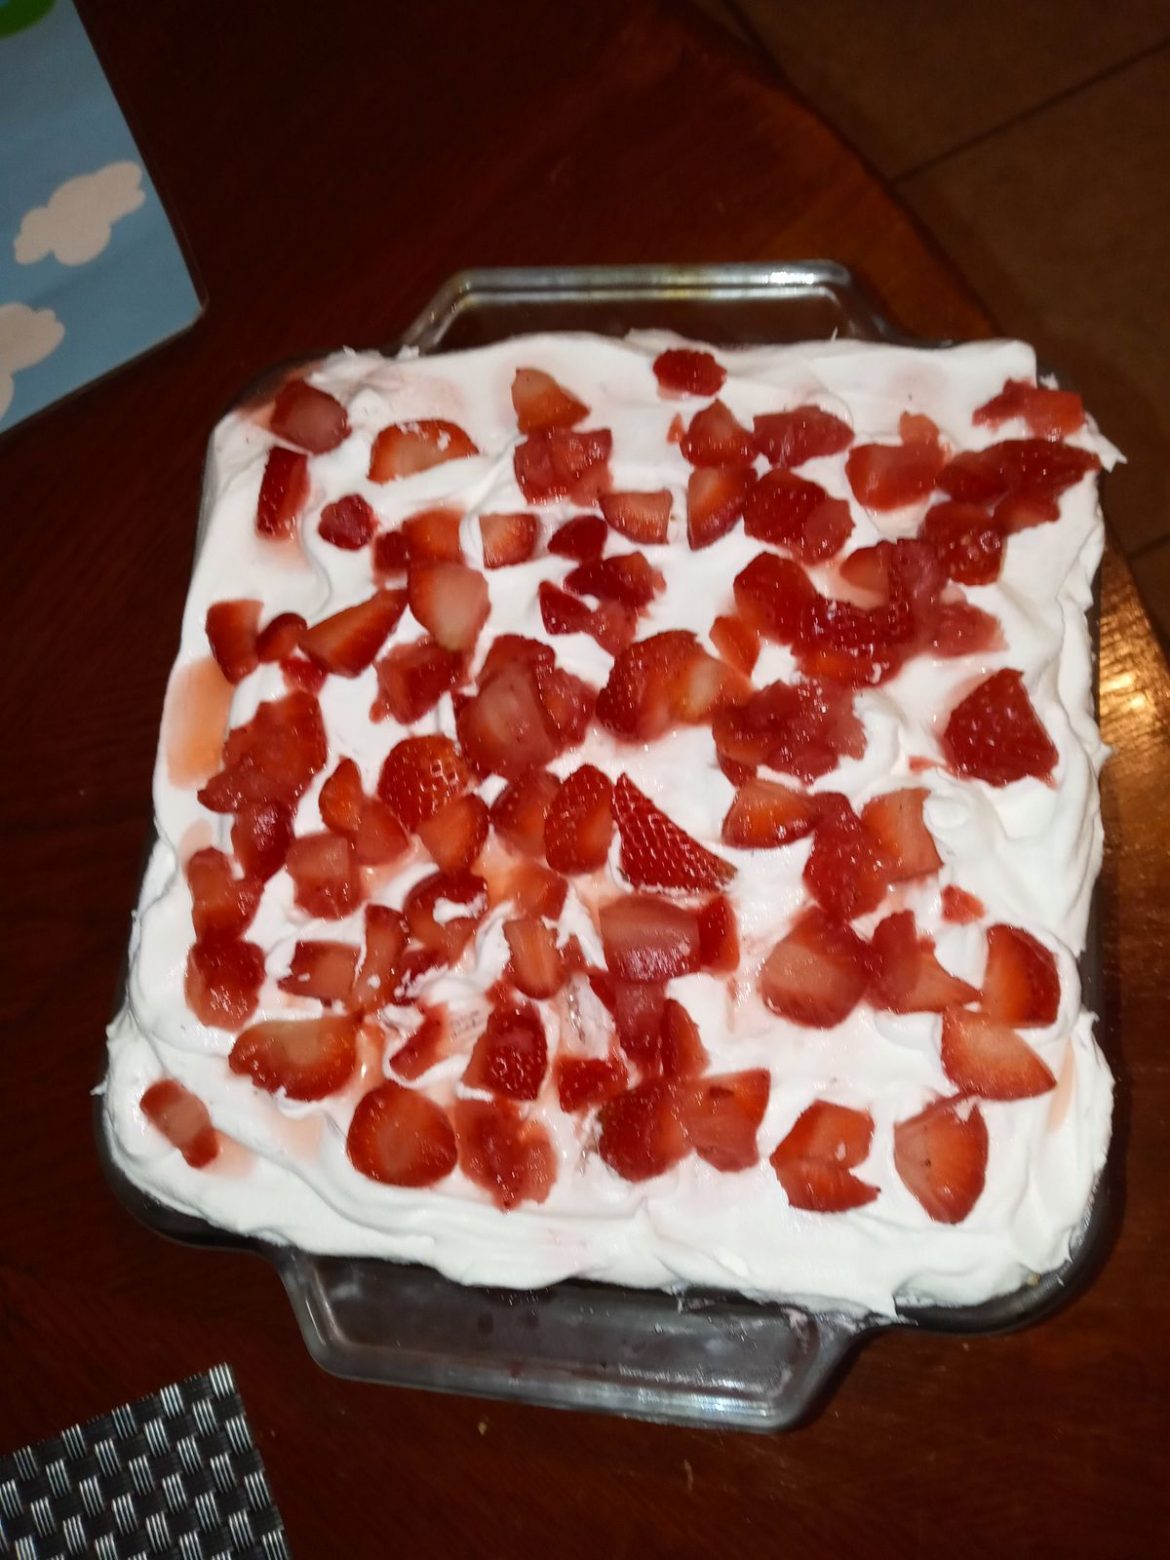
This No-Bake Sugar-Free Strawberry Cheesecake is the perfect dessert for people who are closely watching their sugar. My mom is a diabetic, and ever since she was diagnosed we cut her sweets which makes her very sad. The challenge every day is to satisfy her sweet treats without compromising her blood sugar. It is where this type of dessert comes in. The best part is this is incredibly easy and fun to whip up. I do not have to turn the oven on, I simply need to mix, assemble, and chill this dessert.

Ingredients

3 tbsp butter, melted

3/4 c Graham cracker crumbs

1/4 tsp ground nutmeg1 (8 oz.) package cream cheese, softened

1 1/2 c. milk

1/4 tsp ground cinnamon

2 pints of fresh strawberries, sliced

1 (1 oz) package cheesecake flavor sugar-free instant pudding mix

How to make No Bake Sugar Free Strawberry Cheesecake

Step 1: Into a bowl, place the melted butter, cracker crumbs from the Graham crackers, nutmeg, and cinnamon. Mix well until blended.

Step 2: Into a small pie dish, pour the mixture and press it in using a cup. Place it in the fridge while preparing the filling.

Step 3: In a bowl, place the cream cheese. Using a mixer, beat the cream cheese until softened. Adjust the speed to low and slowly add in the milk until you have a slightly watery texture. Scrape the sides of the bowl using a spatula.

Step 4: Mix in the pudding mix until you have a smooth and thick mixture.

Step 5: Into the bottom portion of the crust, pour half of the filling, and top with half of the strawberries. Repeat the filling and strawberry layers.

Step 6: Keep the pie in the fridge for about an hour or so until set.

Step 7: Slice and serve. Enjoy!

Tips:

Keep this pie in the fridge for an hour or so to chill and set, but do not leave it in the fridge overnight.

I do not recommend freezing this pie as the cream cheese will harden.

I love using fresh strawberries for this recipe.

No Bake Sugar Free Strawberry Cheesecake

Rebecca This No-Bake Sugar-Free Strawberry Cheesecake is the perfect dessert for people who are closely watching their sugar. My mom is a diabetic, and ever since she was diagnosed we cut… General Recipes No Bake Sugar Free Strawberry Cheesecake European Print This
Nutrition facts: 200 calories 20 grams fat
Rating: 5.0/5
( 1 voted )

Ingredients

  • 3 tbsp butter, melted
  • 3/4 c Graham cracker crumbs
  • 1/4 tsp ground nutmeg1 (8 oz.) package cream cheese, softened
  • 1 1/2 c. milk
  • 1/4 tsp ground cinnamon
  • 2 pints of fresh strawberries, sliced
  • 1 (1 oz) package cheesecake flavor sugar-free instant pudding mix

Instructions

Step 1: Into a bowl, place the melted butter, cracker crumbs from the Graham crackers, nutmeg, and cinnamon. Mix well until blended.

Step 2: Into a small pie dish, pour the mixture and press it in using a cup. Place it in the fridge while preparing the filling.

Step 3: In a bowl, place the cream cheese. Using a mixer, beat the cream cheese until softened. Adjust the speed to low and slowly add in the milk until you have a slightly watery texture. Scrape the sides of the bowl using a spatula.

Step 4: Mix in the pudding mix until you have a smooth and thick mixture.

Step 5: Into the bottom portion of the crust, pour half of the filling, and top with half of the strawberries. Repeat the filling and strawberry layers.

Step 6: Keep the pie in the fridge for about an hour or so until set.

Step 7: Slice and serve. Enjoy!

Notes

Keep this pie in the fridge for an hour or so to chill and set, but do not leave it in the fridge overnight. I do not recommend freezing this pie as the cream cheese will harden. I love using fresh strawberries for this recipe.

August 2, 2022 0 comment
0 FacebookTwitterPinterestEmail
General Recipes

The Easiest Peach Dumplings

by Rebecca August 2, 2022
written by Rebecca

Prep time: 20 mins | Cook time: 35 mins | Servings: 8 (16 dumplings)

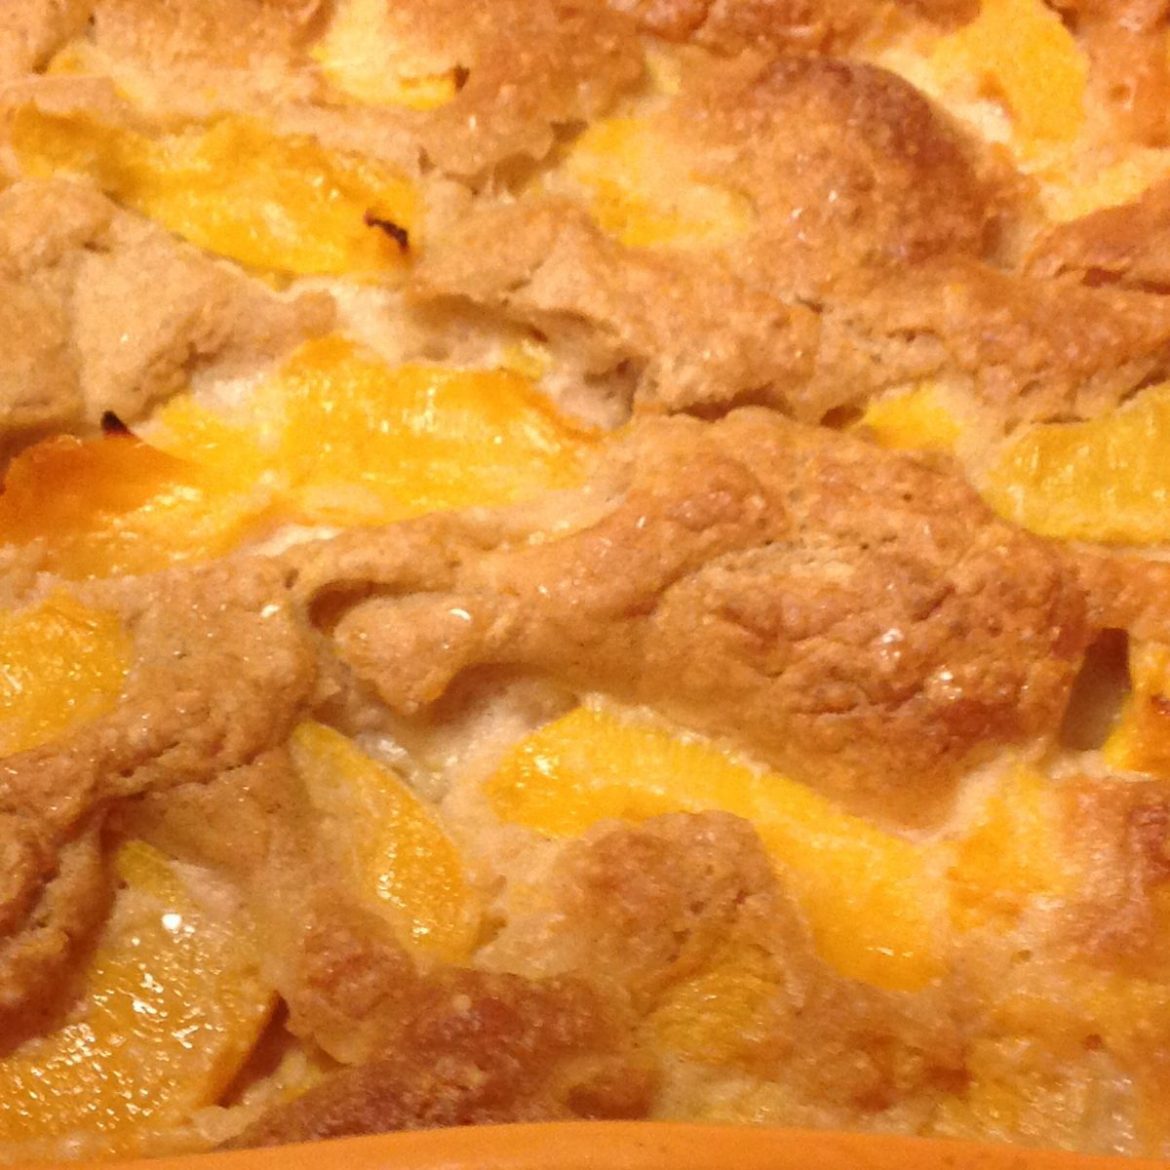
I love these Peach Dumplings! They are the best and incredibly easy to whip up using only simple ingredients that you can find in your pantry. A very versatile recipe that guarantees to satisfy everyone’s cravings. Serve these amazing Peach Dumplings warm, and top each serving with a big scoop of vanilla ice cream.

I have tried varieties of apple dumplings recipes, but this is the one that stood up. For this recipe, you are welcome to use your preferred soda, such as Sprite, Mountain Dew, 7 Up, Fresca, or even orange soda. Anything with slight frizz and a citrusy flavor is a great option, really!

INGREDIENTS

1 c (2 sticks) butter

2 15-ounces canned peaches, drained

2/3 c. brown sugar

2 8-oz. refrigerated crescent roll dough

2/3 c. granulated sugar

3 tsp cinnamon

vanilla ice cream, for serving

1 ½ c. sprite or citrus soda

How to make The Easiest Peach Dumplings

Step 1: Prepare the oven. Preheat it to 350 degrees F. Using nonstick cooking spray, grease an 8 x 8-inch baking dish.

Step 2: After opening the crescent dough, divide it into triangles.

Step 3: At the wide end of the dough triangle, place about 1 or 2 peach slices (depending on the size) and sprinkle with a pinch of cinnamon. Then, roll the dough around the peaches.

Step 4: Transfer the dumpling to the prepared baking dish and do the same for the remaining dough.

Step 5: In a large bowl, melt two sticks of butter. Once the butter has melted, add the white sugar, brown sugar, and the rest of the cinnamon to the bowl and mix well until smooth.

Step 6: Over the dumplings, spoon the butter mixture.

Step 7: Around the dough, pour the Sprite, avoiding the tops.

Step 8: Place in the preheated oven and bake for about 30 to 35 minutes or until the top of the dough is browned.

Step 9: Remove from the oven when done and serve the Peach Dumplings warm. If desired, top with vanilla ice cream. Enjoy!

The Easiest Peach Dumplings

Rebecca Prep time: 20 mins | Cook time: 35 mins | Servings: 8 (16 dumplings) I love these Peach Dumplings! They are the best and incredibly easy to whip up using… General Recipes The Easiest Peach Dumplings European Print This
Serves: 8 Prep Time: 20 mins Cooking Time: 35 mins 35 mins
Nutrition facts: 200 calories 20 grams fat
Rating: 5.0/5
( 1 voted )

Ingredients

  • 1 c (2 sticks) butter
  • 2 15-ounces canned peaches, drained
  • 2/3 c. brown sugar
  • 2 8-oz. refrigerated crescent roll dough
  • 2/3 c. granulated sugar
  • 3 tsp cinnamon
  • vanilla ice cream, for serving
  • 1 ½ c. sprite or citrus soda

Instructions

Step 1: Prepare the oven. Preheat it to 350 degrees F. Using nonstick cooking spray, grease an 8 x 8-inch baking dish.

Step 2: After opening the crescent dough, divide it into triangles.

Step 3: At the wide end of the dough triangle, place about 1 or 2 peach slices (depending on the size) and sprinkle with a pinch of cinnamon. Then, roll the dough around the peaches.

Step 4: Transfer the dumpling to the prepared baking dish and do the same for the remaining dough.

Step 5: In a large bowl, melt two sticks of butter. Once the butter has melted, add the white sugar, brown sugar, and the rest of the cinnamon to the bowl and mix well until smooth.

Step 6: Over the dumplings, spoon the butter mixture.

Step 7: Around the dough, pour the Sprite, avoiding the tops.

Step 8: Place in the preheated oven and bake for about 30 to 35 minutes or until the top of the dough is browned.

Step 9: Remove from the oven when done and serve the Peach Dumplings warm. If desired, top with vanilla ice cream. Enjoy!

August 2, 2022 0 comment
0 FacebookTwitterPinterestEmail
General Recipes

Creamy Crockpot Chicken Tacos (3 Ingredients!)

by Rebecca August 2, 2022
written by Rebecca

Servings: 6

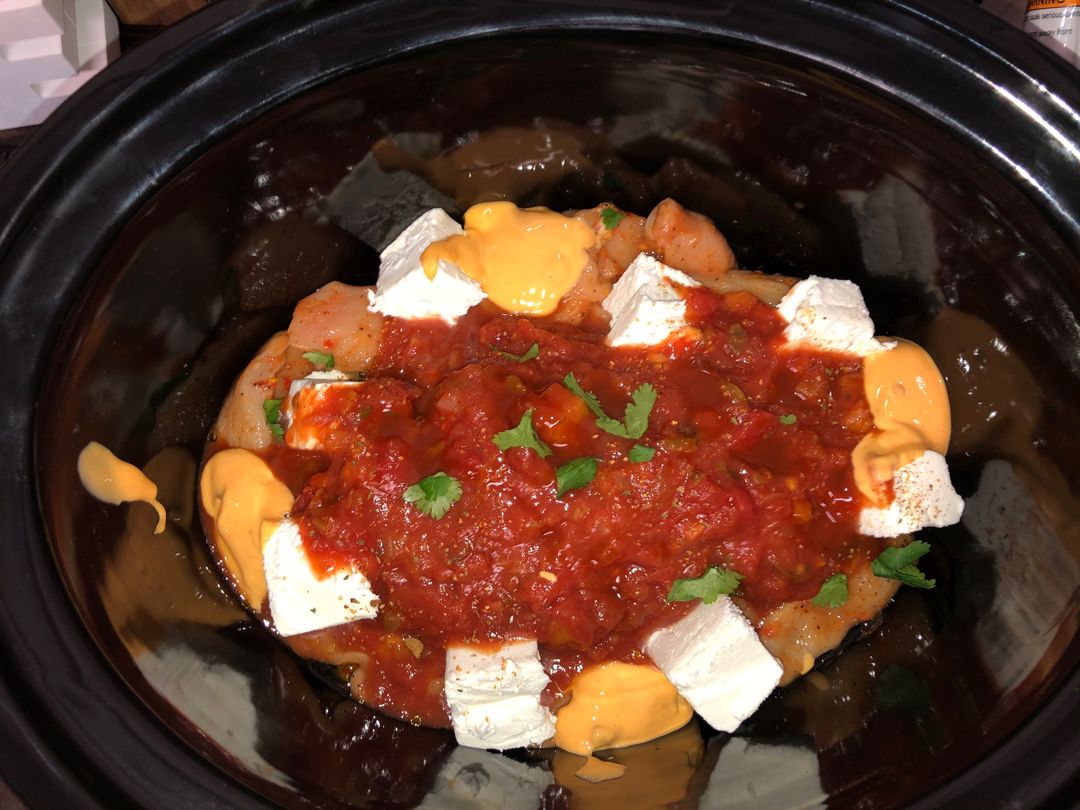
This three-ingredient creamy crockpot chicken taco is another exciting recipe that you should never miss! It is insanely easy to throw together! These tacos are family and kid-friendly. They are very delicious, creamy, and outstanding! All you need to do to make this is grab the ingredients, dump them into your crockpot, and set them to cook. To serve, spoon the chicken mixture into tacos. Or if you want to make a keto or low carb version, try putting this chicken mixture on salad instead.

If you are searching for another easy dinner that everyone will love, then these creamy crockpot chicken tacos are a great choice. For a complete package, top these tacos with your favorite toppings such as shredded cheese, avocado, tomatoes, and more!

Tacos are always a huge hit at home. They are one of our top favorites, and even my fussiest eaters dig them. This recipe is excellent if you want to dress your tacos differently. The taco seasoning is optional but recommended if you want another layer of flavor.

Ingredients

8 ounces cream cheese (cubed)

3-4 chicken breasts

1 (16 ounces) jar of salsa

tortillas for serving (optional)

taco seasoning (optional)

How to make Creamy Crockpot Chicken Tacos

Step 1: Using non-stick cooking spray, grease a slow cooker. In the slow cooker, place the chicken, salsa, cream cheese, and taco seasoning (optional). Cover and set to cook for 3 hours on High or 4 to 5 hours on low.

Step 2: Remove the chicken from the slow cooker and shred using a fork. Return the shredded chicken to the slow cooker and continue to cook for additional 15 minutes.

Step 3: Serve the creamy crockpot chicken tacos in taco shells, soft tortillas, or over a bed of lettuce. Top everything with shredded cheese, tomatoes, avocado, and your favorite toppings. For a keto or low-carb version, serve this on salad instead. Enjoy!

Creamy Crockpot Chicken Tacos (3 Ingredients!)

Rebecca Servings: 6 This three-ingredient creamy crockpot chicken taco is another exciting recipe that you should never miss! It is insanely easy to throw together! These tacos are family and kid-friendly.… General Recipes Creamy Crockpot Chicken Tacos (3 Ingredients!) European Print This
Serves: 6
Nutrition facts: 200 calories 20 grams fat
Rating: 5.0/5
( 1 voted )

Ingredients

  • 8 ounces cream cheese (cubed)
  • 3-4 chicken breasts
  • 1 (16 ounces) jar of salsa
  • tortillas for serving (optional)
  • taco seasoning (optional)

Instructions

Step 1: Using non-stick cooking spray, grease a slow cooker. In the slow cooker, place the chicken, salsa, cream cheese, and taco seasoning (optional). Cover and set to cook for 3 hours on High or 4 to 5 hours on low.

Step 2: Remove the chicken from the slow cooker and shred using a fork. Return the shredded chicken to the slow cooker and continue to cook for additional 15 minutes.

Step 3: Serve the creamy crockpot chicken tacos in taco shells, soft tortillas, or over a bed of lettuce. Top everything with shredded cheese, tomatoes, avocado, and your favorite toppings. For a keto or low-carb version, serve this on salad instead. Enjoy!

August 2, 2022 0 comment
0 FacebookTwitterPinterestEmail
Newer Posts
Older Posts

Popular Posts

  • 1

    Crispy Crunchy Parmesan Potatoes

    March 21, 2020
  • 2

    CROCK POT SMOTHERED PORK CHOPS

    March 21, 2020
  • Facebook
  • Twitter

@2019 - All Right Reserved.


Back To Top