Cook it once
  • Home
  • Privacy Policy
  • Recipes
    • KETO
    • LC
    • WW
  • Tips
  • Contact
Cook it once
  • Home
  • Privacy Policy
  • Recipes
    • KETO
    • LC
    • WW
  • Tips
  • Contact
Category:

General Recipes

General Recipes

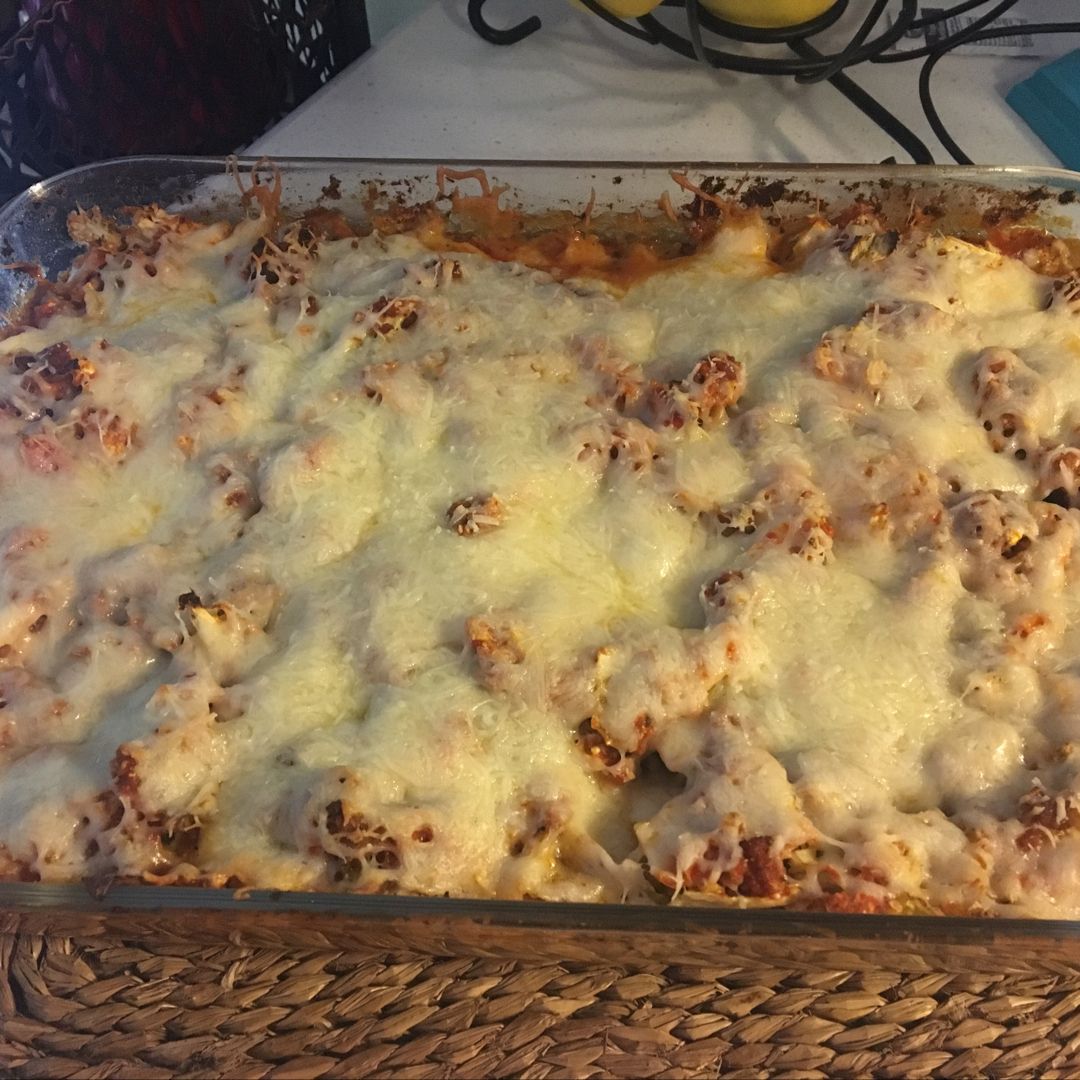
Quick And Easy Cabbage Roll Casserole

by Rebecca August 5, 2022
written by Rebecca

Total time: 1 hr | Serves: 8

This cabbage roll casserole is super easy and quick to make. It’s a filling, delicious casserole that has been a staple at home for years! A simplified version of the traditional cabbage rolls that you can easily make without a fuss.

INGREDIENTS

1 white onion, chopped

2 garlic cloves, minced

2 pounds of ground beef

4 bacon strips, cooked and crumbled

2 (24 ounces) jars of marinara sauce

1/2 tsp dried dill

1/2 tsp dried sage

1 tsp dried thyme

1 medium head (2 pounds) cabbage, shredded

1/4 tsp cayenne pepper

2 c. cooked white rice

1 1/2 c. mozzarella cheese, grated

1 tsp salt

1/2 tsp freshly ground black pepper

How to make Quick And Easy Cabbage Roll Casserole

Step 1: Prepare the oven. Preheat it to 375 degrees F. Using butter or non-stick spray, grease a 9 x 13-inch baking dish.

Step 2: Cook the ground beef and onion in a large skillet over medium heat until browned. Add the garlic and continue to cook for another minute.

Step 3: Drain the excess grease. To the meat mixture, add 1 jar of marinara sauce, thyme, dill, sage, and season with salt & pepper. Bring everything to a boil. Once boiling, decrease the heat and put the lid on. Let everything simmer for about 5 minutes. Then, add the bacon and rice. Stir well and take the pan off the heat.

Step 4: With 1/3 of the cabbage, line a baking dish and evenly top with the meat/rice mixture. On top, add another 1/3 of the cabbage followed by the rest of the meat mixture and the other third of the cabbage. On top, pour the rest of the marinara sauce. Tightly cover the dish with aluminium foil.

Step 5: Place in the preheated oven and bake for about 45 minutes. Uncover and resume baking for another 10 to 12 minutes until the cheese is bubbly and melted.

Step 6: Remove from the oven when done and allow the casserole to rest for about 5 minutes. Serve and enjoy!
Quick And Easy Cabbage Roll Casserole

Rebecca Total time: 1 hr | Serves: 8 This cabbage roll casserole is super easy and quick to make. It’s a filling, delicious casserole that has been a staple at home… General Recipes Quick And Easy Cabbage Roll Casserole European Print This
Serves: 8
Nutrition facts: 200 calories 20 grams fat
Rating: 5.0/5
( 1 voted )

Ingredients

  • 1 white onion, chopped
  • 2 garlic cloves, minced
  • 2 pounds of ground beef
  • 4 bacon strips, cooked and crumbled
  • 2 (24 ounces) jars of marinara sauce
  • 1/2 tsp dried dill
  • 1/2 tsp dried sage
  • 1 tsp dried thyme
  • 1 medium head (2 pounds) cabbage, shredded
  • 1/4 tsp cayenne pepper
  • 2 c. cooked white rice
  • 1 1/2 c. mozzarella cheese, grated
  • 1 tsp salt
  • 1/2 tsp freshly ground black pepper

Instructions

Step 1: Prepare the oven. Preheat it to 375 degrees F. Using butter or non-stick spray, grease a 9 x 13-inch baking dish.

Step 2: Cook the ground beef and onion in a large skillet over medium heat until browned. Add the garlic and continue to cook for another minute.

Step 3: Drain the excess grease. To the meat mixture, add 1 jar of marinara sauce, thyme, dill, sage, and season with salt & pepper. Bring everything to a boil. Once boiling, decrease the heat and put the lid on. Let everything simmer for about 5 minutes. Then, add the bacon and rice. Stir well and take the pan off the heat.

Step 4: With 1/3 of the cabbage, line a baking dish and evenly top with the meat/rice mixture. On top, add another 1/3 of the cabbage followed by the rest of the meat mixture and the other third of the cabbage. On top, pour the rest of the marinara sauce. Tightly cover the dish with aluminium foil.

Step 5: Place in the preheated oven and bake for about 45 minutes. Uncover and resume baking for another 10 to 12 minutes until the cheese is bubbly and melted.

Step 6: Remove from the oven when done and allow the casserole to rest for about 5 minutes. Serve and enjoy!
August 5, 2022 0 comment
0 FacebookTwitterPinterestEmail
General Recipes

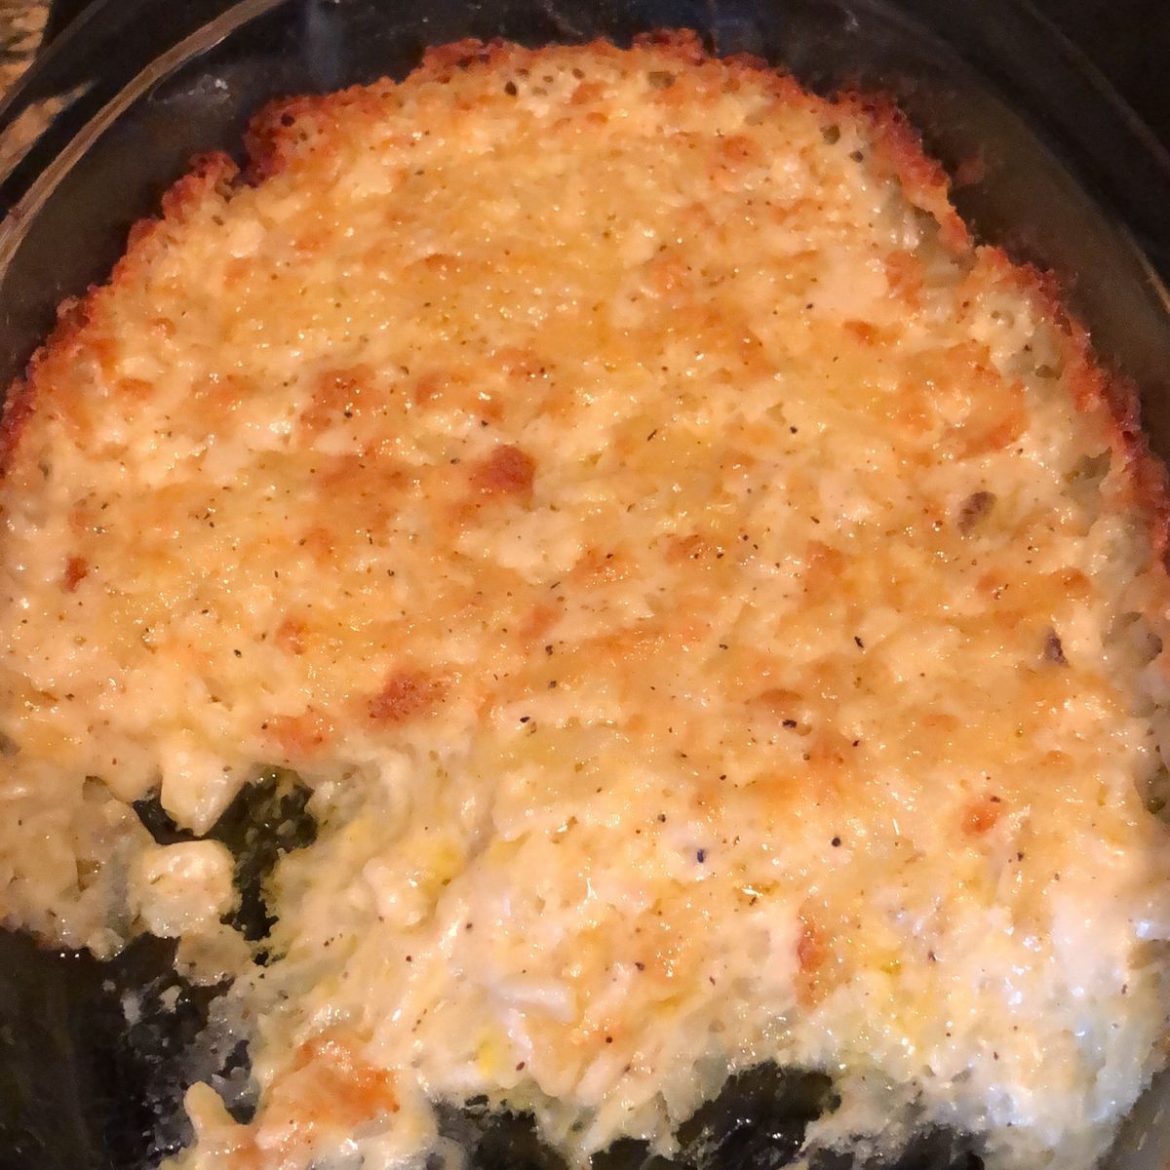
Sour Cream Hash Brown Casserole- A Delicious Side Dish For Easter

by Rebecca August 5, 2022
written by Rebecca

Total time: 1 hr | Serves: 6 – 8

I am in love with this sour cream hash brown casserole. It is incredibly easy to whip up using just basic ingredients, and this is ready in a snap. It’s a great side dish excellent to pair with pork chops, chicken, and steaks, with a side of steamed green beans for dinner. You can bring this to potlucks or gatherings. This casserole is also amazing to serve for a big brunch or dinner.

I especially enjoy this casserole for breakfast with some scrambled eggs and bacon. This sour cream hash brown casserole has been my favorite and go-to for a large weekend brunch or breakfast.

If you prefer a vegetarian casserole, you can use cream of mushroom instead of cream of chicken soup. You can store any leftover sour cream hash brown casserole in the fridge for up to 3 days or freeze it for up to 2 months. Leftovers are great for an easier and quicker meal.

INGREDIENTS

1/3 c. (5-6 tbsp) unsalted butter, melted

1 (32 ounces) package of frozen cubed hash browns

1 (10.75 ounces) can of cream of celery or chicken soup

1 c. sharp cheddar cheese, grated, divided

1/2 c. Ritz crackers, lightly crushed

1 (16 ounces) package of sour cream

1/2 tsp garlic powder

3 strips bacon, garnish

1 tsp salt

1 tsp black pepper

How to make Sour Cream Hash Brown Casserole

Step 1: Prepare the oven. Preheat it to 350 degrees F. Using a non-stick spray, lightly grease a 9 x 13-inch baking dish.

Step 2: Place the sour cream, celery soup, 3/4 cup cheddar cheese, and melted butter in a large bowl. Season with salt, pepper, and garlic powder. Mix well until blended. Fold in the hash browns.

Step 3: Into the prepared baking dish, transfer the mixture, and top with the crushed Ritz cracker.

Step 4: Place in the preheated oven and bake for about 35 to 40 minutes or until hot and bubbly.

Step 5: When done, take the casserole out of the oven and serve immediately. Enjoy!

Sour Cream Hash Brown Casserole- A Delicious Side Dish For Easter

Rebecca Total time: 1 hr | Serves: 6 – 8 I am in love with this sour cream hash brown casserole. It is incredibly easy to whip up using just basic… General Recipes Sour Cream Hash Brown Casserole- A Delicious Side Dish For Easter European Print This
Serves: 6-8
Nutrition facts: 200 calories 20 grams fat
Rating: 5.0/5
( 1 voted )

Ingredients

  • 1/3 c. (5-6 tbsp) unsalted butter, melted
  • 1 (32 ounces) package of frozen cubed hash browns
  • 1 (10.75 ounces) can of cream of celery or chicken soup
  • 1 c. sharp cheddar cheese, grated, divided
  • 1/2 c. Ritz crackers, lightly crushed
  • 1 (16 ounces) package of sour cream
  • 1/2 tsp garlic powder
  • 3 strips bacon, garnish
  • 1 tsp salt
  • 1 tsp black pepper

Instructions

Step 1: Prepare the oven. Preheat it to 350 degrees F. Using a non-stick spray, lightly grease a 9 x 13-inch baking dish.

Step 2: Place the sour cream, celery soup, 3/4 cup cheddar cheese, and melted butter in a large bowl. Season with salt, pepper, and garlic powder. Mix well until blended. Fold in the hash browns.

Step 3: Into the prepared baking dish, transfer the mixture, and top with the crushed Ritz cracker.

Step 4: Place in the preheated oven and bake for about 35 to 40 minutes or until hot and bubbly.

Step 5: When done, take the casserole out of the oven and serve immediately. Enjoy!

August 5, 2022 0 comment
0 FacebookTwitterPinterestEmail
General Recipes

NO-MESS OMELETTES IN A BAG

by Rebecca August 4, 2022
written by Rebecca

Prep Time: 5 mins | Cook Time: 15 mins | Total Time: 20 mins | Servings: 1 omelette

This is not your ordinary omelette recipe. This is a very innovative recipe that unexpectedly comes out amazing! This recipe is good for one person only, but you can add about eight bags in the boiling water at once if serving an entire family.

I am super amazed by the ever-evolving culinary world. Unconventional, very creative, and makes the cooking process easier. I am surprised with this omelette in a bag. This is something I have never expected. This is no doubt a no-mess but guarantees a fun, cool, practical, and delicious omelette.

This recipe is very practical for camping. Place everything in the individual freezer bags, shake, and place them in the pot with boiling water. This omelette in a bag is a true no-fuss, mess-free recipe!

This omelette is worth the hype! Scrambled egg with ham, cheese, salsa, mushrooms, and more in a bag! I urge you to try this recipe. It’ll surprise you!

Ingredients

2 fresh mushrooms, sliced

2 eggs

1 tbsp chopped onion

2 slices of ham, chopped

½ c. shredded Cheddar cheese

2 tbsp chopped fresh tomato

1 tbsp chunky salsa

1 tbsp chopped green bell pepper

HOW TO MAKE NO-MESS OMELETTES IN A BAG

Step 1: In a large resealable freezer bag, crack two eggs. Before sealing the bag, press as much air as possible. Shake the bag to beat the eggs.

Step 2: Open the bag and add the remaining ingredients. Seal the bag and place it in boiling water. Cook for about 20 minutes or until the mixture is set. Take the bag out of the water using tongs when done.

Step 3: Onto a plate, roll the omelette. Before serving, garnish the omelette. Enjoy!

Tips:

This recipe yield one, but you can place up to about eight bags in the boiling water at once.

For this recipe, make sure to use BPA-free freezer bags.

Nutrition Facts:

Calories: 599 kcal | Carbohydrates: 1g | Protein: 36g | Fat: 49g | Saturated Fat: 19g | Cholesterol: 442mg | Sodium: 1053mg | Potassium: 415mg | Sugar: 1g | Vitamin A: 847IU | Calcium: 264mg | Iron: 3mg

NO-MESS OMELETTES IN A BAG

Rebecca Prep Time: 5 mins | Cook Time: 15 mins | Total Time: 20 mins | Servings: 1 omelette This is not your ordinary omelette recipe. This is a very innovative… General Recipes NO-MESS OMELETTES IN A BAG European Print This
Serves: 1 Prep Time: 5 mins Cooking Time: 15 mins 15 mins
Nutrition facts: 599 calories 49 fat
Rating: 5.0/5
( 1 voted )

Ingredients

  • 2 fresh mushrooms, sliced
  • 2 eggs
  • 1 tbsp chopped onion
  • 2 slices of ham, chopped
  • ½ c. shredded Cheddar cheese
  • 2 tbsp chopped fresh tomato
  • 1 tbsp chunky salsa
  • 1 tbsp chopped green bell pepper

Instructions

Step 1: In a large resealable freezer bag, crack two eggs. Before sealing the bag, press as much air as possible. Shake the bag to beat the eggs.

Step 2: Open the bag and add the remaining ingredients. Seal the bag and place it in boiling water. Cook for about 20 minutes or until the mixture is set. Take the bag out of the water using tongs when done.

Step 3: Onto a plate, roll the omelette. Before serving, garnish the omelette. Enjoy!

Notes

This recipe yield one, but you can place up to about eight bags in the boiling water at once. For this recipe, make sure to use BPA-free freezer bags.

August 4, 2022 0 comment
0 FacebookTwitterPinterestEmail
General Recipes

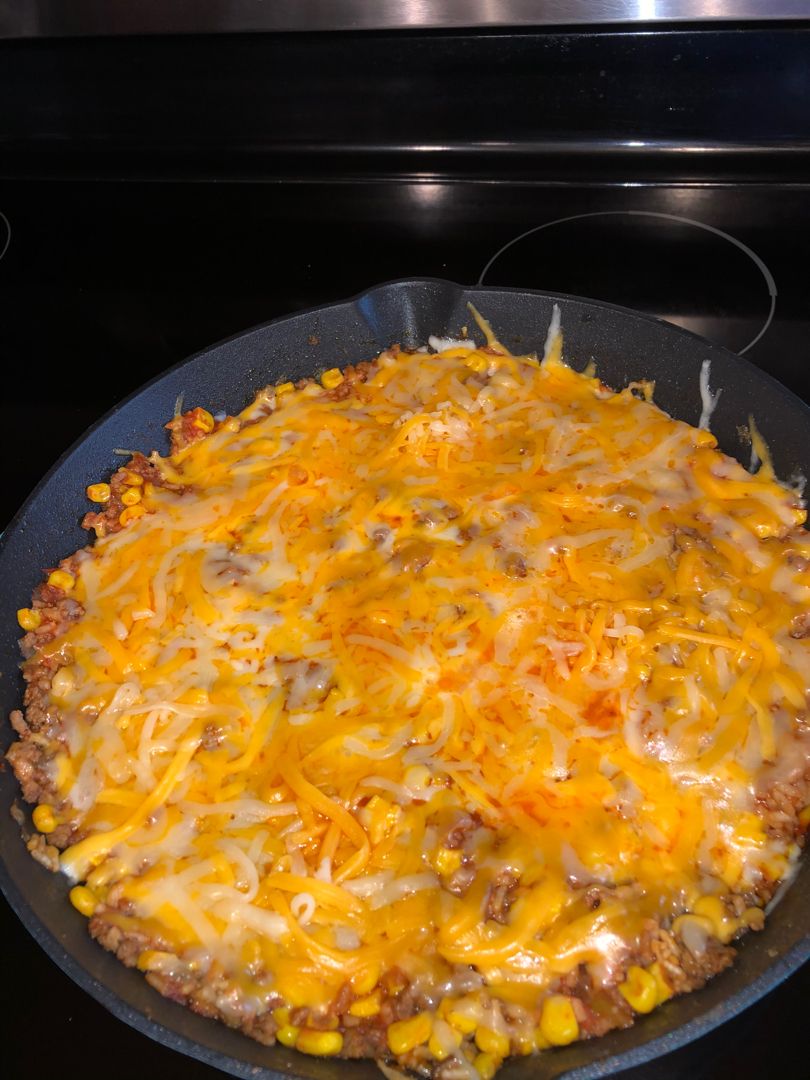
ONE POT MEXICAN RICE CASSEROLE

by Rebecca August 4, 2022
written by Rebecca

This casserole is amazing, packed with a flavorful dish with beefy, cheesy rice mixture. An incredibly simple casserole that you can easily throw together using only a few readily available ingredients. This Mexican Rice Casserole is a wonderful one-pot dish option if you want a full meal with flavors of tacos or enchiladas.

This quick and easy casserole is one of my family’s favorites. It is super flavorful and filling. An amazing, restaurant-quality dish that you can easily make at home. Hearty, versatile, and a great dinner option. Leftovers are excellent, too. Try serving this with an extra side of salsa and a dollop of sour cream for a more satisfying meal!

INGREDIENTS

1 small onion, diced

1 pound of ground beef

2 tablespoons Taco seasoning

1 c. long-grain white rice

1 teaspoon garlic powder

1 1/2 c. beef broth

1 15-ounces can of corn, drained

1/2 c. salsa

8 ounces tomato sauce

1 c. shredded cheese

salt & pepper, to taste

HOW TO MAKE ONE POT MEXICAN RICE CASSEROLE

Step 1: Cook the ground beef in a large skillet, breaking the meat into chunks as it cooks. Season with salt and pepper and cook over medium-high heat until no longer pink. Drain the excess grease.

Step 2: To the ground beef, add garlic and taco seasoning. Then, add the rice, corn, broth, tomato sauce, and salsa. Stir well and bring everything to a boil. Put the lid on and adjust the heat to low. Simmer for about 18 to 20 minutes or until the rice is tender.

Step 3: Take the skillet off the heat and sprinkle the cheese on top. Replace the lid and allow the casserole to sit until the cheese has melted.

Step 4: Serve the casserole right away. Enjoy!

Tips:

In a Tupperware container, keep any leftovers. This will stay fresh for up to a week. Before serving, reheat the leftovers.

If desired, you can add other spices to this recipe. You can add hot salsa or spicier taco seasoning if you want to make this casserole a little hotter.

For best results, use Mexican rice.

ONE POT MEXICAN RICE CASSEROLE

Rebecca This casserole is amazing, packed with a flavorful dish with beefy, cheesy rice mixture. An incredibly simple casserole that you can easily throw together using only a few readily available… General Recipes ONE POT MEXICAN RICE CASSEROLE European Print This
Nutrition facts: 200 calories 20 grams fat
Rating: 5.0/5
( 1 voted )

Ingredients

  • 1 small onion, diced
  • 1 pound of ground beef
  • 2 tablespoons Taco seasoning
  • 1 c. long-grain white rice
  • 1 teaspoon garlic powder
  • 1 1/2 c. beef broth
  • 1 15-ounces can of corn, drained
  • 1/2 c. salsa
  • 8 ounces tomato sauce
  • 1 c. shredded cheese
  • salt & pepper, to taste

Instructions

Step 1: Cook the ground beef in a large skillet, breaking the meat into chunks as it cooks. Season with salt and pepper and cook over medium-high heat until no longer pink. Drain the excess grease.

Step 2: To the ground beef, add garlic and taco seasoning. Then, add the rice, corn, broth, tomato sauce, and salsa. Stir well and bring everything to a boil. Put the lid on and adjust the heat to low. Simmer for about 18 to 20 minutes or until the rice is tender.

Step 3: Take the skillet off the heat and sprinkle the cheese on top. Replace the lid and allow the casserole to sit until the cheese has melted.

Step 4: Serve the casserole right away. Enjoy!

Notes

In a Tupperware container, keep any leftovers. This will stay fresh for up to a week. Before serving, reheat the leftovers. If desired, you can add other spices to this recipe. You can add hot salsa or spicier taco seasoning if you want to make this casserole a little hotter. For best results, use Mexican rice.

August 4, 2022 0 comment
0 FacebookTwitterPinterestEmail
General Recipes

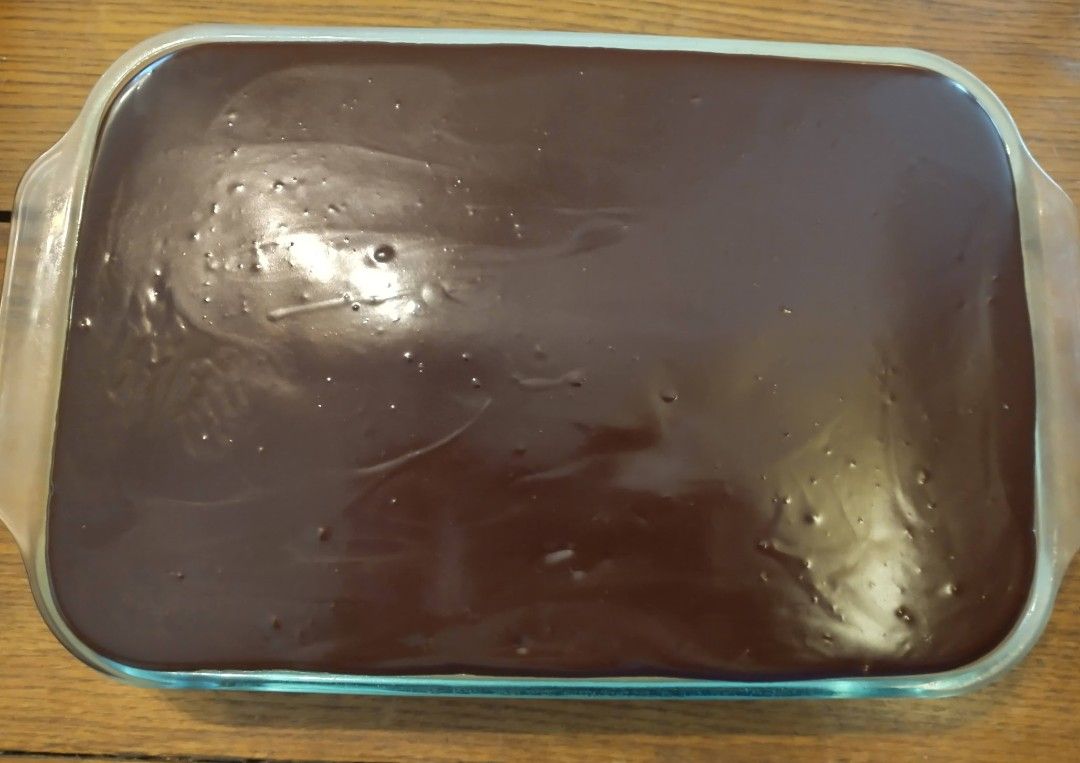
Boston Cream Poke Cake

by Rebecca August 4, 2022
written by Rebecca

This Boston Cream Poke Cake is very special. The pudding is poured into the holes in the cake. This makes an extraordinary cream filling that is bursting with decadent flavors! I enjoy this cake so much that I serve this whenever. This cake is also excellent for all occasions from birthdays, Holidays, anniversaries, or even just as a simple dessert after a meal.

This insanely rich cake is a very simple cake to make. This is out of a box of cake mix cake. This poke cake like the other poke cakes I’ve tried is super fun and easy dessert that has a melt-in-your-mouth surprise inside. This poke cake is great to bring to potlucks, picnics, or parties. This poke cake has been my go-to for a showstopping dessert. A great choice for an easy and quick dessert with a heavenly combination of yellow cake, vanilla pudding, and chocolate frosting!

Ingredients

4 c. Milk

2 small boxes (3.4 ounces) of Instant Vanilla Pudding Mix

1 container of Chocolate Frosting

1 box Yellow Cake Mix (plus box ingredients)

How to make Boston Cream Poke Cake

Step 1: Following the package directions, prepare and bake the yellow cake mix. Remove from the oven when done and let the cake cool until slightly warm.

Step 2: Poke tiny holes across the cake using the handle of a spoon.

Step 3: Whisk the milk and pudding until well combined and smooth. Evenly pour this over the holes in the cake.

Step 4: Chill the cake in the fridge until the pudding is set.

Step 5: In the meantime, make the frosting. In a bowl, place the frosting and microwave for about 15 seconds, stirring a bit. Repeat the same process until you have a pourable frosting.

Step 6: Take the cake out of the fridge and pour the frosting all over the pudding. Cover the whole cake with the chocolate frosting using a spatula.

Step 7: Keep the cake in the fridge again for a couple of hours before serving. Enjoy!

Boston Cream Poke Cake

Rebecca This Boston Cream Poke Cake is very special. The pudding is poured into the holes in the cake. This makes an extraordinary cream filling that is bursting with decadent flavors!… General Recipes Boston Cream Poke Cake European Print This
Nutrition facts: 200 calories 20 grams fat
Rating: 5.0/5
( 1 voted )

Ingredients

  • 4 c. Milk
  • 2 small boxes (3.4 ounces) of Instant Vanilla Pudding Mix
  • 1 container of Chocolate Frosting
  • 1 box Yellow Cake Mix (plus box ingredients)

Instructions

Step 1: Following the package directions, prepare and bake the yellow cake mix. Remove from the oven when done and let the cake cool until slightly warm.

Step 2: Poke tiny holes across the cake using the handle of a spoon.

Step 3: Whisk the milk and pudding until well combined and smooth. Evenly pour this over the holes in the cake.

Step 4: Chill the cake in the fridge until the pudding is set.

Step 5: In the meantime, make the frosting. In a bowl, place the frosting and microwave for about 15 seconds, stirring a bit. Repeat the same process until you have a pourable frosting.

Step 6: Take the cake out of the fridge and pour the frosting all over the pudding. Cover the whole cake with the chocolate frosting using a spatula.

Step 7: Keep the cake in the fridge again for a couple of hours before serving. Enjoy!

August 4, 2022 0 comment
0 FacebookTwitterPinterestEmail
General Recipes

Amish Cinnamon Bread

by Rebecca August 4, 2022
written by Rebecca

Prep time: 15 mins | Cook time: 45 mins | Cooling time: 1 hr | Total time: 2 hrs | Yield: 2 loaves

This Amish Cinnamon Bread is an amazing loaf that you can easily make at any time. All you need are a few simple ingredients. Simply mix everything in a bowl, kneading is not required. Layer the batter and cinnamon sugar in the pans, bake, and boom! You have one of the best loaves you’ll ever make!

This Amish Cinnamon Bread is a quick pick-me-up breakfast and snack loaf. This recipe yield two pieces of bread which is more than enough for a crowd. You can keep the other one in the freezer, and it’ll stay fresh for up to 6 months.

Ingredients

Bread:

2 large eggs

2 c. buttermilk

2 c. granulated sugar

1 c. (2 sticks) Challenge butter, softened

2 tsp vanilla extract

2 tsp baking soda

4 c. all-purpose flour

Topping:

2 tsp ground cinnamon

⅔ c. of granulated sugar

How to make Amish Cinnamon Bread

Step 1: Prepare the oven. Preheat it to 350 degrees F. Ready two loaf pans. Grease and set aside.

Step 2: In a small bowl, place the butter, sugar, eggs, and vanilla. Beat using a handheld mixture. Then, add the buttermilk along with the flour and baking soda. With a rubber spatula, mix everything until well blended.

Step 3: In a small bowl, whisk the cinnamon-sugar ingredients until well mixed.

Step 4: Between the prepared loaf pans, divide half of the batter and evenly sprinkle with 3/4 of the cinnamon-sugar mixture. On top, spread the rest of the batter and sprinkle with the remaining cinnamon sugar. Through each batter, cut a couple of curl marks.

Step 5: Place in the preheated oven for about 45 minutes or until a toothpick inserted in the middle of the bread comes out clean. Remove from the oven when done and let the bread cool for about 20 minutes, then invert on the wire racks to cool completely.

Tips:

Wrap any leftovers in aluminium foil and store them in the freezer for up to 6 months.

Nutritional Facts:

Calories: 182 Kcl, Total Fat: 1g, Cholesterol: 18mg, Sodium: 154mg, Carbohydrates: 39g, Fiber: 1g, Sugar: 23g, Protein: 3g

Amish Cinnamon Bread

Rebecca Prep time: 15 mins | Cook time: 45 mins | Cooling time: 1 hr | Total time: 2 hrs | Yield: 2 loaves This Amish Cinnamon Bread is an amazing… General Recipes Amish Cinnamon Bread European Print This
Prep Time: 15 mins Cooking Time: 45 mins 45 mins
Nutrition facts: 182 calories 1 fat
Rating: 4.2/5
( 5 voted )

Ingredients

  • Bread:
  • 2 large eggs
  • 2 c. buttermilk
  • 2 c. granulated sugar
  • 1 c. (2 sticks) Challenge butter, softened
  • 2 tsp vanilla extract
  • 2 tsp baking soda
  • 4 c. all-purpose flour
  • Topping:
  • 2 tsp ground cinnamon
  • ⅔ c. of granulated sugar

Instructions

Step 1: Prepare the oven. Preheat it to 350 degrees F. Ready two loaf pans. Grease and set aside.

Step 2: In a small bowl, place the butter, sugar, eggs, and vanilla. Beat using a handheld mixture. Then, add the buttermilk along with the flour and baking soda. With a rubber spatula, mix everything until well blended.

Step 3: In a small bowl, whisk the cinnamon-sugar ingredients until well mixed.

Step 4: Between the prepared loaf pans, divide half of the batter and evenly sprinkle with 3/4 of the cinnamon-sugar mixture. On top, spread the rest of the batter and sprinkle with the remaining cinnamon sugar. Through each batter, cut a couple of curl marks.

Step 5: Place in the preheated oven for about 45 minutes or until a toothpick inserted in the middle of the bread comes out clean. Remove from the oven when done and let the bread cool for about 20 minutes, then invert on the wire racks to cool completely.

Notes

Wrap any leftovers in aluminium foil and store them in the freezer for up to 6 months.

August 4, 2022 0 comment
0 FacebookTwitterPinterestEmail
General Recipes

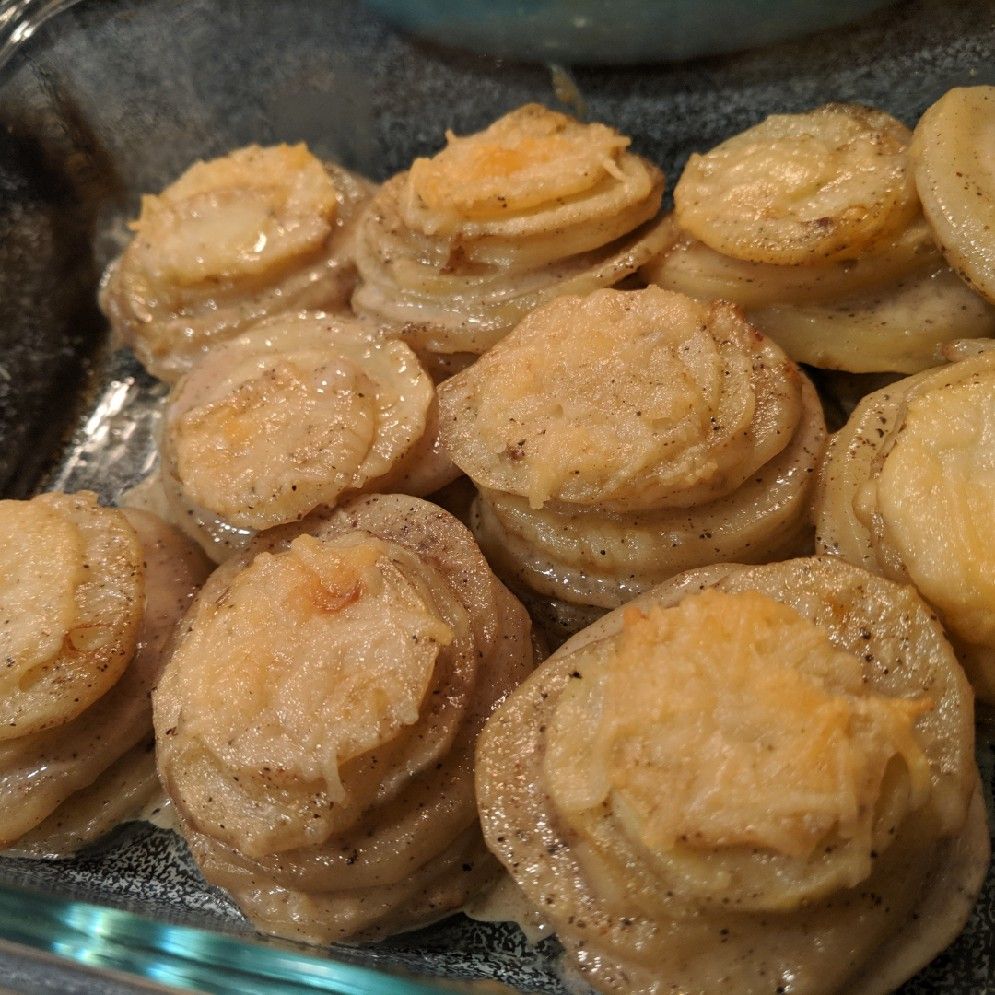
Creamy Parmesan Potato Stacks: A Delicious And Healthy Side Dish

by Rebecca August 4, 2022
written by Rebecca

Prep time: 2 hrs | Cook time: 25 mins | Yield: 12 stacks

I love potatoes. Potatoes are very versatile. I have a long list of my favorite potato recipes, and one of them is these delicious creamy Parmesan potato stacks. These are amazing, healthy side dishes that pair so well with just about anything! These potato stacks are incredibly easy to throw together. For this recipe, you only need simple ingredients that you can find in your kitchen. It is no surprise why even my fussiest eaters love these simple yet very delightful creamy Parmesan potato stacks.

INGREDIENTS

3 garlic cloves, minced

1 sprig of fresh thyme (plus more for garnish)

1/2 tsp nutmeg

1 1/2 c. heavy cream

2 pounds medium russet potatoes (about 4-5), peeled and sliced 1/8-1/16” thick, using a mandolin

Salt & pepper to taste

1 c. Parmesan cheese, grated (plus more for garnish)

How to make Creamy Parmesan Potato Stacks

Step 1: Prepare the oven. Preheat it to 375 degrees. Using nonstick cooking spray, grease a 12-cup standard muffin pan and set aside.

Step 2: In a small saucepan, place the cream, thyme, garlic, and nutmeg. Mix well until combined. Bring everything to a slow simmer and take the pan off the heat. Discard the thyme.

Step 3: Sprinkle the slices of potato with salt and pepper and toss well. Into the prepared muffin cups, layer them into stacks, filling each cup to the top but not over the top. Over each potato stack, spoon the cream. Fill the cups to almost the top. Then, sprinkle each with Parmesan cheese.

Step 4: Place in the preheated oven and bake for about 25 to 30 minutes or until the potatoes are tender and the tops are golden brown.

Step 5: When done, remove the muffin pan from the oven and allow the creamy Parmesan potato stacks for about 5 minutes. Before serving, sprinkle each stack with fresh thyme and extra Parmesan. Enjoy!

Creamy Parmesan Potato Stacks: A Delicious And Healthy Side Dish

Rebecca Prep time: 2 hrs | Cook time: 25 mins | Yield: 12 stacks I love potatoes. Potatoes are very versatile. I have a long list of my favorite potato recipes,… General Recipes Creamy Parmesan Potato Stacks: A Delicious And Healthy Side Dish European Print This
Serves: 12 Prep Time: 2 hrs Cooking Time: 25 mins 25 mins
Nutrition facts: 200 calories 20 grams fat
Rating: 5.0/5
( 1 voted )

Ingredients

  • 3 garlic cloves, minced
  • 1 sprig of fresh thyme (plus more for garnish)
  • 1/2 tsp nutmeg
  • 1 1/2 c. heavy cream
  • 2 pounds medium russet potatoes (about 4-5), peeled and sliced 1/8-1/16” thick, using a mandolin
  • Salt & pepper to taste
  • 1 c. Parmesan cheese, grated (plus more for garnish)

Instructions

Step 1: Prepare the oven. Preheat it to 375 degrees. Using nonstick cooking spray, grease a 12-cup standard muffin pan and set aside.

Step 2: In a small saucepan, place the cream, thyme, garlic, and nutmeg. Mix well until combined. Bring everything to a slow simmer and take the pan off the heat. Discard the thyme.

Step 3: Sprinkle the slices of potato with salt and pepper and toss well. Into the prepared muffin cups, layer them into stacks, filling each cup to the top but not over the top. Over each potato stack, spoon the cream. Fill the cups to almost the top. Then, sprinkle each with Parmesan cheese.

Step 4: Place in the preheated oven and bake for about 25 to 30 minutes or until the potatoes are tender and the tops are golden brown.

Step 5: When done, remove the muffin pan from the oven and allow the creamy Parmesan potato stacks for about 5 minutes. Before serving, sprinkle each stack with fresh thyme and extra Parmesan. Enjoy!

August 4, 2022 0 comment
0 FacebookTwitterPinterestEmail
General Recipes

Ranch Chicken Enchiladas

by Rebecca August 4, 2022
written by Rebecca

Servings: 8

These ranch Chicken Enchiladas are my family’s all-time favorite! These enchiladas are creamy and packed with amazing flavors. Shredded taco chicken covered in cheese and salsa-ranch mixture wrapped in flour tacos with tons of melted cheese on top.

Ingredients

1/2 c. chicken broth

3/4 c. salsa

1 packet (1 oz.) taco seasoning

3/4 c. prepared Ranch dressing

3 to 4 medium boneless, skinless chicken breasts

8 medium flour tortillas

1 to 2 c. shredded cheddar cheese

How to make Ranch Chicken Enchiladas

Step 1: In a crockpot, pour in half a cup of chicken broth. Add the chicken breasts along with the taco seasoning. Put the lid on and set to cook for 3 hours on low or until the chicken is completely cooked. When done, take the chicken out of the pot and shred using two forks.

Step 2: Prepare the oven. Preheat it to 350 degrees F. Using cooking spray, grease a 9 x 13-inch baking dish.

Step 3: Combine the salsa and Ranch dressing until well mixed. On the bottom of the prepared baking dish, spread a thin layer of the salsa-ranch mixture.

Step 4: Into the center of a tortilla, place 1/3 c. of the chicken and top with 1 tbsp cheese and 2 tbsp salsa-ranch mixture. Roll the tortilla and lay it in the baking dish. Do the same with the remaining ingredients.

Step 5: Over the enchiladas, pour the rest of the salsa-ranch mixture and evenly sprinkle the rest of the cheddar cheese on top.

Step 6: Place in the preheated oven and bake for about 25 to 30 minutes or until the cheese has melted and the enchiladas are completely heated.

Step 7: On top, drizzle more ranch dressing. Enjoy!

Note:

You can also cook the chicken breasts on the stovetop. Shred the chicken once cooked and stir with chicken broth and taco seasoning.

Ranch Chicken Enchiladas

Rebecca Servings: 8 These ranch Chicken Enchiladas are my family’s all-time favorite! These enchiladas are creamy and packed with amazing flavors. Shredded taco chicken covered in cheese and salsa-ranch mixture wrapped… General Recipes Ranch Chicken Enchiladas European Print This
Serves: 8
Nutrition facts: 200 calories 20 grams fat
Rating: 4.0/5
( 2 voted )

Ingredients

  • 1/2 c. chicken broth
  • 3/4 c. salsa
  • 1 packet (1 oz.) taco seasoning
  • 3/4 c. prepared Ranch dressing
  • 3 to 4 medium boneless, skinless chicken breasts
  • 8 medium flour tortillas
  • 1 to 2 c. shredded cheddar cheese

Instructions

Step 1: In a crockpot, pour in half a cup of chicken broth. Add the chicken breasts along with the taco seasoning. Put the lid on and set to cook for 3 hours on low or until the chicken is completely cooked. When done, take the chicken out of the pot and shred using two forks.

Step 2: Prepare the oven. Preheat it to 350 degrees F. Using cooking spray, grease a 9 x 13-inch baking dish.

Step 3: Combine the salsa and Ranch dressing until well mixed. On the bottom of the prepared baking dish, spread a thin layer of the salsa-ranch mixture.

Step 4: Into the center of a tortilla, place 1/3 c. of the chicken and top with 1 tbsp cheese and 2 tbsp salsa-ranch mixture. Roll the tortilla and lay it in the baking dish. Do the same with the remaining ingredients.

Step 5: Over the enchiladas, pour the rest of the salsa-ranch mixture and evenly sprinkle the rest of the cheddar cheese on top.

Step 6: Place in the preheated oven and bake for about 25 to 30 minutes or until the cheese has melted and the enchiladas are completely heated.

Step 7: On top, drizzle more ranch dressing. Enjoy!

Notes

You can also cook the chicken breasts on the stovetop. Shred the chicken once cooked and stir with chicken broth and taco seasoning.

August 4, 2022 0 comment
0 FacebookTwitterPinterestEmail
General Recipes

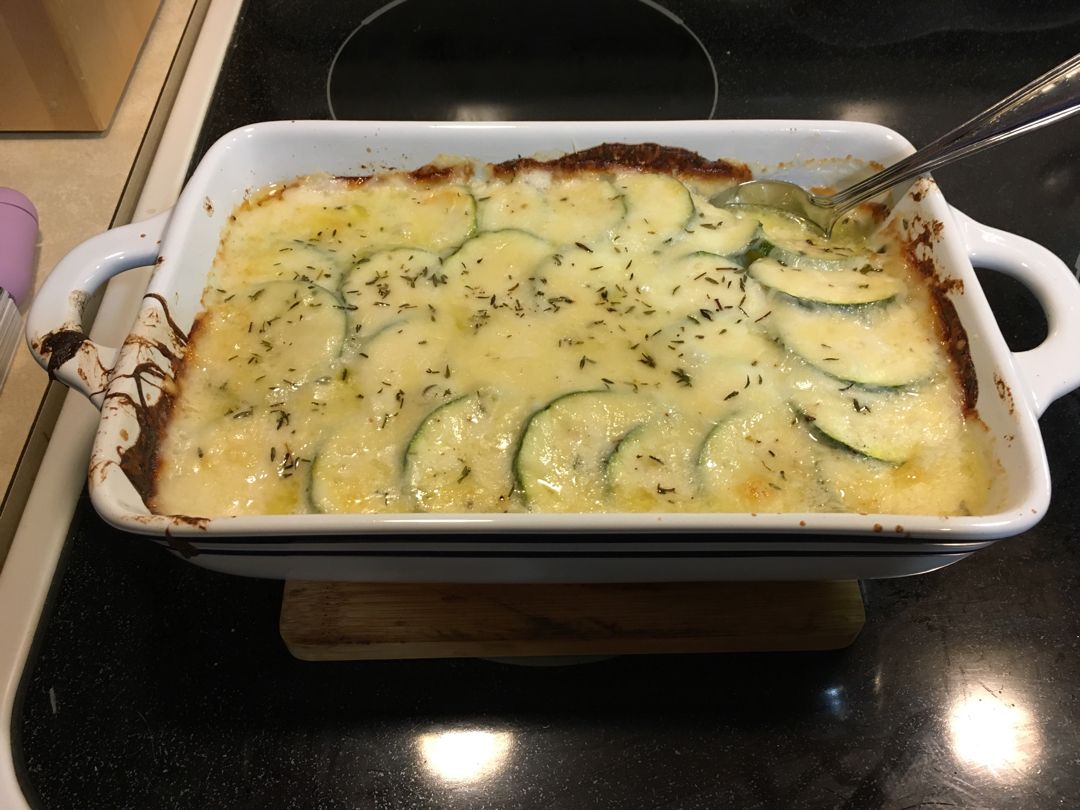
This Cheesy Scalloped Zucchini Recipe Is The Ultimate Comfort Food

by Rebecca August 4, 2022
written by Rebecca

Prep time: 5 mins | Cook time: 10 mins | Serves: 4

I love cheesy scalloped zucchini! I only get this from my favorite restaurant, and I never thought that I can easily whip this up at home. This simple recipe made it possible. It is super easy, quick, and very delicious. A fifteen-minute side dish that pairs so well with just about anything.

This cheesy scalloped zucchini is packed with fresh zucchini smothered in a creamy cheesy sauce. This recipe is excellent if you have an abundance of zucchini or if you simply love zucchinis. This is super good and has been one of my go-to for years. The ultimate comfort food that even my fussiest eaters enjoy! I love to pair this up with grilled and baked meats for a restaurant-quality meal that you can whip up at home!

INGREDIENTS

1 pound zucchini, thinly sliced

Unsalted butter, softened, as needed

2/3 c. heavy cream

1/2 tsp garlic powder

1 1/2 tbsp all-purpose flour

1/2 c. Parmigiano-Reggiano, freshly grated

1/2 c. Gruyere cheese, freshly grated

1 tsp dried thyme

Kosher salt and freshly ground black pepper, to taste

1/3 c. panko breadcrumbs

How to make Cheesy Scalloped Zucchini

Step 1: Place the oven rack about 6 inches from the broiler, then preheat the broiler on high.

Step 2: Using softened butter, grease a shallow 9 x 13-inch baking dish or rimmed sheet pan.

Step 3: Sprinkle the zucchini with salt and pepper. On the prepared baking pan, arrange the zucchini. Place in the preheated oven and broil for about 4 minutes or until the zucchini is just starting to soften.

Step 4: In the meantime, place the cream, thyme, garlic powder, Parmesan cheese, and flour in a small bowl. Mix well until blended. Over the squash, evenly pour the mixture, and top with Gruyere cheese and panko breadcrumbs.

Step 5: Broil for another 4 to 5 minutes or until the top is golden brown.

Step 6: Serve and enjoy!

This Cheesy Scalloped Zucchini Recipe Is The Ultimate Comfort Food

Rebecca Prep time: 5 mins | Cook time: 10 mins | Serves: 4 I love cheesy scalloped zucchini! I only get this from my favorite restaurant, and I never thought that… General Recipes This Cheesy Scalloped Zucchini Recipe Is The Ultimate Comfort Food European Print This
Serves: 4 Prep Time: 5 mins Cooking Time: 10 mins 10 mins
Nutrition facts: 200 calories 20 grams fat
Rating: 4.0/5
( 2 voted )

Ingredients

  • 1 pound zucchini, thinly sliced
  • Unsalted butter, softened, as needed
  • 2/3 c. heavy cream
  • 1/2 tsp garlic powder
  • 1 1/2 tbsp all-purpose flour
  • 1/2 c. Parmigiano-Reggiano, freshly grated
  • 1/2 c. Gruyere cheese, freshly grated
  • 1 tsp dried thyme
  • Kosher salt and freshly ground black pepper, to taste
  • 1/3 c. panko breadcrumbs

Instructions

Step 1: Place the oven rack about 6 inches from the broiler, then preheat the broiler on high.

Step 2: Using softened butter, grease a shallow 9 x 13-inch baking dish or rimmed sheet pan.

Step 3: Sprinkle the zucchini with salt and pepper. On the prepared baking pan, arrange the zucchini. Place in the preheated oven and broil for about 4 minutes or until the zucchini is just starting to soften.

Step 4: In the meantime, place the cream, thyme, garlic powder, Parmesan cheese, and flour in a small bowl. Mix well until blended. Over the squash, evenly pour the mixture, and top with Gruyere cheese and panko breadcrumbs.

Step 5: Broil for another 4 to 5 minutes or until the top is golden brown.

Step 6: Serve and enjoy!

August 4, 2022 0 comment
0 FacebookTwitterPinterestEmail
General Recipes

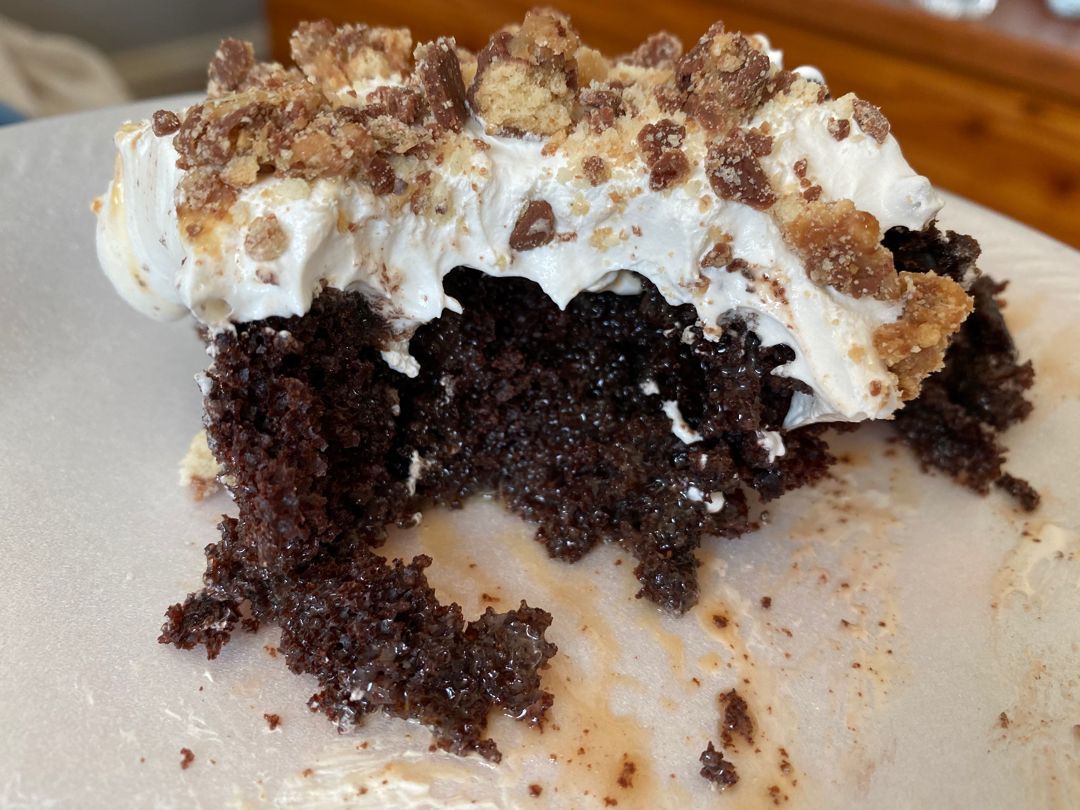
Better Than Anything Cake

by Rebecca August 4, 2022
written by Rebecca

If you are searching for another dessert that will surely impress everyone, then this Better Than Anything Cake is a great option. This cake has three layers with different textures from a delightful nutty bottom and buttery flakiness. This is no doubt the perfect cake for every occasion!

Ingredients

Crust:

3/4 c. butter, melted

1 c. pecans finely chopped

1 1/2 c. all-purpose flour

First layer:

1 (8-12 ounces) container Cool Whip (divided) – 1 c. for this layer and the rest for the topping

1 (8 ounces) package of cream cheese – room temperature

1 c. confectioners’ sugar

Second layer:

3 c. whole milk (for a sturdier pudding)

1 (3.4 ounces) package vanilla instant pudding

1 (3.4 ounces) package of chocolate instant pudding

For the top:

Grated/Shaved chocolate sprinkled over the top

Remaining Cool Whip

How to make Better Than Anything Cake

Crust layer:

Step 1: Prepare the oven. Preheat it to 325 degrees F.

Step 2: Place the flour, butter, and pecans in a medium bowl. Mix well and press the mixture into the bottom of a 9 x 13-inch baking dish.

Step 3: Place in the preheated oven and bake for about 25 minutes. When done, take the baking dish out of the oven and let the crust layer cool completely.

First Layer:

Step 4: Place the cream cheese, confectioners’ sugar, and 1 c. Cool Whip in a large bowl. Using a mixer, beat the ingredients. Over the crust, spread the cream cheese mixture.

Step 5: Chill the first layer until firmed before proceeding to the next step. In the freezer, place the baking dish for about 20 minutes.

Second Layer:

Step 6: In a large bowl, place the puddings and milk. Mix, following the package directions.

Step 7: Take the pan out of the freezer and spread the pudding layer on top of the cream cheese layer.

Step 8: Place the pan back in the freezer and freeze for 20 minutes until firm.

Top Layer:

Step 9: On top, spread the rest of the Cool Whip and sprinkle with shaved/grated chocolate.

Step 10: if time permits, chill in the fridge for at least 2 hours.

Notes:

You can whip this dessert up 2 days ahead. Simply wrap this in plastic wrap and keep it in the fridge.

In a plastic wrap, tightly wrap any leftovers and keep them in the fridge for up to 4 days.

For this recipe, you need 12 ounces of cool whip.

Before proceeding to the next layers, it is very important to chill each layer to prevent mess.

Better Than Anything Cake

Rebecca If you are searching for another dessert that will surely impress everyone, then this Better Than Anything Cake is a great option. This cake has three layers with different textures… General Recipes Better Than Anything Cake European Print This
Nutrition facts: 200 calories 20 grams fat
Rating: 5.0/5
( 1 voted )

Ingredients

  • Crust:
  • 3/4 c. butter, melted
  • 1 c. pecans finely chopped
  • 1 1/2 c. all-purpose flour
  • First layer:
  • 1 (8-12 ounces) container Cool Whip (divided) – 1 c. for this layer and the rest for the topping
  • 1 (8 ounces) package of cream cheese – room temperature
  • 1 c. confectioners’ sugar
  • Second layer:
  • 3 c. whole milk (for a sturdier pudding)
  • 1 (3.4 ounces) package vanilla instant pudding
  • 1 (3.4 ounces) package of chocolate instant pudding
  • For the top:
  • Grated/Shaved chocolate sprinkled over the top
  • Remaining Cool Whip

Instructions

Crust layer:

Step 1: Prepare the oven. Preheat it to 325 degrees F.

Step 2: Place the flour, butter, and pecans in a medium bowl. Mix well and press the mixture into the bottom of a 9 x 13-inch baking dish.

Step 3: Place in the preheated oven and bake for about 25 minutes. When done, take the baking dish out of the oven and let the crust layer cool completely.

First Layer:

Step 4: Place the cream cheese, confectioners’ sugar, and 1 c. Cool Whip in a large bowl. Using a mixer, beat the ingredients. Over the crust, spread the cream cheese mixture.

Step 5: Chill the first layer until firmed before proceeding to the next step. In the freezer, place the baking dish for about 20 minutes.

Second Layer:

Step 6: In a large bowl, place the puddings and milk. Mix, following the package directions.

Step 7: Take the pan out of the freezer and spread the pudding layer on top of the cream cheese layer.

Step 8: Place the pan back in the freezer and freeze for 20 minutes until firm.

Top Layer:

Step 9: On top, spread the rest of the Cool Whip and sprinkle with shaved/grated chocolate.

Step 10: if time permits, chill in the fridge for at least 2 hours.

August 4, 2022 0 comment
0 FacebookTwitterPinterestEmail
Newer Posts
Older Posts

Popular Posts

  • 1

    Crispy Crunchy Parmesan Potatoes

    March 21, 2020
  • 2

    CROCK POT SMOTHERED PORK CHOPS

    March 21, 2020
  • Facebook
  • Twitter

@2019 - All Right Reserved.


Back To Top